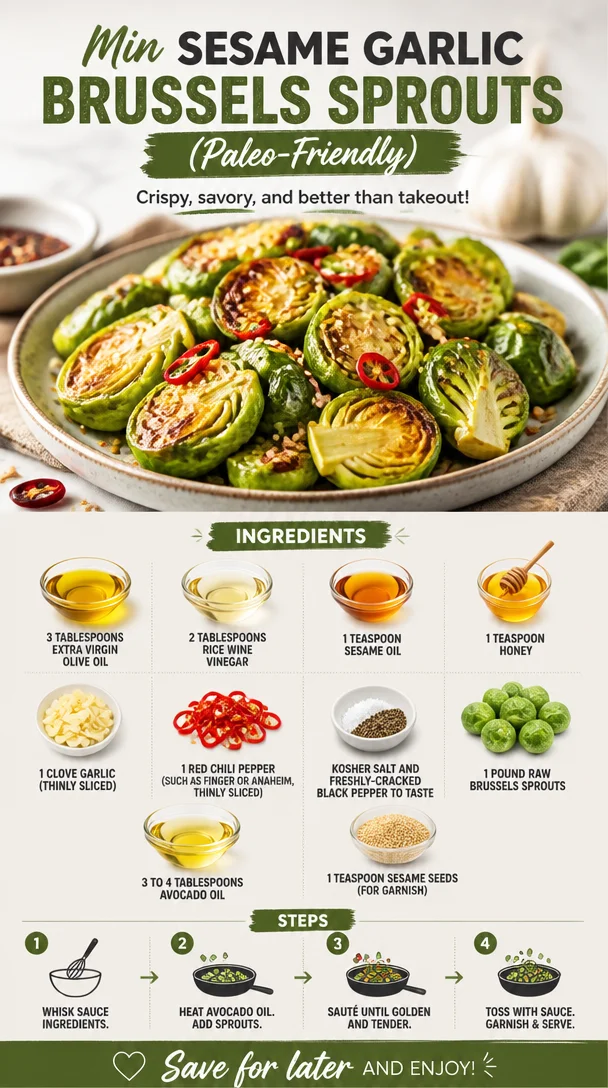
Min Sesame Garlic Brussels Sprouts (Paleo-Friendly)
Sesame Garlic Brussels Sprouts: A Deliciously Wholesome Dish to Savor
Welcome back to Clean Plate Cravings, where we believe that the path to healthy eating is full of flavors and creativity! Today, I’m excited to share one of my all-time favorites—Sesame Garlic Brussels Sprouts. Honestly, these little cabbages are not only soul-satisfying but also quick and simple to whip up. Whether you’re looking to impress at your next dinner party or simply elevate your weeknight meals, this dish checks all the boxes for flavor, healthiness, and ease.
Growing up, I was never a big fan of Brussels sprouts. In fact, I can remember my childhood self pulling that “yucky” face whenever they made their way onto the dinner table. But oh boy, how times have changed! Now, I can honestly say they hold a special place in my heart. It all began on a rainy Sunday afternoon when I decided to experiment in the kitchen. Armed with some garlic, a splash of sesame oil, and a bit of honey, I created a dish that transformed my relationship with Brussels sprouts forever. The warm, nutty aroma danced through my kitchen, sparking a passion that I’d love to share with you.
Ready to dive into these crispy, savory bites of goodness? Let’s make those Brussels sprouts shine!
Personal Story: My Brussels Sprouts Awakening
I’ll never forget the day that I turned the tables on Brussels sprouts. It was a cozy Sunday with rain gently tapping against the window, and the perfect mood for an experiment. My fridge was low on groceries, but I stumbled upon a bag of Brussels sprouts and decided it was time to give them another chance. Armed with my trusty pan and a few essentials, I chopped, sautéed, and tossed seasoning with reckless abandon. The result? A heavenly dish of Sesame Garlic Brussels Sprouts that made my tastebuds sing.
Those crispy, caramelized bites combined with the strong punch of garlic and the gentle sweet nutty finish of sesame oil created a magical symphony of flavors. As I sat down to savor my creation, I couldn’t help but reminisce about those childhood dinners filled with sighs of disdain. Little did I know that Brussels sprouts would become a staple in my kitchen, and I wouldn’t just tolerate them; I would love them! The method to my madness? A simple combo of ingredients and a sprinkle of culinary love. So join me, my fellow food enthusiasts, and let’s whip up these sprightly little orbs of joy!
Ingredients
Here’s the list of everything you’ll need to create this scrumptious Sesame Garlic Brussels Sprouts dish:
-
3 tablespoons Extra Virgin Olive Oil
A staple in every kitchen! Olive oil adds a beautiful, rich flavor to our Brussels sprouts while keeping things light and healthy. For a different flavor, you can substitute with avocado oil or melted coconut oil. -
2 tablespoons Rice Wine Vinegar
This vinegar adds a subtle sweetness and a slight tang that perfectly complements the richness of the olive oil. If you’re looking for a substitute, apple cider vinegar would work beautifully! -
1 teaspoon Sesame Oil
Just a dash of this aromatic oil can elevate the dish with its nutty flavor. If you can’t find sesame oil, try using a touch of toasted almond oil for a similar vibe. -
1 teaspoon Honey
The sweet harmony between the garlic and Brussels sprouts. It balances the flavors! If you’re looking for a vegan option, agave syrup or maple syrup can easily take its place. -
1 clove Garlic (thinly sliced)
Garlic brings a burst of flavor, making this dish irresistible! Feel free to add more if you’re feeling adventurous, or swap for shallots for a different yet delightful taste. -
1 red chili pepper (such as finger or Anaheim, thinly sliced)
This adds a spicy kick! If you’re looking for something milder, try a dash of red pepper flakes instead. -
Kosher Salt and Freshly-Cracked Black Pepper to taste
Essential for enhancing all the flavors! We want to season these babies just right. -
1 pound raw Brussels sprouts
These little beauties are the star of our dish! Choose sprouts that are small, bright green, and firm. If you’re out of Brussels sprouts, try using broccoli or cauliflower as a substitution! -
3 to 4 tablespoons Avocado Oil
A healthier alternative to traditional oils, it’s perfect for roasting the Brussels sprouts to crispy perfection. -
1 teaspoon Sesame Seeds (for garnish)
These little seeds not only add crunch but are also rich in flavor. Feel free to toast them slightly for a deeper flavor!
Let’s set our ingredients aside and prepare for some phenomenal cooking!
Step-by-Step Instructions
-
Preheat Your Oven to 400°F (200°C):
Preheating the oven is crucial when it comes to achieving the perfect roasted Brussels sprouts. This high temperature will help caramelize the outside while keeping the insides tender. Perfecto! -
Prep the Brussels Sprouts:
Start by trimming the stem ends of the Brussels sprouts. Discard any discolored leaves. Cut larger sprouts in half to ensure even cooking. The size is important—too small and they’ll burn; too large and they won’t cook through. Aim for a uniform size! -
Make the Sauce:
In a medium bowl, whisk together the extra virgin olive oil, rice wine vinegar, sesame oil, honey, sliced garlic, and chili pepper. This sauce is where the magic happens! It marries all those flavors together, resulting in a deliciously sticky coating for our sprouts. -
Toss It All Together:
Place the trimmed Brussels sprouts in a large mixing bowl. Drizzle the sauce over them and toss to ensure they’re evenly coated. Don’t be shy! Use your hands if you need to get in there and really mix things up. The more love you put into it, the better they’ll taste! -
Roast Away:
Spread the Brussels sprouts on a large baking sheet in a single layer. This will allow them to roast evenly. If they’re too crowded, they’ll steam instead of roast, and nobody wants that. Roast in the preheated oven for 20–25 minutes or until they’re golden brown and crispy, flipping them halfway through. This is where those lovely caramelized edges come to life! -
Season It Up:
Once they’re out of the oven, sprinkle with kosher salt and freshly-cracked black pepper to taste. Don’t be skimpy with those seasonings—they make a world of difference. -
Garnish and Serve:
Transfer the Brussels sprouts to a serving plate or bowl, and sprinkle with sesame seeds for that final touch. Just look at those beauties!
Serving Suggestions
These Sesame Garlic Brussels Sprouts can be served warm as a delightful side dish to accompany a main course, or they can stand alone as a superstar option in a salad or grain bowl. I love to pair them with grilled chicken or tofu, fresh greens, and a drizzle of extra sesame dressing for a wholesome meal. Don’t forget to sprinkle a few more sesame seeds on top for that perfect finishing touch!
Recipe Variations
Feeling adventurous? Here are some creative twists to make this dish uniquely yours:
-
Citrusy Boost:
Add a squeeze of fresh lime or orange juice just before serving for a refreshing zing! -
Maple Mustard Glaze:
Replace honey with maple syrup and add a tablespoon of Dijon mustard to the sauce for a whole new flavor profile. -
Nutty Crunch:
Toss in some chopped walnuts or pecans during the last 10 minutes of roasting for added texture and nutty goodness. -
Asian Flair:
Add a splash of soy sauce or tamari for a savory umami kick! -
Cheesy Finish:
Sprinkle nutritional yeast or grated parmesan cheese over the roasted sprouts for a cheesy flavor without all the dairy.
Chef’s Notes
Oh, how I love the evolution of recipes! This dish has transformed from a simple roast to one that can take center stage on any table. I remember the first time I brought it to a potluck—everyone adored it. People were asking for the recipe left and right. It made me realize how a little creativity and good ingredients can change the way we perceive certain foods. The joy of seeing others savoring my cooking fueled my passion even more. Every time I make it now, I love to experiment with whatever I have on hand. Cooking has no boundaries!
FAQs and Troubleshooting
Q: Why are my Brussels sprouts not crispy?
A: If your sprouts are soft or soggy, they were likely overcrowded on the baking sheet, or the oven wasn’t hot enough. Make sure to give them room to breathe!
Q: Can I use frozen Brussels sprouts?
A: While fresh Brussels sprouts yield the best results, you can use frozen sprouts. Just be sure to thaw and pat them dry before roasting to eliminate excess moisture.
Q: What’s the best way to store leftovers?
A: Place any leftovers in an airtight container and store in the refrigerator for up to 3 days. Reheat in the oven for that crispy texture again!
Q: Can I serve these cold?
A: Absolutely! These Brussels sprouts also taste great cold as part of a salad. Just toss them with some mixed greens, nuts, and your favorite dressing.
Nutritional Info
Per serving (based on 4 servings):
- Calories: 150
- Protein: 4g
- Fat: 12g (saturated fat: 1.5g)
- Carbohydrates: 10g
- Fiber: 4g
- Sugar: 2g
Brussels sprouts are high in vitamins (especially K and C) and fiber—perfect for nourishing your body!
And there you have it—my beloved Sesame Garlic Brussels Sprouts! I hope you feel inspired to bring this wholesome dish into your kitchen and share the love. Remember, cooking is all about having fun and exploring flavors, so don’t hesitate to make this recipe your own. Happy cooking, foodies! Let me know how yours turn out!
PrintSesame Garlic Brussels Sprouts
Deliciously wholesome Sesame Garlic Brussels Sprouts that are crispy, savory, and easy to prepare, perfect for a side dish or as a salad topper.
- Prep Time: 10 minutes
- Cook Time: 25 minutes
- Total Time: 35 minutes
- Yield: 4 servings 1x
- Category: Side Dish
- Method: Roasting
- Cuisine: American
- Diet: Vegetarian
Ingredients
- 3 tablespoons Extra Virgin Olive Oil
- 2 tablespoons Rice Wine Vinegar
- 1 teaspoon Sesame Oil
- 1 teaspoon Honey
- 1 clove Garlic (thinly sliced)
- 1 red chili pepper (thinly sliced)
- Kosher Salt and Freshly-Cracked Black Pepper to taste
- 1 pound raw Brussels sprouts
- 3 to 4 tablespoons Avocado Oil
- 1 teaspoon Sesame Seeds (for garnish)
Instructions
- Preheat your oven to 400°F (200°C).
- Prep the Brussels sprouts by trimming the stem ends and cutting larger sprouts in half.
- Make the sauce by whisking together olive oil, rice wine vinegar, sesame oil, honey, garlic, and chili pepper.
- Toss the sprouts with the sauce in a large mixing bowl.
- Roast the Brussels sprouts on a baking sheet for 20–25 minutes, flipping halfway, until golden brown and crispy.
- Season with kosher salt and pepper to taste.
- Garnish with sesame seeds before serving.
Notes
Excellent as a side dish or as a topping for salads or grain bowls. Try variations with citrus or nuts for added flavor!
Nutrition
- Serving Size: 1 serving
- Calories: 150
- Sugar: 2g
- Sodium: 200mg
- Fat: 12g
- Saturated Fat: 1.5g
- Unsaturated Fat: 10g
- Trans Fat: 0g
- Carbohydrates: 10g
- Fiber: 4g
- Protein: 4g
- Cholesterol: 0mg
Keywords: Brussels sprouts, vegetarian, side dish, sesame, garlic
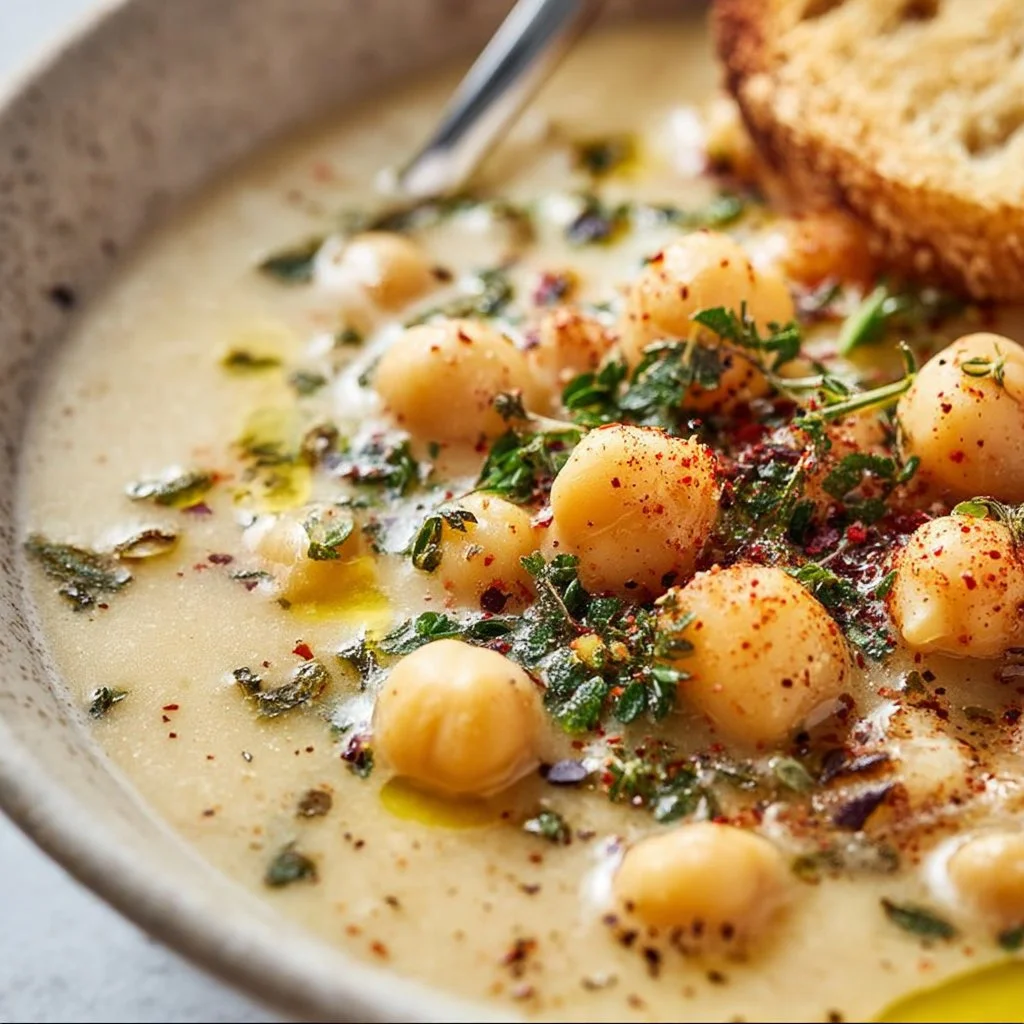
Garlic Chickpea Soup
Garlic Chickpea Soup: A Warming Embrace in a Bowl
Welcome, fellow food lovers! I’m thrilled to have you here at Clean Plate Cravings. Today, we’re diving into a dish that not only warms your soul but also nourishes your body—Garlic Chickpea Soup. This delightful concoction is a celebration of bold flavors, simple ingredients, and the joy of home cooking. Whether you’re in need of a cozy hug on a chilly day or a quick, healthy meal, this soup has got your back.
Imagine this: it’s a rainy afternoon, and the clouds are blanketing the sky. You step inside, greeted by the fragrant aroma of garlic sizzling in olive oil, inviting you to the kitchen. As the vegetables soften and the broth begins to simmer, you can’t help but smile. This is the magic of cooking—turning simple ingredients into comforting moments. And let’s be honest, garlic is the unsung hero of the kitchen! Its warm, rich flavor adds depth to any dish, making it the star of our soup today.
So, roll up your sleeves and let’s get cooking! This recipe is easy to follow, packed with nutritious goodness, and guaranteed to impress. Plus, we’ll sprinkle in a few chef hacks along the way to elevate your kitchen game. Ready? Let’s embark on this culinary adventure together!
A Taste of Nostalgia
As I stand in my cozy kitchen whipping up this Garlic Chickpea Soup, I can’t help but travel back in time to my childhood. My grandmother had this magical ability to transform a handful of ingredients into something spectacular. I remember countless evenings spent in her kitchen. The scent of sautéing garlic filled the air, mingling with the chatter of family around the table. It was during one of those nights that she first introduced me to chickpeas.
“Chickpeas,” she said, “are the little legumes that could! They soak up flavors beautifully and add heartiness to any dish." I watched her muddle garlic, onion, and spices in a pot, creating a symphony of flavor. The soup bubbled gently, and I was captivated as she ladled it into bowls, topped with fresh parsley—the final flourish that made everything pop!
Now, every time I make Garlic Chickpea Soup, I think of her smile and the love infused in every bite. It’s a simple yet profound memory that brings comfort and warmth, and I’m excited to share that with you today.
Ingredients
Here’s what you’ll need to make this luscious Garlic Chickpea Soup. Each ingredient plays a vital role in creating a beautiful balance of flavors, so let’s break it down:
-
1 can chickpeas, drained and rinsed: These protein-packed legumes are the backbone of our soup, lending creaminess without the need for dairy. If you’re short on time, canned chickpeas are a lifesaver. You can also use dried chickpeas if you soak them overnight and cook them beforehand.
-
4 cups vegetable broth: The liquid gold that brings everything together! You can use store-bought or homemade broth. For a richer flavor, try using low-sodium broth, and if you want to customize it, add a splash of soy sauce or tamari.
-
4 cloves garlic, minced: The heart of our dish! Garlic not only adds robust flavor but also offers amazing health benefits. You could easily amp up the garlic’s intensity by roasting it first or using garlic powder if needed.
-
1 onion, chopped: Onions add sweetness and depth to the soup. If you’re a fan of flavor, consider using yellow onions for a milder taste or red onions for a touch of bite.
-
2 carrots, diced: Sweet and vibrant, carrots mellow out the dish’s robust flavors. You can substitute with sweet potatoes for a heartier feel, or even use zucchini for a low-carb option.
-
2 celery stalks, diced: Celery adds a refreshing crunch and subtle flavor. If you’re not a fan, feel free to leave it out or replace it with red bell pepper for a pop of color and sweetness!
-
1 teaspoon cumin: This spice brings earthy warmth to the soup. If you want to switch things up, try coriander or curry powder for an exciting twist.
-
1 teaspoon paprika: Whether you use sweet or smoked paprika, it adds a delightful depth and a hint of smokiness. Don’t have paprika? A sprinkle of cayenne pepper will add some heat!
-
Salt and pepper to taste: Simple but effective! Always season as you go for the best results. Adjust to your preference, keeping in mind that you can always add more but can’t take out!
-
2 tablespoons olive oil: This liquid gold can enhance flavors and provide a luscious mouthfeel. Extra virgin olive oil is the best choice for its rich taste. If you’re looking for a different profile, avocado oil is a fantastic substitute.
-
Fresh parsley for garnish: The finishing touch! Parsley adds brightness and color. You can substitute with cilantro for a different herbaceous flavor.
Step-by-Step Instructions
Now that we’ve gathered our ingredients, let’s get into the nitty-gritty of making this gloriously hearty Garlic Chickpea Soup! Trust me; it’s easier than you think.
-
Heat it Up: In a large pot, drizzle the olive oil over medium heat. Let it warm up for a minute until it shimmers. This is when you’ll want to add your chopped onion and celery. Sauté these until they become tender and aromatic—about 5 minutes. This step is crucial as it lays the flavor foundation for the soup.
-
Garlic Time: Add the minced garlic to the pot. Stir constantly for about 1 minute until it’s fragrant, but be careful; we don’t want it to burn! Burning garlic will leave a bitter taste, and nobody wants that in their soup.
-
Veggies in the Mix: Toss in the diced carrots next. Let everything sauté together for another 3–4 minutes, allowing the carrots to soften slightly. This beautiful medley will create a colorful and fragrant base, setting the stage for the rest of our ingredients.
-
Chickpeas and Spices: It’s time to introduce our star player—chickpeas! Add the drained and rinsed chickpeas along with the cumin and paprika. Give everything a good stir, letting the spices coat the chickpeas and veggies. This will allow the flavors to meld wonderfully.
-
Pour the Broth: Carefully pour in the vegetable broth, bringing everything to a gentle simmer. You want the soup to bubble but not boil violently. This is a moment to season with salt and pepper, adjusting to your liking. Let it simmer for about 15–20 minutes—enough time for all those flavors to unite beautifully.
-
Blend for Creaminess (Optional): If you’re craving a creamy texture, take an immersion blender and blend a portion of the soup. This will create a luscious consistency while still leaving some chunky bits for heartiness. If you don’t have an immersion blender, carefully transfer a few cups to a regular blender, blend until smooth, and return to the pot.
-
Final Taste Test: Don’t forget to give it one last taste before serving! This is your chance to adjust any seasonings—maybe a pinch more salt, or perhaps a dash of lemon juice to brighten everything up. A squeeze of fresh lemon is a chef’s secret weapon!
-
Garnish: Ladle the soup into bowls and top it with freshly chopped parsley. This little sprinkle adds color and a burst of freshness, rounding out our beautiful dish.
Serving Suggestions
When it comes to serving this Garlic Chickpea Soup, the options are endless! Consider pairing it with crusty whole-grain bread or a light side salad for a balanced meal. To elevate your presentation, drizzle a bit of olive oil on top and add a sprinkle of red pepper flakes for a pop of color. Enjoy it with family or friends, served warm, and watch everyone smile with every spoonful!
Recipe Variations
Feel free to get creative with this soup! Here are a few fun variations to try:
-
Spicy Kick: Add a chopped jalapeño when sautéing the onions for a spicy twist! This adds a nice heat.
-
Herbed Flavor: Blend in some fresh herbs like thyme, rosemary, or dill for an earthy flavor infusion.
-
Creamy Vegan Option: For an extra creamy variant, mix in a splash of cashew cream towards the end of cooking.
-
Coconut Curry Chickpea Soup: Replace the broth with coconut milk and add curry powder for a delightful twist.
-
Greens Galore: Stir in some fresh spinach or kale during the last few minutes for added nutrition and a gorgeous green hue.
Chef’s Notes
As the years have gone by, my version of Garlic Chickpea Soup has evolved into a beloved staple in my home. What started as a simple recipe passed down from my grandmother has now taken on new flavors and expressions. Every family gathering, I find myself tweaking it slightly—sometimes it’s with new spices, other times it’s simply a little more garlic because who can resist more garlic?
I remember one particularly memorable dinner party when a guest commented how comforting the soup felt, like a warm hug on a cold night. That right there, I believe, is the essence of cooking—creating food that comforts and connects us all. Let this soup be your go-to recipe to spread warmth and love.
FAQs and Troubleshooting
-
What can I use instead of chickpeas?
You can replace chickpeas with white beans like cannellini or navy beans, which will provide a similar texture and taste. -
How do I store leftovers?
Store any leftover soup in an airtight container in the fridge for up to 4 days. It reheats beautifully on the stove or in the microwave! -
Can I freeze this soup?
Absolutely! Let it cool completely, then store it in freezer-safe containers for up to 3 months. When ready to enjoy, let it thaw in the fridge overnight and reheat gently. -
Why is my soup too salty?
If you find your soup a bit on the salty side, try adding a potato. Cook it in the soup for 10–15 minutes, then remove it. The potato will absorb some saltiness, balancing the flavor.
Nutritional Info
While I won’t bog you down with numbers, I will say that this Garlic Chickpea Soup is packed with protein, fiber, and vitamins from all those lovely veggies. It’s a nourishing, wholesome dish that’s perfect for any meal!
So there you have it, my friends! A comforting bowl of Garlic Chickpea Soup that’s perfect for any day of the week. I hope you join me in this delightful culinary journey, whip it up in your kitchen, and create those warm memories. Enjoy every spoonful, and as always, keep it fresh, simple, and seriously delicious! Happy cooking!
PrintGarlic Chickpea Soup
A warming Garlic Chickpea Soup that combines bold flavors and simple ingredients for a hearty meal.
- Prep Time: 10 minutes
- Cook Time: 30 minutes
- Total Time: 40 minutes
- Yield: 4 servings 1x
- Category: Soup
- Method: Stovetop
- Cuisine: Mediterranean
- Diet: Vegan
Ingredients
- 1 can chickpeas, drained and rinsed
- 4 cups vegetable broth
- 4 cloves garlic, minced
- 1 onion, chopped
- 2 carrots, diced
- 2 celery stalks, diced
- 1 teaspoon cumin
- 1 teaspoon paprika
- Salt and pepper to taste
- 2 tablespoons olive oil
- Fresh parsley for garnish
Instructions
- Heat the olive oil in a large pot over medium heat until shimmering. Add chopped onion and celery, sauté for about 5 minutes until tender.
- Add minced garlic to the pot and stir constantly for about 1 minute until fragrant.
- Toss in diced carrots and sauté for another 3–4 minutes.
- Add the drained chickpeas along with cumin and paprika; stir well.
- Pour in vegetable broth and let it simmer gently for about 15–20 minutes.
- Blend a portion of the soup with an immersion blender if you prefer a creamier texture.
- Garnish with freshly chopped parsley before serving.
Notes
For extra flavor, drizzle olive oil on top and add a sprinkle of red pepper flakes before serving.
Nutrition
- Serving Size: 1 serving
- Calories: 350
- Sugar: 5g
- Sodium: 400mg
- Fat: 12g
- Saturated Fat: 1g
- Unsaturated Fat: 10g
- Trans Fat: 0g
- Carbohydrates: 45g
- Fiber: 10g
- Protein: 15g
- Cholesterol: 0mg
Keywords: Garlic Chickpea Soup, Vegan Soup, Healthy Recipes