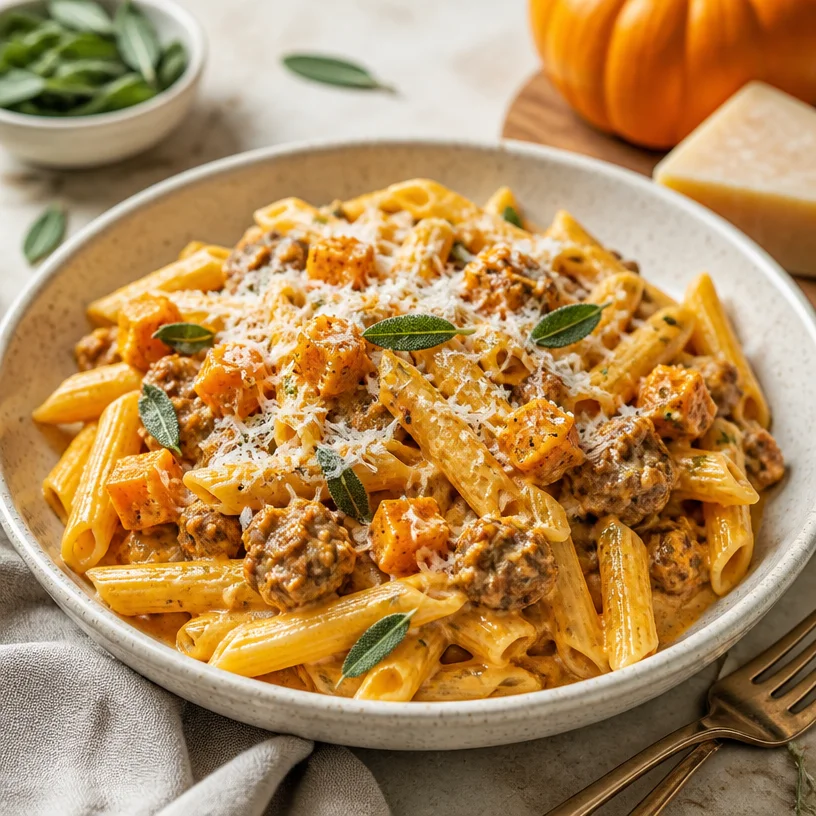
One-Pan Sausage Pumpkin Pasta for Weeknight Comfort
Sausage Pumpkin Pasta: A Cozy Bowl of Bliss
When it comes to comfort food, few dishes can rival a cozy bowl of pasta, especially when it’s packed with unique flavors like sausage and pumpkin. This Sausage Pumpkin Pasta is a delightful fusion of savory and sweet, bringing autumn vibes to your dinner table any time of the year. Think creamy pumpkin sauce, juicy sausage, and al dente penne dancing together in perfect harmony. It’s the kind of dish that warms both your belly and your soul, making even the busiest days feel like a special occasion.
Back in the day, I used to help my grandmother in her kitchen every Sunday. It was our sacred time, surrounded by the rich aroma of her delicious Italian dishes. As a child, I would love to sneak tastes of anything she was cooking, and I’ll always remember the warm, comforting flavors that filled her kitchen. One day, she made a pumpkin and sausage dish that left me enchanted. The way those two flavors melded together was pure magic! Inspired by that beautiful memory, I’ve crafted this Sausage Pumpkin Pasta recipe that’ll transport you right back to those sunny Sundays, no matter where you are.
Are you ready to whip up this comforting dish? Grab your apron, and let’s get started on an adventure through flavors and nostalgia!
Ingredients
-
Sausage: For this recipe, I love using Italian sausage for its bold flavors. You can choose spicy or sweet, depending on how adventurous you’re feeling! Looking for a lighter option? Turkey or chicken sausage works beautifully as well.
-
Pumpkin Puree: The true star of the show! Opt for 100% pure pumpkin puree rather than pumpkin pie filling, which is loaded with sugar and spices. If pumpkin isn’t your jam, butternut squash puree does the trick as a substitute.
-
Penne Pasta: The ridges of penne are perfect for clinging to the sauce. Feel free to switch it up with any pasta shape you have on hand—rigatoni or farfalle would also work magnificently!
-
Parmesan Cheese: A generous sprinkle of grated Parmesan brings a salty, nutty finish to this dish. Pecorino Romano can be a fantastic alternate choice for a sharper taste.
-
Olive Oil: A splash of olive oil not only helps sauté the sausage but also keeps everything nice and moist. You can easily use avocado oil if you prefer something else.
-
Garlic: Fresh minced garlic adds aromatic flavor. Quality garlic powder can be used in a pinch, but fresh is where it’s at for maximum impact!
-
Onion: Sweet yellow onion works beautifully to build flavor. For a milder taste, try using shallots or green onions instead.
-
Spinach: A handful of fresh spinach brightens up the dish with its vibrant color and nutrients. Feel free to swap it for kale or arugula if that’s what you have!
Step-by-Step Instructions
-
Cook the Pasta: Start by bringing a large pot of salted water to a rolling boil. Add your penne and cook according to package instructions until al dente. Remember! Reserve about a cup of pasta water before draining—this will help you adjust your sauce later.
-
Brown the Sausage: In a large skillet over medium heat, drizzle in a bit of olive oil and add the sausage. Use a wooden spoon to break it up as it cooks. Sauté until browned and cooked through—this should take about 5-7 minutes. The goal here is to develop a lovely golden color that adds depth to the dish.
-
Add Aromatics: Once the sausage is beautifully browned, toss in the chopped onion and minced garlic. Sauté for about 2-3 minutes, stirring frequently, until the onion becomes translucent and aromatic. Pro tip: Keep the heat low to prevent the garlic from burning!
-
Incorporate the Pumpkin: Stir in the pumpkin puree and cook for another minute to let the flavors meld. You might want to add a pinch of salt and pepper at this stage to season it well.
-
Create the Sauce: Pour in a splash of reserved pasta water and stir until the sauce is smooth and creamy. If you prefer a thicker sauce, hold back on the water. Remember, you can always add more later!
-
Combine and Wait: Add the drained penne to the skillet with the pumpkin sauce, tossing it until fully coated. If the sauce seems too thick, add more reserved pasta water, a little at a time, until you reach your desired consistency.
-
Final Touch: Toss in the fresh spinach and mix until it wilts into the beautiful orange sauce. This adds a pop of color and nutrition—plus, it’s always great to sneak in some greens!
-
Serve it Up: Turn off the heat and sprinkle a generous amount of grated Parmesan over the pasta. Give everything a final toss and get ready to plate!
Serving Suggestions
When it’s time to serve, grab a nice bowl and twirl the pasta into a delightful nest in the center. Add a sprinkle of extra Parmesan and a few fresh spinach leaves for garnish. For a zesty kick, drizzle with a touch of olive oil and a dusting of cracked black pepper. Pair your bowl of Sausage Pumpkin Pasta with a slice of crusty Italian bread for a full experience, perfect for dipping into that creamy sauce!
Recipe Variations
- Creamy Spinach and Tomato Twist: Toss in some sun-dried tomatoes along with the spinach for an added tangy flavor.
- Spicy Sausage Substitute: Use chorizo instead of Italian sausage for a smoky, spicy kick!
- Vegan Version: Swap sausage for diced mushrooms and utilize coconut cream instead of Parmesan for a creamy, vegan adaptation.
- Herb Infusion: Add a mix of fresh herbs like sage, thyme, or rosemary to elevate the dish with herbal notes.
- Nutty Crunch: Top with toasted pine nuts or walnuts for a delightful crunch!
Chef’s Notes
This recipe has danced around my kitchen for years, evolving as flavors come in and out of season. I remember the first time I substituted butternut squash when I couldn’t find pumpkin puree at my local store—it was a hit! Since then, I often experiment with different ingredients, and each version has its own charm. Cooking should be about creativity and discovery—don’t hesitate to put your own spin on it! Plus, I once made this dish so spicy that my friends recorded the "Sausage Pumpkin Pasta Challenge" as a hilarious competition. Spoiler alert: I lost!
FAQs and Troubleshooting
Q: Can I use fresh pumpkin instead of canned?
A: Absolutely! Just roast your fresh pumpkin until tender, then puree it in a blender. It’ll add a fresh, robust flavor to your dish.
Q: Why is my sauce too thick?
A: If your sauce is too thick, don’t worry! Add a splash of the reserved pasta water to loosen it up.
Q: Can I make this ahead of time?
A: You can prep everything but add the spinach last for freshness! Store just the pasta and sauce in the fridge, then reheat and add spinach before serving.
Q: What can I do with leftovers?
A: This dish makes for great leftovers! You can reheat it gently on the stovetop or in the microwave. Adding a splash of water helps revive the creaminess.
Enjoy every delicious bite of this comforting Sausage Pumpkin Pasta, and remember, the kitchen is your playground—have fun experimenting! Can’t wait to hear how yours turns out!
PrintSausage Pumpkin Pasta

A cozy bowl of pasta with creamy pumpkin sauce, juicy sausage, and al dente penne that captures the essence of autumn comfort.
- Prep Time: 10 minutes
- Cook Time: 20 minutes
- Total Time: 30 minutes
- Yield: 4 servings 1x
- Category: Main Course
- Method: Baking
- Cuisine: Italian
- Diet: Pescatarian
Ingredients
- 1 lb Italian sausage (spicy or sweet)
- 1 cup pumpkin puree
- 12 oz penne pasta
- 1/2 cup grated Parmesan cheese
- 2 tbsp olive oil
- 3 cloves garlic, minced
- 1 large sweet yellow onion, chopped
- 2 cups fresh spinach
Instructions
- Cook the pasta according to package instructions in salted boiling water until al dente. Reserve a cup of pasta water before draining.
- Brown the sausage in olive oil over medium heat, breaking it up, for 5-7 minutes until golden.
- Add the chopped onion and minced garlic, sautéing for 2-3 minutes until the onion is translucent.
- Incorporate the pumpkin puree and cook for an additional minute, seasoning with salt and pepper.
- Create the sauce by pouring in reserved pasta water until smooth and creamy.
- Combine the drained pasta with the sauce, adding more water if needed to achieve desired consistency.
- Final touch: Mix in fresh spinach until it wilts.
- Serve topped with grated Parmesan, garnishing with extra spinach if desired.
Notes
Feel free to experiment with different sausages, herbs, and vegetables for a personal twist.
Nutrition
- Serving Size: 1 serving
- Calories: 450
- Sugar: 6g
- Sodium: 620mg
- Fat: 22g
- Saturated Fat: 7g
- Unsaturated Fat: 15g
- Trans Fat: 0g
- Carbohydrates: 45g
- Fiber: 4g
- Protein: 20g
- Cholesterol: 40mg
Keywords: pasta, pumpkin, sausage, autumn, comfort food, Italian cuisine, creamy sauce, dinner recipe, easy pasta recipe
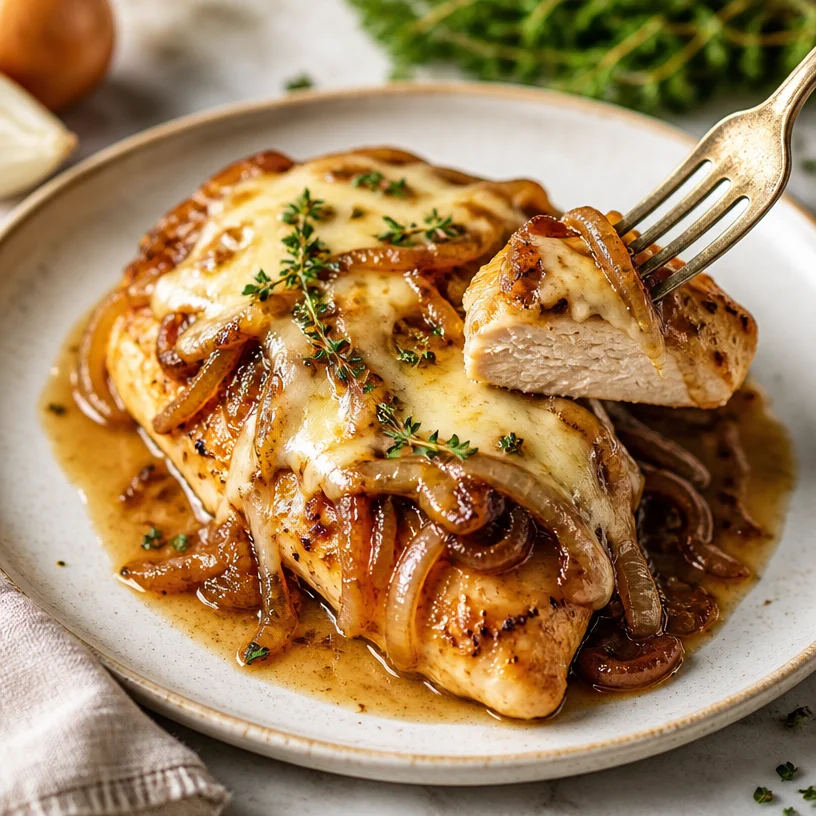
One-Pan French Onion Chicken for Easy Weeknight Dinner
French Onion Chicken: A Flavorful Twist on a Classic
Welcome to Clean Plate Cravings! Today, we’re diving into a dish that’s not only satisfying but also brings a bit of nostalgia to the forefront: French Onion Chicken. Imagine succulent chicken breasts topped with sweet, caramelized onions and melted Gruyère cheese, melding together in a symphony of flavors that’ll have your tastebuds singing! Eating well should always be about treating yourself, and this recipe is here to prove just that.
French onion soup has long been one of my favorite comfort foods—there’s something so heartwarming about the combination of rich broth, tender onions, and that delightful cheese crust that pulls at your heartstrings as you dig in. But let’s be real; as much as I adore it, slurping soup isn’t always the most convenient option. So, what’s the solution? Transform it into a cherished main dish! This French Onion Chicken is perfect for weeknight dinners or special occasions, and I can’t wait to share how it comes together.
As we cook today, you’ll witness the transformation of everyday ingredients into something truly extraordinary. This dish is not just about filling your belly; it’s about savoring each bite, relishing the aromas wafting through your kitchen, and feeling accomplished for creating something that impresses. So, let’s roll up our sleeves and embrace this culinary adventure together!
A Bit of Heart and History
Growing up, my mom had a way of making simple ingredients shine. One of her signature dishes was her French onion soup. The rich aroma of onions slowly caramelizing would fill our home, bringing everyone to the kitchen like moths to a flame. Each bowl was a masterpiece: deep, flavorful broth, melting cheese, and toasted bread floating like cozy little islands. I still remember that comforting sensation of dipping my spoon into the warm soup and savoring that first bite.
When I decided to create this French Onion Chicken recipe, it was a trip down memory lane. I wanted to capture that same warmth and flavor but in a way that felt exciting and elevated. The caramelized onions, the melty cheese, and succulent chicken—it all came together beautifully. Now, it’s not just a nostalgic moment; it’s a delicious meal that I get to share with all of you!
Let’s start cooking and create our own little cozy moments together.
Ingredients
For this French Onion Chicken, you’ll need the following ingredients:
-
Chicken Breasts (4): Juicy and tender, these are the perfect protein base for our dish. If you’re looking for a lighter option, chicken thighs work wonderfully too—they retain moisture and flavor during cooking.
-
Yellow Onions (3 large): This sweet variety is ideal for caramelizing. If you prefer a sharper flavor, feel free to mix in some red onions.
-
Gruyère Cheese (1 cup, grated): This cheese melts beautifully and adds a nutty, slightly sweet flavor. If Gruyère feels too fancy, Swiss or even mozzarella make good substitutes.
-
Olive Oil (2 tablespoons): Used for sautéing the onions, it adds a lovely flavor. You can also use butter if you want that extra richness.
-
Fresh Thyme (1 teaspoon): Thyme enhances the dish with a lovely earthy note. If you don’t have fresh, dried thyme will do in a pinch.
-
Salt and Pepper to Taste: Essential for seasoning and bringing all the flavors together.
-
Chicken Broth (1 cup): This adds depth and moisture to the dish. Vegetable broth works as a great alternative for a lighter version.
Step-by-Step Instructions
Now that we have our ingredients ready, let’s get cooking! Follow these steps to prepare your French Onion Chicken.
-
Caramelize the Onions:
- In a large skillet, heat 2 tablespoons of olive oil over medium heat. Add the sliced onions and a pinch of salt.
- Chef’s Tip: Stir the onions frequently to prevent them from burning. You want them to turn a deep, golden brown, which can take about 20–25 minutes. Patience is key; the transformation is worth it!
-
Add Thyme:
- Once your onions are perfectly caramelized, stir in the fresh thyme and mix well.
- Kitchen Secret: If you want to add a bit of depth, splash in a tablespoon of balsamic vinegar. It adds a delightful tang that balances the sweetness of the onions.
-
Sear the Chicken:
- In a separate pan, season your chicken breasts with salt and pepper. Heat a little more olive oil over medium-high heat, and when it’s hot, add the chicken.
- Cook each side for about 5-7 minutes until they’re golden brown. You’re not cooking them all the way through just yet; this step is about building flavor!
-
Combine Everything:
- Once the chicken is beautifully seared, transfer it to a baking dish. Layer the caramelized onions over the top and pour the chicken broth into the bottom of the dish to create a steaming environment. This will keep the chicken moist while it bakes.
- Bonus Tip: Cover the dish with foil for the first 20 minutes in the oven to trap in steam, then remove it for the last 10 minutes to allow the cheese to get wonderfully melty.
-
Top with Gruyère:
- After about 25 minutes of baking at 375°F (190°C), take the dish out and sprinkle the grated Gruyère over the chicken.
- Return to the oven uncovered for an additional 10 minutes or until the cheese is bubbly and golden.
Serving Suggestions
Once your French Onion Chicken is done, let it rest for a few minutes before serving. Plate it on a generous bed of mashed potatoes, or serve it alongside a fresh green salad for a colorful contrast. I love sprinkling a little extra thyme on top for a pop of color and flavor. Get ready for your family or friends to be impressed—this dish looks just as delightful as it tastes!
Recipe Variations
Feeling adventurous? Here are a few creative twists you can add to this recipe:
-
Mushroom Madness: Sauté some mushrooms with the onions for an earthy flavor that complements the dish.
-
Ham & Cheese Twist: Layer slices of ham under the cheese for a truly decadent experience—think French onion meets Croque Monsieur!
-
Spicy Kick: Add a pinch of red pepper flakes when you season the chicken to give it an extra zing.
-
Herby Delight: Experiment with fresh herbs like rosemary or parsley sprinkled on top for a fresh finish.
-
Vegetarian Version: Swap chicken for hearty portobello mushrooms or eggplant for a delicious meatless option.
Chef’s Notes
It’s funny how recipes can evolve over time. This French Onion Chicken started off as a simple idea inspired by my childhood but grew into a staple in my recipe collection. Over the years, I’ve tweaked it, experimented with different cheeses, and even tried a variety of herbs. The best part is that each variation brings its own charm, and it’s satisfying to see how a simple dish can bring so much joy, especially when shared with loved ones.
FAQs and Troubleshooting
-
Can I use frozen chicken?
- Absolutely! Just make sure to thaw it completely before starting. Cooking from frozen will require longer cooking times, and I wouldn’t recommend it for this recipe.
-
What if my onions aren’t caramelizing?
- If they’re browning too quickly, reduce the heat. It’s a low and slow process, and letting them take their time is what brings out that sweet flavor!
-
Can I make this ahead?
- Yes! Prepare the dish up to the baking step, cover it tightly, and refrigerate. When you’re ready to cook, pop it in the oven—just be aware you may need to adjust baking times slightly.
-
Why is my cheese not melting?
- Make sure to use high-quality Gruyère cheese, as some cheaper variants may not melt as nicely. And don’t forget—you can always switch it up with a different cheese!
Nutritional Info (Optional)
This French Onion Chicken recipe serves about four and is nutritious while still being indulgent.
- Calories: Approximately 350 per serving
- Protein: 40g
- Fat: 20g
- Carbohydrates: 10g
- Fiber: 1g
As you savor the last bites of this unforgettable dish, take a moment to enjoy the journey of flavors and stories that come with it. Whether it’s a weeknight dinner or a special occasion, this French Onion Chicken is sure to bring comfort and joy into your home. Happy cooking, my friend—let’s keep those cravings satisfied!
PrintFrench Onion Chicken
A delightful dish that combines succulent chicken breasts with caramelized onions and melted Gruyère cheese for a comforting and nostalgic meal.
- Prep Time: 15 minutes
- Cook Time: 40 minutes
- Total Time: 55 minutes
- Yield: 4 servings 1x
- Category: Main Course
- Method: Baking
- Cuisine: French
- Diet: None
Ingredients
- 4 Chicken Breasts
- 3 large Yellow Onions
- 1 cup Gruyère Cheese, grated
- 2 tablespoons Olive Oil
- 1 teaspoon Fresh Thyme
- Salt and Pepper to Taste
- 1 cup Chicken Broth
Instructions
- Caramelize the onions: In a large skillet, heat olive oil over medium heat. Add sliced onions and a pinch of salt; stir frequently for 20-25 minutes until golden brown.
- Add thyme: Stir in fresh thyme once onions are caramelized.
- Sear the chicken: Season chicken breasts with salt and pepper, heat olive oil in a separate pan, and cook chicken for 5-7 minutes on each side.
- Combine everything: Transfer seared chicken to a baking dish, layer caramelized onions on top, and pour chicken broth in the bottom.
- Top with Gruyère: Bake at 375°F (190°C) for 25 minutes, then sprinkle cheese and bake uncovered for an additional 10 minutes until bubbly and golden.
Notes
Serve with mashed potatoes or a fresh green salad. For added flavor, sprinkle extra thyme on top before serving.
Nutrition
- Serving Size: 1 serving
- Calories: 350
- Sugar: 5g
- Sodium: 800mg
- Fat: 20g
- Saturated Fat: 10g
- Unsaturated Fat: 8g
- Trans Fat: 0g
- Carbohydrates: 10g
- Fiber: 1g
- Protein: 40g
- Cholesterol: 90mg
Keywords: French Onion, Chicken, Comfort Food, Easy Dinner, Cheese
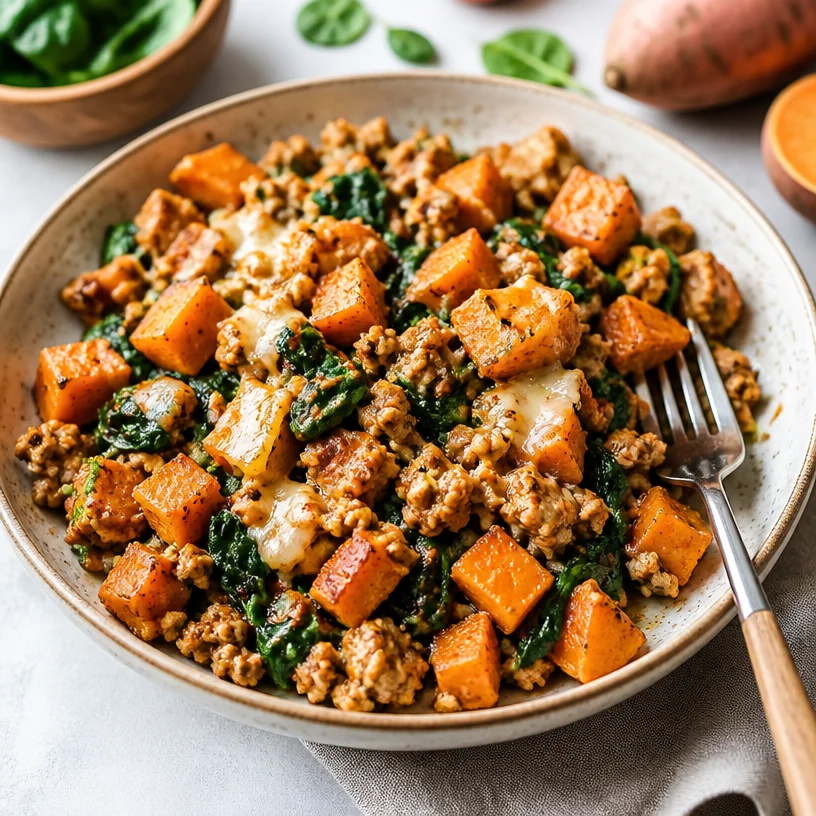
One-Pan Turkey Sweet Potato Skillet (Weeknight Dinner)
Turkey Sweet Potato Skillet: Your New Go-To for Fresh, Flavorful Meals
Hey there, kitchen adventurers! If you’re anything like me, you’re always on the lookout for meals that are not only delicious but also easy to whip up, right? Well, today I’m excited to share one of my all-time favorite recipes: the Turkey Sweet Potato Skillet. It has everything you need—protein, fiber, and loads of flavor—all in one pot. Perfect for weekday dinners and lazy Sundays alike!
Imagine this: a vibrant skillet filled with the earthy sweetness of roasted sweet potatoes, the savory goodness of lean ground turkey, and the bright pop of fresh spinach. It’s comfort food that you don’t have to feel guilty about.
This dish embodies my philosophy of “cleaning your plate” without sacrificing taste. Plus, who doesn’t love a one-skillet meal? Less clean-up means more time enjoying your food and catching up with loved ones—if you can resist diving right in, that is. So, put on your apron, grab your favorite wooden spoon, and let’s create something magical together!
A Taste of Nostalgia
Let me take you back a few years—one crisp autumn afternoon, I found myself in my grandmother’s cozy kitchen, the warm scent of spices filling the air. She was making her famous turkey chili, a recipe passed down through generations but with her own little twists. I remember her saying, “Cooking is like a dance; you add a little of this, a sprinkle of that, and it all comes together.”
Her words stuck with me, and I’ve carried them into my own cooking adventures. That day, I felt inspired to put my own spin on wholesome meals, embracing fresh ingredients and celebrating flavors while keeping things simple. Fast forward to today, and the Turkey Sweet Potato Skillet is my ode to those cherished memories. It’s a dish that marries nostalgia with a contemporary touch—a harmony of taste and health that makes you feel good inside and out.
Ingredients
Before we dive into the nitty-gritty of cooking, let’s gather our ingredients! Here’s what you’ll need:
-
1 lb Ground Turkey: A lean, protein-packed option that keeps this dish light and healthy. If you’re looking for a substitute, ground chicken or beef work well too. Just be mindful of the fat content to keep it healthier!
-
2 Medium Sweet Potatoes: Sweet potatoes bring a natural sweetness and are loaded with vitamins A and C. They’re deliciously creamy when cooked. If you don’t have sweet potatoes on hand, feel free to use regular potatoes or even butternut squash for a different flavor profile.
-
4 Cups Fresh Spinach: This leafy green adds vibrant color and a boost of iron. If you’re not a fan of spinach, kale or Swiss chard can easily take its place.
-
1 Small Onion, diced: Onions add depth and richness to the dish. You could switch it out for shallots or even garlic for added flavor.
-
2 Cloves Garlic, minced: A must for adding aroma and taste. If you’re a garlic lover (like me), a bit more won’t hurt!
-
1 tsp Paprika: This spice adds a warm smokiness. You can use smoked paprika for a deeper flavor, or if you want a kick, a pinch of cayenne pepper can spice things up.
-
Salt and Pepper: To taste! These basic seasonings are essential for bringing out the flavors in our dish.
Now that we have all our ingredients ready, let’s move on to creating this colorful skillet!
Step-by-Step Instructions
Alright, kitchen mates, here’s where the magic happens. Follow these simple steps to bring your Turkey Sweet Potato Skillet to life!
-
Prep Time: Start by peeling and dicing your sweet potatoes into small cubes—about 1 inch thick. This allows them to cook evenly and quicker. While you’re at it, dice the onion and mince the garlic.
Chef’s Tip: You can prep the sweet potatoes ahead of time. Just soak them in cold water to prevent browning!
-
Cook the Sweet Potatoes: Heat a large skillet over medium heat and add a drizzle of olive oil. Once shimmering, toss in the diced sweet potatoes, season with salt and pepper, and sauté for about 10 minutes. Stir occasionally until they begin to soften and caramelize.
Chef’s Commentary: This step is key as it brings out the natural sugars in the sweet potatoes, making them taste even better!
-
Add Onion and Garlic: Once your sweet potatoes are getting tender, add the diced onion and minced garlic to the skillet. Sauté for another 3-5 minutes until the onion is translucent and the garlic is fragrant, stirring frequently.
Hack: Keep an eye on your garlic—it can go from perfectly golden to burnt in a matter of seconds!
-
Brown the Turkey: Add the ground turkey to the skillet and break it up with your wooden spoon. Cook until it’s no longer pink, about 5-7 minutes. Season with paprika, salt, and pepper.
Pro Tip: For added flavor, let the turkey caramelize a bit at the bottom of the pan before stirring it—this gives a nice, rich base to the dish.
-
Incorporate the Spinach: Once the turkey is nicely browned, it’s time to add in the fresh spinach. Stir it in and watch it wilt beautifully! This should take just a couple of minutes.
Little Chef Hint: Don’t overcrowd the skillet. If you can’t fit all the spinach at once, add it in batches—trust me, it shrinks down quickly!
-
Final Seasoning: Give everything a good stir, and taste. Adjust seasoning with additional salt, pepper, or paprika, if desired.
-
Serve: Voila! Your Turkey Sweet Potato Skillet is ready! If you’re feeling fancy, garnish with some chopped fresh herbs like parsley or cilantro for an extra pop.
Serving Suggestions
For a delightful presentation, serve your skillet straight from the pan! This creates an inviting communal dining experience. You can also plate it up in individual bowls, topping each serving with a dollop of Greek yogurt or a sprinkle of feta cheese, if you’re feeling it. Pair it with a slice of crusty whole-grain bread or a light green salad to complete the meal.
Recipe Variations
Here are a few creative twists you can try to keep things exciting:
-
Add a Kick: Toss in some diced jalapeños or red pepper flakes for a spicy version.
-
Sweet and Savory: Add dried cranberries or raisins for a sweet contrast that pairs beautifully with the savory turkey and sweet potatoes.
-
Herby Goodness: Stir in some fresh herbs, like thyme, oregano, or basil, for an aromatic boost.
-
Dairy-Free Option: Skip the cheese toppings or use nut-based cheese for a vegan twist.
-
Chickpea Boost: For added fiber and vegetarian protein, throw in a can of drained chickpeas.
Chef’s Notes
Over the years, my Turkey Sweet Potato Skillet has seen its fair share of changes. What started as an experimental dish in my tiny apartment kitchen has turned into a weeknight staple! I remember the first time I served this to friends at dinner. We laughed as we tried to fit everything into one skillet, but the result was a giant hit. Now, it’s that reliable recipe I can count on when I need something quick, healthy, and satisfying. And the best part? It’s truly flexible!
FAQs and Troubleshooting
-
Can I use frozen sweet potatoes?
Absolutely! Just make sure to thaw them beforehand to ensure even cooking. You may need to adjust cooking times. -
What if my sweet potatoes aren’t cooking through?
No worries! If they’re still hard after the turkey is done, just add a splash of water to the skillet, cover it, and let everything steam for a few more minutes. -
Can I make this recipe ahead of time?
Definitely! You can prepare it ahead and store it in the fridge for up to 3 days. It reheats beautifully on the stovetop or in the microwave! -
What if I don’t like turkey?
Swap it for your ground protein of choice! Chicken, beef, or even plant-based crumbles can work just fine.
Nutritional Info
While nutritional values can vary based on specific brands and measurements, here’s a rough breakdown per serving (assuming 4 servings):
- Calories: 350
- Protein: 30g
- Carbohydrates: 35g
- Fat: 15g
- Fiber: 6g
There you have it, friends! Your very own Turkey Sweet Potato Skillet recipe, brimming with flavor and good vibes. I hope this dish brings you not only nourishment but also joy in the kitchen. Remember, cooking is all about enjoying the process—so don’t forget to keep it fun and flavorful! Let’s create more “clean plate” moments together! Happy cooking!
PrintTurkey Sweet Potato Skillet

A flavorful one-skillet meal combining lean ground turkey, sweet potatoes, and fresh spinach, perfect for quick weekday dinners.
- Prep Time: 15 minutes
- Cook Time: 20 minutes
- Total Time: 35 minutes
- Yield: 4 servings 1x
- Category: Main Course
- Method: Skillet Cooking
- Cuisine: American
- Diet: Healthy
Ingredients
- 1 lb Ground Turkey
- 2 Medium Sweet Potatoes, diced
- 4 Cups Fresh Spinach
- 1 Small Onion, diced
- 2 Cloves Garlic, minced
- 1 tsp Paprika
- Salt and Pepper, to taste
- Olive Oil, for cooking
Instructions
- Prep the sweet potatoes by peeling and dicing them into small cubes.
- Heat a large skillet over medium heat and add olive oil.
- Add diced sweet potatoes to the skillet, season with salt and pepper, and sauté for about 10 minutes.
- Add onion and garlic to the skillet and sauté for another 3-5 minutes.
- Brown the ground turkey in the skillet until no longer pink, about 5-7 minutes.
- Add in fresh spinach and stir until wilted.
- Taste and adjust seasoning as needed.
- Serve garnished with fresh herbs if desired.
Notes
This dish can be made ahead and stored in the fridge for up to 3 days. Thaw frozen sweet potatoes beforehand for even cooking.
Nutrition
- Serving Size: 1 serving
- Calories: 350
- Sugar: 5g
- Sodium: 400mg
- Fat: 15g
- Saturated Fat: 3g
- Unsaturated Fat: 10g
- Trans Fat: 0g
- Carbohydrates: 35g
- Fiber: 6g
- Protein: 30g
- Cholesterol: 85mg
Keywords: Turkey, Sweet Potato, Skillet, Healthy Dinner, One Pan Meal
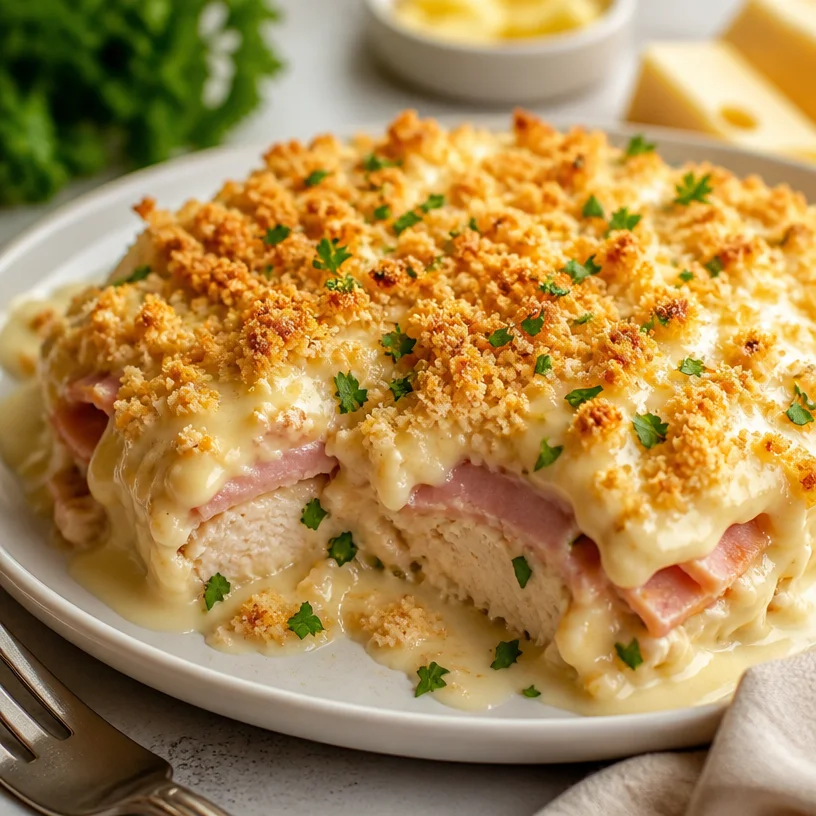
Minute Chicken Cordon Bleu Casserole (One-Pan Weeknight)
Chicken Cordon Bleu Casserole: A Comforting Twist on a Classic Favorite
Welcome to Clean Plate Cravings! Today, I’m inviting you into my kitchen to share a dish that beautifully marries nostalgia and convenience: the Chicken Cordon Bleu Casserole. You know, there’s something about comfort food that always brings a smile to my face. It’s like wrapping yourself in a cozy blanket after a long day. This casserole packs all the decadent flavors of traditional Chicken Cordon Bleu—juicy chicken, savory ham, and gooey Swiss cheese—into a heartwarming one-pot meal that’s easy to prepare and even easier to enjoy.
Now, let’s be real: I love quick recipes as much as the next foodie, but there’s something incredibly satisfying about creating a hearty casserole. It’s a dish that not only feeds your stomach but also nourishes the soul. We all have our stories tied to certain meals, and this particular casserole recipe holds a special place in my heart—one that intertwines with cherished childhood memories and family gatherings.
A Nostalgic Kitchen Memory
I remember the first time I had Chicken Cordon Bleu—a dish my mom would whip up on special occasions. The aroma of baked chicken, smoky ham, and melty cheese wafting through the house is a smell I can still recall today. We’d gather around the dinner table excitedly, forks in hand, as she served up generous portions. It was an event – a feast where laughter and stories flowed just as freely as the food.
Fast forward a few years, and I found myself craving that mix of flavors but without the fuss of the traditional preparation. After several trials in my own kitchen, I created this Chicken Cordon Bleu Casserole. It has all the classic elements but in a comforting, easy-to-prepare format. This dish captures the warmth of my childhood meals, making it an absolute must-try for anyone seeking satisfaction in a casserole.
So, ready to dive in? Let’s pull together all the ingredients that will help us create this delicious Chicken Cordon Bleu Casserole!
Ingredients
-
Chicken Breast (2 cups, shredded):
- The star of the show! You can use rotisserie chicken to save time or poach chicken breast for a fresher flavor. Feel free to substitute with turkey for a leaner option.
-
Ham (1 cup, diced):
- Adds a wonderful savory kick! Use leftover holiday ham or deli meats. For a vegetarian twist, try using sautéed mushrooms or chickpeas.
-
Swiss Cheese (2 cups, shredded):
- The creamy hero! Swiss cheese has a lovely melt and flavor profile but you can swap it for provolone or even mozzarella if you prefer a milder cheese.
-
Creamy Sauce (1 cup):
- This traditional sauce brings everything together. A mix of cream and chicken broth works wonders, but you can use a low-fat cream or homemade white sauce for a healthier option.
-
Breadcrumbs (1 cup):
- Perfect for a crunchy topping! Use panko for extra crunchiness or whole wheat crumbs for a healthier twist. You could even make your own from stale bread!
-
Butter (4 tablespoons):
- For richness and flavor. If you’re looking for a dairy-free version, coconut oil or a vegan butter substitute works well too.
Now that we have everything lined up, it’s time to jump into the cooking process!
Step-by-Step Instructions
-
Preheat Your Oven: Preheat your oven to 375°F (190°C). This ensures a nice, even bake when your casserole goes in, giving you that golden, bubbly top we all crave!
-
Prepare the Chicken: If you’re using raw chicken, season it with a pinch of salt and pepper, and poach it in simmering water for about 15-20 minutes. Shred it using two forks once it cools. If you’re using rotisserie chicken, skip this step—easy peasy!
-
Make the Creamy Sauce: In a saucepan over medium heat, melt 4 tablespoons of butter. Once melted, stir in ½ cup of flour to create a roux. Gradually whisk in 2 cups of chicken broth and 1 cup of heavy cream, bringing it to a simmer until it thickens. This is the heart of the casserole, giving it that creamy goodness!
-
Combine Ingredients: In a large bowl, mix together the shredded chicken, diced ham, 1½ cups of Swiss cheese, and the creamy sauce. Stir until everything is coated in that luscious sauce, ensuring every bite is full of flavor.
-
Transfer to Baking Dish: Grease a 9×13 inch baking dish and pour the chicken mixture into it, spreading it evenly. This is where the magic happens!
-
Top with Breadcrumbs: In a small bowl, mix the remaining ½ cup of Swiss cheese with the breadcrumbs. Sprinkle this mixture generously over the top of the casserole. This will create a delightful contrast of textures—a creamy interior balanced by a crunchy topping.
-
Bake to Perfection: Pop the casserole into your preheated oven and bake for about 25-30 minutes, or until the top is golden brown and bubbling. You’ll want to keep an eye on it as it bakes; nothing beats that sight!
-
Cool and Serve: Once done, let it rest for about 10 minutes—this will help the layers set a bit. Dive in when it’s cool enough to handle!
Serving Suggestions
When it comes to serving this Chicken Cordon Bleu Casserole, presentation is key! Serve it in the baking dish for a rustic feel, or scoop portions into individual bowls for a more refined look. Pair it with a light green salad drizzled with lemon vinaigrette to balance the richness of the casserole, and watch your guests (or family) light up with delight!
Recipe Variations
-
Vegetarian Version: Swap out chicken and ham for tender roasted vegetables like zucchini, bell peppers, and mushrooms for a meat-free delight.
-
Spicy Twist: Add a sprinkle of red pepper flakes or diced jalapeños for a kick of heat—perfect for spicy food lovers!
-
Herbed Delight: Mix in fresh herbs like thyme or rosemary into your creamy sauce for an aromatic twist.
-
Pasta Bake: For a heartier meal, stir in some cooked pasta (like penne or shells) into the mixture before baking. Who doesn’t love a good pasta bake?
-
Gluten-Free Option: Use gluten-free breadcrumbs and make sure to check your cream and broth for gluten-free certification.
Chef’s Notes
This casserole has evolved from a simple childhood favorite into one of my go-to weeknight meals! It’s incredible how a humble dish can bring family and friends together, sparking laughter and shared stories. I mean, who could forget that satisfying crunch of the topping mixed with the creamy filling? Plus, it’s a breeze to customize; sometimes, you’ll find me tossing in whatever leftover veggies are in the fridge!
I’ve even had days where I’ve added a splash of white wine to the creamy sauce for a little extra depth of flavor. Don’t be afraid to experiment!
FAQs and Troubleshooting
Q: Can I make this dish ahead of time?
Absolutely! You can prepare the casserole and store it in the fridge for up to 24 hours before baking. Just add a few extra minutes to your baking time to ensure it’s heated through.
Q: What if the casserole is too dry?
If you find your casserole ends up on the drier side, simply add a splash of chicken broth or cream before serving. This will rejuvenate those flavors and textures instantly.
Q: Can I freeze this casserole?
Yes! Once cooled, wrap it tightly in plastic wrap and freeze for up to three months. When you’re ready to eat it, let it thaw in the fridge overnight and then bake as instructed.
Q: How do I know when it’s done baking?
You’re looking for a golden brown top and bubbly edges. If you want to be sure, you can use a food thermometer—the internal temperature should reach 165°F (74°C).
Nutritional Info
(Per serving, based on 8 servings):
- Calories: 350
- Protein: 30g
- Carbohydrates: 27g
- Fat: 18g
- Fiber: 1g
Feel free to adjust the portion sizes and ingredients according to your dietary needs!
There you have it! A delicious Chicken Cordon Bleu Casserole that’s sure to become a family favorite, full of comforting flavors and timeless appeal. Remember, cooking is about experimentation, fun, and most importantly, sharing good food with great people. Happy cooking, and let’s keep it fresh, simple, and seriously delicious!
PrintChicken Cordon Bleu Casserole

A comforting twist on the classic Chicken Cordon Bleu, this casserole is easy to prepare and packed with delicious flavors of chicken, ham, and Swiss cheese.
- Prep Time: 20 minutes
- Cook Time: 30 minutes
- Total Time: 50 minutes
- Yield: 8 servings 1x
- Category: Main Course
- Method: Baking
- Cuisine: American
- Diet: Meat-based
Ingredients
- 2 cups Chicken Breast, shredded
- 1 cup Ham, diced
- 2 cups Swiss Cheese, shredded
- 1 cup Creamy Sauce (mix of cream and chicken broth)
- 1 cup Breadcrumbs
- 4 tablespoons Butter
Instructions
- Preheat your oven to 375°F (190°C).
- Prepare the chicken by poaching it or using rotisserie chicken.
- Make the creamy sauce by melting butter and stirring in flour, then whisking in chicken broth and cream.
- Combine the shredded chicken, diced ham, Swiss cheese, and creamy sauce in a large bowl.
- Transfer the mixture to a greased 9×13 inch baking dish.
- Top with a mix of Swiss cheese and breadcrumbs.
- Bake for 25-30 minutes until golden brown and bubbly.
- Cool for 10 minutes before serving.
Notes
Customize with leftover veggies, add spice for heat, or make it vegetarian with roasted mushrooms.
Nutrition
- Serving Size: 1 serving
- Calories: 350
- Sugar: 2g
- Sodium: 700mg
- Fat: 18g
- Saturated Fat: 9g
- Unsaturated Fat: 6g
- Trans Fat: 0g
- Carbohydrates: 27g
- Fiber: 1g
- Protein: 30g
- Cholesterol: 85mg
Keywords: Chicken Cordon Bleu, casserole, comfort food, easy recipe
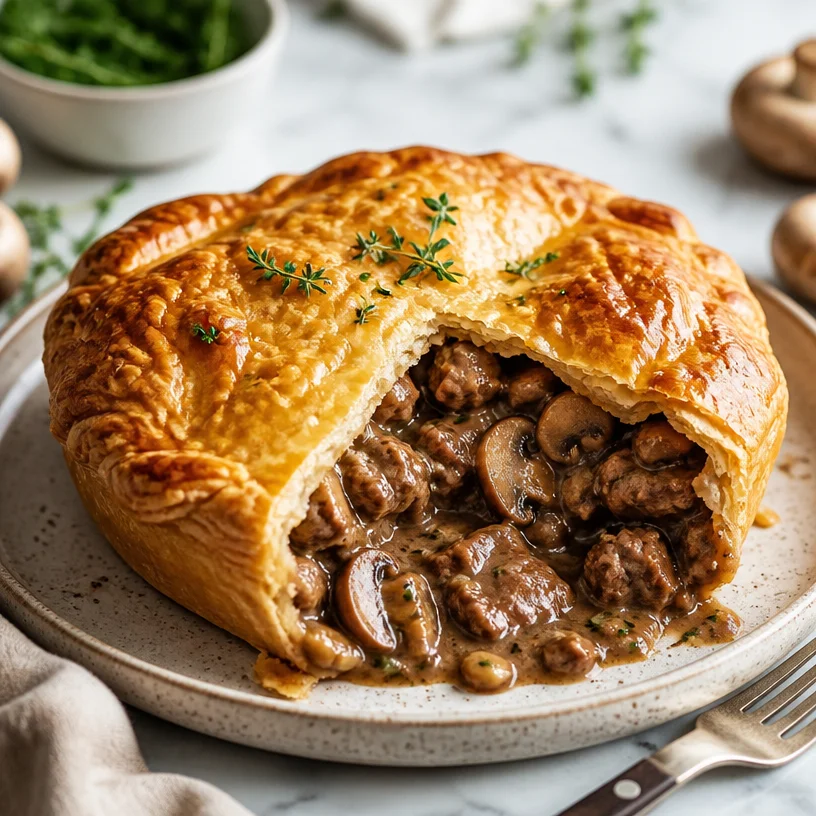
Minute Beef & Mushroom Pie: One-Pan Weeknight Comfort
Perfecting the Beef & Mushroom Pie: A Warm and Satisfying Delight
Welcome back, food lovers! Today, we’re diving into the world of comfort food with a classic dish that warms the soul and fills the belly: Beef & Mushroom Pie. Picture this: a flaky, golden puff pastry enveloping a tender, savory beef and mushroom filling that bursts with flavor in every bite. It’s one of those recipes that bridges generations, a meal that can evoke heartwarming memories and inspire new traditions around the dinner table.
As we stir the pot and roll out the pastry, you’ll find that this dish isn’t just about the ingredients—it’s about the feelings and memories that come along with it. Let’s roll up our sleeves and shuffle into the kitchen together, shall we?
A Nostalgic Kitchen Memory
Let me take you back to my childhood. Every Sunday, without fail, my family gathered around our kitchen table, where the aroma of something delicious simmering filled the air. My grandmother was a master of classic comfort foods, and one of my favorite memories is watching her prepare her famous Beef & Mushroom Pie.
I remember being a small child, perched on a stool, peering over her shoulder as she expertly rolled out the pastry dough. She would always hum a little tune, infusing the kitchen with not just warmth from the oven, but joy and laughter too. The beef was tender and juicy, slow-cooked to perfection with earthy mushrooms that added a rich essence. As she stirred, I sensed that the kitchen was our little universe—a place where flavors and stories intertwined.
Once the pie was in the oven, we had to wait patiently, but the smell taunting us was worth it. When it finally emerged, golden brown and bubbling, it was like an edible masterpiece. We’d sit down as a family, sharing slices and stories, and soaking in that cozy feeling of togetherness.
As I prepared my own version of this recipe for you today, I am transported back to those moments. Food has a wonderful way of connecting us, doesn’t it? So, let’s create some new memories while savoring this delicious Beef & Mushroom Pie!
Ingredients
Here’s what you’ll need to create this delightful Beef & Mushroom Pie, along with some handy tips and insights for each ingredient:
-
Beef (2 lbs): Choose a chuck roast or stew meat for the best flavor and tenderness. You can also opt for ground beef if you want a quick-and-easy version! If you’re looking for a leaner option, go for sirloin or tenderloin.
-
Mushrooms (8 oz): Use cremini or button mushrooms for a rich flavor. If you want a touch of gourmet flair, try shiitake or portobello mushrooms! Remember to clean them with a damp cloth instead of rinsing to retain their earthy flavor.
-
Onion (1 large): Onions are essential for depth of flavor. Yellow onions are my go-to for this recipe, but sweet onions work too. If you’re short on time, shallots can be a fantastic substitute!
-
Garlic (4 cloves): Fresh garlic adds a punch of flavor. Don’t have fresh? Use 1 teaspoon of garlic powder instead, but fresh is always best for that aromatic flair.
-
Carrots (2 medium): These add a hint of sweetness and color. You can swap them with parsnips for a nuttier twist, or skip them altogether if you’re not a fan!
-
Beef broth (1 cup): Contributes moisture and richness. Low-sodium versions allow you to control the saltiness in the dish, or use chicken broth for a lighter flavor.
-
Red wine (1 cup): This enhances the flavor profile a notch. Opt for a robust red, like cabernet or merlot. If you prefer not to use wine, feel free to substitute it with additional broth.
-
Puff pastry (2 sheets): The flaky crust that makes this dish a true delight. You can find store-bought puff pastry in the freezer section, but if you’re feeling ambitious, making your own is a rewarding project!
-
Olive oil (2 tbsp): For sautéing the vegetables and browning the meat. Use butter for a richer flavor, or avocado oil for a healthy alternative.
-
Herbs (thyme and rosemary): Fresh herbs elevate the dish. Use about 1 teaspoon each of dried herbs if fresh isn’t available; just remember, dried herbs are more concentrated!
-
Salt and pepper: Essential seasoning to bring all the flavors together. Adjust to your taste preference.
With these quality ingredients in hand, you’ll create a Beef & Mushroom Pie that’s not only delicious but also memorable. Let’s get cooking!
Step-by-Step Instructions
Now that we have our ingredients ready, it’s time to dive into the cooking process! Follow along step by step for some delicious results.
-
Preheat Your Oven: Start by preheating your oven to 400°F (200°C). This allows the pastry to bake evenly and gives you that gorgeous golden color.
-
Sauté the Aromatics: In a large skillet or Dutch oven, heat up the olive oil over medium heat. Add diced onions and minced garlic, sautéing until they’re soft and fragrant (about 3-4 minutes). This is where the magic begins—don’t rush this step!
-
Add the Carrots and Mushrooms: Toss in chopped carrots and sliced mushrooms, cooking until the mushrooms release their moisture and the mixture reduces (about 5-7 minutes). You’re looking for a nice caramelization here, so let them brown a bit.
-
Brown the Beef: Increase the heat to medium-high and add the beef in batches (if needed) so you don’t overcrowd the pan. Give it a nice sear on all sides, which develops fantastic flavor. Season with salt and pepper while it’s browning.
-
Deglaze with Red Wine: Once the beef is browned, pour in the red wine to deglaze the pan. Scrape up those delicious brown bits on the bottom—it’s pure flavor magic! Let it simmer for a few minutes until the wine reduces slightly.
-
Add Broth and Herbs: Pour in the beef broth and toss in your chopped fresh herbs. Bring the mixture to a boil, then reduce to a simmer. Cover and let it cook gently for about 30-40 minutes. This is where the beef becomes unbelievably tender!
-
Thicken the Filling: If the filling is too thin, mix a tablespoon of cornstarch with a little cold water to create a slurry, then stir it in until thickened. It should be hearty, not runny!
-
Prepare the Puff Pastry: While the filling cools slightly, roll out your puff pastry sheets on a lightly floured surface. You want them large enough to cover your pie dish.
-
Transfer Filling to Pie Dish: Spoon your flavorful filling into a pie dish and top it with the puff pastry, crimping the edges together to seal. Don’t forget to cut a few slits in the top for steam to escape!
-
Final Touch: Brush the pastry with an egg wash (one beaten egg mixed with a splash of water) for that golden shine. It’ll make your pie look as good as it tastes!
-
Bake to Perfection: Place the pie in the preheated oven and bake for about 25-30 minutes, or until the pastry is puffed and golden brown. Keep an eye on it—make sure it doesn’t get too dark!
And there you have it—your very own Beef & Mushroom Pie, full of savory goodness and love.
Serving Suggestions
When it comes to serving, simplicity is key! Slice the pie into hearty wedges and serve it with a side of steamed veggies or a fresh, crisp salad. A drizzle of gravy over the top can enhance the experience, or serve it alongside some tangy chutney for that extra zing. This dish simply invites friends and family to gather and enjoy.
Recipe Variations
Feeling creative? Here are some fun twists you can try:
-
Vegetarian Delight: Swap out the beef for lentils or mushrooms—this variation is just as hearty and perfectly satisfying.
-
Spicy Kick: Add a dash of chili flakes or some diced jalapeños to the filling for a touch of heat.
-
Cheese Lovers’ Special: Incorporate some shredded cheese—like cheddar or Gruyère—into the filling for that cheesy, gooey goodness.
-
Herb Infusion: Experiment with different herbs; try adding parsley or even a sprinkle of oregano for a whole new flavor profile.
-
Individual Pies: Instead of one big pie, use muffin tins to create mini pies—perfect for portion control and fun for parties!
Chef’s Notes
As with any recipe, feel free to play around! I’ve found that every cook adds their own unique twist, and that’s what keeps this dish evolving. I once attempted a Beef & Mushroom Pie with leftover roast beef from a family gathering, and it turned out fabulous. The beauty of home cooking is that it encourages experimentation, so embrace it!
I also remember one time I forgot to cut slits in the top crust before baking—let’s just say, the pie erupted like a volcano! Always check for those air vents; they really do matter!
FAQs and Troubleshooting
Q: What if my beef is tough?
A: If you find your beef isn’t tender after simmering, it may need more time. Just keep it on low heat until it reaches that melt-in-your-mouth texture.
Q: Can I use frozen pastry?
A: Absolutely! Just make sure to thaw it in the refrigerator overnight or at room temperature for a few hours.
Q: How can I store leftovers?
A: Slice any leftovers and store them in an airtight container in the fridge for up to three days. Reheat in the oven for the best texture.
Q: Can I freeze the pie?
A: Yes! Assemble the pie and freeze it before baking. When you’re ready to eat, bake it straight from the freezer—you may need to add a few extra minutes to the baking time.
Nutritional Info
While I like to keep things fresh and flavorful, it’s always good to know what you’re eating! This pie, per serving (based on a standard slice), typically contains:
- Calories: 460
- Protein: 25g
- Carbohydrates: 45g
- Fat: 22g
Keep in mind these values can vary based on specific ingredients and serving sizes.
And there we have it, my delightful foodies! A hearty, comforting Beef & Mushroom Pie recipe that’s bound to bring smiles and warmth to your table. Give it a go, and let me know how it turns out—your feedback fuels my kitchen adventures! Happy cooking!
PrintBeef & Mushroom Pie

A classic comfort food dish of tender beef and mushrooms encased in a flaky puff pastry, perfect for family gatherings.
- Prep Time: 20 minutes
- Cook Time: 50 minutes
- Total Time: 70 minutes
- Yield: 6 servings 1x
- Category: Main Course
- Method: Baking
- Cuisine: British
- Diet: None
Ingredients
- 2 lbs beef (chuck roast or stew meat)
- 8 oz mushrooms (cremini or button)
- 1 large onion
- 4 cloves garlic
- 2 medium carrots
- 1 cup beef broth
- 1 cup red wine
- 2 sheets puff pastry
- 2 tbsp olive oil
- herbs (thyme and rosemary)
- Salt and pepper to taste
Instructions
- Preheat your oven to 400°F (200°C).
- Sauté the onion and garlic in olive oil until fragrant.
- Add the carrots and mushrooms, cooking until reduced and caramelized.
- Brown the beef in batches and season with salt and pepper.
- Deglaze the pan with red wine, scraping up the brown bits.
- Pour in the beef broth and add herbs, bringing to a boil before simmering.
- Thicken the filling if necessary, using a cornstarch slurry.
- Prepare the puff pastry sheets and spoon the filling into a pie dish.
- Top with puff pastry, sealing the edges, and cut slits in the top.
- Brush with egg wash for a golden finish.
- Bake for 25-30 minutes or until golden brown.
Notes
Serve with steamed veggies or a fresh salad. Leftovers can be stored in the fridge for up to three days.
Nutrition
- Serving Size: 1 slice
- Calories: 460
- Sugar: 5g
- Sodium: 600mg
- Fat: 22g
- Saturated Fat: 8g
- Unsaturated Fat: 10g
- Trans Fat: 0g
- Carbohydrates: 45g
- Fiber: 3g
- Protein: 25g
- Cholesterol: 85mg
Keywords: beef pie, mushroom pie, comfort food, family recipe, baking
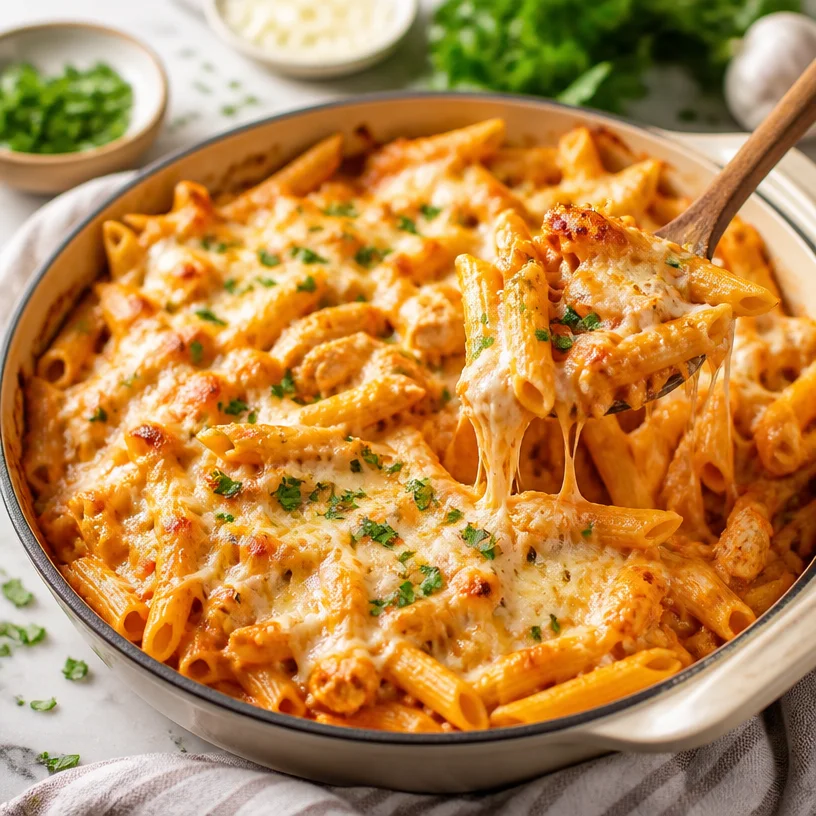
One-Pan Buffalo Chicken Pasta Bake: Weeknight-Ready Comfort
Buffalo Chicken Pasta Bake: A Flavorful Dive into Comfort Food
Welcome back, food lovers! Today, we’re diving into a dish that perfectly balances comfort, flavor, and the joy of a home-cooked meal—Buffalo Chicken Pasta Bake. This dish embodies everything I stand for at Clean Plate Cravings. It’s fresh, simple, and oh-so-satisfying without skimping on taste. Trust me, this isn’t just a meal; it’s a warm hug on a plate.
Let’s face it; we all have those days when life gets a bit hectic, and we crave something that feels indulgent but doesn’t add to the chaos. This Buffalo Chicken Pasta Bake is your answer! It’s hearty, crowd-pleasing, and the best part? It comes together in one dish, which means fewer dishes to wash—score! Whether you’re hosting a game day gathering, a family dinner, or just need a delicious weeknight meal, this recipe will make your taste buds sing.
A Nostalgic Dive into Buffalo Flavor
One of my fondest memories connected to Buffalo Chicken Pasta Bake dates back to my college days. Picture this: a group of friends gathered in our tiny kitchen, attempting to whip up something tasty for a TV marathon. Buffalo wings were always our go-to, but we were feeling adventurous that day. With a cupboard full of pasta, some leftover rotisserie chicken, and a bottle of Buffalo sauce that was boldly beckoning from the fridge, we concocted something magical.
As we tossed everything together, laughter filled the kitchen as we competed to see who could make the cheesiest, spiciest version of this pasta masterpiece. That evening was filled with funny kitchen mishaps, questionable measurements, and high hopes. When we finally dug in, we were blown away! The spicy kick of the Buffalo sauce mixed with creamy cheese and tender pasta created a dish we would recreate many times. From that day forward, Buffalo Chicken Pasta Bake became a beloved staple in my recipe repertoire. Now, I’m thrilled to share my own take on this fantastic dish with you!
Ingredients
Here’s what you’ll need to make your flavor-packed Buffalo Chicken Pasta Bake:
- 2 cups cooked chicken: Shredded or diced, you can use store-bought rotisserie chicken for convenience. If you’re going for a healthier option, grilled chicken breast also works wonders!
- 1 cup Buffalo sauce: The star of the show! This sauce packs a spicy punch. If you prefer a milder flavor, try a combination of Buffalo sauce and a touch of ranch dressing to tone it down.
- 8 ounces pasta: Penne or rotini works best since the sauce clings to the noodles beautifully. Feel free to swap in whole grain or gluten-free pasta if you need a dietary alternative.
- 2 cups shredded cheese: A mix of mozzarella and cheddar gives you that gooey, cheesy goodness. You can substitute with a dairy-free cheese if you’re looking for a non-dairy option.
- 1 cup Greek yogurt or sour cream: This adds creaminess and balances the heat of the Buffalo sauce. Plain yogurt is a lighter option, while sour cream brings a richer flavor.
- 1/4 cup green onions: Chopped for garnish and a pop of freshness. You can leave them out if you’re not a fan, or swap them for chopped parsley or cilantro for an herbaceous touch.
Step-by-Step Instructions
Now let’s get cooking! Follow these steps, and soon you’ll be savoring your own Buffalo Chicken Pasta Bake.
-
Preheat your oven: First things first, preheat your oven to 350°F (175°C). This ensures your dish cooks evenly and gets that nice, bubbly top!
-
Cook the pasta: In a large pot of salted boiling water, cook the pasta according to the package instructions until al dente. Make sure to reserve about a cup of the pasta water before draining—it’s liquid gold for creating the perfect sauce!
-
Mix the chicken and sauce: In a large mixing bowl, combine the cooked chicken and Buffalo sauce. Stir it all together until the chicken is generously coated with that spicy goodness. Are you feeling the heat yet?
-
Combine with pasta: In the same pot where you cooked the pasta, add the cooked noodles, the chicken mixture, Greek yogurt or sour cream, and 1 cup of shredded cheese. If it looks a little dry, add a splash of the reserved pasta water to achieve a creamy consistency. The aim here is to create a luscious sauce that makes every bite irresistible!
-
Transfer to a baking dish: Pour this colorful mixture into a greased 9×13 inch baking dish. Use a spatula to spread it out evenly, making sure every noodle is tucked in for some cozy baking.
-
Top with cheese: Sprinkle the remaining cheese over the top of the pasta bake. We want it to be cheesy, bubbly, and golden brown, so don’t be shy!
-
Bake away: Place the baking dish in the preheated oven and bake for about 25-30 minutes, or until the cheese is melted and bubbly. You can even broil it for a couple of minutes at the end to achieve that gorgeous brown top—just watch it closely, so it doesn’t burn.
-
Garnish and dig in: Once out of the oven, let it sit for a few minutes before serving. Sprinkle with chopped green onions for that added flavor and color, and get ready for compliments all around!
Serving Suggestions
Serving this Buffalo Chicken Pasta Bake is all about presentation! I love to serve it right in the baking dish for that rustic, homey feel. Just grab a big spoon and let everyone help themselves. You can also pair it with a crisp green salad or some sliced veggies to balance out the richness of the dish. And don’t forget those extra napkins; things might get a bit saucy!
Recipe Variations
Feeling adventurous? Here are a few fun twists to keep things interesting:
- Veggie Delight: Add in some diced bell peppers, broccoli, or spinach for a boost of nutrition and color.
- Mac and Cheese Style: Swap in a combination of various cheeses like pepper jack for added heat or cream cheese for extra creaminess.
- Chickpeas for Protein: Keep it vegetarian by using canned chickpeas instead of chicken. Just drain and rinse them before adding them to the mix.
- Spicy Ranch Twist: Mix in a packet of ranch seasoning for an extra zing that complements the Buffalo flavor.
- Lighter Version: Use whole-grain pasta and Greek yogurt instead of sour cream for a lower-calorie option!
Chef’s Notes
This Buffalo Chicken Pasta Bake has come a long way since my college cooking escapades! Over the years, I’ve fine-tuned the recipe to balance heat with creaminess perfectly. It’s become a dish my friends request repeatedly, and I’m always happy to whip it up for gatherings or cozy nights in.
Every time I make it, I can’t help but cherish the laughter and friendship that comes with it. Cooking should always be fun, after all!
FAQs and Troubleshooting
1. Can I make this dish ahead of time?
Absolutely! You can assemble the pasta bake and store it covered in the fridge for up to 24 hours. Just add about 10-15 minutes to the baking time if baking it straight from the fridge.
2. What’s the best way to reheat leftovers?
To reheat, cover with aluminum foil and bake in a 350°F (175°C) oven for about 20 minutes, stirring halfway through. Alternatively, you can reheat individual servings in the microwave.
3. The sauce looks too thick; what can I do?
If you find the mixture a bit too thick before baking, simply add more of that reserved pasta water until you reach your desired consistency—trust your instincts!
4. I don’t like spicy food; can I tone it down?
Definitely! Use a milder Buffalo sauce or mix in some ranch dressing to lower the heat. You can also increase the amount of Greek yogurt or sour cream to balance it out.
Nutritional Info
While I’ve focused on creating a dish that’s both satisfying and flavorful, if you’re curious about the nutritional information, a serving of this Buffalo Chicken Pasta Bake (1 cup) typically contains approximately:
- Calories: 350
- Protein: 25g
- Fat: 15g
- Carbohydrates: 35g
This can vary based on specific ingredients and portion sizes, but it’s always delicious!
There you have it, my friends—a cozy bowl of Buffalo Chicken Pasta Bake that’s ready to steal the show! I hope you embrace this warm and inviting dish, just like I do. Remember, cooking should be a joyous experience, so don’t stress! Enjoy the process. Happy cooking!
PrintBuffalo Chicken Pasta Bake

A hearty and comforting Buffalo Chicken Pasta Bake that combines tender pasta, shredded chicken, and a spicy Buffalo sauce topped with gooey cheese.
- Prep Time: 15 minutes
- Cook Time: 30 minutes
- Total Time: 45 minutes
- Yield: 4 servings 1x
- Category: Main Course
- Method: Baking
- Cuisine: American
- Diet: Non-Vegetarian
Ingredients
- 2 cups cooked chicken, shredded or diced
- 1 cup Buffalo sauce
- 8 ounces pasta (penne or rotini)
- 2 cups shredded cheese (mozzarella and cheddar)
- 1 cup Greek yogurt or sour cream
- 1/4 cup green onions, chopped
Instructions
- Preheat your oven to 350°F (175°C).
- Cook the pasta in a large pot of salted boiling water until al dente, reserving a cup of pasta water before draining.
- Mix the cooked chicken and Buffalo sauce in a large bowl until coated.
- Combine the pasta, chicken mixture, Greek yogurt or sour cream, and 1 cup of shredded cheese in the pot, adding reserved pasta water as needed for a creamy consistency.
- Transfer the mixture to a greased 9×13 inch baking dish.
- Top with remaining cheese.
- Bake for 25-30 minutes until melted and bubbly, broiling for a couple of minutes if desired.
- Garnish with chopped green onions before serving.
Notes
This dish can be made ahead and stored in the fridge for up to 24 hours; just adjust the baking time accordingly.
Nutrition
- Serving Size: 1 cup
- Calories: 350
- Sugar: 5g
- Sodium: 800mg
- Fat: 15g
- Saturated Fat: 7g
- Unsaturated Fat: 5g
- Trans Fat: 0g
- Carbohydrates: 35g
- Fiber: 2g
- Protein: 25g
- Cholesterol: 100mg
Keywords: Buffalo chicken, pasta bake, comfort food, easy dinner, one dish meal
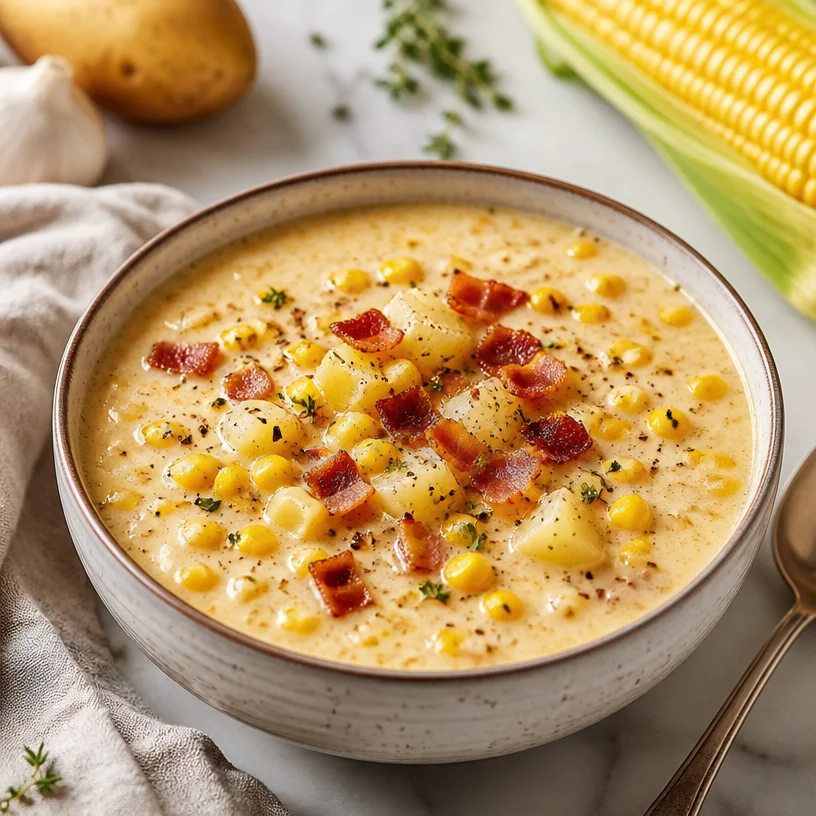
Creamy Corn Chowder
Creamy Corn Chowder: A Warm Bowl of Comfort
Welcome back to Clean Plate Cravings, where we whip up fresh, feel-good meals that nourish both body and soul. Today, we’re diving headfirst into a bowl of comforting goodness with my favorite recipe—Creamy Corn Chowder. This dish doesn’t just warm your belly; it fills your heart with nostalgia and happiness, reminding you of cozy nights spent with family and friends.
Introduction
As the leaves start to turn and the air gets a little crisp, I can’t help but crave something warm and inviting. Corn chowder is one of those dishes that wraps around you like a cozy blanket. It’s the epitome of comfort food! Imagine coming inside from a brisk autumn walk, the scent of sweet corn and smoky bacon wafting from the kitchen—seriously, what could be better? This chowder is creamy, dreamy, and oh-so-satisfying, making it perfect for chilly days or any time you need a little pick-me-up.
What I love about corn chowder is its versatility. While it’s traditionally rich and creamy, making it might just become your new favorite weeknight ritual! The best part? You can whip it up in about 30 minutes or less, and you probably have most of the ingredients already lurking in your pantry or fridge. This dish is all about fresh flavors and simple ingredients, so let’s roll up our sleeves and get cooking.
Are you ready to stir up some love in the kitchen? Let’s chat about how to make this delightful chowder that’s sure to become a family favorite!
Personal Story
Corn chowder has a special place in my heart. I distinctly remember rainy Saturday afternoons spent in my grandma’s kitchen. The sound of the rain tapping on the window mixed with the gentle simmering of her famous chowder on the stove created an atmosphere full of love and warmth. She’d throw in everything she had on hand—fresh corn from the farmer’s market, potatoes from her garden, and of course, a generous helping of bacon that always made the house smell heavenly.
I would sit at the kitchen island with a spoon in hand, eagerly waiting for the first taste of her magically creamy soup. Each spoonful was a symphony of flavors, a comforting hug that seemed to chase away any dreary thoughts. This recipe is my homage to those sweet memories. I’ve taken Grandma’s delightful concoction and added my own twists, ensuring it’s just as scrumptious and nostalgic as I remember, with a few modern-friendly touches.
Ingredients
Here’s what you’ll need for this creamy, comforting chowder:
-
Corn (fresh, frozen, or canned)
Fresh corn is always the best option, sweet and bursting with flavor, but you can easily substitute with frozen or canned corn. Just make sure to drain and rinse canned corn for the best texture. -
Potatoes (Yukon Gold or russet)
Potatoes add heartiness to the chowder. Yukon Gold potatoes are my go-to for their creamy texture when cooked. If you’re looking for a lighter option, try using cauliflower instead! -
Bacon (or turkey bacon)
The smokiness of bacon elevates this dish! If you’re looking for a healthier option, turkey bacon works just as well, though it won’t have quite the same depth of flavor. -
Cream (heavy cream or half-and-half)
Cream makes the chowder luscious and rich. If you want to lighten it, try using half-and-half or a splash of coconut milk for a hint of sweetness and dairy-free delight. -
Vegetable or chicken broth
This forms the chowder’s base and adds depth. Use low-sodium broth if you’re watching salt intake, or homemade broth for an extra fresh touch. -
Onions and garlic
Always a must for flavor, onions add sweetness, while garlic offers a punch that brings everything together. -
Seasoning: salt, pepper, and thyme (or your favorite herbs)
Simple yet effective! Seasoning enhances the flavors—feel free to add a pinch of cayenne if you want a slight kick!
Step-by-Step Instructions
Let’s get cooking! Here’s how you can whip up this creamy corn chowder in no time.
-
Prep Your Ingredients: Start by gathering all your ingredients. Chop the onions, dice the potatoes, and if using fresh corn, cut the kernels off the cobs. Having everything ready makes the cooking process smooth and fun!
-
Sauté the Bacon: In a large pot over medium heat, toss in your diced bacon. Let it cook until crispy, which should take about 5-7 minutes. The bacon fat will infuse the chowder with delicious flavor! Don’t be shy—feel free to use that fat.
-
Add Onions and Garlic: Once your bacon is crispy, add the chopped onions to the pot and sauté them for about 3-4 minutes. They should become translucent. Then, toss in the minced garlic and cook for an additional minute until fragrant. Pro tip: Avoid burning the garlic; nobody likes bitter garlic in their chowder!
-
Stir in the Potatoes: Add the diced potatoes to the pot, and give everything a good stir. Let the potatoes sauté with the bacon and onions for another 2-3 minutes to coat and start cooking.
-
Pour in Broth and Corn: Now it’s time to add the broth and corn! Pour in enough broth to cover the potatoes and corn (about 4 cups, depending on your texture preference). Stir everything together and bring to a boil. Allow it to simmer for about 10-15 minutes, or until the potatoes are tender.
-
Add Cream: When the potatoes are cooked to perfection, lower the heat and stir in the cream. This will make your chowder wonderfully rich and creamy! If you prefer a lighter chowder, feel free to use half-and-half or coconut milk instead.
-
Season It Up: This is the fun part! Season the chowder with salt, pepper, and thyme (or your favored herbs). Taste and adjust until you get that perfect balance of flavors.
-
Blend (Optional): If you like a smoother texture, grab an immersion blender and pulse it a few times directly in the pot. This step adds a lovely thickness without fully puréeing the chowder, allowing some texture from the corn and potatoes to shine through.
-
Serve and Garnish: Ladle your creamy corn chowder into bowls and garnish with crispy bacon bits, fresh herbs, or a sprinkle of cheddar cheese if you’re feeling extra indulgent!
Serving Suggestions
This chowder is best served hot, straight from the pot! Pair it with crusty bread, a simple side salad, or even some spicy cornbread for a complete meal. A fresh sprinkle of parsley or chives adds a beautiful pop of color and freshness!
Recipe Variations
-
Vegetarian Delight: Omit the bacon and use vegetable broth instead for a light, plant-based chowder. You won’t miss the bacon one bit!
-
Spicy Kick: Add diced jalapeños or a teaspoon of cayenne pepper for some heat. This adds a delightful twist that will impress your taste buds.
-
Herb Extravaganza: Switch out thyme for fresh dill or basil for a different flavor profile. Each herb gives the soup a unique touch!
-
Cheesy Comfort: Stir in shredded cheddar cheese at the end of cooking for an extra creamy chowder that’s extra indulgent.
Chef’s Notes
This recipe has evolved over the years—each time I make it, I love experimenting with different ingredients and seasonings. Sometimes I toss in some bell peppers or creative spices, and other times I stick to the classic. It’s super forgiving! Feel free to let your creativity run wild. And you know what? I’ll never forget the first time I accidentally added a bit too much garlic—thankfully, a splash of cream saved the day!
FAQs and Troubleshooting
-
Why is my chowder too thick?
If you find your chowder has thickened more than you like, simply stir in a bit of extra broth or water until it reaches your desired consistency. -
Can I make this chowder ahead of time?
Absolutely! This chowder actually tastes even better the next day. Just store it in an airtight container in the fridge for up to three days. -
What can I add for extra nutrients?
Feel free to toss in fresh spinach, kale, or cooked chickpeas for an added nutritional punch—these mix well without overpowering the original flavors. -
Can I freeze corn chowder?
Yes, but keep in mind the cream may separate when reheating. To freeze, leave out the cream and add it back when you’re ready to enjoy your chowder again.
Nutritional Info
While I prefer to focus on flavor, I know nutrition matters too! This chowder is packed with the goodness of corn and potatoes. Depending on how you make it, a serving can range from 250-400 calories, with protein and fiber to keep you satisfied!
Now that you’re armed with this delicious recipe, I can’t wait to hear how it turns out! Dive into your kitchen, and let the comforting aromas fill your home. Don’t forget to share your creations with us—I love seeing fellow foodies enjoying good food! Happy cooking!
PrintCreamy Corn Chowder

A comforting, creamy corn chowder that warms your belly and fills your heart with nostalgia, perfect for chilly days.
- Prep Time: 10 minutes
- Cook Time: 30 minutes
- Total Time: 40 minutes
- Yield: 4 servings 1x
- Category: Soup
- Method: Stovetop
- Cuisine: American
- Diet: Flexible
Ingredients
- 2 cups corn (fresh, frozen, or canned)
- 2 medium Yukon Gold or russet potatoes, diced
- 4 slices of bacon (or turkey bacon)
- 1 cup heavy cream (or half-and-half)
- 4 cups vegetable or chicken broth
- 1 medium onion, chopped
- 2 cloves garlic, minced
- Salt, to taste
- Pepper, to taste
- 1 teaspoon dried thyme (or your favorite herbs)
Instructions
- Prep your ingredients: Gather and chop all ingredients.
- Sauté the bacon in a large pot over medium heat until crispy (about 5-7 minutes).
- Add onions to the pot and sauté for 3-4 minutes until translucent, then stir in minced garlic for 1 additional minute.
- Stir in the diced potatoes and sauté for 2-3 minutes.
- Pour in the broth and corn; bring to a boil, then simmer for 10-15 minutes until potatoes are tender.
- Add cream to the pot and lower the heat, stirring until well mixed.
- Season with salt, pepper, and thyme to taste.
- Blend (optional): Use an immersion blender for a smoother texture without fully puréeing.
- Serve hot, garnished with bacon bits and fresh herbs if desired.
Notes
For a vegetarian version, omit the bacon and use vegetable broth. Experiment with different herbs and spices to suit your taste!
Nutrition
- Serving Size: 1 bowl
- Calories: 350
- Sugar: 6g
- Sodium: 600mg
- Fat: 20g
- Saturated Fat: 10g
- Unsaturated Fat: 8g
- Trans Fat: 0g
- Carbohydrates: 40g
- Fiber: 5g
- Protein: 10g
- Cholesterol: 40mg
Keywords: corn chowder, creamy soup, comfort food, easy recipes, fall recipes
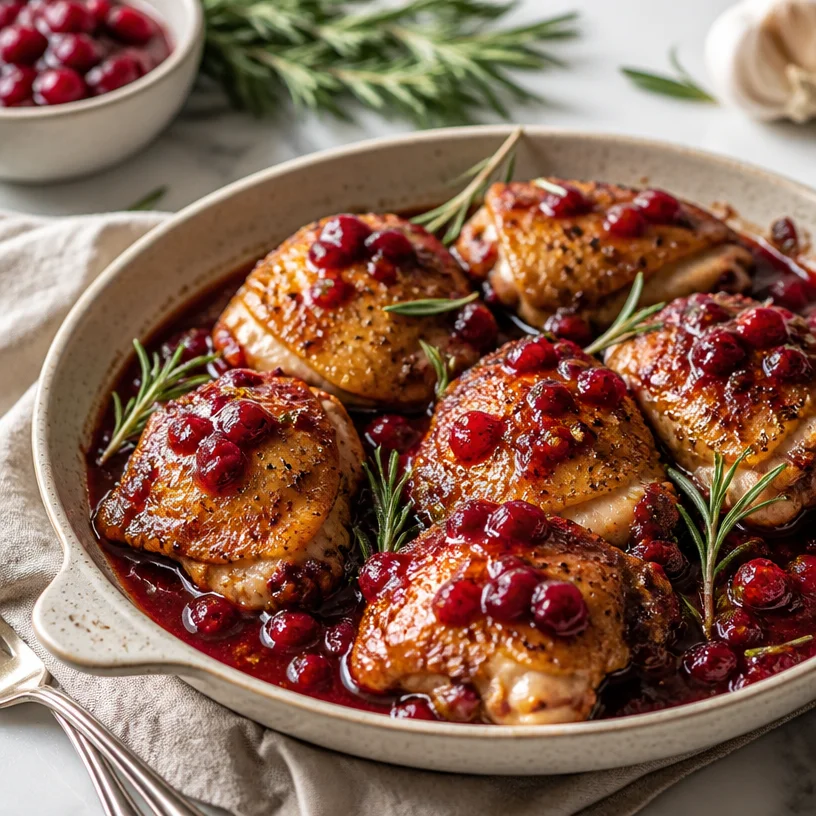
Minute One-Pan Cranberry Chicken: Weeknight Dinner
Cranberry Chicken: A Deliciously Tangy Delight
Welcome to another exciting culinary adventure here at Clean Plate Cravings! Today, we’re diving into a dish that’s as vibrant and delightful as the fall leaves—Cranberry Chicken. This savory-sweet recipe features juicy chicken thighs enveloped in a luscious cranberry sauce, boasting a hint of rosemary that takes every bite to the next level. Don’t worry if you think cooking chicken sounds tricky; I promise to guide you through every step with some fun tips and tricks. So let’s make this delicious meal that you and your loved ones will be craving again and again!
You might wonder why cranberry chicken is a personal favorite of mine—and let me tell you, it comes with a rush of nostalgia that warms my heart. I remember the first time I tasted this dish at a family gathering during the holiday season. My aunt, the queen of cozy cooking, whipped it up effortlessly, and the kitchen was filled with the enchanting aroma of chicken roasting while the cranberry sauce simmered away on the stovetop. It was pure heaven! Each bite was a delightful balance of tart and savory flavors, and I instantly knew this was a recipe I’d cherish forever. Now, as I cook this dish in my kitchen, I can almost hear my family’s laughter resonating from the gathering, creating new, joyous memories.
Ingredients
Here’s what you’ll need to make this scrumptious Cranberry Chicken:
-
Chicken Thighs (Bone-in, Skin-on)
Juicy and flavorful, chicken thighs are perfect for this recipe. Their higher fat content keeps the meat moist during cooking. If you prefer, boneless chicken thighs or chicken breasts can be substituted, keeping mindful of reduced cooking times to avoid dryness. -
Cranberry Sauce
You can use homemade or store-bought cranberry sauce. The tartness of cranberries is what makes this dish sing! If you’re looking for a lower-sugar option, consider using unsweetened cranberry sauce or even a cranberry juice concentrate as a substitute. -
Fresh Rosemary
This aromatic herb brings a lovely earthy note to the dish. If you don’t have fresh rosemary, dried rosemary works too—just reduce the amount, as dried herbs are more potent. Alternatively, thyme or sage can be used for a different flavor profile. -
Garlic
A few cloves of minced garlic punch up the flavor. Feel free to use garlic powder in a pinch, though I always find fresh garlic gives the best taste! -
Olive Oil
For sautéing and adding richness—with heart-healthy benefits! If you’re allergic, avocado oil is a great alternative. -
Salt and Pepper
Essential for seasoning and enhancing all those delicious flavors. Don’t skimp on these, as they elevate the overall taste. -
Chicken Broth or Stock
Simmering the chicken in broth adds depth and moisture to the sauce! Use vegetable broth as a vegetarian alternative, and keep in mind that the flavor may vary slightly.
Step-by-Step Instructions
Ready to cook? Let’s get started on crafting this unforgettable cranberry chicken!
-
Preheat Your Oven
Start by preheating your oven to 400°F (200°C). Preheating ensures that the chicken gets that golden, crispy skin right from the start. -
Season the Chicken
Pat the chicken thighs dry with paper towels and then season both sides generously with salt and pepper. This step is crucial for building a tasty crust as the chicken cooks. Remember, the more seasoning, the tastier your dish! -
Sear the Chicken
In a large oven-safe skillet, heat 2 tablespoons of olive oil over medium-high heat. Add the chicken thighs skin-side down and let them sear for 5-7 minutes until golden brown. The sound and smell of that sizzling chicken will set the mood! Tip: Don’t move the chicken around while it sears; let it form that beautiful crust. -
Add Garlic and Rosemary
Once the chicken is golden, flip them over. Add minced garlic and chopped fresh rosemary to the pan, allowing the garlic to sauté for about 30 seconds until fragrant. Careful not to burn the garlic, as it can turn bitter! -
Incorporate the Cranberry Sauce
Gently pour in the cranberry sauce and chicken broth. Stir the mixture to combine all the flavors, coating the chicken evenly. Here’s a chef hack: if the sauce is too thick, add a bit more broth to achieve your desired consistency. -
Bake in the Oven
Transfer the skillet to the preheated oven and bake for 25-30 minutes. The chicken should reach an internal temperature of 165°F (75°C). If you have a meat thermometer, this will be your best friend! -
Broil for Extra Crispiness
For that perfectly crispy skin, switch your oven setting to broil for the last 3-5 minutes. Just keep a close eye on it, as things can go from beautiful to burnt really quick! -
Rest and Serve
Let the chicken rest for about 5 minutes after removing it from the oven. This helps the juices redistribute, keeping the chicken tender. Serve it up warm and enjoy the colorful and appetizing sight!
Serving Suggestions
When it comes time to serve this Cranberry Chicken, the visual appeal is half the fun! Transfer the chicken to a large platter, spooning some of that beautiful cranberry sauce over the top. To give your presentation a pop, garnish with extra sprigs of fresh rosemary. Pair it with some fluffy mashed potatoes or roasted veggies, making sure to scoop up that heavenly sauce with every bite!
Recipe Variations
Feeling a bit adventurous? Here are a few fun twists you can try with this cranberry chicken recipe:
-
Spicy Cranberry Kick: Add a pinch of red pepper flakes to the sauce for a sweet and spicy flavor explosion.
-
Cranberry Orange Sauce: Mix in freshly grated orange zest or a squeeze of orange juice for a citrusy twist that pairs beautifully with the tart cranberries.
-
Maple Glazed Chicken: Drizzle a little pure maple syrup into the sauce for added sweetness that bites through the tartness.
-
Herbed Variations: Experiment by adding herbs like thyme or sage into the mix instead of rosemary for a different flavor dimension.
-
Veggie-Packed Version: Toss some sliced bell peppers or carrots into the pan while cooking to kick off the veggies and get that extra nutrition in!
Chef’s Notes
Cooking is all about evolving and amazing yourself with what you can create! I used to be intimidated by making a dish with sauce, but over time I learned that it’s all about combining flavors and experimenting with what’s on-hand. This cranberry chicken initially started out as just a holiday special in my family, but I’ve since adapted it for any weeknight dinner. Each time I make it, I can’t help but recall that lovely holiday gathering with my aunt. It’s a reminder to cherish those moments shared over a heartfelt meal and create new memories to savor.
FAQs and Troubleshooting
1. Why is my chicken dry?
The key to juicy chicken is not overcooking it! Make sure to monitor the cooking time, and using a meat thermometer is a great way to avoid under or overcooking.
2. Can I make this dish ahead of time?
Absolutely! You can prepare the chicken and sauce in advance; just store it in the fridge, and reheat when you’re ready to serve.
3. What can I substitute for chicken thighs?
Chicken breasts work fine, but remember to adjust the cooking time since they tend to cook faster. Alternatively, try turkey thighs for a different twist!
4. What do I do if I don’t have enough cranberry sauce?
You can substitute part of the cranberry sauce with a bit of apple or pomegranate juice. It’ll still add that lovely sweetness and tartness without losing the integrity of the dish.
Nutritional Info
This dish is packed with protein from the chicken while also offering fiber and antioxidants from the cranberry sauce. Each serving provides a delicious combination of nutrients, essential for a balanced diet. Plus, it’s a fun way to add flavors without guilt!
Thank you for joining me on this culinary journey with Cranberry Chicken! I hope this dish sparks joy and inspires you in your own kitchen. Always remember, food is not just about sustenance; it’s about creating memories—one delicious bite at a time! Keep it fresh, simple, and seriously delicious, my foodie friends! Happy cooking!
PrintCranberry Chicken

A deliciously tangy dish featuring juicy chicken thighs enveloped in a luscious cranberry sauce with a hint of rosemary.
- Prep Time: 10 minutes
- Cook Time: 30 minutes
- Total Time: 40 minutes
- Yield: 4 servings 1x
- Category: Main Course
- Method: Baking
- Cuisine: American
- Diet: Gluten-Free
Ingredients
- 4 Chicken Thighs (Bone-in, Skin-on)
- 1 cup Cranberry Sauce
- 2 sprigs Fresh Rosemary
- 3 cloves Garlic, minced
- 2 tablespoons Olive Oil
- Salt, to taste
- Pepper, to taste
- 1 cup Chicken Broth or Stock
Instructions
- Preheat your oven to 400°F (200°C).
- Pat the chicken thighs dry with paper towels and season with salt and pepper.
- Sear the chicken thighs skin-side down in a large oven-safe skillet for 5-7 minutes until golden brown.
- Add minced garlic and chopped rosemary, sautéing for about 30 seconds.
- Incorporate the cranberry sauce and chicken broth, stirring to combine.
- Transfer the skillet to the preheated oven and bake for 25-30 minutes.
- Broil for the last 3-5 minutes for crispy skin.
- Rest the chicken for 5 minutes before serving.
Notes
Serve with mashed potatoes or roasted veggies, garnished with fresh rosemary.
Nutrition
- Serving Size: 1 chicken thigh
- Calories: 350
- Sugar: 10g
- Sodium: 400mg
- Fat: 18g
- Saturated Fat: 5g
- Unsaturated Fat: 10g
- Trans Fat: 0g
- Carbohydrates: 15g
- Fiber: 1g
- Protein: 30g
- Cholesterol: 120mg
Keywords: Cranberry Chicken, Holiday Recipe, Chicken Thighs, Easy Dinner
Harvest Grain Bowl: 25-Minute Weeknight Meal Prep Made Easy
Harvest Grain Bowl: A Cozy, Wholesome Delight
When the leaves start to turn and the crisp autumn air sets in, there’s nothing quite like a warm, hearty meal to brighten your day. Enter the Harvest Grain Bowl, a mindful medley of roasted seasonal squash, nutty farro, vibrant kale, and sweet cranberries. This dish brings the best of fall’s bounty into your kitchen while keeping it fresh, feel-good, and oh-so-delicious. It’s perfect for a cozy dinner or a meal prep superstar for those busy weekdays.
As a self-proclaimed grain bowl enthusiast, I can’t help but share how this dish not only embodies the essence of comfort food but also tells a story that resonates deeply with me. Beyond being just a meal, it’s a reminder of all the beautiful moments spent cooking and sharing food with loved ones.
So, let’s grab our aprons and dive into this colorful and nutrient-packed Harvest Grain Bowl that’s sure to leave you feeling energized and satisfied!
A Personal Story: Kitchen Memories That Warm the Heart
Ah, the memories that food can conjure! The first time I knew I was truly passionate about cooking was helping my grandmother prepare her famous autumn feast. She would host family gatherings every year when the first pumpkins appeared at the market. I remember the scent of roasting squash wafting through her cozy kitchen, the bustling chatter of family, and the comforting sound of pots clanging.
One year, we crafted a grain bowl with farro as the base—a grain she loved as much as I do now. The idea was simple: take whatever was in season, roast it, and assemble the most colorful bowl. The sweet notes of cranberries mingled with the earthy squash and the warmth of farro was magical. It became our little tradition, a moment to gather, share stories, and create a feast of gratitude.
Now, as I stand in my kitchen crafting a similar bowl, I always think of her. Each bite transports me back to that autumn kitchen where flavors danced and laughter filled the air. That’s the magic of food—it’s not just about the ingredients; it’s about the heart and stories that come along with them.
Ingredients
Here’s what you’ll need to create your own Harvest Grain Bowl:
-
Farro: A nutty, chewy grain that serves as the hearty base for our bowl. High in fiber and protein, it’s a great alternative to rice or quinoa. Substitute with barley or brown rice if preferred.
-
Roasted Squash: I love butternut squash for its creamy texture and sweet flavor when roasted. It’s rich in vitamins A and C. Don’t have butternut? Try acorn or delicata squash instead!
-
Kale: A superfood that not only adds a vibrant green color but is also packed with nutrients. Use lacinato or curly kale for a more robust texture. If you’re not a kale fan, spinach or Swiss chard work deliciously too.
-
Cranberries: Dried cranberries add a pop of sweetness and a lovely chew. They’re high in antioxidants! If you want to switch things up, dried cherries or raisins can provide that sweet touch.
-
Olive Oil: Use high-quality extra virgin olive oil to drizzle over your bowl for flavor and healthy fats. Avocado oil or melted coconut oil are great alternatives.
-
Salt and Pepper: Essential for enhancing all the flavors. Feel free to add your favorite spices too!
Step-by-Step Instructions
Step 1: Prepare the Farro
Start by rinsing your farro under cold water to remove any impurities. Then, in a medium pot, combine 1 cup of farro with 3 cups of water and a pinch of salt. Bring it to a gentle boil, then reduce the heat and cover for about 25-30 minutes, or until tender. If you want to speed things up, you can soak the farro overnight to decrease cooking time. Once it’s cooked, fluff it with a fork and set aside.
Step 2: Roast the Squash
While the farro is cooking, preheat your oven to 400°F (200°C). Cut your butternut squash in half, scoop out the seeds, and slice it into cubes. Spread the pieces on a baking sheet, drizzle with olive oil, and season with salt, pepper, and a pinch of nutmeg if you like a hint of warmth. Roast for 25-30 minutes, tossing halfway through, until they’re golden and fork-tender. Pro tip: You can roast multiple trays of veggies to save time on meal prep!
Step 3: Sauté the Kale
In a large skillet, heat a tablespoon of olive oil over medium heat. Add the chopped kale and sauté for about 3-5 minutes, just until it wilts down. You can add a splash of water and a pinch of salt to help soften it quickly. If you want, throw in some garlic for an extra kick—because who doesn’t love garlic?!
Step 4: Assemble the Bowl
Now it’s time to bring everything together! In a large bowl, start with a generous scoop of farro. Layer the roasted squash and sautéed kale on top. Sprinkle with dried cranberries, and feel free to add a sprinkle of feta or goat cheese if you’d like some creaminess!
Step 5: Drizzle and Serve
Finish by drizzling a bit more olive oil or a splash of balsamic vinaigrette over the top. For added flavor, sprinkle some toasted nuts or seeds for crunch! And voila! Your Harvest Grain Bowl is ready to be savored.
Serving Suggestions
To plate the dish, arrange the farro in the center of a shallow bowl, artfully place the roasted squash and sautéed kale around it, and top with cranberries. A few sprigs of fresh herbs like parsley or thyme can add an aromatic touch, while a few toasted pumpkin seeds will give a lovely crunch. Serve your Harvest Grain Bowl warm—it’s the perfect comforting hug in a bowl!
Recipe Variations
Feeling adventurous? Here are some fun variations you could try!
-
Mediterranean Twist: Add chickpeas, diced cucumbers, tomatoes, and a drizzle of tzatziki for a Mediterranean flair.
-
Spicy Kick: Toss in some sriracha or a sprinkle of red pepper flakes to crank up the heat.
-
Protein Boost: Add grilled chicken, roasted chickpeas, or baked tofu for extra protein.
-
Seasonal Swap: Substitute the squash with roasted beets or sweet potatoes during the winter months.
-
Herb-infused: Experiment with fresh herbs like basil, cilantro, or mint for a fresh twist!
Chef’s Notes
This Harvest Grain Bowl has become a staple in my home, and I love how flexible it is. On busy days, I make extra farro and veggies so I can mix and match throughout the week. Plus, I encourage you to get creative! When it comes to the ingredients, think of what’s in season or what you have on hand. I once even added crispy, sautéed mushrooms, and it was a game-changer!
And let’s not forget: if there are leftovers, don’t fret! They make an excellent addition to a breakfast hash or a flavorful lunch when tossed with a bit of vinaigrette.
FAQs and Troubleshooting
-
What if my farro is still hard after cooking?
No worries! Just add a bit more water, cover it, and cook a little longer. Farro can take time, but it’s worth the wait! -
How do I store leftovers?
Store your grain bowl components separately in airtight containers in the fridge. They’ll last about 3-4 days. Reheat your farro and veggies, keeping the kale fresh until you’re ready to eat. -
Can I make this bowl vegan?
Absolutely! Everything in this bowl is plant-based. Just skip the cheese or choose a vegan alternative. -
What if I can’t find farro?
Quinoa, barley, or brown rice can all be wonderful substitutes! Adjust cooking times as necessary.
Nutritional Info
While I won’t go into specifics here, I can tell you that this Harvest Grain Bowl is packed with fiber, vitamins, and minerals, making it a solid choice for a balanced meal!
Eating well can be simple and incredibly satisfying. With this Harvest Grain Bowl, you’ll not only nourish your body but also embrace those warm, cozy feelings of home, family, and love. So whip up this recipe and dig into a world of flavors and memories—it’s time to savor every bite!
PrintHarvest Grain Bowl

A cozy and wholesome Harvest Grain Bowl featuring roasted seasonal squash, nutty farro, vibrant kale, and sweet cranberries. Perfect for a nourishing meal.
- Prep Time: 15 minutes
- Cook Time: 30 minutes
- Total Time: 45 minutes
- Yield: 4 servings 1x
- Category: Main Course
- Method: Baking, Sautéing
- Cuisine: American
- Diet: Vegetarian
Ingredients
- 1 cup Farro
- 2 cups Roasted Squash (butternut or acorn)
- 2 cups Kale (lacinato or curly)
- 1/2 cup Dried Cranberries
- 2 tablespoons Olive Oil
- Salt and Pepper to taste
- Optional spices like nutmeg and garlic
Instructions
- Prepare the farro by rinsing it under cold water. In a medium pot, combine farro with water and a pinch of salt. Bring to boil, then reduce to simmer and cover for 25-30 minutes until tender.
- Roast the squash: Preheat oven to 400°F (200°C). Cut squash into cubes, place on a baking sheet, drizzle with olive oil, and season with salt and pepper. Roast for 25-30 minutes.
- Sauté the kale in a large skillet with olive oil over medium heat for 3-5 minutes until wilted.
- Assemble the bowl starting with farro, layering in roasted squash, sautéed kale, and sprinkling dried cranberries on top.
- Drizzle with more olive oil or balsamic vinaigrette and add nuts or seeds for crunch before serving.
Notes
Feel free to substitute farro with quinoa, barley, or brown rice. This bowl is flexible; add any seasonal vegetables or proteins you like!
Nutrition
- Serving Size: 1 bowl
- Calories: 400
- Sugar: 10g
- Sodium: 300mg
- Fat: 14g
- Saturated Fat: 2g
- Unsaturated Fat: 8g
- Trans Fat: 0g
- Carbohydrates: 60g
- Fiber: 8g
- Protein: 12g
- Cholesterol: 0mg
Keywords: grain bowl, autumn recipe, healthy meal, vegetarian bowl, farro, roasted vegetables
Crispy One-Pan Chicken Parmesan Bake for Busy Weeknights
Chicken Parmesan Bake: A Cozy Culinary Hug
Welcome to a delightful culinary escape with my Chicken Parmesan Bake recipe! If there’s one dish that can bring everyone together at the dinner table, it’s a warm, cheesy bake that captures the essence of comfort food while keeping it light and vibrant. Picture this: golden, crispy chicken coated in marinara sauce, topped with gooey mozzarella and sprinkled with rich Parmesan. It’s a recipe that not only satisfyingly fills your belly but also warms your heart and makes your kitchen smell heavenly!
Now, maybe you’re thinking that Chicken Parmesan is usually a daunting meal reserved for special occasions or dining out. I’m here to change that notion. This recipe embraces simplicity and flavor, making it easy for anyone, even the busiest foodies, to whip up this classic dish any day of the week. Plus, the ingredients are straightforward and won’t require you to trek to specialty stores! So, roll up those sleeves and let’s cook!
A Nostalgic Adventure in the Kitchen
As a young chef-in-training, one of my fondest memories revolves around my family’s kitchen during Sunday dinners. The aroma of basil, garlic, and something irresistibly savory wafted through the air as my mom effortlessly mixed her homemade marinara sauce. I remember standing on a stool at the counter, eagerly stirring the bubbling sauce while she layered crispy chicken in the other pan.
She’d always say, “Cooking is like creating a hug on a plate,” and as we piled cheesy goodness onto our toasted garlic bread, I realized that she was right. Those plates of Chicken Parmesan brought warmth not just from the food, but from the love that filled our home. Every bite was infused with laughter, stories, and the pure joy of being together. Now, I strive to replicate that magic in my own kitchen with this Chicken Parmesan Bake. It’s more than just a dish; it’s a celebration of love, community, and delicious food that brings people together.
Ingredients
Let’s gather our ingredients; this recipe is not only simple but packed with flavor:
Chicken
- Why it’s important: Boneless, skinless chicken breasts are the star of this dish. They’re lean, easy to cook, and perfect for soaking up marinara flavor.
- Substitution tip: You can also use chicken thighs for a juicier texture or even substitute with turkey if you prefer!
Marinara Sauce
- Why it’s essential: A good marinara sauce adds depth and flavor. You can use store-bought, but trust me, homemade is worth the extra love!
- Quick chef insight: Look for sauces that use good-quality tomatoes and have no added sugars.
Mozzarella Cheese
- Flavor profile: Melty and gooey, mozzarella provides that dream cheese pull we all crave!
- Substitution tip: If you’re feeling adventurous, try provolone or even a sprinkle of burrata for added richness.
Parmesan Cheese
- Why it’s necessary: Parmesan adds a nutty, sharp flavor that beautifully complements the other ingredients.
- Substitution tip: Grana Padano or Pecorino Romano can be great alternatives if you want a slightly different flavor profile.
Step-by-Step Instructions
Ready to get this baking adventure started? Follow these steps closely, and I promise you’ll end up with a mouthwatering Chicken Parmesan Bake that will make your taste buds dance!
Step 1: Preheat the Oven
Preheat your oven to 375°F (190°C). This is simple but crucial; we want our bake to be perfectly cooked and bubbly at the end.
Step 2: Prepare the Chicken
While the oven warms, let’s prep our chicken. Take your boneless, skinless chicken breasts and place them between two sheets of parchment paper. Grab your trusty meat mallet or rolling pin and pound the chicken to an even thickness, about ¾ inch thick. This helps them cook evenly and stay juicy!
Step 3: Season
Season both sides of the chicken breasts with salt, pepper, and a touch of Italian seasoning for that authentic flavor profile. Just a sprinkle will do, as we’ll have more flavors coming from the sauce and cheeses.
Step 4: Sauté the Chicken
In a skillet over medium-high heat, drizzle a tablespoon of olive oil. Once the oil is hot and shimmering, gently place your chicken breasts in the pan. Cook for about 4-5 minutes per side until they’re golden brown but not completely cooked through. A little bit of extra texture and color makes a huge difference!
Step 5: Assemble
All right, now for the fun part! In a baking dish, spread a thin layer of marinara sauce on the bottom to prevent the chicken from sticking. Layer the browned chicken breasts on top of the sauce. Spoon more marinara sauce over each piece, covering them generously. Go for that gorgeous, saucy goodness!
Step 6: Cheese Galore
Now, let’s add some love! Sprinkle the shredded mozzarella evenly over the chicken. Don’t be shy! Next, add a generous grating of Parmesan on top. This is where it gets real cheesy and delicious.
Step 7: Baking Magic
Cover your baking dish with aluminum foil (to keep that moisture in), and bake it in the preheated oven for about 25 minutes. After that, remove the foil and let it bake for an additional 10-15 minutes until the cheese is bubbly and golden brown. That cheese pull is worth the wait!
Step 8: Rest and Serve
Once out of the oven, allow the bake to rest for about 5-10 minutes before slicing. This gives the layers a chance to settle and makes it easier to serve.
Serving Suggestions
Now that your Chicken Parmesan Bake is ready to shine, let’s talk presentation! Serve it right from the baking dish to keep it cozy and rustic. Pair it with a fresh green salad for a light and refreshing contrast. A sprinkle of fresh basil or parsley on top adds a radiant splash of color and freshness. You could even offer some garlic bread on the side for that perfect dipping duo!
Creative Variations
Feeling adventurous? Here are a few variations to customize your Chicken Parmesan Bake:
-
Pasta Layer: Add cooked pasta, like penne or rotini, between the chicken and marinara for a heartier, family-style meal.
-
Veggie Delight: Layer sautéed spinach, zucchini, or mushrooms into the dish for added nutrients and color!
-
Spicy Kick: Stir in a pinch of crushed red pepper flakes into the marinara sauce if you like a bit of heat.
-
Herb Infusion: Try using fresh herbs like basil and oregano in the marinara sauce for an extra burst of flavor.
-
Gluten-Free Twist: Swap the traditional breadcrumbs for gluten-free breadcrumbs or almond flour for a gluten-free version that’s just as tasty!
Chef’s Notes
Ah, a little personal touch! This Chicken Parmesan Bake recipe has evolved significantly over the years. I’ve swapped ingredients based on what I have at home, experimented with different cheeses, and even tried adding unexpected touches like pesto for an Italian fusion twist. Each iteration has reminded me of the beauty of cooking: it’s about experimenting, discovering what works, and, above all, enjoying the process!
And, speaking of processes, one time I tried to rush things and ended up baking it without the foil. Let’s just say that I nearly set off the smoke alarm! So, a friendly reminder—don’t skip that foil; it keeps everything deliciously moist and helps achieve that golden crust we all admire.
FAQs and Troubleshooting
1. My chicken is dry! What went wrong?
Dry chicken usually means it was overcooked. Keep an eye on your chicken as oven temperatures can vary. Using a meat thermometer can help! Chicken is safe to eat at 165°F (74°C).
2. Can I prep this dish ahead of time?
Absolutely! You can assemble everything, cover tightly, and store it in the refrigerator for up to 24 hours. Just add an extra 10-15 minutes to the baking time if it’s cold from the fridge.
3. What if I don’t have mozzarella?
Feel free to substitute with any cheese that melts well, like Gouda or Monterey Jack. Just keep in mind the flavor profile will change slightly.
4. How do I store leftovers?
Store any leftovers in an airtight container in the refrigerator for up to 3 days. Reheat in the oven for the best results or in the microwave if you’re in a hurry!
Nutritional Info
While I’m all about enjoying food without restrictions, here’s some general nutritional info to keep in mind:
- Calories: Approximately 400-500 calories per serving, depending on portion sizes and ingredients used.
- Protein: Rich in protein thanks to chicken and cheese.
- Fat: Includes healthy fats from olive oil and cheese, which can be adjusted based on preferences.
So there you have it—my Chicken Parmesan Bake recipe that’s not just a dish; it’s a story of love, nostalgia, and vibrant flavors all wrapped up in one easy-to-make meal. I hope you enjoy cooking it as much as I enjoyed sharing this little slice of my kitchen life with you! Happy cooking, food lovers, and let’s keep keepin’ it fresh, simple, and quite delicious!
PrintChicken Parmesan Bake

A warm and cheesy Chicken Parmesan Bake that brings comfort to any dinner table, featuring crispy chicken, marinara, and gooey cheeses.
- Prep Time: 15 minutes
- Cook Time: 35 minutes
- Total Time: 50 minutes
- Yield: 4 servings 1x
- Category: Main Course
- Method: Baking
- Cuisine: Italian
- Diet: Gluten-Free
Ingredients
- 4 boneless, skinless chicken breasts
- 2 cups marinara sauce
- 2 cups shredded mozzarella cheese
- ½ cup grated Parmesan cheese
- 1 tablespoon olive oil
- Salt and pepper to taste
- 1 teaspoon Italian seasoning
Instructions
- Preheat your oven to 375°F (190°C).
- Prepare the chicken by placing it between two sheets of parchment paper and pounding it to an even thickness of about ¾ inch.
- Season both sides of the chicken with salt, pepper, and Italian seasoning.
- Sauté the chicken in a skillet over medium-high heat with olive oil for about 4-5 minutes per side until golden brown.
- Assemble the dish by spreading marinara sauce in a baking dish and layering the chicken on top.
- Spoon more marinara sauce over each chicken piece.
- Add mozzarella and Parmesan cheese over the chicken.
- Bake covered with foil for 25 minutes, then uncover and bake for another 10-15 minutes until bubbly and golden.
- Rest for 5-10 minutes before slicing and serving.
Notes
For a heartier meal, consider adding cooked pasta between the chicken and marinara. Don’t forget to cover with foil to maintain moisture while baking!
Nutrition
- Serving Size: 1 serving
- Calories: 450
- Sugar: 6g
- Sodium: 700mg
- Fat: 18g
- Saturated Fat: 8g
- Unsaturated Fat: 8g
- Trans Fat: 0g
- Carbohydrates: 30g
- Fiber: 2g
- Protein: 35g
- Cholesterol: 80mg
Keywords: Chicken Parmesan, Bake, Comfort Food, Italian Dish, Dinner