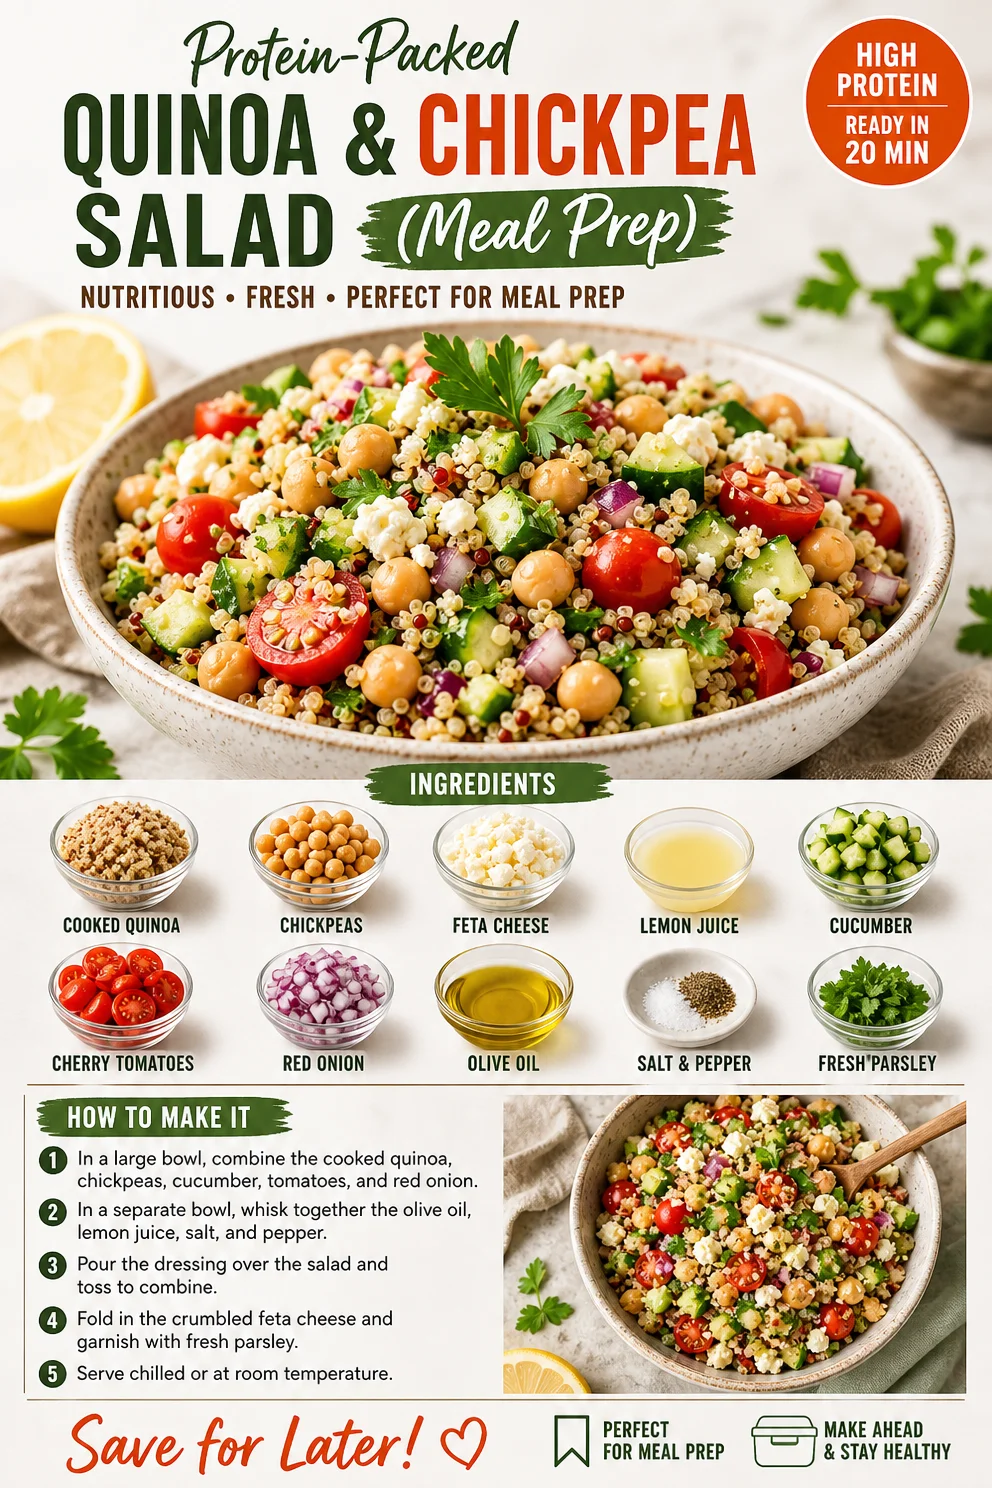
Protein-Packed Quinoa & Chickpea Salad (Meal Prep)
Quinoa and Chickpea Salad: A Delightful Blend of Wholesome Goodness
Welcome back to Clean Plate Cravings, food lovers! Today, we’re diving into a vibrant dish that’s not just a feast for your taste buds but also a powerhouse of nutrition. Yes, you guessed it—it’s the Quinoa and Chickpea Salad! This dish is perfect for quick lunches, potluck gatherings, or even as a refreshing side during your weekend barbecues. Let’s get cooking!
A Memory to Cherish
Ah, quinoa! Just saying the word evokes a wave of nostalgia for me. I remember the first time I tried it way back in college. I was in my tiny dorm kitchen, experimenting with different grains because, let’s be real, that’s what you do when you’re a food nerd in the making. A friend had introduced me to this “superfood,” and I was immediately hooked! After perfectly fluffing my first batch, I tossed it together with some canned chickpeas (because who has time to cook legumes from scratch, right?), fresh veggies, and a drizzle of lemon. The colors on my plate danced around, and as I took that first bite, it was like a burst of flavors and textures hitting my mouth. I felt energized, light, and surprisingly proud of my culinary creation. Ever since that day, quinoa and chickpeas have held a special place in my heart, and I can’t wait to share this delicious recipe with you!
Ingredients You’ll Need
Let’s gather our ingredients! Here’s what you’ll need to whip up this delightful salad:
-
1 cup cooked quinoa: Quinoa is a fantastic grain packed with protein, fiber, and various vitamins. You can easily substitute it with farro or brown rice if quinoa isn’t your thing.
-
1 can (15 oz) chickpeas, drained and rinsed: These little legumes are rich in protein and add a lovely creaminess to the salad. Feel free to swap them out for black beans or white beans for a different flavor.
-
1/4 cup crumbled feta cheese: The salty, tangy flavor of feta adds depth to the salad. If you’re vegan or lactose intolerant, try a dairy-free cheese or skip it altogether!
-
1 tbsp fresh lemon juice: Freshly squeezed lemon juice brightens up the dish. A splash of apple cider vinegar can work as a substitute if you don’t have lemon.
-
1/4 cup diced cucumber: Cucumbers provide a delightful crunch and hydration. If you’re looking for something a little more robust, diced bell peppers would be a great alternative!
-
1/4 cup halved cherry tomatoes: These juicy little gems add sweetness and color to your salad. Any type of diced tomato will work in a pinch.
-
1/4 cup chopped red onion: A little red onion adds a zesty kick. If you find raw onion too strong, green onion or chives are milder options.
-
2 tbsp olive oil: A drizzle of good-quality olive oil not only enhances flavor but is also packed with healthy fats. Avocado oil can substitute nicely here too.
-
Salt and pepper to taste: A must for seasoning! Don’t shy away from experimenting with spices—cumin or smoked paprika can take it to the next level!
-
Fresh parsley for garnish: This not only looks great but adds a fresh, herbal note. Feel free to swap parsley for fresh mint for an extra burst of flavor!
Step-by-Step Instructions
Alright, let’s get down to business! Here’s how to make this brightly colorful Quinoa and Chickpea Salad:
-
Cook the Quinoa: Start by rinsing 1/2 cup of dry quinoa under cold water, which helps remove its natural coating called saponin (this is where the slight bitterness can come from!). Combine it with 1 cup of water or vegetable broth in a small saucepan, bringing it to a boil. Once boiling, reduce the heat to low, cover, and simmer for about 15 minutes until the grains are fluffy and the water is absorbed. A little chef hack? Let it sit covered for 5 extra minutes off the heat to steam for perfect texture!
-
Prep Your Veggies: While your quinoa is cooking, grab your cucumber, cherry tomatoes, red onion, and parsley. Dice the cucumber, halve the cherry tomatoes, chop the red onion, and roughly chop the parsley. Aim for uniform sizes for a visually appealing salad. Oh, and don’t forget to keep some cucumber seeds aside for snacking—so fresh and crunchy!
-
Rinse the Chickpeas: In a colander, drain and rinse your can of chickpeas under cool running water. This helps to reduce sodium content and improves their taste. Plus, it’s great to handle—much more civilized than going straight from the can to the bowl!
-
Combine Everything: Once your quinoa is ready, let it cool for a few minutes. In a large mixing bowl, combine the cooked quinoa, drained chickpeas, diced cucumber, halved cherry tomatoes, chopped red onion, and crumbled feta cheese. The colors should start singing at this point!
-
Dress It Up: Drizzle the salad with olive oil and freshly squeezed lemon juice. Season with salt and pepper to taste. Give everything a gentle toss to marry the flavors together. This is the point where you can add in some other spices or herbs if you’re feeling adventurous. Taste it and tweak to your liking!
-
Chill and Serve: If time allows, let the salad chill in the fridge for at least 30 minutes before serving. This lets the flavors meld beautifully. When you’re ready to serve, sprinkle with fresh parsley as the final touch!
Serving Suggestions
To plate this delightful Quinoa and Chickpea Salad, try using a large platter for a family-style serve or individual bowls for a more refined presentation. A sprinkle of extra feta and a slice of lemon on the side always elevate the experience. For an additional crunch, serve with baked pita chips or alongside a fresh slice of crusty bread. Your family and friends are going to love it!
Recipe Variations
Now that you have the basics down, here are some creative twists to make this salad your own:
-
Mediterranean Kick: Add olives and sun-dried tomatoes for that quintessential Mediterranean vibe.
-
Spicy Version: Toss in some diced jalapeños or a dash of chili flakes for heat.
-
Herbed Delight: Swap in fresh mint or cilantro instead of parsley for a different herbal note.
-
Nutty Texture: Toss in a handful of toasted pine nuts or slivered almonds for extra texture.
-
Fruit Fusion: Add diced avocados or seasonal fruits like berries or pomegranate seeds for a sweet touch.
Chef’s Notes
This dish will always remind me of those carefree college days, experimenting with flavors and textures. It’s grown with me over the years, evolving as my tastes have changed and my cooking style has developed. I still find myself returning to quinoa and chickpeas whenever I need a comfort meal that’s both hearty and nourishing. Plus, it keeps beautifully in the fridge for a few days! It can even be a stellar base for meal prep, allowing me to eat healthily without putting in hours in the kitchen. And let’s be honest—who doesn’t want to whip up something so tasty in no time?
FAQs and Troubleshooting
-
Can I make this salad ahead of time?
Absolutely! This salad keeps well for up to 3 days in the fridge. Just be aware that the tomatoes and cucumbers will release some moisture, so if you prefer a crunchier texture, add those right before serving. -
What if I don’t have quinoa?
No problem! You can substitute it with other grains like bulgur or farro, or even try a gluten-free version with brown rice or millet. -
My salad is too dry. What should I do?
If you find your salad lacks moisture, simply drizzle on a bit more olive oil or lemon juice and toss everything again until it achieves your desired consistency. -
How can I prepare chickpeas from scratch?
If you want to use dried chickpeas, soak them overnight in water and then cook in a pot of boiling water for about 1-2 hours until tender. You’ll want about 1.5 cups of cooked chickpeas for this recipe.
Nutritional Information
While I don’t usually dive deep into the nitty-gritty of nutrition—because I believe in enjoying food first—here’s a quick snapshot of what you’re getting with this Quinoa and Chickpea Salad:
- Calories: Approximately 350 per serving
- Protein: ~15g
- Fiber: ~10g
- Healthy Fats: From the olive oil and feta cheese
And there you have it—your ultimate guide to creating a Quinoa and Chickpea Salad that’s not only easy to prepare but also brimming with flavor and heartiness. I can’t wait for you to try it and make it your own. Remember, cooking is all about creativity, so experiment and have fun in the kitchen! Happy cooking, friends!
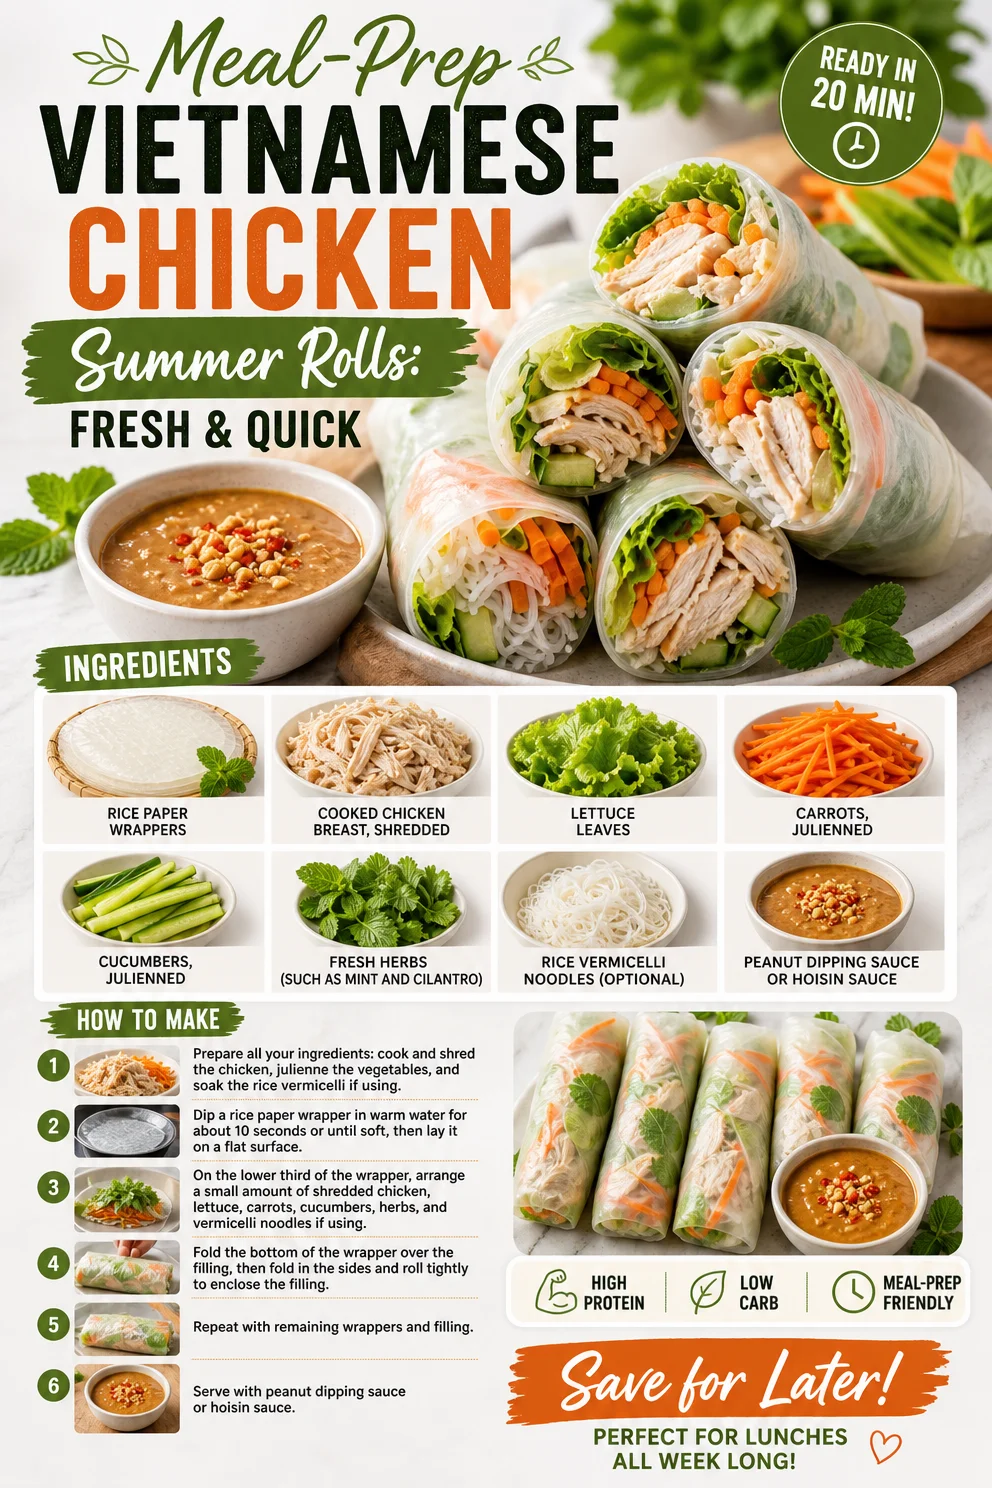
Meal-Prep Vietnamese Chicken Summer Rolls: Fresh & Quick
Fresh and Fabulous Vietnamese Summer Rolls with Chicken
Welcome to my kitchen! I’m Ava Carter, and today, we’re diving into the vibrant world of Vietnamese cuisine with a dish that’s not only easy and fun to make but also as beautiful as it is delicious: Vietnamese Summer Rolls with Chicken. If you’re on the quest for a meal that’s light, refreshing, and bursting with flavor, then you’re going to love these little bundles of joy.
Introduction
Imagine sinking your teeth into a harmonious wrap filled with crunchy veggies, succulent chicken, and aromatic herbs, all dipped in a luscious peanut sauce. Sounds pretty fantastic, right? Summer rolls have a unique charm—they’re not just food; they’re a culinary experience! Having these colorful rolls at a dinner party or as a light lunch brings an element of fun and freshness that’s hard to beat. Plus, they’re remarkably versatile, allowing you to get creative with whatever ingredients you have on hand.
These rolls are perfect for those warm days when you want something that doesn’t weigh you down. And let’s be honest, they look fabulous on any table! As a chef who believes in sharing recipes that spark joy and encourage quick cooking, I am excited to share this recipe with you. Let’s roll up our sleeves and get started!
Personal Story
I was introduced to summer rolls during a visit to Vietnam a few years ago. I remember wandering through the bustling streets of Ho Chi Minh City, the scents of fresh herbs and sizzling meats wafting in the air. It was there that I stumbled upon a small street vendor proudly crafting these rolls with a burst of color and flavor. I was captivated!
Sitting on a tiny stool, I watched as he expertly dipped the rice paper into warm water, then layered on the shredded chicken, vibrant vegetables, and fragrant herbs. Watching those rolls come together was mesmerizing, and the moment I took my first bite, I understood why they were so adored. The balance of textures and flavors was sheer perfection. Since that day, I’ve carried a piece of that experience into my kitchen and now share it with you.
Ingredients
Here’s what you’ll need for your delicious Vietnamese Summer Rolls with Chicken:
-
Rice paper wrappers: These are the stars of the show! They’re thin, gluten-free, and provide a chewy texture that pairs perfectly with the fillings. If you can’t find rice paper, you can use lettuce leaves as a wrap for a low-carb option.
-
Cooked chicken breast, shredded: Opt for rotisserie chicken for a quick shortcut. You could also use tofu or shrimp if you prefer a meatless or seafood version.
-
Lettuce leaves: Romaine or butter lettuce works best. They add a nice crunch and make rolling easier. If you’re looking for a fun twist, try using kale or collard greens.
-
Carrots, julienned: These not only add sweetness but also a pop of color! If you’re short on time, grab a bag of pre-cut carrots or use a peeler to create ribbons.
-
Cucumbers, julienned: Fresh and crisp, cucumbers balance the density of the other ingredients. Substitute zucchini for a unique, but tasty twist.
-
Fresh herbs (such as mint and cilantro): Featuring aromatic herbs is essential! They bring brightness and complexity to the rolls. Basil or chives also work beautifully.
-
Rice vermicelli noodles (optional): Adding these noodles makes the rolls even more filling! Look for them in the Asian aisle at the grocery store; they cook in just a couple of minutes!
-
Peanut dipping sauce or hoisin sauce: A rich, creamy sauce takes these rolls to the next level. You can make your own with peanut butter, soy sauce, and a little sugar or pick up your favorite pre-made version at the store.
Step-by-Step Instructions
Step 1: Prepare Your Ingredients
Start by gathering all your ingredients. Clean and julienne the carrots and cucumbers, shred the chicken, and wash the lettuce and herbs thoroughly. This assembly line approach will make rolling your summer rolls so much easier and more fun!
Step 2: Soften the Rice Paper Wrappers
Fill a large bowl with warm water. Submerge one rice paper wrapper for about 10-15 seconds, or until it softens but is still slightly firm (it will continue to soften while you work). Lay it flat on a damp cutting board or clean surface—this prevents sticking!
Step 3: Layer Your Fillings
In the center of the softened rice paper, place a lettuce leaf (this provides a stable base). Follow it with your shredded chicken (or meat alternative), a small handful of julienned carrots, cucumbers, and a few fresh herbs. If you’re using rice vermicelli noodles, add a small portion on top. Remember not to overfill; you’ll need enough space to roll!
Step 4: Roll It Up
Here’s the fun part! Fold the sides of the rice paper over the filling, then start rolling from the bottom, tucking in the filling as you go. Keep it tight, but gentle—rice paper is delicate. The final product should look like a jewel, just waiting to be dipped into sauce!
Step 5: Make the Peanut Dipping Sauce
If you’re making the peanut dipping sauce, simply whisk together 1/4 cup of peanut butter, a splash of soy sauce, a bit of honey for sweetness, and water until you reach your desired consistency. Taste and adjust as necessary!
Step 6: Serve and Enjoy
Once all your rolls are assembled, serve them alongside your peanut dipping sauce or hoisin sauce in a lovely dish. Enjoy with friends or family while marveling at your creation!
Serving Suggestions
These summer rolls are best served fresh! Lay out your rolls on a large platter, and garnish with extra fresh herbs or sesame seeds for flair. Consider adding lime wedges to squeeze over the rolls for an extra zing. Enjoy them as a light meal, appetizer, or snack that invites dipping and sharing!
Recipe Variations
-
Shrimp Summer Rolls: Swap out the chicken for cooked shrimp for a delectable seafood option.
-
Veggie-Only Rolls: Omit the meat and load up on extra veggies like bell peppers, bean sprouts, and avocado for a satisfying vegetarian option!
-
Spicy Touch: Add slices of jalapeño or a drizzle of sriracha into your rolls for a kick!
-
Fruity Twist: Try adding thin slices of mango or pineapple for a sweet and tropical flavor.
-
Herbed Up: Experiment with different herbs like Thai basil or dill to give your rolls a fresh burst of flavor.
Chef’s Notes
I can’t tell you how many times I’ve experimented with summer roll ingredients based on what I had on hand. I’ve tried funky combinations like smoked salmon and cream cheese (which turned out surprisingly well!). The beauty of cooking is diving into your creativity and not holding back. I also love hosting ‘summer roll nights’ with friends where we each bring our favorite fillings and sauces. It’s not just about the food; it’s the laughs, stories, and memories that make it special!
FAQs and Troubleshooting
Q: What if my rice paper tears while rolling?
A: It’s all part of the learning process! If it tears, simply overlap the pieces a bit or use another wrapper. No one will be able to tell once it’s all rolled up!
Q: Can I make these ahead of time?
A: Summer rolls are best enjoyed fresh, but you can prepare all your ingredients and roll them up in advance. Just keep them covered with a damp cloth until serving so they stay moist.
Q: How do I store leftover rolls?
A: If you have any leftovers, place them in an airtight container with a damp paper towel to avoid drying out. Consume within a day for optimal freshness!
Q: Can I customize the sauce?
A: Absolutely! Feel free to swap the peanut sauce for a soy-vinegar mix or even a spicy hoisin sauce if you’re feeling adventurous.
Nutritional Info (Optional)
These summer rolls are not just tasty but also health-conscious. Per roll (without sauce), you can expect approximately:
- Calories: 70
- Protein: 7g
- Carbohydrates: 10g
- Fat: 2g (mainly from the sauce)
- Fiber: 2g
Embrace the deliciousness of these Vietnamese summer rolls with chicken! They bring a fresh and inviting element to any meal, and you’ll be surprised at how much flavor you can pack into these little parcels. Get creative, enjoy the process, and let your taste buds dance with delight! Happy rolling!
PrintFresh and Fabulous Vietnamese Summer Rolls with Chicken
Light and refreshing Vietnamese summer rolls filled with crunchy veggies, succulent chicken, and aromatic herbs, served with a delicious peanut sauce.
- Prep Time: 15 minutes
- Cook Time: 10 minutes
- Total Time: 25 minutes
- Yield: 4 servings
- Category: Appetizer
- Method: Rolling
- Cuisine: Vietnamese
- Diet: Gluten-Free, Dairy-Free
Ingredients
- Rice paper wrappers
- Cooked chicken breast, shredded
- Lettuce leaves (romaine or butter lettuce)
- Carrots, julienned
- Cucumbers, julienned
- Fresh herbs (mint and cilantro)
- Rice vermicelli noodles (optional)
- Peanut dipping sauce or hoisin sauce
Instructions
- Prepare Your Ingredients: Gather and clean all ingredients; julienne the carrots and cucumbers, shred the chicken, and wash the lettuce and herbs.
- Soften the Rice Paper Wrappers: Submerge a rice paper wrapper in warm water for 10-15 seconds until softened.
- Layer Your Fillings: Place a lettuce leaf, shredded chicken, julienned carrots, cucumbers, and fresh herbs in the center of the wrapper.
- Roll It Up: Fold the sides over the filling and roll tightly from the bottom, tucking in the filling as you go.
- Make the Peanut Dipping Sauce: Whisk together peanut butter, soy sauce, honey, and water to desired consistency.
- Serve and Enjoy: Serve the rolls with your peanut sauce or hoisin sauce and share with friends!
Notes
Experiment with different fillings and sauces for a fun and creative experience!
Nutrition
- Serving Size: 1 roll
- Calories: 70
- Sugar: 3g
- Sodium: 200mg
- Fat: 2g
- Saturated Fat: 0g
- Unsaturated Fat: 1g
- Trans Fat: 0g
- Carbohydrates: 10g
- Fiber: 2g
- Protein: 7g
- Cholesterol: 25mg
Keywords: summer rolls, Vietnamese cuisine, healthy appetizer, fresh sauce, easy recipe
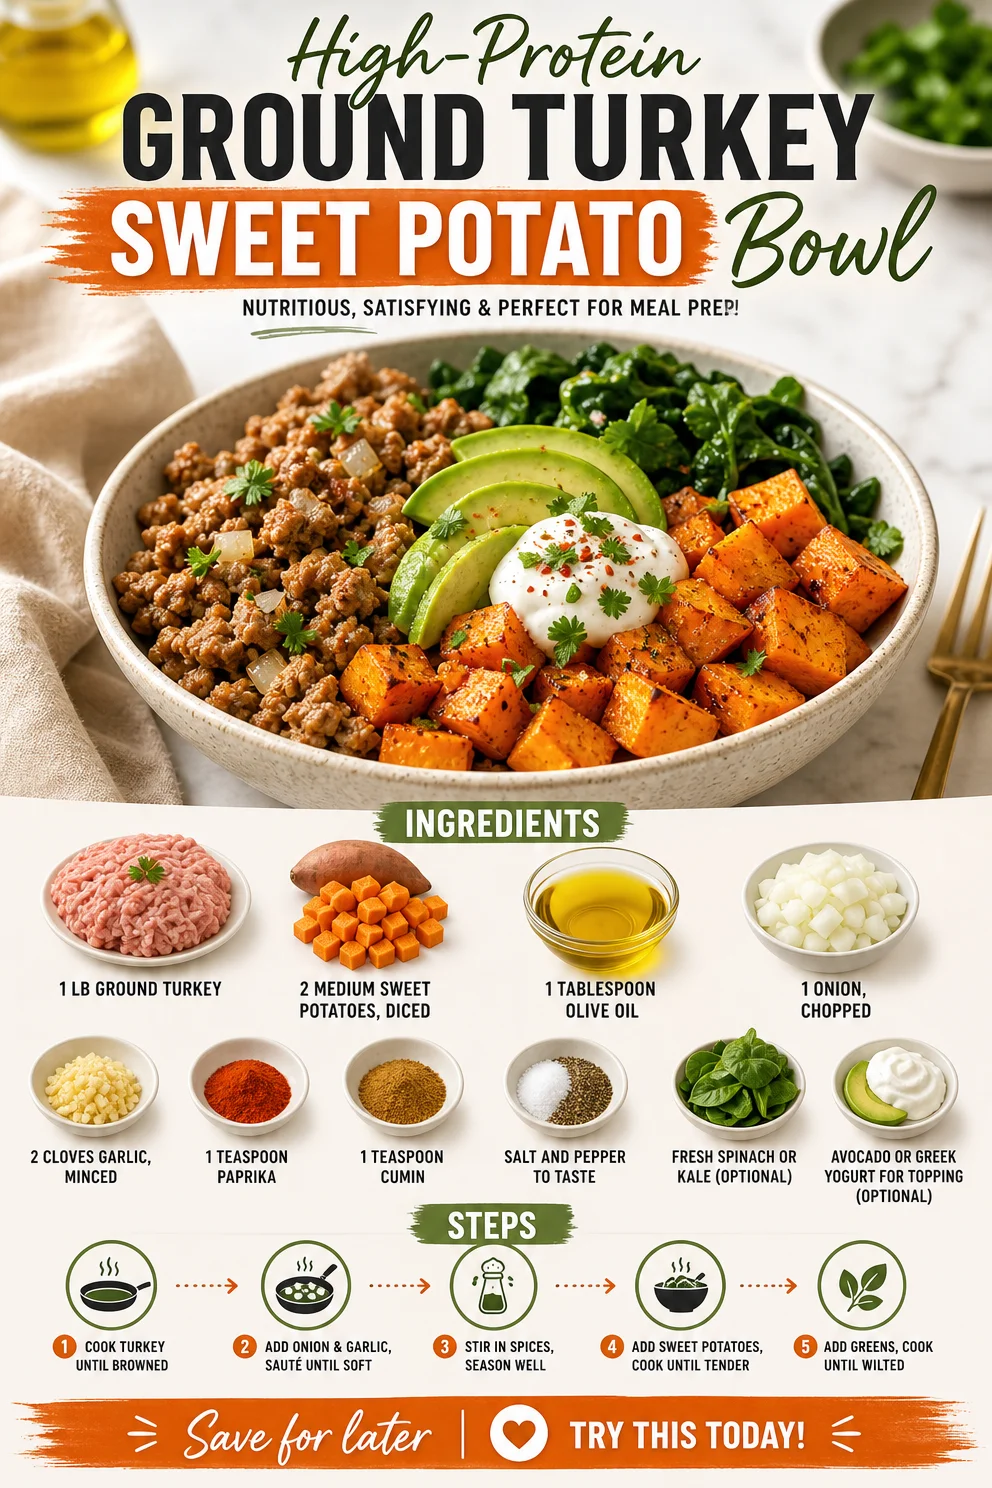
High-Protein Ground Turkey Sweet Potato Bowl for Meal Prep
Delicious Ground Turkey Sweet Potato Bowl: A Wholesome Feast
Welcome back, fellow food lovers! If you’re anything like me, you’re always on the lookout for that perfect meal—something delicious, nutritious, and satisfying all in one bowl. Today, I’m excited to share one of my absolute favorites: the ground turkey sweet potato bowl. It’s a vibrant, feel-good dish that checks all the boxes, and I can’t wait to dive into the details with you.
This recipe is essentially a warm hug that you can enjoy any day of the week. On busy evenings, after a long day at work or when life feels just a little too hectic, this dish delivers comfort without the guilt, and let me tell you, it makes my heart sing! With a cozy combination of sweet potatoes, spiced ground turkey, and fresh greens, you’ll want to whip it up on repeat.
But first, let’s take a little stroll down memory lane.
My Personal Story: A Nostalgic Connection
One of my fondest memories comes from my time in college, when I was learning to cook from scratch—and let me tell you, it was a bit of an adventure! I never quite mastered the art of cooking until my roommate and I decided to make dinner together one evening. With only a few ingredients in our meager college kitchen, we pulled together a dish that was a game changer: it was just ground turkey, a couple of sweet potatoes we picked up from the local farmer’s market, and a handful of spices.
We were both so surprised at how delicious it turned out! The sweet potatoes were creamy and subtly sweet, while the turkey added an earthy, savory kick. It was an instant favorite for our late-night study sessions. The best part? It was so simple—and so satisfying! Our idea of a perfect meal was officially transformed, and we began crafting variations every week. To this day, that original recipe has blossomed into this sweet potato turkey bowl that you’ll be making before you know it!
Ingredients: What You’ll Need
Here’s your shopping list for this delicious bowl, along with some tips to elevate each ingredient:
-
1 lb ground turkey: This lean protein is my go-to for creating a healthy base. If you want a bit more flavor, you could swap it for ground chicken or even lean beef.
-
2 medium sweet potatoes, diced: Naturally sweet and incredibly nutritious, sweet potatoes are your fuel for energy. If you don’t have sweet potatoes on hand, butternut squash or regular potatoes will work in a pinch!
-
1 tablespoon olive oil: A heart-healthy fat that adds a touch of richness. You can use avocado oil for a higher smoke point or even coconut oil for a unique flavor twist.
-
1 onion, chopped: This staple ingredient provides that aromatic base. You can swap it with shallots or green onions for a milder taste.
-
2 cloves garlic, minced: Because everything is better with garlic! If you’re in a hurry, garlic powder (1/2 teaspoon) can be a quick substitute.
-
1 teaspoon paprika: Adds warmth and color to the dish. Feel free to experiment with smoked paprika for a deeper flavor or skip it if you’re sensitive.
-
1 teaspoon cumin: This spice delivers a nice earthiness that pairs perfectly with the sweet potatoes.
-
Salt and pepper to taste: Always taste and adjust to your preference.
-
Fresh spinach or kale (optional): Tossing in greens is an easy way to add nutrient density. Opt for any leafy greens you enjoy or even frozen spinach if that’s what you have!
-
Avocado or Greek yogurt for topping (optional): A dollop of yogurt adds creaminess, while avocado brings healthy fats. Use whichever you prefer—or both if you want to go all out!
Step-by-Step Instructions: Let’s Get Cooking!
Now, let’s get down to the good stuff—cooking! Follow along for each step, with my little kitchen hacks included:
-
Prep Your Ingredients: First things first, let’s get everything ready! Dice the sweet potatoes into even cubes so they cook uniformly. Chop your onion and mince the garlic. This will speed things along and keep the cooking process smooth. Pro tip: If you have a veggie chopper, now’s the time to use it!
-
Heat the Olive Oil: In a large skillet, heat that olive oil over medium heat. Let it warm up for about a minute. It should shimmer when it’s ready. If you see smoke, you’ve gone too far—don’t worry; just turn down the heat.
-
Sauté the Onions and Garlic: Once the oil is heated, add your chopped onion. Sauté for about 3-4 minutes until they are softened and translucent, nice and aromatic! Then toss in the minced garlic and give it a stir for about 30 seconds—no more, or you’ll burn those beautiful cloves!
-
Add Ground Turkey: Now, it’s time to add the ground turkey! Break it up with a wooden spoon as it cooks. This should take about 5-7 minutes until it’s evenly cooked and no longer pink. Here’s a little hack: If you splash a bit of water in the pan while cooking, it helps keep the turkey moist—just keep stirring!
-
Season it Up: Once the turkey is cooked, sprinkle in the paprika, cumin, salt, and pepper. Stir well to coat everything with those spices. This is the moment where the magic happens—those flavors will truly shine!
-
Toss in Sweet Potatoes: Now let’s add in the diced sweet potatoes. Stir them in and then pour in about 1/4 cup of water to help steam them. Cover the skillet with a lid and let them cook for about 15-20 minutes. Check periodically, and stir occasionally. If you’re feeling fancy, add a pinch of cayenne for a kick!
-
Cook Until Tender: You’ll know it’s done when the sweet potatoes are fork-tender and everything is harmonizing. If you want a bit of char, remove the lid in the last few minutes to allow any excess liquid to evaporate.
-
Add Greens (Optional): If you’re using spinach or kale, stir it in during the last minute or so of cooking for a bright green finish. The heat will wilt the greens perfectly!
-
Plate It Up: Once everything is cooked, give it one last taste check. Adjust seasonings if needed. Serve this hearty mixture in bowls, and don’t forget to top with avocado or a dollop of Greek yogurt!
Serving Suggestions
For serving, you can simply scoop generous portions into wide, shallow bowls, which always looks beautiful. Layer it first with the turkey and sweet potato mixture, then add a handful of spinach on top for freshness. Finally, slice up some avocado or add that creamy Greek yogurt on the side for an extra touch of richness. Voila!
Recipe Variations: Get Creative
Here are a few fun twists to keep your turkey sweet potato bowls fresh and exciting each time:
- Southwestern Style: Add black beans and corn to the mixture, and top with salsa and cheese for a zesty Southwestern flair.
- Asian-Inspired: Swap out the spices for soy sauce, ginger, and sesame oil while cooking. Serve it up with some chopped green onions.
- Mediterranean Magic: Mix in diced tomatoes and olives, and finish with crumbled feta cheese and a squeeze of lemon for a Mediterranean twist.
- Spicy Kick: Toss in jalapeños or a splash of sriracha while sautéing for that extra heat if you crave something spicier!
- Vegetarian Delight: Replace the ground turkey with lentils or chickpeas for a vegan version that’s still full of protein.
Chef’s Notes
I can admit that this recipe has evolved over time—what started as a simple meal in a tiny college kitchen has turned into a beloved family dish! Now, it’s a staple that I whip up whenever I’m in need of comfort food that won’t weigh me down. I’ve also learned that it’s super forgiving, so don’t be afraid to mix and match according to what you have on hand!
Oh, and don’t be surprised if you end up with sweet potato mash leftovers—you can use that as a spread on toast for breakfast!
FAQs and Troubleshooting
1. My sweet potatoes are still hard! What do I do?
This often happens when they’re not cut evenly. If you find this happening, just cover the skillet and let them steam a bit longer until they soften.
2. How can I save leftover turkey sweet potato mixture?
Store leftovers in an airtight container in the refrigerator for up to 3 days. You can reheat it on the stove or in the microwave—just add a splash of water to maintain moisture.
3. Can I freeze this meal?
Absolutely! Once it’s cooled, transfer it to a freezer-safe container. It can be frozen for up to 3 months. Just thaw it in the refrigerator the night before you want to enjoy it and reheat.
4. How can I add more flavor?
If you want more depth, consider adding a splash of balsamic vinegar or a sauce of your choice after cooking. A sprinkle of fresh herbs like cilantro or parsley can also elevate it!
Nutritional Info (Optional)
While the exact nutritional information will vary based on the specific ingredients and portion sizes, this ground turkey sweet potato bowl is generally rich in protein, packed with fiber, and full of vitamins A and C. It’s a well-balanced meal that’s perfect for keeping you energized throughout the day!
So there you have it, my fellow food enthusiasts! This ground turkey sweet potato bowl is a complete meal that’s not only delicious but incredibly rewarding to make. I hope you enjoy trying out this recipe as much as I enjoy sharing it with you. Happy cooking!
PrintDelicious Ground Turkey Sweet Potato Bowl
A vibrant, nutritious bowl combining spiced ground turkey, creamy sweet potatoes, and fresh greens for a wholesome meal any day of the week.
- Prep Time: 15 minutes
- Cook Time: 30 minutes
- Total Time: 45 minutes
- Yield: 4 servings 1x
- Category: Main Course
- Method: Sautéing
- Cuisine: American
- Diet: Gluten-Free
Ingredients
- 1 lb ground turkey
- 2 medium sweet potatoes, diced
- 1 tablespoon olive oil
- 1 onion, chopped
- 2 cloves garlic, minced
- 1 teaspoon paprika
- 1 teaspoon cumin
- Salt and pepper to taste
- Fresh spinach or kale (optional)
- Avocado or Greek yogurt for topping (optional)
Instructions
- Prep your ingredients by dicing sweet potatoes and chopping onion and garlic.
- Heat the olive oil in a large skillet over medium heat.
- Sauté the onions for 3-4 minutes until softened, then add garlic for 30 seconds.
- Add the ground turkey, breaking it up with a spoon, and cook for 5-7 minutes until no longer pink.
- Season with paprika, cumin, salt, and pepper.
- Toss in the sweet potatoes and add 1/4 cup water, then cover and cook for 15-20 minutes.
- Cook until sweet potatoes are fork-tender, removing the lid last few minutes if you want char.
- Add optional greens in the last minute of cooking.
- Plate the dish and top with avocado or Greek yogurt as desired.
Notes
Feel free to get creative with additional flavors or toppings based on your preferences.
Nutrition
- Serving Size: 1 serving
- Calories: 350
- Sugar: 4g
- Sodium: 500mg
- Fat: 15g
- Saturated Fat: 3g
- Unsaturated Fat: 10g
- Trans Fat: 0g
- Carbohydrates: 35g
- Fiber: 5g
- Protein: 30g
- Cholesterol: 70mg
Keywords: ground turkey, sweet potato, healthy bowl, easy dinner, quick meal
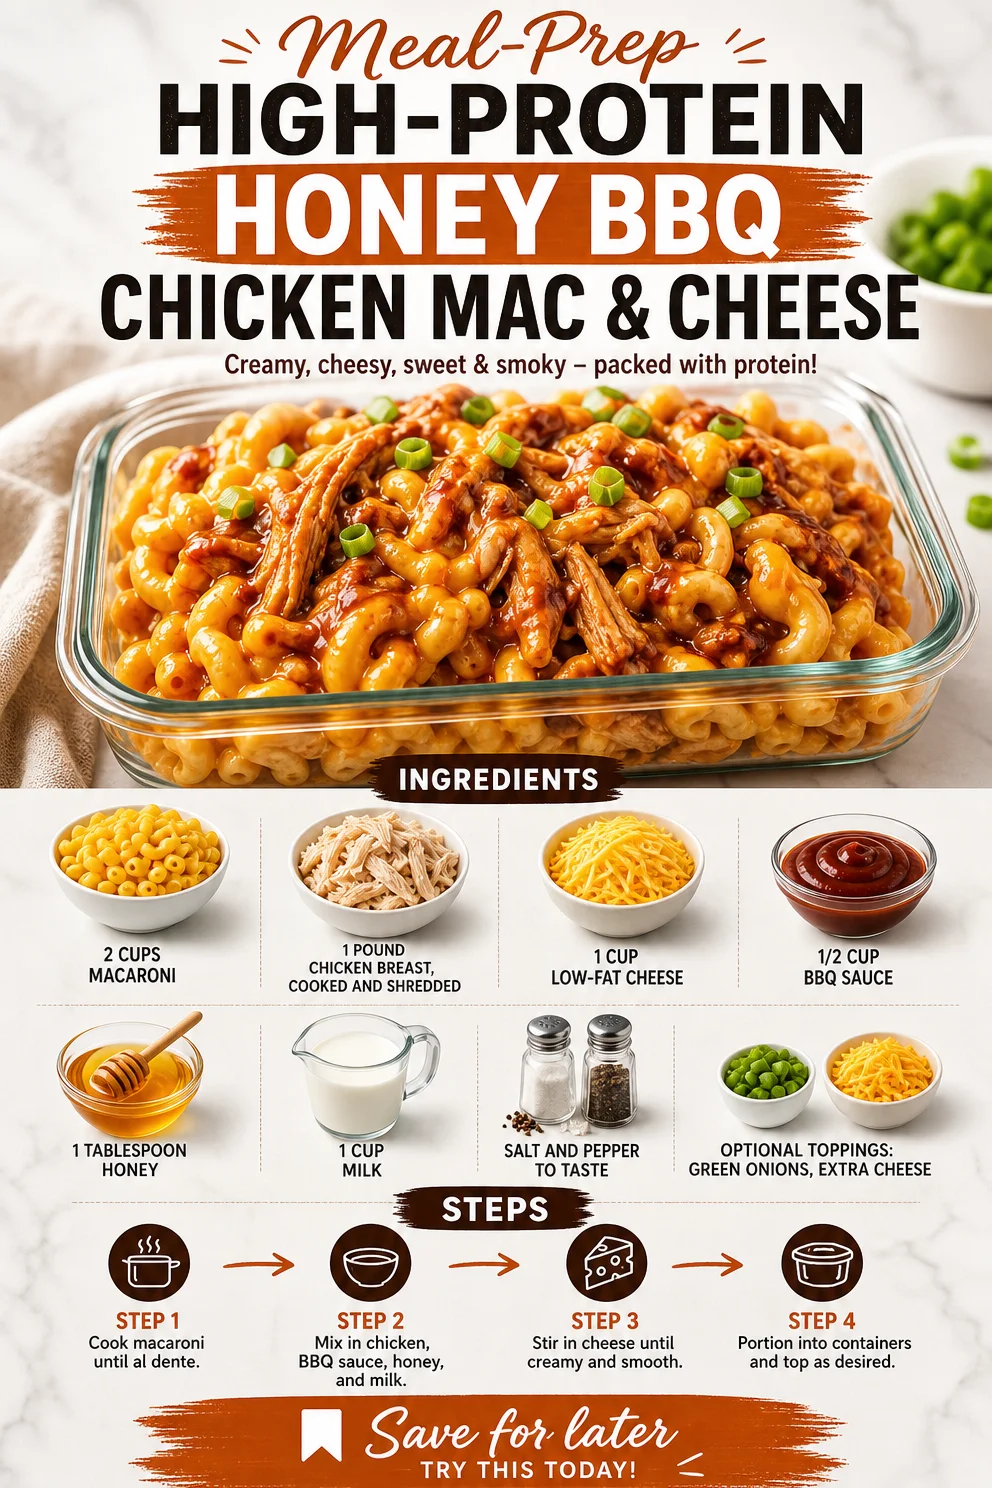
Meal-Prep High-Protein Honey BBQ Chicken Mac & Cheese
High Protein Honey BBQ Chicken Mac & Cheese Meal Prep: A Comfort Food Classic
Welcome to your new favorite comfort food that’s not only delicious but also loaded with protein! Today, we’re whipping up a dish that marries the classic richness of mac and cheese with the tangy sweetness of honey BBQ chicken. It’s the perfect meal prep option for busy weeks ahead—it’s filling, satisfying, and best of all, incredibly easy to make! Whether you’re looking to fuel up after a workout or simply craving that nostalgic taste of mac and cheese, you’ll love what we have in store.
Here’s why this dish is going to become your go-to: It’s packed with protein, thanks to the chicken, and it incorporates beloved flavors that remind us of backyard barbecues. Who said comfort food couldn’t be nutritious? I promise you won’t miss out on anything—you’re in for a delightful culinary journey that balances both health and indulgence.
Let’s roll up our sleeves and get to work on this High Protein Honey BBQ Chicken Mac & Cheese Meal Prep that will have your taste buds dancing! With every bite, you’ll feel the comforting embrace of creamy cheese combined with a sweet and smoky kick that’s simply irresistible. Get ready to enjoy leftovers like never before—this dish has got your back!
A Personal Story: Finding Joy in Simple Meals
Let me take you back a few years to a lazy Sunday afternoon. I was visiting my parents after a long week of work, and there was nothing that sounded better than my mom’s famous mac and cheese. I have fond memories of watching her in the kitchen, her hands moving quickly and effortlessly as she prepared that creamy goodness topped with crispy breadcrumbs. The aroma wafting through our small home was enough to attract the neighbors!
One day, while she was stirring the cheese sauce, I decided to toss in some leftover grilled chicken and a drizzle of honey BBQ sauce that I had been experimenting with for a weeknight dinner. The moment I saw her eyes light up upon that first taste, I knew I had stumbled upon something special. That blend of flavors became our new family favorite. It was a simple and delightful twist that turned an already beloved dish into a protein-packed wonder.
Fast forward to today, and that same combination has inspired this recipe! It’s fun to reflect on how cooking connects us all and turns ordinary moments into extraordinary memories. Now, let’s recreate that joy with our very own High Protein Honey BBQ Chicken Mac & Cheese!
Ingredients
Let’s gather our ingredients! Here’s what you’ll need for this wholesome dish:
-
2 cups macaroni
The backbone of the dish! Opt for whole grain or gluten-free macaroni to sneak in more nutrients. -
1 pound chicken breast (cooked and shredded)
A fantastic source of protein! You can use rotisserie chicken for convenience. -
1 cup low-fat cheese
Cheddar is a classic choice that melts beautifully, but feel free to mix it up with mozzarella or pepper jack for a twist! -
1/2 cup BBQ sauce
This adds that delicious smoky flavor. Go for homemade if you have time, or pick your favorite store-bought brand to save time. -
1 tablespoon honey
The touch of sweetness that brings everything together. Maple syrup is a great alternative if you’re looking for a vegan option. -
1 cup milk
Helps make your cheese sauce creamy! Dairy-free milk works just as well. -
Salt and pepper to taste
Essential for enhancing flavors! Always remember to taste as you go. -
Optional toppings: green onions, extra cheese
These add a delightful crunch and freshness on top of the creaminess.
Step-by-Step Instructions
Now that we have everything prepped and ready, let’s dive into the cooking process! Follow along, and I’ll sprinkle in some of my chef hacks along the way to ensure perfection.
-
Cook the macaroni
Bring a large pot of salted water to a boil, then add your macaroni. Cook according to the package instructions (usually about 7-8 minutes) until al dente. Remember, you’ll be baking this later, so don’t overcook it! Drain and set aside. -
Prepare the cheese sauce
In a large saucepan, pour in the milk and heat on medium until it starts to steam—don’t let it boil! Gradually whisk in the low-fat cheese until melted and smooth. Here’s my pro tip: keep stirring! This prevents your cheese from clumping and ensures a creamy sauce. Add in the salt and pepper to taste. -
Combine chicken and BBQ sauce
In a mixing bowl, combine the shredded chicken with the BBQ sauce and honey. Make sure every piece is well-coated because this is where all that flavor comes from! This is also the perfect time to try different barbecue sauces. Spicy or sweet—whatever makes your taste buds sing. -
Mix it all together
Add the cooked macaroni into the cheese sauce, mixing until every piece is luxuriously coated. Then gently fold in your BBQ chicken mixture. Wowza! You should see creamy, cheesy delight coming to life. -
Transfer to a baking dish
Preheat your oven to 350°F (175°C) and lightly grease a 9×13 inch baking dish. Pour in that beautiful mac and cheese, spreading it evenly. Think of this as a blank canvas ready to be dressed up! -
Bake for 20-25 minutes
Place your dish in the oven and let it bake until it’s bubbly and golden on top. This is where the magic happens—let the kitchen fill with savory aromas! If you want a crispy top, broil for an additional 2-3 minutes, but keep a close eye on it! -
Add toppings
Once out of the oven, sprinkle as much extra cheese and green onions on top as you like! Let it rest for about 5 minutes to cool slightly. -
Serve & enjoy
Dig into your amazing creation! Scoop generous portions onto plates, garnishing with fresh green onions for that extra touch. Don’t forget to serve it with a side salad or veggies for a complete meal.
Serving Suggestions
This High Protein Honey BBQ Chicken Mac & Cheese is delicious on its own, but you can elevate your serving game! Dish it up in vibrant bowls, adding a sprinkle of freshly chopped parsley or cilantro for color and freshness. You can also pair it with a zesty side salad to balance out the creaminess. Trust me—your guests (or your meal prep for the week) will thank you!
Recipe Variations
The great thing about this dish is its versatility! Here are a few creative twists to make it your own:
-
Veggie-packed version: Add in some steamed broccoli or spinach for extra vitamins. Simply toss them in with the macaroni before combining with the cheese sauce!
-
Swap the chicken for turkey: Ground turkey can work wonderfully in this dish, giving it a different flavor profile while keeping it lean.
-
Vegan adaptation: Use chickpeas instead of chicken, nutritional yeast for that cheesy flavor, and a plant-based milk to keep it vegan-friendly!
-
Spicy kick: Add some diced jalapeños or a dash of hot sauce if you love a little heat in your mac and cheese.
Chef’s Notes
You know, cooking is often about experimenting. This Honey BBQ Chicken Mac & Cheese came about one day through sheer creativity and a bit of ingredient juggling. It’s become a family staple and often gets requested for potlucks and gatherings! I chuckle every time I see the plates empty faster than I can serve them!
As foodies, we evolve our recipes over time. I love how this dish has the ability to adapt to seasons—during summer, I might throw in grilled veggies for that fresh taste, while in winter, I keep it cozy and indulgent. This adaptability is what keeps the spark alive in our kitchens.
FAQs and Troubleshooting
Q: Can I make this dish ahead of time?
Absolutely! You can prepare it a day in advance, store it in the fridge, and just pop it in the oven when you’re ready to dig in.
Q: How can I make it creamier?
If you prefer extra creaminess, boost the milk or cheese content. Just keep in mind that the mac and cheese will be a bit saucier, so adjust baking time if needed.
Q: What if I run out of BBQ sauce?
No problem! You can easily switch things up with a homemade sauce. Combining ketchup with a bit of mustard, brown sugar, and spices can give you that similar sweet-tangy flavor.
Q: Can I freeze leftovers?
Yes! This mac and cheese holds up well in the freezer. Just store it in an airtight container, and when you’re ready to eat, let it thaw in the fridge overnight before reheating.
Nutritional Info
This dish packs in about 25 grams of protein per serving, making it perfect for a nutritious lunch or dinner. It’s rich in essential nutrients while being satisfying enough to keep you fueled throughout your busy day!
And there you have it—my High Protein Honey BBQ Chicken Mac & Cheese Meal Prep recipe! I hope it inspires you to get cooking and experiment in your kitchen. Share the love with friends and family, and don’t forget to make those wonderful memories along the way. Let’s keep it fresh, simple, and seriously delicious!
PrintHigh Protein Honey BBQ Chicken Mac & Cheese Meal Prep
A delightful blend of creamy mac and cheese with honey BBQ chicken, packed with protein and perfect for meal prep.
- Prep Time: 10 minutes
- Cook Time: 30 minutes
- Total Time: 40 minutes
- Yield: 6 servings 1x
- Category: Main Course
- Method: Baking
- Cuisine: American
- Diet: High-Protein
Ingredients
- 2 cups macaroni
- 1 pound chicken breast (cooked and shredded)
- 1 cup low-fat cheese
- 1/2 cup BBQ sauce
- 1 tablespoon honey
- 1 cup milk
- Salt and pepper to taste
- Optional toppings: green onions, extra cheese
Instructions
- Cook the macaroni: Bring a large pot of salted water to a boil, add macaroni, and cook until al dente. Drain and set aside.
- Prepare the cheese sauce: In a saucepan, heat milk until steaming, whisk in cheese until melted, adding salt and pepper.
- Combine chicken and BBQ sauce: Mix shredded chicken with BBQ sauce and honey in a bowl.
- Mix it all together: Combine macaroni with cheese sauce and fold in BBQ chicken mixture.
- Transfer to a baking dish: Preheat oven to 350°F, grease a baking dish, and pour in mac and cheese.
- Bake for 20-25 minutes until bubbly and golden. Broil for 2-3 minutes for a crispy top if desired.
- Add toppings: Sprinkle with extra cheese and green onions, let cool before serving.
- Serve & enjoy: Enjoy with side salad or veggies for a complete meal.
Notes
Customize with veggies, turkey, or even a vegan option using chickpeas and plant-based ingredients.
Nutrition
- Serving Size: 1 serving
- Calories: 480
- Sugar: 8g
- Sodium: 600mg
- Fat: 15g
- Saturated Fat: 6g
- Unsaturated Fat: 6g
- Trans Fat: 0g
- Carbohydrates: 60g
- Fiber: 3g
- Protein: 25g
- Cholesterol: 70mg
Keywords: mac and cheese, high protein, meal prep, comfort food, honey BBQ chicken
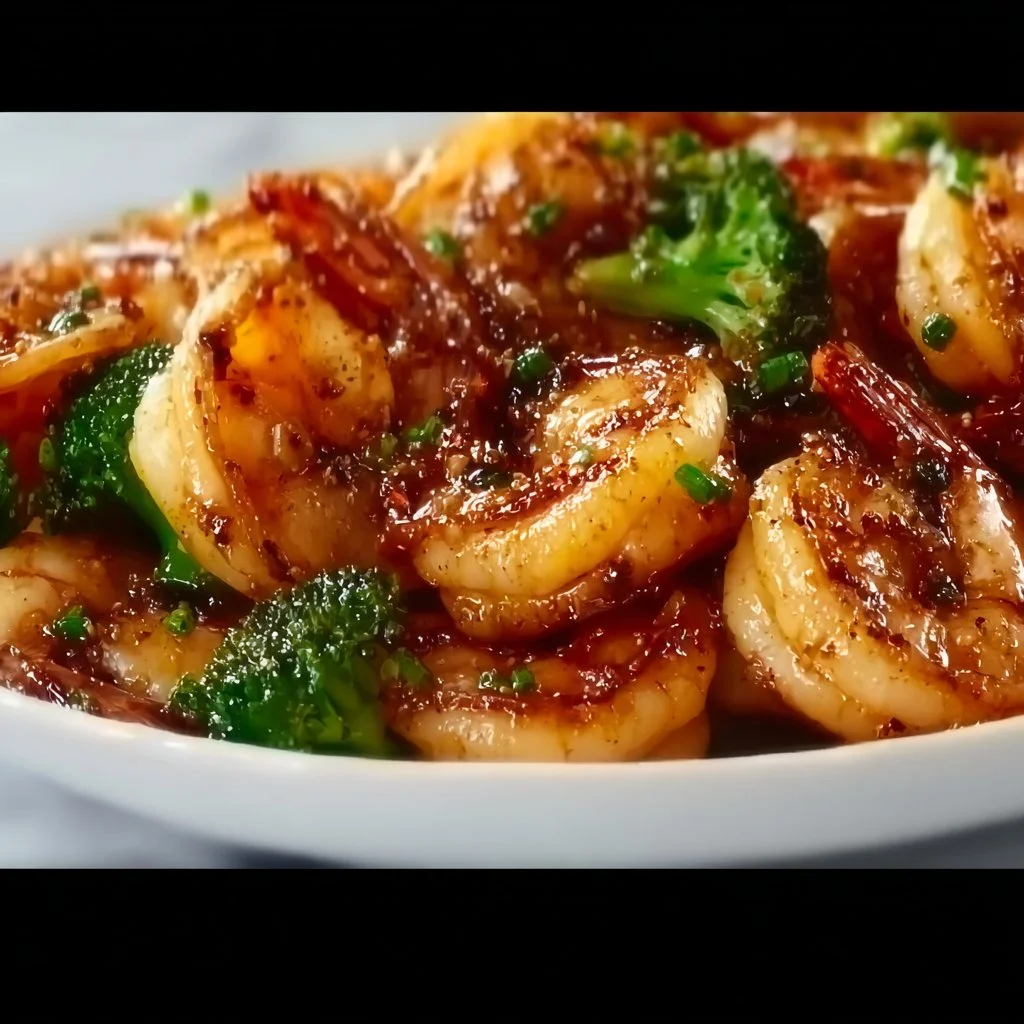
Minute High-Protein Honey Garlic Shrimp for Meal Prep
High-Protein Honey Garlic Shrimp: A Delicious Adventure
Introduction
Hello, fellow food lovers! Buckle up your aprons because today we’re embarking on a culinary journey that’s about to transform your weeknight dinners—High-Protein Honey Garlic Shrimp! This dish is not just tantalizingly tasty; it’s also packed with protein, making it a guilt-free pleasure you’ll want to savor again and again.
Imagine a busy weekday evening. You’ve shuffled through the chaos of meetings, errands, and the inevitable “What’s for dinner?” disaster. You walk into your kitchen, and the thought of whipping up something delicious feels miles away. But wait! With just a handful of ingredients, you can bring the vibrant flavors of a great seafood restaurant right to your table.
This dish features juicy shrimp coated in a sweet and savory honey garlic sauce that’s simply irresistible! Not only is it quick to prepare—taking about 20-30 minutes—but it’s also extraordinarily versatile, allowing you to serve it with rice, quinoa, or fresh vegetables. Plus, it’s wonderful on its own or dressed up with your favorite sides.
And let’s not forget about the nutritional side of things! Shrimp is an excellent source of protein and packed with vitamins and minerals, making this dish not only scrumptious but also wholesome. Join me as we dive headfirst into this adventure in flavor!
Personal Story
Growing up in my family, seafood wasn’t just food; it was a celebration. I fondly remember the evenings spent by the ocean, the salty breeze wrapping around us as my parents cooked up shrimp on the grill while sharing stories and laughter. One evening, my dad decided to try his hand at making garlic shrimp with a touch of honey sauce—an experiment that turned into a family favorite.
We all waited eagerly as the sweet aroma drifted from the kitchen to the dining table—a combination of smoky garlic and a hint of sweetness dancing through the air. As the first bite melted in my mouth, I realized he’d created magic! That simple dish, full of flavor and nostalgia, became a staple in our household.
Fast forward to today, and I can’t tell you how happy it makes me to recreate that same happiness in my own kitchen, pasta parties instead replaced with meal prepping shrimp for the week ahead. Trust me, once you try this High-Protein Honey Garlic Shrimp, you’ll have your own memories to cherish for years to come!
Ingredients
To make this delectable dish, gather the following ingredients:
-
1 pound shrimp, peeled and deveined
Fresh shrimp provides the best flavor and texture. If you can’t find fresh, frozen shrimp works too! Just ensure to thaw it thoroughly before cooking. -
1/4 cup honey
Honey adds a lovely sweetness to balance the garlic. Adjust the quantity if you prefer a sweeter or less sweet flavor! -
3 cloves garlic, minced
Garlic is essential for that delightful aromatic quality. Feel free to use garlic powder in a pinch—just aim for about 1 teaspoon. -
2 tablespoons soy sauce
This adds the umami kick! You can swap in low-sodium soy sauce for a lighter option, or use tamari for a gluten-free alternative. -
1 tablespoon olive oil
Olive oil adds healthy fats and helps prevent shrimp from sticking to the pan. If you’re looking for a flavor twist, try sesame oil for an extra punch! -
Salt and pepper to taste
Seasoning is vital! Remember, you can always add more, but you can’t take it out once it’s in. -
Cooked rice or vegetables for serving
Serve this dish over your choice of rice, quinoa, or steamed veggies. It’s super versatile—play around to find your favorite combination!
Step-by-Step Instructions
Step 1: Preparing the Shrimp
Start by ensuring your shrimp is thawed, cleaned, and patted dry. The drier they are, the better they’ll sear. There’s nothing worse than steaming when you want a lovely golden crust! Chef tip: If your shrimp come with tails, consider leaving them on for presentation—makes it feel a bit fancier!
Step 2: Mixing the Sauce
In a small bowl, whisk together the honey, minced garlic, and soy sauce. This sauce is where the magic happens! Pro tip: If you like a bit of kick, add a pinch of red pepper flakes to the mix for a sweet and spicy finish.
Step 3: Heating the Pan
In a large skillet, heat the olive oil over medium-high heat. You want the oil hot but not smoking; too much heat can burn the garlic and give it a bitter flavor. Keep an eye on it! If your pan starts to smoke, turn it down a notch.
Step 4: Cooking the Shrimp
Add the shrimp to the skillet in a single layer. Let them cook for about 2-3 minutes without stirring to achieve that golden sear. You’ll know they’re ready to flip when they turn pink around the edges. Chef secret: Don’t overcrowd the pan! If you’re making a double batch, do it in two rounds.
Step 5: Adding the Sauce
Once the shrimp are beautifully seared, pour the honey garlic sauce over and toss to coat. Cook for another 1-2 minutes until the shrimp are fully cooked and the sauce has thickened slightly. Tip: The shrimp will continue cooking from residual heat, so take them off the stove as soon as they’re opaque.
Step 6: Seasoning
Taste your shrimp and season with salt and pepper if needed. You may not even need it with the soy sauce already in there! A little spritz of lemon juice at the end can elevate the flavors to another level—try it out!
Serving Suggestions
To serve, pile a generous portion of cooked rice or your favorite veggies on a plate and gently lay the honey garlic shrimp on top. Drizzle any extra sauce over the shrimp and garnish with sesame seeds or finely chopped green onions for a little extra flair! This presentation not only packs a flavor punch but also makes for an eye-catching meal!
Recipe Variations
-
Spicy Honey Garlic Shrimp: Add a splash of sriracha or a diced fresh chili to the sauce for an exciting kick!
-
Citrusy Twist: Squeeze some fresh lime juice into the sauce for a refreshing zing that compliments the sweetness of the honey.
-
Zucchini Noodles Option: Serve the honey garlic shrimp over spiralized zucchini noodles for a low-carb alternative!
-
Herb Infusion: Mix in some fresh basil or cilantro when serving to elevate the dish with vibrant herb flavors.
-
Sweet and Savory: Toss in some pineapple chunks when cooking the shrimp for a tropical, sweet addition!
Chef’s Notes
This High-Protein Honey Garlic Shrimp recipe has evolved over the years. Initially, I used to cook my shrimp in plain olive oil, but after my dad introduced me to the beauty of sauce-making, I couldn’t resist adding flavor layers. The sweetness of honey and the pungent garlic opened a whole new world of possibilities!
And let me tell you, there have been funny moments, too! One time, during a dinner party, I accidentally spilled half a bottle of honey into the pan, thinking I was using a different recipe! It turned into a sticky disaster but somehow turned out to be the favorite dish of the night—so, I guess accidents in the kitchen can be a blessing, right?
FAQs and Troubleshooting
1. How do I know when the shrimp are cooked?
Look for shrimp that have turned pink and opaque all the way through. They should curl up into a "C" shape. If they curl into an "O," they may be overcooked.
2. Can I use frozen shrimp?
Absolutely! Just make sure to thaw them completely and pat them dry before cooking. This ensures they sear nicely.
3. What sides pair well with honey garlic shrimp?
This dish is super versatile! Try it over fluffy rice, sautéed greens, or even a fresh salad for a balanced meal.
4. Why is my sauce too runny?
If your sauce isn’t thickening, try increasing the heat slightly and cooking for a bit longer. Alternatively, you can add a cornstarch-water slurry (1 tsp cornstarch mixed with 1 tsp water) to thicken it up quickly.
Nutritional Info (Optional)
While I haven’t included the specifics in our conversation, you can roughly estimate this serving to contain about 200 calories, with 22 grams of protein, 8 grams of carbs, and minimal fats if you stick to olive oil.
So there you have it—your go-to High-Protein Honey Garlic Shrimp recipe! Don’t forget to share your culinary experiences with me, and let’s keep the delicious vibes flowing. Happy cooking!
PrintHigh-Protein Honey Garlic Shrimp
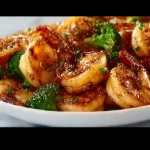
A quick and delicious high-protein meal featuring shrimp coated in a sweet and savory honey garlic sauce.
- Prep Time: 10 minutes
- Cook Time: 10 minutes
- Total Time: 20 minutes
- Yield: 4 servings 1x
- Category: Main Course
- Method: Sautéing
- Cuisine: Seafood
- Diet: Gluten-Free
Ingredients
- 1 pound shrimp, peeled and deveined
- 1/4 cup honey
- 3 cloves garlic, minced
- 2 tablespoons soy sauce
- 1 tablespoon olive oil
- Salt and pepper to taste
- Cooked rice or vegetables for serving
Instructions
- Start by ensuring your shrimp is thawed, cleaned, and patted dry.
- In a small bowl, whisk together the honey, minced garlic, and soy sauce.
- In a large skillet, heat the olive oil over medium-high heat.
- Add the shrimp to the skillet in a single layer; let them cook for about 2-3 minutes without stirring.
- Once the shrimp are beautifully seared, pour the honey garlic sauce over and toss to coat.
- Taste your shrimp and season with salt and pepper if needed.
Notes
For an exciting kick, consider adding sriracha or diced chili to the sauce. A squeeze of fresh lemon juice at the end can elevate the flavors.
Nutrition
- Serving Size: 1 serving
- Calories: 200
- Sugar: 21g
- Sodium: 400mg
- Fat: 7g
- Saturated Fat: 1g
- Unsaturated Fat: 5g
- Trans Fat: 0g
- Carbohydrates: 9g
- Fiber: 0g
- Protein: 22g
- Cholesterol: 200mg
Keywords: shrimp, honey garlic, seafood, quick dinner, high-protein