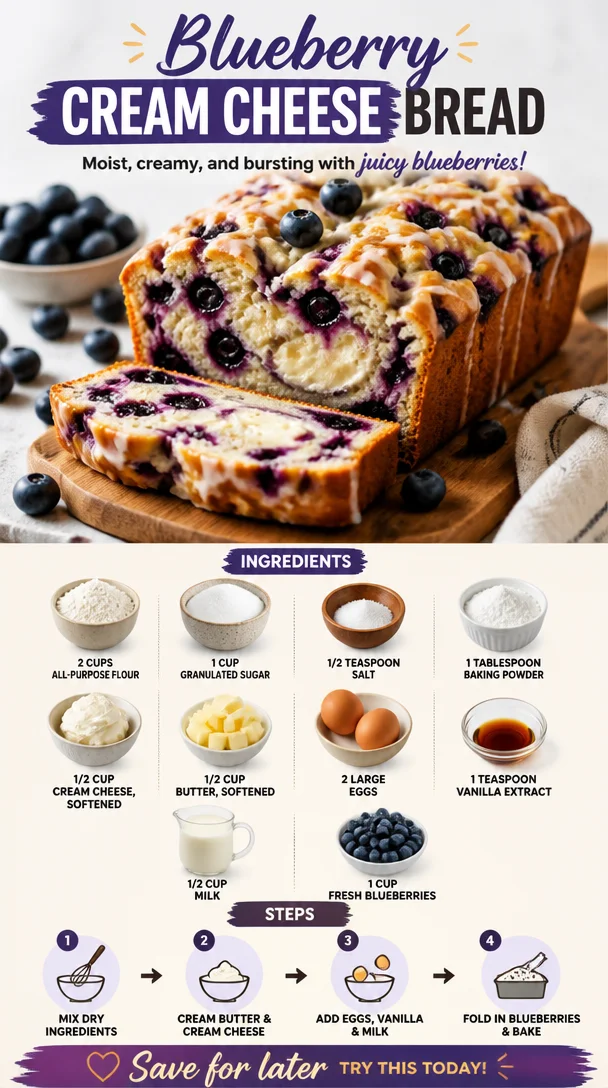
Blueberry Cream Cheese Bread
Blueberry Cream Cheese Bread: A Slice of Heaven
Welcome back to Clean Plate Cravings, friends! Today, I’m excited to share with you a recipe that’s as delightful as a lazy Sunday morning and as comforting as a warm hug from grandma: Blueberry Cream Cheese Bread. This recipe is not just any ordinary bread; it’s a luscious treat that’s bursting with juicy blueberries and creamy goodness that you just won’t be able to resist.
When I first encountered blueberry bread, I was at a quaint little café nestled on the edge of town, where the scent of freshly baked goods danced around me and drew me in like a moth to a flame. There was something about the contrast between the sweet, slightly tangy blueberries and the rich cream cheese that intrigued me. I took a bite, and let me tell you, it was an explosion of flavor that made my taste buds do the happy dance!
Blueberry Cream Cheese Bread is the perfect fusion of wholesome ingredients and indulgent flavors. Whether you enjoy it for breakfast with a hot cup of coffee, as an afternoon snack with tea, or simply as a sweet treat any time of day, this bread stands out in all the right ways. And the best part? It’s so easy to whip up that you may just find yourself making it every week!
Are you ready to dive in? Let’s bake something fun together!
A Slice of Nostalgia
Before we get into the nitty-gritty of the recipe, let me take you back down memory lane. Growing up, Saturdays were sacred in my household. My mom had this delightful ritual of baking while the rest of us would still be nestled under our warm blankets. The sweet and comforting aroma of baked goods would waft through the air, drawing us into the kitchen for what felt like magic in the making.
One particular morning, my mom decided to try her hand at blueberry cream cheese bread. I remember the excitement as the bright blue gems popped against the creamy batter, and my brothers and I were on “blueberry watch,” ensuring every single berry made it into the bowl. As the bread baked, we could hardly contain our anticipation; the delightful smell was too much to bear!
When the timer finally rang, we couldn’t wait to dig into the warm, golden loaf. Each slice was thick and luscious, with that gorgeous cream cheese blended throughout, and the tart blueberries balanced out the sweetness perfectly. We spread butter on top—because why not? It was pure bliss. From that day onward, blueberry cream cheese bread became a staple in our home, one I still cherish deeply.
Ingredients You’ll Need
Let’s gather everything you need to whip up this delicious Blueberry Cream Cheese Bread. Here’s what we’re working with:
-
2 cups all-purpose flour
A classic choice for baking, all-purpose flour gives the bread its structure. For a healthier twist, try using whole wheat flour—just be sure to adjust the liquid slightly as it can absorb more. -
1 cup granulated sugar
This sugar adds sweetness but can also be swapped for coconut sugar for a more caramel undertone, or you might use a sugar substitute if you’re aiming for lower calories. -
1/2 teaspoon salt
A pinch of salt enhances all flavors, balancing out the sweetness of the blueberries and sugar. -
1 tablespoon baking powder
The star here, baking powder ensures our bread rises to fluffy perfection. If you’re out, you can substitute with 1/2 teaspoon of baking soda combined with 1 teaspoon of lemon juice. -
1/2 cup cream cheese, softened
This ingredient brings a creamy tang to the bread. If you’re looking for a dairy-free option, you could try vegan cream cheese. -
1/2 cup butter, softened
A must for flavor and moisture! If you prefer, melted coconut oil or applesauce can work—a fun way to change the taste! -
2 large eggs
The binding agents here provide structure and moisture. For a vegan alternative, consider using flax eggs (1 tablespoon flaxseed meal with 3 tablespoons water for each egg). -
1 teaspoon vanilla extract
Always use pure vanilla for the best flavor; it’s a game changer! In a pinch, you can use almond extract for a different twist. -
1/2 cup milk
The milk adds moistness; non-dairy milk (like almond or oat) are fantastic swaps if you’re avoiding dairy. -
1 cup fresh blueberries
The star of the show! Fresh blueberries bring sweetness and a burst of flavor. If out of season, feel free to use frozen ones; just don’t thaw them beforehand to keep your batter from getting too colorful.
Step-by-Step Instructions
Now, let’s get down to the fun part—actually making this delicious bread! Follow these step-by-step instructions for a baking experience filled with love and flavor:
-
Preheat Your Oven:
Preheat your oven to 350°F (175°C). This initial step is crucial because a properly heated oven leads to perfect baking. Meanwhile, prepare your loaf pan by greasing it well or lining it with parchment paper. -
Mix Dry Ingredients:
In a large mixing bowl, whisk together the all-purpose flour, baking powder, and salt. Make sure they’re well combined—this ensures even baking. Pro-tip: sift the flour for a lighter texture if you want to be super fancy! -
Cream the Butter and Sugar:
In another bowl, combine the softened butter and granulated sugar. Using a hand mixer or a stand mixer, beat them together until the mixture is light and fluffy (about 2-3 minutes). This process incorporates air and makes for a soft bread. -
Add the Cream Cheese:
Next, add the softened cream cheese to the sugar mixture and blend until smooth. Don’t skip this step—cream cheese is what makes this bread decadent! -
Incorporate Eggs and Vanilla:
Crack in those eggs one at a time, mixing well after each addition. Pour in the vanilla extract and mix until everything is combined. This batter should be creamy and luscious! -
Add Dry Ingredients & Milk:
Gradually add the dry ingredients to the creamy mixture, alternating with the milk. Start and end with the flour mixture to keep the batter fluffy. Mix until just combined; be careful not to over-mix! -
Gently Fold in Blueberries:
Using a spatula, gently fold in the fresh blueberries. You want to distribute them evenly without crushing them. Remember, we want those vibrant blue bursts throughout! -
Transfer to Loaf Pan:
Pour the batter into your prepared loaf pan and smooth the top with the spatula. Give it a gentle shake to settle it in. -
Bake:
Bake in the preheated oven for 50-60 minutes or until a toothpick inserted in the center comes out clean. Your kitchen will smell simply amazing during this time. Keep an eye on it; ovens can vary! -
Cool and Enjoy!
Once baked, let it sit in the pan for about 10 minutes before transferring it to a wire rack to cool completely. Slicing it while warm is tempting, but allowing it to cool makes for cleaner slices and better flavor development.
Serving Suggestions
Slice your Blueberry Cream Cheese Bread and serve it warm or at room temperature. It’s incredible on its own, but feel free to dress it up! A light dusting of powdered sugar or a smear of butter adds a touch of luxury. Pair it with a hot cup of coffee or a refreshing herbal tea for a delightful breakfast or snack that you’re going to crave again and again!
Recipe Variations
Here are a few fun twists on the classic Blueberry Cream Cheese Bread that I think you’ll love:
-
Lemon Blueberry Bread: Add the zest of one lemon to the batter for a bright, fresh flavor that complements the blueberries beautifully!
-
Nutty Banana Bread: Incorporate 1 ripe mashed banana into the batter for added moisture and natural sweetness, along with some chopped walnuts for crunch.
-
Spiced Bread: Add 1 teaspoon of cinnamon or nutmeg, or even a pinch of cardamom for a warm, spiced note that makes every bite feel like a cozy hug.
-
Coconut Cream Cheese Bread: Substitute shredded coconut in the batter and on top before baking for wonderful texture and flavor.
Chef’s Notes
I can’t tell you how many times I’ve experimented with this recipe! Each batch brings its own surprises, from slightly overbaked corners to those glorious moments when every slice is perfect. It’s all about experimentation and finding what you love best. One time, I forgot to add the eggs and ended up with a dense, pudding-like treat that’s now my secret guilty pleasure! It was so different but still pined for, and it led to a new family recipe that we now call “Blueberry Pudding Bread”! Remember, kitchen “mistakes” are sometimes the best ways to create something exciting.
FAQs and Troubleshooting
Q1: My bread didn’t rise! What happened?
Answer: This could be due to expired baking powder. Always check the freshness of your leavening agents before baking. A good tip is to add a little vinegar to it; if it bubbles, it’s still good!
Q2: Why is my bread too dense?
Answer: Overmixing your batter can lead to dense bread. Ensure you’re mixing just until combined, and that your ingredients are at room temperature for the best results.
Q3: Can I freeze this bread?
Answer: Absolutely! Once fully cooled, wrap it tightly in plastic wrap and then in foil, or store it in a freezer-safe bag. It should keep well for up to 3 months. Just defrost overnight in the fridge before enjoying!
Q4: Can I use frozen blueberries?
Answer: Yes! Just remember not to thaw them beforehand; adding them frozen will help prevent them from bleeding into the batter and turning it blue.
Nutritional Info
For those curious about the health aspects, here’s a rough estimation per slice (based on a standard loaf cut into 12 slices):
- Calories: 190
- Protein: 3g
- Fat: 8g
- Carbohydrates: 28g
- Fiber: 1g
- Sugar: 9g
Of course, these numbers can vary based on your ingredient choices, but it gives you a general idea of what you’re working with!
Thank you for joining me on this blueberry-filled adventure! I hope you give this Blueberry Cream Cheese Bread a try and experience the nostalgia and deliciousness I hold dear to my heart. Share your creations, stories, and any variations you come up with—let’s keep this vibrant community growing. Until next time, happy baking! 🍞💙
PrintBlueberry Cream Cheese Bread
A delightful bread bursting with juicy blueberries and creamy goodness, perfect for breakfast or as a sweet treat.
- Prep Time: 15 minutes
- Cook Time: 60 minutes
- Total Time: 75 minutes
- Yield: 12 slices 1x
- Category: Bread
- Method: Baking
- Cuisine: American
- Diet: Vegetarian
Ingredients
- 2 cups all-purpose flour
- 1 cup granulated sugar
- 1/2 teaspoon salt
- 1 tablespoon baking powder
- 1/2 cup cream cheese, softened
- 1/2 cup butter, softened
- 2 large eggs
- 1 teaspoon vanilla extract
- 1/2 cup milk
- 1 cup fresh blueberries
Instructions
- Preheat your oven to 350°F (175°C) and prepare your loaf pan.
- Mix the all-purpose flour, baking powder, and salt in a large mixing bowl.
- Cream the softened butter and granulated sugar until light and fluffy.
- Add the softened cream cheese to the sugar mixture and blend until smooth.
- Incorporate the eggs one at a time, mixing well after each addition, and then add the vanilla extract.
- Add the dry ingredients gradually to the creamy mixture, alternating with the milk.
- Gently fold in the fresh blueberries.
- Transfer the batter to your prepared loaf pan and smooth the top.
- Bake for 50-60 minutes or until a toothpick inserted in the center comes out clean.
- Cool the bread in the pan for about 10 minutes, then transfer to a wire rack to cool completely.
Notes
Try variations like adding lemon zest or nuts for a twist on the classic recipe.
Nutrition
- Serving Size: 1 slice
- Calories: 190
- Sugar: 9g
- Sodium: 200mg
- Fat: 8g
- Saturated Fat: 5g
- Unsaturated Fat: 2g
- Trans Fat: 0g
- Carbohydrates: 28g
- Fiber: 1g
- Protein: 3g
- Cholesterol: 35mg
Keywords: blueberry bread, cream cheese bread, breakfast recipe
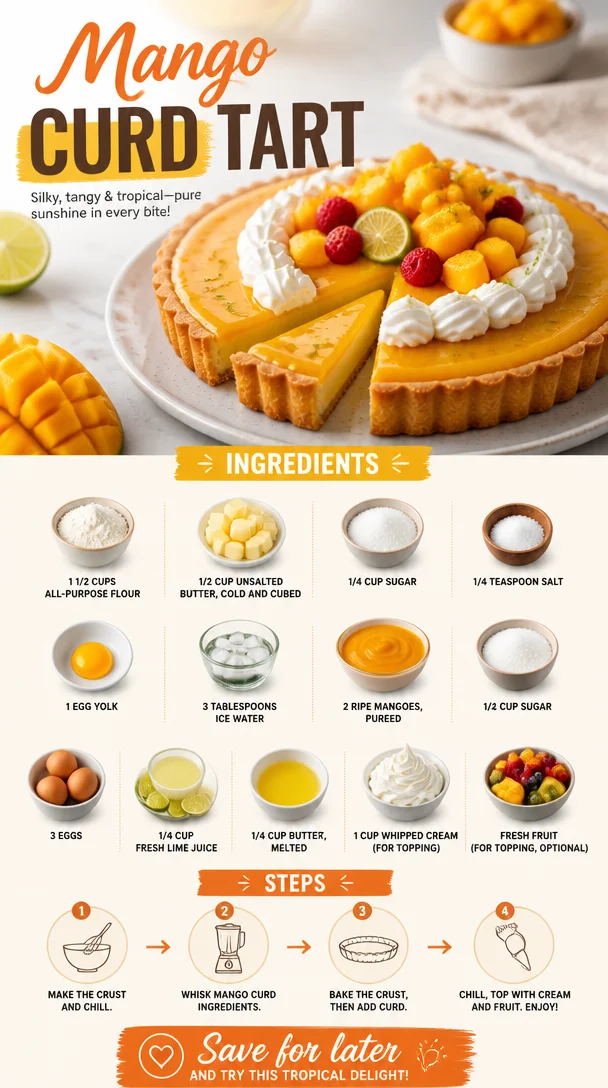
Mango Curd Tart
Indulge in Sunny Goodness: Mango Curd Tart
Hello, food lovers! Welcome back to Clean Plate Cravings, your haven for fresh, feel-good food that’s anything but boring. I’m Ava Carter, and today I’m thrilled to share a dish that brings sunshine right into your kitchen: the delightful Mango Curd Tart. If you’ve ever taken a bite of something that just radiates happiness, you know the experience I’m talking about—and this tart embodies that joy!
Now, why mango, you might ask? Well, growing up in a tropical climate, mangoes were a staple in my household. I have vivid memories of my family gathering around the kitchen during summer, slicing into ripe, juicy mangoes, the sweet fragrance wafting through the air. We’d make simple desserts and smoothies, but the idea of turning mangoes into a velvety curd? Oh, now that’s a story waiting to be told!
Imagine a buttery crust cradling a luscious mango curd, with just a hint of zesty lime to cut through the sweetness. Each slice is a perfect balance of creamy and tangy, making it the go-to dessert for any occasion—be it a family gathering, a casual picnic, or simply a sweet treat on a rainy day. This Mango Curd Tart is sure to please your taste buds and warm your heart.
So grab your apron, let’s dive into this recipe that marries nostalgia with vibrant flavors. Trust me, you’ll want to make this one again and again—not just because it’s delicious, but because it’s a celebration of life itself!
Personal Story
One of my fondest memories revolves around mangoes and this very tart recipe. I was spending a summer with my grandmother, who was known for her pranks as much as she was for her desserts. One day, I watched her whip up this tropical delight while playfully teasing me about my “serious” chef skills. As she mixed the mango puree with sugar and eggs, she reminded me, “Life, dear, is like this tart—sweet with a little bit of tang!” It struck a chord with me, and that summer, I learned that cooking could be as much about savoring the moment as it is about the final dish.
When I finally attempted to recreate her mango curd tart years later, the flavors brought back floods of memories—laughter, sunshine, and her playful spirit. It wasn’t just about the curd; it was about sharing the experience with those I love. To me, this tart is not just dessert; it’s a little piece of my heart that I’m excited to share with you!
Ingredients
Here’s what you’ll need to create this Mango Curd Tart. Each ingredient plays a crucial role in building flavor and texture, so let’s break it down:
-
1 1/2 cups all-purpose flour: The backbone of your tart shell. If you’re looking for a gluten-free option, try using a gluten-free all-purpose blend!
-
1/2 cup unsalted butter, cold and cubed: Cold butter creates a flaky texture. If dairy-free, feel free to use coconut oil or a vegan butter substitute.
-
1/4 cup sugar: This adds just the right sweetness to your tart crust. If you want a more natural option, you can opt for coconut sugar or honey (though it will alter the crust consistency).
-
1/4 teaspoon salt: Balances out the sweetness and enhances the overall flavor. Don’t skip this!
-
1 egg yolk: This adds richness and binds the crust together. You can substitute with flax egg (1 tablespoon flaxseed meal + 2.5 tablespoons water) for a vegan option.
-
3 tablespoons ice water: Helps bring the dough together without warming the butter. Keep your water icy to maintain that flaky texture!
-
2 ripe mangoes, pureed: The star of the show! Choose mangoes that are slightly soft to the touch for maximum sweetness. If mangoes aren’t in season, you can use store-bought mango puree.
-
1/2 cup sugar: Used in the filling, this sweetens the curd perfectly. Adjust to taste if you prefer it less sweet.
-
3 eggs: Provides structure and creaminess to the curd. If you’re vegan, substitute with silken tofu blended until smooth (about 1/4 cup).
-
1/4 cup fresh lime juice: Adds a vibrant zing. If you don’t have fresh limes, bottled lime juice works, but I recommend fresh for the best flavor.
-
1/4 cup butter, melted: This brings richness to the curd. For a lighter option, consider using coconut milk instead!
-
1 cup whipped cream (for topping): Light and airy, it complements the tart’s richness. You can use coconut whipped cream for a dairy-free alternative.
-
Fresh fruit (for topping, optional): Fruit is a beautiful way to brighten the presentation! Consider berries, kiwi, or even more mango slices for a colorful touch.
Step-by-Step Instructions
Alright, let’s get these ingredients singing together! Here’s how to whip up this Mango Curd Tart—trust me, you’ll feel like a pro in your kitchen.
-
Prepare the Tart Crust: Start by preheating your oven to 350°F (175°C). In a large mixing bowl, combine the all-purpose flour, sugar, and salt. Add the cold, cubed butter. Using a pastry cutter or your fingertips, blend the ingredients until the mixture resembles coarse crumbs. (Chef Tip: Keep your hands cold—warm hands melt the butter, and you want those little butter bits intact for flakiness!)
-
Bring it Together: Make a small well in the center of the mixture and add the egg yolk and ice water. Mix gently until the dough holds together. If it feels too crumbly, add a bit more ice water, one tablespoon at a time. (Little hack: You can chill the dough for about 30 minutes for an even flakier crust before rolling it out!)
-
Roll the Dough: Turn the dough out onto a lightly floured surface and roll it into a 12-inch circle. Carefully transfer it to a 9-inch tart pan, pressing it into the edges. Trim any excess dough, and prick the bottom with a fork to avoid bubbling.
-
Blind Bake: Line the crust with parchment paper and fill it with pie weights or dried beans. Bake in the preheated oven for 15 minutes. Remove the weights and parchment, then bake for an additional 10 minutes until lightly golden. Set aside to cool. (Chef Secret: This “blind baking” prevents a soggy crust!)
-
Make the Mango Curd: In a medium saucepan, combine the mango puree, sugar, eggs, and lime juice over medium heat. Whisk constantly until the mixture thickens, about 10-12 minutes. (Tip: Patience is key! It’s ready when it coats the back of a spoon.)
-
Add the Melted Butter: Remove from heat and stir in the melted butter until fully incorporated. (Pro Tip: Let the curd cool for a few minutes before pouring it into your tart shell!)
-
Assemble the Tart: Pour the mango curd into the cooled tart shell, spreading it evenly. Refrigerate for at least 2 hours to set. (Bonus Tip: This curd can be made ahead of time—just keep it in the fridge and assemble when ready to serve!)
-
Serve and Garnish: When you’re ready to dig in, top the tart with whipped cream and your choice of fresh fruit. (Chef’s choice: a sprinkle of lime zest gives it a lovely pop of color!)
Serving Suggestions
Slice your Mango Curd Tart into wedges and serve chilled. It pairs beautifully with a cup of herbal tea or a refreshing glass of iced lemonade—perfect for those warm afternoons! For parties, consider placing the tart on a beautiful cake stand, garnished with fresh mint leaves for a fresh touch. Elegance with ease!
Recipe Variations
Looking to switch things up? Here are a few creative twists for your Mango Curd Tart:
-
Tropical Twist: Add a layer of coconut cream under the mango curd for a delightful tropical flavor bomb!
-
Spiced Mango: Infuse your mango curd with a hint of cardamom or cinnamon for a warm, aromatic flavor profile.
-
Berry Bliss: Layer the tart with mixed berries before serving to add a tangy contrast against the sweet mango.
-
Nutty Crust: Swap out 1/2 cup of all-purpose flour for almond flour in the crust for a nutty flavor that beautifully complements the mango.
-
Mango-Ginger Curd: Add a little grated fresh ginger to the mango filling for an extra zing!
Chef’s Notes
This Mango Curd Tart has been a labor of love over the years. I experimented with several fruit combinations, but the combination of mango and lime remains unparalleled. I chuckle when I think of my initial attempts at making curd—it’s a finicky process! Learning to whisk continuously while dodging curious pets who thought my spatula was a toy makes for some excellent comedic kitchen moments. Each tart made becomes not just a dessert, but a treasured story—reminding me of the joy of creation, laughter, and a hint of chaos in the kitchen.
FAQs and Troubleshooting
-
What if my mango curd doesn’t thicken?
- No worries! If it hasn’t thickened as expected, just keep it on medium heat and whisk frequently—most curds take a little time. If you find yourself in a pinch, a cornstarch slurry can help thicken it.
-
Can I use frozen mangoes?
- Absolutely! If using frozen, be sure to thaw them completely and drain any excess liquid before pureeing. This will keep your curd from becoming too watery.
-
How long will the tart last?
- The tart will stay fresh for up to 4 days in the refrigerator. If there’s leftover curd (unlikely, since it’s so delicious!), it can be stored in an airtight container for about a week.
-
Can I freeze the tart?
- Yes, but the texture might change upon thawing. For the best results, store the assembled tart in the fridge if you plan to eat it within the week. If you must freeze, do so before adding the whipped cream topping.
Nutritional Info
While I focus on flavor and enjoyment rather than strict nutritional guidelines, here’s a rough estimate per slice when cutting an 8-slice tart:
- Calories: 320
- Fat: 20g
- Carbohydrates: 30g
- Protein: 3g
Remember, this is a dessert meant to be savored, so enjoy it guilt-free!
And there you have it, friends! A slice of sunshine in your kitchen with this Mango Curd Tart. I hope you enjoy making it as much as I do. Happy baking!
PrintMango Curd Tart

Indulge in a delightful Mango Curd Tart with a buttery crust and a luscious mango filling, brightened with zesty lime.
- Prep Time: 30 minutes
- Cook Time: 25 minutes
- Total Time: 55 minutes
- Yield: 8 servings 1x
- Category: Dessert
- Method: Baking
- Cuisine: Tropical
- Diet: Vegetarian
Ingredients
- 1 1/2 cups all-purpose flour
- 1/2 cup unsalted butter, cold and cubed
- 1/4 cup sugar
- 1/4 teaspoon salt
- 1 egg yolk
- 3 tablespoons ice water
- 2 ripe mangoes, pureed
- 1/2 cup sugar (for filling)
- 3 eggs
- 1/4 cup fresh lime juice
- 1/4 cup butter, melted
- 1 cup whipped cream (for topping)
- Fresh fruit (for topping, optional)
Instructions
- Prepare the Tart Crust: Preheat your oven to 350°F (175°C). In a large mixing bowl, combine the flour, sugar, and salt. Add the cold butter and blend until coarse crumbs form.
- Bring it Together: Add the egg yolk and ice water, mixing gently until the dough holds. Chill for flakiness if desired.
- Roll the Dough: Roll it into a 12-inch circle and press it into a 9-inch tart pan. Trim excess dough and prick the bottom.
- Blind Bake: Line with parchment, fill with pie weights, and bake for 15 minutes. Remove weights and bake for another 10 minutes until golden. Cool.
- Make the Mango Curd: In a saucepan, combine mango puree, sugar, eggs, and lime juice on medium heat, whisking until thickened, about 10-12 minutes.
- Add the Melted Butter: Stir in the melted butter until incorporated and allow to cool slightly.
- Assemble the Tart: Pour the cooled mango curd into the tart shell and refrigerate for at least 2 hours to set.
- Serve and Garnish: Top with whipped cream and fresh fruit before serving.
Notes
For a vegan option, use coconut oil, flax egg, and silken tofu. Enjoy guilt-free and serve chilled for the best experience.
Nutrition
- Serving Size: 1 slice
- Calories: 320
- Sugar: 21g
- Sodium: 150mg
- Fat: 20g
- Saturated Fat: 10g
- Unsaturated Fat: 8g
- Trans Fat: 0g
- Carbohydrates: 30g
- Fiber: 1g
- Protein: 3g
- Cholesterol: 95mg
Keywords: Mango Tart, Dessert, Tropical Dessert, Curd Tart, Summer Dessert
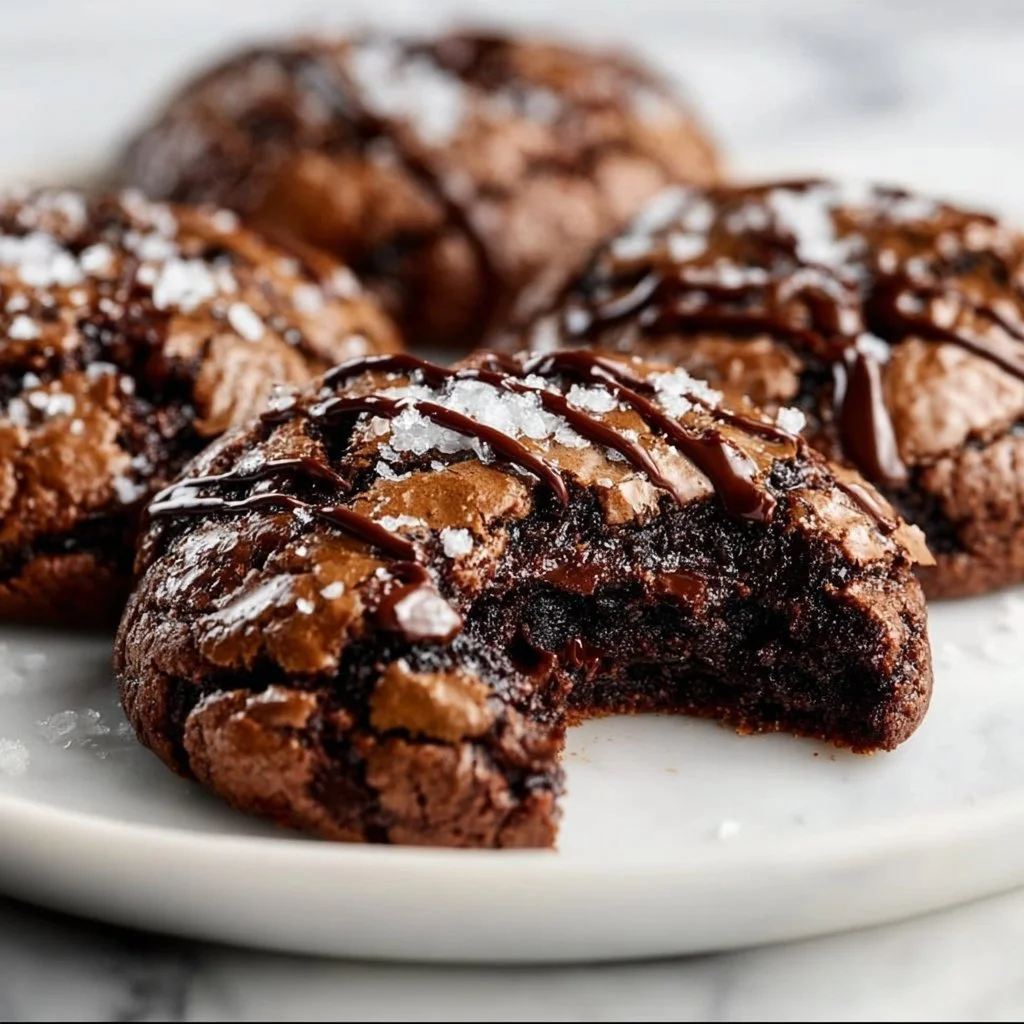
Gourmet Brownie Cookies
Gourmet Brownie Cookies: The Ultimate Treat for Chocoholics
Welcome back to Clean Plate Cravings, fellow food lovers! Today, I’m absolutely thrilled to share a recipe that’s guaranteed to make your sweet tooth sing: Gourmet Brownie Cookies. If you’re like me, dessert is a delightful end to the day, and these cookies are the perfect indulgence when you want a rich chocolate hit without the fuss of a traditional brownie.
Imagine biting into a warm, gooey cookie, the chocolate chips melting in your mouth, with that little crunch on the outside and a soft, brownie-like interior. Sounds heavenly, right? Let’s be honest: Brownies and cookies are two beloved treats that we often find ourselves choosing between. But why choose when we can have the best of both worlds?
What I love most about these Gourmet Brownie Cookies is how simple the ingredients are and how versatile the recipe can be. Whether you whip them up for a special occasion or just to satisfy that chocolate craving on a Tuesday evening, they never disappoint! So, grab your aprons, and let’s dive into the delicious world of cookies.
A Sweet Memory: The First Batch
Let me take you back to a sunny afternoon when I was about ten years old. My mom decided it was the perfect day to bake, and naturally, I was right in the kitchen, eager to help. She pulled out her trusty cookbook, and we stumbled upon a brownie recipe. But instead of making traditional brownies, we decided to experiment and create cookies!
As we stirred the ingredients, the warm, comforting smell of melted butter and chocolate filled the air. I distinctly remember sneaking spoonfuls of that rich batter and feeling like the luckiest kid in the world. When those cookies finally came out of the oven, golden brown and oozing chocolatey goodness, my entire family gathered around the kitchen. It was pure joy as we indulged in those warm cookies, giggling and sharing stories.
To this day, those moments serve as a foundation of my love for cooking and baking. Every time I make these Gourmet Brownie Cookies, I’m transported back to that kitchen, surrounded by laughter and a mouthful of chocolate. Now, let me share this indulgent recipe with you!
The Ingredients You’ll Need
Here’s what you’ll need to whip up these dreamy cookies:
-
1 cup unsalted butter, softened
This is your base for flavor and texture. Don’t forget to soften it—nobody wants a lumpy cookie dough! -
1 cup brown sugar, packed
This adds moisture and a slight caramel flavor. If you don’t have brown sugar on hand, you can substitute half with granulated sugar or mix in a tablespoon of molasses per cup to replicate the moisture and flavor. -
1/2 cup granulated sugar
For added sweetness and a touch of crispness. You can use coconut sugar for a less refined option. -
2 large eggs
Eggs bind the ingredients and add richness. If you’re vegan, try using flaxseed meal (1 tablespoon of flaxseed mixed with 2.5 tablespoons of water) as a great egg substitute. -
2 teaspoons vanilla extract
This elevates the flavor profile. If you’re out, almond extract can also lend a beautiful flavor twist, but use it sparingly! -
1 cup all-purpose flour
This is essential for structure. For a gluten-free option, try substituting with almond flour or a gluten-free flour blend. -
1/2 cup cocoa powder
The star of the show! It provides the deep chocolate flavor. Make sure you use unsweetened cocoa powder for the best results. -
1/2 teaspoon baking powder
This little ingredient helps the cookies rise a bit, giving them that perfect brownie-cookie texture. -
1/4 teaspoon salt
Just a pinch to enhance all the flavors. If you’re watching your sodium, you can omit it, but I wouldn’t recommend it! -
1 cup chocolate chips
Go for semi-sweet or dark chocolate for that rich contrast. Feeling adventurous? Try butterscotch or white chocolate chips for a fun twist!
Step-by-Step Instructions to Cookie Heaven
Now that you’ve gathered all your ingredients, it’s time to bake these delicious treats!
-
Preheat Your Oven
Start by preheating your oven to 350°F (175°C). This step is crucial as it ensures even baking, which is key for that perfect texture. While it’s heating up, let’s prepare the dough! -
Cream the Butter and Sugars
In a large mixing bowl, beat together the softened unsalted butter, packed brown sugar, and granulated sugar until smooth and creamy. This usually takes about 3-4 minutes with an electric mixer. The mixture should become lighter in color. This aeration is what helps create a tender cookie! -
Add the Eggs and Vanilla
Next, crack in those two large eggs and pour in the vanilla extract. Beat until well combined. Make sure not to overmix at this stage; you want a nice smooth blend, but a little lumpiness is okay. -
Sift in Dry Ingredients
Now, in a separate bowl, sift together the all-purpose flour, cocoa powder, baking powder, and salt. Sifting helps to break up any clumps and combines the dry ingredients evenly. Slowly add this dry mixture to your wet ingredients, stirring gently until just combined. -
Fold in Chocolate Chips
At this stage, it’s time to incorporate the chocolate chips. Use a spatula for this, folding gently to avoid breaking the chips. You want even distribution throughout the cookie dough! -
Chill the Dough (Optional)
If you have the time, refrigerate your dough for about 30 minutes. Chilling helps the flavors meld and can prevent the cookies from spreading too much during baking. But if you’re in a hurry, dive right in! -
Scoop and Bake
Using a cookie scoop or spoon, drop dough balls onto a parchment-lined baking sheet, spaced a couple of inches apart. This helps them bake evenly. Pop them into your preheated oven and bake for about 10-12 minutes. The edges should look firm, while the center may still appear soft. That’s perfect! -
Cool and Enjoy
Remove the cookies from the oven and allow them to cool on the baking sheet for about 5 minutes before transferring them to a wire rack. This waiting period allows them to set up perfectly—trust me, the temptation is real, but it’s worth the wait!
Serving Suggestions
For the ultimate sweet experience, serve these Gourmet Brownie Cookies slightly warm with a scoop of vanilla ice cream on top or drizzled with chocolate syrup. You can also dust them with powdered sugar or serve with a side of fresh berries to balance those rich flavors. Presentation is key, so don’t forget a beautiful plate or rustic wooden board to elevate your serving game!
Recipe Variations
Why stop at just one version? Here are a few fun variations you might try:
-
Mint Chocolate Brownie Cookies: Add 1 teaspoon of peppermint extract to the dough for a refreshing twist!
-
Spicy Brownie Cookies: Incorporate a pinch of cayenne pepper or cinnamon to the dough for a warm kick.
-
Nutty Brownie Cookies: Fold in some chopped walnuts or pecans to add a nice crunch and depth of flavor.
-
Double Chocolate Delight: Replace half the flour with more cocoa powder for an extra chocolatey treat.
-
Gluten-Free Option: Swap in a 1:1 gluten-free flour blend as mentioned, and voilà—you can enjoy these cookies without compromise!
Chef’s Notes
You know, every time I make these cookies, I like to reminisce about my childhood kitchen adventures. Sometimes, I’ll even invite friends over for a baking night, where we can munch on cookie dough and share our stories, just like I did with my mom. It’s funny how just one batch of cookies can create so much nostalgia and joy. Over the years, this recipe has evolved, influenced by seasonal flavors and whatever ingredients I have on hand. The important thing is to have fun with it!
FAQs and Troubleshooting
-
Why did my cookies spread too much?
If cookies spread too much, they might be too warm before they hit the oven. Try chilling the dough longer next time, or ensure your ingredients, particularly butter, are properly measured and at the right temperature. -
How do I store leftover cookies?
Store your cookies in an airtight container at room temperature for up to a week. If you want to keep them longer, freeze them in a zip-lock bag, and they’ll last for up to three months! -
My cookies came out cakey. What happened?
It may be due to overmixing the dough or too much flour. Make sure to scoop flour rather than packing it into the measuring cup when measuring. -
Can I add different types of chocolate chips?
Absolutely! Feel free to mix it up with milk chocolate, dark chocolate, or even white chocolate for a delightful taste sensation.
Nutritional Info
While I won’t delve into exact nutritional values for our delicious cookies, you can generally expect them to be a delightful treat that can fit into a balanced diet when enjoyed in moderation. After all, feeling good about what you eat is all part of the experience!
And there you have it! Your ticket to baking the most delectable Gourmet Brownie Cookies. Remember, it’s all about enjoying the process and the delicious end result. I’m so excited for you to make these, and I can’t wait to hear how they turn out. Happy baking, and may your kitchen always be filled with love and chocolate!
PrintGourmet Brownie Cookies
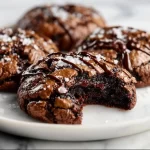
Indulge in these rich and gooey Gourmet Brownie Cookies, the perfect treat for chocolate lovers seeking a delightful combination of brownies and cookies.
- Prep Time: 15 minutes
- Cook Time: 12 minutes
- Total Time: 27 minutes
- Yield: 24 cookies 1x
- Category: Dessert
- Method: Baking
- Cuisine: American
- Diet: Vegetarian
Ingredients
- 1 cup unsalted butter, softened
- 1 cup brown sugar, packed
- 1/2 cup granulated sugar
- 2 large eggs
- 2 teaspoons vanilla extract
- 1 cup all-purpose flour
- 1/2 cup cocoa powder
- 1/2 teaspoon baking powder
- 1/4 teaspoon salt
- 1 cup chocolate chips
Instructions
- Preheat the oven to 350°F (175°C).
- Cream the softened unsalted butter, packed brown sugar, and granulated sugar together until smooth and creamy.
- Add the large eggs and vanilla extract and beat until well combined.
- Sift together the flour, cocoa powder, baking powder, and salt in a separate bowl.
- Slowly add the dry mixture to the wet ingredients, stirring gently until just combined.
- Fold in the chocolate chips gently.
- Chill the dough for about 30 minutes if desired.
- Scoop dough balls onto a parchment-lined baking sheet.
- Bake for 10-12 minutes until the edges are firm but the center is soft.
- Cool on the baking sheet for 5 minutes before transferring to a wire rack.
Notes
For an extra touch, serve with vanilla ice cream or drizzle with chocolate syrup. Chilling the dough can enhance flavor and control spreading.
Nutrition
- Serving Size: 1 cookie
- Calories: 180
- Sugar: 16g
- Sodium: 120mg
- Fat: 8g
- Saturated Fat: 5g
- Unsaturated Fat: 3g
- Trans Fat: 0g
- Carbohydrates: 25g
- Fiber: 1g
- Protein: 2g
- Cholesterol: 30mg
Keywords: brownie cookies, chocolate cookies, dessert recipes, baking, gourmet cookies