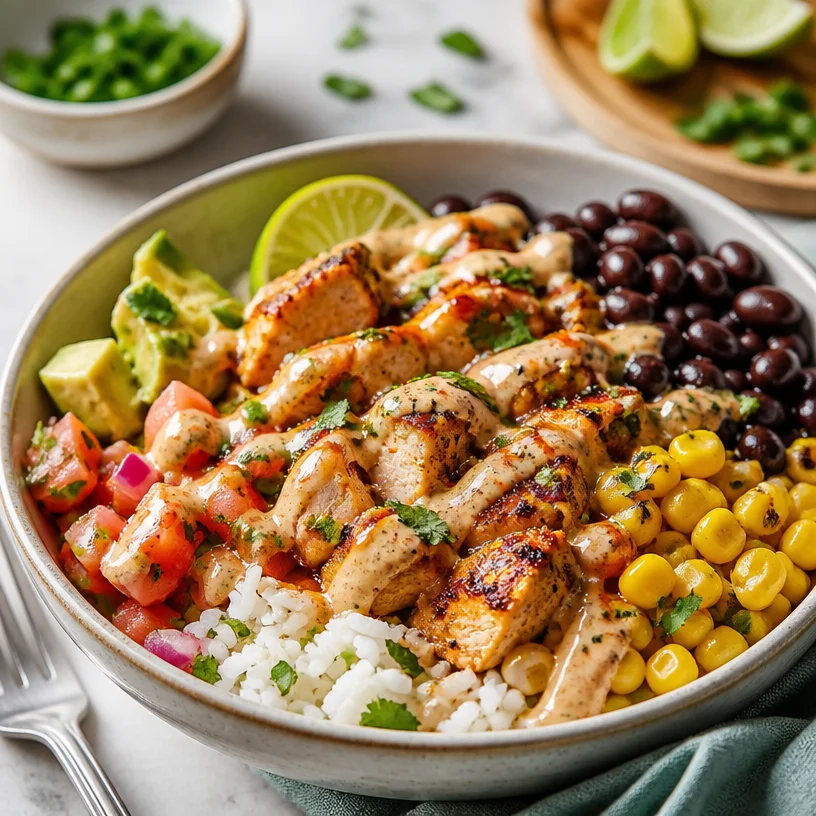
Minute Chicken Burrito Bowl: Simple, Flavorful Meal Prep
Chicken Burrito Bowl: A Fresh and Flavorful Delight
Welcome, fellow food lovers! Today, I’m inviting you into my kitchen to whip up a delicious Chicken Burrito Bowl that’s not just filling but also bursting with flavor! If you think eating clean means giving up on taste, I’m here to shatter that myth. Trust me, you’ll be excited to bring this bowl of goodness to your table.
When I think about burrito bowls, I can’t help but travel back in time to my first taste of one at a local food truck festival. The sizzling sound of chicken on the grill, the fresh aroma of cilantro-lime rice in the air, and the colorful array of toppings—it truly was a feast for both the eyes and the belly! That day sparked my love for healthy, fresh ingredients combined in delightful ways, and what emerged was the inspiration to create my own version of this classic dish.
So, put on your favorite apron, crank up some tunes, and let’s get ready to create a meal that’s not only nourishing but downright satisfying!
A Nostalgic Memory
One sunny afternoon, I found myself at the bustling farmer’s market, soaking in the vibrant sights and sounds. I stumbled upon a food stall that served the most amazing burrito bowls. The cook was a charismatic woman who shared her secret; it was all about the seasoning and fresh ingredients! I watched as she carefully grilled marinated chicken, garnishing it with freshly chopped cilantro and zesty lime. I left the market that day not just with a full belly but with a newfound passion for creative cooking and the magic of assembling flavors. That moment inspired me to blend fresh ingredients into my everyday meals, leading to countless delicious kitchen adventures.
Ingredients
Here’s what you need to create your Chicken Burrito Bowl—each ingredient adds its own flair to this mouthwatering dish!
-
Chicken Breast: Tender and lean, chicken breast is perfect for quick cooking. If you’re looking for a lighter option, you can substitute with turkey or plant-based protein, like tofu or tempeh.
-
Rice: I love using brown rice for its nutty flavor and added fiber, but feel free to swap it for white rice, quinoa, or cauliflower rice for a low-carb alternative.
-
Corn: Sweet, juicy corn adds a burst of sweetness. You can use fresh, frozen, or even canned corn (just rinse it out for extra freshness!).
-
Beans: Black beans are my go-to for their creamy texture and slightly earthy flavor. Pinto beans or chickpeas work well if you want to switch things up.
-
Spices: A blend of cumin, paprika, and chili powder brings warmth and depth to the chicken. Experiment with taco seasoning if you have it on hand!
-
Toppings: Don’t forget the fun stuff! Clear some space in your fridge for fresh cilantro, diced tomatoes, avocado, and a sprinkle of cheese or a dollop of sour cream.
Step-by-Step Instructions
Alright, let’s get cooking! Here’s how to bring your Chicken Burrito Bowl to life:
-
Prepare the Ingredients: Start by gathering all your ingredients. Rinse the rice under cold water until the water runs clear; this removes excess starch and keeps it fluffy. Dice your chicken breast into bite-sized pieces and season them with a blend of cumin, paprika, and chili powder. A pinch of salt goes a long way too!
-
Cook the Rice: In a pot, combine the rice with double the amount of water for cooking. Bring it to a boil, then reduce to a simmer, cover, and let it cook for about 40-45 minutes (for brown rice). The smell will be heavenly! For quicker cooking, you can use a rice cooker or grab some pre-cooked rice.
-
Sauté the Chicken: While the rice is cooking, heat up a skillet over medium-high heat and add a splash of olive oil. Once hot, throw in your seasoned chicken pieces. Cook them for about 6-8 minutes, stirring often, until they are golden brown and cooked through. The key is not to overcrowd the pan, as that can steam the chicken instead of giving it a nice sear.
-
Add the Corn and Beans: Once the chicken is nearly done, toss in the corn and black beans. Stir them around for about 2-3 minutes until everything is heated through. The vibrant colors will start to blend beautifully—that’s your cue to get excited!
-
Assemble the Burrito Bowl: Grab your bowl (make it a big one—you’ll want the room!), and start with a generous scoop of rice at the bottom. Top it with a pile of that delicious chicken, corn, and bean mixture.
-
Garnish with Fresh Toppings: This is where you can get creative! Sprinkle fresh cilantro, diced tomatoes, and avocado slices generously. If you’re a cheese lover, crumble some feta or sprinkle shredded cheese over the top. A squeeze of lime juice will brighten up those flavors even more!
Serving Suggestions
There’s something visually appealing about a well-assembled bowl! Layer your ingredients neatly—perhaps rice on the bottom, a colorful mix of chicken, corn, and beans, and a pop of freshness on top. If you’re feeling fancy, you can serve this delectable dish on a wooden board or in a vibrant bowl that showcases your colorful ingredients. Don’t forget those lime wedges on the side—they’re the cherry on top!
Recipe Variations
- Spicy Kick: Add some diced jalapeños or a drizzle of hot sauce for a spicy twist!
- Tropical Delight: Swap the regular toppings for mango salsa for a sweet and tangy paradise.
- Vegan Option: Use grilled portobello mushrooms instead of chicken for a satisfying texture without meat.
- Paleo-Friendly: Load up on veggies and substitute rice with riced cauliflower for a low-carb delight.
- Breakfast Bowl: Top with a fried egg and some salsa for a fun breakfast or brunch option!
Chef’s Notes
When I first started making burrito bowls, I played around with different spices and toppings, discovering new flavor combinations along the way. One of my friends suggested adding a drizzle of chipotle mayo, and I’ve never looked back! It’s those little inspirations that keep the kitchen fun and exciting. Remember, cooking is an adventure, and the best part is creating something that feels uniquely yours.
FAQs and Troubleshooting
-
Can I make this ahead of time? Absolutely! You can prepare the chicken, rice, and beans ahead and store them in separate containers in the fridge. Just assemble your bowls when it’s time to eat.
-
What if my rice is sticky? If your rice ends up sticky, it might be due to overcooking or using too much water. A quick fix is to let it sit covered for a few minutes, then fluff it with a fork.
-
Can I freeze leftovers? Yes! The chicken, corn, and beans freeze well. Just make sure everything is fully cooled before putting it in airtight containers.
-
How do I make this lower in calories? You can reduce the portion size of rice and opt for extra veggies instead. Feel free to skip high-calorie toppings like cheese and sour cream in favor of additional salsa or fresh veggies.
Nutritional Info (per serving) – Optional
- Calories: 450
- Protein: 35g
- Carbohydrates: 55g
- Fat: 15g
- Fiber: 10g
And there you have it! Your very own Chicken Burrito Bowl packed with flavor and health benefits. I hope this recipe sparks as much joy in your kitchen as it has in mine. Don’t hesitate to experiment, make it your own, and most importantly, have fun! Happy cooking! 🌟
PrintChicken Burrito Bowl

A fresh and flavorful Chicken Burrito Bowl that’s packed with ingredients and bursting with taste.
- Prep Time: 15 minutes
- Cook Time: 30 minutes
- Total Time: 45 minutes
- Yield: 4 servings 1x
- Category: Main Course
- Method: Sautéing
- Cuisine: Mexican
- Diet: Healthy
Ingredients
- 1 lb Chicken Breast, diced
- 1 cup Brown Rice
- 1 cup Corn (fresh, frozen, or canned)
- 1 cup Black Beans
- 1 tsp Cumin
- 1 tsp Paprika
- 1 tsp Chili Powder
- Salt to taste
- Fresh Cilantro, chopped
- Diced Tomatoes
- Avocado, sliced
- Shredded Cheese or Sour Cream
Instructions
- Prepare the Ingredients: Start by gathering all your ingredients. Rinse the rice under cold water until the water runs clear; this removes excess starch and keeps it fluffy. Dice your chicken breast into bite-sized pieces and season them with cumin, paprika, and chili powder. Add a pinch of salt!
- Cook the Rice: In a pot, combine the rice with double the amount of water. Bring it to a boil, then reduce to a simmer, cover, and let it cook for 40-45 minutes (for brown rice).
- Sauté the Chicken: Heat a skillet over medium-high heat and add a splash of olive oil. Once hot, add the seasoned chicken. Cook for 6-8 minutes until golden brown and cooked through.
- Add the Corn and Beans: Toss in the corn and black beans, and stir for about 2-3 minutes until heated through.
- Assemble the Burrito Bowl: Start with a scoop of rice at the bottom, top with chicken, corn, and beans.
- Garnish with Fresh Toppings: Sprinkle cilantro, diced tomatoes, and avocado on top. Add cheese or a squeeze of lime juice for extra flavor!
Notes
Feel free to get creative with toppings and spices. You can also prepare the ingredients ahead of time for quick assembly when it’s time to eat.
Nutrition
- Serving Size: 1 serving
- Calories: 450
- Sugar: 5g
- Sodium: 550mg
- Fat: 15g
- Saturated Fat: 4g
- Unsaturated Fat: 9g
- Trans Fat: 0g
- Carbohydrates: 55g
- Fiber: 10g
- Protein: 35g
- Cholesterol: 75mg
Keywords: Chicken, Burrito Bowl, Healthy, Easy Dinner, Mexican
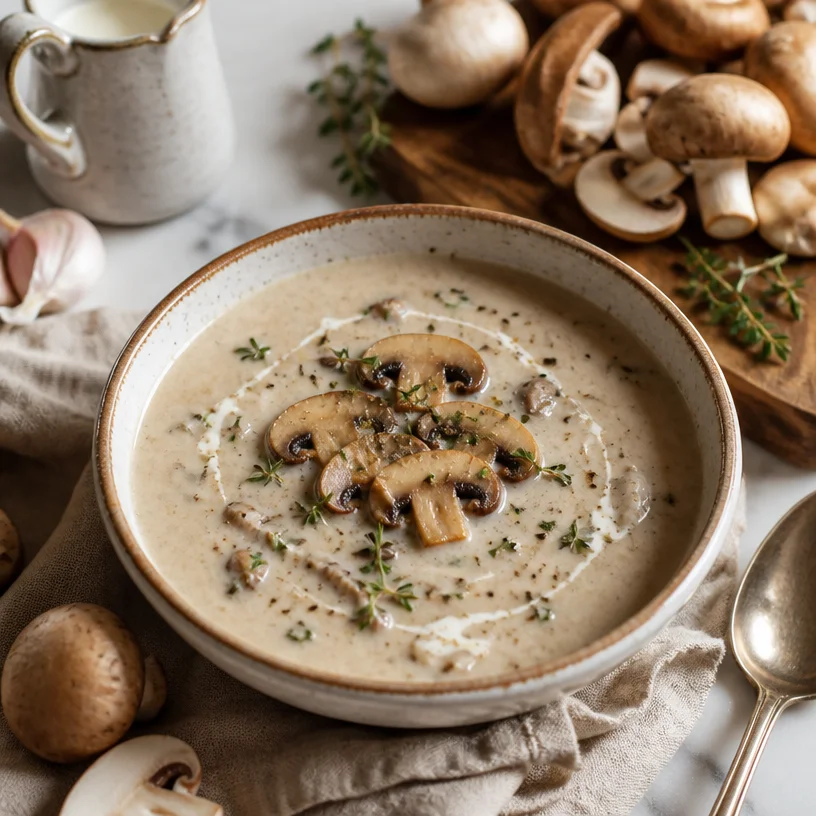
Creamy Mushroom Soup in 20 Minutes: Quick Weeknight Recipe
The Creamy Mushroom Soup That Warms the Soul
Welcome, food lovers! Today, I’m thrilled to share a recipe that brings back warm memories and cozy vibes—Creamy Mushroom Soup. Let’s face it, there’s something wonderfully satisfying about a bowl of rich, velvety soup that seems to hug you from the inside out. Whether you’re winding down after a long day or collecting your thoughts on a rainy afternoon, this soup is the ultimate comfort food that delivers all the feels and flavors.
Picture this: you’re curled up on the couch, a light drizzle dances against your window, and your kitchen is filled with the earthy aroma of sautéing mushrooms and onions. I can already hear the vegetables sizzling in the pan! This creamy masterpiece is not just a recipe; it’s a reminder of cherished moments spent in the kitchen with loved ones, blending simple ingredients into something genuinely enchanting.
A Trip Down Memory Lane
Ah, the first time I made Creamy Mushroom Soup! I was about ten years old, just beginning to explore the wondrous world of cooking. Armed with my mom’s oversized chef’s apron, I was determined to whip up something special for our family dinner. One afternoon, while rummaging through our kitchen, I stumbled upon a bag of mushrooms that had seen better days. Instead of tossing them out, I had an epiphany! Why not transform them into a comforting soup?
With a little help from my mom, I chopped, sautéed, and stirred, and soon enough, the kitchen was filled with a delectable aroma. When my family gathered around the table, their eyes lit up when I served my creation. That moment when they took their first spoonful is forever etched in my heart. It was my first culinary triumph, and I still make that same creamy mushroom soup today, adding my own twists, but always holding onto the spirit of that initial creation.
Ingredients You’ll Need
To whip up this magical soup, here’s what you’ll need:
-
Mushrooms (8 oz): Choose your favorite variety—button, cremini, or shiitake all work beautifully. If you’re looking for a deeper flavor, try a mix. Substitution tip: Dried mushrooms can be rehydrated and also used for a rich, umami flavor!
-
Onion (1 medium): A sweet or yellow onion will caramelize nicely, adding sweetness to the soup. Chef’s insight: For a sharper taste, use a red onion or shallots—just remember they can be a bit more pungent.
-
Heavy Cream (1 cup): This is what gives our soup that luscious, creamy texture. If you’re looking for a lighter option, half-and-half will work, or try coconut cream for a dairy-free twist!
-
Fresh Thyme (1 teaspoon): Thyme brings an earthy aroma and flavor that complements mushrooms perfectly. Additional tip: Dried thyme can be substituted; just use a fraction as dried herbs are more concentrated.
Step-by-Step Instructions
-
Prep Your Ingredients: Before you start cooking, make life easier by prepping your ingredients! Rinse your mushrooms, slice them thinly, and dice the onion. This is a crucial step that makes the cooking process smoother and more fun. A little chef hack: When chopping onions, keep a piece of bread in your mouth; it helps absorb the tear-inducing fumes!
-
Sauté the Aromatics: In a large pot over medium heat, add a splash of olive oil (about 2 tablespoons) and a pat of butter for extra flavor. Once the butter melts, sauté the diced onion until it’s translucent and fragrant—about 5 minutes. It’s the perfect time to show off your stirring skills! Stirring infuses the flavors and prevents the onions from browning too quickly.
-
Cook the Mushrooms: Add the sliced mushrooms to the pot, and sprinkle a pinch of salt. This salt will draw out moisture from the mushrooms, making for a juicy, savory soup. Let the mushrooms cook for around 10 minutes, stirring occasionally. You want them to be nice and brown. A little chef hack: Don’t overcrowd the pot! If you’re making a big batch, consider sautéing in batches to get that perfect golden-brown color.
-
Add Thyme and Broth: Once the mushrooms are beautifully browned, add in the fresh thyme. Give it a quick stir to release those lovely aromatic oils. Then, pour in around 4 cups of vegetable broth—homemade or store-bought works! It’s customizable—if you love a more intense flavor, feel free to add a splash of white wine before the broth.
-
Simmer and Blend: Bring everything to a gentle simmer. Let it cook uncovered for about 15 minutes to meld all those delicious flavors. After simmering, it’s time for a little blending magic! Use an immersion blender for a rustic texture (just whizz the soup to your desired consistency), or carefully transfer it to a countertop blender. Just be cautious—it’s hot!
-
Stir in Cream: Return your blended soup to the pot and stir in that luxurious heavy cream. Adjust your seasoning with salt and pepper to taste. Let it warm for a few more minutes until everything is heated through. A chef tip: If you want an extra splash of color and flavor, consider adding a squeeze of lemon or a few drops of truffle oil!
-
Garnish and Serve: Dish out your creamy mushroom soup into bowls—the world deserves to see those lovely textures! Add a sprinkle of fresh thyme or chives on top for a pop of color, and don’t forget to serve with crusty bread or crackers— a tasty sidekick that’s perfect for dipping!
Serving Suggestions
Serve this Creamy Mushroom Soup hot, garnished with fresh herbs and a drizzle of olive oil or a dollop of sour cream for an added touch. Pair it with a crunchy green salad or a side of garlic bread for a delightful meal. Either way, you’ll find yourself melting into pure comfort.
Recipe Variations
Let’s get creative! Here are some variations to keep things exciting:
-
Add Veggies: Toss in some spinach or kale for an extra nutrient boost! Steam them for a few moments before blending to integrate them smoothly.
-
Spicy Twist: For a kick, add a dash of red pepper flakes or some cayenne pepper while sautéing your onions.
-
Cheesy Mushroom Soup: Stir in some grated parmesan or cheddar cheese after blending for a creamy, cheesy touch. It adds depth and makes for a cozy option.
-
Herbed Wonder: Experiment with different herbs! Rosemary and sage pair beautifully with mushrooms.
-
Nutty Flavor: A splash of sherry or a sprinkle of toasted pine nuts as a topping can elevate the dish to gourmet status!
Chef’s Notes
This recipe is a classic for a reason! I’ve played around with it over the years—adding different herbs, experimenting with different kinds of cream, and even incorporating various mushrooms when I feel adventurous. Each time I make it, it evokes a sense of nostalgia that takes me back to that afternoon in my childhood kitchen, alongside my mom. Plus, I love that it’s simple enough for a beginner yet impressive enough for a dinner party. It has this beautiful versatility that allows everyone to make it their own!
FAQs and Troubleshooting
-
Why is my soup too thick?: If your soup turns out thicker than desired, don’t worry! Just add more broth or cream, stirring it until you reach your desired consistency.
-
What if my mushrooms are rubbery?: Overcooked mushrooms can turn rubbery. Ensure you cook them just until they are golden brown and soft. If you notice that happening, lower the heat or give them more space in the pan.
-
Can I leave out the cream?: Absolutely! For a lighter version, you can substitute with almond milk or cashew cream for the vegan option. Trust me; it’ll still be delicious.
-
How do I store leftovers?: Allow the soup to cool completely before transferring it to an airtight container. It will last about 3-4 days in the fridge or up to 3 months in the freezer. Just remember to reheat gently to maintain the creamy texture.
Nutritional Info (Optional)
This Creamy Mushroom Soup is not only delicious but packed with nutrients too! Here’s a quick breakdown (per serving):
- Calories: ~250
- Total Fat: 15g
- Saturated Fat: 8g
- Carbohydrates: 20g
- Fiber: 2g
- Protein: 4g
And there you have it, my lovely food enthusiasts! Your guide to creating a dish that speaks not just to the belly but to the heart. I can’t wait for you to dive into this recipe and share your own kitchen stories. Remember, cooking should always be fun, full of laughter, and sometimes a little bit messy. Happy cooking, and enjoy every creamy spoonful!
PrintCreamy Mushroom Soup

A rich and velvety soup that brings comfort and warmth with every spoonful, perfect for cozy evenings.
- Prep Time: 15 minutes
- Cook Time: 30 minutes
- Total Time: 45 minutes
- Yield: 4 servings 1x
- Category: Soup
- Method: Stovetop
- Cuisine: American
- Diet: Vegetarian
Ingredients
- 8 oz Mushrooms (button, cremini, or shiitake)
- 1 medium Onion (sweet or yellow)
- 1 cup Heavy Cream (or half-and-half/coconut cream)
- 1 teaspoon Fresh Thyme (or dried thyme)
- Vegetable broth (about 4 cups)
- 2 tablespoons Olive Oil
- Butter (for sautéing)
- Salt and Pepper (to taste)
Instructions
- Prep your ingredients: Rinse and slice mushrooms, and dice the onion.
- Sauté the aromatics: In a large pot, heat olive oil and butter, then add onions and cook until translucent.
- Cook the mushrooms: Add sliced mushrooms and salt, cooking until browned.
- Add thyme and broth: Stir in thyme and pour in vegetable broth.
- Simmer and blend: Bring to a simmer for 15 minutes then blend to your desired texture.
- Stir in cream: Return soup to heat and add heavy cream.
- Garnish and serve: Serve with fresh herbs and a side of bread or crackers.
Notes
For variations, consider adding spinach, red pepper flakes, or cheeses.
Nutrition
- Serving Size: 1 bowl
- Calories: 250
- Sugar: 3g
- Sodium: 500mg
- Fat: 15g
- Saturated Fat: 8g
- Unsaturated Fat: 5g
- Trans Fat: 0g
- Carbohydrates: 20g
- Fiber: 2g
- Protein: 4g
- Cholesterol: 40mg
Keywords: mushroom soup, creamy soup, comfort food, vegetarian soup
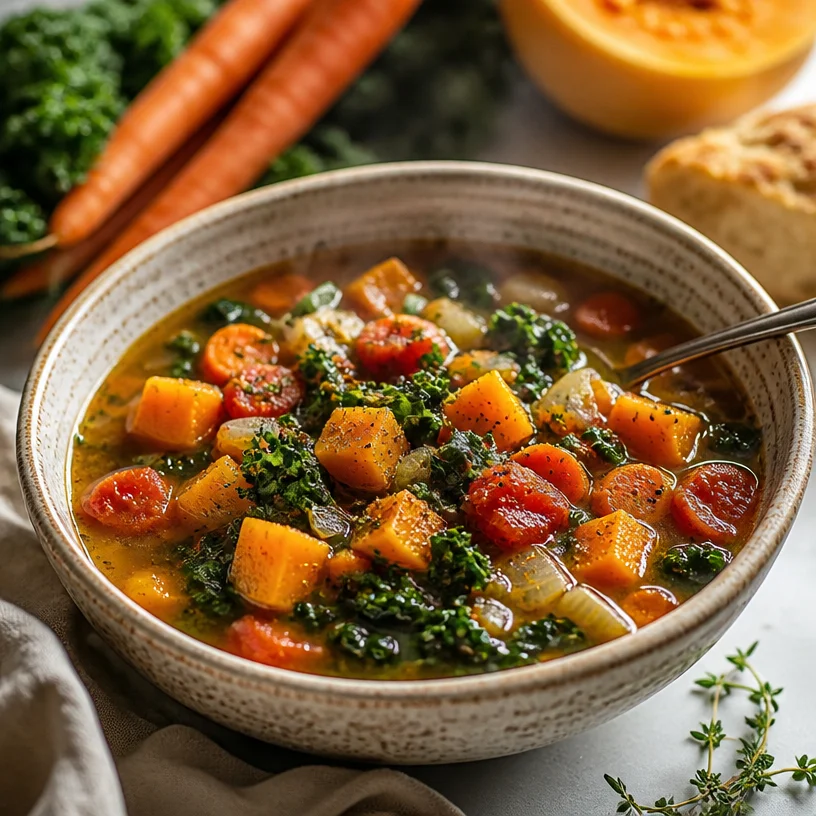
Minute Harvest Vegetable Soup for Weeknight Dinners
Harvest Vegetable Soup: A Warm Bowl of Comfort
Welcome, fellow food lovers! Today, we’re diving into a cozy, colorful dish that’s perfect for those crisp fall nights—Harvest Vegetable Soup. When the leaves turn golden and the air gets that delightful chill, there’s nothing quite like a warm bowl of soup to wrap your hands around and fill your belly. It’s comfort food at its finest, and my goal today is to share with you not just a recipe, but a little bit of love and warmth that comes from cooking.
As the days get shorter and the nights longer, the hustle and bustle of life can feel overwhelming. But cooking can be a soothing retreat from it all, and this harvest vegetable soup is just the answer. Packed with nourishing vegetables, herbs, and spices, it’s deliciously satisfying and easy to whip up, even on your busiest days. There’s something magical about transforming a handful of fresh ingredients into something hearty and soul-warming, and I can’t wait to share the step-by-step process with you. Don’t worry if you’re new to cooking; I’ll be right here to guide you through every chop and stir!
Grab your aprons and your favorite chopping knife, and let’s get started on crafting a bowl of goodness that celebrates the beauty of fall produce. Trust me, you’re going to want to make a double batch for meal prep—you’ll thank yourself later when you’re reaching for a quick, wholesome meal that doesn’t skimp on flavor!
A Trip Down Memory Lane
Let me take you back to my childhood kitchen, where the comforting aroma of soup simmering on the stove was a daily ritual. My grandmother had this magical touch; she could turn the simplest ingredients into a feast for the senses. I remember rushing home from school, the scent of roasted squash and fresh herbs weaving through the air, wrapping around me like an embrace.
One fall afternoon, I wandered into the kitchen, my fingers coated in autumn leaves after playing outside. I spotted her chopping vibrant carrots and rich, golden squash, their colors so bright they almost sparkled. There was kale too—a leafy green that I wasn’t particularly fond of at the time. But under her expert hands, everything melded together, creating something more than just a soup; it was a celebration of the season, a family tradition, and a way to connect with nature.
We’d gather around the table as the soup bubbled away, dipping our bread into steaming bowls, sharing stories, giggles, and countless memories. Even now, as I stand in my kitchen, cooking this harvest vegetable soup, I can feel her spirit guiding me. So, let’s create those memories together. Are you ready?
Ingredients
Here’s what you’ll need to make this comforting harvest vegetable soup:
-
Squash (butternut or acorn are great choices)
- Chef Insight: Squash brings a subtle sweetness and creaminess to the soup. If you can’t find any, sweet potatoes make a fantastic substitute!
-
Carrots (fresh, vibrant, and sweet)
- Substitution Tip: You can use parsnips for a slightly different flavor profile or add some flavor with sweet bell peppers!
-
Kale (the ultimate leafy green)
- Quick Insight: Kale adds a hearty texture and loads of nutrients. If you’re not a kale fan, spinach or swiss chard can be used instead!
-
Tomatoes (canned diced tomatoes work well, or fresh if they’re in season)
- Substitution Tip: For a richer flavor, try using roasted tomatoes for a deeper taste or even sun-dried tomatoes for a unique twist.
-
Vegetable broth (store-bought or homemade)
- Chef Insight: Broth is the soul of your soup! Feel free to use chicken broth for a non-vegetarian option, or even water if you’re in a pinch, although it might lack depth.
-
Onion (for that base flavor)
- Tip: Yellow or white onions work best; they add a mild sweetness that balances the earthy vegetables.
-
Garlic (fresh, minced or crushed)
- Chef Secret: Garlic infuses the soup with warmth and depth. Add it later in the cooking process to keep that fresh flavor!
-
Olive oil (for sautéing)
- Tip: Use high-quality extra virgin olive oil for added richness.
-
Herbs (thyme, rosemary, and a bay leaf)
- Substitution Tip: Dried herbs can work in a pinch, but fresh herbs elevate the dish. Experiment with others like parsley or oregano according to your taste preference!
-
Salt and pepper (to taste)
- Chef Hint: Season in layers—add a pinch while sautéing and adjust before serving.
Step-by-Step Instructions
Let’s get down to the nitty-gritty! Follow these steps, and soon enough, your kitchen will smell heavenly.
-
Prep the Vegetables: Start by washing all your veggies thoroughly. This is a great time to channel your inner chef and get those knife skills polished! Chop the squash, carrots, and onion into bite-sized pieces, and roughly chop the kale. Don’t forget to mince the garlic—tiny pieces release tons of flavor!
-
Sauté the Base:
- In a large pot, heat about a tablespoon of olive oil over medium heat.
- Toss in the chopped onions and sauté until they’re soft and translucent, about 5 minutes.
- Tip: Make sure to stir frequently to avoid burning!
-
Add Garlic & Carrots:
- Once the onions are ready, toss in the minced garlic. Let that sizzle for about 30 seconds until fragrant (keep an eye on it so it doesn’t burn!).
- Add the carrots next and sauté for another 3-4 minutes. This helps to sweeten them up even more.
-
Incorporate the Squash:
- Now, it’s time to introduce the star ingredient—squash! Add it to the pot, stirring to combine everything.
- Chef Hack: This is a great moment to season with a pinch of salt and pepper! It’ll help to draw out moisture from the veggies.
-
Pour in the Broth:
- Add in your vegetable broth (or water if using), followed by the canned tomatoes. Give it a good stir and bring the mixture to a gentle boil.
- Tip: If you like a thicker soup, you can add a little less broth or let it simmer longer to reduce.
-
Add Kale and Herbs:
- Once boiling, reduce the heat to a simmer and toss in the chopped kale, thyme, and rosemary along with the bay leaf.
- Let everything simmer away for about 20-25 minutes, allowing the flavors to mingle and the veggies to soften beautifully.
-
Taste and Adjust:
- Before serving, take out the bay leaf (it’s done its job!). Now’s the time to sample your soup and adjust seasoning if necessary. Maybe a little more salt or a dash more pepper?
- Chef Insight: A squeeze of fresh lemon juice at this stage can brighten the entire dish—definitely worth a try!
-
Serve It Up:
- Ladle your gorgeous harvest vegetable soup into bowls. You can garnish with a drizzle of olive oil or a sprinkle of fresh herbs if you’re feeling fancy!
Serving Suggestions
Serving soup is an art! I love to present this harvest vegetable soup with a side of crusty whole-grain bread, perfect for dipping. You can also pair it with a light salad for a delightful contrast. For those chilly evenings, consider serving it in rustic bowls to bring that cozy vibe home.
Recipe Variations
Why not shake things up a bit? Here are some fun twists you can try:
- Spicy Kick: Add a pinch of red pepper flakes or a diced jalapeño to amp up the heat!
- Creamy Texture: Blend a portion of the soup with an immersion blender for a creamy consistency (add a splash of cream or coconut milk for richness).
- Protein Boost: Toss in some canned beans (like white beans or chickpeas) for added protein and texture.
- Grain Add-In: For more heartiness, add cooked quinoa or barley before serving!
- Herb Swaps: Try using fresh basil or cilantro for a fresh herbaceous flavor.
Chef’s Notes
Creating this soup has been a labor of love! Over time, I’ve played around with different vegetable combinations and spices. What started as a basic recipe has morphed into a delightful collection of seasonal flavors. I once had a “what’s in my fridge” day and added some leftover corn and celery—I ended up loving it so much that it has become a staple! Cooking is all about experimentation and making it your own, after all.
FAQs and Troubleshooting
Q: My soup turned out too salty. What can I do?
A: If your soup is too salty, add a diced potato to simmer in the soup for a bit. It absorbs excess salt. Just remember to remove it before serving!
Q: Can I freeze this soup?
A: Absolutely! This soup freezes beautifully. Just let it cool completely before transferring to airtight containers. It should last about 3 months in the freezer.
Q: How do I store leftovers?
A: Let the soup cool down, then store it in the fridge in an airtight container for up to 5 days.
Q: Can I use frozen vegetables?
A: Yes, frozen vegetables work great in this recipe! Just throw them in and adjust your cooking times as necessary since they’re already prepped.
Nutritional Info
(If this were a real post, I would provide nutritional info. Just a head’s up to calculate calories, fiber, protein, etc., based on the ingredients used.)
So there you have it, my delightful Harvest Vegetable Soup! I hope you feel inspired to whip up this nourishing dish and create your own cozy moments in the kitchen. Enjoy every spoonful, and remember, it’s all about good food and good company! Share this recipe with a friend, and let’s spread the warmth of home-cooked goodness together!
PrintHarvest Vegetable Soup

Warm and comforting, this Harvest Vegetable Soup is packed with nourishing vegetables, herbs, and spices, perfect for cozy fall nights.
- Prep Time: 15 minutes
- Cook Time: 30 minutes
- Total Time: 45 minutes
- Yield: 4 servings 1x
- Category: Soup
- Method: Simmering
- Cuisine: American
- Diet: Vegetarian
Ingredients
- 1 squash (butternut or acorn)
- 2 carrots, chopped
- 2 cups kale, chopped
- 1 can diced tomatoes (or fresh if in season)
- 4 cups vegetable broth
- 1 onion, chopped
- 3 cloves garlic, minced
- 2 tablespoons olive oil
- 1 teaspoon thyme
- 1 teaspoon rosemary
- 1 bay leaf
- Salt and pepper to taste
Instructions
- Prep the vegetables by washing and chopping the squash, carrots, and onion, and roughly chopping the kale.
- Heat olive oil in a large pot over medium heat, then sauté onions until soft, about 5 minutes.
- Add minced garlic and sauté for 30 seconds until fragrant.
- Incorporate the carrots and sauté for another 3-4 minutes.
- Stir in the squash and season with salt and pepper.
- Pour in the vegetable broth and add the diced tomatoes; bring to a gentle boil.
- Reduce heat to a simmer and add kale, thyme, rosemary, and bay leaf; simmer for 20-25 minutes.
- Taste and adjust seasoning before serving. Remove bay leaf.
- Serve hot, garnished with olive oil or fresh herbs.
Notes
This soup can be frozen for up to 3 months. Great with crusty bread or a light salad.
Nutrition
- Serving Size: 1 serving
- Calories: 250
- Sugar: 7g
- Sodium: 600mg
- Fat: 8g
- Saturated Fat: 1g
- Unsaturated Fat: 6g
- Trans Fat: 0g
- Carbohydrates: 38g
- Fiber: 6g
- Protein: 8g
- Cholesterol: 0mg
Keywords: vegetable soup, comfort food, healthy soup, fall recipes