Celebrate Independence Day with Festive Chocolate Covered Strawberries
When it comes to 4th of July festivities, nothing screams summer quite like a table laden with vibrant fruits and colorful treats. This year, I’m taking the celebration to the next level with a simple, yet stunning dessert: chocolate-covered strawberries! These berries are not only a delightful treat but they also embody the spirit of independence with their red, white, and blue decor—perfect for your summer gatherings or backyard barbecues.
What makes these chocolate-covered strawberries truly special isn’t just their picture-perfect presentation; it’s the fun that comes with making them. I have fond memories of preparing festive desserts with my family as a kid. I remember my mom melting chocolate in a double boiler while we’d eagerly await our turn to dip the strawberries in that luscious goodness. The kitchen would be filled with laughter and sweet scents, while our creativity flowed as we decorated them—tossing sprinkles like confetti. Those joyous moments are what inspired this recipe. They perfectly encapsulate the flavors of summer, as well as the spirit of togetherness. So let’s dive into this simple, healthy treat that will elevate your holiday gathering.
Here’s the beauty of chocolate-covered strawberries: they’re incredibly versatile and can be tailored to fit any celebration, but when they sport the colors of our flag? Pure magic! Your guests will love them, and you’ll love how easy they are to whip up. So, roll up your sleeves, and let’s savor the spirit of summer with these gorgeous, sweet bites!
Ingredients
To create the most delectable 4th of July chocolate-covered strawberries, you’ll need the following ingredients:
-
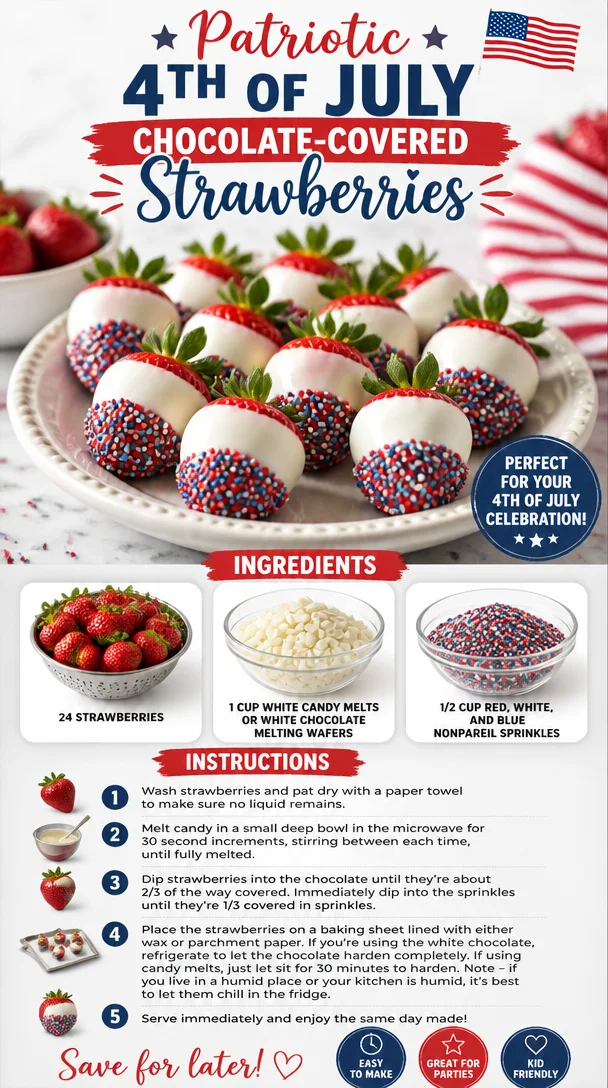
24 strawberries
Fresh strawberries are a must! Look for ones that are bright red, plump, and free of blemishes. If strawberries aren’t in season, you can substitute with other berries like blueberries or raspberries for their vibrant colors. Just remember that the dipping process may vary slightly based on the berry you use. -
1 cup white candy melts or white chocolate melting wafers
These sweet, creamy melts make for an easy and tasty coating. White chocolate can be a little finicky, so the melting wafers tend to provide a smoother finish that’s easier to work with. If you’re feeling extra adventurous, you can substitute with milk chocolate or dark chocolate for a twist on flavor. -
1/2 cup red, white, and blue nonpareil sprinkles
Sprinkles add that festive touch we all adore! Feel free to switch things up with any colored sprinkles, or even coconut flakes for a tropical vibe. Just keep in mind that coconut flakes won’t have the same colorful effect but will definitely bring some texture.
Step-by-Step Instructions
Ready to create some mouthwatering treats? Let’s get started! Here’s a step-by-step guide to making your chocolate-covered strawberries:
-
Prep Your Strawberries
Start by rinsing your strawberries gently under cold water. Pat them dry with a paper towel, making sure they’re completely dry before dipping. One little chef hack—avoid dipping wet strawberries in chocolate as it can lead to clumping and uneven coating. A dry berry means smooth chocolate bliss! -
Melt the Candy Melts
In a microwave-safe bowl, pour in your white candy melts or chocolate wafers. Heat in the microwave for 30 seconds at a time, stirring after each interval until smooth and completely melted. It’s crucial to keep an eye on your mixture—burnt chocolate is a no-go! If you’re using a double boiler, place the chocolate over simmering water and stir until melted. If it starts to seize, add a teaspoon of coconut oil or shortening to regain that silky texture. -
Dip the Strawberries
Hold a strawberry by its leafy green top and dip it into the melted chocolate, swirling gently to coat it evenly. Let the excess chocolate drip back into the bowl. It’s all about that perfect coating! If you find the chocolate thickening while you dip, just reheat it for a few seconds. -
Add the Sprinkles
Now comes the fun part! Before the chocolate sets, sprinkle your red, white, and blue nonpareils over the chocolate-covered strawberries. This is where you can really let your creativity shine. Don’t be shy! The more sprinkles, the better. You could even set up an assembly line and have your friends or kids help out. -
Let Them Set
Place your decorated strawberries on a baking sheet lined with parchment paper. Once all the strawberries are dipped and sprinkled, pop them into the fridge for about 30 minutes. This will help the chocolate firm up nicely, resulting in that satisfying crunch when you bite in.
Serving Suggestions
These chocolate-covered strawberries are not just delicious; they’re a visual delight too! When it’s time to serve, arrange them artfully on a platter or cake stand. You can even line them up in a flag pattern for that extra festive touch. For added elegance, you could drape a few mint leaves around the strawberries for a pop of green. Trust me, your guests will be snapping pictures before digging in!
Recipe Variations
Looking to add your unique twist? Here are a few variations to consider:
-
Chocolate Drizzle: After setting, melt some dark or milk chocolate and drizzle it over the white chocolate-covered strawberries for an elegant touch.
-
Nutty Delight: After dipping in chocolate, roll the strawberries in crushed nuts or shredded coconut for extra texture and flavor.
-
Flavor Explosion: Mix a few drops of mint or almond extract into your melted chocolate for a different flavor profile that will wow your guests.
-
Caramel Surprise: Before dipping in chocolate, drizzle melted caramel over the strawberries to offer a sweet surprise.
-
Fruit Medley: Experiment with other fruits like pretzel rods or bananas! Dip them in chocolate and decorate them in the same festive way.
Chef’s Notes
Over the years, my journey with chocolate-covered strawberries has evolved—from the clumsy, chocolate-smeared hands of childhood to being a weekend favorite at summer parties. I once had a mishap where I completely overlooked a berry’s wetness and ended up with a chocolate blob instead of that glossy finish I wanted. Instead of feeling defeated, we turned it into a game—how messy could we get while making desserts? That’s the joy of cooking: it’s full of surprises and laughter.
These strawberries represent more than just a treat. They symbolize good times, sharing, and delicious adventures in the kitchen with family and friends. So even if they don’t turn out picture-perfect, remember: it’s all about the fun you have along the way!
FAQs and Troubleshooting
-
What if my chocolate thickens or seizes?
This often happens when it overheats. If it thickens, try stirring in a little coconut oil or shortening to smooth it out. For seized chocolate, you can sometimes salvage it with a bit of cream, adding it slowly until you restore that melt-in-your-mouth texture. -
Can I use frozen strawberries?
It’s best to use fresh strawberries for this particular recipe, as frozen strawberries can release water and lead to a messy dipping situation. If you only have frozen on hand, thaw them thoroughly and dry them before dipping. -
How can I store leftover chocolate-covered strawberries?
Store them in an airtight container in the refrigerator for up to 2 days. Keep them in a single layer if possible; layering can lead to squished chocolate on the bottoms. If you notice any condensation, it might be best to let them sit at room temperature for a little while before serving. -
What if I can’t find the right sprinkles?
No worries! You can create your colorful mix using any sprinkles you have—just think outside the box. Crushed candies, colored sugar, or even edible glitter can work wonders!
Nutritional Info
While dessert isn’t usually a focus on nutrition, it’s good to know something like chocolate-covered strawberries has its advantages. Strawberries are rich in vitamins, especially Vitamin C, and antioxidants, and they’re low in calories. Keep in mind that the chocolate and sprinkles will add some sweetness and calories, so enjoy them in moderation!
So there you have it—a delicious recipe for chocolate-covered strawberries that will make your 4th of July celebration even more memorable! With minimal effort, you can impress your friends and family with this stunning dessert that captures the spirit of summer. Happy eating, and may your holiday be filled with laughter and joy!
PrintFestive Chocolate Covered Strawberries

Celebrate Independence Day with these vibrant and delicious chocolate-covered strawberries, perfect for summer gatherings.
- Prep Time: 15 minutes
- Cook Time: 10 minutes
- Total Time: 25 minutes
- Yield: 4 servings 1x
- Category: Dessert
- Method: No-Cook
- Cuisine: American
- Diet: Vegetarian
Ingredients
- 24 strawberries
- 1 cup white candy melts or white chocolate melting wafers
- 1/2 cup red, white, and blue nonpareil sprinkles
Instructions
- Prep your strawberries by rinsing gently under cold water and patting dry.
- Melt the candy melts in a microwave-safe bowl, heating in 30-second intervals, stirring until smooth.
- Dip the strawberries into the melted chocolate, holding by the leafy green tops.
- Add the sprinkles over the chocolate-covered strawberries before the chocolate sets.
- Let them set on a lined baking sheet in the fridge for about 30 minutes.
Notes
Experiment with different types of chocolate and toppings, such as crushed nuts or flavored extracts.
Nutrition
- Serving Size: 1 serving
- Calories: 150
- Sugar: 20g
- Sodium: 30mg
- Fat: 7g
- Saturated Fat: 4g
- Unsaturated Fat: 2g
- Trans Fat: 0g
- Carbohydrates: 20g
- Fiber: 2g
- Protein: 1g
- Cholesterol: 0mg
Keywords: chocolate-covered strawberries, festive dessert, 4th of July, summer treats, easy dessert