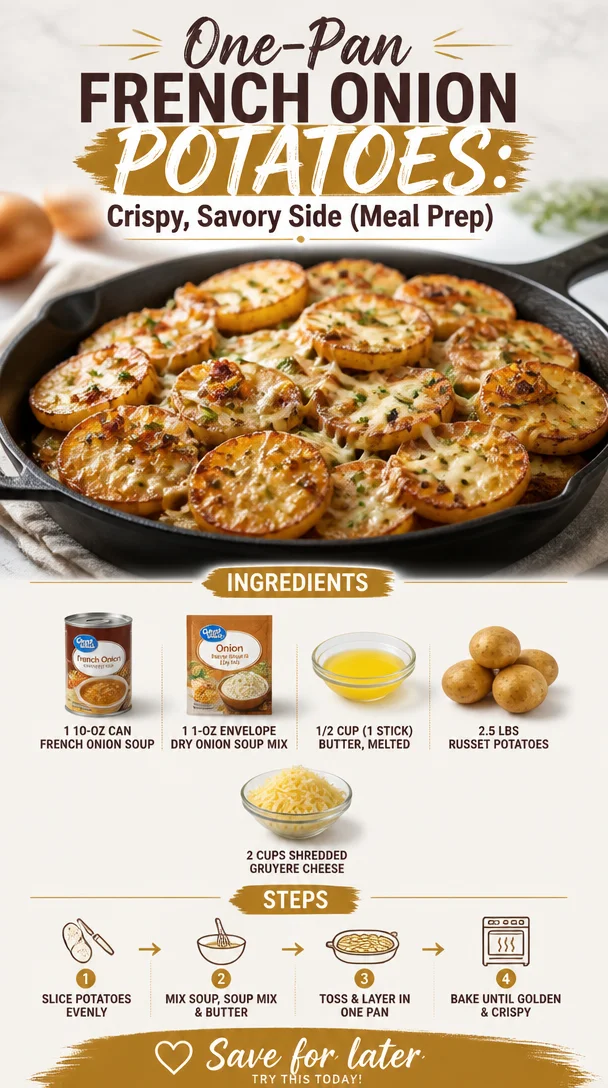
One-Pan French Onion Potatoes: Crispy, Savory Side (Meal Prep)
Indulge in Comfort: Cheesy French Onion Potatoes Recipe
Welcome to the savory world of French Onion Potatoes—a dish that feels like a warm hug on a chilly evening. If you’re a fan of rich flavors and comforting textures, then you’re in for a mouthwatering experience! I’m Ava Carter, and today we’re diving into a recipe that will not only tantalize your taste buds but also fill your home with an irresistible aroma. Who can resist the symphony of sweet onions, melted cheese, and tender potatoes?
French Onion Potatoes are a delightful fusion of two classic favorites: creamy potatoes and the robust taste of French onion soup. This dish embodies everything I believe in about food: it should be real, satisfying, and made with love. I can already picture the smiles on everyone’s faces when they take the first bite. So, whether you’re gearing up for a cozy family dinner or prepping for a potluck, these cheesy delights are sure to steal the spotlight.
Let’s embark on this culinary journey together. Grab your apron and chef’s hat (even if it’s just for fun!), and let’s get cooking. This recipe doesn’t require any fancy equipment—just your trusty oven, a few ingredients, and a whole lot of love.
A Trip Down Memory Lane
Thinking about French onion potatoes takes me back to my childhood kitchen, where my little hands would be involved in every cooking adventure my mother embarked on. She had a special love for hearty dishes, especially ones that made the house smell amazing. One snowy evening, we decided to make something special—a recipe she had come across that transformed simple potatoes into a cheesy, savory masterpiece.
As we peeled and chopped the russet potatoes together, she told me stories of her own childhood, sharing tales filled with laughter and love. By the time we pulled the bubbling tray of French onion potatoes out of the oven, the air was thick with anticipation. The moment we served it, the cheese was perfectly golden, and the aroma wafted through the house, drawing everyone to the table.
Those moments were more than just meal prep; they were memories, laughter, and the magic that food can create. Now, every time I make this dish, I’m reminded of the warmth of family and the joy of sharing good food. Let’s dive into making your own batch of nostalgia!
Ingredients
Here’s what you’ll need for these scrumptious French Onion Potatoes:
-
10-oz can French onion soup: This hearty base delivers the classic flavors we love without needing to simmer onions for hours. If you’re looking for a vegetarian option, some brands offer veggie-based French onion soups!
-
1-oz envelope dry onion soup mix: This little packet is packed with flavor magic! You can also make your own version at home by blending onion powder, garlic powder, and dried herbs.
-
1/2 cup (1 stick) butter, melted: Butter brings richness and depth to this dish. For a lighter option, you can substitute with olive oil or a plant-based butter.
-
2.5 lbs russet potatoes: These starchy gems are perfect for baking due to their high starch content. If you’d like a different texture, you can use Yukon gold potatoes, which are creamier.
-
2 cups shredded gruyere cheese: The star player! Gruyere offers a nutty, rich flavor that complements the dish beautifully. If you’re feeling adventurous, feel free to mix in some mozzarella or sharp cheddar for an extra cheesy experience.
Step-by-Step Instructions
Ready to get your kitchen filled with delicious smells? Here’s how to create your French Onion Potatoes!
-
Preheat Your Oven: Start by preheating your oven to 375°F (190°C). This ensures that your potatoes will bubble and brown beautifully when they meet the heat.
-
Prepare Your Potatoes: Take those russet potatoes and give them a good scrub under cold water. There’s no need to peel—leave the skins on for extra nutrition and texture! Cut each potato into thin slices, about 1/4 inch thick. The more uniform the slices, the better they’ll cook together. Pro tip: If you have a mandoline slicer, now’s the time to use it!
-
Melt the Butter: In a small pot or microwave-safe bowl, melt the butter until bubbling. This step brings out the wonderful flavor of butter while ensuring your potatoes don’t stick together.
-
Mix the Soups and Spices: In a large bowl, combine the can of French onion soup and the dry onion soup mix. Stir in the melted butter, ensuring it’s well incorporated. This mixture is the heart of the dish, giving it that signature flavor punch.
-
Layer the Potatoes: Grab a 9×13 inch baking dish and start layering those potato slices. Begin by placing a third of the potatoes at the bottom, followed by a layer of the soup mixture, and then a sprinkle of gruyere cheese. Repeat this process two more times, finishing with a generous layer of cheese on top.
-
Bake, Bake, Bake: Cover your dish with aluminum foil, making sure it’s tightly sealed. Pop it in the oven and let it bake for 30 minutes. This allows the potatoes to cook through. After 30 minutes, remove the foil and bake for an additional 15-20 minutes until the top is golden and bubbling.
-
Check for Doneness: The potatoes should be tender when pierced with a fork. If they need a little more time, don’t hesitate to pop them back in for a few more minutes.
-
Serve and Enjoy: Let the dish sit for a few minutes to settle, then scoop out a portion and get ready to savor those creamy, cheesy bites. The aroma alone will have everyone flocking to the dining table!
Serving Suggestions
Plate this dish with a simple green salad or some roasted veggies on the side to balance out the richness of the potatoes. A light drizzle of olive oil and a sprinkle of fresh herbs can elevate the presentation. Don’t shy away from adding a dollop of sour cream or a sprinkle of chives on top for a gourmet touch!
Recipe Variations
Feel free to customize your French Onion Potatoes to suit your taste or dietary preferences:
-
Add Protein: Layer in some cooked crumbled bacon or shredded chicken for a heartier option.
-
Veggie Boost: Mix in some sautéed mushrooms or spinach to add colorful veggies to the mix.
-
Spice It Up: For some kick, toss in a pinch of red pepper flakes or a touch of smoked paprika for smoky flavor.
-
Dairy-Free: Swap the butter for olive oil and use a dairy-free cheese blend to make this dish suitable for lactose intolerant friends.
-
Gluten-Free: Ensure your onion soup mix is gluten-free (there are plenty of options on the market!), and you’re good to go!
Chef’s Notes
Over the years, I’ve had a blast experimenting with this recipe. What started as a nostalgic winter dish has transformed into a crowd-pleaser for every season. I remember a summer potluck where I presented this dish with a twist—I used smoked Gouda instead of gruyere, and let me tell you, it was a hit! It’s a great reminder that cooking is all about being adventurous and making it your own.
FAQs and Troubleshooting
Q: Can I make this dish ahead of time?
A: Yes! You can prepare it a day in advance, cover it tightly with foil, and refrigerate. Just add a few extra minutes to the baking time when you’re ready to cook it.
Q: What should I do if my potatoes are still hard after cooking?
A: If your potatoes aren’t tender after the initial 30 minutes, cover them with the foil and check them every 5 minutes until they’re soft. The baking time can vary depending on how thickly you sliced them.
Q: Can I freeze leftovers?
A: Absolutely! Just be sure to let the dish cool completely before transferring it to an airtight container. It’ll keep in the freezer for up to three months—when you’re ready, thaw it overnight in the fridge and reheat!
Q: How can I make this dish spicier?
A: Feel free to toss in some diced jalapeños or a sprinkle of cayenne pepper to infuse some heat!
Nutritional Info
While I believe in enjoying food that fuels and delights, let’s not forget the importance of balance. Each serving of French Onion Potatoes is rich, comforting, and can easily be lightened up with serving sizes or side choices.
And there you have it, friends! Your journey to mastering Cheesy French Onion Potatoes starts now. I encourage you to gather your loved ones around the table and enjoy this dish, making memories as rich and flavorful as the food itself. Happy cooking!
PrintCheesy French Onion Potatoes

A comforting dish that combines the rich flavors of French onion soup with creamy, cheesy potatoes.
- Prep Time: 15 minutes
- Cook Time: 45 minutes
- Total Time: 60 minutes
- Yield: 4 servings 1x
- Category: Main Course
- Method: Baking
- Cuisine: French
- Diet: Vegetarian
Ingredients
- 1 (10-oz) can French onion soup
- 1 (1-oz) envelope dry onion soup mix
- 1/2 cup (1 stick) butter, melted
- 2.5 lbs russet potatoes, sliced
- 2 cups shredded gruyere cheese
Instructions
- Preheat your oven to 375°F (190°C).
- Prepare the russet potatoes by scrubbing them under cold water and slicing into 1/4 inch thick slices.
- Melt the butter in a pot or microwave until bubbling.
- Mix the French onion soup with the dry onion soup mix and melted butter in a large bowl.
- Layer a third of the potato slices in a baking dish, followed by the soup mixture and a sprinkle of cheese; repeat twice more.
- Bake covered with foil for 30 minutes, then remove foil and bake for an additional 15-20 minutes until golden.
- Check for doneness with a fork.
- Serve and enjoy your cheesy, creamy potatoes!
Notes
Feel free to customize with protein or veggies. For a lighter option, substitute butter with olive oil.
Nutrition
- Serving Size: 1 serving
- Calories: 350
- Sugar: 5g
- Sodium: 400mg
- Fat: 12g
- Saturated Fat: 4g
- Unsaturated Fat: 6g
- Trans Fat: 0g
- Carbohydrates: 45g
- Fiber: 3g
- Protein: 15g
- Cholesterol: 30mg
Keywords: cheesy potatoes, French onion, comfort food, vegetarian recipe
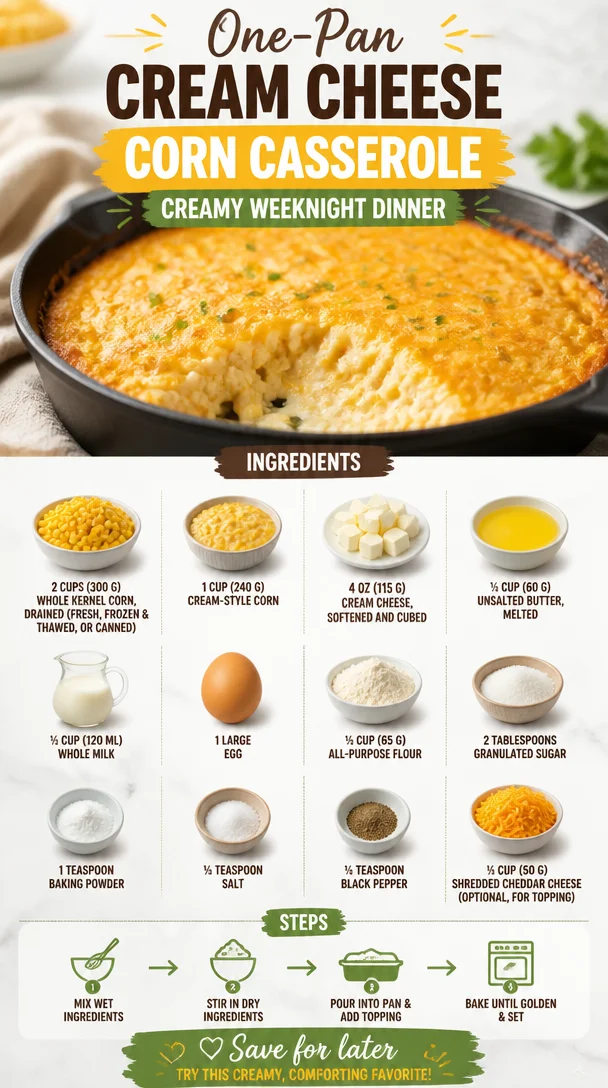
One-Pan Cream Cheese Corn Casserole: Creamy Weeknight Dinner
The Creamy Comfort of Cream Cheese Corn Casserole
Welcome back, food lovers! Today, we’re diving into a dish that holds a special place in my heart—the comforting, creamy, and just plain irresistible Cream Cheese Corn Casserole. If you’ve been looking for a dish that makes you feel cozy while tantalizing your taste buds, you’re in for a treat. This casserole is not just a side dish; it’s a hug in a baking dish, perfect for potlucks, family gatherings, or even a cozy weeknight dinner.
Eating should be an experience that encompasses not just nourishment but joy, and I believe this dish encapsulates that perfectly. The sweet crunch of corn mingled with the lush creaminess of cream cheese creates a delightful combination. Not to mention, it’s easy to make, gives you that warm, fuzzy feeling, and lets you indulge without guilt. So grab your apron and let’s make some kitchen magic!
A Sweet Memory in Every Bite
One of my fondest childhood memories revolves around my Grandma’s kitchen, where every Sunday felt like a festivity dedicated to good food and family. After church, our clan would convene, filling her home with laughter and the heavenly scent of something delicious bubbling in the oven. Amongst her savory roasts and pies, it was the Cream Cheese Corn Casserole that always stole the show.
I remember being just a little girl, peeking into the oven through the glass door, watching the golden top bubble and brown slightly. It would emerge, aromatic and inviting, and we’d all gather around the table, eager to dig in. Each bite tasted like summer sweet corn mixed with love, nostalgia, and a dash of Grandma’s magic. As I grew older, the recipe transformed from a family secret into one of my own cherished creations, evolving while keeping the echoes of those joyful Sundays alive.
Ingredients
Here’s what you’ll need to whip up this delightful Cream Cheese Corn Casserole:
-
2 cups (300 g) whole kernel corn, drained
Fresh, frozen (thawed), or canned works great! Whole kernel corn adds a lovely sweetness and texture. If you’re looking to cut calories, try substituting it with cauliflower rice for a lighter version. -
1 cup (240 g) cream-style corn
This is the superstar for creaminess! If you’re avoiding corn, using pureed potatoes can give a similar creamy consistency. -
4 oz (115 g) cream cheese, softened and cubed
This is key to that lush mouthfeel. For a dairy-free option, try using a plant-based cream cheese alternative. -
¼ cup (60 g) unsalted butter, melted
Butter adds a rich flavor, but olive oil or coconut oil can work well if you’re trying to avoid dairy. -
½ cup (120 ml) whole milk
Adds creaminess! For a non-dairy alternative, almond milk or oat milk does the trick. -
1 large egg
This acts as a binder. If you need an egg substitute, 1/4 cup of unsweetened applesauce works surprisingly well! -
½ cup (65 g) all-purpose flour
Helps give structure and works great as a thickener. If you’re gluten-free, feel free to swap in a gluten-free flour blend. -
2 tablespoons granulated sugar
A little sweetness balances the savory elements. If you’re looking for a healthier option, try using coconut sugar. -
1 teaspoon baking powder
This gives the casserole a little lift and lightness, ensuring it doesn’t get too dense. -
½ teaspoon salt
Essential for elevating flavors. If you’re watching your sodium, you can reduce this if needed. -
¼ teaspoon black pepper
Just enough to bring a hint of warmth! Add more if you like a little extra spice. -
½ cup (50 g) shredded cheddar cheese (optional, for topping)
Adds visual appeal and a delightful flavor boost. You can swap with mozzarella or even go for a dairy-free cheese!
Step-by-Step Instructions
Let’s get started on bringing this culinary delight to life. Here are your step-by-step instructions with a few helpful tips along the way:
-
Preheat the Oven: Set your oven to 350°F (175°C). It’s important to preheat to ensure your casserole cooks evenly.
-
Prepare Your Dish: Grab a baking dish and lightly grease it with spray or a smear of butter. This helps with easy cleanup and keeps the edges from sticking.
-
Mix the Wet Ingredients: In a large mixing bowl, gather the cream cheese, melted butter, whole milk, and the egg. Whisk until smooth. This might take a minute, and it’s okay if you see a few lumps of cream cheese; they will melt into creamy goodness in the oven!
-
Add the Corn: Toss in the whole kernel corn and cream-style corn. Stir gently to combine—this is where the delicious sweet corn flavor really begins to shine through.
-
Combine Dry Ingredients: In another bowl, mix together the flour, sugar, baking powder, salt, and pepper. Whisk to ensure they’re well blended and there are no lumps.
-
Mix Them Together: Gradually add the dry mixture to the wet mixture, stirring until just combined. Be careful not to overmix; a few lumps are totally okay!
-
Cheese, Please: If you’re going for it, fold in half of your shredded cheddar to have it melt through the casserole, then sprinkle the remaining half on top for that beautiful golden crust.
-
Pour and Spread: Carefully pour the mixture into your prepared baking dish. Spread it evenly, but don’t worry too much about making it perfect—rustic is our motto here!
-
Bake Away: Pop your casserole into the preheated oven and let it bake for about 45-55 minutes. You’ll know it’s done when the edges are golden, the top is bubbly, and a toothpick inserted in the center comes out clean.
-
Cool and Serve: Once out of the oven, let it cool for about 10 minutes. This allows it to set a bit and makes serving easier.
Serving Suggestions
To serve, scoop out generous portions onto plates or bowls, adding a sprinkle of fresh herbs like parsley or chives for a pop of color. Pair it with grilled chicken or roasted vegetables for a well-rounded meal. And of course, don’t forget a big salad to balance out the richness of the casserole!
Recipe Variations
Feel like experimenting? Here are a few creative twists you can play with:
-
Spicy Southwest Style: Add diced jalapeños or cooked chorizo to your mixture for a fiery kick.
-
Herbed Delight: Fresh herbs like thyme or rosemary can elevate the flavors and add freshness.
-
Italian Influence: Swap in Italian seasoning and mix in sun-dried tomatoes for an exciting flavor profile!
-
Bacon Lover’s Dream: Crumbled bacon can be added or sprinkled on top for that smoky, savory charm.
-
Veggie Boost: Mix in diced bell peppers or green onions for added texture and nutrition.
Chef’s Notes
I won’t lie; this recipe has seen many evolutions in my kitchen! From using leftover corn on the cob to experimenting with different cheese blends, each batch tells a different story. I once tried it with a packet of ranch seasoning, and let me tell you—it was a game-changer! Cooking is all about finding what works for you and making it your own. So have fun with this, and don’t be afraid to get experimental!
FAQs and Troubleshooting
1. Can I make this ahead of time?
Absolutely! You can prepare the casserole a day in advance and keep it covered in the fridge until you’re ready to bake. Just add an extra 10-15 minutes to your baking time.
2. What can I do if my casserole is too dry?
If you find that the casserole is dry after baking, add a splash of milk before serving; it should bring back some moisture.
3. How do I store leftovers?
Place any leftovers in an airtight container in the fridge, where they will keep for up to 3-4 days. Reheat in the microwave or oven for a quick and easy meal!
4. Why is my casserole not rising?
If your casserole is coming out flat, it may be due to expired baking powder or overmixing the batter. Be sure to check the freshness of your baking powder before using!
Conclusion
There you have it, friends! A deliciously creamy Cream Cheese Corn Casserole that’s sure to impress and delight. I hope you enjoy making this dish as much as I love sharing it with you. It’s more than just a recipe; it’s a warmth-fueled hug from my kitchen to yours. Whether you take it to a potluck or savor it for dinner, I know it will become a beloved staple in your home. So go ahead, dig in, and enjoy the comforting flavors! Happy cooking!
PrintCream Cheese Corn Casserole
A creamy and comforting corn casserole filled with delicious flavors, perfect for potlucks or family dinners.
- Prep Time: 10 minutes
- Cook Time: 55 minutes
- Total Time: 65 minutes
- Yield: 8 servings 1x
- Category: Side Dish
- Method: Baking
- Cuisine: American
- Diet: Vegetarian
Ingredients
- 2 cups (300 g) whole kernel corn, drained
- 1 cup (240 g) cream-style corn
- 4 oz (115 g) cream cheese, softened and cubed
- ¼ cup (60 g) unsalted butter, melted
- ½ cup (120 ml) whole milk
- 1 large egg
- ½ cup (65 g) all-purpose flour
- 2 tablespoons granulated sugar
- 1 teaspoon baking powder
- ½ teaspoon salt
- ¼ teaspoon black pepper
- ½ cup (50 g) shredded cheddar cheese (optional, for topping)
Instructions
- Preheat the Oven: Set your oven to 350°F (175°C).
- Prepare Your Dish: Lightly grease a baking dish.
- Mix the Wet Ingredients: In a large bowl, whisk together cream cheese, melted butter, whole milk, and the egg until smooth.
- Add the Corn: Toss in whole kernel corn and cream-style corn, then stir gently.
- Combine Dry Ingredients: In another bowl, whisk together flour, sugar, baking powder, salt, and pepper.
- Mix Them Together: Gradually add the dry mixture to the wet mixture, stirring until just combined.
- Cheese, Please: Fold in half of the shredded cheddar and sprinkle the remaining half on top.
- Pour and Spread: Carefully pour the mixture into the prepared baking dish.
- Bake Away: Bake for about 45-55 minutes until edges are golden and bubbly.
- Cool and Serve: Let cool for about 10 minutes before serving.
Notes
Serve with fresh herbs and pair with grilled chicken or roasted vegetables for a complete meal.
Nutrition
- Serving Size: 1 serving
- Calories: 350
- Sugar: 5g
- Sodium: 400mg
- Fat: 12g
- Saturated Fat: 6g
- Unsaturated Fat: 6g
- Trans Fat: 0g
- Carbohydrates: 45g
- Fiber: 3g
- Protein: 15g
- Cholesterol: 30mg
Keywords: casserole, corn, comfort food, vegetarian, holiday recipes
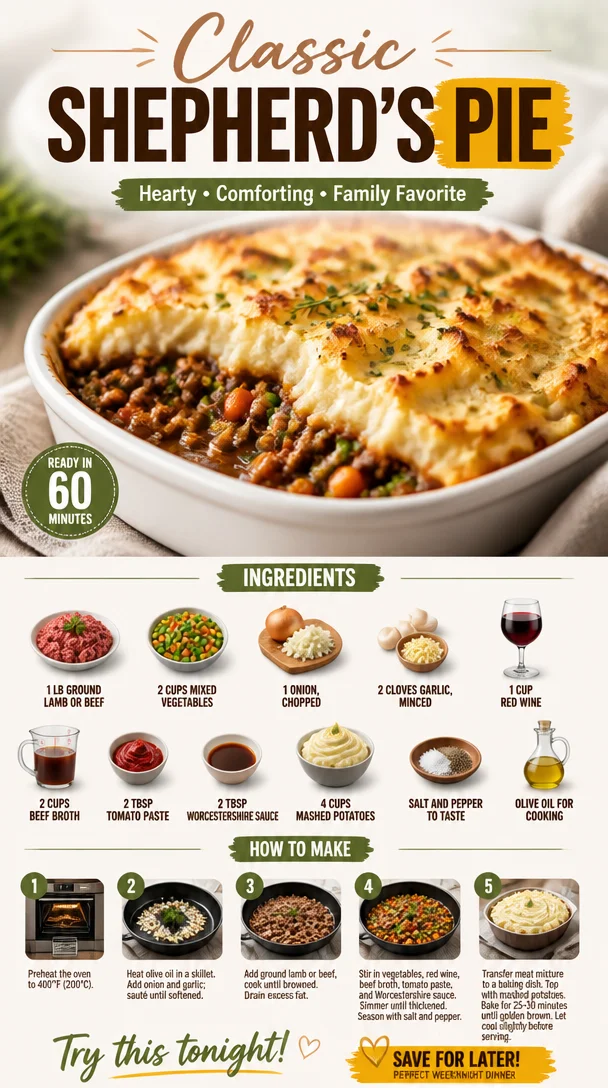
Shepherd’s Pie
Comforting Shepherd’s Pie: A Cozy Culinary Journey
Welcome back to Clean Plate Cravings, food-loving friends! Today, we’re diving into a dish that warms both the belly and the soul—Shepherd’s Pie. With its layers of hearty meat, vibrant veggies, and creamy mashed potatoes, this recipe is the ultimate comfort food that brings a smile to your face with every bite. Shepherd’s Pie is that cozy hug for your stomach we all need sometimes, especially as we ease into the cooler months.
As I whisk you through this delightful journey of flavors and textures, we’ll explore not just how to make this delicious dish but also reminisce about why it holds a special place in my heart. After all, food isn’t just about nutrition; it’s about stories, memories, and the love we share in our kitchens.
So, grab your apron, and let’s get cooking!
A Fond Memory in the Kitchen
I can still remember the first time I made Shepherd’s Pie as a teenager. It was a chilly Sunday afternoon, and my family was all gathered in the kitchen, laughing and sharing stories as the aromas of our favorite foods danced through the air. My grandmother took the lead, guiding me through the entire process from browning the meat to whipping up the creamiest mashed potatoes.
As we stirred the pot, she shared tales of her youth—how her mother would make this comforting dish when the weather turned cold and friends gathered around the table. It wasn’t just a meal; it was a celebration of love, warmth, and togetherness. To this day, every time I make Shepherd’s Pie, I’m transported back to that cozy kitchen filled with laughter, the kind of warmth that stays with you long after the last bite.
Ingredients
Let’s break down the ingredients you’ll need for this classic dish. Each ingredient plays a pivotal role in delivering that rich, savory flavor everyone craves, so let’s dive in:
-
1 lb ground lamb or beef: Choose ground lamb for a traditional Shepherd’s Pie, or opt for ground beef if you prefer. Both are packed with flavor! If you’re looking for a leaner option, go for ground turkey.
-
2 cups mixed vegetables (carrots, peas, corn): A colorful mix adds not just nutrition but also a pleasing texture contrast. Frozen mixes are perfectly fine and super convenient!
-
1 onion, chopped: Onions are the base of any great savory dish. They add depth to the flavor profile. Shallots or green onions can be good alternatives for a milder taste.
-
2 cloves garlic, minced: Garlic brings a beautiful aromatic quality. If you’re in a pinch, garlic powder works, but fresh garlic is always best!
-
1 cup red wine: Wine adds acidity and richness. Any dry red will work, but if you prefer not to cook with alcohol, you can substitute with beef broth mixed with a splash of vinegar.
-
2 cups beef broth: This is essential for that juicy filling. Homemade broth is fantastic if you have it, but store-bought works just as well.
-
2 tablespoons tomato paste: This thickens the filling and adds a touch of sweetness. If you’re fresh out, ketchup can do the trick in a pinch!
-
2 tablespoons Worcestershire sauce: This wonderful umami booster takes the flavor up a notch. If you’re avoiding gluten, ensure you pick a gluten-free brand.
-
4 cups mashed potatoes: Creamy, dreamy mashed potatoes are the topping star! Make them with cream and butter, or lighten them up with a splash of milk and olive oil.
-
Salt and pepper to taste: Always taste as you go! These simple seasonings will enhance every flavor in your pie.
-
Olive oil for cooking: A staple in my kitchen! You could also use butter for a richer flavor.
Step-by-Step Instructions
Now that we’ve gathered our ingredients, let’s get into the nitty-gritty of making this Shepherd’s Pie. I promise, the process is simple and totally worth it!
-
Preheat Your Oven: Start by preheating your oven to 400°F (200°C). This will ensure your pie bakes evenly and the top gets the perfect golden crust.
-
Cook the Meat: In a large skillet, heat 2 tablespoons of olive oil over medium heat. Once it’s shimmering, add your ground lamb or beef. Break it up with a spatula and cook until browned, about 5-7 minutes. The key here is to get that nice, rich color to build flavor.
-
Sauté the Vegetables: Add the chopped onion and minced garlic to the browned meat. Sauté for about 3-4 minutes until the onion is translucent and the garlic is fragrant—your kitchen will smell amazing! This is where you can add a little pinch of salt to help the onions sweat.
-
Incorporate the Veggies: Toss in your mixed vegetables. Stir everything together for another 3 minutes until the veggies are warmed through. This gives them a chance to mingle and absorb flavors.
-
Deglaze with Red Wine: Pour in your cup of red wine, scraping up any delicious bits stuck at the bottom of the skillet. Let it simmer for about 2-3 minutes until it reduces slightly. Not a wine fan? Just skip this step or use that beef broth splash mentioned before!
-
Make It Saucy: Stir in your beef broth, tomato paste, and Worcestershire sauce. Season it generously with salt and pepper. Bring this mixture to a gentle boil, then reduce the heat and let it simmer for about 10 minutes. This helps thicken the filling and blend those incredible flavors.
-
Prepare the Mashed Potatoes: While your filling simmers, if you’re using leftover mashed potatoes, give them a quick mash to warm them up and ensure they’re smooth. If you’re making them from scratch, boil your potatoes in salted water until fork-tender, then mash them with butter and cream (or olive oil) until fluffy!
-
Assemble the Pie: In a baking dish (a 9×9 square dish works great), pour in the meat and vegetable mixture, spreading it evenly. Then, dollop your mashed potatoes on top, using the back of a spoon to create waves and peaks—this will help achieve a crispy top as it bakes!
-
Bake: Pop your Shepherd’s Pie in the preheated oven for about 25-30 minutes until the top is golden brown and crisp. For extra crunch, you can place it under the broiler for a minute or two—just don’t walk away!
-
Cool and Serve: Once done, take it out and let it cool for about 5-10 minutes before serving. This helps meld the flavors further!
Serving Suggestions
When it comes to serving Shepherd’s Pie, I love to keep it simple and rustic. Spoon generous portions onto plates, and if you’re feeling fancy, garnish with fresh herbs like parsley or chives. Serve with a side salad or some crusty bread to soak up every last bit of deliciousness. And let’s be honest, reheating leftovers the next day might just be the highlight of your week!
Recipe Variations
Feel free to get creative with Shepherd’s Pie! Here are a few variations that could spice things up:
-
Vegetarian Delight: Substitute the meat with lentils or mushrooms and use vegetable broth. You won’t miss the meat!
-
Spicy Twist: Add some diced jalapeños or a pinch of cayenne to the filling for a kick of heat.
-
Cheesy Mashed Potatoes: Stir in some grated cheese (like cheddar or Parmesan) into the mashed potatoes before layering—it adds an irresistible cheesy crust.
-
Herb-Infused: Mix in some fresh herbs (like thyme or rosemary) to the meat filling for a more aromatic flavor.
-
Sweet Potato Mash: Replace traditional potatoes with sweet potatoes for a nutritious twist, adding a hint of sweetness to the dish!
Chef’s Notes
Shepherd’s Pie has evolved quite a bit over the years in my kitchen. Initially, I used to shy away from making it because I thought it would be too complicated, but it turns out, it’s one of the easiest and most satisfying dishes you can whip up! Plus, it is a fantastic way to clean out your fridge—just toss in whatever veggies you have on hand.
And here’s a funny little kitchen story: I once made this for a potluck, and let’s just say, my friends were so hooked that they asked for seconds before even finishing their first! So, take my advice, always make more than you think you’ll need!
FAQs and Troubleshooting
1. What if my mashed potatoes are too dry?
No worries! If you happen to find your mash a bit dry, add a touch of warm milk or melted butter and mix until it reaches your desired creaminess.
2. Can I prepare Shepherd’s Pie in advance?
Absolutely! You can make the filling and mashed potatoes a day ahead and assemble the pie when you’re ready to bake. Just keep it covered in the fridge!
3. How do I make it gluten-free?
Just swap the Worcestershire sauce for a gluten-free brand and ensure your beef broth is also gluten-free. The rest of the recipe is naturally gluten-free!
4. Can I freeze Shepherd’s Pie?
Yes! Once assembled, cover it tightly with aluminum foil and freeze. When you’re ready to enjoy it, let it thaw in the fridge overnight before baking.
Nutritional Info
While this dish is comfort food at its finest, I understand the importance of balancing indulgence with health. A typical serving of Shepherd’s Pie (about 1/4 of the recipe) can contain roughly:
- Calories: 450
- Protein: 25 grams
- Fat: 20 grams
- Carbohydrates: 45 grams
- Fiber: 5 grams
Remember, the nutrition can vary based on your specific ingredients and portions, so feel free to adjust as per your dietary needs!
And there you have it—my heartwarming take on Shepherd’s Pie! I hope you find as much joy in making it as I have over the years. Let this dish not only nourish your body but also bring a sense of warmth and comfort to your table. Happy cooking, friends!
PrintComforting Shepherd’s Pie
A heartwarming dish filled with layers of savory meat, vibrant veggies, and creamy mashed potatoes, perfect for cozy gatherings.
- Prep Time: 20 minutes
- Cook Time: 40 minutes
- Total Time: 60 minutes
- Yield: 4 servings 1x
- Category: Main Course
- Method: Baking
- Cuisine: British
- Diet: Meat-based
Ingredients
- 1 lb ground lamb or beef
- 2 cups mixed vegetables (carrots, peas, corn)
- 1 onion, chopped
- 2 cloves garlic, minced
- 1 cup red wine
- 2 cups beef broth
- 2 tablespoons tomato paste
- 2 tablespoons Worcestershire sauce
- 4 cups mashed potatoes
- Salt and pepper to taste
- Olive oil for cooking
Instructions
- Preheat your oven to 400°F (200°C).
- Cook the meat in a large skillet with olive oil until browned, about 5-7 minutes.
- Sauté the onion and garlic for about 3-4 minutes until fragrant.
- Incorporate the mixed vegetables and stir for another 3 minutes.
- Deglaze the skillet with red wine and simmer for 2-3 minutes.
- Make it saucy by adding beef broth, tomato paste, and Worcestershire sauce; simmer for 10 minutes.
- Prepare the mashed potatoes if making from scratch or warm leftover ones.
- Assemble the pie in a baking dish with the meat mix and top with mashed potatoes.
- Bake for about 25-30 minutes until golden brown.
- Cool for 5-10 minutes before serving.
Notes
Feel free to customize with different vegetables or make it vegetarian with lentils.
Nutrition
- Serving Size: 1 serving
- Calories: 450
- Sugar: 5g
- Sodium: 600mg
- Fat: 20g
- Saturated Fat: 8g
- Unsaturated Fat: 10g
- Trans Fat: 0g
- Carbohydrates: 45g
- Fiber: 5g
- Protein: 25g
- Cholesterol: 70mg
Keywords: shepherd's pie, comfort food, baking, hearty meal, British cuisine
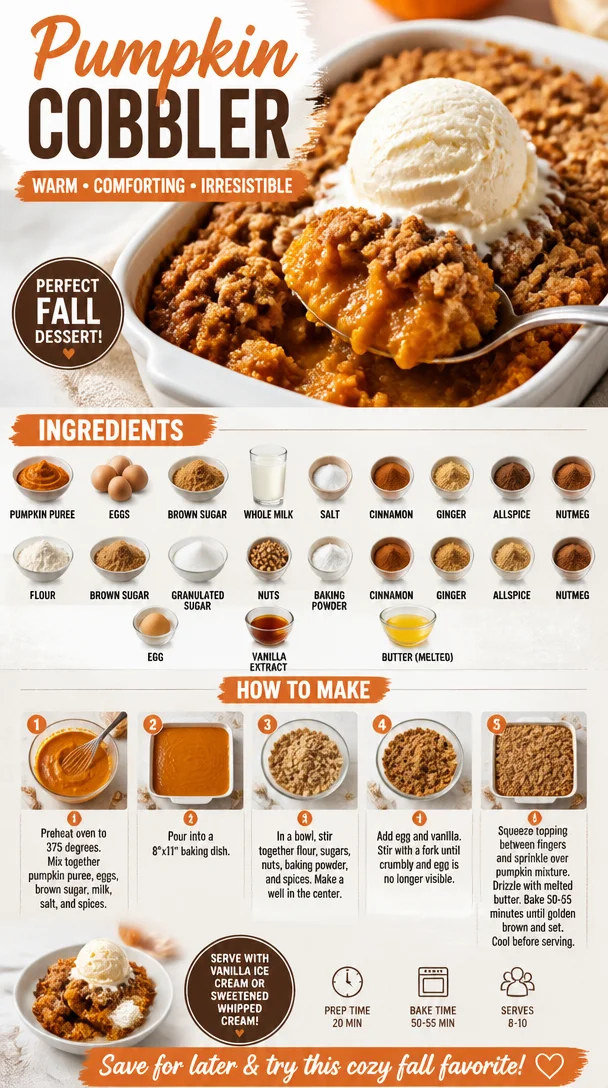
Pumpkin Cobbler
Discover the Joy of Pumpkin Cobbler: A Cozy Treat for All Seasons
Fall may be famous for its leaves blanketing the ground in fiery colors and chilly evenings wrapped in soft sweaters, but the true star of the season undeniably has to be pumpkin! Yes, my friends, pumpkin isn’t just an autumn delight—it’s your all-year-round buddy in the kitchen. That’s why I’m absolutely thrilled to share with you my ultimate Pumpkin Cobbler recipe!
Pumpkin Cobbler is like a warm hug for your taste buds, combining the comforting spices of fall with a delightful texture that’s sure to keep you coming back for more. If you’re anything like me, you’ve fondly held onto memories of family gatherings, where the kitchen was alive with laughter and the heavenly aroma of spices wafted through the air. This dish is a love letter to those moments where food became a celebration of togetherness.
Imagine this: the first bite of warm, fluffy pumpkin filling with the sweet, crunchy topping, pairing perfectly with a dollop of whipped cream or a scoop of vanilla ice cream. It’s like autumn on a plate! Plus, it’s simple enough for a weeknight treat yet impressive enough to serve at a holiday gathering. So, roll up your sleeves, gather your ingredients, and let’s dive into this scrumptious adventure together!
A Pumpkin-Fueled Memory
I still remember the first time I tasted pumpkin cobbler. It was at my grandma’s kitchen during one crisp November afternoon. She would whisk together the ingredients while telling stories of her childhood—an alchemy that felt magical to me. As the cobbler baked, the whole house filled with the scent of cinnamon and nutmeg, transforming our small gathering into a cozy retreat.
Grandma always said that cooking is love made visible and that each ingredient holds a story. It wasn’t just about the food; it was about the memories we created around it. I can still see my cousins and I sneakily trying to swipe a taste from the almost-too-hot baking dish while Grandma chuckled, saying the best way to enjoy life is to share it with those you love.
Those cherished memories inspire every batch of pumpkin cobbler I make today. It’s as much about the flavors as it is about sharing good times with family and friends. So, let’s keep that spirit alive and create some delicious moments together!
Ingredients
Here’s what you need to whip up this delightful Pumpkin Cobbler:
- 15 ounces Pumpkin Puree: The star of the show! Use canned or homemade puree, but make sure it’s pure pumpkin, not pumpkin pie filling.
- 3 whole Eggs: These act as the binding agents, giving the cobbler its structure. Substitute with flax eggs for a vegan option!
- 2/3 cup Brown Sugar: This gives the cobbler a rich, caramel-like flavor. You can use coconut sugar for a healthier option.
- 1 cup Whole Milk: Adds creaminess. Use almond or oat milk for a dairy-free alternative.
- 1/2 teaspoon Salt: Enhances all the flavors—don’t skip this!
- 1 1/2 teaspoons Ground Cinnamon: The warm backbone of this dish—every bite should sing of cinnamon-spiced goodness.
- 1/2 teaspoon Ground Ginger: Adds a zesty kick that makes your taste buds dance.
- 1/2 teaspoon Ground Allspice: A hint of warmth and depth; it’s worth seeking out if you don’t already have it.
- 1/4 teaspoon Ground Nutmeg: Just a sprinkle adds a cozy, holiday-like atmosphere.
- 1 cup All-Purpose or Whole Wheat Pastry Flour: For a heartier texture, whole wheat adds extra nutrients.
- 1/2 cup Brown Sugar: This is for the topping—a sweet and crispy crown that contrasts beautifully with the pumpkin layer.
- 1/2 cup Granulated Sugar: Balances the sweetness.
- 1 cup Walnuts or Pecans, Chopped (Optional): Adds crunch and richness. Feel free to use any favorite nuts here.
- 1 teaspoon Baking Powder: Ensures our cobbler rises just right.
- 1/2 teaspoon Ground Cinnamon: A touch in the topping adds flavor complexity.
- 1/8 teaspoon Ginger, Ground: Enhances the flavors without overpowering.
- 1/8 teaspoon Allspice, Ground: A little sprinkle goes a long way!
- 1/8 teaspoon Nutmeg, Ground: Just enough for warmth.
- 1 whole Egg: For the topping—helps bind everything and adds richness.
- 1 teaspoon Pure Vanilla Extract: Because every great dessert deserves a splash of vanilla!
- 1/2 cup Butter, Melted: Brings everything together and adds moisture; feel free to substitute olive oil for a healthier option.
Step-by-Step Instructions
Ready to dive into the deliciousness? Follow these simple steps to create your Pumpkin Cobbler:
-
Preheat Your Oven:
Preheat your oven to 350°F (175°C). This way, it’s nice and toasty by the time your cobbler is ready to bake. -
Mix the Pumpkin Base:
In a large mixing bowl, whisk together the pumpkin puree, eggs, brown sugar, milk, salt, cinnamon, ginger, allspice, and nutmeg until smooth. Feel free to channel your inner chef and get a little vigorous with that whisk! This not only combines the ingredients but also introduces air for a lighter texture. -
Prepare for the Crust:
In another bowl, combine the flour, brown sugar, granulated sugar, walnuts or pecans, and baking powder. Mix well and set aside. This is your cobbler topping, and the mix of sugars will give it that sweet crust we’re looking for. -
Incorporate the Dry Ingredients:
Gradually add the flour mixture to the pumpkin mixture, stirring just until combined. Avoid over-mixing here to keep your cobbler tender—nobody likes a tough cobbler. -
Prepare the Topping:
In a small bowl, combine the remaining cinnamon, ginger, allspice, nutmeg, and the additional egg. Once mixed, pour melted butter into the egg-spice blend, mixing well. Then gently fold this into your dry topping mixture, ensuring everything is just moistened. -
Assemble the Cobbler:
Grease a 9×13 inch baking dish with butter or non-stick spray, and pour the pumpkin filling into the dish. Spread the topping mixture over the pumpkin evenly, allowing the crust to peek through for that beautiful texture. -
Bake Away!:
Place your creation in the oven and bake for about 45-55 minutes or until the filling is set and the topping is golden brown. The kitchen will be filled with that heavenly scent of warm spices—get ready for some serious drooling! -
Cool and Serve:
Once baked, allow your cobbler to cool for about 15-20 minutes. This helps it set up a bit more, making it easier to slice and serve.
Serving Suggestions
To serve your Pumpkin Cobbler, scoop a generous portion onto a plate while it’s still warm. Top it off with a cloud of whipped cream or a scoop of vanilla ice cream—because can anything make it better? Garnish with a sprinkle of cinnamon and a few chopped walnuts on top to add a little decorative flair. Your guests will be impressed, and you’ll be basking in the warmth of compliment-filled conversations.
Recipe Variations
- Gluten-Free Option: Substitute the all-purpose flour with a gluten-free flour blend for a gluten-free delight!
- Spiced Pumpkin Cobbler: Add a dash of cayenne pepper or chili powder for a surprising kick that pairs well with sweet!
- Chocolate Chip Pumpkin Cobbler: Stir in a cup of chocolate chips for decadence—because why not?
- Fruit Add-Ins: Toss in some dried cranberries or raisins for an extra texture and flavor twist.
- Sweet Potato Cobbler: Swap out the pumpkin for sweet potato puree for a delightful variation.
Chef’s Notes
Pumpkin Cobbler has come a long way since my first nostalgic bite in my grandmother’s cozy kitchen. I’ve played with the spices and the textures over the years, and every twist brings out a new layer of flavor that just warms my heart. I remember an epic kitchen fail where, in my excitement, I added salt instead of sugar—yikes! Lesson learned: always double-check! But hey, that’s what cooking is all about—experiments, laughter, and a sprinkle of chaos.
I encourage you to be playful with this recipe. Add your touch—your memories, your preferences—as it transforms into something that feels uniquely yours.
FAQs and Troubleshooting
-
What should I do if my cobbler comes out soggy?
Make sure all the liquid ingredients are measured correctly and that the baking time is sufficient. If it’s still soggy, consider letting it cool longer to allow for setting. -
Can I make this recipe ahead of time?
Absolutely! Prepare the pumpkin filling and topping separately, then store in the fridge. Just assemble and bake when you’re ready for that warm, fresh dessert. -
How do I store leftovers?
Store in an airtight container in the refrigerator for up to 3-4 days (if it lasts that long!). Reheat in the oven or microwave for a quick treat. -
Is it okay if I skip the nuts?
Definitely! Feel free to omit the nuts or replace them with sunflower seeds for a nut-free option. The cobbler will still be delicious!
Nutritional Info
While I usually steer clear of strict nutritional info, it’s good to know that each generous slice of Pumpkin Cobbler is packed with Vitamin A, fiber, and those amazing spices that are known for their anti-inflammatory properties. Enjoy in moderation, and don’t forget—it tastes even better when shared!
And there you have it, my food-loving friends! A heartwarming journey into the world of Pumpkin Cobbler. I hope this recipe lights up your kitchen as much as it does mine. Let’s bring out the aprons, create some delightful memories, and above all, enjoy every bite. Happy cooking!
PrintPumpkin Cobbler
A warm and cozy pumpkin cobbler that combines the comforting spices of fall with a delightful texture, perfect for any occasion.
- Prep Time: 15 minutes
- Cook Time: 45 minutes
- Total Time: 60 minutes
- Yield: 8 servings 1x
- Category: Dessert
- Method: Baking
- Cuisine: American
- Diet: Vegetarian
Ingredients
- 15 ounces Pumpkin Puree
- 3 whole Eggs
- 2/3 cup Brown Sugar
- 1 cup Whole Milk
- 1/2 teaspoon Salt
- 1 1/2 teaspoons Ground Cinnamon
- 1/2 teaspoon Ground Ginger
- 1/2 teaspoon Ground Allspice
- 1/4 teaspoon Ground Nutmeg
- 1 cup All-Purpose or Whole Wheat Pastry Flour
- 1/2 cup Brown Sugar (for topping)
- 1/2 cup Granulated Sugar
- 1 cup Walnuts or Pecans, Chopped (Optional)
- 1 teaspoon Baking Powder
- 1/2 teaspoon Ground Cinnamon (for topping)
- 1/8 teaspoon Ground Ginger (for topping)
- 1/8 teaspoon Ground Allspice (for topping)
- 1/8 teaspoon Ground Nutmeg (for topping)
- 1 whole Egg (for topping)
- 1 teaspoon Pure Vanilla Extract
- 1/2 cup Butter, Melted
Instructions
- Preheat your oven to 350°F (175°C).
- Mix together the pumpkin puree, eggs, brown sugar, milk, salt, cinnamon, ginger, allspice, and nutmeg until smooth.
- Prepare the cobbler topping by combining the flour, brown sugar, granulated sugar, walnuts or pecans, and baking powder in another bowl.
- Incorporate the flour mixture into the pumpkin mixture, stirring just until combined.
- Prepare the topping by mixing the remaining spices with the additional egg and melted butter.
- Assemble the cobbler by pouring the pumpkin filling into a greased 9×13 inch baking dish and spreading the topping mixture over the pumpkin.
- Bake for 45-55 minutes or until the filling is set and the topping is golden brown.
- Cool for 15-20 minutes before serving.
Notes
Serve warm with whipped cream or vanilla ice cream. For variations, consider gluten-free flour or adding chocolate chips.
Nutrition
- Serving Size: 1 serving
- Calories: 350
- Sugar: 28g
- Sodium: 150mg
- Fat: 18g
- Saturated Fat: 10g
- Unsaturated Fat: 7g
- Trans Fat: 0g
- Carbohydrates: 45g
- Fiber: 3g
- Protein: 6g
- Cholesterol: 70mg
Keywords: pumpkin cobbler, dessert, fall recipe, cozy treat
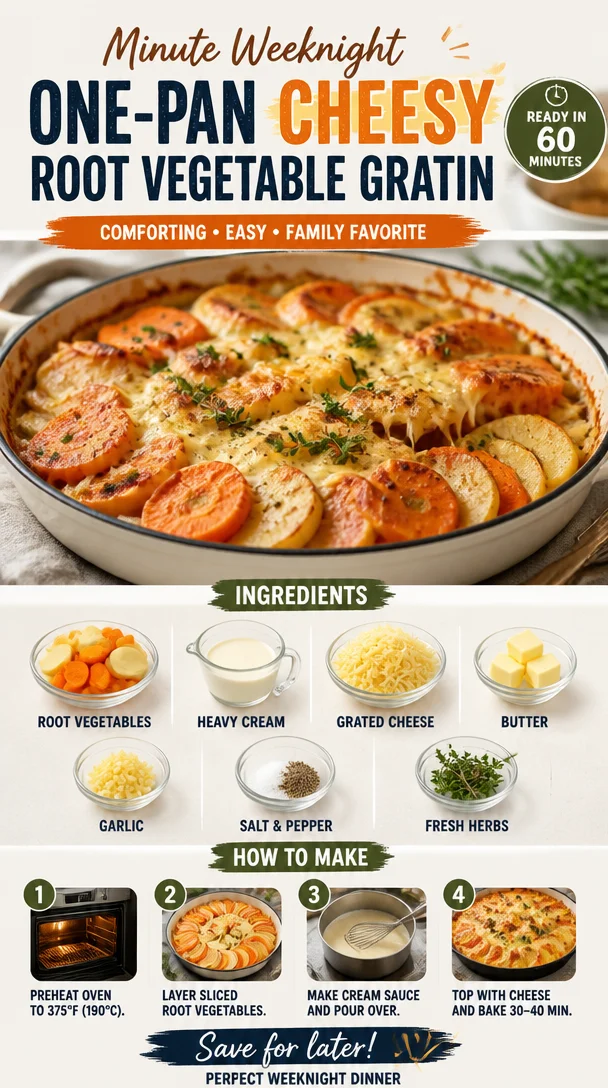
Minute Weeknight One-Pan Cheesy Root Vegetable Gratin
Cheesy Root Vegetable Gratin: A Cozy Delight
Welcome to the comforting world of Cheesy Root Vegetable Gratin! If you’re searching for a dish that wraps you in warmth like a cozy blanket on a chilly evening, you’ve just struck gold. This gratin is not just about layers of glorious root vegetables; it’s about a delightful experience of flavors that dance on your palate. Imagine the creaminess of heavy cream, the richness of melted cheese, and the earthy undertones of various root veggies—doesn’t that sound like a hug from your favorite home-cooked meal?
As a chef who celebrates fresh, nourishing food, I’m super excited to share this recipe with you because it absolutely embodies my mission with Clean Plate Cravings. Eating well doesn’t mean compromising on taste. So, let your kitchen fill with the enticing aroma as we dive into this wonderful gratin that’s perfect for any occasion, from a casual weeknight dinner to a festive gathering with friends.
Join me as we chop, slice, and layer our way to creating a dish that will have your taste buds singing and your heart full. Grab your favorite apron, and let’s get started!
A Trip Down Memory Lane
Let me take you back to when I was a kid, eagerly waiting for family gatherings at my grandma’s house. Her kitchen was always alive with laughter, stories, and, of course, mouthwatering aromas. One dish that stood out among the spread was her root vegetable gratin, which was an ingenious way to make nutritious veggies taste exceptional.
I still remember standing on a stool, peeking over the countertop, watching her expertly slice the vegetables. With every layer she added, she’d sprinkle cheese and pour cream, all while telling me stories of her childhood—how she would gather fresh produce from the local farmers’ market. Those memories shaped my love for cooking and the joy it brings to those we share it with.
I’ve taken my grandma’s traditional gratin recipe and given it a little twist. It’s no longer just a nostalgic dish; it’s a celebration of flavors, textures, and the simple joy of cooking. So, let’s embrace the spirit of those family gatherings as we create our own version of this heartwarming dish.
Ingredients
Here’s a rundown of the ingredients you’ll need to whip up this delicious Cheesy Root Vegetable Gratin:
-
2 cups root vegetables (carrots, parsnips, and potatoes), sliced
These versatile vegetables bring a wonderful sweetness and texture to the dish. Feel free to swap them out with other root veggies like sweet potatoes or turnips! -
1 cup heavy cream
This is the secret ingredient that creates a rich, creamy base for our gratin. If you’re watching your dairy intake, you can substitute it with coconut milk or cashew cream for a non-dairy version. -
1 cup grated cheese (Gruyère or cheddar)
Cheese is always a crowd-pleaser. Gruyère lends a nutty flavor, while cheddar adds sharpness. Mix and match based on your taste preferences— mozzarella works too for a gooey texture! -
2 tablespoons butter
Just a little bit of butter adds a luxurious richness. If you’re looking for a dairy-free option, olive oil or vegan butter will do the trick. -
1 clove garlic, minced
Garlic adds depth to our gratin. You can play around with roasted garlic for a sweeter, milder flavor or use garlic powder for a simple substitution. -
Salt and pepper to taste
Seasoning is key to bringing out the flavors. I love using sea salt and freshly cracked black pepper for a pop of flavor. -
Fresh herbs (such as thyme or parsley) for garnish
Herbs add a lovely fresh note at the end and can transform the look of your dish. Feel free to mix in rosemary or chives according to your taste!
Step-by-Step Instructions
Now that we have all our ingredients, it’s time to roll up our sleeves and get cooking! Just follow these simple steps, and you’ll be enjoying a gorgeous gratin in no time.
-
Preheat your oven
Start by preheating your oven to 375°F (190°C). This ensures your gratin bakes evenly and gets that amazing golden top. -
Prepare the root vegetables
Thinly slice your root vegetables about 1/8 inch thick for even cooking. A mandoline slicer can make this step super quick and easy. Plus, they look so pretty in layers! -
Sauté the garlic
In a medium-sized pan, melt the butter over medium heat. Add the minced garlic and sauté for about 1 minute until it becomes fragrant. Be careful not to let it burn; you want it just golden. -
Combine cream and garlic
Pour in the heavy cream, stirring to combine it with the garlic. Sprinkle in some salt and pepper to taste. This mixture becomes the heavenly sauce that will envelop our veggies! -
Assemble the gratin
In a greased baking dish, start layering your root vegetables. Begin with a layer of potatoes or carrots, followed by a sprinkle of cheese. Pour a little of the cream sauce over it, and continue layering until you’ve used up all the ingredients. End with a generous layer of cheese on top—trust me, that melty goodness is key! -
Bake
Cover the dish with foil and bake in the preheated oven for 30 minutes. This allows the vegetables to soften. After that, remove the foil and bake for another 15–20 minutes until the top is beautifully golden and bubbly. -
Rest and garnish
Once out of the oven, let your gratin rest for about 5-10 minutes before serving. This helps it to set, making it easier to cut into portions. Garnish with fresh herbs for that final touch!
Serving Suggestions
This Cheesy Root Vegetable Gratin is incredibly versatile! Serve it hot from the oven as a comforting side dish to accompany your favorite roast or grilled meats. You can also include a fresh green salad on the side for a lovely balanced meal. If you’re feeling fancy, plate individual servings in ramekins for an elegant touch at dinner parties.
Recipe Variations
Looking to jazz things up? Here are a few playful variations you can try:
-
Herb-Infused Cream
Infuse your heavy cream with fresh herbs like rosemary or basil by gently warming the cream and letting the herbs steep for 10 minutes. This will add a delightful depth of flavor. -
Spicy Twist
Add a pinch of crushed red pepper flakes to your cream sauce, bringing a kick of heat that pairs wonderfully with the sweetness of the root vegetables. -
Savory Mushrooms
Incorporate sautéed mushrooms into the layers for an earthy flavor that complements the richness of the gratin perfectly. -
Nutty Crunch
Sprinkle toasted breadcrumbs or crushed nuts over the top before the final bake. This adds an irresistible crunchy texture that contrasts beautifully with the creamy interior. -
Dairy-Free Delight
For those avoiding dairy, swap the heavy cream for coconut milk, and use a blend of nutritional yeast and nuts to create a cheesy flavor that’s completely plant-based.
Chef’s Notes
Oh, where do I start? This recipe has become a staple in my home and continues to evolve. The great thing about this gratin is its adaptability. I often experiment with different types of cheese based on what’s in my refrigerator. One time, I even mixed leftover cheese from a fondue night with some sharp cheddar, and it turned out splendidly!
I also love sharing this dish with friends, and I get such a kick out of hearing their stories about their own family recipes. Food brings us together, igniting joy and connection, just like how my grandma’s cooking did for us all those years ago.
FAQs and Troubleshooting
Here are some common questions and potential hiccups you might encounter while making your Cheesy Root Vegetable Gratin:
-
Why did my gratin turn out watery?
This can happen if you use watery vegetables or don’t let it rest long enough after baking. Make sure to slice your vegetables evenly and be mindful of the moisture they contain. -
Can I prepare this gratin in advance?
Absolutely! You can slice your veggies and prepare your sauce a day ahead. Just assemble everything in the baking dish and refrigerate. When you’re ready, bake it straight from the fridge—just add a few extra minutes to the baking time. -
What if I don’t have Gruyère?
No worries! You can use any melty cheese you have on hand, such as mozzarella, Monterey Jack, or even vegan cheese alternatives for a delicious result. -
How do I store leftovers?
Allow your gratin to cool, then store it in an airtight container in the refrigerator. It will keep well for 3–4 days. Warm it up in the oven or microwave, but be sure to add a splash of cream or milk to keep it moist.
Nutritional Info
While I don’t typically dwell on numbers, it’s always good to know the general nutritional benefits! This gratin is rich in vitamins due to the vegetables, and when enjoyed in moderation, offers a delicious way to incorporate heart-healthy fats and proteins into your meals. Just remember that balance, as with life, is key!
So there you have it—your guide to making a crowd-pleasing Cheesy Root Vegetable Gratin! I hope you feel inspired to give it a try and perhaps even add your own personal touch. Remember, cooking is not just about following recipes; it’s about expressing your creativity and, most importantly, sharing love through food. Enjoy!
PrintCheesy Root Vegetable Gratin

A comforting dish featuring layers of root vegetables, rich cream, and melted cheese, perfect for cozy evenings.
- Prep Time: 15 minutes
- Cook Time: 45 minutes
- Total Time: 60 minutes
- Yield: 4 servings 1x
- Category: Side Dish
- Method: Baking
- Cuisine: French
- Diet: Vegetarian
Ingredients
- 2 cups root vegetables (carrots, parsnips, and potatoes), sliced
- 1 cup heavy cream
- 1 cup grated cheese (Gruyère or cheddar)
- 2 tablespoons butter
- 1 clove garlic, minced
- Salt and pepper to taste
- Fresh herbs (such as thyme or parsley) for garnish
Instructions
- Preheat your oven to 375°F (190°C).
- Prepare your root vegetables by slicing them about 1/8 inch thick.
- Sauté the garlic in a medium-sized pan with melted butter over medium heat for about 1 minute.
- Combine the heavy cream and sautéed garlic, then season with salt and pepper.
- Assemble the gratin by layering the root vegetables, cheese, and cream sauce in a greased baking dish.
- Bake covered with foil for 30 minutes, then uncover and bake for another 15–20 minutes until golden.
- Rest for 5-10 minutes before serving and garnish with fresh herbs.
Notes
You can prepare this gratin in advance and refrigerate before baking. Also, substitute heavy cream with coconut milk for a dairy-free option.
Nutrition
- Serving Size: 1 serving
- Calories: 400
- Sugar: 6g
- Sodium: 450mg
- Fat: 20g
- Saturated Fat: 10g
- Unsaturated Fat: 8g
- Trans Fat: 0g
- Carbohydrates: 35g
- Fiber: 4g
- Protein: 12g
- Cholesterol: 60mg
Keywords: gratin, root vegetables, cheesy, comfort food, vegetarian
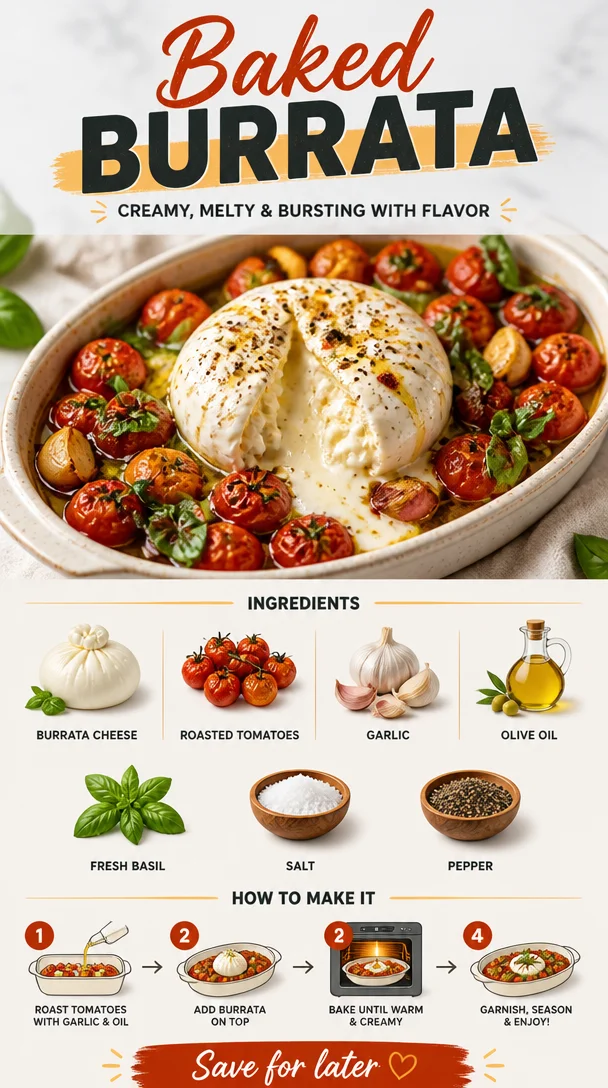
Baked Burrata
Baked Burrata: A Warm & Cheesy Hug in a Dish
Welcome to the cozy world of Clean Plate Cravings, where each recipe feels like a warm embrace! Today, we’re diving into a dish that epitomizes comfort food while keeping it fresh and vibrant—Baked Burrata. Picture it: creamy, dreamy burrata cheese wrapped in a crisp shell, complemented by luscious roasted tomatoes, aromatic garlic, and fragrant basil. It’s like a personal invitation to indulge without the side of guilt. So grab your apron and let’s get cooking!
A Story Behind The Dish
Baked burrata holds a special place in my heart, not just because it lights up any dinner table but also for the nostalgic memories it brings back. I recall a sun-soaked afternoon spent at a charming little café in Florence, Italy with friends. We had just spent the day wandering through narrow cobblestone streets, soaking in the sights, sounds, and of course, the mouthwatering smells wafting from every bakery and trattoria.
We settled down at this quaint café with cute, colorful plates and rustic wooden tables. We ordered a plate of baked burrata, blissfully unaware of how that dish would become a staple in my own kitchen. When it arrived, the cheese was bubbly and golden, surrounded by a medley of roasted tomatoes and fragrant herbs. The first bite—oh my! It was rich and creamy, a burst of flavor that seemed to sing with each mouthful. That day, I discovered the beauty of simple yet sumptuous creations.
Since then, I’ve made it my mission to recreate the magic of that meal. And here we are! Ready to bring a taste of Italy straight into your own kitchen. Let’s joyfully explore the flavors that make this dish a masterpiece.
Ingredients You’ll Need
Here’s what you need to whip up this creamy delight:
-
Burrata Cheese: This soft cheese is the star of the show! If you can’t find burrata, fresh mozzarella can be a decent substitute, although it won’t have that creamy center.
-
Roasted Tomatoes: Sweet, succulent, and bursting with flavor! Feel free to use cherry or grape tomatoes—they caramelize beautifully. You can roast them in advance and keep them in your fridge for quick meals!
-
Garlic: Freshly minced garlic adds depth and aromatic warmth. If you’re not a fan, roasted garlic is a sweeter alternative.
-
Olive Oil: Extra virgin olive oil not only enhances flavors but also adds richness when drizzled over the dish. Avocado oil can be a suitable substitute if you want a higher smoke point.
-
Fresh Basil: This fragrant herb elevates the dish with its distinct flavor. You can swap it for fresh parsley or even a sprinkle of dried basil in a pinch.
-
Salt & Pepper: These pantry staples are essential for seasoning. Use kosher salt for better control and fresh cracked black pepper for a more vibrant flavor.
Step-by-Step Instructions to Baked Burrata Bliss
Now, let’s dive into the cooking process. Follow these steps, and it will feel like a culinary hug with each bite.
-
Preheat the Oven: First off, turn your oven to 400°F (200°C). A hot oven is crucial for roasting those tomatoes to perfection and getting that burrata bubbly!
Chef Tip: Always preheat your oven. It ensures an even cooking temperature, which is key to wonderful roasted flavors.
-
Prepare the Tomatoes: Slice your cherry or grape tomatoes in half. Toss them on a baking sheet with a drizzle of olive oil, minced garlic, and season with salt and pepper.
Hacks: You could add a splash of balsamic vinegar or a sprinkle of sugar to enhance their sweetness.
-
Roast the Tomatoes: Place the baking sheet in the preheated oven and roast for about 20-25 minutes. You want them to become blistered and juicy—just watch for any that might start to burn!
Chef Insight: Roasting concentrates the tomatoes’ sweetness and deepens their flavors. Trust me; you don’t want to skip this step!
-
Add the Burrata: Once your tomatoes have caramelized beautifully, it’s time to introduce the burrata. Nestle the burrata in the center of the pan, gently pressing it into the tomatoes like making a little cheesy bed. Drizzle with more olive oil and a dash of salt and pepper.
-
Bake Again: Pop the tray back into the oven for another 10-15 minutes, just until the burrata begins to soften and ooze. The cheese should be melty and ever so slightly golden on the top.
Chef Hack: You can broil the top for the last couple of minutes for that golden color—just keep an eye on it!
-
Finish with Basil: Once you’ve pulled it out of the oven, tear fresh basil leaves on top. The heat from the dish will release the aromatic fragrance of the basil—pure heaven!
Happiness Tip: Don’t skimp on the basil; it’s what lifts this dish to new heights!
Serving Suggestions
Serving baked burrata is almost as fun as making it! I recommend plating it family-style, straight from the baking dish. Let your guests dig in—pair it with crusty bread for dipping, or serve it over a fresh arugula salad for a delightful contrast. You could also whip up a bruschetta topping using the baked burrata and tomatoes, spreading it generously over toasted crostini. It’s a versatile dish and sure to impress!
Recipe Variations
Let your creativity shine with these delicious twists on baked burrata:
-
Spicy Kick: Add red pepper flakes for a spicy touch! It beautifully balances the creaminess of burrata.
-
Mediterranean Vibes: Toss in olives and artichoke hearts before baking for extra depth of flavor.
-
Vegetable Medley: Mix in other roasted veggies like zucchini, bell peppers, or asparagus for a colorful addition.
-
Pest-o it Up: Incorporate dollops of pesto sauce before baking for a vibrant herbaceous note.
-
Add Nuts: Sprinkle some toasted pine nuts or walnuts on top for an added crunch and healthy fats!
Chef’s Notes
Cooking is always an adventure, right? When I first experimented with this recipe, I was a little hesitant about combining tomatoes directly with burrata. But from the moment I took that first bite of melting cheese fused with sweet, roasted tomatoes, I knew I hit the jackpot. I’ve since played around with flavors and ingredients, continuously evolving this simple dish. Sometimes it turns into a gorgeous summer salad; other times, it’s a comforting winter warmer.
FAQs and Troubleshooting
1. Why is my burrata not melting?
Burrata can be quite delicate. Ensure you’re using fresh burrata and fire up the heat in your oven! If it’s not melting after the suggested time, try checking for doneness—sometimes it just needs a bit more time.
2. Can I prepare this dish in advance?
Absolutely! You can roast the tomatoes ahead of time, store them in the fridge, and bake the burrata just before serving. It’s a great prep hack!
3. What should I do if my tomatoes burn?
If your tomatoes start to burn, reduce the heat. It’s better to roast for a longer time at lower heat than to char them in the oven.
4. Can I make this dish vegan?
Yes! While burrata is a dairy product, you could try vegan cheese alternatives, though flavors will vary. Try soft cashew cheese or a nut-based ricotta substitute for that creamy texture.
Nutritional Info (Optional)
While I always advocate for enjoying food without restriction, here’s a quick look at what’s in your delicious baked burrata per serving (calculated for 4 servings):
- Calories: 310
- Protein: 10g
- Carbohydrates: 6g
- Fats: 28g
Feel free to adjust servings based on your needs!
Thank you for joining this flavorful journey into the world of baked burrata! It’s a dish that’s perfect for gatherings or cozy nights in, and I can’t wait for you to experience the joy it brings. Happy cooking, friends! 🌿🍅🧀
PrintBaked Burrata
A warm and cheesy dish featuring creamy burrata cheese, roasted tomatoes, garlic, and fresh basil.
- Prep Time: 15 minutes
- Cook Time: 30 minutes
- Total Time: 45 minutes
- Yield: 4 servings
- Category: Main Course
- Method: Baking
- Cuisine: Italian
- Diet: Vegetarian
Ingredients
- Burrata Cheese
- Cherry or Grape Tomatoes
- Garlic
- Extra Virgin Olive Oil
- Fresh Basil
- Salt
- Pepper
Instructions
- Preheat the oven to 400°F (200°C).
- Prepare the tomatoes by slicing them in half and tossing them on a baking sheet with olive oil, minced garlic, salt, and pepper.
- Roast the tomatoes in the oven for about 20-25 minutes until blistered and juicy.
- Add the burrata to the center of the pan and drizzle with more olive oil, salt, and pepper.
- Bake again for 10-15 minutes until the burrata is softened and slightly golden.
- Finish by tearing fresh basil leaves on top before serving.
Notes
Pair with crusty bread or a fresh arugula salad for a delightful contrast.
Nutrition
- Serving Size: 1 serving
- Calories: 310
- Sugar: 4g
- Sodium: 300mg
- Fat: 28g
- Saturated Fat: 10g
- Unsaturated Fat: 16g
- Trans Fat: 0g
- Carbohydrates: 6g
- Fiber: 2g
- Protein: 10g
- Cholesterol: 30mg
Keywords: baked burrata, comfort food, Italian dish, creamy cheese, roasted tomatoes
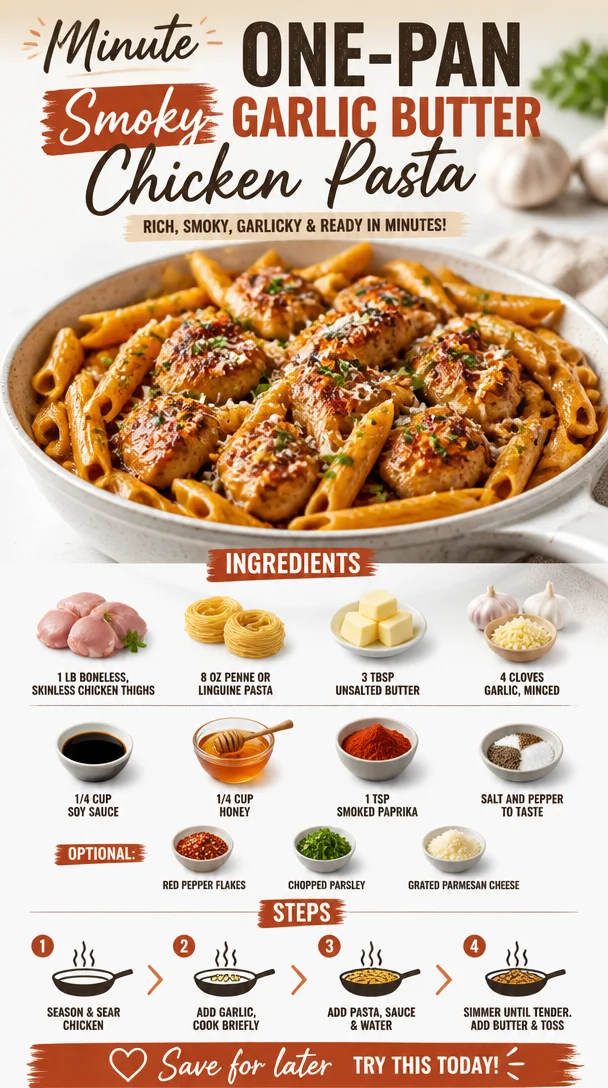
Minute One-Pan Smoky Garlic Butter Chicken Pasta
Sticky Smoky Garlic Butter Chicken Pasta: A Flavor Explosion for Your Dinner Table
Hey food lovers! Welcome to another delicious adventure in the kitchen with me, Ava Carter. Today, I’m absolutely thrilled to share a recipe that not only satisfies those midweek cravings, but also brings a burst of flavor that can transform your dinner into a culinary delight. Say hello to Sticky Smoky Garlic Butter Chicken Pasta!
Imagine golden-brown chicken thighs coated in a rich, sticky garlic buttery sauce that’s so good, you’ll want to lick the plate clean. And let’s not forget the pasta, soaking up all those smokey, garlicky flavors—the perfect vehicle to carry this indulgent goodness straight to your taste buds. If you’re ready to elevate your weeknight dinners and impress your family or guests, then grab your apron and let’s dive in!
Personal Story: A Flavorful Memory
Let me take you back to one of my fondest childhood memories. It was a crisp autumn evening, and my family was gathered in the kitchen, the aroma of garlic and butter wafting through the air. My mom—a powerhouse in the kitchen—was teaching me how to make a simple pasta dish. I vividly recall her laughter, the clinking of pots and pans, and the anticipation of that first bite.
She always said that cooking is an act of love, and I couldn’t agree more. As we stirred the sauce together, she shared stories of her own childhood, showing me how food can transport us to cherished moments. Fast forward years later, I’ve taken that simple dish and given it a sticky, smoky spin, creating this memorable Sticky Smoky Garlic Butter Chicken Pasta recipe. Just like my mom, I want to fill your kitchen with love, laughter, and mouthwatering flavors!
Ingredients
Let’s talk about what you’ll need for this showstopper dish. Here’s a handy checklist:
-
1 lb boneless, skinless chicken thighs: These are juicy and flavorful, perfect for absorbing the sticky sauce. If you’re a fan of leaner cuts, you can substitute with chicken breast, but tender thighs truly shine here.
-
8 oz penne or linguine pasta: Both options work beautifully. Penne holds onto the sauce better with its tubular shape, while linguine adds a delicate touch. Feel free to choose your favorite!
-
3 tbsp unsalted butter: This is what gives our dish that luscious, buttery richness. If you’re wanting a dairy-free option, coconut oil works well too.
-
4 cloves garlic, minced: Garlic is the MVP in this dish, bringing aroma and flavor. Freshly minced garlic is best, though garlic powder in a pinch will do.
-
1/4 cup soy sauce: This brings umami and depth to our sauce. If you need a gluten-free option, use tamari instead.
-
1/4 cup honey: It adds sweetness and balances the saltiness of the soy sauce. Maple syrup or agave can stand in if you prefer a vegan option.
-
1 tsp smoked paprika: It adds a subtle smokiness that really elevates the dish. If you don’t have it, regular paprika will work, although it won’t have that smoky kick.
-
Salt and pepper to taste: Essential for rounding out all the flavors. Always taste as you go!
-
Optional:
- Red pepper flakes: For a spicy kick.
- Chopped parsley: For a fresh touch and color.
- Grated Parmesan cheese: Because who doesn’t love a sprinkle of cheesy goodness?
Step-by-Step Instructions
Okay, are you ready to create some kitchen magic? Let’s get cooking!
-
Cook the Pasta:
In a large pot of boiling salted water, cook your pasta according to package instructions until al dente. Make sure to add salt—this is your chance to flavor the pasta itself! Remember, it’ll keep cooking a bit after you drain it. Once ready, reserve about 1/2 cup of pasta water, then drain and set aside. Little chef tip: toss it with a bit of olive oil to prevent sticking! -
Sear the Chicken:
In a large skillet over medium-high heat, melt 1 tablespoon of the butter. Season the chicken thighs with salt and pepper. Once the butter is sizzling, lay the chicken in the pan and sear until golden brown and cooked through, about 6-7 minutes per side depending on thickness. Here’s a pro chef hack: don’t crowd the pan; work in batches if necessary to get that beautiful sear! -
Create the Sauce:
Once the chicken is done, remove it from the skillet and let it rest for a few minutes. In the same skillet, melt the remaining butter. Add the minced garlic and sauté for about a minute, just until it’s fragrant (but not burned!). Then, pour in the soy sauce and honey, stirring until they blend together. -
Add the Smoky Flavor:
Sprinkle in the smoked paprika and stir. You’ll see the sauce begin to thicken slightly. Lower the heat to medium and return the chicken thighs to the skillet. Let them swim in that glorious sauce for 3-4 minutes, turning them to coat nicely. -
Combine with Pasta:
Now for the exciting part! Toss the cooked pasta into the skillet with the chicken and sauce. Gently mix everything together until the pasta is thoroughly coated. If the sauce seems too thick, add a little reserved pasta water until you reach your desired consistency. Keep tasting and adjusting the seasoning to your liking! -
Serve and Enjoy:
Once everything is well mixed, remove from heat. For the grand presentation, serve it hot right from the skillet or portion it onto individual plates. Top with red pepper flakes (if you like it spicy), a sprinkle of chopped parsley, and freshly grated Parmesan cheese. Each bite is sure to be sticky, smoky, and absolutely scrumptious.
Serving Suggestions
For a beautiful presentation, serve the pasta in wide, shallow bowls for a casual feel, or on a large platter for family-style dining. You can also complement your meal with a fresh green salad or some roasted veggies on the side to balance the richness of the dish. Grab a glass of chilled white wine, and you’ve got yourself a perfect dinner date at home!
Recipe Variations
Feeling adventurous? Here are a few ideas to put a fun twist on this recipe:
-
Vegetarian Delight: Swap the chicken for sautéed mushrooms or chickpeas for a hearty plant-based option.
-
Add More Veggies: Toss in some spinach, cherry tomatoes, or bell peppers for added nutrition and flavor.
-
Different Flavors: Replace soy sauce with teriyaki sauce for a sweeter version, or use a spicy stir-fry sauce for an Asian flair.
-
Nutty Addition: Toss in some toasted sesame seeds before serving for a crunchy surprise.
Chef’s Notes
This recipe has become a family favorite for a reason! I love how simple ingredients can come together to create such a bold, mouthwatering dish. Over the years, I’ve tweaked the recipe here and there—adding more garlic on some days and experimenting with different pasta shapes. But one thing remains constant: the joy it brings to the table. Every time I cook my Sticky Smoky Garlic Butter Chicken Pasta, it reminds me of those cozy family meals from my childhood, and I hope it does the same for you.
FAQs and Troubleshooting
1. Can I use chicken breast instead of thighs?
Absolutely! Chicken breast is a leaner option, but it may dry out if overcooked. Just keep a close eye on it and check for that juicy tenderness.
2. My sauce turned out too salty. What can I do?
If your sauce is too salty, you can balance it out with a pinch of sugar or honey. Another option is to add more pasta or even a splash of cream to tone it down.
3. Can I make this dish in advance?
Yes! You can cook the chicken and sauce ahead of time and just reheat when you’re ready to serve. Just be sure to cook the pasta fresh to avoid it getting mushy.
4. What can I substitute for honey?
If you’re looking for a vegan alternative, agave nectar or maple syrup works wonderfully. If you prefer, you can even try brown sugar for a deeper flavor!
Nutritional Info
While I always suggest enjoying your meals in moderation, here’s a quick nutritional breakdown:
- Calories: Approximately 450-500 per serving (depending on portion size and additional toppings)
- Protein: 30-35g (primarily from chicken)
- Carbohydrates: 50-60g (thanks to the pasta)
- Fats: 20-25g (mainly from butter)
So, there you have it—my Sticky Smoky Garlic Butter Chicken Pasta, a dish that not only delivers on flavor but also evokes sweet memories and warms your heart. I hope you give this recipe a try and create your own kitchen stories! Let me know how it goes, and as always, keep it fresh, simple, and seriously delicious! Happy cooking!
PrintSticky Smoky Garlic Butter Chicken Pasta

A flavor-packed dish featuring tender chicken thighs coated in a rich garlic butter sauce, served with pasta that absorbs all the smokey goodness.
- Prep Time: 15 minutes
- Cook Time: 30 minutes
- Total Time: 45 minutes
- Yield: 4 servings 1x
- Category: Main Course
- Method: Searing
- Cuisine: Italian
- Diet: Non-Vegetarian
Ingredients
- 1 lb boneless, skinless chicken thighs
- 8 oz penne or linguine pasta
- 3 tbsp unsalted butter
- 4 cloves garlic, minced
- 1/4 cup soy sauce
- 1/4 cup honey
- 1 tsp smoked paprika
- Salt and pepper to taste
- Red pepper flakes (optional)
- Chopped parsley (optional)
- Grated Parmesan cheese (optional)
Instructions
- Cook the Pasta: In a large pot of boiling salted water, cook your pasta according to package instructions until al dente. Reserve about 1/2 cup of pasta water, then drain and set aside.
- Sear the Chicken: In a large skillet over medium-high heat, melt 1 tablespoon of the butter. Season the chicken thighs with salt and pepper. Lay the chicken in the pan and sear until golden brown, about 6-7 minutes per side.
- Create the Sauce: Remove the chicken and let it rest. In the same skillet, melt the remaining butter. Add the minced garlic and sauté for about a minute. Pour in the soy sauce and honey, stirring until blended.
- Add the Smoky Flavor: Sprinkle in the smoked paprika and stir. Return the chicken thighs to the skillet and let them coat in the sauce for 3-4 minutes.
- Combine with Pasta: Toss the cooked pasta into the skillet with the chicken and sauce. Mix until the pasta is coated, adding reserved pasta water if needed for consistency.
- Serve and Enjoy: Plate the pasta hot, topped with red pepper flakes, parsley, and Parmesan cheese if desired.
Notes
Feel free to customize with veggies or different sauces to suit your taste preferences!
Nutrition
- Serving Size: 1 serving
- Calories: 475
- Sugar: 15g
- Sodium: 700mg
- Fat: 22g
- Saturated Fat: 10g
- Unsaturated Fat: 8g
- Trans Fat: 0g
- Carbohydrates: 50g
- Fiber: 3g
- Protein: 32g
- Cholesterol: 80mg
Keywords: chicken pasta, garlic butter, smoky flavor, comfort food
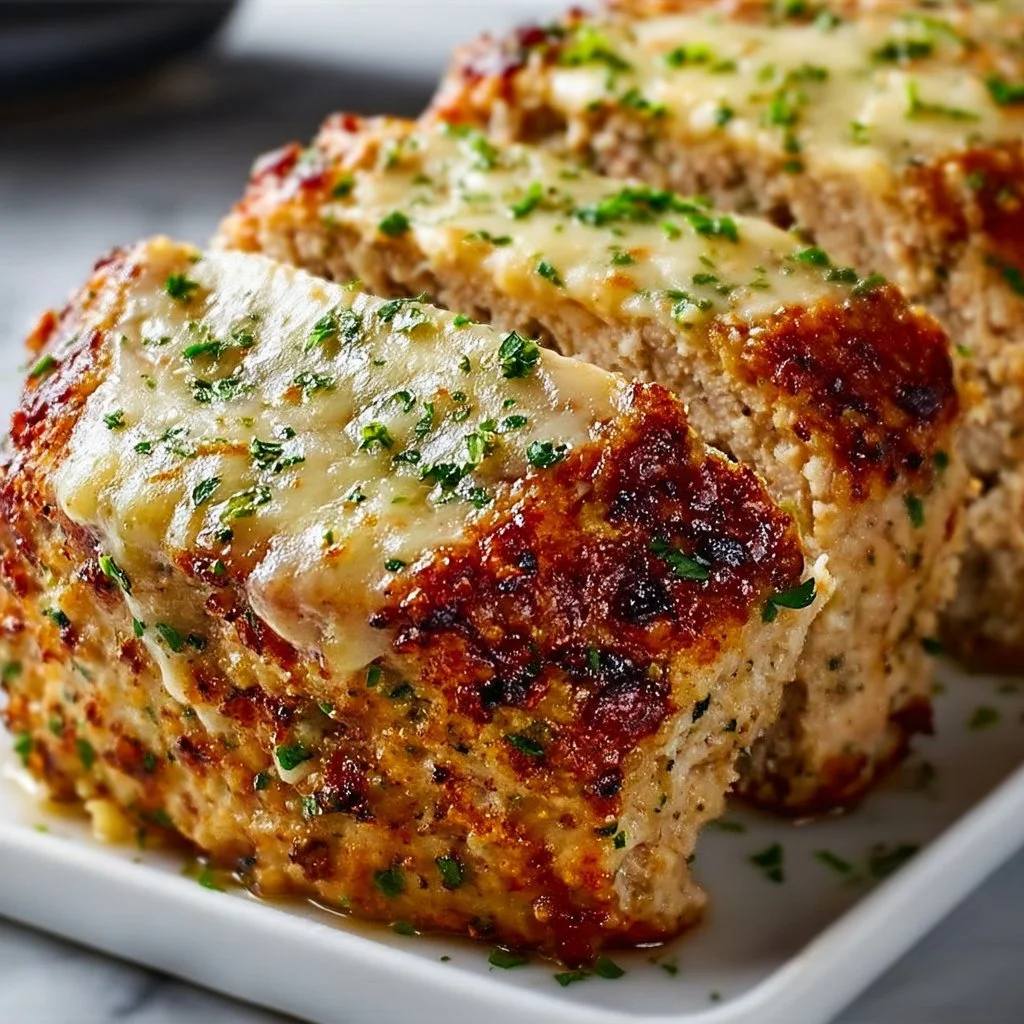
Garlic Parmesan Chicken Meatloaf
Garlic Parmesan Chicken Meatloaf: A Wholesome Twist on a Classic Favorite
Welcome to Clean Plate Cravings! If you’re looking for a dish that captures comfort food in a healthier setting, you’ve landed in just the right spot. Today, we’re diving into the world of deliciousness with a twist on a beloved classic: Garlic Parmesan Chicken Meatloaf. Yes, you heard that right! Think juicy chicken blended with savory garlic and nutty Parmesan, all packed into a hearty loaf that’s just bursting with flavor.
Now, you might be wondering, “Meatloaf with chicken?” The answer is a resounding yes! While traditional meatloaf often calls for beef (and trust me, I love a good beef meatloaf), ground chicken brings a lighter, leaner profile that perfectly absorbs the flavors of garlic and Parmesan. You’ll find this dish not only satisfies that craving for something hearty but also aligns beautifully with a clean and straightforward eating approach.
Imagine slicing into a warm loaf, the aroma of roasted garlic wafting up as you cut each perfectly portioned piece. Pair it with a refreshing side salad or some roasted veggies, and you’ve got yourself a meal that feels both comforting and invigorating. Perfect for busy weeknight dinners or a casual weekend feast, this Garlic Parmesan Chicken Meatloaf is your new go-to recipe! Let’s get started.
A Little Kitchen Story from My Life
Meatloaf has always held a special place in my heart. I remember the first time I made it—my mom’s classic recipe. There she was, apron-clad, guiding me in the kitchen, as we mixed the ingredients together in a big bowl. I had my hands smeared with a mix of ground beef and spices, and I thought it was the most fun I could have while cooking. It was messy, sure, but there’s something magical about getting your hands dirty in the kitchen and creating something delicious.
Years later, I decided to switch things up and experiment with lighter proteins, inspired by my journey towards healthier dining habits. The first time I made chicken meatloaf infused with garlic and Parmesan, it brought back waves of nostalgia, reminding me of those warm evenings spent cooking with my mom. This recipe is more than just food; it’s a celebration of family, flavor, and the joy of eating well. So, let’s channel those good vibes and bring some wholesome, flavorful magic to your kitchen!
Ingredients
Here’s what you’ll need to whip up this tasty Garlic Parmesan Chicken Meatloaf:
-
1 lb ground chicken
The star of the show! Ground chicken is leaner than beef or pork, making it a healthier choice. If you prefer, ground turkey works well as a substitute, just ensure it’s not too lean to keep the meatloaf moist. -
1/2 cup grated Parmesan cheese
This adds a punch of savory goodness! Use fresh grated Parmesan for the best flavor. If you’re looking for a dairy-free option, try nutritional yeast for a similar umami kick. -
2 cloves garlic, minced
Garlic brings a warm, aromatic flavor to the dish. If you’re a garlic lover (like me!), feel free to double this! Alternatively, garlic powder can be used, but fresh garlic offers a more robust taste. -
1/4 cup chopped fresh herbs (like parsley or basil)
Fresh herbs not only enhance the flavor but also add a pop of color. Swap in your favorites—thyme or oregano would work wonderfully, too. -
1/2 cup breadcrumbs
These help bind the meatloaf and ensure it stays moist. Whole wheat bread crumbs add a nice texture, or you can use gluten-free alternatives to accommodate dietary preferences. -
1 large egg
The egg acts as a binder, bringing everything together nicely. If you want an egg-free option, flaxseed meal mixed with water is a great substitution! -
Salt and pepper to taste
Simple yet essential! Don’t be shy with the seasoning; it brings out the flavors of all the other ingredients.
Step-by-Step Instructions
1. Prepare Your Baking Dish
Start by preheating your oven to 375°F (190°C). While it’s heating up, lightly grease a loaf pan with cooking spray or olive oil. This little step ensures your meatloaf won’t stick and makes for an easier cleanup later!
2. Combine the Ingredients
In a large mixing bowl, combine the ground chicken, grated Parmesan cheese, minced garlic, fresh herbs, breadcrumbs, beaten egg, salt, and pepper. Here’s a little chef hack: use your hands to mix everything! Yes, it’s messy, but mixing by hand ensures the meatloaf comes together smoothly without overworking the chicken, which can lead to a rubbery texture.
3. Shape the Meatloaf
Once everything is well combined, transfer the mixture to your prepared loaf pan. Gently press it down to form a loaf shape that’s about 1-1.5 inches high. The height matters! A thicker loaf will take longer to cook, so keep that in mind to ensure it cooks evenly.
4. Bake and Glaze
Pop your meatloaf in the oven and let it bake for about 45 minutes. A few minutes before it’s done, you can add a simple glaze of your choice. My favorite is a mix of ketchup with a splash of balsamic vinegar for some extra zing!
5. Check for Doneness
You’ll know your meatloaf is ready when the internal temperature reaches 165°F (74°C). Use a meat thermometer to check! If you don’t have one handy, simply make a small cut through the center—the juices should run clear.
6. Let It Rest
After pulling it out of the oven, let your meatloaf rest for 10-15 minutes before slicing. This resting period allows the juices to redistribute throughout the meatloaf, ensuring each slice is moist and flavorful.
Serving Suggestions
Slice your Garlic Parmesan Chicken Meatloaf and serve it hot on a plate. Pair it with a fresh salad drizzled with a light vinaigrette, or perhaps some seasoned roasted vegetables for a colorful side. A dollop of homemade pesto on top can also elevate your presentation while adding a vibrant, zesty flavor. It’s all about making it visually appealing, so don’t hesitate to add some herbs for garnish!
Recipe Variations
-
Italian-Style Meatloaf: Add diced sun-dried tomatoes and Italian seasoning for a Mediterranean twist.
-
Spicy Kick: Mix in chopped jalapeños or red pepper flakes for a spicy version.
-
Low-Carb Option: Swap breadcrumbs for finely grated cauliflower for a keto-friendly version.
-
Mushroom Medley: Incorporate finely chopped mushrooms into the mix for an earthy flavor boost.
-
Herb-Infused: Experiment with a variety of fresh herbs like rosemary and thyme for a flavor explosion.
Chef’s Notes
Cooking this Garlic Parmesan Chicken Meatloaf has truly evolved over the years for me! Initially, I started experimenting because I wanted to create a recipe that my kids would love without compromising our family’s health goals. They loved the original beef version, but I knew I could revamp it. This dish has been the perfect solution! Plus, it has become a staple at gatherings with friends and family. I still have to remind them it’s made with chicken because no one can believe something so flavorful can come from poultry!
FAQs and Troubleshooting
Q: Why is my meatloaf too dry?
A: Dry meatloaf typically comes from overcooking or too much breadcrumbs. Ensure you’re monitoring the cooking time and using enough moist ingredients.
Q: Can I freeze meatloaf?
A: Absolutely! This Garlic Parmesan Chicken Meatloaf freezes beautifully. Just wrap it tightly and store it in the freezer for up to three months. Thaw it in the refrigerator overnight before reheating.
Q: What if I don’t have fresh herbs?
A: No worries! You can use dried herbs instead; just remember that dried herbs have a stronger flavor, so use about one-third of the amount.
Q: How can I tell when my meatloaf is done?
A: Use a meat thermometer! The internal temperature should reach 165°F (74°C). If you don’t have a thermometer, cutting into the center should reveal clear juices and no pink.
Nutritional Info
This Garlic Parmesan Chicken Meatloaf offers a great balance of protein and flavor. A typical serving contains approximately:
- Calories: 220
- Protein: 30g
- Carbohydrates: 15g
- Fat: 8g
Feel free to adjust ingredients according to your dietary needs, and don’t forget to enjoy every bite!
Cooking should always be a joyful experience, and I’m thrilled to share this Garlic Parmesan Chicken Meatloaf with you. Whether it becomes a new family favorite or a dish to impress your friends, it’s a great step toward embracing delicious, feel-good food. Let’s keep it fresh and uncomplicated—because you deserve to enjoy meals that nourish and excite you! Happy cooking!
PrintGarlic Parmesan Chicken Meatloaf

A wholesome twist on a classic favorite, this Garlic Parmesan Chicken Meatloaf blends juicy chicken with savory garlic and nutty Parmesan for a flavorful meal.
- Prep Time: 15 minutes
- Cook Time: 45 minutes
- Total Time: 60 minutes
- Yield: 4 servings 1x
- Category: Main Course
- Method: Baking
- Cuisine: American
- Diet: Paleo
Ingredients
- 1 lb ground chicken
- 1/2 cup grated Parmesan cheese
- 2 cloves garlic, minced
- 1/4 cup chopped fresh herbs (like parsley or basil)
- 1/2 cup breadcrumbs
- 1 large egg
- Salt and pepper to taste
Instructions
- Prepare your baking dish by preheating the oven to 375°F (190°C) and greasing a loaf pan.
- Combine the ground chicken, grated Parmesan, minced garlic, fresh herbs, breadcrumbs, beaten egg, salt, and pepper in a large bowl.
- Shape the mixture into a loaf and transfer it to the prepared loaf pan.
- Bake the meatloaf for about 45 minutes, adding a simple glaze a few minutes before it’s done.
- Check for doneness with a meat thermometer; internal temperature should reach 165°F (74°C).
- Let the meatloaf rest for 10-15 minutes before slicing.
Notes
Pair with a fresh salad or roasted vegetables for a complete meal. This meatloaf freezes well, making it perfect for meal prep.
Nutrition
- Serving Size: 1 serving
- Calories: 220
- Sugar: 1g
- Sodium: 300mg
- Fat: 8g
- Saturated Fat: 3g
- Unsaturated Fat: 3g
- Trans Fat: 0g
- Carbohydrates: 15g
- Fiber: 1g
- Protein: 30g
- Cholesterol: 90mg
Keywords: meatloaf, healthy dinner, chicken recipe, garlic, parmesan
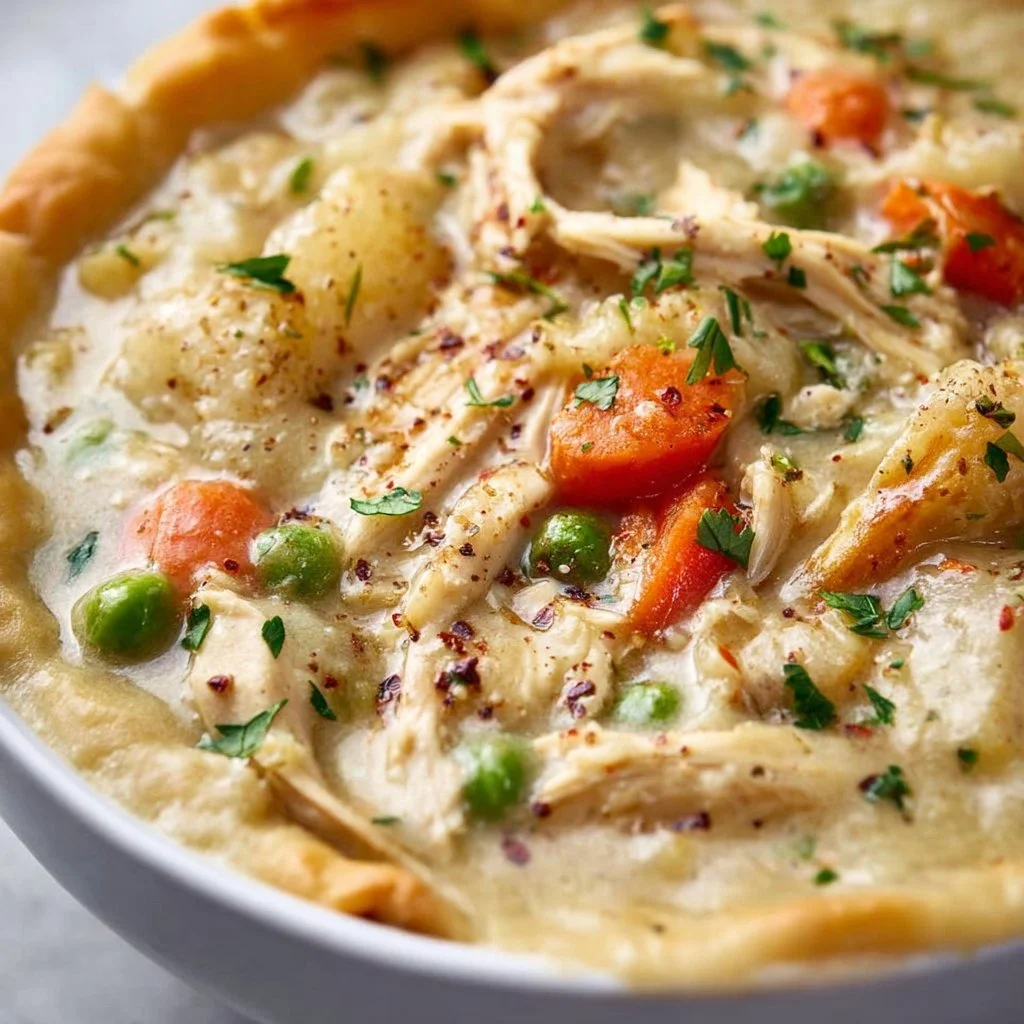
High Protein Chicken Pot Pie Soup
High Protein Chicken Pot Pie Soup: A Comfort Food Classic Made Healthy
Welcome back to Clean Plate Cravings, my dear food enthusiasts! Today, we’re diving into a recipe that wraps you up in all the warmth and nostalgia of home-cooked meals—High Protein Chicken Pot Pie Soup. As the temperatures start to drop, it’s only fitting to bring out those cozy comfort foods, and what’s better than a hearty soup infused with the classic flavors of a chicken pot pie? It’s filling, it’s nutritious, and it might just become your new favorite dish to whip up in your cozy kitchen!
Now, when I think about pot pie, I can’t help but drift back to my childhood. Picture this: chilly afternoons after school, the smell of something savory wafting through the house, calling me from the front door. My mom would be busy in the kitchen, her apron dusted with flour, gently stirring a bubbling pot on the stove. It was a weekly ritual—something about that creamy, chicken-filled goodness made my heart feel lighter and my spirit a little brighter. Fast forward to now, and I’ve taken that childhood favorite and transformed it into a lighter, high-protein soup that’s perfect for any day of the week.
So grab your favorite chopping board, roll up your sleeves, and let’s create something delicious that brings a smile not only to your face but also to your loved ones!
A Trip Down Memory Lane
I’ll never forget those snowy winter nights when my mom would pull out the big, heavy pot for her famous chicken pot pie. There was always a rush of excitement in the air, a sense of warmth, and the promise of a dinner filled with laughter and stories. I’d sneak in small bites of the chicken filling while it was still simmering—totally guilty as charged! The combination of tender chicken, creamy sauce, and colorful vegetables was nothing short of perfection.
Years later, as I began experimenting in my own kitchen, I wanted to recreate that same magic but with a healthier twist. This is how my High Protein Chicken Pot Pie Soup was born! It’s a dish that still pays homage to those cherished memories while also being packed with protein and wholesome ingredients. So, let’s get cooking!
Ingredients
To craft this delectable High Protein Chicken Pot Pie Soup, we’ll gather the following ingredients:
-
1 lb chicken breast, diced: The star of our show! Chicken breast provides lean protein that keeps you full and satisfied. For a twist, you could use turkey breast or even rotisserie chicken for a quicker option.
-
1 cup carrots, diced: These bring a natural sweetness and a pop of color. If you’re short on time, you can use pre-chopped carrots or even frozen ones.
-
1 cup celery, diced: Adding a refreshing crunch and a nice contrast to the creamy soup. Leeks or fennel can also be great substitutes for a unique flavor!
-
1 onion, diced: The aromatic base that hits all the right notes. If you’re not an onion fan, shallots or green onions can work well too.
-
3 cloves garlic, minced: Garlic elevates any dish with its pungent and savory vibes. For those who prefer milder flavors, you can reduce it to one or two cloves.
-
4 cups chicken broth: This adds depth and richness to our soup. Homemade is ideal, but low-sodium boxed broth works perfectly too. You can even use vegetable broth for a vegetarian option!
-
1 cup coconut milk: For that creamy, luscious finish. If you prefer a lighter version, you can swap it for unsweetened almond milk, but it won’t be as thick.
-
1 cup frozen peas: Adding a splash of color and texture to our soup. Fresh peas are fantastic, but frozen work great for convenience!
-
1 tsp thyme: A lovely herb that complements the flavors beautifully. If you don’t have fresh thyme, dried will do just fine.
-
1 tsp rosemary: A fragrant touch that pairs perfectly with chicken. Feel free to substitute it with Italian seasoning or all-purpose herbs if you prefer.
-
Salt and pepper to taste: For seasoning, always add to your taste preference—don’t shy away from seasoning generously!
-
1/4 cup almond flour (optional, for thickening): This is optional but adds a nice thickness to your soup. If you’re gluten-free, this is a perfect alternative. You can also use cornstarch or all-purpose flour as a substitute.
Step-by-Step Instructions
Are you ready to dive into the cooking process? Let’s get saucy!
-
Sauté the Aromatics: In a large pot, heat a drizzle of olive oil over medium-high heat. Once hot, add the diced onion and garlic. Sauté for about 3-4 minutes, or until the onions become translucent. This is where the magic starts, filling your kitchen with that heavenly aroma.
-
Add the Chicken: Toss in the diced chicken breast with a sprinkle of salt and pepper. Cook, stirring occasionally, for about 5-7 minutes until the chicken is browned and cooked through. Here’s a tip: if you want a deeper flavor, consider browning the chicken in batches so they get a golden crust.
-
Mix in the Veggies: Adding in the carrots and celery now! Sauté for another 3-4 minutes until they’re slightly softened. This step is crucial as it develops the flavor base further.
-
Pour in the Broth: Now, it’s time to bring on the liquid love! Pour in the chicken broth, stirring to combine everything. Bring this to a gentle simmer, and get ready to cozy up as the wonderful smells intensify.
-
Coconut Milk & Peas: Stir in the coconut milk and frozen peas. Reduce the heat to medium-low. Let the soup simmer for another 5-10 minutes, allowing all flavors to meld beautifully.
-
Add the Herbs: Sprinkle in the thyme, rosemary, and additional salt and pepper if needed. Here’s a helpful chef hack: tasting as you go is essential! Adjust the seasonings until it feels just right.
-
Thickening the Soup: If you prefer a thicker soup, mix the almond flour with a little water to create a slurry, and stir it into the pot. Allow it to cook for an additional 2-3 minutes until thickened.
-
Final Touches: Once the soup reaches your desired consistency, it’s time to serve! Check the flavor once more, and adjust anything according to your taste.
This High Protein Chicken Pot Pie Soup is comforting, healthy, and bursting with flavor. Perfect for serving on a cozy night in or meal prepping for those busy weekdays ahead!
Serving Suggestions
When it’s time to serve, ladle the soup into bowls and consider garnishing with fresh herbs like parsley or thyme for a pop of color. Pair it with some crusty bread or a simple side salad for a wholesome meal. You might even enjoy sprinkling a bit of crushed red pepper or some fresh lemon juice for an extra zing!
Recipe Variations
Feel free to mix up this recipe based on your mood or dietary preferences! Here are some fun variations:
-
Swap the Protein: Use shredded turkey or even plant-based chicken alternatives for a vegetarian version.
-
Veggie Power-Up: Sneak in different veggies like green beans or corn for added flavor and nutrition.
-
Dairy-Free Version: If you want to skip the coconut milk, use cashew cream or more broth instead for a lighter soup.
-
Herb Fusion: Experiment with different herbs like dill or basil for a unique twist that sings of summer.
-
Spicy Kick: Add chopped jalapeños or crushed red pepper flakes to elevate the heat level!
Chef’s Notes
Cooking is an art, and every recipe evolves over time. I remember the first time I made this soup—it was a messy but delicious affair, and I learned a lot about balancing flavors. The key is not to rush—let the ingredients shine through. You may find different knacks that work for you in the kitchen, and that’s the beauty of it!
I have a funny story too; once, I accidentally added way too much rosemary (whoops!), but instead of tossing it, I turned it into a flavorful sauce for roasted potatoes later. There are no mistakes, just delicious discoveries waiting to happen!
FAQs and Troubleshooting
1. My soup is too thin; how can I thicken it?
Don’t fret! You can create a slurry with almond flour or cornstarch mixed with cold water and add it to the simmering soup. Let it cook for a few more minutes, and it should thicken up nicely.
2. Can I use frozen chicken?
Absolutely! Just make sure to thaw it properly before cooking. You might need to add a few extra minutes to the cooking time to make sure it’s cooked through.
3. What if I don’t have coconut milk?
No worries! You can replace it with heavy cream, milk, or even vegetable broth for a lighter version.
4. Can I make this soup in advance?
Definitely! It stores beautifully in the fridge for up to three days. Just reheat gently on the stove. If you plan to freeze it, consider leaving the almond flour out and thickening it when you reheat—it keeps the texture nicer!
Nutritional Info (Optional)
While I typically keep nutritional information optional, I can tell you that this soup is packed with protein thanks to the chicken, while the inclusion of veggies ensures a multitude of vitamins and minerals. Each serving can provide a hearty punch of nutrition.
So there you have it—my ultimate High Protein Chicken Pot Pie Soup recipe, a comforting hug in a bowl that’s not just for chilly nights but for any day you need a little warmth and nourishment. Enjoy cooking, stay creative, and most importantly, keep those cravings clean and delicious!
Happy cooking, and let me know how your soup turns out!
PrintHigh Protein Chicken Pot Pie Soup

A hearty and healthy soup infused with the classic flavors of chicken pot pie, filled with protein and wholesome ingredients.
- Prep Time: 15 minutes
- Cook Time: 30 minutes
- Total Time: 45 minutes
- Yield: 4 servings 1x
- Category: Soup
- Method: Stovetop
- Cuisine: American
- Diet: High Protein
Ingredients
- 1 lb chicken breast, diced
- 1 cup carrots, diced
- 1 cup celery, diced
- 1 onion, diced
- 3 cloves garlic, minced
- 4 cups chicken broth
- 1 cup coconut milk
- 1 cup frozen peas
- 1 tsp thyme
- 1 tsp rosemary
- Salt and pepper to taste
- 1/4 cup almond flour (optional, for thickening)
Instructions
- Sauté the Aromatics: In a large pot, heat a drizzle of olive oil over medium-high heat. Once hot, add the diced onion and garlic. Sauté for about 3-4 minutes, or until the onions become translucent.
- Add the Chicken: Toss in the diced chicken breast with a sprinkle of salt and pepper. Cook, stirring occasionally, for about 5-7 minutes until the chicken is browned and cooked through.
- Mix in the Veggies: Adding in the carrots and celery now! Sauté for another 3-4 minutes until they’re slightly softened.
- Pour in the Broth: Pour in the chicken broth, stirring to combine everything. Bring this to a gentle simmer.
- Coconut Milk & Peas: Stir in the coconut milk and frozen peas. Reduce the heat to medium-low and let the soup simmer for another 5-10 minutes.
- Add the Herbs: Sprinkle in the thyme, rosemary, and additional salt and pepper if needed.
- Thickening the Soup: If you prefer a thicker soup, mix the almond flour with a little water to create a slurry, and stir it into the pot.
- Final Touches: Once the soup reaches your desired consistency, serve!
Notes
Garnish with fresh herbs and pair with crusty bread or a salad. You can also adjust ingredients based on dietary preferences.
Nutrition
- Serving Size: 1 serving
- Calories: 350
- Sugar: 6g
- Sodium: 800mg
- Fat: 14g
- Saturated Fat: 9g
- Unsaturated Fat: 5g
- Trans Fat: 0g
- Carbohydrates: 30g
- Fiber: 4g
- Protein: 30g
- Cholesterol: 75mg
Keywords: chicken pot pie, soup, high protein, comfort food, healthy recipes
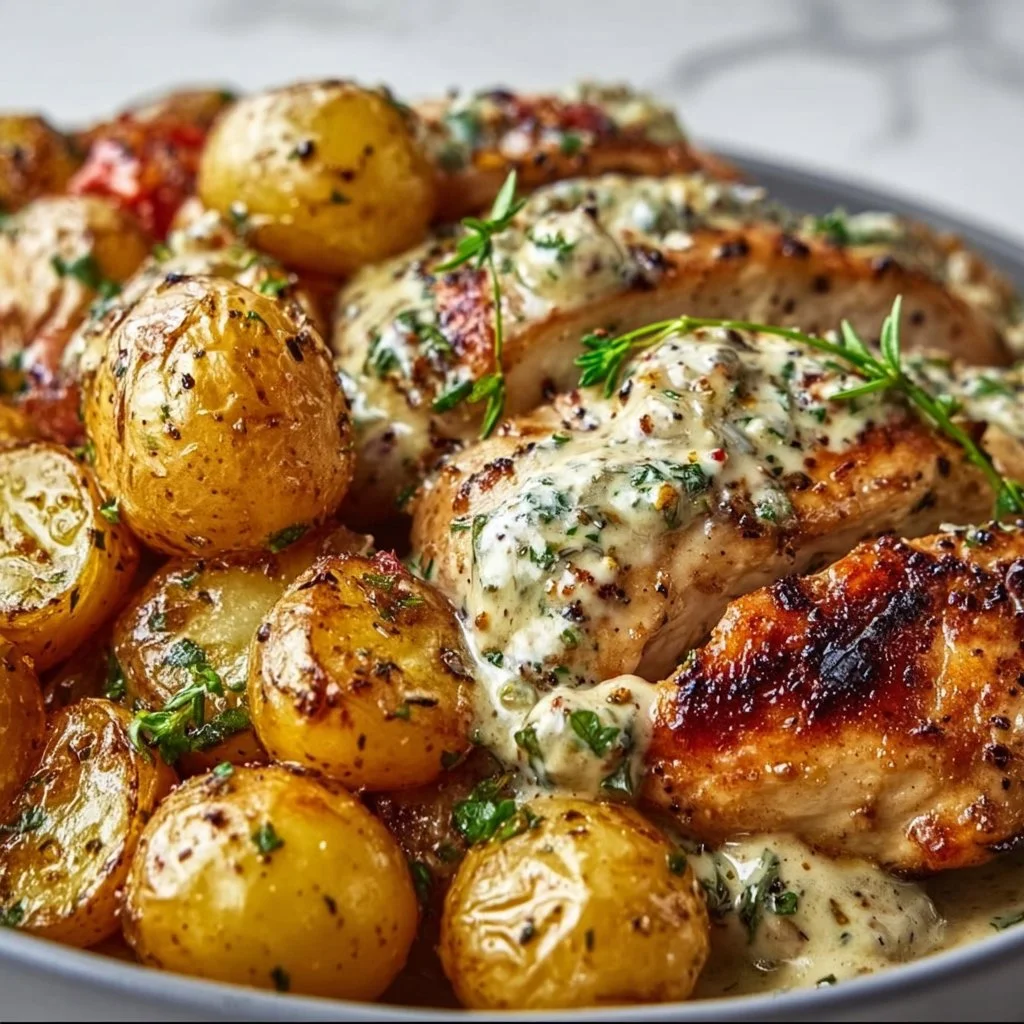
Creamy Garlic Chicken with Roasted Baby Potatoes
Creamy Garlic Chicken with Roasted Baby Potatoes: A Delicious Dream Come True
Hey there, fellow food lovers! Welcome back to Clean Plate Cravings! Today, I’m super excited to share one of my all-time favorite recipes: Creamy Garlic Chicken with Roasted Baby Potatoes. This dish has a way of wrapping you in a comforting embrace, bringing the richness of flavor while keeping things light and wholesome (you won’t be feeling too heavy afterward!).
Imagine coming home after a long day, the aroma of garlic wafting through the air, and knowing that a delectable meal awaits you. Sounds amazing, right? Well, this dish is just that! With tender chicken breasts drenched in a creamy, garlicky sauce and served alongside perfectly roasted baby potatoes, it’s a joyful experience for your taste buds that’s as easy to prepare as it is enjoyable to eat. Let’s dive into the magic of this recipe!
A Timeless Kitchen Memory
Growing up, Sundays were sacred in our household. My family had a tradition where we’d gather around the dinner table for a home-cooked meal. One of the stars of those meals was my mom’s creamy garlic chicken. It had this magical way of making the entire house smell heavenly. I would sit at the table, waiting impatiently, desperately hoping she’d make enough so we could have leftovers!
One particular Sunday, I remember sneaking into the kitchen, trying to watch her work her magic. I was fascinated by how simple ingredients transformed into such a luscious dish. The way she effortlessly minced garlic and blended cream with fragrant seasonings was pure artistry to me. Those moments inspired my love for cooking and these family recipes, and that feeling of togetherness is something I aim to recreate with every meal I share today.
Now, as an adult, I’ve put my own spin on that classic dish, marrying it with delicious roasted baby potatoes that are almost irresistible on their own. Are you ready to recreate this cozy meal with me? Let’s get started!
Ingredients
Here’s what you’ll need to whip up your very own Creamy Garlic Chicken with Roasted Baby Potatoes:
-
4 boneless, skinless chicken breasts
- Tender and quick-cooking, chicken breasts are the perfect canvas for our creamy sauce. If you’re looking for a lighter protein, feel free to swap for turkey cutlets or even tofu for a vegetarian version.
-
Salt, to taste
- A crucial ingredient that enhances all other flavors. For a fragrant twist, try using sea salt or Himalayan salt.
-
Black pepper, to taste
- Adds a touch of heat and depth. If you’re feeling adventurous, fresh cracked peppercorns will elevate the meal even more!
-
2 teaspoons garlic powder, divided
- Adds a lovely background flavor. If you have fresh garlic instead, use 6-8 cloves for that bold, fresh taste.
-
4 cloves garlic, minced
- Fresh garlic is where the real flavor party happens! Always mince it just before cooking to maximize its aromatic effects.
-
3 tablespoons olive oil, divided
- A heart-healthy choice for cooking and drizzling, olive oil lends a nice richness. You can also substitute avocado or coconut oil.
-
1 cup chicken broth
- Provides a deep, savory base for your sauce. Homemade is great, but go for low-sodium store-bought for convenience.
-
1 cup heavy cream
- This is the star player that makes the sauce so luscious! If you want a lighter option, you can use half-and-half or a plant-based cream.
-
1/2 cup grated Parmesan cheese
- Adds a rich umami flavor that marries beautifully with the garlic. Pecorino Romano works just as well if you’re after a sharper taste.
-
1 tablespoon Dijon mustard
- This adds a subtle tang that cuts through the creaminess. For a milder option, you can use yellow mustard.
-
1 teaspoon Italian seasoning
- A blend of herbs that brings a taste of the Mediterranean to the dish. Feel free to adjust the blend with your favorites, like basil or oregano.
-
2 cups baby potatoes, halved
- These little gems are perfect for roasting and absorbing flavors. If you can’t find baby potatoes, try using Yukon Gold or fingerlings cut into smaller pieces.
Step-by-Step Instructions
-
Preheat Your Oven:
First things first, preheat your oven to 400°F (200°C). This will make sure it’s nice and hot to get those baby potatoes perfectly roasted. -
Prep the Baby Potatoes:
Start by placing the halved baby potatoes in a large mixing bowl. Drizzle with 2 tablespoons of olive oil, and sprinkle with salt, black pepper, and a teaspoon of garlic powder. Toss everything together until the potatoes are evenly coated. This little step gets them seasoned and ready for roasting! -
Roast Them Up:
Spread the potatoes out on a baking sheet (line it with parchment for easy cleanup!). Make sure they’re in a single layer to ensure even roasting; no one likes mushy potatoes! Pop them in the oven and roast for about 25-30 minutes or until they’re golden and crispy. Flip them halfway through for that perfect roast! -
Cook the Chicken:
While those delicious potatoes are roasting, let’s move on to the chicken. Heat the remaining tablespoon of olive oil in a large skillet over medium heat. Season both sides of the chicken breasts with salt, black pepper, and the remaining teaspoon of garlic powder. -
Sear the Chicken:
Once your skillet is hot, add the chicken breasts. Sear them for about 5-7 minutes on each side, or until they’re beautifully browned and cooked through. They’ll develop a lovely crust, keeping all those juices locked in. Remove them from the skillet and set them aside on a plate for now. -
Make the Creamy Sauce:
Lower the heat to medium-low. In the same skillet, add the minced garlic. Sauté it for about 30 seconds until it becomes fragrant (but make sure not to burn it!). Add the chicken broth and scrape the bottom of the pan to get all those tasty bits mixed in. -
Add Cream and Cheese:
Stir in the heavy cream, Dijon mustard, Italian seasoning, and grated Parmesan cheese. Keep stirring until it’s nice and bubbly. Let it simmer for about 3-5 minutes until it thickens slightly. -
Return Chicken to Pan:
Add the chicken back into the skillet, making sure it’s coated in that creamy goodness. Let it cook for another 5 minutes, allowing all those flavors to combine.
Serving Suggestions
To plate this dish, serve the creamy garlic chicken on a generous bed of the roasted baby potatoes. I love garnishing with a sprinkle of fresh herbs—like parsley or basil—on top for a pop of color and freshness. You can never go wrong with a side of steamed veggies for a vibrant meal!
Recipe Variations
-
Herb-Infused: Add fresh thyme or rosemary to the creamy sauce for an aromatic twist.
-
Zesty Lemon: For a bright flavor, squeeze some fresh lemon juice into the sauce and add lemon zest before serving.
-
Mushroom Medley: Sauté some sliced mushrooms along with the garlic for a hearty, earthy flavor.
-
Spicy Kick: Add a pinch of red pepper flakes or a splash of hot sauce for some heat!
-
Dairy-Free: Substitute the heavy cream with coconut cream and the cheese with nutritional yeast for a creamy, dairy-free alternative.
Chef’s Notes
Oh boy, this recipe has gone through quite the evolution in my kitchen! The first time I made it, I went a little overboard with the garlic (impressive, but not exactly palatable!). Now, years later, I’ve perfected the balance between creamy and garlicky goodness, and it’s a staple at my gatherings. I love adding little personal touches here and there—like playing around with different herbs or finding new sides that pair well. It’s incredible how a simple dish can tell a story and evolve over time, just like our appreciation for food!
FAQs and Troubleshooting
Q1: What if my sauce is too thick?
A1: No worries! Simply add a splash more chicken broth or cream until you reach your desired consistency.
Q2: How can I ensure my chicken doesn’t dry out?
A2: Don’t overcook the chicken! Use a meat thermometer to check for doneness; it should read 165°F internally. Also, let your chicken rest for a few minutes after cooking to retain its juices.
Q3: Can I make this recipe ahead of time?
A3: Absolutely! You can prepare the sauce and chicken in advance and store them separately in the fridge. Just reheat the chicken and sauce on the stove before serving.
Q4: What’s a good substitute for baby potatoes?
A4: You can use regular-sized potatoes cut into smaller pieces, or even sweet potatoes if you want a healthier twist. Just adjust the cooking time accordingly!
Nutritional Info (if applicable)
This Creamy Garlic Chicken with Roasted Baby Potatoes is packed with protein, flavorful fats, and healthy carbs, making it a balanced dish for any meal. Plus, it’s filled with vitamins from the herbs and garlic, bringing health benefits along with its irresistible taste!
And there you have it—my take on Creamy Garlic Chicken with Roasted Baby Potatoes! I hope this dish warms your kitchen and heart, just like it has mine. Enjoy the process, explore your own creative twists, and remember: cooking is always about bringing joy—not just to your plate, but to everyone you love. Happy cooking, and cheers to flavorful adventures ahead!
PrintCreamy Garlic Chicken with Roasted Baby Potatoes

Tender chicken breasts in a creamy garlic sauce served with perfectly roasted baby potatoes.
- Prep Time: 15 minutes
- Cook Time: 30 minutes
- Total Time: 45 minutes
- Yield: 4 servings 1x
- Category: Main Course
- Method: Baking
- Cuisine: Italian
- Diet: Gluten-Free
Ingredients
- 4 boneless, skinless chicken breasts
- Salt, to taste
- Black pepper, to taste
- 2 teaspoons garlic powder, divided
- 4 cloves garlic, minced
- 3 tablespoons olive oil, divided
- 1 cup chicken broth
- 1 cup heavy cream
- 1/2 cup grated Parmesan cheese
- 1 tablespoon Dijon mustard
- 1 teaspoon Italian seasoning
- 2 cups baby potatoes, halved
Instructions
- Preheat your oven to 400°F (200°C).
- Place the halved baby potatoes in a bowl, drizzle with 2 tablespoons of olive oil, and sprinkle with salt, black pepper, and 1 teaspoon of garlic powder. Toss to coat.
- Spread the potatoes out on a baking sheet and roast for about 25-30 minutes, flipping halfway through.
- Heat the remaining tablespoon of olive oil in a skillet over medium heat. Season the chicken breasts with salt, black pepper, and the remaining garlic powder.
- Sear the chicken in the skillet for 5-7 minutes on each side until browned and cooked through. Remove from the skillet.
- Sauté the minced garlic in the same skillet for 30 seconds, then add chicken broth.
- Stir in heavy cream, Dijon mustard, Italian seasoning, and Parmesan cheese. Simmer for 3-5 minutes until thickened.
- Add the chicken back to the skillet, ensuring it’s coated in the sauce, and cook for another 5 minutes.
Notes
Garnish with fresh herbs for added flavor and color. Best served with steamed vegetables for a complete meal.
Nutrition
- Serving Size: 1 serving
- Calories: 450
- Sugar: 5g
- Sodium: 600mg
- Fat: 20g
- Saturated Fat: 10g
- Unsaturated Fat: 8g
- Trans Fat: 0g
- Carbohydrates: 36g
- Fiber: 4g
- Protein: 30g
- Cholesterol: 90mg
Keywords: Creamy Garlic Chicken, Roasted Baby Potatoes, Comfort Food, Easy Dinner, Family Recipe