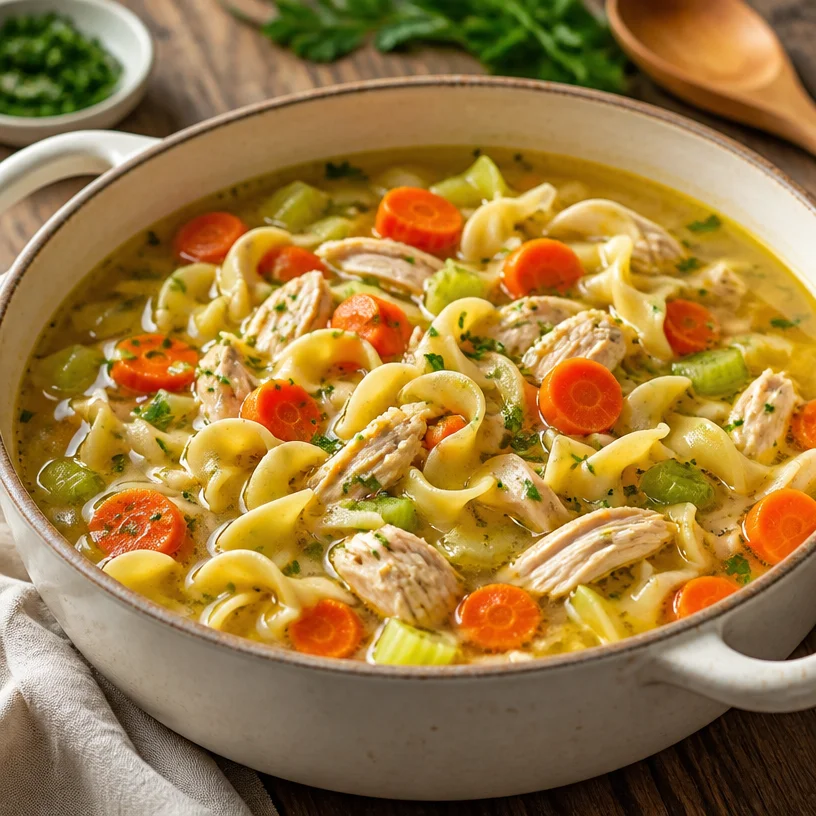
Minute One-Pot Chicken Noodle Soup for Weeknights
The Ultimate Chicken Noodle Soup: A Cozy Classic with a Twist
Ah, chicken noodle soup—just saying the name brings back memories of comforting moments spent at home, wrapped in blankets and surrounded by the warm aroma of a bubbling pot on the stove. There’s something magical about this dish that transcends generations, and for many, it’s a childhood staple that evokes nostalgia and warmth. If you’ve ever struggled through a rainy day or felt under the weather, I’m sure you’d agree that a hearty bowl of chicken noodle soup has a way of making everything better!
I’m Ava Carter, your friendly neighborhood chef, and today I’m excited to share my favorite version of chicken noodle soup with all of you. This isn’t just any chicken noodle soup; it’s a delightful blend of fresh ingredients and wholesome goodness that’ll leave you feeling energized and ready to take on the world. We’re talking about tender chicken, perfectly cooked egg noodles, and vibrant vegetables all swimming in a savory homemade broth.
In this blog post, you’re in for a treat! I’ll guide you through my go-to recipe for chicken noodle soup, complete with personal anecdotes, tips, and tricks straight from my cozy kitchen. Whether you’re battling a cold, searching for the perfect family dinner, or just seeking some soul-warming goodness, I’ve got you covered. So grab your apron, and let’s dive into this delicious culinary adventure!
A Nostalgic Soup Story
One of my fondest memories of chicken noodle soup takes me back to my childhood kitchen, where the scent of garlic and simmering broth would drift through the air on chilly winter evenings. My grandmother was the queen of comfort food, and she would whip up giant batches of her famous chicken noodle soup every Sunday. It was her little way of showing love, and that soup was always served with big smiles and family stories.
I remember sitting at the kitchen table, watching her with wide eyes as she expertly shredded the chicken and tossed in the vibrant vegetables—carrots, celery, and sometimes even peas for a little pop of color! As she stirred the pot, she would share tales of her own grandmother, who had taught her to make this comforting dish. Each bowl was a treasure trove of flavors and history, and I realized even back then that this soup wasn’t just about nourishing the body—it was about nurturing the soul.
So today, as I lace my apron strings and heat up my own pot, I strive to carry on that legacy. Each bowl of chicken noodle soup I make is a tribute to those moments spent laughing and bonding over a shared meal. Let’s create some new memories together, shall we?
Ingredients
To whip up this delightful chicken noodle soup, you’ll need the following ingredients:
-
Chicken: I recommend using boneless, skinless chicken breasts for tenderness, but feel free to use chicken thighs for deeper flavor. For a quicker option, rotisserie chicken works wonders—just shred it right into the pot!
-
Egg Noodles: These lovely little noodles cook up fluffy and filled with flavor. If you’re gluten-free, you can swap in rice noodles or spiralized zucchini for a fresh twist.
-
Carrots: Fresh, diced carrots bring a touch of sweetness. If you’re in a rush, you can use frozen carrot rounds—just toss them in a bit later in cooking.
-
Celery: Celery adds a lovely crunch and a subtle earthiness. If you don’t have celery on hand, chopped bell pepper or green beans can be a quick substitute.
-
Broth: A rich chicken broth is key! Use homemade if you have it, but store-bought works just as well. For a vegetarian twist, vegetable broth can be used instead—just adjust the seasonings.
-
Garlic and Onions: These flavor powerhouses create a wonderful base for your soup. Fresh garlic cloves and a sweet onion will transform your broth. If you’re in a pinch, garlic powder and onion powder can step in for this duo.
-
Herbs: Fresh herbs like thyme or parsley add a refreshing finish. Dried herbs work too; just use them sparingly!
-
Salt and Pepper: To taste, always essential for enhancing flavors.
Step-by-Step Instructions
Now let’s get cooking! Follow these steps to create your comforting chicken noodle soup:
-
Prepare the Chicken: If using raw chicken, start by dicing your chicken into bite-sized cubes. Heat a bit of olive oil in a large pot over medium heat and add the chicken. Sauté until it’s golden and cooked through, about 6-8 minutes. Chef’s tip: Make sure not to overcrowd the pan to ensure it sears instead of steams! If you’re using rotisserie chicken, simply shred it and skip to the next step.
-
Sauté the Aromatics: Next, toss in a chopped onion and 2-3 minced garlic cloves. Sauté until fragrant, about 2-3 minutes, while stirring occasionally. This step builds a flavorful base for your soup. Pro tip: If you want a little kick, throw in a pinch of red pepper flakes here!
-
Add Vegetables: Stir in the diced carrots and celery, cooking for another 4-5 minutes until they soften. Quick hack: If you prefer your veggies a bit crisper, add them later in the cooking process!
-
Pour in the Broth: Now, it’s time to add 6 cups of chicken broth to the pot. Increase the heat to high and bring the mixture to a gentle boil. Chef’s note: For an extra boost of flavor, add the leftover bones or carcass from your rotisserie chicken to the broth!
-
Add the Noodles: Once boiling, reduce the heat to medium and add in 3 cups of egg noodles. Let everything simmer for about 10 minutes or until the noodles are al dente. Don’t forget to taste the broth here and adjust the seasoning with salt and pepper! Tip: You can always add more broth or water if you find the soup too thick.
-
Finish with Herbs: In the last few minutes of cooking, toss in chopped fresh herbs like thyme or parsley. Stir well to combine! If you’re using dried herbs, add them earlier with the broth to allow their flavors to infuse. Personal touch: I love adding a splash of lemon juice right before serving for an extra zest!
-
Serve It Up: Ladle the soup into bowls and enjoy it hot! If you’re feeling fancy, garnish with a sprinkle of fresh herbs or a drizzle of good olive oil. Chef’s magic: Serve it with a crusty slice of bread for dipping—it’s a match made in heaven!
Serving Suggestions
The best part about chicken noodle soup is how versatile it is when it comes to serving. You can go casual with a simple bowl and a spoon, or dress it up by serving it in rustic ramekins with freshly baked rolls on the side. Want to take it to the next level? Try topping it with crispy fried onions or a dusting of Parmesan cheese! Either way, your presentation will make this hearty dish feel extra special.
Recipe Variations
-
Spicy Twist: Add diced jalapeños or a dash of hot sauce for a kick!
-
Creamy Delight: Stir in a splash of heavy cream or coconut milk for a creamy version that’ll warm you from the inside out.
-
Herbaceous Spin: Experiment with different herbs like dill or tarragon for a fragrant twist.
-
Vegetarian Option: Swap chicken for chickpeas and add loads of vibrant veggies like bell peppers and spinach.
-
Noodle-Free: For a low-carb alternative, use cauliflower rice in place of noodles for a light and healthy soup.
Chef’s Notes
This recipe has come a long way from my grandmother’s kitchen. Each time I make it, I find myself tweaking it just a little bit more to suit my taste. Sometimes I add in a splash of white wine for depth of flavor, or I’ll switch up the vegetables based on what’s fresh at the market. What I love most, though, is how this soup has a life of its own! You can make it your own masterpiece by experimenting and throwing in whatever you have on hand. It’s comforting, delicious, and just a spoonful away from a happy memory!
FAQs and Troubleshooting
Q: Why is my soup too salty?
A: If you accidentally add too much salt, try adding a peeled potato while it simmers. The potato will absorb some of the saltiness!
Q: Can I freeze chicken noodle soup?
A: Absolutely! Freeze the soup without the noodles, and when you’re ready for it, just add fresh noodles when reheating!
Q: How can I make a thicker soup?
A: If you prefer a thicker consistency, add a cornstarch slurry (mix equal parts cornstarch with cold water) and stir it in while simmering until it thickens.
Q: My noodles became mushy. What happened?
A: This can happen if they’ve cooked too long. Try cooking the noodles separately next time and just adding them to each bowl before ladling in the soup.
Nutritional Info
While I often focus on the joy of cooking, I know many of you might be interested in the nutritional value of your meals. A typical serving of this chicken noodle soup (about 1.5 cups) contains approximately 350 calories, 20g of protein, 10g of fat, and 35g of carbohydrates. It’s a nourishing, well-rounded meal full of flavor!
Let’s savor every moment spent in the kitchen, embrace our culinary adventures, and celebrate the comfort of chicken noodle soup. You’ve got this, and I can’t wait for you to share your versions with me! Happy cooking!
PrintThe Ultimate Chicken Noodle Soup: A Cozy Classic with a Twist

A delightful blend of fresh ingredients, tender chicken, and vibrant vegetables in a savory homemade broth. This chicken noodle soup is perfect for cozy evenings and nurturing the soul.
- Prep Time: 15 minutes
- Cook Time: 30 minutes
- Total Time: 45 minutes
- Yield: 4 servings 1x
- Category: Main Course
- Method: Stovetop
- Cuisine: American
- Diet: None
Ingredients
- 1 lb boneless, skinless chicken breasts (or thighs)
- 3 cups egg noodles (or rice noodles for gluten-free)
- 2 carrots, diced (or frozen carrot rounds)
- 2 celery stalks, diced (or bell pepper/green beans)
- 6 cups chicken broth (or vegetable broth for vegetarian)
- 2–3 garlic cloves, minced
- 1 onion, chopped
- Fresh herbs (thyme or parsley) to taste
- Salt and pepper to taste
Instructions
- Prepare the Chicken: Dice into bite-sized cubes and sauté in olive oil until golden, about 6-8 minutes.
- Sauté the Aromatics: Add chopped onion and minced garlic, cook until fragrant, about 2-3 minutes.
- Add Vegetables: Stir in diced carrots and celery, cooking for another 4-5 minutes until softened.
- Pour in the Broth: Add 6 cups of chicken broth, bring to a boil.
- Add the Noodles: Reduce heat, add egg noodles, and simmer for about 10 minutes.
- Finish with Herbs: Stir in chopped fresh herbs in the last minutes of cooking.
- Serve It Up: Ladle soup into bowls and enjoy hot, garnished with fresh herbs or a drizzle of olive oil.
Notes
Feel free to customize with your favorite veggies or spices. This soup freezes well without the noodles; just add fresh noodles when reheating.
Nutrition
- Serving Size: 1 serving
- Calories: 350
- Sugar: 5g
- Sodium: 400mg
- Fat: 10g
- Saturated Fat: 2g
- Unsaturated Fat: 8g
- Trans Fat: 0g
- Carbohydrates: 35g
- Fiber: 2g
- Protein: 20g
- Cholesterol: 60mg
Keywords: chicken noodle soup, comfort food, cozy recipes, homemade soup, chicken recipes

Creamy Broccoli Cheddar Soup: 20-Minute Weeknight Comfort
The Comfort of Broccoli Cheddar Soup: A Heartwarming Recipe
Welcome, fellow food lovers! Today, we’re diving into a dish that wraps you up like a cozy blanket on a chilly day—Broccoli Cheddar Soup. If you’ve ever found yourself wanting something warm and delightful, this creamy bowl of goodness is your answer. Not only is it rich and cheesy, but it embodies that perfect balance of comfort food and healthy eating, making it a popular favorite.
Now, if you’re anything like me, the thought of broccoli might have conjured up memories of being a kid at the dinner table, eyeing that plate of steamed greens with a mix of disdain and apprehension. But let me tell you, we’re here to change that narrative! This dish takes humble little broccoli and elevates it into something absolutely magical. So grab your apron, and let’s get cooking!
A Spoonful of Nostalgia
Growing up, my kitchen was bustling with the aromas of homemade meals that brought my family together. One of my fondest memories is when my mom would whip up her famous Broccoli Cheddar Soup on cold winter evenings. The kitchen was filled with laughter and chatter as she guided us through the process, allowing us to help with stirring and grating cheese.
I can still smell the savory scent of sautéing onions mingling with the earthy aroma of broccoli, which always seemed to make the world outside feel a little less daunting. My brothers and I would sneak spoonfuls of the soup while it simmered, fighting over who could stir the pot last. Those moments turned a simple soup into a cherished family tradition, turning tired evenings into gatherings filled with warmth and love. Today, I carry that same spirit into my kitchen, sharing this broccoli cheddar joy with all of you.
Ingredients
Let’s gather our ingredients! Here’s what you’ll need to create our cozy bowl of Broccoli Cheddar Soup:
-
Broccoli: The star of our show! Packed with vitamins and minerals, fresh broccoli will give our soup a beautiful texture. If you can’t find fresh broccoli, frozen works as a great substitute—just remember to thaw it first.
-
Carrots: These bright orange beauties add sweetness and color. They’re perfect for balancing the rich flavors. If you’re in a pinch, you can use frozen carrots or even a dash of carrot juice!
-
Cheddar cheese: The magic ingredient that brings creaminess and flavor. I recommend using sharp cheddar for a more robust taste. Not a fan of cheddar? Try Gruyère or even a dairy-free cheese blend for a different spin.
-
Cream: This gives the soup that luxurious, velvety texture. You can swap it out for half-and-half or even milk, but keep in mind, the soup will be less creamy.
-
Onions: They form the foundation of flavor for our soup. If you’re looking for a milder taste, shallots can be a delightful substitute.
-
Garlic: A little bit of minced garlic adds depth and aroma to the dish. If you adore garlic, feel free to throw in more!
-
Vegetable broth: This liquid gold provides the base of the soup and enhances all the flavors. If you’re in a hurry, water can work in a pinch, but broth adds a richer taste.
-
Spices: A pinch of salt, black pepper, and maybe a dash of nutmeg to elevate those flavors. Replace nutmeg with cayenne for a slight kick!
Step-by-Step Instructions
Ready to bring this soup to life? Here’s how you do it:
-
Prep Your Veggies: Start by washing and chopping your broccoli into bite-sized pieces and peeling and dicing the carrots. This prep work is key because it ensures even cooking. And hey, kitchen prep is like a warm-up before the big game!
-
Sauté the Aromatics: In a large pot or Dutch oven, melt a tablespoon of butter over medium heat. Add diced onions and cook until translucent—about 5 minutes. Then toss in minced garlic and cook for an additional minute until fragrant. This step creates a wonderful aroma that will make your kitchen feel like a cozy cafe.
-
Add the Carrots and Broccoli: Stir in your chopped carrots and broccoli, mixing them with the onions and garlic. Let them cook for about 5 minutes. This step partly cooks the veggies while retaining their vibrant color. Plus, it makes stirring feel like a mini workout—win-win!
-
Pour in the Broth: Now it’s time to add in your vegetable broth! Bring the mixture to a gentle boil, then reduce the heat and let it simmer for about 15-20 minutes, or until the broccoli and carrots are tender. If you want a chunkier soup, make sure not to overcook the vegetables.
-
Blend It Up!: Using a hand blender (or transferring to a stand blender in batches), gently purée the soup until it’s nice and creamy. If you prefer a less smooth texture, feel free to blend just half of it—this way, you’ll have some chunky bits for texture.
-
Stir in the Cream and Cheese: Return the blended soup to the pot and stir in the heavy cream. Gradually add in the shredded cheddar cheese, stirring until it’s melted and fully incorporated. This is the moment where you can’t help but taste test. The cheese should create a bubbly, gooey delight!
-
Season to Taste: Give it a taste and adjust the seasoning with salt and pepper. A dash of nutmeg is optional, but it adds an unexpected warmth—you’ll thank me later!
-
Serve Warm: Ladle the soup into bowls and serve it immediately. If you have any extra cheese, sprinkle it on top for that extra cheesy touch.
Serving Suggestions
When it comes to serving this delicious Broccoli Cheddar Soup, presentation is key! Serve it in hearty bowls with a sprinkle of fresh chives or crispy croutons on top to add a little crunch. And don’t forget some warm, crusty bread on the side for dipping. The combination is sheer perfection!
Recipe Variations
Feel free to get creative with this recipe! Here are a few twists to consider:
-
Spicy Broccoli Cheddar Soup: Add a pinch of red pepper flakes or diced jalapeños for a kick!
-
Herbed Variation: Throw in fresh thyme or basil to elevate the flavor profile.
-
Loaded Broccoli Cheddar: Add cooked bacon bits or ham for a savory twist.
-
Vegan Version: Use plant-based cheddar cheese, coconut cream, and vegetable broth to make this soup vegan-friendly!
-
Add Potatoes: Diced potatoes will add heartiness, making this a one-pot meal!
Chef’s Notes
Ah, the memories this recipe brings back! I’ll never forget how my little brother, who notoriously rejected anything green, took an enormous spoonful of this soup and declared it “the best ever.” You could have knocked me over with a feather! This recipe has evolved over the years; sometimes I’d cook it with beer for a little depth, or other times, I’d add seasonal vegetables based on what was fresh.
It’s funny how food can create such vibrant memories and connections. I’ve seen friends bond over a bowl of this soup and families smile with every hearty serving. I believe that’s the real magic of cooking!
FAQs and Troubleshooting
1. Can I freeze the soup?
Absolutely! Just make sure to let it cool completely before transferring to airtight containers. It’ll last up to 3 months in the freezer. When you reheat, be prepared to add a splash of broth or cream for the best texture.
2. My soup is too thick, what should I do?
If your soup turns out a bit thicker than you’d like, simply add more broth or cream until you reach your desired consistency. Stir while heating it up to blend it well!
3. Why is my soup not cheesy enough?
If you find your soup lacks cheese flavor, consider using a sharper cheddar variety or adding a bit more cheese! Freshly shredded cheese usually melts better and tastes more intense.
4. Can I use different vegetables?
Of course! Feel free to add spinach, cauliflower, or even sweet potatoes for a unique twist. Just keep in mind that cooking times may vary depending on the veggies you use.
Nutritional Info
While I won’t bombard you with detailed nutritional breakdowns, I can give you a rough idea: a cup of this delightful broccoli cheddar soup generally contains about 250-300 calories, depending on the proportions of cheese and cream. It’s a comforting way to enjoy some veggies while indulging a little!
So there you have it—my take on a classic Broccoli Cheddar Soup that’s filled with warmth, coziness, and love. I hope you’ll make this dish to share with your family and friends, creating your own treasured memories along the way. Happy cooking, and here’s to keeping our plates clean and craving more delicious food!
PrintBroccoli Cheddar Soup

A cozy and creamy broccoli cheddar soup that balances comfort with healthy eating, perfect for chilly days.
- Prep Time: 15 minutes
- Cook Time: 30 minutes
- Total Time: 45 minutes
- Yield: 4 servings 1x
- Category: Soup
- Method: Stovetop
- Cuisine: American
- Diet: Vegetarian
Ingredients
- 1 head of broccoli, chopped
- 2 carrots, diced
- 2 cups sharp cheddar cheese, shredded
- 1 cup heavy cream
- 1 onion, diced
- 2 cloves garlic, minced
- 4 cups vegetable broth
- Salt and pepper to taste
- A pinch of nutmeg (optional)
Instructions
- Prep your veggies: Start by washing and chopping your broccoli into bite-sized pieces and peeling and dicing the carrots.
- Sauté the aromatics: In a large pot, melt butter over medium heat, then add onions and cook until translucent, about 5 minutes. Stir in garlic and cook for an additional minute.
- Add the carrots and broccoli: Stir in chopped carrots and broccoli, cooking for about 5 minutes.
- Pour in the broth: Add vegetable broth, bring to a gentle boil, then reduce heat and simmer for about 15-20 minutes until veggies are tender.
- Blend it up: Purée the soup with a hand blender until creamy, leaving some chunks for texture if desired.
- Stir in the cream and cheese: Return the blended soup to pot, stir in cream and cheddar until melted.
- Season to taste: Adjust with salt, pepper, and nutmeg if using.
- Serve warm: Ladle into bowls and serve immediately, optionally topping with extra cheese.
Notes
Serve with warm, crusty bread and a sprinkle of fresh chives or croutons. You can also freeze leftovers for up to 3 months.
Nutrition
- Serving Size: 1 serving
- Calories: 300
- Sugar: 6g
- Sodium: 700mg
- Fat: 20g
- Saturated Fat: 10g
- Unsaturated Fat: 6g
- Trans Fat: 0g
- Carbohydrates: 24g
- Fiber: 3g
- Protein: 12g
- Cholesterol: 50mg
Keywords: broccoli cheddar soup, comfort food, vegetarian soup, cozy recipes, easy soup recipes

One-Pot French Onion Soup: 30-Minute Classic Comfort
French Onion Soup: A Warm Hug in a Bowl
When the cold winds begin to blow, there’s no comfort quite like a steaming bowl of French onion soup. This dish, a unique blend of sweet caramelized onions, rich beef broth, and bubbly melted Gruyère cheese, is more than just a meal; it’s a journey back to cozy, cherished moments.
I remember the first time I decided to tackle this classic dish on my own—it was one of those chilly evenings where you want nothing more than to wrap yourself in a blanket and sip something warm. I was probably around 12 years old, and my love for cooking was blossoming thanks to my grandmother, who always greeted me with a smile and a cutting board when I stepped into her kitchen. She’d whip up French onion soup as quickly as a magician pulls a rabbit from a hat, and I was in awe of how something so simple could taste so divine.
Fast forward a couple of decades, and I still find myself drawn to the comforting aromas of caramelized onions sizzling in a pan. The beauty of this soup is not just in its taste but also in the experience of creating it. It invites you to slow down, savor the process, and enjoy the fruits of your labor. So put on your favorite apron, and let’s dive into making a bowl of French onion soup that’ll warm your soul!
Ingredients
Here’s what you’ll need to whip up this delightful soup, along with a few tips to enhance your dish:
-
Onions: The star of the show! You’ll want yellow or sweet onions—these varieties caramelize beautifully and give that sweet, rich flavor that’s crucial for a tasty French onion soup. If you don’t have onions on hand, shallots can be a delicious alternative.
-
Beef Broth: This is where the deep, savory flavor comes from. If you’re looking for a lighter option, you can substitute with vegetable broth. Just ensure it’s a good quality broth for the best flavor.
-
Baguette: This crusty bread is essential for that delightful topping. It absorbs just the right amount of broth and provides a lovely texture contrast when toasted. If baguette isn’t available, any hearty bread will do—I’ve even used sourdough in a pinch!
-
Gruyère Cheese: This melty, gooey cheese is the crowning glory of your soup. It has that perfect nuttiness that complements the sweetness of the onions. If Gruyère is hard to find, you can substitute it with Emmental, or even Swiss cheese will work, though the flavor profile will shift slightly.
Step-by-Step Instructions
Now that we’ve gathered our ingredients, let’s get cooking! Follow these steps for a tasty bowl of French onion soup that will impress your friends and family:
-
Slice the Onions: Start by peeling and slicing your onions thinly. I like to cut them into about ¼-inch thick rounds. Don’t worry if the tears start to flow; it’s all part of the fun! A sharp knife will help here; it minimizes the juices that make you cry.
-
Caramelize the Onions: In a large, heavy-bottomed pot (a Dutch oven works great), heat 2 tablespoons of butter and a drizzle of olive oil over medium heat. Add your sliced onions, stirring to coat them in the fat. Cook them slowly for about 30-40 minutes. You want them to turn a lovely golden brown and caramelize, stirring occasionally. This patience is key—rushing this step means missing out on that sweet flavor!
-
Add the Broth: Once the onions are beautifully caramelized, pour in 4 cups of beef broth. This is where the magic begins! Turn the heat up to bring it to a gentle simmer. Allow it to cook for another 15-20 minutes, letting all those flavors marry beautifully. Season with a pinch of salt and pepper, tasting as you go.
-
Prepare the Baguette: While the soup simmers, preheat your broiler. Slice the baguette into 1-inch thick pieces and toast them lightly on both sides if you prefer a crunchier texture. You can place them directly under the broiler for a quick toasted crust!
-
Cheesy Goodness: Ladle your soup into oven-safe bowls, and place a slice or two of the toasted baguette on top. Generously sprinkle Gruyère cheese over each piece of bread. The more, the better in my book!
-
Broil: Place the bowls on a baking sheet and slide them under the broiler for about 2-4 minutes or until the cheese is bubbly and golden. Keep an eye on it—things can go from beautifully melted to burnt in a flash!
-
Serve and Enjoy: Carefully remove the bowls from the oven (they’ll be hot!), and let them cool for a minute before indulging. Garnish with a sprinkle of fresh thyme or chives if desired.
Serving Suggestions
For that restaurant-style experience, serve your French onion soup piping hot in individual oven-safe bowls. A sprinkle of fresh herbs not only adds color but enhances those wonderful flavors. Pair it with a simple green salad dressed in a light vinaigrette to balance the richness of the soup. Don’t forget a crisp white wine or a warm chai to keep things cozy and inviting!
Recipe Variations
Feeling adventurous? Here are a few fun twists to elevate your French onion soup:
-
Herb Infusion: Add a few sprigs of fresh thyme or a bay leaf while the broth simmers for an aromatic enhancement.
-
Wine Pairing: Pour a splash of white wine or sherry into the pot after the onions are caramelized. This adds a depth of flavor that brings everything together beautifully.
-
Vegetarian Option: Use vegetable broth instead of beef broth and omit any meat-based seasonings for a delicious vegetarian version.
-
Spicy Kick: Add a pinch of red pepper flakes to the broth for an unexpected heat that complements the sweetness of the onions.
-
Mushroom Medley: Incorporate sautéed mushrooms with the onions for an earthy twist.
Chef’s Notes
One time, I got a bit too excited with the caramelization process and let the onions go a tad too far. Instead of a sweet golden color, I had deep, dark brown onions—almost a bit charred! But you know what? It turned into a delightful smoky flavor that everyone loved! That dish is now known in my circle as "Ava’s Smoky Soup," and it just goes to show that kitchen accidents can lead to delicious surprises.
Over the years, I’ve played around with this recipe quite a bit. I started with a very traditional take, but I now love experimenting with different broths, cheeses, and even adding personal touches like a dollop of sour cream on top. Truly, the best part of cooking is discovering what works for you.
FAQs and Troubleshooting
-
Why are my onions not caramelizing?
If your onions are getting mushy rather than caramelized, your heat may be too high. Dial it down and give them time—patience is key! -
How can I store leftovers?
Store any leftover soup in an airtight container in the fridge for up to 3 days. Reheat on the stovetop, but I recommend adding fresh cheese before broiling again for that melty goodness. -
Can I freeze French onion soup?
Absolutely! Just make sure to freeze the soup without the bread and cheese. When you’re ready to eat, thaw, reheat, and add freshly toasted bread and cheese before serving. -
What can I do if it’s too salty?
A splash of water or low-sodium broth can help mellow out salty flavors. A few extra slices of potato can also balance it out—just be sure to remove them before serving.
Nutritional Info
While comfort food is usually higher in calories, French onion soup can be made a bit lighter by controlling the amount of cheese and butter you use. A serving typically contains around 300-400 calories before adding the cheese and bread, depending on your exact measurements and cooking methods.
And there you have it! A delicious, heartwarming bowl of French onion soup that’s easy to make and even easier to enjoy. Gather your loved ones, pour the wine, and dig in! Happy cooking!
PrintFrench Onion Soup

A comforting bowl of French onion soup made with sweet caramelized onions, rich beef broth, and bubbly melted Gruyère cheese.
- Prep Time: 15 minutes
- Cook Time: 60 minutes
- Total Time: 75 minutes
- Yield: 4 servings 1x
- Category: Soup
- Method: Cooking
- Cuisine: French
- Diet: Vegetarian (with broth substitution)
Ingredients
- 4 large yellow or sweet onions
- 4 cups beef broth (or vegetable broth for a lighter option)
- 1 baguette (or hearty bread)
- 1 1/2 cups Gruyère cheese (or Emmental/Swiss cheese)
- 2 tablespoons butter
- Olive oil
- Salt and pepper to taste
- Fresh thyme or chives (for garnish)
Instructions
- Slice the onions thinly.
- Caramelize the onions in a pot with butter and olive oil for 30-40 minutes.
- Add the beef broth and season with salt and pepper; simmer for 15-20 minutes.
- Prepare the baguette by slicing it and toasting if desired.
- Ladle the soup into bowls and top with baguette slices and Gruyère cheese.
- Broil the bowls until the cheese is bubbly and golden.
- Serve with a garnish of thyme or chives.
Notes
For a vegetarian option, substitute vegetable broth and omit meat-based seasonings. You can also enhance the flavor with herbs or wine.
Nutrition
- Serving Size: 1 serving
- Calories: 350
- Sugar: 7g
- Sodium: 800mg
- Fat: 15g
- Saturated Fat: 7g
- Unsaturated Fat: 6g
- Trans Fat: 0g
- Carbohydrates: 30g
- Fiber: 3g
- Protein: 10g
- Cholesterol: 30mg
Keywords: French onion soup, comfort food, cozy recipes

Creamy Loaded Baked Potato Soup (30-Minute Weeknight)
Loaded Baked Potato Soup: Comfort in a Bowl
Ah, the joy of a cozy night in, snuggled up with a warm bowl of rich, creamy Loaded Baked Potato Soup! If that doesn’t make your heart do a little happy dance, I don’t know what will. There’s something undeniably satisfying about the hearty simplicity of a potato soup—it’s the epitome of comfort food, perfect for cold evenings, lazy weekends, or even a quick weeknight dinner. And let’s be honest, there are few things as comforting as a classic baked potato transformed into a spoonable, luscious soup packed with flavor and cozy vibes.
On chilly days when the wind nips at your nose and the skies are gray, there’s hardly anything better than warming up with a bowl of this soup. Loaded with all the goodness of a baked potato—think crispy bacon, sharp cheddar, and a dollop of sour cream—this soup has all the makings of a classic with a twist. It’s easy enough to whip up on a busy day, yet decadent enough to serve if you have guests over or just want to treat yourself. What’s not to love?
In this post, I’ll take you through my favorite recipe for Loaded Baked Potato Soup, complete with personal stories, tips, and tricks that will make your kitchen adventures not only fun but also successful. So grab your apron, and let’s dive into a bowl of heartwarming comfort!
A Spoonful of Nostalgia
I still remember the first time I made Loaded Baked Potato Soup. I was newly married and attempting to impress my husband with my culinary skills—a daunting task for someone who mostly relied on takeout and boxed dinners at the time. One chilly autumn evening, I decided to try my hand at this rich and creamy soup after flipping through an old cookbook my mom had gifted me. As I chopped the potatoes, I could almost hear her voice guiding me through the process—she was always good at making the simplest dishes feel special, and I wanted to channel that magic.
As the soup simmered and the aroma filled my small apartment kitchen, I felt a sense of accomplishment tinged with a dash of nervousness. I stirred in the cheese and watched it melt, and the sudden swirl of flavors and colors brought a smile to my face. The best part? When I finally served it to my husband, the look on his face said it all. He took a bite, and his eyes lit up! That experience sparked my love for cooking, reminding me that sometimes, all you need is a simple dish cooked with love to create cherished memories.
Now, every time I make this soup, I think back to that evening and smile. It’s not just a dish; it’s a vessel for love, warmth, and laughter.
Ingredients
Here’s what you’ll need to make this mouthwatering Loaded Baked Potato Soup:
-
Potatoes (6 medium-sized, Russet or Yukon Gold)
- These are the star of the show! Russet potatoes will give you that creamy texture while Yukon Gold potatoes add a buttery flavor. If you’re looking to lighten things up, you can totally swap in cauliflower for a lower-carb version.
-
Bacon (6 slices, chopped)
- Because what’s better than crispy bacon? It adds a salty, savory crunch that perfectly complements the creamy potatoes. For a vegetarian option, you can skip the bacon or use turkey bacon.
-
Cheddar Cheese (2 cups, shredded)
- I’m partial to sharp cheddar for that bold flavor, but feel free to get creative. A nice pepper jack would give it a kick, or you can mix in a little mozzarella for creaminess.
-
Sour Cream (1 cup)
- This adds a tangy richness that ties everything together. If you’re looking for a healthier alternative, Greek yogurt works just as well!
-
Green Onions (1/2 cup, sliced)
- These not only bring fresh flavor but also a pop of color. If you don’t have green onions, regular onions will do, just sauté them first to soften their flavor.
-
Chicken or Vegetable Broth (4 cups)
- Use low-sodium broth to control the saltiness easily. Homemade stock is fantastic if you’ve got it on hand!
-
Salt and Pepper (to taste)
- Basics, but won’t forget to season your soup to bring out all those delicious flavors!
Here’s my fun chef insight: when you’re peeling the potatoes, remember that nutrition lies just beneath the skin, so feel free to leave a bit on for extra fiber!
Step-by-Step Instructions
Alright, let’s get cooking! Follow these steps, and you’ll have a steaming pot of Loaded Baked Potato Soup in no time.
-
Prep the Potatoes: Start by washing and peeling your potatoes. Chop them into bite-sized cubes—uniformity helps them cook evenly. If you’ve decided to use cauliflower, cut it into large chunks.
-
Cook the Bacon: In a large pot over medium heat, add the chopped bacon. Cook until crispy, about 5-7 minutes. Don’t get rid of that glorious bacon fat; it adds flavor to our soup! Transfer the crispy bacon to a plate lined with paper towels to drain—leave about 2 tablespoons of fat in the pot.
-
Sauté Aromatics: In the same pot with the bacon fat, add the chopped onions (if using) and cook for about 3 minutes until they soften. This step is optional, but sautéing gives an extra layer of flavor!
-
Add the Potatoes & Broth: Toss your cubed potatoes into the pot, stirring them around to combine with the bacon and onions. Pour in your chicken or vegetable broth. Bring the mixture to a boil, then reduce to a simmer. Let it cook for about 15-20 minutes or until the potatoes are fork-tender.
-
Blend the Soup: Once the potatoes are cooked, use an immersion blender for a few pulses to create a creamier texture while still keeping some chunks. If you don’t have an immersion blender, carefully transfer a few cups to a regular blender and puree—just be cautious of the hot liquid!
-
Stir in the Creaminess: After blending, return the pot to the heat (if needed) and stir in the sour cream and half of the shredded cheddar cheese. Mix until everything is combined and gooey—that’s where all the magic happens! Season with salt and pepper to taste.
-
Final Toppings: Ladle the soup into bowls and top it with the crispy bacon, remaining cheese, and sliced green onions for that beautiful presentation!
Chef Tips:
- Consistency Control: If you prefer a thinner soup, you can add more broth or some milk for creaminess!
- Time-Saving Trick: You can easily make this soup ahead of time and refrigerate it. Just remember that the flavors deepen overnight!
Serving Suggestions
To serve, ladle your Loaded Baked Potato Soup into bowls and garnish it generously. A sprinkle of extra cheddar cheese on top, a few crumbles of crispy bacon, and a handful of green onions will make it pop! For an extra touch of indulgence, consider pairing it with crusty bread or homemade garlic croutons to soak up every last drop. Trust me; you’re going to want to savor this!
Recipe Variations
- Vegan Loaded Baked Potato Soup: Veganize this soup by omitting the bacon, using vegetable broth, and swapping the sour cream for a cashew cream or coconut yogurt—delicious!
- Spicy Kick: Add diced jalapeños or a pinch of cayenne pepper for a bit of heat.
- Herby Twist: Throw in some chopped fresh herbs like chives, thyme, or rosemary for a gourmet touch.
- Loaded with Veggies: Sneak in some greens like kale or spinach to boost the nutrition factor, or throw in some broccoli for added texture.
Chef’s Notes
Each time I make this Loaded Baked Potato Soup, I can’t help but tweak the recipe just a bit. Sometimes, it’s the addition of a splash of white wine for depth. Other times, I might sprinkle in some garlic powder for a bit more flavor. Honestly, that’s the beauty of cooking! It’s an evolving creation, and I encourage you to play around with it as well.
A funny kitchen memory comes to mind: one time I misread a recipe and added way too much garlic. Yes, we had “Garlic Potato Soup” that night! It was a great reminder that sometimes your kitchen adventures don’t go as planned, but hey, real foodies improvise!
FAQs and Troubleshooting
-
Why is my soup too thick? If your Loaded Baked Potato Soup is thicker than you’d like, simply add more broth until you reach your desired consistency.
-
Can I use leftover baked potatoes? Absolutely! If you have leftover baked potatoes, you can cube them and add them to the broth, seasoning as needed. Reduce your cooking time since they’re already cooked.
-
How long will this soup last? Stored in an airtight container in the fridge, this soup will last about 3-4 days. Just be prepared to add a splash of broth when reheating since it may thicken!
-
Why does my soup taste bland? Every ingredient matters! Make sure to taste and adjust the seasoning as you cook. A little salt can make all the difference—don’t shy away from it!
Nutritional Info
This Loaded Baked Potato Soup is comforting but can be tailored to fit different dietary preferences. Typically, one serving (about 1 cup) contains:
- Calories: 350
- Protein: 12g
- Carbohydrates: 45g
- Fat: 15g
Enjoy this luscious soup, and don’t hesitate to make it your own! Let the flavors come together, and get ready to warm your belly and your heart. Happy cooking, friends!
PrintLoaded Baked Potato Soup

A rich and creamy Loaded Baked Potato Soup loaded with crispy bacon, sharp cheddar, and a dollop of sour cream, perfect for cold evenings.
- Prep Time: 15 minutes
- Cook Time: 30 minutes
- Total Time: 45 minutes
- Yield: 4 servings 1x
- Category: Soup
- Method: Stovetop
- Cuisine: American
- Diet: Non-Vegetarian
Ingredients
- 6 medium-sized potatoes (Russet or Yukon Gold)
- 6 slices bacon, chopped
- 2 cups shredded cheddar cheese
- 1 cup sour cream
- 1/2 cup sliced green onions
- 4 cups chicken or vegetable broth
- Salt and pepper to taste
Instructions
- Prep the potatoes by washing and peeling them. Chop into bite-sized cubes.
- Cook the bacon in a large pot over medium heat until crispy, about 5-7 minutes. Transfer to a plate, leaving about 2 tablespoons of fat in the pot.
- Sauté the chopped onions in the bacon fat for about 3 minutes until they soften.
- Add the cubed potatoes and broth to the pot, bringing it to a boil, then reduce to a simmer for 15-20 minutes until fork-tender.
- Blend the soup using an immersion blender for a creamy texture while keeping some chunks. Alternatively, transfer a few cups to a blender and puree carefully.
- Stir in the sour cream and half of the cheddar cheese until combined. Season with salt and pepper to taste.
- Ladle the soup into bowls and top with crispy bacon, remaining cheese, and green onions.
Notes
For a thinner soup, add more broth or milk. The soup can be made ahead and refrigerated. Consider pairing with crusty bread or homemade croutons.
Nutrition
- Serving Size: 1 cup
- Calories: 350
- Sugar: 3g
- Sodium: 800mg
- Fat: 15g
- Saturated Fat: 6g
- Unsaturated Fat: 7g
- Trans Fat: 0g
- Carbohydrates: 45g
- Fiber: 5g
- Protein: 12g
- Cholesterol: 30mg
Keywords: soup, baked potato, comfort food, creamy soup, easy recipe

Taco Soup
Taco Soup: A Comforting Bowl of Flavor and Memories
Welcome to the cozy world of Taco Soup! If you’re like me, there’s nothing quite like the comforting aroma of bubbling soup wafting through your kitchen, especially on a chilly day. This soup is more than just a meal; it’s a dish that brings back memories, sparks creativity, and provides a warm hug in a bowl. Today, I’m excited to take you through this delightful recipe, which boasts not only incredible flavor but also the kind of simplicity that makes it perfect for any night of the week.
Personal Story: Taco Soup Magic in My Family
Not too long ago, I stumbled upon a handwritten recipe tucked between the pages of my mother’s old cookbook. The yellowing paper was filled with grease stains and splatters, telling its own delicious story. This was my family’s Taco Soup recipe—a dish that meant Friday nights by the fireplace, laughter echoing around the table, and those cherished moments of togetherness.
As kids, my siblings and I would play “chef” in the kitchen while Mom prepared this delightful dish. We’d giggle and toss ingredients into the pot, debating the merits of adding extra beans versus more cheese (because, let’s be honest, who can say no to more cheese?). Those nights were filled with aroma and excitement, and they laid the foundation for my love of cooking and sharing meals with others. Now, every time I make Taco Soup, it’s not just about the food; it’s about the connections and memories that come flooding back with every spoonful.
Ingredients: Building Blocks of Flavor
Gathering your ingredients is like prepping for a fun adventure! Here’s what you’ll need for this scrumptious Taco Soup:
-
1 lb Ground Beef
- Use lean ground beef for less grease or swap it with ground turkey or chicken for a healthier option without sacrificing flavor.
-
1 Can (15 oz) Beans (Black, Pinto, or Kidney)
- Beans are packed with protein and fiber. Feel free to mix and match or opt for canned beans for quick prep. Rinse them beforehand to reduce sodium!
-
1 Can (15 oz) Corn (Sweet or Fire-Roasted)
- Corn adds sweetness and texture. If you’re watching carbs, you can replace it with zucchini or cauliflower rice.
-
1 Can (14.5 oz) Diced Tomatoes (with green chilies)
- The tomatoes give depth; the added green chilies bring a spiciness that warms your soul. Go for fire-roasted for an extra smoky flavor!
-
1 Pack Taco Seasoning (or homemade)
- This is where the magic happens! You can use store-bought or make your own using chili powder, cumin, garlic powder, onion powder, and paprika. It’s an easy way to control the heat level!
Step-by-Step Instructions
Now, let’s dive into the deliciousness! Follow these steps to create your Taco Soup masterpiece.
-
Brown the Ground Beef
- In a large pot over medium heat, add the ground beef. Use a wooden spoon to crumble it as it cooks. You want to achieve that beautiful brown color—this is where the savory flavor builds! Drain excess fat if necessary.
-
Add the Taco Seasoning
- Once the beef is browned, stir in the taco seasoning. This will infuse the meat with that classic taco flavor we all know and love. For additional flavor, add a splash of water to help disperse the spices and create a nice sauce.
-
Toss in the Beans and Corn
- Mix in the drained beans and corn. Stir well to combine. If you love a little kick, this is a great time to add jalapeños or hot sauce.
-
Incorporate the Diced Tomatoes
- Pour in the diced tomatoes, along with their juices. This will provide a juicy base for your soup. Let the entire mixture simmer on low for about 15-20 minutes, allowing all those wonderful flavors to meld together!
-
Adjust Seasoning and Serve
- Don’t forget to taste! Adjust seasoning as necessary—this is your masterpiece. If you need more spice, toss in a bit of cayenne pepper or a squeeze of lime juice for brightness.
-
Garnish and Enjoy
- After serving, top with your favorite garnishes like shredded cheese, sour cream, or avocado slices. These not only enhance flavor but make your soup visually appealing too.
Serving Suggestions: The Final Touch
Serve your Taco Soup in colorful bowls, topped with a sprinkle of fresh cilantro, a dollop of creamy sour cream, and perhaps some tortilla chips on the side for an irresistible crunch. You can even pair it with a side salad or a slice of crusty bread for a wholesome meal that’s sure to impress!
Recipe Variations: Keep It Fresh
Bored with the same old soup? Here are a few creative twists you can try:
-
Veggie Delight: Swap the ground beef for a mix of lentils and mushrooms for a hearty vegetarian version.
-
Creamy Taco Soup: Stir in half a cup of cream cheese or sour cream during the last simmer for a decadent, creamy texture.
-
Chili Cheese Taco Soup: Add chili beans for a spicy punch and top with jalapeño slices and shredded cheese.
-
Southwest Style: Mix in some diced bell peppers and corn tortillas for a thicker, Southwestern variation that adds depth.
Chef’s Notes: A Bit of Wisdom
This Taco Soup recipe has evolved over the years from my mom’s simple version into the vibrant dish it is today. I love how flexible it is; you can toss in whatever you have in your refrigerator. Once, in a rush, I dumped in a can of leftover chili—best mistake ever! It’s moments like that which keep cooking fun and spontaneous. Remember, cooking isn’t just about following recipes; it’s about experimenting and finding joy in the process.
FAQs and Troubleshooting
-
What if my soup is too thick?
- Simply add a bit of broth or water until you reach your desired consistency. Taste and adjust seasoning as needed!
-
Can I make it in advance?
- Absolutely! Taco Soup tastes even better the next day, as the flavors continue to develop. Just store it in an airtight container in the fridge.
-
Is it freezer-friendly?
- Yes, you can freeze Taco Soup for up to three months. Just ensure it’s completely cooled before transferring it to a freezer-safe container.
-
How can I reduce the spice level?
- If you’re sensitive to spice, skip the green chilies and adjust the taco seasoning to your preference. Adding dairy toppings like sour cream can also help cut the heat!
Nutritional Info
While I focus more on flavor than strict nutritional counts, a general serving of this Taco Soup (without toppings) packs a nutritious punch. It’s rich in protein from the beef and beans, includes fiber from the beans and corn, and is bursting with vitamins from the tomatoes.
And there you have it—a hearty, flavorful Taco Soup that not only tantalizes your taste buds but also warms your heart with memories of great times spent around the dinner table. So grab your ingredients, roll up your sleeves, and let’s create some delicious memories together! Happy cooking!
PrintTaco Soup

A comforting and flavorful Taco Soup that brings back warm memories of family dinners.
- Prep Time: 15 minutes
- Cook Time: 30 minutes
- Total Time: 45 minutes
- Yield: 4 servings 1x
- Category: Main Course
- Method: Stovetop
- Cuisine: Mexican
- Diet: Flexitarian
Ingredients
- 1 lb Ground Beef
- 1 Can (15 oz) Beans (Black, Pinto, or Kidney)
- 1 Can (15 oz) Corn (Sweet or Fire-Roasted)
- 1 Can (14.5 oz) Diced Tomatoes (with green chilies)
- 1 Pack Taco Seasoning (or homemade)
Instructions
- Brown the Ground Beef in a large pot over medium heat, crumbling it as it cooks. Drain excess fat if necessary.
- Add the Taco Seasoning and stir to infuse the beef with flavor. Optionally add a splash of water.
- Toss in the drained beans and corn, mixing well.
- Incorporate the Diced Tomatoes along with their juices. Let simmer on low for 15-20 minutes.
- Adjust seasoning as necessary, tasting for flavor balance.
- Garnish with shredded cheese, sour cream, or avocado before serving.
Notes
This Taco Soup is flexible; feel free to add extra ingredients based on what you have on hand.
Nutrition
- Serving Size: 1 serving
- Calories: 350
- Sugar: 5g
- Sodium: 400mg
- Fat: 12g
- Saturated Fat: 4g
- Unsaturated Fat: 6g
- Trans Fat: 0g
- Carbohydrates: 45g
- Fiber: 3g
- Protein: 15g
- Cholesterol: 30mg
Keywords: Taco Soup, Comfort Food, Family Recipe, Easy Dinner, Hearty Soup

Creamy Butternut Squash Soup: 30-Minute Weeknight Comfort
Butternut Squash Soup: A Hug in a Bowl
Welcome, dear friends, to a cozy corner of Clean Plate Cravings! Today, we’re diving into something soul-satisfying and utterly delightful: Butternut Squash Soup. Imagine a warm bowl cradled in your hands, steam curling up into the air as the rich, sweet aroma wafts past your nose. This isn’t just any soup; it’s a velvety embrace in a bowl, the kind that warms your heart and fills your belly.
As the leaves begin to turn and the air takes on a crispness, there’s something incredibly therapeutic about preparing a bowl of warm, nourishing soup. Cooking this dish transports me back to my childhood kitchen, where my mom used to whip up big batches on chilly afternoons. The kitchen would be filled with laughter, the smell of sautéing onions, and the bright orange beauty of roasted squash. I can still hear her singing along to her favorite jazz playlists while we chopped, stirred, and tasted. Those memories remind me that cooking is more than just a necessity; it’s an experience, a shared love, and a delightful creativity that fuels our souls.
If you’re ready to conjure those heartfelt memories and create some of your own, let’s dive deeper into this recipe that’s both incredibly easy to make and packed with flavor. Perfect for chilly nights or whenever you’re in need of a comforting meal, Butternut Squash Soup comes together quicker than you might think!
Personal Story
Let me take you back to one cozy autumn afternoon. I was about ten years old, and I was tasked with the important mission of stirring my mom’s famous Butternut Squash Soup. It was a comforting ritual; the first hint of chill in the air meant it was soup season! I can still picture my mom, her colorful apron tied snugly around her waist, guiding me through the steps, her laughter ringing out as I accidentally splattered some squash mixture across the counter.
As the onions caramelized in the pan, they released a sweetness that mingled beautifully with the earthy essence of the butternut squash. We added a sprig of fresh sage at the end, making our little kitchen smell like a dreamy autumn day in New England. I vividly remember the first taste—the way it felt like a warm hug. Ever since that day, this soup has held a special place in my heart, reminding me to take pleasure in the little things and that cooking is all about love.
Ingredients
-
Butternut Squash
The star of the show! Butternut squash is not just sweet and flavorful; it’s packed with vitamins A and C, fiber, and antioxidants. Look for squash that’s firm and has a smooth, even skin. If you can’t find butternut squash, you can substitute pumpkin or acorn squash for a similar texture and taste. -
Onion
A classic base for many soups. Onions add depth and sweetness to the mixture. I recommend yellow onions, but sweet onions or shallots can work beautifully too, giving a slightly different flavor profile. -
Broth
This adds the liquid foundation to our soup. Use vegetable or chicken broth—homemade if you have it, store-bought if you don’t! For a richer flavor, consider using bone broth. If you want to keep it vegan or vegetarian, ensure you choose a broth without meat. -
Cream
A splash of cream adds richness and velvety texture to the soup. You can use heavy cream, half-and-half, or even coconut cream for a dairy-free version. If you prefer a lighter soup, feel free to skip the cream or substitute with almond milk or cashew cream. -
Sage
This aromatic herb elevates the entire dish with its warm, earthy flavor that complements the sweetness of the squash. Fresh sage is ideal, but dried sage can be used in a pinch—just reduce the amount as dried herbs are more potent!
Step-by-Step Instructions
-
Prep Your Squash
Start by peeling the butternut squash. I know this can feel like a workout, but it’s worth it! Use a sharp vegetable peeler or a sharp knife to cut off the skin. Cut the squash in half lengthwise, scoop out the seeds, and then chop it into cubes. This size will ensure it cooks evenly and quickly. Don’t be discouraged—it gets easier each time, and those cubes will soon transform into magic! -
Sauté the Onions
In a large pot, heat up a splash of olive oil or butter over medium heat. Add the chopped onion and a pinch of salt. Sauté for about 5-7 minutes, until the onion turns soft and translucent. This step is crucial—the more you caramelize those onions, the richer your soup will be! Keep stirring, and let the kitchen fill with that sweet scent. -
Combine the Ingredients
Add your cubed butternut squash to the pot. Toss it around in the buttery onion goodness for about 3-4 minutes. This step helps enhance the flavor profile before adding the broth. At this point, it’s all about layering flavors! -
Pour in the Broth
Pour in enough broth to cover the squash. You want it swimming, not drowning! Bring the mixture to a boil, then reduce it to a simmer. Cover the pot and let it cook for about 20 minutes until the squash is fork-tender. Pro tip: If you’re unsure if your squash is done, taste a piece! If it’s soft and sweet, you’re all set. -
Blend to Perfection
Once cooked, use an immersion blender to puree the soup directly in the pot until it’s silky smooth. If you don’t have an immersion blender, carefully transfer the mixture to a standard blender in batches. Just be cautious; it’s hot! Return the soup to the pot, and stir in the cream, sage, and any seasoning adjustments needed. -
Final Touches
Continue to heat the soup over low heat until warmed through. Taste it! This is your moment to shine as a chef. Adjust the seasoning with salt, pepper, or even a sprinkle of nutmeg for warmth. Some people love adding a hint of cayenne for a little kick! -
Serve and Enjoy
Ladle the soup into bowls and garnish with a drizzle of cream and a few crispy sage leaves for extra flair. Trust me; it’ll look as gorgeous as it tastes! The warm colors will brighten up even the cloudiest of days.
Serving Suggestions
Plating is an art, my foodie friends! When serving your Butternut Squash Soup, consider using wide, shallow bowls. Ladle the bright, golden soup and create a small drizzle of cream on top, then use a toothpick or skewer to gently swirl it around. Top with crispy sage leaves, and perhaps even some roasted pumpkin seeds for a delightful crunch! Pair with warm, crusty bread for dipping—trust me, it’s the ultimate comfort combo.
Recipe Variations
Feeling adventurous? Let’s shake things up a bit! Here are some fun variations to try with your Butternut Squash Soup:
- Maple Infusion: Add a spoonful of pure maple syrup for a unique sweet twist—perfect for a chilly day!
- Coconut Curry: Stir in some coconut milk and a teaspoon of curry powder for a warming, spiced version that’ll transport you straight to a tropical paradise.
- Roasted Garlic: Toss in cloves of garlic while roasting your squash for an ultra-deep flavor that complements the sweetness beautifully.
- Spicy Twist: Add chipped red pepper flakes or a dash of Sriracha for a kick—heat lovers will thank you!
- Herb Swap: Experiment with fresh herbs such as thyme or rosemary for an aromatic twist. Each herb brings a different essence to the dish.
Chef’s Notes
Butternut Squash Soup is a timeless classic in our household, but it has evolved significantly over the years. I used to stick to a traditional method, but now I love incorporating bold flavors and textures. One time, while experimenting with a new ingredient, I added a splash of orange juice to the soup. It made the taste pop and brought a brightness that paired wonderfully with the squash! Always keep your kitchen open to experimenting and making it your own. Cooking should be fun, and the worst that can happen is a delicious lesson!
FAQs and Troubleshooting
1. My soup turned out too thick; how can I fix it?
Don’t stress! Simply add more broth or water, a little at a time, until you reach your desired consistency.
2. Can I make this soup ahead of time?
Absolutely! This soup stores well in the fridge for up to 4 days. Just reheat gently on the stove. You can also freeze it for up to 3 months—just leave off adding the cream until you reheat after thawing!
3. What can I do if I can’t find butternut squash?
No worries! You can substitute with pumpkin, sweet potato, or even carrots for similar sweetness and flavors.
4. I want to add protein; what do you suggest?
For a heartier option, consider adding cooked lentils, chickpeas, or even shredded chicken to the soup! These can amp up the nutrient content and make it more filling.
Nutritional Info
(Each serving of Butternut Squash Soup roughly contains)
- Calories: 160
- Protein: 2g
- Fat: 7g
- Carbohydrates: 24g
- Fiber: 3g
Remember, this soup is rich in vitamins A and C, making it a fabulous boost for your immune system!
And there you have it, my dear culinary pals—a full guide to creating a marvelous Butternut Squash Soup that’s sure to bring warmth and joy to your kitchen! I can’t wait for you to share your own versions, stories, and tweaks that make this recipe uniquely yours. So grab your ingredients, put on some tunes, and let’s get cooking! 💛🥣
PrintButternut Squash Soup: A Hug in a Bowl

A soul-satisfying butternut squash soup that is warm, creamy, and perfect for chilly nights.
- Prep Time: 15 minutes
- Cook Time: 30 minutes
- Total Time: 45 minutes
- Yield: 4 servings 1x
- Category: Soup
- Method: Blending
- Cuisine: American
- Diet: Vegetarian
Ingredients
- 1 large Butternut squash, peeled and chopped
- 1 medium Onion, chopped
- 4 cups Vegetable or chicken broth
- 1/2 cup Cream (or coconut cream for dairy-free)
- 2 sprigs Fresh sage
- Olive oil or butter for sautéing
- Salt and pepper to taste
Instructions
- Prep your squash by peeling and chopping it into cubes.
- Sauté the onions in a large pot with oil or butter until soft and translucent.
- Combine the chopped butternut squash with the onions and sauté for a few minutes.
- Pour in the broth until the squash is covered and bring to a boil.
- Blend the soup until silky smooth, then stir in the cream and sage.
- Serve with a drizzle of cream and crispy sage leaves on top.
Notes
This soup is versatile; feel free to add herbs or spices to suit your taste. It pairs well with crusty bread.
Nutrition
- Serving Size: 1 serving
- Calories: 160
- Sugar: 4g
- Sodium: 400mg
- Fat: 7g
- Saturated Fat: 4g
- Unsaturated Fat: 3g
- Trans Fat: 0g
- Carbohydrates: 24g
- Fiber: 3g
- Protein: 2g
- Cholesterol: 30mg
Keywords: butternut squash soup, comfort food, fall recipes, vegetarian soup, cozy meal
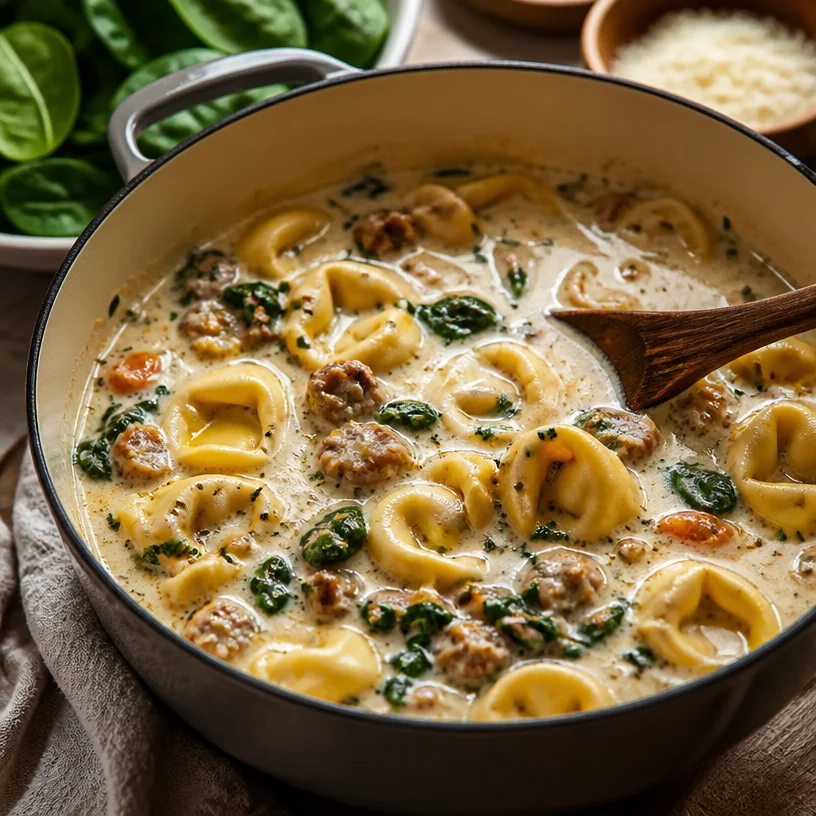
One-Pot Creamy Tortellini Soup for Easy Weeknight Dinners
Creamy Tortellini Soup: A Hug in a Bowl
Welcome to the warm and cozy world of Creamy Tortellini Soup, where every spoonful feels like a hug on a chilly day! I can’t wait to share this delectable recipe with you, because believe me, it’s not just delicious; it’s downright soul-soothing. Whether you’re looking to impress dinner guests or just need a comforting meal for yourself, this soup hits all the right notes.
Picture this: the aroma of sizzling sausage fills your kitchen, mingling with the earthy scent of fresh spinach, and the creamy broth bubbling blissfully in a pot—it’s pure magic! As the cheese tortellini dances around in the pot, you find yourself dreaming of cozy evenings spent with loved ones, sharing laughter and stories over a steaming bowl of this delightful soup.
The beauty of this recipe lies in its simplicity and heartiness. With minimal effort, you can create something that feels both luxurious and homey. Eating well shouldn’t be a chore; it should be a celebration of flavors, textures, and cherished moments. This Creamy Tortellini Soup embodies all these sentiments, and trust me, it’s a total crowd-pleaser!
On a busy weeknight or a chilled weekend afternoon, there’s nothing more satisfying than having a pot of this soup simmering on the stove. So grab your apron, and let’s dive into the process of creating this aromatic masterpiece together!
A Nostalgic Taste of Home
Every great recipe comes with a story, and this one is no exception. Growing up, my mom was a master of creating comfort food, and one of my all-time favorites was her tortellini soup. I can vividly remember coming home from school on rainy days, the sound of the rain pattering against the windows, and that unmistakable smell wafting from the kitchen. My siblings and I would race to the table, tummies rumbling in anticipation.
Mom’s soup was always made from whatever we had on hand, but three key ingredients stood out: smoky sausage, vibrant spinach, and tender cheese tortellini. With each bite, we savored not just the flavors, but the love and warmth that enveloped us like a soft blanket. It was a meal that required no formalities; we could slurp the broth and laugh wholeheartedly without a care in the world.
As I grew older, this recipe became a canvas for my culinary creativity. I’ve modified it over time, adding my twists and tips, but it always retains that comforting essence that brings me back home. Today, I’m thrilled to share my version with you, hoping it sparks similar memories of joy and togetherness.
Ingredients
Now let’s gather our ingredients! Here’s what you’ll need to whip up this delightful Creamy Tortellini Soup:
-
Cheese Tortellini
- The star of the show! You can use fresh or frozen varieties, depending on what you have on hand. If you can’t find tortellini, feel free to substitute with any kind of pasta; just keep an eye on the cooking time.
-
Sausage
- I often use Italian sausage for that savory punch, but turkey or chicken sausage works just as well! For a vegetarian version, skip the meat and add more veggies for depth of flavor.
-
Spinach
- Fresh spinach adds a pop of color and a nutritious boost. If you don’t have fresh on hand, you can substitute with frozen spinach—just be sure to thaw and drain it first.
-
Cream
- Heavy cream gives the soup its luscious texture. If you’re looking for a lighter option, swap it out for half-and-half or even coconut milk for a dairy-free alternative.
-
Broth
- Chicken or vegetable broth serves as the flavorful base of the soup. Homemade is ideal, but store-bought works just fine. When choosing broth, go for low-sodium options for more control over seasoning!
-
Seasonings (not listed above)
- Don’t forget the salt, pepper, garlic, and Italian herbs! These seasonings elevate the flavors to a whole new level. You could also experiment with red pepper flakes for a hint of spice!
Step-by-Step Instructions
Let’s get cooking! Here’s how to bring this delightful Creamy Tortellini Soup to life.
Step 1: Brown the Sausage
In a large pot or Dutch oven, heat a splash of olive oil over medium heat.
- Add the sausage and cook until browned, about 5-7 minutes. Break it up with a wooden spoon as it cooks. This not only ensures even cooking but also maximizes flavor as the edges get caramelized. Tip: If you like it spicy, go for hot Italian sausage—trust me, it’s worth it!
Step 2: Sauté the Veggies
Once the sausage is perfectly browned, toss in minced garlic (about 3 cloves) and sauté for another minute until fragrant.
- Next, add fresh spinach, stirring until it wilts down, which should only take a minute. Chef Hack: If you love garlic like I do, feel free to add an extra clove or two!
Step 3: Add Broth
Now, pour in about 4 cups of your broth of choice, stirring to combine.
- Bring the mixture to a gentle simmer. This step is so crucial! Letting it simmer allows all those delectable flavors to meld. Pro Tip: Use a wooden spoon to scrape up any brown bits from the bottom of the pot. That’s a ton of flavor waiting to be released!
Step 4: Stir in the Tortellini
Once your soup is simmering, it’s time to add the tortellini.
- Cook according to the package directions, usually around 3-5 minutes. These little pockets of goodness will soak up the broth and turn even more tender. Quick Note: If you’re using frozen tortellini, don’t defrost them—just toss them in straight from the freezer!
Step 5: Cream It Up!
After the tortellini has cooked, reduce the heat to low and stir in about 1 cup of heavy cream.
- Continuously stir until the soup is velvety and creamy. That silky texture will drown your taste buds in happiness! Cooking Tip: If you want it even creamier, go for a little extra! It never hurts to pamper yourself, right?
Step 6: Season to Taste
Now it’s time to taste and adjust! Add salt, pepper, and Italian seasonings (like oregano and basil) to elevate the soup and enhance the flavors just right.
- Just remember, a little goes a long way—taste as you go! Final Touch: Finish with a sprinkle of freshly grated Parmesan cheese for extra richness!
Serving Suggestions
Ladle this glorious soup into bowls and garnish with croutons or a sprinkle of fresh herbs. Serve it with a side of toasted crusty bread or a light salad for a delightful meal. The combination of creamy soup and crunchy bread will have you swooning and craving more!
Recipe Variations
The great thing about this soup is its versatility! Here are some fun variations worth exploring:
- Pasta Swap: Use gnocchi for a twist! They soak up the creamy broth beautifully.
- Veggie Boost: Load it up with additional veggies like carrots, zucchini, or bell peppers for more nutrition.
- Protein Options: Try shrimp or grilled chicken instead of sausage for a different protein boost!
- Herb Infusion: Experiment with fresh herbs like thyme or parsley for a brighter flavor.
- Spice It Up: Add a dash of red pepper flakes or a splash of hot sauce for a kick!
Chef’s Notes
I can’t emphasize enough how much this recipe has evolved over the years. I’ve tried numerous variations, and each time, it reminds me just how comforting cooking can be. One particularly funny memory that stands out is the time I decided to add kale, thinking I could be fancy. Let’s just say, my friends were not as impressed as I was! Now, I always keep my recipes straightforward and focused on what brings joy. Remember, cooking is about experimentation—don’t shy away from making it your own!
FAQs and Troubleshooting
1. My soup turned out too thick! What can I do?
No problem at all! Simply whisk in a bit more broth or water until you reach your desired consistency.
2. Can I make this soup in advance?
Absolutely! This soup stores well in the fridge for about 3-4 days. Just keep in mind that the tortellini may absorb some broth, so you might want to add a little extra liquid when reheating.
3. How can I make this soup vegan?
Substitute the sausage with plant-based meat or mushrooms, replace the cream with coconut milk, and use vegetable broth. You can add more veggies to enhance the flavor.
4. What’s the best way to store leftovers?
Store any leftovers in an airtight container in the refrigerator for up to four days. You can freeze portions in freezer-safe bags for up to three months!
Nutritional Information (Optional)
This Creamy Tortellini Soup is not only delicious but also falls into the comforting category of hearty meals. Here’s a quick breakdown of the nutrition per serving (estimate):
- Calories: 450
- Protein: 20g
- Carbohydrates: 50g
- Fat: 20g
- Fiber: 3g
Feel free to customize based on your dietary needs!
And there you have it—your go-to recipe for Creamy Tortellini Soup! I hope you have just as much fun making it as I do. So grab your loved ones, whip up a batch, and enjoy the cozy magic that only a bowl of homemade soup can bring. Happy cooking!
PrintCreamy Tortellini Soup

A warm and cozy Creamy Tortellini Soup that feels like a hug on a chilly day. Full of flavor with cheese tortellini, sausage, and fresh spinach.
- Prep Time: 10 minutes
- Cook Time: 20 minutes
- Total Time: 30 minutes
- Yield: 6 servings 1x
- Category: Soup
- Method: Stovetop
- Cuisine: Italian
- Diet: Non-Vegetarian
Ingredients
- 1 package Cheese Tortellini
- 1 lb Sausage (Italian, turkey, or chicken)
- 4 cups Fresh Spinach
- 1 cup Heavy Cream
- 4 cups Chicken or Vegetable Broth
- Salt and Pepper to taste
- 3 cloves Garlic, minced
- Italian herbs (Oregano, Basil) to taste
- Optional: Red pepper flakes for spice
Instructions
- Brown the sausage in a large pot or Dutch oven with a splash of olive oil over medium heat, about 5-7 minutes.
- Sauté minced garlic until fragrant, then add spinach and stir until wilted.
- Add the broth and bring to a gentle simmer.
- Stir in the tortellini and cook according to package directions, about 3-5 minutes.
- Cream it up by reducing the heat and adding heavy cream, stirring until velvety.
- Season to taste with salt, pepper, and Italian herbs.
Notes
Adjust the thickness of the soup by adding more broth or water if needed. Can be made in advance and stored for up to 4 days.
Nutrition
- Serving Size: 1 bowl
- Calories: 450
- Sugar: 5g
- Sodium: 700mg
- Fat: 20g
- Saturated Fat: 10g
- Unsaturated Fat: 7g
- Trans Fat: 0g
- Carbohydrates: 50g
- Fiber: 3g
- Protein: 20g
- Cholesterol: 60mg
Keywords: tortellini soup, creamy soup, comfort food, Italian recipe

Minute One-Pot Cheeseburger Soup for Busy Weeknights
Cheeseburger Soup: A Comforting Twist on a Classic Favorite
Welcome back to Clean Plate Cravings, food lovers! Today, we’re diving deep into a recipe that brings all the nostalgic flavors of a classic cheeseburger but in a warm, comforting bowl of soup. Yes, you heard that right—cheeseburgers in soup form! There’s just something irresistibly cozy about a bowl of thick, hearty soup, especially when it’s packed with all the flavors of our favorite grill delicacies. So, grab your apron and let’s get cooking!
As the weather cools down, I find myself yearning for meals that warm not just my belly, but my heart too. There’s nothing quite like curling up on the couch with a steaming bowl of cheeseburger soup after a long day. It’s a dish that checks all my boxes: it’s rich, creamy, and packed with flavor, yet simple enough to whip up even on the busiest of weeknights. Plus, this recipe is incredibly adaptable—you can mix in veggies, adjust the seasonings, or even play around with different toppings depending on your mood!
So, how did cheeseburger soup become one of my go-to comfort foods? Well, it all began during a chilly autumn evening when a friend hosted a soup night. The comforting aroma of a bubbling pot filled with savory broth drew me into the kitchen, where I was met with a delicious, cheesy concoction that tasted like a cheeseburger in soup form. Ever since that night, I’ve put my spin on the classic recipe, creating one that brings together fresh ingredients and a whole lot of love.
Now let’s get into the nitty-gritty of making this delicious dish! I promise you’ll be the star of whatever gathering you serve it at, and your kitchen will smell heavenly.
Ingredients
- Ground Beef: The heart of our soup! I love using lean ground beef for a healthier option, but feel free to mix in turkey or a plant-based alternative to keep things light and flavorful.
- Potatoes: Chopped into small cubes, they add creaminess and substance to the soup. For a healthier alternative, you could use sweet potatoes or cauliflower.
- Carrots: These add sweetness and color. You can substitute with parsnips for a unique twist or use pre-shredded carrots to save time.
- Cheddar Cheese: The star ingredient that gives this soup its ultimate cheeseburger flavor. Extra sharp cheddar takes it to the next level, but feel free to mix cheeses like pepper jack for a spicy kick!
- Milk: For a creamy consistency. You can use whole, skim, or even plant-based milk if you want to keep it dairy-free.
Chef Insights:
Using high-quality ingredients really elevates this soup. Don’t shy away from experimenting with different types of cheeses or even adding in some fresh herbs like chives or parsley for a fresh finish!
Step-by-Step Instructions
-
Cooking the Ground Beef:
Begin by browning 1 pound of ground beef in a large pot over medium heat. Use a wooden spoon to break it apart as it cooks. This should take about 5-7 minutes. The aroma will be heavenly, and your kitchen will start coming alive! -
Sautéing the Veggies:
Once your beef is fully cooked, drain any excess fat. Next, toss in 1 diced onion, 1 diced carrot, and a few cloves of minced garlic right into the pot. Sauté these for about 5 minutes until they soften and the onion becomes translucent. This is where the magic happens! The flavors will meld beautifully, and you’ll be tempted to sneak a taste. -
Adding the Potatoes:
Now, time to add 3 cups of cubed potatoes! Toss them in alongside your sautéed vegetables. We’re building layers of flavor here, folks! Give it a good stir, then sprinkle in your favorite seasonings — I recommend a teaspoon of salt, a ½ teaspoon of pepper, and a hint of smoked paprika for that extra depth. -
Pouring in the Broth:
It’s time to add 4 cups of beef broth. This is an important step, as the broth will create the base for our soup. Bring this mixture to a gentle boil, then lower the heat and let it simmer for about 15-20 minutes, or until the potatoes are tender and easily punctured with a fork. -
Making it Creamy:
Here comes the best part! Lower the heat and stir in 1 cup of milk and 2 cups of shredded cheddar cheese. Stir until the cheese melts smoothly into the soup, giving you that delightful creamy texture. If you want it extra cheesy, who am I to stop you? Go ahead and add an additional half cup! -
Final Touches:
Just like any good chef, I love to taste as I go! Give your soup a quick taste and adjust the seasoning if necessary. A sprinkle of salt or a dash of hot sauce can make all the difference if you’re feeling adventurous. Let the soup simmer for another 5 minutes to let those flavors meld together beautifully.
Serving Suggestions
Ladle your warm cheeseburger soup into bowls and garnish with your choice of toppings. I love using crispy bacon bits, a sprinkle of fresh chives, or a dollop of sour cream. Serve with crusty bread on the side for dipping, and watch as everyone dives in!
Recipe Variations
- Add Veggies: You can sneak in some greens with a handful of fresh spinach or kale.
- Spicy Kick: Add some diced jalapeños for a spicy twist or toss in a few dashes of hot sauce to the pot!
- Different Proteins: Go meatless by swapping the ground beef for lentils or plant-based meat alternatives.
- Cheese Swaps: Try mixing in some pepper jack or Gouda for different flavor profiles!
- Creamy Alternative: Replace the milk with cream or half-and-half for an ultra-luxurious soup!
Chef’s Notes
This cheeseburger soup is truly a versatile dish that adapts beautifully to different tastes and preferences. I have to admit, I’ve made it while in a rush and even made it on lazy weekends, and it always hits the spot. My go-to addition these days is a sprinkle of ranch seasoning—trust me, it adds a new level of yum!
FAQs and Troubleshooting
Q: What can I do if my soup ends up too thick?
A: Simply add a bit more broth or milk to thin it out to your desired consistency!
Q: Can I make this soup ahead of time?
A: Absolutely! This soup tastes even better the next day as the flavors meld. Just store it in an airtight container in the fridge for up to 3 days.
Q: Can I freeze the leftovers?
A: Yes, you can! Allow the soup to cool before transferring it to freezer-safe containers. It’s perfect for a quick meal later on!
Q: What if I don’t have beef broth?
A: You can use chicken broth or vegetable broth in a pinch! Just remember that it might change the flavor profile slightly.
Nutritional Information (per serving)
- Calories: 400
- Protein: 25g
- Carbohydrates: 30g
- Fat: 20g
So there you have it, friends! This cheeseburger soup is bound to become a staple in your kitchen. With its rich flavors and comforting character, I know it will bring a smile to your face and warmth to your belly. Happy cooking, and let’s keep those kitchen stories coming!
PrintCheeseburger Soup

A warm and comforting twist on a classic cheeseburger in soup form that’s rich, creamy, and packed with flavor.
- Prep Time: 10 minutes
- Cook Time: 30 minutes
- Total Time: 40 minutes
- Yield: 4 servings 1x
- Category: Soup
- Method: Stovetop
- Cuisine: American
- Diet: None
Ingredients
- 1 pound ground beef
- 1 diced onion
- 1 diced carrot
- a few cloves of minced garlic
- 3 cups cubed potatoes
- 4 cups beef broth
- 1 cup milk
- 2 cups shredded cheddar cheese
- 1 teaspoon salt
- ½ teaspoon pepper
- smoked paprika (to taste)
- optional toppings: crispy bacon bits, fresh chives, sour cream
Instructions
- Begin by browning the ground beef in a large pot over medium heat for about 5-7 minutes.
- Drain any excess fat, then add the diced onion, diced carrot, and minced garlic. Sauté for about 5 minutes.
- Add the cubed potatoes to the pot and stir in your favorite seasonings.
- Pour in the beef broth and bring to a gentle boil. Lower the heat and simmer for 15-20 minutes until the potatoes are tender.
- Lower the heat again and stir in the milk and shredded cheddar cheese until melted and creamy.
- Adjust the seasoning if necessary and let simmer for another 5 minutes.
- Ladle into bowls and garnish with toppings of your choice.
Notes
This soup is versatile; feel free to add veggies or swap proteins. For an extra cheesy version, add more cheese!
Nutrition
- Serving Size: 1 serving
- Calories: 400
- Sugar: 4g
- Sodium: 600mg
- Fat: 20g
- Saturated Fat: 10g
- Unsaturated Fat: 8g
- Trans Fat: 0g
- Carbohydrates: 30g
- Fiber: 3g
- Protein: 25g
- Cholesterol: 70mg
Keywords: cheeseburger soup, comfort food, easy soup recipe, hearty meals

Lasagna Soup
Dive Into Comfort: The Ultimate Lasagna Soup Recipe
Welcome to Clean Plate Cravings! Today, we’re stirring up a pot of joy with a delicious and hearty dish that will warm your soul while tantalizing your taste buds—Lasagna Soup. Picture this: all the comforting flavors of traditional lasagna, but in a cozy, soupy form that’s packed with wholesome ingredients. Yes, please!
This recipe is perfect for when you want to indulge in a classic but don’t have the time (or patience) to layer and bake a full lasagna. Let’s face it—some days you just want to whip up something flavorful without spending hours in the kitchen. Lasagna Soup gives you that delightful taste of Italy with every spoonful while keeping things breezy for you.
As I whip up this version, I’m reminded of how food has this magical way of bringing people together. Growing up, my family would gather around the table every Sunday for a big Italian feast my grandmother would prepare. Her baked lasagna was a highlight, but one day, she decided to switch things up and made a “lazy lasagna” soup. We all loved it—and it quickly became a staple in our household. The nostalgia of slurping down that rich, tomato-y goodness with melted mozzarella pulls at my heartstrings every time I make it.
So, let’s grab our ingredients and dive right in. Whether you’re feeding a crowd or making leftovers for those busy days, this Lasagna Soup is here to make your life a little more delicious!
Ingredients
-
Ground Beef
- The heart of our soup! Choose lean ground beef to keep it lighter. For a healthier twist, you could swap it out for ground turkey or even a plant-based alternative like lentils for a vegetarian option.
-
Lasagna Noodles
- These are the backbone of our dish. You can use traditional lasagna noodles or, if you’re looking for a gluten-free alternative, try using gluten-free pasta. No need to pre-cook them; they will soften beautifully as they cook in the broth!
-
Tomatoes
- A mix of diced tomatoes and tomato sauce brings richness and depth. For a bit of sweetness, you can use San Marzano tomatoes or even add a splash of tomato paste. Crushed tomatoes work great too!
-
Ricotta Cheese
- This creamy delight adds a luxurious texture to the soup. If you’re after a lighter option, low-fat ricotta or cottage cheese is a breezy swap. In a pinch, some Greek yogurt can work as well.
-
Mozzarella Cheese
- Melty and gooey! Fresh mozzarella is divine, but you can also use shredded mozzarella. For a fun twist, add some smoked mozzarella for a bit of extra flavor.
Step-by-Step Instructions
1. Sauté the Ground Beef
In a large pot or Dutch oven over medium-high heat, add the ground beef. Season with a pinch of salt and pepper. Cook until nicely browned, breaking it up with a wooden spoon as it cooks—about 5-7 minutes. This step builds a flavor base, so don’t skip on the seasoning here!
2. Add the Aromatics
Once the beef is browned, toss in one diced onion and two minced garlic cloves. Stir them in and let them soften for about 3-4 minutes. The smell? Utterly divine! This is where the comforting aromas start to fill your kitchen, wrapping you in a warm hug.
3. Mix in the Tomatoes
Stir in a 28-ounce can of diced tomatoes (with juices) and a cup of tomato sauce. Blend everything together, letting it simmer for about 5 minutes. This gives the flavors a chance to meld beautifully. A tip? If you want deeper flavor, throw in a splash of red wine—let it simmer just long enough to cook off the alcohol, but let all those delicious flavors shine!
4. Add Water and Noodles
Pour in 4 cups of water or broth (chicken or vegetable will do). Bring to a boil and then add your lasagna noodles, broken into bits. Cook according to package directions, usually around 8-10 minutes. Don’t worry about the noodles being perfectly shaped! The rustic look adds to the comfort of the dish.
5. Stir in the Ricotta
Once the noodles are cooked, reduce the heat to low. Stir in 1 cup of ricotta cheese until well combined. This adds an ultra-creamy layer to your soup. If you’re feeling a bit adventurous, toss in some freshly chopped basil or your favorite herbs to elevate the flavor!
6. Top with Mozzarella
Once everything is well combined, ladle the soup into bowls. Top each serving generously with shredded mozzarella. If you’re feeling fancy, pop them under the broiler for a minute or two until the cheese is bubbly and golden. Just give it a quick watch to prevent burning!
Serving Suggestions
Serve this delightful Lasagna Soup in deep bowls, topped with some fresh basil, a sprinkle of Parmesan cheese, and a drizzle of olive oil for a touch of elegance. Pair it with crusty garlic bread or a simple green salad for a complete meal that everyone will love!
Recipe Variations
- Vegetarian Delight: Swap ground beef with sautéed mushrooms, zucchini, and spinach for a vibrant vegetable-packed dish.
- Spicy Kick: Add a pinch of red pepper flakes to the ground beef for a spicy kick that will wake up your palate!
- Cheesy Richness: Mix in some grated Parmesan cheese along with the ricotta for an extra cheesy soup.
- Herbic Flavor: Experiment with different herbs! Fresh basil, oregano, or thyme can change the flavor profile and keep things fresh.
- Zoodle Swap: Substitute lasagna noodles with zucchini noodles for a low-carb version—just throw them in during the last 5 minutes of cooking!
Chef’s Notes
Every time I make this soup, I can’t help but think back to family gatherings where plates would be piled high with lasagna, laughter echoing around the table. It’s incredible how food can create such warm memories. Over the years, I’ve evolved this dish to suit my busy lifestyle, making it quicker and easier without skimping on flavor. Plus, it’s fantastic for meal prep—just store it in the fridge or freezer and reheat for busy nights.
FAQs and Troubleshooting
Q: My soup turned out too thick. What can I do?
A: No worries! Just add a splash of water or broth to thin it out. Stir and let simmer for a minute or two.
Q: Can I make this soup ahead of time?
A: Absolutely! It makes for excellent leftovers. Just be mindful that the noodles will absorb more broth as it sits. Add a bit of water when reheating if necessary.
Q: How do I store leftovers?
A: Store leftover soup in an airtight container in the fridge for up to 3-4 days. For longer storage, freeze in smaller portions.
Q: What if I don’t have ricotta?
A: You can use cottage cheese or a blend of cream cheese and sour cream for a creamy component, or just skip it altogether if desired!
Nutritional Info (per serving)
- Calories: approx. 400 (varies based on ingredients)
- Protein: 30g
- Carbohydrates: 45g
- Fat: 15g
- Fiber: 4g
Now that you’ve got the lowdown on how to whip up your very own Lasagna Soup, I hope you feel inspired to jump into the kitchen and create this warm and soothing dish. Remember, cooking is all about having fun and making it your own. Happy cooking, and may your meals be filled with flavor, love, and unforgettable memories!
PrintLasagna Soup

A delicious and hearty dish that combines all the comforting flavors of traditional lasagna in a cozy, soupy form.
- Prep Time: 15 minutes
- Cook Time: 30 minutes
- Total Time: 45 minutes
- Yield: 4 servings 1x
- Category: Main Course
- Method: Stovetop
- Cuisine: Italian
- Diet: Gluten-Free, Vegetarian (when made with plant-based ingredients)
Ingredients
- 1 lb Ground Beef
- 8 oz Lasagna Noodles
- 28 oz Diced Tomatoes
- 1 cup Tomato Sauce
- 1 cup Ricotta Cheese
- 1 cup Shredded Mozzarella Cheese
- 1 Onion, diced
- 2 Garlic Cloves, minced
- 4 cups Water or Broth
- Salt and Pepper to taste
Instructions
- Sauté the Ground Beef in a large pot or Dutch oven over medium-high heat until browned, about 5-7 minutes.
- Add the Aromatics by tossing in the diced onion and minced garlic. Stir in and let them soften for about 3-4 minutes.
- Mix in the Tomatoes by stirring in the diced tomatoes and tomato sauce, letting it simmer for about 5 minutes.
- Add Water and Noodles by pouring in the water or broth, bringing it to a boil, then adding the broken lasagna noodles to cook according to package directions (8-10 minutes).
- Stir in the Ricotta once the noodles are cooked, reducing the heat to low and blending well.
- Top with Mozzarella by ladling the soup into bowls and topping each with shredded mozzarella.
Notes
For a vegetarian option, substitute ground beef with sautéed mushrooms, zucchini, and spinach. You can also experiment with different herbs to enhance the flavor.
Nutrition
- Serving Size: 1 serving
- Calories: 400
- Sugar: 6g
- Sodium: 600mg
- Fat: 15g
- Saturated Fat: 7g
- Unsaturated Fat: 5g
- Trans Fat: 0g
- Carbohydrates: 45g
- Fiber: 4g
- Protein: 30g
- Cholesterol: 70mg
Keywords: lasagna soup, comfort food, Italian recipes, easy dinner, hearty soup

One-Pot White Chicken Chili in 30 Minutes (Creamy Comfort)
The Ultimate White Chicken Chili Recipe
Welcome, fellow food enthusiasts! Today, we’re diving into the heartwarming world of white chicken chili. Imagine cozy evenings wrapped up in a blanket, a bowl of warmth in your hands, and the tantalizing aroma wafting from the kitchen…it’s pure comfort food bliss. This dish is not only nourishing but also bursting with flavor, making it the perfect meal any day of the week. What I love most is how straightforward it is to whip up, making it ideal for both seasoned chefs and kitchen newbies alike. So, grab your apron, and let’s create something truly special together!
Personal Story
Whenever I cook white chicken chili, I’m whisked back to chilly autumn evenings in my grandma’s kitchen. I can still hear the sounds of laughter and chatter as our family gathered around the dinner table, excited for her comforting meal. Grandma had a magical way of making every meal feel like a celebration, and her white chicken chili was the star of the show. The slow bubbling of the pot on the stove and the sizzle of spices made each bite an adventure into coziness.
She always had a way of making it fun, inviting us to help chop vegetables or stir the pot. Her secret? A generous sprinkle of love and laughter. Every bowl served was not just a meal but a hug in a dish. Now, as I share this recipe, I hope to bring a piece of that warmth to your kitchen. So, whether you’re cooking for yourself, friends, or family, let this white chicken chili be an invitation to create memories and indulge in flavors that make your soul smile!
Ingredients
Here’s what you’ll need to bring this fabulous white chicken chili to life:
-
Chicken Breast (or Thighs):
Chicken is the star protein here, providing a savory base. I recommend going for skinless, boneless chicken breasts for a leaner option. If you’re in the mood for a little extra richness, chicken thighs offer a tantalizing depth of flavor. -
White Beans (Canned or Dried):
Creamy white beans like cannellini or great northern beans are perfect for this dish. If you’re using dried beans, soak them overnight for optimal cooking. Canned beans are a fantastic time-saver, too—just rinse before adding them to your chili. -
Green Chiles:
These give a gentle kick and a subtle smokiness to your chili. Use canned green chiles for convenience, or roast your own for a fresh, zesty flavor. If you prefer a milder broth, opt for mild chiles or simply use less. -
Onion:
Onions add that aromatic base that makes this dish sing! Yellow or white onions are perfect here. Pro tip: for a sweeter flavor, sauté them slowly until caramelized. -
Cumin:
This earthy spice ties everything together, imparting warmth and depth. Remember, freshly ground cumin offers a more vibrant flavor, but pre-ground will still do the trick. -
Broth:
Chicken broth or vegetable broth works beautifully. Homemade is always best, but if you’re short on time, store-bought works just as well. For a deeper flavor, try using bone broth.
Step-by-Step Instructions
Let’s get cooking! Follow these easy steps to create your delicious bowl of white chicken chili.
-
Prep the Ingredients:
Start by dicing the onion and mincing garlic (if using fresh). If you’re using dried beans, make sure they’ve soaked overnight. Gather all your other ingredients so you’re ready to go. Staying organized makes kitchen magic happen faster! -
Sauté the Onion:
In a large pot over medium heat, add a drizzle of olive oil. Toss in the diced onion and cook until translucent (about 5 minutes). This step builds a flavor foundation, so take your time here! -
Add Garlic and Spices:
If you’re including garlic, add it now along with the cumin. Stir for about a minute until fragrant. Your kitchen should be smelling divine already! -
Cook the Chicken:
Season your chicken with salt and pepper, then add it to the pot. Sear on both sides for around 5 minutes until lightly browned. This gives a lovely depth of flavor that enhances the entire chili. -
Incorporate the Broth:
Pour in the chicken broth and bring the mixture to a simmer. Make sure to scrape any brown bits from the bottom of the pot; that’s where the magic flavor lies! -
Add Beans and Green Chiles:
Stir in your beans and green chiles. You can add more or less depending on how adventurous you’re feeling. Give it a good stir and lower the heat slightly. -
Simmer Away:
Cover the pot and let it simmer for about 20-30 minutes. This is where all the flavors marry, and your kitchen fills with a cozy aroma. If you’re using shredded chicken, this is a good time to shred it directly in the pot. -
Final Touches:
Taste your chili and adjust the seasoning as needed. Sometimes a hint more salt or a squeeze of lime can make all the difference! -
Serve It Up:
Ladle your warm chili into bowls and top with your favorite garnishes like cilantro, avocado, or a dollop of Greek yogurt.
Serving Suggestions
When you’re ready to serve, consider presenting this chili in beautiful bowls that showcase its creamy texture. A sprinkle of fresh cilantro and a few slices of avocado on top adds a lovely contrast and visual appeal. Serve it alongside warm cornbread or crispy tortilla chips for a delightful crunch.
Recipe Variations
If you’re feeling a bit adventurous, here are some creative twists to try on this basic recipe:
-
Spicy White Chicken Chili: Add diced jalapeños or a pinch of cayenne if you enjoy a good heat kick.
-
Creamy Version: Stir in some cream cheese or coconut milk towards the end for a richer, creamier texture.
-
Vegetarian Option: Swap the chicken for a medley of mushrooms or extra beans for a hearty plant-based version.
-
Southwestern Flair: Toss in some corn and bell peppers for sweetness and extra color.
-
Herb Infusion: Fresh herbs like cilantro or parsley lend a pop of freshness, so don’t shy away from tossing in a handful at the end!
Chef’s Notes
This white chicken chili recipe has been a staple in my family for years, and it’s interesting to see how it’s evolved over time. I once tried adding pumpkin puree for a seasonal twist, and it was a hit! Since then, I’ve added my own flair with spices and unique toppings, demonstrating how versatile and forgiving this recipe can be. And honestly, every time I make it, I feel like my grandma is right there beside me.
The beauty of this dish is that you can make it your own. So get creative! And don’t hesitate to share your own variations—cooking should always be a community experience.
FAQs and Troubleshooting
Q1: What if my chili is too thick?
A: Simply add more broth or water until you reach your desired consistency. A splash of lime juice can also brighten it up!
Q2: Can I make this chili in a slow cooker?
A: Absolutely! Just sauté the onion and spices first, then add everything else into the slow cooker. Set it on low for 6-8 hours or on high for 3-4 hours.
Q3: How do I store leftovers?
A: Store any leftovers in an airtight container in the fridge for up to 4 days or in the freezer for up to 3 months. Reheat gently on the stove or in the microwave.
Q4: What can I do if it’s too spicy?
A: If the chili turned out spicier than you like, add some dairy (like sour cream or cheese) to mellow the heat. Also, servings of rice or avocado can help balance it out.
Nutritional Info (if applicable)
This white chicken chili is not only delicious but also nutritious! Each serving is packed with protein, fiber from the beans, and vitamins from the vegetables. It’s a well-rounded meal that fuels your body and satisfies your cravings without sacrificing flavor. If you’re counting calories or macros, you can easily adjust the ingredients to suit your needs.
And there you have it—a wholesome and delightful white chicken chili that’s ready to steal the show at any dinner gathering! I hope this recipe fills your kitchen with laughter, warmth, and most importantly, great food. So, what are you waiting for? Let’s get cooking, and don’t forget to share your beautiful bowls with me! Happy cooking!
PrintUltimate White Chicken Chili

A warm and comforting white chicken chili that’s easy to prepare, perfect for cozy evenings.
- Prep Time: 15 minutes
- Cook Time: 30 minutes
- Total Time: 45 minutes
- Yield: 4 servings 1x
- Category: Main Course
- Method: Stovetop
- Cuisine: American
- Diet: Gluten-free
Ingredients
- 1 lb Chicken Breast (or Thighs)
- 2 cans (15 oz) White Beans (Canned or Dried)
- 1 can (4 oz) Green Chiles
- 1 Onion, diced
- 1 tsp Cumin
- 4 cups Chicken or Vegetable Broth
- Olive Oil, for cooking
- Salt and Pepper, to taste
Instructions
- Prep the ingredients by dicing the onion and mincing garlic (if using fresh).
- Sauté the onion in a large pot over medium heat with olive oil until translucent (about 5 minutes).
- Add garlic and cumin, and stir for about a minute until fragrant.
- Cook the seasoned chicken in the pot for about 5 minutes until lightly browned.
- Incorporate the broth and bring the mixture to a simmer.
- Add the white beans and green chiles, stirring well.
- Simmer the chili for about 20-30 minutes, allowing flavors to marry.
- Serve the chili hot, garnished with cilantro, avocado, or yogurt.
Notes
Feel free to adjust the spices and toppings based on your preferences. This chili is versatile and can be customized easily.
Nutrition
- Serving Size: 1 serving
- Calories: 350
- Sugar: 2g
- Sodium: 500mg
- Fat: 10g
- Saturated Fat: 2g
- Unsaturated Fat: 8g
- Trans Fat: 0g
- Carbohydrates: 40g
- Fiber: 5g
- Protein: 30g
- Cholesterol: 90mg
Keywords: chili, chicken chili, comfort food, easy recipes, fall recipes