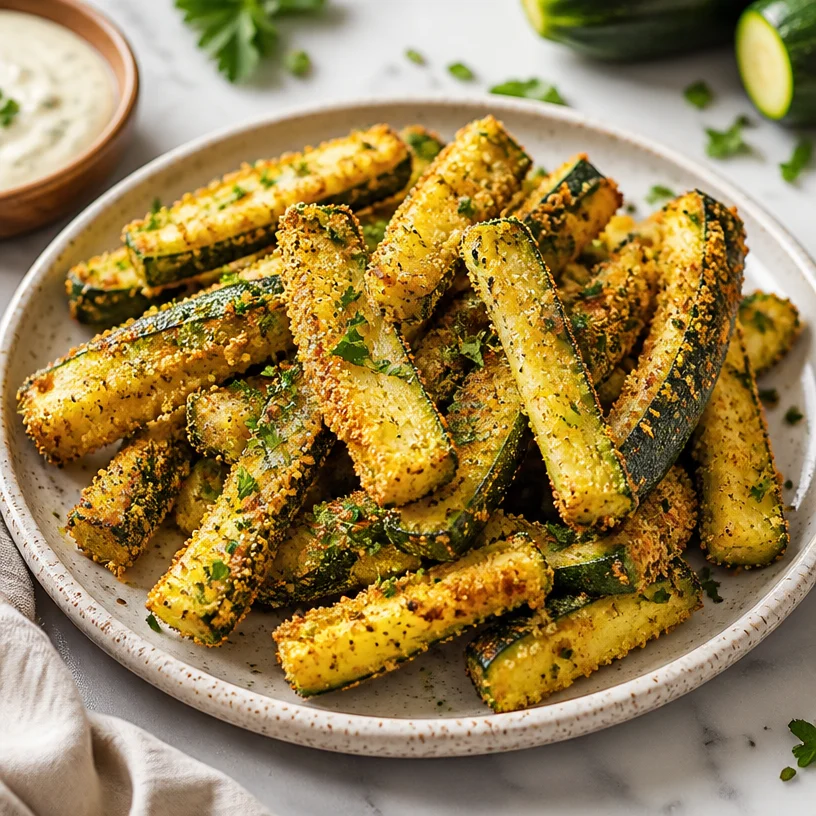
Minute Crispy Air Fryer Zucchini Fries (Low-Carb)
Air Fryer Zucchini: A Fresh Twist on a Classic Dish
Welcome, fellow food lovers! Today, we’re diving into a dish that’s all about celebrating fresh, vibrant flavors—Air Fryer Zucchini. If you’re looking for a way to enjoy this versatile veggie with a delectable crunch, you’ve come to the right spot! As we explore this delightful recipe, I promise you’ll find cooking it the most rewarding experience, filled with nostalgia, creativity, and some serious yum factor.
Introduction
Now, let’s be real—zucchini sometimes gets a bad rap. I mean, who hasn’t confronted a mountain of bland, overcooked zucchini on their plate at some point? But I’m here to tell you that when prepared right, this humble green squash can steal the show! Today, we’re going to air fry it to perfection, achieving a delightful crispiness while keeping the inside tender and juicy. The air fryer makes this recipe faster and healthier without sacrificing flavor.
This dish could become your new go-to side, snack, or even a light meal on its own. Not to mention, it’s super versatile—great for busy weekdays or laid-back weekends. Picture this: a platter of golden, crispy zucchini, ready to be enjoyed as you catch up with friends or family. Ah, yes, that’s how we do it here at Clean Plate Cravings!
Let’s get started by uncovering a little story that makes this dish even more special.
Personal Story
Growing up, my mom had a garden that was the pride of our home. Every summer, I would rush outside after school to see what had ripened. Zucchini seemed to grow overnight! We had zucchini bread, zucchini fritters, and my ultimate favorite—zucchini sautéed in olive oil with garlic and just a hint of lemon. The sizzling sound and that incredible fragrance still evoke warm memories of lazy summer afternoons, laughter, and family dinners.
Fast forward to adulthood, and I once found myself with a more health-conscious mindset. Inspired by my mom’s cooking but wanting something a bit lighter, I decided to elevate my beloved zucchini dish using an air fryer. The result was a stunning twist that stayed true to the freshness I cherished while adding that delightful crunch I adore. It’s become a staple in my kitchen, and I’m thrilled to share this recipe with you!
Ingredients
Here’s what you’ll need to whip up these scrumptious Air Fryer Zucchini bites:
-
2 pounds zucchini (diced into ½-inch pieces)
Zucchini is your star here! Not only is it low in calories, but it’s packed with vitamins A and C. Opt for young, firm zucchinis with shiny skin for the best flavor. If you don’t have zucchini, yellow squash works beautifully too! -
1 tablespoon olive oil (extra-virgin; other oils work as well)
Olive oil adds a rich flavor and helps achieve that crispy texture. Feel free to swap in avocado oil or any neutral oil if that’s what you have on hand. -
1 teaspoon onion powder
This brings a subtle sweetness and depth to your dish. If you prefer a fresher taste, swap it for one small finely chopped onion, adjusting cooking times slightly. -
1 teaspoon garlic powder
Garlic powder packs a flavorful punch without the fuss of peeling and chopping fresh garlic. You can also substitute with fresh minced garlic (just sauté it briefly with the zucchini to prevent burning). -
1 teaspoon salt
Salt helps to draw out moisture and enhance flavors. Feel free to use sea salt or kosher salt based on your preference. -
¼ teaspoon black pepper
Just a touch of black pepper to give your zucchini a little kick. If you’re feeling adventurous, add red pepper flakes for a spicy twist!
This combination of ingredients might seem simple, but trust me—great things come from keeping it clean and straightforward.
Step-by-Step Instructions
Now that we’ve gathered our ingredients, let’s roll up our sleeves and start cooking!
-
Prep Your Zucchini
Begin by washing your zucchini thoroughly under running water to remove any dirt. It’s essential to keep that fresh, healthy vibe! Next, diced the zucchini into ½-inch pieces. The size is key here—it allows for even cooking. Too small and you risk mushy zucchini; too large, and they won’t crisp up properly. -
Drying the Zucchini
After dicing, spread the zucchini pieces out on a clean kitchen towel, and let them sit for about 10-15 minutes. This step is crucial for removing excess moisture, which can lead to sogginess.Chef Tip: If you’re in a hurry, you can pat them dry with paper towels instead!
-
Season the Zucchini
In a large mixing bowl, combine the dried zucchini with olive oil, onion powder, garlic powder, salt, and black pepper. Toss everything together until every piece is evenly coated.Quick Hack: Want to keep your hands clean? Use a large zip-top bag to toss the zucchini with the oil and spices!
-
Preheat Your Air Fryer
Preheat your air fryer to 400°F (200°C) for about 5 minutes. This ensures that your zucchini cooks evenly and achieves that golden-brown finish. -
Air Fry the Zucchini
Spread the zucchini in a single layer in the air fryer basket, making sure not to overcrowd it. If necessary, cook in batches. Air fry them for about 10-12 minutes, shaking the basket halfway through to promote even cooking.Chef Insight: Keep an eye on them in the last few minutes! Each air fryer is different, and you want that lovely crispiness without burning.
-
Serve and Enjoy!
Once your zucchini is beautifully golden and crips, remove them from the air fryer. You can always season with a bit more salt or a sprinkle of parmesan cheese if you’d like.
Voilà! Your Air Fryer Zucchini is ready to enjoy.
Serving Suggestions
How you serve your Air Fryer Zucchini can make it even more special. For a fun twist, you can snack on these crispy bites as finger food, toss them with pasta for a light summer dish, or serve them as a side with grilled chicken or fish. A sprinkle of fresh herbs like basil or parsley adds a vibrant touch, linking the dish beautifully to your sunny memories just like those afternoons with my mom in the garden.
Recipe Variations
If you’re feeling adventurous (or simply want to switch things up), here are a few fun variations to customize your Air Fryer Zucchini:
- Add Cheese: Toss in grated Parmesan or mozzarella before air frying for a cheesy twist.
- Herb Infusion: Experiment with fresh or dried herbs! Oregano, thyme, or Italian seasoning work wonders.
- Spice things up: Add smoked paprika or chili powder for a kick, or even a pinch of cumin for an earthy flavor.
- Zucchini Fries: Cut the zucchini into sticks—perfect for dipping in your favorite sauces!
- Buffalo Style: Toss cooked zucchini in buffalo sauce for a spicy, addictive snack.
Chef’s Notes
This recipe has become a staple not just for its ease but also for its flexibility. One day, it’s a side for grilled salmon; the next, it’s an afternoon snack I can munch on while watching my favorite show. The first time I made this, I was convinced I’d burnt them, but they turned out to be the most flavorful batch I ever made! Embrace the imperfect moments in the kitchen; they tend to lead to the best outcomes.
FAQs and Troubleshooting
Q: Why did my zucchini come out soggy?
A: The secret is in the drying process. Moisture is the enemy of crispiness! Make sure to dry your zucchini thoroughly before seasoning and air frying.
Q: Can I use other vegetables?
A: Absolutely! Bell peppers, asparagus, and even mushrooms can be air-fried using similar techniques and times—just keep an eye on cooking times, as they may vary.
Q: What dipping sauces go well with air-fried zucchini?
A: Try a zesty yogurt dip, ranch dressing, or even marinara sauce! The options are endless; get creative with flavors you love.
Q: Is it okay to use frozen zucchini?
A: Fresh zucchini works best for this recipe to retain that crunch, but if you’re in a pinch, just make sure to thoroughly thaw and drain any excess water before air frying.
Nutritional Info
This recipe is not only delicious but also nutritious! Here’s a quick breakdown per serving (based on a standard serving size):
- Calories: Approximately 80
- Protein: 2 grams
- Carbohydrates: 4 grams
- Fat: 7 grams
- Fiber: 2 grams
Packed with essential vitamins and a lovely boost of fiber, this dish offers a guilt-free way to enjoy your vegetables!
There you have it—a delightful Air Fryer Zucchini recipe that’s easy, flavorful, and sure to impress! I can’t wait for you to try it and make it your own. Remember, cooking is all about enjoyment, experimenting, and sharing with those you love. So fire up that air fryer and get ready for some serious kitchen fun! Happy cooking!
PrintAir Fryer Zucchini
A fresh and crispy twist on classic zucchini, air fried to perfection, creating a delightful side or snack.
- Prep Time: 15 minutes
- Cook Time: 12 minutes
- Total Time: 27 minutes
- Yield: 4 servings 1x
- Category: Side Dish
- Method: Air Frying
- Cuisine: American
- Diet: Vegetarian
Ingredients
- 2 pounds zucchini (diced into ½-inch pieces)
- 1 tablespoon olive oil (extra-virgin)
- 1 teaspoon onion powder
- 1 teaspoon garlic powder
- 1 teaspoon salt
- ¼ teaspoon black pepper
Instructions
- Prep Your Zucchini: Wash zucchini and dice into ½-inch pieces.
- Drying the Zucchini: Spread zucchini on a kitchen towel and let sit for 10-15 minutes.
- Season the Zucchini: Mix zucchini with olive oil, onion powder, garlic powder, salt, and black pepper in a bowl.
- Preheat Your Air Fryer: Preheat to 400°F (200°C) for 5 minutes.
- Air Fry the Zucchini: Cook in a single layer for 10-12 minutes, shaking halfway through.
- Serve and Enjoy!: Sprinkle with more salt or parmesan as desired.
Notes
For extra flavor, try adding cheese or seasonings like smoked paprika. Squeeze fresh lemon juice before serving for brightness.
Nutrition
- Serving Size: 1 serving
- Calories: 80
- Sugar: 3g
- Sodium: 300mg
- Fat: 7g
- Saturated Fat: 1g
- Unsaturated Fat: 6g
- Trans Fat: 0g
- Carbohydrates: 4g
- Fiber: 2g
- Protein: 2g
- Cholesterol: 0mg
Keywords: zucchini, air fryer, healthy snack, vegetarian recipe, crispy vegetables
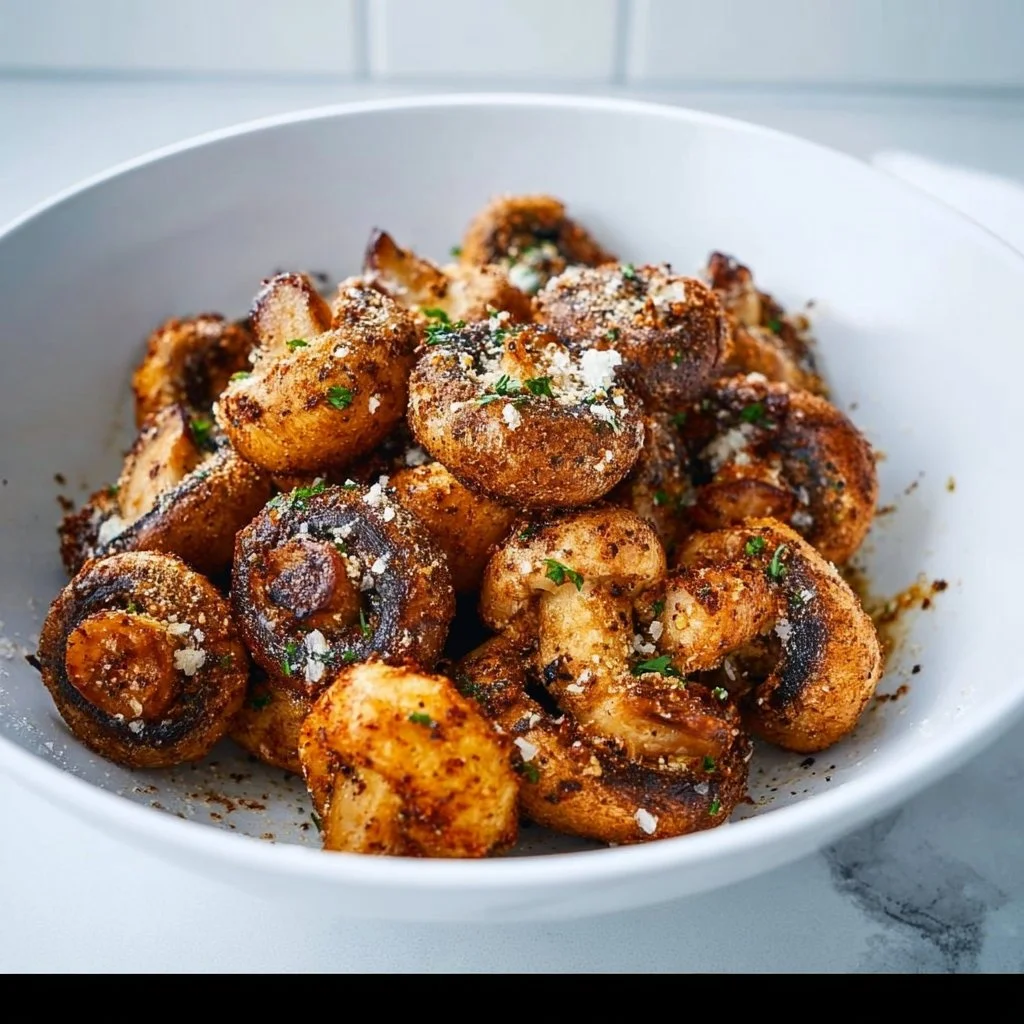
Keto Fried Mushrooms
Keto Fried Mushrooms: A Crispy Delight That Wins Hearts
Welcome to my kitchen, food lovers! Today, I’m excited to take you on a culinary adventure that’s all about crispy, crunchy flavors that tickle your taste buds without the carbs. Yes, you guessed it! We’re diving into the delicious world of Keto Fried Mushrooms.
Now, whether you’re on a keto journey, looking to add more veggies into your meals, or just craving something delightful to snack on, these mushrooms are your ticket to happiness. Why? Because they’re fluffy on the inside with a golden, crispy coating that adds a satisfying crunch to every bite. Plus, they make a perfect snack, side dish, or even a party appetizer that will leave your friends and family wanting more!
Before we jump into the cooking process, let’s take a moment to appreciate the wondrous and versatile mushroom. Not only are they low in carbs, but they’re also packed with flavor and nutrients, proving that healthy eating can be absolutely fabulous! Alright, grab your apron, and let’s get cooking!
A Little Kitchen Story
Growing up, my family had a cozy little restaurant where good food brought everyone together. One dish that never failed to disappear from the menu was our crispy fried mushrooms. My mom used to whip them up for our family gatherings, and they quickly became the star of every meal.
I’ll never forget those weekends when friends would come to our place, seeking not just a meal but an experience. I’d watch eagerly as my mom tossed mushrooms in a zesty batter, her laughter mixing with the sizzling sounds of them frying in the pan. The aroma filled the air, creating an atmosphere of excitement and anticipation that was hard to resist.
Those moments instilled in me a love for food that is both comforting and delightful. They also taught me that cooking is more than just following recipes—it’s about sharing joy, creating connection, and savoring life’s little pleasures. So, as I share this keto-friendly fried mushroom recipe, I want you to feel the same love and joy that was present in my childhood kitchen.
Ingredients
Now, let’s talk about what you’ll need for these delectable Keto Fried Mushrooms:
-
2 cups mushrooms, sliced: Choose your favorite type, such as button, cremini, or shiitake. Mushrooms are low in carbs, high in fiber, and an excellent source of antioxidants. Substitution Tip: If you want a different texture or flavor, try using zucchini slices or eggplant.
-
1/4 cup almond flour: This is our crispy coating that keeps the mushrooms light while giving them a delicate crunch. Chef’s Insight: Almond flour is keto-friendly and gluten-free, making it perfect for those looking for healthier options. If you’re nut-free, you can swap it with finely crushed pork rinds for a unique twist.
-
1/2 teaspoon garlic powder: Garlic is a flavor powerhouse in any dish. It also brings a satisfying aroma that makes your kitchen smell amazing. Substitute: If you love fresh flavors, go for fresh minced garlic!
-
1/2 teaspoon onion powder: Helps to enhance the overall flavor profile of the dish, adding a touch of sweetness. Fun Fact: You can use chives or green onions for a fresh kick.
-
Salt and pepper to taste: Essential seasoning that amplifies flavor. Don’t be shy; taste as you go!
-
Oil for frying: I recommend avocado oil for its high smoke point and health benefits, but you can also use olive oil or coconut oil. Pro Tip: Avoid using vegetable oil as it’s not ideal for high-heat cooking.
Step-by-Step Instructions
Now, it’s time to roll up your sleeves and dive into the cooking! Let’s make these Keto Fried Mushrooms together, shall we?
Step 1: Prepare the Mushrooms
Start by cleaning your mushrooms under running cold water. Gently scrub with a cloth to remove any dirt. Once you’ve cleaned them, slice the mushrooms evenly, about 1/4 inch thick, so they cook evenly and get that nice crispy crust.
Step 2: Create Your Coating
In a medium bowl, combine the almond flour, garlic powder, onion powder, salt, and pepper. Stir them together until they’re well mixed. This flour blend is not only keto-friendly but also gluten-free! You can adjust seasoning according to your preference—feel free to add a splash of your favorite spice!
Step 3: Heat the Oil
In a large skillet, heat about 1/2 inch of your chosen oil over medium-high heat. To check if the oil is hot enough, you can drop a small piece of mushroom in; if it sizzles right away, you’re ready to go!
Step 4: Coat the Mushrooms
Take each sliced mushroom and dip it into the almond flour mixture, making sure to coat it evenly. Shake off any excess flour. This step is crucial because it ensures that each bite delivers that crispy texture we’re after.
Step 5: Fry the Mushrooms
Carefully place the coated mushrooms into the hot oil, a few at a time—don’t overcrowd the skillet! Fry them until they turn golden brown, typically about 2-3 minutes on each side. Use a slotted spoon to turn them for an even fry. You’ll know they’re done when they are beautifully crispy and golden.
Step 6: Drain and Serve
Once fried, use the slotted spoon to transfer the mushrooms to a plate lined with paper towels, which will absorb the excess oil. Repeat with the remaining mushrooms.
Chef’s Tip:
Get creative here—while the mushrooms fry, play some upbeat music or enjoy a fun chat with friends. Cooking is meant to be enjoyable, after all!
Serving Suggestions
These crispy Keto Fried Mushrooms are perfect as they are, but I love to serve them with a vibrant, zesty dipping sauce. A creamy garlic aioli or spicy ranch complements the flavors beautifully! For presentation, simply arrange the mushrooms on a colorful platter, garnished with fresh herbs like parsley or chives. Don’t shy away from getting a little fancy with the plating—this is your moment, food artist!
Recipe Variations
Want to mix things up a bit? Here are a few delicious variations to try:
- Cheesy Delight: Add 1/4 cup of grated Parmesan cheese to your almond flour mix for an extra layer of flavor.
- Spicy Kick: Incorporate some cayenne pepper or chili powder into the coating for a spicier version.
- Herb Infusion: Mix in fresh herbs like thyme or oregano along with the coat for a fragrant twist.
- Sweet & Savory: Try adding a splash of balsamic vinegar to the frying oil for a hint of sweetness.
- Paleo-Friendly: Instead of almond flour, use coconut flour for a different flavor profile (note: you may need to adjust the amount).
Chef’s Notes
As a chef who believes in the transformative power of food, I’ve played around with variations of fried mushrooms over the years. I’d say my favorite discovery was the cheese infusion; it adds a lovely savoriness that’s hard to resist.
One time, I accidentally added way too much cayenne pepper while experimenting, and let’s just say, it was a bit of a spicy surprise! Lesson learned: always adjust seasonings gradually. Cooking is all about experimenting, and sometimes the best dishes come from unexpected places.
FAQs and Troubleshooting
1. Why are my mushrooms soggy?
- This usually happens because of excess moisture or overcrowding in the frying pan. Make sure to dry the mushrooms thoroughly before coating and frying them in batches.
2. Can I bake these instead of frying?
- Absolutely! Lay them out on a baking sheet lined with parchment paper, spray with cooking oil, and bake at 400°F (200°C) for about 15-20 minutes, flipping halfway through.
3. What should I serve with my fried mushrooms?
- These mushrooms pair wonderfully with a fresh salad, grilled protein, or even on top of a keto pizza for some added crunch!
4. How do I store leftovers?
- Store any leftovers in an airtight container in the fridge for up to 3 days. To reheat, place them in a hot skillet for a couple of minutes to regain their crispy texture.
Nutritional Info
While this keto-friendly dish is best enjoyed fresh, if you happen to have leftovers, you won’t have to feel guilty! Each serving contains approximately:
- Calories: 150
- Net Carbs: 5g
- Protein: 5g
- Fat: 12g
And there you have it—my delightful recipe for Keto Fried Mushrooms! I hope you enjoy making these as much as I did sharing them with you. Remember, cooking is about love, creativity, and, most importantly, having fun! Happy cooking!
PrintKeto Fried Mushrooms

Crispy, crunchy keto-friendly mushrooms that make a perfect snack or appetizer.
- Prep Time: 10 minutes
- Cook Time: 15 minutes
- Total Time: 25 minutes
- Yield: 4 servings 1x
- Category: Appetizer
- Method: Frying
- Cuisine: Keto
- Diet: Keto
Ingredients
- 2 cups mushrooms, sliced
- 1/4 cup almond flour
- 1/2 teaspoon garlic powder
- 1/2 teaspoon onion powder
- Salt and pepper to taste
- Oil for frying
Instructions
- Prepare the mushrooms by cleaning them under running cold water and slicing them evenly, about 1/4 inch thick.
- Create the coating by mixing almond flour, garlic powder, onion powder, salt, and pepper in a medium bowl.
- Heat about 1/2 inch of oil in a large skillet over medium-high heat.
- Coat each mushroom slice in the almond flour mixture, shaking off any excess flour.
- Fry the coated mushrooms in the hot oil until they turn golden brown, about 2-3 minutes on each side.
- Drain on paper towels and serve with a dipping sauce of your choice.
Notes
For a fancy touch, serve with a zesty dipping sauce like garlic aioli or spicy ranch.
Nutrition
- Serving Size: 1 serving
- Calories: 150
- Sugar: 1g
- Sodium: 200mg
- Fat: 12g
- Saturated Fat: 1g
- Unsaturated Fat: 11g
- Trans Fat: 0g
- Carbohydrates: 5g
- Fiber: 2g
- Protein: 5g
- Cholesterol: 0mg
Keywords: keto, fried mushrooms, low carb appetizer, crispy snack, healthy eating