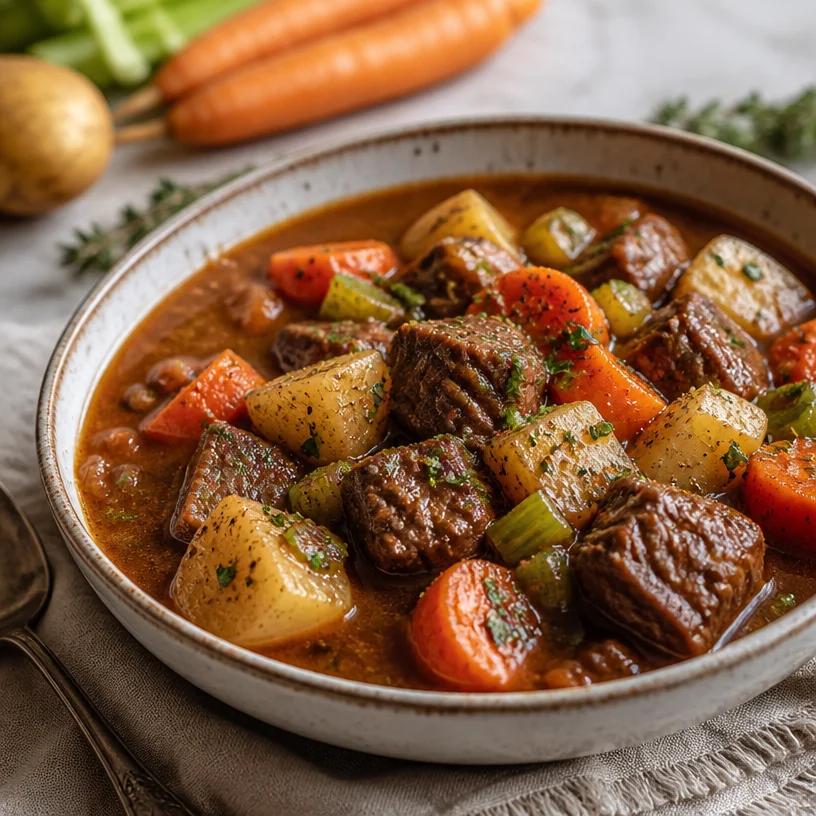
Beef Stew
Hearty Beef Stew: A Cozy Culinary Hug
When the weather starts to chill and the leaves turn vibrant shades of amber and gold, there’s something incredibly comforting about a hearty beef stew simmering on the stove. It’s more than just a meal; it’s an invitation to sit down, relax, and savor each rich bite. Picture yourself wrapped in a warm blanket, the scent of tender beef and fragrant vegetables wafting through your home, filling it with a sense of warmth and nostalgia. Welcome to my cozy culinary corner of the internet, where cooking is a joyous adventure and every recipe is crafted with love!
Today, we’re diving into the world of beef stew—a classic that never goes out of style. Whether you’re a seasoned cook or a kitchen newbie, this recipe is designed for you. As a chef who embraces real food with real flavor, I believe that cooking should be approachable and, above all, fun! So, grab your apron, and let’s get cooking.
A Taste of Nostalgia: Valley of Stews
One of my earliest kitchen memories is being tiny Ava, perched on a stool beside my grandmother as she made her famous beef stew. The kitchen was warm, filled with the laughter of family and the enticing aroma of simmering meat and veggies. I remember how she’d always say, “Happiness is just a spoonful away!” as she stirred the pot. Grandma had this magical way of making a simple meal feel luxurious, and although it seemed like she added a sprinkle of love, the real secret was her patience and technique.
I remember the rainbow of fresh vegetables she would chop—carrots bright as the sun, potatoes waiting to soak up all that delicious sauce, and celery with its satisfying crunch. We’d always sneak in a bite or two while she wasn’t looking, our little family secret! And of course, the beef—she’d insist on the best quality chuck, patiently explaining how the marbled fat kept everything tender and juicy during the long, slow cooking process. Her beef stew was more than just food; it was a symbol of love and connection, and it left a lasting impression on my culinary journey.
Essential Ingredients for Hearty Beef Stew
Let’s gather our ingredients! The beauty of beef stew lies in its simplicity and the richness it brings to the table. Here’s what you’ll need:
-
Beef Chuck (2 lbs)
A flavorful cut with ample marbling, beef chuck becomes incredibly tender when cooked slowly. If you’re looking for a leaner option, you can substitute with sirloin, but keep in mind the texture may differ. -
Carrots (3 medium)
These sweet, crunchy gems add color and depth to your stew. If you’re in a pinch, you can swap them for parsnips or even sweet potatoes for a different flavor profile. -
Potatoes (4 medium)
Essential for substance, they soak up all the rich flavors. Yukon Golds are my go-to for their buttery flavor, but feel free to use russets, Idaho, or even red potatoes—just chop them a little smaller for even cooking. -
Celery (2 stalks)
A key base flavor that adds a refreshing crunch. If you’re not a fan, you can replace it with green beans or even bell peppers. -
Broth (6 cups)
Beef broth is the backbone of this stew, bringing depth. Homemade is always best, but store-bought works just fine. For a lighter version, vegetable broth is an excellent alternative. -
Herbs & Spices: Bay Leaves, Thyme, Salt, and Pepper
These simple seasonings elevate the dish to new heights. Fresh herbs are amazing, but dried herbs work wonders too—just adjust the quantity.
Cooking Instructions: Step-by-Step to Cozy Perfection
Let’s jump into the cooking process! Follow these steps and add your flair for a perfect beef stew:
-
Prep Your Ingredients
Begin by chopping your vegetables into bite-sized pieces and cutting your beef into 1-inch cubes. This not only helps with even cooking but makes for a better presentation. And remember, having everything ready before you start can save you from a last-minute kitchen scramble! -
Sear the Beef
Heat a tablespoon of oil in a large pot over medium-high heat. Once it’s shimmering, add half of your beef cubes, making sure not to overcrowd the pan. Searing them for about 4-5 minutes until browned on all sides adds a beautiful depth of flavor. Then, remove them and repeat with the remaining beef. Chef tip: Don’t skip this step; it’s where the magic happens! -
Sauté the Veggies
In the same pot, toss in your chopped onions (if you have them) and celery. Sauté them for about 3 minutes until they become fragrant. Next, add your carrots and cook for an additional 3 minutes. This mix helps build the flavor foundation of your stew. -
Bring it All Together
Return the beef to the pot and sprinkle flour over it to coat. This helps thicken your stew later. Stir in your broth, add the bay leaves, thyme, salt, and pepper. Bring everything to a gentle simmer. -
Low and Slow Cooking
Cover the pot and reduce the heat to low. Allow your stew to cook slowly for about 2 hours, stirring occasionally. The slower, the better! This is the time when the flavors meld beautifully, and the meat tenderizes perfectly. If you’re in a hurry, you can crank the heat up and cook it on medium for about an hour, but it’s truly worth the wait. -
Add the Potatoes
After 1.5 hours of cooking, add your diced potatoes. These need about 30 minutes to become perfectly tender. Toss them in and stir gently. If you want to feel fancy, sprinkle a bit more thyme or fresh parsley on top! -
Final Taste Test
About 10 minutes before serving, taste your stew. Adjust salt and pepper as needed. Chef secret: Add a splash of Worcestershire sauce or balsamic vinegar at the end for an extra kick! -
Serve and Enjoy
Once your beef stew is saucy and rich, you’re ready to serve! Ladle it into bowls alongside crusty bread or over a bed of fluffy rice.
Serving Suggestions: Plating Your Stew
Serving your beef stew can be as creative as you like! For a lovely presentation, serve it in rustic bowls garnished with a sprinkle of fresh parsley or thyme. Pair it with warm, buttered crusty bread—perfect for soaking up the delicious broth! For something a bit different, you could serve it over creamy mashed potatoes or even a bed of quinoa for a wholesome twist.
Recipe Variations: Putting Your Spin on It
If you’re feeling adventurous, here are some easy variations to try:
-
Spicy Kick: Add a teaspoon of red pepper flakes or diced jalapeños to bring some heat to your stew!
-
Herbaceous Flavor: Throw in fresh rosemary or Italian herbs for a fragrant twist.
-
Mushroom Medley: Add sautéed mushrooms for a rich, earthy depth.
-
Lighter Version: Swap half the broth for red wine for a rich backdrop.
-
Vegetarian Option: Use hearty vegetables like mushrooms and lentils instead of beef and beef broth for a veggie-packed stew!
Chef’s Notes: Memories and Evolution
Every recipe carries a piece of history and love, and beef stew is no different. Over the years, I’ve played with different ingredients and techniques, adapting to what was readily available and what inspired me at the moment. Sometimes, I added a can of tomatoes for body and sweetness, or experimented with different herbs from my garden. Each pot tells a story—of dinners shared, laughter echoed, and warmth spread across the table.
One funny kitchen story I have is about the great “Beef Stew Wars” amongst my family. While everyone claimed to make the best version, it turned out that everyone’s interpretations—the spices, cooking times, or secrets—were equally delicious in their own right. It reminded me that cooking is all about love and making it your own.
FAQ and Troubleshooting: Your Common Questions Answered
-
Why is my beef stew tough?
- If your beef is tough, it probably hasn’t been cooked long enough. Slow-cooking tenderizes the meat, so let it simmer longer until it’s fall-apart tender!
-
Can I freeze beef stew?
- Absolutely! Beef stew freezes beautifully. Allow it to cool completely, then portion it out in airtight containers. It can last up to 3 months in the freezer!
-
How do I thicken my stew?
- If your stew is too runny, you can mix a tablespoon of cornstarch with cold water and add it to the stew, cooking until it thickens. Alternatively, let it simmer uncovered for longer to reduce the liquid.
-
Can I use different cuts of meat?
- Yes! While beef chuck is ideal, you could use brisket or even stew meat cuts, but ensure to cook until tender since they may vary in texture after cooking.
Nutritional Info
While I encourage you to savor your food, here’s a rough estimate if you’re keeping track: A serving of beef stew (about 1 cup) typically has around 250-350 calories, based on ingredient choices. It’s packed with protein, vitamins from veggies, and hearty flavors!
And there you have it—a cozy, delicious beef stew recipe filled with love and nostalgia! Be sure to share it with your friends and family, and remember as you cook: Make it your own, have fun, and let your kitchen be filled with laughter and love. Happy cooking!
PrintHearty Beef Stew

A cozy beef stew simmered with tender meat and flavorful vegetables, perfect for chilly days.
- Prep Time: 15 minutes
- Cook Time: 120 minutes
- Total Time: 135 minutes
- Yield: 6 servings
- Category: Main Course
- Method: Slow Cooking
- Cuisine: American
- Diet: None
Ingredients
- Beef Chuck (2 lbs)
- Carrots (3 medium)
- Potatoes (4 medium)
- Celery (2 stalks)
- Broth (6 cups)
- Bay Leaves
- Thyme
- Salt
- Pepper
Instructions
- Prep Your Ingredients by chopping your vegetables into bite-sized pieces and cutting your beef into 1-inch cubes.
- Sear the Beef by heating oil in a large pot over medium-high heat and browning the beef cubes for 4-5 minutes.
- Sauté the Veggies in the same pot starting with onions and celery for about 3 minutes, then adding carrots for an additional 3 minutes.
- Bring it All Together by returning beef to the pot and stirring in flour, broth, bay leaves, thyme, salt, and pepper.
- Cook Low and Slow for about 2 hours while stirring occasionally.
- Add the Potatoes after 1.5 hours and cook for an additional 30 minutes.
- Final Taste Test about 10 minutes before serving to adjust seasoning as needed.
- Serve and Enjoy by ladling into bowls and pairing with crusty bread.
Notes
For extra flavor, add a splash of Worcestershire sauce or balsamic vinegar before serving.
Nutrition
- Serving Size: 1 cup
- Calories: 300
- Sugar: 4g
- Sodium: 600mg
- Fat: 15g
- Saturated Fat: 5g
- Unsaturated Fat: 8g
- Trans Fat: 0g
- Carbohydrates: 35g
- Fiber: 5g
- Protein: 25g
- Cholesterol: 70mg
Keywords: beef stew, comfort food, hearty meal, cozy cooking, winter recipes
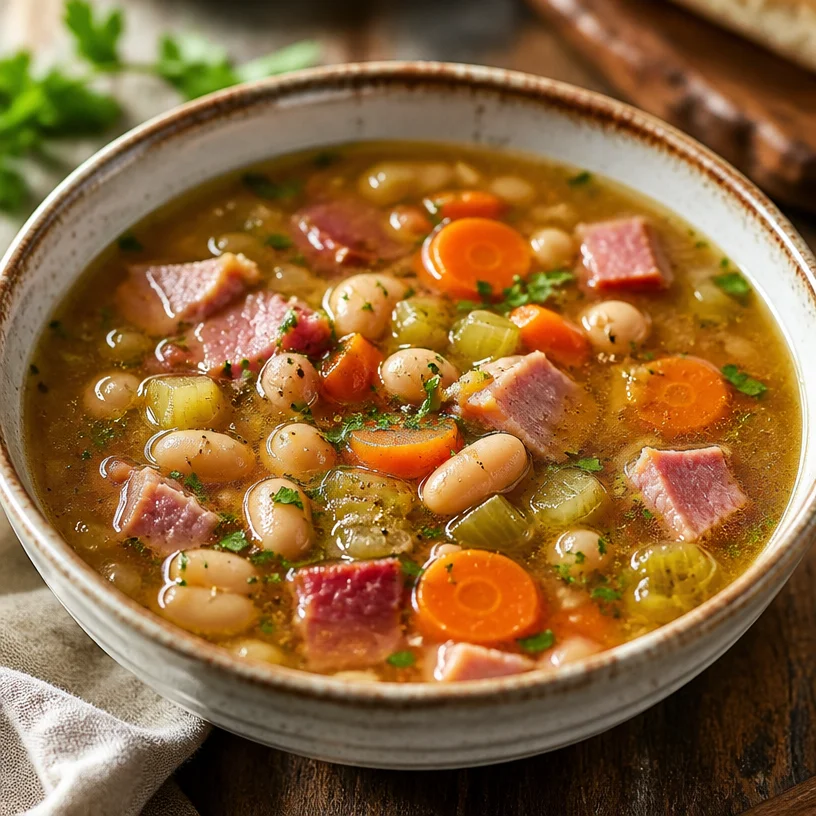
Ham & Bean Soup
Warm Up Your Kitchen with Ham & Bean Soup
Welcome back to Clean Plate Cravings! Today, I’m excited to share a cozy recipe that’s practically a warm hug in a bowl: Ham & Bean Soup. If you’re looking for a healthy, hearty dish that can make you feel nostalgic and comforted in an instant, you’ve stumbled upon the right spot. This soup is not just delicious; it’s also loaded with wholesome ingredients that give your body what it needs to thrive.
There’s something so special about a simmering pot of soup; its aroma wafts through the house, inviting everyone to gather around the kitchen table. It’s like a kind of edible magic, such a simple yet satisfying way to bring good vibes into your home. And the best part? Ham & Bean Soup can be easily tailored to your tastes and whatever you have on hand—no rigid recipes required here! So, grab your apron and let’s dive into this delightful dish.
A Little Slice of Nostalgia
Let’s rewind the clock a bit. I’ll never forget the first time I made Ham & Bean Soup. I was a young chef-in-training, eagerly experimenting in my mom’s kitchen. It was the middle of winter, and the winds outside were howling. I had just come in from the cold, and the smell of something warm bubbling away on the stove immediately caught my attention.
My mom had taken some leftover holiday ham and transformed it into this wonderful soup. I watched her toss in the veggies like she was orchestrating a symphony in the kitchen. The blend of textures and flavors was astonishing to me! Those tender beans paired perfectly with the savory ham, while the vibrant carrots and fresh celery created a colorful medley. It was a moment that perfectly captures the essence of family cooking—warmth, love, and deliciousness.
From that point on, Ham & Bean Soup became a staple in our home. It wasn’t just a clever way to use leftovers; it was a daily reminder of love, craft, and togetherness. Years later, I find myself making it almost weekly, filling my house with that same magical aroma. Sure, it’s simple, but it’s anything but basic. And I’m here to share it with you, so you can have your own bowl of comfort!
Gather Your Ingredients
Let’s talk ingredients! Here’s what you’ll need for this delightful soup:
-
Ham: Use leftover cooked ham or a ham hock for extra flavor. If you’re not a ham lover, feel free to substitute with smoked turkey or a plant-based protein like tempeh.
-
White beans: Canned white beans, like Great Northern or Cannellini, work beautifully. You can also use dried beans by soaking and cooking them beforehand, but the canned variety saves tons of time!
-
Carrots: They add sweetness and color to the soup, making it visually appealing. You can swap them for sweet potatoes or parsnips if you want different flavors.
-
Celery: This brings a lovely crunch and depth to the soup. If you need a substitute, feel free to use fennel or bell peppers.
Simple, wholesome, and packed with flavor; these ingredients create a fabulous base for Ham & Bean Soup!
Step-by-Step Instructions
Now that we’ve gathered our ingredients, it’s time to turn them into something magical. Here’s how to make Ham & Bean Soup, the step-by-step way:
-
Sauté the Aromatics: In a large pot or Dutch oven, heat 1-2 tablespoons of olive oil over medium heat. Add diced onions and sauté for about 5 minutes until they’re translucent. This step is crucial; it builds the foundation of flavor for our soup!
-
Add the Celery and Carrots: Toss in your chopped celery and carrots. Sauté them along with the onions for another 4-5 minutes until they soften slightly. This mix creates a delightful aroma that you just can’t resist—it’s the essence of comfort!
-
Incorporate the Ham: Now, add in your diced ham (or your protein of choice) and cook for about 2-3 minutes. Let those flavors meld; you’ll start to hear some sizzling. If you’re using a ham hock, put it in now to ensure the delicious juices are infused into the soup.
-
Pour in the Broth: It’s time for the liquid gold! Add 4 cups of low-sodium chicken or vegetable broth to the pot. If you want a richer soup, using bone broth is a fantastic option.
-
Add the Beans: In go the white beans! If you’re using canned beans, be sure to drain and rinse them first. This helps remove excess sodium and gives a cleaner flavor to your soup.
-
Season It Up: Sprinkle in your favorite herbs—dried thyme, bay leaves, and a pinch of red pepper flakes for a little heat. Don’t forget to add salt and pepper to taste! Remember, you can always add more later, but it’s hard to take it out once it’s in.
-
Bring to a Simmer: Allow the mixture to come to a gentle simmer. Lower the heat and let it cook uncovered for about 30-40 minutes. This is the part where you can relax; let the soup work its magic.
-
Final Touches: After simmering, check the consistency. If you like it thicker, mash a few beans with a fork! Adjust the seasoning to your liking and remove the bay leaves before serving.
And just like that, your Ham & Bean Soup is ready to warm those hearts!
Serving Suggestions
Ready to serve? Ladle the soup into deep bowls and garnish with a sprinkle of fresh parsley or a few croutons for added crunch. Pair it with a slice of crusty whole-grain bread to soak up all that flavorful goodness. Trust me, this isn’t just a meal; it’s a celebration!
Recipe Variations
If you’re feeling creative, here are some fun variations to try with your Ham & Bean Soup:
-
Spicy Kick: Add in some diced jalapeños or a dash of hot sauce for an extra heat factor.
-
Herby Twist: Experiment with different herbs! Fresh rosemary or sage adds an aromatic layer that elevates the dish.
-
Veggie Delight: Toss in whatever veggies you have on hand—zucchini, spinach, or kale are excellent additions that boost nutrients and flavor.
-
Creamy Comfort: Stir in a splash of cream or coconut milk at the end for a richer, creamier version of this classic soup.
-
Greek Flair: Consider adding lemon juice and feta cheese to turn your soup into a Mediterranean-inspired dish!
Chef’s Notes
This Ham & Bean Soup has a special place in my heart. It evolves each time I make it based on what I have in my pantry or my mood for the day. I remember one winter, I added a hint of smoked paprika, and it transformed the entire flavor profile. It’s amazing how a tiny tweak can lead to such delicious results!
So don’t be afraid to put your spin on this recipe; it’s designed to be flexible and accommodating! When you cook with love, the flavors of your food will reflect that effort.
FAQs and Troubleshooting
1. How long does this soup last in the fridge?
Ham & Bean Soup can last 4-5 days in the refrigerator in an airtight container. It often tastes even better the next day as the flavors have time to meld!
2. Can I freeze Ham & Bean Soup?
Absolutely! This soup freezes beautifully. Just let it cool completely before transferring it to freezer-safe containers. It will keep well for 3-4 months.
3. What if my soup is too salty?
If you find that your soup is saltier than you’d like, you can balance it out by adding more low-sodium broth or water. Adding a peeled potato and letting it cook for 10-15 minutes can also absorb some of the salt.
4. Can I make this vegetarian?
Yes, swap the ham for smoked tofu or a variety of your favorite beans. Use vegetable broth to keep it entirely plant-based.
Nutritional Info
While I usually keep nutritional specifics less rigid, a typical serving of Ham & Bean Soup contains approximately:
- Calories: 250
- Protein: 19g
- Carbohydrates: 35g
- Fat: 7g
- Fiber: 10g
Healthy, hearty, and comforting—now that’s what we like to see on our plates!
I hope you find joy and warmth in making this Ham & Bean Soup, just like I do. Every bite is filled with love, comfort, and a touch of household magic. So cozy up, and let the good flavors fill your heart and home! Enjoy!
PrintHam & Bean Soup

A cozy, hearty ham and bean soup perfect for warming up on cold days.
- Prep Time: 15 minutes
- Cook Time: 40 minutes
- Total Time: 55 minutes
- Yield: 6 servings 1x
- Category: Soup
- Method: Stovetop
- Cuisine: American
- Diet: Paleo
Ingredients
- 2 cups leftover cooked ham, diced
- 2 cans white beans (Great Northern or Cannellini), drained and rinsed
- 2 large carrots, chopped
- 2 stalks celery, chopped
- 1 onion, diced
- 4 cups low-sodium chicken or vegetable broth
- 1–2 tablespoons olive oil
- 1 teaspoon dried thyme
- 1 bay leaf
- Salt and pepper to taste
- Croutons and fresh parsley for garnish
Instructions
- Sauté the Aromatics: In a large pot or Dutch oven, heat olive oil over medium heat. Add diced onions and sauté for about 5 minutes until translucent.
- Add the Celery and Carrots: Toss in chopped celery and carrots. Sauté for another 4-5 minutes until softened.
- Incorporate the Ham: Add diced ham and cook for about 2-3 minutes. If using a ham hock, put it in now.
- Pour in the Broth: Add 4 cups of broth to the pot.
- Add the Beans: Stir in the white beans.
- Season It Up: Add herbs, salt, and pepper to taste.
- Bring to a Simmer: Allow the mixture to come to a gentle simmer, then cook uncovered for 30-40 minutes.
- Final Touches: Check consistency and mash some beans for thickness. Adjust seasoning and remove bay leaves before serving.
Notes
Feel free to adapt the ingredients to your taste or dietary needs. This soup keeps well in the fridge for 4-5 days and can be frozen for 3-4 months.
Nutrition
- Serving Size: 1 serving
- Calories: 250
- Sugar: 3g
- Sodium: 600mg
- Fat: 7g
- Saturated Fat: 2g
- Unsaturated Fat: 3g
- Trans Fat: 0g
- Carbohydrates: 35g
- Fiber: 10g
- Protein: 19g
- Cholesterol: 30mg
Keywords: soup, ham, bean, comfort food, winter recipe

Lasagna Soup
Dive Into Comfort: The Ultimate Lasagna Soup Recipe
Welcome to Clean Plate Cravings! Today, we’re stirring up a pot of joy with a delicious and hearty dish that will warm your soul while tantalizing your taste buds—Lasagna Soup. Picture this: all the comforting flavors of traditional lasagna, but in a cozy, soupy form that’s packed with wholesome ingredients. Yes, please!
This recipe is perfect for when you want to indulge in a classic but don’t have the time (or patience) to layer and bake a full lasagna. Let’s face it—some days you just want to whip up something flavorful without spending hours in the kitchen. Lasagna Soup gives you that delightful taste of Italy with every spoonful while keeping things breezy for you.
As I whip up this version, I’m reminded of how food has this magical way of bringing people together. Growing up, my family would gather around the table every Sunday for a big Italian feast my grandmother would prepare. Her baked lasagna was a highlight, but one day, she decided to switch things up and made a “lazy lasagna” soup. We all loved it—and it quickly became a staple in our household. The nostalgia of slurping down that rich, tomato-y goodness with melted mozzarella pulls at my heartstrings every time I make it.
So, let’s grab our ingredients and dive right in. Whether you’re feeding a crowd or making leftovers for those busy days, this Lasagna Soup is here to make your life a little more delicious!
Ingredients
-
Ground Beef
- The heart of our soup! Choose lean ground beef to keep it lighter. For a healthier twist, you could swap it out for ground turkey or even a plant-based alternative like lentils for a vegetarian option.
-
Lasagna Noodles
- These are the backbone of our dish. You can use traditional lasagna noodles or, if you’re looking for a gluten-free alternative, try using gluten-free pasta. No need to pre-cook them; they will soften beautifully as they cook in the broth!
-
Tomatoes
- A mix of diced tomatoes and tomato sauce brings richness and depth. For a bit of sweetness, you can use San Marzano tomatoes or even add a splash of tomato paste. Crushed tomatoes work great too!
-
Ricotta Cheese
- This creamy delight adds a luxurious texture to the soup. If you’re after a lighter option, low-fat ricotta or cottage cheese is a breezy swap. In a pinch, some Greek yogurt can work as well.
-
Mozzarella Cheese
- Melty and gooey! Fresh mozzarella is divine, but you can also use shredded mozzarella. For a fun twist, add some smoked mozzarella for a bit of extra flavor.
Step-by-Step Instructions
1. Sauté the Ground Beef
In a large pot or Dutch oven over medium-high heat, add the ground beef. Season with a pinch of salt and pepper. Cook until nicely browned, breaking it up with a wooden spoon as it cooks—about 5-7 minutes. This step builds a flavor base, so don’t skip on the seasoning here!
2. Add the Aromatics
Once the beef is browned, toss in one diced onion and two minced garlic cloves. Stir them in and let them soften for about 3-4 minutes. The smell? Utterly divine! This is where the comforting aromas start to fill your kitchen, wrapping you in a warm hug.
3. Mix in the Tomatoes
Stir in a 28-ounce can of diced tomatoes (with juices) and a cup of tomato sauce. Blend everything together, letting it simmer for about 5 minutes. This gives the flavors a chance to meld beautifully. A tip? If you want deeper flavor, throw in a splash of red wine—let it simmer just long enough to cook off the alcohol, but let all those delicious flavors shine!
4. Add Water and Noodles
Pour in 4 cups of water or broth (chicken or vegetable will do). Bring to a boil and then add your lasagna noodles, broken into bits. Cook according to package directions, usually around 8-10 minutes. Don’t worry about the noodles being perfectly shaped! The rustic look adds to the comfort of the dish.
5. Stir in the Ricotta
Once the noodles are cooked, reduce the heat to low. Stir in 1 cup of ricotta cheese until well combined. This adds an ultra-creamy layer to your soup. If you’re feeling a bit adventurous, toss in some freshly chopped basil or your favorite herbs to elevate the flavor!
6. Top with Mozzarella
Once everything is well combined, ladle the soup into bowls. Top each serving generously with shredded mozzarella. If you’re feeling fancy, pop them under the broiler for a minute or two until the cheese is bubbly and golden. Just give it a quick watch to prevent burning!
Serving Suggestions
Serve this delightful Lasagna Soup in deep bowls, topped with some fresh basil, a sprinkle of Parmesan cheese, and a drizzle of olive oil for a touch of elegance. Pair it with crusty garlic bread or a simple green salad for a complete meal that everyone will love!
Recipe Variations
- Vegetarian Delight: Swap ground beef with sautéed mushrooms, zucchini, and spinach for a vibrant vegetable-packed dish.
- Spicy Kick: Add a pinch of red pepper flakes to the ground beef for a spicy kick that will wake up your palate!
- Cheesy Richness: Mix in some grated Parmesan cheese along with the ricotta for an extra cheesy soup.
- Herbic Flavor: Experiment with different herbs! Fresh basil, oregano, or thyme can change the flavor profile and keep things fresh.
- Zoodle Swap: Substitute lasagna noodles with zucchini noodles for a low-carb version—just throw them in during the last 5 minutes of cooking!
Chef’s Notes
Every time I make this soup, I can’t help but think back to family gatherings where plates would be piled high with lasagna, laughter echoing around the table. It’s incredible how food can create such warm memories. Over the years, I’ve evolved this dish to suit my busy lifestyle, making it quicker and easier without skimping on flavor. Plus, it’s fantastic for meal prep—just store it in the fridge or freezer and reheat for busy nights.
FAQs and Troubleshooting
Q: My soup turned out too thick. What can I do?
A: No worries! Just add a splash of water or broth to thin it out. Stir and let simmer for a minute or two.
Q: Can I make this soup ahead of time?
A: Absolutely! It makes for excellent leftovers. Just be mindful that the noodles will absorb more broth as it sits. Add a bit of water when reheating if necessary.
Q: How do I store leftovers?
A: Store leftover soup in an airtight container in the fridge for up to 3-4 days. For longer storage, freeze in smaller portions.
Q: What if I don’t have ricotta?
A: You can use cottage cheese or a blend of cream cheese and sour cream for a creamy component, or just skip it altogether if desired!
Nutritional Info (per serving)
- Calories: approx. 400 (varies based on ingredients)
- Protein: 30g
- Carbohydrates: 45g
- Fat: 15g
- Fiber: 4g
Now that you’ve got the lowdown on how to whip up your very own Lasagna Soup, I hope you feel inspired to jump into the kitchen and create this warm and soothing dish. Remember, cooking is all about having fun and making it your own. Happy cooking, and may your meals be filled with flavor, love, and unforgettable memories!
PrintLasagna Soup

A delicious and hearty dish that combines all the comforting flavors of traditional lasagna in a cozy, soupy form.
- Prep Time: 15 minutes
- Cook Time: 30 minutes
- Total Time: 45 minutes
- Yield: 4 servings 1x
- Category: Main Course
- Method: Stovetop
- Cuisine: Italian
- Diet: Gluten-Free, Vegetarian (when made with plant-based ingredients)
Ingredients
- 1 lb Ground Beef
- 8 oz Lasagna Noodles
- 28 oz Diced Tomatoes
- 1 cup Tomato Sauce
- 1 cup Ricotta Cheese
- 1 cup Shredded Mozzarella Cheese
- 1 Onion, diced
- 2 Garlic Cloves, minced
- 4 cups Water or Broth
- Salt and Pepper to taste
Instructions
- Sauté the Ground Beef in a large pot or Dutch oven over medium-high heat until browned, about 5-7 minutes.
- Add the Aromatics by tossing in the diced onion and minced garlic. Stir in and let them soften for about 3-4 minutes.
- Mix in the Tomatoes by stirring in the diced tomatoes and tomato sauce, letting it simmer for about 5 minutes.
- Add Water and Noodles by pouring in the water or broth, bringing it to a boil, then adding the broken lasagna noodles to cook according to package directions (8-10 minutes).
- Stir in the Ricotta once the noodles are cooked, reducing the heat to low and blending well.
- Top with Mozzarella by ladling the soup into bowls and topping each with shredded mozzarella.
Notes
For a vegetarian option, substitute ground beef with sautéed mushrooms, zucchini, and spinach. You can also experiment with different herbs to enhance the flavor.
Nutrition
- Serving Size: 1 serving
- Calories: 400
- Sugar: 6g
- Sodium: 600mg
- Fat: 15g
- Saturated Fat: 7g
- Unsaturated Fat: 5g
- Trans Fat: 0g
- Carbohydrates: 45g
- Fiber: 4g
- Protein: 30g
- Cholesterol: 70mg
Keywords: lasagna soup, comfort food, Italian recipes, easy dinner, hearty soup

Shepherd’s Pie
Comforting Shepherd’s Pie: A Cozy Culinary Journey
Welcome back to Clean Plate Cravings, food-loving friends! Today, we’re diving into a dish that warms both the belly and the soul—Shepherd’s Pie. With its layers of hearty meat, vibrant veggies, and creamy mashed potatoes, this recipe is the ultimate comfort food that brings a smile to your face with every bite. Shepherd’s Pie is that cozy hug for your stomach we all need sometimes, especially as we ease into the cooler months.
As I whisk you through this delightful journey of flavors and textures, we’ll explore not just how to make this delicious dish but also reminisce about why it holds a special place in my heart. After all, food isn’t just about nutrition; it’s about stories, memories, and the love we share in our kitchens.
So, grab your apron, and let’s get cooking!
A Fond Memory in the Kitchen
I can still remember the first time I made Shepherd’s Pie as a teenager. It was a chilly Sunday afternoon, and my family was all gathered in the kitchen, laughing and sharing stories as the aromas of our favorite foods danced through the air. My grandmother took the lead, guiding me through the entire process from browning the meat to whipping up the creamiest mashed potatoes.
As we stirred the pot, she shared tales of her youth—how her mother would make this comforting dish when the weather turned cold and friends gathered around the table. It wasn’t just a meal; it was a celebration of love, warmth, and togetherness. To this day, every time I make Shepherd’s Pie, I’m transported back to that cozy kitchen filled with laughter, the kind of warmth that stays with you long after the last bite.
Ingredients
Let’s break down the ingredients you’ll need for this classic dish. Each ingredient plays a pivotal role in delivering that rich, savory flavor everyone craves, so let’s dive in:
-
1 lb ground lamb or beef: Choose ground lamb for a traditional Shepherd’s Pie, or opt for ground beef if you prefer. Both are packed with flavor! If you’re looking for a leaner option, go for ground turkey.
-
2 cups mixed vegetables (carrots, peas, corn): A colorful mix adds not just nutrition but also a pleasing texture contrast. Frozen mixes are perfectly fine and super convenient!
-
1 onion, chopped: Onions are the base of any great savory dish. They add depth to the flavor profile. Shallots or green onions can be good alternatives for a milder taste.
-
2 cloves garlic, minced: Garlic brings a beautiful aromatic quality. If you’re in a pinch, garlic powder works, but fresh garlic is always best!
-
1 cup red wine: Wine adds acidity and richness. Any dry red will work, but if you prefer not to cook with alcohol, you can substitute with beef broth mixed with a splash of vinegar.
-
2 cups beef broth: This is essential for that juicy filling. Homemade broth is fantastic if you have it, but store-bought works just as well.
-
2 tablespoons tomato paste: This thickens the filling and adds a touch of sweetness. If you’re fresh out, ketchup can do the trick in a pinch!
-
2 tablespoons Worcestershire sauce: This wonderful umami booster takes the flavor up a notch. If you’re avoiding gluten, ensure you pick a gluten-free brand.
-
4 cups mashed potatoes: Creamy, dreamy mashed potatoes are the topping star! Make them with cream and butter, or lighten them up with a splash of milk and olive oil.
-
Salt and pepper to taste: Always taste as you go! These simple seasonings will enhance every flavor in your pie.
-
Olive oil for cooking: A staple in my kitchen! You could also use butter for a richer flavor.
Step-by-Step Instructions
Now that we’ve gathered our ingredients, let’s get into the nitty-gritty of making this Shepherd’s Pie. I promise, the process is simple and totally worth it!
-
Preheat Your Oven: Start by preheating your oven to 400°F (200°C). This will ensure your pie bakes evenly and the top gets the perfect golden crust.
-
Cook the Meat: In a large skillet, heat 2 tablespoons of olive oil over medium heat. Once it’s shimmering, add your ground lamb or beef. Break it up with a spatula and cook until browned, about 5-7 minutes. The key here is to get that nice, rich color to build flavor.
-
Sauté the Vegetables: Add the chopped onion and minced garlic to the browned meat. Sauté for about 3-4 minutes until the onion is translucent and the garlic is fragrant—your kitchen will smell amazing! This is where you can add a little pinch of salt to help the onions sweat.
-
Incorporate the Veggies: Toss in your mixed vegetables. Stir everything together for another 3 minutes until the veggies are warmed through. This gives them a chance to mingle and absorb flavors.
-
Deglaze with Red Wine: Pour in your cup of red wine, scraping up any delicious bits stuck at the bottom of the skillet. Let it simmer for about 2-3 minutes until it reduces slightly. Not a wine fan? Just skip this step or use that beef broth splash mentioned before!
-
Make It Saucy: Stir in your beef broth, tomato paste, and Worcestershire sauce. Season it generously with salt and pepper. Bring this mixture to a gentle boil, then reduce the heat and let it simmer for about 10 minutes. This helps thicken the filling and blend those incredible flavors.
-
Prepare the Mashed Potatoes: While your filling simmers, if you’re using leftover mashed potatoes, give them a quick mash to warm them up and ensure they’re smooth. If you’re making them from scratch, boil your potatoes in salted water until fork-tender, then mash them with butter and cream (or olive oil) until fluffy!
-
Assemble the Pie: In a baking dish (a 9×9 square dish works great), pour in the meat and vegetable mixture, spreading it evenly. Then, dollop your mashed potatoes on top, using the back of a spoon to create waves and peaks—this will help achieve a crispy top as it bakes!
-
Bake: Pop your Shepherd’s Pie in the preheated oven for about 25-30 minutes until the top is golden brown and crisp. For extra crunch, you can place it under the broiler for a minute or two—just don’t walk away!
-
Cool and Serve: Once done, take it out and let it cool for about 5-10 minutes before serving. This helps meld the flavors further!
Serving Suggestions
When it comes to serving Shepherd’s Pie, I love to keep it simple and rustic. Spoon generous portions onto plates, and if you’re feeling fancy, garnish with fresh herbs like parsley or chives. Serve with a side salad or some crusty bread to soak up every last bit of deliciousness. And let’s be honest, reheating leftovers the next day might just be the highlight of your week!
Recipe Variations
Feel free to get creative with Shepherd’s Pie! Here are a few variations that could spice things up:
-
Vegetarian Delight: Substitute the meat with lentils or mushrooms and use vegetable broth. You won’t miss the meat!
-
Spicy Twist: Add some diced jalapeños or a pinch of cayenne to the filling for a kick of heat.
-
Cheesy Mashed Potatoes: Stir in some grated cheese (like cheddar or Parmesan) into the mashed potatoes before layering—it adds an irresistible cheesy crust.
-
Herb-Infused: Mix in some fresh herbs (like thyme or rosemary) to the meat filling for a more aromatic flavor.
-
Sweet Potato Mash: Replace traditional potatoes with sweet potatoes for a nutritious twist, adding a hint of sweetness to the dish!
Chef’s Notes
Shepherd’s Pie has evolved quite a bit over the years in my kitchen. Initially, I used to shy away from making it because I thought it would be too complicated, but it turns out, it’s one of the easiest and most satisfying dishes you can whip up! Plus, it is a fantastic way to clean out your fridge—just toss in whatever veggies you have on hand.
And here’s a funny little kitchen story: I once made this for a potluck, and let’s just say, my friends were so hooked that they asked for seconds before even finishing their first! So, take my advice, always make more than you think you’ll need!
FAQs and Troubleshooting
1. What if my mashed potatoes are too dry?
No worries! If you happen to find your mash a bit dry, add a touch of warm milk or melted butter and mix until it reaches your desired creaminess.
2. Can I prepare Shepherd’s Pie in advance?
Absolutely! You can make the filling and mashed potatoes a day ahead and assemble the pie when you’re ready to bake. Just keep it covered in the fridge!
3. How do I make it gluten-free?
Just swap the Worcestershire sauce for a gluten-free brand and ensure your beef broth is also gluten-free. The rest of the recipe is naturally gluten-free!
4. Can I freeze Shepherd’s Pie?
Yes! Once assembled, cover it tightly with aluminum foil and freeze. When you’re ready to enjoy it, let it thaw in the fridge overnight before baking.
Nutritional Info
While this dish is comfort food at its finest, I understand the importance of balancing indulgence with health. A typical serving of Shepherd’s Pie (about 1/4 of the recipe) can contain roughly:
- Calories: 450
- Protein: 25 grams
- Fat: 20 grams
- Carbohydrates: 45 grams
- Fiber: 5 grams
Remember, the nutrition can vary based on your specific ingredients and portions, so feel free to adjust as per your dietary needs!
And there you have it—my heartwarming take on Shepherd’s Pie! I hope you find as much joy in making it as I have over the years. Let this dish not only nourish your body but also bring a sense of warmth and comfort to your table. Happy cooking, friends!
PrintComforting Shepherd’s Pie

A heartwarming dish filled with layers of savory meat, vibrant veggies, and creamy mashed potatoes, perfect for cozy gatherings.
- Prep Time: 20 minutes
- Cook Time: 40 minutes
- Total Time: 60 minutes
- Yield: 4 servings 1x
- Category: Main Course
- Method: Baking
- Cuisine: British
- Diet: Meat-based
Ingredients
- 1 lb ground lamb or beef
- 2 cups mixed vegetables (carrots, peas, corn)
- 1 onion, chopped
- 2 cloves garlic, minced
- 1 cup red wine
- 2 cups beef broth
- 2 tablespoons tomato paste
- 2 tablespoons Worcestershire sauce
- 4 cups mashed potatoes
- Salt and pepper to taste
- Olive oil for cooking
Instructions
- Preheat your oven to 400°F (200°C).
- Cook the meat in a large skillet with olive oil until browned, about 5-7 minutes.
- Sauté the onion and garlic for about 3-4 minutes until fragrant.
- Incorporate the mixed vegetables and stir for another 3 minutes.
- Deglaze the skillet with red wine and simmer for 2-3 minutes.
- Make it saucy by adding beef broth, tomato paste, and Worcestershire sauce; simmer for 10 minutes.
- Prepare the mashed potatoes if making from scratch or warm leftover ones.
- Assemble the pie in a baking dish with the meat mix and top with mashed potatoes.
- Bake for about 25-30 minutes until golden brown.
- Cool for 5-10 minutes before serving.
Notes
Feel free to customize with different vegetables or make it vegetarian with lentils.
Nutrition
- Serving Size: 1 serving
- Calories: 450
- Sugar: 5g
- Sodium: 600mg
- Fat: 20g
- Saturated Fat: 8g
- Unsaturated Fat: 10g
- Trans Fat: 0g
- Carbohydrates: 45g
- Fiber: 5g
- Protein: 25g
- Cholesterol: 70mg
Keywords: shepherd's pie, comfort food, baking, hearty meal, British cuisine

Nigerian Chicken Stew Recipe
Nigerian Chicken Stew Recipe
Introduction
Welcome back to Clean Plate Cravings! Today, I’m super excited to share one of my all-time favorite recipes: Nigerian Chicken Stew. This dish is a vibrant, flavor-packed delight that’s perfect for any occasion. It’s cozy, comforting, and downright delicious. Whether you’re new to cooking or a seasoned chef, this stew will whisk you away on a culinary adventure!
Now, if you’ve never had Nigerian chicken stew before, you’re in for quite the treat! The combination of spices and fresh ingredients brings a delightful warmth to your kitchen. As the chicken simmers, the aromas will dance through your home, beckoning everyone to gather around the table—trust me, they won’t be able to resist!
Nigerian chicken stew is a staple in many West African homes and is often served over rice, with some plantains or traditional Nigerian bread. What I love most about this dish is its versatility; it can be enjoyed at a family dinner, a festive gathering, or even a cozy night in while binge-watching your favorite show. The best part? It’s easy to prepare and made with simple ingredients, but it offers that wow factor that will impress anyone who tries it.
So, grab your apron and let’s dive into this amazing recipe! We’ll chat about the origins of the dish, share some kitchen stories, and of course, guide you step by step through the cooking process. Are you ready to savor every bite of this spicy, warm, and satisfying dish? Let’s get cooking!
Personal Story
Growing up, my family held tight to our Nigerian roots, and food was always at the center of our gatherings. I vividly remember Sundays at my grandmother’s house, where the air was filled with the intoxicating scent of spices simmering on the stove. It was a time where laughter intertwined with the sizzling pans, and we all looked forward to the hearty dishes she prepared.
The star of those Sunday meals was always her famous chicken stew. I can still picture her standing over the stove, expertly blending fresh tomatoes and peppers to create that vibrant red sauce we all adored. As a kid, I couldn’t help but sneak bits of chicken when I thought no one was watching (sorry, Grandma!). But finding the perfect spice combination—oh, that was her secret!
Now, every time I whip up this Nigerian chicken stew, I’m transported back to those sunny afternoons filled with laughter and love. It reminds me that food is not just about nutrition; it’s also about memories, connections, and the joy of sharing a table. So, let’s honor those traditions and infuse our kitchens with that same warmth and flavor.
Ingredients
Here’s what you’ll need to create this delicious Nigerian chicken stew:
-
2.5 lbs bone-in chicken (thighs or drumsticks), cleaned
- Bone-in chicken adds depth and flavor to your dish. Thighs and drumsticks are especially juicy!
-
1 teaspoon salt
- A must for enhancing the overall flavor of the stew.
-
1/2 teaspoon black pepper
- Adds a gentle kick without overwhelming the taste.
-
1 teaspoon paprika
- This not only gives color but also a subtle smokiness that complements the dish.
-
1 teaspoon curry powder
- A blend of spices that brings a fragrant warmth to the stew—don’t skip this!
-
1 teaspoon thyme
- Dried thyme is earthy and adds another layer of flavor to the mix.
-
1 onion, chopped
- Essential for building the stew’s base; onions add sweetness when cooked down.
-
1/4 cup vegetable oil
- Used for sautéing; feel free to substitute with olive oil for a healthier option.
-
4 large Roma tomatoes
- Fresh tomatoes offer a vibrant tartness—canned tomatoes can work too in a pinch.
-
1 large red bell pepper
- Sweet and crunchy, the bell pepper balances the heat from the spices.
-
1 small red onion
- Softer and sweeter than yellow onions, it adds a nice contrast.
-
2 scotch bonnet peppers (or 1 for less heat)
- These fiery little guys pack a punch! Adjust depending on your spice tolerance.
-
2 tablespoons tomato paste
- Deepens the flavor with a rich tomato essence.
-
1 teaspoon garlic powder
- Convenience at its best—adds the classic garlic flavor without the chopping.
-
1 teaspoon ginger powder
- Ginger brings warmth and a slight spiciness; you can substitute with fresh ginger if desired.
-
1 bouillon cube
- Enhances the umami flavor—feel free to use a low-sodium version.
-
Salt to taste
- Always taste before serving to adjust seasoning.
Step-by-Step Instructions
Now let’s get cooking! Follow these steps to create your delicious Nigerian chicken stew:
-
Prep the Chicken
Begin by cleaning your chicken pieces under cold water, patting them dry with paper towels. Season the chicken with salt, black pepper, paprika, curry powder, and thyme. Make sure to coat each piece well for maximum flavor. This is where all the magic begins! -
Sauté the Onions
In a large pot, heat the vegetable oil over medium heat. Once hot, add the chopped onion and sauté until they become translucent, about 5-7 minutes. This step builds a flavorful base, so don’t rush it! -
Add the Chicken
Carefully place the seasoned chicken into the pot, and sear each side until golden brown, about 5 minutes per side. The goal here is to lock in those juices and get a good color on the chicken. Just look at that beautiful golden crust! -
Blend the Sauce
While the chicken is browning, blend the Roma tomatoes, red bell pepper, and scotch bonnet peppers in a blender until smooth. If you like it chunky, go for it! Pour this mixture over the browned chicken in the pot. -
Stir in Seasoning
Add the tomato paste, garlic powder, ginger powder, and bouillon cube to the pot. Stir everything together, ensuring the tomato sauce coats the chicken evenly. Here’s where you’ll want to take a deep breath and appreciate those rich aromas filling your kitchen. -
Simmer Away
Bring the stew to a gentle boil, then reduce the heat to low and cover. Let it simmer for about 30-40 minutes. This is the time to get those flavors mingling and the chicken becoming tender and flavorful. Go ahead; check your phone, but don’t wander too far—the smells may just lure you back! -
Taste and Adjust
About 10 minutes before serving, taste the stew and adjust the seasoning if necessary. If you’d like it spicier, toss in an additional scotch bonnet. Just be careful; it’s easy to overdo it! -
Finish Up
Once the chicken is tender and the stew has thickened to your liking, remove it from the heat. A sprinkle of fresh herbs or sliced green onions on top can add a lovely touch before serving.
Serving Suggestions
To serve your Nigerian chicken stew, ladle it over a generous portion of fluffy rice. The hearty stew pairs beautifully with steamed white rice or jollof rice for an added twist. Don’t forget to add some fried plantains on the side for that perfect sweetness. Serve it in wide, shallow bowls to capture all those delicious juices, and watch as smiles emerge around the table!
Recipe Variations
Feel free to get creative with your Nigerian chicken stew! Here are some variations to consider:
- Vegetarian Option: Substitute chicken with chickpeas or firm tofu for a plant-based version.
- Seafood Delight: Add shrimp or fish towards the end of cooking time for a lovely seafood flair.
- Extra Veggies: Toss in diced carrots, green beans, or spinach for added nutrition and colors.
- Coconut Twist: Stir in a splash of coconut milk for a creamier texture and a hint of tropical flavor.
- Jollof Style: Spice it up with additional spices like bay leaves or use jollof rice as a base; the flavors will complement beautifully.
Chef’s Notes
I’ve made this Nigerian chicken stew countless times, and it never gets old! Each batch holds a bit of nostalgia and new discoveries. Over the years, I’ve learned that the key to a great stew lies in the seasoning and allowing it to simmer long enough for those flavors to meld perfectly. One time, I accidentally added too much ginger powder, and you would think it was a disaster, but my friends insisted it was the best version! So, embrace those kitchen accidents; they often turn into culinary gems!
FAQs and Troubleshooting
1. My stew turned out too spicy. What can I do?
If the heat is overwhelming, you can add more tomatoes or coconut milk to balance the spice. A spoonful of sugar can also help tone it down.
2. How can I thicken my stew?
If you prefer a thicker sauce, let it simmer uncovered for a bit longer, or you can stir in a slurry made from cornstarch and water.
3. Is it okay to use frozen chicken?
Absolutely! Just make sure to thaw it properly before seasoning and cooking. It may need a bit more time to cook through.
4. How should I store leftovers?
Store any leftover stew in an airtight container in the fridge for up to 3 days. It also freezes well, so you can save some for later!
Nutritional Info
While I won’t delve into extensive nutritional details, this Nigerian chicken stew is packed with protein from the chicken and plenty of vitamins from the vegetables. Depending on serving sizes and ingredients used, you can enjoy a wholesome, hearty meal with minimal guilt!
And there you have it! A delicious, comforting Nigerian chicken stew recipe that’s sure to become a favorite in your kitchen. Remember, cooking should be enjoyed, not rushed—so take your time, savor each step, and let the love pour into your dish. Happy cooking!
PrintNigerian Chicken Stew

A vibrant, flavor-packed Nigerian chicken stew perfect for any occasion, made with simple ingredients and bold spices.
- Prep Time: 15 minutes
- Cook Time: 40 minutes
- Total Time: 55 minutes
- Yield: 6 servings 1x
- Category: Main Course
- Method: Stovetop
- Cuisine: Nigerian
- Diet: Gluten-Free
Ingredients
- 2.5 lbs bone-in chicken (thighs or drumsticks), cleaned
- 1 teaspoon salt
- 1/2 teaspoon black pepper
- 1 teaspoon paprika
- 1 teaspoon curry powder
- 1 teaspoon thyme
- 1 onion, chopped
- 1/4 cup vegetable oil
- 4 large Roma tomatoes
- 1 large red bell pepper
- 1 small red onion
- 2 scotch bonnet peppers (or 1 for less heat)
- 2 tablespoons tomato paste
- 1 teaspoon garlic powder
- 1 teaspoon ginger powder
- 1 bouillon cube
- Salt to taste
Instructions
- Prep the chicken: Clean the chicken under cold water, pat dry and season with salt, black pepper, paprika, curry powder, and thyme.
- Sauté the onions: Heat vegetable oil in a large pot over medium heat and sauté the chopped onion until translucent, about 5-7 minutes.
- Add the chicken: Place the seasoned chicken in the pot and sear until golden brown, about 5 minutes per side.
- Blend the sauce: Blend Roma tomatoes, red bell pepper, and scotch bonnet peppers until smooth and pour it over the browned chicken.
- Stir in seasoning: Add tomato paste, garlic powder, ginger powder, and bouillon cube, stirring to coat the chicken evenly.
- Simmer away: Bring to a gentle boil, reduce heat, cover, and simmer for about 30-40 minutes.
- Taste and adjust: Taste and adjust seasoning as needed about 10 minutes before serving.
- Finish up: Once chicken is tender and stew thickens, remove from heat and garnish before serving.
Notes
Serve over rice or with fried plantains. Adjust spice levels to your taste by adding or reducing scotch bonnet peppers.
Nutrition
- Serving Size: 1 serving
- Calories: 450
- Sugar: 6g
- Sodium: 600mg
- Fat: 20g
- Saturated Fat: 3g
- Unsaturated Fat: 15g
- Trans Fat: 0g
- Carbohydrates: 25g
- Fiber: 4g
- Protein: 35g
- Cholesterol: 80mg
Keywords: Nigerian stew, chicken stew, west african cuisine, comfort food, hearty meal