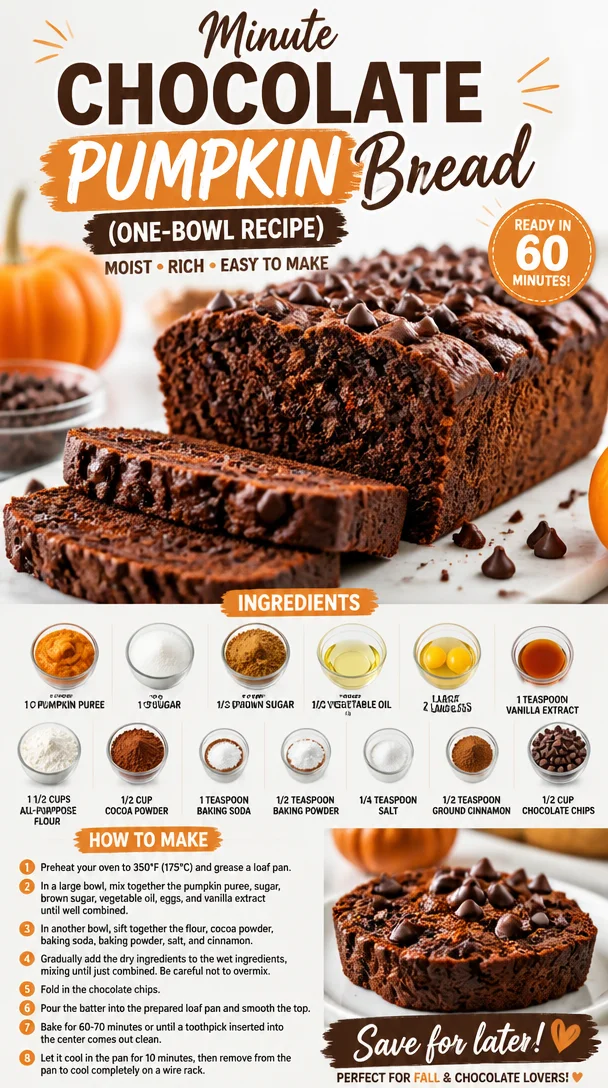
Minute Chocolate Pumpkin Bread (One-Bowl Recipe)
Indulge in Autumn with Chocolate Pumpkin Bread
Hey there, fellow food lovers! Today, I’m inviting you to dive into a delightful treat that brings together the warm embrace of autumn and the irresistible allure of chocolate. Yes, I’m talking about Chocolate Pumpkin Bread! This scrumptious loaf captures the cozy essence of fall—think crispy leaves, warm sweaters, and that sweet aroma wafting through your kitchen. Are you ready to get started? Let’s turn your kitchen into a bakery, where comfort food meets something a little adventurous!
The Moment That Sparked My Love for Pumpkin Bread
Let me take you down memory lane for a moment. Picture it: a chilly October morning, the sun just peeking through the trees, casting a warm glow over the neighborhood. It was my grandma’s kitchen, where the rich scent of spices was mingling with something sweet—a sure sign that something magical was happening. Grandma was known for her incredible pumpkin bread, an infusion of her love and creativity into every bite.
I remember standing on a stool, my little hands covered in flour, as I watched her mix the pumpkin, sugar, and just the right amount of chocolate. It was a playful kitchen affair, where culinary experiments often resulted in delicious masterpieces. The joyful laughter, the gentle GPS direction of “add a pinch more cinnamon,” and, of course, the failed first loaf that turned into an accidental dessert-for-breakfast. Each moment crafted a memory, and it’s those delightful sparks of joy I aim to recreate in my recipe today.
Now, fast forward to now. I’ve blended that nostalgic tradition with my own creative flair to create this Chocolate Pumpkin Bread recipe that’s moist, chocolatey, and downright delicious. Are you ready to get your hands doughy and create some new memories? Grab your apron, and let’s bake!
Ingredients That Bring Your Bread to Life
Before we get our mixing bowls out, let’s gather our ingredients! Each component plays a vital role in making this bread phenomenal. Here’s what you’ll need:
-
1 cup pumpkin puree: The star of the show! You can use canned or homemade pumpkin puree. Just ensure it’s pure pumpkin for the best taste. If you don’t have pumpkin, substitute with applesauce for a different vibe!
-
1 cup sugar: Classic granulated sugar balances the flavors perfectly, but you can experiment with coconut sugar if you’re feeling adventurous.
-
1/2 cup brown sugar: This brings a lovely depth of flavor with its rich molasses notes. If you’re out, feel free to use more granulated sugar or even maple sugar.
-
1/2 cup vegetable oil: This keeps your bread moist and tender. Swap it with melted coconut oil for a delightful twist, or use unsweetened applesauce for a lighter option!
-
2 large eggs: These provide structure and moisture. For a vegan version, try flax eggs—mix 2 tablespoons of ground flaxseed with 6 tablespoons of water, letting it sit for 5 minutes to thicken.
-
1 teaspoon vanilla extract: The flavor enhancer that brings harmony to the blend. Go for pure vanilla extract if you can; it’s worth it!
-
1 1/2 cups all-purpose flour: This gives body to your bread. If you’re gluten-free, a 1:1 gluten-free baking blend is a great alternative.
-
1/2 cup cocoa powder: The chocolate essence! Use unsweetened cocoa for a deep chocolate flavor. For an extra zing, try dark cocoa!
-
1 teaspoon baking soda: This helps your bread rise, creating a fluffy texture. If you’re out, baking powder can be a substitute—just use about 3 teaspoons for a similar effect.
-
1/2 teaspoon baking powder: This works alongside the baking soda for the perfect rise. Sometimes a little baking powder helps keep things light.
-
1/4 teaspoon salt: Don’t skip this! Salt enhances all the flavors, making sure nothing tastes bland.
-
1/2 teaspoon ground cinnamon: This spicy kick captures that autumn vibe. Feel free to add more if you’re a cinnamon lover or substitute with pumpkin pie spice!
-
1/2 cup chocolate chips: Because who can resist chocolate? You can use semi-sweet, dark, or even white chocolate for a different twist.
Step-by-Step: Let’s Bake!
Now that we have our ingredients lined up like a well-rehearsed orchestra, let’s get to the good stuff. Follow these steps as we bake our way to chocolatey perfection!
Step 1: Preheat Your Oven
Start by preheating your oven to 350°F (175°C). Preheating is key for ensuring even baking—just like a warm-up before hitting the gym!
Step 2: Combine the Wet Ingredients
In a large mixing bowl, combine pumpkin puree, granulated sugar, brown sugar, vegetable oil, eggs, and vanilla extract. Using a whisk or a mixer (my mixer is my best friend!), mix until everything is well combined and creamy. This is where the magic begins!
Chef Tip: Make sure your eggs are at room temperature; it helps with a smoother batter!
Step 3: Mix the Dry Ingredients
In another bowl, whisk together flour, cocoa powder, baking soda, baking powder, salt, and ground cinnamon. This helps distribute the leavening agents evenly. You don’t want any surprises!
Tip: Sift the cocoa powder if it’s clumpy. No one wants a chocolate surprise in the wrong way!
Step 4: Combine Wet and Dry Mixes
Gently fold the dry mixture into the wet ingredients. Use a spatula to combine until just blended—be careful not to over-mix. We want a tender loaf, not a chewy one!
Pro Tip: If you see a few flour streaks, that’s okay! It’ll mix in as the ingredients meld together. Over-mixing is the enemy!
Step 5: Add the Chocolate Chips
Now, fold in those glorious chocolate chips. Let’s face it; they deserve a grand entrance in this bread!
Chef Hack: Reserve a few chips for topping the bread. It adds a delightful touch and looks so appealing!
Step 6: Prepare Your Pan
Lightly grease a loaf pan (or line it with parchment paper for easy release). Pour your batter into the prepared pan, spreading it out evenly.
Tip: Tap the pan lightly on the counter to release any air bubbles. Also double-check—don’t forget to add those reserved chocolate chips on top!
Step 7: Bake to Perfection
Place your pan in the preheated oven and bake for 50-60 minutes or until a toothpick inserted into the center comes out clean with just a few moist crumbs.
Chef’s Note: Every oven is different, so start checking around the 50-minute mark!
Step 8: Cool Before Slicing
Once it’s out of the oven, let your bread cool in the pan for about 10-15 minutes before transferring it to a wire rack. This cooling time allows the flavors to settle and the bread to firm up.
Tip: Patience is key here—it’ll be tough to resist sneaking a slice too early, but trust me on this one!
Serving Suggestions: Presenting Your Masterpiece
When it comes to serving your Chocolate Pumpkin Bread, it’s all about making it as inviting as it tastes. Slice it into thick, decadent pieces and arrange them on a charming platter. A sprinkle of powdered sugar on top gives an elegant touch that makes it feel like a special occasion. Pair it with a dollop of whipped cream or a scoop of vanilla ice cream for an indulgent dessert.
But wait, it doesn’t end there! Serve it alongside a steaming cup of coffee or hot cocoa to elevate the whole experience. Picture this: you and your loved ones, cozy blankets, and a slice of warm bread in hand. Doesn’t that sound delightful?
Recipe Variations: Make It Your Own!
Now, let’s talk creativity! The beauty of baking is that the possibilities are endless. Here are a few fun variations to experiment with:
-
Spiced Nut Variation: Add a handful of chopped walnuts or pecans for a delightful crunch and nutty flavor.
-
Zesty Citrus Twist: Incorporate the zest of an orange or lemon for a fresh, fruity note that adds brightness to the bread.
-
** Pumpkin Chocolate Chip Muffins**: Use the same batter but bake in a muffin tin for bite-sized joy! Just reduce the baking time to around 20-25 minutes.
-
Marble Bread: Create a swirled effect by mixing half a batch of plain batter and half chocolate batter together before baking for a show-stopper appearance!
-
Dairy-Free Delight: Use almond milk instead of vegetable oil and opt for dairy-free chocolate chips for a vegan twist.
Chef’s Notes: My Baking Journey
As I reflect on my journey with pumpkin bread, I can’t help but smile at all the little kitchen mishaps that have transformed into delicious success stories. There was that one time I mistook baking powder for baking soda—let’s just say my first loaf had a personality of its own, and by personality, I mean a volcano bread explosion—it was chaotic, but the taste was unforgettable!
This recipe has adapted over time, finding a cozy home in countless family gatherings. Each time it graces the table, someone shares a memory tied to the flavors, and it warms my heart knowing I can recreate that joy for others.
FAQs and Troubleshooting
-
My bread turned out dry! What happened?
- Overmixing or baking too long can lead to dryness. Make sure to mix until just combined, and check your bread a few minutes before the estimated time.
-
What’s the best way to store leftover bread?
- Allow the bread to cool completely, then wrap it tightly in plastic wrap or foil. Store it at room temperature for up to three days or in the fridge for up to a week.
-
Can I freeze my Chocolate Pumpkin Bread?
- Absolutely! Wrap the cooled bread tightly in plastic wrap and then in foil. It can stay in the freezer for up to three months. Just thaw it overnight in the fridge before enjoying!
-
Why did my bread sink in the middle?
- It could be due to underbaking or not using enough leavening agent. Double-check your measurements and ensure the bread is fully baked before removing it from the oven.
Nutritional Info
While sharing treats is the best part, being mindful of nutrition can help us enjoy them even more. Each slice of Chocolate Pumpkin Bread is roughly:
- Calories: 220
- Fat: 9g
- Carbohydrates: 34g
- Protein: 3g
- Fiber: 2g
Remember, these values will vary based on exact ingredients and portion sizes.
So there you have it, my delightful friends! A journey into making the most scrumptiously moist Chocolate Pumpkin Bread, steeped in love and history. Whether you’re baking for yourself or sharing with loved ones, this recipe is perfect for bringing everyone together. Now, roll up those sleeves and let’s get baking—your kitchen stands ready for deliciousness! Happy baking and even happier memories!
PrintChocolate Pumpkin Bread
A delightful loaf combining the cozy essence of fall with rich chocolate flavors, perfect for sharing with loved ones.
- Prep Time: 15 minutes
- Cook Time: 60 minutes
- Total Time: 75 minutes
- Yield: 1 loaf 1x
- Category: Dessert
- Method: Baking
- Cuisine: American
- Diet: Vegetarian
Ingredients
- 1 cup pumpkin puree
- 1 cup granulated sugar
- 1/2 cup brown sugar
- 1/2 cup vegetable oil
- 2 large eggs
- 1 teaspoon vanilla extract
- 1 1/2 cups all-purpose flour
- 1/2 cup cocoa powder
- 1 teaspoon baking soda
- 1/2 teaspoon baking powder
- 1/4 teaspoon salt
- 1/2 teaspoon ground cinnamon
- 1/2 cup chocolate chips
Instructions
- Preheat your oven to 350°F (175°C).
- Combine pumpkin puree, sugar, brown sugar, vegetable oil, eggs, and vanilla extract in a bowl and mix until creamy.
- Whisk together flour, cocoa powder, baking soda, baking powder, salt, and cinnamon in another bowl.
- Fold the dry mixture into the wet ingredients until just blended.
- Add the chocolate chips and fold gently.
- Prepare a loaf pan by greasing it or lining it with parchment paper.
- Pour the batter into the prepared pan and tap it lightly to release air bubbles.
- Bake for 50-60 minutes or until a toothpick comes out clean.
- Cool in the pan for 10-15 minutes before transferring to a wire rack.
Notes
Serve with powdered sugar or paired with whipped cream or vanilla ice cream for a delightful dessert experience.
Nutrition
- Serving Size: 1 slice
- Calories: 220
- Sugar: 22g
- Sodium: 200mg
- Fat: 9g
- Saturated Fat: 2g
- Unsaturated Fat: 7g
- Trans Fat: 0g
- Carbohydrates: 34g
- Fiber: 2g
- Protein: 3g
- Cholesterol: 30mg
Keywords: pumpkin bread, chocolate bread, fall recipes, dessert, baking
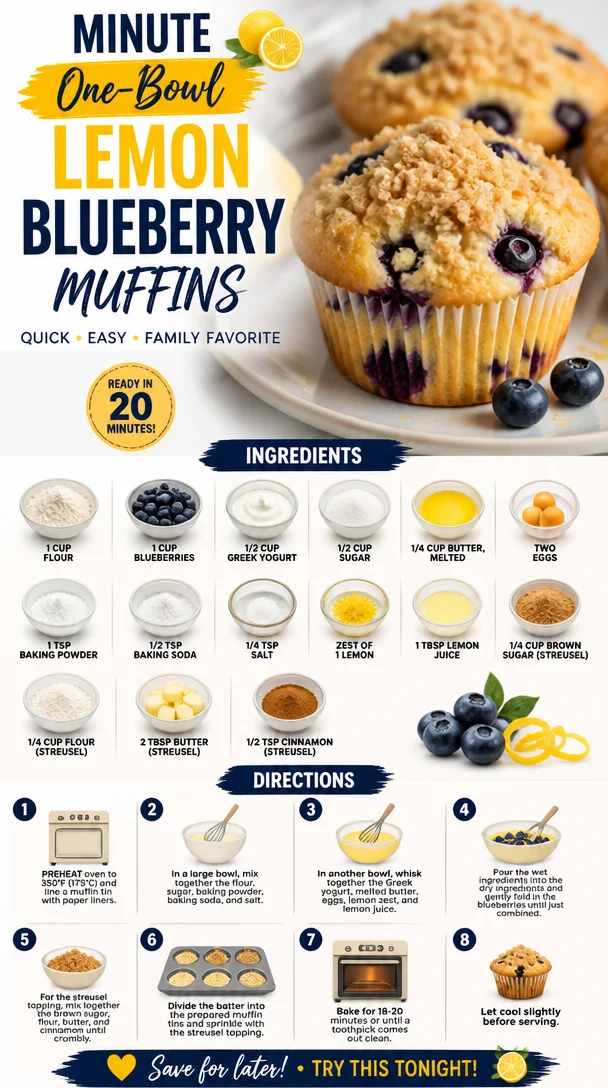
Minute One-Bowl Lemon Blueberry Muffins
Delightful Lemon Blueberry Muffins: A Perfect Morning Pick-Me-Up
Hey there, fellow food lovers! Today, I’m excited to share a special recipe that is sure to brighten your mornings and tantalize your taste buds—Lemon Blueberry Muffins. These aren’t just any muffins; they are a burst of sunshine with each bite, combining the zesty brightness of lemons and the sweet juiciness of blueberries. Trust me; these little guys have a way of making even the rainiest mornings feel like a sunny day.
Now, I know what you’re thinking. Muffins can be boring, right? Well, not these! They are fluffy, moist, and packed with flavors that make them anything but typical. Whether you are busy rushing off to work or simply enjoying a slow weekend breakfast, these muffins are both quick to make and delightful to eat.
A Wholesome Muffin Memory
Let me take you back to when I was a kid. My Grandma Rose had the most enchanting little cottage garden nestled behind her house. Every summer, she would invite me over for afternoon tea, and those dates have become some of my sweetest childhood memories. The best part? We’d whip up a batch of her famous lemon blueberry muffins together.
I remember standing on a stool, my tiny hands covered in flour as we measured ingredients into a big mixing bowl. The house would fill up with that heavenly aroma of lemon and blueberries, making my mouth water in anticipation. We’d sit on the porch, munching on those warm muffins, and sipping herbal tea while watching the butterflies dance around the garden.
Those afternoons taught me more than just how to bake; they instilled in me a love for merging simple ingredients to create cheerful moments. This legacy carries on with each batch I make today.
Ingredients You’ll Need
Here’s what you need to gather to bring these lemon blueberry muffins to life!
-
1 cup all-purpose flour
This is the backbone of your muffins, providing structure. For a gluten-free option, try using almond or oat flour! -
1 cup fresh blueberries
These little jewels add a sweet pop of flavor. If fresh blueberries aren’t available, frozen ones work just as well—no need to thaw! -
1/2 cup Greek yogurt
This ingredient keeps the muffins moist while adding protein. You can swap it out for sour cream or a dairy-free yogurt if you prefer. -
1/2 cup sugar
A good balance of sweetness is essential. You could use coconut sugar or a sugar substitute like stevia for a healthier option. -
1/4 cup butter, melted
Butter adds richness and flavor to the muffins. If you’re looking for a lighter option, coconut oil is a great substitute. -
2 large eggs
Eggs contribute to the texture and moisture. You can use flaxseed meal mixed with water for an egg-free version. -
1 teaspoon baking powder
This helps the muffins rise, yielding a light and fluffy texture. Be sure it’s fresh for the best results! -
1/2 teaspoon baking soda
It complements the baking powder for even better leavening. If you’re out of baking soda, using just a bit more baking powder works too. -
1/4 teaspoon salt
A pinch of salt enhances the flavors and balances the sweetness. -
Zest of 1 lemon
This zest brings a bright, aromatic quality to your muffins. For an extra zing, try adding more zest! -
1 tablespoon lemon juice
Freshly squeezed adds a delightful tang. Lemon juice is highly adjustable if you want a more intense flavor. -
For the streusel topping:
- 1/4 cup brown sugar
Adds a touch of molasses flavor. You can use granulated sugar if that’s all you have. - 1/4 cup all-purpose flour
This provides structure to your crumbly topping. - 2 tablespoons butter
Cold butter will give you that delicious crumble. Substitute with coconut oil for a different twist. - 1/2 teaspoon cinnamon
This adds a warm, cozy flavor to your muffins. Feel free to skip if cinnamon isn’t your thing.
- 1/4 cup brown sugar
Step-by-Step Instructions
Ready to bake? Let’s dive into the process!
-
Preheat your oven:
Preheat your oven to 375°F (190°C). This ensures that your muffins bake evenly and perfectly. -
Prepare your muffin tin:
Grease a muffin tin or use cupcake liners. Greasing and lining helps prevent those delicious beauties from sticking! -
Mix the dry ingredients:
In a medium bowl, whisk together the flour, baking powder, baking soda, salt, and cinnamon for the streusel. This step ensures there are no lumps, promoting even rising. -
Combine the wet ingredients:
In another bowl, mix the melted butter with the sugar until creamy. Then, whisk in the Greek yogurt, eggs, lemon juice, and lemon zest until smooth. A little workout for those mixing muscles! -
Add blueberries:
Gently fold in the blueberries, taking care not to crush them. This preserves the juicy bursts we love in our muffins! -
Combine wet and dry:
Carefully add the dry ingredients into the wet mixture. Stir until just combined; a few lumps are perfectly okay! Over-mixing can lead to dense muffins—yuck! -
Make the streusel topping:
In a small bowl, mix brown sugar, flour, butter, and cinnamon with a fork until crumbly. This will add a delightful crunch to your muffins. -
Fill the muffin cups:
Spoon the batter into the prepared muffin tin, filling each cup about 2/3 full. Sprinkle the streusel topping generously over each muffin—let’s make it extra tasty! -
Bake your muffins:
Place the muffin tin in the preheated oven and bake for around 18-20 minutes or until a toothpick inserted into the center comes out clean. The kitchen should smell heavenly by now! -
Cool it down:
Once they’re out, let the muffins rest in the tin for about 5 minutes before transferring them to a wire rack. This cooling helps them firm up and makes them easier to handle.
Serving Suggestions
Serve these lemon blueberry muffins warm, right out of the oven, with a pat of butter melting on top or a dollop of whipped cream cheese. Pair them with a cup of hot tea or coffee, and you’ve got a perfect breakfast or afternoon snack. You can also top them with a light glaze made from lemon juice and powdered sugar for an extra sweet touch!
Recipe Variations
-
Lemon Poppy Seed Muffins:
Replace some of the flour with poppy seeds for a delicious twist! They add a crunchy texture that pairs beautifully with lemon. -
Gluten-Free Option:
Use a 1:1 gluten-free flour mix instead of all-purpose flour for gluten-free friends joining the table! -
Add Nuts:
Toss in some chopped walnuts or almonds for a delightful crunch and extra nutrition. -
Lemon Blueberry Bread:
Transform this muffin recipe into a loaf by simply pouring the batter into a greased loaf pan and baking for about 50-60 minutes. -
Dairy-Free Delight:
Swap Greek yogurt with dairy-free yogurt and use coconut oil to make these muffins dairy-free, while still delicious!
Chef’s Notes
These muffins have become a staple in my home over the years. Originally inspired by my Grandma Rose’s recipe, I’ve tweaked it plenty of times as seasonal ingredients change. When I have some fresh strawberries or bananas lying around, I toss them in too, and it never disappoints! And let’s be real—they never last more than a day or two; they’re simply too good to resist!
FAQs and Troubleshooting
Q: Why are my muffins dry?
A: Over-mixing or using too much flour can lead to drier muffins. Always measure flour correctly (spoon it into the measuring cup and level it off).
Q: My muffins sank in the middle. What happened?
A: This could happen if your batter was overmixed or if there wasn’t enough leavening. Make sure your baking powder and baking soda are fresh for best results.
Q: Can I freeze these muffins?
A: Absolutely! Allow them to cool completely, then place them in an airtight container or freezer bag. They will keep for up to three months.
Q: Can I make these muffins vegan?
A: You can replace the eggs with flax eggs (1 tablespoon of flaxseed meal + 2.5 tablespoons water per egg) and use non-dairy yogurt and milk.
Nutritional Info (per muffin, approx.)
- Calories: 150
- Protein: 3g
- Fat: 5g
- Carbohydrates: 22g
- Sugar: 7g
Conclusion
So there you have it—Lemon Blueberry Muffins that are not only simple to whip up but also brimming with flavor and nostalgia. Whether it’s for breakfast, a brunch gathering, or just because you crave something sweet, these muffins will always hit the spot. I hope you give them a try, feel inspired, and perhaps create some sweet memories of your own in the kitchen!
Now, grab your apron, channel your inner baker, and let’s get muffin-making. Happy baking!
PrintLemon Blueberry Muffins

Delightful lemon blueberry muffins that are fluffy, moist, and perfect for breakfast or a snack.
- Prep Time: 15 minutes
- Cook Time: 20 minutes
- Total Time: 35 minutes
- Yield: 12 muffins 1x
- Category: Breakfast
- Method: Baking
- Cuisine: American
- Diet: Vegetarian
Ingredients
- 1 cup all-purpose flour
- 1 cup fresh blueberries
- 1/2 cup Greek yogurt
- 1/2 cup sugar
- 1/4 cup butter, melted
- 2 large eggs
- 1 teaspoon baking powder
- 1/2 teaspoon baking soda
- 1/4 teaspoon salt
- Zest of 1 lemon
- 1 tablespoon lemon juice
- Streusel topping:
- 1/4 cup brown sugar
- 1/4 cup all-purpose flour
- 2 tablespoons butter
- 1/2 teaspoon cinnamon
Instructions
- Preheat your oven to 375°F (190°C).
- Prepare a muffin tin by greasing it or using cupcake liners.
- Mix the dry ingredients in a medium bowl: flour, baking powder, baking soda, salt, and cinnamon.
- Combine the wet ingredients in another bowl: melted butter and sugar, whisked in Greek yogurt, eggs, lemon juice, and lemon zest.
- Add the blueberries gently into the wet mixture.
- Combine the dry ingredients with the wet mixture until just combined.
- Make the streusel topping by mixing brown sugar, flour, butter, and cinnamon until crumbly.
- Fill the muffin cups with batter and sprinkle the streusel topping on each.
- Bake in the oven for 18-20 minutes or until a toothpick comes out clean.
- Cool the muffins in the tin for 5 minutes before transferring to a wire rack.
Notes
Serve warm with butter or cream cheese, and enjoy with tea or coffee. These muffins can also be frozen for up to three months.
Nutrition
- Serving Size: 1 muffin
- Calories: 150
- Sugar: 7g
- Sodium: 200mg
- Fat: 5g
- Saturated Fat: 2g
- Unsaturated Fat: 3g
- Trans Fat: 0g
- Carbohydrates: 22g
- Fiber: 1g
- Protein: 3g
- Cholesterol: 30mg
Keywords: muffins, lemon blueberry, breakfast, baking, easy recipes
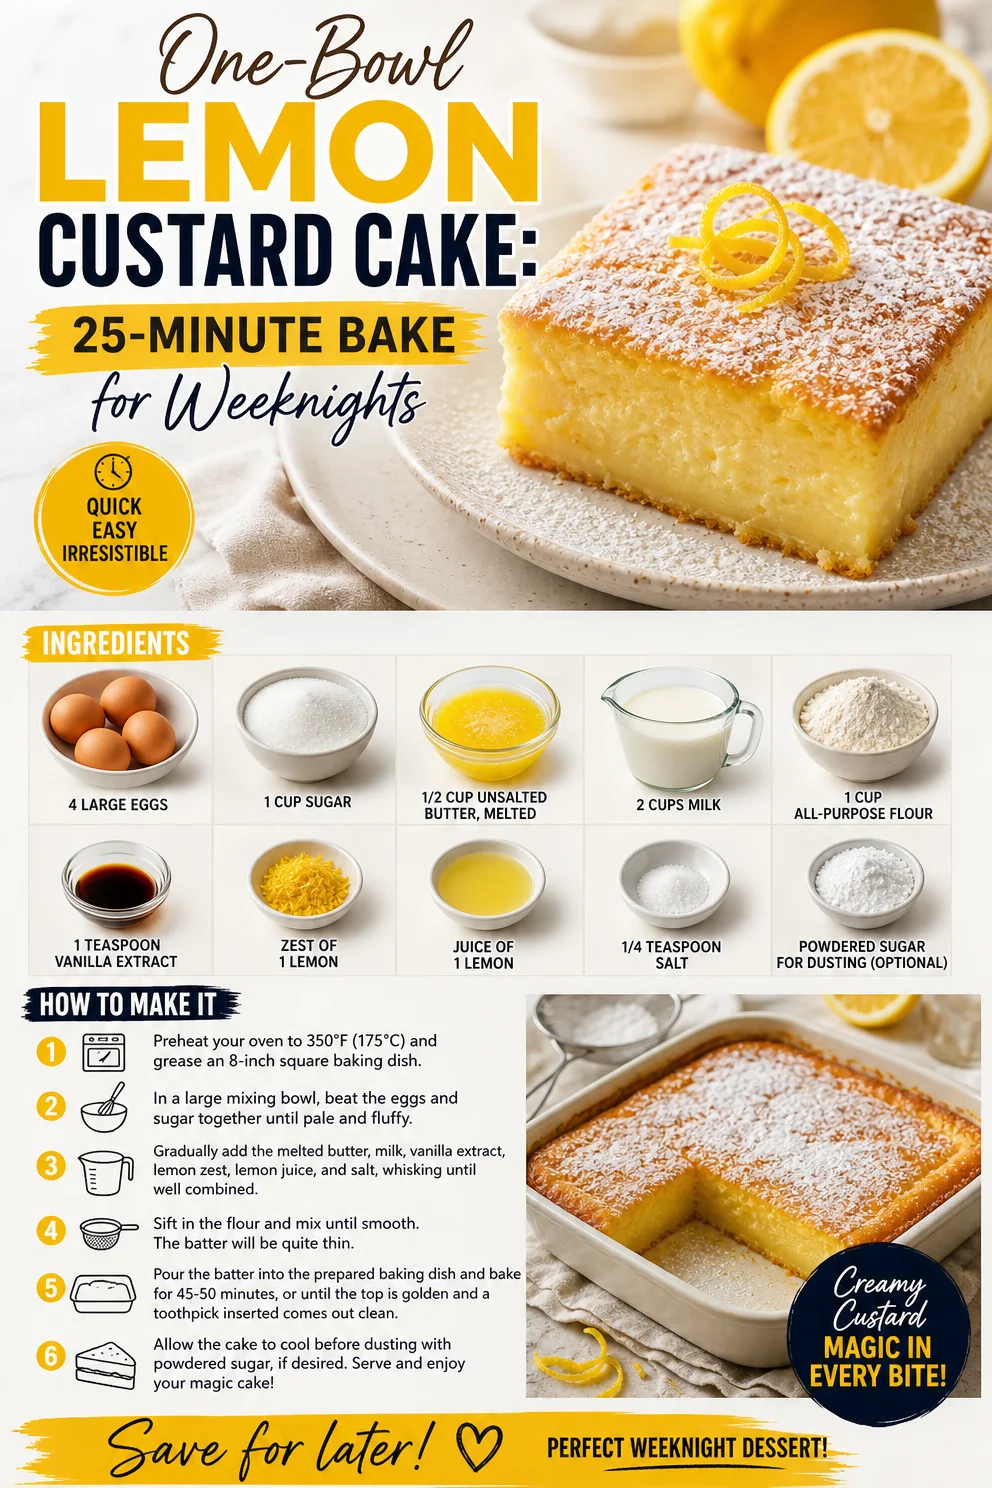
One-Bowl Lemon Custard Cake: 25-Minute Bake for Weeknights
Discover the Magic of Lemon Custard Cake
Hello, fellow food lovers! Today, I’m thrilled to share a little slice of sunshine with you—my beloved Magic Lemon Custard Cake. This isn’t just any dessert; it’s a delightful fusion of tangy lemon flavors and creamy custard that magically transforms as it bakes. If you’re looking for that perfect balance of sweet and tart, this cake is your ticket to flavor town!
Picture this: it’s a lazy Sunday afternoon, and the light filtering through the kitchen window illuminates a gathering of friends around the table. Each person is eagerly discussing everything from weekend plans to travel escapades while the scent of something fresh and lemony wafts through the air. That magical moment when cake comes out of the oven and the anticipation builds—it’s this experience that inspired me to craft this recipe. Cooking is more than just nutrition; it’s about creating memories and enjoying the vibrant tapestry of life through food.
As the custard cake cools, something incredible happens. The top layer becomes light and airy, while the bottom sinks into a rich, creamy custard. It’s a delicious surprise in every bite, and I just know you and your loved ones will savor every moment together with this delightful dish!
A Slice of Nostalgia
You know, food has this amazing ability to take you back to special moments in the past. For me, that moment happened in my grandmother’s cozy kitchen every summer. She would whip up her famous lemon meringue pie, and the family would gather around her as she squeezed fresh lemons and whisked egg whites into pristine peaks. The smell of citrus would dance through the air, and we’d talk about everything from her childhood stories to the best ways to slice a lemon.
One summer, after a particularly sticky day, my grandmother decided to try something a little different—a lemon custard cake. As she explained her recipe, I could see the joy in her eyes. “It’s all about balancing sour and sweet,” she told me. That idea stuck with me all these years, and I promise, this Magic Lemon Custard Cake is an homage to those cherished moments and flavors. Let’s create some magic in your kitchen!
Ingredients
Here’s what you’ll need to bring this enchanting dessert to life:
-
4 large eggs: These help create a fluffy, airy texture for the cake. If you’re looking for a vegan version, you can use flax eggs (1 tablespoon flaxseed meal + 3 tablespoons water = 1 egg).
-
1 cup sugar: Sweetness is key! You can substitute with coconut sugar or use a sugar alternative like stevia; just adjust according to the product’s sweetness level.
-
1/2 cup unsalted butter, melted: This adds richness, but if you’re avoiding dairy, try using coconut oil or a vegan butter spread.
-
2 cups milk: Whole milk gives the best texture, but feel free to use almond milk or oat milk for a non-dairy option.
-
1 cup all-purpose flour: This is vital for structure. Gluten-free all-purpose flour can be used for a gluten-free version.
-
1 teaspoon vanilla extract: This enhances the flavors. Consider using almond extract for a twist!
-
Zest of 1 lemon: A zingy addition! Use a microplane for fine zest, but if you’re in a bind, lemon peel can work too.
-
Juice of 1 lemon: Fresh is best! Bottled lemon juice lacks the same vibrancy, so opt for freshly squeezed.
-
1/4 teaspoon salt: This is essential to balance the sweetness and highlight the lemon flavor.
-
Powdered sugar for dusting (optional): Just a light sprinkle elevates the cake visually and adds a touch of sweetness!
Step-by-Step Instructions
Ready to dive in? Let’s get baking!
-
Preheat the Oven: Preheat your oven to 350°F (175°C). This is crucial for achieving that magical bake.
-
Prepare the Baking Dish: Grease an 8-inch square baking dish or a similar size with butter or any cooking spray. This will prevent sticking and ensure easy removal.
-
Whisk the Eggs: In a large mixing bowl, crack 4 large eggs. Whisk vigorously until they turn pale and frothy—this will add air to your batter, which creates fluffiness!
-
Mix in Sugar and Butter: Slowly add 1 cup of sugar to the frothy eggs while continuing to whisk. Once combined, pour in the 1/2 cup of melted butter and mix until smooth.
-
Incorporate Milk and Vanilla: Gently stir in 2 cups of milk and 1 teaspoon of vanilla extract. This is where the magic begins! The mixture may appear a bit thin—that’s perfect!
-
Add Flour and Lemon: Next, sift in 1 cup of all-purpose flour, zest of 1 lemon, juice of 1 lemon, and 1/4 teaspoon salt. Use a spatula to fold everything together until just combined. Be careful not to overmix; we want to keep it light!
-
Pour and Bake: Pour the batter into the prepared baking dish. Place it in the preheated oven and bake for about 35-40 minutes, or until the top is golden and a toothpick inserted in the center comes out clean. Keep an eye on it towards the end; all ovens vary!
-
Cool and Dust: Let the cake cool in the pan for about 10-15 minutes before transferring it to a wire rack. Once completely cool, dust the top with powdered sugar for that perfect finishing touch!
Serving Suggestions
To plate this delightful Lemon Custard Cake, slice it into squares, and serve each piece on individual plates. If you want to elevate the presentation, add a dollop of whipped cream or a scoop of vanilla ice cream on the side. Garnish with fresh mint or additional lemon zest for that extra pop of color. Trust me, it’ll make your dessert not just delicious but visually appealing too!
Recipe Variations
Feel like getting creative? Here are some scrumptious twists to this classic recipe:
-
Berry Bliss: Add 1 cup of fresh blueberries or raspberries to the batter for a burst of color and flavor.
-
Coconut Dream: Substitute half the milk for coconut milk and add shredded coconut for a tropical flair.
-
Spiced Lemon: Incorporate 1/2 teaspoon of ground ginger or a pinch of cinnamon for a warm, cozy twist.
-
Chocolate Chip Delight: Mix in some mini chocolate chips for an indulgent contrast to the tangy lemon.
-
Herb-Infused: Add a sprinkle of finely chopped rosemary or thyme to the batter for an herbal twist that will surprise your taste buds.
Chef’s Notes
I must confess—my journey with this recipe hasn’t always been smooth sailing. I once made it for a dinner party and forgot the flour (yikes!). My friends still devoured it, claiming it tasted like a lemon soup! It was a funny mishap that turned into a cherished memory. Over time, I’ve perfected it, and now it’s a crowd-pleaser at any gathering. Remember, every misstep in the kitchen is just a new adventure waiting to unfold, so don’t stress—enjoy the process!
FAQs and Troubleshooting
Here are some common questions and potential missteps you might encounter while making your Magic Lemon Custard Cake:
-
Why did my cake not set?
- If your cake came out runny, it may need more cooking time. Make sure to check it towards the end of the baking time. Every oven is different!
-
Can I make this ahead of time?
- Absolutely! This cake stores well. Just keep it in an airtight container in the fridge for up to 3 days. Make sure to dust with powdered sugar just before serving for the best look.
-
Why does my cake have a weird texture?
- Overmixing can lead to a dense texture, so gently fold in the ingredients. Another tip is to avoid opening the oven too soon, as this can cause it to deflate.
-
Can I substitute the lemon?
- Yes! You can use lime juice or even orange for a different flavor profile, but adjust the sugar content slightly since limes tend to be tart.
Nutritional Info
While the nutrition can vary depending on the specific ingredients used, here’s a rough estimate per slice (assuming you cut the cake into 12 pieces):
- Calories: 210
- Protein: 4g
- Fat: 7g
- Carbohydrates: 33g
- Fiber: 1g
- Sugar: 12g
Conclusion
And there you have it—a journey through the delightful world of Magic Lemon Custard Cake! I hope you find as much joy in making and sharing this cake as I do. So roll up your sleeves, savor the process, and enjoy every unforgettable slice alongside the loved ones in your life. Remember, the best part of cooking isn’t just the final dish; it’s the memories we create along the way. Happy baking!
PrintMagic Lemon Custard Cake
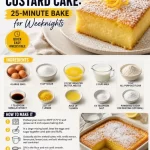
A delightful fusion of tangy lemon flavors and creamy custard that creates a magical treat for any occasion.
- Prep Time: 15 minutes
- Cook Time: 40 minutes
- Total Time: 55 minutes
- Yield: 12 servings 1x
- Category: Dessert
- Method: Baking
- Cuisine: American
- Diet: Vegetarian
Ingredients
- 4 large eggs
- 1 cup sugar
- 1/2 cup unsalted butter, melted
- 2 cups milk
- 1 cup all-purpose flour
- 1 teaspoon vanilla extract
- Zest of 1 lemon
- Juice of 1 lemon
- 1/4 teaspoon salt
- Powdered sugar for dusting (optional)
Instructions
- Preheat your oven to 350°F (175°C).
- Grease an 8-inch square baking dish with butter or cooking spray.
- Whisk the eggs in a large mixing bowl until pale and frothy.
- Mix in the sugar and melted butter until smooth.
- Incorporate the milk and vanilla extract gently into the mixture.
- Add the flour, lemon zest, lemon juice, and salt, and fold until just combined.
- Pour the batter into the prepared baking dish.
- Bake for about 35-40 minutes, or until golden and a toothpick comes out clean.
- Cool the cake in the pan for 10-15 minutes before transferring to a wire rack.
- Dust with powdered sugar before serving.
Notes
This cake can be stored in an airtight container in the fridge for up to 3 days. Dust with powdered sugar just before serving.
Nutrition
- Serving Size: 1 slice
- Calories: 210
- Sugar: 12g
- Sodium: 150mg
- Fat: 7g
- Saturated Fat: 4g
- Unsaturated Fat: 2g
- Trans Fat: 0g
- Carbohydrates: 33g
- Fiber: 1g
- Protein: 4g
- Cholesterol: 100mg
Keywords: lemon cake, custard cake, dessert, baking, easy recipe