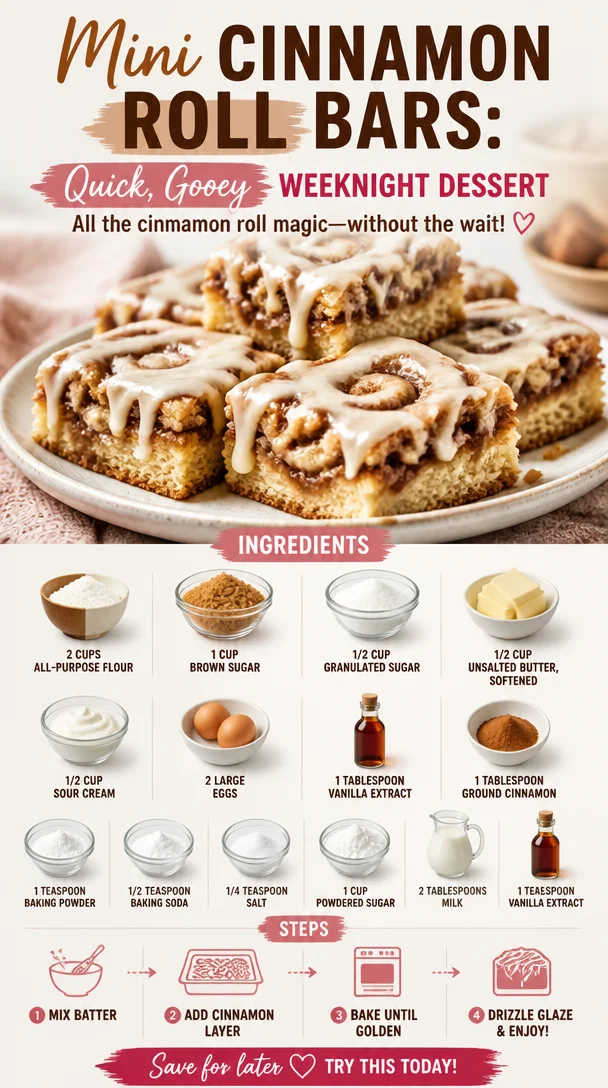
Min Cinnamon Roll Bars: Quick, Gooey Weeknight Dessert
Cinnamon Roll Bars: Quick and Easy Dessert Recipe
Welcome to another delightful adventure in the kitchen! If you adore the rich, buttery flavor of cinnamon rolls but find yourself short on time (who isn’t these days?), you’re in for a real treat! Today, I’ll be sharing my oh-so-easy Cinnamon Roll Bars. These little squares of joy combine everything you love about traditional cinnamon rolls with an effortless preparation that’s perfect for busy weeknights or when you’re itching for a sweet treat without all the fuss. So grab your apron, and let’s dive into this crave-worthy dessert!
A Whirlwind of Nostalgia
The first time I made cinnamon roll bars, I was just a kid standing on a stool next to my mom in our warm and inviting kitchen. The scent of cinnamon wafted through the air while we giggled and stirred together creamy butter and sugar. It was weekend baking bliss, and the anticipation of a freshly made dessert was the cherry on top!
Fast forward to adulthood, and I found myself craving those nostalgic moments. But let’s be honest—who wants to spend hours making traditional cinnamon rolls when you could whip up these bars in no time? They deliver the same delicious flavor but come together quickly, making them perfect for bringing back those fond memories without turning your kitchen into a bake-off challenge zone.
Ingredients
Here’s what you’ll need for these delicious Cinnamon Roll Bars:
-
2 cups all-purpose flour: The backbone of any baked good! You can substitute with whole wheat flour for a nuttier taste or gluten-free flour if you need to accommodate dietary restrictions.
-
1 cup brown sugar: This adds a rich, deep sweetness and moisture. Feel free to swap in coconut sugar for a healthier twist or use white sugar in a pinch.
-
1/2 cup granulated sugar: Balances the flavor of the brown sugar; you could use only brown sugar if that’s your preference for a richer flavor.
-
1/2 cup unsalted butter, softened: Because butter makes everything better! You can use coconut oil or a vegan butter alternative if you’re looking for dairy-free options.
-
1/2 cup sour cream: This ingredient ensures the bars are moist and adds a slight tang. Plain yogurt or cottage cheese can also work in its place.
-
2 large eggs: These help bind everything together. If you’re looking for an egg-free alternative, try mashed banana or a flax egg (1 tablespoon ground flaxseed + 2.5 tablespoons water).
-
1 tablespoon vanilla extract: A must for flavor! You could also use almond extract for a different flavor profile.
-
1 tablespoon ground cinnamon: The star of the show! For a twist, experiment with freshly grated nutmeg or a dash of cardamom.
-
1 teaspoon baking powder: Provides the lift that gives these bars their light texture. You could use baking soda in place of it, just remember to balance it with an acid, like yogurt.
-
1/2 teaspoon baking soda: Another leavening agent for extra fluffiness; don’t skip it!
-
1/4 teaspoon salt: Enhances all the flavors and balances the sweetness.
-
1 cup powdered sugar: For that sweet, delicious glaze on top! You can substitute with a sugar-free alternative or simply omit it if you prefer less sweetness.
-
2 tablespoons milk: To thin out the icing. Use any milk you love—dairy or plant-based works wonders!
-
1 teaspoon vanilla extract (for the glaze): Because every glaze needs a hint of vanilla! Feel free to experiment with flavored extracts here too.
Step-by-Step Instructions
Ready to dive into the baking process? Let’s do this!
-
Preheat your oven: Preheat your oven to 350°F (175°C). This ensures your bars bake evenly from the start. While you’re at it, grease a 9×13 inch baking pan or line it with parchment paper for easy removal later.
-
Mix the dry ingredients: In a medium bowl, whisk together the flour, baking powder, baking soda, salt, and cinnamon. This is a crucial step—mixing these together first ensures you won’t have bursts of baking soda or uneven flavors in your bars. Set the bowl aside for now.
-
Cream the butter and sugars: In a large mixing bowl, cream together the softened butter, brown sugar, and granulated sugar until light and fluffy (about 3-4 minutes). This step is what introduces air to your batter, so it’s essential for that melt-in-your-mouth texture.
-
Add the eggs and sour cream: One by one, add in the eggs, mixing well after each addition, followed by the sour cream and vanilla extract. Keep mixing until fully combined. You’ll notice that the batter starts to come together beautifully.
-
Combine wet and dry ingredients: Gradually add the dry mixture to the wet ingredients, mixing just until no flour streaks remain. Be careful not to overmix—that can lead to tougher bars. A few lumps are totally okay!
-
Spread and swirl: Pour the batter into your prepared baking pan, spreading it evenly. Now here comes the fun part! In a small bowl, mix together a tablespoon of cinnamon and a bit of sugar (like 2-3 tablespoons) to make your cinnamon swirl. Drizzle this mixture over the batter and use a knife or skewer to gently swirl it in. This step creates that lovely cinnamon roll style marbling.
-
Bake: Pop your pan into the oven and bake for about 25-30 minutes, or until a toothpick inserted in the center comes out clean. The smell will be irresistible, and you might have a hard time waiting!
-
Cool and glaze: Once they’re out of the oven, let the bars cool in the pan for about 10-15 minutes. Meanwhile, take another bowl and mix the powdered sugar, milk, and vanilla until you achieve a smooth glaze. Drizzle it over the warm bars with a spoon or whisk for a delightful finishing touch.
Serving Suggestions
To serve your Cinnamon Roll Bars, slice them into squares while they’re still warm and plate on a cheerful serving dish. The glaze will glisten, creating a mouthwatering presentation. You can garnish with additional cinnamon or even a sprinkle of nuts for some added texture. Pair these bars with a hot cup of coffee or tea, and you’re in for a treat!
Recipe Variations
If you want to get creative, here are a few fun variations to try:
-
Apple Cinnamon Roll Bars: Add diced apples to the batter for a delicious twist on a classic.
-
Chocolate Drizzle: Melt some chocolate chips and drizzle over the glaze for a decadent finish.
-
Nutty Crunch: Toss in chopped pecans or walnuts for a delightful crunch throughout the bars.
-
Fruity Flare: Add in some dried cranberries or raisins for an extra pop of flavor.
-
Maple Glaze: Substitute maple syrup for the vanilla in the glaze for a unique flavor twist.
Chef’s Notes
These Cinnamon Roll Bars have become a staple in my kitchen, evolving with the seasons and my family’s cravings. One time, I forgot to take them out of the oven on time, and they turned out a tad more caramelized. Surprisingly, that crispy edge ended up being a new family favorite! It’s funny how even a sweet mishap can lead to delightful discoveries.
I also love how adaptable this recipe is—it’s a great base for different flavors and mix-ins. Whenever friends come over and I want to impress them without spending hours in the kitchen, these bars are sure to make an appearance!
FAQs and Troubleshooting
1. Why are my bars dense?
If you find your bars are overly dense, you may have overmixed the batter. Remember to mix until just combined. Also, check that your leavening agents (baking powder and baking soda) are fresh.
2. Can I make these ahead of time?
Absolutely! These bars store well in an airtight container at room temperature for a few days or in the fridge for a week. You can also prep the batter ahead of time and bake them when you’re ready.
3. What if I don’t have sour cream?
No sour cream? No problem! You can substitute with plain Greek yogurt, or even buttermilk for a similar tanginess and moisture.
4. How can I tell when they’re done?
The best way to check for doneness is to insert a toothpick into the center. If it comes out clean or with a few crumbs, they’re ready to come out of the oven. If there’s wet batter, give them a couple more minutes.
Nutritional Info
Each bar is approximately 200 calories, with varying amounts of sugar and fat depending on your ingredient choices. Remember, indulgence is part of the fun, especially when it comes to desserts!
And there you have it—delicious, easy-to-make Cinnamon Roll Bars that’ll have you reminiscing about cozy kitchen moments while enjoying a scrumptious treat. Whether it’s a family gathering, a casual get-together, or just a quiet evening at home, these bars are sure to spread joy. Happy baking, fellow foodies! Let’s keep it fresh, simple, and seriously delicious!
PrintCinnamon Roll Bars
Delicious Cinnamon Roll Bars that deliver the rich, buttery flavor of traditional cinnamon rolls with a quick and easy preparation.
- Prep Time: 15 minutes
- Cook Time: 30 minutes
- Total Time: 45 minutes
- Yield: 12 servings 1x
- Category: Dessert
- Method: Baking
- Cuisine: American
- Diet: Vegetarian
Ingredients
- 2 cups all-purpose flour
- 1 cup brown sugar
- 1/2 cup granulated sugar
- 1/2 cup unsalted butter, softened
- 1/2 cup sour cream
- 2 large eggs
- 1 tablespoon vanilla extract
- 1 tablespoon ground cinnamon
- 1 teaspoon baking powder
- 1/2 teaspoon baking soda
- 1/4 teaspoon salt
- 1 cup powdered sugar
- 2 tablespoons milk
- 1 teaspoon vanilla extract (for the glaze)
Instructions
- Preheat your oven to 350°F (175°C) and grease a 9×13 inch baking pan or line it with parchment paper.
- Mix the dry ingredients: whisk together the flour, baking powder, baking soda, salt, and cinnamon.
- Cream together the softened butter, brown sugar, and granulated sugar until light and fluffy (about 3-4 minutes).
- Add in the eggs one by one, mixing well after each addition, followed by the sour cream and vanilla extract.
- Combine the dry mixture with the wet ingredients, mixing just until no flour streaks remain.
- Spread the batter into the prepared baking pan and make a cinnamon swirl with a mix of cinnamon and sugar over the batter.
- Bake for 25-30 minutes, or until a toothpick inserted in the center comes out clean.
- Cool for 10-15 minutes and prepare the glaze by mixing the powdered sugar, milk, and vanilla until smooth.
- Drizzle the glaze over the warm bars before slicing into squares and serving.
Notes
These bars are adaptable; you can add mix-ins like nuts, apples, or chocolate. Store in an airtight container at room temperature for a few days.
Nutrition
- Serving Size: 1 bar
- Calories: 200
- Sugar: 18g
- Sodium: 200mg
- Fat: 8g
- Saturated Fat: 4g
- Unsaturated Fat: 3g
- Trans Fat: 0g
- Carbohydrates: 31g
- Fiber: 1g
- Protein: 3g
- Cholesterol: 40mg
Keywords: cinnamon rolls, dessert, easy baking, quick dessert, bars
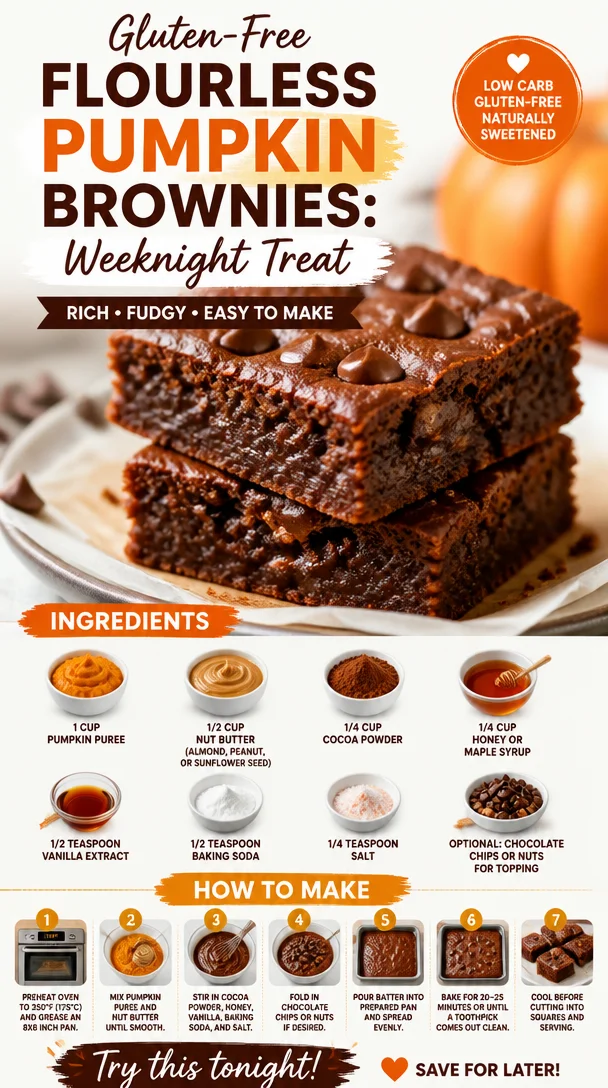
Gluten-Free Flourless Pumpkin Brownies: Weeknight Treat
Indulge Guilt-Free: Flourless Pumpkin Brownies Recipe
Welcome back to Clean Plate Cravings, where fresh, feel-good food meets real life! Today, I’m bringing you a soul-warming treat that’s a perfect blend of seasonal flavor and wholesome goodness: Flourless Pumpkin Brownies. If you’re like me, you love indulging in sweets but don’t want to sacrifice your health or well-being for a decadent dessert. These brownies are the ultimate solution. They are fudgy, rich, and as comforting as that favorite sweater you can’t bear to part with come springtime.
Imagine indulging in a sweet that not only satisfies your cravings but also packs in some nutrients. That’s right, folks—these brownies are made with pumpkin puree, so they’re not just delicious but also come with a hidden dose of vitamins and fiber! Plus, they’re quick to whip up, making them perfect for impromptu get-togethers or cozy nights in. You don’t need fancy ingredients or hours in the kitchen. Just simple, wholesome, and approachable ingredients, which is exactly how I like to roll.
So, grab your mixing bowl and let’s dive into this indulgent yet nutritious recipe together. You won’t believe how easy it is to create these heavenly delights—let’s get started!
A Slice of Nostalgia: My Pumpkin Love Affair
Oh, where do I even begin? My love for pumpkin started in childhood during the crisp autumn months. There was something magical about the transition into fall—the leaves changing color, the air getting just a little bit cooler, and most importantly, the smell of pumpkin baking in the oven. My family had this tradition of making pumpkin bread every Thanksgiving. The whole house would be filled with that warm, spicy aroma, and I remember waiting anxiously for it to come out of the oven, practically salivating as I imagined slathering butter on it.
Fast forward to now, and I wanted to embrace the essence of those autumn days but in a more indulgent form. Enter the flourless pumpkin brownies! These brownies capture that nostalgic feeling in a new, exciting way—satisfying that sweet tooth while still feeling good about what I’m eating. Every bite reminds me of the warmth of family gatherings and cozy evenings spent around the kitchen table, sharing laughter and stories. And now, I can create that magic with these brownies anytime I want!
Ingredients: What You’ll Need
Here’s what you’ll need to whip up these delightful flourless pumpkin brownies:
-
1 cup pumpkin puree
A nutrient-packed powerhouse! Opt for fresh pumpkin or canned—just make sure it’s 100% pumpkin purée with no added sugar. If you’re looking for a substitute, sweet potato puree works beautifully too! -
1/2 cup nut butter (almond, peanut, or sunflower seed)
Nut butter adds that fudgy texture and keeps things rich. Almond and peanut butters give a nice flavor, while sunflower seed butter is a great nut-free alternative for allergy-friendly options. -
1/4 cup cocoa powder
The star ingredient for that deep, chocolatey flavor. Unsweetened cocoa or dark cocoa powder delivers the richest taste. If you want a twist, try using cacao powder for a more intense cocoa flavor. -
1/4 cup honey or maple syrup
This natural sweetener balances the flavors. Honey adds a hint of its floral essence, while maple syrup provides an autumnal twist. If you’re vegan, sticking to maple syrup is your best bet! -
1/2 teaspoon vanilla extract
This adds warmth and depth to the brownies. For an even more vibrant flavor, try using vanilla bean paste for that extra touch of sweetness. -
1/2 teaspoon baking soda
This is your leavening agent, ensuring those brownies don’t come out as dense as a brick. If you need a gluten-free alternative, cream of tartar works as a leavening agent too—just mix it with baking soda in equal parts. -
1/4 teaspoon salt
A little salt enhances all the flavors in your brownies. If you’re watching your sodium, you can reduce this to just a pinch, but I recommend keeping it for the heavenly balance it provides. -
Optional: chocolate chips or nuts for topping
The choice is yours! Add a sprinkle of chocolate chips for an extra indulgent brownie or some chopped nuts for crunch. Pecans or walnuts bring a delicious nutty flavor that complements the pumpkin beautifully.
Step-by-Step Instructions: Get Cooking!
Ready to make some magic? Follow these simple steps, and I promise you’ll be on your way to brownie bliss!
-
Preheat your oven to 350°F (175°C). This is key for getting a perfect, fudgy texture. While it heats up, line an 8×8-inch baking pan with parchment paper or grease it lightly.
-
Mix the wet ingredients. In a large mixing bowl, combine 1 cup of pumpkin puree, 1/2 cup of your chosen nut butter, 1/4 cup of honey or maple syrup, and 1/2 teaspoon of vanilla extract. Grab a whisk and stir until well-blended! You want a creamy, smooth texture—almost like a lovely pumpkin smoothie.
Chef Tip: If your nut butter is a little stiff, pop it in the microwave for 10-15 seconds to warm it up. It’ll blend beautifully with the other ingredients.
-
Sift in the dry ingredients. Add the 1/4 cup cocoa powder, 1/2 teaspoon baking soda, and 1/4 teaspoon salt to the wet mixture. Gently fold everything together using a spatula. You don’t want to overmix—just until everything is well incorporated and no dry spots remain.
Chef Hack: For an even richer brownie, consider adding a tablespoon of espresso powder here! It deepens the chocolate flavor without turning your brownies into coffee-flavored ones.
-
Pour and spread. Transfer the brownie batter into your prepared baking pan. Use a spatula to spread the mixture evenly—get in there and make sure it’s all the way to the corners!
-
Add your toppings. If you’re feeling adventurous, sprinkle some chocolate chips or chopped nuts on top. This is where the creativity can really shine.
-
Bake! Pop the pan into your preheated oven and bake for about 20-25 minutes. Keep an eye on them; they’re ready when a toothpick comes out with just a couple of moist crumbs.
Pro Chef Insight: Don’t overbake! We want these beauties to stay fudgy, so if you’ve got a few moist crumbs on that toothpick, you’re in the clear.
-
Cool and slice. Once baked, remove the brownies from the oven and let them cool in the pan for about 10-15 minutes. Transfer them to a wire rack to cool completely before slicing into squares. Trust me; allowing them to cool fully gives you that perfect fudgy texture!
Serving Suggestions
Now that your brownies are baked and cooled, it’s time to serve them up! Cut them into delightful squares and arrange them on a pretty plate. Drizzle some extra melted nut butter or chocolate sauce on top for an indulgent touch. Pair these brownies with a scoop of vanilla ice cream or a dollop of whipped cream for an even more amazing dessert experience!
Recipe Variations
Feeling a little adventurous? Here are a few fun twists you can add to elevate your flourless pumpkin brownies:
-
Spice it up: Add 1 teaspoon of pumpkin pie spice or a dash of cinnamon for that warm, cozy flavor that complements pumpkin beautifully.
-
Nutty chocolate delight: Fold in some chopped walnuts or pecans into the batter for added crunch and earthy flavors.
-
Boost with dried fruit: Toss in a handful of dried cranberries or raisins into the batter for a pop of sweetness and chewiness.
-
Minty fresh: Add a drop of peppermint extract for a refreshing twist on these brownies—perfect for the holidays!
Chef’s Notes
As I reflect on the journey of creating these flourless pumpkin brownies, I’m reminded how recipes evolve over time. The first version I tried was… well, let’s just say it didn’t quite hit the mark. It was a textbook brownie, dense and slightly crumbly. After several tweaking sessions, I realized that the key was the balance of moisture from the pumpkin and the richness from the nut butter.
And while my kids can turn their noses up at veggies sometimes, they absolutely gobble these brownies up! It’s a joy seeing them enjoy a dessert that’s not just about satisfying a sweet tooth but is also filled with wholesome ingredients. These brownies have become a staple in our household, and I love sharing this recipe with friends and family.
FAQs and Troubleshooting
Q1: Why are my brownies too dense?
A1: If you find your brownies turning out too dense, it might be due to overmixing after adding the dry ingredients. Make sure to mix just until incorporated!
Q2: Can I make these brownies ahead of time?
A2: Absolutely! Store them in an airtight container for up to five days at room temperature or refrigerate them for up to a week. They can also be frozen for up to three months—just make sure to thaw them in the fridge when you’re ready to snack!
Q3: How do I know when the brownies are done?
A3: The trick is to check for moist crumbs on a toothpick inserted in the center. If it comes out clean, they might be overbaked! You want that perfectly fudgy consistency.
Q4: Can I substitute pumpkin with something else?
A4: Yes! Sweet potato or mashed bananas work as great substitutes, though the flavor will change slightly. Each option brings its unique taste while keeping the brownies moist.
Nutritional Info
(Per Brownie—makes about 12 servings)
- Calories: 130
- Protein: 4g
- Fat: 8g
- Carbs: 15g
- Fiber: 2g
- Sugar: 4g
So there you have it—the perfect recipe for Flourless Pumpkin Brownies that are not only easy to make but also incredibly delicious. I hope you take as much joy in making these as I do! Enjoy each rich, fudgy bite, and remember, healthy eating should be about comfort, joy, and of course, deliciousness. Happy baking, my fellow foodies!
PrintFlourless Pumpkin Brownies
These fudgy, rich flourless pumpkin brownies are a guilt-free dessert packed with nutrients and perfect for any occasion.
- Prep Time: 10 minutes
- Cook Time: 25 minutes
- Total Time: 35 minutes
- Yield: 12 servings 1x
- Category: Dessert
- Method: Baking
- Cuisine: American
- Diet: Vegetarian
Ingredients
- 1 cup pumpkin puree
- 1/2 cup nut butter (almond, peanut, or sunflower seed)
- 1/4 cup cocoa powder
- 1/4 cup honey or maple syrup
- 1/2 teaspoon vanilla extract
- 1/2 teaspoon baking soda
- 1/4 teaspoon salt
- Optional: chocolate chips or nuts for topping
Instructions
- Preheat your oven to 350°F (175°C) and line an 8×8-inch baking pan with parchment paper.
- Mix the wet ingredients: combine pumpkin puree, nut butter, honey or maple syrup, and vanilla extract in a bowl.
- Sift in the cocoa powder, baking soda, and salt, folding gently until incorporated.
- Pour the brownie batter into the prepared baking pan, spreading it evenly.
- Add any toppings such as chocolate chips or chopped nuts.
- Bake for 20-25 minutes or until a toothpick comes out with a couple of moist crumbs.
- Cool the brownies in the pan for 10-15 minutes, then transfer to a wire rack to cool completely before slicing.
Notes
These brownies can be stored in an airtight container for up to five days at room temperature or can be refrigerated for up to a week. They also freeze well for up to three months.
Nutrition
- Serving Size: 1 brownie
- Calories: 130
- Sugar: 4g
- Sodium: 120mg
- Fat: 8g
- Saturated Fat: 1g
- Unsaturated Fat: 7g
- Trans Fat: 0g
- Carbohydrates: 15g
- Fiber: 2g
- Protein: 4g
- Cholesterol: 0mg
Keywords: pumpkin brownies, flourless dessert, healthy dessert, chocolate pumpkin, vegetarian brownies