Cleanplate Cravings

Cleanplate Cravings

May 31, 2026 |

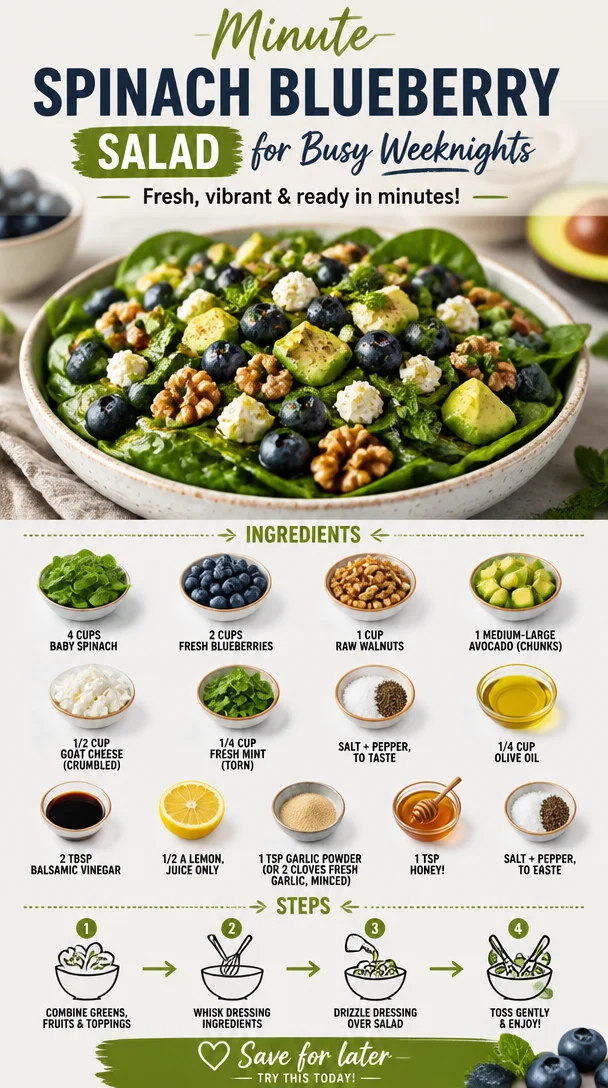
Blueberry Spinach Salad with Honey Balsamic Dressing

Vibrant blueberry spinach salad with honey balsamic dressing on a plate

Blueberry Spinach Salad with Honey Balsamic Dressing

Welcome to Clean Plate Cravings, food lovers! Today, I am super excited to take you on a colorful and delicious journey with a delightful recipe for Blueberry Spinach Salad with Honey Balsamic Dressing. If you’re thinking of a dish that’s not only refreshing but also bursting with flavor and nutrients, look no further. This salad is a beautiful tapestry of textures and tastes that’ll leave you feeling invigorated and satisfied.

Eating salads might seem simple, but let’s be real—too often they can end up being bland, boring, or overly complicated. What I love about this Blueberry Spinach Salad is that it’s packed with wholesome ingredients, combines both sweet and savory, and adds a crunch with the pecans. Trust me, once you take the first bite, you’ll be hooked! Let’s dig into the bright colors and flavors of this wonderful salad that’s perfect for a picnic, a family dinner, or a quick lunch.

A Personal Touch

This dish holds a special place in my heart, as it takes me back to my college days spent at sunny outdoor picnic gatherings with friends. Picture this: A blanket sprawled across the grass, laughter echoing in the air, and an array of vibrant dishes spread out before us. One of my friends made this salad for one of those mini brunch gatherings, and it was love at first bite! The sweet burst from the blueberries mixed with the tangy feta and crunchy pecans was a revelation. It was the kind of dish that made you want to shake off the stress of exams and just enjoy the present moment, surrounded by great friends.

From that day on, I made it my mission to perfect this salad recipe. I wanted to ensure that every time I brought it to a gathering, I shared not only food but also fun memories. It became a staple at my summer BBQs and outdoor picnics, proving to be a crowd-pleaser every single time. Now, I am thrilled to share my version of that picnic favorite with all of you!

Ingredients

Here’s what you’ll need to whip up this scrumptious Blueberry Spinach Salad:

  • 3 cups fresh spinach (3 ounces)
    Spinach is low in calories but rich in nutrients, including vitamins A, C, and K. Fresh spinach is the way to go! You can also swap it with kale or arugula for a different flavor profile.

  • 1/2 cup pecans, chopped
    These nuts add a delightful crunch and a hint of sweetness. You can substitute them with walnuts or almonds if you prefer a different nut.

  • 1/2 cup dried cranberries (I like the low/no sugar type!)
    Dried cranberries provide a chewy texture and a pop of sweetness. If you want to keep the sugars lower, consider going for unsweetened dried cherries or raisins.

  • 1/2 cup feta cheese
    Feta adds creaminess and tanginess to the salad. For a dairy-free option, you can use vegan feta or crumbled tofu, seasoned with a bit of salt and lemon juice.

  • 1/2 cup fresh blueberries
    Juicy blueberries are loaded with antioxidants and add a burst of sweetness. Feel free to mix it up with strawberries or raspberries for variety!

  • 1 tbsp olive oil
    Olive oil brings everything together and adds a healthy fat that helps absorb the vitamins. Avocado oil or a light sesame oil can work well too!

  • 1 tbsp water
    This helps to thin out the dressing. You can use lemon juice as an alternative for an extra zing!

  • 3 tbsp honey
    Honey lends natural sweetness and pairs beautifully with balsamic. For a vegan option, use maple syrup instead.

  • 2 tbsp balsamic vinegar
    The balsamic adds depth and a delightful tang. If you don’t have balsamic on hand, red wine vinegar works in a pinch!

Step-by-Step Instructions

Now that we have all our ingredients ready, let’s get to the fun part — cooking! Follow these simple steps to create your delicious Blueberry Spinach Salad:

  1. Prepare the Dressing: In a small bowl, whisk together the olive oil, water, honey, and balsamic vinegar until well combined. This will be the crown jewel of your salad, with its perfect balance of sweetness and acidity. If you prefer a creamier dressing, you can add a dollop of Greek yogurt for extra thickness.

  2. Wash the Spinach: Rinse the fresh spinach leaves under cold water to remove any dirt or grit. I always find it refreshing to give it a good rinse! After washing, spin it dry in a salad spinner or gently pat it with a clean kitchen towel to remove excess water. A dry spin makes for a crispier salad.

  3. Chop the Pecans: Roughly chop the pecans and give them a quick toast in a dry skillet over medium heat for about 3-4 minutes, stirring frequently. This will enhance their aroma and flavor! Just be careful not to let them burn—your nose will know they’re ready when they smell gloriously nutty.

  4. Combine the Ingredients: In a large mixing bowl, add the fresh spinach, chopped pecans, dried cranberries, feta cheese, and fresh blueberries. Don’t be shy—mix those ingredients gently until they’re beautifully combined. Try to use your hands to toss; it adds a special touch and connects you with your meal!

  5. Dress the Salad: Drizzle the honey balsamic dressing over the salad. Now’s the time to be generous! Toss everything together carefully—gently moving the leaves to coat them evenly with the dressing. You want those blueberries to stay intact and add a pop of juicy goodness!

  6. Taste and Adjust: It’s always a good idea to take a taste before serving! Add a little more honey if you like it sweeter, or extra balsamic for tang. If you’re feeling adventurous, a sprinkle of crushed red pepper flakes might add a fun kick!

Serving Suggestions

To serve this lovely Blueberry Spinach Salad, grab a beautiful bowl (making the presentation a joy!). I often like to layer a few spinach leaves on the bottom, pile on the other ingredients, and then drizzle a bit more dressing on top for that extra flair. Garnish with a few extra blueberries and a sprinkle of feta to captivate the eyes of your guests (or yourself, because you deserve it)!

Recipe Variations

Want to switch things up? Here are some fun variations to make this salad your own:

  • Add Protein: Toss in grilled chicken, shrimp, or chickpeas for a heartier meal.
  • Go Vegan: Skip the feta (or use tofu) and honey, switching it for agave syrup.
  • Fruit Swap: Try mixing in diced mango, strawberries, or apple slices for a different summer twist.
  • Crunch Factor: Substitute pecans with sunflower seeds or pumpkin seeds! It’s nut-free and adds a nice crunch.
  • Dressing Variety: Switch the dressing to a citrus vinaigrette, using orange juice and zest instead of balsamic for a fresh summer feel!

Chef’s Notes

As I crafted this recipe over the years, I’ve learned that a humble salad can be a canvas for creativity. I once hosted a gathering and made an enormous bowl of this salad—my guests couldn’t get enough! It has morphed from a simple dish into a magical mix of flavors where I sometimes even sneak in ingredients like roasted beets or avocado. It’s a reminder that the kitchen is a place of experimentation, joy, and connection.

Prepare this dish and watch how it becomes a cherished recipe in your home, too!

FAQs and Troubleshooting

  1. Can I prepare this salad in advance?
    Absolutely! Prep the ingredients the day before, but hold off on dressing the salad until just before serving to keep the spinach fresh and crisp.

  2. What if I’m allergic to nuts?
    No worries! Simply omit the pecans or replace them with seeds like sunflower or pumpkin seeds to maintain that crunch.

  3. How do I store leftovers?
    You can store the salad in an airtight container in the fridge for up to two days. The flavors may improve as they meld together, but be cautious as the spinach can wilt!

  4. Is there a substitute for honey?
    For those who want a vegan option, use maple syrup or agave nectar. They provide similar sweetness without the use of honey.

Nutritional Info

(An optional section for those keen on health benefits):

  • Calories: Approximately 250 calories per serving
  • Protein: 5g
  • Fat: 16g (mostly from walnuts and olive oil)
  • Carbohydrates: 25g
  • Fiber: 4g
  • Sugar: 12g (natural sugars from fruits)

And there you have it, my dear foodies! An easy-to-make, delightful Blueberry Spinach Salad with Honey Balsamic Dressing that will brighten any meal. Enjoy making it, sharing it, and most importantly, savoring every delicious bite! Happy cooking!

Print

Blueberry Spinach Salad with Honey Balsamic Dressing

A vibrant and refreshing salad packed with blueberries, spinach, and a sweet honey balsamic dressing, perfect for any occasion.

  • Prep Time: 15 minutes
  • Cook Time: 5 minutes
  • Total Time: 20 minutes
  • Yield: 4 servings 1x
  • Category: Salad
  • Method: No Cooking Required
  • Cuisine: American
  • Diet: Vegetarian

Ingredients

Scale
  • 3 cups fresh spinach
  • 1/2 cup pecans, chopped
  • 1/2 cup dried cranberries
  • 1/2 cup feta cheese
  • 1/2 cup fresh blueberries
  • 1 tbsp olive oil
  • 1 tbsp water
  • 3 tbsp honey
  • 2 tbsp balsamic vinegar

Instructions

  1. Prepare the Dressing: In a small bowl, whisk together the olive oil, water, honey, and balsamic vinegar until well combined.
  2. Wash the Spinach: Rinse the fresh spinach leaves under cold water and pat dry.
  3. Chop the Pecans: Roughly chop the pecans and toast in a dry skillet over medium heat for 3-4 minutes.
  4. Combine the Ingredients: In a large bowl, mix the spinach, pecans, cranberries, feta, and blueberries.
  5. Dress the Salad: Drizzle the dressing over the salad and toss gently.
  6. Taste and Adjust: Taste the salad and add more honey or balsamic as desired.

Notes

You can prepare the ingredients a day in advance but add dressing right before serving to avoid wilting. Great for picnics or family gatherings!

Nutrition

  • Serving Size: 1 serving
  • Calories: 250
  • Sugar: 12g
  • Sodium: 150mg
  • Fat: 16g
  • Saturated Fat: 3g
  • Unsaturated Fat: 13g
  • Trans Fat: 0g
  • Carbohydrates: 25g
  • Fiber: 4g
  • Protein: 5g
  • Cholesterol: 15mg

Keywords: salad, spinach, blueberries, honey balsamic, healthy, vegetarian

Did you make this recipe?

Share a photo and tag us — we can't wait to see what you've made!

May 31, 2026 |

Strawberry, Blueberry & Greens Salad with Honey Vinaigrette

Fruit salad with strawberries, blueberries, and greens topped with honey vinaigrette

A Fresh Take on Salad: Strawberry, Blueberry & Greens Salad with Honey Vinaigrette

Welcome to Clean Plate Cravings, food lovers! Today, we’re diving into the delightful world of salads with my vibrant and oh-so-satisfying Strawberry, Blueberry & Greens Salad with Honey Vinaigrette. If you’re thinking salads can be boring, think again! This dazzling dish is not only packed with flavor; it’s a celebration of summer’s best bounty. Picture this: a sun-drenched day, a picnic blanket sprawled on the grass, and a bowl full of juicy strawberries and blueberries that burst with flavor. That’s the essence of this salad!

Salads are often seen as a quick meal or a side dish, but trust me when I say they can be show-stoppers in their own right. With the fresh, enticing colors and textures of mixed greens, vibrant fruits, creamy feta, and crunchy nuts, this salad is a feast for the senses. It’s the perfect accompaniment for grilled meats, a light lunch on its own, or even as a stunning side for your next dinner party. Are you ready to embrace fresh, feel-good flavors? Let’s get started!

A Flashback to Family Picnics

Salads have always been a part of my life, but there’s one memory that stands out: family picnics at the park. My grandmother was a true kitchen wizard. She had an endless supply of recipes passed down through the generations, but the one dish she made that we always looked forward to was her fruit salad. It was a colorful mix of seasonal fruits—juicy strawberries, sweet blueberries, and whatever else was ripe and ready from her garden.

I remember her tossing everything together in a big bowl, and as the flavors melded, the entire kitchen lit up with a warm sweetness. Everyone gathered around, the sound of laughter and the smell of fresh fruit mingling in the air. That memory stayed with me, and as I grew older, I realized how much I cherished those flavors. I wanted to create something that evoked that same joy, and thus, this Strawberry, Blueberry & Greens Salad was born—a nod to the past while celebrating fresh ingredients that make our bodies feel good and our taste buds dance!

Ingredients You’ll Need

Let’s gather our ingredients! Here’s what you’ll need to create this fresh and flavorful salad:

  • Mixed greens (spinach, arugula, or your choice): The base of your salad, these greens offer a delightful crunch and a pop of color. Feel free to mix and match various leafy greens for different textures. Want a peppery kick? Arugula is your friend!

  • Fresh strawberries, sliced: Sweet, juicy strawberries bring a vibrant flavor to the dish. Choose ripe, organic strawberries when possible to ensure the best taste.

  • Fresh blueberries: These little nuggets of goodness are packed with antioxidants and add a subtle sweetness. If you can’t find fresh blueberries, frozen ones work in a pinch—just make sure to thaw them first.

  • Feta cheese, crumbled: This tangy cheese adds a creamy texture that balances out the sweetness of the fruits. If you’re looking for a dairy-free option, try a plant-based feta or skip it altogether.

  • Walnuts or pecans, toasted: Adding a lovely crunch, nuts are also a great source of healthy fats. Feel free to roast your nuts on the stove or in the oven for a few minutes for enhanced flavor.

  • Honey: This natural sweetener enhances the dressing and brings everything together. If you prefer a vegan option, agave syrup or maple syrup makes an excellent substitute.

  • Olive oil: A staple in many kitchens, good-quality extra virgin olive oil provides a rich, fruity taste and healthy fats. Choose an oil you enjoy—the better the oil, the tastier the vinaigrette.

  • Apple cider vinegar: This vinegar gives our dressing a tangy kick. If you prefer a milder flavor, try using white wine vinegar as an alternative.

  • Salt and pepper to taste: These basic seasonings enhance all the flavors in your salad. Remember, seasoning is important; it can make or break a dish!

Step-by-Step Instructions

Ready to whip up this delicious salad? Let’s get into the cooking (or assembling, in this case) steps!

  1. Prepare the Greens:
    Start by washing your mixed greens thoroughly. There’s nothing worse than biting into a salad and finding gritty dirt! I usually rinse them under cold water and then pat them dry with a paper towel or use a salad spinner. The crisp, fresh greens will be the base of our lovely salad, so make sure they’re as clean as can be!

  2. Slice the Strawberries:
    Next, grab your strawberries and slice them! I like to cut them into quarters for a more substantial bite. Lay them out on your cutting board, and let the colors inspire you—it’s all about that vibrant tassel of summer, isn’t it?

  3. Combine the Fruits:
    In a large mixing bowl, add the sliced strawberries and fresh blueberries. Giving these little beauties a gentle toss will create a harmonious blend of sweetness. It’s like creating a fruity canvas for our salad masterpiece!

  4. Toast the Nuts:
    If you’re using walnuts or pecans, now’s the time to toast them. In a skillet over medium-low heat, add the nuts and toast them for about 5-7 minutes, stirring occasionally until they become fragrant and lightly golden. Be careful—once they start to brown, they can burn quickly! The nuttiness will enhance the overall flavor of your salad.

  5. Make the Vinaigrette:
    In a small bowl or jar, add 2 tablespoons of honey, 3 tablespoons of olive oil, and 1 tablespoon of apple cider vinegar. Whisk or shake until everything is combined. Taste it—the sweet and tangy notes should mingle perfectly! Adjust the sweetness or acidity to your liking.

  6. Assemble the Salad:
    Start assembling your salad! Layer the greens at the bottom of a large salad bowl, then add the beautiful fruit mixture on top. Sprinkle with crumbled feta cheese and your toasted nuts. Last but not least, drizzle your honey vinaigrette over the top, making sure to cover all the goodness.

  7. Toss and Serve:
    Using tongs or serving utensils, gently toss your salad until every component is coated in the dressing. Serve it immediately for the freshest bite, although it can sit for a few minutes if you’re not quite ready. Just know that the longer it sits, the softer your greens will become!

Serving Suggestions

This Strawberry, Blueberry & Greens Salad has flexibility written all over it! For a beautiful presentation, consider serving it in individual bowls or on large, rustic platters. A sprinkle of freshly cracked black pepper on top adds an inviting touch and brings out the flavors even more. Pair it with grilled chicken or fish for a hearty meal, or serve it alongside some crusty bread for a delightful lunch.

Recipe Variations

Let’s get creative! Here are some tasty twists you can try for this salad:

  1. Add Protein: Toss in grilled chicken, shrimp, or even quinoa for a protein-packed version.

  2. Make it Vegan: Swap out feta cheese with a vegan cheese alternative or simply leave it out. You won’t miss it!

  3. Herbs Galore: Fresh mint or basil added to the mix gives your salad an aromatic lift. This is especially refreshing in summer.

  4. Different Nuts: Swap walnuts for sliced almonds or pistachios for a different crunch.

  5. Spicy Kick: If you love spice, throw in some sliced jalapeños or cayenne pepper in your dressing for a fun kick!

Chef’s Notes

Cooking is not just about creating a dish but about cherishing the moments that surround it. There was a time when I couldn’t make a vinaigrette to save my life. I would mix the ingredients and hope for the best! But as I learned from experience, the key is to trust your palate. Taste as you go. Remember, cooking doesn’t have to be perfect; it just needs to be made with love and a dash of creativity! Over the years, this salad has evolved as I’ve played with the ingredients. Sometimes I’ll throw in herbs, or adjust the vinaigrette ratios—cooking is an art, and I’m proud to keep discovering new strokes.

FAQs and Troubleshooting

1. Can I meal prep this salad?
Absolutely! Just keep the dressing separate until you’re ready to eat. The greens and fruits can get soggy if dressed too early.

2. How do I store leftovers?
Any leftovers should be stored in an airtight container in the fridge for up to 24 hours. The fresher, the better!

3. What if I don’t like feta cheese?
No worries! You can replace it with goat cheese, a dairy-free option, or simply leave it out for a lighter take.

4. How can I prevent the fruits from browning?
Keep the fruits in the fridge until you’re ready to serve. If they’re cut, a splash of lemon juice can help prevent browning.

Nutritional Info

While the nutritional values can vary, this Strawberry, Blueberry & Greens Salad is generally low in calories and packed with antioxidants, vitamins, and healthy fats. The addition of nuts adds protein and omega-3s, while fruits bring in fiber and hydration, making this salad a powerhouse of nutrition.

In conclusion, if you’re looking for a vibrant, delicious, and easy-to-make salad that will light up your meals, look no further than this Strawberry, Blueberry & Greens Salad with Honey Vinaigrette. Embrace the freshness, savor the flavors, and above all—enjoy each bite! Happy cooking, friends!

Print

Strawberry, Blueberry & Greens Salad with Honey Vinaigrette

A vibrant salad featuring fresh strawberries, blueberries, mixed greens, and a homemade honey vinaigrette, perfect for summer picnics and light meals.

  • Prep Time: 15 minutes
  • Cook Time: 10 minutes
  • Total Time: 25 minutes
  • Yield: 4 servings
  • Category: Salad
  • Method: Mixing
  • Cuisine: American
  • Diet: Vegetarian

Ingredients

  • Mixed greens (spinach, arugula, or your choice)
  • Fresh strawberries, sliced
  • Fresh blueberries
  • Feta cheese, crumbled
  • Walnuts or pecans, toasted
  • Honey
  • Olive oil
  • Apple cider vinegar
  • Salt and pepper to taste

Instructions

  1. Prepare the greens by washing them thoroughly and drying completely.
  2. Slice the strawberries into quarters.
  3. Combine the sliced strawberries and fresh blueberries in a large mixing bowl.
  4. Toast the walnuts or pecans in a skillet over medium-low heat for about 5-7 minutes.
  5. Make the vinaigrette by whisking together honey, olive oil, and apple cider vinegar in a small bowl.
  6. Assemble the salad by layering greens and the fruit mixture, then topping with feta and nuts.
  7. Toss gently with dressing and serve immediately.

Notes

Consider serving in individual bowls or on platters. Pair with grilled chicken or fish for a heartier meal.

Nutrition

  • Serving Size: 1 serving
  • Calories: 250
  • Sugar: 15g
  • Sodium: 200mg
  • Fat: 8g
  • Saturated Fat: 2g
  • Unsaturated Fat: 6g
  • Trans Fat: 0g
  • Carbohydrates: 35g
  • Fiber: 5g
  • Protein: 7g
  • Cholesterol: 10mg

Keywords: salad, summer salad, strawberry salad, blueberry salad, healthy recipe, picnic salad

Did you make this recipe?

Share a photo and tag us — we can't wait to see what you've made!

May 31, 2026 |

No-Bake Blueberry Pretzel Salad Recipe: Creamy Crunch in 15 Minutes

No-bake blueberry pretzel salad served in a bowl with vibrant blueberries and pretzel crust

Blueberry Pretzel Salad: A Cool Summer Treat!

Welcome to my kitchen, where we’re diving into a classic dessert that plays a sweet symphony on your taste buds while bringing a wave of nostalgia: Blueberry Pretzel Salad! Now, this isn’t your ordinary salad filled with leafy greens—oh no! This is a delightful blend of sweet, salty, and creamy goodness that feels like a celebration in a bowl. Whether you serve it at a summer picnic, a holiday gathering, or simply as a refreshing treat at home, this dessert salad is bound to leave everyone smiling and craving more.

Picture this: It’s a warm summer day, and the sun is shining. The air is filled with the laughter of friends and family, and you’re seated at a long table adorned with a colorful spread of delicious food. In the center, there’s a bowl of that beautiful blueberry pretzel salad—the eye-catching layers of salty pretzels, creamy filling, and vibrant blueberries beckoning everyone to dig in. This dish isn’t just about flavor; it’s encapsulated with memories, love, and moments shared around the table.

This delightful dessert is so easy to make, you’ll wonder why you didn’t whip it up sooner! Not only does it tantalize your taste buds, but it also brings a sense of joy and nostalgia that keeps you coming back for more. Are you ready to create your own Blueberry Pretzel Salad that will be the star of your next gathering? Let’s roll up our sleeves and get into the kitchen—trust me, it’s going to be a delicious journey!

A Taste of Nostalgia

Growing up, summer gatherings with my family were always a treat, but the highlight was undoubtedly my grandma’s famous Blueberry Pretzel Salad. Every time she’d make it, the aroma of melted butter combined with the crunch of salty pretzels filled the room, setting the stage for something truly special. I remember standing on tiptoes, peeking into the fridge, eagerly waiting for our after-meal dessert.

With each bite of that sweet and creamy salad, I was transported to a world where everything felt light and joyful. The crunch of the pretzels perfectly balanced the velvety cream cheese mixture, and the blueberries provided a burst of flavor that was always refreshing. It wasn’t just a dessert; it was a family tradition that united us, sparking laughter and stories as we savored every last bite.

To this day, I love recreating that same dish, evoking those cherished memories while adding my own twist. It’s amazing how food has this magical ability to transport us back in time, don’t you think? So grab your apron and let’s make some new memories around this timeless dessert!

Ingredients

Here’s what you’ll need to whip up your very own Blueberry Pretzel Salad. Each component brings something special to this dish!

  • 2 cups pretzel sticks
    These provide that delicious salty crunch! You can substitute with gluten-free pretzels if you need a gluten-free option.

  • 3/4 cup butter, melted
    This forms the base for our pretzel crust and adds richness. If you’re looking for a healthier option, you can try coconut oil for a tropical twist.

  • 1/2 cup sugar
    Sugar balances the saltiness of the pretzels and enhances the flavors of our cream cheese filling. You can swap it with maple syrup or agave nectar for a more natural sweetener.

  • 8 oz cream cheese, softened
    This creamy base is what makes our salad luscious and decadent. Neufchâtel cheese is a great lower-fat substitute!

  • 1 cup powdered sugar
    For that smooth sweetness! If you want a grain-free alternative, powdered erythritol will work too.

  • 1 cup whipped topping
    This adds a light and airy texture. If you prefer a homemade touch, use freshly whipped cream instead!

  • 2 cups blueberries
    Fresh or frozen—both work wonderfully. Swap with raspberries or strawberries for a unique flavor twist.

  • 1 cup water
    This will be used to dissolve our gelatin.

  • 1/2 cup sugar
    Another layer of sweetness for the blueberry layer! Same sweetener options apply here.

  • 1 package (3 oz) blueberry gelatin
    This packs a punch of blueberry flavor, giving our salad its beautiful color and sweetness. If you’d like to avoid artificial sweeteners, look for natural gelatin options.

Step-by-Step Instructions

Ready to create this beautiful Blueberry Pretzel Salad? Here’s how to bring it all together!

  1. Preheat your oven to 350°F (175°C).
    Preheating is essential for an even bake, so don’t skip this step!

  2. Crush the pretzel sticks.
    Place the pretzel sticks in a large zip-top bag and crush them gently with a rolling pin or meat mallet. You want a mixture of large and small pieces for texture. Trust me, the crunch will be amazing!

  3. Combine pretzels and butter.
    In a bowl, mix the crushed pretzels, melted butter, and 1/2 cup sugar until fully combined. This will create that irresistible salty crust. The melted butter helps hold everything together!

  4. Spread mixture in a baking dish.
    Press the pretzel mixture evenly into the bottom of a 9×13-inch baking dish. It’s important to pack it down well, as this will serve as the crust for our salad.

  5. Bake the pretzel crust.
    Pop the baking dish into your preheated oven and bake for about 10 minutes until golden brown. Keep an eye on it—over-baking can lead to a hard crust!

  6. Let it cool.
    Remove the dish from the oven and let it cool completely while you prepare the filling. This is the perfect time to snag a sip of your favorite drink!

  7. Make the cream cheese filling.
    In a large bowl, beat the softened cream cheese and powdered sugar together until smooth and creamy. You want a smooth texture—this is the heart of our salad! A handheld mixer works wonderfully here.

  8. Fold in the whipped topping.
    Gently fold in the whipped topping until fully incorporated. This will add lightness to our mixture! Take care not to deflate the fluffiness of the whipped topping.

  9. Spread the cream cheese mixture.
    Once your pretzel crust has cooled, spread the cream cheese mixture evenly over the crust. Use a spatula to get it nice and smooth.

  10. Prepare the blueberry layer.
    In a separate bowl, dissolve the blueberry gelatin in hot water, stirring until completely dissolved. Then, add 1/2 cup of sugar and mix well. This step is essential, as it brings that vibrant blueberry flavor to life!

  11. Add the blueberries.
    Stir in the blueberries gently, ensuring they’re evenly distributed throughout the mixture.

  12. Pour the blueberry mixture over the cream cheese layer.
    Gently pour the gelatin mixture over the cream cheese layer in your baking dish, spreading it out evenly. You want it to set beautifully atop the creamy filling.

  13. Chill and set.
    Cover with plastic wrap and place in the refrigerator for at least 4 hours, or overnight if possible. This allows all the flavors to meld beautifully!

  14. Serve and Enjoy!
    Slice into squares or scoop into bowls, and serve chilled. This dessert is ready to impress with its layered beauty!

Serving Suggestions

Plating your Blueberry Pretzel Salad is easy and fun! You can serve it directly from the baking dish or scoop individual servings into glass dessert cups for an elegant touch. Add a sprig of mint or a sprinkle of fresh blueberries on top for a pop of color and freshness. Enjoy every delightful layer, and watch the smiles grow with each delicious bite!

Recipe Variations

Feeling adventurous? Here are a few creative twists you can try with your Blueberry Pretzel Salad:

  • Mixed Berry Medley: Swap out blueberries for a mix of your favorite berries like strawberries, raspberries, or blackberries for a colorful twist.
  • Nutty Crunch: Add some chopped nuts like pecans or walnuts into the pretzel crust for an additional crunch and flavor.
  • Infused Cream Cheese: Try adding lemon zest or a splash of almond extract to the cream cheese mixture for an elevated flavor profile.
  • Chocolate Drizzle: For a decadent treat, drizzle melted chocolate over the top before chilling.
  • Vegan Version: Use dairy-free cream cheese and whipped topping for a fabulous vegan-friendly option!

Chef’s Notes

This Blueberry Pretzel Salad has been a staple in my family for as long as I can remember, and I love how every batch seems to come out a little differently. Sometimes I’ll add a bit of lemon zest to brighten the flavor, while other times, I keep it classic. One memorable occasion was when I accidentally used sea salt instead of regular sugar on the crust—they say trial and error is the best teacher! The sweet and salty combination turned out to be deliciously surprising, and I’m still sticking with it for a little extra flair! Every time I make it, I’m reminded of those lovely summer gatherings and the joy of sharing food with loved ones.

FAQs and Troubleshooting

  1. Can I use fresh blueberries instead of frozen?
    Absolutely! Fresh blueberries are perfect for this recipe—just make sure to rinse and dry them lightly before adding them to your gelatin mixture.

  2. How can I store leftovers?
    Store any leftovers in an airtight container in the refrigerator. Enjoy them within 3-4 days for the best freshness.

  3. What should I do if my gelatin doesn’t set?
    If your gelatin isn’t setting, make sure you’re using the correct amount of water. If the layers don’t firm up, you can place it back in the refrigerator for additional time.

  4. Can I make this ahead of time?
    Yes! This salad is perfect for make-ahead; preparing it the day before lets all the flavors meld beautifully.

Nutritional Info (Optional)

(Nutritional information may vary based on specific ingredients and serving sizes but here’s a rough estimate per serving, based on 12 servings)

  • Calories: 215
  • Total Fat: 11g
  • Saturated Fat: 6g
  • Cholesterol: 30mg
  • Sodium: 150mg
  • Total Carbohydrates: 29g
  • Dietary Fiber: 1g
  • Sugars: 15g

With this Blueberry Pretzel Salad, you’re not just creating a dessert; you’re crafting an experience filled with laughter and warmth. So grab your ingredients, gather your loved ones, and let’s make some delicious memories together! Happy cooking!

Print

Blueberry Pretzel Salad

A delightful blend of sweet, salty, and creamy goodness, this Blueberry Pretzel Salad is the perfect cool summer treat that everyone will love.

  • Prep Time: 20 minutes
  • Cook Time: 10 minutes
  • Total Time: 240 minutes
  • Yield: 12 servings 1x
  • Category: Dessert
  • Method: Baking
  • Cuisine: American
  • Diet: Vegetarian

Ingredients

Scale
  • 2 cups pretzel sticks
  • 3/4 cup butter, melted
  • 1/2 cup sugar
  • 8 oz cream cheese, softened
  • 1 cup powdered sugar
  • 1 cup whipped topping
  • 2 cups blueberries
  • 1 cup water
  • 1/2 cup sugar
  • 1 package (3 oz) blueberry gelatin

Instructions

  1. Preheat your oven to 350°F (175°C).
  2. Crush the pretzel sticks.
  3. Combine pretzels and butter.
  4. Spread mixture in a baking dish.
  5. Bake the pretzel crust for about 10 minutes until golden brown.
  6. Let it cool.
  7. Make the cream cheese filling.
  8. Fold in the whipped topping.
  9. Spread the cream cheese mixture.
  10. Prepare the blueberry layer.
  11. Add the blueberries.
  12. Pour the blueberry mixture over the cream cheese layer.
  13. Chill and set for at least 4 hours.
  14. Serve and Enjoy!

Notes

This dessert can be made ahead of time and stored in the refrigerator. For an extra twist, try mixing in different berries or adding nuts.

Nutrition

  • Serving Size: 1 serving
  • Calories: 215
  • Sugar: 15g
  • Sodium: 150mg
  • Fat: 11g
  • Saturated Fat: 6g
  • Unsaturated Fat: 5g
  • Trans Fat: 0g
  • Carbohydrates: 29g
  • Fiber: 1g
  • Protein: 3g
  • Cholesterol: 30mg

Keywords: blueberry, pretzel, salad, dessert, summer treat

Did you make this recipe?

Share a photo and tag us — we can't wait to see what you've made!

May 31, 2026 |

No-Bake Blueberry Greek Yogurt Bites: High-Protein Snack

No-bake blueberry Greek yogurt bites, a healthy high-protein snack

Refreshingly Delicious Blueberry Greek Yogurt Bites

When it comes to healthy snacking, it’s easy to find yourself reaching for the same old options—maybe a handful of nuts or a sad apple that’s been sitting in the fridge a little too long. Well, my dear foodies, I’m here to change that narrative with a vibrant, tasty, and oh-so-easy recipe that you’ll be craving week after week: Blueberry Greek Yogurt Bites! These delightful little bites are a perfect blend of creamy Greek yogurt, juicy blueberries, and a touch of sweetness, all frozen to create a satisfying and refreshing treat.

As a chef, I see food as a celebration, and snacks like these are the perfect way to bring joy into your everyday routine. Picture this: it’s a sunny afternoon; you’re lounging on your patio or perhaps enjoying a picnic in the park. You unwrap a Blueberry Greek Yogurt Bite, take a bite, and instantly feel a wave of happiness wash over you. Who says healthy eating can’t be fun?

And the best part? These bites are super customizable! Whether you’re looking for a morning pick-me-up, a midday boost, or a healthier dessert option, these creamy, fruity delights will keep you energized without any guilt. Ready to dive in? Let’s roll up our sleeves and make these scrumptious bites together!


My Blueberry Journey: A Sweet Slice of Nostalgia

Growing up, my grandmother had a knack for turning every family gathering into a delicious feast, and one of her specialties was berry picking. Each summer, we’d eagerly await those weekend morning trips to the local farm, armed with buckets and sun hats, ready to hunt for the ripest blueberries. The feeling of plucking those plump blueberries off the bushes, staining our fingers with vibrant blue juice, was magical. We weren’t just picking fruit; we were making memories.

After a fruitful day at the farm, my grandmother would gather us all in the kitchen to whip up her famous blueberry yogurt parfaits. One bite of those creamy layers filled with blueberries and a drizzle of honey takes me straight back to those sun-soaked afternoons. Fast forward to today, and while I may not be berry picking every weekend, I still seek to invite that nostalgia into my cooking. That’s where these Blueberry Greek Yogurt Bites come in—a modern twist that’s just as delightful and packed with love!


Ingredients

Let’s gather our ingredients and get ready to create something fabulous:

  • 1 cup Greek yogurt: The star of our dish! Greek yogurt is rich and creamy, packed with protein, and supports gut health. If you want a non-dairy option, go for coconut or almond-based yogurt.

  • 1 cup fresh blueberries: Bursting with antioxidants and natural sweetness, blueberries add a delicious-tart flavor. If fresh are out of season, feel free to use frozen blueberries—just thaw and drain any excess water before use.

  • 2 tablespoons honey or maple syrup: This adds a touch of sweetness to balance the tanginess of the yogurt. For a raw alternative, agave nectar works wonderfully too!

  • 1 teaspoon vanilla extract: A hint of vanilla elevates the flavors and gives our bites that extra oomph. You could also use almond extract for a fun twist!

  • 1/2 cup granola or nuts (optional): This is all about texture! Granola brings a delightful crunch, while nuts like chopped almonds or walnuts can add healthy fats. Feel free to skip this if you prefer a smoother bite.


Step-by-Step Instructions

  1. Prep Your Ingredients: Gather all your ingredients and ensure your blueberries are clean and dry. This will really make a difference when you pop these bites out of the mold!

  2. Mix the Yogurt and Sweetener: In a mixing bowl, combine the Greek yogurt, honey (or maple syrup), and vanilla extract. Use a spatula to mix until smooth and well incorporated. Here’s a chef hack: taste it! Adjust the sweetness to your liking. If you love it sweeter, just add a drizzle more of honey, and mix again.

  3. Fold in the Blueberries: Now for the fun part! Gently fold in the fresh blueberries into your yogurt mixture. Be gentle to avoid mashing them up; we want those lovely bursts of flavor in every bite.

  4. Pour into Molds: Grab your silicone ice cube trays or muffin tins (lightly greased for easy release). Spoon the yogurt-blueberry mixture into the molds, filling them about 3/4 full. If you’re using granola or nuts, sprinkle some on top for an added crunch.

  5. Freeze: Place the molds in the freezer and allow the mixture to freeze for at least 4 hours, or until completely firm.

  6. Pop Them Out: Once frozen, remove the molds from the freezer. To release the bites, simply pull gently on the sides of the silicone mold or run warm water over the outside of a metal mold. They should pop right out!

  7. Serve & Enjoy: Enjoy immediately, or store the bites in an airtight container in the freezer for those moments when you need a pick-me-up!


Serving Suggestions

These Blueberry Greek Yogurt Bites are best enjoyed fresh from the freezer! Serve them on a colorful platter for a fun snack option at parties or keep them ready in your freezer for a quick grab-and-go breakfast. They also work beautifully alongside a warm slice of whole-grain toast or a smoothie for a balanced breakfast spread.


Recipe Variations

Get creative and shake things up with these fun spins:

  • Berry Blast: Substitute blueberries for your favorite berries—think strawberries, raspberries, or even cherries! Mix and match for a berry medley.

  • Nutty Delight: Add a tablespoon of nut butter (like almond or peanut butter) to your yogurt mixture for a creamy, protein-packed treat.

  • Zesty Citrus: Add the zest of a lemon or orange to the mixture for a zesty pop of flavor that brightens up the bites.

  • Chocolate Swirl: For the chocolate lovers, drizzle some melted dark chocolate over the tops of the bites before freezing, or fold in some mini chocolate chips!


Chef’s Notes

This recipe holds a special place in my heart! I originally concocted it when I was looking for a healthy snack option to keep my energy up during long cooking sessions. As my friends began to taste them, they kept coming back with requests for more! What started as a simple snack evolved into a delicious treat that friends and family adore. Now, it’s one of my go-to recipes for potlucks, and they always vanish before I get the chance to enjoy one myself.

Remember, cooking is all about experimenting. If you have leftover yogurt or fruit, throw it into this mix! It may surprise you how delightful your accidental creations turn out.


FAQs and Troubleshooting

1. Can I use frozen blueberries?
Absolutely! Just thaw them beforehand and drain any excess liquid so they don’t water down your mixture.

2. What if my bites are too hard?
If your bites end up too frozen, you can let them sit at room temperature for a few minutes to soften before enjoying them, or pop them in the microwave for just a few seconds to get the perfect creamy texture.

3. I don’t have silicone molds—what should I do?
No worries! You can use paper muffin cups placed in a regular muffin tin, or even an ice cube tray—just make sure to lightly grease it for the easiest release.

4. How long can I store these bites in the freezer?
These yogurt bites can be stored in an airtight container for up to 3 months. Just make sure to keep them frozen until you’re ready to eat!


Nutritional Info

These Blueberry Greek Yogurt Bites are not only a treat for your taste buds but also a healthy choice. Each bite is packed with protein, antioxidants, healthy fats (if you include nuts), and a touch of natural sweetness—making them the perfect guilt-free snack option.


Now that you’ve got the scoop on these delightful Blueberry Greek Yogurt Bites, it’s time to head into your kitchen and whip up a batch. Trust me, not only will they satisfy your cravings, but they’ll also bring a smile to your face and love to your heart! Happy snacking!

Print

Refreshingly Delicious Blueberry Greek Yogurt Bites

A vibrant, tasty, and healthy snack made with creamy Greek yogurt and juicy blueberries, perfect for a guilt-free treat.

  • Prep Time: 15 minutes
  • Cook Time: 0 minutes
  • Total Time: 255 minutes
  • Yield: 12 servings 1x
  • Category: Snack
  • Method: Freezing
  • Cuisine: American
  • Diet: Vegetarian

Ingredients

Scale
  • 1 cup Greek yogurt
  • 1 cup fresh blueberries
  • 2 tablespoons honey or maple syrup
  • 1 teaspoon vanilla extract
  • 1/2 cup granola or nuts (optional)

Instructions

  1. Prep Your Ingredients: Gather all your ingredients and ensure your blueberries are clean and dry.
  2. Mix the Yogurt and Sweetener: In a mixing bowl, combine the Greek yogurt, honey (or maple syrup), and vanilla extract. Use a spatula to mix until smooth.
  3. Fold in the Blueberries: Gently fold in the fresh blueberries into your yogurt mixture.
  4. Pour into Molds: Spoon the yogurt-blueberry mixture into silicone ice cube trays or muffin tins, filling them about 3/4 full.
  5. Freeze: Place the molds in the freezer and allow to freeze for at least 240 minutes, or until firm.
  6. Pop Them Out: Remove the molds from the freezer and release the bites by pulling gently on the sides.
  7. Serve & Enjoy: Enjoy immediately or store in an airtight container in the freezer.

Notes

These bites can be customized with various fruits, nuts, or flavorings. Perfect for grab-and-go snacks!

Nutrition

  • Serving Size: 1 bite
  • Calories: 50
  • Sugar: 6g
  • Sodium: 40mg
  • Fat: 1g
  • Saturated Fat: 0g
  • Unsaturated Fat: 1g
  • Trans Fat: 0g
  • Carbohydrates: 10g
  • Fiber: 1g
  • Protein: 2g
  • Cholesterol: 5mg

Keywords: blueberry, yogurt bites, healthy snacks, frozen treats, easy recipe

Did you make this recipe?

Share a photo and tag us — we can't wait to see what you've made!

May 31, 2026 |

Blueberry Overnight Oats: 4-Ingredient Make-Ahead Breakfast

Delicious blueberry overnight oats in a jar with fresh blueberries on top.

Blueberry Overnight Oats: A Delicious Way to Start Your Day

Welcome to another scrumptious chapter at Clean Plate Cravings! Today, we’re diving into the vibrant world of blueberry overnight oats—perfect for busy mornings when you need a nourishing, flavorful meal without the fuss. Let’s be honest, who doesn’t love waking up to a delicious breakfast that’s already prepped and waiting in the fridge? Blueberry overnight oats are not only delightful, but they also pack a nutritional punch that sets the tone for a fantastic day ahead.

There’s something magical about starting your day with oats and berries. The combination of creamy yogurt, juicy blueberries, and nutty oats creates a texture paradise. It’s a celebration of flavors that reminds me of lazy summer mornings spent in my grandmother’s kitchen, where the sweet scent of baking wafted through the air. I remember her making a big bowl of oatmeal topped with whatever berries she could find. She always claimed that berries were nature’s candy, and I couldn’t agree more!

In this post, I want to share my favorite blueberry overnight oats recipe with you. It’s simple, nourishing, and can be customized to fit your taste. So grab your favorite jar, and let’s get cooking (or should I say prepping)!

A Little Bit of Nostalgia in Every Bite

Growing up, my summers revolved around family gatherings filled with laughter, delicious food, and, most importantly, fresh fruit. The highlight was always our annual berry-picking adventure. My friends and I would race each other to see who could fill their baskets first while munching on the freshest berries we’d picked. Blueberries became a staple in my childhood, and it was only natural for me to incorporate them into my breakfast.

One summer morning, I decided to make a batch of overnight oats using the blueberries we had just picked. I let the oats soak overnight, excited to wake up to my little creation. To my delight, the oats absorbed all the berry goodness, and the result was an explosion of flavors. Ever since that day, blueberry overnight oats have held a special place in my heart—and my breakfast rotation!

Ingredients

Here’s what you’ll need to whip up these delightful blueberry overnight oats:

  • 2 cups blueberries (fresh or frozen): These little gems are packed with antioxidants and give a burst of sweetness and flavor. If you can’t find blueberries, feel free to substitute with strawberries, raspberries, or blackberries!

  • 2 tablespoons maple syrup: This natural sweetener adds a lovely caramel-like flavor. If you prefer, honey or agave syrup can be great alternatives.

  • 2 cups old-fashioned rolled oats: These oats are the star of the show! They absorb liquid perfectly overnight. Quick oats will work in a pinch, but they’ll give a different texture.

  • 4 tablespoons chia seeds: Not only do chia seeds help thicken the oats, but they’re also loaded with Omega-3 fatty acids. Flaxseeds can be a great substitute if you’re looking for variety.

  • 3 cups water or milk: Use your preferred liquid! Almond milk, oat milk, or regular cow’s milk all work terrific here.

  • 1 cup Greek yogurt (vanilla or blueberry): This adds creaminess and protein to your oats. If you’re dairy-free, a non-dairy yogurt works just as well.

  • 2-3 teaspoons vanilla extract: This elevates the flavor and makes the oats taste delightfully sweet.

  • 1 pinch salt: Just a touch of salt brings all the flavors together beautifully.

Step-by-Step Instructions

Now that you have your ingredients ready, let’s get into the nitty-gritty of preparing these blueberry overnight oats. Follow these simple steps, and you’ll be rewarded with a breakfast that’s as beautiful as it is delicious!

  1. Combine all ingredients: In a large mixing bowl or a jar (I love using mason jars for this), combine the rolled oats, chia seeds, and a pinch of salt. Mix them until they are evenly distributed. This little step ensures that each spoonful has that perfect texture!

  2. Add the liquid: Slowly pour in the milk (or water) while stirring to avoid clumps. This is where the magic happens as the oats begin soaking up the liquid. You’re creating the foundation of your overnight oats.

  3. Sweeten it up: Drizzle in the maple syrup and vanilla extract. Stir well to ensure everything is evenly mixed. This is the stage where your oats start to take on amazing flavors.

  4. Mix in the yogurt: Fold in the Greek yogurt gently, helping to create a creamy consistency. You want to keep your oats light and fluffy, so be gentle!

  5. Incorporate the blueberries: Gently stir in the blueberries. If you’re using frozen blueberries, there’s no need to thaw them—they will soften overnight, releasing their delicious juices into the oats.

  6. Chill overnight: Cover your jar or bowl and refrigerate overnight (or at least for 4-6 hours). This is when the oats soak up all that yummy goodness, transforming into a delightful breakfast.

  7. Serve and enjoy: The next morning, give your oats a good stir. If the mixture is too thick, splash in a bit more milk to loosen it up. You can also top it off with extra blueberries, a sprinkle of nuts, or a dollop of yogurt for a beautiful presentation.

Serving Suggestions

These blueberry overnight oats are incredibly versatile! To serve, scoop them into a bowl or enjoy straight from the jar. Consider garnishing with a handful of fresh blueberries, a sprinkle of granola for a satisfying crunch, or a drizzle of maple syrup on top. It’s all about visual appeal when you’re starting your day!

Recipe Variations

  • Nutty Delight: Add a tablespoon of your favorite nut butter (like almond or cashew) for a hearty, protein-packed twist.

  • Tropical Vibes: Swap blueberries for diced mango or pineapple, and add a bit of coconut milk for a taste of the tropics.

  • Spicy Cinnamon: Add a dash of cinnamon or nutmeg for a warm, cozy flavor that pairs beautifully with blueberries.

  • Choco-Berry: Mix in a tablespoon of cocoa powder for a chocolaty, berry delight. You can also top it with dark chocolate chips!

  • Vegan Creaminess: Use vegan yogurt and substitute maple syrup with agave nectar to make it completely plant-based.

Chef’s Notes

This recipe has evolved through my own kitchen experiences. At first, I made a straightforward version with just oats and water, but as I experimented with ingredients, I found that adding Greek yogurt really took it to another level. I love that this dish is so adaptable! Sometimes, I even throw in some pumpkin puree in the fall or swap out the blueberries for whatever berry is in season—and let me tell you, that’s where the fun really begins!

I have a funny story about one of my first attempts to make these overnight oats. I got so excited about adding toppings (I mean, who wouldn’t?) that I forgot to put the oats in the refrigerator! I woke up to a countertop mess of what was meant to be breakfast. Lesson learned: make sure the lids are on tight and the jars are in the fridge before you hit the hay!

FAQs and Troubleshooting

1. Can I use quick oats instead of rolled oats?
While you can use quick oats, they have a different texture and can become overly mushy. Rolled oats are preferred for a heartier bite.

2. My overnight oats are too thick. What should I do?
No worries! Simply add a splash of milk (or water) and stir until you reach your desired consistency.

3. Can I prepare these oats for more than one day in advance?
Absolutely! You can prep a few jars at once and keep them in the fridge for up to four days. Just avoid adding fresh toppings until you’re ready to serve to keep them fresh.

4. How can I make it nut-free?
Simply omit any nuts or nut butters and swap in sunflower seed butter instead for a nut-free option.

Nutritional Info

These blueberry overnight oats make for a wholesome breakfast, with essential nutrients packed into every jar.

  • Calories: Approximately 250-300 per serving
  • Protein: 10-15g (depending on yogurt choice)
  • Fiber: 7-8g
  • Fat: 5g

In summary, blueberry overnight oats are not just a meal; they are a canvas for creativity in the kitchen. This delightful breakfast makes healthy eating easy, flavorful, and fun. Enjoy the vibrant colors, delicious flavors, and little bursts of blueberry joy with every bite. Whether you’re a busy professional, a student cramming for exams, or a parent juggling morning routines, these overnight oats have got your back. So roll up those sleeves, grab your jars, and let’s make every breakfast a joyful, energizing experience! Happy cooking, and enjoy every delicious spoonful!

Print

Blueberry Overnight Oats

A delicious and nutritious recipe for blueberry overnight oats, perfect for busy mornings.

  • Prep Time: 15 minutes
  • Cook Time: 0 minutes
  • Total Time: 480 minutes
  • Yield: 4 servings 1x
  • Category: Breakfast
  • Method: No Cook
  • Cuisine: American
  • Diet: Vegetarian

Ingredients

Scale
  • 2 cups blueberries (fresh or frozen)
  • 2 tablespoons maple syrup
  • 2 cups old-fashioned rolled oats
  • 4 tablespoons chia seeds
  • 3 cups water or milk
  • 1 cup Greek yogurt (vanilla or blueberry)
  • 23 teaspoons vanilla extract
  • 1 pinch salt

Instructions

  1. Combine all ingredients in a large mixing bowl or jar.
  2. Add the liquid while stirring to avoid clumps.
  3. Sweeten it up with maple syrup and vanilla extract.
  4. Mix in the Greek yogurt gently.
  5. Incorporate the blueberries.
  6. Chill overnight in the refrigerator.
  7. Serve and enjoy the next morning.

Notes

These overnight oats can be customized with various toppings and ingredients.

Nutrition

  • Serving Size: 1 serving
  • Calories: 275
  • Sugar: 8g
  • Sodium: 150mg
  • Fat: 5g
  • Saturated Fat: 1g
  • Unsaturated Fat: 4g
  • Trans Fat: 0g
  • Carbohydrates: 47g
  • Fiber: 8g
  • Protein: 12g
  • Cholesterol: 5mg

Keywords: blueberry, overnight oats, healthy breakfast, easy recipe, nutritious meal

Did you make this recipe?

Share a photo and tag us — we can't wait to see what you've made!

May 31, 2026 |

Blueberry Crisp

Homemade Blueberry Crisp with a golden oat topping

Indulge in Delight: Easy Blueberry Crisp Recipe

Welcome, fellow food lovers! Today, we’re diving deep into a dish that not only brings joy with each bite but also carries with it a spectrum of delightful memories—Blueberry Crisp. Picture this: a warm, bubbling layer of sweet blueberries, topped with a golden, crunchy, buttery crust that practically sings happiness. If that doesn’t sound like pure bliss, then I don’t know what does!

Blueberry Crisp is one of those desserts that feels like a big hug. It’s the kind of dish that makes any occasion special—whether you’re hosting friends for a summer barbecue, celebrating a casual family gathering, or simply treating yourself after a long week. The best part? It’s a breeze to whip up! I can’t wait to share this easy recipe with all of you, along with a sprinkle of my favorite kitchen stories and tips.

A Slice of Nostalgia

Growing up, my family had a tradition of going to our local farmers’ market every Saturday morning. The air was filled with the sweet scent of fresh fruit, and my siblings and I would dart toward the vibrant stalls bursting with colors. One fateful Saturday, I spotted a mountain of luscious blueberries—glossy, plump, and absolutely irresistible. I convinced my mom to get a few pints, and of course, I insisted we bake something special that afternoon.

Fast forward to our cozy kitchen, where we transformed those sweet blueberries into a delightful crisp. The sounds of bubbling fruit mixing with the crunchy topping filled the air while my mom expertly guided me through each step. I was blissfully covered in flour, with blueberry juice staining my messy apron. As that warm, comforting smell wafted through our home, it wasn’t just a dessert we were creating; it was a cherished memory—a cozy moment of love and laughter that I carry with me to this day.

And so began my love affair with Blueberry Crisp! It’s more than just a dessert; it’s a treasured experience, and every time I whip it up, I’m reminded of those carefree summer days filled with family, laughter, and, of course, mouth-watering treats.

Ingredients

Let’s gear up for our Blueberry Crisp! Here’s what you’ll need:

  • 1 cup sifted all-purpose flour
    This is the base of our crisp topping. Sifting ensures a lighter texture and a better rise. You can substitute whole wheat flour for added fiber or gluten-free flour for a GF version.

  • ½ cup unsalted butter
    Butter is essential for that rich flavor and crispy texture. Ensure it’s at room temperature for easy mixing. If you’re looking for a lighter alternative, you could try coconut oil (just note that it’ll give a slightly different flavor).

  • 1 cup granulated sugar
    Sugar brings sweetness to our blueberries and a delightful crunch to the topping. If you want a healthier option, consider using coconut sugar or honey (adjust the amount based on sweetness preference).

  • ½ teaspoon salt
    A pinch of salt enhances the flavor and balances the sweetness. It’s a small but mighty ingredient!

  • ½ teaspoon vanilla extract
    Vanilla elevates every dessert! If you’re out of vanilla, feel free to use almond extract for an interesting twist.

  • ½ teaspoon baking powder
    This ingredient helps the crisp topping to rise and become light as air.

  • 4 cups fresh blueberries
    The stars of our dish! Fresh blueberries are ideal for maximum flavor, but you can also use frozen; just be sure to thaw and drain them before baking.

  • 2 tablespoons flour (for blueberries)
    This helps to thicken the juices released by the blueberries, making it less soupy.

  • 2 tablespoons granulated sugar (for blueberries)
    We’re sweetening the fruit to balance their natural tartness. Adjust according to your taste!

Step-by-Step Instructions

Ready to get baking? Let’s make this scrumptious Blueberry Crisp together!

1. Preheat Your Oven

First things first, crank up that oven to 350°F (175°C). Preheating is crucial—it ensures that your crisp will bake evenly and achieve that desired golden color.

2. Prepare the Blueberries

In a medium bowl, combine 4 cups of fresh blueberries with 2 tablespoons of sugar and 2 tablespoons of flour. Give them a gentle toss. The sugar will coax out the blueberries’ natural sweetness, while the flour will help to thicken the juice as it bakes. Set this sweet mixture aside while you prepare the topping.

3. Make the Crisp Topping

In a separate large bowl, mix together 1 cup of sifted flour, ½ cup of softened butter, 1 cup of sugar, ½ teaspoon of salt, ½ teaspoon of vanilla extract, and ½ teaspoon of baking powder. Use your fingertips or a pastry blender to combine these ingredients until the mixture resembles coarse crumbs. Think of it as giving your butter a little massage until it’s all blended in!

Chef Tip: If you want an extra crunch, consider adding oats (about ½ cup) to the mixture for more texture.

4. Assemble the Crisp

Grab a baking dish (an 8×8-inch dish works wonderfully). Pour the blueberry mixture into the bottom of the dish, spreading it out evenly. Next, sprinkle the crumbly topping generously over the blueberries, ensuring every berry is covered with love.

5. Bake to Perfection

Place your assembled crisp in the preheated oven and bake for 30-35 minutes, or until the topping is golden and the blueberries are bubbling. You’ll know it’s ready when your kitchen fills with the delicious aroma of baked fruit and sweet sugary goodness.

Chef Hack: If the topping is browning too quickly, you can tent it with a piece of aluminum foil halfway through baking.

6. Let It Cool (If You Can!)

Once your Blueberry Crisp is baked, remove it from the oven and let it cool slightly—if you can wait! This cooling time allows the juices to thicken a bit more, but I won’t blame you for sneaking a spoonful while it’s still warm!

Serving Suggestions

To plate your Blueberry Crisp, scoop out a generous portion and serve it warm in a bowl. For a delightful indulgence, add a scoop of vanilla ice cream on top! The warm crisp with the cold ice cream is an irresistible combo that will have everyone coming back for seconds (and thirds!). Drizzle a touch of caramel sauce for an extra touch of elegance.

Recipe Variations

Feel like experimenting? Here are some creative twists on this classic:

  • Peach & Blueberry Crisp: Replace half of the blueberries with fresh peaches for a juicy twist.
  • Lemon-Basil Bliss: Add the zest of one lemon and chopped fresh basil to the blueberry mixture for a refreshing herbal hint.
  • Nutty Delight: Mix in chopped nuts like almonds or pecans into the topping for an extra crunch.
  • Spice It Up: Add a teaspoon of cinnamon or nutmeg to the topping for a warm, cozy flavor.

Chef’s Notes

This Blueberry Crisp has evolved over time in my kitchen. I remember the first time I made it; it was a bit of a mess! The blueberries erupted like a juicy volcano as I took my first scoop. But hey, that’s the beauty of cooking—it doesn’t have to be perfect! Your kitchen is your space, and mistakes just pave the way for new flavors. Now, I proudly whip up this recipe with confidence, knowing that whether it looks perfect or not, the taste will always be spot-on!

FAQs and Troubleshooting

1. My blueberries turned out too runny—what happened?

This can happen if the blueberries were too ripe or if you didn’t add enough flour to thicken the juices. Make sure to stir the flour in well with the blueberries to absorb excess moisture.

2. Can I use frozen blueberries?

Absolutely! Just make sure to thaw them thoroughly and drain any excess moisture before using. Frozen blueberries will likely create a juicier crisp, so don’t skip the flour!

3. Why is my topping too hard?

If your topping turns out overly hard, it may be due to overmixing. Gently mix until just combined to retain that crumbly texture.

4. Can I make this ahead of time?

Yes! You can prepare the blueberry mixture and the topping separately, then assemble them just before baking. You can also bake ahead and reheat it gently in the oven before serving.

Nutritional Info

This Blueberry Crisp is packed with flavor and mindfulness, making it a delightful treat! One serving has roughly:

  • Calories: 270
  • Fat: 11g
  • Carbohydrates: 41g
  • Fiber: 3g
  • Sugar: 20g

Of course, adjust this based on your substitutions and serving sizes.

So there you have it! A warm and inviting Blueberry Crisp recipe that’s perfect for celebrating sweet moments in life. I hope this dish fills your kitchen with love and inspires you to create wonderful memories just like it did for me. Happy baking, and enjoy every delicious bite!

Print

Easy Blueberry Crisp

A delightful dessert featuring a warm layer of sweet blueberries topped with a crunchy, buttery crust, perfect for any occasion.

  • Prep Time: 15 minutes
  • Cook Time: 35 minutes
  • Total Time: 50 minutes
  • Yield: 8 servings 1x
  • Category: Dessert
  • Method: Baking
  • Cuisine: American
  • Diet: Vegetarian

Ingredients

Scale
  • 1 cup sifted all-purpose flour
  • ½ cup unsalted butter
  • 1 cup granulated sugar
  • ½ teaspoon salt
  • ½ teaspoon vanilla extract
  • ½ teaspoon baking powder
  • 4 cups fresh blueberries
  • 2 tablespoons flour (for blueberries)
  • 2 tablespoons granulated sugar (for blueberries)

Instructions

  1. Preheat your oven to 350°F (175°C).
  2. In a medium bowl, combine the blueberries with sugar and flour and toss gently.
  3. In a separate bowl, mix the flour, butter, sugar, salt, vanilla, and baking powder until it resembles coarse crumbs.
  4. Pour the blueberry mixture into a baking dish and top with the crumbly mixture.
  5. Bake for 30-35 minutes, until the topping is golden and blueberries are bubbling.
  6. Let it cool slightly before serving.

Notes

Serve warm with vanilla ice cream and caramel sauce for an indulgent treat.

Nutrition

  • Serving Size: 1 serving
  • Calories: 270
  • Sugar: 20g
  • Sodium: 200mg
  • Fat: 11g
  • Saturated Fat: 7g
  • Unsaturated Fat: 4g
  • Trans Fat: 0g
  • Carbohydrates: 41g
  • Fiber: 3g
  • Protein: 2g
  • Cholesterol: 30mg

Keywords: blueberry crisp, dessert, easy recipe, baking, summer treat

Did you make this recipe?

Share a photo and tag us — we can't wait to see what you've made!

May 31, 2026 |

Beginner-Friendly 30-Minute Lemon Blueberry Cake Recipe

Delicious lemon blueberry cake slice on a plate with fresh blueberries

The Best Lemon Blueberry Cake: A Zesty Delight for Every Occasion

Welcome back, my fellow food lovers! Today, I’m bursting with excitement to share with you a truly heavenly recipe that perfectly marries the bright, cheerful flavor of lemon with the sweet, juicy burst of blueberries. Whether you’re celebrating a special occasion, hosting a brunch, or simply treating yourself to an indulgent dessert, this Best Lemon Blueberry Cake is going to be your new go-to.

Lemon blueberry cake is not just a dessert; it’s a slice of sunshine on your plate! With a light and fluffy texture combined with a tangy lemon twist, this cake is sure to become a family favorite. Trust me; each bite will make your taste buds dance with joy. And the best part? It’s surprisingly easy to whip up right in your cozy kitchen, which means you can indulge your sweet tooth without spending all day baking. So, grab your apron, and let’s get baking!

A Slice of Nostalgia

Ah, nostalgia! It has a way of transporting us back to simpler times, doesn’t it? One of my fondest memories of baking this cake dates back to my childhood. I remember running into the kitchen one sunny Saturday morning, all excited because my grandmother was visiting. She always brought with her the most delightful recipes and stories of her youth. I can still hear her cheerful laughter as she mixed butter and sugar in a bowl, filling the air with that sweet aroma of baked goodies.

That day, she decided we would make a lemon blueberry cake, using the fresh blueberries that we had just picked from the local farm. As we squeezed the lemons and mixed in the vibrant blueberries, my grandmother shared stories of how she used to bake with her mother. Little did we know we were creating not just a delicious cake but also cherished memories that would last a lifetime. Now, every time I bake this cake, I remember those sunny days spent in the kitchen with her, and it fills my heart with warmth.

Ingredients

Let’s gather our ingredients! Here’s what you’ll need to create this delectable cake:

  • 2 cups all-purpose flour: The backbone of any good cake! This gives the cake structure and a tender crumb. For a gluten-free option, you can substitute with a 1:1 gluten-free flour blend.

  • 1 1/2 cups sugar: Sweetness is essential! Feel free to use coconut sugar for a healthier twist or even a sugar substitute like stevia for a lower-calorie alternative.

  • 1/2 cup unsalted butter, softened: This rich addition helps create a moist and fluffy cake. If you’re dairy-free, opt for coconut oil or a dairy-free butter substitute.

  • 1 cup milk: This adds moisture and richness. You can use almond milk or oat milk for a dairy-free version.

  • 3 large eggs: Eggs provide structure and stability. For a vegan option, try substituting each egg with a tablespoon of ground flaxseed mixed with three tablespoons of water.

  • 1 tablespoon lemon zest: This is where the magic begins! The zest brings an intense citrus flavor that will elevate your cake. Don’t skip this step!

  • 1/4 cup lemon juice: Freshly squeezed lemon juice is the star of the show, imparting that zesty kick. Bottled lemon juice will do in a pinch, but fresh is always best.

  • 1 tablespoon baking powder: This helps our cake rise and become fluffy. Make sure it’s fresh for the best results.

  • 1/2 teaspoon salt: A touch of salt balances the sweetness and enhances flavor.

  • 1 cup blueberries (fresh or frozen): Bursting with sweetness, these little gems add a pop of flavor and color to the cake. If using frozen, no need to thaw—just toss them in straight from the freezer!

  • 1 cup mascarpone cheese: This creamy addition makes for an indulgent frosting. If you can’t find mascarpone, cream cheese is a great alternative.

  • 1/2 cup heavy whipping cream: This creates a light and fluffy texture in the frosting. You can use coconut cream if you’re dairy-free.

  • 1/4 cup lemon curd: For an extra burst of lemon flavor in the frosting! You can buy this or, if you’re feeling adventurous, make your own.

Step-by-Step Instructions

Now, let’s dive into the fun part—baking the cake! Follow these simple steps:

  1. Preheat Your Oven: Start by preheating your oven to 350°F (175°C). This is crucial to ensure our cake bakes evenly.

  2. Prepare Your Baking Pans: Grease and flour two 9-inch round cake pans. You don’t want your cake to stick! Alternatively, you can line the bottoms with parchment paper for easy removal.

  3. Mix the Dry Ingredients: In a medium bowl, whisk together the flour, baking powder, and salt. Mixing them in a separate bowl helps to evenly distribute the baking powder and salt throughout the flour.

  4. Cream the Butter and Sugar: In a large mixing bowl, beat the softened butter and sugar together using an electric mixer on medium speed until it’s light and fluffy (about 3–4 minutes). This crucial step incorporates air into the butter, giving your cake a light texture.

  5. Add the Eggs and Mix: One by one, add in the eggs, mixing well after each addition. Scrape down the sides of the bowl to make sure everything is well combined. This is where our cake starts to become a beautiful batter!

  6. Incorporate the Zest and Juice: Mix in the lemon zest and lemon juice. The batter will smell divine, and you’ll be tempted to keep tasting it. (I won’t tell if you do!)

  7. Combine Dry and Wet Mixtures: Gradually add the dry ingredients to the butter mixture, alternating with the milk. Start and end with the dry ingredients, mixing until just combined. Overmixing can lead to a dense cake, so mix gently!

  8. Fold in the Blueberries: Gently fold in the blueberries using a spatula, being careful not to crush them. This will give our cake those iconic pops of juicy fruit.

  9. Divide and Pour: Pour the batter evenly between the prepared cake pans, smoothing the tops with a spatula.

  10. Bake the Cakes: Bake in your preheated oven for 25-30 minutes, or until a toothpick inserted into the center comes out clean. Keep an eye on them towards the end!

  11. Cool the Cakes: Once done, remove the cakes from the oven and let them cool in the pans for about 10 minutes. Then, turn them out onto a wire rack to cool completely. Patience is key here; we don’t want to frost a warm cake!

  12. Make the Frosting: In a mixing bowl, beat together the mascarpone cheese, heavy cream, and lemon curd until smooth and fluffy. You can add a pinch of sugar here if you like your frosting sweeter.

  13. Assemble the Cake: Place one cake layer on a serving plate. Spread a generous layer of frosting on top, then place the other cake layer on top and frost the top and sides of the cake.

  14. Decorate: For an extra touch, garnish with fresh blueberries and additional lemon zest. This adds a beautiful pop of color and a fresh touch!

Serving Suggestions

To present this luscious cake, I recommend slicing it into generous pieces and serving it on fun, vibrant plates. A sprig of mint or a dusting of powdered sugar on top works wonders for an appealing presentation. You can pair it with a dollop of whipped cream or a scoop of vanilla ice cream for that extra indulgence. Trust me; everyone will be begging for the recipe!

Recipe Variations

Feeling adventurous? Here are a few delightful twists to switch things up:

  • Berry Medley: Swap out blueberries for raspberries or strawberries for a mixed berry flavor fest.

  • Lemon Lavender: Add a teaspoon of dried culinary lavender to the batter for a touch of floral elegance.

  • Gluten-Free: Replace all-purpose flour with a gluten-free flour blend for a delicious gluten-free version.

  • Vegan Delight: Use flax eggs, coconut milk, and a dairy-free alternative for frosting to make it vegan-friendly.

  • Zesty Citrus Addition: Experiment by incorporating orange or lime zest in addition to lemon for a citrus explosion!

Chef’s Notes

You know, every time I bake this cake, it reminds me of how food has an extraordinary power to bring people together. Whether it’s for birthdays, Sunday brunch with the family, or just treating a friend, this cake has a way of creating smiles. I’ve adapted this recipe over time, playing around with different combinations of fruits and flavors, making it a perfect blank canvas for your creative touch.

Oh, and here’s a fun little kitchen story: once, I tried to bake this cake while multitasking and completely forgot to add the baking powder! Let’s just say it turned out to be a very dense but still tasty "lemon blueberry pancake" that my friends and family lovingly still talk about to this day!

FAQs and Troubleshooting

  1. Why did my cake turn out dense?
    Dense cakes are often a result of overmixing the batter or not incorporating enough air. Remember to mix until just combined and not to skimp on cream time!

  2. Can I make this cake ahead of time?
    Absolutely! You can bake the cakes in advance and freeze them. Just wrap them well in plastic wrap after they’ve cooled completely. Thaw and frost on the day of serving.

  3. How do I store leftovers?
    Store any leftover cake in an airtight container at room temperature for up to 2 days or in the fridge for about a week. It’s always best enjoyed fresh!

  4. Can I use frozen blueberries?
    Yes! Frozen blueberries work just as well as fresh ones. Just toss them in the batter straight from the freezer, and you’ll be good to go!

Conclusion

So there you have it! The Best Lemon Blueberry Cake is not just an ordinary cake; it’s a celebration of flavors, memories, and love. With its delightful airy texture and zesty taste, it’s perfect for any occasion, be it a summer picnic or a cozy family gathering. I know you’re going to love it just as much as I do.

Now, get into that kitchen and let your creativity shine. I can’t wait for you to bake this beauty and share your slices of happiness. Remember, cooking should always be a joyful experience. Let’s keep it fresh, simple, and seriously delicious! 🍰

Print

The Best Lemon Blueberry Cake

A delightful lemon blueberry cake that combines zesty lemon flavor with sweet blueberries, perfect for any occasion.

  • Prep Time: 15 minutes
  • Cook Time: 30 minutes
  • Total Time: 45 minutes
  • Yield: 8 servings 1x
  • Category: Dessert
  • Method: Baking
  • Cuisine: American
  • Diet: Vegetarian

Ingredients

Scale
  • 2 cups all-purpose flour
  • 1 1/2 cups sugar
  • 1/2 cup unsalted butter, softened
  • 1 cup milk
  • 3 large eggs
  • 1 tablespoon lemon zest
  • 1/4 cup lemon juice
  • 1 tablespoon baking powder
  • 1/2 teaspoon salt
  • 1 cup blueberries (fresh or frozen)
  • 1 cup mascarpone cheese
  • 1/2 cup heavy whipping cream
  • 1/4 cup lemon curd

Instructions

  1. Preheat your oven to 350°F (175°C).
  2. Prepare two 9-inch round cake pans by greasing and flouring them.
  3. Mix the flour, baking powder, and salt in a medium bowl.
  4. Cream the butter and sugar together until light and fluffy.
  5. Add the eggs one at a time, mixing well after each addition.
  6. Incorporate the lemon zest and lemon juice.
  7. Combine the dry ingredients with the butter mixture, alternating with milk.
  8. Fold in the blueberries gently.
  9. Divide the batter evenly between the prepared cake pans.
  10. Bake for 25-30 minutes until a toothpick comes out clean.
  11. Cool the cakes in pans for 10 minutes, then transfer to a wire rack to cool completely.
  12. Make the frosting by beating mascarpone, heavy cream, and lemon curd until smooth and fluffy.
  13. Assemble the cake by layering frosting between the cake layers and on the outside.
  14. Decorate with fresh blueberries and lemon zest before serving.

Notes

For vegan options, substitute eggs with flaxseed and milk with non-dairy alternatives.

Nutrition

  • Serving Size: 1 slice
  • Calories: 350
  • Sugar: 26g
  • Sodium: 200mg
  • Fat: 18g
  • Saturated Fat: 9g
  • Unsaturated Fat: 7g
  • Trans Fat: 0g
  • Carbohydrates: 48g
  • Fiber: 1g
  • Protein: 5g
  • Cholesterol: 70mg

Keywords: lemon cake, blueberry cake, dessert recipe, baking, easy cake recipe

Did you make this recipe?

Share a photo and tag us — we can't wait to see what you've made!

May 31, 2026 |

One-Bowl Lemon Blueberry Cake: Weeknight-Ready in 30 Minutes

One-bowl lemon blueberry cake topped with fresh berries and lemon zest

Indulge in the Zesty Delight of Lemon Blueberry Cake

Hey there, food lovers! Today, I’m so excited to share one of my all-time favorite recipes with you: Lemon Blueberry Cake. This cake is a slice of sunshine, bringing together the tangy brightness of lemon and the sweet juiciness of blueberries. It’s perfect for any occasion—be it a sunny brunch with friends, a cozy family dinner, or just an indulgent treat to brighten up your day. But enough about why I love it; let’s dive into the deliciousness and the memories it brings!

A Taste of Nostalgia

Growing up, summer weekends were all about family gatherings at my grandmother’s house, where the aroma of baked goods would greet you at the door. One particular Saturday stands out in my mind. My grandma would whip up her famous lemon dessert, which always made a special appearance during berry-picking season. Usually, she’d take the juiciest blueberries we picked from the garden and fold them into a buttery lemon batter, and the result was pure magic.

I can still picture her mixing things up in the kitchen, her hands dusted with flour and a twinkle in her eyes. She had this special technique: she’d zest and squeeze lemons like they were the last on Earth, and you could hardly resist sneaking spoonfuls of that heavenly batter. Once baked, the treats would disappear almost as quickly as she could make them.

Inspired by those sweet moments, I’ve created my own version of a lemon blueberry cake. Each bite is a reminder of simpler times, filled with zest and sweet nostalgia that makes any gathering special. So, roll up your sleeves, grab your apron, and let’s create something beautiful together!

Ingredients You’ll Need

Here’s what you’ll need to bake this delightful Lemon Blueberry Cake:

  • 2 cups all-purpose flour
    A staple for this cake, providing structure and a light texture. You can substitute with gluten-free flour if needed.

  • 1 ½ cups sugar
    This gives the cake its sweetness. For a healthier option, consider coconut sugar or a sugar substitute like erythritol.

  • ½ cup unsalted butter, softened
    It adds richness and flavor. If you want to lighten the recipe, try using applesauce or Greek yogurt instead.

  • 1 cup milk
    Whole milk enhances moisture, but feel free to swap with almond, soy, or oat milk for a dairy-free version.

  • 3 large eggs
    Eggs are essential for structure and moisture. Aquafaba is an excellent egg substitute for our vegan friends!

  • 2 teaspoons baking powder
    This leavening agent makes your cake light and fluffy. Check that it’s fresh for the best rise!

  • 1 teaspoon vanilla extract
    Adds a warm note to the flavor profile. Make your own or use a quality store-bought version.

  • Zest of 1 lemon
    The zest brings that bright, citrusy punch! If you’re in a pinch, bottled lemon juice can also be used but won’t pack the same punch.

  • 1 cup fresh blueberries
    Juicy and sweet, they burst in your mouth with every bite. If fresh isn’t available, frozen blueberries can work too, just toss them in a bit of flour to prevent sinking.

  • Cream cheese frosting (for topping)
    This luscious frosting adds the final touch. You can also use whipped cream for a lighter option.

Step-by-Step Instructions

Now that we have our ingredients ready, let’s bake this beauty! Follow these steps for the ultimate Lemon Blueberry Cake:

  1. Preheat the Oven
    Start by preheating your oven to 350°F (175°C). This ensures that your cake will rise beautifully as soon as it hits the oven. Pro tip: Always preheat your oven for the best results!

  2. Prepare the Pans
    Grease and flour two 9-inch round cake pans. This is crucial; nobody wants a cake that sticks! A little parchment paper on the bottom helps too—extra insurance that it will slide right out.

  3. Mix the Dry Ingredients
    In a medium bowl, whisk together the flour, baking powder, and a pinch of salt. This step is vital to evenly distribute the baking powder and prevent lumps—nobody likes a dense cake!

  4. Cream the Butter and Sugar
    In a large mixing bowl, beat the softened butter and sugar together until light and fluffy. This usually takes about 3-4 minutes. This step incorporates air into your batter, making the cake light and airy.

  5. Add the Eggs and Vanilla
    Next, beat in the eggs, one at a time, mixing well after each addition. Then add your vanilla extract. This is where the magic starts—your batter will transform into something much smoother and fragrant.

  6. Incorporate Lemon Zest
    Stir in the lemon zest for that zesty kick! It’s like sunshine in your bowl. Don’t skimp on this step; zesting releases those lovely oils that will enhance the flavor.

  7. Combine with Dry Ingredients and Milk
    Gradually add the dry mixture to the butter mixture, alternating with the milk. Start and end with the dry ingredients. Mix just until everything is combined—overmixing can lead to a tough cake.

  8. Fold in the Blueberries
    Gently fold in the fresh blueberries using a rubber spatula. Be careful not to crush them too much; we want those juicy bursts in your cake!

  9. Bake
    Pour the batter evenly into the prepared pans. Bake for 25-30 minutes, or until a toothpick inserted in the center of the cakes comes out clean. While they bake, your kitchen will smell like a fruity bakery—trust me!

  10. Cool
    Once baked, let the cakes cool in their pans for about 10 minutes, then transfer to a wire rack to cool completely. Patience is key, as frosting a warm cake is a no-no!

  11. Frost
    Once cooled, generously spread cream cheese frosting on top of one cake layer, carefully placing the second layer on top before frosting the top and sides. Decorate with extra blueberries and lemon zest if you’re feeling fancy!

Serving Suggestions

To serve, slice your glorious Lemon Blueberry Cake and plate it with a fresh mint sprig or a dollop of whipped cream for added flair. It pairs beautifully with a cup of tea or coffee, making it not just a dessert, but a full experience!

Recipe Variations

If you’re feeling adventurous, here are some creative twists for your Lemon Blueberry Cake:

  • Lemon Poppy Seed Switch-Up: Add 2 tablespoons of poppy seeds for a delightful crunch and flavor contrast.
  • Berry Blast: Mix in different berries, like raspberries or blackberries, for a mixed berry cake!
  • Coconut Lemon: Replace some of the butter with coconut oil and add shredded coconut for a tropical vibe.
  • Almond Joy: Substitute almond extract for the vanilla and sprinkle sliced almonds on top for an extra layer of flavor.

Chef’s Notes

This recipe has evolved over the years based on trial and error. I remember the first time I tried to bake this cake; it turned into more of a lemon pudding than a cake! But with each attempt, I learned to balance the flavors and perfect the technique. And now, it’s a staple in my kitchen and with my friends, who can’t resist a slice! Remember, cooking is about experimenting and finding your own voice in the kitchen. Don’t worry about perfection—just love what you make!

FAQs and Troubleshooting

1. Why is my cake dense?
If your cake comes out dense, it might be due to overmixing the batter. Mix just until combined!

2. Can I use frozen blueberries?
Absolutely! Just toss them in a little flour before folding them into the batter to prevent them from sinking.

3. How do I prevent my cake from sticking to the pan?
Greasing and flouring your pans or using parchment paper at the bottom will help keep your cake intact.

4. How can I make it dairy-free?
Substitute the milk with almond milk and the butter with coconut oil or unsweetened applesauce.

Nutritional Info (Optional)

Calories: ~320 per slice (based on 12 servings per cake), Fat: 15g, Carbs: 45g, Protein: 4g. This is a treat, so savor each bite!

So there you have it, my delightful Lemon Blueberry Cake! I hope this recipe brings you as much joy in recreating it as it has brought into my life. Happy baking, and remember, keep it fresh, simple, and seriously delicious! 🍋🫐

Print

Lemon Blueberry Cake

A delightful blend of tangy lemon and sweet blueberries, perfect for any occasion.

  • Prep Time: 15 minutes
  • Cook Time: 30 minutes
  • Total Time: 45 minutes
  • Yield: 12 servings 1x
  • Category: Dessert
  • Method: Baking
  • Cuisine: American
  • Diet: Vegetarian

Ingredients

Scale
  • 2 cups all-purpose flour
  • 1 ½ cups sugar
  • ½ cup unsalted butter, softened
  • 1 cup milk
  • 3 large eggs
  • 2 teaspoons baking powder
  • 1 teaspoon vanilla extract
  • Zest of 1 lemon
  • 1 cup fresh blueberries
  • Cream cheese frosting (for topping)

Instructions

  1. Preheat the oven to 350°F (175°C).
  2. Prepare two 9-inch round cake pans by greasing and flouring them.
  3. Mix the dry ingredients: whisk together the flour, baking powder, and a pinch of salt.
  4. Cream the softened butter and sugar together until light and fluffy.
  5. Add the eggs one at a time, mixing well after each addition, then stir in the vanilla extract.
  6. Incorporate the lemon zest into the batter.
  7. Combine the dry mixture with the butter mixture, alternating with the milk.
  8. Fold in the blueberries gently.
  9. Bake for 25-30 minutes, or until a toothpick comes out clean.
  10. Cool the cakes in their pans for about 10 minutes, then transfer to a wire rack to cool completely.
  11. Frost the cakes with cream cheese frosting once cooled.

Notes

For a lighter option, whipped cream can be used instead of cream cheese frosting. If using frozen blueberries, toss them in flour before folding into the batter.

Nutrition

  • Serving Size: 1 slice
  • Calories: 320
  • Sugar: 20g
  • Sodium: 150mg
  • Fat: 15g
  • Saturated Fat: 8g
  • Unsaturated Fat: 7g
  • Trans Fat: 0g
  • Carbohydrates: 45g
  • Fiber: 1g
  • Protein: 4g
  • Cholesterol: 50mg

Keywords: cake, lemon, blueberry, dessert, baking

Did you make this recipe?

Share a photo and tag us — we can't wait to see what you've made!

May 31, 2026 |

Blueberry Cream Cheese Bread

Delicious slice of blueberry cream cheese bread with fresh blueberries on top

Blueberry Cream Cheese Bread: A Slice of Heaven

Welcome back to Clean Plate Cravings, friends! Today, I’m excited to share with you a recipe that’s as delightful as a lazy Sunday morning and as comforting as a warm hug from grandma: Blueberry Cream Cheese Bread. This recipe is not just any ordinary bread; it’s a luscious treat that’s bursting with juicy blueberries and creamy goodness that you just won’t be able to resist.

When I first encountered blueberry bread, I was at a quaint little café nestled on the edge of town, where the scent of freshly baked goods danced around me and drew me in like a moth to a flame. There was something about the contrast between the sweet, slightly tangy blueberries and the rich cream cheese that intrigued me. I took a bite, and let me tell you, it was an explosion of flavor that made my taste buds do the happy dance!

Blueberry Cream Cheese Bread is the perfect fusion of wholesome ingredients and indulgent flavors. Whether you enjoy it for breakfast with a hot cup of coffee, as an afternoon snack with tea, or simply as a sweet treat any time of day, this bread stands out in all the right ways. And the best part? It’s so easy to whip up that you may just find yourself making it every week!

Are you ready to dive in? Let’s bake something fun together!

A Slice of Nostalgia

Before we get into the nitty-gritty of the recipe, let me take you back down memory lane. Growing up, Saturdays were sacred in my household. My mom had this delightful ritual of baking while the rest of us would still be nestled under our warm blankets. The sweet and comforting aroma of baked goods would waft through the air, drawing us into the kitchen for what felt like magic in the making.

One particular morning, my mom decided to try her hand at blueberry cream cheese bread. I remember the excitement as the bright blue gems popped against the creamy batter, and my brothers and I were on “blueberry watch,” ensuring every single berry made it into the bowl. As the bread baked, we could hardly contain our anticipation; the delightful smell was too much to bear!

When the timer finally rang, we couldn’t wait to dig into the warm, golden loaf. Each slice was thick and luscious, with that gorgeous cream cheese blended throughout, and the tart blueberries balanced out the sweetness perfectly. We spread butter on top—because why not? It was pure bliss. From that day onward, blueberry cream cheese bread became a staple in our home, one I still cherish deeply.

Ingredients You’ll Need

Let’s gather everything you need to whip up this delicious Blueberry Cream Cheese Bread. Here’s what we’re working with:

  • 2 cups all-purpose flour
    A classic choice for baking, all-purpose flour gives the bread its structure. For a healthier twist, try using whole wheat flour—just be sure to adjust the liquid slightly as it can absorb more.

  • 1 cup granulated sugar
    This sugar adds sweetness but can also be swapped for coconut sugar for a more caramel undertone, or you might use a sugar substitute if you’re aiming for lower calories.

  • 1/2 teaspoon salt
    A pinch of salt enhances all flavors, balancing out the sweetness of the blueberries and sugar.

  • 1 tablespoon baking powder
    The star here, baking powder ensures our bread rises to fluffy perfection. If you’re out, you can substitute with 1/2 teaspoon of baking soda combined with 1 teaspoon of lemon juice.

  • 1/2 cup cream cheese, softened
    This ingredient brings a creamy tang to the bread. If you’re looking for a dairy-free option, you could try vegan cream cheese.

  • 1/2 cup butter, softened
    A must for flavor and moisture! If you prefer, melted coconut oil or applesauce can work—a fun way to change the taste!

  • 2 large eggs
    The binding agents here provide structure and moisture. For a vegan alternative, consider using flax eggs (1 tablespoon flaxseed meal with 3 tablespoons water for each egg).

  • 1 teaspoon vanilla extract
    Always use pure vanilla for the best flavor; it’s a game changer! In a pinch, you can use almond extract for a different twist.

  • 1/2 cup milk
    The milk adds moistness; non-dairy milk (like almond or oat) are fantastic swaps if you’re avoiding dairy.

  • 1 cup fresh blueberries
    The star of the show! Fresh blueberries bring sweetness and a burst of flavor. If out of season, feel free to use frozen ones; just don’t thaw them beforehand to keep your batter from getting too colorful.

Step-by-Step Instructions

Now, let’s get down to the fun part—actually making this delicious bread! Follow these step-by-step instructions for a baking experience filled with love and flavor:

  1. Preheat Your Oven:
    Preheat your oven to 350°F (175°C). This initial step is crucial because a properly heated oven leads to perfect baking. Meanwhile, prepare your loaf pan by greasing it well or lining it with parchment paper.

  2. Mix Dry Ingredients:
    In a large mixing bowl, whisk together the all-purpose flour, baking powder, and salt. Make sure they’re well combined—this ensures even baking. Pro-tip: sift the flour for a lighter texture if you want to be super fancy!

  3. Cream the Butter and Sugar:
    In another bowl, combine the softened butter and granulated sugar. Using a hand mixer or a stand mixer, beat them together until the mixture is light and fluffy (about 2-3 minutes). This process incorporates air and makes for a soft bread.

  4. Add the Cream Cheese:
    Next, add the softened cream cheese to the sugar mixture and blend until smooth. Don’t skip this step—cream cheese is what makes this bread decadent!

  5. Incorporate Eggs and Vanilla:
    Crack in those eggs one at a time, mixing well after each addition. Pour in the vanilla extract and mix until everything is combined. This batter should be creamy and luscious!

  6. Add Dry Ingredients & Milk:
    Gradually add the dry ingredients to the creamy mixture, alternating with the milk. Start and end with the flour mixture to keep the batter fluffy. Mix until just combined; be careful not to over-mix!

  7. Gently Fold in Blueberries:
    Using a spatula, gently fold in the fresh blueberries. You want to distribute them evenly without crushing them. Remember, we want those vibrant blue bursts throughout!

  8. Transfer to Loaf Pan:
    Pour the batter into your prepared loaf pan and smooth the top with the spatula. Give it a gentle shake to settle it in.

  9. Bake:
    Bake in the preheated oven for 50-60 minutes or until a toothpick inserted in the center comes out clean. Your kitchen will smell simply amazing during this time. Keep an eye on it; ovens can vary!

  10. Cool and Enjoy!
    Once baked, let it sit in the pan for about 10 minutes before transferring it to a wire rack to cool completely. Slicing it while warm is tempting, but allowing it to cool makes for cleaner slices and better flavor development.

Serving Suggestions

Slice your Blueberry Cream Cheese Bread and serve it warm or at room temperature. It’s incredible on its own, but feel free to dress it up! A light dusting of powdered sugar or a smear of butter adds a touch of luxury. Pair it with a hot cup of coffee or a refreshing herbal tea for a delightful breakfast or snack that you’re going to crave again and again!

Recipe Variations

Here are a few fun twists on the classic Blueberry Cream Cheese Bread that I think you’ll love:

  • Lemon Blueberry Bread: Add the zest of one lemon to the batter for a bright, fresh flavor that complements the blueberries beautifully!

  • Nutty Banana Bread: Incorporate 1 ripe mashed banana into the batter for added moisture and natural sweetness, along with some chopped walnuts for crunch.

  • Spiced Bread: Add 1 teaspoon of cinnamon or nutmeg, or even a pinch of cardamom for a warm, spiced note that makes every bite feel like a cozy hug.

  • Coconut Cream Cheese Bread: Substitute shredded coconut in the batter and on top before baking for wonderful texture and flavor.

Chef’s Notes

I can’t tell you how many times I’ve experimented with this recipe! Each batch brings its own surprises, from slightly overbaked corners to those glorious moments when every slice is perfect. It’s all about experimentation and finding what you love best. One time, I forgot to add the eggs and ended up with a dense, pudding-like treat that’s now my secret guilty pleasure! It was so different but still pined for, and it led to a new family recipe that we now call “Blueberry Pudding Bread”! Remember, kitchen “mistakes” are sometimes the best ways to create something exciting.

FAQs and Troubleshooting

Q1: My bread didn’t rise! What happened?

Answer: This could be due to expired baking powder. Always check the freshness of your leavening agents before baking. A good tip is to add a little vinegar to it; if it bubbles, it’s still good!

Q2: Why is my bread too dense?

Answer: Overmixing your batter can lead to dense bread. Ensure you’re mixing just until combined, and that your ingredients are at room temperature for the best results.

Q3: Can I freeze this bread?

Answer: Absolutely! Once fully cooled, wrap it tightly in plastic wrap and then in foil, or store it in a freezer-safe bag. It should keep well for up to 3 months. Just defrost overnight in the fridge before enjoying!

Q4: Can I use frozen blueberries?

Answer: Yes! Just remember not to thaw them beforehand; adding them frozen will help prevent them from bleeding into the batter and turning it blue.

Nutritional Info

For those curious about the health aspects, here’s a rough estimation per slice (based on a standard loaf cut into 12 slices):

  • Calories: 190
  • Protein: 3g
  • Fat: 8g
  • Carbohydrates: 28g
  • Fiber: 1g
  • Sugar: 9g

Of course, these numbers can vary based on your ingredient choices, but it gives you a general idea of what you’re working with!


Thank you for joining me on this blueberry-filled adventure! I hope you give this Blueberry Cream Cheese Bread a try and experience the nostalgia and deliciousness I hold dear to my heart. Share your creations, stories, and any variations you come up with—let’s keep this vibrant community growing. Until next time, happy baking! 🍞💙

Print

Blueberry Cream Cheese Bread

A delightful bread bursting with juicy blueberries and creamy goodness, perfect for breakfast or as a sweet treat.

  • Prep Time: 15 minutes
  • Cook Time: 60 minutes
  • Total Time: 75 minutes
  • Yield: 12 slices 1x
  • Category: Bread
  • Method: Baking
  • Cuisine: American
  • Diet: Vegetarian

Ingredients

Scale
  • 2 cups all-purpose flour
  • 1 cup granulated sugar
  • 1/2 teaspoon salt
  • 1 tablespoon baking powder
  • 1/2 cup cream cheese, softened
  • 1/2 cup butter, softened
  • 2 large eggs
  • 1 teaspoon vanilla extract
  • 1/2 cup milk
  • 1 cup fresh blueberries

Instructions

  1. Preheat your oven to 350°F (175°C) and prepare your loaf pan.
  2. Mix the all-purpose flour, baking powder, and salt in a large mixing bowl.
  3. Cream the softened butter and granulated sugar until light and fluffy.
  4. Add the softened cream cheese to the sugar mixture and blend until smooth.
  5. Incorporate the eggs one at a time, mixing well after each addition, and then add the vanilla extract.
  6. Add the dry ingredients gradually to the creamy mixture, alternating with the milk.
  7. Gently fold in the fresh blueberries.
  8. Transfer the batter to your prepared loaf pan and smooth the top.
  9. Bake for 50-60 minutes or until a toothpick inserted in the center comes out clean.
  10. Cool the bread in the pan for about 10 minutes, then transfer to a wire rack to cool completely.

Notes

Try variations like adding lemon zest or nuts for a twist on the classic recipe.

Nutrition

  • Serving Size: 1 slice
  • Calories: 190
  • Sugar: 9g
  • Sodium: 200mg
  • Fat: 8g
  • Saturated Fat: 5g
  • Unsaturated Fat: 2g
  • Trans Fat: 0g
  • Carbohydrates: 28g
  • Fiber: 1g
  • Protein: 3g
  • Cholesterol: 35mg

Keywords: blueberry bread, cream cheese bread, breakfast recipe

Did you make this recipe?

Share a photo and tag us — we can't wait to see what you've made!

May 31, 2026 |

Minute Blueberry Muffins for Busy Weekday Mornings

Freshly baked minute blueberry muffins for quick weekday breakfasts

The Best Blueberry Muffins: A Sweet Journey

Welcome to my cozy kitchen, where the air is always fragrant with the wonderful scent of baked goodies. If there’s one thing that brings joy and comfort like nothing else, it’s the irresistible aroma of freshly baked blueberry muffins wafting through the house. These muffins are not just a breakfast staple; they are a warm hug in the form of baked goods. Throughout the years, they’ve become a beloved treat for family gatherings, lazy Sunday mornings, and even surprise brunches. Today, I’m thrilled to share my foolproof recipe for the best blueberry muffins that are guaranteed to make your taste buds sing!

You might be wondering, what makes these blueberry muffins so special? Well, not only are they fluffy, moist, and bursting with juicy berries, but they also come together quickly and easily—perfect for those busy mornings or impromptu baking sessions. Oh, and did I mention they’re endlessly customizable? You could keep the classic vibe with just blueberries or mix it up with spices and zests. Whatever you choose, you’re in for a treat!

Now, let’s dive into this delicious journey and whip up a batch of blueberry bliss. But before we start mixing, allow me to share a little personal story about my love for these muffins.

A Trip Down Memory Lane

Growing up, my weekends were often filled with the comforting ritual of baking with my grandmother, a true kitchen queen. One of my fondest memories was the day we decided to whip up blueberry muffins from scratch because we had just come back from a berry-picking adventure. We had buckets overflowing with fresh, succulent blueberries, and she thought, “Why not turn these into something delicious?”

With flour dusting the countertops and berry juice streaked across our aprons, we mixed, poured, and baked—but not without her many anecdotes about the “secret ingredient” in her famous muffins: love. I remember that day vividly; the muffins rose beautifully in the oven, and when they finally cooled enough to taste, we couldn’t wait. As we sunk our teeth into the warm, fluffy treasures, the blend of sweetness and tartness exploded in my mouth—it was pure heaven.

Ever since that day, blueberry muffins have held a special place in my heart. They remind me of family, creativity, and the simple joy of baking together. Today, I’m excited to share that joy with you because I believe everyone should experience the magic of these delightful muffins!

Ingredients

Let’s gather our ingredients, shall we? Here’s what you’ll need to bake these scrumptious blueberry muffins:

  • 2 cups all-purpose flour: The foundation of our muffins. For a lighter muffin, you could swap in half of the all-purpose flour for whole wheat flour, or even a gluten-free blend if you’re accommodating dietary restrictions.

  • 1 cup sugar: This adds sweetness but can easily be adjusted to your taste. Feel free to cut it down to ¾ cup for a less sweet muffin or use coconut sugar for a more wholesome option.

  • 1 tablespoon baking powder: Our trusty leavening agent. Be sure it’s fresh for maximum rise; an easy way to check is to drop a bit in warm water and see if it bubbles.

  • ½ teaspoon salt: Balances the sweetness and enhances flavor. If you’re watching your sodium intake, you can reduce it to ¼ teaspoon without losing too much flavor.

  • ½ cup unsalted butter, melted: Adds richness and moisture. You can substitute with coconut oil for a dairy-free version, or applesauce for a lighter option!

  • 1 cup milk: Provides moisture. You can easily switch to almond milk, oat milk, or any other non-dairy milk if you’re vegan or lactose intolerant.

  • 2 large eggs: Helps bind everything together. If you’re looking for a vegan option, you can replace each egg with ¼ cup of unsweetened applesauce or 1 tablespoon of ground flaxseed mixed with 2.5 tablespoons of water (let it sit for a few minutes to thicken).

  • 1 teaspoon vanilla extract: For an aromatic twist. Feel free to experiment with almond extract or even a bit of citrus zest for an added pop of flavor!

  • 1 cup fresh blueberries: The stars of the show! While fresh is best, you can use frozen blueberries if that’s what you have on hand. Just make sure to toss them in a little flour to prevent them from sinking.

  • Optional: coarse sugar for topping: For that bakery-style finish. If you’re feeling extra fancy, a sprinkle of cinnamon alongside the coarse sugar can be delightful!

By keeping these ingredients handy, you’re well on your way to muffin heaven!

Step-by-Step Instructions

Alright, let’s get to the fun part: baking! Follow these step-by-step instructions, and you’ll have a batch of warm blueberry muffins ready in no time.

  1. Preheat your oven: First things first, preheat your oven to 375°F (190°C). This ensures a perfect bake from the start. Don’t forget to line your muffin tin with paper liners or grease them if you prefer a more rustic, crumbly muffin.

  2. Mix the dry ingredients: In a large mixing bowl, whisk together the flour, sugar, baking powder, and salt. Make sure there are no lumps in the flour. This is crucial for the proper rise and fluffy texture of your muffins.

  3. Combine the wet ingredients: In another bowl, whisk the melted butter, milk, eggs, and vanilla extract until everything is blended nicely. Just as my grandma used to say, the secret to moist muffins is combining wet and dry ingredients well but not overmixing.

  4. Combine wet and dry: Pour the wet ingredients into the dry ingredients. With a rubber spatula, gently fold them together until just combined. It’s okay if there are a few lumps! Overmixing can lead to dense muffins, and we want fluffy goodness.

  5. Add the blueberries: Carefully fold in the blueberries until evenly distributed. Pro tip: You can toss them lightly in flour before this step. It helps them stay suspended in the batter rather than sinking to the bottom!

  6. Fill the muffin tins: Scoop the batter into the prepared muffin tins, filling each cup about two-thirds full. This allows room for rising without overflowing. For that bakery-touch, sprinkle a bit of coarse sugar on top of each muffin.

  7. Bake: Place your muffin tin in the preheated oven and bake for 18-22 minutes or until a toothpick inserted in the center comes out clean. You might experience the heavenly aroma wafting through your house during this time—it’s absolutely worth the wait!

  8. Cool and enjoy: Once baked, remove the muffins from the oven and allow them to cool in the tin for a few minutes. Transfer them to a wire rack to cool completely or dive in while they’re still warm, like I usually do!

Serving Suggestions

Now that your muffins are beautifully golden and fragrant, how do you serve them? They’re delightful on their own, fresh out of the oven, or spread with a touch of butter or cream cheese for some extra indulgence. These muffins shine at breakfast but can also be enjoyed as a delicious snack or dessert. Pair them with a hot cup of coffee or a glass of cold milk, and you’ve got an exquisite treat that works any time of the day!

Recipe Variations

The beauty of blueberry muffins lies in their adaptability! Here are a few creative twists you can consider:

  • Lemon Blueberry Muffins: Add the zest of one lemon and a tablespoon of lemon juice to the batter for a refreshing zing.

  • Nutty Muffins: Mix in chopped walnuts or pecans for added crunch and nutrition. They pair wonderfully with the blueberries!

  • Double Berry Swirl: Combine blueberries with raspberries or strawberries for a mixed berry surprise. Just adjust the amount to balance the flavors.

  • Chocolate Chip Blueberry Muffins: Because chocolate makes everything better! Fold in a half cup of chocolate chips along with the blueberries for a decadent touch.

  • Vegan Blueberry Muffins: Simply substitute the eggs and milk with plant-based options, and you’ve got a delightful vegan version that everyone will love!

Chef’s Notes

These blueberry muffins have traveled with me through various stages of life—from that cherished kitchen with my grandmother to my cozy apartment filled with the sound of excited friends and family as they devour them. Over time, I’ve tweaked the recipe a bit, sometimes experimenting with different fillings or spices. What remains constant is the joyous reaction they evoke in everyone who tastes them.

You may even find me making these muffins with my little ones, creating new memories just as my grandmother did with me. And it never fails—there’s always flour on their cheeks and grins on their faces!

FAQs and Troubleshooting

Q: Why are my muffins dense?
A: Dense muffins usually result from overmixing your batter or not adding enough leavening agent. Ensure you mix until just combined and check that your baking powder is fresh!

Q: How do I prevent my blueberries from sinking to the bottom?
A: Tossing the berries in a little flour before adding them to the batter helps. This creates a barrier that keeps them suspended in the muffin while baking.

Q: Can I make these muffins ahead of time?
A: Absolutely! These muffins store well in an airtight container at room temperature for up to three days. You can also freeze them for up to three months. Simply reheat in the oven or microwave when you’re ready to enjoy!

Q: How can I ensure my muffins are perfectly baked?
A: Stick a toothpick in the center of a muffin; if it comes out clean or with just a few crumbs, they’re done! Avoid opening the oven door too often, as that can cause temperature fluctuations.

Nutritional Info

While exact nutritional values can vary based on your ingredient choices and portion sizes, here’s a rough estimate per muffin (assuming 12 muffins):

  • Calories: 200
  • Protein: 3g
  • Carbohydrates: 28g
  • Fat: 9g

Note: Adjust ingredients for a healthier option, like substituting less sugar or butter, to lighten up your muffins without sacrificing flavor!

Now it’s time for you to grab those ingredients and start baking! I can’t wait to hear how your blueberry muffins turn out. Happy baking!

Print

The Best Blueberry Muffins

Fluffy, moist blueberry muffins bursting with juicy berries, perfect for breakfast or a snack.

  • Prep Time: 15 minutes
  • Cook Time: 22 minutes
  • Total Time: 37 minutes
  • Yield: 12 servings 1x
  • Category: Breakfast
  • Method: Baking
  • Cuisine: American
  • Diet: Vegetarian

Ingredients

Scale
  • 2 cups all-purpose flour
  • 1 cup sugar
  • 1 tablespoon baking powder
  • ½ teaspoon salt
  • ½ cup unsalted butter, melted
  • 1 cup milk
  • 2 large eggs
  • 1 teaspoon vanilla extract
  • 1 cup fresh blueberries
  • Optional: coarse sugar for topping

Instructions

  1. Preheat your oven to 375°F (190°C) and line muffin tin with paper liners.
  2. Mix the dry ingredients: In a bowl, whisk together flour, sugar, baking powder, and salt.
  3. Combine the wet ingredients: In another bowl, whisk melted butter, milk, eggs, and vanilla extract.
  4. Combine the wet and dry ingredients until just combined.
  5. Add the blueberries and fold them in gently.
  6. Fill the muffin tins about two-thirds full and sprinkle with coarse sugar if desired.
  7. Bake for 18-22 minutes or until a toothpick comes out clean.
  8. Cool the muffins for a few minutes before transferring to a wire rack.

Notes

These muffins can be customized with spices, zests, or other berries.

Nutrition

  • Serving Size: 1 muffin
  • Calories: 200
  • Sugar: 10g
  • Sodium: 180mg
  • Fat: 9g
  • Saturated Fat: 5g
  • Unsaturated Fat: 4g
  • Trans Fat: 0g
  • Carbohydrates: 28g
  • Fiber: 1g
  • Protein: 3g
  • Cholesterol: 40mg

Keywords: blueberry muffins, breakfast, baked goods

Did you make this recipe?

Share a photo and tag us — we can't wait to see what you've made!