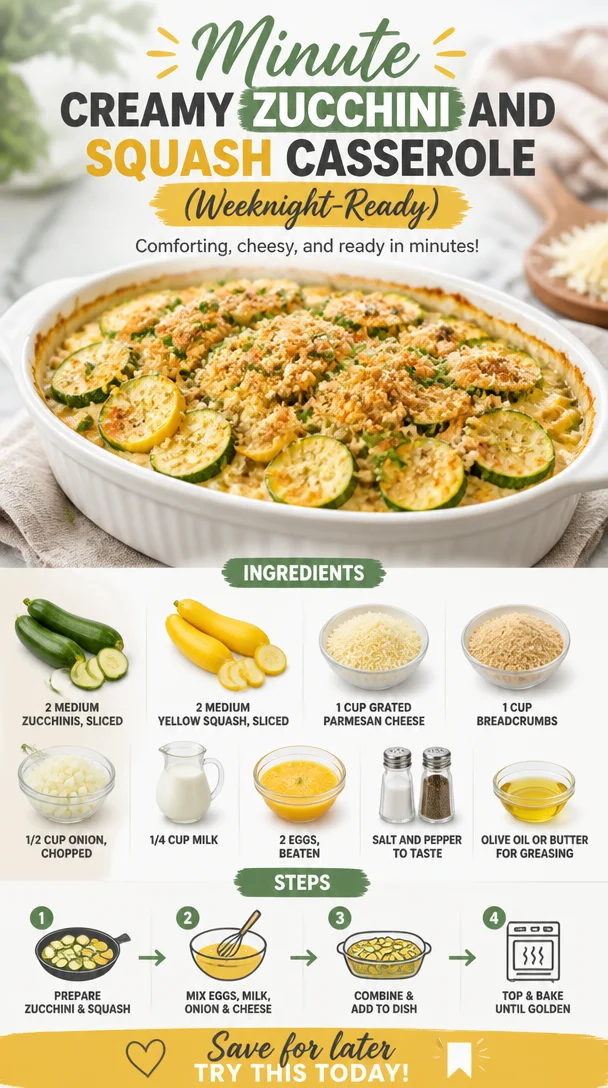
Minute Creamy Zucchini and Squash Casserole (Weeknight-Ready)
Zucchini and Squash Casserole: A Warm Hug in a Dish
Introduction
Welcome to my sunny kitchen, where fresh ingredients come together to create comfort food with a twist! Today, we’re diving into a delightful Zucchini and Squash Casserole that’s about to become your new go-to dish. There’s something so heartwarming about casseroles—perhaps it’s the way they fill the house with a tantalizing aroma or how they bring everyone around the table, forks ready and smiles wide.
This dish is not just another veggie side; it’s a vibrant celebration of summer produce at its finest. Imagine tender slices of zucchini and yellow squash enveloped in a creamy, cheesy goodness topped off with golden, crunchy breadcrumbs. Whether it’s a family dinner, a potluck gathering, or just a cozy night in, this casserole embraces every occasion with open arms.
What I love most is how easy it is to put together, making it the perfect recipe for both seasoned chefs and kitchen newbies alike. The ingredients are straightforward, and the steps are a breeze. Plus, you know I’ll sprinkle in some cooking tips along the way—because who doesn’t love a little kitchen hack to impress friends and family? Whether you’re a lifelong fan of squash or just looking to sneak in some more veggies, I promise you’ll be craving second helpings of this delightful dish.
So grab those zucchinis and yellow squashes, and let’s jump into this culinary adventure. I can already feel the warmth and joy that this casserole will bring to your table!
Personal Story
Whenever I think of casseroles, I’m reminded of the countless family gatherings I attended growing up. One specific memory stands out: my grandma’s house during one of those lazy summer afternoons. The air was thick with the sweet aroma of fresh herbs and baked goods, but it was her famous veggie casserole that stole the show.
Every Sunday, without fail, she’d whip up a casserole using whatever fresh produce she could find from the local farmer’s market. Zucchini, squash, tomatoes… you name it, it was in there! The best part? She made a big batch so we could all dig in and take some home. The laughter, the stories shared over dinner, and the comforting taste of that cheesy goodness made those Sundays feel like pure magic.
Now, every time I create this Zucchini and Squash Casserole, I channel that nostalgic vibe. I imagine my family gathered around the table, reaching for seconds (or thirds!) while sharing good laughs and stories, just like we did back in those sunny days. It reminds me that food is not only about nourishing our bodies, but also about feeding our souls and creating connections.
Ingredients
Here’s what you need to make this scrumptious Zucchini and Squash Casserole:
-
2 medium zucchinis, sliced
Zucchini adds a lovely, mild flavor and is packed with nutrients. If you can’t find zucchini, you can substitute with eggplant for a unique twist! -
2 medium yellow squash, sliced
Yellow squash pairs beautifully with zucchini, providing a splash of color and sweetness. For a different take, try using pattypan squash. -
1 cup grated Parmesan cheese
The salty nuttiness of Parmesan elevates this casserole to another level. Feel free to swap with sharp cheddar cheese if you prefer a bolder taste! -
1 cup breadcrumbs
Toasted breadcrumbs create that irresistible crunch on top. For a gluten-free version, opt for gluten-free breadcrumbs or crushed cornflakes. -
1/2 cup onion, chopped
Onions bring a savory depth to the dish. If you’re not a fan, shallots or leeks can be a milder alternative. -
1/4 cup milk
Milk adds creaminess to the casserole. You can replace it with almond milk or coconut milk if you’re looking for a dairy-free option. -
2 eggs, beaten
Eggs serve as a binder, holding everything together. If you want to keep this egg-free, a flaxseed egg (1 tablespoon ground flaxseed + 2.5 tablespoons water) works like a charm! -
Salt and pepper to taste
These basic seasonings enhance all the flavors. Don’t skip this step; it’s all about finding that perfect balance! -
Olive oil or butter for greasing
Use whichever you prefer to keep things from sticking. If you want, you can also use cooking spray for a lighter touch.
Step-by-Step Instructions
Let’s get cooking! Here’s a step-by-step guide to ensure your Zucchini and Squash Casserole turns out fabulously:
-
Preheat the Oven
Preheat your oven to 350°F (175°C). This is essential for that perfect golden-brown top! While the oven warms up, you can prepare your ingredients. -
Prep the Baking Dish
Grease a 9×13 inch baking dish with olive oil or butter. This step might seem simple, but it prevents a sticky situation later! -
Slice the Vegetables
Slice your zucchinis and yellow squash into thin, even rounds. The thinner they are, the quicker they’ll cook down and blend together in the casserole. Plus, it makes for a beautiful presentation when it’s all baked! -
Sauté the Onions
In a medium skillet over medium heat, add a splash of olive oil and sauté the chopped onion until translucent (about 3-4 minutes). This enhances their sweetness, and you’ll be amazed at the flavor it adds! -
Combine the Ingredients
In a large mixing bowl, combine the sliced zucchini and yellow squash, sautéed onions, grated Parmesan cheese, milk, and beaten eggs. Gently stir everything together until it’s uniformly mixed. This is where you can taste test for salt and pepper. Don’t be shy—flavor is key! -
Layer the Casserole
Pour the vegetable mixture into your greased baking dish. Spread it out evenly, making sure every corner gets that delightful mix. -
Add the Breadcrumbs
Sprinkle the breadcrumbs over the top of the casserole. If you want to add a bit of extra flavor, mix the breadcrumbs with a drizzle of olive oil and some dried herbs (like oregano or thyme) before topping. This step is where the magic happens—those crunchy bits will become delightfully crispy in the oven! -
Bake to Perfection
Place the casserole in the preheated oven and bake for 30-35 minutes or until the vegetables are tender and the top is golden brown and crispy. Your kitchen will smell heavenly! -
Let it Cool
Once out of the oven, let the casserole sit for about 10 minutes before serving. This allows it to set up nicely, making it easier to slice and serve. -
Dig In!
Serve the casserole warm, and watch your loved ones smile as they take their first bites. You might even inspire them to ask for the recipe themselves!
Serving Suggestions
When it comes to plating, simplicity is key! Serve your Zucchini and Squash Casserole in the baking dish, allowing everyone to scoop out their desired amount. I love to garnish with a sprinkle of fresh herbs, like basil or parsley, for a pop of color and flavor. Pair it with a light salad or crusty bread, and dinner is set! It’s a great side dish for grilled meats or can stand alone as a satisfying vegetarian main.
Recipe Variations
Want to spice things up? Here are some fun variations you can try:
-
Herb-Infused: Add fresh herbs such as thyme, rosemary, or basil to the veggie mix for an aromatic twist.
-
Spicy Kick: Toss in a pinch of crushed red pepper flakes for a zing!
-
Add Protein: For a heartier meal, mix in cooked ground turkey or chicken to the veggie mixture.
-
Cheesy Delight: Experiment by substituting Parmesan with mozzarella or gouda for a creamier texture.
-
Vegan Version: Use a flax egg, non-dairy milk, and nutritional yeast in place of cheese to keep it completely plant-based!
Chef’s Notes
It’s interesting to see how recipes can evolve over time. This Zucchini and Squash Casserole started as a basic mix of vegetables topped with cheese, but as I played around in the kitchen, the addition of breadcrumbs brought it to life. I also love to swap in whatever seasonal veggies I have on hand, making it a versatile dish tailored to every palate!
Once, I forgot to add the eggs in a hurry, and it still turned out delicious, just a bit more tender! So don’t stress if you miss a step—cooking is about enjoying the process and making it work for you.
FAQs and Troubleshooting
1. Can I prepare this casserole ahead of time?
Absolutely! You can prep the casserole the day before and store it covered in the fridge. Just bake it when you’re ready to enjoy!
2. My casserole turned out watery. What happened?
This can happen if the zucchini and squash release too much moisture during baking. To mitigate this, you can salt the sliced veggies beforehand, let them sit for a bit, and then pat them dry before mixing.
3. Can I freeze the leftovers?
Yes! This casserole freezes beautifully. Just ensure it’s cooled completely, then wrap it tightly and store it in the freezer. To reheat, thaw it overnight in the fridge and then bake until warmed through.
4. What if I’m allergic to dairy?
No problem! Simply use plant-based milk and a vegan cheese option, or leave the cheese out completely; it will still be delicious!
Nutritional Info
While it can vary based on specific ingredients, a single serving of the Zucchini and Squash Casserole is approximately 250 calories, 10g of protein, and packed with vitamins A and C from the veggies, making it a nutritious choice for your table!
So there you have it! A wonderfully delicious Zucchini and Squash Casserole that celebrates the joy of cooking and sharing good food. I hope this inspires you to get creative in your kitchen and gather your loved ones for a meal filled with warmth and laughter. Happy cooking!
PrintZucchini and Squash Casserole
A comforting Zucchini and Squash Casserole packed with summer produce, creamy cheese, and a crunchy breadcrumb topping.
- Prep Time: 15 minutes
- Cook Time: 35 minutes
- Total Time: 50 minutes
- Yield: 4 servings 1x
- Category: Main Course
- Method: Baking
- Cuisine: Italian
- Diet: Vegetarian
Ingredients
- 2 medium zucchinis, sliced
- 2 medium yellow squash, sliced
- 1 cup grated Parmesan cheese
- 1 cup breadcrumbs
- 1/2 cup onion, chopped
- 1/4 cup milk
- 2 eggs, beaten
- Salt and pepper to taste
- Olive oil or butter for greasing
Instructions
- Preheat your oven to 350°F (175°C).
- Grease a 9×13 inch baking dish with olive oil or butter.
- Slice your zucchinis and yellow squash into thin, even rounds.
- Sauté the chopped onion in a medium skillet over medium heat until translucent (about 3-4 minutes).
- Combine the sliced zucchini and yellow squash, sautéed onions, grated Parmesan cheese, milk, and beaten eggs in a large mixing bowl.
- Pour the vegetable mixture into your greased baking dish.
- Sprinkle the breadcrumbs over the top of the casserole.
- Bake for 30-35 minutes until the vegetables are tender and the top is golden brown.
- Let the casserole sit for about 10 minutes before serving.
- Serve the casserole warm and enjoy!
Notes
Consider adding fresh herbs or protein for variation. Great for potlucks and family gatherings!
Nutrition
- Serving Size: 1 serving
- Calories: 250
- Sugar: 4g
- Sodium: 350mg
- Fat: 9g
- Saturated Fat: 3g
- Unsaturated Fat: 3g
- Trans Fat: 0g
- Carbohydrates: 32g
- Fiber: 3g
- Protein: 10g
- Cholesterol: 150mg
Keywords: casserole, zucchini, squash, vegetarian, comfort food, summer produce

One-Pan Chicken with Buttered Noodles
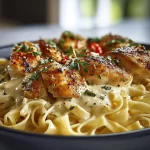
One-Pan Chicken with Buttered Noodles: A Comforting Classic
Welcome to another delicious adventure here at Clean Plate Cravings! Today, we’re diving into a dish that’s not only comforting but also incredibly simple to whip up on busy weeknights: One-Pan Chicken with Buttered Noodles. This dish is the definition of cozy, packing in all those warm flavors that remind you of home-cooked meals shared with loved ones. So grab your apron, and let’s get cooking together!
A Touch of Nostalgia
Growing up, my family had a tradition of Sunday dinners that brought us all together. The kitchen would fill with the sound of laughter, the aromas of simmering garlic and tasty sauces, and the unmistakable rhythm of pots and pans clinking. One of those memorable meals was a chicken and pasta dish that my mom made, and I can still remember the way the egg noodles twirled around my fork, perfectly coated in creamy goodness with those beautifully seared chicken breasts.
There was something magical about cooking together during those Sunday afternoons. As Mom would sauté the chicken, I was usually perched on a stool, eager to help, because that meant I got to add the garlic—the official starter to any flavor explosion, right? Little did I know how much that kitchen experience would later shape my love for cooking and sharing recipes. Today, looking back, it’s not just about the food; it’s about those moments spent with family, and that’s precisely the spirit I want to convey in my own kitchen today. Let’s make a comforting dish that’s flavorful, hearty, and destined to create its own warm memories in your home!
Ingredients
Here’s the lineup of ingredients you’ll need for our One-Pan Chicken with Buttered Noodles:
-
4 boneless, skinless chicken breasts (1.5 lbs)
These are the stars of the show! You can also use thighs if you prefer darker meat. Just remember, cooking times might differ slightly. -
8 oz egg noodles
Egg noodles are perfect because they soak up the chicken broth well. If you’re feeling adventurous, switch them out for whole-grain or gluten-free pasta! -
4 tbsp real butter
Butter adds that lovely richness. If you’d like a lighter option, coconut oil can be a wonderful substitute. -
4 cloves garlic, minced
Garlic is a flavor powerhouse! You can use garlic powder in a pinch, but nothing beats fresh garlic. -
2 cups low-sodium chicken broth
This builds the base of our sauce. Low-sodium keeps things under control salt-wise, but homemade broth is even better if you have it on hand! -
¼ cup fresh parsley, chopped
Fresh parsley adds color and freshness. Don’t have fresh? You can use dried, but half the amount is all you need. -
Salt and pepper to taste
These are your flavor friends—don’t be shy to taste as you go!
Step-by-Step Instructions
Alright, let’s roll up our sleeves and get cooking!
-
Prep the chicken:
Start by seasoning the chicken breasts generously with salt and pepper. This isn’t just a sprinkle; you want a nice coating that will enhance the flavor when we sear them. Take this moment to channel your inner chef—give those breasts a little pat to make sure the seasoning sticks! -
Sear the chicken:
In a large skillet (trust me, you’ll love this one-pan business), melt 2 tablespoons of butter over medium heat. Once it’s bubbly, add your seasoned chicken breasts. Sear them for about 5-6 minutes on each side until they form that golden-brown crust. This is where the flavor explosion begins! If the chicken is sticking, give it a few more moments—patience is key. -
Add the garlic:
When the chicken is beautifully browned, throw in the minced garlic. Stir it around for about 30 seconds until it’s fragrant. Keep an eye on it to avoid burning; this is a common rookie mistake (trust me!). -
Pour in the broth:
Now it’s time to add the chicken broth to the same skillet. Gently scrape the bottom of the pan with a wooden spoon to release those flavorful brown bits (they’re called fond, and they add an incredible taste!). Bring the broth to a simmer, and then nestle the chicken back into the skillet. -
Cook the noodles:
Once the broth is simmering, add in the egg noodles. Cover the skillet and let everything cook for about 10 minutes, stirring occasionally until the noodles are al dente and the chicken is cooked through. This is that moment where magic happens—everything melds into one deliciously cohesive dish. -
Finishing touches:
Once the noodles are tender, remove the skillet from heat. Take out the chicken breasts and let them rest on a plate. This is crucial because resting allows the juices to redistribute, resulting in succulent chicken. Add the remaining butter and chopped parsley to the noodles and give them a good toss. -
Slice and serve:
Slice the chicken breasts into medallions and arrange them over the buttery noodles. Sprinkle with extra parsley for a pop of color.
Serving Suggestions
To plate this delightful dish, use a large serving bowl or individual plates for a more elegant touch. Gather the buttery noodles in the center, artfully lay the sliced chicken on top, and finish with a sprinkle of fresh parsley. Want to impress? Add a drizzle of olive oil or a squeeze of lemon for a fresh zing!
Recipe Variations
-
Herb-Infused Chicken:
Marinate the chicken in a mixture of olive oil and your favorite herbs like thyme or rosemary before searing for deeper flavor. -
Veggie Booster:
Toss in some spinach, peas, or cherry tomatoes along with the noodles to amp up the nutritional value and color! -
Creamy Twist:
For a creamier sauce, stir in a splash of heavy cream towards the end of cooking. It creates a luscious, restaurant-style finish. -
Add Heat:
Sprinkle in some red pepper flakes while cooking for an added kick that brings the dish to life! -
Cheesy Delight:
Top the dish with freshly grated Parmesan or Pecorino cheese before serving for an extra indulgent experience.
Chef’s Notes
This recipe has become one of my go-to comfort meals over the years. I remember my first attempt; I was so excited that I forgot to season the chicken, and it turned out bland! Lesson learned: seasoning is your best friend. Over the years, this recipe has evolved from being just a quick fix for my family into a crowd-pleaser among friends and a staple in my cooking repertoire. It never fails to ignite discussions and nostalgia, just like the heartfelt Sunday dinners of my childhood.
FAQs and Troubleshooting
-
What if my chicken is dry?
If your chicken is overcooked, next time, try using a meat thermometer to check for doneness—it should reach 165°F (75°C). Also, consider letting it rest before slicing. -
Why are my noodles sticky?
Make sure you stir the noodles occasionally while they cook. Additionally, adding enough liquid is essential, so ensure you don’t skimp on the broth! -
Can I make this dish ahead of time?
While it’s best served fresh, you can certainly prep the chicken and garlic in advance. Just put everything together shortly before mealtime for best results. -
My sauce is too thin. How can I thicken it?
If you prefer a thicker sauce, you can mix a teaspoon of cornstarch with cold water and stir it in while simmering. Let it cook for a few more minutes to thicken!
Nutritional Info (Optional)
While specific nutritional content can vary based on ingredient brands and portions, a serving of this One-Pan Chicken with Buttered Noodles is generally around 450 calories, with 30 grams of protein, 20 grams of carbs, and 25 grams of fat.
This One-Pan Chicken with Buttered Noodles is more than just a meal—it’s a celebration of simple ingredients and cherished memories. I hope this recipe brings a smile to your face, fills your kitchen with delightful scents, and more importantly, ignites your passion for cooking. So gather your loved ones and dig into this simple yet satisfying dish. Happy cooking!
PrintOne-Pan Chicken with Buttered Noodles
A comforting dish of juicy chicken and buttery egg noodles, perfect for busy weeknights.
- Prep Time: 10 minutes
- Cook Time: 20 minutes
- Total Time: 30 minutes
- Yield: 4 servings 1x
- Category: Main Course
- Method: Stovetop
- Cuisine: American
- Diet: Gluten-Free, Dairy-Free upon substitution
Ingredients
- 4 boneless, skinless chicken breasts (1.5 lbs)
- 8 oz egg noodles
- 4 tbsp real butter
- 4 cloves garlic, minced
- 2 cups low-sodium chicken broth
- ¼ cup fresh parsley, chopped
- Salt and pepper to taste
Instructions
- Prep the chicken: Season the chicken breasts generously with salt and pepper.
- Sear the chicken: In a large skillet, melt 2 tablespoons of butter over medium heat and sear the chicken for about 5-6 minutes on each side.
- Add the garlic: Throw in the minced garlic and stir it around for about 30 seconds until fragrant.
- Pour in the broth: Add the chicken broth, scraping the bottom of the pan, and bring to a simmer.
- Cook the noodles: Add in the egg noodles, cover, and cook for about 10 minutes until the noodles are al dente and the chicken is cooked through.
- Finishing touches: Remove the skillet from heat, let the chicken rest, and stir the remaining butter and parsley into the noodles.
- Slice and serve: Slice the chicken and arrange over the noodles, garnishing with extra parsley.
Notes
For a creamier sauce, stir in a splash of heavy cream before serving. Adjust seasoning to taste.
Nutrition
- Serving Size: 1 serving
- Calories: 450
- Sugar: 2g
- Sodium: 350mg
- Fat: 25g
- Saturated Fat: 10g
- Unsaturated Fat: 12g
- Trans Fat: 0g
- Carbohydrates: 30g
- Fiber: 2g
- Protein: 30g
- Cholesterol: 80mg
Keywords: chicken, pasta, quick meal, comfort food, one-pan dish
Hot Honey Feta Chicken
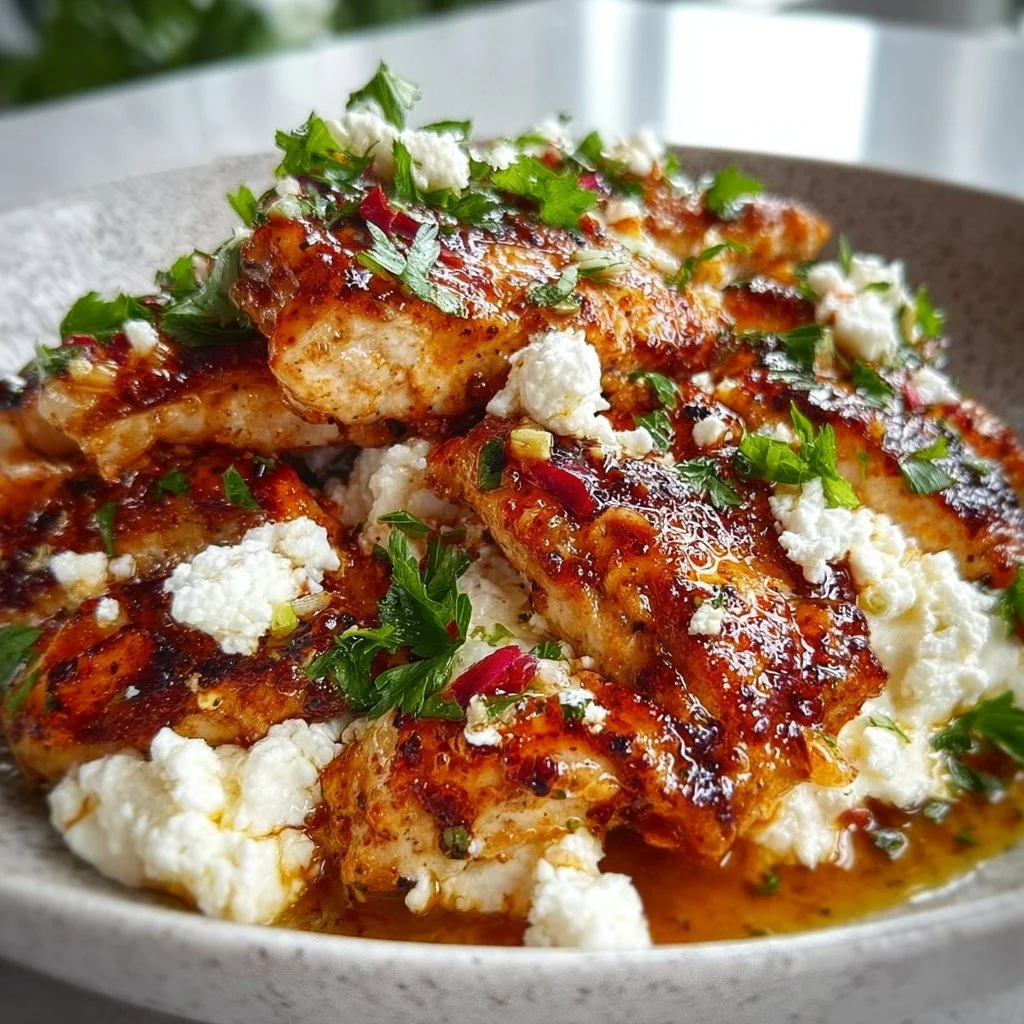
Hot Honey Feta Chicken: A Flavor-Packed Dish to Ignite Your Taste Buds
Hey there, food lovers! Today, I’m super excited to share a dish that’s going to spice up your dinner routine: Hot Honey Feta Chicken. If you’re like me, you treasure meals that bring a punch of flavor without keeping you in the kitchen for hours on end. This dish does just that! It’s an effortless way to impress your family or friends, or simply treat yourself to something delicious after a long day.
Introduction
When you think of comfort food, what comes to mind? Is it a warm bowl of pasta, a cheesy slice of pizza, or perhaps a juicy piece of chicken? For me, it’s all about that perfect balance of flavors. The kind of meal that dances on your taste buds and warms your heart. The first time I stumbled upon the combination of sweet honey and spicy heat paired with feta cheese, I knew I was onto something special. My love for adventurous flavors has taken me all over the culinary map, and this dish embodies that spirit perfectly.
Imagine succulent chicken breasts drizzled with a sticky-sweet hot honey sauce, melting into rich, tangy feta cheese. It’s a celebration of sweet and spicy, all while keeping things light and satisfying. If you’re hoping to cook something that’s not only vibrant and delicious but also easy to whip up, you’re in for a real treat today!
Let’s be honest: we all have those busy days where cooking feels more like a chore than a joy. That’s why I’m here—to show you that with just a few basic ingredients and a couple of steps, you can create something fantastic in your very own kitchen. Plus, this recipe is flexible enough to adapt to what you have on hand!
So grab your apron, and let’s dive into some kitchen magic with this Hot Honey Feta Chicken recipe that’s sure to make your taste buds tingle and your heart sing!
Personal Story
Ah, the memories I have of my first bite of hot honey drizzled over anything! I was visiting a charming little bistro downtown with friends, eager for some fun and tasty bites. As we scanned the menu, something caught my eye—a chicken dish topped with a hot honey sauce and feta crumble. At first, I was unsure. Hot honey? On chicken? But curiosity (and my love for feta) won me over, and I ordered it.
When that plate arrived, I knew I was in for an experience. The aroma wafted up to meet me with hints of sweetness and spice. The first bite was pure bliss. The chicken was perfectly cooked, tender and juicy, while the creamy, tangy feta complemented the honey in a way I’d never imagined. I was hooked! I left that bistro with a full belly and a heart full of inspiration, and I couldn’t wait to recreate that dish at home. Now, each time I make Hot Honey Feta Chicken, I’m reminded of that delightful evening and the joy of sharing good food with great friends.
Ingredients
Let’s gather what we need! Here’s a simple list of ingredients for your Hot Honey Feta Chicken with some chef insights and substitution tips:
-
4 Chicken Breasts: The star of the show! Look for organic or free-range chicken if possible. Want a more budget-friendly option? Boneless, skinless thighs work just as well!
-
1 Cup Feta Cheese, Crumbled: Feta brings a salty, tangy flavor that pairs beautifully with the sweetness of honey. If you’re feeling adventurous, you can swap it for goat cheese for a creamier texture.
-
1/4 Cup Honey: This is where your dish gets its glorious sweetness. Local honey not only adds a unique flavor but also carries potential health benefits. If you’re vegan, agave syrup is a great substitute.
-
1-2 Tablespoons Hot Sauce: The magic ingredient! Adjust the amount depending on your spice preference; I usually go with a tablespoon for just the right kick. Sriracha, Frank’s RedHot, or any of your favorite hot sauces will do the trick!
-
Salt and Pepper to Taste: Just a sprinkle to enhance all the beautiful flavors.
-
Olive Oil: A drizzle to keep the chicken juicy as it cooks.
-
Fresh Vegetables or Salad for Serving: This dish pairs wonderfully with a fresh green salad, roasted veggies, or even a grain like quinoa. You could sneak in some extra color with a mix of peppers, zucchini, or whatever is in season!
Step-by-Step Instructions
Let’s get cooking! Follow these step-by-step instructions, and trust me, you’ll end up with an enticing meal that fills your kitchen with mouthwatering aromas!
-
Preheat Your Oven: Start by preheating your oven to 400°F (200°C). This allows your chicken to cook perfectly while you prepare the sauce.
-
Prepare the Chicken: Grab your chicken breasts, pat them dry with paper towels, and place them in a baking dish. This might seem trivial, but removing excess moisture will help achieve that beautiful golden crust.
-
Season the Chicken: Drizzle a little olive oil over the chicken and then sprinkle with salt and pepper. This step is essential to bring out the flavors in the chicken and forms a tasty base for your sauce.
-
Mix Your Hot Honey Sauce: In a small bowl, combine the honey and hot sauce, stirring until mixed well. This sauce is where the magic happens—sweet and spicy melded together.
-
Apply the Sauce: Generously brush the hot honey mixture over the seasoned chicken breasts. Make sure every inch is coated; you want that sweet glaze to caramelize beautifully as it bakes.
-
Add the Feta: Sprinkle the crumbled feta cheese evenly over the chicken. This step not only adds flavor but also gives the dish that creamy texture we love.
-
Bake to Perfection: Place the baking dish in the preheated oven and let it bake for 25-30 minutes, or until the chicken reaches an internal temperature of 165°F (75°C). The feta will melt slightly and create a delicious crust.
-
Finish with a Drizzle: Once the chicken is cooked, pull it out of the oven and give it a final drizzle of any leftover hot honey sauce for that extra oomph. This will leave your taste buds dancing!
-
Resting Time: Let the chicken rest for about 5 minutes before slicing. This ensures the juices redistribute throughout the chicken, making every bite succulent!
Serving Suggestions
Now comes the best part—serving! Plate up your Hot Honey Feta Chicken with a side of fresh veggies or a vibrant salad. You can also skip the plate and enjoy it straight from the baking dish; no judgment here! For an extra touch, garnish the dish with fresh herbs, like parsley or basil, to add a pop of color and a fresh aroma.
Recipe Variations
Feeling adventurous? Here are a few creative twists and substitutions you can try:
-
Herb-Infused Olive Oil: Drizzle the chicken with a flavored olive oil, such as rosemary or lemon-infused, for an added layer of flavor.
-
Citrus Kick: Add a splash of lemon juice or orange zest to your hot honey sauce. The citrus tones will brighten the dish with a refreshing zing.
-
Stuffed Chicken: Create a stuffed version by slicing a pocket into each chicken breast and filling it with sautéed spinach and garlic prior to baking. Yum!
-
Spicy Crunch: For some added texture, toss in some chopped nuts like pistachios or walnuts before serving for a crispy contrast.
Chef’s Notes
Every recipe has its own story, and this one is no different! Every time I prepare Hot Honey Feta Chicken, I think about how I started off following a different recipe and how it has transformed over the years. Initially, I was hesitant about combining sweetness and heat, but it quickly became a staple in my household. The beauty of this dish lies in its versatility; you can swap ingredients to fit your preferences.
Plus, the joy it continues to bring whenever I serve it is priceless. Whether for a cozy night in or gathering with friends, it never fails to evoke smiles and satisfied bellies!
FAQs and Troubleshooting
1. Can I use chicken thighs instead of breasts?
Absolutely! Chicken thighs are a great choice for this recipe. They add an extra layer of juiciness and flavor, plus they’re often more forgiving if you accidentally overcook them a bit.
2. What if I don’t have honey?
If honey isn’t available, agave syrup or maple syrup are great substitutes! You might end up with a slightly different flavor profile, but sweet is sweet, right?
3. What if my feta isn’t crumbly?
If your feta cheese is not crumbly, you can simply crumble it with your hands or use a fork to break it apart. Fresh feta tends to be a bit more moist, but that’s totally fine!
4. How can I store leftovers?
If you have leftovers (they’re rare, but it happens!), store them in an airtight container in the fridge and enjoy within 3–4 days. Just reheat in the oven or microwave before serving.
Nutritional Info
While I know some of us are a little conscious about the numbers, I encourage balance above all. Enjoy your Hot Honey Feta Chicken with a generous serving of fresh veggies, and you’ll have a nutritious meal straight from the heart!
So there you have it—a delightful recipe to warm your heart and satisfy your cravings! Hot Honey Feta Chicken certainly delivers on all fronts, and I hope you enjoy every bite as much as I do. Don’t forget to share your creations and experiences. Happy cooking!
PrintHot Honey Feta Chicken

A flavor-packed dish featuring succulent chicken breasts drizzled with a sweet and spicy hot honey sauce, topped with creamy feta cheese.
- Prep Time: 10 minutes
- Cook Time: 30 minutes
- Total Time: 40 minutes
- Yield: 4 servings 1x
- Category: Main Course
- Method: Baking
- Cuisine: American
- Diet: Paleo
Ingredients
- 4 Chicken Breasts
- 1 Cup Feta Cheese, Crumbled
- 1/4 Cup Honey
- 1–2 Tablespoons Hot Sauce
- Salt and Pepper to Taste
- Olive Oil
- Fresh Vegetables or Salad for Serving
Instructions
- Preheat your oven to 400°F (200°C).
- Prepare the chicken by patting dry and placing in a baking dish.
- Season the chicken with olive oil, salt, and pepper.
- Mix honey and hot sauce in a small bowl.
- Apply the hot honey mixture over the chicken breasts.
- Add crumbled feta evenly over the chicken.
- Bake for 25-30 minutes until the chicken reaches 165°F (75°C).
- Finish with a drizzle of leftover hot honey sauce.
- Rest for 5 minutes before slicing.
Notes
Pairs well with fresh veggies or a salad. For added flavor, consider herb-infused oils or a citrus kick.
Nutrition
- Serving Size: 1 serving
- Calories: 350
- Sugar: 14g
- Sodium: 400mg
- Fat: 12g
- Saturated Fat: 4g
- Unsaturated Fat: 6g
- Trans Fat: 0g
- Carbohydrates: 32g
- Fiber: 0g
- Protein: 30g
- Cholesterol: 85mg
Keywords: chicken, feta, honey, spicy, easy dinner