
Weeknight Creamy One-Pan Summer Squash & Zucchini Casserole
Satisfy Your Cravings with Yellow Squash and Zucchini Casserole!
Hello, food lovers! Today, I’m excited to bring you a dish that is as comforting as it is delicious: Yellow Squash and Zucchini Casserole! This vibrant casserole is not only a fantastic way to celebrate summer’s bounty but also an excellent option for anyone looking to add some light yet satisfying flavors to their dinner table. With a delightful combination of fresh vegetables and gooey cheese, it’s a dish that will have everyone coming back for seconds!
Personal Story: A Flavorful Family Tradition
Growing up, summer evenings were filled with the enticing aroma of my mom’s cooking wafting through our home. One dish that always took center stage during the sunnier months was her yellow squash and zucchini casserole. I fondly remember watching her skillfully slice the vegetables while we chatted about our day. I loved how she made cooking feel like a form of art, transforming simple ingredients into something extraordinary.
After dinner, we’d often gather on the porch, savoring each bite while listening to the sounds of chirping crickets under a starlit sky. It was more than just a meal; it was about family, connection, and appreciating the simple things in life. Fast forward to today, and I find immense joy in recreating that same casserole for my friends and family, continuing the tradition while adding my own twists and flavors. So, let’s jump into this nostalgic recipe that we can all cherish!
Ingredients
Here’s what you’ll need for this mouthwatering Yellow Squash and Zucchini Casserole:
-
2 cups yellow squash, sliced: This summer squash provides a slight sweetness and a lovely texture. If you can’t find it, you can substitute with extra zucchini or even pattypan squash!
-
2 cups zucchini, sliced: Zucchini brings a subtle flavor and pairs perfectly with yellow squash. If zucchini’s not your jam, feel free to use eggplant or even bell peppers!
-
1 cup onion, chopped: Onion adds a savory depth to the dish. For a milder flavor, you can swap it out for shallots or green onions.
-
2 cups shredded cheese (e.g., cheddar or mozzarella): Cheese is the magical glue that holds this casserole together. Cheddar adds sharpness, while mozzarella gives creaminess. Experiment with pepper jack for a kick or a combo of your favorites!
-
1 cup bread crumbs: Breadcrumbs create a delightful crunch on top. You can use panko for extra crispiness or try crushed crackers for a unique twist.
-
1/2 cup milk: Milk adds moisture to the casserole. If you’re looking for a dairy-free option, almond milk or oat milk works well!
-
2 eggs: Eggs act as a binder, keeping everything together. For a vegan alternative, try flax eggs or a commercial egg replacer.
-
Salt and pepper to taste: These essentials elevate the flavors, so don’t skip them! Feel free to throw in your favorite spices or herbs to customize the taste.
-
Olive oil or butter for greasing: Choose whatever you love! Coconut oil or avocado oil is also a fabulous option.
Step-by-Step Instructions
Now, let’s dive into the heart of the matter—preparing this delicious casserole!
-
Preheat your oven to 350°F (175°C). This is the perfect time to get things warming up and ready for some cheesy goodness.
-
Prepare the veggies. Grab your cutting board and slice those yellow squash and zucchini into about 1/4-inch rounds. Feel free to make them a bit thicker if you prefer a heartier bite!
-
Chop the onion. Dice that onion into small pieces. If you’re sensitive to onion, positioning yourself in front of a fan can help keep the tears away.
-
Sauté the onion, if you wish! Heat a drizzle of olive oil in a skillet over medium heat. Add the chopped onion and sauté until it’s translucent and fragrant, about 5 minutes. This step is optional but adds a wonderful flavor base to the casserole.
-
Combine the veggies in a bowl. In a large mixing bowl, combine the sliced squash, zucchini, and sautéed onion (if you decided to go that route). Season them generously with salt and pepper—a pinch of this and a dash of that to your taste!
-
Mix the cheesy goodness. In a separate large bowl, whisk together the eggs and milk until fully combined. Slowly add the shredded cheese (reserve some for topping!) into the egg mixture, mixing it well. This cheesy bath brings everything together.
-
Add the breadcrumbs. Stir in the bread crumbs into the cheese mixture until evenly distributed. You can get creative here by adding herbs or spices to the breadcrumbs if desired.
-
Combine it all. Pour the cheese mixture into the bowl of veggies. Gently fold everything together until the squash and zucchini are well coated.
-
Grease the baking dish. Grab a 9×13 inch baking dish and grease it generously with olive oil or butter. This will prevent any sticking and help create a beautiful crust.
-
Transfer the mixture into the baking dish. Spread it evenly in the dish. You can also top it off with the reserved cheese for extra melty goodness.
-
Bake! Pop that casserole in the oven and bake for 30-35 minutes, or until the top is golden brown and the cheese is bubbly. You’ll know it’s ready when your kitchen smells like a cheesy heaven!
-
Cool and serve. Once it’s done baking, let it cool for a few minutes before serving. This gives it time to set a bit, making it easier to slice.
Serving Suggestions
When it comes to serving this Yellow Squash and Zucchini Casserole, the possibilities are endless! I love to serve it hot, right out of the oven, alongside a fresh green salad drizzled with a light vinaigrette. You can also pair it with grilled chicken or fish for a protein boost. This dish also makes a fabulous side for family gatherings or potlucks—just imagine presenting this colorful casserole alongside crispy roasted potatoes or a platter of seasonal veggies.
Recipe Variations
-
Herb-Infused: Add fresh or dried herbs such as thyme, oregano, or basil to the veggie mixture for an herbal twist.
-
Protein-Packed: Mix in some cooked ground turkey, chicken, or even black beans for added protein.
-
Spicy Kick: Add some diced jalapeños or crushed red pepper flakes for those who like a bit of heat!
-
Cheesy Overload: Try using a combination of your favorite cheeses, such as feta, mozzarella, and cheddar for a flavor explosion.
-
Gluten-Free Option: Substitute regular breadcrumbs with gluten-free bread crumbs or use crushed nuts for a grain-free alternative.
Chef’s Notes
As I’ve made this yellow squash and zucchini casserole over the years, I’ve learned that it’s one of those versatile dishes that can adapt to whatever you have on hand. It’s like a blank canvas for your creativity in the kitchen! I once experimented by tossing in some leftover roasted red peppers and wow—the dish took on a whole new dimension!
One of my funniest kitchen stories involving this casserole happened when I had friends over for dinner. I had forgotten to buy cheese, so I made a quick run to the store. While racing back home, I realized I had the wrong address in my mind and ended up on the other side of town. Let’s just say we all had a hearty laugh about it, but it was definitely worth it when everyone finally got their servings of cheesy goodness!
FAQs and Troubleshooting
-
Why is my casserole watery?
If your casserole turns out watery, it may be due to overcooked squash releasing too much moisture. You can remedy this by patting the sliced veggies dry before mixing them in. Also, make sure to not skip the baking time! -
Can I make this in advance?
Absolutely! You can prepare the casserole up to a day in advance and keep it in the fridge until you’re ready to bake. Just make sure to cover it well to avoid drying out. -
Can I freeze leftovers?
Yes! This casserole freezes quite well. Just ensure it’s cooled to room temperature before storing it in an airtight container. When ready to enjoy again, thaw in the fridge overnight and reheat in the oven. -
What if I don’t have breadcrumbs?
No worries! Use crushed crackers, oats, or even pulverized nuts for that crunchy topping.
Nutritional Info
Though I focus on clean eating with nourishing ingredients, it’s always good to be aware of nutritional values. A serving of this Yellow Squash and Zucchini Casserole includes a healthy portion of your daily veggies, protein from the cheese and eggs, and plenty of flavor without sacrificing your taste buds!
So there you have it—a scrumptious Yellow Squash and Zucchini Casserole that’s sure to become a staple in your kitchen! Whether you’re making it for a cozy family dinner or a festive gathering, everyone will appreciate this delightful dish. Let’s keep it fresh, simple, and seriously delicious! Happy cooking!
PrintYellow Squash and Zucchini Casserole

A comforting and delicious casserole featuring yellow squash and zucchini, perfect for summer.
- Prep Time: 15 minutes
- Cook Time: 35 minutes
- Total Time: 50 minutes
- Yield: 4 servings 1x
- Category: Main Course
- Method: Baking
- Cuisine: American
- Diet: Vegetarian
Ingredients
- 2 cups yellow squash, sliced
- 2 cups zucchini, sliced
- 1 cup onion, chopped
- 2 cups shredded cheese (e.g., cheddar or mozzarella)
- 1 cup bread crumbs
- 1/2 cup milk
- 2 eggs
- Salt and pepper to taste
- Olive oil or butter for greasing
Instructions
- Preheat your oven to 350°F (175°C).
- Prepare the veggies by slicing yellow squash and zucchini into about 1/4-inch rounds.
- Chop the onion into small pieces.
- Sauté the onion in a skillet with olive oil over medium heat until translucent, about 5 minutes (optional).
- Combine the sliced squash, zucchini, and sautéed onion in a large mixing bowl, seasoning with salt and pepper.
- Mix the eggs and milk in a separate bowl and then stir in the shredded cheese.
- Add the bread crumbs to the cheese mixture and stir until combined.
- Combine the cheese mixture with the vegetables until coated.
- Grease a 9×13 inch baking dish with olive oil or butter.
- Transfer the mixture into the baking dish, spreading it evenly and topping with reserved cheese.
- Bake for 30-35 minutes until golden brown and bubbly.
- Cool for a few minutes before serving.
Notes
Serve hot alongside a fresh salad or as a side for protein dishes. Can be made in advance and frozen.
Nutrition
- Serving Size: 1 serving
- Calories: 350
- Sugar: 5g
- Sodium: 400mg
- Fat: 12g
- Saturated Fat: 4g
- Unsaturated Fat: 6g
- Trans Fat: 0g
- Carbohydrates: 45g
- Fiber: 3g
- Protein: 15g
- Cholesterol: 30mg
Keywords: casserole, summer dish, vegetarian recipe, yellow squash, zucchini, comfort food

Minute Creamy Pumpkin Pasta Sauce for Weeknight Dinners
Creamy Pumpkin Pasta Sauce: A Match Made in Heaven
Welcome back to Clean Plate Cravings, food lovers! If you’re craving something that combines cozy autumn vibes with a deliciously creamy twist, then you are in for a treat today. Imagine twirling perfectly al dente pasta around your fork, covered in a velvety pumpkin sauce that hugs every bite. The best part? This dish is simple, satisfying, and oh-so-comforting. By the time you’re done reading this, you’ll be ready to make your kitchen smell like a cozy fall festival—without all the fuss!
Now, let’s set the scene. It’s a crisp October afternoon, and the leaves are just starting to turn a kaleidoscope of reds and oranges. With a cozy sweater on and the scent of cinnamon in the air, there’s nothing that screams autumn quite like pumpkin. Growing up, my family had this quirky yet delightful tradition of visiting a local pumpkin patch every fall. We’d hike through rows of plump pumpkins bobbing in the fields, while trying to choose the perfect one for our annual jack-o’-lanterns.
After a day filled with laughter, hayrides, and straw fights (because why not?), we would come home and make the most nostalgic autumn dishes. And guess what? Pumpkin pasta was always at the top of that list! This recipe brings all those warm, fuzzy memories rushing back; each bite feels like a hug from the past. So, let’s dive right in!
Personal Story
I still remember the first time we experimented with pumpkin in savory dishes. My mom was always adventurous in the kitchen, and she figured, “Why not try pumpkin in pasta?” Imagine all of us gathered around the table, waiting eagerly as she tossed spaghetti with a shiny orange sauce. When she set the bowl down, we were skeptical but hopeful. One taste, and we were all instantly converts! The creaminess of the sauce paired perfectly with the spices, making it a kind of culinary symphony.
Every autumn from that day forward, pumpkin pasta became a staple in our home—each bowl served with laughter and a reminder that good food creates happy memories. Now, as I whip this dish up in my own kitchen, I cherish those moments and hope to share that same joy with all of you!
Ingredients
Here’s everything you’ll need to bring this luscious pumpkin pasta sauce to life:
-
1 cup pumpkin puree: Use canned or homemade! Just make sure it’s pure pumpkin puree and not pumpkin pie filling, so you get all that delicious pumpkin flavor without extra sugars.
-
1 cup heavy cream: This is what makes the sauce luxuriously creamy. If you want a lighter version, you can swap in half-and-half or even coconut milk for a dairy-free option.
-
2 tablespoons olive oil: Perfect for sautéing garlic and adding a bit of depth. You can substitute it with avocado oil if olive oil isn’t your jam.
-
2 cloves garlic, minced: Fresh garlic adds a lovely aroma and flavor. If you’re in a pinch, pre-minced garlic or garlic powder can work too—just adjust the quantity to avoid overpowering the dish!
-
1/2 teaspoon nutmeg: A little nutmeg brings warmth and that cozy, homey feeling. If nutmeg isn’t available, try using a pinch of allspice or just leave it out.
-
1/2 teaspoon cinnamon: It may sound odd, but it blends beautifully with the pumpkin. Plus, it’s the spice of fall, right? Again, feel free to omit if you’re not a fan.
-
Salt and pepper to taste: Always, always season to your preference! Quality sea salt elevates all the flavors.
-
12 ounces pasta of choice: This recipe is versatile; I love using whole-grain or gluten-free pasta, but you can use whatever you have on hand!
-
Parmesan cheese for serving: A sprinkle of freshly grated Parmesan will elevate the entire dish. Nutritional yeast is a great vegan alternative!
Step-by-Step Instructions
Let’s get cookin’, shall we? Here are your step-by-step instructions to create this pumpkin paradise. It’s easier than you might think!
-
Cook Your Pasta: Start by boiling a large pot of salted water. Add your choice of pasta and cook according to package instructions. Stir occasionally to ensure even cooking. When it’s al dente, reserve 1 cup of pasta water and then drain the pasta. Quick tip: don’t rinse your pasta! That starch helps the sauce cling.
-
Sauté the Garlic: In a large skillet, heat the olive oil over medium heat. Once warm, add the minced garlic and sauté for about 30 seconds until fragrant. You want it golden but not browned—burnt garlic can taste bitter.
-
Add the Pumpkin and Cream: Lower the heat slightly and add the pumpkin puree. Stir it into the garlic; let it cook for a minute or so. Then, pour in the heavy cream and mix until fully combined. Watch as the orange and white meld into a beautiful sunset-colored sauce.
-
Season It Up: Sprinkle in the nutmeg and cinnamon (if using), and season with salt and pepper to taste. This is where you can experiment according to your preferences. I usually go for a good pinch of salt and a couple of cracks of black pepper to really bring out the flavors.
-
Blend It (Optional): For an extra creamy sauce, you can blend it using an immersion blender right in the skillet until it’s smooth and dreamy. It’s optional but definitely adds that indulgent touch.
-
Mix Everything Together: Toss your cooked pasta straight into the skillet with the pumpkin sauce. If it looks a little thick, add some of that reserved pasta water, a little at a time, until you reach your desired consistency. A tip? Start with 1/4 cup and adjust from there.
-
Serve It Up: Plate your creamy pumpkin pasta and finish with a generous sprinkle of grated Parmesan cheese (or nutritional yeast) on top. If you have fresh herbs like basil or parsley, a bit of green adds some gorgeous color and freshness!
Serving Suggestions
For an inviting presentation, swirl the pasta onto each plate and then drizzle a little more olive oil and a sprinkle of fresh herbs on top. Pair with a crisp green salad to balance out the creaminess, and don’t forget a glass of white wine or sparkling water for a bubbly touch! Your table will look as festive as your plate, perfect for a cozy dinner with friends or family.
Recipe Variations
Now, let’s talk creativity! Here are a few fun twists to switch things up:
-
Add Protein: Throw in some grilled chicken, sautéed mushrooms, or roasted chickpeas for an added protein boost.
-
Spice It Up: Love a little heat? Add a pinch of red pepper flakes or toss in some sautéed kale for a kick of flavor and nutrients.
-
Herby Goodness: Stir in fresh herbs like sage or thyme right at the end of cooking for an aromatic twist.
-
Nutty Texture: Add toasted walnuts or pine nuts for some crunch and a nutty flavor that complements the pumpkin beautifully.
-
Cheesy Delight: For an extra cheesy indulgence, blend in some cream cheese or mascarpone along with the heavy cream.
Chef’s Notes
This creamy pumpkin pasta sauce has come a long way since those family dinners. I originally started with just pumpkin and cream, but over time, I’ve embraced spices and variations to make this dish my own. And now, it’s one of my go-to recipes whenever fall rolls around! I can’t help but smile at how something so simple can spark nostalgia and comfort. Give it a try—you might just find it sparking your own special memories!
FAQs and Troubleshooting
1. Can I use fresh pumpkin instead of canned?
Absolutely! Just roast and puree fresh pumpkin until smooth. It will be delicious, though you may need to adjust seasoning since fresh pumpkin can vary in sweetness.
2. My sauce is too thick—what do I do?
No worries! Just keep adding small amounts of reserved pasta water until you reach your desired creaminess.
3. Can I make this sauce ahead of time?
Yes! This sauce stores well in the fridge for up to 3 days. Just reheat gently on the stove, adding a splash of cream or pasta water to loosen it up.
4. How can I make this dairy-free?
Substitute the heavy cream with coconut milk or a dairy-free cream alternative, and nutritional yeast instead of Parmesan cheese for that cheesy flavor!
Nutritional Info
Per serving (based on 4 servings):
- Calories: 450
- Protein: 10g
- Carbohydrates: 60g
- Fat: 20g
- Fiber: 3g
And there you have it—a cozy, creamy pumpkin pasta sauce that’s sure to please both your taste buds and your heart. It’s a dish that invites you to slow down, savor, and reflect on the beauty of home-cooked meals. So grab those ingredients, channel your inner chef, and let’s make some delicious memories in the kitchen! Happy cooking, friends!
PrintCreamy Pumpkin Pasta Sauce

A luscious pumpkin pasta sauce that combines cozy autumn flavors with a creamy twist, perfect for a comforting meal.
- Prep Time: 15 minutes
- Cook Time: 20 minutes
- Total Time: 35 minutes
- Yield: 4 servings 1x
- Category: Main Course
- Method: Cooking
- Cuisine: Italian
- Diet: Vegetarian
Ingredients
- 1 cup pumpkin puree
- 1 cup heavy cream
- 2 tablespoons olive oil
- 2 cloves garlic, minced
- 1/2 teaspoon nutmeg
- 1/2 teaspoon cinnamon
- Salt and pepper to taste
- 12 ounces pasta of choice
- Parmesan cheese for serving
Instructions
- Cook Your Pasta: Start by boiling a large pot of salted water. Add your choice of pasta and cook according to package instructions. Stir occasionally to ensure even cooking. When it’s al dente, reserve 1 cup of pasta water and then drain the pasta.
- Sauté the Garlic: In a large skillet, heat the olive oil over medium heat. Once warm, add the minced garlic and sauté for about 30 seconds until fragrant.
- Add the Pumpkin and Cream: Lower the heat slightly and add the pumpkin puree. Stir it into the garlic, then pour in the heavy cream and mix until fully combined.
- Season It Up: Sprinkle in the nutmeg and cinnamon (if using), and season with salt and pepper to taste.
- Blend It (Optional): For an extra creamy sauce, blend it using an immersion blender until it’s smooth.
- Mix Everything Together: Toss your cooked pasta straight into the skillet with the pumpkin sauce, adding reserved pasta water as needed to reach desired consistency.
- Serve It Up: Plate your creamy pumpkin pasta and finish with grated Parmesan cheese on top.
Notes
This sauce can be made ahead of time and stored in the fridge for up to 3 days. Reheat gently, adding a splash of cream or pasta water to loosen.
Nutrition
- Serving Size: 1 serving
- Calories: 450
- Sugar: 6g
- Sodium: 500mg
- Fat: 20g
- Saturated Fat: 10g
- Unsaturated Fat: 7g
- Trans Fat: 0g
- Carbohydrates: 60g
- Fiber: 3g
- Protein: 10g
- Cholesterol: 60mg
Keywords: pumpkin, pasta, creamy sauce, autumn recipe, comfort food
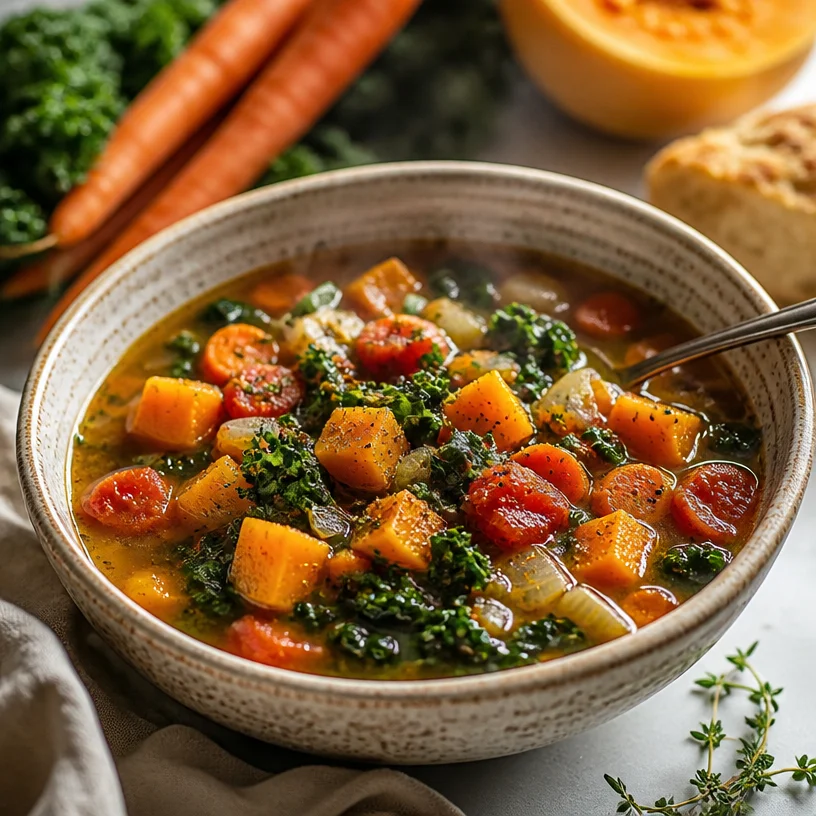
Minute Harvest Vegetable Soup for Weeknight Dinners
Harvest Vegetable Soup: A Warm Bowl of Comfort
Welcome, fellow food lovers! Today, we’re diving into a cozy, colorful dish that’s perfect for those crisp fall nights—Harvest Vegetable Soup. When the leaves turn golden and the air gets that delightful chill, there’s nothing quite like a warm bowl of soup to wrap your hands around and fill your belly. It’s comfort food at its finest, and my goal today is to share with you not just a recipe, but a little bit of love and warmth that comes from cooking.
As the days get shorter and the nights longer, the hustle and bustle of life can feel overwhelming. But cooking can be a soothing retreat from it all, and this harvest vegetable soup is just the answer. Packed with nourishing vegetables, herbs, and spices, it’s deliciously satisfying and easy to whip up, even on your busiest days. There’s something magical about transforming a handful of fresh ingredients into something hearty and soul-warming, and I can’t wait to share the step-by-step process with you. Don’t worry if you’re new to cooking; I’ll be right here to guide you through every chop and stir!
Grab your aprons and your favorite chopping knife, and let’s get started on crafting a bowl of goodness that celebrates the beauty of fall produce. Trust me, you’re going to want to make a double batch for meal prep—you’ll thank yourself later when you’re reaching for a quick, wholesome meal that doesn’t skimp on flavor!
A Trip Down Memory Lane
Let me take you back to my childhood kitchen, where the comforting aroma of soup simmering on the stove was a daily ritual. My grandmother had this magical touch; she could turn the simplest ingredients into a feast for the senses. I remember rushing home from school, the scent of roasted squash and fresh herbs weaving through the air, wrapping around me like an embrace.
One fall afternoon, I wandered into the kitchen, my fingers coated in autumn leaves after playing outside. I spotted her chopping vibrant carrots and rich, golden squash, their colors so bright they almost sparkled. There was kale too—a leafy green that I wasn’t particularly fond of at the time. But under her expert hands, everything melded together, creating something more than just a soup; it was a celebration of the season, a family tradition, and a way to connect with nature.
We’d gather around the table as the soup bubbled away, dipping our bread into steaming bowls, sharing stories, giggles, and countless memories. Even now, as I stand in my kitchen, cooking this harvest vegetable soup, I can feel her spirit guiding me. So, let’s create those memories together. Are you ready?
Ingredients
Here’s what you’ll need to make this comforting harvest vegetable soup:
-
Squash (butternut or acorn are great choices)
- Chef Insight: Squash brings a subtle sweetness and creaminess to the soup. If you can’t find any, sweet potatoes make a fantastic substitute!
-
Carrots (fresh, vibrant, and sweet)
- Substitution Tip: You can use parsnips for a slightly different flavor profile or add some flavor with sweet bell peppers!
-
Kale (the ultimate leafy green)
- Quick Insight: Kale adds a hearty texture and loads of nutrients. If you’re not a kale fan, spinach or swiss chard can be used instead!
-
Tomatoes (canned diced tomatoes work well, or fresh if they’re in season)
- Substitution Tip: For a richer flavor, try using roasted tomatoes for a deeper taste or even sun-dried tomatoes for a unique twist.
-
Vegetable broth (store-bought or homemade)
- Chef Insight: Broth is the soul of your soup! Feel free to use chicken broth for a non-vegetarian option, or even water if you’re in a pinch, although it might lack depth.
-
Onion (for that base flavor)
- Tip: Yellow or white onions work best; they add a mild sweetness that balances the earthy vegetables.
-
Garlic (fresh, minced or crushed)
- Chef Secret: Garlic infuses the soup with warmth and depth. Add it later in the cooking process to keep that fresh flavor!
-
Olive oil (for sautéing)
- Tip: Use high-quality extra virgin olive oil for added richness.
-
Herbs (thyme, rosemary, and a bay leaf)
- Substitution Tip: Dried herbs can work in a pinch, but fresh herbs elevate the dish. Experiment with others like parsley or oregano according to your taste preference!
-
Salt and pepper (to taste)
- Chef Hint: Season in layers—add a pinch while sautéing and adjust before serving.
Step-by-Step Instructions
Let’s get down to the nitty-gritty! Follow these steps, and soon enough, your kitchen will smell heavenly.
-
Prep the Vegetables: Start by washing all your veggies thoroughly. This is a great time to channel your inner chef and get those knife skills polished! Chop the squash, carrots, and onion into bite-sized pieces, and roughly chop the kale. Don’t forget to mince the garlic—tiny pieces release tons of flavor!
-
Sauté the Base:
- In a large pot, heat about a tablespoon of olive oil over medium heat.
- Toss in the chopped onions and sauté until they’re soft and translucent, about 5 minutes.
- Tip: Make sure to stir frequently to avoid burning!
-
Add Garlic & Carrots:
- Once the onions are ready, toss in the minced garlic. Let that sizzle for about 30 seconds until fragrant (keep an eye on it so it doesn’t burn!).
- Add the carrots next and sauté for another 3-4 minutes. This helps to sweeten them up even more.
-
Incorporate the Squash:
- Now, it’s time to introduce the star ingredient—squash! Add it to the pot, stirring to combine everything.
- Chef Hack: This is a great moment to season with a pinch of salt and pepper! It’ll help to draw out moisture from the veggies.
-
Pour in the Broth:
- Add in your vegetable broth (or water if using), followed by the canned tomatoes. Give it a good stir and bring the mixture to a gentle boil.
- Tip: If you like a thicker soup, you can add a little less broth or let it simmer longer to reduce.
-
Add Kale and Herbs:
- Once boiling, reduce the heat to a simmer and toss in the chopped kale, thyme, and rosemary along with the bay leaf.
- Let everything simmer away for about 20-25 minutes, allowing the flavors to mingle and the veggies to soften beautifully.
-
Taste and Adjust:
- Before serving, take out the bay leaf (it’s done its job!). Now’s the time to sample your soup and adjust seasoning if necessary. Maybe a little more salt or a dash more pepper?
- Chef Insight: A squeeze of fresh lemon juice at this stage can brighten the entire dish—definitely worth a try!
-
Serve It Up:
- Ladle your gorgeous harvest vegetable soup into bowls. You can garnish with a drizzle of olive oil or a sprinkle of fresh herbs if you’re feeling fancy!
Serving Suggestions
Serving soup is an art! I love to present this harvest vegetable soup with a side of crusty whole-grain bread, perfect for dipping. You can also pair it with a light salad for a delightful contrast. For those chilly evenings, consider serving it in rustic bowls to bring that cozy vibe home.
Recipe Variations
Why not shake things up a bit? Here are some fun twists you can try:
- Spicy Kick: Add a pinch of red pepper flakes or a diced jalapeño to amp up the heat!
- Creamy Texture: Blend a portion of the soup with an immersion blender for a creamy consistency (add a splash of cream or coconut milk for richness).
- Protein Boost: Toss in some canned beans (like white beans or chickpeas) for added protein and texture.
- Grain Add-In: For more heartiness, add cooked quinoa or barley before serving!
- Herb Swaps: Try using fresh basil or cilantro for a fresh herbaceous flavor.
Chef’s Notes
Creating this soup has been a labor of love! Over time, I’ve played around with different vegetable combinations and spices. What started as a basic recipe has morphed into a delightful collection of seasonal flavors. I once had a “what’s in my fridge” day and added some leftover corn and celery—I ended up loving it so much that it has become a staple! Cooking is all about experimentation and making it your own, after all.
FAQs and Troubleshooting
Q: My soup turned out too salty. What can I do?
A: If your soup is too salty, add a diced potato to simmer in the soup for a bit. It absorbs excess salt. Just remember to remove it before serving!
Q: Can I freeze this soup?
A: Absolutely! This soup freezes beautifully. Just let it cool completely before transferring to airtight containers. It should last about 3 months in the freezer.
Q: How do I store leftovers?
A: Let the soup cool down, then store it in the fridge in an airtight container for up to 5 days.
Q: Can I use frozen vegetables?
A: Yes, frozen vegetables work great in this recipe! Just throw them in and adjust your cooking times as necessary since they’re already prepped.
Nutritional Info
(If this were a real post, I would provide nutritional info. Just a head’s up to calculate calories, fiber, protein, etc., based on the ingredients used.)
So there you have it, my delightful Harvest Vegetable Soup! I hope you feel inspired to whip up this nourishing dish and create your own cozy moments in the kitchen. Enjoy every spoonful, and remember, it’s all about good food and good company! Share this recipe with a friend, and let’s spread the warmth of home-cooked goodness together!
PrintHarvest Vegetable Soup

Warm and comforting, this Harvest Vegetable Soup is packed with nourishing vegetables, herbs, and spices, perfect for cozy fall nights.
- Prep Time: 15 minutes
- Cook Time: 30 minutes
- Total Time: 45 minutes
- Yield: 4 servings 1x
- Category: Soup
- Method: Simmering
- Cuisine: American
- Diet: Vegetarian
Ingredients
- 1 squash (butternut or acorn)
- 2 carrots, chopped
- 2 cups kale, chopped
- 1 can diced tomatoes (or fresh if in season)
- 4 cups vegetable broth
- 1 onion, chopped
- 3 cloves garlic, minced
- 2 tablespoons olive oil
- 1 teaspoon thyme
- 1 teaspoon rosemary
- 1 bay leaf
- Salt and pepper to taste
Instructions
- Prep the vegetables by washing and chopping the squash, carrots, and onion, and roughly chopping the kale.
- Heat olive oil in a large pot over medium heat, then sauté onions until soft, about 5 minutes.
- Add minced garlic and sauté for 30 seconds until fragrant.
- Incorporate the carrots and sauté for another 3-4 minutes.
- Stir in the squash and season with salt and pepper.
- Pour in the vegetable broth and add the diced tomatoes; bring to a gentle boil.
- Reduce heat to a simmer and add kale, thyme, rosemary, and bay leaf; simmer for 20-25 minutes.
- Taste and adjust seasoning before serving. Remove bay leaf.
- Serve hot, garnished with olive oil or fresh herbs.
Notes
This soup can be frozen for up to 3 months. Great with crusty bread or a light salad.
Nutrition
- Serving Size: 1 serving
- Calories: 250
- Sugar: 7g
- Sodium: 600mg
- Fat: 8g
- Saturated Fat: 1g
- Unsaturated Fat: 6g
- Trans Fat: 0g
- Carbohydrates: 38g
- Fiber: 6g
- Protein: 8g
- Cholesterol: 0mg
Keywords: vegetable soup, comfort food, healthy soup, fall recipes
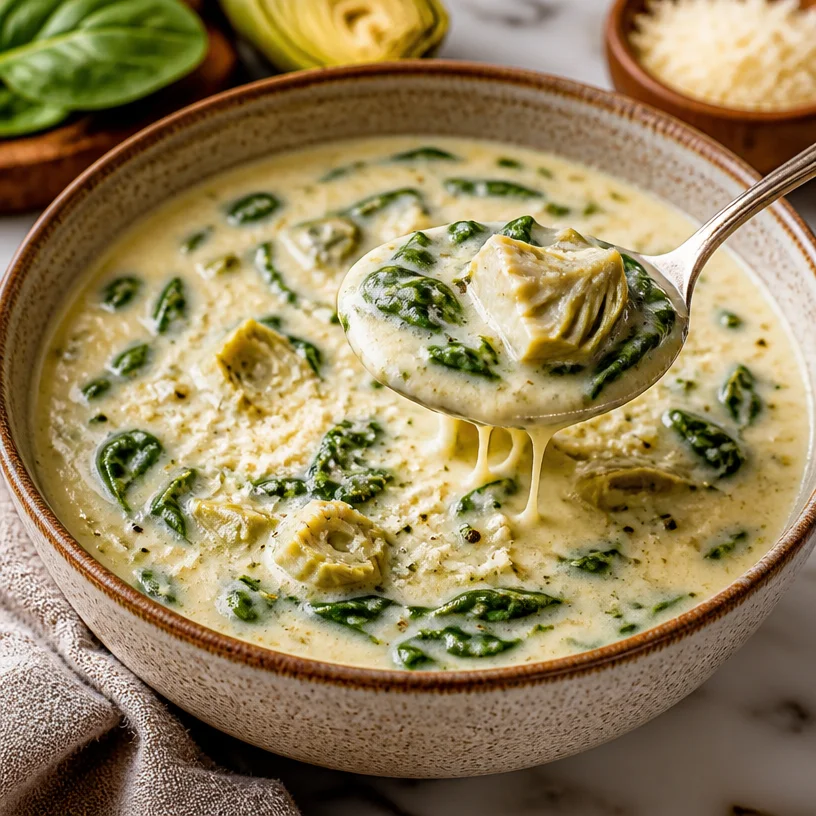
Creamy Spinach Artichoke Soup in 20 Minutes (Weeknight)
Spinach Artichoke Soup: A Warm Embrace in a Bowl
Welcome, dear foodies! Let’s take a cozy journey together through the world of flavors, warmth, and comfort as we dive into a bowl of Spinach Artichoke Soup. If you’ve never experienced the creamy, savory delight of this dish, then prepare yourselves! This isn’t just any soup; it’s a hug in a bowl, perfect for chilly nights or whenever you need a little pick-me-up.
If I’ve learned anything from my years swaying with my wooden spoon in the kitchen, it’s that certain dishes hold memories that stick with us like the smell of warm bread wafting through the house. Spinach Artichoke Soup is one of those nostalgic treasures for me. I remember the first time I made it for my friends during a dinner party at my tiny apartment. At the time, I was a little overwhelmed by fancy recipes, but the beauty of this soup lay in its simplicity. It required minimal effort and maximum flavor, making it a star of the evening.
The aroma filled the air, and as my friends gathered around the table, we shared not just a meal but bursts of laughter, stories, and the kind of connection that stays etched in our hearts. Each spoonful was like wrapping my taste buds in a velvety embrace—rich, creamy, and utterly satisfying. So, grab your favorite apron, and let’s re-create that magical moment in your kitchen!
Personal Story: The Dinner Party that Sparked a Tradition
Picture this: a dimly lit apartment with an eclectic mix of mismatched chairs and a table overflowing with my latest culinary experiments. It was a crisp autumn evening, and I invited a few close friends over to catch up and share my latest kitchen creations. The evening took a delightful turn when I decided to whip up my Spinach Artichoke Soup.
I vividly remember scooping the creamy goodness into bowls, steam rising up like a little cloud of happiness. The moment everyone took their first spoonful, the room erupted in a chorus of "Mmm!" and "Wow!" Laughter filled the air as we reminisced about our college days, and I felt like a real chef for the first time.
As the years went by, my Spinach Artichoke Soup became a staple at all gatherings, evolving into a tradition. It was the go-to dish for game nights, movie marathons, and even comforting rainy day lunches. That night, I discovered the power of food to bring people together, and I’ve carried that lesson with me ever since. Now, let’s create those beautiful moments in your home!
Ingredients
Let’s gather our ingredients! This vibrant soup is made with a few simple, wholesome ingredients. Each one adds something special to the dish, so let’s take a closer look:
-
Fresh Spinach: The star of our show! Spinach is packed with nutrients and offers a mild, earthy flavor that blends beautifully in a creamy soup. If you’re out of fresh spinach, you can substitute with frozen spinach—just ensure to thaw and drain it well!
-
Artichoke Hearts: These tender hearts contribute a unique, slightly tangy flavor that complements the richness of the cheese. Canned or frozen artichoke hearts work perfectly, but if you have fresh ones, feel free to use them as well—just make sure to prep them properly!
-
Cream Cheese: This creamy delight gives our soup a luscious texture. It melts smoothly into the broth, making every spoonful feel indulgent. For a lighter option, try using Neufchâtel cheese, or for a vegan version, coconut cream can work in a pinch.
-
Parmesan Cheese: The finishing touch! Parmesan adds a nutty, salty depth of flavor that rounds out the soup beautifully. If you’re dairy-free, try nutritional yeast for that cheesy umami kick!
Step-by-Step Instructions
Now that we have our ingredients lined up, let’s get cooking! Follow me, and I’ll share my step-by-step guide to making the most delicious Spinach Artichoke Soup.
Step 1: Sautéing the Base
In a large pot, heat about 2 tablespoons of olive oil over medium heat. Once it’s shimmering, toss in one chopped onion and three cloves of minced garlic. Sauté for about 3–5 minutes until the onions are translucent and fragrant. Chef’s tip: Always keep a close eye on your garlic to avoid burning it—it can go from golden to bitter in a heartbeat!
Step 2: Adding Spinach
Once the onion and garlic are ready, it’s time to toss in 8 ounces of fresh spinach. Stir for about 2–3 minutes, or until the spinach has wilted down. If you’re using frozen spinach, let it thaw slightly before adding it in. A great way to enhance flavor is to sprinkle in a bit of salt while cooking; it brings out the moisture!
Step 3: Incorporating Artichokes
Next, drain and chop 1 can (or about 14 ounces) of artichoke hearts and add them to the pot. Stir to combine and let them mingle with our sautéed goodness for an additional 2 minutes. Those artichokes are like little pockets of flavor just waiting to shine!
Step 4: Creamy Bliss
Now for the creamy part! Add 8 ounces of cream cheese (you can let it soften slightly beforehand) into the pot, along with 4 cups of vegetable broth and a bit of black pepper and red pepper flakes to taste. Stir everything together, allowing the cream cheese to melt and blend into the broth. Chef’s hack: If you want an ultra-smooth soup, you can use an immersion blender at this stage to get rid of any lumps!
Step 5: Finishing Touches
Once it’s all simmered together, slowly stir in ½ cup of grated Parmesan cheese until it’s melted and incorporated. Taste and adjust seasoning if needed—maybe a pinch of salt or a squeeze of fresh lemon juice to brighten it up? Simmer the soup for about 10 minutes, allowing all the flavors to marry beautifully.
Step 6: Serving It Up
When you’re ready to serve, ladle the soup into bowls. You can garnish it with a sprinkle of extra Parmesan and a few cracks of black pepper for presentation. Maybe even some fresh herbs like parsley or basil for a pop of color!
Serving Suggestions
This soup can be enjoyed on its own, but it pairs beautifully with crusty bread, a side salad, or even your favorite grilled cheese sandwich! I love serving it with a slice of sourdough, letting that crusty goodness soak up the creamy soup. Trust me, nothing warms the soul quite like this combination!
Recipe Variations
Feel like mixing things up? Here are a few ways you can add your own twist to this Spinach Artichoke Soup recipe:
- Add Protein: Toss in some cooked chicken, turkey, or even white beans for added heartiness.
- Spice It Up: Want a kick? Experiment with different spices like smoked paprika or cayenne pepper for an added layer of flavor.
- Swap the Greens: Don’t have spinach? Try kale or Swiss chard for a different texture and taste.
- Vegan Version: Substitute the cream cheese and Parmesan with cashew cream and nutritional yeast for a plant-based delight!
Chef’s Notes
This recipe has truly come a long way since that cozy dinner party. I’ve had my fair share of experiments—once I accidentally used feta cheese instead of Parmesan, and while it was a happy accident, I still love my classic version best. Each iteration taught me something new about flavor balance, and I love sharing these experiences with fellow food lovers.
Food is a journey, and this Spinach Artichoke Soup has proven to be the perfect vehicle for creating memories. So go ahead and make it your own. It’s perfect for sharing and is guaranteed to make your kitchen feel like home!
FAQs and Troubleshooting
Q1: Why is my soup too thick?
If your soup turns out too thick, simply whisk in more vegetable broth until you reach your desired consistency.
Q2: Can I use frozen artichokes?
Absolutely! Just be sure to thaw and drain them well before adding them to the soup.
Q3: How long will leftovers last?
This soup keeps well in the refrigerator for about 3-4 days. Just make sure to store it in an airtight container!
Q4: Can I freeze this soup?
Yes! Allow the soup to cool completely, then store it in freezer-safe containers. It can last for up to 3 months. Just be cautious about the cream cheese—freezing might alter its texture slightly.
Nutritional Info
While I’m not one to focus solely on numbers in the kitchen, a serving of this Spinach Artichoke Soup is packed with nutrients, including vitamins A, C, and K, and offers a nice amount of calcium from the cheese. It’s the perfect way to feel good while enjoying something utterly delicious!
So there you have it—your ultimate guide to crafting a hearty, creamy Spinach Artichoke Soup that warms more than just your belly. Gather your favorite people around the table, share some stories, and savor this delightful dish that’s sure to become a cherished recipe in your home. Happy cooking!
PrintSpinach Artichoke Soup

A creamy and savory Spinach Artichoke Soup that’s perfect for chilly nights or whenever you need comfort in a bowl.
- Prep Time: 10 minutes
- Cook Time: 30 minutes
- Total Time: 40 minutes
- Yield: 4 servings 1x
- Category: Soup
- Method: Stovetop
- Cuisine: American
- Diet: Vegetarian
Ingredients
- 8 ounces fresh Spinach
- 1 can (14 ounces) Artichoke Hearts
- 8 ounces Cream Cheese
- ½ cup grated Parmesan Cheese
- 1 chopped Onion
- 3 cloves minced Garlic
- 4 cups Vegetable Broth
- 2 tablespoons Olive Oil
- Black Pepper to taste
- Red Pepper Flakes to taste
- Salt to taste
Instructions
- Heat 2 tablespoons of olive oil in a large pot over medium heat. Add chopped onion and minced garlic, and sauté for about 3–5 minutes until translucent.
- Toss in 8 ounces of fresh spinach and stir for about 2–3 minutes until wilted.
- Add drained and chopped artichoke hearts to the pot, stir to combine, and let mingle for 2 minutes.
- Incorporate 8 ounces of cream cheese, 4 cups of vegetable broth, and season with black pepper and red pepper flakes. Stir until cream cheese melts.
- Slowly stir in ½ cup of grated Parmesan cheese until melted. Taste and adjust seasoning as needed.
- Simmer the soup for about 10 minutes to allow flavors to marry. Serve hot.
Notes
For a lighter option, substitute cream cheese with Neufchâtel cheese. For a vegan version, use coconut cream for cream cheese and nutritional yeast for Parmesan.
Nutrition
- Serving Size: 1 bowl
- Calories: 320
- Sugar: 4g
- Sodium: 600mg
- Fat: 22g
- Saturated Fat: 10g
- Unsaturated Fat: 8g
- Trans Fat: 0g
- Carbohydrates: 24g
- Fiber: 5g
- Protein: 10g
- Cholesterol: 40mg
Keywords: soup, spinach, artichoke, comfort food, creamy soup

Minute One-Pot Turkey Vegetable Soup for Weeknights
A Warm Bowl of Comfort: Turkey Vegetable Soup
Welcome, fellow food lovers! Today, we’re diving into a dish that’s close to my heart and definitely a staple in my kitchen: Turkey Vegetable Soup.
As the days get shorter and the weather a bit brisker, there’s nothing quite like curling up with a cozy bowl of soup. It’s nourishing, comforting, and oh-so-satisfying—plus, it’s an excellent way to use up leftovers or whatever veggies are lingering in your fridge. This soup isn’t just about comfort; it’s about embracing healthy eating without sacrificing flavor. So, grab your apron, and let’s get cooking!
Introduction
Picture this: It’s a chilly Sunday afternoon. The kind of day that invites you to snuggle up with a good book, wrapped in your favorite blanket. As I sat there, my stomach grumbling, a memory washed over me—my grandmother’s kitchen filled with the delightful aroma of her famous turkey soup simmering on the stove. It was more than just food; it was a warm hug, a gathering place for family, and a celebration of love through cooking.
Turkey Vegetable Soup is more than just another recipe; it’s a beautiful blend of nostalgia and practicality. Whether you’re a seasoned chef or just starting out in the kitchen, this dish is accessible to all. It showcases vibrant veggies dancing in a rich broth, providing comfort and nourishment in every spoonful. Trust me, you’ll be looking forward to leftovers with this one!
In this blog post, I’ll share not only the recipe but also some fun stories from my kitchen, tips to elevate your soup game, and a few creative twists you might want to try. So let’s hop right into this delightful wellness bowl—which is perfect for busy weekdays or laid-back weekends. Are you ready? Let’s go!
Personal Story
I remember the first time I made turkey soup by myself. I was about ten years old, standing on a stool so I could reach the stove. My grandmother had passed down her turkey soup recipe, scribbled in her beautiful, looping handwriting. With her guiding spirit behind me, I felt a sense of pride as I chopped up vegetables and stirred the pot. The broth bubbled cheerfully, and I could already smell the deliciousness brewing.
When my family gathered around the table that night, I couldn’t wait to serve them the soup I had made all by myself. As we sat down together, I felt a deep connection to my roots; here I was, following a tradition that had been passed down through generations. And you know what? The soup turned out incredible! It didn’t just taste good; it tasted like memories and love, served up in a bowl.
That experience sparked a passion for cooking in me—a belief that food can bring us together and create warm memories. Ever since then, I’ve been whipping up my version of turkey vegetable soup every winter, adjusting it here and there to reflect what inspires me in the kitchen today. So, let’s create some new culinary memories together!
Ingredients
Here’s what you’ll need to make this delicious Turkey Vegetable Soup:
-
Turkey: The star of our soup! You can use leftover turkey from Thanksgiving, rotisserie chicken, or ground turkey. Ground turkey gives you a finer texture, while shredded turkey offers those delightful rustic chunks.
-
Mixed Vegetables: I love a colorful mix of carrots, celery, and peas. To keep it fresh, you can swap in whatever veggies you have on hand—zucchini, bell peppers, or even kale work beautifully!
-
Broth: Choose a good quality chicken or vegetable broth as your base. Homemade is great, but if you’re short on time, store-bought works perfectly. If you want a deeper flavor, you can even add a splash of white wine or soy sauce!
-
Herbs: Fresh or dried herbs will really elevate your soup. I recommend thyme, rosemary, and parsley for that earthy touch. If you’re looking for a bit of zing, sprinkle some red pepper flakes or lemon juice before serving.
Chef Tips:
- When using fresh vegetables, try to chop them consistently to ensure they cook evenly.
- Always taste the broth before serving—it’s your leading flavor, and you can adjust the seasonings as you prefer!
Step-by-Step Instructions
Now that we have our ingredients ready, let’s make some magic happen! Follow these steps for a delightful Turkey Vegetable Soup:
-
Prep Your Veggies: Begin by washing and chopping your mixed vegetables into bite-sized pieces. Aim for consistency in size, so they cook evenly. Carrots can be sliced into thin rounds, celery into small half-moons, and if you’re adding zucchini, cut it into cubes.
-
Sauté the Aromatics: In a large pot, heat a couple of tablespoons of olive oil over medium heat. Add chopped onions and garlic, sautéing them until they’re golden and fragrant—about 3-4 minutes. This step is crucial; it builds the flavor base!
-
Cook the Turkey: If you’re using ground turkey, add it to the pot now. Break it apart with a wooden spoon and cook until browned. If you’re using shredded turkey, you can skip this step. Just toss it in later!
-
Add the Veggies: Stir in your mixed veggies and let them cook for about 5 minutes. You want them to soften a bit but still have that vibrant crunch! If you’re feeling adventurous, now’s the perfect time to add in some spices or herbs like thyme or rosemary for depth.
-
Add the Broth: Pour in your broth, bringing it all to a gentle simmer. If you have leftover turkey carcass hanging around, this is a great time to throw it in for extra flavor! Allow the soup to simmer for 20-30 minutes so the flavors can meld beautifully.
-
Season to Taste: Before serving, taste the broth and check the seasoning. Add salt, pepper, and any additional herbs as needed. This is where you can truly make it yours, adjusting to your preferred flavor profile.
-
Final Touches: Once the veggies are tender and the flavors have merged, remove from the heat. If you used a turkey carcass, carefully take it out and pull off any remaining meat to add back to the soup.
Serving Suggestions
When it comes to serving Turkey Vegetable Soup, presentation matters! Ladle the steaming soup into bowls, and consider adding a sprinkle of fresh parsley or a drizzle of olive oil to elevate the look. Serve it with a side of crusty whole-grain bread or a vibrant green salad for the perfect meal. Your loved ones will be so impressed—they’ll want your secret recipe!
Recipe Variations
Let’s shake things up! Here are a few creative variations to personalize your Turkey Vegetable Soup:
-
Southwestern Twist: Add black beans, corn, and a dash of cumin and chili powder for a zesty, southwestern vibe. Top with cilantro and avocado for extra freshness!
-
Asian Fusion: Use bok choy and shiitake mushrooms instead of your traditional veggies. Add a splash of soy sauce and sesame oil for a delicious Asian flavor.
-
Creamy Version: Stir in a splash of heavy cream or coconut milk just before serving for a rich, velvety texture.
-
Lentil Boost: Toss in a cup of cooked lentils for added protein and fiber, making it even heartier!
Chef’s Notes
Ah, the evolution of this soup has been so delightful! What started as my grandmother’s traditional recipe has transformed over the years into my personal playbook. I’ve added twists that reflect my tastes and inspire creativity. A funny memory that stands out is when I mistakenly added cinnamon instead of thyme—let’s just say it was an interesting experiment! But it taught me that even mishaps can lead to tasty new dishes.
So, embrace the journey in your kitchen! Cooking is about exploration and having fun. Don’t shy away from making this soup your own; try new ingredients or spices, and remember: the best meals are made with love.
FAQs and Troubleshooting
-
What if the soup is too salty?
- No worries! You can add diced potatoes or a bit of cream to balance the saltiness. They’ll absorb some of the saltiness and give your soup a creamy texture!
-
Can I make this soup ahead of time?
- Absolutely! This soup actually tastes even better the next day as the flavors deepen. Just store it in an airtight container in the fridge for up to 3 days.
-
Can I freeze Turkey Vegetable Soup?
- Yes, you can! Divide into portions and freeze for up to three months. Just be sure to let it cool completely before transferring to freezer-safe containers.
-
What if I have dietary restrictions?
- No problem! This soup is incredibly flexible. You can easily substitute turkey for cooked beans or tofu for a vegan-friendly option. Plus, using gluten-free broth keeps it celiac-safe.
Nutritional Info
While nutritional content can vary based on specific ingredients and portion sizes, this Turkey Vegetable Soup is generally low in calories and high in protein, thanks to the turkey and vegetables. A typical serving provides excellent fiber, vitamins, and minerals, making it a wholesome addition to your meals.
So there you have it! A cozy and delicious Turkey Vegetable Soup ready to warm both your body and soul. I hope it brings the same joy and memories to your kitchen as it has to mine. Happy cooking, foodies—let’s keep those plates clean and our cravings satisfied!
PrintTurkey Vegetable Soup

A comforting and nourishing Turkey Vegetable Soup perfect for chilly days, featuring vibrant veggies and hearty turkey.
- Prep Time: 15 minutes
- Cook Time: 30 minutes
- Total Time: 45 minutes
- Yield: 4 servings 1x
- Category: Main Course
- Method: Simmering
- Cuisine: American
- Diet: Low-Calorie
Ingredients
- 1 pound ground turkey or shredded turkey
- 2 cups mixed vegetables (carrots, celery, peas)
- 4 cups chicken or vegetable broth
- 1 onion, chopped
- 2 cloves garlic, minced
- 2 tablespoons olive oil
- 1 teaspoon thyme (fresh or dried)
- 1 teaspoon rosemary (fresh or dried)
- Salt and pepper to taste
- Optional: red pepper flakes or lemon juice for serving
Instructions
- Prep your veggies: Wash and chop your mixed vegetables into bite-sized pieces.
- Sauté the aromatics: In a large pot, heat olive oil over medium heat and add chopped onions and garlic, cooking until golden.
- Cook the turkey: If using ground turkey, add it now and cook until browned.
- Add the veggies: Stir in the mixed veggies and sauté for about 5 minutes.
- Add the broth: Pour in the broth and bring to a gentle simmer.
- Season to taste: Before serving, taste the broth and adjust seasonings as needed.
- Final touches: Remove the heat when veggies are tender, ensuring all flavors have melded.
Notes
This soup can be made ahead of time and tastes even better the next day. It can also be frozen for up to three months.
Nutrition
- Serving Size: 1 serving
- Calories: 250
- Sugar: 4g
- Sodium: 600mg
- Fat: 7g
- Saturated Fat: 2g
- Unsaturated Fat: 5g
- Trans Fat: 0g
- Carbohydrates: 30g
- Fiber: 5g
- Protein: 20g
- Cholesterol: 70mg
Keywords: turkey soup, vegetable soup, healthy soup, comfort food, winter recipes, easy soup recipes

Minute One-Pot Chicken Noodle Soup for Weeknights
The Ultimate Chicken Noodle Soup: A Cozy Classic with a Twist
Ah, chicken noodle soup—just saying the name brings back memories of comforting moments spent at home, wrapped in blankets and surrounded by the warm aroma of a bubbling pot on the stove. There’s something magical about this dish that transcends generations, and for many, it’s a childhood staple that evokes nostalgia and warmth. If you’ve ever struggled through a rainy day or felt under the weather, I’m sure you’d agree that a hearty bowl of chicken noodle soup has a way of making everything better!
I’m Ava Carter, your friendly neighborhood chef, and today I’m excited to share my favorite version of chicken noodle soup with all of you. This isn’t just any chicken noodle soup; it’s a delightful blend of fresh ingredients and wholesome goodness that’ll leave you feeling energized and ready to take on the world. We’re talking about tender chicken, perfectly cooked egg noodles, and vibrant vegetables all swimming in a savory homemade broth.
In this blog post, you’re in for a treat! I’ll guide you through my go-to recipe for chicken noodle soup, complete with personal anecdotes, tips, and tricks straight from my cozy kitchen. Whether you’re battling a cold, searching for the perfect family dinner, or just seeking some soul-warming goodness, I’ve got you covered. So grab your apron, and let’s dive into this delicious culinary adventure!
A Nostalgic Soup Story
One of my fondest memories of chicken noodle soup takes me back to my childhood kitchen, where the scent of garlic and simmering broth would drift through the air on chilly winter evenings. My grandmother was the queen of comfort food, and she would whip up giant batches of her famous chicken noodle soup every Sunday. It was her little way of showing love, and that soup was always served with big smiles and family stories.
I remember sitting at the kitchen table, watching her with wide eyes as she expertly shredded the chicken and tossed in the vibrant vegetables—carrots, celery, and sometimes even peas for a little pop of color! As she stirred the pot, she would share tales of her own grandmother, who had taught her to make this comforting dish. Each bowl was a treasure trove of flavors and history, and I realized even back then that this soup wasn’t just about nourishing the body—it was about nurturing the soul.
So today, as I lace my apron strings and heat up my own pot, I strive to carry on that legacy. Each bowl of chicken noodle soup I make is a tribute to those moments spent laughing and bonding over a shared meal. Let’s create some new memories together, shall we?
Ingredients
To whip up this delightful chicken noodle soup, you’ll need the following ingredients:
-
Chicken: I recommend using boneless, skinless chicken breasts for tenderness, but feel free to use chicken thighs for deeper flavor. For a quicker option, rotisserie chicken works wonders—just shred it right into the pot!
-
Egg Noodles: These lovely little noodles cook up fluffy and filled with flavor. If you’re gluten-free, you can swap in rice noodles or spiralized zucchini for a fresh twist.
-
Carrots: Fresh, diced carrots bring a touch of sweetness. If you’re in a rush, you can use frozen carrot rounds—just toss them in a bit later in cooking.
-
Celery: Celery adds a lovely crunch and a subtle earthiness. If you don’t have celery on hand, chopped bell pepper or green beans can be a quick substitute.
-
Broth: A rich chicken broth is key! Use homemade if you have it, but store-bought works just as well. For a vegetarian twist, vegetable broth can be used instead—just adjust the seasonings.
-
Garlic and Onions: These flavor powerhouses create a wonderful base for your soup. Fresh garlic cloves and a sweet onion will transform your broth. If you’re in a pinch, garlic powder and onion powder can step in for this duo.
-
Herbs: Fresh herbs like thyme or parsley add a refreshing finish. Dried herbs work too; just use them sparingly!
-
Salt and Pepper: To taste, always essential for enhancing flavors.
Step-by-Step Instructions
Now let’s get cooking! Follow these steps to create your comforting chicken noodle soup:
-
Prepare the Chicken: If using raw chicken, start by dicing your chicken into bite-sized cubes. Heat a bit of olive oil in a large pot over medium heat and add the chicken. Sauté until it’s golden and cooked through, about 6-8 minutes. Chef’s tip: Make sure not to overcrowd the pan to ensure it sears instead of steams! If you’re using rotisserie chicken, simply shred it and skip to the next step.
-
Sauté the Aromatics: Next, toss in a chopped onion and 2-3 minced garlic cloves. Sauté until fragrant, about 2-3 minutes, while stirring occasionally. This step builds a flavorful base for your soup. Pro tip: If you want a little kick, throw in a pinch of red pepper flakes here!
-
Add Vegetables: Stir in the diced carrots and celery, cooking for another 4-5 minutes until they soften. Quick hack: If you prefer your veggies a bit crisper, add them later in the cooking process!
-
Pour in the Broth: Now, it’s time to add 6 cups of chicken broth to the pot. Increase the heat to high and bring the mixture to a gentle boil. Chef’s note: For an extra boost of flavor, add the leftover bones or carcass from your rotisserie chicken to the broth!
-
Add the Noodles: Once boiling, reduce the heat to medium and add in 3 cups of egg noodles. Let everything simmer for about 10 minutes or until the noodles are al dente. Don’t forget to taste the broth here and adjust the seasoning with salt and pepper! Tip: You can always add more broth or water if you find the soup too thick.
-
Finish with Herbs: In the last few minutes of cooking, toss in chopped fresh herbs like thyme or parsley. Stir well to combine! If you’re using dried herbs, add them earlier with the broth to allow their flavors to infuse. Personal touch: I love adding a splash of lemon juice right before serving for an extra zest!
-
Serve It Up: Ladle the soup into bowls and enjoy it hot! If you’re feeling fancy, garnish with a sprinkle of fresh herbs or a drizzle of good olive oil. Chef’s magic: Serve it with a crusty slice of bread for dipping—it’s a match made in heaven!
Serving Suggestions
The best part about chicken noodle soup is how versatile it is when it comes to serving. You can go casual with a simple bowl and a spoon, or dress it up by serving it in rustic ramekins with freshly baked rolls on the side. Want to take it to the next level? Try topping it with crispy fried onions or a dusting of Parmesan cheese! Either way, your presentation will make this hearty dish feel extra special.
Recipe Variations
-
Spicy Twist: Add diced jalapeños or a dash of hot sauce for a kick!
-
Creamy Delight: Stir in a splash of heavy cream or coconut milk for a creamy version that’ll warm you from the inside out.
-
Herbaceous Spin: Experiment with different herbs like dill or tarragon for a fragrant twist.
-
Vegetarian Option: Swap chicken for chickpeas and add loads of vibrant veggies like bell peppers and spinach.
-
Noodle-Free: For a low-carb alternative, use cauliflower rice in place of noodles for a light and healthy soup.
Chef’s Notes
This recipe has come a long way from my grandmother’s kitchen. Each time I make it, I find myself tweaking it just a little bit more to suit my taste. Sometimes I add in a splash of white wine for depth of flavor, or I’ll switch up the vegetables based on what’s fresh at the market. What I love most, though, is how this soup has a life of its own! You can make it your own masterpiece by experimenting and throwing in whatever you have on hand. It’s comforting, delicious, and just a spoonful away from a happy memory!
FAQs and Troubleshooting
Q: Why is my soup too salty?
A: If you accidentally add too much salt, try adding a peeled potato while it simmers. The potato will absorb some of the saltiness!
Q: Can I freeze chicken noodle soup?
A: Absolutely! Freeze the soup without the noodles, and when you’re ready for it, just add fresh noodles when reheating!
Q: How can I make a thicker soup?
A: If you prefer a thicker consistency, add a cornstarch slurry (mix equal parts cornstarch with cold water) and stir it in while simmering until it thickens.
Q: My noodles became mushy. What happened?
A: This can happen if they’ve cooked too long. Try cooking the noodles separately next time and just adding them to each bowl before ladling in the soup.
Nutritional Info
While I often focus on the joy of cooking, I know many of you might be interested in the nutritional value of your meals. A typical serving of this chicken noodle soup (about 1.5 cups) contains approximately 350 calories, 20g of protein, 10g of fat, and 35g of carbohydrates. It’s a nourishing, well-rounded meal full of flavor!
Let’s savor every moment spent in the kitchen, embrace our culinary adventures, and celebrate the comfort of chicken noodle soup. You’ve got this, and I can’t wait for you to share your versions with me! Happy cooking!
PrintThe Ultimate Chicken Noodle Soup: A Cozy Classic with a Twist

A delightful blend of fresh ingredients, tender chicken, and vibrant vegetables in a savory homemade broth. This chicken noodle soup is perfect for cozy evenings and nurturing the soul.
- Prep Time: 15 minutes
- Cook Time: 30 minutes
- Total Time: 45 minutes
- Yield: 4 servings 1x
- Category: Main Course
- Method: Stovetop
- Cuisine: American
- Diet: None
Ingredients
- 1 lb boneless, skinless chicken breasts (or thighs)
- 3 cups egg noodles (or rice noodles for gluten-free)
- 2 carrots, diced (or frozen carrot rounds)
- 2 celery stalks, diced (or bell pepper/green beans)
- 6 cups chicken broth (or vegetable broth for vegetarian)
- 2–3 garlic cloves, minced
- 1 onion, chopped
- Fresh herbs (thyme or parsley) to taste
- Salt and pepper to taste
Instructions
- Prepare the Chicken: Dice into bite-sized cubes and sauté in olive oil until golden, about 6-8 minutes.
- Sauté the Aromatics: Add chopped onion and minced garlic, cook until fragrant, about 2-3 minutes.
- Add Vegetables: Stir in diced carrots and celery, cooking for another 4-5 minutes until softened.
- Pour in the Broth: Add 6 cups of chicken broth, bring to a boil.
- Add the Noodles: Reduce heat, add egg noodles, and simmer for about 10 minutes.
- Finish with Herbs: Stir in chopped fresh herbs in the last minutes of cooking.
- Serve It Up: Ladle soup into bowls and enjoy hot, garnished with fresh herbs or a drizzle of olive oil.
Notes
Feel free to customize with your favorite veggies or spices. This soup freezes well without the noodles; just add fresh noodles when reheating.
Nutrition
- Serving Size: 1 serving
- Calories: 350
- Sugar: 5g
- Sodium: 400mg
- Fat: 10g
- Saturated Fat: 2g
- Unsaturated Fat: 8g
- Trans Fat: 0g
- Carbohydrates: 35g
- Fiber: 2g
- Protein: 20g
- Cholesterol: 60mg
Keywords: chicken noodle soup, comfort food, cozy recipes, homemade soup, chicken recipes

Creamy Loaded Baked Potato Soup (30-Minute Weeknight)
Loaded Baked Potato Soup: Comfort in a Bowl
Ah, the joy of a cozy night in, snuggled up with a warm bowl of rich, creamy Loaded Baked Potato Soup! If that doesn’t make your heart do a little happy dance, I don’t know what will. There’s something undeniably satisfying about the hearty simplicity of a potato soup—it’s the epitome of comfort food, perfect for cold evenings, lazy weekends, or even a quick weeknight dinner. And let’s be honest, there are few things as comforting as a classic baked potato transformed into a spoonable, luscious soup packed with flavor and cozy vibes.
On chilly days when the wind nips at your nose and the skies are gray, there’s hardly anything better than warming up with a bowl of this soup. Loaded with all the goodness of a baked potato—think crispy bacon, sharp cheddar, and a dollop of sour cream—this soup has all the makings of a classic with a twist. It’s easy enough to whip up on a busy day, yet decadent enough to serve if you have guests over or just want to treat yourself. What’s not to love?
In this post, I’ll take you through my favorite recipe for Loaded Baked Potato Soup, complete with personal stories, tips, and tricks that will make your kitchen adventures not only fun but also successful. So grab your apron, and let’s dive into a bowl of heartwarming comfort!
A Spoonful of Nostalgia
I still remember the first time I made Loaded Baked Potato Soup. I was newly married and attempting to impress my husband with my culinary skills—a daunting task for someone who mostly relied on takeout and boxed dinners at the time. One chilly autumn evening, I decided to try my hand at this rich and creamy soup after flipping through an old cookbook my mom had gifted me. As I chopped the potatoes, I could almost hear her voice guiding me through the process—she was always good at making the simplest dishes feel special, and I wanted to channel that magic.
As the soup simmered and the aroma filled my small apartment kitchen, I felt a sense of accomplishment tinged with a dash of nervousness. I stirred in the cheese and watched it melt, and the sudden swirl of flavors and colors brought a smile to my face. The best part? When I finally served it to my husband, the look on his face said it all. He took a bite, and his eyes lit up! That experience sparked my love for cooking, reminding me that sometimes, all you need is a simple dish cooked with love to create cherished memories.
Now, every time I make this soup, I think back to that evening and smile. It’s not just a dish; it’s a vessel for love, warmth, and laughter.
Ingredients
Here’s what you’ll need to make this mouthwatering Loaded Baked Potato Soup:
-
Potatoes (6 medium-sized, Russet or Yukon Gold)
- These are the star of the show! Russet potatoes will give you that creamy texture while Yukon Gold potatoes add a buttery flavor. If you’re looking to lighten things up, you can totally swap in cauliflower for a lower-carb version.
-
Bacon (6 slices, chopped)
- Because what’s better than crispy bacon? It adds a salty, savory crunch that perfectly complements the creamy potatoes. For a vegetarian option, you can skip the bacon or use turkey bacon.
-
Cheddar Cheese (2 cups, shredded)
- I’m partial to sharp cheddar for that bold flavor, but feel free to get creative. A nice pepper jack would give it a kick, or you can mix in a little mozzarella for creaminess.
-
Sour Cream (1 cup)
- This adds a tangy richness that ties everything together. If you’re looking for a healthier alternative, Greek yogurt works just as well!
-
Green Onions (1/2 cup, sliced)
- These not only bring fresh flavor but also a pop of color. If you don’t have green onions, regular onions will do, just sauté them first to soften their flavor.
-
Chicken or Vegetable Broth (4 cups)
- Use low-sodium broth to control the saltiness easily. Homemade stock is fantastic if you’ve got it on hand!
-
Salt and Pepper (to taste)
- Basics, but won’t forget to season your soup to bring out all those delicious flavors!
Here’s my fun chef insight: when you’re peeling the potatoes, remember that nutrition lies just beneath the skin, so feel free to leave a bit on for extra fiber!
Step-by-Step Instructions
Alright, let’s get cooking! Follow these steps, and you’ll have a steaming pot of Loaded Baked Potato Soup in no time.
-
Prep the Potatoes: Start by washing and peeling your potatoes. Chop them into bite-sized cubes—uniformity helps them cook evenly. If you’ve decided to use cauliflower, cut it into large chunks.
-
Cook the Bacon: In a large pot over medium heat, add the chopped bacon. Cook until crispy, about 5-7 minutes. Don’t get rid of that glorious bacon fat; it adds flavor to our soup! Transfer the crispy bacon to a plate lined with paper towels to drain—leave about 2 tablespoons of fat in the pot.
-
Sauté Aromatics: In the same pot with the bacon fat, add the chopped onions (if using) and cook for about 3 minutes until they soften. This step is optional, but sautéing gives an extra layer of flavor!
-
Add the Potatoes & Broth: Toss your cubed potatoes into the pot, stirring them around to combine with the bacon and onions. Pour in your chicken or vegetable broth. Bring the mixture to a boil, then reduce to a simmer. Let it cook for about 15-20 minutes or until the potatoes are fork-tender.
-
Blend the Soup: Once the potatoes are cooked, use an immersion blender for a few pulses to create a creamier texture while still keeping some chunks. If you don’t have an immersion blender, carefully transfer a few cups to a regular blender and puree—just be cautious of the hot liquid!
-
Stir in the Creaminess: After blending, return the pot to the heat (if needed) and stir in the sour cream and half of the shredded cheddar cheese. Mix until everything is combined and gooey—that’s where all the magic happens! Season with salt and pepper to taste.
-
Final Toppings: Ladle the soup into bowls and top it with the crispy bacon, remaining cheese, and sliced green onions for that beautiful presentation!
Chef Tips:
- Consistency Control: If you prefer a thinner soup, you can add more broth or some milk for creaminess!
- Time-Saving Trick: You can easily make this soup ahead of time and refrigerate it. Just remember that the flavors deepen overnight!
Serving Suggestions
To serve, ladle your Loaded Baked Potato Soup into bowls and garnish it generously. A sprinkle of extra cheddar cheese on top, a few crumbles of crispy bacon, and a handful of green onions will make it pop! For an extra touch of indulgence, consider pairing it with crusty bread or homemade garlic croutons to soak up every last drop. Trust me; you’re going to want to savor this!
Recipe Variations
- Vegan Loaded Baked Potato Soup: Veganize this soup by omitting the bacon, using vegetable broth, and swapping the sour cream for a cashew cream or coconut yogurt—delicious!
- Spicy Kick: Add diced jalapeños or a pinch of cayenne pepper for a bit of heat.
- Herby Twist: Throw in some chopped fresh herbs like chives, thyme, or rosemary for a gourmet touch.
- Loaded with Veggies: Sneak in some greens like kale or spinach to boost the nutrition factor, or throw in some broccoli for added texture.
Chef’s Notes
Each time I make this Loaded Baked Potato Soup, I can’t help but tweak the recipe just a bit. Sometimes, it’s the addition of a splash of white wine for depth. Other times, I might sprinkle in some garlic powder for a bit more flavor. Honestly, that’s the beauty of cooking! It’s an evolving creation, and I encourage you to play around with it as well.
A funny kitchen memory comes to mind: one time I misread a recipe and added way too much garlic. Yes, we had “Garlic Potato Soup” that night! It was a great reminder that sometimes your kitchen adventures don’t go as planned, but hey, real foodies improvise!
FAQs and Troubleshooting
-
Why is my soup too thick? If your Loaded Baked Potato Soup is thicker than you’d like, simply add more broth until you reach your desired consistency.
-
Can I use leftover baked potatoes? Absolutely! If you have leftover baked potatoes, you can cube them and add them to the broth, seasoning as needed. Reduce your cooking time since they’re already cooked.
-
How long will this soup last? Stored in an airtight container in the fridge, this soup will last about 3-4 days. Just be prepared to add a splash of broth when reheating since it may thicken!
-
Why does my soup taste bland? Every ingredient matters! Make sure to taste and adjust the seasoning as you cook. A little salt can make all the difference—don’t shy away from it!
Nutritional Info
This Loaded Baked Potato Soup is comforting but can be tailored to fit different dietary preferences. Typically, one serving (about 1 cup) contains:
- Calories: 350
- Protein: 12g
- Carbohydrates: 45g
- Fat: 15g
Enjoy this luscious soup, and don’t hesitate to make it your own! Let the flavors come together, and get ready to warm your belly and your heart. Happy cooking, friends!
PrintLoaded Baked Potato Soup

A rich and creamy Loaded Baked Potato Soup loaded with crispy bacon, sharp cheddar, and a dollop of sour cream, perfect for cold evenings.
- Prep Time: 15 minutes
- Cook Time: 30 minutes
- Total Time: 45 minutes
- Yield: 4 servings 1x
- Category: Soup
- Method: Stovetop
- Cuisine: American
- Diet: Non-Vegetarian
Ingredients
- 6 medium-sized potatoes (Russet or Yukon Gold)
- 6 slices bacon, chopped
- 2 cups shredded cheddar cheese
- 1 cup sour cream
- 1/2 cup sliced green onions
- 4 cups chicken or vegetable broth
- Salt and pepper to taste
Instructions
- Prep the potatoes by washing and peeling them. Chop into bite-sized cubes.
- Cook the bacon in a large pot over medium heat until crispy, about 5-7 minutes. Transfer to a plate, leaving about 2 tablespoons of fat in the pot.
- Sauté the chopped onions in the bacon fat for about 3 minutes until they soften.
- Add the cubed potatoes and broth to the pot, bringing it to a boil, then reduce to a simmer for 15-20 minutes until fork-tender.
- Blend the soup using an immersion blender for a creamy texture while keeping some chunks. Alternatively, transfer a few cups to a blender and puree carefully.
- Stir in the sour cream and half of the cheddar cheese until combined. Season with salt and pepper to taste.
- Ladle the soup into bowls and top with crispy bacon, remaining cheese, and green onions.
Notes
For a thinner soup, add more broth or milk. The soup can be made ahead and refrigerated. Consider pairing with crusty bread or homemade croutons.
Nutrition
- Serving Size: 1 cup
- Calories: 350
- Sugar: 3g
- Sodium: 800mg
- Fat: 15g
- Saturated Fat: 6g
- Unsaturated Fat: 7g
- Trans Fat: 0g
- Carbohydrates: 45g
- Fiber: 5g
- Protein: 12g
- Cholesterol: 30mg
Keywords: soup, baked potato, comfort food, creamy soup, easy recipe
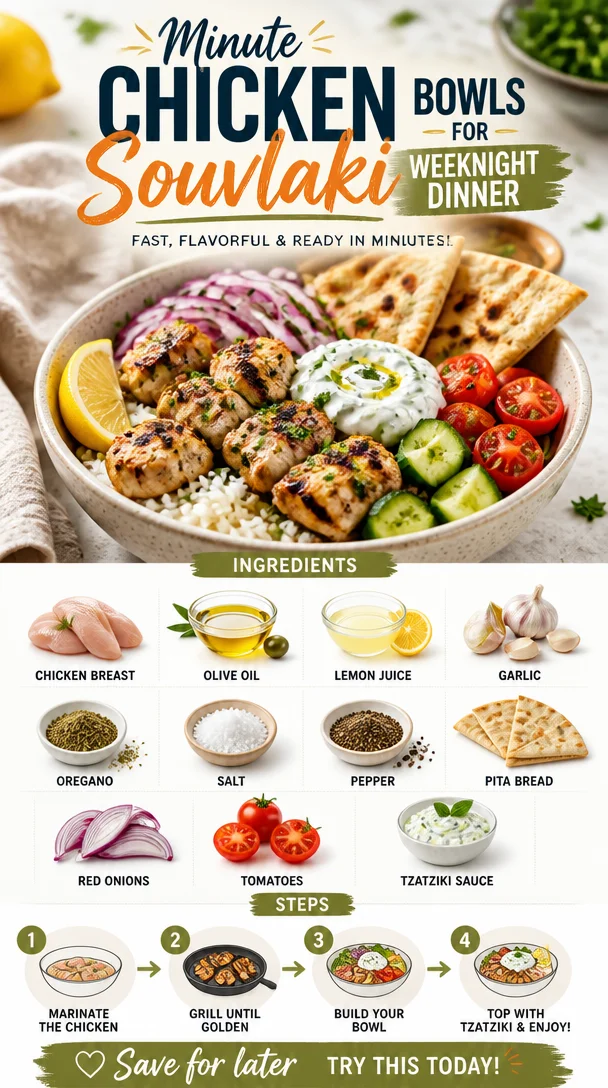
Minute Chicken Souvlaki Bowls for Weeknight Dinner
Chicken Souvlaki: A Flavorful Journey to the Mediterranean
Welcome, food lovers! Today, we’re venturing into the vibrant world of Mediterranean cuisine with a mouthwatering recipe for Chicken Souvlaki. Trust me; once you get a taste of this dish, it’ll become a staple in your kitchen. Imagine juicy chicken marinated in a zesty blend of lemon and herbs, grilled to perfection, and served with warm pita, crisp veggies, and luscious tzatziki. It’s fresh, it’s flavorful, and it’s downright delicious!
Why Chicken Souvlaki? Well, this dish is more than just food; it’s a culinary experience that takes you straight to the sun-kissed shores of Greece. Beyond that, it perfectly embodies my philosophy that eating clean doesn’t need to be complicated or bland. If you’ve been on the lookout for something that hits all the right notes—comforting yet invigorating, simple yet impressive—you’re in the right place.
There’s a unique joy in preparing souvlaki. Picture yourself hosting a gathering, the scent of grilled chicken filling the air, laughter echoing around the table—it’s an invitation to savor not just a meal but a moment. Plus, it’s a breeze to whip up even during your busiest days! Join me as I guide you through every step, including those chef tips and tricks that will leave your loved ones raving about your newfound skills. Ready to dive in? Let’s go!
A Nostalgic Memory with Souvlaki
Growing up, my family didn’t often dine out; instead, we created our own little world in the kitchen. One summer evening, I remember we decided to host a backyard barbecue that would transform our humble home into a Mediterranean haven. My dad, who’s known for his grilling prowess, chose chicken souvlaki as the star of the show. He marinated the chicken overnight, and as it grilled, the delightful aroma wafted through our neighborhood—I’m pretty sure our neighbors were secretly jealous!
My job was to prepare the sides. I chopped fresh veggies, mashed garlic for the tzatziki, and laughed with my siblings as we watched our dad flip the chicken skewers, charred to perfection. That evening, surrounded by family, friends, and delicious food, I learned the joyous power of shared meals. My love for cooking was born that night, sparked by the simple act of grilling chicken and blending flavors. Since then, Chicken Souvlaki has been a beloved family tradition, a dish that brings us together, no matter how far life takes us.
Ingredients for Chicken Souvlaki
Gathering quality ingredients is a crucial part of creating mouthwatering chicken souvlaki. Here’s what you need:
-
Chicken Breast: Skinless, boneless chicken breast is lean and cooks beautifully on the grill. If you prefer dark meat, boneless thighs work well too!
-
Olive Oil: Extra virgin olive oil adds richness and helps lock in flavor. It’s also heart-healthy! In a pinch, avocado oil is a great alternative.
-
Lemon Juice: Freshly squeezed lemon juice brightens up the dish and tenderizes the chicken. Bottled lemon juice could work, but fresh is best for flavor.
-
Garlic: Fresh garlic adds aromatic depth. If you’re in a hurry, pre-minced garlic can be used, though it lacks that punch!
-
Oregano: This herb is a Mediterranean superstar! Dried oregano is perfect for marinades, but if you can get your hands on fresh, definitely use that for a more vibrant flavor.
-
Salt and Pepper: Simple seasonings that enhance the natural flavors of the chicken. Feel free to experiment with flavored salts or freshly cracked black pepper for a twist.
-
Pita Bread: Soft, warm pita is the traditional wrap. You can substitute with flatbreads or even collard greens for a low-carb option.
-
Red Onions & Tomatoes: Fresh veggies add crunch and freshness. Customize with other favorites, like cucumbers or bell peppers!
-
Tzatziki Sauce: This creamy yogurt sauce is a must! You can buy it pre-made for convenience, or try making your own with Greek yogurt, cucumber, garlic, and dill for something truly special.
Step-by-Step Instructions
It’s time to cook, friends! Follow these simple steps to create your own Chicken Souvlaki masterpiece.
-
Marinate the Chicken: In a bowl, combine 2 pounds of cubed chicken breast with ½ cup olive oil, ¼ cup fresh lemon juice, 4 minced garlic cloves, 2 teaspoons dried oregano, 1 teaspoon salt, and ½ teaspoon pepper. Mix everything to coat the chicken well. Cover the bowl and let it marinate in the fridge for at least 30 minutes, or even overnight if you have the time. Chef’s Tip: The longer it marinates, the more flavorful it becomes!
-
Preheat the Grill: Get your grill ready! Preheat it to medium-high heat for at least 10-15 minutes. If you’re using skewers, soak them in water if they’re wooden to prevent burning. Chef Hack: If grilling indoors, a grill pan works beautifully!
-
Skewer the Chicken: Once marinated, thread the chicken onto skewers. Leave a little space between each piece to ensure even cooking. Note: If you’re using vegetables, feel free to incorporate some red onion or bell pepper between the chicken pieces for a colorful, flavor-packed skewer!
-
Grill the Chicken: Place the skewers on the hot grill. Cook for about 10-12 minutes, turning them halfway through, until the chicken is cooked through (internal temperature should reach 165°F). Tip: Avoid pressing down on the chicken while grilling; this releases juices that keep it moist!
-
Warm the Pitas: While the chicken grills, wrap your pita bread in aluminum foil and place it on the grill for the last 2-3 minutes to warm up. You can also use indirect heat on the grill or even a toaster oven!
-
Prepare Tzatziki: If you’re making homemade tzatziki, mix 1 cup of Greek yogurt, ½ grated cucumber (squeezed of excess water), 1 minced garlic clove, 1 tablespoon chopped fresh dill (or 1 teaspoon dried), a squeeze of lemon, and salt to taste in a bowl.
-
Assemble Your Dish: Remove the chicken skewers from the grill. Carefully take each piece off the skewer, then layer them on the warm pita and top with sliced red onions, diced tomatoes, and generous dollops of tzatziki. Optional: Create a little salad on the side with cucumbers and lettuce for extra crunch!
Serving Suggestions
Presentation is key! Serve your Chicken Souvlaki wrapped in warm pita on a colorful plate with fresh veggies and tzatziki served on the side for dipping. If you’re feeling fancy, garnish with a sprig of dill or parsley. Pair it with a light salad dressed with olive oil and lemon to complete the meal. This delightful platter will not only be a feast for the taste buds but also a treat for the eyes!
Recipe Variations
Chicken Souvlaki is incredibly versatile! Here are some delicious variations to keep things interesting:
-
Shrimp Souvlaki: Swap chicken for shrimp! Just adjust the cooking time since shrimp cooks faster.
-
Vegetarian Option: Use marinated tofu, seitan, or your favorite hearty vegetables, like zucchini and bell peppers, for a scrumptious vegetarian souvlaki.
-
Herb Variations: Explore different herbs! Try adding fresh mint or parsley to your marinade for a unique flavor twist.
-
Spicy Kick: Add a pinch of red pepper flakes or a splash of your favorite hot sauce to the marinade for an extra zing!
-
Mediterranean Bowl: Instead of pitas, serve the marinated chicken over rice or quinoa, topped with veggies and tzatziki for a satisfying grain bowl.
Chef’s Notes
Every chef has those kitchen adventures that become cherished stories, and mine involves a delightful disaster! One day, in my excitement to impress friends, I thought I could multitask and marinate the chicken while whipping up a batch of homemade tzatziki. The tzatziki turned out fine, but I forgot about the chicken sitting on the counter! Let’s just say, I learned the hard way to either set a timer or keep a close eye on the marinating process. But in retrospect, it turned into a funny memory, and everyone at the table enjoyed a good laugh, squished pita sandwiches and all!
Chicken Souvlaki holds a special place in my heart, evolving over time from a simple family recipe to something even more dynamic; adding herbs, tweaking spices, and even changing up the sides keep it exciting. I think that’s the beauty of cooking—creating your own twist on cherished dishes.
FAQs and Troubleshooting
-
Can I use chicken thighs instead of breast? Absolutely! Chicken thighs are juicy and delicious and can give your souvlaki an even richer flavor.
-
How do I know when the chicken is done? The best way to ensure your chicken is fully cooked is to use a meat thermometer. Aim for an internal temperature of 165°F.
-
What if my chicken is dry? A few reasons could lead to dry chicken. Overcooking can cause it to dry out, so take it off the grill once it reaches temp. Additionally, let your chicken rest for a few minutes after grilling; this helps retain juices!
-
Can I make the marinade ahead of time? Yes! You can prepare the marinade up to 24 hours in advance. Just make sure to store it in an airtight container in the fridge until you’re ready to add it to the chicken.
Nutritional Info
While I typically focus on flavor, let’s not forget about nutrition! A serving of Chicken Souvlaki typically includes lean protein from the chicken and healthy fats from the olive oil, making it a balanced choice for any meal. The veggies add fiber and vitamins, and the yogurt in tzatziki provides probiotics—just the right boost for your health!
Now, let’s bring this Chicken Souvlaki recipe into your kitchen! Get ready to enjoy Mediterranean flavors that will not only satisfy your cravings but nourish your body. Invite a friend over, put on some music, and savor each delicious bite together. Happy cooking!
PrintChicken Souvlaki

A delicious Mediterranean dish featuring juicy chicken marinated in lemon and herbs, grilled to perfection, served in warm pita with fresh veggies and tzatziki.
- Prep Time: 30 minutes
- Cook Time: 15 minutes
- Total Time: 45 minutes
- Yield: 4 servings 1x
- Category: Main Course
- Method: Grilling
- Cuisine: Mediterranean
- Diet: Paleo
Ingredients
- 2 pounds skinless boneless chicken breast, cubed
- ½ cup extra virgin olive oil
- ¼ cup freshly squeezed lemon juice
- 4 cloves fresh garlic, minced
- 2 teaspoons dried oregano
- 1 teaspoon salt
- ½ teaspoon pepper
- Pita bread or flatbreads
- Red onions and tomatoes, for serving
- Tzatziki sauce, for serving
Instructions
- Marinate the chicken by combining cubed chicken breast, olive oil, lemon juice, garlic, oregano, salt, and pepper in a bowl. Mix and let it marinate in the fridge for at least 30 minutes.
- Preheat the grill to medium-high heat for 10-15 minutes.
- Skewer the marinated chicken onto skewers with space between each piece.
- Grill the skewers for 10-12 minutes, turning halfway, until the chicken reaches an internal temperature of 165°F.
- Warm the pita bread on the grill for the last 2-3 minutes.
- Prepare the tzatziki if making homemade by mixing Greek yogurt, grated cucumber, minced garlic, dill, lemon juice, and salt.
- Assemble the dish by removing chicken from skewers, placing it on warm pita, and topping with onions, tomatoes, and tzatziki.
Notes
For extra flavor, add grilled vegetables to the skewers or serve with a light salad dressed with olive oil and lemon.
Nutrition
- Serving Size: 1 serving
- Calories: 380
- Sugar: 2g
- Sodium: 450mg
- Fat: 22g
- Saturated Fat: 3g
- Unsaturated Fat: 19g
- Trans Fat: 0g
- Carbohydrates: 20g
- Fiber: 3g
- Protein: 30g
- Cholesterol: 70mg
Keywords: Chicken, Souvlaki, Mediterranean, Grilled Chicken, Healthy Recipe
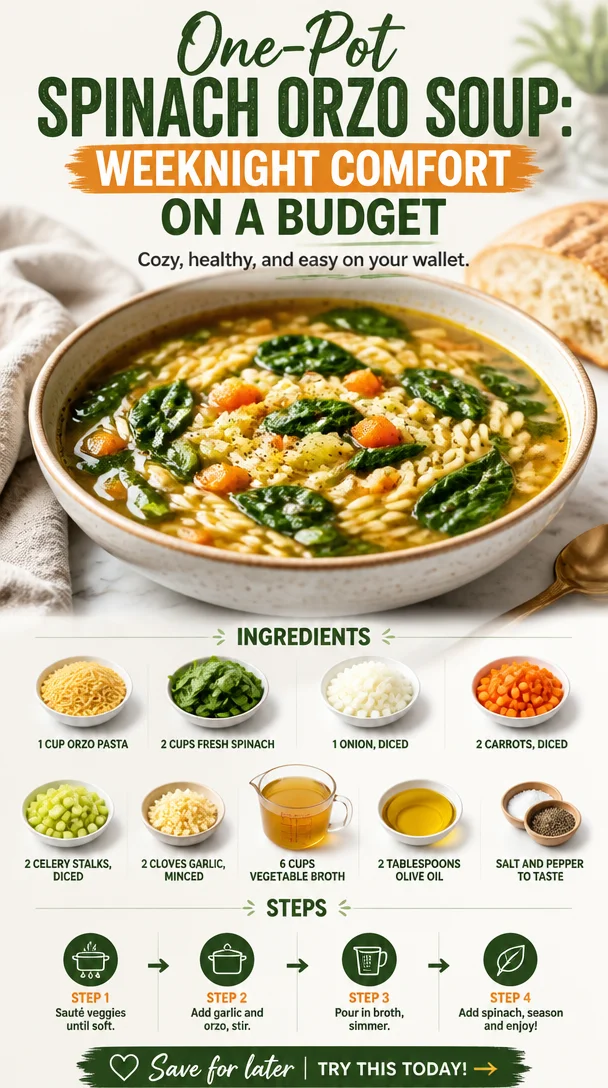
One-Pot Spinach Orzo Soup: Weeknight Comfort on a Budget
Spinach Orzo Soup: A Cozy Bowl of Goodness
Welcome to today’s kitchen adventure, where we’re diving into a bowl of warm, comforting Spinach Orzo Soup! There’s something magical about soup, isn’t there? It’s like a warm hug in a bowl that wraps you up in cozy flavors and makes the world feel just a little bit brighter. Whether it’s a chilly evening or you’re feeling under the weather, this soup is here to uplift your spirits and fuel your body with wholesome goodness.
Now, I’m not just sharing this recipe from the depths of a cookbook; I’m excited to tell you that I have a special place in my heart for this dish. You see, soup has been part of my family gatherings for as long as I can remember. My grandmother was a master of soup-making, often heading to the garden to gather fresh vegetables. One particular memory that stands out is her kitchen filled with the fragrance of sautéed onions and garlic, as she would toss in handfuls of spinach and orzo pasta, transforming simple ingredients into a vibrant, nourishing meal.
It was always a ritual in our house—brothers slurping, parents chatting, and the joyful chaos of family filling the room. Soup made everything feel complete, and it was a symbol of togetherness. Fast forward to today, and I still carry that tradition with me. I make this Spinach Orzo Soup not just to satisfy hunger but to create those moments of warmth and connection with loved ones. So, grab your favorite pot, and let’s cook up a storm together!
Ingredients
Let’s gather our ingredients! Each one plays a vital role in creating this delightful soup.
-
1 cup orzo pasta
This tiny pasta used in the soup adds a delightful chewiness and heartiness. If you don’t have orzo on hand, feel free to swap it with any small pasta, like ditalini or even rice. -
2 cups fresh spinach
Spinach is not just a great source of iron—it brings that vibrant green color and a fresh flavor to our bowl. You can substitute it with kale or Swiss chard if you prefer. -
1 onion, diced
Onions form the base of many dishes by imparting sweetness and depth. You could use shallots for a milder flavor or even leeks for a gourmet touch. -
2 carrots, diced
Carrots add sweetness and color. If you’re in a pinch, you can swap in some diced bell pepper for a different profile. -
2 celery stalks, diced
Celery contributes a subtle earthiness. If you’re not a fan, you can skip it or replace it with zucchini for a fresher twist. -
2 cloves garlic, minced
Garlic brings a savory punch that can’t be beaten! If you want a milder garlic flavor, try using roasted garlic instead. -
6 cups vegetable broth
This is the heart of our soup! Homemade is always best, but don’t fret; store-bought broth works perfectly fine. A low-sodium version keeps things healthy. -
2 tablespoons olive oil
Olive oil not only helps to sauté our veggies, but it also adds a touch of richness. You can substitute it with avocado oil if you’re after a different flavor profile. -
Salt and pepper to taste
These are the essential seasonings that help balance all the flavors. Keep adjusting until it suits your palate!
Now that we’ve prepped our flavorful arsenal let’s get down to cooking!
Step-by-Step Instructions
-
Sauté the Aromatics
Start by drizzling 2 tablespoons of olive oil into a large pot over medium heat. Once hot, add the diced onions, carrots, and celery. Sauté for about 5-7 minutes, or until the vegetables are soft and the onions are translucent. Pro tip: This is where the magic begins! The aroma of sautéing veggies will fill your kitchen, and trust me, it’s a great way to get the family curious about what’s cooking! -
Garlic Time!
Toss in the minced garlic and give it a good stir. Let it cook for about 1 minute until fragrant. Be careful not to let it brown, or it will turn bitter. Garlic is one of those ingredients that transform the entire dish, and you’ll know you’re on the right track when that heavenly scent envelops you. -
Add the Broth
Pour in the 6 cups of vegetable broth. Swirl it all together and bring it to a gentle simmer. At this point, you can also season with a pinch of salt and pepper. Taste it as you go! This is your soup, after all, and adjusting the seasoning early on helps it develop a lush flavor. -
Orzo Overboard!
Once the broth is simmering, stir in the orzo pasta. Let it cook for about 8-10 minutes until it’s tender, but still slightly al dente. Keep an eye on this—overcooked orzo can turn mushy, and nobody wants that! -
Stir in the Spinach
Once the orzo is al dente, it’s time for the star of the show—add the fresh spinach! It will wilt down in just about 2-3 minutes, turning the soup into a beautiful green masterpiece. This is where the vibrant color takes it over the top! -
Final Touches
Give everything a good stir to combine. Taste once more and adjust the seasoning with more salt and pepper, if needed. Serve hot, and prepare for an array of compliments!
Serving Suggestions
Serve your spoonfuls of Spinach Orzo Soup in lovely bowls, topped with a drizzle of olive oil for extra richness. A sprinkle of fresh herbs (like parsley or basil) can elevate the presentation, making your soup not only delicious but beautiful! Pair it with a slice of crusty bread or a refreshing salad for a complete meal that’ll surely impress.
Recipe Variations
-
Protein Boost
Add shredded rotisserie chicken or some white beans for extra protein. It’ll transform your soup into a hearty meal perfect for a chilly evening. -
Herb-Infused
Try stirring in fresh herbs such as dill, thyme, or parsley for an added layer of flavor that draws on seasonal freshness. -
Spice It Up!
A pinch of red pepper flakes can elevate your soup with a bit of heat. Adjust according to your taste! -
Cheesy Delight
Stir in a handful of grated Parmesan cheese at the end for a creamy twist. A sprinkle on top before serving adds a lovely texture, too!
Chef’s Notes
This Spinach Orzo Soup is like an old friend you can rely on whenever you’re feeling nostalgic or just need to whip something up fast! I’ve grown to love making this dish, tweaking it here and there, and soaking in the stories from friends and family as they gather around the table. One time, I made a massive pot for a potluck, and let’s just say; I barely took any home!
Now, every time I make this recipe, I think of Grandma, and I honor her by adding a little twist here and there, keeping her spirit alive in the kitchen.
FAQs and Troubleshooting
1. Can I make this soup ahead of time?
Absolutely! You can make this soup a day in advance. Just be mindful that the orzo may absorb some of the broth overnight. Simply add a little water or broth when reheating to reach your desired consistency.
2. How do I store leftovers?
Store any leftover soup in an airtight container in the fridge for up to three days. If you plan on keeping it longer, consider freezing it. The soup can freeze well, though the orzo will soften a bit.
3. My soup is too thick; what should I do?
Don’t panic! Simply add more broth or water and heat it through to adjust the consistency to your liking.
4. What’s the best way to reheat?
The stovetop works wonders for reheating soup. Just place it in a pot over medium heat and stir it occasionally until warmed through. Microwaving is also fine if you’re in a hurry!
Nutritional Info
One serving of Spinach Orzo Soup (about 1 cup) is packed with approximately:
- Calories: 220
- Protein: 6g
- Carbohydrates: 35g
- Fat: 6g
- Fiber: 4g
But remember, these are approximate values and can vary based on the exact ingredients you use!
And there you have it, my friends—a comforting Spinach Orzo Soup that’s easy to make and even easier to love. I hope this dish warms your heart and fuels your kitchen adventures. Enjoy every spoonful!
PrintSpinach Orzo Soup

A warm, comforting soup filled with spinach, orzo pasta, and hearty vegetables, perfect for chilly evenings or when you need a cozy meal.
- Prep Time: 15 minutes
- Cook Time: 20 minutes
- Total Time: 35 minutes
- Yield: 4 servings 1x
- Category: Soup
- Method: Stovetop
- Cuisine: Italian
- Diet: Vegetarian
Ingredients
- 1 cup orzo pasta
- 2 cups fresh spinach
- 1 onion, diced
- 2 carrots, diced
- 2 celery stalks, diced
- 2 cloves garlic, minced
- 6 cups vegetable broth
- 2 tablespoons olive oil
- Salt and pepper to taste
Instructions
- Start by drizzling 2 tablespoons of olive oil into a large pot over medium heat. Once hot, add the diced onions, carrots, and celery. Sauté for about 5-7 minutes, or until the vegetables are soft.
- Toss in the minced garlic and cook for about 1 minute until fragrant.
- Pour in the 6 cups of vegetable broth, swirl it together, and bring it to a gentle simmer. Season with salt and pepper.
- Stir in the orzo pasta and cook for about 8-10 minutes until it’s tender but still slightly al dente.
- Add the fresh spinach and let it wilt for about 2-3 minutes.
- Give everything a good stir to combine, taste, and adjust seasonings if necessary. Serve hot.
Notes
This soup can be made a day in advance; just add more broth when reheating if needed.
Nutrition
- Serving Size: 1 cup
- Calories: 220
- Sugar: 3g
- Sodium: 500mg
- Fat: 6g
- Saturated Fat: 1g
- Unsaturated Fat: 4g
- Trans Fat: 0g
- Carbohydrates: 35g
- Fiber: 4g
- Protein: 6g
- Cholesterol: 0mg
Keywords: spinach soup, orzo soup, vegetarian soup, healthy soup, cozy meal

Minute Secret Ingredient Fruit Salad for Busy Weeknights
Secret Ingredient Fruit Salad: A Sweet Twist on a Classic
Welcome to Clean Plate Cravings! If you’re anything like me, a bright and colorful fruit salad can instantly lift your spirits, especially on a warm, sunny day. But what if I told you there’s a way to take that classic dish and elevate it with just one secret ingredient? Well, friends, that’s what we’re diving into today!
Imagine sitting outside on a lazy afternoon, surrounded by friends and family, and served with a bowl of the sweetest fruit salad imaginable. You take a bite and suddenly realize that there’s something special about it—something that makes it ridiculously delicious. This isn’t just fruit; it’s a harmonious blend of flavors that dances on your tongue!
Today, we’re going to explore the magical world of fruit salad with a twist. The secret? Peach pie filling. Yes, you heard that right! It adds a touch of sweetness and a creamy texture that transforms ordinary fruits into a symphony of flavors. Let’s jump into this fun kitchen adventure and create the perfect Secret Ingredient Fruit Salad that’s bound to impress your guests and keep you coming back for more!
A Little Kitchen Nostalgia
I remember the first time I ever experimented with adding something unexpected to a classic dish. I was about 12 years old, and my grandma was in the kitchen making her famous peach cobbler. One summer day, I decided to sneak a taste of the peach pie filling and accidentally spilled some into my fruit bowl of freshly washed strawberries and bananas. At first, I panicked! But then, as I took a taste, I was met with an explosion of flavor. The creaminess of the filling perfectly complemented the tartness of the strawberries and the sweetness of the bananas. That moment ignited a passion in me for playing with ingredients, experimenting, and turning simple dishes into something extraordinary.
Ever since then, I’ve been on a quest to find ways to reinvent simple recipes, celebrating the joy of cooking with fun, unexpected ingredients. So, today, we’re going to channel that same spirit of creativity and joy, transforming a typical fruit salad into something you’ll remember. Grab your favorite fruits and let’s get cooking!
Ingredients
To whip up this Secret Ingredient Fruit Salad, you’ll need the following components:
-
Fruit of Your Choice (e.g., strawberries, blueberries, bananas): Fresh fruits are the star of our show! Select your favorites or whatever is in season. For an extra flavor punch, feel free to mix tart and sweet fruits—like strawberries combined with sweet bananas.
-
Peach Pie Filling: This is the secret ingredient that adds a delightful sweetness and creamy texture. If you’re feeling adventurous, you could also use other pie fillings like cherry or apple for a different twist.
-
1 Tablespoon Lemon Juice: This adds a touch of brightness and balances out the sweetness. Lemon juice also helps prevent fruits like bananas from browning too quickly. If you prefer a different citrus flavor, feel free to swap it with lime juice!
-
Mint Leaves for Garnish: These fresh leaves not only add a pop of color but also a refreshing flavor touch. If mint isn’t your jam, consider using fresh basil or even edible flowers for a whimsical flair.
Step-by-Step Instructions
Ready to make this stunning fruit salad? Let’s break it down step by step!
-
Prepare Your Fruit: Begin by selecting the fruits you want to include. I love a vibrant mix of strawberries, blueberries, and bananas for a sweet and colorful combination. Wash your strawberries and blueberries thoroughly, and if you’re using bananas, slice them into bite-sized pieces. Pro tip: to keep your bananas from browning, only slice them just before assembling.
-
Gently Combine: In a large bowl, add your prepared fruits. Be gentle while mixing; we want to avoid mushing all that goodness together. A light toss will keep the fruits intact and looking fresh!
-
Add the Secret Ingredient: Here comes the magic! Spoon in the peach pie filling. Start with a couple of generous spoonfuls—it’s always easier to add more than to take it out. The filling should coat the fruit without overpowering it.
-
Squeeze in Lemon Juice: Drizzle in that tablespoon of lemon juice and give everything a gentle toss. The citrus will brighten up the flavors and meld everything together. It also adds a beautiful sheen to the fruit!
-
Taste Test: Now’s the fun part—taste your fruit salad! Does it need a little more pie filling? A bit of sugar or honey if you prefer it sweeter? Adjust to your liking!
-
Chill it Down: If you have time, cover the bowl and let your salad chill in the fridge for about 30 minutes before serving. This allows the flavors to marry and creates a refreshing treat.
-
Garnish: Just before serving, you can give your salad a final touch. Toss in some fresh mint leaves, or if you’re feeling fancy, arrange them artfully on top of the salad for a pop of color.
And voilà! Your Secret Ingredient Fruit Salad is ready to shine.
Serving Suggestions
Presentation is everything! When you’re ready to serve, consider using a clear glass bowl to showcase the vibrant colors of your fruit salad. You can serve it as a light dessert, a refreshing side at a summer barbecue, or even as a breakfast twist alongside pancakes or yogurt. If you want to elevate it even more, consider pairing it with a drizzle of honey or a scoop of vanilla ice cream for an indulgent treat!
Recipe Variations
Looking for ways to switch things up? Here are a few fun variations to consider:
- Tropical Twist: Swap your berries for tropical fruits like mangoes, kiwis, and pineapples for a sunny flavor explosion!
- Berry Medley: Use an all-berry mix—blueberries, raspberries, and blackberries—paired with the peach pie filling for a berry lover’s dream.
- Citrus Salad: Add segments of orange and grapefruit for a citrusy kick, pairing wonderfully with the peach flavor.
- Nutty Crunch: Toss in some chopped nuts, like pecans or almonds, for added texture, flavor, and a protein boost.
- Yogurt Parfait: Layer your salad with yogurt and granola for a delicious and satisfying parfait option!
Chef’s Notes
As a chef in this wonderful world of flavors, I’ve learned that recipes are never merely sharable instructions—they carry stories and memories. This fruit salad has been a staple in my gatherings, sparking laughter and joyful exchanges at every bite. While I always come back to the tried-and-true peach pie filling, I love to play around with other unexpected ingredients too; who knows—perhaps one day I’ll stumble upon the next delightful surprise! Every time I make this salad, I’m reminded of those summer afternoons spent with family, creativity flowing in the air, and joy found in every bowl.
FAQs and Troubleshooting
Here are some common questions you might have when making your Secret Ingredient Fruit Salad, along with helpful tips:
Q: What fruits work best in this salad?
A: Almost any fruit works well! Just make sure they’re ripe and fresh. I find that the best combinations happen with a mix of sweet and tart flavors. Don’t shy away from trying seasonal fruits!
Q: Can I prepare this salad in advance?
A: Absolutely! You can make it a few hours ahead of time, but I recommend adding delicate fruits like bananas only right before serving to avoid browning. Keep it refrigerated until you’re ready to enjoy!
Q: Can I use frozen fruit?
A: Yes, though fresh will give you a crisper texture. If you choose frozen fruit, make sure to thaw and drain it well, as excess liquid could make your salad more soupy than you’d like.
Q: Is this salad good for meal prep?
A: While this salad is best fresh to maintain texture, you can prepare the fruit the night before and mix everything the next day for a quick grab-and-go meal.
Nutritional Info
While the specific nutritional information can vary based on the fruits and pie filling used, generally, this salad is a nutritious choice packed with vitamins and antioxidants from the fresh fruits, along with some added sweetness from the pie filling. Enjoy this as a guilt-free treat!
So, whether you’re entertaining guests or simply looking to brighten your day, this Secret Ingredient Fruit Salad is an absolute must-try. With just a simple twist, you’ll create a dish that’s vibrant, delicious, and oh-so-memorable. Let’s get cooking and enjoy every delicious bite!
PrintSecret Ingredient Fruit Salad

A refreshing fruit salad elevated with the secret addition of peach pie filling for a creamy, sweet twist.
- Prep Time: 15 minutes
- Cook Time: 0 minutes
- Total Time: 15 minutes
- Yield: 4 servings 1x
- Category: Side Dish
- Method: No cooking required
- Cuisine: American
- Diet: Vegetarian
Ingredients
- Fruit of Your Choice (e.g., strawberries, blueberries, bananas)
- 1 cup Peach Pie Filling
- 1 Tablespoon Lemon Juice
- Mint Leaves for Garnish
Instructions
- Prepare your fruit: Select and wash the fruits you want to include, slicing bananas into bite-sized pieces just before assembling.
- Gently combine: In a large bowl, add your prepared fruits and toss gently to avoid mushing.
- Add the secret ingredient: Spoon in the peach pie filling and mix until the fruit is coated.
- Squeeze in lemon juice: Drizzle lemon juice over the fruit and give it a gentle toss.
- Taste test: Adjust sweetness if necessary by adding more pie filling, sugar, or honey.
- Chill it down: Cover and let the salad chill in the fridge for about 30 minutes.
- Garnish: Just before serving, toss in fresh mint leaves or arrange them on top.
Notes
Serve in a clear glass bowl to showcase the vibrant colors. Pairs well with honey or vanilla ice cream.
Nutrition
- Serving Size: 1 serving
- Calories: 180
- Sugar: 25g
- Sodium: 10mg
- Fat: 1g
- Saturated Fat: 0g
- Unsaturated Fat: 1g
- Trans Fat: 0g
- Carbohydrates: 43g
- Fiber: 3g
- Protein: 1g
- Cholesterol: 0mg
Keywords: fruit salad, summer recipe, peach pie filling, refreshing dessert