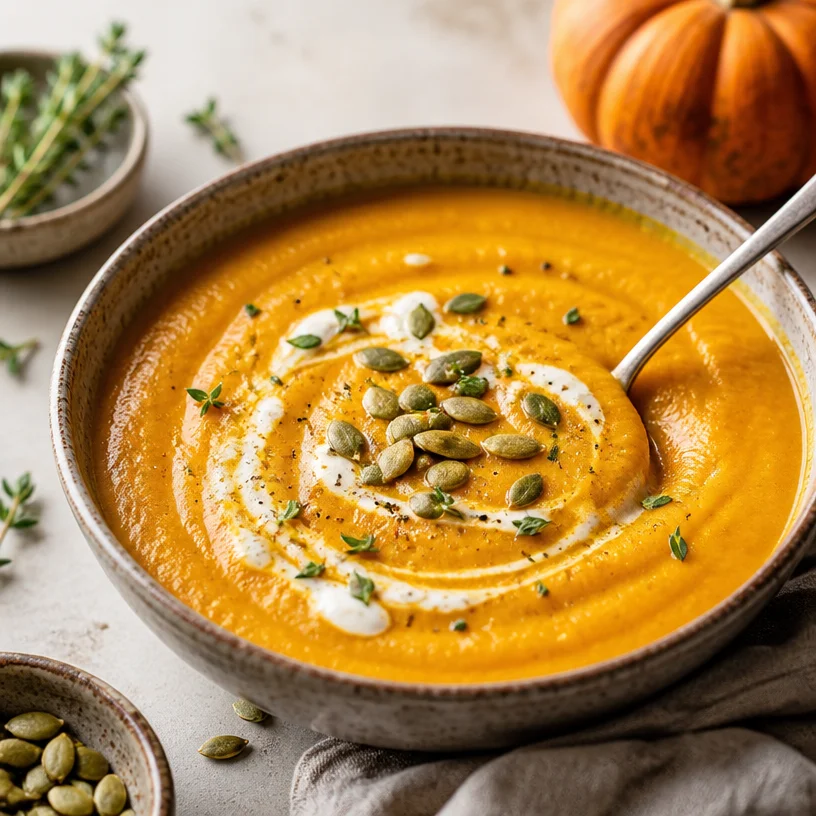
One-Pot Creamy Pumpkin Soup for Busy Weeknight Dinners
Creamy Pumpkin Soup: A Cozy Bowl of Fall Flavors
When the leaves start to turn and the air gets that crisp bite, it’s time to warm the soul with one of my all-time favorite comfort dishes: creamy pumpkin soup. This dish is like a hug in a bowl, radiating warmth and heartiness with every spoonful. Unlike those overly complex recipes you might find out there, this one is refreshing, simple, and bursting with flavor — the perfect representation of what Clean Plate Cravings is all about.
Imagine cozying up on the couch, a soft blanket wrapped around you, and the aroma of savory spices wafting through your home. It’s a depiction that feels just like fall, and it makes my heart happy. We’ve all been there — life gets busy, and sometimes we just need a wholesome meal that doesn’t require a culinary degree. Let’s dive into this creamy pumpkin soup recipe, which is not just nourishing but also a fantastic way to transition into those colder months ahead. Are you ready? Let’s bring the kitchen magic to life!
A Nostalgic Bowl
Growing up, every autumn my mom would whip up her signature pumpkin soup, packed with warmth and flavor. I remember coming home from school, the scent of garlic and pumpkin enveloping the house as I turned the corner into our kitchen. It was a bit of alchemy—watching her turn simple ingredients into something extraordinary. That soup was more than just a dish; it was a family tradition, a moment of togetherness, and a celebration of seasonal bounty.
I would eagerly await the sound of the blender whirring, signaling that the soup was almost ready, and I’d sneak spoonfuls straight from the pot. It was a ritual we shared, comfort food sealing our bond. Today, I strive to create a soup that captures that nostalgia in every bowl—a creamy pumpkin soup that radiates warmth, quality ingredients, and comfort. And trust me, your kitchen will smell fantastic!
Ingredients
Here’s what you’ll need to whip up this incredibly creamy pumpkin soup:
-
Pumpkin Puree: The star of the show! You can use canned pumpkin puree for convenience, or roast and puree fresh pumpkin if you’re feeling adventurous. Both work wonders. Just keep in mind that fresh pumpkin might be a tad lighter in color and flavor.
-
Broth (Vegetable or Chicken): This builds the base of our soup. A good quality broth enhances the flavor and gives a depth of taste. Want to cut down on sodium? Go for low-sodium varieties!
-
Heavy Cream: For that luscious creaminess that brings it all together! If you’re looking for a lighter version, coconut milk is a wonderful substitute, adding a hint of sweetness.
-
Onion: A finely chopped onion adds sweetness and depth. You can swap it with leeks for a milder flavor or shallots if you fancy something a bit more gourmet.
-
Garlic (optional): I always find that garlic elevates any dish. A couple of cloves, minced, can marry nicely with the pumpkin if you love that robust flavor. Skip it if you’re not a fan or have a sensitivity!
-
Spices (Cinnamon and Nutmeg): A dash of warm spices truly enhances the flavor profile of the soup. Feel free to use pumpkin pie spice if you have it on hand.
Understanding your ingredients is half the fun! We want this soup to be as approachable as it is delicious, so feel free to play around with substitutions based on your personal preferences and what you have on hand.
Step-by-Step Instructions
Ready to get cooking? Let’s bring our creamy pumpkin soup to life!
-
Sauté the Aromatics:
- In a large pot over medium heat, add a drizzle of olive oil (or butter for richer flavor) to coat the bottom. Add your chopped onion and a pinch of salt, allowing it to soften for about 5 minutes. Here’s a little kitchen hack: stirring in a bit of cracked black pepper helps to boost the flavor right away!
-
Add Garlic (if using):
- Toss in the minced garlic and sauté for about 1 minute; you’ll know it’s ready when the kitchen smells divine! Keep the heat at medium to avoid burning the garlic, which can become bitter.
-
Stir in the Pumpkin:
- Now, scoop in your pumpkin puree and mix it with the sautéed onions and garlic. This step is crucial—let it cook for a couple of minutes to enhance the flavor before adding the liquid. It allows the pumpkin to caramelize slightly and bring out its natural sweetness.
-
Incorporate Broth:
- Pour your broth of choice into the pot and stir to combine. Bring it to a gentle simmer. You want this to bubble gently, not boil fiercely. Let it cook for about 10 minutes! This allows the flavors to meld and develop.
-
Blend it Up:
- Here comes the fun part! If you have an immersion blender, use it directly in the pot to puree the soup until smooth. If using a regular blender, carefully transfer the soup in batches and blend until creamy. Always start slow to prevent any splashing.
-
Creamy Finish:
- Once blended to your liking, return the soup to the pot (if using a blender) and stir in your cream. You want this to get warm but not boil again. It’s that comforting creamy touch that brings it all together!
-
Season and Taste:
- Season your soup with salt and freshly cracked pepper. Here’s my secret: a pinch of cinnamon can elevate the sweetness of the pumpkin. Don’t forget to adjust the seasoning; everyone’s taste buds are different!
And voilà! You’ve crafted a delightful creamy pumpkin soup that’s a feast for the eyes and the taste buds!
Serving Suggestions
To serve this gorgeous soup, ladle into warm bowls, then finish with a drizzle of heavy cream for a touch of elegance. A sprinkle of roasted pumpkin seeds on top adds delightful crunch and nutty flavor. You can also finish with a dash of freshly chopped parsley or thyme for a pop of color and freshness. Paired with some crusty bread or grilled cheese, it’s a cozy meal to savor.
Recipe Variations
Feel like getting creative? Here are some variations to put a twist on this comforting classic:
-
Spicy Kick: Add a teaspoon of cayenne pepper or a splash of hot sauce to the pot for a spicy version that’ll warm you from the inside out.
-
Herb Infusion: Swap out some of the spices for fresh herbs such as thyme or sage, which complement pumpkin beautifully.
-
Smoky Flavor: Stir in some smoked paprika for an unexpected twist that adds depth and personality.
-
Roasted Veggie Medley: Before puréeing, fold in some roasted carrots or sweet potatoes for added sweetness and nutrition.
-
Vegan Version: Utilize coconut or almond milk instead of cream and vegetable broth to make this soup completely plant-based without losing any creaminess.
Chef’s Notes
What I love about this creamy pumpkin soup is how adaptable it is. Over the years, I’ve changed up the spices and toppings based on what I have available, but the core of the recipe always remains comforting. I’ve even been known to serve this soup cold during a particularly warm fall day! (Yes, yes, I know — sounds bizarre, but I promise it works!)
Cooking is about discovering what resonates with you and finding joy in the kitchen. Don’t be afraid to make this soup your own—after all, it should feel as good as it tastes!
FAQs and Troubleshooting
Q: My soup is too thick! What should I do?
A: Easy fix! Just stir in a bit more broth or water until you reach your desired consistency.
Q: How can I add more flavor?
A: Always taste as you go! A splash of apple cider vinegar or lemon juice at the end can brighten the flavors nicely.
Q: Can I freeze leftover soup?
A: Absolutely! Just let it cool completely, then freeze in airtight containers. To reheat, thaw overnight in the fridge and warm it up gently on the stove.
Q: My soup turned out grainy. What happened?
A: This can happen if the soup was blended too long or at too high a speed. Make sure to blend on a low setting, and just until smooth!
Nutritional Info
While I’m not a nutritionist, this creamy pumpkin soup is packed with vitamins and nutrients. Pumpkin is high in fiber and Vitamin A, making it a healthful option. Pair it with bread, and you’ve got a well-rounded meal!
And there you have it! A delightful, cozy, and creamy pumpkin soup that warms the heart and fills the belly, just like how my mom used to make it. I hope you enjoy every bite and create your own beautiful memories around the table. Remember, cooking is about connection and joy—it should never feel like a chore. Keep it fresh, simple, and utterly delicious, my friends! Happy cooking!
PrintCreamy Pumpkin Soup
A cozy bowl of creamy pumpkin soup, bursting with fall flavors and warmth.
- Prep Time: 15 minutes
- Cook Time: 30 minutes
- Total Time: 45 minutes
- Yield: 4 servings 1x
- Category: Main Course
- Method: Stovetop
- Cuisine: American
- Diet: Vegetarian
Ingredients
- 2 cups Pumpkin Puree
- 4 cups Broth (Vegetable or Chicken)
- 1 cup Heavy Cream
- 1 Onion, finely chopped
- 2 cloves Garlic, minced (optional)
- 1 teaspoon Cinnamon
- 1/2 teaspoon Nutmeg
- Olive oil or butter for sautéing
- Salt and pepper, to taste
Instructions
- Sauté the aromatics: In a large pot over medium heat, add a drizzle of olive oil (or butter) and sauté the onion with a pinch of salt for about 5 minutes.
- Add garlic (if using) and sauté for 1 minute.
- Stir in the pumpkin puree and let it cook for a couple of minutes.
- Incorporate broth and stir to combine. Bring to a gentle simmer and cook for about 10 minutes.
- Blend the soup until smooth using an immersion blender or a regular blender in batches.
- Add cream to the blended soup and warm it up without boiling.
- Season with salt, pepper, and a pinch of cinnamon to taste.
Notes
For a lighter version, use coconut milk instead of heavy cream. This soup can be served warm or cold.
Nutrition
- Serving Size: 1 serving
- Calories: 350
- Sugar: 5g
- Sodium: 400mg
- Fat: 12g
- Saturated Fat: 4g
- Unsaturated Fat: 6g
- Trans Fat: 0g
- Carbohydrates: 45g
- Fiber: 3g
- Protein: 15g
- Cholesterol: 30mg
Keywords: pumpkin soup, fall recipes, creamy soup, vegetarian soup, comfort food

One-Pan 30-Minute Creamy Pumpkin Mac and Cheese this Fall
The Creamy Comfort of Pumpkin Mac and Cheese
Ah, fall! The beautiful dance of leaves changing colors, the aroma of cinnamon wafting through the air, and, of course, the irresistible call of pumpkin-flavored everything. There’s something about this season that makes us all just a little more nostalgic and a lot more hungry for cozy comfort foods. And speaking of comfort food, let me introduce you to the star of today’s show—Pumpkin Mac and Cheese!
This dish takes the classic mac and cheese we all know and love to a whole new level, infusing creamy pumpkin puree with cheese to create a luscious, orange-hued pasta dish that’s perfect for both chilly evenings and festive gatherings. It’s festive yet approachable, nourishing yet indulgent. You see, as a self-proclaimed pumpkin enthusiast, I can’t help but celebrate the versatility of this seasonal superstar, and what better way to do that than by combining it with the ultimate go-to comfort food?
In this post, not only will you learn how to whip up the best Pumpkin Mac and Cheese of your life, but I’ll also sprinkle in some of my favorite kitchen stories, tips, and tricks along the way. So grab your apron and let’s dive into a world where pasta meets pumpkin in the most delicious way possible!
A Taste of Nostalgia
Ah, mac and cheese. A dish that transcends time and age! Like most children of the ’90s, I grew up on the blue box—those neon orange powder days are forever etched in my memory. But it wasn’t until college that I discovered the magic of making mac and cheese from scratch. Let me take you back to an unforgettable fall evening when a few friends and I decided it was time to throw a cozy movie night. We were armed with blankets, popcorn, and yes, lots of cheesy goodness!
Since it was October, I thought, “Why not add some pumpkin to our mac and cheese?” After all, what could be better than pairing the creamy, cheesy pasta we adored with the warming flavors of fall? The result was nothing short of magical! The blending of spices with the gooey cheese made for an unforgettable experience—a simple, nostalgic dish with a new vibrant twist. The laughter and flavors shared that night remain a treasured memory, and it sparked my lifelong passion for experimenting with flavors that worked together in a cozy harmony. And that’s why I’m so excited to share this Pumpkin Mac and Cheese recipe with you today!
Ingredients
Let’s gather everything you need to create this autumnal masterpiece. Here’s your grocery list, along with chef insights for each ingredient:
-
Pasta (Elbow Macaroni or Shells)
- Opt for elbow macaroni for the classic feel, or switch it up with shells for more surface area to hold that creamy sauce. Whole wheat pasta can be a great alternative for added fiber.
-
Pumpkin Puree
- This ingredient adds a delightful creaminess and a subtle earthy flavor to your dish. Make sure to pick up pure pumpkin puree, not pumpkin pie filling, which contains added sugars and spices.
-
Cheddar Cheese (Sharp or Mild)
- Cheddar provides that classic cheesy goodness! Sharp cheddar gives a bold flavor, while mild is less intense. You can use any cheese you love, even gouda or gruyere, for a unique twist.
-
Mozzarella Cheese
- This cheese adds a melty texture that pulls together the dish. For a fun touch, try using smoked mozzarella for a slightly different flavor profile.
-
Butter
- You’ll need this for the roux, which is the base for your cheese sauce. Vegan butter can be used for a dairy-free version.
-
Milk
- Whole milk will create a creamy sauce, but you can substitute with almond milk or oat milk if you’re looking for a lighter or non-dairy alternative.
-
Spices (Salt, Pepper, Nutmeg, and Paprika)
- These little guys elevate the flavor profile. Nutmeg pairs beautifully with pumpkin, while paprika adds a hint of warmth. Feel free to sprinkle in some garlic powder or thyme for more complexity!
Step-by-Step Instructions
1. Prepare Your Pasta
Bring a large pot of salted water to a boil. Add in your pasta and cook according to the package instructions until al dente. Don’t forget to stir occasionally! Once cooked, drain it and set aside, but remember to reserve about a cup of pasta water for later. This starchy water will help thicken your cheese sauce.
2. Make the Creamy Sauce
In the same pot, melt 4 tablespoons of butter over medium heat. Once melted, add in ¼ cup of flour, whisking constantly for about 1-2 minutes. This creates a roux that helps thicken the sauce. Chef Hack: Don’t rush this step! Cooking the roux for long enough helps eliminate any raw flour taste.
3. Whisk in the Milk
Slowly pour in 3 cups of milk while whisking continuously. This helps create a smooth and creamy texture without lumps. Bring the mixture to a gentle simmer, allowing it to thicken slightly—this should take about 5 minutes.
4. Add the Pumpkin Puree and Spices
Stir in 1 cup of pumpkin puree, 1 teaspoon of salt, ½ teaspoon pepper, ¼ teaspoon nutmeg, and ½ teaspoon paprika. Give it a good mix until everything is combined and the sauce is beautifully orange. Tip: Taste as you go! Adjust the seasoning if needed to get the flavor just right for your palate.
5. Cheese, Please!
Remove the pot from the heat and slowly fold in 2 cups of shredded cheddar and 1 cup of mozzarella. Stir continuously until the cheeses melt into that creamy goodness. If the sauce is too thick, whisk in some reserved pasta water until you achieve the desired consistency.
6. Combine Pasta and Sauce
Fold the pasta into the cheese sauce until fully coated. This is where the magic happens! The pasta should be lush and perfectly enveloped in that pumpkin-cheese dream.
7. Serve It Up!
Transfer your Pumpkin Mac and Cheese to a serving dish and dive in! You could also sprinkle some more cheese on top and pop it into the oven for a bubbly, cheesy crust if you’re feeling a little extra.
Serving Suggestions
For an elegant touch, serve your Pumpkin Mac and Cheese in individual ramekins for a fancy dinner party vibe, or place it in a large serving bowl for family-style dining. Pair it with a fresh green salad drizzled with a light vinaigrette to balance the richness, and don’t forget the crusty bread on the side!
Recipe Variations
Feeling adventurous? Here are some delicious twists you can try:
- Spicy Kick: Add a dash of cayenne pepper to the sauce for a little heat.
- Meaty Add-in: Incorporate cooked bacon or sautéed sausage for a savory punch.
- Veggie Delight: Stir in sautéed spinach or roasted Brussels sprouts for extra nutrition and flavor.
- Cheesy Overload: Mix in crumbled blue cheese for a gourmet indulgence.
- Herb Infusion: Add in fresh herbs like sage or thyme for a fragrant twist that complements the pumpkin.
Chef’s Notes
This recipe has evolved over time from my college experimentations to a beloved fall favorite. I remember that one evening when I decided to add a hint of nutmeg, and it changed everything! The warm spices made all the difference and transformed my simple mac and cheese into a dish that feels like a warm hug. It’s become a staple in my kitchen, perfect for gatherings or a cozy night in—my friends can never say no to it!
FAQs and Troubleshooting
1. My sauce is too thick! What did I do wrong?
Don’t fret! Simply whisk in a little reserved pasta water or milk until you reach the desired consistency.
2. What can I use as a cheese substitute?
You can use various non-dairy cheeses for a vegan version; just make sure they melt well!
3. How do I prevent my cheese sauce from being grainy?
Be sure to melt your cheeses on low heat and add them slowly to avoid separating. If it happens, try blending the sauce until smooth.
4. Can I bake this dish?
Absolutely! If you’d like a crispy topping, transfer it to a baking dish, top with breadcrumbs and extra cheese, and bake at 350°F (175°C) for about 20 minutes or until golden and bubbly.
Nutritional Info
Per serving:
- Calories: ~500 kcal
- Protein: ~20g
- Carbohydrates: ~60g
- Fat: ~25g
So there you have it, my deliciously creamy Pumpkin Mac and Cheese! With these tips, tricks, and stories, I hope you feel inspired to take on this cozy dish in your kitchen. Remember, cooking should be fun and enjoyable. Let’s keep it fresh, simple, and oh-so-delicious! Happy cooking, friends!
PrintPumpkin Mac and Cheese

A creamy and comforting twist on classic mac and cheese with the delightful flavors of pumpkin.
- Prep Time: 15 minutes
- Cook Time: 30 minutes
- Total Time: 45 minutes
- Yield: 4 servings 1x
- Category: Main Course
- Method: Baking
- Cuisine: American
- Diet: Vegetarian
Ingredients
- 2 cups Elbow Macaroni or Shells
- 1 cup Pumpkin Puree
- 2 cups Sharp or Mild Cheddar Cheese, shredded
- 1 cup Mozzarella Cheese, shredded
- 4 tablespoons Butter
- 3 cups Milk
- 1/4 cup Flour
- 1 teaspoon Salt
- 1/2 teaspoon Pepper
- 1/4 teaspoon Nutmeg
- 1/2 teaspoon Paprika
Instructions
- Prepare your pasta by boiling salted water and cooking until al dente. Drain and reserve pasta water.
- Make the creamy sauce by melting butter and whisking in flour to create a roux.
- Whisk in the milk and simmer until slightly thickened.
- Add the pumpkin puree and spices, mixing until combined.
- Remove from heat and fold in the cheeses until melted.
- Combine pasta with the cheese sauce until fully coated.
- Serve in a dish and enjoy, optionally baking for a cheesy crust.
Notes
Try adding a dash of cayenne for a spicy kick or sautéed vegetables for extra nutrition.
Nutrition
- Serving Size: 1 serving
- Calories: 500
- Sugar: 5g
- Sodium: 600mg
- Fat: 25g
- Saturated Fat: 12g
- Unsaturated Fat: 8g
- Trans Fat: 0g
- Carbohydrates: 60g
- Fiber: 3g
- Protein: 20g
- Cholesterol: 75mg
Keywords: pumpkin, mac and cheese, comfort food, fall recipes, vegetarian
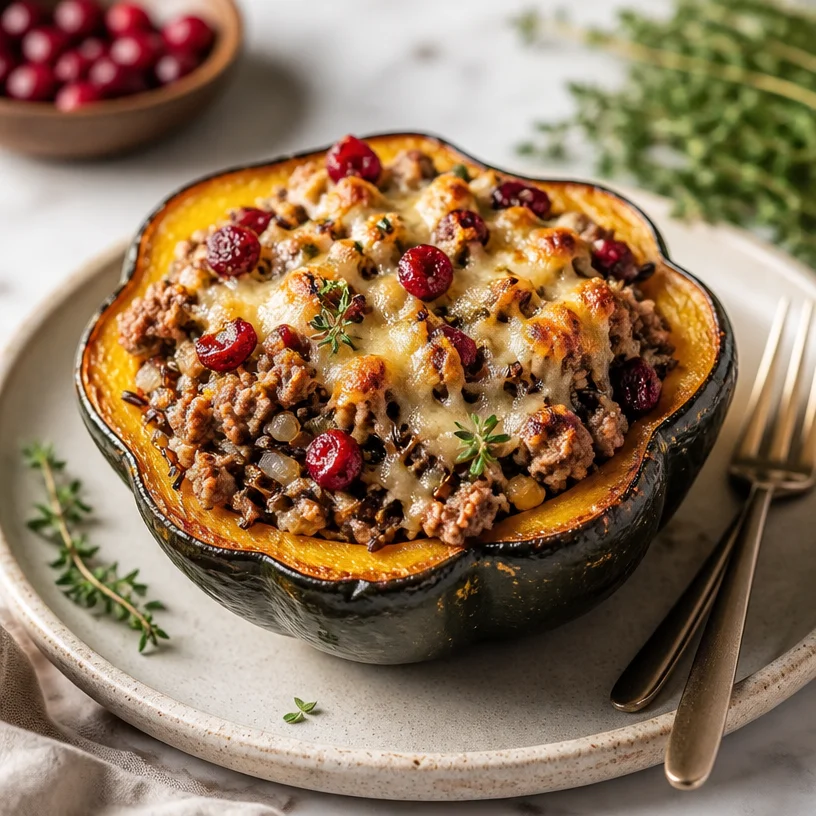
One-Pan Stuffed Acorn Squash: 30-Minute Weeknight Dinner
Stuffed Acorn Squash: A Cozy Fall Delight
Fall is in the air, and there’s nothing quite like the sight of vibrant acorn squash gracing your kitchen counter, beckoning you to transform it into a beautiful and wholesome meal. Today, we’re diving into a dish that not only fills your belly but feeds your soul: Stuffed Acorn Squash with Ground Turkey, Cranberries, and Wild Rice.
As the weather gets cooler, it’s the perfect time to take comfort in hearty, feel-good recipes. This dish is elegant enough for dinner parties yet simple enough for a cozy weeknight in. I promise that with each bite, you’ll experience a lovely blend of flavors that warms both the heart and the palate.
Personal Story
When I was a child, autumn meant two things: the thrill of jumping into piles of crunchy leaves and my mom’s famous stuffed acorn squash. I remember the aroma wafting through our home as she prepared the meal, a blend of sweet and savory notes that wrapped around me like a warm hug. Each year, she’d encourage my siblings and me to help her with the stuffing. With every scoop of wild rice mixed with cranberries, we’d squeal with delight; it felt like we were creating little treasures that held all our favorite flavors. Now, every time I make stuffed acorn squash, I’m transported back to those cherished moments. It’s more than just a dish; it’s a reminder that food has the power to bring people together.
Ingredients
Let’s roll up our sleeves and gather the ingredients for this luxurious dish:
-
Acorn Squash: The star of our show! Its slightly sweet, nutty flavor perfectly complements the savory stuffing. If acorn squash isn’t available, butternut or spaghetti squash can also work beautifully.
-
Ground Turkey: Lean and packed with protein, ground turkey is a lovely substitute for traditional beef or pork. If you prefer a vegetarian option, consider using lentils or chickpeas instead.
-
Cranberries: Dried cranberries add a burst of sweetness that balances the dish. If you’re watching your sugar, dried cherries or blueberries can be great alternatives.
-
Wild Rice: This adds a delightful chewy texture and earthy flavor. You could swap in quinoa or brown rice if you prefer, but the wild rice offers a unique twist that’s flavorful and nutritious.
-
Onion: Onion brings depth to the stuffing. Shallots or leeks can also lend a lovely flavor profile.
-
Celery: Adds crunch and freshness. You can replace it with bell peppers for a sweeter note, or simply omit it if you’re not a fan.
-
Garlic: A classic flavor booster! If fresh isn’t on hand, garlic powder works in a pinch.
-
Olive Oil: A drizzle of olive oil helps sauté the veggies and adds a silky finish. Avocado oil or grapeseed oil are solid substitutes.
-
Herbs (Thyme and Sage): Fresh herbs elevate the dish with fragrant notes of autumn. Feel free to use dried herbs if that’s what you have on hand – just adjust the quantities.
-
Salt and Pepper: Essential for flavor! Always season to taste as you go.
Step-by-Step Instructions
-
Preheat the Oven: Start by preheating your oven to 400°F (200°C). This gets the cooking process going before you even start assembling your dish.
-
Prepare the Acorn Squash: Cut the acorn squashes in half lengthwise (cooking tip: use a sharp knife for clean cuts). Scoop out the seeds—don’t worry about being perfect! Drizzle a little olive oil inside each half and sprinkle with salt and pepper. This will help them roast to perfection!
-
Roast the Squash: Place the squash halves, cut side down, on a baking sheet. Roast them in the oven for about 25-30 minutes. You want them fork-tender, so keep an eye on them!
-
Cook the Wild Rice: While the squash is roasting, prepare the wild rice according to package instructions. Usually, it takes about 45 minutes to cook, so it’s good to have this going while everything else is in the oven. The fluffiness of the rice is key, so don’t rush it!
-
Sauté the Aromatics: In a large skillet, heat a tablespoon of olive oil over medium heat. Add diced onion and celery to the pan. Sauté these for about 5 minutes, until the onion becomes translucent and the celery softens.
-
Brown the Ground Turkey: Push the veggies to one side of the pan and add the ground turkey, breaking it up with a spatula. Cook until it’s browned and cooked through (about 7-10 minutes). The turkey will soak up all that delicious flavor from the aromatics.
-
Add the Flavor: Toss in minced garlic and herbs at this stage. Cook for an additional minute until fragrant. Your kitchen will smell heavenly!
-
Mix It Up: Now, add the cooked wild rice and dried cranberries into the skillet with the turkey and veggies. Stir everything together and season with salt and pepper to taste. Feel free to get creative—this is your moment to shine!
-
Stuff the Squash: Carefully turn the roasted squash halves right side up. Generously fill each half with the turkey and rice mixture. Don’t be shy—heap it high!
-
Final Bake: Pop the stuffed squash back in the oven for an additional 10-15 minutes, just to heat everything through and allow the flavors to meld.
-
Serve and Enjoy: Once done, pull them out of the oven and let them cool for a few minutes. Then, drizzle a little extra olive oil on top, if desired, for a finishing touch.
Serving Suggestions
Plating these stuffed acorn squashes is a visual delight! Serve them warm on a rustic wooden platter to create a cozy vibe. Garnish with a sprinkle of fresh chopped herbs for that beautiful pop of green, and don’t forget a wedge of lemon on the side for a zesty twist!
Recipe Variations
-
Vegetarian Delight: Skip the turkey and load up on beans, mushrooms, and extra veggies like zucchini or spinach for a wholesome vegetarian version.
-
Cheesy Goodness: Mix in some feta or goat cheese into the stuffing before baking for a creamy and tangy flavor kick.
-
Spice it Up: Add some heat with diced jalapeños or a dash of cayenne pepper to the turkey mixture. A little kick never hurt anyone!
-
Nuts About It: Toss in some chopped walnuts or pecans for added crunch and nuttiness.
-
Herb Forward: Swap out thyme and sage for fresh rosemary and parsley for a refreshing take on flavor!
Chef’s Notes
If there’s one thing I’ve learned in my cooking journey, it’s that recipes are never set in stone. I often find myself getting a little adventurous—like the time I added leftover cranberry sauce (yes, that’s right!) into the stuffing. It gave a surprising burst of tart sweetness that I can’t believe I hadn’t tried sooner! Each time I make this dish, I embrace the idea that cooking should be flexible and fun. So, my advice is always to trust your instincts and have fun with it!
FAQs and Troubleshooting
1. My acorn squash is tough to cut! What should I do?
If your squash is particularly firm, microwave it for 2-3 minutes first to soften it slightly, making it easier to cut.
2. How do I know when my wild rice is done?
Wild rice should be chewy and split open when cooked, with a tender bite. Just be sure to taste it before draining!
3. Can I make this dish ahead of time?
Absolutely! You can prepare the stuffing a day in advance and just assemble and bake the acorn squash before serving.
4. My stuffing seems dry. How can I fix it?
If your stuffing ends up a bit dry, drizzle in some chicken or vegetable broth, or even a splash of olive oil, to add moisture!
Nutritional Info (Optional)
While I believe good food doesn’t need to dwell on numbers, here’s a rough estimate for one stuffed acorn squash half:
- Calories: 350
- Protein: 20g
- Carbs: 40g
- Fat: 12g
- Fiber: 7g
Conclusion
There you have it, my lovely foodies! Stuffed acorn squash is a delightful celebration of fall flavors that is tough to beat. With each bite, you’ll savor the warmth of home-cooked goodness and perhaps a sprinkle of nostalgia, just like I do. Remember, cooking is all about enjoying the moment, so embrace the spices, share the laughter, and have fun in your kitchen. Now, roll up those sleeves and get stuffing—your cozy meal awaits!
PrintStuffed Acorn Squash

A cozy fall dish featuring acorn squash stuffed with ground turkey, cranberries, and wild rice, perfect for chilly evenings.
- Prep Time: 15 minutes
- Cook Time: 45 minutes
- Total Time: 60 minutes
- Yield: 4 servings 1x
- Category: Main Course
- Method: Baking
- Cuisine: American
- Diet: None
Ingredients
- 2 Acorn Squash
- 1 lb Ground Turkey
- 1/2 cup Dried Cranberries
- 1 cup Wild Rice
- 1 Onion, diced
- 1 Celery stalk, diced
- 2 cloves Garlic, minced
- 2 tbsp Olive Oil
- 1 tsp Dried Thyme
- 1 tsp Dried Sage
- Salt and Pepper to taste
Instructions
- Preheat the oven to 400°F (200°C).
- Prepare the acorn squash by cutting in half and scooping out the seeds. Drizzle with olive oil and season with salt and pepper.
- Roast the squash halves cut side down on a baking sheet for 25-30 minutes until fork-tender.
- Cook the wild rice according to package instructions (approximately 45 minutes).
- Sauté diced onion and celery in a skillet with olive oil for 5 minutes.
- Brown the ground turkey in the skillet for 7-10 minutes, breaking it up as it cooks.
- Add minced garlic and herbs, cooking for an additional minute.
- Mix in the cooked wild rice and cranberries, seasoning with salt and pepper.
- Stuff the roasted squash with the turkey and rice mixture.
- Final bake for 10-15 minutes to heat through.
- Serve warm with a drizzle of olive oil on top.
Notes
Feel free to customize with additional vegetables or spices to create your perfect stuffed squash.
Nutrition
- Serving Size: 1 half of acorn squash
- Calories: 350
- Sugar: 5g
- Sodium: 400mg
- Fat: 12g
- Saturated Fat: 2g
- Unsaturated Fat: 8g
- Trans Fat: 0g
- Carbohydrates: 40g
- Fiber: 7g
- Protein: 20g
- Cholesterol: 75mg
Keywords: stuffed acorn squash, fall recipe, savory squash, healthy dinner, comfort food
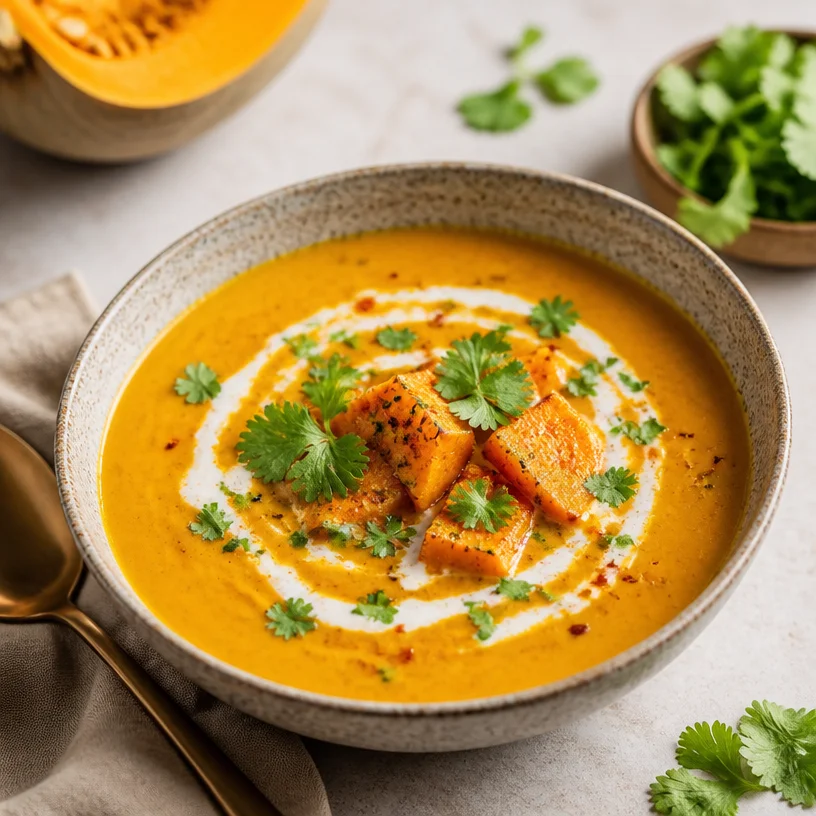
Minute Creamy Pumpkin Curry Soup (One-Pot Comfort)
Warm Up with a Cozy Bowl of Pumpkin Curry Soup
Welcome, fellow food lovers! If you’re looking for a comforting, vibrant, and utterly delicious dish to make this fall (or any time of year), then let me introduce you to my beloved Pumpkin Curry Soup. It’s creamy, savory, and just the right amount of spice to warm your soul. Plus, it’s packed with nourishing ingredients and comes together in a snap.
Autumn’s here, and with it arrives the bounty of pumpkins—bright orange beauties that grace our porches and kitchens alike. As the days grow shorter and the nights a bit cooler, there’s nothing quite like a steaming bowl of soup to bring warmth and joy to your meals.
Now, you might think making a rich, flavorful soup sounds tricky, but trust me, this Pumpkin Curry Soup is as easy as pie (or, rather, pumpkin pie!). I’ll walk you through my foolproof recipe that’s loaded with goodness and flavor. Prepare yourself for a lovely culinary adventure that’s bound to become a staple in your recipe arsenal.
So grab your cozy sweater and your favorite set of kitchen utensils, and let’s get to it!
A Slice of Nostalgia
You know, my love for pumpkin soup goes way back. I remember the first time I attempted to make a pumpkin curry soup in college. I had just moved into my tiny apartment, and let’s just say my cooking skills were still very much in development. One crisp October afternoon, I invited my friends over for a cozy movie night and felt the urge to impress them with something special. Armed with a can of pumpkin puree, some curry paste, and a handful of spices I found in the back of my pantry, I embarked on what felt like an epic culinary quest.
The kitchen was filled with the warm, inviting aroma of spices simmering away; I felt like a kitchen wizard! We settled down with big mugs of the soup, laughing and enjoying each other’s company. That night, we not only savored every bite but also forged memories that still bring a smile to my face. Fast forward to today, and that very recipe has evolved, but the spirit of joy and connection around a meal remains the same.
Let’s dive into the ingredients that make this dish the star of the show!
Ingredients
-
Pumpkin Puree
- The star of the dish! You can use canned puree for convenience or roast fresh pumpkin for a more robust flavor. If you’re in a pinch, butternut squash works beautifully as a substitute!
-
Coconut Milk
- This gives our soup its creamy texture and delightful tropical flavor. Look for full-fat coconut milk for a luscious base. You can also substitute it with almond milk for a lighter option, but keep in mind the flavor will be different.
-
Curry Paste
- A little goes a long way! I usually opt for red or yellow curry paste for this recipe, but feel free to experiment. If you prefer a milder flavor, you can use half the amount or make your own spice mix with turmeric, cumin, and ginger.
-
Vegetable Broth
- This adds depth and richness to the soup. Homemade broth is fantastic, but store-bought works just as well. If you’re looking for a gluten-free option, check your labels!
-
Onion and Garlic
- Aromatics that will lay the foundation for flavor. Don’t rush the sautéing step; allowing them to caramelize just right enhances the overall taste of your soup. Swap the onion for shallots if you like a milder profile!
-
Ginger
- Fresh ginger gives a lovely kick, plus it’s known for its health benefits. If you’re out of fresh ginger, powdered ginger can be used as a substitute, but use less since it’s stronger!
-
Lime Juice
- A splash of lime juice brightens the soup and balances out the richness of the coconut milk. Don’t have limes? A splash of apple cider vinegar can work in a pinch, too!
-
Fresh Herbs (like cilantro or parsley)
- These are optional but add a pop of freshness to finish off your soup. If you’re not a fan of cilantro, try fresh basil instead!
Step-by-Step Instructions
Now that we’ve gathered our ingredients, it’s time to roll up our sleeves and make some magic happen in the kitchen!
-
Start with the Aromatics:
- In a large pot over medium heat, heat a drizzle of olive oil. Once it’s shimmering, add one diced onion and sauté until it’s soft and translucent, about 5-7 minutes. Add minced garlic (about 3 cloves) and freshly grated ginger (around 1 tablespoon) and stir for another minute until fragrant. This step is essential; you want to build a flavor base here!
-
Add the Curry Paste:
- Stir in 2 tablespoons of your chosen curry paste (add more if you love a strong curry flavor!). Cook for another minute, allowing it to bloom and coat the onions and garlic. You’ll notice the spices start to release their aroma—believe me, this is the moment your kitchen will start to feel like a home!
-
Incorporate the Pumpkin:
- Stir in 1 can (15 oz) of pumpkin puree and blend well, letting it mingle with those fragrant aromatics. This is where your soup starts to look like magic. Feel free to add a pinch of salt to enhance the flavors.
-
Pour in the Coconut Milk and Broth:
- Slowly add 2 cups of vegetable broth and the entire can (13.5 oz) of coconut milk, stirring as you go. This is where the soup gets creamy and dreamy! Bring it to a gentle simmer—about 10-15 minutes should do it.
-
Season to Perfection:
- Taste your soup and add salt and pepper to your preference. Don’t forget the lime juice—add the juice of half a lime (adjust to your taste). If you want a little sweetness, a teaspoon of maple syrup can also elevate the flavors beautifully.
-
Blend (Optional):
- If you like your soup super smooth, use an immersion blender and puree it directly in the pot until creamy. Alternatively, you can carefully transfer it to a standard blender in batches (just allow some steam to escape!). This is where you can really control the texture to your liking.
-
Final Touch:
- Return the soup to the heat to warm it through for a couple more minutes. It’s now ready to serve!
Serving Suggestions
Ladle the soup into bowls and garnish with fresh cilantro or parsley for that burst of green color. A sprinkle of toasted pumpkin seeds on top for some added crunch can elevate your dish further! Serve with slices of crusty bread for dipping, or even a side salad for a complete meal. This soup is perfect for cozy dinners, lunch breaks, or impressing guests!
Recipe Variations
-
Spicy Pumpkin Curry Soup: Add diced jalapeños or a sprinkle of red pepper flakes for an extra kick!
-
Herb-Infused: You can infuse the coconut milk with herbs like lemongrass or basil before adding it to the soup.
-
Protein Boost: Stir in some cooked chickpeas or lentils for a heartier soup that’ll keep you full longer.
-
Nutty Twist: Top with a drizzle of spicy sesame oil or a handful of toasted peanuts for texture!
-
Creamy Spin: Add a swirl of yogurt or sour cream just before serving for a tangy finish.
Chef’s Notes
First off, let me just say that this soup is a total crowd-pleaser! It’s vegan, gluten-free, and can be whipped up in no time. One of my favorite sayings is, “Cooking is love made visible,” and each time I make this soup, I feel that love radiating in the kitchen. Over the years, I’ve experimented a lot with the base ingredients, and while I adore the classic version, I love exploring new flavors. Sometimes I add a dash of curry powder or even some sautéed mushrooms. Cooking is all about having fun and making it your own!
One time, I hosted a pumpkin party, where everything was pumpkin-themed. This soup was the star, and I even served it in miniature pumpkins—how cute is that? Instant hits, those little edible bowls!
FAQs and Troubleshooting
1. My soup is too thick; how can I fix it?
If your soup becomes overly thick, just stir in a bit more vegetable broth or coconut milk until you reach your desired consistency.
2. What if I don’t have all the ingredients?
No worries! Cooking allows room for creativity. You can substitute many ingredients (as noted above). Just keep the core ones: pumpkin, coconut milk, and curry paste.
3. Can I store the soup for later?
Absolutely! This soup stores well in airtight containers in the fridge for up to 5 days. It also freezes beautifully—just leave some room in the container for expansion!
4. It tastes too bland; what should I do?
When in doubt, season to taste! A bit more lime juice, salt, or even a splash of soy sauce can bring those flavors to life. Fresh herbs at the end can also brighten things up.
Nutritional Info (Optional)
While specific nutritional information can vary based on exact ingredient choices and portion sizes, here’s a general overview per serving of this delicious Pumpkin Curry Soup (based on roughly 6 servings):
- Calories: 250
- Protein: 5g
- Carbohydrates: 28g
- Dietary Fiber: 5g
- Sugars: 6g
- Fat: 15g
Now that you have the full scoop on making a delightful Pumpkin Curry Soup, I can’t wait for you to dive into this recipe! It’s comfort in a bowl, bringing warmth and flavor to your table. Happy cooking, and remember—each bite is a little piece of joy! Let’s keep those cravings fresh and fulfilling!
PrintPumpkin Curry Soup

A creamy, savory, and spicy soup that warms your soul with the vibrant flavors of autumn.
- Prep Time: 10 minutes
- Cook Time: 25 minutes
- Total Time: 35 minutes
- Yield: 6 servings 1x
- Category: Soup
- Method: Stovetop
- Cuisine: Indian
- Diet: Vegan
Ingredients
- 1 can (15 oz) Pumpkin Puree
- 1 can (13.5 oz) Coconut Milk
- 2 tablespoons Curry Paste
- 2 cups Vegetable Broth
- 1 Onion, diced
- 3 cloves Garlic, minced
- 1 tablespoon Fresh Ginger, grated
- Juice of 1/2 Lime
- Fresh Herbs (cilantro or parsley), for garnish
- Salt and Pepper, to taste
Instructions
- Heat a drizzle of olive oil in a large pot over medium heat. Add diced onion and sauté until soft and translucent, about 5-7 minutes. Add minced garlic and grated ginger and stir for another minute.
- Stir in curry paste and cook for another minute until fragrant.
- Incorporate pumpkin puree into the pot and blend well. Optionally, add a pinch of salt.
- Pour in vegetable broth and coconut milk, stirring as you go. Bring to a gentle simmer for about 10-15 minutes.
- Taste and season with salt, pepper, and lime juice. Add maple syrup if desired.
- Blend using an immersion blender for a smooth texture, if preferred.
- Return the soup to heat for a couple more minutes before serving.
Notes
This soup can be thickened or thinned as per preference by adjusting the broth or coconut milk. It’s excellent for meal prep and can be frozen for later.
Nutrition
- Serving Size: 1 serving
- Calories: 250
- Sugar: 6g
- Sodium: 600mg
- Fat: 15g
- Saturated Fat: 12g
- Unsaturated Fat: 3g
- Trans Fat: 0g
- Carbohydrates: 28g
- Fiber: 5g
- Protein: 5g
- Cholesterol: 0mg
Keywords: pumpkin soup, curry soup, vegan soup, fall recipe, comfort food
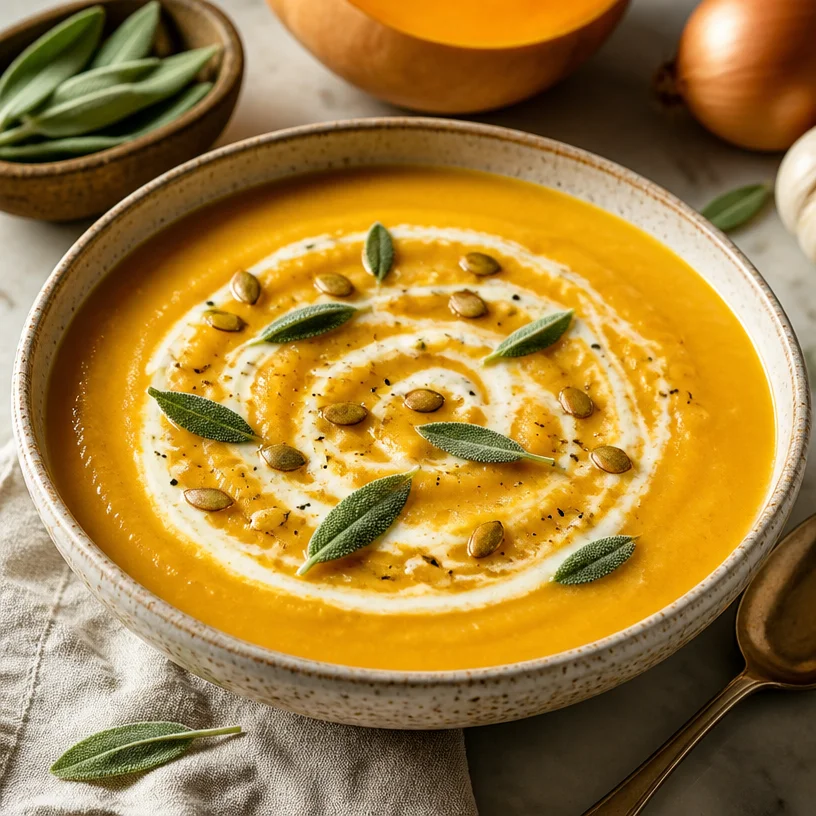
One-Pot Creamy Butternut Squash Soup in 30 Minutes
Discovering the Creamy Comfort of Butternut Squash Soup
Hello, my lovely foodies! Today, we’re diving into a bowl of pure comfort with a heartwarming recipe for Butternut Squash Soup. This dish is like a hug in a bowl—smooth, creamy, and bursting with flavor. Butternut squash has a naturally sweet and nutty profile, and when you blend it up with some aromatic onion, fresh sage, and a splash of cream, you end up with a dish that’s perfect for any occasion.
Imagine it: a chilly autumn day, the leaves painted with nature’s vibrant colors, and you cozy up with a warm bowl of butternut squash soup. There’s something magical about this time of year that makes this dish feel especially inviting. This soup is not just a meal; it’s a moment of pause and reflection. Plus, it’s super simple to make, which means you can whip it up on those busy weeknights without breaking a sweat!
Let me take you on a journey where comfort meets creativity in the kitchen. I promise this recipe will not only nourish your body but also delight your taste buds. So grab your apron, put on some good tunes, and let’s get cooking!
A Spoonful of Nostalgia
My love for butternut squash soup began in my grandmother’s kitchen. She had a way of turning the simplest ingredients into something magical. I remember standing on a stool beside her, mesmerized as she peeled, chopped, and roasted fresh squash from her garden. The air would fill with the warm, nutty aroma, tantalizing my senses.
One chilly evening, we made butternut squash soup together for the first time. It was the kind of day where the brisk wind made you crave comfort food. We chopped everything from scratch, giggling at the occasional splash of broth and dancing to the old records playing in the background. The soup quickly became our favorite, passing down from generation to generation—always a staple at family dinners during the fall and winter months.
That first taste? Oh, it was pure bliss. The silky texture coated my tongue, and the warmth radiated through me, just like the love and laughter that we shared in that little kitchen. Today, every time I make butternut squash soup, I channel that same carefree spirit and warmth that my grandmother instilled in me. Now, let’s create some memories of our own, shall we?
Ingredients
Here’s what you’ll need to whip up this delicious butternut squash soup:
-
Butternut Squash: The star of the show! Choose one that feels heavy for its size and has a deep, even color. If you can’t find butternut squash, pumpkin or acorn squash can be great alternatives, though they may have different flavor profiles.
-
Onion: A classic aromatics powerhouse, onion adds depth and sweetness to the soup. Yellow onion is my go-to, but feel free to experiment with shallots for a milder flavor or red onion for a pop of color.
-
Broth: This is where your soup gets its savory goodness. Vegetable or chicken broth works beautifully. If you’re looking for a lighter option, try low-sodium broth to control the saltiness, which can always be adjusted later.
-
Cream: Just a splash for that dreamy, velvety texture! You can use heavy cream for richness or opt for half-and-half for a lighter version. If you need a dairy-free option, coconut milk adds a lovely creaminess with a hint of tropical flavor.
-
Sage: This herb adds an earthy, aromatic touch that pairs beautifully with the squash. Fresh sage is preferred for its brighter flavor, but dried sage will also do the job! Just remember, if using dried, you’ll need less as it’s more concentrated.
Step-by-Step Instructions
Alright, let’s roll up those sleeves and get to work!
-
Prep the Squash:
- Start by slicing your butternut squash in half lengthwise. Be cautious—those squash can be tough! Use a sharp knife and a sturdy cutting board. Once halved, scoop out those seeds with a spoon.
- Next, cut it into cubes (about 1-inch pieces). This helps the squash cook down more quickly, making your life easier. Pro tip: you can roast the squash halves directly in the oven at 400°F (200°C) for about 30 minutes until fork-tender, or you can use the stovetop method for an even simpler approach.
-
Sauté the Aromatics:
- In a large pot, heat a drizzle of olive oil (or butter if you prefer) over medium heat. Toss in the chopped onion and sauté until golden and translucent, about 5-7 minutes.
- Here’s a little chef hack: sprinkle a pinch of salt over the onions while they cook. This will help draw out their moisture, allowing them to caramelize nicely.
-
Add the Squash:
- Once your onions are glowing with flavor, add in the cubed butternut squash. Stir well to combine and let this mixture sauté for another 5 minutes. The squash will start to soften just a bit, and trust me—it’s going to smell divine!
-
Pour in the Broth:
- Next up, grab your broth and pour it over the squash and onion mixture. Just enough to cover the squash should do! Bring this to a gentle boil, then reduce heat to a simmer. Let it cook until the squash is tender, which should be around 15-20 minutes.
- During this time, feel free to reflect on your day or even dance it out a little. Cooking should be fun!
-
Blend It Up:
- Once the squash is tender, it’s blending time! If you have an immersion blender, that’s the easiest way to go. Blend until completely smooth. If using a regular blender, be careful to allow some steam to escape, and blend in batches if necessary to prevent overflow.
- After blending, return the soup to the pot. If you want to get really velvety, you can pass it through a fine-mesh sieve, but that’s up to you!
-
Stir in the Cream and Sage:
- Here comes the magic—stir in the cream and chopped fresh sage. Allow the soup to gently warm through, and taste to adjust seasoning. A touch of salt and pepper can go a long way!
-
Serve and Enjoy:
- Ladle your creamy soup into bowls. Consider drizzling a little extra cream on top or adding some crispy sage leaves for garnish. Voilà! You’ve created a soul-soothing dish that’s ready to be devoured.
Serving Suggestions
For a beautiful presentation, serve your butternut squash soup in deep bowls or rustic mugs. It’s perfect alongside a crusty piece of bread, perfect for dipping. You could also sprinkle a handful of roasted pumpkin seeds or a drizzle of balsamic glaze on top for that gourmet touch.
Recipe Variations
-
Spicy Kick: Add a pinch of cayenne or red pepper flakes to the pot for a touch of heat!
-
Apple Delight: For a touch of sweetness, toss in a chopped apple (like Granny Smith) while cooking the squash. It gives a lovely tartness that balances the flavors.
-
Herb Infusion: Experiment by adding thyme or rosemary alongside the sage for an herbal explosion.
-
Nutty Flavor: Stir in a spoonful of nut butter (like almond or cashew) while blending for a rich, nutty flavor.
-
Garnish Game: Top with crispy bacon bits or a dollop of yogurt for added crunch and texture.
Chef’s Notes
Every time I make this soup, I adapt it depending on what I have on hand, making it a canvas for creativity! One time, I threw in some roasted garlic, and let me tell you, the flavor was next-level delicious. Sometimes cooking isn’t so much about following a rigid recipe; it’s about feeling free to experiment. I cherish these moments as they always lead to delightful surprises in the kitchen, just like the one I had with my grandmother.
FAQs and Troubleshooting
-
Why is my soup too thick?
- If your soup ends up a bit thicker than you prefer, simply add a splash of broth or water and blend again until you achieve your desired consistency!
-
Can I freeze butternut squash soup?
- Absolutely! This soup freezes beautifully. Just let it cool completely before transferring to airtight containers or freezer bags. It can last up to three months in the freezer. When ready to serve, let it thaw overnight in the fridge and then reheat on the stove.
-
Can I make this soup vegan?
- Yes! Swap the cream for coconut milk (about a cup) and use vegetable broth. It’s equally creamy and delicious!
-
What if I don’t have fresh sage?
- No worries! Dried sage works just as well—use about half a teaspoon in place of fresh. You can always add more to taste.
Nutritional Info (Optional)
While it may vary depending on the specific brands and quantities you use, here’s a rough estimate for a serving of this butternut squash soup (without cream):
- Calories: 150
- Protein: 2g
- Fat: 5g
- Carbohydrates: 26g
- Fiber: 5g
- Sugar: 6g
So there you have it, my lovely friends—your go-to recipe for a heartwarming Butternut Squash Soup! I hope it brings as much joy to your kitchen as it does to mine. Remember, cooking is not just about feeding your body; it’s also about creating memories, sharing stories, and always—always—having fun. Happy cooking!
PrintCreamy Butternut Squash Soup

A heartwarming recipe for creamy butternut squash soup, perfect for chilly days.
- Prep Time: 15 minutes
- Cook Time: 30 minutes
- Total Time: 45 minutes
- Yield: 4 servings 1x
- Category: Soups
- Method: Blending
- Cuisine: American
- Diet: Vegetarian
Ingredients
- 1 butternut squash, halved and cubed
- 1 yellow onion, chopped
- 4 cups vegetable or chicken broth
- 1/2 cup heavy cream or coconut milk
- 1 tablespoon fresh sage, chopped (or 1 teaspoon dried)
- Olive oil or butter for sautéing
Instructions
- Prep the squash: Slice butternut squash in half lengthwise and scoop out seeds. Cut into 1-inch cubes.
- Sauté the aromatics: Heat olive oil in a large pot, add chopped onion, and sauté until golden, about 5-7 minutes.
- Add the squash: Stir in cubed butternut squash, sauté for another 5 minutes.
- Pour in the broth: Add broth to cover the squash, bring to a boil, then simmer until tender, about 15-20 minutes.
- Blend it up: Blend the soup until smooth. Return to pot.
- Stir in the cream and sage: Warm through and adjust seasoning as needed.
- Serve and enjoy: Ladle into bowls, garnish with extra cream or crispy sage, and serve with bread.
Notes
This soup can be frozen for up to three months. Just cool completely before storing.
Nutrition
- Serving Size: 1 serving
- Calories: 150
- Sugar: 6g
- Sodium: 500mg
- Fat: 5g
- Saturated Fat: 2g
- Unsaturated Fat: 3g
- Trans Fat: 0g
- Carbohydrates: 26g
- Fiber: 5g
- Protein: 2g
- Cholesterol: 10mg
Keywords: butternut squash soup, fall recipes, comfort food, vegan options, easy recipes
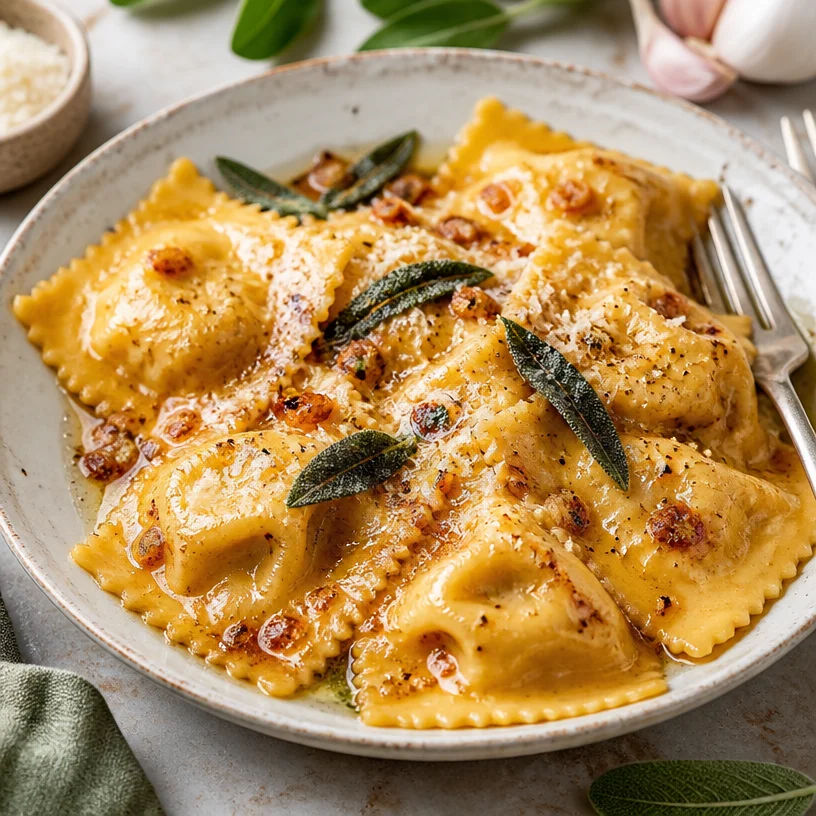
Homemade Pumpkin Ravioli with Garlic Brown Butter
Homemade Pumpkin Ravioli with Garlic Brown Butter
Welcome to Clean Plate Cravings! Today, I’m thrilled to share a recipe that dances at the intersection of comfort and elegance—Homemade Pumpkin Ravioli with Garlic Brown Butter. This dish is a true labor of love, perfect for cozy evenings or impressing friends at dinner parties. As the fall season rolls around, it’s the ideal time to embrace the rich flavors of pumpkin and mix them with the warm, nutty aroma of brown butter. Are you ready to join me on this culinary adventure?
A Bit of Nostalgia
Let me whisk you back to a chilly autumn day a few years ago. I was at my parents’ house, bustling around the kitchen with my mom, who always had a flair for making everything from scratch. That day, we decided to tackle homemade ravioli together. The kitchen was filled with laughter, flour dust, and the fragrance of simmering pumpkin puree. I can still picture us rolling out the dough, her hands skillfully shaping it, while I tried to keep up and not make a mess (though the mess was inevitable!)
As we filled the ravioli with a creamy pumpkin and ricotta mixture, I felt a sense of connection—not just to my mom but to the traditions and love that food brings to our lives. We topped the dish with a beautiful garlic brown butter sauce, and oh, the first bite was bliss—a warm hug on a plate! Every time I make this dish, those memories flood back, reminding me that cooking is about more than just food; it’s about the love and connections we share.
Ingredients
Let’s get into our ingredient list! These are the stars of our homemade pumpkin ravioli:
-
2 cups all-purpose flour: This is the backbone of our pasta dough. For a gluten-free option, you could substitute with a gluten-free flour blend, but make sure it’s designed for pasta to get the right texture.
-
3 large eggs: Eggs give structure and richness to the dough. If you’re vegan or can’t have eggs, try using a flaxseed egg (1 tablespoon ground flaxseed mixed with 2.5 tablespoons water) per egg, though it might alter the texture slightly.
-
1 cup pumpkin puree: Canned pumpkin works perfectly here, but roasting fresh pumpkin is worth the effort for a deeper flavor. Just make sure you use pure pumpkin, not pumpkin pie filling!
-
1/2 cup ricotta cheese: This adds creaminess to our filling. You can swap it out for mascarpone or goat cheese for a different flavor profile.
-
1/4 cup grated Parmesan cheese: An essential touch of saltiness and nuttiness. Nutritional yeast is a great vegan alternative if you want to keep it dairy-free.
-
1 teaspoon salt: Essential for flavor. Adjust according to your preference, but don’t skimp on this!
-
1/2 teaspoon nutmeg: This fragrant spice is a classic partner to pumpkin. If you’re not a nutmeg fan, cinnamon works too, but use it sparingly.
-
1 tablespoon olive oil: For a hint of richness in the pasta dough. You can substitute with melted coconut oil for a twist!
-
1/2 cup unsalted butter: We’re using it to make that beautiful brown butter sauce. You could also use vegan butter or ghee for those needing dairy-free options.
-
2 cloves garlic, minced: Adding garlic infuses the butter with a delightful aroma. Feel free to add more if you’re a garlic lover!
-
Fresh sage leaves (optional): These are optional but highly recommended; they pair beautifully with the pumpkin flavor.
-
Salt and pepper to taste: Always important!
Step-by-Step Instructions
Ready to get cooking? Let’s make this awesome homemade pumpkin ravioli!
-
Make the Dough: In a large bowl or on a clean countertop, pile the flour and create a well in the center. Crack the eggs into this well, and add the olive oil and salt. Use a fork to beat the eggs, gradually incorporating the flour from the edges of the well. Once it starts to come together, use your hands to knead the dough for about 8-10 minutes until smooth and elastic. If it’s too sticky, sprinkle a little more flour as needed.
-
Rest the Dough: Wrap the dough in plastic wrap or cover it with a clean kitchen towel. Let it rest for at least 30 minutes; this allows the gluten to relax, making rolling easier.
-
Prepare the Filling: While the dough rests, mix together the pumpkin puree, ricotta, Parmesan, nutmeg, and a pinch of salt and pepper in a bowl. Taste and adjust the seasoning. You want it to be flavorful since it’ll be the heart of your ravioli.
-
Roll Out the Dough: After resting, divide your dough into four equal portions. Keep the portions you’re not using covered to prevent drying out. Roll out one portion to about 1/8 inch thick using a pasta machine or a rolling pin. Dust lightly with flour to prevent sticking.
-
Shape the Ravioli: Using a cookie cutter or glass, cut out circles from the rolled-out dough. Place a teaspoon of filling in the center of half the circles, leaving enough space to seal. Wet the edges with a little water, place another circle on top, and gently press the edges to seal completely. Repeat with the remaining dough and filling.
-
Cook the Ravioli: Bring a large pot of salted water to a gentle boil. Carefully add the ravioli, cooking them for about 4-5 minutes or until they rise to the surface and are tender. Fresh pasta cooks quickly, so keep an eye on them.
-
Make the Brown Butter Sauce: In a skillet, melt the unsalted butter over medium heat. Once melted, add the garlic and cook for 1-2 minutes until fragrant. Keep an eye on it, stirring occasionally to prevent burning. Once the butter turns a lovely golden brown, remove it from the heat and add fresh sage leaves, allowing them to infuse the butter with flavor.
-
Toss the Ravioli: Using a slotted spoon, transfer the cooked ravioli to the skillet with the brown butter sauce. Gently toss the ravioli in the sauce to coat them beautifully.
-
Serve: Plate your scrumptious ravioli, garnishing with more Parmesan and a sprinkle of freshly cracked black pepper. Enjoy every bite!
Serving Suggestions
Elevate your dish by serving it with a side of arugula salad dressed lightly with lemon vinaigrette for a fresh contrast. You can also add toasted pine nuts or walnuts for crunch on top of the ravioli, and don’t be shy with the Parmesan cheese! Plating this dish with a sprig of fresh sage will make it look as good as it tastes.
Recipe Variations
-
Spinach and Ricotta Filling: Swap out the pumpkin filling with a mix of sautéed spinach and ricotta for a lighter dish.
-
Butternut Squash: You can use butternut squash puree instead of pumpkin for a sweet twist—just make sure it’s well-seasoned.
-
Vegan Ravioli: Substitute the ricotta with a blended tofu mixture seasoned with nutritional yeast, and use vegan butter for the brown butter sauce.
-
Mushroom Brown Butter: Switch out the garlic for sautéed mushrooms in your brown butter for an earthy flavor.
-
Cheese Stuffed Varieties: Try a combination of different cheeses in the filling, like goat cheese and crumbled feta!
Chef’s Notes
This pumpkin ravioli has become a favorite among my friends and family. Over time, I’ve adapted the recipe to fit new tastes and dietary preferences, and I find joy in experimenting every autumn. One fond memory involves a dinner party where we discovered the joy of a sage-infused oil drizzled on top, which brought a new delicious layer to the dish!
And here’s a little secret—leftover ravioli can be frozen! Just make sure to layer them between parchment paper on a baking sheet before transferring them to a freezer bag. They’ll be your go-to quick meal any busy night.
FAQs and Troubleshooting
1. My dough is too sticky; what do I do?
If your dough is too sticky, sprinkle a bit more flour while kneading until you achieve a smooth texture. Keep in mind that a touch of stickiness is okay—it means your pasta will be tender!
2. How do I know when the ravioli is done cooking?
Fresh ravioli will float to the surface once they’re cooked. Allow them another minute or two after they surface to ensure the filling is hot.
3. Can I make the ravioli in advance?
Absolutely! You can make the ravioli up to a day in advance. Just keep them in the fridge, layered with parchment paper, until you’re ready to cook.
4. What should I do if they’re sticking together?
If your ravioli are sticking, try dusting them lightly with flour before they call it a day. Also, avoid stacking them directly on top of each other.
Nutritional Info
While I don’t always list nutritional info (because let’s face it, cooking is about enjoyment!), this dish does embody wholesome ingredients. Each serving provides a delicious balance of carbohydrates, protein from the ricotta, and healthy fats from the butter. Plus, it’s a seasonal delight that packs in vitamins from the pumpkin!
I hope you’re as excited to whip up this Homemade Pumpkin Ravioli with Garlic Brown Butter as I am. Let’s keep those kitchen stories flowing—after all, every dish we cook is a memory in the making! Happy cooking, my friend! 🍂✨
PrintHomemade Pumpkin Ravioli with Garlic Brown Butter

A delightful homemade pumpkin ravioli paired with a rich garlic brown butter sauce, perfect for cozy evenings and impressing friends.
- Prep Time: 30 minutes
- Cook Time: 15 minutes
- Total Time: 45 minutes
- Yield: 4 servings 1x
- Category: Main Course
- Method: Baking
- Cuisine: Italian
- Diet: Vegetarian
Ingredients
- 2 cups all-purpose flour
- 3 large eggs
- 1 cup pumpkin puree
- 1/2 cup ricotta cheese
- 1/4 cup grated Parmesan cheese
- 1 teaspoon salt
- 1/2 teaspoon nutmeg
- 1 tablespoon olive oil
- 1/2 cup unsalted butter
- 2 cloves garlic, minced
- Fresh sage leaves (optional)
- Salt and pepper to taste
Instructions
- Make the Dough: In a large bowl or on a clean countertop, pile the flour and create a well in the center. Crack the eggs into this well, and add the olive oil and salt. Use a fork to beat the eggs, gradually incorporating the flour from the edges of the well. Knead the dough for about 8-10 minutes until smooth and elastic.
- Rest the Dough: Wrap the dough in plastic wrap or cover it with a clean kitchen towel. Let it rest for at least 30 minutes.
- Prepare the Filling: Mix together the pumpkin puree, ricotta, Parmesan, nutmeg, and a pinch of salt and pepper in a bowl. Adjust the seasoning.
- Roll Out the Dough: Divide your dough into four equal portions. Roll out one portion to about 1/8 inch thick using a pasta machine or a rolling pin.
- Shape the Ravioli: Cut out circles from the rolled-out dough, place a teaspoon of filling in the center of half the circles, wet the edges, place another circle on top, and gently press the edges to seal completely.
- Cook the Ravioli: Bring a large pot of salted water to a gentle boil. Carefully add the ravioli, cooking for about 4-5 minutes.
- Make the Brown Butter Sauce: In a skillet, melt the butter over medium heat, add the garlic, and cook until fragrant. Remove from heat and add fresh sage leaves.
- Toss the Ravioli: Transfer the cooked ravioli to the skillet with the brown butter sauce and gently toss to coat.
- Serve: Plate your delicious ravioli, garnishing with more Parmesan and freshly cracked black pepper.
Notes
Consider serving with a side of arugula salad and toasted nuts for added texture.
Nutrition
- Serving Size: 1 serving
- Calories: 400
- Sugar: 4g
- Sodium: 600mg
- Fat: 20g
- Saturated Fat: 10g
- Unsaturated Fat: 8g
- Trans Fat: 0g
- Carbohydrates: 45g
- Fiber: 4g
- Protein: 12g
- Cholesterol: 100mg
Keywords: pumpkin ravioli, homemade pasta, garlic brown butter, vegetarian recipes, fall recipes
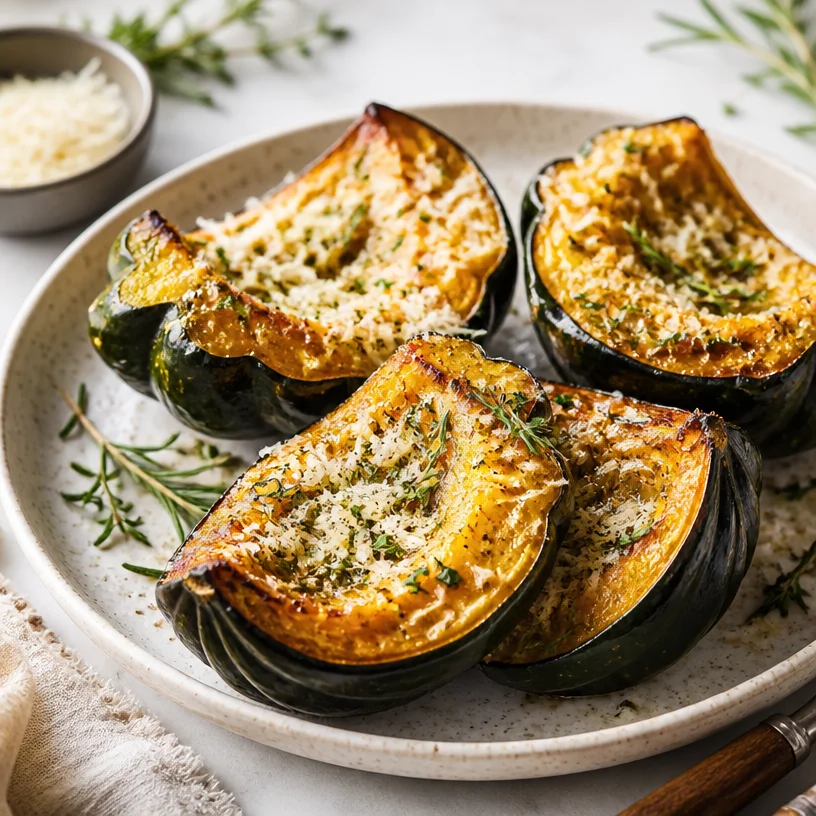
Roasted Acorn Squash with Parmesan Herb Seasoning
Roasted Acorn Squash with Parmesan Herb Seasoning: A Feel-Good Fall Delight
There’s something about autumn that just makes my heart sing. The air turns crisp, the leaves explode in a palette of golden hues, and the harvest fills our kitchens with warm, inviting scents. When I think of comfort food, roasted acorn squash instantly comes to mind. It’s not just delicious; it’s downright heartwarming. A vibrantly colored acorn squash roasted to perfection, drizzled with olive oil, sprinkled with fragrant herbs, and kissed with the earthy goodness of Parmesan cheese—that’s what I call a cozy meal.
Imagine walking into your kitchen, the aroma of roasting squash swirling around you like a warm hug. The best part? This dish is straightforward, requiring only a handful of ingredients, yet it never fails to impress. Whether you’re cooking for family, hosting friends, or simply whipping up a weeknight dinner for one, this roasted acorn squash is versatile and satisfying. It’s a dish that can stand alone or accompany almost anything. Let’s dive into the delicious details!
A Memorable Journey to the Kitchen
I remember the first time I had roasted acorn squash. It was a chilly fall evening, and I was invited to a friend’s house for dinner. She served it alongside a hearty soup and salad—a perfect trio for a cool night. I was smitten by the dish’s vibrant colors and the way the sweetness of the squash was harmonized beautifully with savory herbs and cheese.
As a child, my grandmother often said that the kitchen is the heart of the home. Watching her create magic from simple ingredients ignited my passion for cooking. So, when I took my first bite of the acorn squash that evening, I was transported back to those moments in my grandmother’s kitchen filled with warmth, laughter, and the sweet smells of home-cooked meals. I knew then that I had to recreate this dish myself! Now, every time I roast acorn squash, it feels like I’m inviting a piece of that nostalgia and love back into my life.
Ingredients You’ll Need
-
2 medium acorn squash: The star of the dish! Choose firm, unblemished squash. You can also substitute butternut squash for a sweeter flavor.
-
3 tablespoons olive oil: This adds richness and helps the squash caramelize beautifully. Feel free to swap in melted coconut oil for a different flavor profile.
-
1/2 cup grated Parmesan cheese: A touch of savory goodness! For a dairy-free option, try nutritional yeast for a similar umami kick.
-
1 tablespoon fresh rosemary, chopped: Earthy and aromatic. If you don’t have rosemary, thyme or sage can be delightful substitutes.
-
1 tablespoon fresh thyme, chopped: Enhances the overall flavor with a subtle woodsy note. Dried thyme works too in a pinch—just use about a teaspoon.
-
Salt and pepper to taste: Essential for bringing all the flavors together. Experiment with flavored salts for an exciting twist!
Step-by-Step Cooking Instructions
-
Preheat the Oven: Begin by preheating your oven to 400°F (200°C). This high temperature is key for caramelizing our squash and creating those lovely crispy edges.
-
Prepare the Squash:
- Cut the acorn squash in half lengthwise. Be careful here; the flesh can be a bit tough! A sharp knife and a gentle sawing motion work best.
- Scoop out the seeds and stringy bits with a spoon—don’t worry; we’re not wasting them! You can roast the seeds separately for a crunchy snack.
- Slice off a small piece at the base of each half to create flat surfaces, ensuring they sit upright in the oven.
-
Drizzle with Olive Oil:
- Place the squash halves cut side up on a baking sheet lined with parchment paper.
- Drizzle the olive oil over each half and use a brush or your hands to coat every inch. This ensures even roasting and prevents them from drying out.
-
Season Like a Pro:
- Sprinkle the grated Parmesan cheese inside each half generously.
- Next, toss the chopped rosemary and thyme into the mix, followed by a good pinch of salt and pepper.
- Feel free to get creative here! Add red pepper flakes for a kick or some garlic powder for additional depth.
-
Roast to Perfection:
- Pop the baking sheet in the preheated oven and roast for about 30-35 minutes.
- You’ll know they’re done when the flesh is tender and the edges have caramelized and turned golden brown.
- The aromas wafting through your kitchen will be pure magic.
-
Finish Strong:
- For an extra touch, broil the squash for the last 2-3 minutes of cooking. Just keep a close eye on it to prevent any burning; we want crispy, not charred!
Serving Suggestions
When it comes to serving roasted acorn squash, keep it simple and beautiful! Place each squash half on a colorful plate, cut side up, for an eye-catching presentation. Drizzle a little extra virgin olive oil on top for shine and flavor, and a sprinkle of fresh herbs for a pop of color. Pair it with a simple green salad or serve as a side dish alongside grilled chicken or fish. It’s versatile enough that it can easily be the star of the show or a delightful supporting role.
Recipe Variations
-
Sweet and Spicy: For a more adventurous flavor, drizzle a little maple syrup over the squash before roasting and sprinkle with cayenne pepper for an exciting balance of sweet and savory.
-
Mediterranean Inspired: Swap out parsley for the herbs and add some crumbled feta cheese for a tangy touch.
-
Nutty Addition: Top with toasted pecans or walnuts before serving for a satisfying crunch.
-
Vegan Delight: Omit the Parmesan or use a vegan version, and sprinkle with hemp seeds to keep it tasty and nutritious!
-
Stuffed Acorn Squash: After roasting, fill the squash with a mixture of quinoa, cranberries, and nuts for a filling main dish.
Chef’s Notes
Every time I make this dish, I’m reminded of how adaptable it is! I’ve experimented with different cheeses, herbs, and toppings. Sometimes, I’ve even turned it into a breakfast dish by adding a runny egg on top! It’s one of those recipes that continues to evolve with you—perfect for getting creative in the kitchen. Don’t hesitate to make it your own. The most memorable dishes come from a little experimentation and a lot of love!
FAQs and Troubleshooting
-
My squash didn’t caramelize: Make sure you have enough oil on the squash, and ensure your oven is set to the correct temperature. Love that high heat!
-
How do I know when it’s done?: The flesh should be fork-tender, and the edges should be golden brown. Don’t shy away from roasting them a bit longer for that beautiful caramelization.
-
Can I prepare the squash in advance?: Absolutely! You can cut and prep the squash a day ahead, store it in the fridge, and simply season and roast it when you’re ready to eat.
-
What else can I serve with it?: This pairs wonderfully with proteins like chicken, fish, or even a hearty lentil stew. It’s incredibly versatile and fits right in with a variety of cuisines.
Nutritional Info
While I don’t always focus on the numbers, it’s worth noting that acorn squash is rich in vitamins A and C, fiber, and contains antioxidants. The Parmesan adds a nice hit of protein and calcium, making this dish not only delicious but also nourishing!
Now, my friend, it’s time for you to put on your apron and enjoy the delicious process of bringing this roasted acorn squash to life in your kitchen! Remember, cooking should be fun and an opportunity to connect with those beautiful ingredients. Happy cooking!
PrintRoasted Acorn Squash with Parmesan Herb Seasoning
A cozy, heartwarming dish featuring roasted acorn squash drizzled with olive oil, topped with Parmesan cheese and fragrant herbs.
- Prep Time: 15 minutes
- Cook Time: 35 minutes
- Total Time: 50 minutes
- Yield: 4 servings 1x
- Category: Side Dish
- Method: Baking
- Cuisine: American
- Diet: Vegetarian
Ingredients
- 2 medium acorn squash
- 3 tablespoons olive oil
- 1/2 cup grated Parmesan cheese
- 1 tablespoon fresh rosemary, chopped
- 1 tablespoon fresh thyme, chopped
- Salt and pepper to taste
Instructions
- Preheat the oven to 400°F (200°C).
- Prepare the squash by cutting them in half lengthwise and scooping out the seeds.
- Drizzle olive oil over each half and coat evenly.
- Season with Parmesan cheese, rosemary, thyme, salt, and pepper.
- Roast in the oven for 30-35 minutes until tender and caramelized.
- Finish by broiling for 2-3 minutes for extra crispiness.
Notes
Feel free to experiment with different herbs and toppings for variety.
Nutrition
- Serving Size: 1 half squash
- Calories: 350
- Sugar: 5g
- Sodium: 400mg
- Fat: 12g
- Saturated Fat: 4g
- Unsaturated Fat: 6g
- Trans Fat: 0g
- Carbohydrates: 45g
- Fiber: 3g
- Protein: 15g
- Cholesterol: 30mg
Keywords: acorn squash, roasted vegetables, fall recipe, vegetarian side dish, comfort food
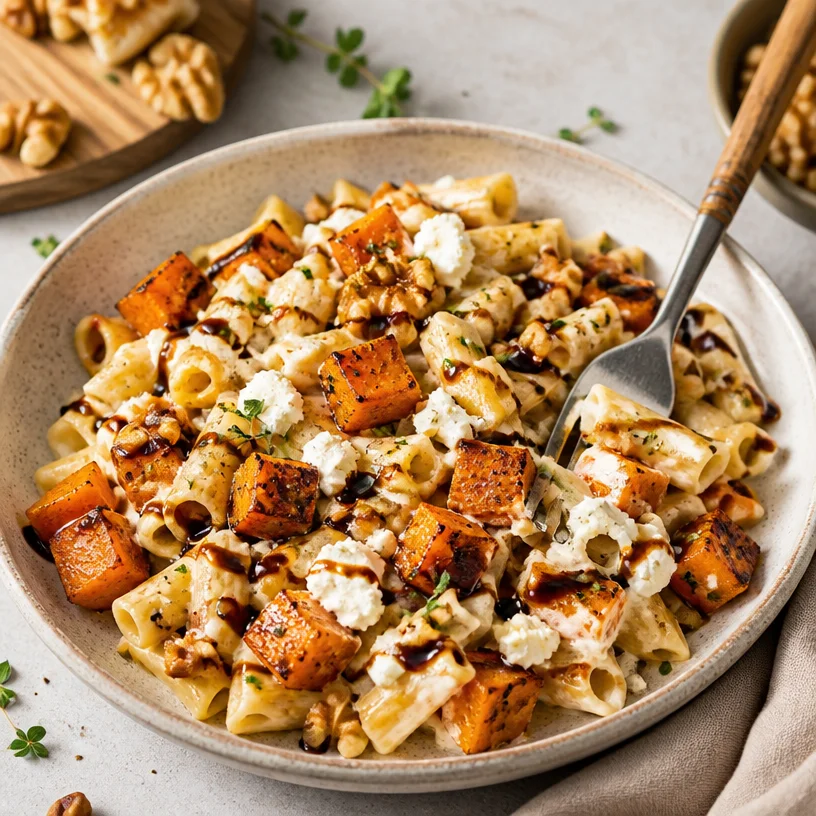
One-Pan Roasted Winter Squash Pasta for Cozy Weeknights
Roasted Winter Squash Pasta: A Cozy Dish for Chilly Days
Hello, food lovers! I’m Ava Carter, and today, we are diving into a dish that perfectly encapsulates the essence of comfort food—Roasted Winter Squash Pasta. With the winter chill creeping in, there’s nothing quite like a warm bowl of pasta that not only satisfies your cravings but also nourishes your body and spirit. This recipe is one I’ve savored over the years; it’s simple yet packed with flavor, and best of all, it’s guilt-free!
Picture this: You come home after a long day, your shoes soaked from the rain, and the only thing on your mind is coziness. What if I told you that you can whip up a delicious, wholesome meal in less than an hour, using just a handful of ingredients? That’s the magic of Roasted Winter Squash Pasta! Whether you’re preparing a solo meal or hosting friends for dinner, this dish is versatile enough for any occasion and gets everyone involved in the kitchen.
As we dive into this recipe, you’ll appreciate how the natural sweetness of the roasted squash pairs beautifully with tangy goat cheese, creating a rich, comforting flavor profile that wraps you in a warm embrace. Plus, it’s an excellent way to incorporate seasonal produce into your diet while keeping it exciting and creative!
So grab those aprons and let’s get cooking—because who says healthy eating can’t be delicious and fun?
Personal Story
I’ll never forget the first time I made roasted squash pasta. It was one of those crisp autumn afternoons, and I had just come back from the farmers’ market, my bags laden with fresh produce and the rich aroma of autumn. I had picked up a beautiful butternut squash, its bright orange flesh promising a sweetness that melted my heart.
Back in my cozy kitchen, I set to work, chopping up the squash and tossing it with olive oil and a sprinkle of salt. As it roasted, the sweet scent filled my home, creating a cozy nook that invited me to come to the table. I had invited a few close friends over for dinner that night, and as we sat around the table, sharing stories and laughter—giggling about our culinary mishaps and debating over the best pasta shapes—we savored every bite. The combination of nutty walnuts, creamy goat cheese, and the warm squash felt like a hug in every forkful.
That night turned into a cherished memory, and ever since, Roasted Winter Squash Pasta has become a staple in my kitchen, a meal that brings together friends and family to enjoy the simple pleasures of life.
Ingredients
Let’s gather our ingredients! Here’s what you’ll need to create this delightful dish:
-
1 butternut squash (or kabocha, or delicata)
This star of our dish brings natural sweetness and a creamy texture when roasted. If you can find kabocha or delicata squash, feel free to use those as they offer slightly different flavor profiles but work beautifully in this recipe. -
1 onion, chopped
The onion adds a touch of sweetness and depth to the dish. I love using yellow onions, but red onions work just as well if you want a bit more color! -
2 tablespoons olive oil
A heart-healthy fat that not only aids in roasting but also enhances flavor. You can swap the olive oil for melted coconut oil or even avocado oil if you’re looking for different nuances. -
Salt and pepper to taste
Essential elements for bringing out the flavors of our ingredients. No dish should ever be without a pinch of salt and a dash of pepper! -
8 oz pasta of choice
Use your favorite! I often go for whole wheat spaghetti or gluten-free pasta, but feel free to get creative—rigatoni or penne would work great too. -
4 oz goat cheese
This adds creaminess and offers a tangy twist to the dish. If you’re not a fan of goat cheese, parmesan or ricotta would be excellent substitutes. -
Pasta water (reserved from cooking pasta)
This starchy water is a secret weapon to make your sauce silky. Don’t forget to save a bit before draining! -
1/2 cup toasted walnuts
Crunchy, nutty goodness that complements the sweetness of the squash. If you’re nut-free, sunflower seeds or pumpkin seeds could be delicious substitutes. -
Balsamic glaze (for drizzling)
A sweet and tangy finishing touch that brings a lovely balance to the dish. You can make your own by reducing balsamic vinegar, or you can buy it pre-made!
Step-by-Step Instructions
Now that we’ve gathered our ingredients, let’s get down to the business of cooking! Follow these steps to create your delicious Roasted Winter Squash Pasta.
-
Preheat the Oven
Preheat your oven to 400°F (200°C). A hot oven is key to roasting vegetables, as it caramelizes sugars and adds depth to our dish. -
Prepare the Squash
Carefully cut the butternut squash in half lengthwise and scoop out the seeds. (Pro tip: A sturdy, sharp knife makes it much easier.) Cut the squash into cubes and place them in a large bowl. Next, toss the cubed squash with 1 tablespoon of olive oil, salt, and pepper, ensuring the pieces are evenly coated. -
Roast the Squash
Spread the seasoned squash in a single layer on a baking sheet lined with parchment paper. Roast it in the preheated oven for about 25-30 minutes, or until it’s fork-tender and slightly caramelized. Don’t forget to give it a flip halfway through for even roasting! -
Cook the Pasta
While the squash is roasting, set a large pot of water to boil and salt it generously. Add your pasta of choice and cook according to the package instructions until al dente. (Tip: Reserve 1 cup of the pasta cooking water before draining!) -
Sauté the Onions
In a large skillet, heat the remaining tablespoon of olive oil over medium heat. Add the chopped onion and sauté until soft and translucent, about 5-7 minutes. Season with a pinch of salt to bring out their natural sweetness. If you want to add a little depth, incorporate minced garlic during the last minute—trust me, it elevates everything! -
Combine it All
Once the squash is done roasting, add it to the skillet with the sautéed onions. Stir to combine. Then, add the drained pasta to the skillet, tossing everything together. -
Make it Creamy
Here comes the fun part! Crumble in the goat cheese and add a splash of reserved pasta water. Toss everything together until the cheese melts and coats the pasta—voilà! You should have a creamy, luscious sauce that’s silky and delicious. -
Finish with Nuts and Glaze
Finally, toss in the toasted walnuts—they add the perfect crunch! Plate this beauty up, and don’t forget a drizzle of balsamic glaze on top for that irresistible tangy-sweet finish.
Serving Suggestions
To serve your Roasted Winter Squash Pasta, I recommend plating it in wide, shallow bowls. This allows all the colors and textures to shine! Add a sprinkle of freshly cracked black pepper and an extra drizzle of balsamic glaze to elevate the presentation. Want to wow your guests? Garnish with a few parsley leaves or microgreens for that gourmet touch!
Recipe Variations
Now that you’ve mastered the classic Roasted Winter Squash Pasta, feel free to get creative! Here are some fun variations to inspire you:
-
Add Greens: Toss in some fresh spinach or kale while mixing in the pasta for an extra dose of nutrients.
-
Spice it Up: Add a pinch of red pepper flakes when sautéing the onions for a little heat!
-
Herby Twist: Mix in fresh herbs like sage or thyme with the roasted squash to amplify the autumnal flavors.
-
Cheese Swap: Use feta or blue cheese instead of goat cheese for a different flavor profile.
-
Vegan Version: Make it completely plant-based by omitting the cheese and using nutritional yeast for a cheesy flavor.
Chef’s Notes
This Roasted Winter Squash Pasta has evolved over the years, just like my cooking style. I’ve experimented with different cheeses, spices, and even added a dollop of cream for extra decadence. What started as a simple comfort food has transformed into a versatile dish that adapts to whatever I have on hand. One time, I even added a splash of white wine to deglaze the pan while sautéing the onions, and it took the dish to new realms of flavor—definitely worth a try!
FAQs and Troubleshooting
1. Why is my squash not roasting properly?
If your squash isn’t caramelizing, make sure you’ve cut it into evenly sized pieces and don’t overcrowd the baking sheet. Give it space to breathe!
2. Can I use other pasta shapes?
Absolutely! While I love long pasta for this dish, feel free to use shapes like farfalle or orecchiette. Just keep an eye on the cooking time!
3. How can I store leftovers?
Store any leftovers in an airtight container in the fridge for up to 3 days. Reheat gently in a skillet with a splash of water to prevent it from drying out.
4. What can I substitute for goat cheese?
If you’re not a fan of goat cheese, creamy ricotta or tangy feta could work wonders—or even a vegan cheese if you prefer a plant-based option!
Nutritional Info
While the exact nutritional info may vary depending on the specific brands and quantities you use, here’s a rough breakdown:
- Servings: 4
- Calories per serving: ~400
- Protein: 15g
- Carbs: 50g
- Fats: 18g
At the end of the day, let this recipe be a canvas for your flavors and preferences! I can’t wait to hear how yours turns out. So go on, get in the kitchen, and enjoy the simple pleasure of creating something fantastic. Happy cooking!
PrintRoasted Winter Squash Pasta

A cozy dish that combines roasted winter squash with creamy goat cheese for a warm, comforting pasta meal perfect for chilly days.
- Prep Time: 15 minutes
- Cook Time: 30 minutes
- Total Time: 45 minutes
- Yield: 4 servings 1x
- Category: Main Course
- Method: Baking
- Cuisine: Italian
- Diet: Vegetarian
Ingredients
- 1 butternut squash (or kabocha, or delicata)
- 1 onion, chopped
- 2 tablespoons olive oil
- Salt and pepper to taste
- 8 oz pasta of choice
- 4 oz goat cheese
- Pasta water (reserved from cooking pasta)
- 1/2 cup toasted walnuts
- Balsamic glaze (for drizzling)
Instructions
- Preheat the oven to 400°F (200°C).
- Prepare the butternut squash by cutting it in half, scooping out the seeds, and chopping it into cubes. Toss with 1 tablespoon olive oil, salt, and pepper.
- Roast the seasoned squash on a baking sheet for 25-30 minutes until fork-tender.
- Cook the pasta in a large pot of salted boiling water according to package instructions until al dente. Reserve 1 cup of pasta water before draining.
- Sauté the chopped onion in a skillet with the remaining tablespoon of olive oil over medium heat for 5-7 minutes.
- Combine the roasted squash with the sautéed onions, then add the drained pasta, tossing to mix.
- Make it creamy by crumbling in the goat cheese and adding a splash of reserved pasta water, mixing until combined.
- Finish with toasted walnuts and drizzle with balsamic glaze before serving.
Notes
Garnish with freshly cracked black pepper and microgreens for an elevated presentation. Leftovers can be stored in an airtight container for up to 3 days.
Nutrition
- Serving Size: 1 serving
- Calories: 400
- Sugar: 6g
- Sodium: 500mg
- Fat: 18g
- Saturated Fat: 4g
- Unsaturated Fat: 12g
- Trans Fat: 0g
- Carbohydrates: 50g
- Fiber: 5g
- Protein: 15g
- Cholesterol: 20mg
Keywords: pasta, winter squash, vegetarian recipe, comfort food, goat cheese
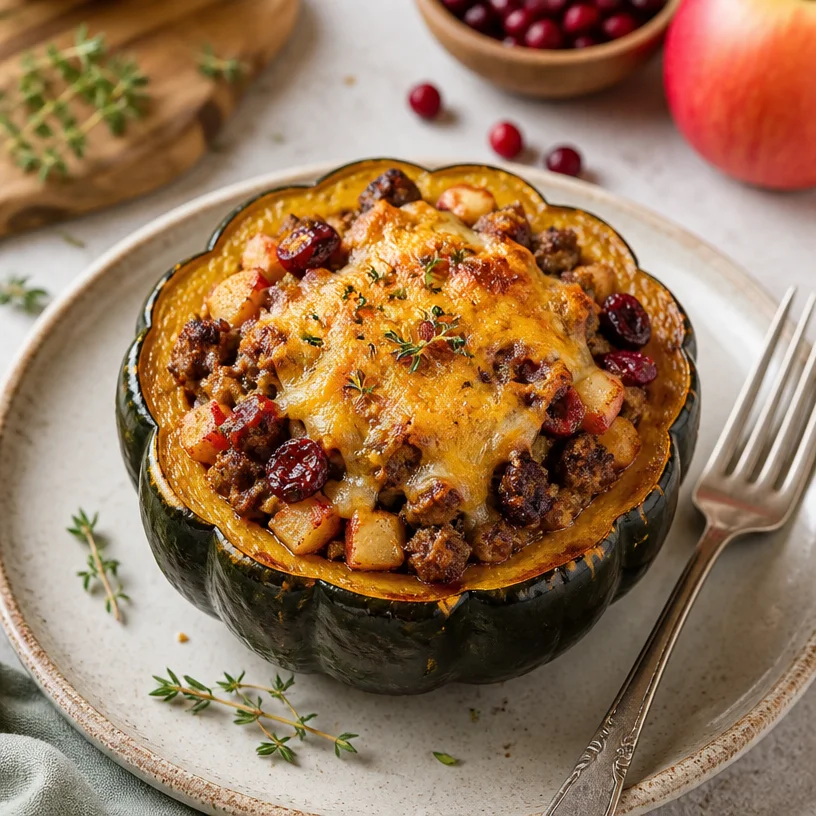
Sweet & Savory Stuffed Acorn Squash Dinner
Sweet & Savory Stuffed Acorn Squash Dinner
Welcome to another delicious adventure in the kitchen! Today, we’re diving into a dish that captures the cozy spirit of autumn with its vibrant colors and enticing aromas—Sweet & Savory Stuffed Acorn Squash. If you’re looking for a meal that’s not only delicious but also packed with nutrients, you’re in for a treat!
Introduction
There’s something magical about autumn, isn’t there? With the leaves turning golden and the air getting a crisp bite, it feels like an invitation to gather around the table with comforting meals that warm the soul. This Sweet & Savory Stuffed Acorn Squash is exactly that—a beautiful, wholesome dish that offers layers of flavors like a soft embrace.
Imagine slicing through perfectly roasted acorn squash, only to reveal a warm filling bursting with ground beef, tart apples, and a hint of spices! It’s a dish that makes you feel nourished while cozying up on those chilly evenings. Plus, it’s visually appealing, making it perfect for any cozy dinner party or family meal.
When my grandparents would visit during the colder months, they would often bring with them the first acorn squashes of the season from their garden. I vividly remember my grandmother teaching me how to prepare them—mapping out all the flavors and textures that made her version unforgettable. She’d say, “Cooking is like a story, dear. Each ingredient has its own chapter.” And oh, how true that is! I’ve since added my own twist to her classic recipe, bringing in a little bit of sweetness with apples and cranberries, creating a delightful balance between savory and sweet.
So gather your loved ones, roll up your sleeves, and let’s create some kitchen magic together!
Personal Story
I still remember that first time I made stuffed squash on my own. I was probably around 12 years old, eagerly trying to impress a few friends at a cozy gathering. With my grandmother’s voice echoing in my head, I roasted the acorn squash just right, careful not to overdo it. I remember the kitchen filled with an enticing aroma as the savory beef and sweet apples cooked together; I could hardly wait to serve it. When I brought those beauties to the table, everyone was stunned by the color and aroma. I eagerly scooped my first bite, and the rich flavors danced in my mouth! The combination of savory and sweet was an instant hit, sending my friends back for seconds and thirds. That moment sparked my love for cooking—turning simple ingredients into something truly special. Now, every time I make this dish, I’m transported back to that warm kitchen filled with laughter and the smell of home.
Ingredients
Here’s what you’ll need to create this warm, vibrant dish:
- 2 medium acorn squash: These are the stars of the show! Their sweet, nutty flavor pairs beautifully with the savory filling. Look for squash that feels heavy for its size and has a smooth, deep green skin.
- Sea salt, to taste: A little sprinkle here and there enhances the flavors. You can always adjust it at the end, so go easy at first.
- Black pepper, to taste: Freshly cracked black pepper adds a subtle heat that rounds out the dish beautifully.
- 1 lb ground beef: This is your protein base. If you’re looking for a healthier option, you can easily swap it for ground turkey or even a plant-based protein!
- 1/4 medium yellow onion, minced: Onions bring an aromatic backbone to the dish, adding depth and sweetness. Feel free to substitute with shallots or even green onions.
- 2 cloves garlic, minced: Garlic adds a beautiful aroma and flavor punch. If you’re a garlic lover, check out roasted garlic for a sweeter flavor!
- 1-2 small apples, peeled and chopped (about 1 cup chopped; I used 1 1/2 small Gala): Apples offer a slight sweetness and acidity that balance the savory tones. Gala, Fuji, or Honeycrisp work best; just avoid apples that are too tart!
- 1/2 tsp cinnamon: Cinnamon rounds out the dish with a warm, sweet spice that elevates the flavor.
- 1/2 tsp nutmeg: A pinch adds an earthy note, creating that comforting autumn vibe.
- 1/2 tsp cumin: This spice brings a smoky richness to the filling. For a twist, try smoked paprika!
- Dash of cayenne: A hint of heat to contrast with the sweet apples—totally optional if you’re sensitive to spice!
- 2 Tbsp dried cranberries, chopped: These little gems add pops of sweetness and chewiness. You can substitute with raisins or even chopped apricots.
- 1/4 cup shredded sharp cheddar: For that gooey, melty finish! Swap with a dairy-free cheese alternative for a vegan spin.
Step-by-Step Instructions
Now that we have our ingredients lined up, let’s get to cooking! Follow these steps for a dish that’s bound to wow you and your guests.
-
Preheat Your Oven: Preheat your oven to 400°F (200°C). This step is crucial for that perfectly roasted squash brimmed with flavor.
-
Prepare the Squash: Cut the acorn squashes in half lengthwise. Scoop out the seeds with a spoon and give them a gentle rinse to remove any strings. Pro tip: If you find the squash wobbling, slice a small piece off the bottom to create a flat base!
-
Roast the Squash: Place the acorn squash halves cut side up on a baking sheet. Drizzle with olive oil and sprinkle with sea salt and pepper. Roast in the oven for about 25-30 minutes or until tender and golden. You want them fork-tender but not mushy. Keep an eye on them!
-
Cook the Meat Mixture: While the squash roasts, heat a skillet over medium heat. Add a drizzle of olive oil, then toss in the minced onion. Sauté for about 2-3 minutes until translucent, then add the minced garlic. Cook until fragrant—about another minute.
-
Brown the Beef: Add the ground beef to the skillet. Brown it, breaking it up with a spatula until no longer pink, about 5-7 minutes. Drain excess fat if necessary.
-
Add the Sweetness: Once the beef is cooked through, stir in the chopped apples, cranberries, cinnamon, nutmeg, cumin, and a dash of cayenne. Let this cook for about 5 minutes, allowing the flavors to meld and the apples to soften slightly.
-
Season It Up: Taste your mixture and adjust seasoning with salt and pepper as needed. This step is key to personalizing the dish to your taste!
-
Stuff the Squash: Remove the roasted squash from the oven (careful, they’ll be HOT!). Spoon the beef mixture generously into each half, packing it in to maximize flavors.
-
Top with Cheese: Sprinkle the shredded sharp cheddar on top of each stuffed squash. Pop them back in the oven for an additional 5-10 minutes, until the cheese is melted and bubbly.
-
Serve: Remove from oven, let them cool for a minute, then drizzle a bit of olive oil or honey over the top if you’re feeling fancy. Garnish with fresh herbs if you have them on hand—like parsley or thyme!
Serving Suggestions
To serve, place each stuffed acorn squash half on a warm plate. I love garnishing with a sprinkle of fresh herbs for a pop of color and a dash of flavor. Pair it with a simple side salad or some roasted veggies to complete your meal. This dish is not only visually stunning but makes for beautiful leftovers, too!
Recipe Variations
- Vegetarian Delight: Swap the ground beef for a mix of lentils and mushrooms for a hearty, vegetarian version.
- Spicy Kick: Replace the sweet apples with spicy jalapeños or add in some diced red pepper to add heat and complexity.
- Nutty Twist: Stir in some chopped walnuts or pecans for an added crunch. They bring a deliciously nutty flavor that complements the squash perfectly.
- Quinoa Boost: Replace the beef with cooked quinoa for a plant-based protein boost that’s gluten-free!
- Greek Style: Use feta cheese instead of cheddar and toss in some chopped olives for a Mediterranean twist.
Chef’s Notes
This recipe has become a staple in my household, often made during family dinners or when I need a comforting meal at the end of a long day. I love how flexible it is—the possibilities are endless! Once, in the spirit of experimentation, I decided to toss in some cooked quinoa left over from a previous meal, and it was such a delightful surprise. My partner couldn’t even tell the difference, and it added such a lovely texture! Give it a try and watch how it evolves for you!
FAQs and Troubleshooting
-
How do I know when the squash is done cooking?
You want the squash to be fork-tender but not overly mushy. Check them around the 30-minute mark! -
Can I make this ahead of time?
Absolutely! You can prepare the filling a day in advance and stuff the squash just before baking for an easy meal. -
What’s the best way to store leftovers?
Store any leftovers in an airtight container in the refrigerator for up to 3-4 days. Reheat gently in the oven or microwave. -
Can I freeze the stuffed squash?
Yes! Once baked and cooled, you can freeze them. To serve, thaw in the fridge overnight and reheat in the oven until warmed through.
Nutritional Info
- Calories: Approximately 350-400 per serving (1 stuffed squash half).
- Protein: About 20-25 grams (depending on the meat used).
- Fiber: Roughly 5-6 grams (thanks to the acorn squash and cranberries).
And there you have it—a Sweet & Savory Stuffed Acorn Squash Dinner that brings warmth to your kitchen and deliciousness to your plate. Enjoy cooking, enjoy sharing, and as always, let your kitchen be filled with love and laughter! Happy cooking, foodie friends!
PrintSweet & Savory Stuffed Acorn Squash Dinner

A comforting autumn dish featuring roasted acorn squash stuffed with a savory mixture of ground beef, apples, and spices, perfect for family meals or cozy dinner parties.
- Prep Time: 15 minutes
- Cook Time: 30 minutes
- Total Time: 45 minutes
- Yield: 4 servings 1x
- Category: Main Course
- Method: Baking
- Cuisine: American
- Diet: Gluten-Free
Ingredients
- 2 medium acorn squash
- Sea salt, to taste
- Black pepper, to taste
- 1 lb ground beef
- 1/4 medium yellow onion, minced
- 2 cloves garlic, minced
- 1–2 small apples, peeled and chopped (about 1 cup)
- 1/2 tsp cinnamon
- 1/2 tsp nutmeg
- 1/2 tsp cumin
- Dash of cayenne
- 2 Tbsp dried cranberries, chopped
- 1/4 cup shredded sharp cheddar
Instructions
- Preheat your oven to 400°F (200°C).
- Prepare the acorn squashes by cutting them in half lengthwise and scooping out the seeds.
- Roast the acorn squash halves on a baking sheet, drizzled with olive oil and seasoned with salt and pepper, for about 25-30 minutes.
- Cook the minced onion in a skillet over medium heat for 2-3 minutes until translucent, then add the minced garlic.
- Brown the ground beef in the skillet for about 5-7 minutes, breaking it up until no longer pink.
- Add the chopped apples, cranberries, cinnamon, nutmeg, cumin, and cayenne to the beef mixture and cook for another 5 minutes.
- Season to taste with salt and pepper.
- Stuff the roasted squash halves with the beef mixture.
- Top with shredded cheddar and return to the oven for an additional 5-10 minutes until cheese is melted.
- Serve warm, garnished with olive oil or honey and fresh herbs, if desired.
Notes
This dish is flexible; feel free to substitute ground beef with turkey or a plant-based protein. Experiment with different cheeses and seasonal ingredients!
Nutrition
- Serving Size: 1 serving
- Calories: 375
- Sugar: 12g
- Sodium: 350mg
- Fat: 20g
- Saturated Fat: 9g
- Unsaturated Fat: 8g
- Trans Fat: 0g
- Carbohydrates: 36g
- Fiber: 5g
- Protein: 25g
- Cholesterol: 70mg
Keywords: acorn squash, stuffed squash, autumn recipes, cozy dinner, healthy meals

Ingredient Apple Fritter Muffins for Busy Weekday Mornings
Easy Apple Fritter Muffins to Make Your Mornings Delightful
Welcome, food lovers! If you’re stumbling upon this post while dreaming of tempting treats that brighten up your mornings, you’re in for a sweet surprise. Today, we’re diving into the world of Easy Apple Fritter Muffins. You know, those fluffy bites of heaven that perfectly balance the sweetness of apples and the warm spice of cinnamon? Yes, those! Whether you’re looking for a special breakfast to share with loved ones or just something to add a little joy to your weekday routine, I guarantee these muffins will become an instant favorite.
Now, let’s set the scene. Picture this: it’s a crisp autumn morning, the golden sunlight is filtering through the leaves, and the scent of fresh apples fills the air as I preheat the oven. My fingers are dusted with flour, and soon my kitchen will be transformed into a cozy haven of warmth and delicious aromas. With the first batch of Apple Fritter Muffins baking in the oven, I can’t help but share my excitement with you, as I’m pretty sure you’ll want to experience the magic of these delightful muffins. So, grab your apron, and let’s get baking!
A Memorable Kitchen Story
Let me take you back to one of my fondest childhood memories: the day my grandpa introduced me to apple fritters. It was a Saturday morning, and there was no school—just sweet freedom and the delightful smell of cinnamon wafting from the kitchen. Grandpa turned flour and sugar into magic. I still remember how he would peel the apples carefully, letting me do the fun part of dicing them into tiny cubes. We laughed and shared stories as the batter came together.
His secret was a touch of nutmeg, which gave the fritters a flavor like nothing I’d tasted before. Watching those fritters puff up in the hot oil was mesmerizing; they seemed to shimmer with sweetness, begging to be devoured. Later, he’d glaze them while they were still warm. Those moments were more than just about the food—they were bonding time filled with laughter, love, and the sweetest memories. Now, as I recreate this nostalgic recipe into muffin form, I honor those cherished moments every time.
Ingredients
Here’s what you’ll need to make those scrumptious Apple Fritter Muffins:
-
2 cups All-Purpose Flour
(Best to sift for light, fluffy muffins. If you prefer whole wheat, it adds a nutty flavor to the mix.) -
1 cup Granulated Sugar
(Feel free to adjust based on your preference. You can even use coconut sugar for a healthier twist.) -
2 teaspoons Baking Powder
(Ensure it’s fresh for that perfect rise. If you’re using something old, you might want a trip to the store!) -
0.5 teaspoon Salt
(Just a pinch goes a long way! Don’t skip it; it enhances all the flavors.) -
1 teaspoon Ground Cinnamon
(Use fresh for the best flavor impact. I love buying it from the local spice shop!) -
0.25 teaspoon Ground Nutmeg
(A little goes a long way; it adds that cozy warmth. Some even use freshly grated nutmeg if they’re feeling fancy!) -
1 Large Egg
(Substitute with a flax egg for a vegan option: mix 1 tablespoon ground flaxseed with 2.5 tablespoons water and let it sit until it thickens.) -
0.5 cup Milk (or Dairy-Free Alternative)
(Almond or oat milk works well. Experiment with different types until you find your favorite!) -
0.25 cup Vegetable Oil (or Melted Coconut Oil)
(They can be switched interchangeably. Coconut oil will add a subtle coconut flavor!) -
1 teaspoon Vanilla Extract
(Opt for pure extract for the best taste. Trust me, it’s worth it!) -
2 cups Peeled, Diced Apples
(Choose Granny Smith or Honeycrisp for optimal sweetness and texture. Feel free to mix varieties!) -
1 cup Powdered Sugar
(Sift for a smoother texture—nobody likes chunky glaze!) -
2-4 tablespoons Milk (for Glaze)
(Adjust quantity for desired glaze consistency. Start with less, adding more until it’s just right!)
Step-by-Step Instructions
Alright, let’s bring this recipe to life! Here’s how to make these delectable muffins:
-
Preheat the Oven:
Set your oven to 350°F (175°C) and line a muffin tin with paper liners. This saves you from the dreaded muffin cleanup later! -
Mix the Dry Ingredients:
In a large bowl, whisk together the flour, sugar, baking powder, salt, cinnamon, and nutmeg. This step ensures that all the dry ingredients are well incorporated and gives every muffin a consistent flavor. -
Combine Wet Ingredients:
In another bowl, beat the egg (or flax egg), then add the milk, vegetable oil, and vanilla extract. Stir until well combined. This part is super fun; feel free to sneak a little taste of the batter—just remember to save enough for the muffins! -
Combine Dry and Wet Mixtures:
Pour the wet ingredients into the dry ones and mix gently until just combined. Be careful—overmixing can lead to dense muffins. It’s all about those tender crumbs. -
Fold in the Apples:
Add those diced apples and fold them into the batter. This is where you get to enjoy the crunch of fresh, juicy apples. If you’re using multiple apple varieties, feel free to mix them; it adds visual flair and flavor depth! -
Fill the Muffin Tin:
Using a spoon or ice cream scoop, fill each muffin slot about 2/3 full. This allows room for them to rise beautifully without overflowing. -
Bake:
Pop the muffin tin into the preheated oven and bake for 18 to 22 minutes or until a toothpick inserted into the center of a muffin comes out clean. Keep an eye on them during the last few minutes; nobody wants a dry muffin! -
Cool and Prepare the Glaze:
Once baked, allow the muffins to cool in the tin for about 5 minutes before transferring them to a wire rack. To prepare your glaze, whisk together powdered sugar and milk until smooth—make it as thick or thin as you prefer! -
Drizzle the Glaze:
Drizzle that sweet glaze over the muffins, letting it cascade down the sides for an irresistible finish. You might want to make extra glaze because… yum!
Serving Suggestions
To serve these delightful Apple Fritter Muffins, arrange them on a pretty platter or wooden board for a rustic vibe. You can even garnish them with some extra diced apples on the side or a sprinkle of cinnamon. For an extra touch, pair them with a dollop of whipped cream or a scoop of vanilla yogurt. Trust me, your guests will be oooh-ing and aaah-ing over this spectacular morning treat!
Recipe Variations
Feel adventurous? Here are a few ways to twist the classic Apple Fritter Muffins:
- Cranberry Apple Delight: Toss in a cup of fresh or dried cranberries for that sweet-tart combination.
- Nutty Goodness: Add a handful of chopped walnuts or pecans for some crunch.
- Spiced Up Muffins: Experiment with ginger or cardamom for an unexpected flavor boost.
- Caramel Drizzle: Drizzle warm caramel sauce over the muffins instead of glaze for an indulgent treat.
- Vegan Swap: Create a fully plant-based version by substituting the egg, milk, and oil with their vegan counterparts.
Chef’s Notes
As I mentioned earlier, making these Apple Fritter Muffins takes me back to my childhood. Each time I bake them, I’m transported to that cozy kitchen, laughing and creating with my grandpa. Over the years, I’ve adapted this recipe to suit my palate and lifestyle—swapping out refined sugar for coconut sugar occasionally, or even bulking it up with some oats for added fiber. As always, feel free to adjust to your liking!
One of my favorite kitchen stories involves a minor mishap with too much nutmeg. Let’s just say, you can definitely overdo it! So, be gentle with those spices, or you might end up with muffins that taste like holiday potpourri!
FAQs and Troubleshooting
-
Why are my muffins dense?
If your muffins turned out dense, it might be because you overmixed the batter or used too much flour. Make sure to scoop the flour gently rather than packing it into the cup. -
Can I use other fruits?
Absolutely! You can swap apples for peaches, blueberries, or even bananas. Just adjust the quantity based on moisture content—bananas tend to be wetter than apples. -
How can I store them?
These muffins can stay fresh in an airtight container at room temperature for a couple of days. For longer storage, pop them in the fridge or freeze them for those busy mornings when you need a treat pronto! -
What can I do if they stick to the pan?
Make sure to grease your muffin tray well or use paper liners. If they still stick, run a butter knife around the edges to help loosen them while still warm.
Nutritional Info
Each muffin is approximately:
- Calories: 180
- Protein: 2g
- Carbohydrates: 28g
- Sugar: 10g
- Fat: 8g
Feel free to adjust based on your ingredient swaps!
And there you have it—deliciously Easy Apple Fritter Muffins that will make your mornings delightful! I hope you enjoy baking them and savoring every bite as much as I do. Remember, kitchen magic happens with love and a dash of creativity, so let that passion flow! Happy baking, friends!
PrintEasy Apple Fritter Muffins

Delightful apple fritter muffins that perfectly balance the sweetness of apples and warm cinnamon spice, ideal for a cozy morning treat.
- Prep Time: 15 minutes
- Cook Time: 20 minutes
- Total Time: 35 minutes
- Yield: 12 muffins 1x
- Category: Breakfast
- Method: Baking
- Cuisine: American
- Diet: Vegetarian
Ingredients
- 2 cups All-Purpose Flour
- 1 cup Granulated Sugar
- 2 teaspoons Baking Powder
- 0.5 teaspoon Salt
- 1 teaspoon Ground Cinnamon
- 0.25 teaspoon Ground Nutmeg
- 1 Large Egg
- 0.5 cup Milk (or Dairy-Free Alternative)
- 0.25 cup Vegetable Oil (or Melted Coconut Oil)
- 1 teaspoon Vanilla Extract
- 2 cups Peeled, Diced Apples
- 1 cup Powdered Sugar
- 2–4 tablespoons Milk (for Glaze)
Instructions
- Preheat the oven to 350°F (175°C) and line a muffin tin with paper liners.
- Mix the dry ingredients in a large bowl: flour, sugar, baking powder, salt, cinnamon, and nutmeg.
- Combine the wet ingredients in another bowl: beat the egg, then add the milk, vegetable oil, and vanilla extract.
- Pour the wet ingredients into the dry ingredients and mix gently until just combined.
- Fold in the diced apples into the batter.
- Fill each muffin slot about 2/3 full with the batter.
- Bake for 18 to 22 minutes or until a toothpick inserted comes out clean.
- Cool the muffins in the tin for about 5 minutes before transferring them to a wire rack.
- Whisk together powdered sugar and milk for the glaze.
- Drizzle the glaze over the muffins once cooled.
Notes
For a vegan option, substitute the egg with a flax egg and use a dairy-free milk alternative. Feel free to adjust the sugar according to taste.
Nutrition
- Serving Size: 1 muffin
- Calories: 180
- Sugar: 10g
- Sodium: 200mg
- Fat: 8g
- Saturated Fat: 2g
- Unsaturated Fat: 6g
- Trans Fat: 0g
- Carbohydrates: 28g
- Fiber: 1g
- Protein: 2g
- Cholesterol: 30mg
Keywords: apple muffins, breakfast muffins, easy muffins, baked goods