Cleanplate Cravings

Cleanplate Cravings

June 18, 2026 |

Ingredient Raspberry Sorbet: Quick Summer Treats
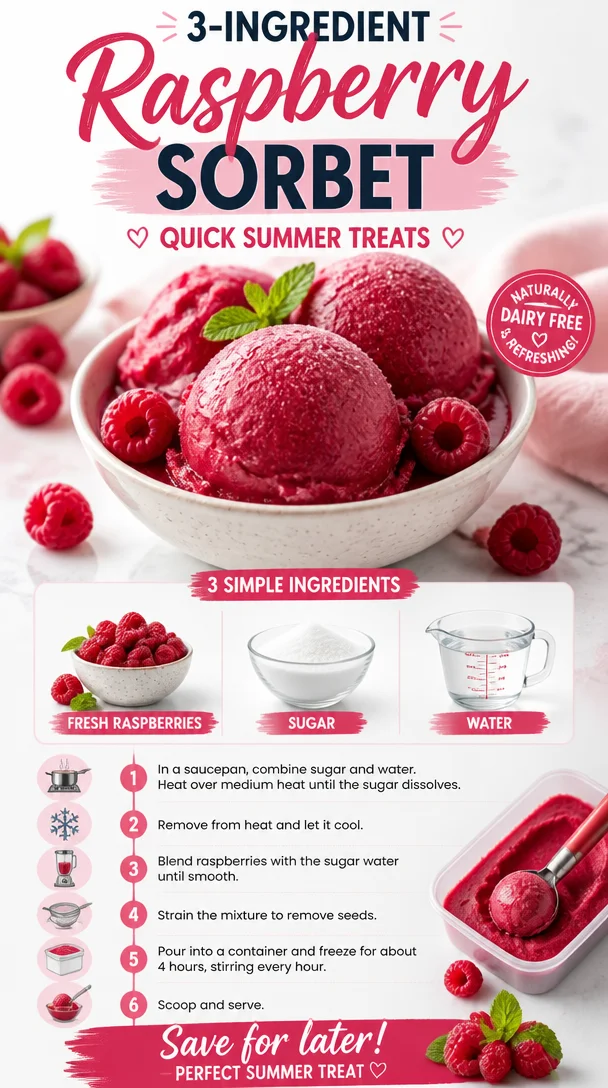
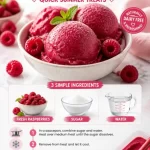
Homemade raspberry sorbet in a bowl, a quick and refreshing summer treat.

Refreshed and Revitalized: How to Make Perfect Raspberry Sorbet

Nothing screams summer like a refreshing scoop of homemade raspberry sorbet. It’s that perfect treat that strikes a balance between indulgent and guilt-free, and the best part? You can whip it up in your own kitchen with just a few simple ingredients. Today, we’re diving into the juicy world of raspberry sorbet—trust me, this recipe will soon become your go-to for cooling off on warm days or impressing guests at summer gatherings.

But first, let’s talk about why raspberry sorbet holds a special place in my heart. Picture this: it’s a sunny afternoon, the kind of day where the air feels light and the sun casts a golden glow over everything. As a child, I spent those days at my grandma’s house, where she always managed to have the best treats stashed away in her freezer. One of my favorites? Her homemade raspberry sorbet. It was vibrant, so bright in color, and equally bursting with flavor. Each spoonful transported me to berry fields, where I could imagine myself picking ripe, juicy raspberries under the warm sun.

When I asked her how she made it, she chuckled and said, “Oh dear, it’s much simpler than you think! Just fresh raspberries, some sugar, and a little bit of water. It’s all about letting the fresh fruit shine.” And shine it did! The moments spent savoring her sorbet with the laughter and joy of family surrounding me made those summers unforgettable. Now, I’m excited to share her simple yet delightful recipe with all of you so that you can create your own sweet memories!

Ingredients

Here’s what you need to make this delightful raspberry sorbet:

  • 2 cups fresh raspberries
    Raspberries are the star of the show! These little gems are not only delicious, but they’re also packed with antioxidants and vitamins. If fresh raspberries are unavailable, you can substitute with frozen raspberries—just thaw them before blending.

  • 1 cup sugar
    Sugar helps extract the sweetness from the berries and gives the sorbet its signature texture. If you’re looking for a healthier option, consider using honey or agave syrup, though you may need to adjust the quantity based on taste.

  • 1 cup water
    The water helps create a smoother texture in the sorbet. If you’re feeling adventurous, you could use coconut water or a splash of fruit juice to introduce a hint of extra flavor.

Step-by-Step Instructions

Ready to get started? Let’s whip up some raspberry sorbet!

  1. Prepare the Raspberries
    Start by rinsing the fresh raspberries gently under cool water. Be careful not to squish them! Pat them dry with a paper towel or clean kitchen cloth. Fresh berries are the heart of this recipe, so starting with quality fruit is key.

  2. Make the Simple Syrup
    In a saucepan, combine 1 cup of sugar and 1 cup of water over medium heat. Stir until the sugar is completely dissolved. This will only take a few minutes. Gently simmer if you want to bring out the flavors, but there’s no need to boil. Once the syrup is clear and has thickened slightly, remove it from the heat and let it cool for about 10 minutes.

    Chef’s Tip: You can infuse your simple syrup with a splash of lemon juice or mint leaves for an added twist!

  3. Blend it Up
    Once your syrup has cooled, combine the fresh raspberries in a blender or food processor. Pour the cooled syrup over the raspberries and blend until you achieve a smooth mixture. It should look luscious and bright!

    Chef’s Insight: If you prefer a chunkier texture, you can pulse the blender instead of blending continuously. This will retain some raspberry seeds that give the sorbet a delightful crunch.

  4. Strain the Mixture
    For a super smooth sorbet, strain the blended mixture through a fine-mesh sieve into a bowl. This will help remove the seeds, resulting in a creamy texture that’s perfect for scooping. Use a spatula to press the mixture, getting every last drop of sorbet goodness.

  5. Chill Out Time
    Pour the strained mixture into an airtight container and place it in the freezer. Allow it to freeze for about 4-6 hours, or until it’s firm yet scoopable. If you plan ahead, you can prep this the night before for a really easy dessert the next day.

    Pro Tip: Stir the mixture every hour during freezing to help break up any ice crystals and achieve that silky sorbet texture.

  6. Scoop and Serve
    Once the sorbet is frozen and ready to be enjoyed, take it out and let it sit at room temperature for a few minutes before attempting to scoop. It’ll be more pliable, making it easier to dish out into bowls or cones.

Serving Suggestions

When it comes to serving raspberry sorbet, a little creativity goes a long way! I love serving it in chilled bowls garnished with fresh mint leaves or a sprinkle of lemon zest. If you’re feeling fancy, consider creating a sorbet float by layering it with sparkling water or lemonade—talk about a refreshing treat!

Recipe Variations

  • Berry Blast: Swap out some of the raspberries for other berries like strawberries, blueberries, or blackberries for a mixed berry sorbet.
  • Citrus Burst: Add a squeeze of fresh lemon or lime juice into the mix for a zesty kick that brightens up those raspberry flavors.
  • Tropical Twist: Incorporate some coconut milk for added creaminess, transforming your sorbet into a tropical delight.
  • Herbaceous Infusion: A hint of basil or rosemary can elevate the flavors, making for a sophisticated sorbet perfect for dinner parties.
  • Chocolate Drizzle: Once served, drizzle some melted dark chocolate on top for an indulgent treat that balances the tartness of the raspberries.

Chef’s Notes

Every time I make raspberry sorbet, I’m reminded of my grandma and her wisdom—keeping recipes simple and letting the natural flavors shine. What I love about this sorbet is that it’s not just a sweet snack; it’s an experience to enjoy with loved ones. Over the years, I’ve played with this basic recipe, infusing fresh herbs or creating flavors that evoke special moments. No matter how you choose to make it, the joy of creating and sharing it is what truly matters.

FAQs and Troubleshooting

Q: My sorbet turned out too icy. What happened?
A: If your sorbet is icy, this often happens because it hasn’t been stirred enough while freezing. Next time, be sure to stir every hour or consider using an ice cream maker for a creamier texture.

Q: Can I use frozen raspberries instead of fresh?
A: Absolutely! Just be sure to thaw them slightly before blending. Frozen fruit can often yield even more intense flavor!

Q: How can I store leftover sorbet?
A: Store any leftover sorbet in an airtight container in the freezer. To prevent ice crystals from forming, ensure it’s tightly sealed.

Q: Can I use a different type of sweetener?
A: Yes! Honey or agave syrup works well, but remember to adjust the quantity to your desired sweetness level since they are sweeter than sugar.

Nutritional Info

(Serving Size: 1/2 cup, Approximate values)

  • Calories: 120
  • Total Fat: 0g
  • Saturated Fat: 0g
  • Cholesterol: 0mg
  • Sodium: 0mg
  • Total Carbohydrates: 31g
  • Dietary Fiber: 3g
  • Sugars: 27g
  • Protein: 1g

Raspberry sorbet is not just a dessert; it’s a celebration of flavors and memories that we create in the kitchen. So roll up those sleeves, grab your ingredients, and let your culinary adventure begin. Here’s to creating fresh, flavorful moments—one scoop at a time!

Print

Perfect Raspberry Sorbet

A refreshing homemade raspberry sorbet that balances indulgence with guilt-free enjoyment, perfect for summer days.

  • Prep Time: 10 minutes
  • Cook Time: 10 minutes
  • Total Time: 360 minutes
  • Yield: 4 servings 1x
  • Category: Dessert
  • Method: Freezing
  • Cuisine: American
  • Diet: Vegan

Ingredients

Scale
  • 2 cups fresh raspberries
  • 1 cup sugar
  • 1 cup water

Instructions

  1. Prepare the raspberries by rinsing them gently under cool water and patting them dry.
  2. Make the simple syrup by combining 1 cup of sugar and 1 cup of water in a saucepan over medium heat until dissolved.
  3. Blend the cooled syrup with the fresh raspberries until smooth.
  4. Strain the mixture through a fine-mesh sieve into a bowl to remove seeds.
  5. Chill the strained mixture in an airtight container in the freezer for about 4-6 hours.
  6. Scoop the sorbet and serve in chilled bowls, garnished as desired.

Notes

Stir the mixture every hour during freezing to prevent ice crystallization.

Nutrition

  • Serving Size: 1/2 cup
  • Calories: 120
  • Sugar: 27g
  • Sodium: 0mg
  • Fat: 0g
  • Saturated Fat: 0g
  • Unsaturated Fat: 0g
  • Trans Fat: 0g
  • Carbohydrates: 31g
  • Fiber: 3g
  • Protein: 1g
  • Cholesterol: 0mg

Keywords: raspberry, sorbet, summer dessert, easy dessert, vegan dessert
Did you make this recipe?

Share a photo and tag us — we can't wait to see what you've made!

June 18, 2026 |

Patriotic 4th of July Chocolate-Covered Strawberries

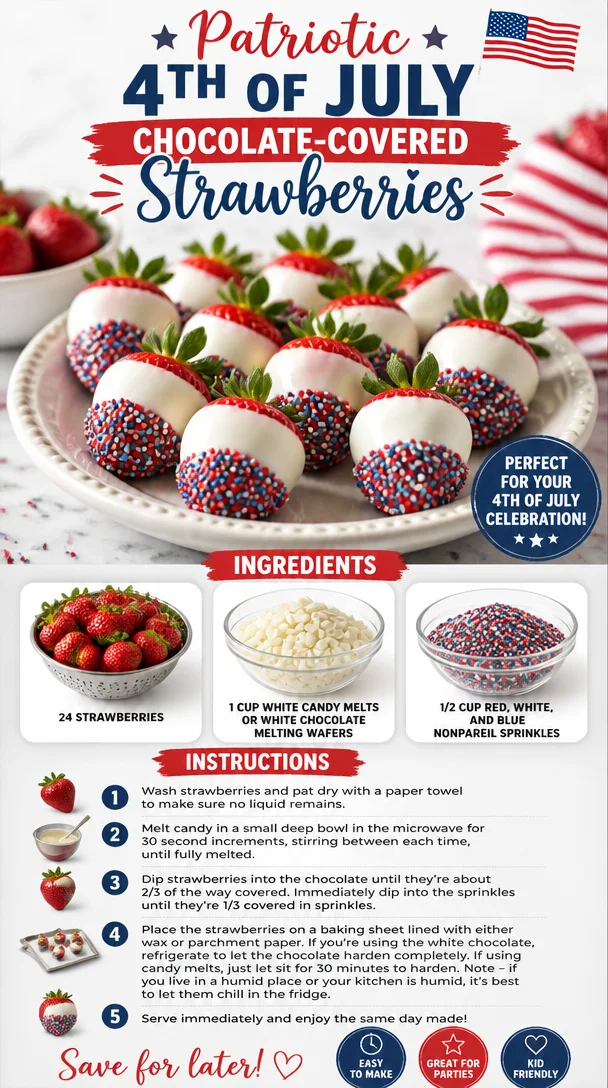
Patriotic 4th of July chocolate-covered strawberries with red, white, and blue decorations.

Celebrate Independence Day with Festive Chocolate Covered Strawberries

When it comes to 4th of July festivities, nothing screams summer quite like a table laden with vibrant fruits and colorful treats. This year, I’m taking the celebration to the next level with a simple, yet stunning dessert: chocolate-covered strawberries! These berries are not only a delightful treat but they also embody the spirit of independence with their red, white, and blue decor—perfect for your summer gatherings or backyard barbecues.

What makes these chocolate-covered strawberries truly special isn’t just their picture-perfect presentation; it’s the fun that comes with making them. I have fond memories of preparing festive desserts with my family as a kid. I remember my mom melting chocolate in a double boiler while we’d eagerly await our turn to dip the strawberries in that luscious goodness. The kitchen would be filled with laughter and sweet scents, while our creativity flowed as we decorated them—tossing sprinkles like confetti. Those joyous moments are what inspired this recipe. They perfectly encapsulate the flavors of summer, as well as the spirit of togetherness. So let’s dive into this simple, healthy treat that will elevate your holiday gathering.

Here’s the beauty of chocolate-covered strawberries: they’re incredibly versatile and can be tailored to fit any celebration, but when they sport the colors of our flag? Pure magic! Your guests will love them, and you’ll love how easy they are to whip up. So, roll up your sleeves, and let’s savor the spirit of summer with these gorgeous, sweet bites!

Ingredients

To create the most delectable 4th of July chocolate-covered strawberries, you’ll need the following ingredients:

  • 24 strawberries
    Fresh strawberries are a must! Look for ones that are bright red, plump, and free of blemishes. If strawberries aren’t in season, you can substitute with other berries like blueberries or raspberries for their vibrant colors. Just remember that the dipping process may vary slightly based on the berry you use.

  • 1 cup white candy melts or white chocolate melting wafers
    These sweet, creamy melts make for an easy and tasty coating. White chocolate can be a little finicky, so the melting wafers tend to provide a smoother finish that’s easier to work with. If you’re feeling extra adventurous, you can substitute with milk chocolate or dark chocolate for a twist on flavor.

  • 1/2 cup red, white, and blue nonpareil sprinkles
    Sprinkles add that festive touch we all adore! Feel free to switch things up with any colored sprinkles, or even coconut flakes for a tropical vibe. Just keep in mind that coconut flakes won’t have the same colorful effect but will definitely bring some texture.

Step-by-Step Instructions

Ready to create some mouthwatering treats? Let’s get started! Here’s a step-by-step guide to making your chocolate-covered strawberries:

  1. Prep Your Strawberries
    Start by rinsing your strawberries gently under cold water. Pat them dry with a paper towel, making sure they’re completely dry before dipping. One little chef hack—avoid dipping wet strawberries in chocolate as it can lead to clumping and uneven coating. A dry berry means smooth chocolate bliss!

  2. Melt the Candy Melts
    In a microwave-safe bowl, pour in your white candy melts or chocolate wafers. Heat in the microwave for 30 seconds at a time, stirring after each interval until smooth and completely melted. It’s crucial to keep an eye on your mixture—burnt chocolate is a no-go! If you’re using a double boiler, place the chocolate over simmering water and stir until melted. If it starts to seize, add a teaspoon of coconut oil or shortening to regain that silky texture.

  3. Dip the Strawberries
    Hold a strawberry by its leafy green top and dip it into the melted chocolate, swirling gently to coat it evenly. Let the excess chocolate drip back into the bowl. It’s all about that perfect coating! If you find the chocolate thickening while you dip, just reheat it for a few seconds.

  4. Add the Sprinkles
    Now comes the fun part! Before the chocolate sets, sprinkle your red, white, and blue nonpareils over the chocolate-covered strawberries. This is where you can really let your creativity shine. Don’t be shy! The more sprinkles, the better. You could even set up an assembly line and have your friends or kids help out.

  5. Let Them Set
    Place your decorated strawberries on a baking sheet lined with parchment paper. Once all the strawberries are dipped and sprinkled, pop them into the fridge for about 30 minutes. This will help the chocolate firm up nicely, resulting in that satisfying crunch when you bite in.

Serving Suggestions

These chocolate-covered strawberries are not just delicious; they’re a visual delight too! When it’s time to serve, arrange them artfully on a platter or cake stand. You can even line them up in a flag pattern for that extra festive touch. For added elegance, you could drape a few mint leaves around the strawberries for a pop of green. Trust me, your guests will be snapping pictures before digging in!

Recipe Variations

Looking to add your unique twist? Here are a few variations to consider:

  • Chocolate Drizzle: After setting, melt some dark or milk chocolate and drizzle it over the white chocolate-covered strawberries for an elegant touch.

  • Nutty Delight: After dipping in chocolate, roll the strawberries in crushed nuts or shredded coconut for extra texture and flavor.

  • Flavor Explosion: Mix a few drops of mint or almond extract into your melted chocolate for a different flavor profile that will wow your guests.

  • Caramel Surprise: Before dipping in chocolate, drizzle melted caramel over the strawberries to offer a sweet surprise.

  • Fruit Medley: Experiment with other fruits like pretzel rods or bananas! Dip them in chocolate and decorate them in the same festive way.

Chef’s Notes

Over the years, my journey with chocolate-covered strawberries has evolved—from the clumsy, chocolate-smeared hands of childhood to being a weekend favorite at summer parties. I once had a mishap where I completely overlooked a berry’s wetness and ended up with a chocolate blob instead of that glossy finish I wanted. Instead of feeling defeated, we turned it into a game—how messy could we get while making desserts? That’s the joy of cooking: it’s full of surprises and laughter.

These strawberries represent more than just a treat. They symbolize good times, sharing, and delicious adventures in the kitchen with family and friends. So even if they don’t turn out picture-perfect, remember: it’s all about the fun you have along the way!

FAQs and Troubleshooting

  1. What if my chocolate thickens or seizes?
    This often happens when it overheats. If it thickens, try stirring in a little coconut oil or shortening to smooth it out. For seized chocolate, you can sometimes salvage it with a bit of cream, adding it slowly until you restore that melt-in-your-mouth texture.

  2. Can I use frozen strawberries?
    It’s best to use fresh strawberries for this particular recipe, as frozen strawberries can release water and lead to a messy dipping situation. If you only have frozen on hand, thaw them thoroughly and dry them before dipping.

  3. How can I store leftover chocolate-covered strawberries?
    Store them in an airtight container in the refrigerator for up to 2 days. Keep them in a single layer if possible; layering can lead to squished chocolate on the bottoms. If you notice any condensation, it might be best to let them sit at room temperature for a little while before serving.

  4. What if I can’t find the right sprinkles?
    No worries! You can create your colorful mix using any sprinkles you have—just think outside the box. Crushed candies, colored sugar, or even edible glitter can work wonders!

Nutritional Info

While dessert isn’t usually a focus on nutrition, it’s good to know something like chocolate-covered strawberries has its advantages. Strawberries are rich in vitamins, especially Vitamin C, and antioxidants, and they’re low in calories. Keep in mind that the chocolate and sprinkles will add some sweetness and calories, so enjoy them in moderation!


So there you have it—a delicious recipe for chocolate-covered strawberries that will make your 4th of July celebration even more memorable! With minimal effort, you can impress your friends and family with this stunning dessert that captures the spirit of summer. Happy eating, and may your holiday be filled with laughter and joy!

Print

Festive Chocolate Covered Strawberries

Celebrate Independence Day with these vibrant and delicious chocolate-covered strawberries, perfect for summer gatherings.

  • Prep Time: 15 minutes
  • Cook Time: 10 minutes
  • Total Time: 25 minutes
  • Yield: 4 servings 1x
  • Category: Dessert
  • Method: No-Cook
  • Cuisine: American
  • Diet: Vegetarian

Ingredients

Scale
  • 24 strawberries
  • 1 cup white candy melts or white chocolate melting wafers
  • 1/2 cup red, white, and blue nonpareil sprinkles

Instructions

  1. Prep your strawberries by rinsing gently under cold water and patting dry.
  2. Melt the candy melts in a microwave-safe bowl, heating in 30-second intervals, stirring until smooth.
  3. Dip the strawberries into the melted chocolate, holding by the leafy green tops.
  4. Add the sprinkles over the chocolate-covered strawberries before the chocolate sets.
  5. Let them set on a lined baking sheet in the fridge for about 30 minutes.

Notes

Experiment with different types of chocolate and toppings, such as crushed nuts or flavored extracts.

Nutrition

  • Serving Size: 1 serving
  • Calories: 150
  • Sugar: 20g
  • Sodium: 30mg
  • Fat: 7g
  • Saturated Fat: 4g
  • Unsaturated Fat: 2g
  • Trans Fat: 0g
  • Carbohydrates: 20g
  • Fiber: 2g
  • Protein: 1g
  • Cholesterol: 0mg

Keywords: chocolate-covered strawberries, festive dessert, 4th of July, summer treats, easy dessert

Did you make this recipe?

Share a photo and tag us — we can't wait to see what you've made!

June 18, 2026 |

Coffee Cake Muffins

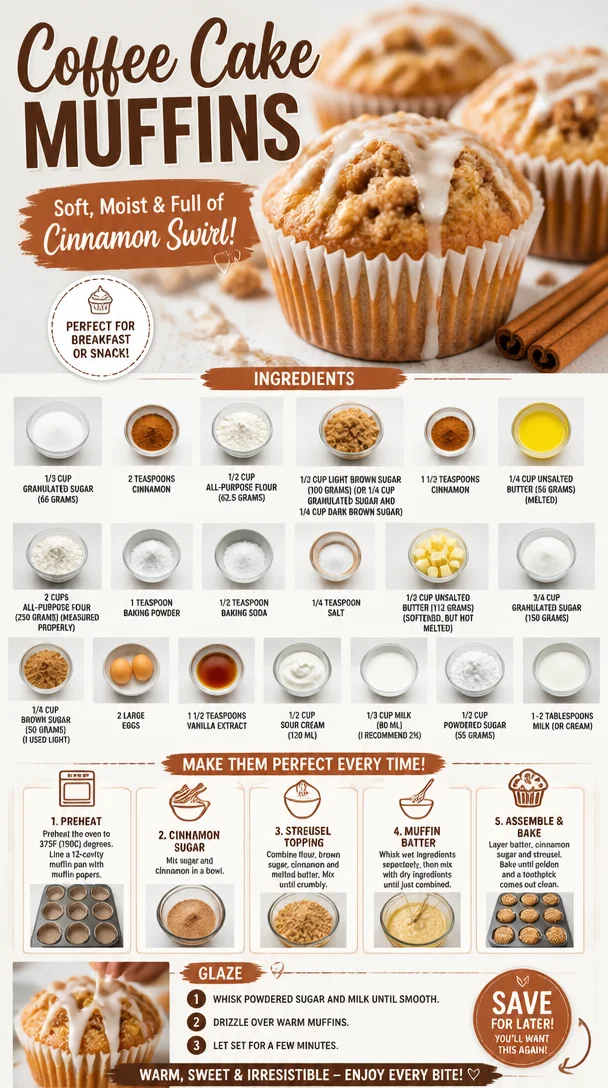
Freshly baked coffee cake muffins with a crumbly topping

Coffee Cake Muffins: A Sweet Start to Your Day

Welcome to the cozy world of Clean Plate Cravings! Today, we’re diving into a delightful dish that brings joy to breakfast tables everywhere—Coffee Cake Muffins! These muffins encapsulate the perfect balance of flavor and texture, making them a beloved choice for those lazy Sunday mornings or a quick grab-and-go breakfast during the week.

What’s amazing about these muffins is how they echo that childhood nostalgia of enjoying something sweet with your morning brew. When I think about coffee cake, I can’t help but remember the times I’d visit my grandmother’s kitchen, watching her whip up a batch of fluffy muffins that would fill the house with the warm aroma of cinnamon and sugar. She always said her secret was to “fold in a little love” in every bite, and boy, did it work!

With rich buttery goodness, a hint of vanilla, and a crunchy cinnamon-sugar topping, these Coffee Cake Muffins are not just easy to make but also incredibly satisfying. Let’s get our aprons on and create these little delights that are sure to be a staple in your kitchen!

A Sweet Memory with Coffee Cake

Every food has a story, and mine with coffee cake muffins goes back to my childhood. I remember the sound of the mixer whirring in my grandmother’s cozy kitchen, a place filled with warmth and laughter. My siblings and I would race there every Saturday morning, eager to help and snack on the delicious treats that my Grandma made.

One of my fondest memories was the day we chose to experiment a little. We decided we’d make “the ultimate coffee cake,” which led us to raid her pantry for an array of spices, nuts, and chocolate chips. We ended up with this glorious, slightly messy creation that was less about perfection and more about joy. I can still picture Grandma watching us with a smile, her eyes twinkling with amusement as we debated whether to call it a “muffin” or “cake.” Whatever we decided, it was exactly what we needed—sweet, comforting, and made with a whole lot of love.

Let’s channel that nostalgic energy as we create our Coffee Cake Muffins, perfect for sharing or savoring all on your own!

Ingredients to Bring These Muffins to Life

Here’s what you’ll need for these Coffee Cake Muffins. Each ingredient plays a crucial role in developing the flavor and texture, so let’s break it down:

  • 1/3 cup granulated sugar (66 grams): This adds sweetness to the muffins. You can substitute with coconut sugar for a healthier option!

  • 2 teaspoons cinnamon: The warm spice that will fill your kitchen with a heavenly aroma. You can also try nutmeg or pumpkin spice for a twist!

  • 1/2 cup all-purpose flour (62.5 grams): This is part of the crumb topping. Use whole wheat flour if you want a nuttier flavor and added health benefits.

  • 1/2 cup light brown sugar (100 grams): It lends a rich, caramel-like flavor to both the muffins and the crumb topping. You can mix equal parts dark brown sugar for a deeper flavor profile.

  • 1 1/2 teaspoons cinnamon (for topping): More of that glorious spice!

  • 1/4 cup unsalted butter (56 grams, melted): Adds moisture and richness to the crumb topping. If you’re dairy-free, coconut oil works wonderfully here.

  • 2 cups all-purpose flour (250 grams): The base for the muffin’s structure. If you’re gluten-free, you can use a 1:1 gluten-free flour blend.

  • 1 teaspoon baking powder: This is your leavening agent that helps the muffins rise.

  • 1/2 teaspoon baking soda: An additional leavening agent.

  • 1/4 teaspoon salt: Balances the sweetness and enhances the overall flavor.

  • 1/2 cup unsalted butter (112 grams, softened, not melted): A key player in creating that soft, fluffy texture. You can replace this with applesauce for a lighter option.

  • 3/4 cup granulated sugar (150 grams): The main sweetener for the muffins.

  • 1/4 cup brown sugar (50 grams, light): Further contributes to the moistness and flavor.

  • 2 large eggs: They provide structure and moisture. If you want a vegan option, you can replace them with flaxseed meal or unsweetened applesauce.

  • 1 1/2 teaspoons vanilla extract: This adds warmth and depth to the muffins.

  • 1/2 cup sour cream (120 ml): This makes for incredibly moist muffins. Greek yogurt could be a great substitute!

  • 1/3 cup milk (80 ml, I recommend 2%): Helps to incorporate all the ingredients smoothly; almond milk also works great for a dairy-free version.

  • 1/2 cup powdered sugar (55 grams): For a final touch of sweetness on top!

  • 1–2 tablespoons milk (or cream): For adjusting the consistency of your icing.

Step-by-Step Instructions for Deliciously Fluffy Muffins

1. Preheat Your Oven

Start by preheating your oven to 350°F (175°C). This is essential for a good bake. While the oven’s heating up, let’s set the scene for muffin magic!

2. Prepare Your Muffin Pan

Grease or line a muffin pan with paper liners. This will make it easier to get those muffins out after they’re baked without losing a crumb!

3. Make the Crumb Topping

In a medium bowl, mix together the 1/2 cup flour, 1/2 cup light brown sugar, 1/3 cup granulated sugar, and 2 teaspoons cinnamon. Melt 1/4 cup of unsalted butter and pour it into the dry ingredients. Use a fork or your hands to combine until crumbly. Set this aside while we whip up the muffin batter.

4. Whisk the Dry Ingredients

In a large bowl, whisk together 2 cups of all-purpose flour, 1 teaspoon baking powder, 1/2 teaspoon baking soda, and 1/4 teaspoon salt. Mixing these dry ingredients first ensures an even rise.

5. Cream the Butters and Sugars

In a separate large bowl, beat the 1/2 cup softened unsalted butter, 3/4 cup granulated sugar, and 1/4 cup brown sugar until it’s creamy and light. Don’t rush through this step—creaming your butter and sugars well incorporates air, making your muffins fluffy.

6. Add Eggs and Vanilla

Once your sugars and butter are creamy, add in 2 large eggs, one at a time, mixing well after each addition. Follow this with the 1 1/2 teaspoons vanilla extract—let that sweet aroma whisk you away!

7. Mix in the Sour Cream and Milk

Now it’s time to add the 1/2 cup sour cream and 1/3 cup milk to your mixture. Mix until just combined; the batter will be thick and luscious.

8. Combine Wet and Dry Ingredients

Carefully fold the dry ingredients into the wet. Do this gently with a spatula to avoid overmixing, which can lead to dense muffins. You want a few lumps—trust me!

9. Fill Your Muffin Pan

Spoon the batter into your prepared muffin pan, filling each cup about 2/3 full. This gives them room to rise without overflowing.

10. Crumble It Up!

Now, sprinkle that glorious crumb topping generously over each muffin. Don’t be shy; this is where the magic happens!

11. Bake to Perfection

Pop the muffin pan into your preheated oven and bake for about 18-22 minutes or until a toothpick inserted into the center comes out clean. You’ll know they’re ready when your kitchen is filled with the irresistible aroma of cinnamon!

12. Cool and Glaze

Once baked, allow the muffins to cool in the pan for about 5-10 minutes before transferring them to a wire rack. For an added touch of sweetness, mix 1/2 cup powdered sugar with 1-2 tablespoons milk to create a simple glaze and drizzle it over the muffins once cooled.

Serving Suggestions

These Coffee Cake Muffins are wonderful served warm out of the oven or at room temperature. They’re perfect for breakfast alongside a hot cup of coffee or tea. Feel free to present them on a rustic wooden board or in a cute muffin basket for a brunch vibe that guests (or your family) will adore!

Recipe Variations

Here are some fun variations to keep your muffins exciting every time:

  • Nutty Crunch: Add 1/2 cup chopped walnuts or pecans to the batter for an extra crunch.

  • Fruity Twist: Toss in 1/2 cup of blueberries or diced apples for a fruity version.

  • Chocolate Lovers: Replace half a cup of flour with cocoa powder for a chocolatey coffee cake experience.

  • Spiced Up: Add a dash of nutmeg or cardamom to the spices for a warm twist.

Chef’s Notes

Over the years, my Coffee Cake Muffins have evolved as I’ve experimented in the kitchen. I remember the early days, where they would sometimes be too dry or not rise enough. Come to find out, perfecting the right balance of wet and dry ingredients makes all the difference!

And of course, the greatest lesson? Don’t take it too seriously! Cooking should be fun, and if your muffins come out looking a little wonky, just call them “rustic”!

FAQs and Troubleshooting

1. Why are my muffins dense?
If your muffins are denser than expected, they might have been overmixed. Remember, only mix until just combined!

2. How do I know when my muffins are done?
Use a toothpick; if it comes out clean or with just a few crumbs, they are ready to come out.

3. Can I freeze these muffins?
Absolutely! Once cooled, store them in an airtight container or freezer bag, and they’ll be perfect for up to three months. Just pop them in the microwave or oven for a quick warm-up!

4. What if I don’t have sour cream?
Greek yogurt is a great alternative, or you can make your own by mixing plain yogurt with a splash of vinegar for tanginess.

Nutritional Info

While I am not providing the specific nutritional breakdown, these muffins are made with wholesome ingredients that balance enjoyment with nourishment.


There you have it—your guide to creating the most delightful Coffee Cake Muffins! Not only do they capture the essence of my cherished memories, but they also offer a sweet treat for your mornings. So, roll up your sleeves and get ready to unleash that love into your kitchen. Happy baking!

Print

Coffee Cake Muffins

Deliciously fluffy Coffee Cake Muffins filled with rich buttery goodness and topped with crunchy cinnamon-sugar, perfect for breakfast or a snack.

  • Prep Time: 15 minutes
  • Cook Time: 22 minutes
  • Total Time: 37 minutes
  • Yield: 12 muffins 1x
  • Category: Snack
  • Method: Baking
  • Cuisine: American
  • Diet: Vegetarian

Ingredients

Scale
  • 1/3 cup granulated sugar (66 grams)
  • 2 teaspoons cinnamon
  • 1/2 cup all-purpose flour (62.5 grams)
  • 1/2 cup light brown sugar (100 grams)
  • 1 1/2 teaspoons cinnamon (for topping)
  • 1/4 cup unsalted butter (56 grams, melted)
  • 2 cups all-purpose flour (250 grams)
  • 1 teaspoon baking powder
  • 1/2 teaspoon baking soda
  • 1/4 teaspoon salt
  • 1/2 cup unsalted butter (112 grams, softened)
  • 3/4 cup granulated sugar (150 grams)
  • 1/4 cup brown sugar (50 grams, light)
  • 2 large eggs
  • 1 1/2 teaspoons vanilla extract
  • 1/2 cup sour cream (120 ml)
  • 1/3 cup milk (80 ml, 2% recommended)
  • 1/2 cup powdered sugar (55 grams)
  • 1–2 tablespoons milk (or cream)

Instructions

  1. Preheat your oven to 350°F (175°C).
  2. Prepare your muffin pan by greasing or lining it with paper liners.
  3. Make the crumb topping by mixing 1/2 cup flour, 1/2 cup light brown sugar, 1/3 cup granulated sugar, and 2 teaspoons cinnamon. Add melted butter and combine until crumbly. Set aside.
  4. Whisk together 2 cups of all-purpose flour, 1 teaspoon baking powder, 1/2 teaspoon baking soda, and 1/4 teaspoon salt.
  5. Cream the softened unsalted butter, 3/4 cup granulated sugar, and 1/4 cup brown sugar until creamy and light.
  6. Add in the eggs one at a time, mixing well after each addition, then add the vanilla extract.
  7. Mix in the sour cream and milk until just combined.
  8. Fold the dry ingredients into the wet mixture gently with a spatula.
  9. Fill each muffin cup about 2/3 full with the batter.
  10. Sprinkle the crumb topping generously over each muffin.
  11. Bake for about 18-22 minutes until a toothpick comes out clean.
  12. Cool in the pan for 5-10 minutes, then transfer to a wire rack. Drizzle glaze made of powdered sugar and milk on top.

Notes

Use whole wheat flour for a nuttier flavor or coconut sugar for a healthier alternative.

Nutrition

  • Serving Size: 1 muffin
  • Calories: 320
  • Sugar: 20g
  • Sodium: 300mg
  • Fat: 14g
  • Saturated Fat: 8g
  • Unsaturated Fat: 4g
  • Trans Fat: 0g
  • Carbohydrates: 45g
  • Fiber: 1g
  • Protein: 4g
  • Cholesterol: 60mg

Keywords: coffee cake, muffins, breakfast, dessert, cinnamon, sweet

Did you make this recipe?

Share a photo and tag us — we can't wait to see what you've made!

June 18, 2026 |

Blueberry Cream Cheese Muffins

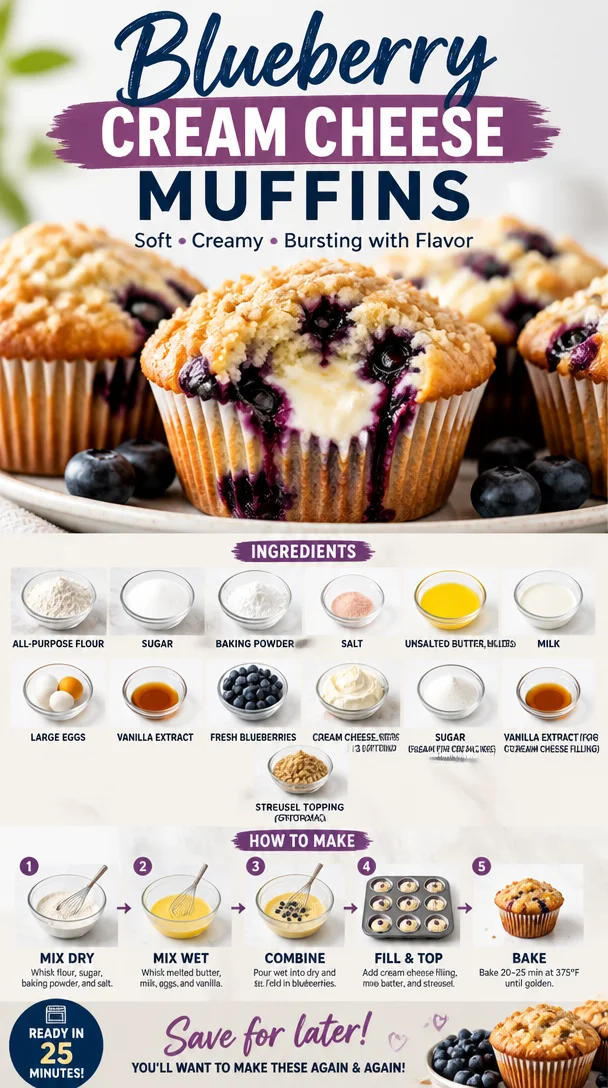
Delicious blueberry cream cheese muffins baked to perfection.

Blueberry Cream Cheese Muffins: A Sweet Journey

Welcome, fellow food lovers! Today, I’m thrilled to share a delightful recipe that combines the sweetness of fresh blueberries with the creamy goodness of cream cheese—Blueberry Cream Cheese Muffins! If you’re looking for a dish that’s both comforting and indulgent, yet so easy to whip up, you’re in for a treat. Picture cozy mornings spent savoring warm muffins fresh out of the oven, the aroma wrapping around you like a hug. It’s not just food; it’s a slice of joy!

Blueberry muffins are essentially a breakfast classic, but when you throw cream cheese into the mix, you take things to a whole new level. It’s like the best of both worlds—the soft, airy muffin paired with a rich, tangy filling! Whether you’re gearing up for a busy week ahead or planning a lazy weekend brunch, these muffins are perfect for any occasion.

So, let me take you on a journey back to my childhood where muffins meant love and laughter. Growing up, every Sunday felt like a special holiday in our cozy kitchen. My mom was a self-proclaimed muffin aficionado. With flour dust dancing in the air and the sweet smell of berries filling our home, she’d whip up a batch of muffins like a magician casting a delicious spell. Her signature blueberry muffins were what drew my siblings and me to the kitchen with wide, hungry eyes. But the twist? She always had a little surprise hidden inside: a creamy dollop of cream cheese waiting to be discovered.

There’s something undeniably special about cozy moments in the kitchen, don’t you think? Those memories inspired me to create this recipe, blending a classic blueberry muffin with that nostalgic cream cheese filling. So grab your apron, and let’s embark on this baking adventure together!

Ingredients

Here’s what you’ll need to bring these scrumptious muffins to life:

  • 2 cups all-purpose flour
    A staple in any muffin-making kitchen! Feel free to swap it for whole wheat flour for a heartier texture or gluten-free flour if you’re avoiding gluten.

  • 1 cup sugar
    Sweetness is key! You can substitute this with coconut sugar or even a sugar alternative like Stevia for a lighter option.

  • 1 tablespoon baking powder
    This magical ingredient helps your muffins rise beautifully. Make sure it’s fresh for the best results!

  • 1/2 teaspoon salt
    Just a pinch to enhance all those lovely flavors.

  • 1/2 cup unsalted butter, melted
    Adds richness and moisture. You can use coconut oil for a dairy-free option or applesauce for a lower-fat version.

  • 1 cup milk
    Whether you go with whole, almond, or oat milk, it’ll help create that tender crumb. Play around with your favorite!

  • 2 large eggs
    Acts as a binding agent—without them, your muffins might crumble. If you’re vegan, try using flax eggs (1 tablespoon ground flaxseed mixed with 2.5 tablespoons water).

  • 1 teaspoon vanilla extract
    A must for that warm, aromatic flavor! Feel free to experiment with almond extract if you’re feeling adventurous.

  • 1 cup fresh blueberries
    These beauties add a burst of flavor and color. Frozen blueberries work too, but toss them in flour before adding to prevent sinking.

  • 8 ounces cream cheese, softened
    The creamy star of the show! For a lighter alternative, consider using ricotta cheese.

  • 1/4 cup sugar (for cream cheese filling)
    Sweetens up that rich cream cheese blend.

  • 1 teaspoon vanilla extract (for cream cheese filling)
    Just a touch to bring the filling to life.

  • 1/2 cup streusel topping (optional)
    For those crunchy muffin tops! Combine flour, sugar, butter, and a pinch of cinnamon for a delightful crumble.

Step-by-Step Instructions

Ready to bake? Let’s get those muffins in the oven!

  1. Preheat the Oven
    Start by preheating your oven to 350°F (175°C). This ensures an inviting, warm environment for those muffins to rise and crust up perfectly.

  2. Mix the Dry Ingredients
    In a large mixing bowl, whisk together the flour, sugar, baking powder, and salt. Whisking won’t just combine them; it adds air, which contributes to that fluffy texture we crave. Pro tip: sift your flour for the fluffiest results!

  3. Combine Wet Ingredients
    In another bowl, mix the melted butter, milk, eggs, and vanilla extract. Whisk until well combined. The melted butter should cool slightly before adding to avoid scrambling the eggs!

  4. Incorporate the Blueberries
    Gently fold the blueberries into the wet mixture, being careful not to crush them too much. This keeps those beautiful juicy bursts intact!

  5. Combine Wet and Dry
    Create a well in the center of your dry ingredients and pour in the wet mixture. Using a spatula, fold gently until just combined. A few lumps are okay; overmixing can lead to dense muffins! Here’s a fun chef hack: use a rubber spatula to "cut" through the batter, folding as you go for an even mix.

  6. Prepare Cream Cheese Filling
    While your batter rests, mix the softened cream cheese, sugar, and vanilla extract in a separate bowl. Beat until smooth and creamy. If it’s too thick, add a splash of milk until it’s spreadable.

  7. Fill the Muffin Tins
    Grease your muffin tins or use liners. Fill each muffin cup about one-third of the way with batter. Add a dollop of that delicious cream cheese mixture, followed by more batter to fill the cups about two-thirds full. Leave a little room for rising!

  8. Add Streusel (Optional)
    If you’re using the optional streusel topping, sprinkle it generously on top. This adds a fantastic crunch and makes your muffins look bakery-fresh!

  9. Bake
    Pop these beauties in the oven for 18-20 minutes. Keep a close eye; they’re ready when the tops are golden brown and a toothpick inserted in the center comes out clean.

  10. Cool and Enjoy
    Once baked, remove from the oven and let them cool in the pan for about 5 minutes, then transfer to a wire rack. The aroma wafting through your kitchen will be enough to make anyone’s mouth water. Dig in while they’re warm for that perfect gooey cream cheese moment!

Serving Suggestions

These muffins shine best when served fresh! Plate them up on a pretty platter, dust with powdered sugar for an extra touch, and place a few fresh blueberries on top for that inviting, homey vibe. Pair them with a steaming cup of coffee or a refreshing glass of cold milk for the ultimate treat.

Recipe Variations

Feeling adventurous? Here are a few twists to try with these muffins:

  • Lemon Zest: Add a teaspoon of fresh lemon zest to the batter for a bright citrusy flavor!
  • Mixed Berries: Swap out the blueberries for raspberries, blackberries, or a mix of berries for a fruity explosion.
  • Chocolate Chips: For all the chocoholics out there, toss in 1/2 cup of dark or white chocolate chips for a decadent twist.
  • Nutty Addition: Add chopped walnuts or pecans to the batter for a delightful crunch.
  • Spice It Up: A dash of cinnamon or nutmeg can add warmth and coziness to your muffins!

Chef’s Notes

These muffins have come a long way from that beloved family recipe. Over the years, I’ve played with the sweetness, swapped in different fruits, and even experimented with gluten-free options. Each batch tells a story of kitchen adventures, laughter, and the joy of sharing good food with friends and family. I can’t help but smile thinking of my little ones’ faces after their first bite—pure bliss!

FAQs and Troubleshooting

  1. Why are my muffins dense?
    Overmixing can be the culprit! When combining wet and dry ingredients, mix just until incorporated. A few lumps are fine!

  2. My cream cheese filling wasn’t smooth. What did I do wrong?
    Make sure your cream cheese is at room temperature. If it’s too cold, it won’t mix well. Consider beating it a bit longer to achieve that creamy texture.

  3. How do I store leftovers?
    Keep them in an airtight container at room temperature for up to 2 days or refrigerate for up to a week. You can also freeze them for up to three months—just thaw and warm before serving!

  4. Can I use frozen blueberries?
    Absolutely! Use them directly from the freezer, but sprinkle them with a tablespoon of flour to help prevent sinking.

Nutritional Info

While these muffins are a delightful treat, they are meant to be enjoyed in moderation. Each muffin contains approximately:

  • Calories: 265
  • Total Fat: 12g
  • Saturated Fat: 6g
  • Cholesterol: 45mg
  • Sodium: 190mg
  • Total Carbohydrates: 36g
  • Dietary Fiber: 1g
  • Sugars: 14g
  • Protein: 4g

Remember that nutritional values can vary based on ingredient substitutions!

In closing, I hope these Blueberry Cream Cheese Muffins become a beloved part of your kitchen adventures! They embrace everything we love about cooking: sharing, creating, and most importantly, enjoying delicious food. So gather your loved ones, bake a batch (or two), and let the good times roll! Happy baking!

Print

Blueberry Cream Cheese Muffins

Delightful blueberry muffins filled with creamy cream cheese for a comforting breakfast treat.

  • Prep Time: 15 minutes
  • Cook Time: 20 minutes
  • Total Time: 35 minutes
  • Yield: 12 servings 1x
  • Category: Breakfast
  • Method: Baking
  • Cuisine: American
  • Diet: Vegetarian

Ingredients

Scale
  • 2 cups all-purpose flour
  • 1 cup sugar
  • 1 tablespoon baking powder
  • 1/2 teaspoon salt
  • 1/2 cup unsalted butter, melted
  • 1 cup milk
  • 2 large eggs
  • 1 teaspoon vanilla extract
  • 1 cup fresh blueberries
  • 8 ounces cream cheese, softened
  • 1/4 cup sugar (for cream cheese filling)
  • 1 teaspoon vanilla extract (for cream cheese filling)
  • 1/2 cup streusel topping (optional)

Instructions

  1. Preheat the oven to 350°F (175°C).
  2. Mix the dry ingredients: whisk together flour, sugar, baking powder, and salt.
  3. Combine the wet ingredients: mix the melted butter, milk, eggs, and vanilla extract.
  4. Incorporate the blueberries into the wet mixture carefully.
  5. Combine the wet and dry mixtures, folding gently.
  6. Prepare the cream cheese filling by mixing cream cheese, sugar, and vanilla.
  7. Fill muffin tins with batter, add cream cheese filling, and top with more batter.
  8. Add streusel topping if desired.
  9. Bake for 18-20 minutes until golden brown.
  10. Cool for 5 minutes before transferring to a wire rack.

Notes

For a lighter alternative, consider using ricotta cheese. Store in an airtight container.

Nutrition

  • Serving Size: 1 muffin
  • Calories: 265
  • Sugar: 14g
  • Sodium: 190mg
  • Fat: 12g
  • Saturated Fat: 6g
  • Unsaturated Fat: 6g
  • Trans Fat: 0g
  • Carbohydrates: 36g
  • Fiber: 1g
  • Protein: 4g
  • Cholesterol: 45mg

Keywords: blueberry, muffins, cream cheese, breakfast, baking

Did you make this recipe?

Share a photo and tag us — we can't wait to see what you've made!

June 18, 2026 |

One-Bowl Banana Bread Brownies: Quick, Gooey Slice

One-Bowl Banana Bread Brownies on a rustic wooden table

Banana Bread Brownies: A Delightful Mashup of Flavors

Hey there, fellow food adventurers! Let me take you on a delicious journey today as we dive into the world of Banana Bread Brownies. If you’ve ever found yourself with some overly ripe bananas sitting on your counter, you’ve come to the right place. I’m Ava Carter, and I’m excited to share this fantastic recipe that combines the moistness of banana bread with the rich indulgence of brownies.

This dish is truly a game changer, and it’s perfect for those days when you’re craving something a little sweeter but don’t want to feel too guilty about it. Welcome to a sweet universe where your dessert dreams come true, minus the fuss!

You see, life is too short for boring desserts. I believe in eating well and still getting that sweet satisfaction we all crave. Let’s make banana bread feel like a decadently fun treat rather than a wholesome chore. Are you ready to grab your mixing bowl and dive into this easy, approachable recipe that will have you saying, “Why didn’t I think of this sooner?” Let’s get started!

A Sweet Memory

I can still remember the smell wafting through my childhood home as my mother baked her famous banana bread. Giggles filled the air as my siblings and I raced around the kitchen, eagerly anticipating breakfast or a snack. The soft, warm slices slathered with butter and paired with a steaming cup of cocoa represented comfort in its finest form. However, as I got older, I realized that while banana bread was a classic standby, sometimes I craved a little more chocolatey goodness.

One day, while staring down those overly ripe bananas, I decided to take a leap of faith and combine those two beloved flavors – banana and chocolate. And voilà! Banana Bread Brownies were born. It was a day filled with experimentation and splattered chocolate all over my kitchen, but it ended with a pan full of moist, fudgy brownies that made my heart sing. The nostalgia of my mom’s banana bread infused with a rich brownie texture made me feel right at home. If you can’t beat them, combine them, right?

Ingredients

Let’s gather our ingredients and get down to the sweet business of baking! Here’s what you’ll need:

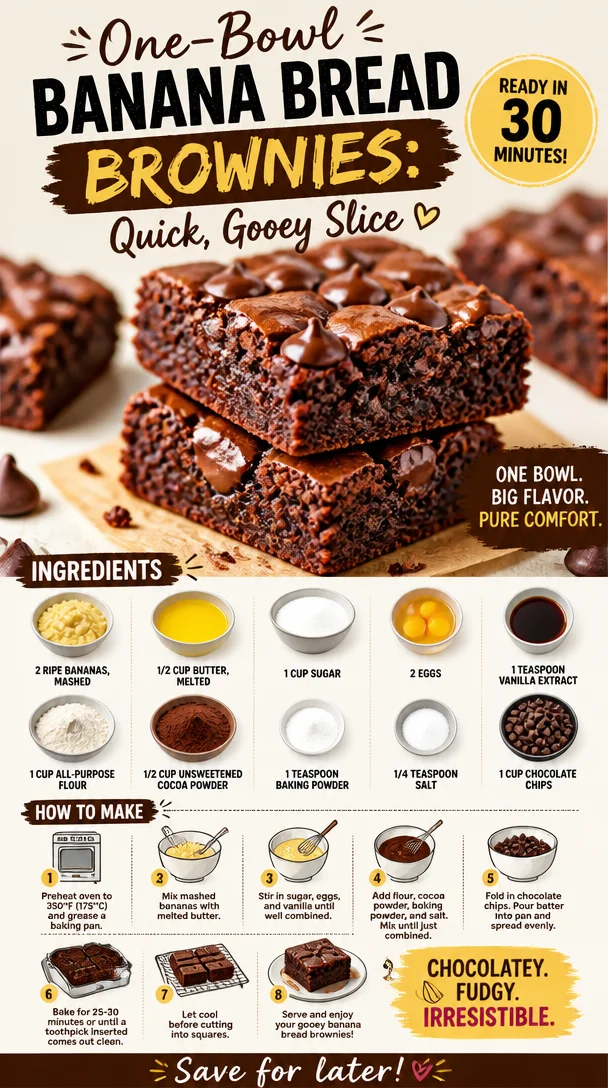
  • 2 ripe bananas, mashed: The sweeter, the better! Ripe bananas add moisture and that unmistakable banana flavor. If you’re in a pinch, you can use applesauce as a substitute (1/2 cup for every banana) for a similar texture.

  • 1/2 cup butter, melted: This adds richness to our brownies. For a healthier twist, feel free to swap in coconut oil or even a more low-fat option like Greek yogurt.

  • 1 cup sugar: A touch of sweetness is essential. You can reduce sugar to 3/4 cup or use coconut sugar for a more natural sweetener.

  • 2 eggs: They help bind everything together. If you need an egg-free alternative, 1/4 cup of unsweetened applesauce or flax eggs (1 tablespoon of ground flaxseed mixed with 2.5 tablespoons of water) works wonderfully.

  • 1 teaspoon vanilla extract: This enhances all the flavors. Look for pure vanilla extract for the best taste; trust me, it makes a difference!

  • 1 cup all-purpose flour: The backbone of our brownies. If you’re looking to go gluten-free, almond flour or a gluten-free blend can be a great alternative.

  • 1/2 cup unsweetened cocoa powder: This is where the magic happens! It gives brownies their divine chocolatey goodness. If you’re feeling adventurous, try dark cocoa powder for an extra rich flavor.

  • 1 teaspoon baking powder: This is our leavening agent, making sure things rise slightly for that delightful brownie texture. Baking soda can be used as a substitute, but adjust the amount to 1/2 teaspoon.

  • 1/4 teaspoon salt: A pinch of salt enhances all the other flavors, trust me!

  • 1 cup chocolate chips: Because who doesn’t love a chocolate surprise in every bite? If you’re feeling fancy, use dark chocolate chips or even white chocolate for contrast.

Step-by-Step Instructions

Alright, my fellow bakers, let’s get our hands a little dirty and make those Banana Bread Brownies! Follow these steps for a guaranteed sweet success:

Step 1: Preheat the Oven

Preheat your oven to 350°F (175°C). Grease a 9×9-inch baking pan or line it with parchment paper (trust me, your future self will be thankful for the easy cleanup).

Step 2: Mash the Bananas

In a large mixing bowl, mash those ripe bananas with a fork or potato masher until smooth. Leave some small lumps for texture. This is also a great time for a little dance party; it makes the bananas taste better, I swear!

Step 3: Mix Wet Ingredients

Add the melted butter, sugar, eggs, vanilla, and mix everything until well combined. Use a whisk or an electric mixer for a couple of minutes to ensure it’s creamy and well-blended.

Step 4: Sift Dry Ingredients

In a separate bowl, sift together the flour, cocoa powder, baking powder, and salt. Sifting is key here to prevent any lumps and ensure everything is evenly distributed – nobody wants a surprise clump of cocoa!

Step 5: Combine Everything

Fold the dry ingredients into the wet ingredients gently. You don’t want to overmix; just blend until you see no more flour streaks. Little lumps are just fine – they’ll bake out beautifully.

Step 6: Add Chocolate Chips

Stir in those delectable chocolate chips! This is where the magic truly happens. Feel free to save a handful to sprinkle on top before popping them into the oven for an extra chocolaty finish.

Step 7: Pour and Bake

Pour the batter into your prepared baking pan and smooth the top with a spatula. Place it in the preheated oven and bake for 25-30 minutes. The chocolatey aroma will fill your kitchen, and you’ll feel like a baking wizard!

Step 8: Check for Doneness

Around the 25-minute mark, use a toothpick to check doneness. Insert it into the center; if it comes out with a few moist crumbs, you’re golden. If it comes out wet with batter, give it a couple more minutes.

Step 9: Cool and Slice

Once baked, remove the brownies from the oven and let them cool in the pan for about 10-15 minutes. Once cooled, lift them out (if using parchment paper), slice them into squares, and prepare to be amazed at your creation.

Serving Suggestions

These Banana Bread Brownies are fantastic on their own, but you can elevate them even further! Serve these delightful squares warm with a scoop (or two) of vanilla ice cream on the side or drizzle them with warm chocolate sauce. You can also dust them lightly with powdered sugar or serve with fresh fruit alongside for a pop of color—think slices of banana or a handful of berries.

Trust me, your guests will be raving!

Recipe Variations

Want to make these Banana Bread Brownies your own? Here are a few fun variations to consider:

  • Nutty Delight: Add 1/2 cup of chopped nuts like walnuts or pecans for a delightful crunch.

  • Spicy Kick: Add a pinch of cinnamon or a teaspoon of espresso powder to deepen the flavor profile.

  • Gluten-Free Option: Swap the all-purpose flour for a gluten-free flour blend. Choose a blend meant for baking for the best results!

  • Nut Butter Swirl: Swirl in some almond or peanut butter for an extra layer of richness and flavor.

  • Fruit Fiesta: Fold in a cup of shredded coconut or chopped dried fruit like apricots or cranberries for a tropical twist.

Chef’s Notes

This recipe has evolved over the years as I’ve tinkered with flavors, and I can’t help but laugh remembering the time I accidentally used salt instead of sugar (yikes!). It’s a good lesson that sometimes mistakes in the kitchen can lead to unexpected creativity. Each iteration has become more delicious than the last, and I am thrilled every time my family devours these brownies! Each bite brings back memories of laughter and warmth from those days in my mom’s kitchen, whisking away our worries one batch at a time.

Cooking is all about having fun and experimenting, so feel free to make it your own. You’ve got this!

FAQs and Troubleshooting

1. Why are my brownies too dense?

If your brownies turned out too dense, it might be because of overmixing the batter. Just mix until combined for best results. Also, ensure your baking powder isn’t expired, as this could affect the rise.

2. Can I use frozen bananas?

Absolutely! Just let the frozen bananas thaw at room temperature before mashing, and proceed with the recipe as usual.

3. How do I store these brownies?

Store them in an airtight container at room temperature for up to 3 days, or in the fridge for up to a week. You can also freeze them for up to 3 months—perfect for on-the-go treats!

4. Can I make these ahead of time?

Yes! These brownies taste even better the next day, so feel free to make them ahead. Just remember, they won’t last long once your friends get a whiff of them!

Nutritional Info

For those who are curious about the nutritional breakdown (per brownie, based on 16 servings):

  • Calories: 180
  • Protein: 2g
  • Carbs: 25g
  • Fat: 8g
  • Fiber: 1g
  • Sugar: 12g

Enjoy every morsel of these Banana Bread Brownies without guilt! With wholesome bananas, a touch of butter, and lots of love, they’re the perfect treat to brighten your day.

There you have it, folks! An irresistible treat that blends nostalgia and flavor, perfect for any occasion (or just because!). I hope you’ll enjoy baking and sharing these delightful brownies as much as I do. Happy baking, and remember, life is what you make it—make it sweet. 🍌🍫

Print

Banana Bread Brownies

A delightful mashup of banana bread and brownies, perfect for satisfying your sweet tooth without feeling guilty.

  • Prep Time: 15 minutes
  • Cook Time: 30 minutes
  • Total Time: 45 minutes
  • Yield: 16 servings 1x
  • Category: Dessert
  • Method: Baking
  • Cuisine: American
  • Diet: Vegetarian

Ingredients

Scale
  • 2 ripe bananas, mashed
  • 1/2 cup butter, melted
  • 1 cup sugar
  • 2 eggs
  • 1 teaspoon vanilla extract
  • 1 cup all-purpose flour
  • 1/2 cup unsweetened cocoa powder
  • 1 teaspoon baking powder
  • 1/4 teaspoon salt
  • 1 cup chocolate chips

Instructions

  1. Preheat your oven to 350°F (175°C). Grease a 9×9-inch baking pan or line it with parchment paper.
  2. Mash the ripe bananas with a fork or potato masher until smooth, leaving some small lumps for texture.
  3. Add the melted butter, sugar, eggs, and vanilla. Mix everything until well combined.
  4. Sift together the flour, cocoa powder, baking powder, and salt in a separate bowl.
  5. Fold the dry ingredients into the wet ingredients gently until no more flour streaks remain.
  6. Add the chocolate chips and stir them into the batter.
  7. Pour the batter into your prepared baking pan and smooth the top with a spatula.
  8. Bake for 25-30 minutes, checking for doneness with a toothpick around the 25-minute mark.
  9. Cool in the pan for about 10-15 minutes before slicing into squares.

Notes

These brownies taste even better the next day and can be served warm with ice cream or drizzled with chocolate sauce.

Nutrition

  • Serving Size: 1 brownie
  • Calories: 180
  • Sugar: 12g
  • Sodium: 200mg
  • Fat: 8g
  • Saturated Fat: 5g
  • Unsaturated Fat: 2g
  • Trans Fat: 0g
  • Carbohydrates: 25g
  • Fiber: 1g
  • Protein: 2g
  • Cholesterol: 30mg

Keywords: banana bread brownies, dessert, chocolate, baking, banana recipe

Did you make this recipe?

Share a photo and tag us — we can't wait to see what you've made!

June 18, 2026 |

Ingredient Peach Sorbet in 10 Minutes: Creamy Summer Treat

Deliciously creamy peach sorbet served in a bowl, perfect summer treat

The Best Peach Sorbet: A Summer Delight

As the sun begins to warm the days and the sweet scent of summer fills the air, there’s nothing quite like the juicy burst of a ripe peach. For me, peaches are the quintessential summer fruit—a nostalgic reminder of childhood summers spent roaming orchards and indulging in sweet, messy peach slices. That’s why I’m thrilled to share my simple, dreamy Peach Sorbet recipe with you.

Imagine this: you’ve just spent a sun-soaked day at the beach, and the golden hour is painting the sky in shades of pink and orange. You come home and whip up this refreshing sorbet that not only cools you down but also brings the fresh flavors of summer right to your kitchen. This is the magic of making your own sorbet! Best of all, it’s incredibly easy and uses just a handful of simple ingredients.

The beauty of this recipe is that it captures the sweet, fragrant essence of fresh peaches without any fuss—no ice cream maker required! Whether you’re looking for a delightful dessert to impress your friends, a refreshing treat for kids, or a simple way to utilize those juicy peaches before they spoil, this Peach Sorbet checks all the boxes. Plus, it’s a great way to enjoy a lighter dessert without sacrificing flavor.

So grab those peaches from your local farmers’ market (or your backyard tree if you’re lucky!) and let’s dive into this deliciously fresh adventure. I promise you; this sorbet will become your go-to summer treat!

A Nostalgic Memory with Peaches

Let me take you back to my grandmother’s backyard in the heart of summer. It was a riot of color—vibrant flowers blooming, grass so green it almost felt electric underfoot, and those charmingly crooked peach trees laden with fruit. My cousins and I spent endless hours climbing those trees, trying to reach the highest peaches. How many times did we tumble, giggling, into the grass, red juice dripping down our chins? Too many to count!

One memorable day, my grandmother decided it was time to put our peach-picking spoils to good use. She gathered us into the kitchen, where the aromas of vanilla and citrus filled the air. Together, we sliced up the peaches and made a simple sorbet that would cool us down after our adventures. It became a family tradition—a sweet way to celebrate summer while passing down wisdom and laughter.

This memory stayed with me, fueling my love for fresh, light desserts. Today, every spoonful of that peach sorbet takes me right back to those blissful summer afternoons spent in my grandmother’s kitchen.

Ingredients You’ll Need

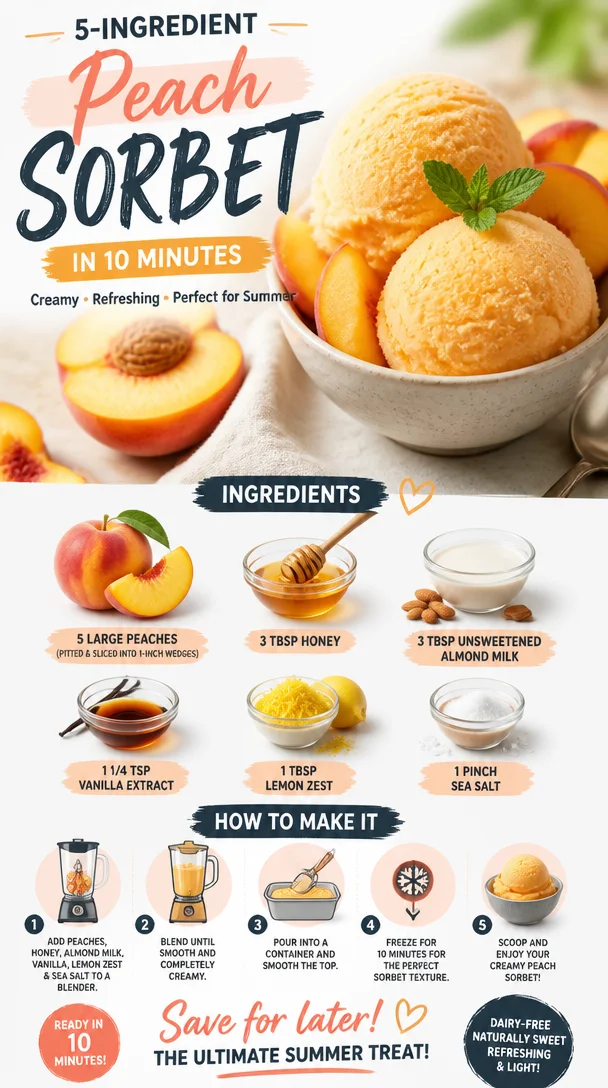
  • 5 large peaches: The star of the show! Opt for ripe, juicy peaches for the best flavor. If peaches are out of season, feel free to substitute with nectarines or frozen peaches for a brisk flavor.

  • 3 tbsp honey: A natural sweetener that enhances the peach’s natural sugars. Agave syrup or maple syrup works as an excellent alternative.

  • 3 tbsp unsweetened almond milk: This keeps things creamy while keeping it dairy-free. If you prefer, you can substitute with coconut milk or regular milk for a richer texture.

  • 1 1/4 tsp vanilla extract: Adds a lovely depth of flavor. If you’re feeling adventurous, try using a splash of almond extract for a different twist.

  • 1 tbsp lemon zest: This ingredient brings brightness to the dessert and balances the sweetness of the peaches. If you don’t have lemon, lime zest adds a fun twist!

  • 1 pinch sea salt: Just a touch to enhance all the flavors. Never underestimate the power of salt in sweet dishes!

Step-by-Step Instructions

  1. Prepare the Peaches: Start by washing the peaches thoroughly. Using a sharp knife, slice them into wedges and remove the pits. This is the time to get your hands a little sticky! The more ripe the peaches, the easier they’ll slice.

  2. Sweeten It Up: Place the peach wedges into a blender or food processor. Add the honey, almond milk, vanilla extract, lemon zest, and sea salt. Blend until incredibly smooth. Think of this as peach purée magic!

  3. Taste and Adjust: Here’s a little chef’s hack—always taste the mixture! If you feel it needs a tad more sweetness, add a bit more honey. If you want more zesty flavor, go ahead and add a squeeze of lemon juice.

  4. Chill It Down: Once blended, pour the mixture into a shallow dish or a freezer-safe container. This will help it freeze faster and more evenly.

  5. Freeze: Pop the container into the freezer for about 2-3 hours. Every 30 minutes, give it a gentle stir with a fork to break up any ice crystals and create a smoother texture. This step is key to a creamy sorbet!

  6. Serve and Enjoy: After 2-3 hours, your sorbet should have firmed up beautifully. Now it’s time to scoop! Use an ice cream scoop to serve it up in bowls or cones. If the sorbet is too hard after freezing, let it sit at room temperature for a few minutes to soften before serving.

Serving Suggestions

Scoop your gorgeous peach sorbet into a pretty bowl or a fun ice cream cone. Drizzle a little extra honey over the top for an elegant touch, or garnish with fresh mint leaves for a pop of color. You could also serve it alongside a slice of almond cake or as a topping for yogurt for a refreshing breakfast treat.

Recipe Variations

  • Raspberry Peach Sorbet: Mix in a cup of fresh raspberries to add a bright tartness to your peach sorbet. This duo is juicy and vibrant!

  • Peach Basil Sorbet: For a unique twist, incorporate freshly chopped basil into the mixture before freezing. The result? A refreshing garden-inspired treat.

  • Peach Mango Magic: Substitute half of the peaches with ripe mangoes for a tropical take on this classic recipe.

  • Spicy Ginger Peach: For a kick, add a teaspoon of finely grated ginger. It elevates the flavors to a whole new level, and you’ll love the zing!

  • Coconut Peach Sorbet: Use coconut milk instead of almond milk for a creamy, tropical flavor that’s reminiscent of vacations by the beach.

Chef’s Notes

This recipe is one of those delightful concoctions that has evolved with me over the years. I started with a basic sorbet recipe years ago and have tinkered with it to create my version that is not only scrumptious but also healthy, relying on natural ingredients.

Oh, and here’s a funny little kitchen story: the first time I tried making it, I was too impatient and didn’t stir it enough while freezing. I ended up with a solid block of ice! Lesson learned: patience is key when it comes to creating the perfect sorbet!

FAQs and Troubleshooting

Can I use frozen peaches?
Absolutely! Frozen peaches work wonderfully; just let them thaw for a bit before blending. The flavor will still be delightful, just like summer!

Why is my sorbet icy instead of smooth?
If you didn’t stir it enough while freezing, ice crystals can form, leading to a grainy texture. To avoid this, remember to break it up with a fork every 30 minutes.

How can I store leftovers?
Keep any leftover sorbet in a tightly sealed container. If it hardens too much, let it sit at room temperature for a few minutes before scooping.

Can I make this ahead of time?
Definitely! You can make this up to a week in advance. Just make sure to store it properly in the freezer.

Nutritional Info

This delightful sorbet is not only refreshing but also packed with nutrients. Each serving is low in calories, contains natural sugars from the peaches, and is free from dairy and artificial additives. Enjoy guilt-free!

In conclusion, this Peach Sorbet is a fresh, delicious, and easy way to celebrate summer’s bounty. I hope it brings back sweet memories for you, just as it does for me. So grab those peaches, blend away, and treat yourself—summer is waiting! Enjoy every flavorful spoonful!

Print

The Best Peach Sorbet

A refreshing peach sorbet that captures the sweet essence of summer with just a handful of simple ingredients.

  • Prep Time: 15 minutes
  • Cook Time: 180 minutes
  • Total Time: 195 minutes
  • Yield: 4 servings 1x
  • Category: Dessert
  • Method: Freezing
  • Cuisine: American
  • Diet: Vegan

Ingredients

Scale
  • 5 large peaches, sliced
  • 3 tbsp honey
  • 3 tbsp unsweetened almond milk
  • 1 1/4 tsp vanilla extract
  • 1 tbsp lemon zest
  • 1 pinch sea salt

Instructions

  1. Prepare the peaches by washing and slicing them into wedges.
  2. Sweeten it up by placing the peach wedges into a blender and adding honey, almond milk, vanilla, lemon zest, and salt.
  3. Taste and adjust as needed for sweetness or zestiness.
  4. Chill the blended mixture in a shallow dish or freezer-safe container.
  5. Freeze for about 2-3 hours, stirring every 30 minutes to break up ice crystals.
  6. Serve and enjoy scooping it into bowls or cones.

Notes

For extra elegance, drizzle honey or garnish with mint leaves before serving. This recipe is versatile with variations like Raspberry Peach or Spicy Ginger Peach.

Nutrition

  • Serving Size: 1 serving
  • Calories: 150
  • Sugar: 20g
  • Sodium: 5mg
  • Fat: 2g
  • Saturated Fat: 0g
  • Unsaturated Fat: 2g
  • Trans Fat: 0g
  • Carbohydrates: 35g
  • Fiber: 2g
  • Protein: 1g
  • Cholesterol: 0mg

Keywords: peach, sorbet, summer dessert, fruity dessert, vegan

Did you make this recipe?

Share a photo and tag us — we can't wait to see what you've made!

June 18, 2026 |

No-Bake Mixed Berry Yogurt Bark for Weeknight Snack

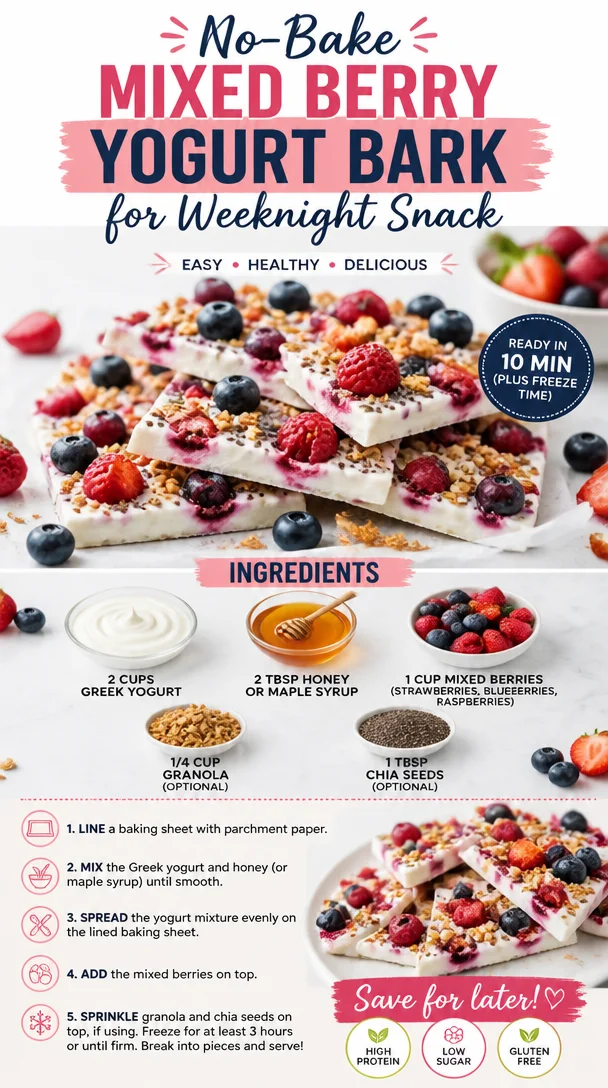
No-bake mixed berry yogurt bark with fresh berries and yogurt on a serving plate.

Mixed Berry Yogurt Bark: A Sweet Treat for the Soul

Hey there, fellow food enthusiasts! If there’s one thing I’ve learned in my culinary journey, it’s that some of the simplest recipes bring the most joy. Today, we’re diving into a vibrant and refreshing treat that’s perfect for any time of day: Mixed Berry Yogurt Bark. This recipe is not just about satisfying your sweet tooth; it’s also about nourishing your body and spirit.

Now, whether you’re a busy mom looking for a quick snack for the kiddos, a college student needing a brain boost during finals, or someone who simply adores the fresh taste of summer berries, this yogurt bark is here to save the day! It’s creamy, fruity, a little crunchy—and oh-so-Instagrammable.

A Nostalgic Kitchen Memory

Every time I whip up this Mixed Berry Yogurt Bark, I’m reminded of sunny afternoons in my grandma’s kitchen. On those lazy summer days, we would set out blankets in the backyard, spread them with delicious snacks, and enjoy the fresh fruits of the season. I remember helping her make desserts, blending flavors and colors in a way that made the food irresistible.

One summer, we concocted a berry parfait layered with yogurt and topped with crunchy nuts. The flavors burst in my mouth, igniting a childhood joy that never fades. It was during those joyful moments that I learned that good cooking is rooted in love and simplicity. This yogurt bark captures that same spirit: easy to make, delightful to eat, and best of all, it invites you to experiment and make it your own.

So grab your apron and let’s get started on this delicious journey!

Ingredients

Here’s what you’ll need to create this berry-licious yogurt bark:

  • 2 cups Greek yogurt
    Greek yogurt is rich, creamy, and packed with protein, making it a great base for our bark. For a lighter option, you can substitute with regular yogurt or even coconut yogurt for a dairy-free version.

  • 2 tablespoons honey or maple syrup
    This natural sweetener will add just the right amount of sweetness without overpowering the fresh flavors of the berries. You can easily swap this for agave nectar or date syrup if you prefer a different flavor profile.

  • 1 cup mixed berries (strawberries, blueberries, raspberries)
    Fresh or frozen, these tiny gems are bursting with antioxidants and vitamins. If you’re out of fresh berries, feel free to use dried fruit—just keep in mind that it will create a different texture.

  • 1/4 cup granola (optional)
    For a delightful crunch, sprinkle in some granola! You can use your favorite variety, whether it’s nutty, fruity, or even a chocolate granola for a sweet twist.

  • 1 tablespoon chia seeds (optional)
    These little seeds are powerhouses of nutrients and will help to thicken the yogurt, adding an extra health boost. If chia isn’t your thing, flax seeds or even crushed nuts are wonderful substitutes!

Step-by-Step Instructions

Ready to make your own Mixed Berry Yogurt Bark? Let’s dive into the steps!

  1. Prepare Your Baking Sheet
    Start by lining a baking sheet with parchment paper. This will help the yogurt bark come off easily once it’s frozen, and it also prevents sticking. Plus, using parchment paper makes cleanup a breeze!

  2. Mix the Yogurt and Sweetener
    In a mixing bowl, combine 2 cups of Greek yogurt with 2 tablespoons of honey (or maple syrup). Whisk it together until it’s smooth and creamy. Pro tip: If you’re looking for a little zing, try adding a splash of vanilla extract or a sprinkle of cinnamon—it elevates the flavor beautifully!

  3. Spread It Out
    Spoon the yogurt mixture onto the prepared baking sheet. Using a spatula, gently spread it out into an even layer about half an inch thick. Don’t stress over perfection—this bark is all about a homemade touch!

  4. Add the Berries
    Next, scatter your cup of mixed berries across the yogurt layer. Feel free to get creative—mix the colors and sizes for a stunning visual appeal. Press them down lightly to ensure they stick when frozen.

  5. Sprinkle on the Crunch
    If you’ve chosen to use granola, now’s the time to sprinkle it over the top along with the chia seeds. It’ll add that delightful crunch we all love. Just be sure not to overcrowd; less is often more!

  6. Freeze
    Carefully place the baking sheet in your freezer and let it freeze for at least 3–4 hours, or until the yogurt is completely firm. This is the perfect time to whip up a quick salad or admire your handiwork!

  7. Break It Up
    Once frozen, take the baking sheet out and let it sit at room temperature for a few minutes to soften slightly. This makes it easier to break into pieces. Use a sharp knife to cut, or just use your hands to break it into fun, rustic shapes!

Serving Suggestions

This Mixed Berry Yogurt Bark is best enjoyed straight out of the freezer! Feel free to plate it up for a charming snack or even serve it as a dessert. If you want to take things up a notch, drizzle a little extra honey or chocolate sauce over the top for an indulgent finish. You can also garnish with fresh mint leaves for that pop of color and freshness.

Recipe Variations

Want to experiment? Here are some exciting ideas to customize your yogurt bark:

  • Tropical Twist: Swap out the mixed berries for tropical fruits like mango, pineapple, and kiwi. Add a splash of coconut milk for a tropical flavor.

  • Nutty Delight: Mix in crushed nuts—like almonds or walnuts—into the yogurt before spreading it on the baking sheet for a nutty flavor explosion.

  • Chocolate Lovers: Drizzle melted dark chocolate over the yogurt before freezing for a deliciously decadent treat.

  • Seasonal Flavors: Try using seasonal fruits; peaches in summer or cranberries in the fall will provide a new gorgeous color and a hint of flavor adjustment.

  • Plant-Based Option: Make this recipe vegan by opting for plant-based yogurt and maple syrup as your sweetener, ensuring everyone can enjoy this treat!

Chef’s Notes

Creating this yogurt bark has been a delightful journey in my kitchen. I love how it has become a staple snack in my household, whether it’s a quick breakfast for me on busy mornings or a delightful treat for friends who stop by. Over the years, I’ve played around with different flavor combos and toppings, discovering that the sky’s the limit with this recipe! My kids especially love it because we can all collaborate on selecting our favorite toppings—it’s a fun family activity, and it’s an easy way to involve them in the kitchen.

FAQs and Troubleshooting

  1. What if I can’t find Greek yogurt?
    No problem! You can easily substitute regular yogurt, but the texture may be a bit thinner. If you like it firmer, you can strain it through a cheesecloth to get that thicker consistency.

  2. Can I use frozen berries?
    Absolutely! Frozen berries can be used. Just keep in mind they may release extra moisture. If so, you might want to blot them dry before using to prevent the bark from becoming too watery.

  3. How should I store leftovers?
    Store any leftovers in an airtight container in the freezer for up to two weeks. They can get a bit icy, so you might let them sit out for a couple of minutes before enjoying them again.

  4. My yogurt bark turned out too soft. What happened?
    If your yogurt bark doesn’t freeze well, it might be due to extra moisture or not freezing long enough. Make sure to spread it evenly and allow sufficient freezing time.

Nutritional Info

While this recipe is flexible, here’s a rough estimate per serving (based on one piece out of eight):

  • Calories: 150
  • Protein: 5g
  • Carbohydrates: 20g
  • Sugars: 7g
  • Fat: 6g

Conclusion

And there you have it—your very own Mixed Berry Yogurt Bark! This refreshing treat is not only a feast for the eyes but also a delight for the taste buds. It’s versatile, satisfying, and a fantastic option for a snack or dessert. So the next time you’re in the kitchen, remember this recipe, and let those fresh flavors inspire you. Happy cooking and enjoy every single bite!

Print

Mixed Berry Yogurt Bark

A vibrant and refreshing yogurt bark filled with mixed berries for a healthy and delightful treat.

  • Prep Time: 15 minutes
  • Cook Time: 240 minutes
  • Total Time: 255 minutes
  • Yield: 8 servings 1x
  • Category: Snack
  • Method: Freezing
  • Cuisine: American
  • Diet: Vegetarian

Ingredients

Scale
  • 2 cups Greek yogurt
  • 2 tablespoons honey or maple syrup
  • 1 cup mixed berries (strawberries, blueberries, raspberries)
  • 1/4 cup granola (optional)
  • 1 tablespoon chia seeds (optional)

Instructions

  1. Prepare your baking sheet by lining it with parchment paper.
  2. Mix the Greek yogurt and honey (or maple syrup) in a mixing bowl until smooth.
  3. Spread the yogurt mixture onto the prepared baking sheet into an even layer.
  4. Add the mixed berries across the yogurt layer, pressing them down lightly.
  5. Sprinkle granola and chia seeds on top if using.
  6. Freeze for at least 180-240 minutes, or until firm.
  7. Break into pieces once frozen and enjoy!

Notes

This yogurt bark is best enjoyed straight out of the freezer and can be customized with various fruits and toppings.

Nutrition

  • Serving Size: 1 piece
  • Calories: 150
  • Sugar: 7g
  • Sodium: 50mg
  • Fat: 6g
  • Saturated Fat: 3g
  • Unsaturated Fat: 2g
  • Trans Fat: 0g
  • Carbohydrates: 20g
  • Fiber: 2g
  • Protein: 5g
  • Cholesterol: 15mg

Keywords: yogurt bark, healthy snack, mixed berries, easy dessert, frozen treat

Did you make this recipe?

Share a photo and tag us — we can't wait to see what you've made!

June 18, 2026 |

Minute Mediterranean Watermelon Salad with Feta

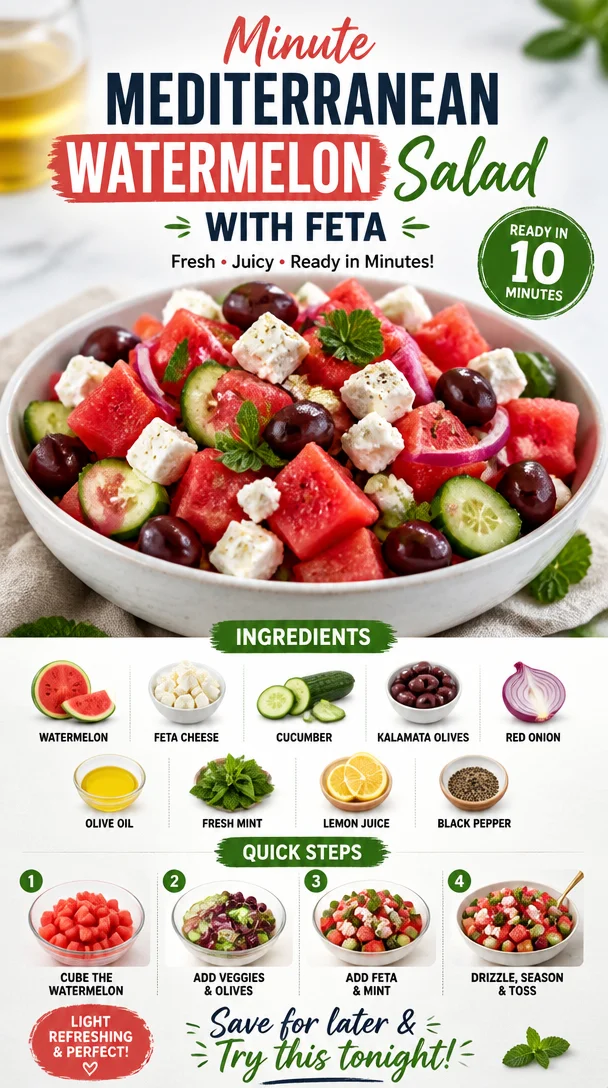
Fresh Mediterranean Watermelon Salad with Feta topped with mint leaves.

Mediterranean Watermelon Salad with Feta: A Fresh Take on Summer

Welcome, fellow food lovers! Today, I’m excited to share a delightful recipe that beautifully marries refreshing watermelon with the rich, savory notes of feta cheese. The Mediterranean Watermelon Salad is not just a dish; it’s about celebrating the vibrant flavors of summer and embracing a wholesome lifestyle.

Picture this: It’s a balmy afternoon, the sun is shining, and the sound of laughter fills the air as friends gather on a back porch. Suddenly, you unveil this stunning salad, and everyone’s eyes light up. The juicy pink watermelon is perfectly contrasted by the crumbly white feta and the vibrant green mint. The first bite? Pure bliss! Not only is this dish bright and beautiful, but it’s also incredibly easy to whip up. Let’s dive deep into this recipe, and I’ll guarantee that you’ll find yourself making it time and again.

Personal Story

When I think of summer, I can’t help but remember the countless BBQs and picnics my family hosted in our backyard. My grandmother, who was a fabulous cook, would always whip up a massive bowl of her watermelon salad. It wasn’t exactly the same as this Mediterranean version, but oh, was it delicious! Her secret ingredient was a splash of balsamic vinegar, which somehow made the sweetness of the watermelon dance.

Fast forward to today, as I continue to develop my culinary creativity, I couldn’t help but borrow that nostalgia and give it a Mediterranean twist. Just like Grandma, I wanted to capture the spirit of summer gatherings while adding a little zest of my own. Thus, the Mediterranean Watermelon Salad was born! Each bite takes me back to those sunny days filled with laughter, love, and lots of delicious food. And now, I’m excited for you to create your own memories with this sensational salad!

Ingredients

Here’s what you’ll need for this luscious Mediterranean Watermelon Salad:

  • Seedless Watermelon (4 cups, cubed): The star ingredient! Watermelon is hydrating and high in vitamins A and C, making it perfect for summer. If you can’t find seedless, just choose a sweet variety and make sure to remove the seeds.

  • Feta Cheese (1 cup, crumbled): This tangy cheese adds a creamy texture that perfectly complements the watermelon’s sweetness. If you’re looking for a non-dairy option, try crumbled tofu with a touch of lemon juice for that tangy flavor!

  • Fresh Mint (1/2 cup, chopped): Mint brightens the salad and brings a refreshing note. If you’re not a mint fan, basil or parsley work well, too!

  • Cucumber (1 medium, diced): This adds crunch and a refreshing bite. For a twist, you could use a different variety of cucumber, like Persian or English, which are sweeter and less bitter.

  • Red Onion (1/4 small, diced): A little raw onion brings depth and a bit of zing. If raw onion isn’t your favorite, try soaking it in cold water for 10 minutes to mellow the flavor, or substitute with chives.

  • Extra-Virgin Olive Oil (2 tablespoons): A drizzle of good-quality olive oil makes everything taste fancy! For extra flavor, infuse it with herbs or garlic.

  • Balsamic Vinegar (1 tablespoon): The sweetness of balsamic elevates the flavor profile of this salad. If you prefer, a citrus vinaigrette or a splash of fresh lime juice can also work.

  • Salt and Pepper (to taste): These simple seasonings help enhance and balance flavors. Always taste as you go!

Step-by-Step Instructions

Let’s roll up those sleeves and get cooking! Here’s how to create your refreshing Mediterranean Watermelon Salad step by step:

  1. Prepare the Ingredients: Begin by gathering all your ingredients. A well-organized kitchen makes the cooking process smoother and more enjoyable. Trust me; I always feel like a culinary rockstar when the mise en place is complete!

  2. Cube the Watermelon: Using a sharp knife, carefully cut the watermelon into manageable chunks. Aim for roughly 1-inch cubes—this will help with even distribution when you combine the salad. If juice collects on your cutting board, save it! That lovely liquid is flavor gold.

  3. Dice the Cucumber: Next, dice your cucumber into small pieces. You want it to be similar in size to the watermelon cubes for uniformity. As a tip, consider using a melon baller for a playful texture, or spiralize the cucumber for a fun twist!

  4. Chop the Mint: Take your fresh mint and give it a rough chop. Remember, the leaves can bruise easily, so use a gentle hand! One of my favorite hacks is to roll the leaves up tightly before slicing (that’s called chiffonade—fancy, huh?).

  5. Prepare the Onion: If you’re using red onion, finely dice it and, if desired, soak it in a bowl of cold water for about 10 minutes. This helps reduce the sharpness! For a sweeter option, you can use green onions instead.

  6. Combine Ingredients in a Bowl: In a large mixing bowl, combine the watermelon, cucumber, mint, red onion, and feta cheese. This is where the magic begins! Take a moment to appreciate the colors; it’s a feast for the eyes!

  7. Dress the Salad: Drizzle the olive oil and balsamic vinegar over the salad. Season with salt and pepper to taste. Use a gentle hand here as feta can crumble easily—fold the ingredients together rather than stirring vigorously.

  8. Give It a Taste: This is the best part! Taste your salad and adjust the seasonings as necessary. Maybe it needs a little more mint or a dash more balsamic? Don’t be shy—this salad is all about your personal touch.

  9. Chill (Optional): For maximum flavor, let the salad chill in the fridge for about 30 minutes before serving. This allows all those bright flavors to meld beautifully.

Serving Suggestions

Present your Mediterranean Watermelon Salad in a large, shallow bowl to showcase all those vibrant colors! A sprinkle of extra feta and some mint leaves on top creates a stunning finish. Serve it as a refreshing appetizer at your next gathering or pair it with grilled chicken or fish for a complete meal. It’s light yet fulfilling!

Recipe Variations

Want to get creative with this salad? Here are some fun twists to try out:

  • Add Protein: Toss in some grilled shrimp or chickpeas for a heartier option.

  • Spice it Up: Drizzle a hint of sriracha or add jalapeño slices for that extra kick.

  • Fruit Fusion: Swap out some watermelon for other fruits like strawberries or pomegranate seeds. The flavor will surprise you!

  • Nutty Crunch: For added texture, throw in toasted pine nuts or pistachios. They’ll add a delightful crunch!

Chef’s Notes

Let me share a quick kitchen story: I once attempted to impress a special someone with this salad at a summer gathering. However, in my excitement to create, I accidentally grabbed the chili powder instead of the cumin I had intended to use for another dish. Let’s just say the salad became a bit more of a ‘fiery watermelon concoction’ than anticipated! But you know what? We ended up laughing about it, and it sparked a conversation that lasted all evening. Kitchen mishaps are part of the process, and every meal brings its own story. This salad has evolved over time, and while I occasionally venture into spice territory, I always return to this classic Mediterranean version.

FAQs and Troubleshooting

1. My watermelon is too sweet! What can I do?
If your watermelon is overly sweet, balance it with a tad more feta or introduce a splash of fresh lime juice to cut through the sweetness.

2. Can I make this salad ahead of time?
Absolutely! However, I recommend adding the feta and mint just before serving to keep the flavors fresh. You can prep the watermelon and cucumber ahead of time.

3. What if I can’t find feta?
You can easily substitute with goat cheese or even a light ricotta for a different flavor profile. If you’re dairy-free, crumbled tofu or nutritional yeast can provide a nice alternative.

4. How do I store leftovers?
Keep any leftovers in an airtight container in the fridge for up to 2 days. Note that the watermelon may release some moisture, but it will still taste delish!

Nutritional Info

(Optional)

  • Calories: Approximately 150 per serving
  • Protein: 5g
  • Carbohydrates: 15g
  • Fat: 10g
  • Fiber: 1g

There you have it—a Mediterranean Watermelon Salad that is a celebration of summer flavors! Enjoy your culinary journey, and remember, each salad you create has the potential to spark laughter, joy, and delicious memories. Bon appétit!

Print

Mediterranean Watermelon Salad with Feta

A refreshing salad combining juicy watermelon, creamy feta, and vibrant mint, perfect for summer gatherings.

  • Prep Time: 15 minutes
  • Cook Time: 0 minutes
  • Total Time: 15 minutes
  • Yield: 4 servings 1x
  • Category: Salad
  • Method: No-Cook
  • Cuisine: Mediterranean
  • Diet: Vegetarian

Ingredients

Scale
  • 4 cups Seedless Watermelon, cubed
  • 1 cup Feta Cheese, crumbled
  • 1/2 cup Fresh Mint, chopped
  • 1 medium Cucumber, diced
  • 1/4 small Red Onion, diced
  • 2 tablespoons Extra-Virgin Olive Oil
  • 1 tablespoon Balsamic Vinegar
  • Salt and Pepper to taste

Instructions

  1. Prepare the Ingredients: Begin by gathering all your ingredients.
  2. Cube the Watermelon: Cut the watermelon into manageable chunks.
  3. Dice the Cucumber: Cut your cucumber into small pieces.
  4. Chop the Mint: Gently chop your fresh mint.
  5. Prepare the Onion: Finely dice the onion or soak it to mellow the flavor.
  6. Combine Ingredients in a Bowl: Mix the watermelon, cucumber, mint, red onion, and feta in a bowl.
  7. Dress the Salad: Drizzle olive oil and balsamic vinegar, then season with salt and pepper.
  8. Give It a Taste: Adjust seasonings as necessary.
  9. Chill (Optional): Let the salad chill in the fridge for 30 minutes.

Notes

Serve chilled for maximum flavor. Great as a side or light meal.

Nutrition

  • Serving Size: 1 serving
  • Calories: 150
  • Sugar: 8g
  • Sodium: 400mg
  • Fat: 10g
  • Saturated Fat: 4g
  • Unsaturated Fat: 6g
  • Trans Fat: 0g
  • Carbohydrates: 15g
  • Fiber: 1g
  • Protein: 5g
  • Cholesterol: 30mg

Keywords: watermelon salad, feta salad, summer salad, Mediterranean recipes

Did you make this recipe?

Share a photo and tag us — we can't wait to see what you've made!

June 18, 2026 |

One-Bowl Banana Cake with Cream Cheese Frosting (Fast & Easy Recipe)

One-bowl banana cake topped with cream cheese frosting on a wooden table

The Ultimate Comfort: Pioneer Woman Banana Cake with Cream Cheese Frosting

Introduction

Hey, food lovers! It’s Ava Carter here, and today we’re diving into a whimsical dessert that radiates warmth and nostalgia—Pioneer Woman Banana Cake with Cream Cheese Frosting. If you’re anything like me, you’ve got a special spot in your heart for bananas, whether they’re in a smoothie, on toast, or in this unforgettable cake.

Banana cake reminds me of lazy afternoons spent in my grandma’s kitchen, where the sun streamed through the window, and the sweet smell of ripe bananas filled the air. There was something magical about how her kitchen transformed ordinary ingredients into something extraordinary. This cake is one of those wonders that embodies both comfort and joy, making it perfect for any gathering—a birthday party, family dinner, or simply a treat for yourself!

This cake is fluffy, moist, and packed with the delightful sweetness of bananas, all topped with a silky cream cheese frosting that will make your taste buds dance. So grab your apron, roll up your sleeves, and let’s create something delicious together that will surely become a family favorite!

Personal Story

When I think of banana cake, I can’t help but be transported back to my childhood. I vividly remember stacking up overripe bananas on the kitchen counter, waiting for their day to shine in my grandma’s banana bread. But one day, she decided to whip up a cake instead—and oh, what a day that was! As the rich aroma wafted through the house, my siblings and I couldn’t contain our excitement.

After what felt like hours (in reality, it was only thirty minutes), the cake was finally ready, bringing us all together around the kitchen table. Each slice was a perfect blend of banana sweetness and a velvety cream cheese frosting that was out of this world. We licked our forks clean, of course, and nobody cared about the mess we made around the table. That day, I learned not just about baking, but the warmth of sharing a homemade treat with loved ones. It’s the kind of memory that sticks with you, don’t you think? It taught me to cherish each moment, especially when it’s accompanied by dessert!

Ingredients

Here’s what you’ll need to make this delightful cake, along with some helpful notes:

  • 4 ripe bananas: The riper, the better! Brown spots mean more sweetness. If you’re out of bananas, you can try substituting with unsweetened applesauce—about 1 cup will do.

  • 1 cup sugar: A standard granulated sugar provides the perfect sweetness. If you prefer, you can use coconut sugar as a healthier alternative, keeping in mind it will give a slightly caramel-like flavor.

  • 1/2 cup brown sugar: This adds depth and moisture. Light brown is better, but dark brown works beautifully too if that’s what you have on hand.

  • 1/2 cup unsalted butter, softened: This is essential for that to-die-for texture. You can swap it with coconut oil for a dairy-free option, or use vegan butter.

  • 2 large eggs: They add structure and moisture. If you’re looking for an egg-free option, a flax egg (1 tablespoon flaxseed meal + 2.5 tablespoons water) works wonders!

  • 1 teaspoon vanilla extract: A must-have for that aromatic flavor. Feel free to experiment with almond extract for a unique twist.

  • 2 cups all-purpose flour: All-purpose gives us that light and fluffy texture. For a gluten-free version, use a 1:1 gluten-free baking flour.

  • 1 teaspoon baking soda: This is the leavening agent that gives our cake rise. Make sure it’s fresh for the best results!

  • 1/2 teaspoon salt: A pinch of salt enhances all the flavors. Feel free to use Kosher or sea salt.

  • 1/2 cup buttermilk: Buttermilk makes the cake tender and moist. If you don’t have any, a simple substitute can be made by adding a tablespoon of vinegar to regular milk and letting it sit for a few minutes.

  • 8 oz cream cheese, softened: The creamy base for our frosting. If you want a lighter version, you can use Neufchâtel cheese.

  • 2 cups powdered sugar: This gives the frosting its sweetness and silky texture. You can reduce the sugar for a less sweet frosting if desired.

  • 1/4 cup milk: To help with the consistency of the frosting. You can opt for almond or oat milk if you’re dairy-free.

Step-by-Step Instructions

Now that we have everything ready, let’s roll up our sleeves and get baking!

  1. Preheat Your Oven
    Start by preheating your oven to 350°F (175°C). This will ensure your cake bakes evenly and perfectly. Trust me; preheating is one of those steps you don’t want to skip!

  2. Prepare Your Pans
    Grease and flour two 9-inch round cake pans—or if you’re feeling fancy, you could line them with parchment paper for easier removal! This step is crucial—nobody wants their cake to stick to the bottom.

  3. Mash the Bananas
    In a mixing bowl, mash those ripe bananas until smooth. I love to use a fork for this—it’s easy and nostalgic, reminding me of my childhood baking sessions.

  4. Mix the Sugars and Butter
    In a separate bowl (or your stand mixer), combine the granulated sugar, brown sugar, and softened butter. Beat until creamy and fluffy—that’s about 2-3 minutes. This is where the magic begins!

  5. Incorporate the Eggs and Vanilla
    Add in the eggs one at a time, mixing well after each addition. Pour in that lovely vanilla extract, too; your kitchen is about to smell incredible!

  6. Combine Dry Ingredients
    In another bowl, mix the all-purpose flour, baking soda, and salt. This step helps distribute the leavening agent evenly throughout the cake.

  7. Add Dry Ingredients and Buttermilk
    Gradually add the dry mixture to the wet ingredients, alternating with the buttermilk, mixing just until combined. Avoid over-mixing to keep that cake light and fluffy!

  8. Fold in the Mashed Bananas
    Carefully fold in those mashed bananas, ensuring they’re evenly distributed. You want every bite to be filled with banana goodness!

  9. Pour and Bake
    Divide the batter evenly between the prepared pans. Pop them into your preheated oven and bake for about 25-30 minutes or until a toothpick inserted in the center comes out clean.

  10. Cool the Cakes
    Once done, remove them from the oven and let them cool in the pans for about 10 minutes. Then, carefully remove them from the pans and transfer them to a wire rack to cool completely. This is where patience pays off!

  11. Prepare the Frosting
    In a mixing bowl, beat the softened cream cheese and gradually add in the powdered sugar until smooth and creamy. Stir in the milk to reach your desired consistency. You want it spreadable, not too runny.

  12. Frost the Cake
    Once the cakes are completely cooled, place one layer on your serving plate, spread a generous amount of frosting, then gently place the second layer on top and frost the top and sides. Get creative here; no need for perfection—rustic is so in!

Serving Suggestions

Slice the cake into generous portions and serve on a colorful plate, perhaps with a fresh banana slice on top for that extra flourish. A dollop of whipped cream or a scoop of ice cream on the side wouldn’t hurt either, am I right? This cake is suitable for any occasion, but it also makes a delightful afternoon treat with a cup of coffee or tea.

Recipe Variations

Now let’s get your creativity flowing! Here are a few twists you could try:

  • Chocolate Chip Banana Cake: Fold in 1 cup of semi-sweet chocolate chips into the batter for a delightful chocolatey flavor.

  • Nutty Banana Cake: Add 1 cup of chopped walnuts or pecans for a crunchy texture throughout the cake.

  • Spiced Banana Cake: Mix in a teaspoon of cinnamon or a pinch of nutmeg to add a warm, cozy flavor profile.

  • Banana Coconut Cake: Stir in 1/2 cup of shredded coconut to the batter for a tropical vibe.

  • Vegan Version: Replace eggs with flax eggs, use coconut oil instead of butter, and substitute with almond milk for buttermilk and vegan cream cheese for frosting.

Chef’s Notes

This banana cake has traveled with me through many kitchens and has adapted to various tastes and preferences. The beauty of this recipe is its incredible versatility. I once made it for a friend’s birthday party and added a layer of chocolate ganache on top of the cream cheese frosting—let me tell you, it was a hit! If you ever have overripe bananas staring at you from the counter, you know exactly what to do—it’s like a warm hug in dessert form.

FAQs and Troubleshooting

1. My cake is dense! What happened?
This often happens when the batter is over-mixed or if too much flour was added. Remember to mix just until combined, and spoon flour into your measuring cup rather than scooping it directly with the cup, which can pack it in.

2. How can I tell when my cake is done?
A toothpick inserted into the center should come out clean or with just a few moist crumbs. If it’s covered in batter, give it a few more minutes!

3. Can I make this cake ahead of time?
Absolutely! This cake stores well in the fridge for up to 5 days. You can also freeze the layers (wrapped in plastic wrap) for up to 3 months. Just thaw and frost when you’re ready!

4. My frosting is too runny. What do I do?
No worries! You can add a little more powdered sugar to thicken up the frosting. Conversely, if it’s too thick, a splash of milk will do the trick!

Nutritional Info

While indulgent, this cake is best enjoyed in moderation. Each slice is a lovely treat to brighten your day, and when you bake it with love, it’s an ingredient you can definitely feel good about!

So there you have it, friends—a delightful recipe for Pioneer Woman Banana Cake with Cream Cheese Frosting that’s sure to create not just a delicious treat but fantastic memories in your kitchen. Now go forth, bake up a storm, and savor every delightful bite! Happy baking! 🍌🍰

Print

Pioneer Woman Banana Cake with Cream Cheese Frosting

A fluffy, moist banana cake topped with silky cream cheese frosting, perfect for any gathering.

  • Prep Time: 15 minutes
  • Cook Time: 30 minutes
  • Total Time: 45 minutes
  • Yield: 12 servings 1x
  • Category: Dessert
  • Method: Baking
  • Cuisine: American
  • Diet: Vegetarian

Ingredients

Scale
  • 4 ripe bananas
  • 1 cup granulated sugar
  • 1/2 cup brown sugar
  • 1/2 cup unsalted butter, softened
  • 2 large eggs
  • 1 teaspoon vanilla extract
  • 2 cups all-purpose flour
  • 1 teaspoon baking soda
  • 1/2 teaspoon salt
  • 1/2 cup buttermilk
  • 8 oz cream cheese, softened
  • 2 cups powdered sugar
  • 1/4 cup milk

Instructions

  1. Preheat your oven to 350°F (175°C).
  2. Grease and flour two 9-inch round cake pans.
  3. Mash the bananas until smooth.
  4. Mix the granulated sugar, brown sugar, and softened butter until creamy.
  5. Incorporate the eggs one at a time and add the vanilla extract.
  6. Combine the flour, baking soda, and salt in another bowl.
  7. Add the dry mixture to the wet ingredients, alternating with buttermilk.
  8. Fold in the mashed bananas.
  9. Pour the batter into prepared pans and bake for 25-30 minutes.
  10. Cool the cakes in the pans for 10 minutes, then transfer to a wire rack.
  11. Prepare the frosting by beating cream cheese and powdered sugar until smooth and creamy; stir in milk.
  12. Frost the cooled cakes and serve.

Notes

This cake is versatile—try adding chocolate chips, nuts, or spices for variations.

Nutrition

  • Serving Size: 1 slice
  • Calories: 400
  • Sugar: 30g
  • Sodium: 300mg
  • Fat: 15g
  • Saturated Fat: 8g
  • Unsaturated Fat: 5g
  • Trans Fat: 0g
  • Carbohydrates: 55g
  • Fiber: 2g
  • Protein: 5g
  • Cholesterol: 60mg

Keywords: banana cake, cream cheese frosting, dessert, baking, comfort food

Did you make this recipe?

Share a photo and tag us — we can't wait to see what you've made!

June 18, 2026 |

Mango Margarita

Delicious Mango Margarita cocktail garnished with lime and salt

The Ultimate Mango Margarita: A Tropical Escape in Every Sip

Hey there, fellow foodies! Today, I can’t wait to whisk you away to a sunny beach with the perfect recipe for a Mango Margarita. Imagine the glistening sun, gentle waves crashing in the background, and the sweet aroma of ripe mangoes wafting through the air. This isn’t just any ordinary cocktail; it’s a taste of summer, a burst of tropical goodness, and let’s be real—who doesn’t want to sip on something delightful and refreshing?

Now, you might be wondering why I’m so passionate about this particular drink. Well, pull up a chair and let me set the scene. Picture it: it was a lazy Sunday afternoon in my backyard, and the golden rays kissed my skin while a few close friends gathered around. The laughter flowed as freely as the drinks, but it was that first taste of a fresh Mango Margarita that turned my day into an unforgettable memory. The vibrant flavor of mango, combined with the zesty vibrancy of lime and a kick from tequila, brought smiles all around. I knew from that moment on, this concoction would always have a special place in my heart.

Mango Margaritas are not just cocktails; they’re an experience! They remind me of sipping drinks by the pool, toasting to life’s little victories, or even unwinding after a long week. So, whether it’s a backyard barbecue, a casual get-together, or even just a quiet evening at home, this drink is your ticket to a mini-vacation. Ready to dive into the tropical vibes? Let’s shake things up and get started!

A Slice of My Life with Mango Margaritas

Let me take you back to one of the simplest yet most glorious days I remember. I was still in college, soaking up the sun on a weekend getaway with friends in Mexico. We stumbled upon a little beach bar tucked away from the tourists—just the sound of waves, sun-kissed sand, and the faint strumming of a guitar in the background. As we settled down, we noticed the bartender expertly crafting something vibrant and colorful. Intrigued, we ordered a round.

When that Mango Margarita arrived—oh, my goodness! The rich yellow-orange hue beckoned to us like a siren’s song. The first sip transported me to citrusy heaven. I vividly remember the tropical sweetness washing over me as I felt the warmth of the sun on my skin. It was one of those moments when everything seems just right. We laughed, reminisced, and bonded over shared experiences, all thanks to that magical drink in hand.

Since that trip, I’ve mastered the art of making Mango Margaritas, so you too can have that transportive experience right in your own home. Grab your ingredients, and together we’ll bring that beachy bliss into your kitchen!

Ingredients

Here’s what you’ll need to whip up your Mango Margarita:

  • 2 ripe mangoes, peeled and diced
    The star of the show! Look for mangoes that yield slightly to pressure for the best flavor. If fresh mangoes aren’t available, you can substitute with frozen mango chunks—just let them thaw before blending.

  • 1/2 cup lime juice
    Fresh is always best! Squeeze a few limes for juice. Bottled juice is convenient but often lacks that zesty punch. If you’re in a pinch, lemon juice does in a squeeze.

  • 1/2 cup tequila
    Go for a quality blanco tequila for optimal flavor. If you want a lighter variant, try a tequila with a lower alcohol percentage or a tequila-infused sparkling water.

  • 1/4 cup Cointreau
    This orange-flavored liqueur adds a lovely sweetness and balance. You can substitute with triple sec if needed, but trust me, Cointreau takes it to another level.

  • Ice (for on-the-rocks or freezing)
    Essential for chilling your drink! If you want a frozen version, use ice that’s been blended until fluffy, like a slushy.

  • Salt (for rimming the glass, optional)
    The salt brings out flavors beautifully! Use coarse sea salt or Himalayan salt for a more unique touch. If you’re into sweet, skip the salt in favor of some sugar to rim your glass.

Step-by-Step Instructions

Ready for the fun part? Let’s get mixing! Follow these steps to become the Mango Margarita master.

  1. Prepare Your Glass
    Start with rimming your glass! Take a lime wedge and run it along the rim, then dip it in salt. This not only looks fancy but enhances the drink’s flavor with each sip.

  2. Blend the Mangoes
    Toss your ripe mangoes into a blender! Blend until smooth. If you prefer a pulpier texture (who wouldn’t want that fruity goodness?), pulse it a few times instead of blending completely.

  3. Add the Lime Juice
    Next, pour in that fresh lime juice. It’s crucial to balance out the sweetness of the mango with a punch of acidity.

  4. Incorporate the Spirits
    Pour in the tequila and Cointreau. Mix these together with a spoon first to get everything evenly distributed. Pro tip: Taste along the way; if you prefer a sweeter drink, add more Cointreau.

  5. Add Ice
    If you’re serving it on the rocks, fill your glass with ice. If you want a frozen Margarita, toss the mixture back in the blender with more ice and blend to your desired consistency.

  6. Give It a Shake
    For on-the-rocks, use a cocktail shaker—add the margarita mix and ice. Shake until chilled and then, pour into your prepared glass.

  7. Garnish
    Garnish your creation with a slice of lime or even a few pieces of fresh mango on the rim. It’s all about aesthetics, right?

  8. Serve and Enjoy!
    Now it’s time to sip and savor! Take a moment to appreciate your handiwork. Feel free to share this delightful drink with friends or keep it all to yourself (no judgment here!).

Serving Suggestions

The Mango Margarita is stunning on its own, but to elevate the experience, serve it with colorful straws and cocktail napkins. You can also set up a mini taco bar nearby; trust me, nothing pairs better with a margarita than some zesty tacos or spicy shrimp! For an added flair, set out tropical-themed decorations and festive music to create that beach party vibe right in your living room.

Recipe Variations

  1. Spicy Mango Margarita: Add a slice of jalapeño to the blender for a spicy kick.

  2. Coconut Mango Margarita: Substitute half the lime juice with coconut water for a tropical twist.

  3. Berry Mango Margarita: Blend in some strawberries or raspberries with the mango for a berry delight.

  4. Frozen Mango Margaritas: Blend the ingredients with more ice for a frozen treat—perfect for hot summer days!

  5. Non-Alcoholic Version: Swap the tequila and Cointreau for sparkling water and a drop of orange extract for a mocktail that still packs a fruity punch!

Chef’s Notes

As with any classic recipe, my Mango Margarita has seen its fair share of evolution. Over the years, I’ve experimented with everything from different juices to infusing flavors. I once made a batch with passion fruit blended in—and wow, was that a game changer! I’ve also tried adding herbs like mint for a refreshing twist. But at the end of the day, I keep coming back to the classic that brings back those sunny memories.

Now, I want to hear your stories! What special moments do you have tied to Margaritas, or any fun twists you’ve put on this recipe? Let me know!

FAQs and Troubleshooting

Q: My margarita ended up too sweet! What can I do?
A: If your mix is too sweet, you can balance it out with additional lime juice. Start with a tablespoon at a time until you find that sweet-sour harmony.

Q: Can I use pre-made margarita mix?
A: Sure! Just know that it often contains added sugars and preservatives, which may not offer the vibrant fresh flavors you’d achieve using the ingredients listed here.

Q: How can I make this drink lower in calories?
A: Opt for diet versions of the liqueurs or reduce the amount of tequila and Cointreau while increasing the fresh fruit juices. You can also use sparkling water for extra volume.

Q: Can I make a large batch for a party?
A: Absolutely! Just multiply the ingredients based on the number of servings you need. Keep the salt rim optional until serving so guests can choose!

Nutritional Info

Calories: Approximately 200 calories per serving (without rim)
Carbs: 26g
Sugars: 19g
Fat: 0g
Protein: 1g

Enjoy your journey to making the perfect Mango Margarita! Let this tropical drink be not just a recipe, but an embodiment of memories shared and moments cherished. Here’s to many more beautiful experiences—sip at a time! Cheers! 🍹

Print

The Ultimate Mango Margarita

Experience the taste of summer with this refreshing Mango Margarita, a perfect blend of ripe mangoes, lime juice, and tequila.

  • Prep Time: 10 minutes
  • Cook Time: 0 minutes
  • Total Time: 10 minutes
  • Yield: 2 servings 1x
  • Category: Cocktail
  • Method: Blending
  • Cuisine: Mexican
  • Diet: Vegetarian

Ingredients

Scale
  • 2 ripe mangoes, peeled and diced
  • 1/2 cup lime juice
  • 1/2 cup tequila
  • 1/4 cup Cointreau
  • Ice (for on-the-rocks or freezing)
  • Salt (for rimming the glass, optional)

Instructions

  1. Prepare Your Glass
  2. Blend the Mangoes
  3. Add the Lime Juice
  4. Incorporate the Spirits
  5. Add Ice
  6. Give It a Shake
  7. Garnish
  8. Serve and Enjoy!

Notes

Consider serving with colorful straws and setting up a mini taco bar for an elevated experience.

Nutrition

  • Serving Size: 1 serving
  • Calories: 200
  • Sugar: 19g
  • Sodium: 10mg
  • Fat: 0g
  • Saturated Fat: 0g
  • Unsaturated Fat: 0g
  • Trans Fat: 0g
  • Carbohydrates: 26g
  • Fiber: 1g
  • Protein: 1g
  • Cholesterol: 0mg

Keywords: Mango, Margarita, Cocktail, Tropical, Summer Drink

Did you make this recipe?

Share a photo and tag us — we can't wait to see what you've made!