
One-Pan Creamy Tuscan Chicken in 30 Minutes: Weeknight Dinner
Creamy Tuscan Chicken: A Delicious Journey
Welcome to Clean Plate Cravings, my foodie friends! Today, I’m thrilled to share with you a dish that has quickly become a favorite in our kitchen—Creamy Tuscan Chicken. This dish is not just a meal; it’s an experience that brings the warmth of Italian cooking right into your home. Imagine succulent chicken breasts draped in a velvety sauce bursting with flavors from sun-dried tomatoes and fresh spinach, finished off with a sprinkle of Parmesan cheese. It’s comfort food at its finest, and trust me, you’ll be going back for seconds!
A Slice of My Kitchen Memories
Let me take you back to a delightful summer evening a few years ago. I was visiting my best friend Sofia, who invited me for dinner at her family’s cozy home, which felt a bit like stepping right into Italy. Her mom prepared this incredible Creamy Tuscan Chicken, and I still remember the tantalizing aroma wafting through the kitchen. The golden crispy edges of the chicken, the vibrant greens of the spinach, and the deep, rich flavors of sun-dried tomatoes filled us with excitement.
As we gathered around the table, my heart was light, having spent the day laughing, reminiscing, and savouring amazing food. That first bite was pure magic—each element harmonizing perfectly with the others. I learned an important lesson that night: food tastes best when shared with those you love. It was a beautiful reminder that the kitchen is not just a place to cook; it’s where memories are created and hearts are nourished. Now, every time I make this dish, it takes me back to that summer night filled with laughter and love.
Ingredients
Here’s what you’ll need to create your own creamy masterpiece:
-
Chicken Breasts (2-4 pieces)
Juicy and tender, chicken breasts are the backbone of this dish. You can substitute with chicken thighs for a richer flavor, or for a lighter version, use turkey breast. -
Spinach (2 cups, fresh)
Fresh spinach not only adds a vibrant color but also packs a nutritious punch. If you’re out of spinach, kale or Swiss chard works too! -
Sun-Dried Tomatoes (1 cup)
Sweet and tangy, these add a burst of flavor to the dish. If you prefer a milder taste, replace them with roasted red peppers or chopped fresh tomatoes. -
Garlic (4 cloves, minced)
A fresh, aromatic garlic brings a beautiful depth to the sauce. If you’re short on fresh garlic, a teaspoon of garlic powder can suffice—though it won’t have quite the same impact. -
Parmesan Cheese (1 cup, grated)
Savory and cheesy, Parmesan elevates the creaminess of the dish. Pecorino Romano is a fantastic substitute, especially if you enjoy a stronger taste. -
Heavy Cream (1 cup)
This is the secret to that luscious, creamy texture! For a lighter option, you can experiment with half-and-half or coconut cream for a dairy-free version.
Step-by-Step Instructions
Now, let’s get cooking! Follow these simple steps to whip up your Creamy Tuscan Chicken:
-
Prep Your Ingredients
Start by gathering all your ingredients. Chop the garlic, slice the sun-dried tomatoes, and rinse your spinach. This makes the cooking process smooth and enjoyable. Trust me, a little prep goes a long way! -
Sear the Chicken
In a large skillet over medium heat, add a splash of olive oil. Season your chicken breasts with salt and pepper. When the oil is hot, place the chicken in the pan and let it sear for about 6-7 minutes on each side until golden brown. This step caramelizes the chicken and enhances the flavor. Chef hack: Avoid flipping the chicken too soon to achieve that lovely crust! -
Remove and Rest
Once cooked through, remove the chicken from the skillet and let it rest on a plate. This allows the juices to redistribute, keeping your chicken juicy. Cover it with foil to keep it warm while you work on the sauce. -
Sauté the Garlic and Spinach
In the same skillet (don’t clean it; we want those yummy flavors), add a bit more olive oil if needed, then toss in the minced garlic. Sauté for about 30 seconds or until fragrant—your kitchen will smell heavenly! Next, add the fresh spinach and cook until wilted. This adds both nutrients and color! -
Add Sun-Dried Tomatoes
Now, stir in the sun-dried tomatoes. Let them mingle with the garlic and spinach for a minute, letting their flavors blend together. This is where the magic begins—your taste buds will sing! -
Introduce Heavy Cream
Slowly pour in the heavy cream, stirring to combine. Bring the sauce to a gentle simmer, and watch it thicken beautifully. Chef tip: If you want an even thicker sauce, let it simmer a little longer. -
Add the Parmesan
Stir in the grated Parmesan cheese until it melts into the sauce. This gives your dish that iconic creaminess. Taste and adjust seasoning if necessary—maybe a pinch more salt or some cracked black pepper. -
Combine it All
Return the chicken to the skillet, spooning the sauce over it. Let everything simmer together for another 3-4 minutes. This step allows the chicken to soak up all the delicious flavors. -
Serve with Love
Your Creamy Tuscan Chicken is ready! Serve it hot and watch your family and friends be mesmerized by this beautiful meal.
Serving Suggestions
To plate your Creamy Tuscan Chicken, you can serve it over a bed of pasta, rice, or even zucchini noodles for a lighter option. A sprinkle of fresh parsley or basil on top adds a pop of color and freshness to the dish. Pair it with crusty bread for dipping into that delicious sauce, and don’t forget a side salad for balance!
Recipe Variations
Feeling adventurous? Here are some fun variations to shake things up:
- Mushroom Lovers: Add sautéed mushrooms for an earthy flavor boost.
- Spicy Kick: Toss in a pinch of red pepper flakes when sautéing the garlic for some heat.
- Herby Twist: Incorporate fresh herbs like thyme, oregano, or basil for extra aromatic bliss.
- Cauliflower Rice: Make it keto-friendly by serving over cauliflower rice instead of traditional grains.
- Vegan Delight: Swap chicken for chickpeas or a plant-based protein and use coconut cream instead of heavy cream.
Chef’s Notes
This recipe has evolved over the years, and I’ve experimented with different ingredients and flavors. The creaminess of the sauce was inspired by my love for Italian pasta dishes, but the addition of spinach and sun-dried tomatoes took it to the next level! I remember the first time I tried it with a sprinkle of crushed red pepper—it was a game-changer. Food is all about experimenting, so don’t hesitate to make it your own!
FAQs and Troubleshooting
1. My sauce is too thick; what should I do?
If your sauce is thicker than you’d like, simply add a splash of chicken broth or water to thin it out to your desired consistency.
2. Can I use frozen spinach?
Absolutely! Thaw the frozen spinach and squeeze out excess water before adding it to the skillet.
3. The chicken is still pink inside; how do I make sure it cooks fully?
If you find your chicken is undercooked, lower the heat and cover the skillet to allow it to cook through without drying out.
4. How do I store leftovers?
Store leftover Creamy Tuscan Chicken in an airtight container in the fridge for up to 3 days. Reheat gently on the stove or in the microwave.
Nutritional Info (Optional)
This Creamy Tuscan Chicken is packed with protein and vitamins from the spinach and tomatoes. Each serving provides approximately 400 calories, 30g of protein, 28g of fat, and 5g of carbohydrates, making it a balanced dish that satisfies without weighing you down.
And there you have it! Your scrumptious Creamy Tuscan Chicken is ready to impress. Remember, the heart of this recipe lies not just in the ingredients but in the joy of creating and sharing this meal. So gather your loved ones, dig in, and savor every bite together! Happy cooking!
PrintCreamy Tuscan Chicken

A comforting dish featuring succulent chicken breasts in a velvety sauce with sun-dried tomatoes, fresh spinach, and Parmesan cheese.
- Prep Time: 15 minutes
- Cook Time: 30 minutes
- Total Time: 45 minutes
- Yield: 4 servings 1x
- Category: Main Course
- Method: Sautéing
- Cuisine: Italian
- Diet: None
Ingredients
- 2–4 pieces Chicken Breasts
- 2 cups Fresh Spinach
- 1 cup Sun-Dried Tomatoes
- 4 cloves Garlic, minced
- 1 cup Grated Parmesan Cheese
- 1 cup Heavy Cream
Instructions
- Prep your ingredients by chopping the garlic, slicing the sun-dried tomatoes, and rinsing your spinach.
- Sear the chicken in a skillet over medium heat with olive oil, seasoning with salt and pepper, for 6-7 minutes on each side.
- Remove the chicken from the skillet and let it rest on a plate to keep it juicy.
- Sauté the minced garlic in the same skillet, followed by adding the fresh spinach and cooking until wilted.
- Add the sun-dried tomatoes to the skillet and let them mingle with the garlic and spinach.
- Introduce the heavy cream, stirring to combine and allowing it to simmer until thickened.
- Add the grated Parmesan cheese, stirring until melted into the sauce.
- Combine the chicken back into the skillet with the sauce, letting it simmer for another 3-4 minutes.
- Serve hot and enjoy your Creamy Tuscan Chicken!
Notes
For variations, try adding sautéed mushrooms, red pepper flakes for heat, or substitute the chicken with chickpeas for a vegan option.
Nutrition
- Serving Size: 1 serving
- Calories: 400
- Sugar: 5g
- Sodium: 400mg
- Fat: 28g
- Saturated Fat: 15g
- Unsaturated Fat: 10g
- Trans Fat: 0g
- Carbohydrates: 5g
- Fiber: 1g
- Protein: 30g
- Cholesterol: 100mg
Keywords: Creamy Tuscan Chicken, Italian recipe, chicken dinner, comfort food

One-Pot Creamy Broccoli Cheddar Soup in 30 Minutes
Delight in a Bowl: My Creamy Broccoli Cheddar Soup Recipe
Welcome to Clean Plate Cravings! Today we’re diving into one of my all-time comfort food favorites—Broccoli Cheddar Soup. Picture this: a warm, vibrant bowl brimming with creamy goodness, where luscious cheese meets nutrient-packed broccoli. This soup is not just about nourishing your body; it’s about treating your taste buds to a delightful experience every single spoonful. So grab your favorite ladle and let’s get cooking!
A Warm Whiff of Nostalgia
Let me take you back for a moment. Growing up in a bustling kitchen, I have vivid memories of my mom whipping up pots of soup during the cool autumn evenings. One dish that always stood out was her delightful Broccoli Cheddar Soup. I remember the way she’d hum her favorite tunes while stirring the pot, and oh, that aromatic blend of sautéed onions and garlic wafting through our home—it felt like a warm hug in a bowl!
I was drawn to how she effortlessly turned simple ingredients into something magical. Even as a kid, I realized how food could bring people together. I’d always beg her for the secret ingredient, thinking there had to be something mysterious that made it taste so divine. Spoiler alert: it was love (and a sprinkle of good ol’ cheese). Now, I’m sharing my own take on that delicious memory, so you too can recreate a piece of nostalgia in your kitchen.
Ingredients You’ll Need
-
Broccoli: The star of our show! Broccoli is not only vibrant in color but is loaded with vitamins K and C. Look for firm, bright green florets. If you’re in a pinch, you can use frozen broccoli instead—just thaw and drain it well before adding!
-
Cheddar Cheese: This is what gives our soup that rich, cheesy goodness. Aged cheddar will give you a sharper flavor while mild cheddar offers creaminess. If you prefer alternatives, try using Gruyère or a dairy-free cheese for a vegan option!
-
Carrots: Adding sweetness and a pop of color, carrots not only enhance the flavor but also boost the nutrition. If you’re short on carrots, parsnips or sweet potatoes work great as substitutes.
-
Cream: This elevates our soup’s texture to silky perfection! Heavy cream is traditional, but if you want to lighten it up a bit, half-and-half or even coconut cream can do the trick. Non-dairy options include cashew cream for a creamy vegan alternative.
-
Onions: Essential for flavor, they add a subtle sweetness when sautéed. Yellow or white onions are perfect here, but shallots can also be a great twist.
-
Garlic: A must for depth of flavor. Always use fresh garlic when you can, but in a pinch, garlic powder is a decent substitute.
-
Vegetable Broth: This is the base of our soup. A good-quality vegetable broth will keep the flavor bright and wholesome. Homemade broth is ideal, but store-bought works just as well!
Step-by-Step Instructions
Alright, let’s get down to the heart of the matter—cooking up this delightful soup!
-
Prepare the Veggies: Start by washing and chopping the broccoli into small florets. Don’t forget to dice the carrots and onions finely. Like my mom used to say, uniform sizes mean even cooking.
-
Sauté Aromatics: In a large pot, add a drizzle of olive oil (about 2 tablespoons) over medium heat. Once heated, toss in the diced onions and sauté for about 3-4 minutes until they become translucent. You’ll love the fragrant aroma filling your kitchen. Next, add minced garlic—don’t skip this step! Let it cook for another minute, stirring continuously to avoid burning.
-
Add the Broccoli and Carrots: Throw in your chopped broccoli and diced carrots into the mix. Sauté for another 5-6 minutes, stirring frequently. This step softens them up just enough, allowing their flavors to shine.
-
Pour in the Broth: Now, it’s time to pour in 4 cups of vegetable broth. Bring it to a simmer, then cover and let it cook for about 15 minutes until the broccoli and carrots are tender. Remember, patience is key here; the veggies need to soften well for a creamy texture.
-
Blend It Up: If you want a smooth soup, it’s time to blend! Using an immersion blender, blend the soup directly in the pot until you reach your desired consistency. For a chunkier texture, you can blend only half of the soup or use a regular blender. Just be careful with hot liquids!
-
Cheese It Up: After blending, return the pot to low heat. Slowly stir in about 2 cups of shredded cheddar cheese, letting it melt into the warm soup. This is where the magic happens! If you want it extra cheesy (who doesn’t?), feel free to add more. Blend in the cream next, stirring until well combined.
-
Final Seasoning: Taste your soup and season it with salt and pepper to your liking. Boost it with a squeeze of lemon juice if desired for a refreshing zing, or even a pinch of red pepper flakes for an extra kick!
-
Serve It Up: Ladle that creamy goodness into bowls, garnishing with a sprinkle of extra cheddar or a few broccoli florets for flair. You just made yourself a bowl of pure comfort!
Serving Suggestions
For a lovely presentation, serve your Broccoli Cheddar Soup in colorful bowls topped with a dollop of cream or a sprinkle of fresh herbs like parsley for that pop of color. Pair it with crusty whole-grain bread or some crunchy croutons for texture. This combo not only looks appealing but turns your meal into a feast!
Recipe Variations
-
Add Protein: Spice things up by adding cooked chicken, sausage, or even beans for an extra boost of protein.
-
Spicy Twist: Incorporate some diced jalapeños or a dash of hot sauce for a spicy flair!
-
Herb It Up: Rev up the flavors by adding fresh herbs—thyme, dill, or basil can elevate your soup game.
-
Creamy Vegan: For a plant-based version, use cashew cream instead of dairy and nutritional yeast for a cheesy flavor without the cheese!
-
Grilled Cheese Sidekick: Serve this soup alongside a melty grilled cheese sandwich for the ultimate comfort food experience!
Chef’s Notes
This recipe has evolved over the years, and I’ve played with different ingredients and techniques to perfect it. Initially, I used only cheddar, but then I discovered the magic of blending cheeses. Now, I love mixing sharp cheddars with creamy, mild varieties for a layered flavor profile. And oh boy, it’s been a hit! I keep the core ingredients but enjoy switching things up depending on what I have in my fridge. One day the soup may have a hint of nutmeg, and the next, it could flaunt a splash of sherry. Variety keeps my cooking exciting!
FAQs and Troubleshooting
-
Why is my soup too thick?: If your soup is thicker than desired, add more broth or cream to achieve your preferred consistency. Remember to stir well!
-
Can I make this soup in advance?: Absolutely! This soup tastes even better the next day! Just store it in the fridge for up to 3 days and reheat on a stovetop with a splash of broth to loosen it up.
-
What if my cheddar isn’t melting well?: Make sure you’re using high-quality cheese without additives, as processed cheeses don’t melt as beautifully. Shredding your cheese instead of cubing it helps it melt faster and more evenly too.
-
Is it okay to freeze leftover soup?: Yes! This soup freezes well. Just store it in a freezer-safe container, ensuring to leave some space for the soup to expand. Thaw it overnight in the fridge for best results when you’re ready to enjoy!
Nutritional Info (optional)
- Calories: 350 per serving
- Protein: 15g
- Fat: 25g
- Carbohydrates: 25g
- Fiber: 4g
So there you have it, my delightful Broccoli Cheddar Soup that’s perfect for any occasion! Remember, cooking is all about having fun, so don’t sweat the small stuff. Share those bowls of comforting goodness with loved ones, and create new memories around the dinner table. Cheers to fresh, feel-good food!
PrintCreamy Broccoli Cheddar Soup

A warm and vibrant bowl of creamy broccoli cheddar soup that nourishes your body and delights your taste buds.
- Prep Time: 15 minutes
- Cook Time: 30 minutes
- Total Time: 45 minutes
- Yield: 4 servings 1x
- Category: Soup
- Method: Stovetop
- Cuisine: American
- Diet: Vegetarian
Ingredients
- 4 cups broccoli florets
- 2 cups shredded cheddar cheese
- 2 medium carrots, diced
- 1 cup heavy cream
- 1 cup diced onions
- 2 cloves garlic, minced
- 4 cups vegetable broth
- 2 tablespoons olive oil
- Salt and pepper to taste
- Lemon juice (optional)
- Red pepper flakes (optional)
Instructions
- Prepare the veggies: Start by washing and chopping the broccoli into small florets and dicing the carrots and onions finely.
- Sauté aromatics: In a large pot, add olive oil and sauté the onions for about 3-4 minutes until translucent. Add minced garlic and cook for another minute.
- Add the broccoli and carrots: Sauté for another 5-6 minutes, stirring frequently.
- Pour in the broth: Add vegetable broth, simmer, cover, and cook for about 15 minutes until veggies are tender.
- Blend it up: Use an immersion blender to blend the soup to your desired consistency.
- Cheese it up: Stir in shredded cheddar cheese until melted, then blend in the cream.
- Final seasoning: Taste and add salt, pepper, and optional lemon juice or red pepper flakes.
- Serve it up: Ladle into bowls and garnish with extra cheddar or broccoli florets.
Notes
This soup can be made ahead and tastes even better the next day. Store in the fridge for up to 3 days and reheat on the stovetop.
Nutrition
- Serving Size: 1 serving
- Calories: 350
- Sugar: 5g
- Sodium: 400mg
- Fat: 25g
- Saturated Fat: 15g
- Unsaturated Fat: 5g
- Trans Fat: 0g
- Carbohydrates: 25g
- Fiber: 4g
- Protein: 15g
- Cholesterol: 80mg
Keywords: broccoli soup, cheddar soup, creamy soup, comfort food, vegetarian recipes
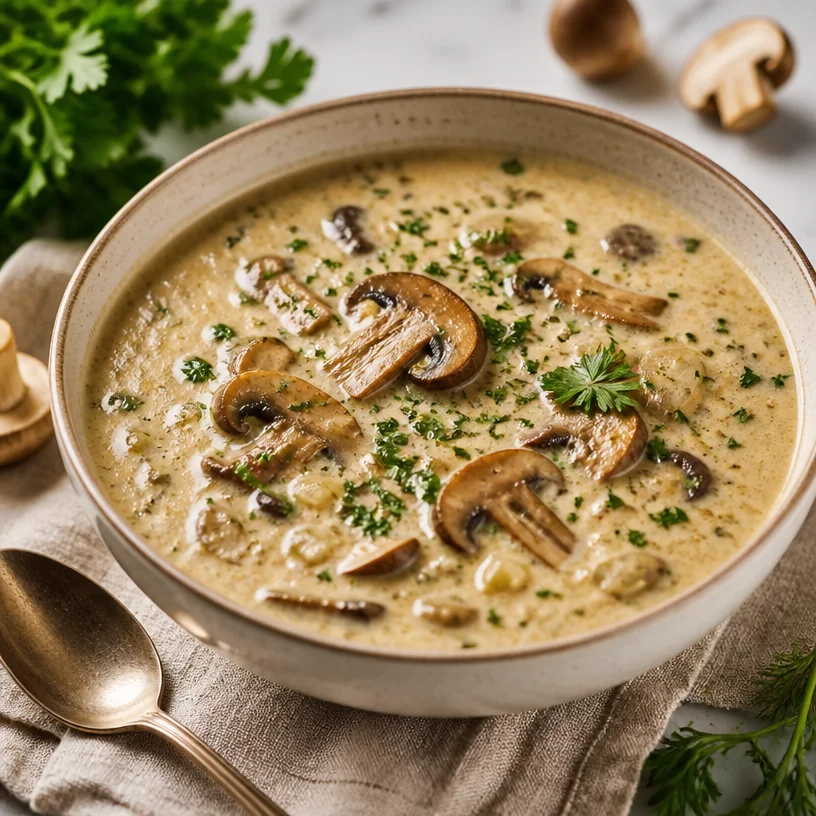
Creamy Hungarian Mushroom Soup: 30-Minute One-Pot Comfort
Creamy Hungarian Mushroom Soup: A Cozy Bowl of Nostalgia
Welcome to another delicious adventure in the kitchen! Today, we’re diving into a dish that wraps around you like a warm hug on a chilly day—Creamy Hungarian Mushroom Soup. This savory, earthy soup is not just packed with delicious flavor; it also contains a rich history and a splash of nostalgia for me. Whether you’re looking for a comforting meal after a long day or a dish that brings a little warmth to your table, this soup is exactly what you need.
Growing up, my family had a ritual of gathering around the dinner table every Sunday. The aroma of something hearty usually filled the air, and I remember the chatter and laughter echoing in the cozy kitchen. One of our favorite dishes was my grandma’s version of mushroom soup. Every spoonful was rich, comforting, and had just the right hint of tanginess from the sour cream. It was so delightful that it became a staple in our kitchen, especially during the colder months.
This creamy Hungarian Mushroom Soup has a unique twist of flavors that elevate it from the ordinary. It’s everything you’d desire in a cozy bowl: it’s rich, earthy, and oh-so-indulgent, all while being a little lighter than traditional recipes. You’ll absolutely love how easy this is to whip up, but more importantly, you’ll cherish every delicious bite. So, grab your apron, and let’s embark on this culinary journey together!
A Taste of Belonging: My Mushroom Soup Story
Let me share a little story with you. My culinary passion ignited in my grandmother’s kitchen, where I developed not only my love for cooking but also an appreciation for the way food brings us all together. I remember the first time she taught me how to make this creamy mushroom soup. She handed me a wooden spoon and told me that the secret ingredient was love, but I quickly learned that the real magic was in the fresh, earthy mushrooms and the delightful spices used to create depth in flavor.
We stood side by side, her piercing blue eyes sparkling with joy, as she explained the importance of each ingredient. The mushrooms—oh boy, how they captivated us! I could hardly believe that something so humble could transform into something extraordinary. As the aroma wafted through the house, drawing family members in one by one, I realized that food had the power to create not just meals but memories.
Now, every time I make this soup, it’s as if I’m right back there in her kitchen, stirring the pot with her by my side. Each creamy, mushroom-packed bowl tells a story—a story of togetherness, warmth, and pure comfort. So, whether you’re making this for yourself or for loved ones, remember that each spoonful carries a bit of that magic.
Ingredients You’ll Need
Here’s what you need to make this luscious Creamy Hungarian Mushroom Soup. Trust me, it’ll be worth the trip to the grocery store!
-
3 tablespoons olive oil
The heart of our base! Olive oil adds richness and depth. You can substitute with avocado oil or melted coconut oil for a different flavor profile. -
1 ½ pounds mixed mushrooms (trimmed and sliced ¼-inch thick)
Go wild here! Use any mushrooms you love—button, cremini, shiitake, or even portobello! They’re packed with umami, giving the soup an earthy flavor. If you want a gluten-free option, just make sure to check for gluten-free varieties if you’re using any pre-packaged items. -
2 cups diced yellow onions
Onions create a wonderful foundation of flavor. If you prefer a milder taste, try using sweet onions like Walla Walla or Vidalia. -
3 tablespoons unsalted butter
Butter adds creaminess and flavor. For those looking for a dairy-free option, vegan butter or coconut cream can do the trick. -
¼ cup all-purpose flour
This will help thicken the broth. If you’re gluten-free, use a gluten-free all-purpose flour mix. -
4 teaspoons sweet mild paprika
A quintessential Hungarian spice that adds warmth and color. If you like a little heat, try using smoked paprika for a smoky twist. -
1 tablespoon chopped fresh dill, or 2 teaspoons dried dill
Dill brings a refreshing taste. Fresh is always better, but dried works fine too. Feel free to swap with thyme or tarragon for a different herbaceous note. -
Kosher salt and cracked black pepper
Essential seasoning that enhances the overall flavor. Don’t skimp on this! -
½ cup dry white wine (such as Sauvignon Blanc)
This adds a lovely acidity. If you prefer not to use wine, substitute with additional broth and a splash of lemon juice. -
3 cups low-sodium chicken broth or vegetable broth
Use homemade or store-bought as your soup base. For a vegetarian version, vegetable broth works like a charm. -
2 tablespoons low-sodium soy sauce
Adds a nice umami hit. You can swap it for tamari if you want a gluten-free option. -
1 ½ cups whole milk
This creamy component makes the soup indulgent! Use plant-based milk for a lactose-free option. -
¾ cup sour cream
For that rich creaminess and a little tang! Greek yogurt works brilliantly as a substitute. -
2 tablespoons white wine vinegar or sherry vinegar
This little splash brightens the flavors. If you’re out of vinegar, a squeeze of lemon juice can do the trick. -
½ cup chopped fresh parsley
Finish off with a pop of color and brightness. You could also use chives or green onions for a different twist!
Step-by-Step Instructions
Now, let’s get to the fun part—cooking! Here’s how to whip up this creamy goodness.
-
Heat the Olive Oil
In a large pot, heat the olive oil over medium heat. Let it warm for about a minute or until it starts to shimmer. This is the base of our flavors, so don’t skip this step! -
Sauté the Onions and Mushrooms
Add the diced onions and a generous pinch of salt to the pot. Cook, stirring occasionally, until the onions are translucent (about 5-7 minutes). Next, toss in your sliced mushrooms. Let them sizzle away for about 10-15 minutes until they get beautifully browned and release their juices. This is where it gets aromatic and you’ll start feeling like a superstar chef! -
Incorporate the Butter and Flour
Now it’s time to add the butter. Stir until it melts, then sprinkle in the flour. Cook this mixture for about 2 minutes, stirring constantly until it turns golden brown. This roux will help thicken our soup later. -
Add the Paprika and Dill
Stir in the sweet paprika and dill, allowing it to coat the mushroom mixture for about 30 seconds. You’ll capture that gorgeous flavor that makes this dish stand out! -
Pour in the Wine
Pour in the dry white wine and scrape the bottom of the pot to deglaze it—those brown bits are flavor gold! Let the wine simmer for 2-3 minutes, allowing the alcohol to cook off. -
Stir in the Broth and Soy Sauce
Next, gradually stir in the chicken or vegetable broth and soy sauce, bringing everything to a boil, then reduce the heat and let it simmer for about 15 minutes. -
Add Milk and Sour Cream
After simmering, reduce the heat to low, slowly whisk in the whole milk and sour cream until everything is combined. Trust me, you’ll want to taste this once it’s mixed! -
Add Vinegar and Season
Finally, stir in the white wine vinegar or sherry vinegar, then season it generously with kosher salt and cracked black pepper to taste. Adjust to your preferred seasoning level! -
Garnish and Enjoy
Just before serving, stir in fresh parsley and prepare yourself for the feast about to unfold!
Serving Suggestions
Presentation is key! Ladle this creamy soup into beautiful bowls, and don’t forget to top it off with a sprinkle of fresh parsley—this adds a touch of color and elegance. Serve with a crusty slice of bread or a light salad for a complete meal, and watch your guests’ eyes light up with the first whiff of that savory aroma!
Recipe Variations
Feeling adventurous? Here are some fantastic twists you can try with this soup:
- Spicy Hungarian Mushroom Soup: Add a dash of cayenne pepper or a few red pepper flakes to give it a kick.
- Creamy Vegan Option: Use coconut milk instead of whole milk, and substitute sour cream with cashew cream
- Wild Mushroom Medley: Experiment with exotic mushrooms like oyster and enoki for a more complex flavor.
- Cheesy Addition: Add a handful of shredded cheese like Gruyère just before serving for a delightful cheesy twist.
- Add Protein: Shredded chicken or sautéed sausage can be incorporated for a heartier meal.
Chef’s Notes
Oh, how this recipe has evolved over time! I remember when I first tried making this with whatever mushrooms I had on hand. It was a bit of a disaster, but every misstep taught me something new about balancing flavors. Nowadays, I love venturing into farmers’ markets to source different mushrooms—you’d be amazed by the variety available! Oh, and pro tip: never rush the sautéing process; that’s where all the magic happens!
FAQs and Troubleshooting
1. My soup is too thick; how do I fix it?
If your soup turned out thicker than expected, just gradually add a bit more broth or water until you reach your desired consistency.
2. Can I make this soup ahead of time?
Absolutely! It stores beautifully in the fridge for up to 3 days. Just reheat gently on the stove, adding a splash of broth to loosen it up.
3. What if I can’t find fresh dill?
No worries! Dried dill or even thyme can be wonderful substitutes. Remember, dried herbs are more potent, so use about one-third of the amount.
4. Can I freeze this soup?
Yes, but the texture may slightly change after freezing. Store in an airtight container and enjoy within 3 months. Defrost it in the fridge overnight before reheating.
Nutritional Info
This Creamy Hungarian Mushroom Soup is not just delicious but also nourishing!
- Calories: Approximately 320 per serving
- Protein: 8g
- Carbohydrates: 25g
- Fat: 22g (mostly from the olive oil and butter)
So there you have it, my friends—a warm, comforting bowl of Creamy Hungarian Mushroom Soup that’s perfect for any occasion! Whether you’re snuggled up on the couch or sharing a meal with loved ones, this soup is a gentle reminder that food truly brings us together. Happy cooking, and may every spoonful bring you joy!
PrintCreamy Hungarian Mushroom Soup

A rich and comforting mushroom soup that brings warmth and nostalgia to your table.
- Prep Time: 15 minutes
- Cook Time: 30 minutes
- Total Time: 45 minutes
- Yield: 6 servings 1x
- Category: Soup
- Method: Stovetop
- Cuisine: Hungarian
- Diet: Vegetarian
Ingredients
- 3 tablespoons olive oil
- 1 ½ pounds mixed mushrooms (trimmed and sliced ¼-inch thick)
- 2 cups diced yellow onions
- 3 tablespoons unsalted butter
- ¼ cup all-purpose flour
- 4 teaspoons sweet mild paprika
- 1 tablespoon chopped fresh dill, or 2 teaspoons dried dill
- Kosher salt and cracked black pepper to taste
- ½ cup dry white wine (such as Sauvignon Blanc)
- 3 cups low-sodium chicken broth or vegetable broth
- 2 tablespoons low-sodium soy sauce
- 1 ½ cups whole milk
- ¾ cup sour cream
- 2 tablespoons white wine vinegar or sherry vinegar
- ½ cup chopped fresh parsley
Instructions
- Heat the olive oil in a large pot over medium heat until shimmering.
- Sauté the diced onions with a pinch of salt until translucent (about 5-7 minutes), then add the sliced mushrooms and cook until browned (10-15 minutes).
- Incorporate the butter until melted, then stir in the flour and cook for about 2 minutes.
- Add the paprika and dill, stirring for about 30 seconds.
- Pour in the dry white wine and deglaze the pot, simmering for 2-3 minutes.
- Stir in the broth and soy sauce, bringing it to a boil before reducing heat and simmering for about 15 minutes.
- Add the milk and sour cream, whisking until combined.
- Finish by stirring in the vinegar and seasoning to taste.
- Garnish with fresh parsley before serving.
Notes
For a vegan version, substitute whole milk with coconut milk and sour cream with cashew cream. Add a sprinkle of cayenne for a spicy twist!
Nutrition
- Serving Size: 1 serving
- Calories: 320
- Sugar: 5g
- Sodium: 600mg
- Fat: 22g
- Saturated Fat: 10g
- Unsaturated Fat: 10g
- Trans Fat: 0g
- Carbohydrates: 25g
- Fiber: 3g
- Protein: 8g
- Cholesterol: 30mg
Keywords: mushroom soup, creamy soup, comforting soup

One-Pot Chicken Enchilada Soup: 30-Minute Weeknight Comfort
Cozy Up with This Flavorful Chicken Enchilada Soup
Hey there, fellow food lovers! Today, I’m super excited to share a recipe that has become a cozy essential in my kitchen — Chicken Enchilada Soup. This delicious dish perfectly captures the vibrant flavors of Mexican cuisine while also being loaded with wholesome ingredients. It’s warm, comforting, and oh-so-easy to whip up.
Imagine coming home after a long day; the aroma of spicy, savory soups wafts through your kitchen, and suddenly, life feels just a little bit sweeter. That’s exactly how this Chicken Enchilada Soup makes me feel. If you’re anything like me, food isn’t just about nourishment; it’s about experiences, comfort, and connection. That’s why I think you’re going to love this recipe even more when I share a little backstory with you.
A Soupy Memory Lane
Let me take you on a little stroll down memory lane. I have vivid memories of my grandmother bustling around the kitchen during family gatherings, her energy infectious as she cooked up a storm. One of the highlights was when she pulled out her famous enchiladas, wrapping them up snugly and baking away—sometimes, we had to wait, but the anticipation only made the food taste better.
One chilly evening, she decided to switch things up and make a soup instead. It was such a hit, combining the comfort of those warm enchiladas with a thick, hearty broth. Everyone raved about it, and that evening turned into a yearly tradition for our family. Fast forward a few years, and I’ve created my own rendition that brings all those nostalgic vibes right back. It’s a warm hug in a bowl that’s also incredibly easy to throw together on a weeknight.
Ingredients
Now, let’s dive into the lineup of ingredients that come together to make this hearty Chicken Enchilada Soup. I promise you, the flavor is downright addictive!
-
Chicken: I typically use boneless, skinless chicken breasts or thighs. If you want more flavor, feel free to use rotisserie chicken—just shred it up, and you’re good to go!
-
Enchilada Sauce: Homemade or store-bought—your choice! If you want to amp up the heat, try a spicy enchilada sauce or a green variety for a twist.
-
Beans: I love using black beans for their flavor and protein, but pinto beans work beautifully as well. Drain and rinse to get rid of excess sodium!
-
Corn: Fresh, frozen, or canned corn adds a sweet crunch. If you’re feeling adventurous, try adding roasted corn for some smoky goodness!
-
Onion and Garlic: Essential aromatics! They add depth and flavor to your soup. For a milder taste, sauté shallots instead.
-
Veggies: Bell peppers, jalapeños, or even zucchini can add more flavor and nutrition. Just chop them up and toss them in!
-
Chicken Broth: Use low-sodium chicken broth to control the salt levels. Vegetable broth is a great alternative if you want to keep it plant-based.
-
Cilantro: A fresh garnish that brings brightness. Not a fan? Try green onions or avocado as alternate toppings!
Step-by-Step Instructions
Alright, let’s roll up our sleeves and get cooking. Here’s your step-by-step guide to making this mouthwatering Chicken Enchilada Soup:
-
Prep Your Ingredients: Gather all your ingredients. Chop the onion, garlic, and any additional veggies you’re using. Shred the chicken if you’re using a rotisserie. This makes cooking smoother and quicker—not to mention more fun!
-
Sauté the Aromatics: In a large pot, heat a little olive oil over medium heat. Add the chopped onion and sauté for about 3-4 minutes, until it turns translucent. Toss in minced garlic and sauté for another minute. The smell is heavenly, isn’t it?
-
Cook the Chicken: If you’re using raw chicken, add it to the pot and cook for 5-7 minutes, stirring occasionally, until it’s no longer pink. You can also season it with a pinch of salt and pepper at this stage for more flavor.
-
Mix in the Veggies: Add any additional chopped veg at this point, like bell peppers or jalapeños. Sauté for another 2-3 minutes to start softening them up.
-
Add Sauces and Broth: Pour in the enchilada sauce and then the chicken broth. Stir to combine everything. Allow this to simmer for about 15 minutes. You can add a bay leaf for extra flavor—just remember to remove it before serving!
-
Beans and Corn: Stir in the black beans and corn, and let the soup simmer for another 10 minutes. The combination of flavors at this stage is simply divine!
-
Shred the Chicken: If you used whole chicken, now’s the time to shred it right in the pot with two forks. If you’re feeling fancy, use an immersion blender for a creamier texture, but that’s totally optional!
-
Final Touches: Taste your soup and adjust seasonings as needed. Maybe a pinch of cumin or some more salt and pepper to really pull together the flavors.
-
Garnish It Up: Ladle the soup into bowls and get ready to serve! A sprinkle of fresh cilantro, avocado slices, or a dollop of sour cream makes this dish pop visually and flavor-wise.
Serving Suggestions
Serve this Chicken Enchilada Soup hot, straight from the pot to a hearty bowl. It pairs wonderfully with crispy tortilla chips for crunch or a side of cornbread that can soak up the flavors. You can also offer a little lime wedge for folks to squeeze a hint of brightness on top—it complements the rich flavors beautifully!
Recipe Variations
Feeling adventurous? Here are some fun twists to take your Chicken Enchilada Soup to a whole new level:
-
Vegetarian Version: Swap chicken with chickpeas or extra veggies for a plant-based delight. Just make sure your enchilada sauce is vegetarian-friendly!
-
Spicy Kick: Add diced jalapeños or a splash of hot sauce if you like a little heat!
-
Creamy Style: Stir in a bit of cream cheese or heavy cream at the end to make it ultra-creamy—that’s total comfort food!
-
Taco Inspired: Add taco seasoning for a different flavor profile or top with cheese and bake until bubbling for a cheesy enfolding.
-
Coconut Twist: For a unique flavor, add a can of coconut milk for richness and a hint of sweetness.
Chef’s Notes
As a chef, I love to experiment, and this recipe has seen plenty of twists over the years! Sometimes I toss in leftover veggies from the fridge, and other times, I make it a bit spicy for my friends who love heat. No matter how I make it, the best part is sharing it with others—friends, family, or even a cozy night in. This soup reminds me that food is not just about nourishment; it’s about creating connections, memories, and, of course, good vibes!
FAQs and Troubleshooting
I don’t have enchilada sauce. Can I use something else?
Absolutely! You can use salsa or even taco sauce in a pinch. Just keep an eye on the spice levels!
My soup is too thick. What can I do?
Add more broth or water, little by little, until you reach your desired consistency. Soup should be fluid and delightful, after all!
How long can I store this in the fridge?
The soup keeps well in the fridge for about 3-4 days. Just reheat before enjoying, but I bet it won’t last that long in your house!
Can I freeze Chicken Enchilada Soup?
Yes, indeed! Just cool it completely, then transfer it to freezer-safe bags or containers. It can last up to 2-3 months, but make sure to leave some space for expansion!
So, are you ready to embrace the warmth and comfort of this Chicken Enchilada Soup? Grab your ingredients, follow this simple guide, and let the aroma of deliciousness fill your kitchen. I can’t wait for you to dig in, savor each bite, and create a few memories of your own along the way. Happy cooking!
PrintChicken Enchilada Soup

A warm and comforting Chicken Enchilada Soup that captures the vibrant flavors of Mexican cuisine.
- Prep Time: 15 minutes
- Cook Time: 30 minutes
- Total Time: 45 minutes
- Yield: 4 servings 1x
- Category: Soup
- Method: Stovetop
- Cuisine: Mexican
- Diet: Non-Vegetarian
Ingredients
- 2 cups boneless, skinless chicken breasts or thighs
- 2 cups enchilada sauce
- 1 can black beans, drained and rinsed
- 1 cup corn (fresh, frozen, or canned)
- 1 onion, chopped
- 3 cloves garlic, minced
- 1 bell pepper, chopped
- 1 jalapeño, chopped (optional)
- 4 cups low-sodium chicken broth
- 1/4 cup fresh cilantro, for garnish
Instructions
- Prep your ingredients: Gather all your ingredients. Chop the onion, garlic, and any additional veggies you’re using.
- Sauté the aromatics: In a large pot, heat a little olive oil over medium heat. Add the chopped onion and sauté for 3-4 minutes.
- Cook the chicken: If you’re using raw chicken, add it to the pot and cook for 5-7 minutes, stirring occasionally.
- Mix in the veggies: Add any additional chopped veg at this point. Sauté for another 2-3 minutes.
- Add sauces and broth: Pour in the enchilada sauce and the chicken broth. Stir to combine and let simmer for about 15 minutes.
- Stir in the beans and corn: Let the soup simmer for another 10 minutes.
- Shred the chicken: Shred the chicken right in the pot with two forks.
- Garnish it up: Serve the soup hot with fresh cilantro and optional toppings.
Notes
Add a squeeze of lime for brightness and serve with tortilla chips for crunch.
Nutrition
- Serving Size: 1 bowl
- Calories: 350
- Sugar: 5g
- Sodium: 800mg
- Fat: 12g
- Saturated Fat: 3g
- Unsaturated Fat: 6g
- Trans Fat: 0g
- Carbohydrates: 40g
- Fiber: 8g
- Protein: 25g
- Cholesterol: 70mg
Keywords: Chicken, Enchilada, Soup, Mexican Cuisine, Comfort Food
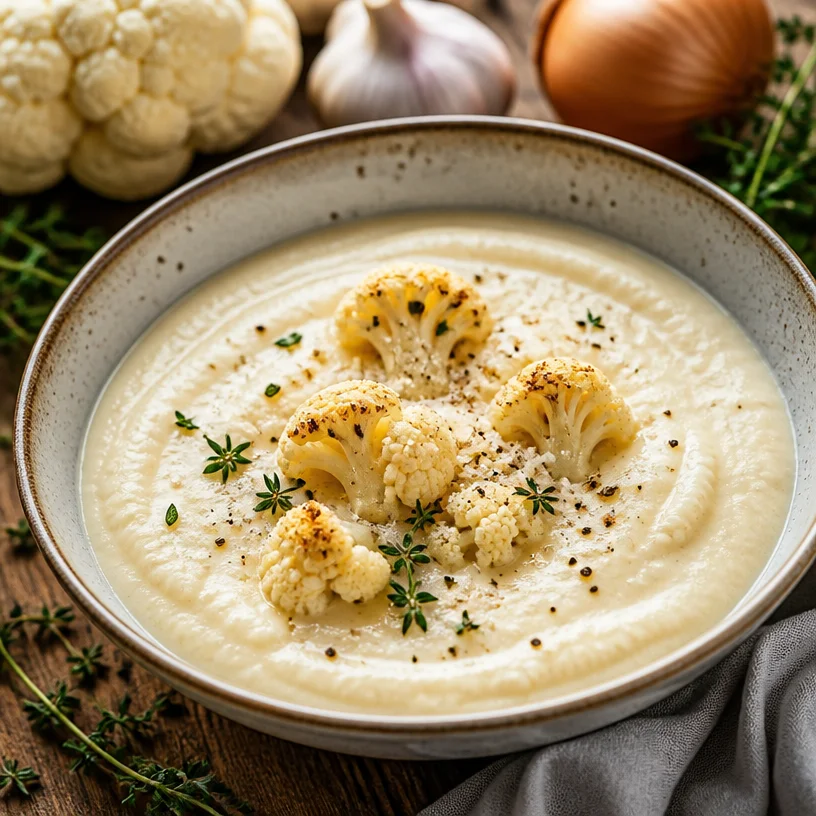
Weeknight 30-Minute Creamy Cauliflower Soup (One-Pot)
Creamy Cauliflower Soup: A Cozy Delight
Welcome, soup lovers! Today, we’re diving into a dish that’s perfect for cozy nights, quick lunches, or whenever you need a little comfort in a bowl. I’m thrilled to share my recipe for Creamy Cauliflower Soup—a dreamy fusion of flavors that’s as nourishing as it is satisfying.
Let’s start with a truth: if you’ve ever thought that healthy eating means skimping on flavor, I’m here to change your mind! This soup proves that you can enjoy indulgent, creamy textures without feeling like you’re overdoing it. So grab your apron, and let’s get cooking!
A Memory to Warm Your Heart
As I think back on the first time I made creamy cauliflower soup, I can’t help but smile at the memory. It was a chilly Saturday afternoon—I was lazily wandering through the local farmer’s market, and the scent of roasted vegetables filled the air. I spotted a towering pile of fresh, splendid cauliflowers that beckoned me.
Fueled by inspiration, I bought one and hurried home. As the soup simmered on the stove, the aroma wafted through my tiny kitchen, instantly transforming the space into a cozy haven of warm flavors. I tossed in sautéed onions and garlic, and before I knew it, my friends had arrived, drawn in by the tantalizing scent.
What started as a simple recipe evolved into a lively kitchen gathering filled with laughter, stories, and plenty of bread for dipping. It was a reminder that food not only nourishes our bodies but also brings people together. That first pot of creamy cauliflower soup became our go-to comfort dish, and I bet it will become yours too!
Ingredients You’ll Need
Here’s what you’ll need to whip up this delightful creamy cauliflower soup:
-
1 medium head of cauliflower
Cauliflower forms the base of this soup and provides a lovely, creamy texture when blended. Choose a fresh one with firm florets for the best flavor. If you’re feeling adventurous, you can substitute with broccoli or even a mix of both! -
1 medium onion, chopped
Onions add depth and sweetness to the soup. A yellow onion works perfectly, but a shallot or even a red onion can add a nice twist. -
3 cloves of garlic, minced
Garlic is essential for flavor! Freshly minced garlic offers the best taste, but you can use pre-minced or garlic powder in a pinch. -
2 cups vegetable or chicken broth
This adds moisture and enhances the soup’s flavor. Either homemade or store-bought works; just aim for low-sodium versions if you’re watching your salt intake. -
1 cup heavy cream
Cream gives the soup that luxurious quality. If you’re looking for a lighter option, you can swap it for coconut milk or even cashew cream for a vegan alternative. -
Salt and pepper to taste
These seasonings are essential! They help elevate the flavors in the soup. Remember, you can always add more, but you can’t take it away.
Cooking Up a Storm: Step-by-Step Instructions
Ready to create some magic in the kitchen? Let’s walk through the steps!
-
Prep Your Ingredients
Start by chopping your onion and mincing the garlic. Cut the cauliflower into bite-sized florets, ensuring they’re roughly the same size for even cooking. Lay everything out in an organized fashion—trust me, it makes the process smoother! -
Sauté the Aromatics
In a large pot over medium heat, drizzle a touch of olive oil. Once it’s shimmering, toss in the onions. Sauté for about 5 minutes until they’re translucent and gently softened. Stir in the minced garlic and sauté for an additional minute until fragrant. Pro tip: Don’t let the garlic burn; it turns bitter! -
Blanch the Cauliflower
Add your cauliflower florets to the pot and give them a mix with the onions and garlic for about 2-3 minutes, allowing them to soak up that delicious flavor. -
Add Broth and Simmer
Pour in the vegetable or chicken broth, ensuring that the cauliflower is mostly submerged. Bring everything to a gentle boil, then reduce to a simmer. Cover the pot and let it cook for about 15 minutes or until the cauliflower is tender when pierced with a fork. -
Blend It Up!
After 15 minutes of simmering, it’s time to blend. If you have an immersion blender, use that for ease. Otherwise, carefully transfer the soup in batches to a blender (be cautious of the hot liquid!). Blend until super smooth and creamy. This step is where the magic happens! -
Create the Creamy Texture
Return the soup to the pot. Stir in the heavy cream (or your chosen substitute) and season generously with salt and pepper. Heat the soup gently over low heat, allowing it to meld together for a few minutes—don’t let it boil! -
Taste and Adjust
Take a moment to taste your soup. This is where you can really make it your own—add additional seasoning, squeeze in some lemon juice for brightness, or even stir in some freshly chopped herbs for a flavor kick!
Serving Suggestions
Serve your creamy cauliflower soup in warm bowls, garnished with a drizzle of olive oil, a sprinkle of freshly cracked pepper, or some chopped fresh herbs. It pairs wonderfully with crusty bread or a vibrant green salad for a complete meal. The goal is to make it inviting and delicious, just like you would find in a cozy café!
Recipe Variations
Feel free to get creative with these variations:
-
Spicy Cauliflower Soup: Add a pinch of red pepper flakes or some diced jalapeños for a spicy kick.
-
Herbed Cauliflower Soup: Sprinkle in fresh herbs like thyme, rosemary, or parsley during the cooking process to infuse the flavors further.
-
Cheesy Version: Stir in some freshly grated Parmesan cheese at the end for a rich, cheesy flavor.
-
Curried Cauliflower Soup: Add a tablespoon of curry powder when you sauté the onions for an aromatic twist.
-
Vegan Delight: Swap heavy cream with coconut milk and use vegetable broth for a fully plant-based version.
Chef’s Notes
Over the years, this creamy cauliflower soup has morphed into my kitchen’s unsung hero! I’ve served it at dinner parties, cozy gatherings, and even enjoyed it as a quick lunch straight from the pot while wearing my comfiest pajamas. It’s the kind of recipe that evolves with each batch; sometimes, I add different spices or even a little bit of smoked paprika for a deeper flavor. The beauty of this soup is that it welcomes creativity!
Funny enough, I’ve even had moments where I forgot to buy heavy cream and ended up blending in silken tofu for a creaminess that turned out to be a happy accident.
FAQs and Troubleshooting
-
Why is my soup grainy?
If your soup comes out grainy, it might be because the cauliflower was not blended thoroughly. Ensure you blend until it’s incredibly smooth. Also, using an immersion blender can help create the perfect texture! -
Can I freeze the soup?
Absolutely! This soup freezes beautifully. Just cool it completely, and then transfer it to an airtight container. When you’re ready to eat, thaw it in the fridge overnight and reheat on the stove. -
What if I don’t have enough cauliflower?
No problem! You can bulk it up with other vegetables like potatoes, carrots, or parsnips. Just remember that the cooking times may vary, so adjust accordingly! -
How can I make it thicker?
If you prefer a thicker soup, you can either add more cauliflower or blend in a potato. Alternatively, let it simmer without the lid to reduce liquid more rapidly.
Nutritional Info
This creamy cauliflower soup is not only comforting but also packed with nutrients. Cauliflower is low in calories while high in fiber and vitamins C and K. When enjoyed with a side of fresh bread or a healthy salad, you’ll find it’s the perfect meal to support overall well-being.
So there you have it! A creamy cauliflower soup that’s as uplifting as a warm hug on a cool day. I hope you enjoy creating your own version of this comforting classic. Happy cooking!
PrintCreamy Cauliflower Soup

A creamy and comforting cauliflower soup that’s perfect for cozy nights and quick lunches.
- Prep Time: 10 minutes
- Cook Time: 20 minutes
- Total Time: 30 minutes
- Yield: 4 servings 1x
- Category: Soup
- Method: Blending
- Cuisine: American
- Diet: Vegetarian
Ingredients
- 1 medium head of cauliflower
- 1 medium onion, chopped
- 3 cloves of garlic, minced
- 2 cups vegetable or chicken broth
- 1 cup heavy cream
- Salt and pepper to taste
Instructions
- Prep your ingredients: chop the onion, mince the garlic, and cut the cauliflower into florets.
- Sauté the aromatics: in a pot, heat olive oil, then add onions and sauté until translucent. Stir in garlic and sauté for an additional minute.
- Blanch the cauliflower: add cauliflower florets to the pot and mix for 2-3 minutes.
- Add broth and simmer: pour in broth, bring to a boil, then reduce heat; cover and cook for 15 minutes.
- Blend it up: use an immersion blender or transfer soup to a blender and purée until smooth.
- Create the creamy texture: return blended soup to pot, stir in heavy cream, and season with salt and pepper.
- Taste and adjust seasoning as desired.
Notes
Serve garnished with olive oil, pepper, or herbs, and enjoy with crusty bread.
Nutrition
- Serving Size: 1 bowl
- Calories: 250
- Sugar: 4g
- Sodium: 600mg
- Fat: 20g
- Saturated Fat: 10g
- Unsaturated Fat: 8g
- Trans Fat: 0g
- Carbohydrates: 18g
- Fiber: 5g
- Protein: 6g
- Cholesterol: 40mg
Keywords: cauliflower soup, creamy soup, vegetarian soup
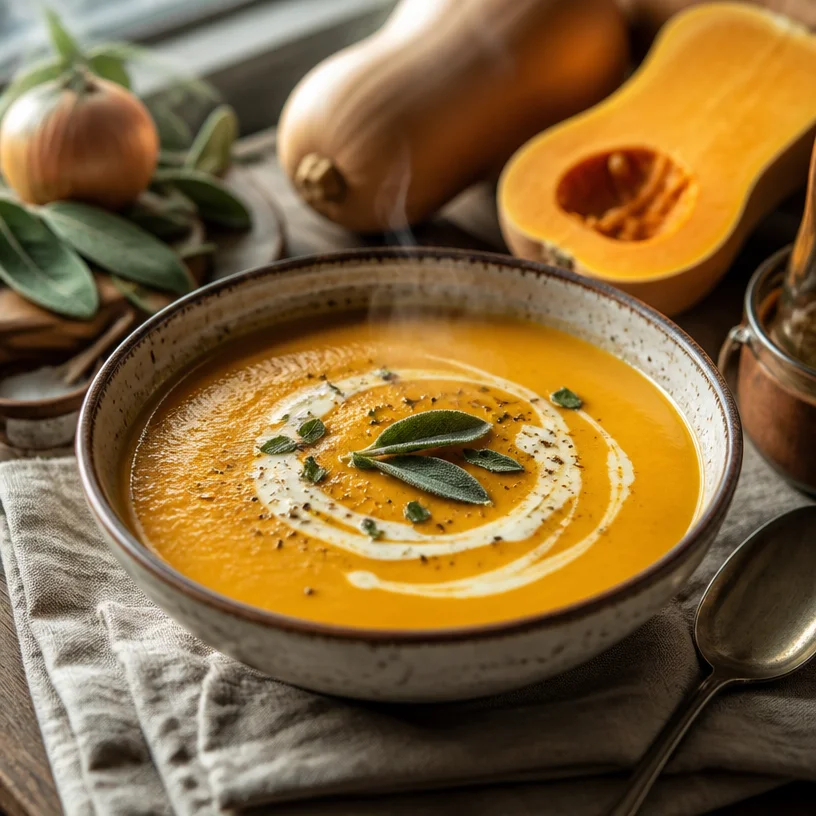
Creamy Butternut Squash Soup: 30-Minute Weeknight Comfort
Butternut Squash Soup: A Hug in a Bowl
Welcome, dear friends, to a cozy corner of Clean Plate Cravings! Today, we’re diving into something soul-satisfying and utterly delightful: Butternut Squash Soup. Imagine a warm bowl cradled in your hands, steam curling up into the air as the rich, sweet aroma wafts past your nose. This isn’t just any soup; it’s a velvety embrace in a bowl, the kind that warms your heart and fills your belly.
As the leaves begin to turn and the air takes on a crispness, there’s something incredibly therapeutic about preparing a bowl of warm, nourishing soup. Cooking this dish transports me back to my childhood kitchen, where my mom used to whip up big batches on chilly afternoons. The kitchen would be filled with laughter, the smell of sautéing onions, and the bright orange beauty of roasted squash. I can still hear her singing along to her favorite jazz playlists while we chopped, stirred, and tasted. Those memories remind me that cooking is more than just a necessity; it’s an experience, a shared love, and a delightful creativity that fuels our souls.
If you’re ready to conjure those heartfelt memories and create some of your own, let’s dive deeper into this recipe that’s both incredibly easy to make and packed with flavor. Perfect for chilly nights or whenever you’re in need of a comforting meal, Butternut Squash Soup comes together quicker than you might think!
Personal Story
Let me take you back to one cozy autumn afternoon. I was about ten years old, and I was tasked with the important mission of stirring my mom’s famous Butternut Squash Soup. It was a comforting ritual; the first hint of chill in the air meant it was soup season! I can still picture my mom, her colorful apron tied snugly around her waist, guiding me through the steps, her laughter ringing out as I accidentally splattered some squash mixture across the counter.
As the onions caramelized in the pan, they released a sweetness that mingled beautifully with the earthy essence of the butternut squash. We added a sprig of fresh sage at the end, making our little kitchen smell like a dreamy autumn day in New England. I vividly remember the first taste—the way it felt like a warm hug. Ever since that day, this soup has held a special place in my heart, reminding me to take pleasure in the little things and that cooking is all about love.
Ingredients
-
Butternut Squash
The star of the show! Butternut squash is not just sweet and flavorful; it’s packed with vitamins A and C, fiber, and antioxidants. Look for squash that’s firm and has a smooth, even skin. If you can’t find butternut squash, you can substitute pumpkin or acorn squash for a similar texture and taste. -
Onion
A classic base for many soups. Onions add depth and sweetness to the mixture. I recommend yellow onions, but sweet onions or shallots can work beautifully too, giving a slightly different flavor profile. -
Broth
This adds the liquid foundation to our soup. Use vegetable or chicken broth—homemade if you have it, store-bought if you don’t! For a richer flavor, consider using bone broth. If you want to keep it vegan or vegetarian, ensure you choose a broth without meat. -
Cream
A splash of cream adds richness and velvety texture to the soup. You can use heavy cream, half-and-half, or even coconut cream for a dairy-free version. If you prefer a lighter soup, feel free to skip the cream or substitute with almond milk or cashew cream. -
Sage
This aromatic herb elevates the entire dish with its warm, earthy flavor that complements the sweetness of the squash. Fresh sage is ideal, but dried sage can be used in a pinch—just reduce the amount as dried herbs are more potent!
Step-by-Step Instructions
-
Prep Your Squash
Start by peeling the butternut squash. I know this can feel like a workout, but it’s worth it! Use a sharp vegetable peeler or a sharp knife to cut off the skin. Cut the squash in half lengthwise, scoop out the seeds, and then chop it into cubes. This size will ensure it cooks evenly and quickly. Don’t be discouraged—it gets easier each time, and those cubes will soon transform into magic! -
Sauté the Onions
In a large pot, heat up a splash of olive oil or butter over medium heat. Add the chopped onion and a pinch of salt. Sauté for about 5-7 minutes, until the onion turns soft and translucent. This step is crucial—the more you caramelize those onions, the richer your soup will be! Keep stirring, and let the kitchen fill with that sweet scent. -
Combine the Ingredients
Add your cubed butternut squash to the pot. Toss it around in the buttery onion goodness for about 3-4 minutes. This step helps enhance the flavor profile before adding the broth. At this point, it’s all about layering flavors! -
Pour in the Broth
Pour in enough broth to cover the squash. You want it swimming, not drowning! Bring the mixture to a boil, then reduce it to a simmer. Cover the pot and let it cook for about 20 minutes until the squash is fork-tender. Pro tip: If you’re unsure if your squash is done, taste a piece! If it’s soft and sweet, you’re all set. -
Blend to Perfection
Once cooked, use an immersion blender to puree the soup directly in the pot until it’s silky smooth. If you don’t have an immersion blender, carefully transfer the mixture to a standard blender in batches. Just be cautious; it’s hot! Return the soup to the pot, and stir in the cream, sage, and any seasoning adjustments needed. -
Final Touches
Continue to heat the soup over low heat until warmed through. Taste it! This is your moment to shine as a chef. Adjust the seasoning with salt, pepper, or even a sprinkle of nutmeg for warmth. Some people love adding a hint of cayenne for a little kick! -
Serve and Enjoy
Ladle the soup into bowls and garnish with a drizzle of cream and a few crispy sage leaves for extra flair. Trust me; it’ll look as gorgeous as it tastes! The warm colors will brighten up even the cloudiest of days.
Serving Suggestions
Plating is an art, my foodie friends! When serving your Butternut Squash Soup, consider using wide, shallow bowls. Ladle the bright, golden soup and create a small drizzle of cream on top, then use a toothpick or skewer to gently swirl it around. Top with crispy sage leaves, and perhaps even some roasted pumpkin seeds for a delightful crunch! Pair with warm, crusty bread for dipping—trust me, it’s the ultimate comfort combo.
Recipe Variations
Feeling adventurous? Let’s shake things up a bit! Here are some fun variations to try with your Butternut Squash Soup:
- Maple Infusion: Add a spoonful of pure maple syrup for a unique sweet twist—perfect for a chilly day!
- Coconut Curry: Stir in some coconut milk and a teaspoon of curry powder for a warming, spiced version that’ll transport you straight to a tropical paradise.
- Roasted Garlic: Toss in cloves of garlic while roasting your squash for an ultra-deep flavor that complements the sweetness beautifully.
- Spicy Twist: Add chipped red pepper flakes or a dash of Sriracha for a kick—heat lovers will thank you!
- Herb Swap: Experiment with fresh herbs such as thyme or rosemary for an aromatic twist. Each herb brings a different essence to the dish.
Chef’s Notes
Butternut Squash Soup is a timeless classic in our household, but it has evolved significantly over the years. I used to stick to a traditional method, but now I love incorporating bold flavors and textures. One time, while experimenting with a new ingredient, I added a splash of orange juice to the soup. It made the taste pop and brought a brightness that paired wonderfully with the squash! Always keep your kitchen open to experimenting and making it your own. Cooking should be fun, and the worst that can happen is a delicious lesson!
FAQs and Troubleshooting
1. My soup turned out too thick; how can I fix it?
Don’t stress! Simply add more broth or water, a little at a time, until you reach your desired consistency.
2. Can I make this soup ahead of time?
Absolutely! This soup stores well in the fridge for up to 4 days. Just reheat gently on the stove. You can also freeze it for up to 3 months—just leave off adding the cream until you reheat after thawing!
3. What can I do if I can’t find butternut squash?
No worries! You can substitute with pumpkin, sweet potato, or even carrots for similar sweetness and flavors.
4. I want to add protein; what do you suggest?
For a heartier option, consider adding cooked lentils, chickpeas, or even shredded chicken to the soup! These can amp up the nutrient content and make it more filling.
Nutritional Info
(Each serving of Butternut Squash Soup roughly contains)
- Calories: 160
- Protein: 2g
- Fat: 7g
- Carbohydrates: 24g
- Fiber: 3g
Remember, this soup is rich in vitamins A and C, making it a fabulous boost for your immune system!
And there you have it, my dear culinary pals—a full guide to creating a marvelous Butternut Squash Soup that’s sure to bring warmth and joy to your kitchen! I can’t wait for you to share your own versions, stories, and tweaks that make this recipe uniquely yours. So grab your ingredients, put on some tunes, and let’s get cooking! 💛🥣
PrintButternut Squash Soup: A Hug in a Bowl

A soul-satisfying butternut squash soup that is warm, creamy, and perfect for chilly nights.
- Prep Time: 15 minutes
- Cook Time: 30 minutes
- Total Time: 45 minutes
- Yield: 4 servings 1x
- Category: Soup
- Method: Blending
- Cuisine: American
- Diet: Vegetarian
Ingredients
- 1 large Butternut squash, peeled and chopped
- 1 medium Onion, chopped
- 4 cups Vegetable or chicken broth
- 1/2 cup Cream (or coconut cream for dairy-free)
- 2 sprigs Fresh sage
- Olive oil or butter for sautéing
- Salt and pepper to taste
Instructions
- Prep your squash by peeling and chopping it into cubes.
- Sauté the onions in a large pot with oil or butter until soft and translucent.
- Combine the chopped butternut squash with the onions and sauté for a few minutes.
- Pour in the broth until the squash is covered and bring to a boil.
- Blend the soup until silky smooth, then stir in the cream and sage.
- Serve with a drizzle of cream and crispy sage leaves on top.
Notes
This soup is versatile; feel free to add herbs or spices to suit your taste. It pairs well with crusty bread.
Nutrition
- Serving Size: 1 serving
- Calories: 160
- Sugar: 4g
- Sodium: 400mg
- Fat: 7g
- Saturated Fat: 4g
- Unsaturated Fat: 3g
- Trans Fat: 0g
- Carbohydrates: 24g
- Fiber: 3g
- Protein: 2g
- Cholesterol: 30mg
Keywords: butternut squash soup, comfort food, fall recipes, vegetarian soup, cozy meal

One-Pot White Chicken Chili in 30 Minutes (Creamy Comfort)
The Ultimate White Chicken Chili Recipe
Welcome, fellow food enthusiasts! Today, we’re diving into the heartwarming world of white chicken chili. Imagine cozy evenings wrapped up in a blanket, a bowl of warmth in your hands, and the tantalizing aroma wafting from the kitchen…it’s pure comfort food bliss. This dish is not only nourishing but also bursting with flavor, making it the perfect meal any day of the week. What I love most is how straightforward it is to whip up, making it ideal for both seasoned chefs and kitchen newbies alike. So, grab your apron, and let’s create something truly special together!
Personal Story
Whenever I cook white chicken chili, I’m whisked back to chilly autumn evenings in my grandma’s kitchen. I can still hear the sounds of laughter and chatter as our family gathered around the dinner table, excited for her comforting meal. Grandma had a magical way of making every meal feel like a celebration, and her white chicken chili was the star of the show. The slow bubbling of the pot on the stove and the sizzle of spices made each bite an adventure into coziness.
She always had a way of making it fun, inviting us to help chop vegetables or stir the pot. Her secret? A generous sprinkle of love and laughter. Every bowl served was not just a meal but a hug in a dish. Now, as I share this recipe, I hope to bring a piece of that warmth to your kitchen. So, whether you’re cooking for yourself, friends, or family, let this white chicken chili be an invitation to create memories and indulge in flavors that make your soul smile!
Ingredients
Here’s what you’ll need to bring this fabulous white chicken chili to life:
-
Chicken Breast (or Thighs):
Chicken is the star protein here, providing a savory base. I recommend going for skinless, boneless chicken breasts for a leaner option. If you’re in the mood for a little extra richness, chicken thighs offer a tantalizing depth of flavor. -
White Beans (Canned or Dried):
Creamy white beans like cannellini or great northern beans are perfect for this dish. If you’re using dried beans, soak them overnight for optimal cooking. Canned beans are a fantastic time-saver, too—just rinse before adding them to your chili. -
Green Chiles:
These give a gentle kick and a subtle smokiness to your chili. Use canned green chiles for convenience, or roast your own for a fresh, zesty flavor. If you prefer a milder broth, opt for mild chiles or simply use less. -
Onion:
Onions add that aromatic base that makes this dish sing! Yellow or white onions are perfect here. Pro tip: for a sweeter flavor, sauté them slowly until caramelized. -
Cumin:
This earthy spice ties everything together, imparting warmth and depth. Remember, freshly ground cumin offers a more vibrant flavor, but pre-ground will still do the trick. -
Broth:
Chicken broth or vegetable broth works beautifully. Homemade is always best, but if you’re short on time, store-bought works just as well. For a deeper flavor, try using bone broth.
Step-by-Step Instructions
Let’s get cooking! Follow these easy steps to create your delicious bowl of white chicken chili.
-
Prep the Ingredients:
Start by dicing the onion and mincing garlic (if using fresh). If you’re using dried beans, make sure they’ve soaked overnight. Gather all your other ingredients so you’re ready to go. Staying organized makes kitchen magic happen faster! -
Sauté the Onion:
In a large pot over medium heat, add a drizzle of olive oil. Toss in the diced onion and cook until translucent (about 5 minutes). This step builds a flavor foundation, so take your time here! -
Add Garlic and Spices:
If you’re including garlic, add it now along with the cumin. Stir for about a minute until fragrant. Your kitchen should be smelling divine already! -
Cook the Chicken:
Season your chicken with salt and pepper, then add it to the pot. Sear on both sides for around 5 minutes until lightly browned. This gives a lovely depth of flavor that enhances the entire chili. -
Incorporate the Broth:
Pour in the chicken broth and bring the mixture to a simmer. Make sure to scrape any brown bits from the bottom of the pot; that’s where the magic flavor lies! -
Add Beans and Green Chiles:
Stir in your beans and green chiles. You can add more or less depending on how adventurous you’re feeling. Give it a good stir and lower the heat slightly. -
Simmer Away:
Cover the pot and let it simmer for about 20-30 minutes. This is where all the flavors marry, and your kitchen fills with a cozy aroma. If you’re using shredded chicken, this is a good time to shred it directly in the pot. -
Final Touches:
Taste your chili and adjust the seasoning as needed. Sometimes a hint more salt or a squeeze of lime can make all the difference! -
Serve It Up:
Ladle your warm chili into bowls and top with your favorite garnishes like cilantro, avocado, or a dollop of Greek yogurt.
Serving Suggestions
When you’re ready to serve, consider presenting this chili in beautiful bowls that showcase its creamy texture. A sprinkle of fresh cilantro and a few slices of avocado on top adds a lovely contrast and visual appeal. Serve it alongside warm cornbread or crispy tortilla chips for a delightful crunch.
Recipe Variations
If you’re feeling a bit adventurous, here are some creative twists to try on this basic recipe:
-
Spicy White Chicken Chili: Add diced jalapeños or a pinch of cayenne if you enjoy a good heat kick.
-
Creamy Version: Stir in some cream cheese or coconut milk towards the end for a richer, creamier texture.
-
Vegetarian Option: Swap the chicken for a medley of mushrooms or extra beans for a hearty plant-based version.
-
Southwestern Flair: Toss in some corn and bell peppers for sweetness and extra color.
-
Herb Infusion: Fresh herbs like cilantro or parsley lend a pop of freshness, so don’t shy away from tossing in a handful at the end!
Chef’s Notes
This white chicken chili recipe has been a staple in my family for years, and it’s interesting to see how it’s evolved over time. I once tried adding pumpkin puree for a seasonal twist, and it was a hit! Since then, I’ve added my own flair with spices and unique toppings, demonstrating how versatile and forgiving this recipe can be. And honestly, every time I make it, I feel like my grandma is right there beside me.
The beauty of this dish is that you can make it your own. So get creative! And don’t hesitate to share your own variations—cooking should always be a community experience.
FAQs and Troubleshooting
Q1: What if my chili is too thick?
A: Simply add more broth or water until you reach your desired consistency. A splash of lime juice can also brighten it up!
Q2: Can I make this chili in a slow cooker?
A: Absolutely! Just sauté the onion and spices first, then add everything else into the slow cooker. Set it on low for 6-8 hours or on high for 3-4 hours.
Q3: How do I store leftovers?
A: Store any leftovers in an airtight container in the fridge for up to 4 days or in the freezer for up to 3 months. Reheat gently on the stove or in the microwave.
Q4: What can I do if it’s too spicy?
A: If the chili turned out spicier than you like, add some dairy (like sour cream or cheese) to mellow the heat. Also, servings of rice or avocado can help balance it out.
Nutritional Info (if applicable)
This white chicken chili is not only delicious but also nutritious! Each serving is packed with protein, fiber from the beans, and vitamins from the vegetables. It’s a well-rounded meal that fuels your body and satisfies your cravings without sacrificing flavor. If you’re counting calories or macros, you can easily adjust the ingredients to suit your needs.
And there you have it—a wholesome and delightful white chicken chili that’s ready to steal the show at any dinner gathering! I hope this recipe fills your kitchen with laughter, warmth, and most importantly, great food. So, what are you waiting for? Let’s get cooking, and don’t forget to share your beautiful bowls with me! Happy cooking!
PrintUltimate White Chicken Chili

A warm and comforting white chicken chili that’s easy to prepare, perfect for cozy evenings.
- Prep Time: 15 minutes
- Cook Time: 30 minutes
- Total Time: 45 minutes
- Yield: 4 servings 1x
- Category: Main Course
- Method: Stovetop
- Cuisine: American
- Diet: Gluten-free
Ingredients
- 1 lb Chicken Breast (or Thighs)
- 2 cans (15 oz) White Beans (Canned or Dried)
- 1 can (4 oz) Green Chiles
- 1 Onion, diced
- 1 tsp Cumin
- 4 cups Chicken or Vegetable Broth
- Olive Oil, for cooking
- Salt and Pepper, to taste
Instructions
- Prep the ingredients by dicing the onion and mincing garlic (if using fresh).
- Sauté the onion in a large pot over medium heat with olive oil until translucent (about 5 minutes).
- Add garlic and cumin, and stir for about a minute until fragrant.
- Cook the seasoned chicken in the pot for about 5 minutes until lightly browned.
- Incorporate the broth and bring the mixture to a simmer.
- Add the white beans and green chiles, stirring well.
- Simmer the chili for about 20-30 minutes, allowing flavors to marry.
- Serve the chili hot, garnished with cilantro, avocado, or yogurt.
Notes
Feel free to adjust the spices and toppings based on your preferences. This chili is versatile and can be customized easily.
Nutrition
- Serving Size: 1 serving
- Calories: 350
- Sugar: 2g
- Sodium: 500mg
- Fat: 10g
- Saturated Fat: 2g
- Unsaturated Fat: 8g
- Trans Fat: 0g
- Carbohydrates: 40g
- Fiber: 5g
- Protein: 30g
- Cholesterol: 90mg
Keywords: chili, chicken chili, comfort food, easy recipes, fall recipes

Beginner-Friendly Brimstone Cookies: Easy 30-Minute Batch
Brimstone Cookies: A Spicy Sweet Treat That Will Ignite Your Taste Buds
Welcome to Clean Plate Cravings, my foodie friends! Today, we’re diving into a cookie recipe that’s nothing short of magical—Brimstone Cookies! Now, you might be thinking, “What in the world makes a cookie brimstone?” Well, buckle up because I’m about to take your taste buds on a wild adventure that combines the warmth of sweet treats with a fiery twist that’ll leave you craving more!
Baking cookies is all about finding joy and a bit of nostalgia in the kitchen. Growing up, cookies were my ultimate comfort food. The aroma of warm cookies filling the house felt like a hug at the end of a long day. But, as I grew older and experimented with flavors, I realized that cookies could be so much more than just sugar and flour. So, what happens when you mix traditional cookie elements with a hint of heat? You get Brimstone Cookies—a unique blend that brings sweet and spicy together.
What inspired this fiery flavor? It was a cozy evening spent experimenting in my little kitchen while rewatching my favorite movie, "Chocolat." The idea sparked when the protagonist introduced spicy chocolate as a way to evoke passion and excitement. On a whim, I tossed a sprinkle of cayenne pepper into my usual cookie dough recipe, and oh boy, the results were explosive in the best possible way! The sweetness of the sugar and chocolate chips playfully dances with the warm kick of cayenne, creating a balance that’s utterly irresistible.
Imagine biting into a warm cookie that’s crispy on the outside, soft and chewy on the inside, with a delightful hint of heat that activates your taste buds. These Brimstone Cookies aren’t just a treat; they’re an experience. Plus, they make for a perfect dessert for a dinner party where you want to impress guests or simply enjoy a fun baking day at home. So, let’s get down to business and see what you need to whip up this extraordinary batch!
Ingredients
Gathering the right ingredients is crucial for creating delicious cookies. Here’s what you’ll need:
-
2 cups all-purpose flour
A staple in any baking recipe! If you’re gluten-free, you can substitute with a 1:1 gluten-free flour blend, but note that it might affect the texture slightly. -
1 cup granulated sugar
This adds sweetness and helps in achieving that delightful texture. Want a coconut twist? Try coconut sugar for a subtle caramel flavor! -
1/2 cup brown sugar, packed
Brown sugar not only sweetens but also offers moisture and rich flavor. If you’re out, white sugar mixed with a bit of molasses can work as a good substitute. -
1/2 cup unsalted butter, softened
Make sure it’s at room temperature for easier mixing. You can swap for coconut oil or vegan butter to make these cookies dairy-free! -
2 large eggs
Eggs provide structure and moisture. If you’re vegan or allergic, try using flaxseed meal mixed with water as a substitute—1 tablespoon flaxseed meal + 2.5 tablespoons water equals 1 egg! -
1 tsp vanilla extract
A splash of vanilla amplifies the flavors. Pure vanilla extract is worth it—try to avoid imitation! -
1 tsp baking soda
Key for helping the cookies rise and achieving that perfect texture. Always check the expiration date! -
1/2 tsp salt
A pinch of salt elevates flavors. Sea salt or kosher salt works wonders as it brings out the sweet notes! -
1/2 tsp cayenne pepper (or to taste)
Here’s where the magic happens! Adjust the amount based on your spice tolerance. If you prefer, you can even try chili powder for a milder kick. -
1/2 cup chocolate chips (optional)
These little gems add a touch of sweetness along with the chocolatey goodness. Use dark, milk, or even white chocolate chips based on your preference!
Step-by-Step Instructions
Now that we’ve got all our ingredients lined up, let’s get baking!
-
Preheat Your Oven
Preheat your oven to 350°F (175°C). This is key to achieving that perfect golden-brown color. If you forget, don’t worry! Just give your oven an extra few minutes—exact timing can vary by appliance. -
Mix the Dry Ingredients
In a large bowl, whisk together the all-purpose flour, baking soda, salt, and cayenne pepper. This ensures the baking soda is well-distributed throughout the flour, giving your cookies an even rise. -
Cream the Butter and Sugars
In another bowl, use an electric mixer to cream together the softened unsalted butter, granulated sugar, and brown sugar until the mixture is light and fluffy—about 2-3 minutes. This step is crucial for achieving a light texture, so don’t rush it! -
Add Eggs and Vanilla
Beat in the eggs one at a time, making sure each is combined before adding the next. Then mix in the vanilla extract. This adds a depth of flavor to the batter. -
Combine Dry and Wet Ingredients
Gradually mix the dry ingredients into the wet, being careful not to overmix—mix just until everything is combined! A few floury bits are okay because they’ll blend in during baking. -
Fold in the Chocolate Chips
If you’re using chocolate chips, gently fold them in at this point to incorporate them evenly into the dough. This is where the real fun happens! -
Scoop and Bake
Use a cookie scoop or two spoons to drop dollops of dough onto a parchment-lined baking sheet, leaving enough space between them to allow for spreading. Bake for 10-12 minutes, or until the edges are golden brown. Pro tip: for a chewy texture, take them out when they look slightly undercooked—they’ll continue to firm up as they cool! -
Cool Down
Remove the cookies from the oven and let them rest on the baking sheet for about 5 minutes before transferring them to a cooling rack. This cooling time helps develop that perfect texture!
Serving Suggestions
These Brimstone Cookies can be enjoyed on their own, but for an extra special treat, pair them with a scoop of vanilla ice cream or a dollop of whipped cream drizzled with chocolate syrup. They also make for a fabulous gift, so consider packaging them up in a cute box tied with a ribbon for your friends or family!
Recipe Variations
Feeling adventurous? Here are a few fun twists you can try with your Brimstone Cookies:
-
Nuts About it!
Add 1/2 cup of chopped pecans or walnuts for crunch and extra flavor. -
Spicy Chocolate Chips
Swap your standard chocolate chips for spicy chocolate chips to turn up the heat even more! -
Citrus Zing
Grate a teaspoon of orange or lemon zest into the dough for a refreshing burst that complements the spice beautifully. -
Dried Fruit
Introduce dried cherries or cranberries for a hint of tartness that pairs beautifully with the sweet heat. -
Double Trouble
Do a half-and-half mix of white and dark chocolate chips for a decadent flavor explosion.
Chef’s Notes
Brimstone Cookies started as a simple experiment, but they quickly became a family favorite. I remember serving them at a holiday gathering, and the guests were both surprised and delighted by the unexpected kick in every bite. Many have even asked me to host a "cookie tasting" where everyone brings their own spicy cookie interpretation. These cookies have turned into a conversation starter, a memory-maker!
FAQs and Troubleshooting
Q: Why are my cookies spreading too much?
A: If your cookies are spreading too much, try chilling the dough for at least 30 minutes before baking. This helps solidify the butter and gives you thicker cookies.
Q: Can I make these cookies ahead of time?
A: Absolutely! You can prepare the dough in advance and refrigerate it for up to 3 days. Just make sure to bring it back to room temperature before baking.
Q: My cookies turned out too spicy. What can I do?
A: If the spice is overwhelming, serve them with whipped cream or a scoop of vanilla ice cream to balance it out. You can also reduce the cayenne pepper in future batches.
Q: How should I store these cookies?
A: Store cooled cookies in an airtight container at room temperature for up to a week. If you want to keep them fresh longer, freeze them in a single layer and transfer to a freezer bag for up to 3 months.
Now that you have all the details, it’s time to roll up your sleeves and embark on your cookie-baking adventure. The Brimstone Cookies are sure to become a unique staple in your baking repertoire—combining sweetness and spice that keeps things fun! So grab your apron, preheat that oven, and let’s get baking! Each bite is like a tiny celebration, and I can’t wait to hear how yours turn out. Enjoy every spicy, sweet moment!
PrintBrimstone Cookies

A unique cookie recipe that combines sweet and spicy flavors, featuring a hint of cayenne pepper for an irresistible kick.
- Prep Time: 15 minutes
- Cook Time: 12 minutes
- Total Time: 27 minutes
- Yield: 24 cookies 1x
- Category: Dessert
- Method: Baking
- Cuisine: American
- Diet: Vegetarian
Ingredients
- 2 cups all-purpose flour
- 1 cup granulated sugar
- 1/2 cup brown sugar, packed
- 1/2 cup unsalted butter, softened
- 2 large eggs
- 1 tsp vanilla extract
- 1 tsp baking soda
- 1/2 tsp salt
- 1/2 tsp cayenne pepper (or to taste)
- 1/2 cup chocolate chips (optional)
Instructions
- Preheat your oven to 350°F (175°C).
- Mix the dry ingredients in a bowl.
- Cream the butter and sugars until light and fluffy.
- Add the eggs and vanilla, mixing well.
- Combine dry and wet ingredients without overmixing.
- Fold in chocolate chips if using.
- Scoop dollops of dough onto a baking sheet.
- Bake for 10-12 minutes until golden brown.
- Cool on a rack for 5 minutes before serving.
Notes
Pair with vanilla ice cream for an extra treat. Adjust cayenne to suit your spice tolerance.
Nutrition
- Serving Size: 1 cookie
- Calories: 150
- Sugar: 10g
- Sodium: 150mg
- Fat: 6g
- Saturated Fat: 4g
- Unsaturated Fat: 2g
- Trans Fat: 0g
- Carbohydrates: 22g
- Fiber: 1g
- Protein: 2g
- Cholesterol: 25mg
Keywords: cookies, spicy cookies, dessert recipe, baking, sweet and spicy

Weeknight One-Pan: 30-Minute Creamy Tomato Skillet Gnocchi
30-Minute Creamy Tomato Gnocchi: A Wholesome Comfort in Every Bite
Welcome, food lovers! If you’re looking for a quick, comforting meal that packs a ton of flavor and feels downright indulgent, you’ve landed in the right spot. Today, we’re diving into the world of creamy tomato gnocchi, a dish that not only satisfies your cravings but also warms your heart. With velvety textures and vibrant colors, this dish is your ticket to a cozy night in or a delightful dinner party.
But let’s be real; this creamy wonder can be on your table in just 30 minutes! Yes, you heard that right—30 minutes from prep to plate. In our busy lives, it’s so easy to feel like home-cooked meals are just too much of a hassle. Well, let’s change that narrative, shall we? You can whip up a dish that feels like a warm hug, all while juggling work, family, and the never-ending to-do list.
What’s even better is that this recipe brings together some of my favorite ingredients. Picture yourself savoring pillowy gnocchi coated in a luscious tomato sauce enriched with heavy cream, garlic, and just a sprinkle of parmesan cheese. Add a twirl of fresh basil, and you have a beautiful dish that invites everyone to sit down and enjoy.
Speaking of beauty, there’s something so nostalgic about gnocchi. It reminds me of lazy Sunday afternoons spent in the kitchen, where the biggest decision was whether to go with marinara or Alfredo sauce, and all sides involved were happy with whatever choice was made. So let’s roll up our sleeves, grab those ingredients, and find out how to make this delightful dish!
A Nostalgic Spin
Let me take you back for a moment. My first experience with gnocchi was in my grandmother’s cozy kitchen, where the air was always filled with the smell of fresh garlic and simmering tomatoes. She had a knack for making everything from scratch. I remember standing on my little stool beside her as we rolled out the dough, her seasoned hands guiding me through the art of creating those adorable little dumplings.
My favorite part? The impromptu taste tests! She would always sneak a forkful of the simmering sauce right under my nose, and I would giggle as the warm flavors spread across my palate. Those moments etched themselves into my heart, turning gnocchi from a mere dish into a symbol of togetherness and love.
Fast forward to today, I find myself recreating those memories in my own kitchen, sharing that same warmth and comfort with friends and loved ones. This 30-minute creamy tomato gnocchi not only connects me to my roots but also makes it accessible for anyone craving the same joy. And hey, you don’t even need to roll out any dough!
Ingredients
Here’s what you’ll need to bring this dish to life:
-
Gnocchi: The star of the show! You can find gnocchi in the pasta aisle of your grocery store, usually made from potatoes. If you’re feeling adventurous, you can even make your own, but store-bought creates a wonderful base that cooks up in a flash.
-
Tomato Sauce: A classic marinara or a roasted tomato sauce works beautifully. If you want to elevate the flavor, look for a brand with high-quality ingredients or even make your own!
-
Heavy Cream: This is what gives our dish that irresistible creaminess. You can swap it for half-and-half for a lower-fat option, or even coconut cream if you want a dairy-free alternative.
-
Garlic: Fresh garlic is a must! It brings a fragrant punch that elevates every bite. Alternatively, you could use garlic powder if you’re in a pinch, but fresh is always best.
-
Olive Oil: Don’t skip on the good stuff; high-quality olive oil enhances flavors and brings a lush texture. Feel free to substitute with avocado oil if you’re looking for a different profile.
-
Parmesan Cheese: Grated Parmesan adds a salty element that perfectly complements the creamy sauce. For a vegan alternative, nutritional yeast can provide that cheesy oomph without the dairy!
-
Basil: Fresh basil is a game-changer! Its fragrant aroma and taste take the dish to new heights. You can substitute with dried basil; just remember, fresh herbs have a brighter flavor!
Step-by-Step Instructions
Now that we have our ingredients, let’s talk about how to bring it all together.
-
Cook the Gnocchi:
Start by bringing a large pot of salted water to a boil. It’s essential to season your water well—this is where your gnocchi will start to absorb flavor. Once boiling, toss in your gnocchi. You’ll know they’re done when they float to the top, typically about 2-3 minutes. Give them a minute more to cook through, and then drain them in a colander. -
Sauté Garlic:
In a large skillet over medium heat, add 1 tablespoon of olive oil. Once it shimmers, toss in minced garlic. Sauté for about 30 seconds until it’s fragrant, but be careful not to let it turn brown. Burnt garlic can turn bitter and ruin that beautiful sauce! -
Add Tomato Sauce:
Pour in your tomato sauce and bring it to a gentle simmer. This is where the magic happens! The garlic will infuse the sauce, making it even more flavorful. Keep it bubbling away for about 3-4 minutes, allowing those flavors to meld together. -
Introduce the Cream:
Once your sauce is simmering, slowly mix in the heavy cream (or your choice of alternative). Stir it well to combine, and watch as it transforms into a dreamy, creamy concoction. Season with salt and pepper to taste—don’t be shy! Taste as you go so you get just the right balance. -
Toss in Gnocchi:
After your sauce has reached creamy perfection, add the drained gnocchi into the skillet. Gently toss to coat every piece in that luscious sauce. You want each gnocchi to bask in the creaminess! -
Finish with Cheese and Basil:
Sprinkle in the grated Parmesan cheese and fresh basil, stirring to incorporate them into the dish. Let it warm through for another minute so the cheese melts into the sauce beautifully. -
Plating:
Grab your plates and serve this masterpiece while it’s hot. A quick drizzle of olive oil or a sprinkle of more cheese on top adds a lovely finishing touch.
Serving Suggestions
To plate this creamy tomato gnocchi, I love using wide, shallow bowls that allow the dish to shine. A light drizzle of extra virgin olive oil and a few torn basil leaves on top gives a fresh pop. You may want to serve it with a side salad or some freshly baked bread to soak up all that glorious sauce. Trust me, your guests will be asking for seconds!
Recipe Variations
Looking to mix things up? Here are a few creative twists you can try with this recipe:
- Add Veggies: Toss in some sautéed spinach, mushrooms, or zucchini for an extra nutrition boost.
- Protein Packed: Add grilled chicken or Italian sausage for an added protein punch.
- Spice It Up: Feel free to add red pepper flakes to the sauce for a touch of heat if you like some spice.
- Herb Swap: Swap basil for fresh parsley or even arugula for a peppery twist.
- Make it Vegan: Replace the heavy cream with cashew cream and the cheese with a nut-based alternative.
Chef’s Notes
This recipe is a staple in my household and has morphed over the years based on what I have on hand or the season. I’ve hosted countless dinner parties where this dish has stolen the spotlight! One time, I forgot to buy cream, and I creatively substituted it with Greek yogurt. It turned out surprisingly delicious and added a tangy edge to the sauce that was a big hit! Don’t hesitate to make this your own—swap, experiment, and enjoy!
FAQs and Troubleshooting
-
What if my gnocchi is mushy?
This can happen if they’re overcooked. Always keep an eye on them; they cook quickly. When you see them float, that’s your cue! -
Can I make this ahead of time?
Absolutely! You can prepare the sauce a day ahead, but I suggest adding the gnocchi fresh when you’re ready to serve. -
What if my sauce is too thick?
Just add a splash of pasta water or more cream to thin it out to your desired consistency. -
How do I store leftovers?
Store in an airtight container in the fridge for up to 3 days. You can reheat on the stovetop or microwave, adding a splash of water or cream to loosen it up.
Nutritional Info
While I won’t bore you with exact numbers, this dish is rich in flavors while offering balanced nutrients. It’s a great source of carbohydrates from gnocchi, healthy fats from olive oil and cream, and protein from Parmesan. And that’s not to mention the fresh basil, which is loaded with antioxidants!
In conclusion, this 30-minute creamy tomato gnocchi is not just a recipe—it’s a love letter to those cozy dinners and cherished kitchen memories. So grab your ingredients, gather your loved ones, and make some delicious memories of your own. Happy cooking!
Print30-Minute Creamy Tomato Gnocchi

A quick, comforting dish featuring pillowy gnocchi coated in a luscious creamy tomato sauce, perfect for a cozy night in or a dinner party.
- Prep Time: 10 minutes
- Cook Time: 20 minutes
- Total Time: 30 minutes
- Yield: 4 servings 1x
- Category: Main Course
- Method: Stovetop
- Cuisine: Italian
- Diet: Vegetarian
Ingredients
- 1 package of gnocchi
- 1 cup tomato sauce
- 1/2 cup heavy cream
- 2 cloves garlic, minced
- 1 tablespoon olive oil
- 1/4 cup grated Parmesan cheese
- Fresh basil, for garnish
Instructions
- Cook the gnocchi by bringing a large pot of salted water to a boil. Add the gnocchi and cook until they float, about 2-3 minutes. Drain.
- Sauté garlic in olive oil in a skillet over medium heat for about 30 seconds.
- Add tomato sauce and let it simmer for 3-4 minutes.
- Introduce heavy cream, stirring to combine. Season with salt and pepper.
- Toss in the drained gnocchi and coat well with the sauce.
- Finish with grated Parmesan and fresh basil, warming through for another minute.
- Plate and serve hot with a drizzle of olive oil on top.
Notes
Feel free to add veggies, proteins, or swap ingredients based on your preferences. This dish can be made ahead but add gnocchi fresh when ready to serve.
Nutrition
- Serving Size: 1 serving
- Calories: 350
- Sugar: 5g
- Sodium: 400mg
- Fat: 12g
- Saturated Fat: 4g
- Unsaturated Fat: 6g
- Trans Fat: 0g
- Carbohydrates: 45g
- Fiber: 3g
- Protein: 15g
- Cholesterol: 30mg
Keywords: gnocchi, creamy tomato sauce, Italian comfort food, quick dinner