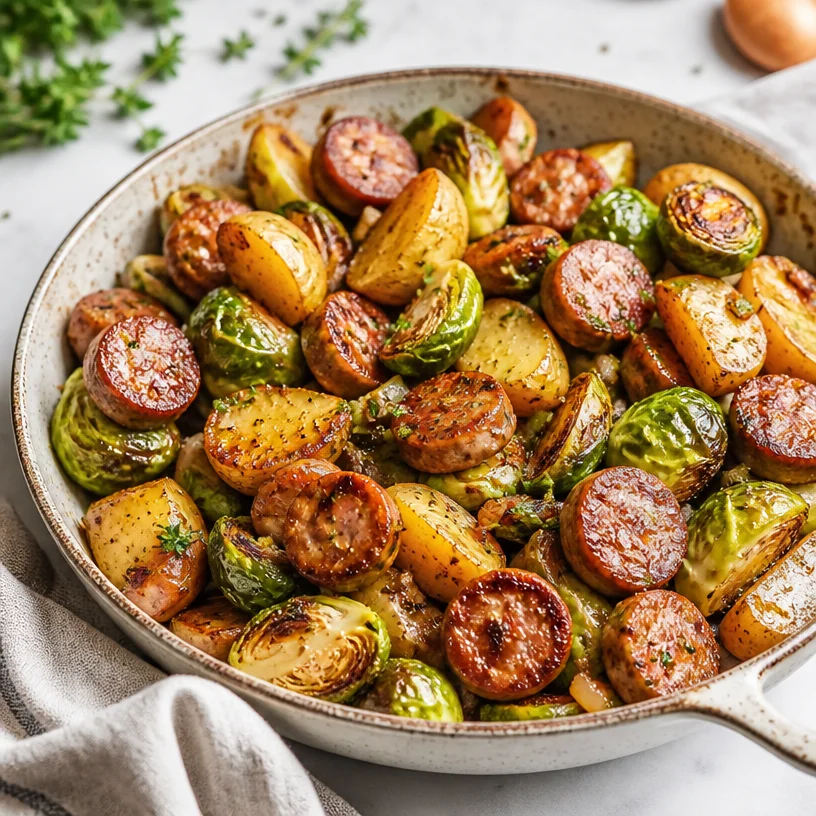
One-Pan Sausage Veggies: 25-Minute Weeknight Skillet
One-Pan Sausage Veggies: A Delicious and Easy Dinner Adventure
Welcome, food enthusiasts! Today, we’re diving into a dish that’s not only bursting with flavor but also a total game-changer for busy weeknights: One-Pan Sausage Veggies. Picture this: it’s been a long day, the last thing you want is a sink full of dishes or a complicated recipe to tackle. You want something that feels like a warm hug on a plate, right? Well, this recipe is just that—simple, delicious, and so satisfying!
Now, let’s talk about why one-pan meals have captured my heart. There’s something incredibly grounding and leisurely about those evenings spent in the kitchen. When I was a kid, my family often gathered around the table for homemade dinners. My mom had this magical ability to create mouthwatering meals with whatever we had left in the fridge. One night, she whipped up a dish that’s forever etched in my memory—sausage and whatever vegetables were on hand. It may have been a simple humble meal, but those delightful flavors dancing together on my plate ignited my love for cooking.
As I grew up and embarked on my culinary journey, I aimed to recreate that magic. This One-Pan Sausage Veggies recipe beautifully mirrors my childhood nostalgia while adding a modern twist. Made with hearty sausages, crisp Brussels sprouts, and creamy potatoes, you’ll find that every forkful is a satisfying bite of comfort. Plus, it’s all cooked in one pan, making clean-up a breeze. Are you ready to make this magic happen in your kitchen? Let’s get cooking!
A Taste of Home: A Personal Story
One of my fondest memories around food revolves around weekends with my family—a cherished time when we’d gather together after a busy week. I remember my mom preparing different meals every Saturday. It was like a fun cooking adventure. The aroma of sausages sizzling and potatoes roasting would waft throughout the house, filling every corner with warmth and excitement. One particular Saturday, she made a delightful one-pan dish with some leftover sausages, seasonings, and whatever vegetables we had lying around. As we sat at the table, sharing stories and laughing over each bite, I realized how food truly brings us together.
Fast forward to today, I’ve taken that very idea and built upon it. My One-Pan Sausage Veggies recipe channels that same cozy spirit, combining what once were fridge leftovers into a wholesome and vibrant dinner. Each time I cook this meal, I’m taken back to those sunlit days, bringing my kids into the kitchen to share that sense of togetherness. It’s a reminder that the best meals are often those made with love and a bit of creativity, all wrapped up in a single pan.
Ingredients
Here’s what you’ll need to get started on this beautiful dish:
-
Sausages (about 4-6, any variety you prefer)
- I recommend using your favorite sausage—whether it’s spicy Italian, chicken, or even plant-based options like soy or lentil. Feel free to customize to your taste!
-
Brussels Sprouts (1 pound, trimmed and halved)
- These little gems add such a beautiful, earthy flavor. If Brussels sprouts aren’t your thing, try substituting with broccoli, green beans, or even asparagus!
-
Potatoes (about 1 pound, diced)
- I like using baby Yukon Golds for their creamy texture, but any type of potato (sweet potatoes add a nice sweetness!) works here. Just make sure to cut them into even pieces for uniform cooking.
-
Olive Oil (3 tablespoons)
- Olive oil not only brings richness but also helps achieve that lovely golden brown crust. If you’re looking for a change, avocado oil is a fantastic alternative.
-
Garlic Powder (1 teaspoon)
- A flavor powerhouse! You can use fresh minced garlic if you prefer, just adjust the quantity according to your taste.
-
Dried Italian herbs (1 teaspoon – a blend of oregano, basil, and thyme works well)
- These herbs bring that Mediterranean vibe to your dish. Use fresh herbs to enhance the flavor even more if they’re available!
-
Salt and Pepper (to taste)
- Essential for bringing out the natural flavors in your veggies and sausage. Don’t be shy with this!
Step-by-Step Instructions
Now that we’ve gathered all our vibrant ingredients, let’s turn up the heat and whip up this delightful dish! Follow along with these simple steps:
-
Preheat your oven: Set your oven to 400°F (200°C) and let it come to that perfect cooking temperature. This step is crucial for achieving beautifully roasted vegetables.
-
Prepare the pan: Grab a large rimmed baking sheet—that surface area helps everything get nice and crispy! Drizzle about two tablespoons of olive oil over the top, making sure to spread it evenly.
-
Cut your sausages: If you prefer even cooking, slice your sausages into pieces—about 2 inches thick works well. If you’re using links, you can keep them whole for a rustic feel.
-
Toss the veggies: In a large bowl, combine the Brussels sprouts and diced potatoes. Drizzle with the remaining olive oil, then sprinkle the garlic powder, dried herbs, salt, and pepper over the top. Give everything a good toss so that each piece gets evenly coated. This is where the magic begins!
-
Add the sausages: Now, it’s time to introduce our stars of the show! Add the sliced sausages to the bowl and mix everything one last time. I’m telling you, this combination is mouthwatering already!
-
Spread it out: Pour the entire mixture onto your prepared baking sheet, spreading it out in a single layer. This allows for optimal roasting, so don’t overcrowd the pan—feel free to use two if needed!
-
Roast away: Pop the baking sheet into the preheated oven and let everything roast for about 25-35 minutes. Halfway through, make sure to stir the ingredients around to ensure even cooking. Keep an eye on those Brussels sprouts; you want them tender and golden-brown, not mushy.
-
Check for doneness: When your sausages are cooked through and the veggies are beautifully caramelized, take your pan out of the oven. Use a meat thermometer for the sausage to make sure they’ve reached an internal temperature of 165°F (74°C).
-
Serve it up: This dish is all about enjoying those simple moments. Grab your favorite plate or serving dish, and dive into the flavorful feast you just created.
Serving Suggestions
Plating this One-Pan Sausage Veggies is simple yet beautiful! Serve it hot, straight from the oven, and enjoy the vibrant colors on your plate. I love sprinkling a little extra chopped fresh parsley over the top for a pop of freshness and color. A side of crusty bread or a light green salad can complement this dish nicely if you’re feeling fancy. But let’s be real—this dish can stand strong on its own, and you’ll find it’s already a complete meal!
Recipe Variations
Feeling adventurous? Here are a few creative twists to keep things exciting:
- Spicy Kick: Add some red pepper flakes before roasting for a touch of heat!
- Herby Delight: Substitute the dried Italian herbs with fresh rosemary or thyme for a fragrant twist.
- Zesty Lemon: Squeeze some fresh lemon juice over the dish just before serving for brightness.
- Creamy Additions: Add dollops of crème fraîche or Greek yogurt on top for a creamy finish.
- Vegetarian Delight: Swap out the sausage for roasted chickpeas or marinated tempeh to make it plant-based.
Chef’s Notes
This One-Pan Sausage Veggies has a special place in my heart, quite like the cherished family meals from my childhood. It’s evolved over the years; I’ve learned that cooking doesn’t have to be tedious or stressful—it’s all about simplicity and flavor. Whenever I whip up this dish, I can’t help but smile as the aromas fill the kitchen, transforming the space into a cozy haven. Plus, my kids love it, which makes me a happy chef!
The flexibility of this recipe is fantastic, allowing for a little improvisation based on what you have at hand. It’s a reminder that every meal can be a little adventure. You just need the right ingredients and a generous sprinkle of creativity!
FAQs and Troubleshooting
1. What can I do if my veggies are cooking too quickly?
If you notice your veggies browning too fast, simply pull the baking sheet out and cover it loosely with aluminum foil to manage the cooking while still allowing them to roast.
2. Can I prep this dish ahead of time?
Absolutely! You can chop your veggies and sausage the night before. Store them in an airtight container in the fridge and toss them together right before roasting.
3. How can I tell when the sausages are fully cooked?
Using a meat thermometer is the best way to check! Sausages should reach an internal temperature of 165°F (74°C) to ensure they’re safe to eat.
4. Is it okay to use frozen veggies?
It’s best to use fresh vegetables for this recipe to achieve that lovely caramelized texture. However, if frozen veggies are all you have on hand, just be sure to adjust the cooking time, as they may require less time in the oven.
Nutritional Info
While I always encourage enjoying food without the pressure of counting calories, if you’re curious, a typical serving of One-Pan Sausage Veggies contains approximately:
- Calories: 450
- Protein: 20g
- Carbohydrates: 35g
- Fat: 25g
Your mileage may vary based on the specific ingredients and portion sizes, but this dish is sure to fill you with wholesome goodness!
That wraps up our culinary adventure into the delightful realm of One-Pan Sausage Veggies! I hope you find as much joy in cooking and sharing this dish as I do. Remember, every meal is an opportunity to create lasting memories—so let’s keep it fresh, simple, and seriously delicious! Happy cooking!
PrintOne-Pan Sausage Veggies

A simple and delicious one-pan meal featuring hearty sausages, Brussels sprouts, and creamy potatoes, perfect for busy weeknights.
- Prep Time: 15 minutes
- Cook Time: 35 minutes
- Total Time: 50 minutes
- Yield: 4 servings
- Category: Main Course
- Method: Baking
- Cuisine: American
- Diet: Omnivore
Ingredients
- Sausages (about 4-6, any variety)
- Brussels Sprouts (1 pound, trimmed and halved)
- Potatoes (about 1 pound, diced)
- Olive Oil (3 tablespoons)
- Garlic Powder (1 teaspoon)
- Dried Italian herbs (1 teaspoon)
- Salt and Pepper (to taste)
Instructions
- Preheat your oven to 400°F (200°C).
- Prepare a large rimmed baking sheet and drizzle two tablespoons of olive oil over it.
- Cut the sausages into pieces or leave them whole if using links.
- Toss the Brussels sprouts and diced potatoes in a bowl with the remaining olive oil, garlic powder, dried herbs, salt, and pepper.
- Add the sliced sausages and mix everything together.
- Spread the mixture on the prepared baking sheet in a single layer.
- Roast for about 25-35 minutes, stirring halfway through.
- Check for doneness with a meat thermometer to ensure sausages reach 165°F (74°C).
- Serve hot and enjoy!
Notes
For added flavor, sprinkle fresh parsley before serving. This dish pairs nicely with crusty bread or a light salad.
Nutrition
- Serving Size: 1 serving
- Calories: 450
- Sugar: 5g
- Sodium: 600mg
- Fat: 25g
- Saturated Fat: 9g
- Unsaturated Fat: 10g
- Trans Fat: 0g
- Carbohydrates: 35g
- Fiber: 5g
- Protein: 20g
- Cholesterol: 80mg
Keywords: one-pan meal, sausage, veggies, easy dinner, healthy recipe
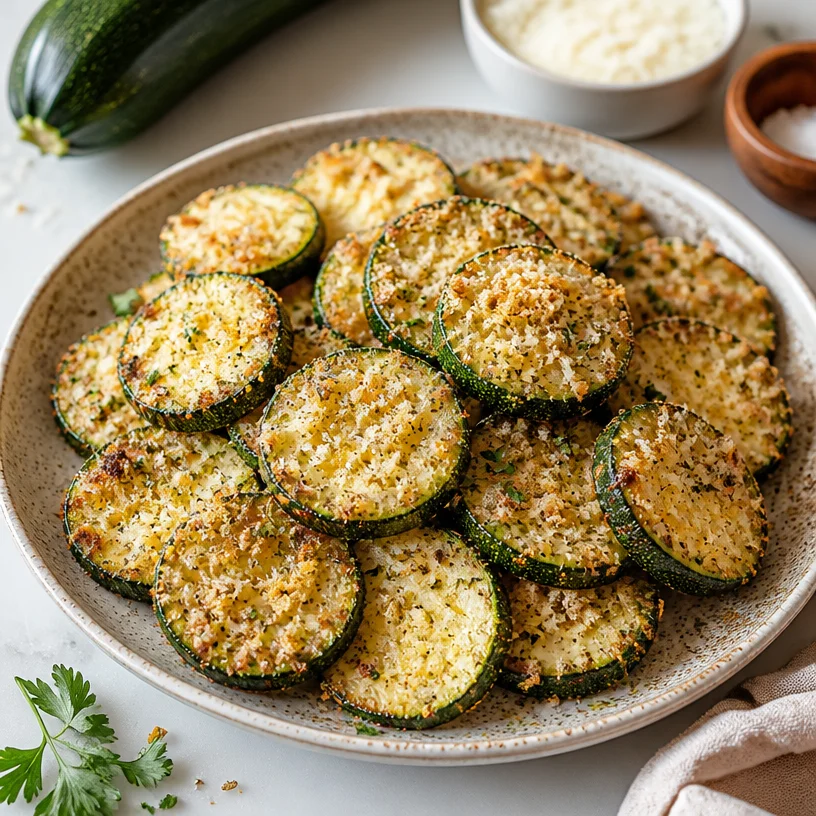
Minute Crispy Air Fryer Zucchini Parmesan, Weeknight Side
Crispy Air Fryer Zucchini Parmesan: A Flavorful Crunch in Every Bite
Welcome, fellow food enthusiasts! Are you ready to bring a little extra crunch to your next meal? Today, we’re diving into the wonderful world of air frying, and I’ll be sharing one of my all-time favorite recipes: Crispy Air Fryer Zucchini Parmesan. This dish is not just a side; it’s a delicious way to celebrate vibrant summer zucchini while keeping things light and wholesome. Flavorful, satisfying, and super easy to whip up—this recipe embodies everything Clean Plate Cravings stands for!
I remember the first time I tried crispy zucchini. It was at a little Italian bistro where I spent many summer evenings with friends, laughing, chatting, and indulging in the freshest of dishes. The zucchini came out golden and crispy, paired perfectly with a tangy marinara that just made my taste buds dance. I was mesmerized by its simple perfection—who would have thought that humble zucchini could transform into a dish so delightful? I promised myself I would try to recreate that crispy goodness in my kitchen one day. And here we are!
Using an air fryer is an absolute game-changer; it gives you the satisfying crunch of frying but retains a healthy twist. By the end of this blog post, you’ll learn how to make these crispy bites and create lasting memories around the dinner table. So grab that zucchini, and let’s get cooking!
A Nostalgic Kitchen Memory
Let’s take a moment to rewind to my childhood kitchen, where culinary adventures sparked my love for cooking. I can vividly remember the summer evenings with my family gathered in our cozy kitchen, the scent of garlic wafting through the air. One of my mom’s go-to recipes was her crispy vegetable fritters, which always included zucchini when they were in season. My siblings and I would eagerly help her grate the zucchini, and we often ended up in a playful fight over who got to use the biggest grater.
Once the batter was mixed, it was an exercise in patience (and restraint) to wait for them to finish cooking. The crazy anticipation turned into joyful laughter as we devoured those crispy bites, dipping them into homemade marinara sauce. Those memories of warmth, sharing, and delicious food inspired my love of cooking. It’s that feeling of connection that always drives me to create meals that not only taste great but also make you feel good.
Ingredients
Here’s what you will need to create these delightful air-fried zucchini bites:
-
1 medium-sized zucchini: Fresh and versatile, zucchini adds a mild flavor while soaking up seasoning beautifully. If you can’t find zucchini, yellow squash works great too!
-
1 tablespoon olive oil: A healthy fat that helps achieve that crispy texture we all love. Feel free to substitute with avocado oil if you’re looking for a neutral flavor or a high smoke point.
-
1 teaspoon Italian seasoning: A blend of herbs that brings a delicious Italian flair—and it’s super convenient! You can use a homemade mix or switch it up with your favorite herbs like oregano or basil.
-
2 tablespoons Parmesan cheese: This adds a savory depth and an irresistible umami kick to the zucchini. If you’re vegan or dairy-free, consider using nutritional yeast for a cheesy flavor without the dairy!
-
Salt and black pepper to taste: Essential for enhancing all the flavors. Sea salt or Himalayan salt can provide nice crunch and flavor, while freshly cracked black pepper adds a delightful spiciness.
Step-by-Step Instructions
Now, let’s get into the delicious details of whipping up these crispy delights!
-
Prep the Zucchini: Start by washing your zucchini under cold water and patting it dry. Trim off both ends, then slice it into rounds or stick shapes, around ½ inch thick. The thicker the slice, the longer it will take to cook, and you want it crispy! If you prefer, you can also spiralize the zucchini for an interesting shape.
-
Mix the Coating: In a mixing bowl, whisk together the olive oil, Italian seasoning, salt, and pepper. You can do this by hand or use a whisk for a quick mix. This step is essential—so don’t skip it! The oil will help the spices coat the zucchini evenly and aid in that delightful crunch.
-
Coat the Zucchini: Add your zucchini slices into the bowl and give them a gentle toss, ensuring each piece is coated well. This is where you might want to get your hands in there! Make sure they’re nicely coated but not drenched in oil.
-
Add the Parmesan: Once your zucchini is coated, sprinkle the Parmesan on top and give it another gentle toss. The cheese will crank up the deliciousness factor, and who doesn’t love a bit of cheesy goodness?
-
Preheat the Air Fryer: Preheat your air fryer to 400°F (200°C) for about 5 minutes. This step isn’t just a formality; preheating ensures that your zucchini gets that golden crisp right from the start!
-
Air Fry the Zucchini: Place the coated zucchini pieces in the air fryer basket in a single layer, making sure not to overcrowd them—let them breathe! You may need to work in batches depending on your air fryer’s capacity. Cook them for about 8-10 minutes, flipping halfway through, until they are crispy and golden brown.
-
Serve and Enjoy: Once they’re done, remove them carefully (they’ll be hot!) and let them cool for a minute. Serve with marinara sauce for dipping or enjoy them plain. Either way, you’re in for a treat!
Serving Suggestions
To plate these crispy bites, you can arrange them on a beautiful platter with a small bowl of warm marinara nestled in the center for dipping. A sprinkle of fresh parsley on top adds a pop of color and freshness. These little beauties are perfect for sharing as an appetizer, alongside a salad, or even as a healthy snack during movie night!
Recipe Variations
While the classic Crispy Air Fryer Zucchini Parmesan is a surefire winner, here are a few variations to keep things exciting:
-
Spicy Crunch: Add a pinch of red pepper flakes to the coating for an extra kick!
-
Herbed Delight: Substitute Italian seasoning with a mix of fresh herbs like dill or cilantro for a fresh twist.
-
Cheesy Italian Trio: Mix Parmesan with a little mozzarella and cheddar for a cheesier layer of flavor.
-
Balsamic Glaze Drizzle: After air frying, drizzle some balsamic glaze over the zucchini for a tangy finish.
-
Sweet Potato Zucchini Bake: Layer slices of zucchini with sweet potatoes, some cheese, and bake for a tasty casserole version!
Chef’s Notes
Creating this recipe has been a journey! Over the years, I experimented with various seasonings, and different cooking methods (including pan-frying!). The air fryer truly delivers on the promise of crispy without the guilt, making it my go-to method for veggie cooking. One of those times, I accidentally grabbed smoked paprika instead of regular paprika, and I have to say—the smoky flavor added a whole new dimension! Play around and make it your own—kitchen experiments lead to delightful discoveries.
FAQs and Troubleshooting
Can I make this recipe gluten-free?
Absolutely! This recipe is naturally gluten-free. However, if you want some extra crunch, you can use gluten-free breadcrumbs instead of Parmesan cheese.
My zucchini turned out soggy. What happened?
Soggy zucchini can happen if they were too wet before cooking. Make sure to pat them dry after washing. Additionally, ensure they’re not crowded in the air fryer; space them out for optimal crispiness!
Can I store leftovers?
While these zucchini bites are best enjoyed fresh, you can store leftovers in an airtight container in the fridge for up to two days. They might lose some crispiness, but you can pop them back in the air fryer for a few minutes to revive that crunch!
What other vegetables can I air fry?
Oh, the possibilities are endless! You can try this technique with eggplant, bell peppers, or even asparagus. Just adjust your cooking time as needed, and enjoy creating a whole platter of air-fried veggies!
Nutritional Info
While exact nutritional info might depend on specifics like brand and measurements, rest assured that this dish is low in calories, rich in fiber, and packed with vitamins A and C from the zucchini.
I hope this recipe inspires you to embrace your inner chef and whip up these Crispy Air Fryer Zucchini Parmesan bites! Food is an adventure, and I’m thrilled to share this one with you. Happy cooking, and don’t forget to savor every delightful bite!
PrintCrispy Air Fryer Zucchini Parmesan
A deliciously crispy air-fried zucchini dish that celebrates summer flavors while keeping things light and wholesome.
- Prep Time: 10 minutes
- Cook Time: 10 minutes
- Total Time: 20 minutes
- Yield: 4 servings 1x
- Category: Appetizer
- Method: Air Frying
- Cuisine: Italian
- Diet: Vegetarian
Ingredients
- 1 medium-sized zucchini
- 1 tablespoon olive oil
- 1 teaspoon Italian seasoning
- 2 tablespoons Parmesan cheese
- Salt and black pepper to taste
Instructions
- Prep the zucchini: Wash under cold water and pat dry. Trim off both ends and slice into rounds or sticks, around ½ inch thick.
- Mix the coating: Whisk together olive oil, Italian seasoning, salt, and pepper in a mixing bowl.
- Coat the zucchini: Toss zucchini slices in the bowl, ensuring each piece is well-coated.
- Add the Parmesan: Sprinkle Parmesan on top and toss gently to coat.
- Preheat the air fryer: Set to 400°F (200°C) for about 5 minutes.
- Air fry the zucchini: Place coated zucchini in a single layer in the air fryer basket. Cook for 8-10 minutes, flipping halfway.
- Serve and enjoy: Remove carefully and serve with marinara sauce for dipping.
Notes
Store leftovers in an airtight container in the fridge for up to two days. To revive crispiness, reheat in the air fryer for a few minutes.
Nutrition
- Serving Size: 1 serving
- Calories: 180
- Sugar: 3g
- Sodium: 200mg
- Fat: 10g
- Saturated Fat: 3g
- Unsaturated Fat: 5g
- Trans Fat: 0g
- Carbohydrates: 12g
- Fiber: 3g
- Protein: 5g
- Cholesterol: 10mg
Keywords: zucchini, air fryer, crispy snacks, vegetarian appetizer, healthy eating
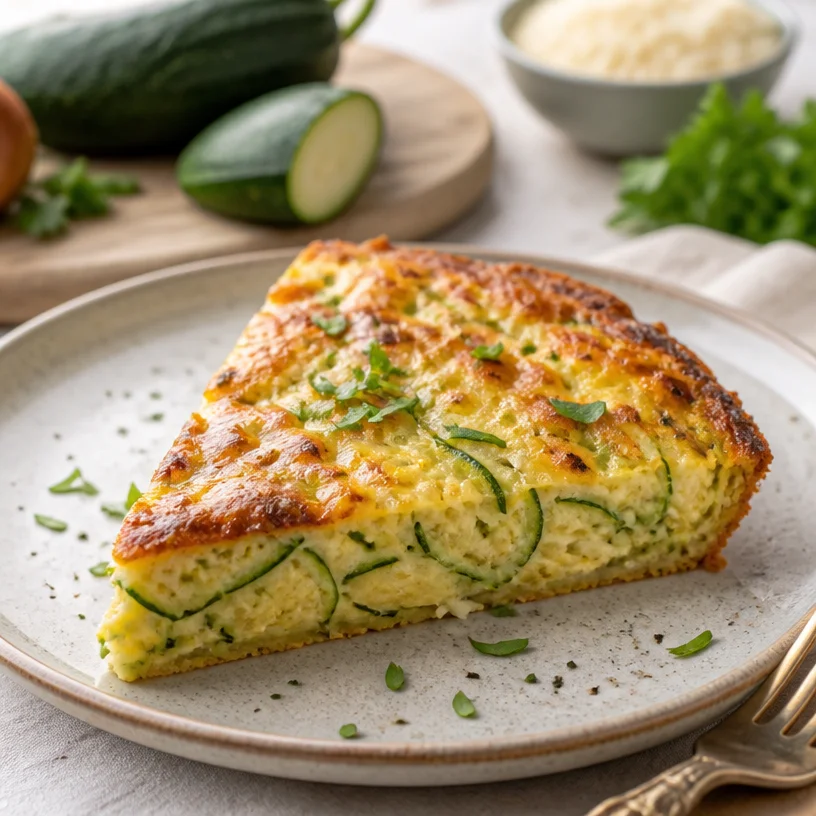
Zucchini Pie
Zucchini Pie: A Slice of Summer Flavor
Welcome to my kitchen! Today, we’re diving into a dish that perfectly encapsulates the delicious summer flavors of the garden: Zucchini Pie. Trust me when I say this dish is a celebration of fresh ingredients, warmth, and nostalgia. You can already picture the golden crust, aromatic fillings, and a slice of comfort that just makes you feel good inside.
Zucchini, that versatile vegetable that seems to grow in abundance during the warmer months, can sometimes leave us scratching our heads about what to do with it all. Here’s the magic, though—Zucchini Pie takes this otherwise humble veggie and transforms it into a mouthwatering, savory delight!
So, gather your ingredients, put on your favorite apron, and let’s get cooking. This recipe is not just about eating; it’s about creating cherished moments and sharing joy through food. I’ll guide you through every step, making this dish as approachable as it is delicious because healthy eating should fit into your own fresh and flavorful lifestyle!
A Personal Journey to Zucchini Pie
I still remember the summer evenings at my grandmother’s house, where a chorus of crickets filled the air. The kitchen was a swirl of warmth and enticing aromas, and one dish that stood out was her famous Zucchini Pie. A delightful mishmash of flavors, every bite was something special—making even non-zucchini lovers like my cousin convert into avid fans!
She would grate the zucchinis with precision, her hands a blur of motion as she talked about the garden produce as if they were dear friends. I loved how she stressed the importance of simplicity in cooking, insisting that if you respect your ingredients, they will reward you—they’ll sing!
This recipe is a tribute to those evenings, where the simplest ingredients came together in perfect harmony. It’s more than just food; it’s a mouthful of memories and laughter with family. Let’s recreate that magic together!
Ingredients
Here’s everything you’ll need to bring this Zucchini Pie to life. Each ingredient plays a crucial role in creating the perfect flavor and texture.
-
2 medium zucchinis, grated: Zucchini is the star of the show here! When grated, these beauties add moisture and a delightful texture. If you’re in a pinch, yellow squash works just as well!
-
1 cup grated Parmesan cheese: This cheesy goodness adds depth and richness to the pie. No Parmesan? Feel free to swap in pecorino or cheddar for a different twist!
-
1 cup all-purpose flour: Essential for binding all the ingredients together. You can use whole wheat flour for a nuttier flavor or a gluten-free blend if you prefer a gluten-free option.
-
4 large eggs: Eggs help set the pie structure and bring everything together. For a vegan option, ground flaxseed mixed with water can serve as an egg replacement!
-
1 teaspoon salt: Just enough to enhance all the flavors without making the dish overly salty.
-
1/2 teaspoon black pepper: Freshly cracked black pepper adds a touch of warmth and zing to our pie.
-
1 teaspoon garlic powder (optional): A hint of garlic can elevate this dish further! Fresh minced garlic is another great choice if you prefer some texture.
-
1 onion, diced (optional): Adding onion introduces sweetness and depth. If you’re not a fan of onions, you can easily leave it out or substitute it with green onions.
-
2 tablespoons olive oil: A drizzle of olive oil brings a luscious richness and is perfect for roasting the onions if you choose to add them.
Step-by-Step Instructions
Now that we’ve got our ingredients lined up, let’s take this step by step! I like to prepare my workspace first and foremost—so make sure you have a clean countertop, your bowls ready, and you’re feeling inspired!
1. Preheat Your Oven
Before we get started, preheat your oven to 350°F (175°C). This ensures your pie comes out perfectly baked.
2. Grate the Zucchini
Take those lovely zucchinis and grate them using the largest holes of your box grater. You want a good amount of zucchini for the filling. Once you’ve grated the zucchinis, place them in a clean towel or cheese cloth and squeeze out the excess moisture. This step is crucial to prevent your pie from being soggy!
3. Dice the Onion (if using)
In a medium skillet, heat 1 tablespoon of olive oil over medium heat. Toss in your diced onion and sauté until they become translucent and fragrant, about 3-4 minutes. This step is optional, but trust me; it elevates the flavor!
4. Mix Wet Ingredients
In a large bowl, whisk together the eggs until they’re well-blended. Now add in the grated zucchini, sautéed onions (if you used them), garlic powder, salt, and black pepper.
5. Combine in the Dry Ingredients
In a separate bowl, mix the grated Parmesan cheese with the flour. Stir this mixture into the wet ingredients. Make sure everything is well combined; you’ll find that the consistency is slightly thick, which is just perfect for a pie!
6. Pour and Bake
Grease a pie dish with a tablespoon of olive oil and pour the zucchini mixture into the dish. Spread it out evenly and pop it into your preheated oven. Bake for about 35-40 minutes or until the top is golden and a toothpick comes out clean.
7. Cool and Serve
Once done, allow the pie to cool for about 10-15 minutes before slicing. This small resting time helps the pie set up a bit more. Serve warm and enjoy the party of flavors!
Serving Suggestions
This Zucchini Pie is wonderful on its own, but it shines even more with some simple accompaniments. You can serve it with a fresh garden salad drizzled with lemon vinaigrette or with a dollop of Greek yogurt or sour cream for added creaminess. For a more rustic experience, serve it with some crusty whole-grain bread. Happy eating!
Recipe Variations
Feel like experimenting? Here are a few fun twists you can try with this Zucchini Pie recipe:
- Mediterranean Style: Add kalamata olives, sun-dried tomatoes, and feta cheese for a tangy kick.
- Herbed Delight: Stir in fresh herbs like basil or dill for an aromatic herbal infusion.
- Add Protein: For a heartier dish, mix in some cooked ground turkey or shredded chicken.
- Cheesy Variation: Experiment with a blend of cheeses—bring in mozzarella for gooeyness or goat cheese for creaminess.
- Spicy Kick: Add red pepper flakes or diced jalapeños for a zingy surprise.
Chef’s Notes
Cooking is all about evolution, and my Zucchini Pie recipe has been fine-tuned over the years! I used to make it with a store-bought crust, but honestly, it’s better without one. Besides, if you ever experience a kitchen mishap, like stuffing too many ingredients in (I’m guilty of this—I refuse to waste a single veggie!), just remember that cooking is about having fun and learning. My most memorable dish has often resulted from little kitchen accidents!
FAQs and Troubleshooting
Q: My Zucchini Pie turned out watery! What went wrong?
A: The most common reason for this is excess moisture from the zucchini. Always squeeze out as much liquid as possible!
Q: Can I make this pie ahead of time?
A: Absolutely! You can prepare it a day in advance and store it in the refrigerator. Just reheat it in the oven before serving.
Q: What can I do if I don’t have enough zucchini?
A: No problem! You can replace a portion of the zucchini with shredded carrots or even spinach for added nutrition and flavor.
Q: How can I store leftovers?
A: Let the pie cool down before covering it with plastic wrap or aluminum foil. Store it in the fridge for up to 3-4 days.
Nutritional Info
For those mindful of their nutrition, a single slice of Zucchini Pie (assuming 8 servings total) contains approximately:
- Calories: 150
- Protein: 8g
- Carbohydrates: 10g
- Fat: 10g
Feel free to enjoy this dish guilt-free, knowing it is brimming with nutrients and flavor!
Embrace your inner chef, and may your kitchen always be filled with love, laughter, and the scrumptious aroma of homemade meals. Happy cooking, friends!
PrintZucchini Pie

A delightful Zucchini Pie bursting with summer flavors, perfect for any occasion.
- Prep Time: 15 minutes
- Cook Time: 40 minutes
- Total Time: 55 minutes
- Yield: 8 servings 1x
- Category: Main Course
- Method: Baking
- Cuisine: Italian
- Diet: Vegetarian
Ingredients
- 2 medium zucchinis, grated
- 1 cup grated Parmesan cheese
- 1 cup all-purpose flour
- 4 large eggs
- 1 teaspoon salt
- 1/2 teaspoon black pepper
- 1 teaspoon garlic powder (optional)
- 1 onion, diced (optional)
- 2 tablespoons olive oil
Instructions
- Preheat your oven to 350°F (175°C).
- Grate the zucchinis and squeeze out excess moisture.
- Dice the onion and sauté in olive oil until translucent (optional).
- Mix the eggs, grated zucchini, sautéed onions, garlic powder, salt, and pepper in a large bowl.
- Combine the grated Parmesan cheese with the flour and stir into the wet ingredients.
- Pour the mixture into a greased pie dish and bake for 35-40 minutes.
- Cool for 10-15 minutes before slicing and serve.
Notes
For a vegetarian twist, omit the optional ingredients or substitute as desired.
Nutrition
- Serving Size: 1 slice
- Calories: 150
- Sugar: 2g
- Sodium: 400mg
- Fat: 10g
- Saturated Fat: 3g
- Unsaturated Fat: 6g
- Trans Fat: 0g
- Carbohydrates: 10g
- Fiber: 1g
- Protein: 8g
- Cholesterol: 150mg
Keywords: Zucchini, Pie, Summer, Vegetarian, Italian, Comfort Food
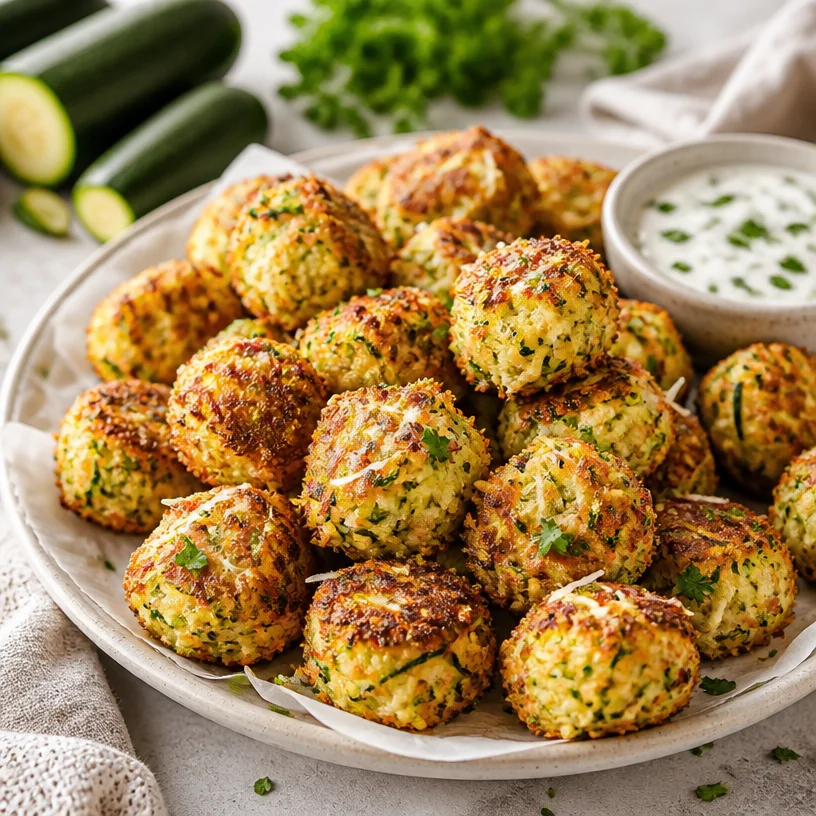
Crispy Cheesy Zucchini Tots: 25-Minute Weeknight Snack
Cheesy Zucchini Tots: The Perfect Bite of Nostalgia and Flavor
Hey there, food lovers! Welcome back to Clean Plate Cravings, where we believe eating well means tasting amazing. Today, we’re talking about one of my absolute favorite comfort foods: Cheesy Zucchini Tots. These little wonders are crispy on the outside, cheesy on the inside, and a delightful way to sneak some veggies into your day. So, grab your apron, and let’s get cooking!
A Dash of Nostalgia
When I think back to my childhood, I can almost hear the sizzling sound of fresh vegetables meeting hot olive oil in my mom’s kitchen. She had a magic touch when it came to making veggie dishes that tasted like a treat instead of a chore. One of my earliest culinary memories is racing home from school, smelling something irresistible wafting through the air, only to find out that it was her famous zucchini fries—golden brown, crispy, and oh-so-cheesy!
Those were the days when vegetables were our best allies, and I didn’t even realize I was being fed healthy food. I still remember the joy of dipping those crunchy bites into homemade ranch dressing, scraping the plate clean. Inspired by those memories, I decided to whip up a fun twist on my mom’s creation: Cheesy Zucchini Tots! My version is perfect for satisfying cravings while keeping things light and fulfilling.
Ingredients
Let’s talk ingredients! Here’s what you’ll need for these scrumptious tots:
-
2 medium zucchinis: The star of the show! Look for firm zucchinis without any blemishes. If zucchini isn’t in season, you could substitute with yellow squash.
-
1 cup shredded cheese (cheddar or mozzarella): Cheese adds that melty goodness! Cheddar provides a sharp flavor, while mozzarella will give you that classic gooiness. Feel free to mix and match!
-
1/2 cup breadcrumbs: These help bind everything together and give the tots their crunchy texture. Use gluten-free breadcrumbs to keep it free from gluten or even crushed crackers if you’re out.
-
1/4 cup grated Parmesan cheese: This adds a fantastic depth of flavor. Nutritional yeast can be a great vegan substitute if you’re looking for a cheesy flavor without dairy.
-
1 egg: This acts as a binder to hold everything together. If you’re vegan or egg-free, try a flax egg (1 tablespoon ground flaxseeds + 2.5 tablespoons water, let it sit for 5 minutes).
-
1 teaspoon garlic powder: For that savory kick! Fresh minced garlic is an excellent substitute; just use a little less since it’s more potent.
-
1 teaspoon onion powder: Adds another layer of flavor. If you have fresh onions, sauté a small amount until soft before mixing them in.
-
Salt and pepper to taste: Essential seasonings to enhance all the flavors! Remember, you can get creative with herbs or spices based on your preference.
-
Olive oil for cooking: A light drizzle will keep those tots from sticking and who doesn’t love a hint of oiliness for extra flavor?
Step-by-Step Instructions
Alright, it’s showtime! Let’s guide you through the process of making these delicious Cheesy Zucchini Tots.
-
Preheat Your Oven: Start by preheating your oven to 400°F (200°C). This ensures that your tots will be perfectly crisp when they come out.
-
Grate the Zucchini: Wash the zucchinis well and grate them using a box grater or a food processor. Aim for medium shreds. The more moisture you can extract, the better your tots will crisp up, so don’t skip this step!
-
Drain the Zucchini: Place the grated zucchini in a cheesecloth or a clean kitchen towel. Squeeze out as much liquid as you can! This will prevent the mixture from becoming too soggy. Sometimes, after taxing those zucchinis, you might feel like a little workout was just involved!
-
Mix the Ingredients: In a mixing bowl, combine the drained zucchini, shredded cheese, breadcrumbs, Parmesan, egg, garlic powder, onion powder, salt, and pepper. Fold everything together until it’s well combined—this is where the magic happens!
-
Form the Tots: With clean hands (or a cookie scoop!), shape the mixture into small, oval-shaped tots, about 1 inch long. Make sure they are tightly packed so they hold their shape during baking—think of it like playing with edible clay!
-
Arrange on a Baking Sheet: Line a baking sheet with parchment paper or lightly grease it with olive oil. Place the tots on the sheet, leaving space between them to allow for even cooking.
-
Drizzle with Olive Oil: Give the tots a quick drizzle of olive oil or spritz with cooking spray before popping them in the oven. This little step adds that golden crispy finish we all crave!
-
Bake: Bake for about 20-25 minutes, flipping halfway through, until they are golden brown and crispy. I know it’s tough, but try to resist eating them straight out of the oven; let them cool for a few minutes!
Serving Suggestions
These Cheesy Zucchini Tots are best served hot, right from the oven. They make the perfect appetizer or snack, paired with a dollop of sour cream, ranch dressing, or even some spicy salsa for those who like it a little kicked up! I love to plate them up in a fun bowl, garnished with fresh herbs for that extra flair. They’re sure to impress friends and family alike—just don’t forget the napkins!
Recipe Variations
Mixing things up in the kitchen is key! Here are a few fun twists to try with your Cheesy Zucchini Tots:
-
Herbed Tots: Add fresh herbs like basil or parsley to the mix for a burst of freshness.
-
Spicy Tots: Toss in a pinch of crushed red pepper flakes for a spicy kick or some diced jalapeños for heat.
-
Mediterranean Style: Replace the Parmesan with feta cheese and add some chopped black olives for a delicious Mediterranean twist.
-
Sweet Potato Add-in: Toss in half a cup of grated sweet potato for sweetness and an extra nutrient boost.
-
Bacon or Ham: Mix in some crumbled bacon or diced ham for that smoky, savory flavor that’ll be hard to resist.
Chef’s Notes
These Cheesy Zucchini Tots have definitely evolved through the years! Originally inspired by my love for all things fried, I tried a few variations before landing on this lighter baked version. I also genuinely believe that every chef must have a recipe that saves dinner for those evenings filled with chaos—these tots are that recipe for me. Making your family love veggies while keeping the good vibes flowing? That’s my kind of cooking!
FAQs and Troubleshooting
1. My tots fell apart while baking! What did I do wrong?
This usually means there wasn’t enough binding in your mixture. Make sure to drain your zucchini well, and consider adding an extra egg or more breadcrumbs to help hold the mixture together.
2. Can I make these ahead of time?
Absolutely! Shape the tots and refrigerate them for up to 24 hours before baking. Just ensure they’re in a sealed container so they don’t dry out.
3. What do I do if they aren’t crispy enough?
If you find the tots aren’t as crispy as you’d like, let them bake a little longer, flipping them halfway through for even cooking. A sprinkle of extra breadcrumbs before baking can also help.
4. Can I freeze them?
Yes! Freeze the uncooked, shaped tots on a baking sheet, and once they’re frozen solid, transfer them to a bag. Bake from frozen, adding a few more minutes to the cooking time.
Nutritional Info
The beauty of these Cheesy Zucchini Tots lies not just in their taste but also in their health benefits. They’re low in calories and high in fiber, helping you feel fuller longer without the guilt.
Each serving (around 4-5 tots) contains approximately:
- Calories: 150
- Protein: 8g
- Carbohydrates: 10g
- Dietary Fiber: 2g
- Fat: 8g
So there you have it, foodies! Your guide to whipping up the most delightful Cheesy Zucchini Tots that are sure to become a staple in your kitchen. Remember to have fun while cooking—after all, that’s what it’s all about! Let me know how your creation turns out, and happy cooking! 🥳
PrintCheesy Zucchini Tots

Crispy on the outside and cheesy on the inside, these Cheesy Zucchini Tots are a delightful way to sneak some veggies into your day.
- Prep Time: 15 minutes
- Cook Time: 25 minutes
- Total Time: 40 minutes
- Yield: 4 servings 1x
- Category: Appetizer
- Method: Baking
- Cuisine: American
- Diet: Vegetarian
Ingredients
- 2 medium zucchinis
- 1 cup shredded cheese (cheddar or mozzarella)
- 1/2 cup breadcrumbs
- 1/4 cup grated Parmesan cheese
- 1 egg
- 1 teaspoon garlic powder
- 1 teaspoon onion powder
- Salt and pepper to taste
- Olive oil for cooking
Instructions
- Preheat your oven to 400°F (200°C).
- Grate the zucchinis using a box grater or food processor.
- Drain the grated zucchini using a cheesecloth or kitchen towel to remove excess moisture.
- Mix the drained zucchini, shredded cheese, breadcrumbs, Parmesan, egg, garlic powder, onion powder, salt, and pepper in a bowl.
- Form the mixture into small oval-shaped tots, about 1 inch long.
- Arrange the tots on a lined baking sheet with space between them.
- Drizzle with olive oil or spritz with cooking spray.
- Bake for 20-25 minutes, flipping halfway through, until golden brown and crispy.
Notes
These tots are best served hot and pair well with ranch dressing or spicy salsa. Feel free to customize with herbs or spices to taste.
Nutrition
- Serving Size: 4-5 tots
- Calories: 150
- Sugar: 2g
- Sodium: 300mg
- Fat: 8g
- Saturated Fat: 3g
- Unsaturated Fat: 5g
- Trans Fat: 0g
- Carbohydrates: 10g
- Fiber: 2g
- Protein: 8g
- Cholesterol: 30mg
Keywords: zucchini tots, cheesy snacks, healthy appetizers, comfort food
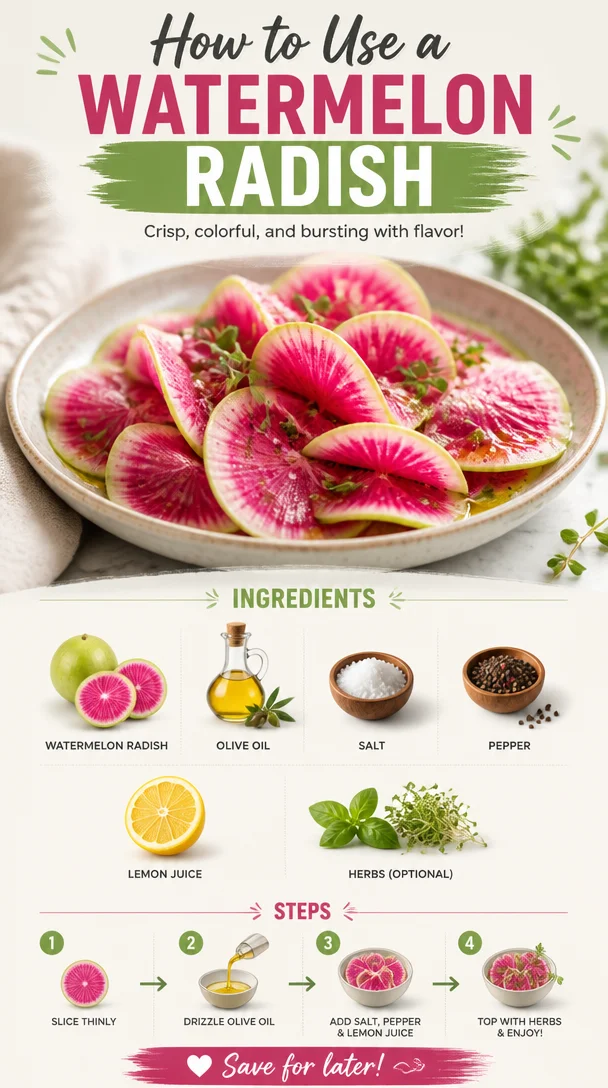
How to Use a Watermelon Radish
How to Use a Watermelon Radish: Refreshing Ideas for Your Next Meal
Hey there, fellow food enthusiasts! Today, we’re diving into one of my absolute favorite ingredients—the watermelon radish. Yes, that stunningly beautiful, vibrant pink vegetable that brings a pop of color and crunch to your dishes! If you’ve been seeing this beauty at your local farmers’ market or grocery store and wondering what to do with it, you’re in for a treat.
In this post, I’ll walk you through everything you need to know about the watermelon radish: its versatile uses, a delightful recipe that makes it shine, and tips that will have you falling in love with this root vegetable. Let’s get ready to elevate your meals, boost your health, and have a little fun along the way!
A Taste of Nostalgia
I’ll never forget the first time I encountered a watermelon radish. I was at a charming little farm-to-table restaurant with friends, and the server brought out a colorful salad—piled high with greens, topped with thinly sliced pink and white watermelon radishes, and drizzled with a lemon vinaigrette. I was mesmerized by the radish’s striking hue, and just had to dig in! The first bite sent my taste buds dancing; the radish was juicy, crisp, and slightly sweet. It was a true revelation that made healthy eating feel vibrant and exciting.
That experience sparked my love affair with watermelon radishes and inspired many creative kitchen adventures since. Now, I want to share this journey with you so that you can incorporate this delightful ingredient into your meals! So, let’s roll up our sleeves and get cooking!
Ingredients
-
1 Watermelon Radish: Also known as a "beauty heart radish," this stunning radish is mildly sweet and crunchy. If you can’t find it, try swapping it out for a regular radish, although the flavor will be a bit stronger.
-
Olive Oil: A staple in any kitchen, olive oil adds richness and helps to balance out the flavors. For a different twist, use avocado oil.
-
Salt: This simple ingredient enhances all the flavors and helps to bring out the natural taste of the radish.
-
Pepper: Freshly cracked black pepper adds a warm, zesty note that complements the radish beautifully.
-
Lemon Juice: Bright, tangy lemon juice elevates the dish! You could also use lime juice for a different citrus kick.
-
Herbs (optional): Fresh herbs like parsley, mint, or basil lend an aromatic touch. If fresh herbs aren’t available, dried herbs work too—just use less!
Step-by-Step Instructions
Step 1: Prepare the Watermelon Radish
Start by rinsing the watermelon radish under cold water to remove any dirt. Pat it dry with a clean kitchen towel. Next, slice it in half vertically—this gives you two halves to work with. Now you can use a sharp knife or a mandoline to cut it into thin rounds or half-moons, depending on your preference. Remember to always watch your fingers when slicing!
Chef Hack: If you want to switch things up, try grating the radish for an interesting texture that works perfectly in salads or as a topping!
Step 2: Assemble the Oil and Seasoning
In a small bowl, whisk together a couple of tablespoons of olive oil, a generous pinch of salt, a few grinds of black pepper, and the juice of half a lemon. This simple vinaigrette will bring all your flavors together.
Tip: To bring out more flavor, let the dressing sit for 5 to 10 minutes—but don’t worry if you’re short on time; it’ll still taste great!
Step 3: Toss and Serve
In a mixing bowl, combine your sliced watermelon radish with the dressing. Toss gently to ensure each slice is coated, but be careful not to mash them! Let them marinate for about 15 minutes—this allows the flavors to really soak in.
Pro Tip: If you’re meal prepping, this salad stores well. Just keep the dressing separate until you’re ready to serve to keep the radish crisp!
Step 4: Add Fresh Herbs
Once the radish has marinated, feel free to toss in your fresh herbs at this stage. Gently fold them into the salad, so they don’t get too bruised.
Step 5: Plate It Up
Find a lovely platter or bowl to serve your radish salad. Add a sprinkling of extra herbs on top for that restaurant-style presentation!
Serving Suggestions
This watermelon radish salad is delightful on its own or served alongside grilled chicken, fish, or a hearty grain like quinoa. I love piling it high atop a bed of arugula or mixing it into tacos for a refreshing crunch. Get creative—you’ll impress your friends and family with this eye-catching dish!
Recipe Variations
-
Pickled Watermelon Radish: Slice the radish and pickle it in a mixture of equal parts vinegar and sugar. Let it sit in the fridge for a few hours, and voilà! A tangy treat perfect for topping sandwiches or tacos.
-
Watermelon Radish Slaw: Combine grated watermelon radish with shredded cabbage, carrots, and a sesame dressing for a crunchy slaw that’s great for barbecues or meal prep.
-
Spicy Twist: Add chili flakes or minced jalapeño to your dressing for a spicy kick that brings heat to the refreshing radish flavor.
-
Creamy Avocado Dressing: Blend avocado with lemon juice, olive oil, and a splash of water for a creamy dressing that pairs beautifully with the crunch of the radish.
Chef’s Notes
When I first began experimenting with watermelon radishes, I found that they added incredible variety to everyday meals. They’ve transformed from a garnish on my dishes to a central star in my salads and appetizers. If you’ve never tried them before, now is the perfect time! I promise they will brighten up your plate and elevate your kitchen endeavors. After all, cooking should be fun and joyful—just like eating!
FAQs and Troubleshooting
Q: Can I eat watermelon radish raw?
Absolutely! Watermelon radishes are crunchy and delicious raw. They make terrific additions to salads or veggie platters.
Q: How long do watermelon radishes last?
Stored in the fridge, watermelon radishes can last up to two weeks. Keep them in a paper towel and inside a plastic bag to keep them fresh.
Q: What if I don’t like the taste of radishes?
If you find the flavor a bit too strong for your palate, try roasting them! Cooking can mellow the flavor significantly while enhancing their natural sweetness.
Q: Where can I buy watermelon radishes?
They can be found at farmers’ markets, health food stores, and some supermarkets. Their peak season is from late winter through early spring.
Nutritional Info
Watermelon radishes are not just a pretty face—they’re packed with nutrients! They’re low in calories yet rich in vitamins C, B6, and potassium. Plus, they contain antioxidants that contribute to overall health, making them a nourishing addition to your plates.
So, there you have it! With everything you need to know about watermelon radishes, I hope you’re inspired to bring this fabulous veggie into your kitchen. Together, let’s create meals that are not only healthy but full of joy and flavor. Happy cooking!
PrintWatermelon Radish Salad

A refreshing salad featuring watermelon radishes, drizzled with a simple lemon vinaigrette.
- Prep Time: 15 minutes
- Cook Time: 0 minutes
- Total Time: 15 minutes
- Yield: 4 servings 1x
- Category: Salad
- Method: No-Cook
- Cuisine: American
- Diet: Vegetarian
Ingredients
- 1 Watermelon Radish
- 2 tablespoons Olive Oil
- Salt to taste
- Freshly cracked Black Pepper to taste
- Juice of 1/2 Lemon
- Fresh Herbs (optional)
Instructions
- Prepare the Watermelon Radish: Rinse it under cold water, pat dry, slice in half and cut into thin rounds.
- Assemble the Oil and Seasoning: Whisk olive oil, salt, pepper, and lemon juice in a bowl.
- Toss and Serve: Combine sliced radish with dressing, let marinate for 15 minutes.
- Add Fresh Herbs: Fold herbs into the salad gently.
- Plate It Up: Serve in a platter, adding extra herbs for garnish.
Notes
This salad pairs well with grilled chicken or fish, and can be mixed into tacos for a refreshing crunch!
Nutrition
- Serving Size: 1 serving
- Calories: 120
- Sugar: 2g
- Sodium: 100mg
- Fat: 10g
- Saturated Fat: 1g
- Unsaturated Fat: 9g
- Trans Fat: 0g
- Carbohydrates: 8g
- Fiber: 2g
- Protein: 1g
- Cholesterol: 0mg
Keywords: watermelon radish, salad, healthy, vegetarian, refreshing