
Minute Crispy Zucchini Puffs for Busy Weeknights
The Ultimate Easy Zucchini Puffs: A Delightful Bites Experience
Welcome to Clean Plate Cravings! If you’re anything like me, you love hearty food that doesn’t just fill your belly but also warms your heart. Today, I’m super excited to share a gem of a recipe that’s perfect for any time of year: Easy Zucchini Puffs! These delightful savory bites are bursting with flavor, incredibly versatile, and oh-so-simple to whip up. Connecting our playful culinary adventures with nutrition and taste is what we’re all about, and these puffs hit that sweet spot like a home run!
Imagine the summer days of my childhood, running around the backyard, giggling with friends while the sweet smell of baked goodies wafted through the air. My grandma would be in the kitchen, making the most out of every vegetable she could find from the garden. Among her many creations were these little savory nuggets we lovingly called “zucchini puffs.” They were always the first to disappear at family gatherings, and I remember sneaking into the kitchen for just one more… and then another.
These puffs are a celebration of those crisp summer zucchinis, hugging together in a cheesy, savory embrace that brings smiles with every bite. They’re not just a snack – they bring back memories, connection, and joy. Ready to dive into this culinary adventure with me? Let’s do it!
Personal Story
Growing up, my summers were spent exploring my neighborhood and, of course, spending time with my grandma in her colorful garden. I can still visualize the delightful chaos of the vegetable patch – my tiny hands searching for plump zucchinis hidden beneath sprawling leaves. Whenever a batch came home, Grandma had a knack for turning them into the most mouthwatering dishes. One of my favorites was her famous zucchini puffs.
I can remember eagerly waiting by the kitchen counter, the aroma of cheesy goodness filling the air. It always amazed me how just a few simple ingredients could create such a zesty explosion of flavors! Watching her whisk, mix, and bake gave me a front-row seat to the magic of cooking, leaving me hooked for life. Today, I carry on that tradition, adding my own spin while cherishing the nostalgia. And lucky for you, I’m sharing the recipe that always reminds me of those golden afternoons spent with her.
Ingredients
Here’s what you’ll need to create these tasty Easy Zucchini Puffs:
-
¾ cup all-purpose flour
Essential for binding the puffs together. You can swap for whole wheat flour or a gluten-free mix if needed! -
¾ teaspoon baking powder
This is the magic ingredient that helps our puffs rise and become fluffy. Make sure it’s fresh for the best results! -
2 teaspoons Italian seasoning
A blend of herbs that adds a lovely aromatic touch. Feel free to customize this to your liking; oregano or thyme can be great substitutes! -
¾ cup milk
Milk helps keep our mixture moist. You can use almond milk or oat milk for a dairy-free version. -
1 large egg
This binds everything together. If you want a vegan option, replace it with a flax egg (1 tablespoon of ground flaxseeds mixed with 2.5 tablespoons of water, let it sit until it thickens). -
½ cup shredded cheddar cheese
Cheese provides that gooeyness and flavor. Try swapping with feta or mozzarella for a different twist! -
1 cup zucchini (grated)
The star of our recipe! You can also sneak in other veggies like carrots or squash for added nutrition and color.
Step-by-Step Instructions
-
Preheat Your Oven:
Preheat your oven to 375°F (190°C). This allows the puffs to rise beautifully while ensuring they turn golden brown. I always say, “A preheated oven is key to crispy puffs!” -
Prepare Your Zucchini:
Grate your zucchini and squeeze out excess moisture using a clean kitchen towel or cheesecloth. This step is crucial to prevent soggy puffs. Less water, more flavor! -
Mix the Dry Ingredients:
In a large bowl, combine flour, baking powder, and Italian seasoning. Whisk them together until evenly blended. Sifting can be a great way to add air, but honestly, a good whisk will do the trick! -
Combine Wet Ingredients:
In another bowl, whisk together the milk and egg until mixed. If you’re using a flax egg, this is the time to add that! Incorporating the wet ingredients into our dry mix is where the magic starts to happen! -
Fold in the Zucchini and Cheese:
Gently fold the grated zucchini and shredded cheese into the batter, making sure everything is uniformly coated. This is the fun part—watch the mixture become vibrant with green and yellow hues! -
Fill Your Muffin Tin:
Grease a muffin tin or line it with silicone cups. Spoon the mixture evenly into each cup; they should be about two-thirds full. Pro-tip: Using an ice cream scoop makes this step a breeze and keeps the portion sizes perfect! -
Bake to Perfection:
Slide your muffin tin into the preheated oven, and let those beauties bake for about 25-30 minutes or until they turn a lovely golden color. You’ll know they’re ready when a toothpick comes out clean. Don’t forget to check out that puffiness! -
Cool and Enjoy:
Once done, let them cool for a few minutes in the tin before transferring them to a wire rack. The aroma in your kitchen will have everyone begging for a taste!
Serving Suggestions
These Easy Zucchini Puffs are wonderfully versatile! You can treat them as appetizers, a fun snack, or even serve them as a side alongside a fresh salad or soup. Drizzle some homemade ranch or garlic aioli over the top for an extra flavor kick. Whether you’re chatting with friends at a gathering or enjoying a quiet evening in, these puffs are the perfect companion!
Recipe Variations
-
Spicy Zucchini Puffs: Add sliced jalapeños or a teaspoon of red pepper flakes for some heat!
-
Mediterranean Twist: Blend in sun-dried tomatoes and olives along with feta cheese for a Mediterranean twist.
-
Herbed Zucchini Puffs: Incorporate fresh herbs like basil or parsley for a burst of freshness.
-
Cheesy Bacon Zucchini Puffs: Add crumbled bacon and a mix of cheeses for a richer flavor profile.
-
Vegan Version: Simply replace the egg and milk with the flax egg and a plant-based milk to make them vegan!
Chef’s Notes
Every recipe carries a piece of our story, and these Easy Zucchini Puffs hold a special place in my kitchen. They have evolved over the years as I experimented with different ingredients. They weren’t always perfect; I recall a batch that was more like zucchini pancakes than puffs! But with every mishap comes learning. Cooking is personal, and I love how it allows us to express creativity while evoking memories and emotions.
Fun anecdote: Last summer, I made these puffs for a potluck, but they mysteriously vanished before I even made it into the party. Turns out, my friends thought they were irresistible and couldn’t resist sneaking bites while they were still cooling on the counter!
FAQs and Troubleshooting
Q: Why are my zucchini puffs soggy?
A: This often occurs when zucchini retains too much moisture. Make sure to squeeze out as much excess liquid as possible before mixing it into the batter!
Q: Can I make these puffs ahead of time?
A: Absolutely! You can make them a day in advance and store them in an airtight container in the fridge. Simply reheat in the oven for a few minutes before serving.
Q: How do I store leftovers?
A: Store any leftovers in an airtight container in the fridge for up to three days. They also freeze well! Just make sure to wrap them tightly.
Q: What can I serve with these puffs?
A: They pair beautifully with a tangy dipping sauce like tzatziki or marinara, or you can enjoy them alongside a fresh salad!
Nutritional Info
These Zucchini Puffs pack a balance of carbohydrates, protein, and healthy fats, making them a satisfying option! They are rich in vitamins thanks to the zucchini and provide a delightful cheesy flavor that’s hard to resist. Each puff is about 70 calories, making them a guilt-free treat that can be enjoyed without hesitation!
And there you have it, friends—the delightful journey of crafting your Easy Zucchini Puffs is complete! I hope you find as much joy making these in your kitchen as I did sharing this recipe with you. Remember, cooking is all about love, laughter, and plenty of flavor. Let’s keep these good vibes going, and enjoy every bite together! Happy cooking!
PrintEasy Zucchini Puffs

Delightful savory bites bursting with cheesy flavor, perfect for any occasion.
- Prep Time: 15 minutes
- Cook Time: 30 minutes
- Total Time: 45 minutes
- Yield: 4 servings 1x
- Category: Appetizer
- Method: Baking
- Cuisine: American
- Diet: Vegetarian
Ingredients
- ¾ cup all-purpose flour
- ¾ teaspoon baking powder
- 2 teaspoons Italian seasoning
- ¾ cup milk
- 1 large egg
- ½ cup shredded cheddar cheese
- 1 cup zucchini (grated)
Instructions
- Preheat your oven to 375°F (190°C).
- Grate your zucchini and squeeze out excess moisture.
- Combine flour, baking powder, and Italian seasoning in a large bowl.
- Whisk together the milk and egg in another bowl.
- Fold in the grated zucchini and shredded cheese into the batter.
- Grease a muffin tin and fill each cup about two-thirds full.
- Bake for 25-30 minutes until golden.
- Cool for a few minutes before transferring to a wire rack.
Notes
Serve as appetizers, snacks, or sides. Great with ranch or garlic aioli.
Nutrition
- Serving Size: 1 puff
- Calories: 70
- Sugar: 1g
- Sodium: 150mg
- Fat: 3g
- Saturated Fat: 1g
- Unsaturated Fat: 2g
- Trans Fat: 0g
- Carbohydrates: 10g
- Fiber: 1g
- Protein: 3g
- Cholesterol: 25mg
Keywords: zucchini, puffs, snack, appetizer, vegetarian
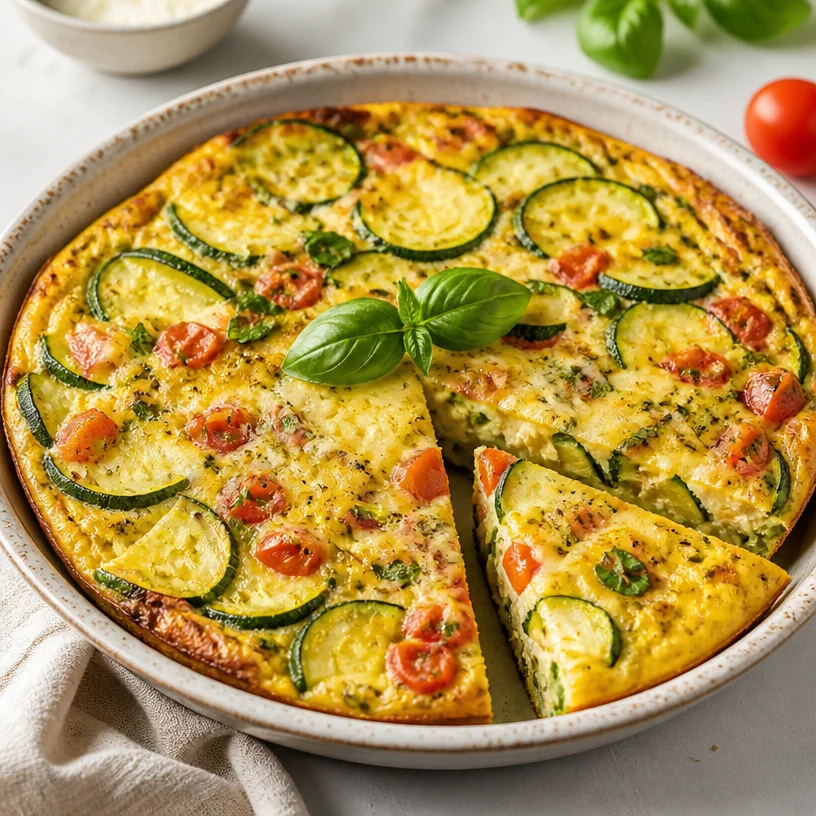
Crustless Zucchini Tomato Quiche
Crustless Zucchini Tomato Quiche: A Bright and Flavorful Escape
Hey there, fellow foodies! Welcome back to Clean Plate Cravings, where we believe that fresh, wholesome meals can be exciting, energizing, and downright delicious. Today, I’m thrilled to share a delightful dish that’s not just easy to whip up but also brimming with garden-fresh flavors—the Crustless Zucchini Tomato Quiche! This dish is perfect for brunch, a light lunch, or even a quick weeknight dinner, making it as versatile as it is tasty. So, grab your apron and let’s get cooking!
A Slice of Nostalgia: My First Quiche Experience
I have to tell you about my very first experience with quiche. I was about 12 years old, helping my mom prepare a Sunday brunch for our friends. As a curious kitchen explorer, I was assigned the task of whisking eggs for what my mom called "the best quiche ever." She never mentioned that it had a crust—it was all about the filling for her. She poured in the eggs, mom’s mystical blend of hidden cheeses, herbs, and oh, the glorious vegetables!
When the quiche came out of the oven, it was a golden treasure, alive with colors and smells that still make my taste buds tingle with excitement! That day, I learned that good food is about more than just ingredients; it’s about creating memories and sharing experiences with the people you love. Ever since, I’ve had a soft spot for quiche, evolving it into various forms while keeping that vibrant simplicity alive. Today’s crustless version is one of my personal favorites, marrying the zing of tomatoes and the gentle goodness of zucchini into a dish that is satisfying and nutritious.
Ingredients
Here’s what you’ll need to create your own Crustless Zucchini Tomato Quiche. Each ingredient plays a special role, so let’s break them down!
-
1 tablespoon olive oil: This not only prevents sticking but also adds a lovely flavor. You can substitute it with avocado oil for a different twist.
-
1 small onion (finely chopped): Sweet and aromatic, onion is a flavor base. Try using shallots for a milder taste, or even green onions for a fresh pop.
-
2 medium zucchinis (about 3 cups, thinly sliced): Zucchini brings moisture and texture. If you’re feeling adventurous, yellow squash works just as well!
-
2 medium tomatoes (seeded and diced): Juicy and refreshing, tomatoes add a wonderful burst of flavor. You could also use cherry tomatoes for a sweeter note.
-
3 large eggs: The base for our quiche! Organic eggs can elevate the taste and nutrition.
-
1 cup milk (whole or 2%): This adds richness. For a dairy-free option, use almond or oat milk, but note that it’ll change the texture slightly.
-
½ cup heavy cream (or use more milk): Cream adds a decadent touch. Coconut cream can be an excellent dairy-free alternative if you want a tropical twist!
-
1 cup shredded mozzarella cheese: Melty and stretchy, mozzarella is perfect here! You can swap it with cheddar or feta for a sharper flavor.
-
½ cup grated Parmesan cheese: This lends a salty, nutty flavor. Nutritional yeast is a fantastic dairy-free substitute if you’re going vegan.
-
2 cloves garlic (minced): Ah, garlic—the heart of flavor! Fresh or crushed garlic works best, but powdered can be used in a pinch.
-
1 teaspoon dried basil (or 1 tablespoon fresh basil, chopped): Basil adds an herbaceous note that delights the senses. You can use any fresh herb you have—thyme and parsley are great options too!
-
½ teaspoon dried oregano: This complements the herbs beautifully. Marjoram is a lovely substitute as well.
-
½ teaspoon salt: Essential for overall flavor enhancement. Always adjust based on your personal preference or dietary needs!
-
¼ teaspoon black pepper: For a subtle kick! Add more if you like things spicy.
-
Pinch of red pepper flakes (optional): If you love a little heat, go for it! It adds a fun surprise in every bite.
Step-by-Step Instructions
Ready to dive in? Let’s get cooking with these simple steps to create your Crustless Zucchini Tomato Quiche!
-
Preheat Your Oven: Begin by preheating your oven to 375°F (190°C). This ensures that your quiche bakes evenly from the moment you pop it in—trust me, this makes a difference!
-
Sauté the Aromatics: In a large skillet over medium heat, heat up the olive oil. Once hot, add the chopped onion. Sauté it for about 3-4 minutes until it becomes translucent. Add the minced garlic and sauté for an additional minute until fragrant. This step is where the magic begins! The aromas will make your kitchen feel like a cozy Italian restaurant.
-
Cook the Zucchini: Next, toss in the thinly sliced zucchini. Season with a pinch of salt and pepper and let it cook for about 5 minutes, just until it softens a bit. You want to retain some crunch, so don’t overdo it. Stir frequently, and feel free to admire your colorful creation!
-
Mix the Eggs and Cream: In a large bowl, whisk together the eggs, milk, and heavy cream until smooth. This is also a great time to add the dried basil, oregano, and any other seasonings. Whisking well ensures a lovely, fluffy texture in your quiche.
-
Combine It All Together: Once the zucchini mixture is ready, remove it from the heat and let it cool slightly. Add the sautéed veggies and the diced tomatoes to the egg mixture. Now, fold in the mozzarella and parmesan cheese gently to keep that texture nice and light.
-
Prepare the Baking Dish: Grease a 9-inch pie dish or a similar oven-safe skillet with olive oil or cooking spray. This step is crucial—nobody wants a quiche that sticks to the pan, right?
-
Pour and Bake: Pour the vegetable and egg mixture into your prepared dish, ensuring it spreads evenly. If you’re using red pepper flakes, sprinkle them just on top for a hint of spice. Pop the dish into the oven and bake for about 30-35 minutes or until the top is set and a lovely golden brown. A toothpick should come out clean!
-
Cool and Serve: Once out of the oven, let the quiche cool for at least 10 minutes before slicing. This helps it set a bit more and makes for cleaner slices!
Serving Suggestions
Ready to serve this beauty? I recommend slicing it into wedges and serving alongside a simple green salad drizzled with a light vinaigrette. The fresh greens balance the richness of the quiche beautifully. For a truly Instagram-worthy presentation, garnish each slice with a sprig of fresh basil or a sprinkle of extra cheese. Your guests will be amazed!
Recipe Variations
Want to mix things up? Here are a few creative twists and variations you can try:
-
Spinach and Feta Version: Substitute half the zucchini with fresh spinach and add crumbled feta for a Mediterranean flair.
-
Bacon Lovers Delight: Add crispy bacon bits to the mix for an irresistible twist.
-
Herbed Twist: Experiment with different herbs like dill or cilantro for an entirely new flavor profile!
-
Veggie Lover’s Delight: Throw in diced bell peppers or mushrooms for extra color and taste.
-
Quinoa Base: For added protein, mix cooked quinoa into the egg mixture before baking.
Chef’s Notes
I’m always looking for ways to reinvent classic recipes, and this crustless quiche is a fine example. Over the years, I’ve played around with different veggie combinations and herbs to bring vibrant flavors to the forefront. I remember a time when I had a surplus of thyme from my herb garden; I thought, “Why not?” and added it—I’ve never gone back! There’s a freedom in cooking that allows you to adapt and evolve. So trust your taste buds, and don’t be afraid to make this quiche your own!
FAQs and Troubleshooting
-
Why did my quiche turn out soggy?
- Sogginess can occur if there’s too much moisture in your veggies. Always sauté them first to release excess water and let them cool slightly before mixing with the eggs.
-
Can I make this ahead of time?
- Absolutely! You can prepare it a day in advance and simply reheat it when you’re ready to serve. Just keep it covered in the refrigerator.
-
How long can I store leftovers?
- Wrap leftovers in an airtight container, and they can last up to 4 days in the fridge. For longer storage, you can freeze slices for up to 3 months!
-
Can I use different types of cheese?
- Yes! Feel free to swap mozzarella and Parmesan for any cheese you love—cheddar, goat cheese, or even a mix can work beautifully. Just keep an eye on the saltiness level.
Nutritional Info
While I won’t bore you with strict numbers, this quiche is packed with protein from eggs and cheese while providing a lovely serving of veggies. It’s a wholesome dish that can fit into various dietary preferences—especially when you make some of those swaps!
So there you have it—your new go-to Crustless Zucchini Tomato Quiche recipe that’s bursting with flavor and nostalgia! I can’t wait to hear how yours turns out, so be sure to share your thoughts. As always, let’s keep it fresh, simple, and seriously delicious. Happy cooking, friends! 🌱🍳
PrintCrustless Zucchini Tomato Quiche

A delightful crustless quiche bursting with fresh zucchini and tomatoes, perfect for brunch or a light dinner.
- Prep Time: 15 minutes
- Cook Time: 35 minutes
- Total Time: 50 minutes
- Yield: 4 servings 1x
- Category: Main Course
- Method: Baking
- Cuisine: Italian
- Diet: Vegetarian
Ingredients
- 1 tablespoon olive oil
- 1 small onion, finely chopped
- 2 medium zucchinis, thinly sliced
- 2 medium tomatoes, seeded and diced
- 3 large eggs
- 1 cup milk (whole or 2%)
- ½ cup heavy cream
- 1 cup shredded mozzarella cheese
- ½ cup grated Parmesan cheese
- 2 cloves garlic, minced
- 1 teaspoon dried basil (or 1 tablespoon fresh basil, chopped)
- ½ teaspoon dried oregano
- ½ teaspoon salt
- ¼ teaspoon black pepper
- Pinch of red pepper flakes (optional)
Instructions
- Preheat your oven to 375°F (190°C).
- Sauté the olive oil and chopped onion in a large skillet over medium heat for about 3-4 minutes until translucent, then add the minced garlic and sauté for an additional minute.
- Add the thinly sliced zucchini, seasoning with a pinch of salt and pepper, and cook for about 5 minutes until softened slightly.
- Whisk together the eggs, milk, and heavy cream in a large bowl until smooth, adding in the dried basil, oregano, and any other seasonings.
- Combine the sautéed veggies and diced tomatoes into the egg mixture, then fold in the mozzarella and Parmesan cheeses gently.
- Grease a 9-inch pie dish or an oven-safe skillet with olive oil.
- Pour the vegetable and egg mixture into the prepared dish and sprinkle red pepper flakes on top if using. Bake for about 30-35 minutes until set and golden brown.
- Cool for at least 10 minutes before slicing and serving.
Notes
This quiche can be made ahead of time and can be stored in the fridge for up to 4 days. It also freezes well for longer storage.
Nutrition
- Serving Size: 1 slice
- Calories: 350
- Sugar: 5g
- Sodium: 400mg
- Fat: 12g
- Saturated Fat: 4g
- Unsaturated Fat: 6g
- Trans Fat: 0g
- Carbohydrates: 45g
- Fiber: 3g
- Protein: 15g
- Cholesterol: 30mg
Keywords: quiche, zucchini, tomatoes, brunch, vegetarian
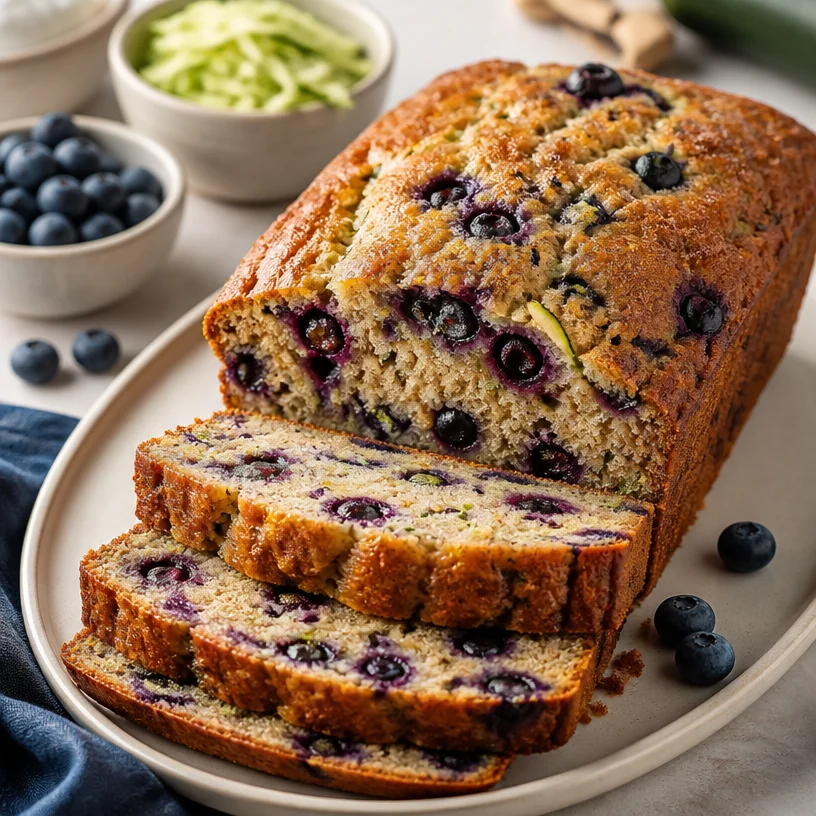
Blueberry Zucchini Bread
Blueberry Zucchini Bread: A Deliciously Moist Treat
Welcome, my fellow food lovers! Today, we’re diving into a recipe that perfectly combines the sweetness of ripe blueberries with the subtle earthiness of zucchini. Yes, we’re talking about Blueberry Zucchini Bread—a delightful and moist loaf that makes the perfect snack, breakfast, or even dessert. This vibrant bread is not just a treat for the taste buds but also a wonderful way to sneak in some veggies. So, grab your mixing bowls, and let’s get baking!
A Trip Down Memory Lane
Growing up, my grandmother always had a garden that she was incredibly proud of. Among her prized vegetables were mountains of zucchinis that seemed to multiply overnight! I remember summers spent at her house, where I’d help her pick zucchinis larger than my arm. Rather than let any of that bounty go to waste, she would whip up a myriad of delicious treats, but there was always one that stood out: her famous zucchini bread.
With its golden crust and subtle sweetness, it was the ultimate comfort food! One sunny afternoon, we decided to mix things up by adding blueberries—a random idea that turned into a family favorite. I can still picture the joy on my grandmother’s face as we pulled that loaf from the oven, its aroma wafting through the kitchen. The recipe not only became a staple in our home but also sparked my love for baking. Now, every time I make Blueberry Zucchini Bread, I can’t help but feel a connection to my grandmother, her garden, and those lazy summer days filled with laughter and good food.
Ingredients You’ll Need
Here’s the fabulous lineup for this Blueberry Zucchini Bread:
-
1 cup grated zucchini: This adds moisture and a subtle flavor. Look for a medium zucchini for the perfect balance. No zucchini? Try substituting with grated carrot for a sweet twist!
-
1 cup blueberries (fresh or frozen): These juicy little gems are packed with antioxidants and lend a burst of sweetness! If you don’t have blueberries, feel free to swap in raspberries or chopped strawberries for a different flavor profile.
-
1/2 cup vegetable oil: This keeps the bread moist and tender. Canola oil or melted coconut oil work well too!
-
1/2 cup granulated sugar: Sweet but not too overpowering. You can reduce this by 1/4 cup if you prefer a less sweet loaf.
-
1/2 cup brown sugar: This adds a rich, caramel-like flavor to the bread. Light brown sugar is your best bet; dark brown sugar adds even more depth if you’re feeling adventurous.
-
2 large eggs: These bind everything together and help the bread rise. If you’re vegan or egg-free, try using flax eggs (1 tablespoon ground flaxseed mixed with 3 tablespoons water per egg).
-
1 teaspoon vanilla extract: For that warm, comforting flavor—don’t skip this one! If you want a twist, consider using almond extract for a different layer.
-
1 1/2 cups all-purpose flour: This is the base of the bread. You can also use whole wheat flour or gluten-free flour as a swap!
-
1 teaspoon baking powder: This helps the bread rise beautifully. Make sure it’s not expired for optimal fluffiness!
-
1/2 teaspoon baking soda: Working in tandem with baking powder, it gives the loaf a lovely lift.
-
1/2 teaspoon salt: A small amount to balance the sweetness.
-
1 teaspoon ground cinnamon: This adds warmth and depth. Feel free to experiment with nutmeg or cardamom if you’re feeling spicy!
Step-by-Step Instructions
1. Preheat the Oven
Preheat your oven to 350°F (175°C). This ensures that the bread begins baking instantly, helping it to rise perfectly!
2. Prepare the Baking Dish
Grease a 9×5 loaf pan with cooking spray or line it with parchment paper. This will prevent our delicious creation from sticking. Ah, the beauty of a clean release!
3. Grate the Zucchini
Using a box grater or a food processor, grate your zucchini. Once you have a cup, place it in a clean kitchen towel and wring out as much moisture as possible. This step is important! Too much moisture can lead to a soggy loaf.
4. Mix Wet Ingredients
In a large mixing bowl, combine the grated zucchini, granulated sugar, brown sugar, vegetable oil, and eggs. Whisk until the mixture is smooth and well blended. Don’t you just love how the sugars and oil come together in a beautiful, sugary embrace?
5. Add Vanilla
Stir in the vanilla extract. This fragrant addition will have your kitchen smelling heavenly! Remember to taste it if you want to reassure yourself that the sweet aroma is indeed delightful.
6. Combine Dry Ingredients
In a separate bowl, whisk together the all-purpose flour, baking powder, baking soda, salt, and ground cinnamon until they are well combined. This helps ensure even distribution of the leavening agents so you won’t have any surprises!
7. Combine Wet and Dry Mixtures
Gradually add your dry ingredient mixture into the wet ingredients, folding gently with a spatula. Overmixing can lead to dense bread—nobody wants that! Just combine until you still see a few streaks of flour.
8. Fold in Blueberries
Gently fold in the blueberries. If you’re using frozen blueberries, do not thaw them first, or the batter will turn a mysterious shade of blue!
9. Pour into the Pan
Transfer your lovely batter into the prepared loaf pan. Use the spatula to smooth the top; a nice, level surface will bake evenly and look gorgeous.
10. Bake
Place the loaf pan in the preheated oven and bake for about 55-60 minutes. You’ll know it’s done when a toothpick inserted in the center comes out clean, with just a few moist crumbs sticking to it.
11. Cool
Let it cool in the pan for about 10 minutes, then carefully transfer it to a wire rack to cool completely. Don’t rush this—trust me, the cooling stage is essential to ensure the correct texture!
Serving Suggestions
This Blueberry Zucchini Bread is best served slightly warm or at room temperature. Slice it up and enjoy it plain, or smear a bit of butter or cream cheese on top for that little extra indulgence. Pair it with a cup of coffee or tea for a marvelous afternoon treat, or enjoy it as a sweet and healthy breakfast option!
Recipe Variations
-
Nutty Addition: Toss in 1/2 cup of chopped walnuts or pecans for a delightful crunch.
-
Spice it Up: Add a pinch of nutmeg or a teaspoon of ginger for a warm twist.
-
Citrusy Zing: Add the zest of one lemon or orange to brighten the flavors.
-
Chocolatey Delight: Fold in 1/2 cup of chocolate chips for a sweet surprise!
-
Gluten-Free Version: Replace the all-purpose flour with a gluten-free flour blend to keep it celiac-friendly.
Chef’s Notes
I can honestly say that this Blueberry Zucchini Bread has evolved over the years. The original recipe was a simple zucchini bread that my grandmother made. But as I grew and started experimenting in the kitchen, I realized that blueberries made everything better! This recipe becomes a fun reminder that baking is about exploring flavors and creating memories. Plus, it’s a great way to use up those extra zucchinis that you might have lying around.
FAQs and Troubleshooting
Q: Why did my bread come out too dense?
A: This is often due to overmixing. Once you add the dry ingredients to the wet, mix just until incorporated. A few flour streaks are okay!
Q: What do I do if the top of my bread is browning too quickly?
A: If you notice that the top is browning too much while baking, cover it loosely with aluminum foil for the last 10 minutes of baking.
Q: Can I store this bread?
A: Absolutely! You can store it at room temperature in an airtight container for up to 3 days. For longer storage, freeze individual slices wrapped in plastic wrap or foil for up to 3 months.
Q: How do I know when it’s fully baked?
A: Besides the toothpick test, you should also look for a golden-brown crust and a springy top. If you gently press the top and it springs back, it’s done!
Nutritional Information
- Serving Size: 1 slice
- Calories: ~200
- Protein: 3g
- Fat: 8g
- Carbohydrates: 30g
- Fiber: 2g
- Sugars: 10g
And there you have it, my friends—Blueberry Zucchini Bread, infused with love, warmth, and a splash of nostalgia. I hope this recipe finds its way into your kitchen and adds a touch of cheer to your day. Happy baking!
PrintBlueberry Zucchini Bread

A deliciously moist loaf that combines the sweetness of blueberries with the earthiness of zucchini.
- Prep Time: 15 minutes
- Cook Time: 60 minutes
- Total Time: 75 minutes
- Yield: 8 servings 1x
- Category: Dessert
- Method: Baking
- Cuisine: American
- Diet: Vegetarian
Ingredients
- 1 cup grated zucchini
- 1 cup blueberries (fresh or frozen)
- 1/2 cup vegetable oil
- 1/2 cup granulated sugar
- 1/2 cup brown sugar
- 2 large eggs
- 1 teaspoon vanilla extract
- 1 1/2 cups all-purpose flour
- 1 teaspoon baking powder
- 1/2 teaspoon baking soda
- 1/2 teaspoon salt
- 1 teaspoon ground cinnamon
Instructions
- Preheat the oven to 350°F (175°C).
- Grease a 9×5 loaf pan with cooking spray or line it with parchment paper.
- Grate the zucchini and wring out moisture using a towel.
- Combine the zucchini, granulated sugar, brown sugar, vegetable oil, and eggs in a bowl and whisk until smooth.
- Add the vanilla extract.
- Whisk the flour, baking powder, baking soda, salt, and cinnamon together in a separate bowl.
- Fold the dry ingredients gently into the wet mixture.
- Fold in the blueberries.
- Pour the batter into the prepared loaf pan.
- Bake for 55-60 minutes, until a toothpick comes out clean.
- Cool in the pan for 10 minutes, then transfer to a wire rack.
Notes
Best served slightly warm or at room temperature. Can be enjoyed plain or with butter or cream cheese.
Nutrition
- Serving Size: 1 slice
- Calories: 200
- Sugar: 10g
- Sodium: 300mg
- Fat: 8g
- Saturated Fat: 1g
- Unsaturated Fat: 7g
- Trans Fat: 0g
- Carbohydrates: 30g
- Fiber: 2g
- Protein: 3g
- Cholesterol: 40mg
Keywords: blueberry, zucchini bread, quick bread, moist bread, healthy dessert
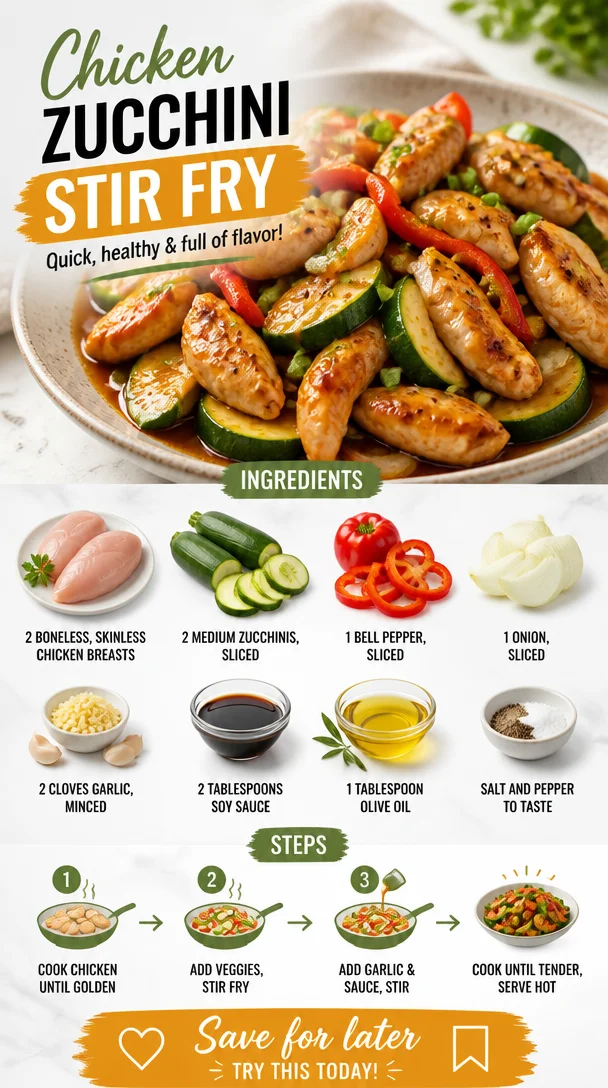
Chicken Zucchini Stir Fry
Delightful Chicken Zucchini Stir Fry: A Colorful and Flavorful Meal
Welcome to Clean Plate Cravings, my kitchen haven where delicious meets nutritious! Today, I’m thrilled to share a vibrant Chicken Zucchini Stir Fry that’s not only packed with flavors but also represents everything I believe about enjoying food. Eating well shouldn’t feel like a chore; it should be a joyful experience where colors, tastes, and even the smell of cooking coax you into a happy dance in the kitchen!
Imagine the sizzle of chicken, the crunch of the bell pepper, and the fresh aroma of garlic filling your home. This stir fry is made with simple, fresh ingredients that are likely hanging out in your fridge right now. It’s the kind of recipe that fits perfectly into a busy weeknight cooking schedule or an everyday meal prepped on a Sunday, ready to be enjoyed all week long.
Stir fry dishes are one of my favorite ways to whip up quick, delicious meals. With minimal cooking time, you can whip together something that not only tastes good but also fuels your body with nutrients. This Chicken Zucchini Stir Fry is certainly one of those dishes that delivers on taste while keeping it light and healthy. So, let’s dive deep into this recipe and stir up some magic together!
A Bite of Nostalgia: Mom’s Kitchen Wisdom
This dish brings back sweet memories from my childhood when my mom would whip up her famous stir fry for dinner. As a busy working mom, she had her ways of making the kitchen her own little sanctuary, producing meals that not only tasted great but were also wholesome. I remember sitting at the kitchen counter, watching her slice vibrant veggies. Every slice was precise and purposeful, and she always emphasized using what’s fresh and in season.
I’d help her wash the vegetables while she’d hum along to our favorite tunes playing in the background. Those moments taught me the importance of bringing joy into cooking and reminded me that food can forge connections, comfort, and perhaps even a little nostalgia. That’s why this Chicken Zucchini Stir Fry is special to me—it embodies what I learned from her: keep it simple, vibrant, and full of love.
Ingredients
Before we jump into the kitchen, let’s gather our ingredients. Here’s what you’ll need to create this colorful stir fry:
-
2 boneless, skinless chicken breasts
Tender chicken is the base of this dish. You can swap it for turkey breast if you prefer. For a plant-based option, try using tofu or tempeh! -
2 medium zucchinis, sliced
Zucchini adds a lovely crunch and absorbs all the flavors beautifully. If zucchini isn’t available, yellow squash works just as well. -
1 bell pepper, sliced
Use any color you have on hand—red, yellow, or green—each brings its own sweetness. If you’re looking for a spicy twist, try a jalapeño instead! -
1 onion, sliced
Onions enhance the overall flavor. I love using red onions, but yellow or sweet onions can be fantastic substitutes too. -
2 cloves garlic, minced
Garlic is the secret flavor booster in this dish! If you love garlic, feel free to add more. If you’re short on fresh, garlic powder can be used, too—just keep it light. -
2 tablespoons soy sauce
This brings the salty umami flavor that stir fry is known for. If you want a gluten-free option, use tamari or coconut aminos instead. -
1 tablespoon olive oil
Olive oil is perfect for cooking due to its light flavor and health benefits. Feel free to use avocado oil or sesame oil for an Asian flair. -
Salt and pepper to taste
Always be generous with seasoning! What matters is it’s to your preference.
Step-by-Step Instructions
Now that we have everything ready, it’s time to cook! Cooking is all about enjoying the process, so grab your favorite playlist, and let’s get started.
-
Prepare Your Ingredients
Start by slicing your chicken, zucchini, bell pepper, and onion into bite-sized pieces. Keep everything uniform so it cooks evenly. Pro-tip: use a sharp knife for quicker and easier cutting. If you struggle with knifework, check out some online tutorials for handy tips! -
Sauté the Chicken
Heat the olive oil in a large skillet or wok over medium-high heat. Once it’s shimmering, add in the chicken pieces. Season with salt and pepper. Sauté the chicken for about 5-7 minutes until it’s fully cooked and golden brown. Make sure not to crowd the pan—this allows for a nice sear. Here’s a hack: if you use a wooden spoon to flip the chicken, you’ll get an even cook on all sides. -
Add the Aromatics
Toss in the minced garlic and sliced onions into the pan. The fragrance will hit you like a wave of comfort! Stir-fry this mix for about 1-2 minutes until fragrant and the onions become translucent. Keep it moving so the garlic doesn’t burn—charred garlic can turn bitter. -
In with the Veggies
Next, add the sliced zucchini and bell pepper to the pan. Stir well and cook for another 3-5 minutes, allowing the vegetables to soften while still being crisp. Remember, we want crunch in our stir fry! If your veggies start wilting too fast, turn down the heat slightly to avoid overcooking. -
Season It Up
Finally, pour in the soy sauce. It’ll add depth and richness! Stir everything together and allow it to cook for another minute to let the flavors meld. If you like a bit of zing, try adding a dash of chili paste or sesame oil at this stage. -
Taste Test and Adjust
Before serving, taste your dish and adjust the seasoning as needed—you might find it needs a little more salt or soy sauce. Cooking is about personal preference, so don’t hesitate to make it yours. -
Serve and Savor
Once everything is cooked, remove it from heat and let it rest for a couple of minutes. This gives the flavors a moment to settle before serving.
Serving Suggestions
Serving this Chicken Zucchini Stir Fry is all about presentation and satisfaction. I love serving it over a fluffy bed of jasmine rice or whole grain quinoa for a wholesome touch. You can also enjoy it wrapped in lettuce leaves for a fresh, low-carb option. Drizzle a little extra soy sauce or a sprinkle of sesame seeds for a finishing touch.
Recipe Variations
Let’s get creative with some variations to keep this dish exciting:
- Spicy Kick: Add sliced red chili peppers or a sprinkle of chili flakes for a bit of heat!
- Coconut Delight: Stir in a splash of coconut milk for a creamy twist.
- Herb Weave: Finish with a handful of fresh basil or cilantro for a zesty lift.
- Noodle Swap: Swap out the chicken for shrimp and toss in some rice noodles for an easy Asian-inspired meal.
- Veggie Load: Add in additional veggies like broccoli, snap peas, or carrots based on what you have.
Chef’s Notes
This Chicken Zucchini Stir Fry is a staple in my kitchen for good reason! The recipe has evolved since those childhood memories; now I play with various ingredients to keep things fresh and in line with the season. I often encourage people to explore their pantry and fridge and let those ingredients dictate the meal. This stir fry has seen everything from leftover veggies to different protein sources, emphasizing its versatility.
And let me tell you a little secret: there’s no wrong way to stir fry. One time, I accidentally spilled in some red wine while cooking, and instead of being upset, I embraced it! That was one of the most delicious flukes I’ve ever created in my kitchen.
FAQs and Troubleshooting
Here are some common questions and potential hiccups you might run into:
-
Why is my stir fry watery?
Make sure you’re cooking on high heat, which helps to evaporate excess moisture. If it’s still watery, you might have added too much sauce—consider using less next time or increasing your cooking time to reduce it. -
Can I make this ahead of time?
Absolutely! This stir fry stores well in an airtight container in the fridge for up to 3 days. Just reheat it in a skillet or microwave when you’re ready to enjoy it again. -
What if my veggies overcook?
If this happens, next time try adding the firmer veggies, like carrots and onion, first, and add the softer ones, like zucchini and peppers, later in the cooking process. -
Can I freeze this dish?
Yes, but I recommend freezing just the chicken and veggies before cooking, as stir-fried vegetables don’t retain their texture well after freezing and reheating.
Nutritional Info
- Calories: 350 per serving (approx.)
- Protein: 30g
- Carbohydrates: 15g
- Fats: 15g
- Fiber: 2g
(Note: Nutritional values can vary based on exact ingredients and portion sizes.)
Thanks for tuning in! I hope this Chicken Zucchini Stir Fry brings warmth to your kitchen and joy to your table. Don’t forget to embrace your creativity and bake with love. Happy cooking, foodies!
PrintChicken Zucchini Stir Fry

A vibrant Chicken Zucchini Stir Fry that’s packed with flavors and perfect for a quick weeknight meal.
- Prep Time: 15 minutes
- Cook Time: 15 minutes
- Total Time: 30 minutes
- Yield: 4 servings 1x
- Category: Main Course
- Method: Stir Fry
- Cuisine: Asian
- Diet: Gluten-Free
Ingredients
- 2 boneless, skinless chicken breasts
- 2 medium zucchinis, sliced
- 1 bell pepper, sliced
- 1 onion, sliced
- 2 cloves garlic, minced
- 2 tablespoons soy sauce
- 1 tablespoon olive oil
- Salt and pepper to taste
Instructions
- Prepare your ingredients by slicing your chicken, zucchini, bell pepper, and onion into bite-sized pieces.
- Sauté the chicken in a large skillet over medium-high heat with olive oil, seasoning with salt and pepper, for 5-7 minutes.
- Add minced garlic and sliced onions, stir-frying for 1-2 minutes until fragrant.
- In with the sliced zucchini and bell pepper, cooking for an additional 3-5 minutes.
- Season it up by pouring in the soy sauce and letting it cook for another minute.
- Taste test and adjust the seasoning before serving.
- Serve the stir fry over jasmine rice or quinoa, and enjoy!
Notes
This stir fry can be customized with different vegetables or proteins like tofu, shrimp, or even a splash of coconut milk for creaminess.
Nutrition
- Serving Size: 1 serving
- Calories: 350
- Sugar: 5g
- Sodium: 700mg
- Fat: 15g
- Saturated Fat: 2g
- Unsaturated Fat: 10g
- Trans Fat: 0g
- Carbohydrates: 15g
- Fiber: 2g
- Protein: 30g
- Cholesterol: 70mg
Keywords: chicken, zucchini, stir fry, quick meal, healthy cooking
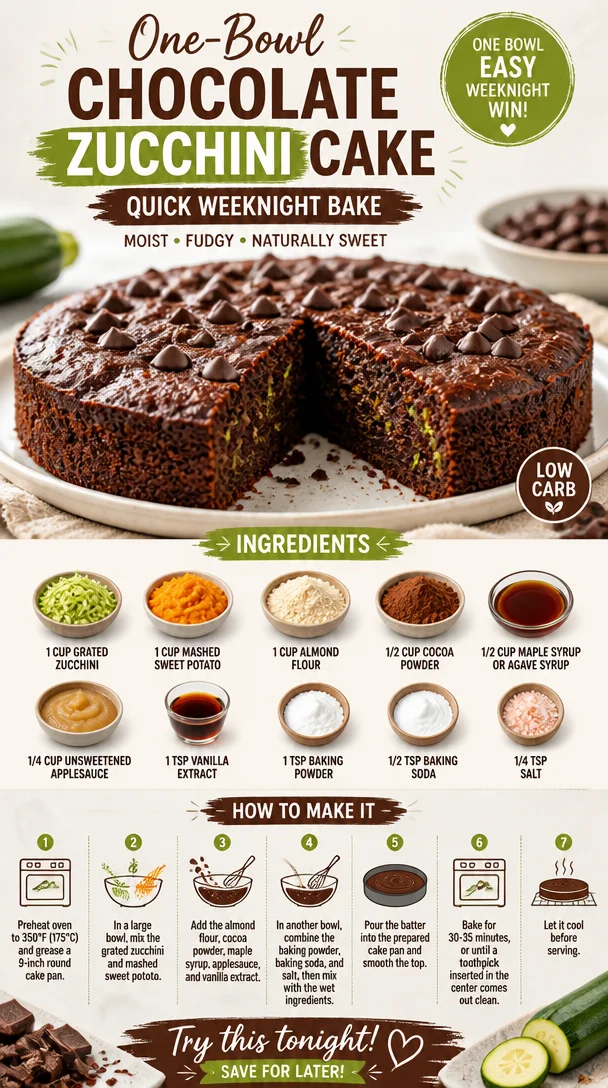
One-Bowl Chocolate Zucchini Cake: Quick Weeknight Bake
A Decadent Delight: Chocolate Zucchini Cake Recipe
Welcome back, fellow foodies! Today, we’re diving into an absolute gem of a recipe that’s not only a feast for your taste buds but also a sneaky way to sneak in some nutrition – we’re talking about Chocolate Zucchini Cake! Yes, you heard that right. This luscious cake combines rich chocolatey goodness with the moisture of zucchini, making it incredibly moist and fluffy. Whether you’re trying to use up some surplus zucchini from your garden (or your next-door neighbor’s garden), or you just have a craving for something sweet and delicious, this cake is here to satisfy.
So, let’s roll up our sleeves and get baking! But first, let me share a little backstory that makes this recipe even more special.
A Slice of Nostalgia
This Chocolate Zucchini Cake recipe brings back fond memories from my childhood when my grandmother would whip it up on lazy summer afternoons. I can still see her in the kitchen, apron tied snugly around her waist, a mischievous twinkle in her eye as she beckoned me closer to the counter. The smell of chocolate wafted through the air, an intoxicating blend of sweetness and warmth that made my heart flutter.
“Trust me, my dear,” she would say, sliding a slice of still-warm cake in front of me. “You’ll never know there’s zucchini in it!” I often wondered how she pulled off this chocolate magic trick. As a kid, I was skeptical, but one bite into that cake and I was convinced! The rich flavor and moist texture were utterly irresistible.
Those afternoons were filled with laughter, flour-covered countertops, and the pure joy of creating something together. Now, as I share this recipe with you, I feel connected to those memories every time I bake it. It’s a reminder that cooking is about love, creativity, and, of course, a touch of sweetness.
Ingredients
Let’s check out the ingredients you’ll need for this decadent Chocolate Zucchini Cake!
-
1 cup grated zucchini: Zucchini adds moisture and a subtle sweetness. You can use yellow squash as a fun substitute if you’re looking for a little variety! Just be sure to squeeze out any excess moisture beforehand to avoid a soggy batter.
-
1 cup mashed sweet potato: This natural sweetener adds creaminess and depth of flavor. Canned sweet potato works perfectly here but feel free to roast and mash your own if you’re looking for that homemade touch!
-
1 cup almond flour: Almond flour gives this cake a lovely nutty flavor and keeps it gluten-free. If you need a substitution, oat flour or a gluten-free all-purpose blend can do the trick.
-
1/2 cup cocoa powder: You can’t have a chocolate cake without cocoa powder! For a deeper flavor, opt for Dutch-processed cocoa. But if you’re going for an intense chocolate hit, feel free to use a mix of cocoa and dark chocolate.
-
1/2 cup maple syrup or agave syrup: This natural sweetener elevates the cake while keeping it moist. Honey can work too, but it’s a bit sweeter, so adjust to taste.
-
1/4 cup unsweetened applesauce: Applesauce adds moisture with a subtle sweet flavor. You can substitute it with more mashed banana or additional sweet potato if you wish.
-
1 tsp vanilla extract: This aromatic ingredient amplifies flavors and gives the cake a warm, inviting essence. Make sure to go for real vanilla extract – your taste buds will thank you!
-
1 tsp baking powder: This leavening agent helps the cake rise beautifully. Always double-check its freshness for the best results!
-
1/2 tsp baking soda: A little extra oomph for rising! If you’re out of baking soda, you can replace it with more baking powder at a 1:3 ratio.
-
1/4 tsp salt: A pinch of salt enhances all the flavors; it’s like a secret weapon in baking! Feel free to use sea salt for a more robust taste.
Step-by-Step Instructions
Now that we have our ingredients lined up like a culinary dream team, let’s get into the magic of making this cake!
-
Preheat Your Oven
Preheat your oven to 350°F (175°C). This is crucial, as it allows your cake to rise and bake evenly. It’s like a warm-up for your batter! -
Prepare Your Baking Pan
Grab an 8-inch square cake pan (or round if you prefer) and grease it lightly with oil or cooking spray. You can also line it with parchment paper for easy removal. Trust me; you don’t want a beautiful cake stuck in the pan! -
Grate the Zucchini
Using a box grater or food processor, grate your zucchini finely. Once you’ve got a cup, place it in a clean kitchen towel and wring out any excess moisture. This step is super important for achieving that perfect cake consistency. -
Mash the Sweet Potato
If using fresh sweet potatoes, roast them until tender, then scoop the flesh into a bowl and mash. If you prefer the canned version, make sure it’s unsweetened and mash it up until smooth. -
Mix the Wet Ingredients
In a large mixing bowl, combine the grated zucchini, mashed sweet potato, maple syrup (or agave), applesauce, and vanilla extract. Use a whisk or spatula to combine until the mixture is smooth and well-combined. I love getting my hands in here too – the texture is so satisfying! -
Combine the Dry Ingredients
In another bowl, sift together the almond flour, cocoa powder, baking powder, baking soda, and salt. Sifting helps remove lumps and guarantees a lighter cake. Just think of it as a mini workout! -
Combine Wet and Dry
Gradually incorporate the dry mixture into the wet ingredients. Gently fold them together using a spatula or wooden spoon, taking care not to overmix. You want a beautifully blended batter, not a tough one! -
Pour and Bake
Pour the batter into your prepared cake pan, smoothing the top with a spatula. Pop it in the preheated oven and bake for about 25-30 minutes, or until a toothpick inserted in the center comes out clean. The smell wafting through your kitchen will be pure bliss! -
Cool Down
Once done, remove the cake from the oven and let it cool in the pan for about 10 minutes. Then, carefully turn it out onto a wire rack to cool completely – if you can resist not diving in right away!
Serving Suggestions
When it comes to serving this chocolatey creation, presentation is key! Dust the top with a sprinkle of powdered sugar for a fancy touch, or drizzle with a little melted dark chocolate. For an extra indulgent treat, serve a slice warm with a dollop of whipped coconut cream or your favorite ice cream. Your friends and family will be in chocolate heaven!
Recipe Variations
Here are a few delicious twists to keep this Chocolate Zucchini Cake vibrant and exciting:
- Add Mix-Ins: Toss in a handful of chocolate chips or chopped walnuts for added texture.
- Nut Butter Swirl: Dollop some almond or peanut butter into the batter before baking for a surprise creamy center.
- Spiced Delight: Add a pinch of cinnamon or espresso powder to the batter to deepen the flavors.
- Frosting Options: Top with a light frosting made from Greek yogurt and cocoa powder for a yogurt-based treat, or keep it simple with a vegan cream cheese frosting.
Chef’s Notes
This recipe has evolved over time, and I can’t help but smile every time I bake it. Initially, I made it just for myself during my health-conscious foodie phase, but soon my friends caught wind of this chocolate delight. It became an instant favorite at gatherings, and I love seeing the surprised expressions when I reveal the star ingredient: zucchini!
There was one time I forgot to strain the zucchini, and let’s just say it was a very "moist" cake! But hey, those moments are what make cooking so adventurous, right? Each time I bake, I remember my grandmother’s laughter and love infusing each bite.
FAQs and Troubleshooting
1. Why is my cake too dense?
If your cake is dense, it might be due to overmixing the batter or not measuring the ingredients accurately. Make sure to fold gently and use the right measurements, especially with the flour!
2. Can I freeze this cake?
Absolutely! This Chocolate Zucchini Cake freezes beautifully. Wrap it tightly in plastic wrap and foil to prevent freezer burn. When you’re ready, thaw it in the fridge overnight.
3. What if I don’t have almond flour?
No worries! You can substitute almond flour with any other nut flour, or a gluten-free all-purpose flour work perfectly if you’re aiming for a gluten-free alternative.
4. Can I use other vegetables?
Definitely! Carrots are a fantastic swap if you want to try a veggie twist. Just prepare them similarly by grating, and you’ll end up with a deliciously moist cake.
Nutritional Info
While I won’t delve too deeply into numbers, I will say this Chocolate Zucchini Cake is a delightful treat that provides a nice serving of fiber thanks to the veggies! It’s a little less sweet and heavy than traditional cakes, making it a great guilt-free indulgence.
So there you have it! A fun and fabulous recipe for Chocolate Zucchini Cake that’s sure to impress and delight. Let me know when you try it and if you make any variations! Happy baking, and remember to keep it fresh and delicious.
PrintChocolate Zucchini Cake
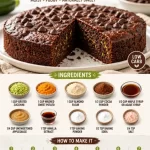
A decadent and moist chocolate zucchini cake that is both delicious and nutritious.
- Prep Time: 15 minutes
- Cook Time: 30 minutes
- Total Time: 45 minutes
- Yield: 8 servings 1x
- Category: Dessert
- Method: Baking
- Cuisine: American
- Diet: Vegetarian
Ingredients
- 1 cup grated zucchini
- 1 cup mashed sweet potato
- 1 cup almond flour
- 1/2 cup cocoa powder
- 1/2 cup maple syrup or agave syrup
- 1/4 cup unsweetened applesauce
- 1 tsp vanilla extract
- 1 tsp baking powder
- 1/2 tsp baking soda
- 1/4 tsp salt
Instructions
- Preheat your oven to 350°F (175°C).
- Prepare an 8-inch square or round cake pan by greasing it lightly with oil or cooking spray.
- Grate the zucchini finely and squeeze out excess moisture using a clean kitchen towel.
- Mash the sweet potato until smooth.
- Mix the wet ingredients: zucchini, sweet potato, maple syrup (or agave), applesauce, and vanilla extract in a large bowl.
- Combine the dry ingredients: almond flour, cocoa powder, baking powder, baking soda, and salt in another bowl.
- Combine the wet and dry mixtures gently without overmixing.
- Pour the batter into the prepared pan and smooth the top.
- Bake for about 25-30 minutes, or until a toothpick comes out clean.
- Cool in the pan for 10 minutes, then transfer to a wire rack to cool completely.
Notes
Top with powdered sugar or melted dark chocolate for serving. Can add chocolate chips or nuts for extra texture.
Nutrition
- Serving Size: 1 slice
- Calories: 250
- Sugar: 14g
- Sodium: 180mg
- Fat: 9g
- Saturated Fat: 1g
- Unsaturated Fat: 5g
- Trans Fat: 0g
- Carbohydrates: 38g
- Fiber: 4g
- Protein: 4g
- Cholesterol: 0mg
Keywords: Chocolate Zucchini Cake, Healthy Dessert, Moist Cake, Baking, Zucchini Recipes