
Chicken Pot Pie Bake
A Cozy Chicken Pot Pie Bake to Warm Your Heart
Welcome back to Clean Plate Cravings, friends! Today, we’re diving into a dish that’s the ultimate comfort food winner: Chicken Pot Pie Bake. This classic is perfect for gathering around the table with loved ones, reminiscing about old times, and, most importantly, savoring every delectable bite. The best part? We’re making it simple, fun, and, of course, so delicious you’ll want to whip it up again and again!
Picture this: it’s a chilly Sunday afternoon, and the aroma of a hearty meal fills the kitchen. Growing up, Sundays meant family time, and more often than not, that involved a cozy kitchen where my mom would transform ingredients into the most satisfying meals. I remember the excitement as she pulled out the mixing bowl, chopping fresh vegetables while we chatted about our week. And oh, the chicken pot pie! It was always a thrill to peel back the crust and reveal the creamy goodness underneath.
The beauty of Chicken Pot Pie Bake is that it combines everything we love about comfort food into one dish. Tender chicken, colorful mixed vegetables, a luscious cream sauce, and topped with fluffy biscuit dough—all baked to bubbly perfection. It’s like a warm hug on a plate! So, grab your apron, and let’s make this delightful dish a reality in your kitchen.
Personal Story: A Taste of Home
One of my fondest memories involving chicken pot pie is from when I was about ten years old. My family lived in a tiny house where the kitchen was the heart of our home. That specific Sunday, my mom had a special surprise for us—a chicken pot pie! The kitchen was alive with the sounds of clattering pots and pans, and I couldn’t help but sneak peeks as she prepared the filling.
As the pie baked, the warm scents of chicken, herbs, and vegetables danced through the house, drawing the whole family into the kitchen like a moth to a flame. I remember setting the table with my siblings, our faces beaming with anticipation. When we finally sat down, we couldn’t wait to dig in. The first bite was everything! Creamy and savory, with the perfect flaky crust that crumbled in just the right way. That chicken pot pie solidified my love for cooking—sharing good food brings people together in the most beautiful way.
Ingredients
Now that we’re all set to create some cozy memories, let’s gather our ingredients for this Chicken Pot Pie Bake. Here’s what you’ll need:
-
Chicken: Boneless, skinless chicken breasts or thighs work best. If you’re short on time, feel free to use rotisserie chicken! It saves time without compromising flavor.
-
Mixed Vegetables: A colorful medley of carrots, peas, and corn adds freshness and nutrition. If you’re in a pinch, frozen mixed veggies are a great substitute—just toss them in directly!
-
Cream Sauce: This rich and luscious sauce is the heart of the dish. You can use cream of chicken soup as a shortcut or make a homemade cream sauce with butter, flour, milk, and seasonings for a more from-scratch option.
-
Biscuit Dough: Store-bought biscuit dough makes this meal super simple. You can also use homemade dough if you’re feeling adventurous! Check out our quick biscuit recipe for a delightful DIY option.
-
Herbs and Seasoning: Fresh or dried thyme and parsley really elevate the flavors. Don’t underestimate the power of seasoning—Salt and pepper are key players in this dish!
Step-by-Step Instructions
Ready to bring this Chicken Pot Pie Bake to life? Follow these easy steps to ensure a flavorful and winning dish:
-
Preheat Your Oven: Preheat your oven to 375°F (190°C). This is a crucial first step to ensure your chicken pot pie bakes evenly and comes out bubbly and golden brown.
-
Cook the Chicken: In a large skillet over medium heat, cook your chicken until golden brown, approximately 6-8 minutes per side. You want it cooked through! Season it with salt and pepper as it cooks to build flavor.
-
Shred the Chicken: Once the chicken is cooked, let it rest for a few minutes, then shred it using two forks or chop it into bite-sized pieces. This is where you can involve the kids, making it a fun, interactive step!
-
Sauté the Veggies: Using the same skillet, add a splash of olive oil if needed and toss in your mixed vegetables. Sauté until they’re fork-tender, about 3-5 minutes. If you’re using frozen veggies, there’s no need to thaw them—just pop them in and cook a little longer.
-
Prepare the Cream Sauce: In a medium saucepan, whisk together your cream of chicken soup or homemade cream sauce until smooth. If you’re opting for the homemade route, melt 4 tablespoons of butter, then whisk in 1/4 cup of flour, gradually adding 1 cup of milk while stirring continuously until thickened. Season with thyme and parsley to taste.
-
Combine Everything: In a large mixing bowl, combine the shredded chicken, sautéed vegetables, and cream sauce. Stir until everything is evenly coated and looking luscious!
-
Transfer to Baking Dish: Pour this delightful mixture into a greased 9×13-inch baking dish. Spread it out evenly, making sure there are no dry corners—every bite should have that creamy goodness!
-
Top with Biscuit Dough: Open your biscuit dough and break it into pieces, strategically placing them on top of the chicken and veggie mixture. Don’t worry about covering every inch; they’ll puff up beautifully as they bake, creating that fantastic topping we all love.
-
Bake: Slide the dish into your preheated oven and bake for 25-30 minutes or until the biscuits are golden brown and the filling is bubbly. Resist the urge to peek too often; you want to maintain that oven heat!
-
Cool and Serve: Once it’s done, let it sit for about 5-10 minutes before digging in. This will allow the delicious filling to set just a bit, making serving much easier.
Serving Suggestions
When it comes to plating your Chicken Pot Pie Bake, it’s all about comfort and warmth. Serve generous portions right from the baking dish for a rustic feel, or scoop individual servings into bowls for a more elegant presentation. Garnish with a sprinkle of fresh parsley to add a pop of color. It pairs perfectly with a simple green salad dressed in a light vinaigrette or some crusty bread for soaking up the wonderful sauce.
Recipe Variations
Here are a few fun twists to switch up your Chicken Pot Pie Bake:
-
Buffalo Chicken Pot Pie: Spice things up by adding shredded buffalo chicken instead of plain chicken. Top with blue cheese crumbles for an extra kick!
-
Vegetarian Option: Swap the chicken for hearty ingredients like chickpeas or mushrooms and load it up with your favorite veggies.
-
Cheesy Delight: Stir in a cup of shredded cheese (like cheddar or mozzarella) into the cream sauce for an extra creamy, cheesy goodness.
-
Herb Garden: Mix in fresh herbs like rosemary or sage for a wonderful aroma and flavor profile that transforms the dish.
-
Potato Topping: Instead of biscuit dough, top your filling with creamy mashed potatoes for a twist on a shepherd’s pie.
Chef’s Notes
This Chicken Pot Pie Bake is one of those recipes that has evolved overtime in my kitchen. Initially, I followed my mom’s traditional recipe to the letter, but as I experimented, I discovered so many delightful additions and variations that kept me excited! The funny thing is that my friends now expect me to bring this dish to every gathering, so it’s become a true classic in my circle. I often reminisce with my mom about how I used to sne sneak into the kitchen while she was busy cooking, and now, I find myself recreating those moments with my own little ones—sharing the love of cooking across generations.
FAQs and Troubleshooting
1. Can I make this in advance?
Absolutely! You can assemble the chicken pot pie filling and store it in the fridge for up to a day before baking it. Just add the biscuit dough right before you’re ready to pop it in the oven.
2. What do I do if the toppings are browning too quickly?
If the biscuit tops are browning too fast before the filling is bubbling, cover them loosely with foil to prevent over-browning while allowing the filling to cook through.
3. How can I ensure my filling isn’t too runny?
If you find your filling is too runny, let it simmer a little longer to thicken, or mix in a tablespoon of cornstarch dissolved in water to help tow it up.
4. What do I do with leftovers?
Store any leftovers in an airtight container in the fridge for up to 3 days. Reheat in the oven for the best results, covering it with foil to keep the biscuits from drying out.
Nutritional Info
This hearty Chicken Pot Pie Bake provides a well-balanced meal packed with protein from the chicken and a dose of veggies. Each serving delivers a satisfying combination of carbohydrates and healthy fats, making it an excellent option for a cozy family dinner.
And there you have it—your ultimate guide to creating a methodical and flavorful Chicken Pot Pie Bake! I hope you enjoyed this journey into comfort food and feel inspired to share this delightful dish with your friends and family. Remember, cooking is all about love, laughter, and good vibes. Keep it fresh, simple, and, most importantly, delicious!
PrintChicken Pot Pie Bake

A cozy and comforting chicken pot pie bake filled with tender chicken, mixed vegetables, and topped with fluffy biscuit dough.
- Prep Time: 15 minutes
- Cook Time: 30 minutes
- Total Time: 45 minutes
- Yield: 4 servings 1x
- Category: Main Course
- Method: Baking
- Cuisine: American
- Diet: Gluten Free
Ingredients
- 2 cups Boneless, skinless chicken breasts or thighs
- 2 cups Mixed vegetables (carrots, peas, corn)
- 1 can Cream of chicken soup or homemade cream sauce
- 1 package Biscuit dough (store-bought or homemade)
- 1 teaspoon Fresh or dried thyme
- 1 teaspoon Fresh or dried parsley
- Salt and pepper to taste
- Olive oil (as needed)
Instructions
- Preheat your oven to 375°F (190°C).
- Cook the chicken in a large skillet over medium heat until golden brown, about 6-8 minutes per side.
- Shred the cooked chicken using two forks or chop into bite-sized pieces.
- Sauté mixed vegetables in the skillet until fork-tender, about 3-5 minutes.
- Prepare the cream sauce by whisking together soup or homemade sauce until smooth.
- Combine shredded chicken, sautéed vegetables, and cream sauce in a large mixing bowl.
- Transfer the mixture into a greased 9×13-inch baking dish.
- Top with pieces of biscuit dough.
- Bake for 25-30 minutes or until biscuits are golden brown and filling is bubbly.
- Cool for 5-10 minutes before serving.
Notes
You can assemble the filling in advance and refrigerate it before baking.
Nutrition
- Serving Size: 1 serving
- Calories: 350
- Sugar: 5g
- Sodium: 400mg
- Fat: 12g
- Saturated Fat: 4g
- Unsaturated Fat: 6g
- Trans Fat: 0g
- Carbohydrates: 45g
- Fiber: 3g
- Protein: 15g
- Cholesterol: 30mg
Keywords: chicken pot pie, comfort food, family dinner, easy recipe, cozy recipes
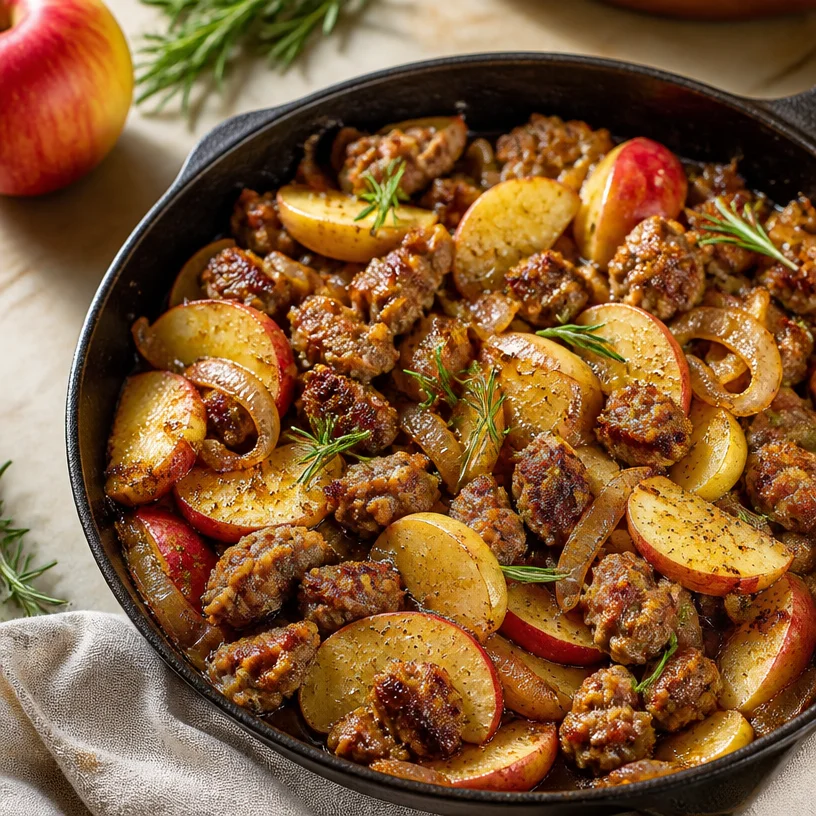
One-Pan Sausage & Apple Skillet for Weeknights (15 Minutes)
Sausage & Apple Skillet: A Heartwarming Classic for Busy Days
Welcome to the delightful world of Clean Plate Cravings, where we marry wholesome ingredients with vibrant flavors! Today, we’re diving into a dish that tickles the taste buds and warms the soul: the Sausage & Apple Skillet. Imagine the sweet aroma of caramelized apples dancing with the savory notes of Italian sausage—a delightful fusion that feels like a cozy hug in a bowl. Perfect for busy evenings or leisurely weekends, this skillet is a celebration of simple, fresh, and feel-good food.
A Quick Culinary Story
Every time I make this Sausage & Apple Skillet, I’m transported back to my childhood kitchen. Growing up, my grandmother had a magical way of mixing sweet and savory flavors—always using what was fresh from her garden or the local market. One chilly autumn afternoon, she invited me to help prepare dinner. The moment I stepped into her kitchen, the air was swirling with the sounds of laughter and the sizzling of sausage.
As we cooked, she taught me how to caramelize onions until they were golden, coaxing out their natural sweetness. We chatted about life, love, and the importance of good food while mixing the hearty sausage with juicy apples. That dish was not just a meal; it was an experience, infused with love and memories that I cherish to this day. And now, I’m thrilled to share my spin on that beloved recipe with you!
Ingredients
Let’s gather our ingredients! Here’s what you’ll need for this vibrant Sausage & Apple Skillet:
-
Italian Sausage: Choose your favorite type—sweet, mild, or spicy! If you’re looking for a lighter alternative, turkey or chicken sausage works beautifully, too.
-
Apples: I recommend using tart apples like Granny Smith, which provide a wonderful contrast to the savory sausage. Feel free to swap with sweeter varieties or even pears if you’re in the mood for a change!
-
Onions: A classic yellow onion does the trick, but red onions could add a lovely pop of color and a milder taste. If you’re in a pinch, shallots can also bring a nuanced sweetness.
-
Rosemary: Fresh rosemary imparts a fragrant, earthy note to the dish. Dried rosemary can work in a pinch, but use it sparingly—dried herbs are more concentrated in flavor.
Step-by-Step Instructions
Ready to cook? Let’s dive into the simple yet satisfying process of making this Sausage & Apple Skillet!
-
Prepare Your Ingredients: Start by dicing your onions and slicing your apples into wedges or cubes. If you’re using sausage links, slice them into rounds. Having everything prepped makes the cooking process a breeze!
Chef’s Tip: To prevent browning, squeeze a little lemon juice on your apple slices if you’ll be handling them for a while.
-
Cook the Sausage: In a large skillet over medium heat, add your Italian sausage. Cook until nicely browned, about 5-7 minutes. Make sure to break it up into bite-sized pieces with your spatula.
Chef’s Note: If you like a bit of crispiness, let the sausage cook undisturbed for the first few minutes before stirring!
-
Add Onions: Once the sausage is browned, throw in the diced onions and a pinch of salt. Sauté until the onions are soft and translucent, about 3-5 minutes.
Kitchen Hack: Don’t be afraid to add a splash of water or broth to the skillet to deglaze the pan and scrape up those flavorful brown bits!
-
Incorporate Apples and Rosemary: Stir in the apple slices and finely chopped rosemary. Cook for another 5-7 minutes until the apples soften and caramelize, melding beautifully with the sausage and onions.
Flavor Boost: For an extra depth of flavor, add a dash of apple cider vinegar or balsamic vinegar at this stage!
-
Season and Serve: Taste for seasoning and adjust with salt and pepper as needed. Once everything is perfectly combined and fragrant, remove the skillet from heat.
Serving Suggestions
When it comes to serving, presentation can elevate your dish! Serve this Sausage & Apple Skillet warm in bowls, garnished with a sprinkle of fresh rosemary. It pairs wonderfully with a side of crusty bread to soak up the savory juices or over a bed of quinoa for a nutritious addition.
Recipe Variations
Feel like switching things up? Here are a few fun variations to consider:
-
Crispy Kale: Toss in some crispy kale at the end for added crunch and nutrition.
-
Spicy Kick: Add red pepper flakes during the sausage cooking stage if you love a bit of heat!
-
Seasonal Twist: Swap out apples for pears in the spring, or throw in seasonal veggies like butternut squash in the fall.
-
One-Pan Wonder: Serve it over polenta or creamy grits for a hearty meal or even toss in some cooked pasta for a comforting pasta dish.
-
Herb Infusion: Experiment by using different herbs like thyme or sage for a new flavor profile.
Chef’s Notes
This recipe has been a absolute favorite in my household! Over the years, I’ve tried different types of sausages and fresh herbs, making it a versatile staple. One funny kitchen story that sticks out to me is when I accidentally added way too much rosemary, thinking it wouldn’t matter! My family had a good laugh, but it turned out to be unexpectedly delicious—so don’t be afraid to experiment!
FAQs and Troubleshooting
Q: Can I make this dish ahead of time?
Yes! Prepare the skillet as instructed and store it in the fridge for up to three days. Just reheat gently on the stove or in the microwave.
Q: What if my onions burn?
If that happens, don’t worry! Just reduce the heat and add a little water or broth to help deglaze the pan.
Q: Can I freeze this dish?
Absolutely! The Sausage & Apple Skillet freezes well. Portion it into airtight containers, and it will last for up to three months. Thaw overnight in the fridge before reheating.
Q: What’s the best way to store leftovers?
Keep any leftovers in an airtight container in the fridge for up to three days. Enjoy them reheated for a quick lunch or dinner!
Nutritional Info
A single serving of this Sausage & Apple Skillet is roughly 400-500 calories, depending on the sausage you choose. It’s packed with protein, fiber, and essential nutrients from the apples and onions, making it a well-balanced meal for any day of the week.
Now, fellow foodies, I hope you’re as excited to whip up this dish as I am to share it! Remember, cooking should be fun and delicious, without the stress. So grab your skillet, invite some friends, and let’s create some mouthwatering memories together! Enjoy every flavorful bite, and happy cooking!
PrintSausage & Apple Skillet

A heartwarming skillet dish that combines savory Italian sausage with sweet caramelized apples for a comforting meal.
- Prep Time: 15 minutes
- Cook Time: 20 minutes
- Total Time: 35 minutes
- Yield: 4 servings 1x
- Category: Main Course
- Method: Skillet
- Cuisine: Italian
- Diet: Paleo
Ingredients
- Italian Sausage (sweet, mild, or spicy)
- 2 Tart Apples (like Granny Smith)
- 1 Yellow Onion (or red onion)
- 1 tablespoon Fresh Rosemary (or dried, if needed)
Instructions
- Prepare Your Ingredients: Start by dicing your onions and slicing your apples into wedges or cubes. If you’re using sausage links, slice them into rounds.
- Cook the Sausage: In a large skillet over medium heat, add your Italian sausage. Cook until nicely browned, about 5-7 minutes.
- Add Onions: Once the sausage is browned, throw in the diced onions and a pinch of salt. Sauté until the onions are soft and translucent, about 3-5 minutes.
- Incorporate Apples and Rosemary: Stir in the apple slices and finely chopped rosemary. Cook for another 5-7 minutes until the apples soften and caramelize.
- Season and Serve: Taste for seasoning and adjust with salt and pepper as needed. Once everything is perfectly combined and fragrant, remove the skillet from heat.
Notes
Serve warm in bowls, garnished with fresh rosemary. Pairs well with crusty bread or quinoa.
Nutrition
- Serving Size: 1 serving
- Calories: 450
- Sugar: 10g
- Sodium: 500mg
- Fat: 12g
- Saturated Fat: 4g
- Unsaturated Fat: 6g
- Trans Fat: 0g
- Carbohydrates: 50g
- Fiber: 5g
- Protein: 20g
- Cholesterol: 40mg
Keywords: Sausage, Apples, Skillet, Comfort Food, Quick Meals

Pumpkin Alfredo Pasta
Cozy Up with Creamy Pumpkin Alfredo Pasta: A Fall Favorite
Welcome back to Clean Plate Cravings! Today, we’re diving into a dish that perfectly reflects the beauty of fall: Pumpkin Alfredo Pasta. Picture this: a creamy, dreamy Alfredo sauce infused with the rich, earthy goodness of pumpkin. It’s not just a meal; it’s a hug in a bowl! As the leaves turn and the air becomes crisp, this dish will warm your heart and fill your belly, all while keeping your taste buds dancing.
There’s a Little Pumpkin in Every Bite
You see, my love affair with pumpkin Alfredo started in college. I was knee-deep in studies, fueled by late-night coffee and takeout that often left me feeling sluggish. Then came a starry evening spent in my friend Lily’s tiny kitchen. She whipped up a simple yet luscious pumpkin Alfredo, and I was hooked. We laughed, shared stories, and devoured every last bite as we pieced together our lives amidst the chaos of exams and papers.
Making this dish was a revelation. It was quick, wholesome, and comforting. I realized right then that food is not just sustenance; it’s a way to connect with others, spark joy, and whip up memories that stand the test of time. Fast forward to today, and I’m here to show you how to recreate that very magic in your kitchen!
Ingredients to Bring Your Dish to Life
Let’s gather our ingredients! These powerhouse components will come together to create a symphony of flavor:
-
Fettuccine: This flat pasta is the perfect vehicle for our creamy sauce! If you’re feeling adventurous, you can use whole wheat or gluten-free pasta for a hearty alternative.
-
Pumpkin Puree: This is the star of the show! Opt for canned pumpkin puree for convenience or roast your own pumpkin if you want to elevate the dish. Just make sure it’s pure pumpkin, not pumpkin pie filling!
-
Cream: Heavy cream gives this sauce its luscious texture. If you want a lighter option, half-and-half or coconut cream works well, though you may want to tweak the seasoning a bit!
-
Parmesan Cheese: This salty, umami-packed cheese adds depth. Freshly grated will give you the best flavor and melt beautifully. If you’re out of Parmesan, Pecorino Romano is a fantastic substitute.
-
Garlic: Fresh garlic brings aroma and flavor to the sauce. I always crush it to release its natural oils, but you could use garlic powder if you’re in a pinch!
Step-by-Step Instructions to Create Magic
Alright, let’s dive into the kitchen and make some magic happen!
-
Cook the Fettuccine:
- Bring a large pot of salted water to a boil. Add the fettuccine and cook until al dente, according to package instructions—usually 8-10 minutes.
- Chef Tip: Reserve about a cup of pasta water before draining! It’s your secret weapon to adjust the sauce’s thickness later.
-
Sauté the Garlic:
- In a large skillet over medium heat, add a splash of olive oil or a knob of butter. Once hot, toss in minced garlic, cooking until fragrant (about 1-2 minutes). Be careful not to burn it!
- Commentary: The smell of sautéing garlic is happiness in the air—trust me!
-
Bring in the Pumpkin:
- Stir in your pumpkin puree with the sautéed garlic and combine well. Let it cook for about 2-3 minutes to heat through and deepen the flavor.
- Tip: If you want extra flavor, you can season it with a pinch of nutmeg—it pairs wonderfully with pumpkin!
-
Add the Cream:
- Pour in the heavy cream and mix it well, allowing it to simmer gently for about 5 minutes. The cream will create a luscious, velvety sauce.
- Chef Hack: For an extra burst of flavor, add a splash of white wine while the cream is simmering!
-
Cheesy Goodness:
- Gradually stir in the Parmesan cheese, mixing until fully melted and combined. If the sauce is too thick, add a bit of your reserved pasta water to loosen it up.
- Chef Insight: Don’t rush this step! The slower you incorporate the cheese, the creamier it becomes.
-
Combine Pasta and Sauce:
- Add your cooked fettuccine directly into the skillet, tossing to coat all the pasta beautifully in the sauce.
- Serving Tip: If you find the pasta is clumping together, another splash of pasta water can help create a beautiful, silky texture.
-
Final Touches:
- Give it a taste! Season with salt, pepper, and maybe even a sprinkle of red pepper flakes for a bit of heat.
- Serve immediately for the best flavor!
Serving Suggestions: Make it Beautiful
Now that you’ve made your delicious Pumpkin Alfredo Pasta, it’s time to serve it up! For plating, twirl the fettuccine into nests on large, chilled plates. Add a generous ladle of sauce, and top it with extra Parmesan and fresh parsley or sage for a pop of color. A drizzle of high-quality olive oil adds that final touch that says, “I’m fancy!”
Recipe Variations to Get Creative
While classic Pumpkin Alfredo is magical, don’t hesitate to explore! Here are a few creative twists you might love:
- Add Protein: Cooked chicken, shrimp, or sautéed mushrooms make it a heartier meal.
- Vegetarian Boost: Toss in some spinach, kale, or roasted Brussels sprouts for added nutrition and texture.
- Flavor Infusion: Swap the Parmesan for nutritional yeast for a vegan option or use a blend of cheeses for a unique flavor.
- Curry Twist: Consider adding a tablespoon of curry powder for a delightful curry pumpkin flavor.
- Nutty Finish: Top with toasted pine nuts or walnuts for a lovely crunch!
Chef’s Notes: A Little Extra Love
This Pumpkin Alfredo Pasta has evolved over the years as I’ve played around with flavors, and it holds a special place in my heart. Some nights, it’s made creamy with coconut milk instead of dairy; on others, I might toss in whatever veggies are about to go bad in my fridge! The beauty of this dish is its versatility, and it can easily adapt to your style. Don’t be afraid to make it your own!
And don’t get me started on leftovers—this pasta keeps beautifully in the fridge and warms up like a dream the next day, making it perfect for meal prep nights!
FAQs and Troubleshooting: Avoid the Snags
-
Why is my sauce too thick?
- Simply add reserved pasta water a little at a time until you achieve your desired consistency.
-
Can I use a different type of pasta?
- Absolutely! Any pasta shape works, but something with ridges or curves helps hold onto that creamy sauce.
-
How can I store leftovers?
- Keep leftovers in an airtight container in the fridge for up to three days. When reheating, add a splash of milk, cream, or water to help loosen the sauce.
-
What do I do if the sauce curdles?
- This can happen if the cream is heated too quickly. If it does, remove from heat immediately and stir in a bit more hot pasta water to smooth it out.
Nutritional Info
While I’m not a nutritionist, this Pumpkin Alfredo Pasta is loaded with energy-boosting carbohydrates from fettuccine and pumpkin—an excellent source of beta-carotene! With cream and cheese, it packs in flavor and satisfaction too.
Let’s Make Every Bite Count
And there you have it! A bowl of creamy, decadent Pumpkin Alfredo Pasta to bring warmth to your dinner table. It’s simple, it’s comforting, and most importantly, it’s delicious. Whether you’re creating memories with loved ones or treating yourself after a long day, this dish promises to fill your kitchen with love and joy.
So grab your apron, let’s create some kitchen magic together! Until next time, keep it fresh, simple, and delectable!
PrintCreamy Pumpkin Alfredo Pasta

A comforting dish featuring creamy Alfredo sauce with earthy pumpkin, perfect for the fall season.
- Prep Time: 10 minutes
- Cook Time: 20 minutes
- Total Time: 30 minutes
- Yield: 4 servings 1x
- Category: Main Course
- Method: Baking
- Cuisine: Italian
- Diet: Vegetarian
Ingredients
- 8 oz Fettuccine
- 1 cup Pumpkin Puree
- 1 cup Heavy Cream
- 1/2 cup Parmesan Cheese, freshly grated
- 2 cloves Garlic, minced
- Salt, to taste
- Pepper, to taste
- Olive oil or butter, for sautéing
- Red pepper flakes, optional
- Fresh parsley or sage, for garnish
Instructions
- Cook the Fettuccine in a large pot of salted boiling water until al dente, about 8-10 minutes. Reserve 1 cup of pasta water before draining.
- Sauté the Garlic in a large skillet with olive oil or butter over medium heat for 1-2 minutes until fragrant.
- Bring in the Pumpkin Puree, stirring well, and let it cook for 2-3 minutes.
- Add the Heavy Cream and simmer for about 5 minutes.
- Stir in the Parmesan Cheese until melted, adjusting thickness with reserved pasta water.
- Combine the cooked Fettuccine with the sauce in the skillet, tossing to coat.
- Final Touches: Season with salt, pepper, and red pepper flakes if desired, and serve immediately.
Notes
For serving, twirl fettuccine into nests, ladle the sauce over, and garnish with extra Parmesan and fresh herbs.
Nutrition
- Serving Size: 1 serving
- Calories: 450
- Sugar: 6g
- Sodium: 350mg
- Fat: 18g
- Saturated Fat: 10g
- Unsaturated Fat: 6g
- Trans Fat: 0g
- Carbohydrates: 52g
- Fiber: 4g
- Protein: 12g
- Cholesterol: 40mg
Keywords: Pumpkin Pasta, Alfredo, Fall Recipe, Creamy Pasta, Vegetarian Dish
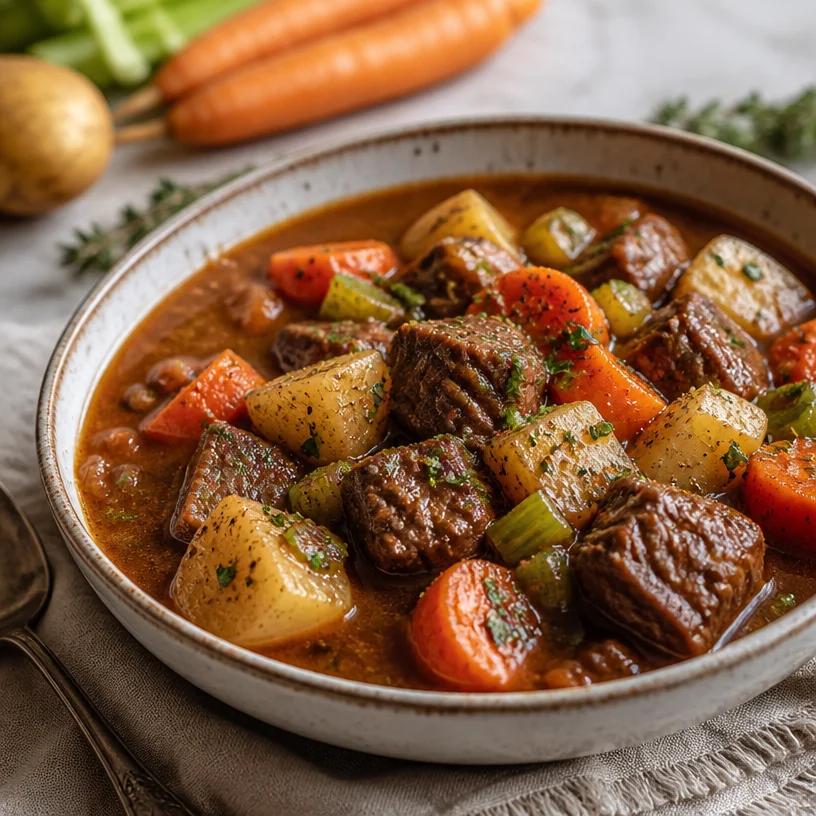
Beef Stew
Hearty Beef Stew: A Cozy Culinary Hug
When the weather starts to chill and the leaves turn vibrant shades of amber and gold, there’s something incredibly comforting about a hearty beef stew simmering on the stove. It’s more than just a meal; it’s an invitation to sit down, relax, and savor each rich bite. Picture yourself wrapped in a warm blanket, the scent of tender beef and fragrant vegetables wafting through your home, filling it with a sense of warmth and nostalgia. Welcome to my cozy culinary corner of the internet, where cooking is a joyous adventure and every recipe is crafted with love!
Today, we’re diving into the world of beef stew—a classic that never goes out of style. Whether you’re a seasoned cook or a kitchen newbie, this recipe is designed for you. As a chef who embraces real food with real flavor, I believe that cooking should be approachable and, above all, fun! So, grab your apron, and let’s get cooking.
A Taste of Nostalgia: Valley of Stews
One of my earliest kitchen memories is being tiny Ava, perched on a stool beside my grandmother as she made her famous beef stew. The kitchen was warm, filled with the laughter of family and the enticing aroma of simmering meat and veggies. I remember how she’d always say, “Happiness is just a spoonful away!” as she stirred the pot. Grandma had this magical way of making a simple meal feel luxurious, and although it seemed like she added a sprinkle of love, the real secret was her patience and technique.
I remember the rainbow of fresh vegetables she would chop—carrots bright as the sun, potatoes waiting to soak up all that delicious sauce, and celery with its satisfying crunch. We’d always sneak in a bite or two while she wasn’t looking, our little family secret! And of course, the beef—she’d insist on the best quality chuck, patiently explaining how the marbled fat kept everything tender and juicy during the long, slow cooking process. Her beef stew was more than just food; it was a symbol of love and connection, and it left a lasting impression on my culinary journey.
Essential Ingredients for Hearty Beef Stew
Let’s gather our ingredients! The beauty of beef stew lies in its simplicity and the richness it brings to the table. Here’s what you’ll need:
-
Beef Chuck (2 lbs)
A flavorful cut with ample marbling, beef chuck becomes incredibly tender when cooked slowly. If you’re looking for a leaner option, you can substitute with sirloin, but keep in mind the texture may differ. -
Carrots (3 medium)
These sweet, crunchy gems add color and depth to your stew. If you’re in a pinch, you can swap them for parsnips or even sweet potatoes for a different flavor profile. -
Potatoes (4 medium)
Essential for substance, they soak up all the rich flavors. Yukon Golds are my go-to for their buttery flavor, but feel free to use russets, Idaho, or even red potatoes—just chop them a little smaller for even cooking. -
Celery (2 stalks)
A key base flavor that adds a refreshing crunch. If you’re not a fan, you can replace it with green beans or even bell peppers. -
Broth (6 cups)
Beef broth is the backbone of this stew, bringing depth. Homemade is always best, but store-bought works just fine. For a lighter version, vegetable broth is an excellent alternative. -
Herbs & Spices: Bay Leaves, Thyme, Salt, and Pepper
These simple seasonings elevate the dish to new heights. Fresh herbs are amazing, but dried herbs work wonders too—just adjust the quantity.
Cooking Instructions: Step-by-Step to Cozy Perfection
Let’s jump into the cooking process! Follow these steps and add your flair for a perfect beef stew:
-
Prep Your Ingredients
Begin by chopping your vegetables into bite-sized pieces and cutting your beef into 1-inch cubes. This not only helps with even cooking but makes for a better presentation. And remember, having everything ready before you start can save you from a last-minute kitchen scramble! -
Sear the Beef
Heat a tablespoon of oil in a large pot over medium-high heat. Once it’s shimmering, add half of your beef cubes, making sure not to overcrowd the pan. Searing them for about 4-5 minutes until browned on all sides adds a beautiful depth of flavor. Then, remove them and repeat with the remaining beef. Chef tip: Don’t skip this step; it’s where the magic happens! -
Sauté the Veggies
In the same pot, toss in your chopped onions (if you have them) and celery. Sauté them for about 3 minutes until they become fragrant. Next, add your carrots and cook for an additional 3 minutes. This mix helps build the flavor foundation of your stew. -
Bring it All Together
Return the beef to the pot and sprinkle flour over it to coat. This helps thicken your stew later. Stir in your broth, add the bay leaves, thyme, salt, and pepper. Bring everything to a gentle simmer. -
Low and Slow Cooking
Cover the pot and reduce the heat to low. Allow your stew to cook slowly for about 2 hours, stirring occasionally. The slower, the better! This is the time when the flavors meld beautifully, and the meat tenderizes perfectly. If you’re in a hurry, you can crank the heat up and cook it on medium for about an hour, but it’s truly worth the wait. -
Add the Potatoes
After 1.5 hours of cooking, add your diced potatoes. These need about 30 minutes to become perfectly tender. Toss them in and stir gently. If you want to feel fancy, sprinkle a bit more thyme or fresh parsley on top! -
Final Taste Test
About 10 minutes before serving, taste your stew. Adjust salt and pepper as needed. Chef secret: Add a splash of Worcestershire sauce or balsamic vinegar at the end for an extra kick! -
Serve and Enjoy
Once your beef stew is saucy and rich, you’re ready to serve! Ladle it into bowls alongside crusty bread or over a bed of fluffy rice.
Serving Suggestions: Plating Your Stew
Serving your beef stew can be as creative as you like! For a lovely presentation, serve it in rustic bowls garnished with a sprinkle of fresh parsley or thyme. Pair it with warm, buttered crusty bread—perfect for soaking up the delicious broth! For something a bit different, you could serve it over creamy mashed potatoes or even a bed of quinoa for a wholesome twist.
Recipe Variations: Putting Your Spin on It
If you’re feeling adventurous, here are some easy variations to try:
-
Spicy Kick: Add a teaspoon of red pepper flakes or diced jalapeños to bring some heat to your stew!
-
Herbaceous Flavor: Throw in fresh rosemary or Italian herbs for a fragrant twist.
-
Mushroom Medley: Add sautéed mushrooms for a rich, earthy depth.
-
Lighter Version: Swap half the broth for red wine for a rich backdrop.
-
Vegetarian Option: Use hearty vegetables like mushrooms and lentils instead of beef and beef broth for a veggie-packed stew!
Chef’s Notes: Memories and Evolution
Every recipe carries a piece of history and love, and beef stew is no different. Over the years, I’ve played with different ingredients and techniques, adapting to what was readily available and what inspired me at the moment. Sometimes, I added a can of tomatoes for body and sweetness, or experimented with different herbs from my garden. Each pot tells a story—of dinners shared, laughter echoed, and warmth spread across the table.
One funny kitchen story I have is about the great “Beef Stew Wars” amongst my family. While everyone claimed to make the best version, it turned out that everyone’s interpretations—the spices, cooking times, or secrets—were equally delicious in their own right. It reminded me that cooking is all about love and making it your own.
FAQ and Troubleshooting: Your Common Questions Answered
-
Why is my beef stew tough?
- If your beef is tough, it probably hasn’t been cooked long enough. Slow-cooking tenderizes the meat, so let it simmer longer until it’s fall-apart tender!
-
Can I freeze beef stew?
- Absolutely! Beef stew freezes beautifully. Allow it to cool completely, then portion it out in airtight containers. It can last up to 3 months in the freezer!
-
How do I thicken my stew?
- If your stew is too runny, you can mix a tablespoon of cornstarch with cold water and add it to the stew, cooking until it thickens. Alternatively, let it simmer uncovered for longer to reduce the liquid.
-
Can I use different cuts of meat?
- Yes! While beef chuck is ideal, you could use brisket or even stew meat cuts, but ensure to cook until tender since they may vary in texture after cooking.
Nutritional Info
While I encourage you to savor your food, here’s a rough estimate if you’re keeping track: A serving of beef stew (about 1 cup) typically has around 250-350 calories, based on ingredient choices. It’s packed with protein, vitamins from veggies, and hearty flavors!
And there you have it—a cozy, delicious beef stew recipe filled with love and nostalgia! Be sure to share it with your friends and family, and remember as you cook: Make it your own, have fun, and let your kitchen be filled with laughter and love. Happy cooking!
PrintHearty Beef Stew

A cozy beef stew simmered with tender meat and flavorful vegetables, perfect for chilly days.
- Prep Time: 15 minutes
- Cook Time: 120 minutes
- Total Time: 135 minutes
- Yield: 6 servings
- Category: Main Course
- Method: Slow Cooking
- Cuisine: American
- Diet: None
Ingredients
- Beef Chuck (2 lbs)
- Carrots (3 medium)
- Potatoes (4 medium)
- Celery (2 stalks)
- Broth (6 cups)
- Bay Leaves
- Thyme
- Salt
- Pepper
Instructions
- Prep Your Ingredients by chopping your vegetables into bite-sized pieces and cutting your beef into 1-inch cubes.
- Sear the Beef by heating oil in a large pot over medium-high heat and browning the beef cubes for 4-5 minutes.
- Sauté the Veggies in the same pot starting with onions and celery for about 3 minutes, then adding carrots for an additional 3 minutes.
- Bring it All Together by returning beef to the pot and stirring in flour, broth, bay leaves, thyme, salt, and pepper.
- Cook Low and Slow for about 2 hours while stirring occasionally.
- Add the Potatoes after 1.5 hours and cook for an additional 30 minutes.
- Final Taste Test about 10 minutes before serving to adjust seasoning as needed.
- Serve and Enjoy by ladling into bowls and pairing with crusty bread.
Notes
For extra flavor, add a splash of Worcestershire sauce or balsamic vinegar before serving.
Nutrition
- Serving Size: 1 cup
- Calories: 300
- Sugar: 4g
- Sodium: 600mg
- Fat: 15g
- Saturated Fat: 5g
- Unsaturated Fat: 8g
- Trans Fat: 0g
- Carbohydrates: 35g
- Fiber: 5g
- Protein: 25g
- Cholesterol: 70mg
Keywords: beef stew, comfort food, hearty meal, cozy cooking, winter recipes

Weeknight One-Pan Creamy Butternut Squash Risotto with Sage
Butternut Squash Risotto: A Warm Hug in a Bowl
Welcome, fellow food enthusiasts! Today, I’m absolutely thrilled to share one of my all-time favorite dishes: Butternut Squash Risotto. Imagine creamy, indulgent rice that’s infused with the warm, nutty sweetness of roasted butternut squash—comfort food at its finest! This risotto is the kind of meal that wraps you in a cozy blanket after a long day, filling your kitchen with irresistible aromas. Let’s dive into this delightful dish that’s perfect for any occasion, from casual weeknight dinners to special gatherings with friends.
Now, I know risotto can sound a bit intimidating at first. The stirring! The timing! But trust me, this creamy masterpiece is way easier than you might think. With just a little patience and love, you’ll have a restaurant-quality dish right in your own home. Plus, this recipe is packed with wholesome ingredients that will leave you feeling satisfied and nourished without sacrificing flavor. So get ready to delight your taste buds and impress your loved ones with this dish that truly speaks both comfort and elegance!
My Risotto Journey
Let me take you back to the first time I ever attempted making risotto. I was in college, and my friends and I were hosting a "fancy" dinner party. The goal was to impress everyone with some homemade gourmet cuisine. After flipping through a well-loved cookbook and getting mildly lost in its beautiful pictures of creamy risottos, I settled on a butternut squash version.
Despite my nerves, I felt a thrill of excitement. The kitchen was alive with chatter, and laughter echoed off the walls as I stirred the pot. There were a few mishaps—a splash or two of broth here, a moment of panic when I added too much cheese, and definitely a bit of squash that decided to escape the roasting pan. But through it all, that creamy, golden goodness came together beautifully.
When I finally served it, the room fell silent as everyone savored every bite. In that moment, I realized that cooking doesn’t just fill our bellies; it feeds our souls and connects us with those we love. Ever since then, butternut squash risotto has held a special place in my heart. So let’s roll up our sleeves and create this comforting dish together!
Ingredients
Here’s what you’ll need to whip up this delightful Butternut Squash Risotto:
-
Arborio Rice: The star of our show! This short-grain rice is essential for achieving that creamy texture we all love. If you can’t find Arborio, Carnaroli or Vialone Nano are excellent substitutes.
-
Butternut Squash: Sweet, nutty, and packed with vitamins, butternut squash is perfect for risotto. You can swap it with pumpkin or acorn squash if necessary—just adjust cooking times slightly.
-
Vegetable or Chicken Broth: This is what elevates our dish to the next level of flavor! Homemade broth is fantastic, but low-sodium store-bought variety works well too. Want a richer flavor? Use bone broth instead.
-
Parmesan Cheese: Ah, the secret ingredient for that luscious creaminess! Freshly grated Parmesan is the best way to go; if you’re dairy-free, nutritional yeast adds a delicious cheesy flavor.
-
Fresh Sage: This herb contributes a warm, earthy aroma to our risotto. If you can’t find fresh sage, dried sage can be used—just use half the amount since dried herbs have a stronger flavor.
Step-by-Step Instructions
Alright, let’s get cooking! Follow these steps to create your butternut squash risotto masterpiece:
-
Prep the Butternut Squash: Start by peeling, seeding, and cutting your butternut squash into small, even cubes (about 1-inch pieces). This ensures even cooking. Preheat your oven to 400°F (200°C), spread the cubes on a baking sheet, drizzle with a little oil, and toss with a pinch of salt. Roast them for 25-30 minutes or until they’re tender and caramelized—this will amplify their sweetness!
Chef Tip – To speed up prep, look for pre-cut butternut squash in your grocery store.
-
Gather Your Broth: In a medium saucepan, heat about 4 cups of vegetable or chicken broth and keep it warm over low heat. This will help the rice cook evenly.
-
Sauté the Aromatics: In a large skillet over medium heat, add a drizzle of olive oil and a tablespoon of butter (you can use all olive oil if you prefer). Once it’s sizzling, toss in 1 finely chopped onion and sauté until it’s translucent—about 5 minutes. This is where the flavor base begins to build!
-
Toast the Rice: Add 1 cup of Arborio rice to the skillet with the onions and stir for about 2 minutes until the rice is lightly toasted. This step helps the rice absorb flavors and gives it a slight nuttiness.
Chef Hack – Resist the urge to stir too vigorously. Gentle stirring is key for releasing the starches that will make your risotto creamy.
-
Add the Broth Gradually: Begin adding your warm broth one ladle at a time, stirring frequently. Wait until most of the liquid has been absorbed before adding the next ladle. This gradual absorption is crucial for that creamy texture we crave.
Chef Insight – This process takes about 20-25 minutes. Enjoy the stirring—it’s therapeutic!
-
Add the Roasted Squash: Once your rice is creamy and al dente, fold in your roasted butternut squash along with a handful of chopped fresh sage, and let it cook for an additional 5 minutes to allow those flavors to meld together.
-
Finish with Parmesan: Off the heat, stir in about ½ cup of freshly grated Parmesan cheese and another pat of butter for richness. Taste and adjust the seasoning with salt and pepper.
Enjoy the aroma of pure joy wafting through your kitchen!
Serving Suggestions
Your Butternut Squash Risotto is ready to steal the show! To serve it, simply spoon generous portions into shallow bowls and garnish with more grated Parmesan, a sprinkle of fresh sage, and a drizzle of high-quality olive oil. It also pairs beautifully with a side salad or crusty bread for that perfect meal experience.
Recipe Variations
Feeling adventurous? Here are some delicious twists you can try with your risotto:
- Mushroom Risotto: Swap out half of the butternut squash for mushrooms for an earthy twist.
- Herbed Risotto: Add fresh herbs like thyme or rosemary instead of sage for a different flavor profile.
- Creamy Spinach: Stir in a couple of cups of fresh spinach at the end for a vibrant, nutrient-packed variation.
- Lemon Zest: Add a touch of brightness with freshly grated lemon zest before serving.
- Bacon Lardons: Crispy bacon bits sprinkled on top make for a decadent twist!
Chef’s Notes
As I’ve played with this recipe over the years, I’ve discovered that the beauty of risotto is its adaptability. You can sneak in seasonal veggies (think peas in the spring or wild mushrooms in the fall) or incorporate leftovers for a hearty meal. Whenever I make risotto, I challenge myself to use whatever I have in my pantry or fridge, and I’m always amazed at the delicious results. One time, I added some leftover roasted garlic, and it took the dish to a whole new level!
Always remember, cooking is about embracing creativity and having fun in the kitchen; don’t be afraid to experiment!
FAQs and Troubleshooting
Q: My risotto is too sticky. What did I do wrong?
A: Overcooking the rice can cause it to become mushy and sticky. Be sure to keep an eye on your cooking time and don’t use too much broth at once.
Q: Can I reheat leftover risotto?
A: Absolutely! Add a splash of broth or water while reheating on the stovetop to bring back that creamy texture. Microwaving is another option, but the stovetop works better for restoring the creaminess.
Q: How can I make this dish vegan?
A: Replace the butter and cheese with plant-based alternatives, and use vegetable broth. Nutritional yeast can add a delicious cheesy flavor!
Q: Can I make risotto ahead of time?
A: Risotto is best enjoyed fresh, but if you need to prepare it ahead, cook up to the point when you add the cheese. Once reheated, stir in the cheese just before serving.
Nutritional Info (Optional)
While risotto is comforting and satisfying, portion control is key! A typical serving of butternut squash risotto (about 1 cup) contains approximately:
- Calories: 350
- Protein: 10g
- Fat: 10g
- Carbohydrates: 55g
- Fiber: 4g
Remember, these values can vary depending on your ingredient choices and portions!
So there you have it—my heartfelt take on Butternut Squash Risotto! I hope this recipe becomes a staple in your kitchen, bringing warmth and joy to your dining table as it has in mine. Let’s keep sharing our love for good food, and as always, happy cooking!
PrintButternut Squash Risotto

A creamy and indulgent risotto infused with the warm, nutty sweetness of roasted butternut squash, perfect for any occasion.
- Prep Time: 15 minutes
- Cook Time: 30 minutes
- Total Time: 45 minutes
- Yield: 4 servings 1x
- Category: Main Course
- Method: Baking
- Cuisine: Italian
- Diet: Vegetarian
Ingredients
- 1 cup Arborio rice
- 2 cups butternut squash, peeled and cubed
- 4 cups vegetable or chicken broth
- ½ cup freshly grated Parmesan cheese
- 1 onion, finely chopped
- 2 tablespoons olive oil
- 1 tablespoon butter
- Fresh sage, chopped
- Salt and pepper, to taste
Instructions
- Prep the butternut squash: Preheat your oven to 400°F (200°C), spread the cubed squash on a baking sheet, drizzle with oil, and roast for 25-30 minutes.
- Gather your broth: In a saucepan, heat the broth and keep warm over low heat.
- Sauté the aromatics: In a large skillet, heat olive oil and butter, then add onion and sauté until translucent.
- Toast the rice: Add Arborio rice and stir for about 2 minutes until lightly toasted.
- Add the broth gradually, one ladle at a time, stirring frequently until most of the liquid is absorbed.
- Fold in the roasted squash and sage, cooking for an additional 5 minutes.
- Finish with Parmesan: Off the heat, stir in the cheese and adjust seasoning.
Notes
For best results, maintain gentle stirring to release starches for creaminess. Experiment with seasonal vegetables for variations!
Nutrition
- Serving Size: 1 serving
- Calories: 350
- Sugar: 6g
- Sodium: 400mg
- Fat: 10g
- Saturated Fat: 4g
- Unsaturated Fat: 5g
- Trans Fat: 0g
- Carbohydrates: 55g
- Fiber: 4g
- Protein: 10g
- Cholesterol: 20mg
Keywords: butternut squash, risotto, Italian, vegetarian comfort food, creamy risotto, warm dish
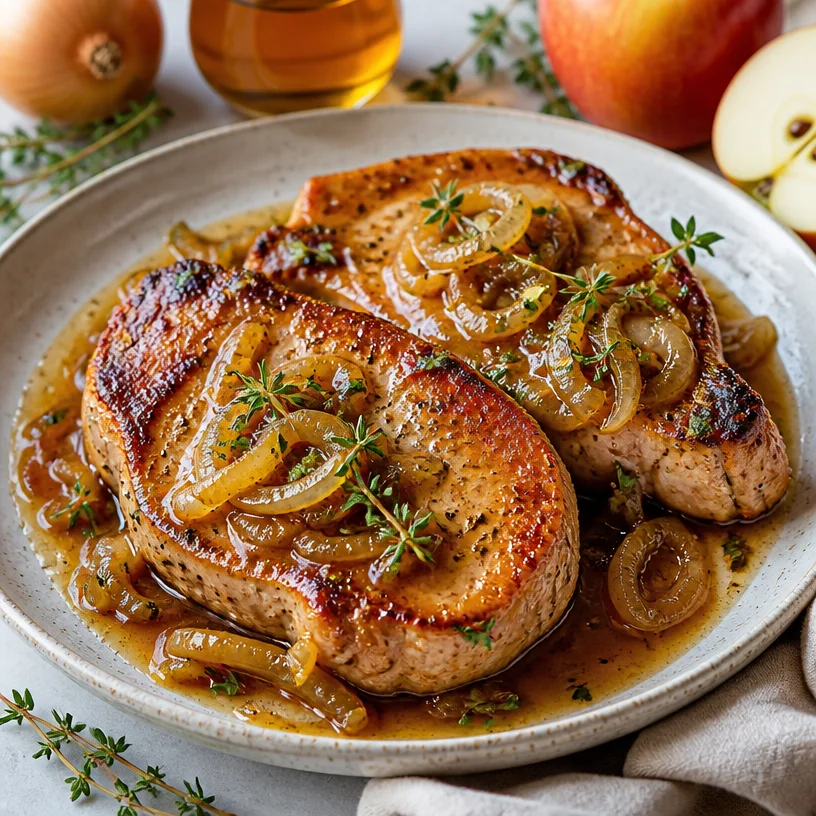
One-Pan Apple Cider Pork Chops: Quick Weeknight Dinner
Apple Cider Pork Chops: A Cozy Culinary Delight
Welcome to the heart of the kitchen! Today, we’re diving into a dish that’s not just satisfying but also bursts with flavor and nostalgia: Apple Cider Pork Chops. If you’re looking for a meal that warms you from the inside out, you’ve come to the right place. Picture this: savory pork chops seeping in sweet and tangy apple cider, mingling with the aromatic hints of thyme and the sweet caramelization of onions. It’s comfort food at its finest!
Introduction: The Magic of Apple Cider Pork Chops
As the leaves turn golden and the crisp air sets in, there’s something so comforting about cooking meals that evoke homey vibes and cherished memories. Apple Cider Pork Chops embody that feeling perfectly. This dish is not just about the ingredients but the experiences and heartwarming moments that come with it. It’s ideal for everything from a weeknight dinner to a cozy gathering with friends and family.
But let’s talk about the magic of cooking with apple cider. There’s a reason it has been a staple in many recipes. Its sweetness cuts through the richness of the pork, accentuating its flavor while bringing a hint of fall to your plate. Pair it with tender onions and fragrant thyme, and you have a symphony of tastes that sing in harmony. As you cook, the aroma wafts through your kitchen, wrapping you in a comforting embrace.
Whether you’re tweaking your dinner routine or impressing guests, this recipe is your ticket to success. Grab those pork chops and a bottle of apple cider; together, we’re about to create something fantastically delicious!
Personal Story
Let me take you back to a chilly autumn evening a few years ago when my family gathered around our rustic dining table for a celebration. Mom decided to whip up her famous Apple Cider Pork Chops, a recipe passed down through generations. I vividly remember how the kitchen filled with a delightful mix of flavors as the chops sizzled in the pan. My siblings and I leaned against the counter, eager for tastes and smells that hinted at the delicious meal to come.
As we sat down, the ambiance was filled with laughter and stories, punctuated only by the sound of fork meeting plate. Each bite was a reminder of home, warmth, and togetherness. That night, not only did we enjoy a scrumptious meal, but we also shared memories that are still cherished today. This dish has since become a beloved tradition in my home, a go-to for potlucks and special gatherings alike. Now that you’ve shared in my nostalgia, let’s cook up some magic in your kitchen!
Ingredients
To create these delicious Apple Cider Pork Chops, here’s what you’ll need:
-
Pork Chops (4 pieces)
Go for bone-in chops for extra flavor and juiciness. If you prefer leaner options, boneless chops work beautifully too. -
Apple Cider (1 cup)
Choose a quality apple cider that isn’t overly sweet; it will balance well with the pork. For a non-alcoholic version, any apple juice can be used for a similar sweetness. -
Onions (1 large, sliced)
Sweet onions like Vidalia add a lovely flavor; however, yellow onions are also a great choice. Sautéing them brings out their natural sweetness, enhancing the dish. -
Thyme (2 teaspoons, fresh)
Fresh thyme elevates the dish with its earthy flavor, but if you only have dried thyme on hand, use about a teaspoon—just crush it between your fingers for better flavor release! -
Butter (2 tablespoons)
Butter adds richness and depth. You can substitute with olive oil for a healthier option. However, leave a little butter in for flavor, if possible.
Step-by-Step Instructions
Now that we’ve gathered our ingredients, let’s get cooking! Follow these steps for perfectly succulent Apple Cider Pork Chops.
-
Prepare the Pork Chops
Start by patting your pork chops dry with a paper towel. This is a small but essential step that ensures that gorgeous golden-brown crust forms when you cook them. Season both sides generously with salt and pepper—don’t be shy! The seasoning enhances the overall flavor. -
Sear the Chops
Heat a large skillet over medium-high heat and add the butter. Allow it to melt and start to bubble gently. When ready, place the pork chops in the skillet. You should hear that satisfying sizzle! Sear them for about 4-5 minutes on each side until they’re beautifully browned. If your chops are thick, you may need an extra minute or two.Chef’s Tip: Avoid overcrowding the pan; if it’s too crowded, you won’t achieve that lovely sear!
-
Remove and Set Aside
Once the pork chops are seared, remove them from the pan and set them aside on a plate. Lower the heat a bit; we’re now transitioning into that flavorful sauce. -
Caramelize the Onions
In the same skillet, add the sliced onions and a pinch of salt. Sauté them for about 5-7 minutes, stirring occasionally, until they become translucent and slightly caramelized. This is where the magic happens!
Chef Tip: If the onions start to brown too quickly, add a splash of apple cider to deglaze the pan—this helps lift all those scrumptious bits stuck to the bottom.
-
Add the Apple Cider and Thyme
Pour in the apple cider, scraping up those delightful browned bits as you do. Sprinkle in the fresh thyme. Bring the mixture to a simmer. This step lets the flavors meld together beautifully. -
Return the Pork Chops
Nestle the pork chops back into the skillet, spooning some of the sauce over the top. Cover the skillet and let everything simmer together for about 10-15 minutes, or until the pork is cooked through (an internal temperature of 145°F). Your kitchen is about to smell heavenly! -
Adjust the Seasoning
Once the pork chops finish cooking, taste the sauce. Adjust seasoning with more salt, pepper, or even a splash of vinegar if you crave a little tanginess. -
Serve and Enjoy
Plate the pork chops, drizzling the apple cider sauce over them. You can garnish with a sprig of fresh thyme for a touch of color and flavor.
Serving Suggestions
These Apple Cider Pork Chops shine when paired with sides that complement their rich flavors and comforting nature. I recommend serving them alongside creamy mashed potatoes or roasted Brussels sprouts. For a lighter option, a crisp fall salad featuring arugula, nuts, and sliced apples will balance out the dish perfectly. Don’t forget to pour a glass of that remaining apple cider—it’s a match made in culinary heaven!
Recipe Variations
Let’s get creative! Here are a few twists you can explore with your Apple Cider Pork Chops:
-
Spicy Kick: Add a pinch of red pepper flakes to the onions during cooking for a spicy kick that complements the sweetness beautifully.
-
Herb Swap: Don’t have thyme? Fresh rosemary or sage can elevate the dish with a unique flavor twist.
-
Fruit Fusion: Toss in slices of pears or even cranberries into the sauce for added sweetness and festive flair.
-
Sweet and Savory: Drizzle a bit of maple syrup into the sauce before simmering for an enhanced depth of flavor.
-
Grill It: If you’re feeling adventurous, marinate the pork chops in apple cider overnight and throw them on the grill for a smoky flavor profile!
Chef’s Notes
Over the years, this recipe has become a staple not just in my home but with friends who’ve requested it multiple times. The first time I made it for a group, I accidentally grabbed apple juice instead of apple cider. The pork still turned out delicious—armed with that experience; I learned that cooking often leads to great surprises. Each iteration of this dish has been a reminder that adapting recipes to your taste is part of the culinary adventure!
FAQs and Troubleshooting
-
What if my pork chops are tough?
Overcooking is often the culprit. Ensure you’re cooking them just until they reach an internal temperature of 145°F for the most tender results. -
Can I use a slow cooker?
Absolutely! Sear the chops first, then combine all ingredients in a slow cooker and cook on low for 6-8 hours. -
What if I don’t have apple cider?
No worries! You can use apple juice, but remember to adjust sweetness if it’s very sugary. A mix of apple juice and a splash of vinegar can mimic the tang of cider. -
How do I store leftovers?
Place any leftovers in an airtight container and store them in the refrigerator for up to 3 days. Reheat gently in the skillet to keep them juicy.
Nutritional Info
While I won’t bore you with numbers, this dish is a comforting choice packed with protein and flavors, balanced by the natural sweetness of the cider and offers a great source of iron from the pork. Plus, you can play around with sides to make it as healthy as you wish!
So there you have it! A fabulous Apple Cider Pork Chops recipe that you can whip up easily and enjoy with loved ones. Trust me, every bite will be filled with warmth and flavor, turning any meal into a memorable occasion. Happy cooking!
PrintApple Cider Pork Chops

Apple Cider Pork Chops are savory pork chops cooked in sweet and tangy apple cider, enhanced with caramelized onions and fresh thyme for a comforting meal.
- Prep Time: 15 minutes
- Cook Time: 30 minutes
- Total Time: 45 minutes
- Yield: 4 servings 1x
- Category: Main Course
- Method: Pan-frying
- Cuisine: American
- Diet: Paleo
Ingredients
- 4 Pork Chops (bone-in for extra flavor)
- 1 cup Apple Cider
- 1 large Onion, sliced
- 2 teaspoons fresh Thyme
- 2 tablespoons Butter
Instructions
- Prepare the pork chops by patting them dry and seasoning with salt and pepper.
- Sear the chops in a skillet with melted butter for 4-5 minutes on each side until browned.
- Remove the chops and set them aside on a plate.
- Caramelize the sliced onions in the same skillet for 5-7 minutes until translucent.
- Add the apple cider and thyme, bringing it to a simmer.
- Return the pork chops to the skillet, cover, and simmer for 10-15 minutes until cooked through.
- Adjust seasoning to taste with salt, pepper, or vinegar.
- Serve the pork chops with the sauce drizzled on top.
Notes
Serve with mashed potatoes or roasted Brussels sprouts for sides that complement the rich flavors. You can also garnish with a sprig of fresh thyme.
Nutrition
- Serving Size: 1 chop
- Calories: 350
- Sugar: 10g
- Sodium: 400mg
- Fat: 12g
- Saturated Fat: 5g
- Unsaturated Fat: 7g
- Trans Fat: 0g
- Carbohydrates: 40g
- Fiber: 2g
- Protein: 28g
- Cholesterol: 90mg
Keywords: pork chops, apple cider, comfort food, autumn recipes, family meal

One-Pan Creamy Tuscan Chicken in 30 Minutes: Weeknight Dinner
Creamy Tuscan Chicken: A Delicious Journey
Welcome to Clean Plate Cravings, my foodie friends! Today, I’m thrilled to share with you a dish that has quickly become a favorite in our kitchen—Creamy Tuscan Chicken. This dish is not just a meal; it’s an experience that brings the warmth of Italian cooking right into your home. Imagine succulent chicken breasts draped in a velvety sauce bursting with flavors from sun-dried tomatoes and fresh spinach, finished off with a sprinkle of Parmesan cheese. It’s comfort food at its finest, and trust me, you’ll be going back for seconds!
A Slice of My Kitchen Memories
Let me take you back to a delightful summer evening a few years ago. I was visiting my best friend Sofia, who invited me for dinner at her family’s cozy home, which felt a bit like stepping right into Italy. Her mom prepared this incredible Creamy Tuscan Chicken, and I still remember the tantalizing aroma wafting through the kitchen. The golden crispy edges of the chicken, the vibrant greens of the spinach, and the deep, rich flavors of sun-dried tomatoes filled us with excitement.
As we gathered around the table, my heart was light, having spent the day laughing, reminiscing, and savouring amazing food. That first bite was pure magic—each element harmonizing perfectly with the others. I learned an important lesson that night: food tastes best when shared with those you love. It was a beautiful reminder that the kitchen is not just a place to cook; it’s where memories are created and hearts are nourished. Now, every time I make this dish, it takes me back to that summer night filled with laughter and love.
Ingredients
Here’s what you’ll need to create your own creamy masterpiece:
-
Chicken Breasts (2-4 pieces)
Juicy and tender, chicken breasts are the backbone of this dish. You can substitute with chicken thighs for a richer flavor, or for a lighter version, use turkey breast. -
Spinach (2 cups, fresh)
Fresh spinach not only adds a vibrant color but also packs a nutritious punch. If you’re out of spinach, kale or Swiss chard works too! -
Sun-Dried Tomatoes (1 cup)
Sweet and tangy, these add a burst of flavor to the dish. If you prefer a milder taste, replace them with roasted red peppers or chopped fresh tomatoes. -
Garlic (4 cloves, minced)
A fresh, aromatic garlic brings a beautiful depth to the sauce. If you’re short on fresh garlic, a teaspoon of garlic powder can suffice—though it won’t have quite the same impact. -
Parmesan Cheese (1 cup, grated)
Savory and cheesy, Parmesan elevates the creaminess of the dish. Pecorino Romano is a fantastic substitute, especially if you enjoy a stronger taste. -
Heavy Cream (1 cup)
This is the secret to that luscious, creamy texture! For a lighter option, you can experiment with half-and-half or coconut cream for a dairy-free version.
Step-by-Step Instructions
Now, let’s get cooking! Follow these simple steps to whip up your Creamy Tuscan Chicken:
-
Prep Your Ingredients
Start by gathering all your ingredients. Chop the garlic, slice the sun-dried tomatoes, and rinse your spinach. This makes the cooking process smooth and enjoyable. Trust me, a little prep goes a long way! -
Sear the Chicken
In a large skillet over medium heat, add a splash of olive oil. Season your chicken breasts with salt and pepper. When the oil is hot, place the chicken in the pan and let it sear for about 6-7 minutes on each side until golden brown. This step caramelizes the chicken and enhances the flavor. Chef hack: Avoid flipping the chicken too soon to achieve that lovely crust! -
Remove and Rest
Once cooked through, remove the chicken from the skillet and let it rest on a plate. This allows the juices to redistribute, keeping your chicken juicy. Cover it with foil to keep it warm while you work on the sauce. -
Sauté the Garlic and Spinach
In the same skillet (don’t clean it; we want those yummy flavors), add a bit more olive oil if needed, then toss in the minced garlic. Sauté for about 30 seconds or until fragrant—your kitchen will smell heavenly! Next, add the fresh spinach and cook until wilted. This adds both nutrients and color! -
Add Sun-Dried Tomatoes
Now, stir in the sun-dried tomatoes. Let them mingle with the garlic and spinach for a minute, letting their flavors blend together. This is where the magic begins—your taste buds will sing! -
Introduce Heavy Cream
Slowly pour in the heavy cream, stirring to combine. Bring the sauce to a gentle simmer, and watch it thicken beautifully. Chef tip: If you want an even thicker sauce, let it simmer a little longer. -
Add the Parmesan
Stir in the grated Parmesan cheese until it melts into the sauce. This gives your dish that iconic creaminess. Taste and adjust seasoning if necessary—maybe a pinch more salt or some cracked black pepper. -
Combine it All
Return the chicken to the skillet, spooning the sauce over it. Let everything simmer together for another 3-4 minutes. This step allows the chicken to soak up all the delicious flavors. -
Serve with Love
Your Creamy Tuscan Chicken is ready! Serve it hot and watch your family and friends be mesmerized by this beautiful meal.
Serving Suggestions
To plate your Creamy Tuscan Chicken, you can serve it over a bed of pasta, rice, or even zucchini noodles for a lighter option. A sprinkle of fresh parsley or basil on top adds a pop of color and freshness to the dish. Pair it with crusty bread for dipping into that delicious sauce, and don’t forget a side salad for balance!
Recipe Variations
Feeling adventurous? Here are some fun variations to shake things up:
- Mushroom Lovers: Add sautéed mushrooms for an earthy flavor boost.
- Spicy Kick: Toss in a pinch of red pepper flakes when sautéing the garlic for some heat.
- Herby Twist: Incorporate fresh herbs like thyme, oregano, or basil for extra aromatic bliss.
- Cauliflower Rice: Make it keto-friendly by serving over cauliflower rice instead of traditional grains.
- Vegan Delight: Swap chicken for chickpeas or a plant-based protein and use coconut cream instead of heavy cream.
Chef’s Notes
This recipe has evolved over the years, and I’ve experimented with different ingredients and flavors. The creaminess of the sauce was inspired by my love for Italian pasta dishes, but the addition of spinach and sun-dried tomatoes took it to the next level! I remember the first time I tried it with a sprinkle of crushed red pepper—it was a game-changer. Food is all about experimenting, so don’t hesitate to make it your own!
FAQs and Troubleshooting
1. My sauce is too thick; what should I do?
If your sauce is thicker than you’d like, simply add a splash of chicken broth or water to thin it out to your desired consistency.
2. Can I use frozen spinach?
Absolutely! Thaw the frozen spinach and squeeze out excess water before adding it to the skillet.
3. The chicken is still pink inside; how do I make sure it cooks fully?
If you find your chicken is undercooked, lower the heat and cover the skillet to allow it to cook through without drying out.
4. How do I store leftovers?
Store leftover Creamy Tuscan Chicken in an airtight container in the fridge for up to 3 days. Reheat gently on the stove or in the microwave.
Nutritional Info (Optional)
This Creamy Tuscan Chicken is packed with protein and vitamins from the spinach and tomatoes. Each serving provides approximately 400 calories, 30g of protein, 28g of fat, and 5g of carbohydrates, making it a balanced dish that satisfies without weighing you down.
And there you have it! Your scrumptious Creamy Tuscan Chicken is ready to impress. Remember, the heart of this recipe lies not just in the ingredients but in the joy of creating and sharing this meal. So gather your loved ones, dig in, and savor every bite together! Happy cooking!
PrintCreamy Tuscan Chicken

A comforting dish featuring succulent chicken breasts in a velvety sauce with sun-dried tomatoes, fresh spinach, and Parmesan cheese.
- Prep Time: 15 minutes
- Cook Time: 30 minutes
- Total Time: 45 minutes
- Yield: 4 servings 1x
- Category: Main Course
- Method: Sautéing
- Cuisine: Italian
- Diet: None
Ingredients
- 2–4 pieces Chicken Breasts
- 2 cups Fresh Spinach
- 1 cup Sun-Dried Tomatoes
- 4 cloves Garlic, minced
- 1 cup Grated Parmesan Cheese
- 1 cup Heavy Cream
Instructions
- Prep your ingredients by chopping the garlic, slicing the sun-dried tomatoes, and rinsing your spinach.
- Sear the chicken in a skillet over medium heat with olive oil, seasoning with salt and pepper, for 6-7 minutes on each side.
- Remove the chicken from the skillet and let it rest on a plate to keep it juicy.
- Sauté the minced garlic in the same skillet, followed by adding the fresh spinach and cooking until wilted.
- Add the sun-dried tomatoes to the skillet and let them mingle with the garlic and spinach.
- Introduce the heavy cream, stirring to combine and allowing it to simmer until thickened.
- Add the grated Parmesan cheese, stirring until melted into the sauce.
- Combine the chicken back into the skillet with the sauce, letting it simmer for another 3-4 minutes.
- Serve hot and enjoy your Creamy Tuscan Chicken!
Notes
For variations, try adding sautéed mushrooms, red pepper flakes for heat, or substitute the chicken with chickpeas for a vegan option.
Nutrition
- Serving Size: 1 serving
- Calories: 400
- Sugar: 5g
- Sodium: 400mg
- Fat: 28g
- Saturated Fat: 15g
- Unsaturated Fat: 10g
- Trans Fat: 0g
- Carbohydrates: 5g
- Fiber: 1g
- Protein: 30g
- Cholesterol: 100mg
Keywords: Creamy Tuscan Chicken, Italian recipe, chicken dinner, comfort food

Minute Turkey Pesto Sandwich for Busy Weeknights
The Ultimate Turkey Pesto Sandwich: A Flavorful Adventure
Welcome, fellow food enthusiasts! Today, we’re going to embark on a mouth-watering journey as we whip up a Turkey Pesto Sandwich that’s so packed with flavor, you’ll be dreaming about it long after the last bite. Picture this: a warm, crusty Ciabatta bread enveloping tender slices of turkey, slathered in vibrant pesto, and paired with melty provolone cheese. Let’s face it, who wouldn’t want to dive into that deliciousness?
Before we get our hands a little messy (and trust me, we will!), let me set the stage with a personal story that’s near and dear to my heart.
A Taste of Nostalgia
Back when I was in college, life was a whirlwind of studying, part-time jobs, and late-night cramming sessions. With all that chaos, I sought comfort in food, especially sandwiches. There was a little deli where I would often treat myself to a turkey pesto sandwich after a long day. I can vividly remember the moment I took my first bite; the fresh basil kissed my taste buds, the turkey was perfectly seasoned, and the provolone added just the right creaminess. It was a simple yet magical symphony of flavors that reminded me that good food can bring joy—even on the most stressful of days.
Years later, as I started my food blog—Clean Plate Cravings—I wanted to create a version of that beloved sandwich. Not only did I nail the taste, but I also made it lighter and cleaner without sacrificing flavor. So, let’s gather our ingredients and get ready to recreate this gem of a sandwich in your own kitchen!
Ingredients
Here’s what you’ll need for a delicious Turkey Pesto Sandwich:
-
Turkey (sliced): Lean turkey breast is perfect for this sandwich. If you want to switch it up, roasted chicken or even a plant-based turkey alternative can work wonders too!
-
Pesto: The star of the show! You can use store-bought pesto for convenience, but homemade pesto made with fresh basil, garlic, pine nuts, and Parmesan takes it to the next level. Nut allergies? Try sunflower seed pesto!
-
Provolone cheese: This cheese offers a beautiful melt with a mild flavor. If you want to kick it up a notch, consider swapping it for pepper jack for some spice or mozzarella for nuttiness.
-
Ciabatta bread: The ideal bread for this sandwich! Its crusty exterior and soft interior hold everything together beautifully. No ciabatta? No problem! You can use whole grain bread, focaccia, or even a baguette!
Quick Chef Insight
Remember, the freshness of your ingredients can make or break this sandwich, so seek out the best quality turkey, pesto, and bread you can find. Good ingredients become great dishes!
Step-by-Step Instructions
Alright, let’s roll up our sleeves and get cooking! Here’s how to whip up your Turkey Pesto Sandwich in just a few simple steps.
-
Prep Your Ingredients: Start by gathering all your ingredients on the counter. This makes the process smoother and helps you avoid any last-minute panics when you’re mid-sandwich assembly.
-
Toast the Ciabatta: Preheat your oven or toaster oven to 375°F (190°C). Slice your Ciabatta bread in half and pop it into the oven for about 5-7 minutes, or until it’s warm and slightly crispy. This step is crucial! A toasted exterior will keep your sandwich from getting soggy.
-
Spread the Pesto: Once the bread is toasted, generously spread a swath of pesto on each half. This vibrant green spread is the backbone of our flavor profile, so don’t be shy!
-
Layer on the Turkey: Next, add a hearty portion of sliced turkey on top of the pesto. Here’s a little chef hack: If you’re using deli turkey, pile up the slices for a thicker sandwich! You want that satisfying mouthfeel with every bite.
-
Add the Provolone: Lay your slices of provolone cheese over the turkey. If you want a melty masterpiece, you can add the sandwich back into your oven for a few minutes until the cheese is luscious and gooey.
-
Close It Up: After the cheese has melted to your liking, place the top half of the Ciabatta back on, gently pressing it down. You want to create a delightful sandwich that holds together well.
-
Slice and Serve: Finally, slice your sandwich in half on a diagonal for that classic deli look. Not only does it look appetizing, but it also makes it easier to handle!
Chef Tips
- Feel free to make this sandwich open-faced! Just skip the top half of the Ciabatta and enjoy it like a pizza.
- Don’t have an oven? A skillet works perfectly! Just heat a skillet over medium heat and grill the sandwich on both sides for that golden crust.
Serving Suggestions
Serve your Turkey Pesto Sandwich alongside a light salad or a bowl of fresh fruit for a balanced meal. You can also pair it with crispy sweet potato fries or a bowl of homemade soup if you’re looking for comfort. Arrange it on a trendy wooden board for an Instagram-worthy display that’ll impress even the toughest of critics!
Recipe Variations
Let’s get creative! Here are a few flavorful spins on the classic Turkey Pesto Sandwich:
- Caprese Style: Add fresh mozzarella, sliced tomatoes, and arugula for a Caprese twist.
- Spicy Delight: Incorporate roasted red peppers and a drizzle of hot sauce for a kick!
- Mediterranean Flair: Use feta cheese and Kalamata olives along with the turkey and pesto for a Mediterranean vibe.
- Veggie-Loaded: Swap turkey for grilled zucchini and bell peppers, perfect for a lighter option.
Chef’s Notes
This Turkey Pesto Sandwich has become a staple in my kitchen, and I love experimenting with different ingredients! I’ve even made a version with smoked turkey for an extra depth of flavor. And let’s confess, there have been times when my friends requested this hearty sandwich for brunch, and I happily complied, serving it crispy and hot with a side of homemade sweet potato fries. There’s just something special about sharing good food with friends and family that makes my heart (and stomach) sing!
FAQs and Troubleshooting
-
Can I use turkey leftovers? Absolutely! This sandwich is perfect for using up leftover turkey from Thanksgiving or any family gathering. The added flavor from roasted turkey truly shines through.
-
What if I don’t like pesto? You can substitute pesto with hummus for a creamy, flavorful spread or try a sun-dried tomato spread for a tangy kick.
-
How can I make it gluten-free? Substitute the Ciabatta bread with gluten-free bread options or lettuce wraps for a lower-carb version.
-
Why is my sandwich soggy? Toasting the bread should help prevent sogginess. If you’re making it ahead of time, layer the ingredients in a way that keeps moisture (like pesto) away from the bread until serving.
Nutritional Info
While the exact nutritional values will depend on your specific ingredients, a typical Turkey Pesto Sandwich made with lean turkey, fresh pesto, provolone, and Ciabatta bread might contain approximately:
- Calories: 380
- Protein: 28g
- Fat: 18g
- Carbohydrates: 30g
Wondering how to make this sandwich even healthier? Consider using whole grain bread, reduced-fat cheese, or a plant-based turkey option.
I hope you’re as excited about this Turkey Pesto Sandwich as I am! Now go ahead, roll up those sleeves, and get cooking. Remember, food is not just about nourishing our bodies; it’s about feeding our souls. Happy cooking!
PrintTurkey Pesto Sandwich

A flavorful Turkey Pesto Sandwich featuring tender turkey slices, vibrant pesto, and melty provolone cheese on crusty Ciabatta bread.
- Prep Time: 10 minutes
- Cook Time: 7 minutes
- Total Time: 17 minutes
- Yield: 2 servings 1x
- Category: Sandwich
- Method: Baking
- Cuisine: American
- Diet: None
Ingredients
- 8 oz sliced turkey breast
- 1/4 cup pesto
- 4 oz provolone cheese
- 2 Ciabatta rolls
Instructions
- Prep your ingredients by gathering all the items needed for the sandwich.
- Toast the Ciabatta by preheating your oven to 375°F (190°C), slicing the bread in half, and toasting for 5-7 minutes until warm and slightly crispy.
- Spread the pesto generously on each half of the toasted bread.
- Layer on the sliced turkey over the pesto.
- Add the provolone cheese slices on top of the turkey.
- Close the sandwich with the top half of the Ciabatta.
- Slice and serve the sandwich diagonal for an enticing presentation.
Notes
Fresh ingredients can make a big difference in flavor. Feel free to experiment with different cheeses or breads.
Nutrition
- Serving Size: 1 sandwich
- Calories: 380
- Sugar: 2g
- Sodium: 800mg
- Fat: 18g
- Saturated Fat: 8g
- Unsaturated Fat: 8g
- Trans Fat: 0g
- Carbohydrates: 30g
- Fiber: 2g
- Protein: 28g
- Cholesterol: 70mg
Keywords: turkey sandwich, pesto sandwich, ciabatta sandwich, easy lunch

Minute Creamy Chicken Soup for Weeknight Comfort
Creamy Chicken Soup: A Cozy Hug in a Bowl
Welcome back to Clean Plate Cravings, my wonderful foodies! Today, we’re diving into a bowl of comfort to talk about one of my all-time favorites: Creamy Chicken Soup. Imagine this: the tantalizing aroma of herbs mingling with tender chicken and vibrant vegetables fills your kitchen, wrapping you in its warm embrace. It’s not just a dish; it’s a hug in a bowl, especially on chilly evenings or when you need a little pick-me-up!
This recipe is all about ease and flavor; we’re keeping things simple but oh-so-delicious. As we cook together, you’ll find that this isn’t just another soup recipe—it’s a gateway to cozy memories, nourishing your body and soul. Whether you’re curled up on the couch on a rainy day or enjoying a dinner with loved ones, this creamy chicken soup delivers on every front.
Are you ready to get cooking? Let’s in dive in a little deeper and explore the flavors, the joy, and a few fun stories surrounding this delightful dish!
A Personal Story: Finding Comfort in a Bowl
Let me take you back to my childhood kitchen. Growing up, my mom made chicken soup every Sunday without fail. It was our ritual: as the sun dipped low, the whir of the blender and bubbling pots filled the air, creating a symphony of love and comfort. I can still hear the clinking of her wooden spoon against the pot as she stirred, adding just a pinch of this and a dash of that without ever measuring.
One particularly rainy afternoon, I remember walking into the house, drenched and shivering, only to be greeted by the warm, savory scent of her creamy chicken soup. As I settled in at the table, my mom served me a steaming bowl, and as I took the first spoonful, I felt every worry of the day wash away.
That was the magic of her cooking. It wasn’t just about the flavors—it was about how food brought us together, crafted memories, and nourished our spirits. Now, every time I make creamy chicken soup, I feel that same warmth and nostalgia, and I hope to share that feeling with all of you!
Ingredients: What You’ll Need
Here’s a list of the hero ingredients for our creamy chicken soup. Each one plays a crucial role in creating that rich, comforting bowl of goodness.
-
Chicken (boneless, skinless thighs or breasts): Tender and juicy, chicken adds protein and heartiness to the soup. Feel free to substitute with turkey or even cooked rotisserie chicken for quicker prep!
-
Vegetables (carrots, celery, onion): These aromatics lay the foundation for flavor. You can mix it up with bell peppers or add in some spinach at the end for extra greens!
-
Garlic: Fresh minced garlic enhances the dish with a bold kick. If you’re in a pinch, garlic powder works, but fresh is always best.
-
Chicken Broth (or stock): This is the flavorful base for your soup. Homemade is fantastic, but store-bought works just as well—just check for low sodium!
-
Heavy Cream: This is what gives our soup its signature creaminess! For a lighter version, consider using half-and-half or coconut milk if you want a dairy-free option.
-
Herbs (thyme, rosemary, bay leaf): Fresh herbs bring brightness and aromatic depth. Dried herbs work too; just remember to adjust the amounts (1 teaspoon dried is equivalent to 1 tablespoon fresh).
-
Salt and Pepper: Always essential; they’ll help amplify the flavors in the pot. Taste as you go to find the perfect balance!
Step-by-Step Instructions: Let’s Get Cooking!
Now that we’ve got our ingredients, it’s time to bring this creamy chicken soup to life! Here’s how you do it, step by step.
-
Sauté the Aromatics:
- In a large pot, heat a drizzle of olive oil over medium heat. Add the chopped onions, and let them soften for about 3-4 minutes.
- Chef Tip: Don’t rush this step! A little caramelization adds a lovely depth of flavor.
-
Add Garlic and Vegetables:
- Toss in the minced garlic along with diced carrots and celery. Cook for another 5 minutes, stirring occasionally.
- Chef Hack: If you want a deeper flavor, add a splash of white wine to deglaze the pan once the vegetables are softened. Let it simmer for a minute until the alcohol evaporates!
-
Incorporate the Chicken:
- Nestle the chicken into the pot, pouring in your chicken broth to cover the ingredients by an inch.
- Bring it all to a boil, then reduce the heat and let it simmer for about 20 minutes, or until the chicken is cooked through.
- Pro Tip: If you prefer shredded chicken, you can shred it right in the pot using two forks!
-
Create Creaminess:
- Once the chicken is cooked, remove it from the pot and set it on a cutting board to cool slightly. In the meantime, add your heavy cream to the soup.
- Quick Tip: Stir well to combine! If you want it creamier, blend a part of the soup using an immersion blender for a rich texture.
-
Shred and Return the Chicken:
- Once cool enough to handle, shred the chicken and return it to the pot. Season the soup with thyme, rosemary, salt, and pepper to taste, and simmer for an additional 5 minutes, allowing the herbs to infuse their flavor.
- Kitchen Secret: Taste throughout! Adjust seasoning to match your personal preference.
-
Final Touches:
- If you’re using any optional add-ins like spinach or peas, throw them in for the last couple of minutes until just wilted.
- Serve hot, garnished with fresh herbs or a sprinkle of Parmesan, if desired!
Serving Suggestions: Present with Love
When it comes to serving this creamy chicken soup, presentation is key! Serve it in oversized, hearty bowls to evoke that comforting feeling. A sprinkle of freshly chopped parsley or a dash of paprika on top adds a pop of color and flavor.
Pair this soup with crusty bread or a fresh side salad for a lovely meal! This dish also warms up beautifully, so don’t shy away from making a big batch.
Recipe Variations: Get Creative!
One of my favorite things about this creamy chicken soup is how versatile it is. Here are a few variations to keep it exciting:
-
Spicy Kick: Add a touch of cayenne pepper or diced jalapeños for a warming spice.
-
Herbed Twist: Experiment with different fresh herbs! Try dill or basil for a bright summer flavor.
-
Lemon Zing: A squeeze of fresh lemon juice before serving brightens the flavors beautifully.
-
Veggie-Loaded: Toss in other vegetables like frozen peas, corn, or zucchini to boost the nutritional value.
-
Dairy-Free Option: Substitute heavy cream with coconut milk and use dairy-free broth for a completely dairy-free version.
Chef’s Notes: A Recipe for Memories
This creamy chicken soup has evolved over the years, much like my cooking style! Initially, it was a no-fuss recipe filled with whatever was in the fridge. Over time, I began to understand the nuances of flavor—how to layer them for maximum impact. Cooking is a journey, and I love that this soup now holds a special place in my heart, both as a nourishing meal and as a sentimental reminder of home.
I often think of the incredible conversations had around the dinner table, friendly laughter, and how a simple bowl of soup can spark joy and connection. So as you make this recipe, remember that it’s not just about the ingredients, but the love that you put into it!
FAQs and Troubleshooting: Answers to Your Questions
-
Can I freeze the soup?
- Absolutely! This soup freezes beautifully. Just make sure to leave out the cream, and stir it in after reheating to maintain that creamy texture!
-
My soup turned out too thick. What can I do?
- If you find your soup is thicker than desired, just add a bit more chicken broth or water to thin it out, mixing it well.
-
Are there quick-cooking alternatives?
- You can use pre-cooked rotisserie chicken to save time. Just add it at the end, warming it through.
-
Can I use a slow cooker?
- For sure! Just combine everything in the slow cooker, cook on low for 6-7 hours, and stir in the cream before serving!
Nutritional Information (Optional)
Each serving of this creamy chicken soup is packed with protein and essential nutrients from the vegetables. Plus, it can be a part of a balanced diet offering healthy fats if you’re mindful of the cream content.
So there you have it! A delicious, nourishing, and creamy chicken soup that warms not just your tummy but your heart. I hope this recipe becomes a staple in your kitchen, just like it is in mine. Happy cooking, and may your bowls be ever full!
PrintCreamy Chicken Soup

A comforting and creamy chicken soup, perfect for chilly evenings and nourishing to the soul.
- Prep Time: 15 minutes
- Cook Time: 30 minutes
- Total Time: 45 minutes
- Yield: 4 servings 1x
- Category: Main Course
- Method: Stovetop
- Cuisine: American
- Diet: Gluten-Free
Ingredients
- 2 lbs Chicken (boneless, skinless thighs or breasts)
- 2 cups Vegetables (carrots, celery, onion)
- 3 cloves Garlic (minced)
- 6 cups Chicken Broth (or stock)
- 1 cup Heavy Cream
- 2 tsp Herbs (thyme, rosemary, bay leaf)
- Salt and Pepper to taste
Instructions
- Sauté the aromatics: In a large pot, heat a drizzle of olive oil over medium heat. Add the chopped onions, and let them soften for about 3-4 minutes.
- Add garlic and vegetables: Toss in the minced garlic along with diced carrots and celery. Cook for another 5 minutes, stirring occasionally.
- Incorporate the chicken: Nestle the chicken into the pot, pouring in your chicken broth to cover the ingredients by an inch, and bring it all to a boil. Reduce heat and simmer for about 20 minutes, or until the chicken is cooked through.
- Create creaminess: Once the chicken is cooked, remove it from the pot and add your heavy cream to the soup.
- Shred and return the chicken: Once cool enough to handle, shred the chicken and return it to the pot. Season the soup with herbs, salt, and pepper to taste, and simmer for an additional 5 minutes.
- Final touches: If using any optional add-ins like spinach or peas, throw them in for the last couple of minutes until just wilted.
Notes
Serve hot, garnished with fresh herbs or a sprinkle of Parmesan, and enjoy with crusty bread.
Nutrition
- Serving Size: 1 serving
- Calories: 350
- Sugar: 5g
- Sodium: 400mg
- Fat: 12g
- Saturated Fat: 4g
- Unsaturated Fat: 6g
- Trans Fat: 0g
- Carbohydrates: 45g
- Fiber: 3g
- Protein: 15g
- Cholesterol: 30mg
Keywords: chicken soup, creamy soup, comfort food, cozy recipes, easy chicken recipes

Minute Apple Cheddar Quesadilla (Crispy & Gooey)
Apple Cheddar Quesadilla: A Sweet and Savory Delight
Welcome to the delightful world of apple cheddar quesadillas, where sweet meets savory in the most mouthwatering way! If you’re anything like me, you adore dishes that combine unexpected flavors to create something truly special. This dish embodies that perfect harmony of sweetness from the apples and the sharp, melty goodness of cheddar cheese, all sandwiched between warm, crispy tortillas. It’s a comforting and satisfying meal or snack that’s as easy to whip up as it is delicious.
A Slice of Nostalgia
Growing up, my family often gathered in the kitchen on chilly autumn days to experiment with different flavors and recipes. One particular Saturday, my mom decided to challenge us to a quesadilla cook-off. Using leftover ingredients, we were to create the ultimate quesadilla. My sister went with the classic cheese and salsa duo, while my brother opted for a spicy chicken version. As I rummaged through the fridge, my eyes landed on a shiny red apple that seemed to shout, “Pick me!” And there it was—the birth of the apple cheddar quesadilla. I couldn’t help but feel a bit rebellious mixing cheese with fruit, but once I took that first crispy bite, I knew I had stumbled upon something magical. We proudly presented our creations, and my apple cheddar quesadilla won the hearts (and taste buds) of my family. This dish became a staple at our home, igniting memories of fun kitchen cook-offs and the thrill of flavor experimentation.
Ingredients
Here’s what you’ll need to create your own apple cheddar quesadilla masterpiece:
-
Apples (2 medium, any variety)
- I prefer using crisp, sweet varieties like Honeycrisp or Fuji for their juicy sweetness. You can use Granny Smith for a tart flavor instead; just balance it out with a little extra honey or maple syrup!
-
Cheddar Cheese (1 cup, shredded)
- Cheddar adds the perfect creamy, tangy profile. Feel free to swap it for Monterey Jack for a milder flavor or vegan cheese for a dairy-free option.
-
Tortillas (4 medium-sized)
- Flour or corn tortillas both work beautifully. Flour tortillas provide a softer texture, while corn tortillas are gluten-free and have a wonderful, slightly nutty taste.
-
Butter or Olive Oil (for cooking)
- Use butter for a rich flavor that makes everything taste even better, but olive oil works too—it’s a healthier option and adds a nice crispiness.
-
Optional Extras:
- Honey or Maple Syrup: To drizzle on top for added sweetness.
- Cinnamon: A sprinkle can elevate the flavor profile, adding a warm, cozy note.
Step-by-Step Instructions
Ready to make your tastebuds dance? Let’s dive into the cooking steps:
-
Prep Your Ingredients: Start by washing and slicing your apples into thin wedges, about 1/4-inch thick. If you’re using a tart apple variety like Granny Smith, consider tossing them with a sprinkle of cinnamon and a drizzle of honey to balance the flavors. Trust me, it’s a game-changer!
-
Cheese It Up: Grate your cheddar cheese if you haven’t done so already—freshly shredded cheese melts better than pre-shredded. About 1 cup is perfect, but feel free to go a little heavy if you’re a true cheese lover!
-
Heat Things Up: In a large skillet, heat about 1 tablespoon of butter or olive oil over medium heat until melted and bubbly. The pan should be hot but not smoking.
-
Assemble Your Quesadilla: Take one tortilla and place it in the hot skillet. Arrange a handful of apple slices evenly across the tortilla, followed by a generous sprinkle of cheddar cheese. Top with another tortilla—like a cheesy, apple-filled sandwich.
-
Cook It Right: Let the quesadilla cook for about 3-4 minutes, or until the bottom tortilla is golden brown and crispy. Here’s a little chef hack: press down with a spatula to ensure that the cheese melts evenly and everything sticks together.
-
Flip It!: Carefully flip the quesadilla with a spatula. Add another small pat of butter/olive oil to the skillet if needed, and cook for another 3-4 minutes until the second side is also perfectly golden and the cheese is gooey.
-
Slice and Serve: Transfer the quesadilla to a cutting board and let it rest for a minute. Slice it into wedges with a sharp knife or pizza cutter. This will help you retain all that melty goodness inside!
Serving Suggestions
To serve your apple cheddar quesadilla, arrange the crispy wedges on a colorful plate. Drizzle with a touch of honey or maple syrup for that extra burst of flavor! You might even want to serve it with a dollop of Greek yogurt or sour cream on the side for added creaminess. This dish is perfect as a snack, light lunch, or even a fun appetizer for your next gathering!
Recipe Variations
Feeling adventurous? Here are a few creative twists you can try:
- Add Protein: Add cooked chicken or turkey for a heartier meal.
- Spicy Kick: Toss in some sliced jalapeños or drizzle some sriracha for a sweet and spicy combo.
- Herbed Up: Sprinkle fresh herbs like thyme or rosemary on top for an aromatic twist.
- Fruit Mix: Experiment with other fruits—pears, peaches, or even dried cranberries could all be fantastic additions.
- Nutty Crunch: Try adding some crushed walnuts or pecans for added texture and healthy fats.
Chef’s Notes
This recipe has been my go-to for casual gatherings, and it’s fascinating to see how it evolves with each occasion! Sometimes I tweak the ingredients based on what I have on hand, and it never disappoints. Plus, it’s one of those dishes that is not just about eating; it’s about experimenting and having fun. I’ve lost track of the number of taste tests I’ve performed with friends, trying to find the perfect balance of sweet and cheesy. Each version has its charm, and I encourage you to make it your own! Share your stories and variations—I’d love to hear about your kitchen adventures!
FAQs and Troubleshooting
1. My quesadilla isn’t getting crispy! What’s wrong?
- Make sure your skillet is heated adequately. If it’s too low, the quesadilla will cook slowly without achieving that golden crisp.
2. What if my cheese isn’t melting?
- Using pre-shredded cheese can sometimes lead to less melty results. Opt for block cheese and shred it yourself for a better melting quality!
3. Can I make this ahead of time?
- You can prep the ingredients ahead of time, but I recommend cooking it fresh! If you do make them in advance, store them in airtight containers and reheat in a skillet for best results.
4. Can I freeze quesadillas?
- Absolutely! After cooking, let them cool completely, then wrap each one tightly in foil or plastic wrap, and store them in a freezer bag. They can last up to three months!
Nutritional Info (Optional)
While the nutritional info can vary based on specific ingredients and serving sizes, here’s a rough estimate for one serving (1 quesadilla without added toppings):
- Calories: 320
- Protein: 15g
- Fat: 15g
- Carbs: 40g
- Fiber: 3g
With each crisp bite of these apple cheddar quesadillas, you’ll not only indulge your taste buds but also tap into a world of flavor and creativity. So grab your ingredients, invite a friend into the kitchen, and let the flavor adventures begin. Happy cooking!
PrintApple Cheddar Quesadilla

A delightful combination of sweet apples and savory cheddar cheese, all cocooned in crispy tortillas.
- Prep Time: 10 minutes
- Cook Time: 8 minutes
- Total Time: 18 minutes
- Yield: 4 servings 1x
- Category: Main Course
- Method: Cooking
- Cuisine: American
- Diet: Vegetarian
Ingredients
- 2 medium Apples (any variety)
- 1 cup Cheddar Cheese, shredded
- 4 medium-sized Tortillas
- Butter or Olive Oil (for cooking)
- Optional: Honey or Maple Syrup (for drizzling)
- Optional: Cinnamon (for a sprinkle)
Instructions
- Prep your ingredients: Wash and slice apples into thin wedges. Toss with cinnamon and honey if using a tart variety.
- Grate your cheddar cheese if not already done.
- Heat about 1 tablespoon of butter or olive oil in a large skillet over medium heat until melted.
- Assemble your quesadilla: Place one tortilla in the skillet, top with apple slices and cheese, and add another tortilla on top.
- Cook for about 3-4 minutes until the bottom is golden brown and crispy.
- Flip carefully with a spatula, adding more butter/oil if needed, and cook for another 3-4 minutes.
- Transfer to a cutting board, let it rest, then slice into wedges.
Notes
For added sweetness, drizzle with honey or maple syrup when serving. This dish is versatile; feel free to experiment with different fruits and add-ins!
Nutrition
- Serving Size: 1 quesadilla
- Calories: 320
- Sugar: 5g
- Sodium: 350mg
- Fat: 15g
- Saturated Fat: 8g
- Unsaturated Fat: 7g
- Trans Fat: 0g
- Carbohydrates: 40g
- Fiber: 3g
- Protein: 15g
- Cholesterol: 30mg
Keywords: quesadilla, apple, cheddar, sweet and savory, easy recipe