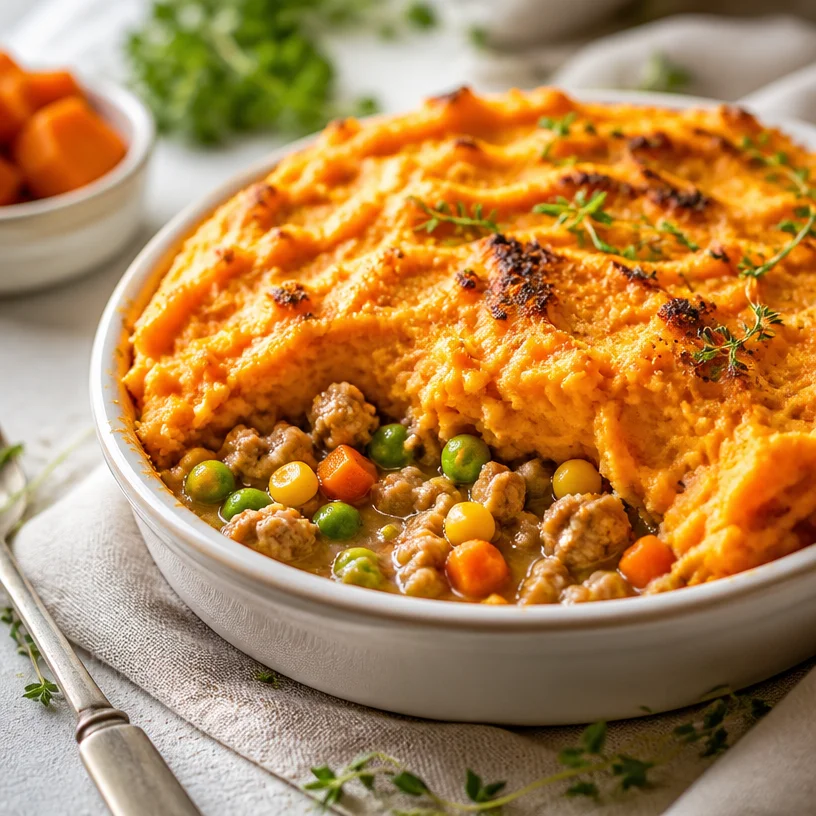
Sweet Potato Shepherd’s Pie
Sweet Potato Shepherd’s Pie: A Cozy Classic with a Twist
Welcome foodies! Today, I’m excited to share with you a dish that’s not just a feast for your stomach, but also a cozy hug for your soul—Sweet Potato Shepherd’s Pie. Imagine scooping into a warm, savory pie loaded with lean ground turkey and vibrant mixed vegetables, all nestled beneath a creamy layer of sweet potato mash. This isn’t just comfort food; it’s a celebration of home and nourishment, designed to make you feel good inside and out.
A Little Background
If you’ve ever dined in a cozy pub or gathered around the table during a family holiday, you probably have a fond memory connected to shepherd’s pie. For me, it all began at my grandmother’s house. She had a knack for creating meals that not only filled our bellies but also sparked joy and laughter around the table. Every Sunday afternoon, we would gather to enjoy her classic shepherd’s pie, its irresistible aroma wafting through the house, enticing everyone to drop whatever they were doing. My grandmother used a mix of lamb and hearty vegetables, topped with buttery mashed potatoes, but here’s where my twist comes in!
Over the years, I’ve put my spin on this comforting classic, using ground turkey and sweet potatoes to create a lighter, healthier version without sacrificing any flavor. Seeing friends and family dig into this dish brings back all those warm memories, reminding me that the kitchen is a place for love, connection, and, of course, delicious food.
Ingredients
Ready to get cooking? Here’s what you’ll need for this delightful Sweet Potato Shepherd’s Pie:
-
Ground Turkey: A lean protein base that lightens up the dish while still providing all the satisfying richness of traditional shepherd’s pie. Can’t find turkey? Sub in lean ground beef or even lentils for a vegetarian option!
-
Mixed Vegetables (Carrots, Peas, Corn): A colorful medley not only for visual appeal but also flavor and nutrients! You can swap any of these veggies for what you have on hand—think green beans or bell peppers.
-
Sweet Potatoes: These bring a lovely sweetness to the pie, and their vibrant orange color can’t be beaten! Need a change? Try white or yellow potatoes for a more classic taste.
-
Olive Oil: A staple for sautéing! You could use avocado oil or even unsalted butter if you prefer a richer flavor.
-
Salt & Pepper: Essential for enhancing all the other flavors. Don’t skip this step—seasoning is key!
-
Garlic Powder: Adds a depth of flavor effortlessly. Fresh minced garlic works just as well if you prefer!
-
Onion Powder: A quick way to infuse that savory onion flavor without chopping away. You can also use fresh onions; just sauté them with the turkey for a great base flavor.
Step-by-Step Instructions
Now that we’ve gathered all our ingredients, let’s dive right into the cooking process!
-
Preheat Your Oven to 375°F (190°C): This ensures your pie gets that warm, bubbly finish we all crave. It’s like telling your oven that it’s about to get party mode activated!
-
Boil the Sweet Potatoes: Peel and dice about 2 pounds of sweet potatoes. Place them in a pot of boiling water and cook until tender, about 15-20 minutes. To make things easier, you can also steam them! The goal here: fork-tender Sweeties that can be mashed easily!
-
Sauté the Ground Turkey: In a large skillet over medium heat, drizzle about a tablespoon of olive oil. Once hot, add in your ground turkey. Cook it until it’s browned and cooked through, breaking it up as you go. Use a wooden spoon to channel your inner chef, making sure there are no pink spots left behind!
-
Add Your Veggies: Toss in 2 cups of mixed vegetables right into the skillet with the turkey. Stir them together and cook for an additional 5-7 minutes until they’re nice and hot. This is where the magic begins, and your kitchen starts smelling irresistible!
-
Season, Season, Season: Time to sprinkle in your salt, pepper, garlic powder, and onion powder. Give everything a good mix, letting those flavors mingle and dance. Trust me; your taste buds will thank you for this!
-
Mash Those Sweet Potatoes: Once cooked, drain the sweet potatoes and return them to the pot. Add a drizzle of olive oil, a pinch of salt, and a bit of pepper to taste. Mash until creamy but leave it a bit rustic for texture. If you like it creamy, feel free to add a splash of milk or a dollop of Greek yogurt!
-
Layering Time: Grab a casserole dish and start layering. Pour the turkey and veggie mixture as your base, then top it off with a generous layer of mashed sweet potatoes. Spread it evenly, and don’t be shy about really packing it down!
-
Bake to Perfection: Pop your casserole in the preheated oven and bake for about 25-30 minutes, or until the sweet potato topping is slightly golden and the edges are bubbling!
-
Cool & Serve: Once you pull it out of the oven, let it rest for about 5-10 minutes. This pause allows all the flavors to settle down so every bite is harmonious.
Serving Suggestions
When you’re ready to dig in, serve this delicious shepherd’s pie straight from the dish! A sprinkle of fresh parsley over the top adds a pretty finish that brightens the whole meal. Pair it with a light side salad or some crusty whole-grain bread for a complete meal. The goal is to keep everything fresh, vibrant, and entirely enjoyable.
Recipe Variations
Feel free to get creative! Here are some fun twists to play with:
-
Spicy Kick: Add a teaspoon of chili powder or some diced jalapeños to your turkey mixture for a spicy edge.
-
Cheesy Goodness: Stir in a handful of shredded cheese into the mashed sweet potatoes for an extra creamy texture!
-
Herb Infusion: Mix in some chopped fresh herbs like rosemary or thyme with the turkey for an aromatic touch that adds depth.
-
Make it Vegetarian: Swap out the ground turkey for lentils or chickpeas. Use vegetable broth instead of chicken broth to get that comforting feel without the meat.
Chef’s Notes
This Sweet Potato Shepherd’s Pie has become a staple in my cooking repertoire. Initially inspired by my grandmother’s sumptuous version, I played around with healthier ingredients to create a dish that feels just as indulgent, yet resonates with today’s health-conscious approach. It’s amazing how simply swapping out a few ingredients can create a new twist on an old classic!
I once accidentally added way too much garlic powder and ended up with a surprisingly delicious garlic mash—a delightful surprise that taught me the value of experimenting in the kitchen! Cooking should always be an adventure, so don’t be afraid to play around!
FAQs and Troubleshooting
-
What if my sweet potatoes are too watery? If your mashed sweet potatoes are too wet, try draining any excess water and adding a bit more olive oil or another sweet potato to absorb some of that moisture.
-
Can I freeze shepherd’s pie? Absolutely! This dish freezes beautifully. Just make sure it’s completely cooled before covering it tightly with plastic wrap and then aluminum foil. It should be good for up to 3 months!
-
How do I ensure my turkey mixture isn’t dry? The key to moist turkey is to avoid overcooking it. Just cook until it’s no longer pink, and remember that it will continue to cook while baking with the pie!
-
I don’t have mixed vegetables, what can I use? No sweat! You can grab any veggies you have on hand—zucchini, spinach, or even a can of green beans will work great. It’s all about getting creative!
Nutritional Info (Optional)
For those who are keeping an eye on nutrition, this recipe is packed with protein from the turkey and fiber from the sweet potatoes and veggies. Each serving is balanced, nutritious, and incredibly satisfying—perfect for any day of the week!
And there you have it, my delightful twist on Sweet Potato Shepherd’s Pie. A recipe steeped in nostalgia but made fresh and exciting. Can’t wait for you to dig in and bring your friends and family together with this comforting joy! Happy cooking!
PrintSweet Potato Shepherd’s Pie

A cozy classic Shepherd’s pie with a twist, featuring lean ground turkey, vibrant mixed vegetables, and a creamy sweet potato mash.
- Prep Time: 15 minutes
- Cook Time: 30 minutes
- Total Time: 45 minutes
- Yield: 4 servings 1x
- Category: Main Course
- Method: Baking
- Cuisine: American
- Diet: Healthy
Ingredients
- 2 pounds Sweet Potatoes, peeled and diced
- 1 tablespoon Olive Oil
- 1 pound Ground Turkey
- 2 cups Mixed Vegetables (Carrots, Peas, Corn)
- Salt to taste
- Pepper to taste
- 1 teaspoon Garlic Powder
- 1 teaspoon Onion Powder
Instructions
- Preheat your oven to 375°F (190°C).
- Boil the sweet potatoes until tender, about 15-20 minutes.
- Sauté the ground turkey in a skillet with olive oil until cooked through.
- Add the mixed vegetables and cook for an additional 5-7 minutes.
- Season with salt, pepper, garlic powder, and onion powder.
- Mash the sweet potatoes with olive oil, salt, and pepper.
- Layer the turkey mixture in a casserole dish, topping with the mashed sweet potatoes.
- Bake for 25-30 minutes until golden on top.
- Cool for 5-10 minutes before serving.
Notes
Add fresh parsley for garnish and serve with a light side salad or whole-grain bread.
Nutrition
- Serving Size: 1 serving
- Calories: 350
- Sugar: 5g
- Sodium: 400mg
- Fat: 12g
- Saturated Fat: 4g
- Unsaturated Fat: 6g
- Trans Fat: 0g
- Carbohydrates: 45g
- Fiber: 3g
- Protein: 15g
- Cholesterol: 30mg
Keywords: Sweet Potato, Shepherd's Pie, Comfort Food
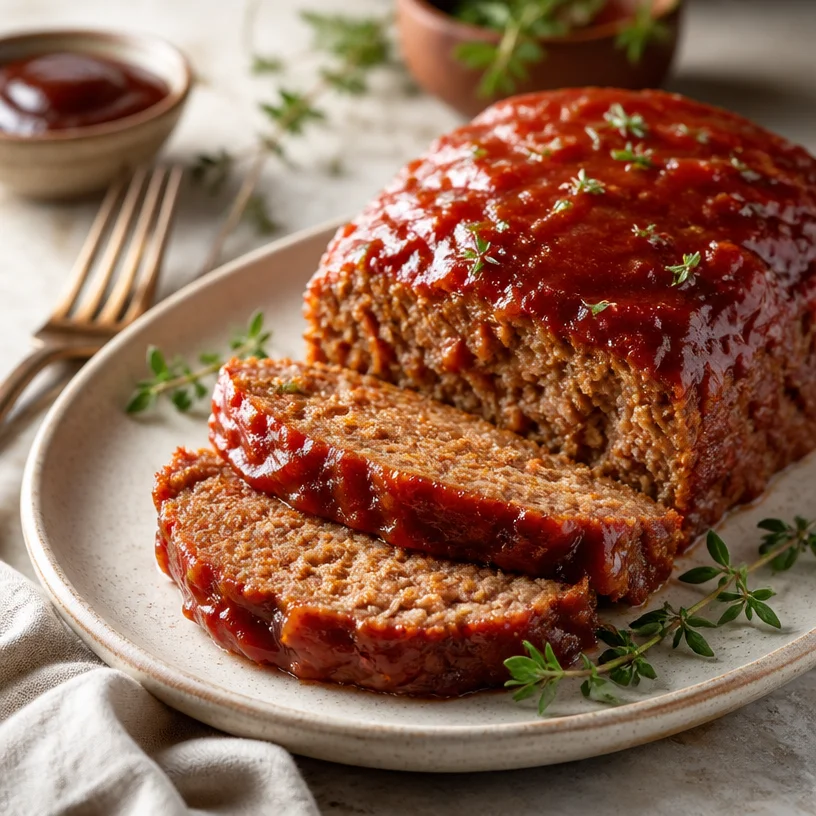
Maple-Glazed Meatloaf: Weeknight Comfort in One-Pan
Maple Glazed Meatloaf: A Feel-Good Classic
Welcome, food lovers! Today, we’re diving into a dish that’s close to my heart and maybe even your stomach—Maple Glazed Meatloaf. Yes, you heard that right! I know what you might be thinking: “Meatloaf? Isn’t that a bit old-fashioned?” Trust me; I have taken this classic comfort food and turned it into something that feels modern and totally irresistible!
Picture this—it’s a chilly evening, the sun is setting, and you walk into your kitchen, where the aroma of sweet maple and savory herbs fills the air. Your family gathers around the table, eagerly anticipating a warm slice of meatloaf, topped with a sticky maple glaze that glistens like a treasure. It’s not just food; it’s an experience, a celebration of warmth and togetherness.
At Clean Plate Cravings, I believe that cooking should be exciting and enjoyable, not a chore. So, let’s roll our sleeves up and cook a dish that will have everyone asking for seconds, while also nourishing our bodies. This Maple Glazed Meatloaf recipe is not only easy to make but also packed with flavor that will have you licking your plate clean—hence the name: Clean Plate Cravings! Ready? Let’s get started!
Personal Story: A Taste of Nostalgia
The first time I tried meatloaf was not just any ordinary evening. It was a Sunday family dinner filled with laughter and the kind of warmth that only a home-cooked meal can bring. My grandma, who always wore her floral apron and a welcoming smile, had perfected her meatloaf over the years, and I was her eager sous-chef.
I remember stepping onto a stool to help her mix the ingredients in a big bowl; the blend of spices and the slow rise of the savory smell made my mouth water. But the real game changer? The glaze! My grandma had a secret ingredient—maple syrup. She’d stir it into the ketchup, and when applied to the meatloaf, it created this sublime sweet and tangy flavor that was so unique. That special touch made every slice burst with nostalgia, transporting me back to those cherished moments. Today, I still find comfort in those flavors, so I wanted to recreate this delicious family tradition, giving it a fresh twist.
Ingredients
Here’s what you’ll need to whip up this Maple Glazed Meatloaf:
-
Ground Beef:
You can use beef chuck or even ground turkey for a lighter option. If you’re looking for a leaner choice, ground chicken or turkey is a fantastic substitute—just keep in mind they might require a bit more moisture to keep them from drying out. -
Maple Syrup:
This is the star of our show! Use pure maple syrup if possible; the flavor is incredibly rich. If you’re out, honey can work in a pinch, but it won’t give you that warm, cozy maple vibe that’s so satisfying. -
Ketchup:
A classic condiment that not only adds sweetness and moisture but also balances the flavors in the meatloaf. You can swap this out with BBQ sauce for a smokier profile or even use a sugar-free version if you’re counting carbs. -
Breadcrumbs:
These help to bind the meatloaf and give it a lovely texture. You can use regular or whole wheat breadcrumbs. If you want a gluten-free option, crushed oats or almond flour works beautifully. -
Egg:
Acts as a binding element, helping hold everything together. If you’re vegan, try using a flaxseed meal (1 tablespoon of flaxseed + 2.5 tablespoons of water = 1 egg) for similar binding properties. -
Onions and Garlic:
Essential aromatics that provide depth and flavor. Feel free to sauté them beforehand if you prefer a softer taste or want to bring out their sweetness. -
Salt and Pepper:
Simple seasonings that elevate the dish. Don’t skimp on the seasoning; it’s all about depth of flavor. -
Herbs (parsley or thyme):
Fresh herbs work best, but dried herbs are perfectly fine as well. Just use a bit less, as they are more concentrated in flavor.
Step-by-Step Instructions
-
Preheat Your Oven:
Start by preheating your oven to 350°F (175°C). This ensures a beautifully cooked meatloaf with a lovely glaze. -
Prepare the Pan:
Line a loaf pan with parchment paper or lightly grease it to prevent sticking. Trust me, this little step saves time washing up later! -
Mix It Up:
In a large bowl, combine the ground beef, breadcrumbs, egg, finely chopped onions, minced garlic, salt, pepper, and herbs. Use your hands (clean, of course!) to mix everything together. This is where the magic happens! But don’t overmix; you want a tender meatloaf, not a dense brick. -
Shape the Loaf:
Transfer the meat mixture into your prepared loaf pan, forming it into a loaf shape. If you’re feeling a bit fancy, you can also shape it by hand into a free-form loaf on a baking sheet for a rustic look. -
Create the Maple Glaze:
In a small bowl, mix together your ketchup and maple syrup. This is where it gets exciting! Once combined, pour half of this mixture over the meatloaf, spreading it evenly with a spatula or spoon. -
Bake It:
Pop the meatloaf into the preheated oven and let it bake for about 50–60 minutes, or until the internal temperature reaches 160°F (70°C). You want it thoroughly cooked but still juicy! -
Brush and Rest:
When there are about 10 minutes left, take the remaining glaze and brush it over the top of the meatloaf for the last bit of cooking. This caramelizes the glaze and enhances flavor. Once it’s done, let the meatloaf rest for about 10-15 minutes before slicing. This allows the juices to redistribute, making for a perfect slice.
Serving Suggestions
Now comes the fun part—serving up your Maple Glazed Meatloaf! It’s best enjoyed warm, and I like to plate it up alongside some buttery mashed potatoes and a green veggie, like steamed broccoli or green beans. Drizzle it with a bit more maple glaze for that extra touch, and don’t forget to serve with some crusty bread on the side to soak up all that delicious sauce. Your family will be fighting over the last piece, I promise!
Recipe Variations
Want to mix things up a bit? Here are some fun twists:
- Spicy Maple Glazed Meatloaf: Add a teaspoon of chili powder or hot sauce to the glaze for a kick!
- Italian Twist: Incorporate chopped sun-dried tomatoes and Italian herbs for a Mediterranean flair.
- Veggie-Packed Meatloaf: Fold in finely chopped veggies like carrots and bell peppers for added nutrition.
- Cheesy Delight: Add shredded cheddar cheese into the meat mixture for a savory surprise.
- BBQ Glaze: Instead of maple syrup, use your favorite barbecue sauce for a smoky flavor.
Chef’s Notes
Cooking is all about love and creativity, and I’ve certainly learned many lessons while perfecting this Maple Glazed Meatloaf. One time, I accidentally grabbed smoked maple syrup instead of regular, and while it was a bit of an experiment, it created a deliciously unique flavor that everyone raved about! Plus, if you ever find yourself with leftovers, this meatloaf tastes even better the next day. Just slice it up, pop it in a sandwich with some fresh greens, and enjoy a spectacular lunch!
FAQs and Troubleshooting
Q: My meatloaf turned out dry. What did I do wrong?
A: Dry meatloaf typically results from overcooking or using extra-lean meat. To ensure juiciness, use a good quality ground beef and don’t skip on the egg and breadcrumb for moisture.
Q: Can I make this ahead of time?
A: Absolutely! You can prepare the meatloaf mixture, shape it, and store it in the fridge for up to a day before baking. Just add a few extra minutes to the cooking time if baking straight from the fridge.
Q: Why is my glaze not shiny?
A: If your glaze isn’t shiny, try adding a bit more maple syrup or allowing it to bake longer to caramelize on top. Keep an eye on it so it doesn’t burn!
Q: How should I store leftovers?
A: Wrap any leftover meatloaf tightly in plastic wrap or place it in an airtight container. Store it in the fridge for up to 3 days or freeze it for future meals.
Nutritional Info
If you’re curious about the numbers, here’s a general breakdown for one serving (about 1/8 of the loaf):
- Calories: 290
- Protein: 22g
- Carbohydrates: 15g
- Fat: 15g
- Fiber: 1g
Now you’re all set to create a meatloaf masterpiece! Whether you’re dining solo or hosting a cozy gathering, this Maple Glazed Meatloaf is sure to warm your heart and please your palate. Happy cooking, my foodie friends! Let’s keep it fresh, simple, and oh-so-delicious!
PrintMaple Glazed Meatloaf
A modern twist on the classic comfort food, this Maple Glazed Meatloaf is packed with flavor and topped with a sticky maple glaze that brings everyone to the table.
- Prep Time: 15 minutes
- Cook Time: 60 minutes
- Total Time: 75 minutes
- Yield: 8 servings 1x
- Category: Main Course
- Method: Baking
- Cuisine: American
- Diet: None
Ingredients
- 2 lbs ground beef (or ground turkey)
- 1/2 cup pure maple syrup
- 1/2 cup ketchup
- 1 cup breadcrumbs
- 1 large egg
- 1 cup finely chopped onions
- 3 cloves minced garlic
- 1 tsp salt
- 1/2 tsp pepper
- 1 tbsp chopped fresh herbs (parsley or thyme)
Instructions
- Preheat your oven to 350°F (175°C).
- Prepare the pan by lining it with parchment paper or greasing it.
- Mix together the ground beef, breadcrumbs, egg, onions, garlic, salt, pepper, and herbs in a large bowl.
- Shape the mixture into a loaf and place it in the prepared loaf pan.
- Create the maple glaze by mixing ketchup and maple syrup, then pour half over the meatloaf.
- Bake for 50–60 minutes, until the internal temperature reaches 160°F (70°C).
- Brush the remaining glaze over the top for the last 10 minutes of baking.
- Rest the meatloaf for 10-15 minutes before slicing.
Notes
For a lighter version, substitute ground turkey or chicken. Leftovers taste great as sandwiches!
Nutrition
- Serving Size: 1 slice
- Calories: 290
- Sugar: 10g
- Sodium: 600mg
- Fat: 15g
- Saturated Fat: 4g
- Unsaturated Fat: 9g
- Trans Fat: 0g
- Carbohydrates: 15g
- Fiber: 1g
- Protein: 22g
- Cholesterol: 70mg
Keywords: meatloaf, maple glaze, comfort food, family dinner, easy recipes
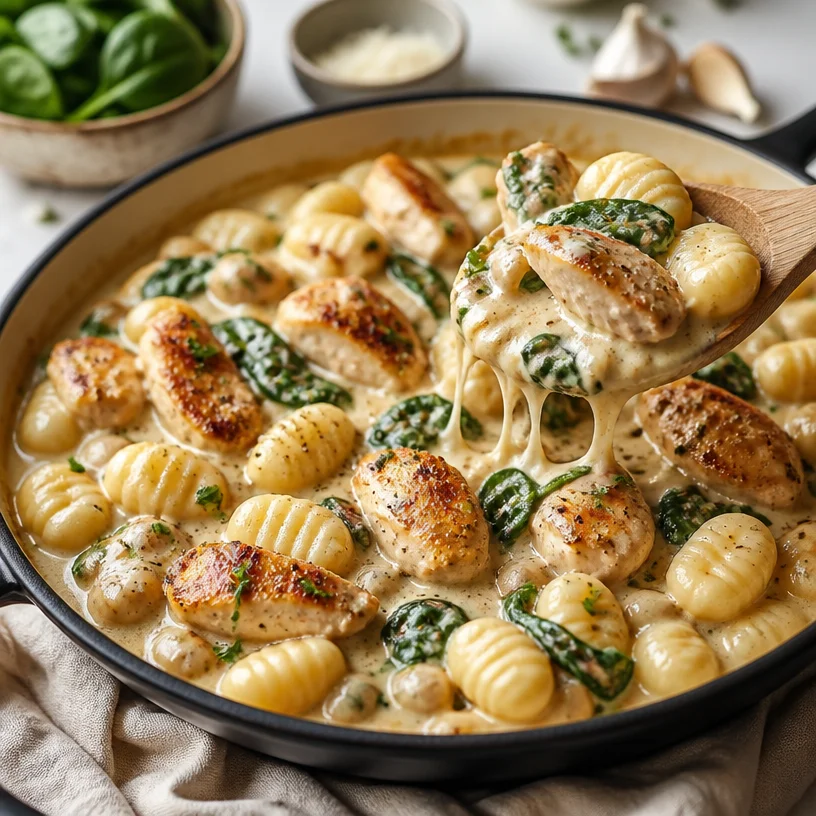
One-Pan Creamy Chicken Gnocchi Skillet (15-Minute Weeknight)
Chicken Gnocchi Skillet: A Deliciously Cozy Dish
Welcome back, food lovers! Today, I’m thrilled to share one of my absolute favorite recipes with you: the Chicken Gnocchi Skillet. This dish is a celebration of flavors that comes together in one pan, making for an easy weeknight dinner or a delightful meal to impress your friends and family. With tender pieces of chicken, pillowy gnocchi, and vibrant spinach, all enveloped in a creamy sauce, this dish is bound to become a staple in your kitchen. So, let’s dive into this flavorful adventure together!
When I first stumbled upon this dish years ago, I was instantly enchanted by its simplicity and the depth of flavor it offers. One evening, I found myself at a cozy little restaurant while on a weekend getaway with friends. I was feeling adventurous and decided to try something new: gnocchi! It was then that I experienced the heavenly combination of tender pasta and rich, creamy sauce. As soon as I took my first bite, I was hooked! The warm flavors wrapped around me like a soft blanket, and I knew I had to recreate that experience at home. Fast forward to today, and here I am, ready to share my version of the Chicken Gnocchi Skillet with you!
Ingredients
Let’s talk about what you’ll need for this mouthwatering dish:
-
Chicken Breast: The star of our dish! I recommend using boneless, skinless chicken breasts for ease of cooking. For a juicy alternative, try thighs. You can also substitute with tofu for a vegetarian twist.
-
Gnocchi: These delightful little potato dumplings are the heart of this dish. You can find them in most grocery stores, either fresh or shelf-stable. If you’re feeling adventurous, try making your own from scratch!
-
Fresh Spinach: A vibrant addition that brings both color and nutrition to the skillet. If you don’t have fresh spinach, feel free to swap it out for kale or other leafy greens.
-
Cream: This is what gives our dish that rich, velvety sauce. You can substitute with half-and-half or even a dairy-free cream (like coconut or cashew cream) for a lighter twist.
-
Garlic: Because what’s better than the aroma of sautéed garlic? Fresh garlic cloves are best, but pre-minced or garlic powder can work in a pinch.
-
Chicken Broth: Adds depth and richness to our sauce. You can use low-sodium broth or vegetable broth if you prefer.
-
Parmesan Cheese: For that final touch of flavor and creaminess. If you’re counting calories or avoiding dairy, nutritional yeast makes a fantastic substitute!
Step-by-Step Instructions
Ready to get cooking? Let’s whip up this delicious Chicken Gnocchi Skillet together!
-
Prep Your Chicken: Begin by cutting the chicken breasts into bite-sized pieces. Season them with salt and pepper. (Chef’s tip: Letting the seasoned chicken sit for a few minutes helps the flavors meld!)
-
Sauté the Chicken: Heat a tablespoon of olive oil in a large skillet over medium heat. Add the chicken pieces and cook for about 5-7 minutes until they’re golden brown and cooked through. (Remember, we want that lovely sear for depth of flavor.) Once cooked, transfer the chicken to a plate and set aside.
-
Cook the Gnocchi: In the same skillet, add a little more oil if needed and toss in the gnocchi. Sauté for about 3-4 minutes until they start to brown slightly. (Chef hack: This extra step gives the gnocchi a nice texture!)
-
The Flavor Base: Add minced garlic to the skillet and cook for about 30 seconds until fragrant. Be cautious not to burn it, or you’ll end up with a bitter taste. (A little garlic goes a long way, so adjust based on your preference!)
-
Bring in the Cream: Pour in the chicken broth, followed by the cream. Stir everything together, scraping up any bits stuck to the bottom of the pan. This is where the magic happens!
-
Combine and Simmer: Return the chicken to the skillet and throw in the fresh spinach. Lower the heat and let everything simmer for about 5-7 minutes, allowing the flavors to meld beautifully. (Don’t forget to keep an eye on it—nobody likes a burnt sauce!)
-
Finish it off: Once the spinach is wilted and the sauce is slightly thickened, stir in the grated Parmesan cheese until melted. (Pro tip: Save a little cheese for garnishing when you serve!)
-
Serve and Enjoy: That’s it! Your Chicken Gnocchi Skillet is ready to be devoured. Garnish with extra cheese and a sprinkle of black pepper for a lovely finish.
Serving Suggestions
For a beautiful presentation, plate your Chicken Gnocchi Skillet family-style right in the pan. Serve it with a fresh green salad and some crusty bread to soak up that delicious sauce. Pair it with a light white wine or sparkling water for a refreshing complement to this creamy dish!
Recipe Variations
Feeling creative? Here are a few delicious twists you can put on this Chicken Gnocchi Skillet:
- Add Veggies: Toss in some cherry tomatoes, bell peppers, or zucchini for added color and nutrition.
- Herby Goodness: Infuse fresh herbs like basil or thyme into your cream for a burst of fresh flavor.
- Spicy Kick: Sprinkle in some red pepper flakes for a touch of heat!
- Pesto Swirl: Stir in a couple of tablespoons of pesto just before serving for a unique and vibrant flavor.
Chef’s Notes
This Chicken Gnocchi Skillet has journeyed with me through many kitchen experiments. Originally, I made it with just cream and cheese, but over time I found that including broth added a lovely depth of flavor. One funny kitchen story I have is the time I accidentally used vanilla almond milk instead of cream—let’s just say that wasn’t my best idea! But those little mishaps only enhance our cooking adventures, right?
FAQs and Troubleshooting
Q: Can I use frozen gnocchi?
Absolutely! Just toss them in the skillet without thawing. They may take a minute longer to cook, but they’ll turn out just as delicious.
Q: My sauce is too thin; how can I thicken it?
No worries! You can let it simmer a bit longer to reduce. Alternatively, whisk a little cornstarch with cold water and add it to the sauce to thicken it up.
Q: Can I make this dish ahead of time?
Yes, you can! Just store it in an airtight container in the fridge. When you’re ready to eat, reheat it gently in a skillet, adding a splash of broth or cream to loosen it up.
Q: What can I do with leftovers?
You can enjoy them as is, or toss them into a wrap or use them as a filling for a baked potato or omelette for a delicious twist!
Nutritional Info
(This information is approximate and can vary based on ingredients used.)
- Calories: ~450 per serving
- Protein: ~30g
- Fat: ~20g
- Carbohydrates: ~40g
- Fiber: ~3g
And there you have it—my delightful Chicken Gnocchi Skillet! A cozy, comforting meal that brings the flavors of my early culinary adventures into your kitchen. Whether you’re looking for simplicity or a dash of creativity, this recipe is adaptable, delicious, and totally satisfying. Get ready to savor each bite! Happy cooking, friends!
PrintChicken Gnocchi Skillet

A deliciously cozy dish featuring tender chicken, pillowy gnocchi, and vibrant spinach in a creamy sauce.
- Prep Time: 15 minutes
- Cook Time: 30 minutes
- Total Time: 45 minutes
- Yield: 4 servings 1x
- Category: Main Course
- Method: Sautéing
- Cuisine: Italian
- Diet: Gluten-Free
Ingredients
- 1 lb boneless, skinless Chicken Breast, cut into bite-sized pieces
- 1 lb Gnocchi
- 2 cups Fresh Spinach
- 1 cup Cream (or half-and-half)
- 2 cloves Garlic, minced
- 1 cup Chicken Broth
- 1/2 cup Parmesan Cheese, grated
- 1 tbsp Olive Oil
- Salt and pepper to taste
Instructions
- Prep your chicken by cutting it into bite-sized pieces and seasoning with salt and pepper.
- Sauté the chicken in a skillet with olive oil over medium heat for 5-7 minutes until golden brown and cooked through. Transfer to a plate.
- Cook the gnocchi in the same skillet for about 3-4 minutes until they start to brown slightly.
- Add minced garlic to the skillet and cook for about 30 seconds until fragrant.
- Pour in the chicken broth and cream, stirring to combine and scraping any bits off the bottom of the pan.
- Combine the chicken and fresh spinach, then let everything simmer for 5-7 minutes.
- Stir in the grated Parmesan cheese until melted and creamy.
- Serve the Chicken Gnocchi Skillet, garnished with extra cheese and black pepper if desired.
Notes
For added flavor, you can incorporate vegetables or fresh herbs, and reheating can be done gently on the stove with a splash of broth.
Nutrition
- Serving Size: 1 serving
- Calories: 450
- Sugar: 5g
- Sodium: 600mg
- Fat: 20g
- Saturated Fat: 10g
- Unsaturated Fat: 8g
- Trans Fat: 0g
- Carbohydrates: 40g
- Fiber: 3g
- Protein: 30g
- Cholesterol: 90mg
Keywords: chicken, gnocchi, skillet, creamy sauce, comfort food

One-Pan 30-Minute Creamy Pumpkin Mac and Cheese this Fall
The Creamy Comfort of Pumpkin Mac and Cheese
Ah, fall! The beautiful dance of leaves changing colors, the aroma of cinnamon wafting through the air, and, of course, the irresistible call of pumpkin-flavored everything. There’s something about this season that makes us all just a little more nostalgic and a lot more hungry for cozy comfort foods. And speaking of comfort food, let me introduce you to the star of today’s show—Pumpkin Mac and Cheese!
This dish takes the classic mac and cheese we all know and love to a whole new level, infusing creamy pumpkin puree with cheese to create a luscious, orange-hued pasta dish that’s perfect for both chilly evenings and festive gatherings. It’s festive yet approachable, nourishing yet indulgent. You see, as a self-proclaimed pumpkin enthusiast, I can’t help but celebrate the versatility of this seasonal superstar, and what better way to do that than by combining it with the ultimate go-to comfort food?
In this post, not only will you learn how to whip up the best Pumpkin Mac and Cheese of your life, but I’ll also sprinkle in some of my favorite kitchen stories, tips, and tricks along the way. So grab your apron and let’s dive into a world where pasta meets pumpkin in the most delicious way possible!
A Taste of Nostalgia
Ah, mac and cheese. A dish that transcends time and age! Like most children of the ’90s, I grew up on the blue box—those neon orange powder days are forever etched in my memory. But it wasn’t until college that I discovered the magic of making mac and cheese from scratch. Let me take you back to an unforgettable fall evening when a few friends and I decided it was time to throw a cozy movie night. We were armed with blankets, popcorn, and yes, lots of cheesy goodness!
Since it was October, I thought, “Why not add some pumpkin to our mac and cheese?” After all, what could be better than pairing the creamy, cheesy pasta we adored with the warming flavors of fall? The result was nothing short of magical! The blending of spices with the gooey cheese made for an unforgettable experience—a simple, nostalgic dish with a new vibrant twist. The laughter and flavors shared that night remain a treasured memory, and it sparked my lifelong passion for experimenting with flavors that worked together in a cozy harmony. And that’s why I’m so excited to share this Pumpkin Mac and Cheese recipe with you today!
Ingredients
Let’s gather everything you need to create this autumnal masterpiece. Here’s your grocery list, along with chef insights for each ingredient:
-
Pasta (Elbow Macaroni or Shells)
- Opt for elbow macaroni for the classic feel, or switch it up with shells for more surface area to hold that creamy sauce. Whole wheat pasta can be a great alternative for added fiber.
-
Pumpkin Puree
- This ingredient adds a delightful creaminess and a subtle earthy flavor to your dish. Make sure to pick up pure pumpkin puree, not pumpkin pie filling, which contains added sugars and spices.
-
Cheddar Cheese (Sharp or Mild)
- Cheddar provides that classic cheesy goodness! Sharp cheddar gives a bold flavor, while mild is less intense. You can use any cheese you love, even gouda or gruyere, for a unique twist.
-
Mozzarella Cheese
- This cheese adds a melty texture that pulls together the dish. For a fun touch, try using smoked mozzarella for a slightly different flavor profile.
-
Butter
- You’ll need this for the roux, which is the base for your cheese sauce. Vegan butter can be used for a dairy-free version.
-
Milk
- Whole milk will create a creamy sauce, but you can substitute with almond milk or oat milk if you’re looking for a lighter or non-dairy alternative.
-
Spices (Salt, Pepper, Nutmeg, and Paprika)
- These little guys elevate the flavor profile. Nutmeg pairs beautifully with pumpkin, while paprika adds a hint of warmth. Feel free to sprinkle in some garlic powder or thyme for more complexity!
Step-by-Step Instructions
1. Prepare Your Pasta
Bring a large pot of salted water to a boil. Add in your pasta and cook according to the package instructions until al dente. Don’t forget to stir occasionally! Once cooked, drain it and set aside, but remember to reserve about a cup of pasta water for later. This starchy water will help thicken your cheese sauce.
2. Make the Creamy Sauce
In the same pot, melt 4 tablespoons of butter over medium heat. Once melted, add in ¼ cup of flour, whisking constantly for about 1-2 minutes. This creates a roux that helps thicken the sauce. Chef Hack: Don’t rush this step! Cooking the roux for long enough helps eliminate any raw flour taste.
3. Whisk in the Milk
Slowly pour in 3 cups of milk while whisking continuously. This helps create a smooth and creamy texture without lumps. Bring the mixture to a gentle simmer, allowing it to thicken slightly—this should take about 5 minutes.
4. Add the Pumpkin Puree and Spices
Stir in 1 cup of pumpkin puree, 1 teaspoon of salt, ½ teaspoon pepper, ¼ teaspoon nutmeg, and ½ teaspoon paprika. Give it a good mix until everything is combined and the sauce is beautifully orange. Tip: Taste as you go! Adjust the seasoning if needed to get the flavor just right for your palate.
5. Cheese, Please!
Remove the pot from the heat and slowly fold in 2 cups of shredded cheddar and 1 cup of mozzarella. Stir continuously until the cheeses melt into that creamy goodness. If the sauce is too thick, whisk in some reserved pasta water until you achieve the desired consistency.
6. Combine Pasta and Sauce
Fold the pasta into the cheese sauce until fully coated. This is where the magic happens! The pasta should be lush and perfectly enveloped in that pumpkin-cheese dream.
7. Serve It Up!
Transfer your Pumpkin Mac and Cheese to a serving dish and dive in! You could also sprinkle some more cheese on top and pop it into the oven for a bubbly, cheesy crust if you’re feeling a little extra.
Serving Suggestions
For an elegant touch, serve your Pumpkin Mac and Cheese in individual ramekins for a fancy dinner party vibe, or place it in a large serving bowl for family-style dining. Pair it with a fresh green salad drizzled with a light vinaigrette to balance the richness, and don’t forget the crusty bread on the side!
Recipe Variations
Feeling adventurous? Here are some delicious twists you can try:
- Spicy Kick: Add a dash of cayenne pepper to the sauce for a little heat.
- Meaty Add-in: Incorporate cooked bacon or sautéed sausage for a savory punch.
- Veggie Delight: Stir in sautéed spinach or roasted Brussels sprouts for extra nutrition and flavor.
- Cheesy Overload: Mix in crumbled blue cheese for a gourmet indulgence.
- Herb Infusion: Add in fresh herbs like sage or thyme for a fragrant twist that complements the pumpkin.
Chef’s Notes
This recipe has evolved over time from my college experimentations to a beloved fall favorite. I remember that one evening when I decided to add a hint of nutmeg, and it changed everything! The warm spices made all the difference and transformed my simple mac and cheese into a dish that feels like a warm hug. It’s become a staple in my kitchen, perfect for gatherings or a cozy night in—my friends can never say no to it!
FAQs and Troubleshooting
1. My sauce is too thick! What did I do wrong?
Don’t fret! Simply whisk in a little reserved pasta water or milk until you reach the desired consistency.
2. What can I use as a cheese substitute?
You can use various non-dairy cheeses for a vegan version; just make sure they melt well!
3. How do I prevent my cheese sauce from being grainy?
Be sure to melt your cheeses on low heat and add them slowly to avoid separating. If it happens, try blending the sauce until smooth.
4. Can I bake this dish?
Absolutely! If you’d like a crispy topping, transfer it to a baking dish, top with breadcrumbs and extra cheese, and bake at 350°F (175°C) for about 20 minutes or until golden and bubbly.
Nutritional Info
Per serving:
- Calories: ~500 kcal
- Protein: ~20g
- Carbohydrates: ~60g
- Fat: ~25g
So there you have it, my deliciously creamy Pumpkin Mac and Cheese! With these tips, tricks, and stories, I hope you feel inspired to take on this cozy dish in your kitchen. Remember, cooking should be fun and enjoyable. Let’s keep it fresh, simple, and oh-so-delicious! Happy cooking, friends!
PrintPumpkin Mac and Cheese

A creamy and comforting twist on classic mac and cheese with the delightful flavors of pumpkin.
- Prep Time: 15 minutes
- Cook Time: 30 minutes
- Total Time: 45 minutes
- Yield: 4 servings 1x
- Category: Main Course
- Method: Baking
- Cuisine: American
- Diet: Vegetarian
Ingredients
- 2 cups Elbow Macaroni or Shells
- 1 cup Pumpkin Puree
- 2 cups Sharp or Mild Cheddar Cheese, shredded
- 1 cup Mozzarella Cheese, shredded
- 4 tablespoons Butter
- 3 cups Milk
- 1/4 cup Flour
- 1 teaspoon Salt
- 1/2 teaspoon Pepper
- 1/4 teaspoon Nutmeg
- 1/2 teaspoon Paprika
Instructions
- Prepare your pasta by boiling salted water and cooking until al dente. Drain and reserve pasta water.
- Make the creamy sauce by melting butter and whisking in flour to create a roux.
- Whisk in the milk and simmer until slightly thickened.
- Add the pumpkin puree and spices, mixing until combined.
- Remove from heat and fold in the cheeses until melted.
- Combine pasta with the cheese sauce until fully coated.
- Serve in a dish and enjoy, optionally baking for a cheesy crust.
Notes
Try adding a dash of cayenne for a spicy kick or sautéed vegetables for extra nutrition.
Nutrition
- Serving Size: 1 serving
- Calories: 500
- Sugar: 5g
- Sodium: 600mg
- Fat: 25g
- Saturated Fat: 12g
- Unsaturated Fat: 8g
- Trans Fat: 0g
- Carbohydrates: 60g
- Fiber: 3g
- Protein: 20g
- Cholesterol: 75mg
Keywords: pumpkin, mac and cheese, comfort food, fall recipes, vegetarian
Beef Stroganoff
Beef Stroganoff: A Comforting Classic Made Easy
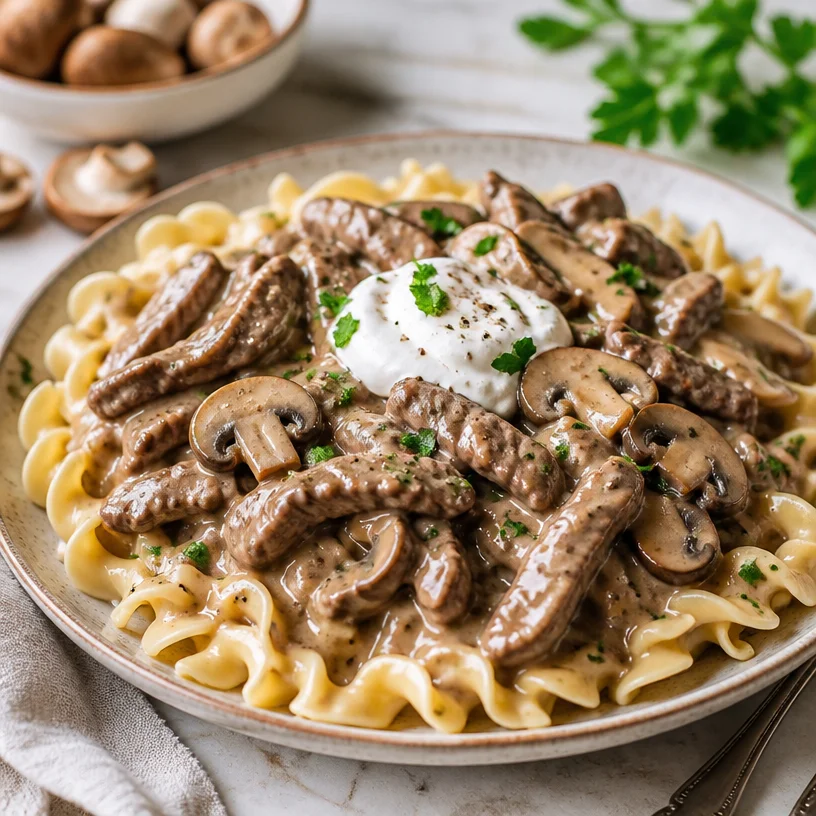
Welcome to my cozy corner of the culinary world! Today, we’re diving into a classic dish that’s not only soul-warming but also incredibly satisfying—Beef Stroganoff. With its tender beef strips, earthy mushrooms, and creamy sauce over a nest of egg noodles, this dish is a celebration of flavors and comfort. It’s a one-pot wonder that’s perfect for busy weeknights or those weekends when you just want to indulge without the fuss.
If you’ve never made Beef Stroganoff before, don’t worry! I’ll walk you through the steps in a fun, friendly way—no culinary degree required. This dish is all about simple ingredients and straightforward techniques, so it’ll feel like a breeze whether you’re a kitchen novice or a seasoned chef. Let’s get started!
A Little Kitchen Memory
Every time I cook Beef Stroganoff, I find myself transported back to my childhood kitchen, where my mom would whip up this dish after a long day. The smell of sizzling beef and sautéing mushrooms would fill the air, creating an atmosphere of warmth and love. We would gather around the table, spoons clanking against bowls of egg noodles, eagerly anticipating our first bite.
That creamy, savory sauce was like a warm hug after a chilly day. I can still hear those giggles and light-hearted banter, and it reminds me of how food can bring us together. Now, I love to make this recipe for my friends and family, keeping that comforting tradition alive. It’s not just about feeding our bellies; it’s about creating lasting memories and connections. So let’s roll up our sleeves and create our very own Beef Stroganoff magic!
Ingredients You’ll Need
Here’s your grocery list to gather all the goodies you’ll need for this delightful dish:
-
Beef Strips: Look for tender cuts like sirloin or tenderloin for the best results. If you’re aiming for a more budget-friendly option, flank steak works well too. Just slice it thinly against the grain for tenderness.
-
Mushrooms: Cremini or button mushrooms are classic choices. If you’re feeling adventurous, try shiitake for a deeper flavor. Fresh is best, but if you’re in a pinch, canned mushrooms will do in a rush!
-
Sour Cream: This adds that creamy richness to our sauce. For a lighter version, Greek yogurt can stand in seamlessly—it’s tangy and luscious!
-
Egg Noodles: These are traditionally used in Beef Stroganoff, but feel free to swap them out for whole wheat or gluten-free pasta if that’s your jam. Or even try some dreamy spiralized zucchini for a low-carb alternative!
Step-by-Step Instructions
Now, let’s dive into cooking! Follow these easy-peasy steps to bring your Beef Stroganoff to life:
-
Sear the Beef:
In a large skillet, heat a tablespoon of olive oil over medium-high heat. Once shimmering, add your thinly sliced beef strips in a single layer. Don’t overcrowd the pan; work in batches if needed. Let them sear for about 3-4 minutes without stirring—they should get a lovely golden-brown crust. This step is crucial for flavor! -
Remove and Rest:
Once beautifully browned, transfer your beef strips to a plate and let them rest. This ensures they stay juicy while you work on the sauce. -
Sauté the Mushrooms:
In the same skillet, toss in another tablespoon of oil if necessary and add your sliced mushrooms. Sauté for about 5 minutes until they’re browned and tender. The mushrooms will soak up all those delicious beef drippings—yay for flavor! -
Make the Sauce:
Reduce the heat to medium and add a finely chopped onion (if you want to include it) to the mushrooms. Sauté until translucent, about 3 minutes. Next, sprinkle in 2 tablespoons of flour and stir well to coat the mushrooms, cooking for 1 minute. This will help thicken your sauce later! -
Add Broth and Simmer:
Gradually whisk in 2 cups of beef broth, scraping any brown bits off the bottom of the pan (that’s where the magic is!). Bring it to a simmer and let it cook for about 5 minutes until it thickens slightly. -
Finish with Sour Cream:
Remove the skillet from the heat and stir in your sour cream (or Greek yogurt). This is where the creamy goodness happens! Mix well, and then add the cooked beef strips back into the sauce. Toss to coat everything evenly and let it warm through for an additional 2-3 minutes. -
Cook the Noodles:
Meanwhile, cook your egg noodles according to package instructions. Drain and set aside. -
Combine and Serve:
To plate it up, add a generous scoop of egg noodles to a bowl and top with that luscious Beef Stroganoff sauce. Garnish with fresh parsley for a pop of color, and voila! Dinner is served!
Serving Suggestions
For a delightful presentation, serve your Beef Stroganoff in deep bowls to highlight that creamy sauce. A sprinkle of fresh parsley not only adds a lovely color contrast but also a hint of freshness. If you’re feeling extra fancy, a dollop of additional sour cream right on top is always a welcome addition. Pair this meal with a crunch side salad or some steamed green beans for a balanced plate.
Recipe Variations
Let’s get creative! Here are some fun twists you can try with your Beef Stroganoff:
- Herbed Stroganoff: Add a tablespoon of Dijon mustard and some fresh thyme or dill into the sauce for a herby twist.
- Mushroom Medley: Mix up your mushrooms! Try a combination of shiitake, portobello, and oyster mushrooms for an earthy depth.
- Spicy Kick: For those who love heat, add a pinch of cayenne pepper or a splash of hot sauce to the sauce.
- Creamy Vegan Option: Replace beef with mushrooms or tofu, use full-fat coconut milk instead of sour cream, and serve it over rice for a plant-based version.
- Cheesy Touch: Stir in a handful of grated Parmesan cheese before serving for an extra creamy richness.
Chef’s Notes
Over the years, my Beef Stroganoff recipe has gone through quite the evolution—from the traditional Russian-style to a more modern interpretation with healthier swaps. I’ve learned that cooking is all about flexibility—don’t be afraid to make it your own! One time, I tried adding a splash of red wine to the sauce, and let me tell you, it was a game changer. So, always be open to experimenting in the kitchen!
FAQs and Troubleshooting
1. Why is my sauce too thin?
If your sauce doesn’t thicken as you’d like, try simmering it a bit longer or stir in a cornstarch slurry (1 tablespoon cornstarch mixed with 2 tablespoons cold water) to thicken it up.
2. Can I make this ahead of time?
Absolutely! You can make the stroganoff and keep it in the fridge for up to 3 days. Just reheat gently on the stove, adding a splash of broth to loosen it if necessary.
3. What can I substitute for egg noodles?
If you’re avoiding gluten, try using rice noodles or zucchini noodles for a lighter option. They’ll still soak up that delicious sauce!
4. How can I make this dish dairy-free?
You can substitute the sour cream with a dairy-free alternative like cashew cream or coconut yogurt. Just make sure to adjust the seasoning to balance the flavors!
Nutritional Info
While specific nutritional content can vary, a standard serving of Beef Stroganoff usually contains about:
- Calories: 600
- Protein: 30g
- Carbohydrates: 40g
- Fat: 30g
Remember, it’s all about balance—enjoying your meals while also nourishing your body!
Now that you’re equipped to make this delicious Beef Stroganoff, I can’t wait for you to try it out! Gather your loved ones around the table, create those precious memories, and enjoy every comforting bite. Happy cooking, friends!
PrintBeef Stroganoff
A comforting classic dish made with tender beef strips, earthy mushrooms, and a creamy sauce over egg noodles.
- Prep Time: 15 minutes
- Cook Time: 30 minutes
- Total Time: 45 minutes
- Yield: 4 servings 1x
- Category: Main Course
- Method: Stovetop
- Cuisine: Russian
- Diet: None
Ingredients
- 1 pound beef strips (sirloin or tenderloin)
- 8 ounces cremini or button mushrooms, sliced
- 1 cup sour cream
- 12 ounces egg noodles
- 2 tablespoons olive oil
- 1 onion, finely chopped (optional)
- 2 tablespoons flour
- 2 cups beef broth
- Fresh parsley, for garnish
Instructions
- Sear the beef: Heat a tablespoon of olive oil in a large skillet over medium-high heat. Add thinly sliced beef strips in a single layer and let sear for about 3-4 minutes without stirring.
- Remove the beef and transfer to a plate, allowing it to rest.
- Sauté the mushrooms: In the same skillet, add another tablespoon of oil if needed and add sliced mushrooms. Sauté for about 5 minutes until browned.
- Make the sauce: Reduce heat to medium, add chopped onion, and sauté until translucent. Sprinkle in flour, stirring well for 1 minute.
- Add broth gradually while scraping the bottom of the pan. Bring to a simmer and cook for about 5 minutes until slightly thickened.
- Finish with sour cream: Remove from heat and stir in sour cream. Add beef strips back and toss to coat, warming through for an additional 2-3 minutes.
- Cook the noodles according to package instructions, drain and set aside.
- Combine and serve: Plate noodles and top with Beef Stroganoff sauce. Garnish with fresh parsley.
Notes
For a lighter version, you can substitute Greek yogurt for sour cream. This dish can also be made ahead and stored in the fridge for up to 3 days.
Nutrition
- Serving Size: 1 serving
- Calories: 600
- Sugar: 5g
- Sodium: 800mg
- Fat: 30g
- Saturated Fat: 12g
- Unsaturated Fat: 8g
- Trans Fat: 0g
- Carbohydrates: 40g
- Fiber: 2g
- Protein: 30g
- Cholesterol: 90mg
Keywords: Beef Stroganoff, Comfort Food, Easy Dinner, One-Pot Meal, Quick Recipe
Creamy Mushroom Chicken Skillet: 20-Minute Weeknight Comfort
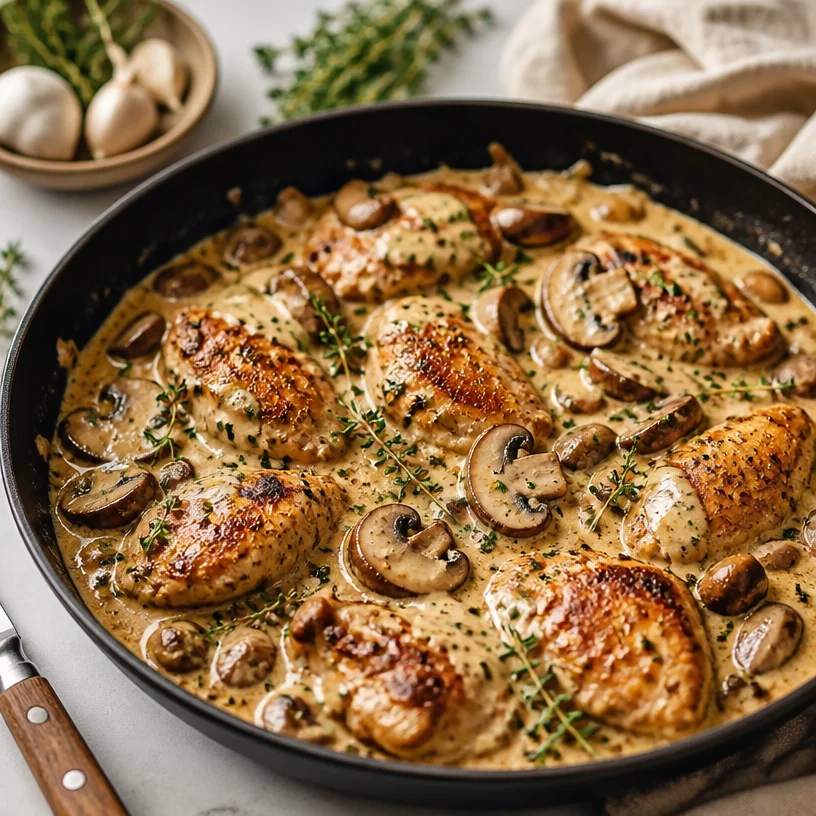
Creamy Mushroom Chicken: A Delightful Comfort Food Classic
Welcome back, food lovers! Today, we’re diving into a dish that embodies warmth, comfort, and soul – Creamy Mushroom Chicken. This recipe has become a beloved staple in my kitchen, and I can’t wait to share it with you! Imagine a cozy evening, the aromas of garlic and herbs wafting through your home, and a plate of succulent chicken bathed in a luscious, creamy mushroom sauce. Sounds dreamy, right? That’s exactly what we’ll create today.
This dish is not just about feeding our bodies; it’s about filling our hearts with joy! The beauty of Creamy Mushroom Chicken lies in its simplicity. It’s made with just a handful of ingredients that come together in perfect harmony. Whether you’re winding down after a long day, hosting a gathering, or simply indulging in some self-care with good food, this recipe checks all the boxes. So, roll up those sleeves and let’s get cooking!
A Taste of Nostalgia
Let me take you on a little journey down memory lane. Growing up, my family had a tradition where Sunday dinners were a big deal. We’d gather around the table, the scents of various dishes dancing in the air, combining to create a sensory feast. One of my favorites was my grandmother’s chicken in a creamy mushroom sauce. She had a way of making even the simplest of meals feel special.
I remember watching her in the kitchen, her apron dusted with flour, as she sautéed mushrooms until they were the perfect shade of golden brown, filling the air with an intoxicating aroma. The sound of sizzling chicken joined in, and I couldn’t resist stealing tastes right from the pan. The love and care she poured into each meal taught me that food isn’t just sustenance; it’s an experience and a way to bring people together.
Now, I’ve taken those cherished memories and put my spin on this classic. Let’s recreate that warmth in your kitchen with this indulgent yet approachable Creamy Mushroom Chicken!
Ingredients
Here’s everything you’ll need to make this delicious dish:
-
Chicken (boneless, skinless breasts or thighs)
- The star of the dish! I often opt for thighs for their juiciness, but breasts work beautifully too. If you prefer a leaner option, go for chicken breasts.
-
Mushrooms (cremini or button mushrooms)
- These earthy gems add depth and flavor. Cremini mushrooms have a bolder taste, while button mushrooms are milder. You can substitute them with shiitake or portobello if you’re feeling adventurous.
-
Heavy cream
- This is what makes the sauce creamy and luxurious! If you’re looking for lighter options, you can use half-and-half or a non-dairy cream substitute like coconut cream, but note that it will alter the flavor.
-
Garlic (fresh, minced)
- Garlic infuses everything with incredible flavor. Fresh is best for its potency! You can use garlic powder as a shortcut, but fresh garlic adds a magical nutty quality when cooked.
-
Thyme (fresh or dried)
- Thyme pairs beautifully with chicken and mushrooms, adding a herbal note to the dish. If you don’t have fresh thyme, use about a third of the amount if using dried as it’s more concentrated.
Step-by-Step Instructions
Alright, let’s get down to the nitty-gritty of making this creamy masterpiece!
-
Prepare the Chicken
Start by seasoning your chicken pieces with salt and pepper. This simple step is crucial—it enhances the flavor tremendously! Heat 1 tablespoon of olive oil in a large skillet over medium-high heat. Once hot, carefully place the chicken in the pan, ensuring not to overcrowd it. Let it sear undisturbed for about 5-7 minutes until it’s golden brown. Flip it and do the same on the other side. This creates that delicious crust we all crave! -
Cook the Chicken Thoroughly
Once both sides are seared, check if the chicken is cooked through (165°F for safety!). If it is, remove it from the skillet and set it aside on a plate; if not, let it cook for a few more minutes. Quick tip: Cover the skillet with a lid to keep the heat in—it helps cook it evenly! -
Add the Aromatics
In the same skillet (don’t wash it!), add another tablespoon of olive oil if necessary and toss in the minced garlic. Sauté it for about 30 seconds until fragrant—watch it closely, as garlic can burn quickly! -
Sauté the Mushrooms
Add your sliced mushrooms to the pan. You’ll hear a sizzle, and that’s the sound of flavor! Allow them to cook for about 5-7 minutes until nicely browned and tender. Stir them occasionally, and don’t rush this step; browning the mushrooms builds so much more flavor. -
Create the Sauce
Reduce the heat to medium and pour in the heavy cream, scraping any flavorful bits from the bottom of the skillet. Add in your thyme and bring the mixture to a gentle simmer. Let it bubble away for about 3-5 minutes, stirring occasionally, until the sauce thickens slightly. -
Combine Chicken and Sauce
Return the cooked chicken to the skillet, allowing it to soak up the creamy goodness. Let it simmer gently in the sauce for another 3-5 minutes, making sure the chicken is heated through and fully coated in that dreamy sauce. -
Final Touches
Taste the sauce and adjust the seasoning if needed. If you like a bit of zing, a squeeze of lemon juice can bring all the flavors to life! -
Serve
Time to plate up! Serve your Creamy Mushroom Chicken over rice, pasta, or with a side of crusty bread to soak up that amazing sauce.
Serving Suggestions
To serve, you can plate the chicken on a bed of fluffy rice or buttered noodles. Drizzle that rich, creamy sauce over the top and garnish with fresh thyme or parsley for a pop of color and freshness. If you want to elevate your dish, a sprinkle of freshly grated Parmesan cheese on top adds a wonderful umami note. Pair your dish with a seasonal salad for a complete and satisfying meal!
Recipe Variations
Let’s get creative! Here are a few ways to customize this dish to your liking:
-
Spinach & Mushroom Combo: For a boost of nutrition, add a couple of handfuls of fresh spinach to the sauce right before serving. It wilts beautifully and adds a lovely pop of color.
-
Different Protein: Swap out chicken for pork chops or even shrimp for a tasty twist.
-
Herb Infusion: Experiment with herbs! Rosemary or sage can impart a different flavor profile if you’re feeling adventurous.
-
Mushroom Medley: Use a variety of mushrooms like oyster, shiitake, or even dried mushrooms rehydrated in warm water for added depth.
-
Make it Spicy: Add a dash of red pepper flakes for a little heat!
Chef’s Notes
This recipe has gone through its own evolution! Initially, I made it using cream of mushroom soup when I was short on time. While that was convenient, it couldn’t quite capture the homemade essence I remember from Grandma’s kitchen. Over the years, I experimented with fresh ingredients and incorporated my love for vibrant flavors, and now, I couldn’t be happier with this version! It’s comforting, satisfying, and sure to impress.
Cooking is not just about the final dish; it’s also about the joy of creating. So don’t stress! Enjoy the process and let your kitchen be a place of happiness and adventure.
FAQs and Troubleshooting
-
Why is my sauce too thin? If your sauce isn’t thickening, let it simmer for a few extra minutes. You can also whisk in a little cornstarch mixed with water as a thickener!
-
Can I make this dish ahead of time? Absolutely! You can prepare the chicken and sauce in advance and reheat when ready to serve. Just be careful not to overcook the chicken when reheating.
-
What if I don’t have thyme? If you don’t have thyme on hand, you can use Italian seasoning or even a bit of oregano. Each herb brings its unique flavor, so be creative!
-
How do I know when the chicken is done? The best way to check is with a meat thermometer—it should read 165°F in the thickest part of the chicken. If you don’t have one, cut into the thickest part, and ensure it’s no longer pink inside.
Nutritional Info
While this recipe is not only delicious but also comforting, it’s good to note that a serving contains roughly 350 calories, mostly from proteins and fats provided by the cream and chicken. It’s hearty yet flexible enough to adapt depending on your dietary needs. Remember, a meal is about balance!
And there you have it! A joyful, flavorsome journey to Creamy Mushroom Chicken that’s sure to become a treasured addition to your recipe collection. With simple steps and everyday ingredients, you can create a dish that brings smiles and warm feelings to your table. Time to get cooking, and let’s make some delicious memories together! Remember to share your creations with me—I can’t wait to see how yours turn out! Happy cooking!
PrintCreamy Mushroom Chicken

A comforting dish featuring succulent chicken in a rich and creamy mushroom sauce, perfect for family gatherings or cozy nights in.
- Prep Time: 15 minutes
- Cook Time: 30 minutes
- Total Time: 45 minutes
- Yield: 4 servings
- Category: Main Course
- Method: Sautéing
- Cuisine: American
- Diet: None
Ingredients
- Chicken (boneless, skinless breasts or thighs)
- Mushrooms (cremini or button mushrooms)
- Heavy cream
- Garlic (fresh, minced)
- Thyme (fresh or dried)
- Salt and pepper
- Olive oil
Instructions
- Prepare the chicken by seasoning with salt and pepper and heating olive oil in a skillet.
- Cook the chicken until golden brown, about 5-7 minutes on each side.
- Add minced garlic to the skillet and sauté for 30 seconds.
- Sauté the mushrooms, cooking until browned and tender, about 5-7 minutes.
- Create the sauce by adding heavy cream and thyme, and simmering for 3-5 minutes.
- Combine the chicken with the sauce, allowing it to simmer together for an additional 3-5 minutes.
- Serve over rice, pasta, or alongside crusty bread.
Notes
For a lighter option, substitute heavy cream with half-and-half or coconut cream, though it will change the flavor. Adding spinach or different herbs can enhance the recipe.
Nutrition
- Serving Size: 1 serving
- Calories: 350
- Sugar: 5g
- Sodium: 400mg
- Fat: 12g
- Saturated Fat: 4g
- Unsaturated Fat: 6g
- Trans Fat: 0g
- Carbohydrates: 45g
- Fiber: 3g
- Protein: 15g
- Cholesterol: 30mg
Keywords: creamy chicken, mushroom sauce, comfort food, family dinner, easy recipe
One-Pan Maple-Dijon Salmon: Weeknight Dinner in 20 Minutes
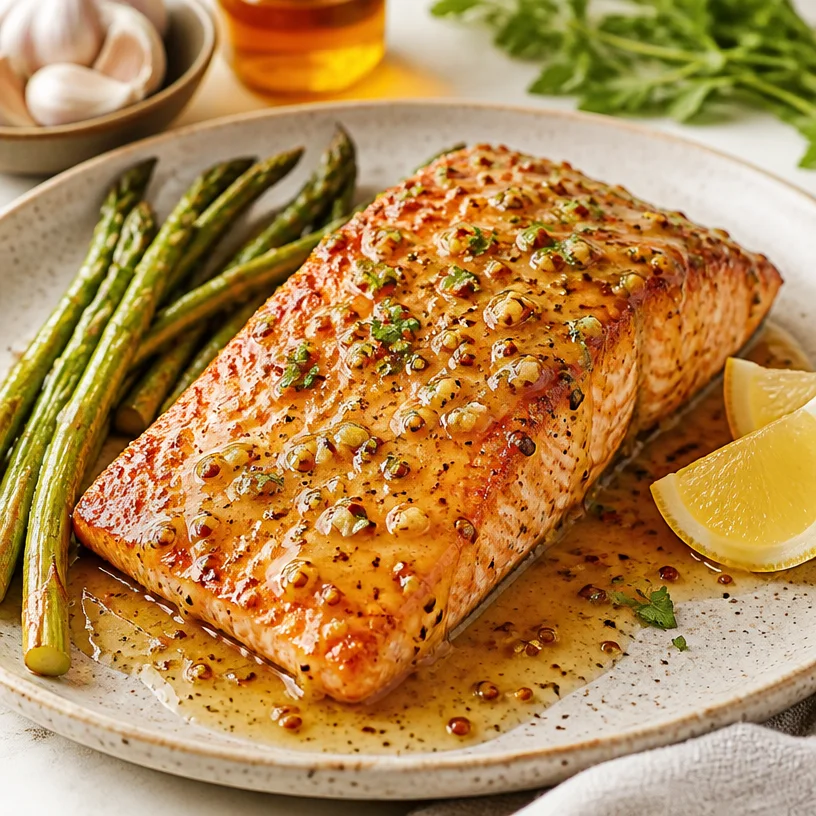
Maple Dijon Salmon: A Flavor-Packed Delight
Welcome to the vibrant world of Clean Plate Cravings, where I am excited to share with you one of my absolute favorites: Maple Dijon Salmon! If you’re anything like me, you crave meals that are not only delicious but make you feel good about what you’re eating. In this blog post, I’ll walk you through creating a sensational salmon dish that will elevate your weeknight dinners and impress your friends at gatherings.
Imagine succulent salmon fillets kissed by the sweetness of maple syrup and the zing of Dijon mustard, all finished with a hint of garlic. This dish is a perfect marriage of flavors that combines simplicity and sophistication. Whether you’re a seasoned home chef or just starting in the kitchen, trust me, this dish will have you feeling like a pro in no time.
What I love most about Maple Dijon Salmon is its versatility and ease. You can whip it up for a casual family dinner or serve it as a showstopper for your weekend guests. Pair it with a fresh side salad or steamed veggies, and you’ve got a meal that’s both hearty and healthful. Plus, it only takes about 30 minutes from start to finish—what’s not to love?
Let’s dive into this culinary adventure, where every step is infused with love and flavor. Prepare to wow your taste buds and make them shout for joy!
A Nostalgic Kitchen Adventure
One of my fondest memories in the kitchen revolves around my great-aunt Martha. She was a culinary wizard who made cooking seem like a magical art form. Growing up, I would often find myself perched on a stool, watching her concoct delightful dishes that danced with flavor. One of her favorites was a glaze she made for her salmon—a sweet and tangy number that always drew compliments from family and friends.
As I learned more about cooking, I tried to recreate her delicious meals. I wanted to capture that feeling of warmth and joy that came from sharing good food. After some experimentation in my kitchen, I stumbled upon the idea of combining maple syrup with Dijon mustard to create a glaze that not only honors Aunt Martha’s magic but adds my twist. The first time I made it for my family, they were blown away by how well the flavors blended. It reminded me of those joyful days with Aunt Martha, and for me, that’s the heart of cooking—bringing people together with deliciousness.
Ingredients
Let’s gather our ingredients! Here’s what you’ll need for this dazzling Maple Dijon Salmon:
-
Salmon Fillets: The star of this dish! Fresh, wild-caught salmon is ideal for flavor and health benefits. If you can’t find salmon, trout or any fatty fish can be excellent substitutes, offering similar taste and texture.
-
Maple Syrup: This natural sweetener not only adds a delightful sweetness but also complements the fish beautifully. If you don’t have maple syrup, honey or agave syrup could work in a pinch, though the flavor will vary slightly.
-
Dijon Mustard: This tangy condiment elevates the dish with its distinct kick. For a milder taste, you can swap in yellow mustard, or for something a bit spicier, whole grain mustard would add a fun texture.
-
Garlic: Fresh minced garlic gives this glaze its incredible aroma and depth. If you’re in a hurry, garlic powder can be a decent alternative, though fresh is always best!
These ingredients come together in a magical way, bringing health benefits and flavor in every bite. Now that we have our gear, let’s get to cooking!
Step-by-Step Instructions
-
Preheat the Oven: Start by preheating your oven to 400°F (200°C). A hot oven is essential for achieving that perfect caramelization on your salmon.
-
Prepare the Glaze: In a small mixing bowl, combine ¼ cup of maple syrup, 2 tablespoons of Dijon mustard, and 2 cloves of minced garlic. Whisk them together until smooth. Not only does this create a glossy glaze, but the whisking also infuses air into it, making it light and fluffy. A little chef tip: If you want a hint of spice, add a pinch of cayenne pepper!
-
Prepare the Salmon: Place your salmon fillets skin-side down on a lined baking sheet. Make sure to leave some space between each fillet for even cooking. Season the fillets lightly with salt and pepper to enhance the natural flavors of the fish.
-
Add the Glaze: Spoon the delicious maple Dijon mixture evenly over each salmon fillet. Don’t be shy—get that glaze on there! Use a pastry brush if you want a more polished finish.
-
Bake to Perfection: Slide the baking sheet into the oven and bake for about 15-20 minutes, or until the salmon flakes easily with a fork. You’ll know it’s ready when the edges turn golden and the glaze gets a bit bubbly. Chef’s hack: If you like a crispy top, broil the salmon for the last 2-3 minutes of cooking!
-
Let It Rest: Once the salmon is out of the oven, let it sit for a couple of minutes. This helps the juices redistribute, resulting in a moist and tender bite.
-
Ready to Serve: You can garnish with fresh herbs like parsley or chives for an extra pop of color and flavor. And voilà! You have a stunning Maple Dijon Salmon that’s ready to impress!
Serving Suggestions
To plate your Maple Dijon Salmon, serve it on a vibrant dinner plate with a fresh side salad or steamed vegetables. A sprinkle of sesame seeds or a squeeze of fresh lemon juice can brighten the dish even more. If you’re feeling adventurous, serve it alongside a creamy quinoa or warm brown rice to soak up all that fantastic glaze. Trust me; your guests will be clamoring for seconds!
Recipe Variations
Here are a few creative twists you can try with this recipe:
-
Spicy Maple Dijon: Add a teaspoon of sriracha or a dash of hot sauce to the glaze mix for a zesty kick.
-
Herby Delight: Fold in fresh herbs like dill or thyme into the glaze for an earthier flavor profile.
-
Citrus Twist: Squeeze some fresh lemon or orange juice into the glaze for a zesty flavor that pairs wonderfully with salmon.
-
Sweet Potato Side: Serve with roasted sweet potatoes drizzled with olive oil and a sprinkle of cinnamon for a comforting side.
-
Wrap it Up: Try this glaze on grilled chicken or tofu for an equally delicious meal that caters to different palates.
Chef’s Notes
One thing I love about this recipe is its evolution. Early on, I used way too much syrup, and it turned my dish into a sticky mess. I learned that balance is key! The beauty of cooking is that it allows you to experiment and discover what works best for you. As I’ve played around with the ratios, I’ve learned to appreciate the unique flavor profile created by each ingredient. It’s those small tweaks that lead to magic in the kitchen.
Every time I make this dish, I’m transported back to those cherished moments with Aunt Martha, reminding me that food is more than just sustenance—it’s an expression of love.
FAQs and Troubleshooting
1. How can I tell if the salmon is done?
You’ll know the salmon is cooked when it flakes easily with a fork and the flesh turns from translucent to opaque. Use a meat thermometer for precision—it should read 145°F (63°C).
2. What if I overcooked the salmon?
If your salmon is dry, try adding a squeeze of lemon or a drizzle of olive oil just before serving to help moisten the fish.
3. Can I use frozen salmon?
Absolutely! Just be sure to thaw it completely in the refrigerator before cooking to ensure even cooking.
4. How can I store leftovers?
Store leftover salmon in an airtight container in the refrigerator for up to 2 days. Reheat gently in the oven or microwave. To keep it moist, add a splash of water before reheating.
Nutritional Info
- Serving Size: 1 fillet
- Calories: Approximately 350
- Protein: 30g
- Carbohydrates: 15g
- Fat: 20g
- Fiber: 0g
- Sugars: 12g
Whether you’re whipping this up for a quick weeknight dinner or impressing friends at a weekend dinner party, this Maple Dijon Salmon is sure to be a hit. Remember, cooking is about enjoying the process and indulging your taste buds. So grab those ingredients, put on your favorite tunes, and get ready to create something magical in your kitchen! Happy cooking, my friends!
PrintMaple Dijon Salmon
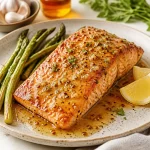
A succulent salmon dish with a sweet maple glaze and a hint of Dijon mustard, perfect for any dinner occasion.
- Prep Time: 10 minutes
- Cook Time: 20 minutes
- Total Time: 30 minutes
- Yield: 4 servings 1x
- Category: Main Course
- Method: Baking
- Cuisine: American
- Diet: Pescatarian
Ingredients
- 4 Salmon fillets
- ¼ cup Maple syrup
- 2 tablespoons Dijon mustard
- 2 cloves Garlic, minced
- Salt and pepper, to taste
Instructions
- Preheat your oven to 400°F (200°C).
- Combine maple syrup, Dijon mustard, and minced garlic in a small bowl.
- Place salmon fillets skin-side down on a lined baking sheet.
- Season lightly with salt and pepper.
- Spoon the maple Dijon mixture over each salmon fillet.
- Bake for 15-20 minutes, until the salmon flakes easily with a fork.
- Let it rest for a couple of minutes before serving.
- Garnish with fresh herbs if desired and serve.
Notes
You can substitute salmon with trout or other fatty fish. Experiment with adding spices or fresh herbs for a twist on flavors.
Nutrition
- Serving Size: 1 fillet
- Calories: 350
- Sugar: 12g
- Sodium: 400mg
- Fat: 20g
- Saturated Fat: 3g
- Unsaturated Fat: 14g
- Trans Fat: 0g
- Carbohydrates: 15g
- Fiber: 0g
- Protein: 30g
- Cholesterol: 60mg
Keywords: salmon, maple glaze, Dijon mustard, quick dinner, healthy recipes
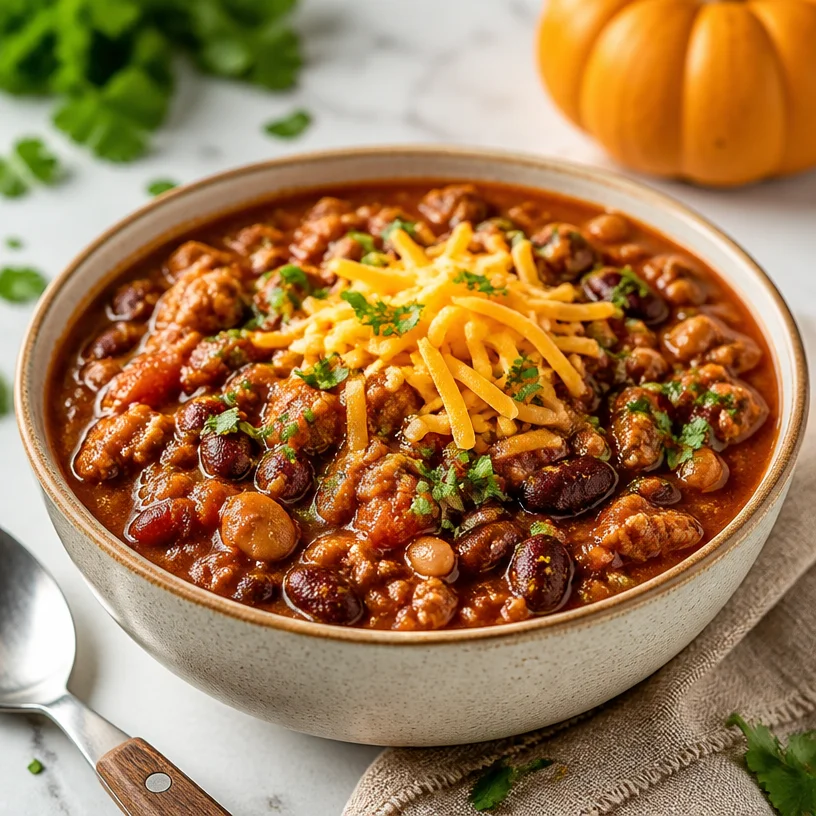
Turkey Chili
Heartwarming Turkey Chili: A Flavorful Journey to Wellness
Welcome, food lovers! Today, we’re diving into one of my all-time favorite comfort foods—Turkey Chili. This dish isn’t just a staple in my kitchen; it’s a heartwarming recipe that has a story to tell. Picture cozy evenings, the aroma of spices wafting through the air, and laughter shared over a hearty bowl of chili. If you’re craving something wholesome yet bursting with flavor, you’ve come to the right spot!
So why Turkey Chili, you ask? Well, let me take you back to my childhood, where chili was synonymous with family gatherings on crisp autumn evenings. We’d gather around a cozy kitchen table, our laughter mixing with the sounds of bubbling pots and sizzling pans. My mom was the queen of chili, and she had this magical ability to turn simple ingredients into a warm hug for the soul. As a kid, I remember sitting on the counter, eagerly waiting for her to finish so we could dig in. The best part? She always let me add a bit of whatever toppings I fancied—cheese, sour cream, or jalapeños—and that’s when my love for cooking really began.
Fast forward to today, I’ve put my own spin on my mother’s classic recipe with the addition of some nourishing ingredients like pumpkin puree. Trust me, it not only amps up the flavor but also sneaks in a healthy dose of vitamins. This Turkey Chili is a delightful mix of ground turkey, beans, tomatoes, and pumpkin puree—all simmered together to create a delicious pot of happiness.
Now, enough chit-chat! Let’s get cooking so you can share this nostalgic and vibrant dish with your loved ones!
Ingredients
Let’s gather our stars for today’s performance! Here’s what you’ll need for this scrumptious Turkey Chili:
-
Ground Turkey: This lean protein is a fantastic choice to keep the dish light and nutritious. You can substitute it with ground chicken or even plant-based crumbles if you prefer a meat-free option.
-
Beans (Kidney or Black Beans): Beans add not just protein but also fiber, making this chili hearty and filling. Canned beans work well for convenience—just remember to rinse them! If you want a twist, you might try garbanzo beans instead.
-
Canned Tomatoes: You can use diced tomatoes, crushed tomatoes, or even a mix of both for a lovely texture. Keep an eye out for low-sodium options to keep it healthier! For a unique flavor boost, consider using fire-roasted tomatoes.
-
Pumpkin Puree: This secret ingredient adds creaminess and depth of flavor while providing vitamins A and C. If you don’t have pumpkin puree on hand, you can use butternut squash puree as a substitute.
-
Onion: For that aromatic base, chopped onions are key! You can swap in shallots or even leeks if you want a slightly sweeter flavor.
-
Garlic: Fresh garlic elevates the taste—there’s nothing like the fragrance of sautéing garlic! Garlic powder can be used in a pinch, but fresh is best.
-
Chili Powder: This seasoning brings a warm heat to the dish. Adjust the quantity based on how spicy you want it! You can mix in cayenne or paprika for a kick, or even use a chili seasoning blend.
-
Cumin: A delightful earthiness comes from cumin. Ground cumin works perfectly here, but if you have whole seeds, feel free to toast and grind them for a more intense flavor.
-
Salt and Pepper: To taste! Always adjust seasoning at the end for the perfect balance.
Step-by-Step Instructions
Now we’re ready to bring these ingredients together to create your delicious Turkey Chili!
Step 1: Sauté the Aromatics
In a large pot or dutch oven over medium heat, drizzle a bit of olive oil. Once warmed, toss in your chopped onions and sauté until they’re soft and translucent, about 3-5 minutes. Add minced garlic and stir it up for another minute, until everything’s fragrant. Chef’s Tip: Make sure not to burn the garlic—it can turn bitter.
Step 2: Cook the Turkey
Next, add in the ground turkey. Use a wooden spoon to break it down into smaller pieces while it cooks. Sauté until the meat is browned and no longer pink, about 6-8 minutes. Don’t rush this step; browning adds so much flavor! Pro Insight: If you notice the mixture becoming too dry, a splash of chicken broth will save the day.
Step 3: Spice It Up
Sprinkle in the chili powder, cumin, salt, and pepper, stirring well to evenly coat the turkey and onions. Let it cook for about 2 minutes to allow the spices to bloom and release their aroma. Chef Hack: A touch of cinnamon can bring a lovely depth to your chili if you’re feeling adventurous!
Step 4: Mix in the Good Stuff
Now it’s time for the showstoppers! Pour in your diced tomatoes, beans, and pumpkin puree. Stir everything together until it’s well combined. Bring the mixture to a gentle simmer. Tip: If you want a bit more liquid, you can add a cup of vegetable or chicken broth at this stage.
Step 5: Let It Simmer
Reduce the heat to low, cover, and let it simmer for at least 20-30 minutes. This allows all those flavors to mingle and deepen. If you have more time, let it simmer on low for an hour or longer—trust me, it’s worth the wait! Helpful Hint: Stir occasionally to keep things from sticking to the bottom.
Step 6: Taste and Adjust
After your chili has simmered, give it a taste! Adjust the seasoning as needed—add more salt, pepper, or chili powder based on your preference. Personal Note: My mom used to always say, “A little more salt can make it sing!”
Step 7: Serve It Up
Ladle your rich Turkey Chili into bowls. The colors should be vibrant and the aromas inviting.
Serving Suggestions
You can’t go wrong with classic toppings! Garnish your chili with freshly chopped cilantro, a dollop of sour cream or Greek yogurt, and a sprinkle of shredded cheese. Want a little extra kick? Slice up some fresh jalapeños or drizzle on hot sauce! Serve with warm, crusty bread or over a bed of rice for a complete meal.
Recipe Variations
-
Spicy Turkey Chili: Add some diced jalapeños or a pinch of cayenne pepper for a fiery kick.
-
Veggie-Packed: Toss in diced bell peppers or zucchini during the sauté phase for an extra dose of veggies.
-
Sweet and Savory Twist: Stir in a tablespoon of brown sugar or maple syrup for a sweet contrast to the spices.
-
Chili Mac: Cook some pasta and mix it into the chili for a delicious, hearty dish.
-
Southwestern Style: Include corn and serve it with avocado slices for a refreshing touch.
Chef’s Notes
Chili has come a long way since those childhood days of sitting at the counter. While my mom’s recipe was perfect in its simplicity, I’ve enjoyed experimenting with adding ingredients that elevate it and keep it nourishing. I remember the first time I decided to throw pumpkin puree into the mix—it was a game changer! Now, every time I make it, I’m reminded of those delicious family dinners filled with love and laughter.
Sometimes, I’ll throw on a fun podcast while I cook, letting the kitchen fill with laughter in a different way. Cooking should always be more enjoyable than stressful, so take it easy and have fun!
FAQs and Troubleshooting
Q: My chili turned out too watery. What should I do?
A: No worries! If your chili is too runny, let it simmer uncovered for a while to reduce the liquid. You can also add a thickener, like masa harina (corn flour) or even a little cornstarch mixed with water.
Q: Can I make this chili in advance?
A: Absolutely! In fact, chili often tastes even better the next day as the flavors continue to meld. Store it in an airtight container in the fridge for up to 3 days, or freeze it for up to a month.
Q: How can I make this vegetarian?
A: Swap the ground turkey for lentils or your favorite plant-based meat substitute. You can also just load up on more beans and veggies for a hearty meal.
Q: Can I use fresh tomatoes instead of canned?
A: Yes! Just peel and chop fresh tomatoes—about 4-5 medium tomatoes should suffice. Keep in mind that fresh tomatoes may not be as concentrated in flavor as canned.
Nutritional Info
Per serving (1 cup):
- Calories: 320
- Protein: 24g
- Carbohydrates: 35g
- Fiber: 10g
- Fat: 10g
Now that you’re armed with this delightful Turkey Chili recipe, it’s time to get cooking! I can’t wait for you to experience the warmth and flavor of this dish. Whether it’s a weeknight dinner or a cozy weekend gathering, this Turkey Chili is bound to steal the show. Happy cooking, and remember—keep it fresh, simple, and seriously delicious!
PrintHeartwarming Turkey Chili

A heartwarming and flavorful Turkey Chili recipe that combines ground turkey, beans, tomatoes, and pumpkin puree for a comforting dish.
- Prep Time: 15 minutes
- Cook Time: 40 minutes
- Total Time: 55 minutes
- Yield: 4 servings 1x
- Category: Main Course
- Method: Cooking
- Cuisine: American
- Diet: None
Ingredients
- 1 lb Ground Turkey
- 1 can (15 oz) Beans (Kidney or Black Beans)
- 1 can (14.5 oz) Canned Tomatoes (diced or crushed)
- 1/2 cup Pumpkin Puree
- 1 Onion, chopped
- 3 cloves Garlic, minced
- 2 tbsp Chili Powder
- 1 tsp Cumin
- Salt and Pepper to taste
Instructions
- Sauté the chopped onions in olive oil until soft, about 3-5 minutes. Add minced garlic and stir for another minute.
- Add the ground turkey, breaking it down as it cooks until browned, about 6-8 minutes.
- Sprinkle in chili powder, cumin, salt, and pepper; stir for about 2 minutes.
- Pour in diced tomatoes, beans, and pumpkin puree; stir and bring to a simmer.
- Reduce heat, cover, and let simmer for at least 20-30 minutes.
- Taste and adjust seasoning as needed.
- Serve in bowls garnished with toppings of choice.
Notes
Feel free to add toppings like cilantro, sour cream, shredded cheese, or jalapeños. Chili can be made in advance and tastes better the next day.
Nutrition
- Serving Size: 1 cup
- Calories: 320
- Sugar: 5g
- Sodium: 600mg
- Fat: 10g
- Saturated Fat: 3g
- Unsaturated Fat: 7g
- Trans Fat: 0g
- Carbohydrates: 35g
- Fiber: 10g
- Protein: 24g
- Cholesterol: 85mg
Keywords: Turkey Chili, Comfort Food, Healthy Recipe
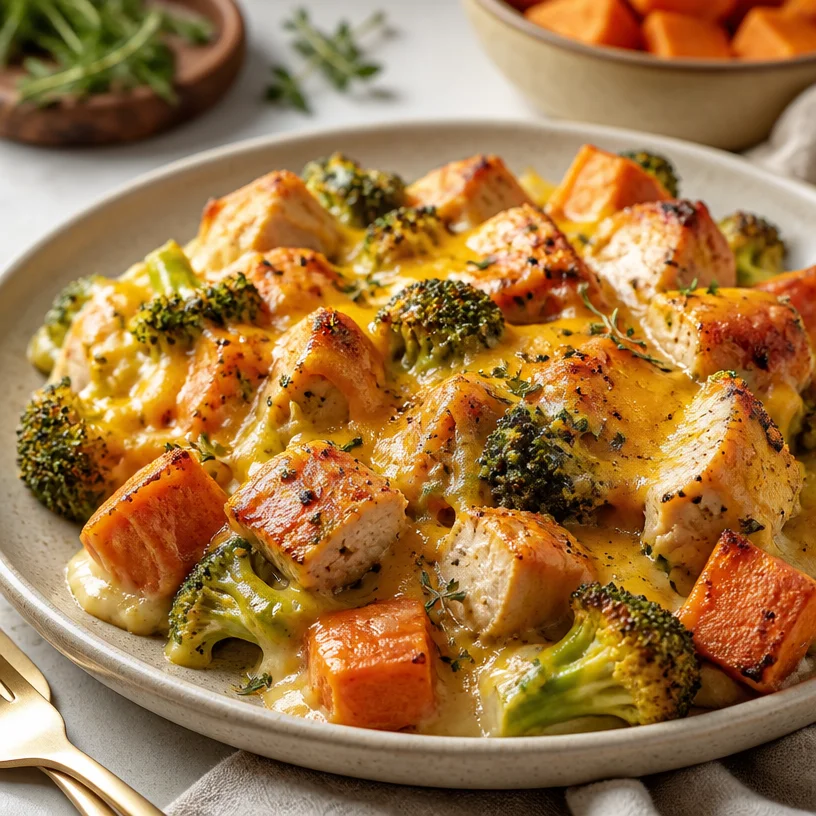
One-Pan Harvest Chicken Casserole for Weeknight Dinners
Harvest Chicken Casserole: A Cozy Feast for the Soul
Welcome, fellow food lovers! Today, we’re diving into the heart of what makes comfort food so darn comforting with my Harvest Chicken Casserole. Picture this: tender chicken, sweet potatoes, vibrant broccoli, and a melting layer of cheddar cheese all harmoniously coming together to create a dish that warms your heart while tantalizing your taste buds. Whether it’s a chilly evening or just a family gathering, this casserole is bound to shine on your dinner table.
Eating clean doesn’t mean sacrificing flavor, and I promise you won’t feel deprived with this delightful dish. It’s easy, satisfying, and incredibly versatile! So grab your apron and let’s get cooking!
A Personal Story: Inspired by My Grandmother
Before we dive into the recipe, let me share a little story from my kitchen. Growing up, Sunday dinners at my grandmother’s house were sacred. She was a master of casseroles, and her "Harvest Surprise" was the star of the show. As kids, we’d always peek into the oven, eyes wide with anticipation, hoping to catch a whiff of the savory goodness. She expertly layered ingredients, always ensuring the flavors burst forth like fireworks.
I remember how she’d have me help her peel the sweet potatoes while regaling me with tales of her childhood. It wasn’t just the dish that warmed my belly, but the love she poured into it that filled my heart. It’s those precious moments that inspired me to create my own version of her beloved casserole, with a modern twist of course!
Ingredients
Here’s what you’ll need for this delectable Harvest Chicken Casserole:
-
2 cups cooked chicken, shredded or diced
A great source of protein, you can use rotisserie chicken for speed or poach your own. For a vegetarian option, consider subbing with chickpeas or lentils! -
2 medium sweet potatoes, peeled and cubed
Naturally sweet and rich in nutrients, sweet potatoes add a delicious earthiness. If you’re craving a different flavor, butternut squash is a fantastic substitute! -
2 cups broccoli florets
Fresh or frozen, broccoli packs a nutritional punch and adds lovely color. Don’t have broccoli? Brussels sprouts or green beans work beautifully too. -
1 ½ cups shredded cheddar cheese
The gooey goodness that holds everything together! Feel free to switch it up with mozzarella or a dairy-free cheese blend for a comforting dairy-free option. -
1 cup chicken broth
This keeps everything moist and flavorful. Homemade broth is the best, but store-bought is a convenient choice if time is short. -
1 teaspoon garlic powder
Essential for a flavor boost—fresh garlic would work wonders too! -
Salt & pepper to taste
Essential for seasoning! Always taste as you go to get the perfect balance. -
Olive oil for drizzling
Just a splash helps enhance flavors and makes for a golden-brown finish.
These ingredients are easy to find and combine to create a symphony of flavors and textures that will keep you coming back for seconds.
Step-by-Step Instructions
-
Preheat Your Oven:
Start by preheating your oven to 375°F (190°C). A hot oven is crucial for that perfectly baked casserole, so don’t skip this step! -
Prepare Your Sweet Potatoes:
Toss those cubed sweet potatoes into a pot of boiling salted water. Let them cook for about 10-12 minutes until fork-tender. This little pre-cook ensures they’ll be soft and perfectly integrated in the casserole! Drain and set aside. -
Mix Chicken and Broccoli:
In a large mixing bowl, combine your shredded chicken, broccoli florets, garlic powder, salt, and pepper. Stir until everything is well coated. Here’s a tip: If your broccoli is frozen, just give it a quick steam first—trust me, it’ll still turn out beautifully! -
Combine Ingredients in a Casserole Dish:
In a greased 9×13 inch casserole dish, layer the cooked sweet potatoes in an even layer at the bottom. Top this with the chicken and broccoli mixture, spreading it evenly. -
Pour the Chicken Broth:
Gradually pour the chicken broth over the entire dish. This will ensure your casserole remains moist and flavorful as it bakes. -
Add the Cheese:
Go ahead and sprinkle that glorious shredded cheddar cheese all over the top. Cheese is happiness in food form, and it’ll create a delicious, bubbly top! -
Bake to Perfection:
Place it in the oven and let it bake for about 30-35 minutes, or until the cheese is melted and bubbly, and the edges are lightly browned. You might want to use a broiler for the last few minutes to get that golden finish—just keep an eye on it! -
Let It Rest:
Once it comes out of the oven, let it rest for about 10 minutes. This allows everything to set and makes for easier serving. Trust me; it’s worth the wait!
Serving Suggestions
When it comes to plating your Harvest Chicken Casserole, simplicity is key! Go for serving it directly from the casserole dish, garnished with a sprinkle of fresh herbs, such as parsley or chives, for a pop of color. You can also pair it with a fresh green salad to balance out the warm, hearty casserole. For those cozy nights, it’s perfect with a side of crusty bread to soak up all those luscious flavors!
Recipe Variations
-
Swap the Protein:
How about going vegetarian by using quinoa or tofu instead of chicken? For a spicy kick, add some cooked Italian sausage! -
Veggie Lovers Delight:
Mix in other veggies like spinach, bell peppers, or zucchini for added nutrients and fiber without sacrificing taste! -
Flavor Burst:
Add a teaspoon of smoked paprika or a tablespoon of Dijon mustard to the mix for an extra layer of flavor. -
Cheesy Goodness:
Try using different cheese combinations such as pepper jack for a little heat or feta for a tangy twist. -
Herbs and Spices:
Experiment with various herbs, such as thyme or rosemary. A sprinkle of Italian seasoning will elevate it to a whole new level!
Chef’s Notes
This recipe has been a cherished part of my cooking repertoire for years. It started as a simple homage to my grandma’s casserole and has evolved into a dish bursting with flavors that reflect my cooking journey. I remember one Thanksgiving when I accidentally dropped my casserole dish! I salvaged it as best I could, and you know what? Everyone went back for seconds. A perfect reminder that cooking is about love, experimentation, and sometimes, embracing the unexpected!
FAQs and Troubleshooting
Q1: Can I prep this casserole in advance?
Absolutely! You can assemble it a day ahead and store it in the refrigerator. Just remember to add a few extra minutes to the cooking time if you’re baking it straight from cold.
Q2: Why is my casserole watery?
If you find your casserole is too watery, it might be because the vegetables released moisture while cooking. Ensure to not overdo it on the broth, or you can let it simmer a bit longer on the stove to reduce excess liquid.
Q3: How long will leftovers last?
Covered, leftovers can last in the fridge for up to 3 days. This casserole also freezes well! Just make sure to separate it into portions and store in freezer-safe containers if you want to save some for later.
Q4: Can I make this gluten-free?
Yes, this recipe is naturally gluten-free! Just be sure to double-check your broth choice and any substitutes to ensure they fit your dietary needs.
Nutritional Info (Optional)
Each serving of the Harvest Chicken Casserole has approximately:
- Calories: 370
- Protein: 30g
- Carbohydrates: 45g
- Dietary Fiber: 6g
- Fat: 12g
Feel free to adjust portions as needed!
And there you have it—every bit of comfort packed into a single casserole dish, ready to nourish your body and soul. I hope you dive headfirst into making this Harvest Chicken Casserole because nothing feels quite as rewarding as serving a warm meal that resonates with heartwarming memories. Happy cooking, and let’s keep those plates clean and cravings satisfied!
PrintHarvest Chicken Casserole

A cozy feast for the soul featuring tender chicken, sweet potatoes, vibrant broccoli, and melted cheddar cheese that warms your heart.
- Prep Time: 15 minutes
- Cook Time: 35 minutes
- Total Time: 50 minutes
- Yield: 4 servings 1x
- Category: Main Course
- Method: Baking
- Cuisine: American
- Diet: Gluten-Free
Ingredients
- 2 cups cooked chicken, shredded or diced
- 2 medium sweet potatoes, peeled and cubed
- 2 cups broccoli florets
- 1 ½ cups shredded cheddar cheese
- 1 cup chicken broth
- 1 teaspoon garlic powder
- Salt & pepper to taste
- Olive oil for drizzling
Instructions
- Preheat your oven to 375°F (190°C).
- Toss cubed sweet potatoes into boiling salted water and cook for 10-12 minutes until fork-tender. Drain and set aside.
- In a large mixing bowl, combine shredded chicken, broccoli, garlic powder, salt, and pepper. Stir until well coated.
- In a greased 9×13 inch casserole dish, layer cooked sweet potatoes evenly at the bottom.
- Top with the chicken and broccoli mixture, spreading it evenly.
- Pour chicken broth over the dish.
- Sprinkle shredded cheddar cheese on top.
- Bake for about 30-35 minutes, until cheese is melted and bubbly.
- Let it rest for 10 minutes before serving.
Notes
This dish can be prepared a day in advance and stored in the refrigerator. Leftovers last up to 3 days in the fridge and freeze well.
Nutrition
- Serving Size: 1 serving
- Calories: 370
- Sugar: 6g
- Sodium: 750mg
- Fat: 12g
- Saturated Fat: 6g
- Unsaturated Fat: 4g
- Trans Fat: 0g
- Carbohydrates: 45g
- Fiber: 6g
- Protein: 30g
- Cholesterol: 90mg
Keywords: chicken casserole, comfort food, healthy recipe
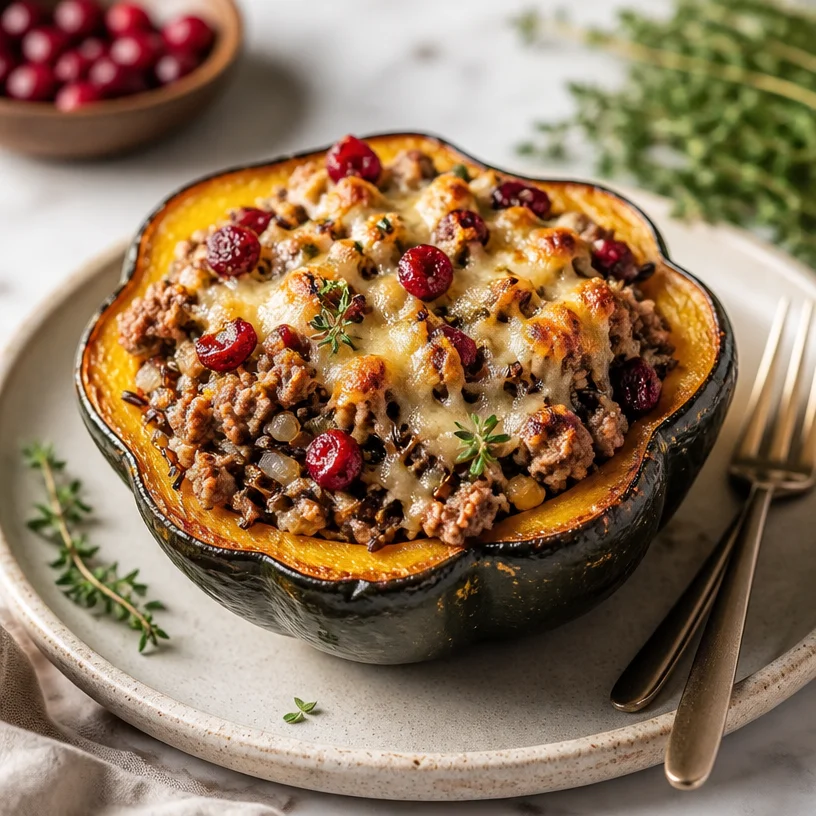
One-Pan Stuffed Acorn Squash: 30-Minute Weeknight Dinner
Stuffed Acorn Squash: A Cozy Fall Delight
Fall is in the air, and there’s nothing quite like the sight of vibrant acorn squash gracing your kitchen counter, beckoning you to transform it into a beautiful and wholesome meal. Today, we’re diving into a dish that not only fills your belly but feeds your soul: Stuffed Acorn Squash with Ground Turkey, Cranberries, and Wild Rice.
As the weather gets cooler, it’s the perfect time to take comfort in hearty, feel-good recipes. This dish is elegant enough for dinner parties yet simple enough for a cozy weeknight in. I promise that with each bite, you’ll experience a lovely blend of flavors that warms both the heart and the palate.
Personal Story
When I was a child, autumn meant two things: the thrill of jumping into piles of crunchy leaves and my mom’s famous stuffed acorn squash. I remember the aroma wafting through our home as she prepared the meal, a blend of sweet and savory notes that wrapped around me like a warm hug. Each year, she’d encourage my siblings and me to help her with the stuffing. With every scoop of wild rice mixed with cranberries, we’d squeal with delight; it felt like we were creating little treasures that held all our favorite flavors. Now, every time I make stuffed acorn squash, I’m transported back to those cherished moments. It’s more than just a dish; it’s a reminder that food has the power to bring people together.
Ingredients
Let’s roll up our sleeves and gather the ingredients for this luxurious dish:
-
Acorn Squash: The star of our show! Its slightly sweet, nutty flavor perfectly complements the savory stuffing. If acorn squash isn’t available, butternut or spaghetti squash can also work beautifully.
-
Ground Turkey: Lean and packed with protein, ground turkey is a lovely substitute for traditional beef or pork. If you prefer a vegetarian option, consider using lentils or chickpeas instead.
-
Cranberries: Dried cranberries add a burst of sweetness that balances the dish. If you’re watching your sugar, dried cherries or blueberries can be great alternatives.
-
Wild Rice: This adds a delightful chewy texture and earthy flavor. You could swap in quinoa or brown rice if you prefer, but the wild rice offers a unique twist that’s flavorful and nutritious.
-
Onion: Onion brings depth to the stuffing. Shallots or leeks can also lend a lovely flavor profile.
-
Celery: Adds crunch and freshness. You can replace it with bell peppers for a sweeter note, or simply omit it if you’re not a fan.
-
Garlic: A classic flavor booster! If fresh isn’t on hand, garlic powder works in a pinch.
-
Olive Oil: A drizzle of olive oil helps sauté the veggies and adds a silky finish. Avocado oil or grapeseed oil are solid substitutes.
-
Herbs (Thyme and Sage): Fresh herbs elevate the dish with fragrant notes of autumn. Feel free to use dried herbs if that’s what you have on hand – just adjust the quantities.
-
Salt and Pepper: Essential for flavor! Always season to taste as you go.
Step-by-Step Instructions
-
Preheat the Oven: Start by preheating your oven to 400°F (200°C). This gets the cooking process going before you even start assembling your dish.
-
Prepare the Acorn Squash: Cut the acorn squashes in half lengthwise (cooking tip: use a sharp knife for clean cuts). Scoop out the seeds—don’t worry about being perfect! Drizzle a little olive oil inside each half and sprinkle with salt and pepper. This will help them roast to perfection!
-
Roast the Squash: Place the squash halves, cut side down, on a baking sheet. Roast them in the oven for about 25-30 minutes. You want them fork-tender, so keep an eye on them!
-
Cook the Wild Rice: While the squash is roasting, prepare the wild rice according to package instructions. Usually, it takes about 45 minutes to cook, so it’s good to have this going while everything else is in the oven. The fluffiness of the rice is key, so don’t rush it!
-
Sauté the Aromatics: In a large skillet, heat a tablespoon of olive oil over medium heat. Add diced onion and celery to the pan. Sauté these for about 5 minutes, until the onion becomes translucent and the celery softens.
-
Brown the Ground Turkey: Push the veggies to one side of the pan and add the ground turkey, breaking it up with a spatula. Cook until it’s browned and cooked through (about 7-10 minutes). The turkey will soak up all that delicious flavor from the aromatics.
-
Add the Flavor: Toss in minced garlic and herbs at this stage. Cook for an additional minute until fragrant. Your kitchen will smell heavenly!
-
Mix It Up: Now, add the cooked wild rice and dried cranberries into the skillet with the turkey and veggies. Stir everything together and season with salt and pepper to taste. Feel free to get creative—this is your moment to shine!
-
Stuff the Squash: Carefully turn the roasted squash halves right side up. Generously fill each half with the turkey and rice mixture. Don’t be shy—heap it high!
-
Final Bake: Pop the stuffed squash back in the oven for an additional 10-15 minutes, just to heat everything through and allow the flavors to meld.
-
Serve and Enjoy: Once done, pull them out of the oven and let them cool for a few minutes. Then, drizzle a little extra olive oil on top, if desired, for a finishing touch.
Serving Suggestions
Plating these stuffed acorn squashes is a visual delight! Serve them warm on a rustic wooden platter to create a cozy vibe. Garnish with a sprinkle of fresh chopped herbs for that beautiful pop of green, and don’t forget a wedge of lemon on the side for a zesty twist!
Recipe Variations
-
Vegetarian Delight: Skip the turkey and load up on beans, mushrooms, and extra veggies like zucchini or spinach for a wholesome vegetarian version.
-
Cheesy Goodness: Mix in some feta or goat cheese into the stuffing before baking for a creamy and tangy flavor kick.
-
Spice it Up: Add some heat with diced jalapeños or a dash of cayenne pepper to the turkey mixture. A little kick never hurt anyone!
-
Nuts About It: Toss in some chopped walnuts or pecans for added crunch and nuttiness.
-
Herb Forward: Swap out thyme and sage for fresh rosemary and parsley for a refreshing take on flavor!
Chef’s Notes
If there’s one thing I’ve learned in my cooking journey, it’s that recipes are never set in stone. I often find myself getting a little adventurous—like the time I added leftover cranberry sauce (yes, that’s right!) into the stuffing. It gave a surprising burst of tart sweetness that I can’t believe I hadn’t tried sooner! Each time I make this dish, I embrace the idea that cooking should be flexible and fun. So, my advice is always to trust your instincts and have fun with it!
FAQs and Troubleshooting
1. My acorn squash is tough to cut! What should I do?
If your squash is particularly firm, microwave it for 2-3 minutes first to soften it slightly, making it easier to cut.
2. How do I know when my wild rice is done?
Wild rice should be chewy and split open when cooked, with a tender bite. Just be sure to taste it before draining!
3. Can I make this dish ahead of time?
Absolutely! You can prepare the stuffing a day in advance and just assemble and bake the acorn squash before serving.
4. My stuffing seems dry. How can I fix it?
If your stuffing ends up a bit dry, drizzle in some chicken or vegetable broth, or even a splash of olive oil, to add moisture!
Nutritional Info (Optional)
While I believe good food doesn’t need to dwell on numbers, here’s a rough estimate for one stuffed acorn squash half:
- Calories: 350
- Protein: 20g
- Carbs: 40g
- Fat: 12g
- Fiber: 7g
Conclusion
There you have it, my lovely foodies! Stuffed acorn squash is a delightful celebration of fall flavors that is tough to beat. With each bite, you’ll savor the warmth of home-cooked goodness and perhaps a sprinkle of nostalgia, just like I do. Remember, cooking is all about enjoying the moment, so embrace the spices, share the laughter, and have fun in your kitchen. Now, roll up those sleeves and get stuffing—your cozy meal awaits!
PrintStuffed Acorn Squash

A cozy fall dish featuring acorn squash stuffed with ground turkey, cranberries, and wild rice, perfect for chilly evenings.
- Prep Time: 15 minutes
- Cook Time: 45 minutes
- Total Time: 60 minutes
- Yield: 4 servings 1x
- Category: Main Course
- Method: Baking
- Cuisine: American
- Diet: None
Ingredients
- 2 Acorn Squash
- 1 lb Ground Turkey
- 1/2 cup Dried Cranberries
- 1 cup Wild Rice
- 1 Onion, diced
- 1 Celery stalk, diced
- 2 cloves Garlic, minced
- 2 tbsp Olive Oil
- 1 tsp Dried Thyme
- 1 tsp Dried Sage
- Salt and Pepper to taste
Instructions
- Preheat the oven to 400°F (200°C).
- Prepare the acorn squash by cutting in half and scooping out the seeds. Drizzle with olive oil and season with salt and pepper.
- Roast the squash halves cut side down on a baking sheet for 25-30 minutes until fork-tender.
- Cook the wild rice according to package instructions (approximately 45 minutes).
- Sauté diced onion and celery in a skillet with olive oil for 5 minutes.
- Brown the ground turkey in the skillet for 7-10 minutes, breaking it up as it cooks.
- Add minced garlic and herbs, cooking for an additional minute.
- Mix in the cooked wild rice and cranberries, seasoning with salt and pepper.
- Stuff the roasted squash with the turkey and rice mixture.
- Final bake for 10-15 minutes to heat through.
- Serve warm with a drizzle of olive oil on top.
Notes
Feel free to customize with additional vegetables or spices to create your perfect stuffed squash.
Nutrition
- Serving Size: 1 half of acorn squash
- Calories: 350
- Sugar: 5g
- Sodium: 400mg
- Fat: 12g
- Saturated Fat: 2g
- Unsaturated Fat: 8g
- Trans Fat: 0g
- Carbohydrates: 40g
- Fiber: 7g
- Protein: 20g
- Cholesterol: 75mg
Keywords: stuffed acorn squash, fall recipe, savory squash, healthy dinner, comfort food