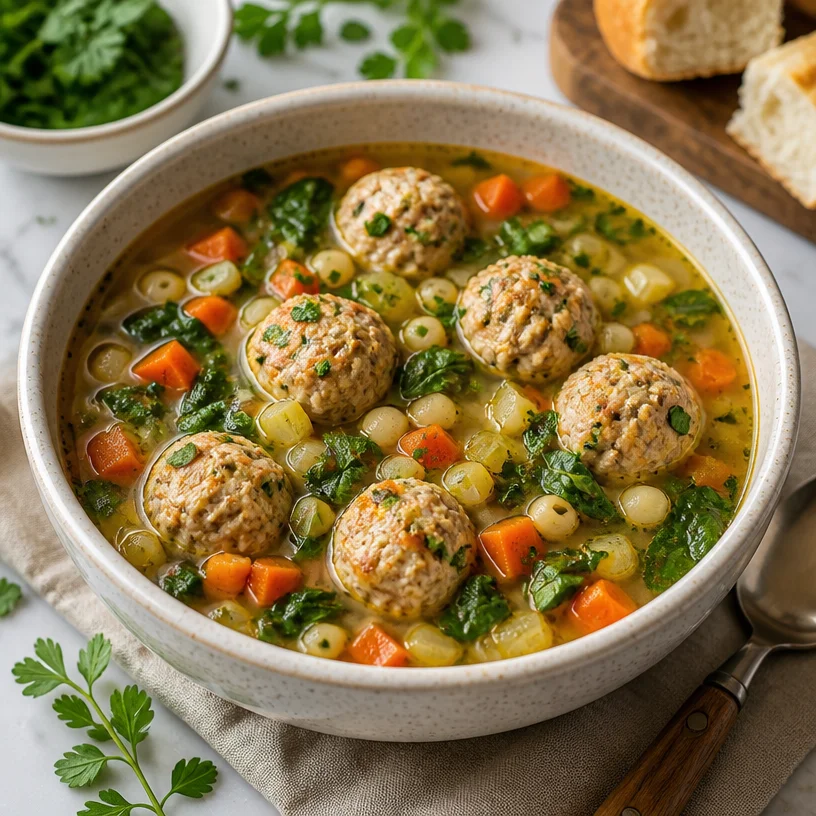
Minute High-Protein Turkey Meatball Soup for Weeknights
Cozy Up with Turkey Meatball Soup: A Wholesome Adventure
Ah, the warmth of a bowl of soup on a chilly day—there’s nothing quite like it to wrap you up in a cozy embrace. Today, I’m excited to share one of my all-time favorite recipes: Turkey Meatball Soup. This isn’t just any soup; it’s packed with juicy turkey meatballs, vibrant veggies, and a hearty broth that keeps you coming back for more. As the days grow cooler, this comforting bowl of goodness is the perfect meal for family gatherings or a quiet self-care night at home.
There’s something special about homemade soup. It’s a dish woven into the fabric of family traditions and winter evenings spent huddled together. Picture this: you walk into the kitchen after a long day. The aroma of simmering meatballs envelops you like a warm hug, while the vibrant colors of fresh vegetables brighten your mood. This turkey meatball soup embodies those cherished moments and elevates them with a nutritious twist. Whip up a batch, and I guarantee you’ll feel that warmth surround you.
So, roll up your sleeves and let’s cook! I’ll guide you through each step, share some insider tips, and sprinkle in a few personal anecdotes to make this kitchen journey as enjoyable as possible. Whether you’re feeding a crowd or just want to have a few leftovers for the week, this turkey meatball soup is your ticket to a heartwarming meal that’s nutritious, simple, and downright delicious.
A Warm Memory with Meatballs
I still remember the first time I made turkey meatballs. It was during a brisk autumn afternoon; the leaves were crunching underfoot, and the air was crisp with the scent of fall. My best friend and I decided to host a cozy potluck dinner. The goal was to impress our other friends with a meal that was both wholesome and delightful. We chose to tackle the famous meatball soup, but there was a twist—we opted for turkey instead of beef!
We gathered in the kitchen, laughing and exchanging playful banter as we mixed turkey, breadcrumbs, and spices, excited to create something special together. When the aroma of those meatballs started wafting through the house, it was like culinary magic. We could hardly wait to serve our creation!
The smile on our friends’ faces when they took their first bites was worth all the effort. The soup was a hit, and we ended the evening sharing stories and laughter around the table. Fast forward to today, and I still make this turkey meatball soup whenever I want to recreate that cozy atmosphere. It’s more than a recipe; it’s a connection to those vibrant moments with friends.
Ingredients
Ready to create your own cozy masterpiece? Here’s what you’ll need:
-
Ground Turkey: The star of the show! Lean and packed with protein. You can swap it with ground chicken or even lean beef if you prefer.
-
Breadcrumbs: Bind those meatballs together! Use panko for a crunchier texture or homemade breadcrumbs from your favorite bread—a great way to reduce waste.
-
Egg: This helps hold the meatballs together. If you’re egg-free, use a flaxseed meal (1 tablespoon mixed with 3 tablespoons water) as a substitute.
-
Garlic: Freshly minced garlic adds depth to the meatballs. Feel free to use garlic powder in a pinch.
-
Onion: Diced onion brings sweetness and moisture. Shallots are a lovely substitution if you’ve got them on hand.
-
Parsley: Finely chopped parsley adds freshness and brightens up flavors. Basil or cilantro could also be fun alternatives.
-
Stock/Broth: A good base is essential! Chicken broth is a classic choice, but vegetable broth works beautifully if you want to keep it lighter.
-
Vegetables (Carrots, Celery, Zucchini): This trio adds texture and nutrition. Experiment with others like bell peppers or spinach for variety.
-
Tomatoes (Canned Diced or Fresh): For a touch of acidity and sweetness. Fire-roasted tomatoes can give your soup a smoky punch.
-
Seasonings (Salt, Pepper, Italian Herbs): Elevate your flavors! Use fresh herbs if available—they pack a stronger punch than dried.
Step-by-Step Instructions
Let’s get our hands a little messy and build this soup!
-
Mix the Meatballs: In a large mixing bowl, combine the ground turkey, breadcrumbs, egg, minced garlic, diced onion, parsley, salt, and pepper. Use your clean hands to mix until everything is evenly combined. Don’t over-mix; we want light and tender meatballs!
Chef Tip: Moisten your hands with water before rolling the meatballs; it prevents sticking and makes for a smoother process.
-
Form the Meatballs: Shape the mixture into golf ball-sized meatballs, about 1 inch in diameter. You can use a small ice cream scoop for uniformity. Place them on a parchment-lined baking sheet for easy cleanup.
Little Hack: If your mixture feels too sticky, a bit of extra breadcrumbs can help mold them without falling apart.
-
Brown the Meatballs: Heat a few tablespoons of olive oil in a large pot over medium-high heat. Carefully add the meatballs in batches to avoid overcrowding. Brown them for about 3-4 minutes on each side until golden but not fully cooked—this adds flavor!
Culinary Insight: Browning the meatballs before simmering in broth enhances their texture and flavor, creating a beautiful contrast that’s worth the extra step.
-
Sauté the Vegetables: Remove the browned meatballs from the pot and set aside. In the same pot, add a splash more olive oil if needed, then toss in chopped carrots, celery, and zucchini. Sauté for about 5-7 minutes or until they start to soften.
Flavor Boost: Feel free to add a pinch of red pepper flakes for some zing or toss in chopped fresh herbs at this stage for added aroma.
-
Build the Soup: Once your veggies are soft, pour in your broth and add the diced tomatoes (with their juice). Bring this mixture to a gentle simmer, then carefully place the browned meatballs back in.
Pro Tip: If you want to add extra nutrition, consider tossing in a handful of kale or spinach. They’ll wilt beautifully right before serving!
-
Simmer Away: Let the soup simmer gently for about 20-25 minutes. This gives the meatballs time to cook through while melding all the flavors into a delicious harmony. Give it a gentle stir now and then to make sure nothing sticks to the bottom.
-
Taste and Adjust: After simmering, taste your soup to check if it needs a bit more salt, pepper, or even a squeeze of lemon juice for brightness.
Kitchen Hack: Keep a spoon handy and taste as you go—cooking should be a joyful exploration of flavors!
Serving Suggestions
When it’s time to serve, ladle the warm soup into bowls and sprinkle freshly chopped parsley on top for that beautiful pop of color. If you’re feeling indulgent, a sprinkle of grated Parmesan cheese adds a rich, savory note that enhances every bite.
Recipe Variations
Want to get adventurous? Here are a few twists you can explore:
-
Mediterranean Flair: Add kalamata olives and a dash of lemon juice for a vibrant Mediterranean spin. Serve with a side of crusty bread.
-
Asian-Inspired: Swap regular broth for miso broth, add a splash of soy sauce, and finish with scallions and sesame seeds for an Asian-inspired twist.
-
Spicy Kick: Toss in some diced jalapeños or a spoonful of sriracha to heat things up.
-
Add Quinoa or Rice: For a heartier soup, stir in cooked quinoa, whole grain rice, or even a small pasta.
Chef’s Notes
This turkey meatball soup recipe has evolved over time. I’ve made it countless times, playing around with veggies and seasonings to suit my mood. I recall one memorable kitchen mishap where I added too much cayenne pepper. Instead of tossing it out, I served it anyway. Much to my surprise, everyone loved the unexpected heat! That taught me that cooking is as much about experimentation as it is about following a recipe. Embrace the chaos!
Remember, the beauty of cooking lies in your ability to make it your own. Don’t be afraid to adjust seasonings, swap ingredients, or add your own signature flair!
FAQs and Troubleshooting
Q: My meatballs are falling apart while cooking. What happened?
A: It might be that too few binding agents (like breadcrumbs or egg) were used. Consider adding a bit more breadcrumbs or an additional egg to help hold them together.
Q: Can I make this soup ahead of time?
A: Absolutely! This soup actually tastes even better the next day. Just store it in the fridge and reheat when you’re ready to enjoy it—it’s perfect for meal prep!
Q: How can I freeze this soup?
A: Let the soup cool completely, then transfer it to freezer-safe containers. It’ll keep well for up to 3 months. Thaw it in the fridge overnight before reheating.
Q: What if I don’t have broth on hand?
A: Water can be used in a pinch, but I highly recommend using at least a bouillon cube to enhance the flavor!
Nutritional Info
While I won’t bog you down with specific numbers, rest assured that this turkey meatball soup is rich in protein, vitamins, and minerals, while being low in calories and fat—perfect for a hearty meal that doesn’t weigh you down!
So there you have it! You’re now equipped with all the knowledge to create a heartwarming Turkey Meatball Soup. Gather your loved ones, enjoy the process, and let those vibrant flavors bring warmth to your home. Happy cooking, my friends!
PrintTurkey Meatball Soup

A heartwarming turkey meatball soup packed with juicy meatballs, vibrant veggies, and a hearty broth.
- Prep Time: 15 minutes
- Cook Time: 30 minutes
- Total Time: 45 minutes
- Yield: 4 servings 1x
- Category: Main Course
- Method: Simmering
- Cuisine: American
- Diet: Protein-rich, Low-calorie
Ingredients
- 1 lb Ground Turkey
- 1 cup Breadcrumbs
- 1 Egg
- 3 cloves Garlic, minced
- 1 medium Onion, diced
- 1/4 cup Parsley, finely chopped
- 4 cups Stock/Broth (chicken or vegetable)
- 2 Carrots, chopped
- 2 Celery stalks, chopped
- 1 Zucchini, chopped
- 1 can (14.5 oz) Tomatoes (diced)
- Salt and Pepper, to taste
- Italian Herbs, to taste
Instructions
- Mix the Meatballs: In a large mixing bowl, combine the ground turkey, breadcrumbs, egg, minced garlic, diced onion, parsley, salt, and pepper. Use your clean hands to mix until everything is evenly combined.
- Form the Meatballs: Shape the mixture into golf ball-sized meatballs and place them on a parchment-lined baking sheet.
- Brown the Meatballs: Heat olive oil in a large pot over medium-high heat. Add the meatballs in batches, browning for about 3-4 minutes on each side.
- Sauté the Vegetables: Remove meatballs and add chopped carrots, celery, and zucchini to the same pot. Sauté for about 5-7 minutes.
- Build the Soup: Pour in the broth and add the diced tomatoes. Bring to a gentle simmer and return the browned meatballs to the pot.
- Simmer Away: Let the soup simmer gently for about 20-25 minutes until meatballs are cooked through.
- Taste and Adjust: Check seasoning and add more salt, pepper, or lemon juice as necessary.
Notes
This soup tastes even better the next day; perfect for meal prep! Experiment with different vegetables or spices to personalize your soup.
Nutrition
- Serving Size: 1 serving
- Calories: 300
- Sugar: 6g
- Sodium: 450mg
- Fat: 10g
- Saturated Fat: 2g
- Unsaturated Fat: 8g
- Trans Fat: 0g
- Carbohydrates: 30g
- Fiber: 4g
- Protein: 25g
- Cholesterol: 80mg
Keywords: soup, turkey, meatballs, cozy, comfort food
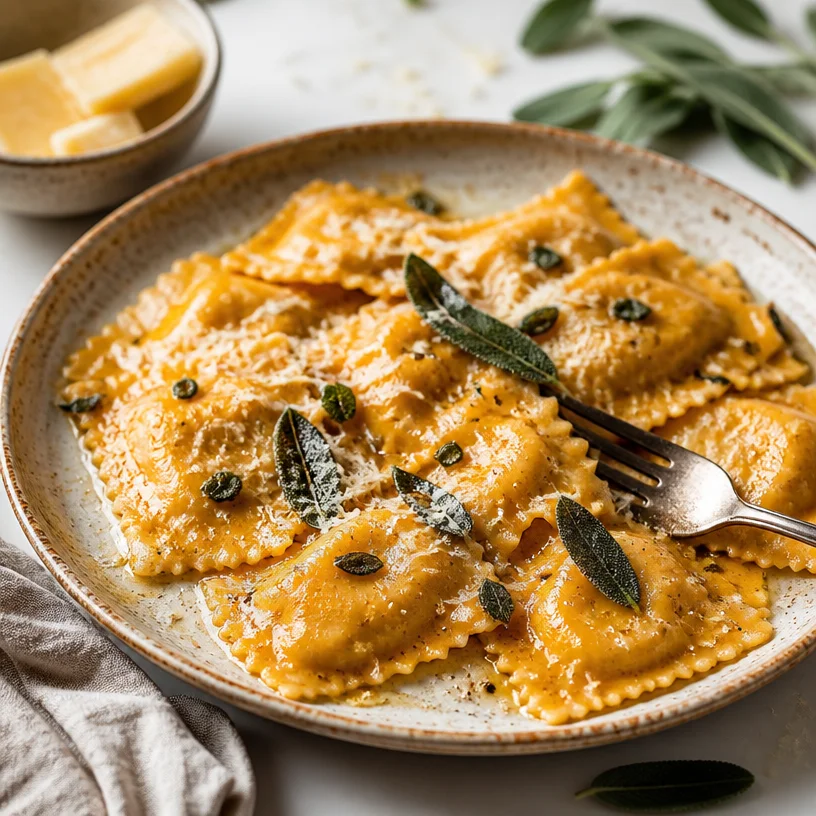
Minute Autumn Pumpkin Sage Ravioli for Weeknights
Savory Comfort: Pumpkin Sage Ravioli
Introduction
Welcome to another delicious adventure with Clean Plate Cravings! Today, we’re diving into a dish that captures the warmth of autumn and the excitement of fresh flavors—Pumpkin Sage Ravioli. This recipe is a true celebration of that perfect balance between comforting and sophisticated, making it ideal for cozy family dinners or an impressive date night at home. There’s just something magical about the combination of velvety pumpkin filling, crispy sage, and rich, nutty Parmesan cheese, don’t you think?
And here’s the best part: making pumpkin ravioli at home is easier than you might think! I remember the first time I attempted this dish. I was living in a tiny apartment with a kitchen so small that I had to shove my coffee maker into the hallway just to make room for my cutting board. Yet, despite the cramped quarters and a slightly questionable oven, I decided to channel my inner Italian nonna and whip up a batch of homemade ravioli. The aroma of sizzling sage mixed with my homemade pasta filled the air, and suddenly my little kitchen felt like an Italian trattoria.
As I’ve shared this recipe with friends and family over the years, it’s become a beloved staple that transforms any ordinary day into something special. So grab your aprons and let’s get cooking! This Pumpkin Sage Ravioli is all about fresh ingredients, vibrant flavors, and a healthy dose of comfort. Ready to impress your taste buds? Let’s jump in!
Personal Story
I still remember the first time I had pumpkin ravioli. It was during a crisp fall weekend in college, and some friends and I decided to visit a charming little Italian restaurant tucked away in a busy downtown area. We ordered an array of dishes, but I can still picture the ravioli perfectly presented with a sage brown butter sauce glistening with hints of garlic. The bite was heavenly—creamy pumpkin filling with just the right amount of sweetness paired with the rich, nutty flavor of the sauce.
After that meal, I was obsessed! I wanted to recreate it in my own kitchen and impress everyone with my newfound cooking skills. My first attempt was a hilarious disaster. The ravioli fell apart, the filling oozed out, and I ended up with more dough on the floor than on my plate. But I didn’t let that discourage me; the joy of trying something new outweighed the mishaps. With each batch, I learned something new about the process, the ingredients, and my own cooking style. Flash forward to today, and I’m thrilled to share a perfected version of this delightful dish that brings all those fond memories rushing back!
Ingredients
To make your own Pumpkin Sage Ravioli, here’s what you’ll need:
-
Ravioli Pasta:
- Fresh or store-bought, both work famously! If you’re feeling adventurous, make your own pasta dough for an extra touch of homemade goodness. Substitute with gluten-free pasta if needed!
-
Pumpkin Puree:
- The star of the filling! Use canned pumpkin puree (not pumpkin pie filling) for convenience or roast and mash fresh pumpkins for a deeper flavor.
-
Butter:
- This not only adds richness to the sauce but also helps create that irresistible brown butter flavor. You can substitute with olive oil for a lighter version.
-
Sage:
- Fresh sage is key for flavor! Its earthiness complements the sweetness of pumpkin perfectly. Dried sage can be used in a pinch, but fresh is always better.
-
Parmesan Cheese:
- Grated fresh Parm adds a salty, nutty depth to your dish. Pecorino Romano can also work if you want a stronger flavor profile.
These ingredients come together to create a dish that’s not only delicious but also visually stunning. Plus, they are fairly easy to find at your local grocery store, making this recipe approachable for beginners.
Step-by-Step Instructions
1. Prepare the Filling
- In a mixing bowl, combine 1 cup of pumpkin puree with 1/2 cup grated Parmesan, a pinch of salt, and fresh ground pepper. Mix well until smooth. The sweetness of the pumpkin paired with the savory cheese is magical!
2. Roll Out Your Pasta
- If you’re making fresh pasta, roll out your dough using a pasta machine or a rolling pin until it’s about 1/8 inch thick. Once rolled, let the pasta sit for a few minutes to dry slightly. Chef tip: Dust your countertops and rolling pins with flour to prevent sticking.
3. Shape the Ravioli
- Lay one sheet of pasta on a clean surface. Spoon small dollops of the filling about 1 inch apart. Fold the other half of the pasta sheet over the filling. Press out any air between the filling and the dough, then cut into squares or use a ravioli cutter for a fun shape!
4. Cook the Ravioli
- Bring a large pot of salted water to a gentle boil. Add the ravioli and cook for about 3-5 minutes or until they float to the surface—this means they’re ready!
5. Make the Sage Brown Butter Sauce
- In a skillet, melt 1/2 cup of butter over medium heat. Toss in your fresh sage leaves and let them crisp up for about 2-3 minutes. The butter should turn a light brown color, and the sage will become fragrant. Keep an eye on it; burnt butter is not as tasty!
6. Combine
- Carefully transfer the cooked ravioli to the skillet with the brown butter sauce. Gently toss them to coat them in the sage-infused butter. Cook for an additional minute to let the flavors mingle.
7. Plate Up
- Grab a plate, and serve your ravioli topped with extra grated Parmesan and a sprinkle of fresh sage. Drizzle any remaining brown butter sauce on top for that extra touch of deliciousness!
Serving Suggestions
Presentation is key when it comes to impressing your guests! You can plate the ravioli beautifully in a shallow bowl, adding a drizzle of the brown butter sauce around the edges. A sprinkle of fresh parsley or extra Parmesan on top adds that vibrant pop of color. Serve with a side salad of mixed greens dressed lightly in balsamic vinaigrette to balance out the richness of the dish.
Recipe Variations
-
Ricotta Spinach Mix: For an even creamier filling, mix equal parts pumpkin puree with ricotta and sautéed spinach. This gives a delightful twist and a nutritional boost!
-
Spicy Kick: Add a pinch of nutmeg or chili flakes to the pumpkin filling for a delightful heat that drives the flavor home.
-
Mushroom Medley: Consider adding sautéed mushrooms to the filling for a savory depth.
-
Alternative Sauces: Try a white wine and garlic sauce if brown butter isn’t your style—it also pairs beautifully!
-
Vegan Option: Swap out the butter for olive oil, replace the Parmesan with nutritional yeast, and use vegan ravioli for a plant-based version.
Chef’s Notes
This recipe has become a staple in my kitchen and has evolved over time. The first batch was less than perfect (think ravioli casualties galore!), but I learned to embrace the mishaps and adjust each time. Sometimes I grab seasonal veggies to spice things up, and I’ve even experimented with different cheese blends. Each variation brings a unique flavor profile while remaining true to that comforting essence.
FAQs and Troubleshooting
Q: My ravioli is falling apart during cooking! What can I do?
A: Make sure you’re sealing the edges of your ravioli tightly and try to remove any air pockets before cooking. You can also dust the ravioli with flour to help them stay intact in the water.
Q: How do I know when my ravioli is cooked?
A: Fresh ravioli cooks in about 3-5 minutes; they’re done when they float to the surface. If you’re using frozen ravioli, follow package directions for best results.
Q: Can I make the filling ahead of time?
A: Absolutely! Prepare the filling a day in advance and store it in an airtight container in the fridge. Just remember to bring it to room temperature before using.
Q: How do I store leftover ravioli?
A: If you have any leftovers, store them in an airtight container in the refrigerator for up to three days. Reheat with a bit more butter or sauce to prevent sticking.
Nutritional Info
While the specific nutritional details can vary, one serving of Pumpkin Sage Ravioli typically contains around 300-400 calories, depending on portion size and ingredients. It provides a good source of carbohydrates, healthy fats from the butter, and protein from the cheese, making it a balanced meal that keeps you satisfied.
So there you have it! This Pumpkin Sage Ravioli recipe combines nostalgia, vibrant flavors, and easy steps to create a delightful dish that brings warmth to your kitchen. I hope you enjoy every bite, relish the cooking process, and share it with loved ones! Let’s keep the comfort food love alive—happy cooking!
PrintPumpkin Sage Ravioli

A comforting yet sophisticated dish featuring homemade pumpkin-filled ravioli, crispy sage, and rich brown butter sauce.
- Prep Time: 30 minutes
- Cook Time: 20 minutes
- Total Time: 50 minutes
- Yield: 4 servings 1x
- Category: Main Course
- Method: Boiling and sautéing
- Cuisine: Italian
- Diet: Vegetarian
Ingredients
- Ravioli pasta (fresh or store-bought)
- 1 cup pumpkin puree
- 1/2 cup grated Parmesan cheese
- 4 tablespoons butter
- Fresh sage leaves
- Salt and pepper to taste
Instructions
- Prepare the filling by combining pumpkin puree, grated Parmesan, salt, and pepper in a mixing bowl until smooth.
- Roll out your pasta dough until it’s about 1/8 inch thick and let it rest.
- Shape the ravioli by placing dollops of filling on one sheet and folding the other over, sealing tightly.
- Cook the ravioli in boiling salted water for 3-5 minutes until they float.
- Make the sage brown butter sauce by melting butter over medium heat and adding fresh sage until crispy.
- Combine the cooked ravioli with the brown butter sauce and toss gently.
- Plate the ravioli with extra Parmesan and a drizzle of sauce.
Notes
For extra flavor, plate with fresh parsley or additional grated cheese. Serve with a side salad for balance.
Nutrition
- Serving Size: 1 serving
- Calories: 350
- Sugar: 5g
- Sodium: 400mg
- Fat: 14g
- Saturated Fat: 7g
- Unsaturated Fat: 5g
- Trans Fat: 0g
- Carbohydrates: 45g
- Fiber: 3g
- Protein: 10g
- Cholesterol: 30mg
Keywords: Pumpkin Ravioli, Homemade Ravioli, Italian Recipe, Comfort Food
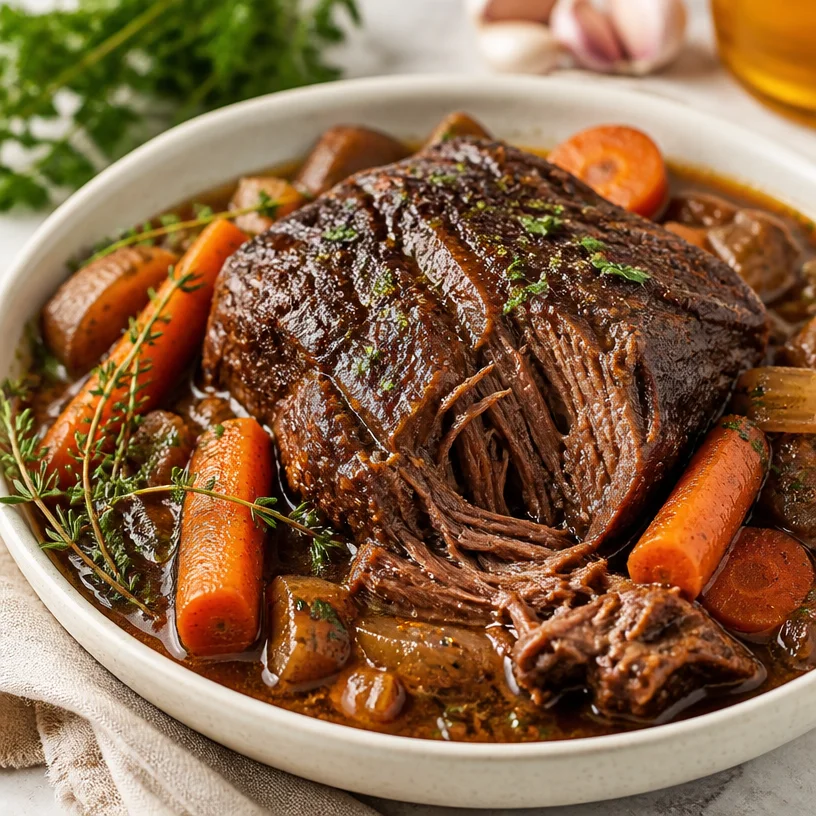
One-Pot Balsamic Pot Roast: Tender Weeknight Dinner
The Ultimate Balsamic Pot Roast: A Comfort Food Classic
Welcome to another delicious adventure in the Clean Plate Cravings kitchen! Today, we’re unraveling the magic behind a dish that not only warms the soul but also tantalizes the taste buds: Balsamic Pot Roast. This hearty, flavorful recipe is perfect for family gatherings, cozy Sunday dinners, or any day when you’re craving something comforting yet nourishing.
As the chill of autumn makes way for winter, there’s something extra special about coming home to the comforting aroma of a slow-cooked pot roast. Imagine tossing your ingredients into a pot and letting the magic happen while you sip on a warm cup of tea or tackle a few tasks around the house. The balsamic vinegar adds a delightful tang that cuts through the richness of the meat, making this dish an instant crowd-pleaser.
Cooking pot roast is not just about the ingredients; it’s about the experience. It’s about the love you pour into it and the memories you create with family and friends around the dinner table. So, pull up your apron, and let’s embark on this culinary journey together!
A Wholesome Memory
Growing up, Sundays were all about family and food. My mother had a knack for making the most comforting meals, and her pot roast was legendary. The aroma would fill our home as we anxiously awaited the moment we could gather around the table. She always used balsamic vinegar for that extra flavor kick, which made the roast so tender and mouthwatering that it became a staple in our home.
I remember one particular Sunday when we had family visiting. The laughter and stories filled the air while I assisted her in the kitchen. Just as we were about to sit down, my little brother accidentally spilled his drink all over the tablecloth. Instead of frowning or getting upset, my mom burst out laughing and declared, “This is why we can’t have nice things!” It was in that moment that I realized cooking didn’t just fill our bellies; it filled our hearts with joy and togetherness.
Now that I’ve gone on my own culinary journey, I cherish the lessons learned around that kitchen table. I’m thrilled to share this Balsamic Pot Roast recipe with you, where every bite will evoke a warm memory of love and laughter shared.
Ingredients
To create this incredible Balsamic Pot Roast, you’ll need the following ingredients:
-
Chuck Roast (3-4 lbs)
- The star of our dish, chuck roast is known for its rich marbling and tenderness when slow-cooked. It becomes melt-in-your-mouth delicious after hours in the pot! If chuck roast isn’t available, you can substitute it with brisket or round roast.
-
Carrots (3-4 medium)
- These provide a natural sweetness that balances the dish beautifully. Always opt for fresh, vibrant carrots. If you’re short on time, baby carrots can work just as well!
-
Balsamic Vinegar (½ cup)
- This tangy and sweet vinegar is what elevates the dish to the next level. Always opt for a good quality balsamic for the best flavor. If you need a substitute, you can use red wine vinegar with a touch of sugar for sweetness.
-
Onions (1 large, quartered)
- They add depth and flavor to the pot roast. I prefer sweet onions for their balanced sweetness, but yellow onions are great, too!
-
Garlic (4 cloves, minced)
- A must-have for any savory dish! Garlic brings warmth and a robust flavor profile. If you want to switch it up, shallots can provide a milder flavor.
-
Beef Broth (2 cups)
- This enhances the overall richness of the roast. You can also use vegetable broth for a lighter version. If you’re short on broth, a combination of water and bouillon can work in a pinch.
-
Thyme (1 teaspoon, dried or 4-5 sprigs, fresh)
- Thyme complements the beef beautifully with its earthy flavor. If you don’t have thyme, fresh rosemary could work wonders as an alternative.
-
Salt and Pepper to taste
- Always essential in bringing out the flavors in any dish!
Step-by-Step Instructions
Step 1: Prep Your Ingredients
Start by gathering all your ingredients and giving them a good rinse and chop. Chop the carrots into thick rounds, quarter the onion, and mince the garlic.
Chef’s Tip: Mise en place (everything in its place) is key here! Organizing your ingredients makes cooking smoother and way more enjoyable.
Step 2: Sear the Chuck Roast
In a large Dutch oven or heavy pot, heat 2 tablespoons of olive oil over medium-high heat. Season the chuck roast generously with salt and pepper, then sear it in the hot oil for about 4-5 minutes on each side, or until it’s browned all over.
Chef Hack: Searing the roast develops that rich, deep flavor and creates a beautiful crust. Don’t skip this step—it’s where the magic starts!
Step 3: Toss in the Aromatics
Once your roast is nicely browned, remove it from the pot and set it on a plate. In the same pot, add the quartered onions and sauté for about 3-4 minutes until translucent. Stir in the minced garlic and cook for an additional minute, releasing that wonderful aroma.
Step 4: Add the Carrots and Liquids
Now, it’s time to add in the carrots, balsamic vinegar, and beef broth. Return the roast to the pot and make sure it’s sitting snugly among the vegetables. The liquid should cover about halfway up the roast—this is what makes it so juicy!
Chef’s Note: If you’re feeling adventurous, you can toss in some potatoes or parsnips for a heartier meal.
Step 5: Season it Up
Sprinkle in the dried thyme (or add fresh sprigs if you’re using them). Give everything a good stir, and then cover the pot with a lid.
Step 6: Slow Cook to Perfection
Preheat your oven to 300°F (150°C). Transfer the pot to the oven and let it cook for about 3 to 4 hours. Cooking low and slow is key to breaking down the meat—trust me, it’ll be worth the wait.
Chef Fun Fact: Every hour, you can check on it and give a little stir to ensure nothing is sticking. Consider this a mini kitchen workout!
Step 7: Shred and Serve
When the time is up, carefully remove the pot from the oven. The roast should be fall-apart tender. Use two forks to shred the meat into large pieces.
Serving Suggestion: Serve the pot roast with a generous spoonful of the sauce, and don’t forget those luscious carrots!
Serving Suggestions
Plating your Balsamic Pot Roast can be as simple or as fancy as you like! I love serving it over a bed of creamy mashed potatoes or fluffy polenta to soak up all the flavors. Garnish with a sprinkle of fresh herbs like parsley for that finishing touch. You can also serve it with a side of sautéed greens for added nutrition!
Recipe Variations
- Italian Twist: Add some diced tomatoes and Italian seasoning for a different flavor profile. Serve over pasta for a hearty meal.
- Spicy Kick: Toss in a few red pepper flakes or a dash of hot sauce for those who enjoy a little heat.
- Acidic Zing: Try adding a splash of lemon juice or even some whole olives for a Mediterranean vibe!
- Vegetarian Version: Substitute the chuck roast with jackfruit or a hearty mushroom like portobello. Use vegetable broth and balsamic for a delightful plant-based pot roast.
Chef’s Notes
I remember one time I prepared this recipe for a dinner party, and in all the excitement, I forgot to add the balsamic vinegar until the end! I panicked, but a quick splash into the pot and let simmer for a few minutes worked wonders. It just goes to show that cooking sometimes requires improvisation, and it often leads to some of the most delicious outcomes! Every roast I make now carries a bit of that memory, reminding me to embrace the joyful chaos of cooking.
FAQs and Troubleshooting
-
Why does my pot roast come out tough?
- If your roast doesn’t fall apart, it might not have cooked long enough. Low and slow is key! Make sure it cooks long enough, ideally around 4 hours.
-
Can I use a slow cooker instead?
- Absolutely! Sear the roast first, then transfer it to a slow cooker with all the ingredients. Cook on low for about 6-8 hours for optimal tenderness.
-
What if I don’t have balsamic vinegar?
- If balsamic vinegar isn’t available, red wine vinegar with a bit of sugar can be an excellent substitute.
-
How do I store the leftovers?
- Store in an airtight container in the fridge for up to 3-4 days. Reheat gently to avoid drying out the meat.
Nutritional Info
While specific nutritional details can vary based on exact serving sizes and any changes made during preparation, here’s a rough breakdown for a typical serving:
- Calories: Approximately 350
- Protein: 40g
- Fat: 15g
- Carbohydrates: 20g
- Fiber: 3g
By now, I hope you can feel the love and passion emanating from this Balsamic Pot Roast recipe! It’s more than just a meal; it’s a celebration of flavor, family, and memories. Grab your ingredients, roll up your sleeves, and let’s create something wonderful in your kitchen today. Happy cooking!
PrintBalsamic Pot Roast
A comforting and flavorful pot roast enriched with balsamic vinegar, perfect for family gatherings and cozy dinners.
- Prep Time: 15 minutes
- Cook Time: 240 minutes
- Total Time: 255 minutes
- Yield: 6 servings
- Category: Main Course
- Method: Braising
- Cuisine: American
- Diet: None
Ingredients
- Chuck Roast (3-4 lbs)
- Carrots (3-4 medium)
- Balsamic Vinegar (½ cup)
- Onions (1 large, quartered)
- Garlic (4 cloves, minced)
- Beef Broth (2 cups)
- Thyme (1 teaspoon, dried or 4-5 sprigs, fresh)
- Salt and Pepper to taste
- Olive Oil (2 tablespoons)
Instructions
- Prep Your Ingredients: Gather all your ingredients and give them a good rinse and chop.
- Sear the Chuck Roast: Heat olive oil over medium-high heat and sear the chuck roast for 4-5 minutes on each side.
- Remove the roast and toss in the onions, sautéing for 3-4 minutes until translucent.
- Add the carrots, balsamic vinegar, and beef broth. Return the roast to the pot.
- Sprinkle in the dried thyme and give everything a good stir.
- Preheat your oven to 300°F (150°C) and transfer the pot to cook for 3-4 hours.
- Shred and serve: Use two forks to shred the meat and serve with sauce and carrots.
Notes
For extra flavor, you can add potatoes or parsnips and serve over mashed potatoes or polenta. Leftovers can be stored in an airtight container for up to 3-4 days.
Nutrition
- Serving Size: 1 serving
- Calories: 350
- Sugar: 5g
- Sodium: 500mg
- Fat: 15g
- Saturated Fat: 6g
- Unsaturated Fat: 8g
- Trans Fat: 0g
- Carbohydrates: 20g
- Fiber: 3g
- Protein: 40g
- Cholesterol: 100mg
Keywords: pot roast, balsamic, comfort food, slow cooking, beef

Weeknight One-Pan Creamy Chicken Broccoli Alfredo Bake
The Creamy Delight That is Chicken Broccoli Alfredo Bake
Welcome to the cozy corner of my kitchen! Today, I’m beyond excited to share a dish that brings together simplicity, comfort, and a burst of flavor: the Chicken Broccoli Alfredo Bake. This dish speaks to my love of creamy goodness, vibrant veggies, and a satisfying bite. Imagine warm, tender chicken mingling with crisp-tender broccoli and al dente pasta, all enveloped in a luxurious Alfredo sauce. Trust me, one whiff of this bubbling, cheesy casserole and you’ll find your taste buds doing a happy dance!
Food, at its best, is about connection and joy. Whenever I whip up this Chicken Broccoli Alfredo Bake, I’m instantly transported back to my Sunday family dinners as a child—those long gatherings filled with laughter, the chatter of loved ones, and the clanking of plates as everyone dug into a steaming spread. My mom often had a go-to casserole or two in her repertoire, and this one was a family favorite! It was everyone’s comforting dish that made the world just feel right.
Bringing this nostalgia to modern-day kitchens is exactly what Clean Plate Cravings is all about. You don’t have to spend hours or craft elaborate techniques to create comforting meals that taste like they came from a gourmet restaurant. With a few basic ingredients and some enjoyable steps, this Chicken Broccoli Alfredo Bake can easily become your family’s new favorite.
Let’s dive in and get cooking! In this post, I’ll guide you from the very start to the final presentation so you can whip up this delightful dish with confidence. So grab your apron, and let’s create some food love!
Personal Story
One of my fondest memories involves my grandmother’s generous spirit and her incredible knack for creating delicious meals that brought the family together. I remember vividly her bustling around the kitchen, her laughter ringing like a sweet melody as she prepared her infamous Chicken Alfredo. It wasn’t just the creamy sauce or perfectly cooked chicken that charmed us; it was the love she poured into each dish.
I once had the opportunity to assist her in the kitchen—a rare treat! She entrusted me with stirring the Alfredo sauce, her wisdom pouring forth in the form of culinary advice and laughter. We spent hours experimenting and perfecting that sauce. Seeing how excited everyone got to dig into dinner created a love for cooking and family bonding that has stuck with me ever since. Fast forward to today, I love reimagining that experience and sharing it with you in the form of this Chicken Broccoli Alfredo Bake. Chock-full of nostalgic flavors and modern twists, it’s the comfort food you need on chilly nights or when you simply want to feel warm and cozy inside.
Ingredients
Here’s what you’ll need for this amazing Chicken Broccoli Alfredo Bake:
-
2 cups cooked chicken: Shredded or cubed works great! Leftover rotisserie chicken is fantastic for this recipe since it’s already flavorful. For a leaner option, consider using turkey or tofu for a plant-based alternative.
-
2 cups broccoli florets: Fresh broccoli adds a beautiful color and crunch to this dish. If you’re short on time, frozen broccoli works perfectly fine, too—just thaw before adding.
-
8 oz pasta: I recommend using penne or rotini for the best texture, but feel free to substitute any shape you love—spaghetti, farfalle, or even gluten-free pasta are all great choices!
-
2 cups Alfredo sauce: You can make your own with heavy cream, garlic, and parmesan, or save time with a quality store-bought sauce. For lightening things up, consider using a cauliflower-based sauce or even plain Greek yogurt for a creamy texture without the extra calories!
-
1 cup shredded mozzarella cheese: The melted cheese on top gives this dish its ooey-gooey goodness. You can use other types of cheese like cheddar or even vegan cheese if you’re looking for dairy-free options.
-
Salt and pepper: Classic seasoning is essential! I always emphasize using fresh ground black pepper for a more pronounced flavor.
Step-by-Step Instructions
Now that we have our ingredients, let’s bring this Chicken Broccoli Alfredo Bake to life! Follow these steps for a flawless dish:
-
Preheat Your Oven: Start by preheating your oven to 350°F (175°C). This is essential, so your bake cooks evenly.
-
Cook the Pasta: In a large pot, bring salted water to a boil. Add your pasta and cook until just al dente (about 1-2 minutes less than package instructions). This prevents your pasta from becoming mushy when baked. You want it to have a little bite!
-
Prepare the Broccoli: While your pasta is cooking, take your fresh or frozen broccoli florets and steam them until they’re bright green and just tender—about 3-4 minutes. This helps retain their vibrant color and nutrients. You can either use a steamer basket or just microwave with a splash of water in a covered bowl.
-
Mix It Together: In a large mixing bowl, combine the cooked pasta, shredded chicken, steamed broccoli, and Alfredo sauce. Here’s a little chef hack: stir gently to combine so everything is well coated, but be careful not to mush the broccoli!
-
Season: Don’t forget to add salt and pepper to taste! As I always say, seasoning is key—feel free to taste and adjust as you go!
-
Transfer to Baking Dish: Pour the mixture into a greased 9×13-inch baking dish, spreading it evenly. You want to ensure every bit gets nice and cheesy!
-
Cheese Time: Top with the shredded mozzarella cheese, making sure every inch is covered (because who doesn’t love cheesy goodness!). For an extra flavor boost, consider sprinkling a dash of garlic powder or Italian seasoning on top.
-
Bake: Place the dish in your preheated oven and bake for about 25-30 minutes, or until the cheese is bubbly and golden on top. This is the moment you’ll want to watch closely!
-
Serve and Enjoy!: Once it’s out of the oven, let it cool for a few minutes before digging in. Your kitchen will smell heavenly, and everyone will rush to the table!
Serving Suggestions
To plate this delectable Chicken Broccoli Alfredo Bake, serve generous scoops on a vibrant plate or bowl. For a pop of color, garnish with freshly chopped parsley or basil. A sprinkle of red pepper flakes can add an exciting kick, too! Pair it with a light arugula salad dressed in lemon vinaigrette to balance the richness.
Recipe Variations
Feel like getting creative? Here are a few ideas to switch things up:
-
Add Veggies: Throw in other veggies, like bell peppers, spinach, or even artichokes, to amp up the nutrition and flavor.
-
Spice it Up: Add diced jalapeños or a sprinkle of cayenne pepper for a heat element.
-
Protein Swap: Instead of chicken, use shrimp or chunks of sausage for a different flavor. Feel free to go plant-based with chickpeas or your favorite veggie protein!
-
Pasta Alternatives: Try quinoa or zoodles (zucchini noodles) for a low-carb twist.
-
Herb Infusion: Swirl in some pesto for added flavor. You can get a delightful twist on this classic!
Chef’s Notes
Over the years, this recipe has become a staple not just for its flavor but for the memories created while preparing it. It’s the dish I turn to when my friends come over for a cozy night in, and I want to impress without stressing out. I laugh remembering the time I accidentally mistook table salt for sugar while seasoning it (oops!)—thankfully, my guests thought it was a "new flavor" experiment and loved it! Every mishap turns into a cherished kitchen story!
FAQs and Troubleshooting
1. Can I use store-bought Alfredo sauce?
Absolutely! A good quality store-bought sauce makes this dish a breeze and saves time. Just look for brands with minimal additives.
2. What if my pasta is overcooked?
Don’t panic! If your pasta is a little softer than ideal, it will still work; just keep an eye on the bake time and cover it with foil if you notice it browning too much.
3. How can I make this dish ahead of time?
You can prepare the dish up to the baking step, cover it, and store it in the fridge for a day or two. Just add a few extra minutes to the baking time if baking from cold.
4. Can I freeze leftovers?
Yes! This dish freezes well. Just let it cool completely, then transfer to an airtight container. To reheat, thaw in the fridge overnight and bake until heated through.
Nutritional Info
For a 1-cup serving of Chicken Broccoli Alfredo Bake, expect approximately:
- Calories: 380
- Protein: 28g
- Carbohydrates: 38g
- Fat: 15g
- Fiber: 3g
Keep in mind that these values vary based on your ingredient choices and portion sizes!
And there you have it! A warm, comforting Chicken Broccoli Alfredo Bake, perfect for family dinners, cozy nights in, or whenever you’re just craving a taste of nostalgia. Enjoy every bite, and remember to share the love—because cooking is always better with friends (or family) at the table! Happy cooking, fellow foodies!
PrintChicken Broccoli Alfredo Bake

A creamy and comforting bake that combines tender chicken, crisp broccoli, and al dente pasta enveloped in a luxurious Alfredo sauce.
- Prep Time: 15 minutes
- Cook Time: 30 minutes
- Total Time: 45 minutes
- Yield: 4 servings 1x
- Category: Main Course
- Method: Baking
- Cuisine: American
- Diet: Paleo
Ingredients
- 2 cups cooked chicken, shredded or cubed
- 2 cups broccoli florets, fresh or frozen
- 8 oz pasta, penne or rotini recommended
- 2 cups Alfredo sauce
- 1 cup shredded mozzarella cheese
- Salt and pepper to taste
Instructions
- Preheat your oven to 350°F (175°C).
- Cook the pasta in salted boiling water until just al dente.
- Prepare the broccoli by steaming until bright green and tender.
- Mix together the cooked pasta, shredded chicken, steamed broccoli, and Alfredo sauce in a large bowl.
- Season with salt and pepper to taste.
- Transfer the mixture into a greased 9×13-inch baking dish.
- Top with shredded mozzarella cheese.
- Bake for about 25-30 minutes until the cheese is bubbly and golden.
- Serve and enjoy your delicious Chicken Broccoli Alfredo Bake!
Notes
For a healthier twist, use a cauliflower-based sauce or plain Greek yogurt in place of traditional Alfredo sauce.
Nutrition
- Serving Size: 1 serving
- Calories: 380
- Sugar: 3g
- Sodium: 600mg
- Fat: 15g
- Saturated Fat: 7g
- Unsaturated Fat: 5g
- Trans Fat: 0g
- Carbohydrates: 38g
- Fiber: 3g
- Protein: 28g
- Cholesterol: 70mg
Keywords: Chicken, Broccoli, Alfredo, Bake, Casserole, Comfort Food
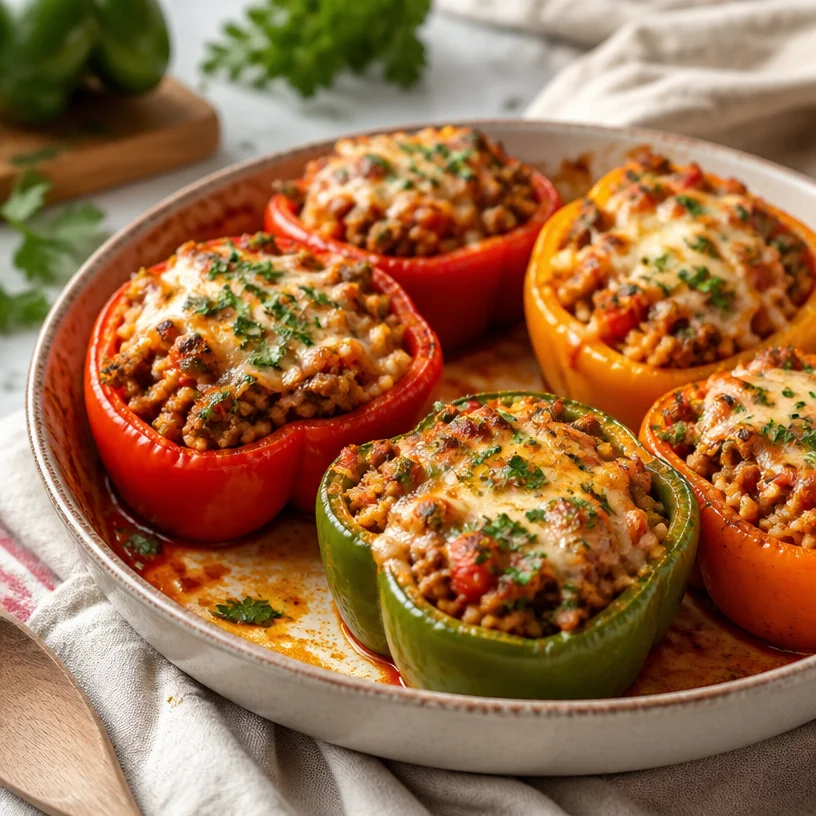
One-Pan Sausage Stuffed Peppers: 30-Minute Weeknight Dinner
Stuffed with Flavor: Sausage Stuffed Peppers to Satisfy Your Cravings
Hello, lovelies! Welcome back to Clean Plate Cravings. Today, I’m super excited to share a kitchen classic that’s both bursting with flavor and impressively easy to make—Sausage Stuffed Peppers! Perfectly colorful and overflowing with tasty goodness, these stuffed peppers are the kind of dish that brings everyone to the table, makes your home smell divine, and warms your heart with nostalgic bites. So let’s dive in!
Personal Story: A Taste of Home
Growing up, my weekends revolved around family gatherings, and our dinner table was the canvas for culinary creativity. One of our family traditions that always stood out was my Aunt Linda’s sausage stuffed peppers. I remember hovering around the kitchen, eagerly awaiting the moment she’d pull those vibrant peppers from the oven, fragrant with spices and cheesy goodness. The anticipation was palpable, and every bite was a burst of nostalgia wrapped in a delicious embrace! My cousins and I would fight over the last pepper, each of us wanting just one more helping. Those are the kinds of memories that shaped my love for cooking—those moments where food is more than just fuel; it’s a connection, a joy, a celebration. Now, I’m thrilled to pass this wonderful dish on to you, with a few little twists of my own!
Ingredients
Here’s what you’ll need to create these savory, satisfying stuffed peppers:
-
Bell Peppers (4 large)
Bell peppers are the star of the show, bringing both color and vitamin C to the table. Opt for a mix of colors—red, yellow, and green—for a visually stunning dish! If you prefer, you can use zucchini or eggplant for a fun twist. -
Sausage (1 pound)
Choose your favorite sausage, whether it’s spicy Italian, sweet Italian, or even chicken sausage for a lighter twist. You can easily swap the sausage for a plant-based option if you’re looking to keep things vegan while still enjoying robust flavors! -
Cooked Rice (1 cup)
Rice acts as a filling base to soak up all those delicious flavors. Brown rice adds a hearty texture, or you can use quinoa for a protein-packed alternative. For a low-carb option, try cauliflower rice! -
Cheese (1 cup, shredded)
Cheese is the magic ingredient that binds everything together! Opt for mozzarella for a gooey feel or cheddar for a sharper taste. If you’re on a dairy-free journey, there are plenty of vegan cheese options available that melt beautifully.
Step-by-Step Instructions
-
Prep Your Peppers:
Preheat your oven to 375°F (190°C). While that’s warming up, grab your bell peppers. Slice the tops off and remove the seeds and membranes. This is where I like to get creative—save those tops! You can chop them finely and toss them into your filling later for extra flavor. -
Cook the Sausage:
In a large skillet over medium heat, crumble your sausage and cook it until browned and cooked through, about 5-7 minutes. The aroma will be heavenly! As it cooks, feel free to add in some minced garlic or diced onions for an extra layer of flavor. Always remember: the more aromatic, the better! -
Mix the Filling:
Once the sausage is done cooking, transfer it to a mixing bowl. Add in your cooked rice and half of the cheese (reserve the other half for topping later). Stir in any chopped pepper tops, and season with salt, pepper, and your favorite Italian herbs. Sweet basil and oregano add a loving touch here, but feel free to get creative! -
Stuff Those Peppers:
Spoon your delicious mixture into the hollowed-out bell peppers. Pack them tightly for maximum flavor! Place them upright in a baking dish, fitting them snugly. If you’re feeling generous, sprinkle a pinch of paprika over the tops for a pop of color. -
Bake to Perfection:
Cover your baking dish with aluminum foil (this traps steam and keeps everything juicy) and bake for 25 minutes. Afterwards, remove the foil, top each pepper with the remaining cheese, and bake uncovered for an additional 10-15 minutes, or until the cheese is bubbly and golden. -
Let Them Rest:
Once out of the oven, let your stuffed peppers sit for about 5 minutes before serving. This way, the filling will firm up a bit, making it easier to enjoy every delicious bite.
Serving Suggestions
Plating these stuffed beauties is as easy as it gets! Simply place the peppers upright on your favorite serving dish, and drizzle with a bit of balsamic glaze for that chef’s touch. Pair them with a nice green salad or some grilled veggies on the side for a balanced meal. You could even serve these with a side of crusty bread for a satisfying feast that will have everyone asking for seconds!
Recipe Variations
Feeling adventurous? Here are some fun variations to take your stuffed peppers to the next level:
- Spicy Kick: Add some chopped jalapeños or a splash of hot sauce to the sausage mixture for a bit of heat.
- Mediterranean Twist: Substitute the rice for couscous and incorporate spinach and feta cheese for a Greek-inspired flavor.
- Breakfast Stuffed Peppers: Mix in scrambled eggs and veggies—perfect for a brunch centerpiece!
- Mexican Flair: Use chorizo as your sausage and mix in black beans, corn, and cheddar for a fiesta in a pepper!
Chef’s Notes
These sausage stuffed peppers have definitely evolved over time in my kitchen. I remember dedicating an entire Sunday afternoon to perfecting my method, only to find my five-year-old nephew devouring them like they were candy! That moment reminded me that cooking should be fun, accessible, and most importantly, enjoyable for everyone. They’ve since become a staple dish in my household, perfect for meal prep or a quick family dinner.
And here’s a fun fact: I often keep leftover stuffing—whether it’s some of the sausage mixture or just a few extra pepper tops—and toss it into scrambled eggs or omelets for a next-day brunch treat!
FAQs and Troubleshooting
1. Can I prepare these stuffed peppers ahead of time?
Absolutely! You can prepare them a day in advance. Just fill the peppers, cover, and store them in the fridge. When ready to bake, add an extra five minutes to the cooking time since they’ll go in cold.
2. My filling is too wet! How do I fix it?
If your filling seems wet, it could be due to the sausage or overcooked rice releasing moisture. Try draining any excess liquid and adding a bit more rice or cheese to absorb the moisture.
3. Can I freeze the stuffed peppers?
Yes! Make sure they’re completely cool before transferring them to an airtight container or freezer bag. They’ll keep well for about 3 months. Just thaw them in the fridge overnight before baking.
4. Why did my cheese not melt properly?
If your cheese doesn’t melt well, try covering the dish with foil during the initial baking. Also, using a cheese that melts well, such as mozzarella, can make a big difference!
Nutritional Info
While specific nutritional information can vary depending on the ingredients you choose, here’s a general breakdown per stuffed pepper:
- Calories: Approx. 350-450 calories
- Protein: 20-25g
- Carbohydrates: 30g
- Fiber: 3-5g
- Fat: 15-20g
Now that you’ve created these delicious sausage stuffed peppers, don’t forget to savor those moments in the kitchen. Cooking is as much about the journey as it is about the destination, and I hope you enjoy every bite of this flavorful dish. Until next time, keep it fresh, simple, and seriously delicious! Happy cooking!
PrintSausage Stuffed Peppers

These vibrant sausage stuffed peppers are bursting with flavor and nostalgia, perfect for family gatherings and sure to satisfy your cravings.
- Prep Time: 15 minutes
- Cook Time: 35 minutes
- Total Time: 50 minutes
- Yield: 4 servings 1x
- Category: Main Course
- Method: Baking
- Cuisine: Italian
- Diet: None
Ingredients
- 4 large Bell Peppers
- 1 pound Sausage
- 1 cup Cooked Rice
- 1 cup Cheese, shredded
Instructions
- Preheat your oven to 375°F (190°C). Slice the tops off the bell peppers and remove the seeds and membranes.
- Cook the sausage in a large skillet over medium heat for 5-7 minutes until browned.
- Mix the cooked sausage with rice and half of the cheese in a bowl and season with salt, pepper, and herbs.
- Stuff the mixture into the hollowed-out bell peppers and pack tightly.
- Bake covered with aluminum foil for 25 minutes, then remove foil, top with remaining cheese, and bake uncovered for an additional 10-15 minutes.
- Let the peppers rest for 5 minutes before serving.
Notes
Feel free to prepare these stuffed peppers a day in advance and store them in the fridge until ready to bake!
Nutrition
- Serving Size: 1 pepper
- Calories: 400
- Sugar: 5g
- Sodium: 500mg
- Fat: 18g
- Saturated Fat: 7g
- Unsaturated Fat: 8g
- Trans Fat: 0g
- Carbohydrates: 30g
- Fiber: 4g
- Protein: 22g
- Cholesterol: 55mg
Keywords: stuffed peppers, sausage, comfort food, easy dinner, family recipe
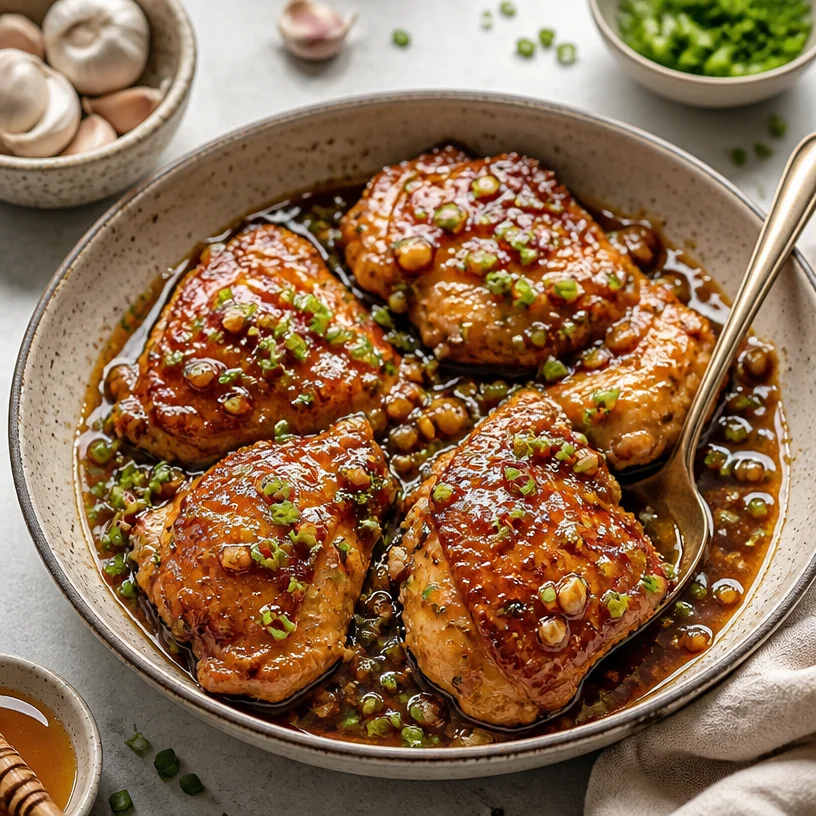
One-Pan Honey Garlic Chicken: 30-Minute Weeknight Dinner
Delicious Honey Garlic Chicken: A Flavor-Packed Journey
Welcome to Clean Plate Cravings, my foodie friends! Today, we’re diving into a dish that’s close to my heart and guaranteed to spark joy on your dinner table: Honey Garlic Chicken. Imagine a beautiful plate of tender, succulent chicken thighs glazed with a mouthwatering honey garlic sauce—yum! This dish is not only sweet and savory; it’s also perfect for a weeknight dinner or a cozy weekend meal. So, grab your apron, and let’s get cooking!
A Sweet Memory to Savor
Every great recipe often comes with a story, and this one is no exception. When I think of honey garlic chicken, I’m transported back to my childhood kitchen where my mom would whip up this dish with love and a sprinkle of memories. I remember rushing home from school, the aroma of sizzling garlic and the sweet scent of honey wafting through the air as I walked in. It was like a warm hug that greeted me after a long day.
Mom would be at the stovetop, her trusty wooden spoon in hand, stirring up a divine concoction. “Ava, honey makes everything better,” she would say with a wink. And you know what? She was absolutely right! This dish became a family favorite, and it was the centerpiece of countless dinner gatherings.
With each bite of that juicy chicken swimming in the lush glaze, I learned that cooking could be both simple and magical. Now, I’m excited to share this experience with you, hoping to inspire the same joy in your kitchen. Let’s make some honey garlic chicken together!
Ingredients You’ll Need
Here’s a list of what you’ll need to create this delicious dish, along with some helpful tips:
-
Chicken Thighs: Boneless, skinless chicken thighs are perfect for this recipe because they’re juicy and easy to cook. You can substitute them with chicken breasts if you prefer, but they may require a bit more care to avoid drying out.
-
Honey: This natural sweetener not only adds delicious flavor but also helps create that gorgeous glaze. If you’re looking for an alternative, agave syrup or maple syrup work well, too – just keep in mind they may alter the flavor slightly.
-
Garlic: Fresh garlic is a must for this recipe to infuse your chicken with that irresistible aroma and taste. If you’re in a pinch, garlic powder can be used; however, fresh garlic is always better!
-
Soy Sauce: This salty and umami-rich ingredient brings depth to the sauce. You can use low-sodium soy sauce for a lighter option or even coconut aminos for a soy-free alternative.
Step-by-Step Instructions
Ready to bring this delightful dish to life? Let’s get cooking!
-
Prep Your Chicken: Start by patting the chicken thighs dry with paper towels. This helps them brown beautifully when you cook them. Lightly season both sides with salt and pepper. A pinch of seasoning can make a huge difference, adding flavor right from the get-go!
-
Heat the Pan: In a large skillet, heat about 1 tablespoon of olive oil over medium-high heat. You want the oil to shimmer but not smoke—it’s like your pan is doing a little dance!
-
Sear the Chicken: Once the oil is hot, place the chicken thighs in the skillet, skin-side down if they have skin (you want a crispy texture). Let them cook undisturbed for about 5-7 minutes. The key here is NOT to move them around; we want that beautiful browning to happen!
-
Flip and Add Garlic: After 7 minutes, carefully flip the chicken over and add the minced garlic to the pan. The aroma will be heavenly! Cook for another 4-5 minutes, allowing the garlic to infuse the dish.
-
Mix the Sauce: In a small bowl, whisk together the honey and soy sauce. This is where the magic happens! If you like a bit of heat, feel free to add a pinch of red pepper flakes.
-
Pour the Sauce In: Once the chicken is cooked through (165°F internal temperature), pour the honey-soy mixture over the chicken. Reduce the heat to low and simmer for about 3-5 minutes, allowing the sauce to thicken and the chicken to soak up all that flavor.
-
Glaze It Up: Using a spoon, scoop up the sauce and drizzle it over the chicken as it simmers in the pan. This will create a lovely, sticky glaze that makes the chicken even more irresistible.
-
Rest and Serve: Once it’s done, set the chicken on a plate and let it rest for a few minutes. This is an important step because it allows the juices to redistribute. Trust me, you don’t want to miss out on juicy chicken!
Plating Your Honey Garlic Chicken
Now that your honey garlic chicken is ready, let’s talk presentation! Serve the chicken on a bed of fluffy jasmine rice or quinoa to soak up that tasty sauce. Don’t forget to drizzle any extra glaze from the skillet on top to make every bite even more delightful. A sprinkle of chopped green onions or sesame seeds on top adds a pop of color and flavor. Voila! You have a gorgeous plate that’s as pleasing to the eyes as it is to the palate.
Recipe Variations
Want to switch things up? Here are some fun variations to try:
- Citrus Twist: Add the zest and juice of an orange or lime for a refreshing citrusy twist.
- Spicy Honey: Mix in some sriracha or chili paste for a spicy kick that balances beautifully with the sweetness.
- Vegetarian/Vegan Option: Swap chicken for tofu or tempeh. Just make sure to marinate it to absorb all that delicious flavor!
- Add Veggies: Toss in some colorful bell peppers or broccoli during the cooking process for an easy one-pan meal.
- Stone Fruit Glaze: During summer, try adding pureed peaches or apricots to the sauce for a seasonal twist!
Chef’s Notes
Over the years, this honey garlic chicken recipe has evolved to fit my family’s tastes, but the heart of it remains the same: simple, delicious, and brimming with love. I’ll never forget the time I experimented and accidentally doubled the garlic—it turned out to be a happy mistake that everyone raved about! It’s those little moments in the kitchen that make cooking special; each dish tells a story.
FAQs and Troubleshooting
Wondering about something? Here are a few common questions that might help:
-
Can I use frozen chicken? Yes, you can! Just be sure to thaw it completely before cooking to ensure even cooking.
-
What if the sauce isn’t thickening? If your sauce isn’t getting thick, let it simmer a bit longer on low heat. Alternatively, you can mix a teaspoon of cornstarch with water and add that to the sauce to thicken it up.
-
How do I store leftovers? Leftovers can be kept in an airtight container in the fridge for up to 3 days. Reheat gently in the microwave or on the stove with a splash of water or broth to keep it moist.
-
Can I make this in advance? Absolutely! You can prepare the chicken and sauce in advance, then reheat it when you’re ready to serve. It’s a great meal prep option!
Nutritional Info
While I always advise enjoying delicious food in moderation, here’s a rough breakdown per serving (based on a 4-serving recipe):
- Calories: 320
- Protein: 25g
- Carbohydrates: 35g
- Fat: 10g
Remember, this is just a ballpark figure! The actual nutritional values will vary based on the specific ingredients you use.
And there you have it, lovely friends! Your very own Honey Garlic Chicken recipe that’s sure to impress and delight. Remember, cooking is all about experimenting, enjoying, and sharing moments with the people you love. So, roll up your sleeves, put on your chef hat, and let the cooking adventure begin! Happy cooking! 🌟
PrintDelicious Honey Garlic Chicken

A mouthwatering dish featuring tender chicken thighs glazed with a sweet and savory honey garlic sauce, perfect for weeknight dinners.
- Prep Time: 10 minutes
- Cook Time: 20 minutes
- Total Time: 30 minutes
- Yield: 4 servings 1x
- Category: Main Course
- Method: Stovetop
- Cuisine: American
- Diet: None
Ingredients
- 4 boneless, skinless chicken thighs
- 1/2 cup honey
- 4 cloves garlic, minced
- 1/4 cup soy sauce
- 1 tablespoon olive oil
- Salt and pepper to taste
Instructions
- Prep your chicken: Pat the chicken thighs dry with paper towels and season with salt and pepper.
- Heat the pan: In a large skillet, heat 1 tablespoon of olive oil over medium-high heat.
- Sear the chicken: Place the chicken thighs in the skillet and cook undisturbed for 5-7 minutes.
- Flip and add garlic: After 7 minutes, flip the chicken and add minced garlic.
- Mix the sauce: Whisk together honey and soy sauce in a small bowl.
- Pour the sauce in: Once chicken is cooked through, pour the honey-soy mixture over the chicken.
- Glaze it up: Drizzle the sauce over chicken as it simmers until thickened.
- Rest and serve: Let the chicken rest for a few minutes before serving.
Notes
Serve on a bed of jasmine rice or quinoa and drizzle extra glaze on top. Garnish with green onions or sesame seeds.
Nutrition
- Serving Size: 1 serving
- Calories: 320
- Sugar: 30g
- Sodium: 500mg
- Fat: 10g
- Saturated Fat: 2g
- Unsaturated Fat: 8g
- Trans Fat: 0g
- Carbohydrates: 35g
- Fiber: 0g
- Protein: 25g
- Cholesterol: 70mg
Keywords: Honey Garlic Chicken, Chicken Thighs, Easy Dinner

One-Pot Beef & Butternut Squash Chili: Weeknight Dinner
The Comfort of Beef & Butternut Squash Chili: A Heartwarming Bowl of Joy
Welcome to Clean Plate Cravings! Today, we’re diving into a dish that’s not only a feast for the taste buds but also a warm hug for the soul: Beef & Butternut Squash Chili. Imagine a pot bubbling on the stove, filling your kitchen with an aroma that draws everyone in and invites them to gather around the table. This chili is a celebration of cozy nights in, hearty flavors, and fresh ingredients that can turn an ordinary day into something special.
The great thing about chili is its versatility; it can be personalized in countless ways while still delivering that satisfying warmth we all crave. The combination of ground beef, sweet butternut squash, wholesome beans, and rich tomatoes creates a balanced dish that provides nourishment and comfort in every spoonful. Perfect for chilly evenings, game days, or just because it’s Tuesday, this recipe delivers big on flavor without requiring a degree in culinary arts.
As you step into your kitchen, ready to embark on this culinary adventure with me, remember that food isn’t just about sustenance—it’s about the stories it carries, the memories it creates, and the joy it brings. So let’s put on our aprons and get cooking!
A Taste of Nostalgia
I’ll always remember the first time I made chili from scratch. I was in college, living in a tiny apartment, armed with a limited budget and an even more limited list of cooking skills. A friend invited me over for a late-night study session, and I wanted to impress him with something tasty. After rifling through my pantry and spotting some ground beef and canned beans, I decided on chili.
I had no idea what I was doing. I chopped up an onion, threw in some canned tomatoes, and seasoned with whatever I could find. But then I had a lightbulb moment: I remembered my grandmother always sneaking in seasonal vegetables into her dishes. Butternut squash was in season, so I ran to the grocery store and grabbed a few.
To my surprise, the final product was a comforting, hearty dish that was filled with flavor and warmth. We ate it right out of the pot, and I’ll never forget how I felt like a real chef for the first time. That simple, impromptu chili turned into a staple in my kitchen. The addition of butternut squash not only enhanced the flavor but added a lovely sweetness that balanced the savory beef. From then on, chili became a canvas for all my culinary creativity.
Ingredients
Here’s what you’ll need to whip up this mouthwatering Beef & Butternut Squash Chili:
-
Ground Beef
The star of the show! Opt for lean ground beef for a healthier option. If you’re looking for a leaner swap, turkey or chicken can be great alternatives. -
Butternut Squash
This sweet, nutty squash adds a delightful depth of flavor and texture. If you can’t find butternut squash, sweet potatoes or pumpkin are fantastic substitutes! -
Beans (kidney or black beans)
Beans provide heartiness and are packed with protein and fiber. You can use canned beans for convenience or dry beans—just soak and cook them beforehand. -
Canned Tomatoes (diced or crushed)
Tomatoes form the chili base. I love using fire-roasted canned tomatoes for that extra layer of smokiness, but regular canned tomatoes work just as well. -
Onion
A classic aromatic that builds the flavor foundation. White or yellow onions are perfect, but red onions can add a nice pop of color and sweetness. -
Garlic
Fresh minced garlic takes this chili to the next level! If you don’t have fresh garlic, garlic powder can be a convenient substitute. -
Chili Powder
This spice blend gives your chili its signature flavor. Feel free to adjust the heat level—cayenne or a hot chili powder can amp it up if you like it spicy! -
Cumin
The earthy notes of cumin complement the other spices beautifully. Ground coriander can be a nice alternative if you’re in a pinch. -
Salt and Black Pepper
Essential for balancing flavors. Don’t skip these! Tasting as you go is the best way to find your perfect balance. -
Olive Oil
For sautéing the onions and garlic to bring out their flavors. Feel free to use coconut oil or avocado oil if you prefer!
Step-by-Step Instructions
Ready to create your new favorite chili? Let’s dive into the cooking process, step by step!
-
Prepare the Butternut Squash
Start by peeling and dicing your butternut squash into small cubes. This can be tricky, so to make it easier, cut the squash in half lengthwise, scoop out the seeds, and then slice it into manageable pieces. You want the cubes small enough to cook through quickly but not so tiny that they turn mushy. This will create a luscious texture throughout the chili. -
Sauté the Aromatics
In a large pot or Dutch oven, heat a tablespoon of olive oil over medium heat. Add the chopped onion and a pinch of salt. Sauté for about 5 minutes until the onion becomes translucent. Next, toss in the minced garlic and sauté for another minute. The aroma should be heavenly by now! -
Brown the Ground Beef
Add the ground beef to the pot, breaking it up with a wooden spoon. Cook until it’s browned all over, about 6-8 minutes. This step is crucial for building flavor, so don’t rush it! Make sure you sauté until there’s no pink left. -
Season It Up
Sprinkle in your chili powder, cumin, salt, and black pepper. Stir well to coat the beef evenly. This is where your kitchen starts to smell like a cozy haven—trust me, you’ll be tempted to dive in already! -
Add the Cube and Tomatoes
Now, stir in the diced butternut squash, canned tomatoes, and beans (drained and rinsed, if using canned). Give everything a good stir, and watch as the colors combine and the pot fills with potential. -
Simmer to Perfection
Pour in enough water or broth to just cover the ingredients (about 2 cups). Bring it to a gentle boil; then reduce the heat to low and let it simmer, covered, for 30 to 40 minutes. This is where the magic happens! The flavors meld beautifully, and the butternut squash becomes tender yet maintains its shape. -
Adjust to Taste
After simmering, taste your chili. Depending on your preference, you may want to add more salt, pepper, or spices. If it’s too thick, a little extra broth or water can loosen it up. -
Serve with Love
Once your chili is ready, remove it from the heat and let it rest for a few minutes. This allows the flavors to deepen.
Serving Suggestions
To make this meal even more delightful, serve your Beef & Butternut Squash Chili in beautiful bowls. Garnish with fresh cilantro or parsley, a dollop of sour cream or Greek yogurt, and a sprinkle of shredded cheese—yum! Pair it with crusty bread for a cozy, comforting meal perfect for chilly evenings.
Recipe Variations
Feel free to get creative with this chili! Here are just a few ideas to make it your own:
- Spicy Kick: Add diced jalapeños or a dash of hot sauce for an extra kick.
- Vegetarian Delight: Swap the beef for lentils, tempeh, or extra beans to keep it plant-based.
- Sweet and Smoky: Mix in a tablespoon of smoked paprika for a smoky flavor that complements the sweetness of the squash.
- BBQ Twist: Stir in some barbecue sauce towards the end of cooking for a southern flair.
- Add More Veggies: Feel free to toss in any additional vegetables like bell peppers, zucchini, or carrots for more color and nutrition.
Chef’s Notes
This recipe has seen some changes over the years. I remember my early attempts being a bit more chaotic, with plenty of guesswork and experimentation involved. But that’s what cooking is all about—learning as you go! I’ve found that adding butternut squash has transformed this dish from ordinary to extraordinary. It not only adds flavor but substantial nutrition, making it a go-to meal for my family during the cooler months. Don’t be afraid to experiment with your twists—this chili is as flexible as you want it to be!
FAQs and Troubleshooting
-
What can I do if my chili is too thick?
No worries! Just add a splash of broth or water and give it a good stir. Let it simmer for a few more minutes to incorporate everything. -
Can I make this chili in advance?
Absolutely! Chili often tastes better the next day because the flavors deepen. Store it in an airtight container in the fridge for up to 4 days or freeze it for longer storage. -
What if I don’t like butternut squash?
You can definitely substitute with sweet potatoes or even skip the squash entirely. Just add more beans or vegetables to maintain bulk. -
How spicy is this chili?
It depends! You control the heat by selecting your chili powder and any additional spices. Start with a milder blend, taste as you go, and adjust to your preference.
Nutritional Info
While specific nutritional information may vary based on ingredients and portions, here’s a rough estimate per serving (1 cup):
- Calories: 320
- Protein: 22g
- Carbohydrates: 35g
- Fiber: 8g
- Fat: 12g
Each bowl of Beef & Butternut Squash Chili is like a warm embrace, nourishing your body and soul, all while being utterly enjoyable. It is my hope this recipe sparks joy in your kitchen as it has in mine. Happy cooking, and remember, let your cravings guide you!
PrintBeef & Butternut Squash Chili

A heartwarming beef chili with sweet butternut squash, rich tomatoes, and wholesome beans, perfect for cozy nights.
- Prep Time: 15 minutes
- Cook Time: 40 minutes
- Total Time: 55 minutes
- Yield: 4 servings 1x
- Category: Main Course
- Method: Stovetop
- Cuisine: American
- Diet: None
Ingredients
- 1 lb Ground Beef
- 2 cups Butternut Squash (peeled and diced)
- 1 can Beans (kidney or black beans)
- 1 can Canned Tomatoes (diced or crushed)
- 1 Onion (chopped)
- 3 cloves Garlic (minced)
- 2 tbsp Chili Powder
- 1 tsp Cumin
- Salt and Black Pepper (to taste)
- 1 tbsp Olive Oil
Instructions
- Prepare the butternut squash by peeling and dicing into small cubes.
- Heat olive oil in a large pot over medium heat and sauté the onion with salt until translucent.
- Add minced garlic and sauté for an additional minute.
- Brown the ground beef until no pink remains, about 6-8 minutes.
- Sprinkle in chili powder, cumin, salt, and pepper; stir to coat the beef.
- Add diced butternut squash, canned tomatoes, and beans; give it a good stir.
- Pour in water or broth to cover the ingredients, bring to a gentle boil, then reduce the heat and simmer covered for 30-40 minutes.
- Taste and adjust seasonings as needed before serving.
- Serve in bowls, garnished with toppings like cilantro, sour cream, or cheese.
Notes
Chili often tastes better the next day. Feel free to customize with your choice of spices and vegetables.
Nutrition
- Serving Size: 1 cup
- Calories: 320
- Sugar: 6g
- Sodium: 500mg
- Fat: 12g
- Saturated Fat: 4g
- Unsaturated Fat: 8g
- Trans Fat: 0g
- Carbohydrates: 35g
- Fiber: 8g
- Protein: 22g
- Cholesterol: 75mg
Keywords: chili, beef chili, butternut squash, comfort food, cozy meal
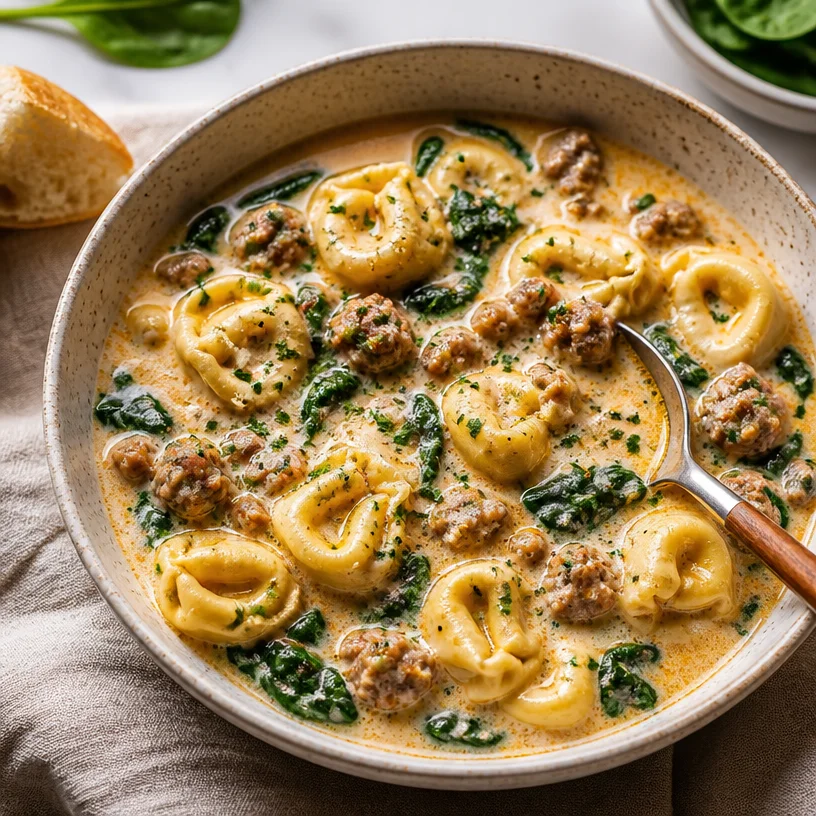
One-Pot Creamy Tortellini Soup for Busy Weeknights
Creamy Tortellini Soup: A Cozy Hug in a Bowl
Welcome to another flavorful journey at Clean Plate Cravings! Today, we’re diving into the world of warmth and comfort with a dish that feels like a cozy hug on a chilly day: Creamy Tortellini Soup. If you’re anything like me, there’s nothing better than slipping into your favorite oversized sweater after a long day and slurping on a steaming bowl of savory goodness.
This creamy soup is not just a feast for the stomach; it also brings a feast for the soul. It’s got everything you need—from the delightful bite of cheese tortellini to the robust flavors of sausage, the fresh pop of spinach, and of course, the silken richness of cream. Don’t worry if you’re crunched for time, because this recipe keeps things streamlined without sacrificing a single bit of flavor.
So take a seat, roll up your sleeves, and let’s bring some magic to your kitchen! Whether you’re planning a simple family dinner or looking to impress your friends at the next gathering, this soup will surely become a staple in your repertoire. Ready? Let’s get cooking!
A Taste of Nostalgia
I have to tell you about the first time I made tortellini soup. It was a chilly Sunday evening, and the aroma of spices filled our small kitchen. My grandmother had come over to help me out, and I was excited to show off this new recipe I had stumbled upon. The kitchen was filled with laughter as we cooked together—her stirring the pot while I attempted to cut the sausage, which, let’s be real, was a little more challenging than I anticipated!
As we waited for the soup to simmer, she shared stories from her childhood, of winter nights spent around the dinner table with family. It was reminiscent of a scene from an old Italian movie where everyone’s arms are intertwined, sharing love and laughs over a hearty meal. The soup was a hit! It was creamy, savory, and filling; but more importantly, it was served with a side of memories that would last a lifetime. Since that evening, this dish has been a wonderful reminder of warmth, family, and the simple joys that come with cooking together.
Ingredients
Here’s what you’ll need to whip up this delightful Creamy Tortellini Soup:
-
Cheese Tortellini: The star of our soup! You can use fresh or frozen tortellini, and they’re always filled with cheesy goodness. If you’re feeling adventurous, try other stuffed pastas like ravioli or your favorite gluten-free options.
-
Sausage: I generally prefer Italian sausage for its robust flavor that really elevates the soup. Feel free to swap in turkey sausage for a lighter option, or even omit it for a vegetarian version—just add an extra splash of vegetable broth for depth.
-
Spinach: Fresh spinach adds vibrant color and nutrients to the soup. If you don’t have fresh on hand, frozen spinach can work too—just ensure you drain any excess moisture before tossing it in.
-
Cream: This is what gives the soup its lusciousness. I recommend heavy cream for the richest flavor, but half-and-half or a plant-based cream can be used for a lighter alternative without sacrificing creaminess.
-
Vegetable or Chicken Broth: You can either make your own (if you have time!) or opt for store-bought to keep things simple. A good quality broth is crucial for layering flavors.
-
Garlic and Onion: These aromatics add depth to your soup and make your kitchen smell heavenly. Fresh garlic and onion are best, but if you’re in a pinch, you can use garlic powder and onion powder as substitutes.
-
Italian Seasoning: A blend of basil, oregano, and thyme that provides a great Italian flair. If you don’t have it, you can mix in your favorite herbs or use fresh herbs if you have them!
Each of these ingredients plays a vital role in our dish, coming together harmoniously for a bowl of pure joy.
Step-by-Step Instructions
Now let’s get cooking! Follow these steps closely, and don’t hesitate to sprinkle in your own personality along the way:
-
Sauté the Aromatics: In a large pot over medium heat, add a splash of olive oil. Once it’s hot, toss in the chopped onion (about one medium-sized onion should do) and minced garlic (3-4 cloves). Sauté them until the onion is translucent—about 5 minutes. This is where the magic begins! The combination of onion and garlic creates a fragrant base that will elevate every bite of your soup.
-
Brown the Sausage: Remove the sausage from its casing and crumble it into the pot. Cook it thoroughly, stirring occasionally until it’s browned and cooked through—about 7-10 minutes. The goal here is to build flavor; those little brown bits on the bottom of the pot? They’re flavor gold!
-
Pour in the Broth: Pour in 6 cups of your chosen broth. Bring the mixture to a gentle simmer. This step is all about building layers of flavor; simmering allows all the ingredients to marry and deepen.
-
Add the Tortellini: Gently add the cheese tortellini to the pot and let them cook until they float to the surface, typically about 5-7 minutes for fresh tortellini or around 8-10 minutes for frozen. A chef hack? Stir the soup occasionally so the pasta doesn’t stick together!
-
Incorporate the Spinach: Once the tortellini is cooked, stir in 2 cups of fresh spinach. Cook for an additional 2-3 minutes until the spinach is wilted and bright green. This is also when you can adjust the seasoning; taste the soup and add salt, pepper, or extra herbs as needed.
-
Make it Creamy: Finally, reduce the heat to low and stir in 1 cup of heavy cream. This is what makes the soup rich and decadent. Warm it for another minute or so without boiling it vigorously to preserve that creaminess.
-
Serve and Enjoy: Ladle the soup into bowls, maybe sprinkle some fresh parmesan cheese on top, or add a drizzle of olive oil for an elevated touch. Don’t forget a crusty piece of bread for dipping!
Serving Suggestions
Presentation is everything! Serve your Creamy Tortellini Soup in large, rustic bowls. A sprinkle of freshly grated Parmesan and a few fresh basil leaves can add elegance and brightness. Pair this soup with a crisp side salad or some toasted garlic bread to round out the meal. It’s the perfect way to make our cozy recipe feel gourmet!
Recipe Variations
Looking to shake things up? Here are some creative twists you can add to your Creamy Tortellini Soup:
-
Vegetarian Delight: Swap the sausage for your favorite veggies such as bell peppers, zucchini, and mushrooms. Just sauté these in the beginning along with the garlic and onion!
-
Spicy Kick: Add a pinch of red pepper flakes while cooking the sausage for a hint of heat.
-
Herb Garden: Incorporate fresh herbs such as thyme or dill towards the end for a fresh garden taste.
-
Protein Boost: Toss in some shredded rotisserie chicken or white beans for an extra dose of protein.
-
Nutty Flavor: Stir in a spoonful of pesto before serving to infuse a rich, nutty flavor into the creamy base.
Chef’s Notes
Can I let you in on a little secret? When I first started making this soup, I didn’t have a clue about balance. My first attempt tasted more like a cream pool than the well-rounded bowl I dreamt of. It took a few tries to get the balance just right, and I learned that tasting as you go is key! Also, remember to let the soup cool before storing it; like most soups, it tastes even better the next day when the flavors have more time to mingle.
Now, every time I make it, it brings back those nostalgic feelings of cooking with my grandmother. I smile thinking of how she would’ve added her own unique twist with whatever she had in the pantry.
FAQs and Troubleshooting
1. Can I make this soup ahead of time?
Absolutely! Creamy soups like this one often taste better the next day. Just store it in an airtight container in the fridge. When reheating, add a little extra broth or cream to bring back its luscious texture.
2. My soup turned out too thick; what can I do?
If your soup is thicker than you’d like, simply add a splash of broth or water until it reaches your desired consistency.
3. Can I freeze this soup?
While you can freeze tortellini soup, please note that the cream may separate when reheated. If you plan to freeze it, consider leaving the cream out and adding it fresh while reheating.
4. What if I can’t find tortellini?
No worries! You can substitute with any small pasta shape, such as ditalini, or even rice if you’re feeling creative.
Nutritional Info (optional)
This Creamy Tortellini Soup is not only delicious but also nourishing. It offers a balanced meal with protein from the sausage, carbohydrates from the tortellini, and a hearty dose of vitamins from the spinach. If you’d like, you can lighten it up by using turkey sausage or skipping the cream—whatever fits your lifestyle best!
So there you have it! A warm, nourishing bowl of Creamy Tortellini Soup that’s perfect for any day of the week. Whether you share it with loved ones or enjoy it curled up by yourself, this recipe is sure to be a hit. Happy cooking, foodies! Let’s keep it fresh and seriously delicious!
PrintCreamy Tortellini Soup

A cozy and creamy soup featuring cheese tortellini, savory sausage, and vibrant spinach, perfect for chilly days.
- Prep Time: 15 minutes
- Cook Time: 30 minutes
- Total Time: 45 minutes
- Yield: 4 servings
- Category: Soup
- Method: Stovetop
- Cuisine: Italian
- Diet: Non-Vegetarian
Ingredients
- Cheese Tortellini (fresh or frozen)
- Italian Sausage (or turkey sausage for a lighter option)
- Fresh Spinach (2 cups)
- Heavy Cream (1 cup)
- Vegetable or Chicken Broth (6 cups)
- Garlic (3-4 cloves, minced)
- Onion (1 medium, chopped)
- Italian Seasoning (to taste)
- Olive Oil (for sautéing)
- Salt and Pepper (to taste)
Instructions
- Sauté the aromatics: In a large pot over medium heat, add a splash of olive oil. Once it’s hot, toss in the chopped onion and minced garlic. Sauté until the onion is translucent, about 5 minutes.
- Brown the sausage: Remove the sausage from its casing and crumble it into the pot. Cook thoroughly, stirring occasionally until browned, about 7-10 minutes.
- Pour in the broth: Add 6 cups of your chosen broth and bring to a gentle simmer.
- Add the tortellini: Gently add the cheese tortellini to the pot and cook until they float to the surface, approximately 5-7 minutes for fresh or 8-10 minutes for frozen.
- Incorporate the spinach: Stir in 2 cups of fresh spinach and cook for an additional 2-3 minutes until wilted.
- Make it creamy: Reduce the heat to low and stir in 1 cup of heavy cream. Warm for another minute without boiling.
- Serve and enjoy: Ladle into bowls and top with fresh parmesan cheese or a drizzle of olive oil.
Notes
For added flavor, serve with crusty bread and a sprinkle of fresh herbs.
Nutrition
- Serving Size: 1 serving
- Calories: 450
- Sugar: 3g
- Sodium: 800mg
- Fat: 20g
- Saturated Fat: 10g
- Unsaturated Fat: 8g
- Trans Fat: 0g
- Carbohydrates: 38g
- Fiber: 3g
- Protein: 22g
- Cholesterol: 60mg
Keywords: tortellini soup, creamy soup, Italian soup, cozy recipe, comforting meals
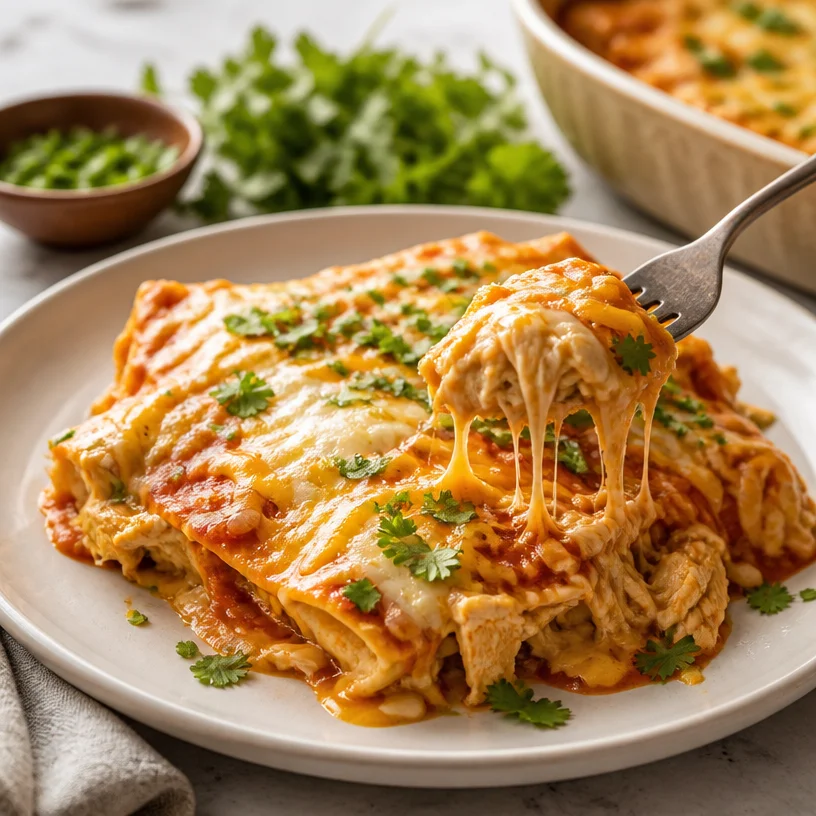
Creamy One-Pan Chicken Enchilada Casserole for Weeknights
Chicken Enchilada Casserole: A Cozy Dish for Any Day
Welcome back to Clean Plate Cravings, food enthusiasts! If there’s one dish that warms the heart and fills the home with mouthwatering aromas, it has to be a delicious Chicken Enchilada Casserole. Perfectly layered, cheesy, and bursting with flavor, this dish is a favorite among families and friends alike. Today, I’m thrilled to share my take on this classic comfort food, and I promise it’s as uncomplicated as it is scrumptious!
Now, I can almost hear the sizzling sounds of chicken cooking and the joyful chatter of loved ones gathered around the table as I write this. Chicken enchiladas have always held a special spot in my heart. Growing up, I remember my mom whipping them up on chilly weeknights, each layer crafted with love and laughter. The smell of the enchilada sauce bubbling and the sound of my siblings eagerly waiting at the table are memories that bring a smile to my face. I wanted to recreate that warmth in a way that feels fresh and accessible for you, my wonderful readers.
This Chicken Enchilada Casserole jars those nostalgic feelings and transforms them into easy-to-follow steps that anyone can embrace, regardless of cooking experience. All you need are a few simple ingredients, a dash of love, and a willingness to embark on this flavorful journey. So, grab your apron and let’s dive into this hearty and wholesome recipe that’s perfect for busy weekdays or lazy weekends!
Personal Story
As I mentioned earlier, Chicken Enchiladas were a staple in my childhood home. I can vividly recall Sunday dinners when my mom would gather us all in the kitchen, her apron dusted with flour, and her laughter bouncing off the walls like a joyous melody. Each of us had a role to play: my younger brother would shred the chicken (albeit a slightly messy job at times), while I would carefully arrange the tortillas in the baking dish. My sister would sneak in bites of cheese as we layered on the enchilada sauce, each one more delicious than the last.
It was during these moments that I truly realized the magic of cooking: it’s not just about the food but the memories we create while preparing it. As we would dig into the casserole, my mom would share stories from her childhood, her voice warm and comforting, mingling with the delicious flavors we savored. To this day, every time I make Chicken Enchilada Casserole, I think of those moments—the love, the laughter, and the delicious food that brought us together. That’s precisely the essence I aim to capture in this recipe, inviting you to create your own memories along the way.
Ingredients
Let’s gather our ingredients! Here’s what you’ll need for this flavorful Chicken Enchilada Casserole, along with some tips and tricks to make the most of each one:
-
2 cups shredded chicken: Whether it’s leftover roast chicken or rotisserie chicken from your local grocery store, this makes for a quick and easy filling. You can also use turkey for a twist!
-
8 corn or flour tortillas: This dish works wonderfully with either. Corn tortillas give a more traditional flavor, while flour ones make it a bit more hearty. Feel free to cut them into sixths for easier layering!
-
2 cups enchilada sauce: Store-bought or homemade—your choice! If you’re making it from scratch, consider adding spices like cumin or lime juice for an extra punch. If you need a low-sodium option, you can find several brands that cater to that.
-
2 cups shredded cheese (cheddar or Mexican blend): Who doesn’t love a gooey, cheesy topping? Don’t shy away from mixing varieties like Monterey Jack or pepper jack for some added flavor.
-
1 cup black beans (optional): They add an extra layer of protein and texture. If you’re not a fan, feel free to leave them out or substitute with kidney beans or even corn!
-
1 cup diced bell peppers: A pop of color and crunch! Grab whatever’s on hand—red, green, or yellow bell peppers work beautifully.
-
1 small onion, diced: Sautéed until translucent, it adds a lovely depth to the dish. You can swap for green onions for a milder flavor.
-
1 teaspoon cumin: This spice brings warmth and complements the flavors beautifully. If you’re feeling adventurous, consider trying smoked paprika for a smoky twist!
With these ingredients, you’re set up for success. Each component plays a crucial role in layering flavor, and it’s all about personal preference when you want to make swaps or additions!
Step-by-Step Instructions
Time to get cooking! Follow these easy steps to create your Chicken Enchilada Casserole:
-
Preheat Your Oven: Begin by preheating your oven to 350°F (175°C). Getting the oven hot ahead of time ensures your casserole will cook evenly and bubble nicely!
-
Cook the Aromatics: In a skillet over medium heat, add a splash of olive oil and sauté the diced onion until it becomes translucent—about 5 minutes. Add in your diced bell peppers and cook for another 3-4 minutes. The aroma will fill your kitchen with warmth and make you think twice about ordering takeout tonight!
-
Mix the Filling: In a large bowl, combine your shredded chicken, sautéed onions and bell peppers, black beans (if using), and half of your enchilada sauce. Give it a good stir to unite all those delicious flavors. I always say the filling is where the magic happens, so don’t be shy about tasting it to adjust seasonings!
-
Layer the Casserole: In a 9×13 inch baking dish, spread a few tablespoons of enchilada sauce on the bottom to prevent sticking. Layer with tortillas, placing about three or four across the bottom. Add half of the chicken mixture on top, followed by a sprinkle of cheese. Repeat the layers, finishing with tortillas, the remaining enchilada sauce, and a generous amount of cheese to cover the top. I love adding extra cheese—because, why not?!
-
Bake to Perfection: Cover the dish with aluminum foil and bake for 25 minutes. After that, remove the foil and bake for an additional 10-15 minutes, or until the cheese is bubbly and golden. While it bakes, your home will fill with heavenly scents that’ll have everyone gathering anxiously in the kitchen.
-
Cool and Slice: Once out of the oven, let the casserole sit for about 10 minutes. This allows it to set a bit, making it easier to slice. Trust me; you’ll want those perfect pieces for serving!
-
Serve and Enjoy: Now comes the best part! Serve up generous portions, and don’t forget to scoop on a bit of sour cream, guacamole, or salsa for that extra flavor kick.
These steps are simple and, with a bit of practice, you’ll feel like a pro in no time. And remember, cooking is all about having fun, so feel free to play around with the assembly and flavors!
Serving Suggestions
Plating this Chicken Enchilada Casserole is half the fun! For a beautiful presentation, serve it directly from the baking dish, garnished with fresh cilantro or green onions. Add a dollop of sour cream or some sliced avocados on the side for a refreshing contrast to the rich flavors. Pair it with a crisp green salad or some seasoned rice to complete a wholesome meal.
Recipe Variations
Now that you have the basics down, here are a few fun variations to put your own spin on this dish:
-
Vegetarian Version: Swap the chicken with sautéed mushrooms, zucchini, and black beans for a hearty vegetarian option. Add in some diced spinach for additional nutrients!
-
Spicy Kick: For those who like it hot, add diced jalapeños to the chicken filling or choose a spicier enchilada sauce to crank up the heat.
-
Tex-Mex Twist: Incorporate taco seasoning into the chicken mixture for a delightful Tex-Mex flavor that takes things up a notch.
-
Cheesy Overload: Layer the casserole with a combination of cheese, including cream cheese and pepper jack, for a rich and creamy texture.
-
Low-Carb Alternative: Use zucchini or eggplant slices in place of tortillas for a keto-friendly version that is still satisfying.
Feel free to mix and match these ideas according to your taste preferences and dietary needs!
Chef’s Notes
This Chicken Enchilada Casserole did not have an overnight success story in my kitchen. Initially, I struggled with getting the layers just right, and let’s not even talk about the times I accidentally used WAY too much cheese… if there’s such a thing! But as I experimented over the years, I learned to embrace creativity and adjust the recipe according to what I had on hand. It has evolved from a simple recipe to one that tells the story of my culinary journey—messy, delicious, and filled with fun!
Whether you mess up a little, try a new variation, or accidentally put in way too much spice, remember, it’s all part of the fun. Appreciate each delicious moment in the kitchen, and savor the joy that food brings to every table!
FAQs and Troubleshooting
Q: My casserole is too watery; what did I do wrong?
A: This could happen if too much enchilada sauce is used or if the chicken wasn’t drained well. For next time, take care to evenly distribute the sauce and allow nutrients from cooking to evaporate.
Q: Can I make this casserole ahead of time?
A: Absolutely! Assemble the casserole ahead of time, refrigerate it, and then bake it when you’re ready to dig in. Just add an extra 10-15 minutes to the baking time if it goes in chilled.
Q: What can I use instead of chicken?
A: You can substitute the chicken with shredded beef, turkey, or keep it vegetarian by using beans and veggies. The possibilities are endless!
Q: Can this be frozen?
A: Yes, you can freeze the uncooked casserole wrapped tightly in plastic wrap and foil. When you’re ready, bake directly from the freezer, adding 20-30 more minutes to the baking time.
As you can see, the Chicken Enchilada Casserole is not only a delightful dish but also versatile and adaptable to suit your culinary desires!
Nutritional Info
Per serving (assuming 8 servings):
- Calories: 350
- Fat: 15g
- Carbohydrates: 30g
- Protein: 25g
- Fiber: 5g
- Sodium: 500mg
Enjoy your creation and share the love of food with those you cherish! Now, go ahead and make that casserole that brings everyone to the table, and remember—good food nourishes the body, but it’s the hearts gathered around it that truly feed the soul. Happy cooking!
PrintChicken Enchilada Casserole

A cozy and flavorful Chicken Enchilada Casserole, perfectly layered and cheesy, making it ideal for family gatherings or weeknight dinners.
- Prep Time: 20 minutes
- Cook Time: 35 minutes
- Total Time: 55 minutes
- Yield: 8 servings 1x
- Category: Main Course
- Method: Baking
- Cuisine: Mexican
- Diet: Non-Vegetarian
Ingredients
- 2 cups shredded chicken
- 8 corn or flour tortillas
- 2 cups enchilada sauce
- 2 cups shredded cheese (cheddar or Mexican blend)
- 1 cup black beans (optional)
- 1 cup diced bell peppers
- 1 small onion, diced
- 1 teaspoon cumin
Instructions
- Preheat your oven to 350°F (175°C).
- Cook the diced onion in a skillet with olive oil until translucent, about 5 minutes. Add in the diced bell peppers and cook for another 3-4 minutes.
- Mix the shredded chicken, sautéed onions and bell peppers, black beans (if using), and half of the enchilada sauce.
- Layer a few tablespoons of enchilada sauce on the bottom of a 9×13 inch baking dish, followed by tortillas, half of the chicken mixture, and cheese. Repeat layers, finishing with tortillas and the remaining enchilada sauce and cheese.
- Bake covered for 25 minutes, then remove foil and bake for another 10-15 minutes until cheese is bubbly and golden.
- Cool for 10 minutes before slicing.
- Serve with sour cream, guacamole, or salsa.
Notes
Feel free to customize with vegetarian options or different spice levels. Leftovers store well and can be easily reheated.
Nutrition
- Serving Size: 1 serving
- Calories: 350
- Sugar: 5g
- Sodium: 500mg
- Fat: 15g
- Saturated Fat: 7g
- Unsaturated Fat: 5g
- Trans Fat: 0g
- Carbohydrates: 30g
- Fiber: 5g
- Protein: 25g
- Cholesterol: 50mg
Keywords: chicken, enchiladas, casserole, Mexican, comfort food, family meal
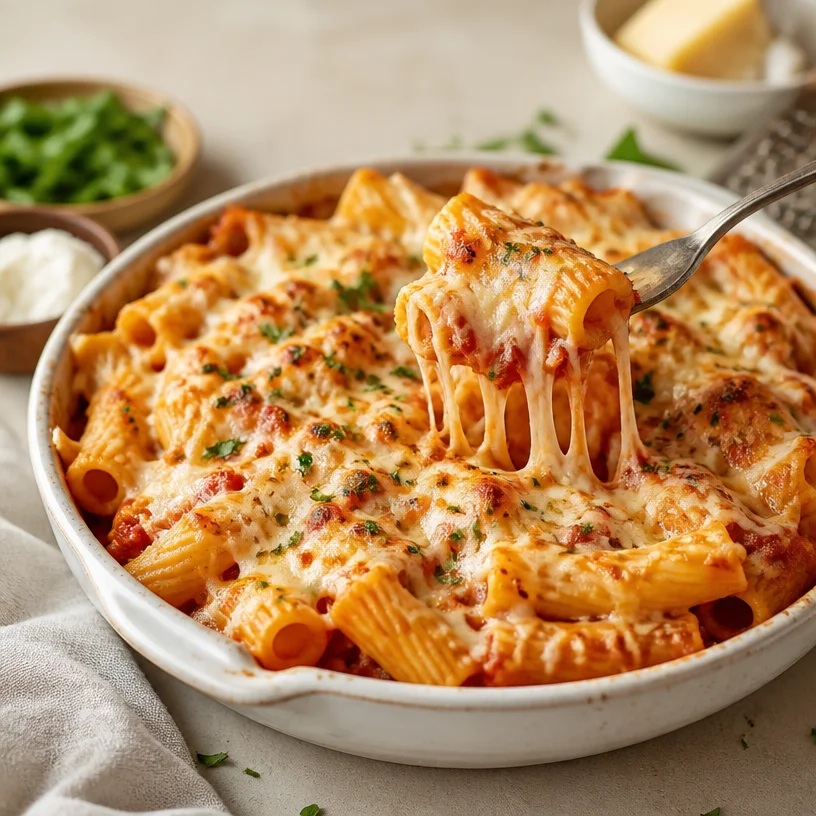
Baked Ziti
The Ultimate Comfort Food: Baked Ziti
Welcome to Clean Plate Cravings, food lovers! Today, we’re diving into one of the most comforting meals you could ever whip up—Baked Ziti. This dish is a celebration of cheesy goodness, hearty pasta, and warm, vibrant flavors that will make you feel right at home. So, grab your apron, and let’s get cooking!
A Cozy Memory
Every time I think of baked ziti, I’m transported back to my childhood kitchen, where the air was thick with the smell of marinara and melted cheese. My mom would throw this dish together on busy weeknights when the house was bustling with activity. I remember her letting me sprinkle the mozzarella cheese on top, and how it was almost like a family bonding ritual; more cheese meant more love, right? We’d sit down at our cozy table, laughter filling the room as we devoured the cheesy goodness. It was a comfort food we looked forward to and a way for her to show us she cared. Since then, I’ve tweaked the recipe to make it my own, but the essence of those happy memories remains.
Now, let’s recreate this warm and cheesy dish, perfect for gatherings, meal prep, or just a cozy night in!
Ingredients
Here’s what you’ll need for this delicious Baked Ziti:
-
Ziti: This tubular pasta is the star of the show. It holds onto the sauce perfectly and bakes beautifully! If you can’t find ziti, penne also works well as a substitute.
-
Marinara Sauce: A classic marinara brings the dish together. Feel free to use your favorite store-bought sauce, or whip up a homemade version to boost freshness.
-
Ricotta Cheese: This creamy goodness adds richness and a bit of sweetness to the dish. If you’re looking for lower-fat options, cottage cheese can fill in, although the texture might differ slightly.
-
Mozzarella Cheese: No baked ziti is complete without mozzarella! It melts beautifully and creates that bubbly, golden crust we all crave. Try swapping with provolone or a dairy-free cheese if you’re keeping it plant-based!
Step-by-Step Instructions
Let’s get cooking! Follow these simple steps to create a delicious Baked Ziti:
-
Boil the Pasta:
Start by bringing a large pot of salted water to a boil. Add about 12 ounces of ziti and cook until al dente (usually about 8-10 minutes). Remember: the pasta will cook more in the oven, so don’t overdo it! Drain and set aside. -
Prepare the Marinara:
In a large saucepan over medium heat, pour in your marinara sauce. If you’re utilizing a homemade sauce, now’s the time to add fresh herbs, a pinch of red pepper flakes, or a splash of red wine to deepen the flavor. Allow it to simmer for about 5 minutes, stirring occasionally. This step elevates many jarred sauces into something gourmet! -
Mix with Ricotta:
In a mixing bowl, combine 15 ounces of ricotta cheese, a pinch of salt, and some fresh basil or parsley for added flavor. Play around by adding garlic powder or fresh minced garlic. This creamy mixture is what makes your ziti extra special! -
Combine:
Fold the cooked ziti into the marinara sauce, ensuring each piece is coated. Then, add dollops of your ricotta cheese mixture throughout, and gently give it a stir. You want pockets of creamy ricotta in every bite. -
Layer and Top:
Preheat your oven to 375°F (190°C). In a large oven-safe dish, spread half of your ziti mixture. Sprinkle with half of your mozzarella cheese (about 1-2 cups), then layer in the remaining ziti mixture. Top it all off with the rest of the mozzarella! -
Bake:
Cover the dish with aluminum foil (shiny side down to avoid sticking) and bake for 20-25 minutes. Then, remove the foil and bake for an additional 10-15 minutes until the cheese is bubbly and golden. -
Cool and Serve:
Once out of the oven, let your baked ziti cool for about 10 minutes. This helps everything set up nicely, making it easier to serve. Garnish with a sprinkle of fresh herbs before diving in.
Serving Suggestions
Plating your baked ziti can be as relaxed or as fancy as you like! I love serving it in a rustic casserole dish right from the oven, allowing everyone to scoop their share. Place a generous serving on a plate, pairing it with a fresh side salad and maybe some garlic bread for that extra indulgence! Trust me, it’s a meal that everyone will devour.
Recipe Variations
Here are a few creative twists to keep your baked ziti exciting:
-
Veggie-Packed: Add seasonal vegetables like spinach, mushrooms, or bell peppers. Sauté them before mixing them in for an added nutritional boost.
-
Meaty Option: For meat lovers, toss in some cooked ground beef, sausage, or turkey. It adds more flavor and heartiness.
-
Cheesy Delight: Don’t be afraid to mix in different cheeses like Parmesan or goat cheese for a flavor explosion. Cheese aficionados could even try adding a dash of blue cheese for a unique flair.
-
Spicy Kick: Add a hint of heat! Mix in some sliced jalapeños or a dash of hot sauce to the marinara to give it a spicy twist.
-
Gluten-Free: Use gluten-free pasta for a fabulous alternative without sacrificing taste!
Chef’s Notes
This baked ziti recipe has evolved over the years in my kitchen. I’ve experimented with different cheeses, sauces, and add-ins, but the core memory of sharing a meal with loved ones has remained unchanged. One time, I accidentally grabbed a spicy marinara sauce that left us all reaching for glasses of water! Now I double-check the labels. Don’t let “oops” ruin your meal—embrace creativity and make it your own!
FAQs and Troubleshooting
-
What if my ziti is too dry?
If your baked ziti turns out dry, you may have overcooked it. Next time, be sure to monitor the baking time closely. If it’s still hot, drizzling a bit of olive oil or extra sauce on top can help bring moisture back. -
Can I freeze baked ziti?
Absolutely! Baked ziti freezes wonderfully. Just prepare it as directed but without baking. Cover it tight with aluminum foil and freeze. When ready to bake, thaw overnight in the fridge, and then bake as directed! -
Why is my cheese clumping together?
If your cheese is clumping up, it may be due to not using enough moisture in the dish (like sauce or ricotta). Ensure you’re generously coating your pasta and creating those delightful pockets of creamy cheese. -
How do I know when my ziti is done?
You’ll know it’s done when it’s bubbly, golden on top, and a little crispy around the edges. A toothpick should slide through easily, indicating that it’s hot and cooked throughout.
Nutritional Info (optional)
Per serving (approx.):
- Calories: 450
- Protein: 15g
- Carbohydrates: 35g
- Fat: 25g
- Fiber: 3g
Now that you have all the ingredients, tips, and personal stories, it’s time to embrace your inner chef! Baked Ziti is more than just a recipe; it’s a testament to the love of food, family, and good times in the kitchen. So roll up your sleeves, get those sauces simmering, and enjoy a serving with those you cherish. Happy cooking, foodies!
PrintBaked Ziti

A comforting dish of cheesy, hearty pasta baked to perfection with marinara and ricotta cheese.
- Prep Time: 15 minutes
- Cook Time: 30 minutes
- Total Time: 45 minutes
- Yield: 4 servings 1x
- Category: Main Course
- Method: Baking
- Cuisine: Italian
- Diet: Vegetarian
Ingredients
- 12 ounces ziti (or penne)
- 3 cups marinara sauce
- 15 ounces ricotta cheese
- 2 cups mozzarella cheese, shredded
- Salt and pepper, to taste
- Fresh basil or parsley, for garnish
Instructions
- Boil the Pasta: Bring a large pot of salted water to a boil. Add ziti and cook until al dente, about 8-10 minutes. Drain and set aside.
- Prepare the Marinara: In a large saucepan, heat the marinara sauce over medium heat and allow it to simmer for about 5 minutes.
- Mix with Ricotta: Combine ricotta cheese, a pinch of salt, and fresh basil or parsley in a mixing bowl.
- Combine: Fold the cooked ziti into the marinara sauce, adding dollops of ricotta mixture throughout.
- Layer and Top: Preheat oven to 375°F (190°C). Spread half of the ziti mixture in an oven-safe dish, sprinkle with half of the mozzarella, layer in remaining ziti, and top with remaining mozzarella.
- Bake: Cover with aluminum foil and bake for 20-25 minutes. Remove foil and bake for an additional 10-15 minutes until bubbly and golden.
- Cool and Serve: Let cool for 10 minutes, garnish with fresh herbs, and serve.
Notes
Feel free to customize with veggies or meat to enhance the flavor and nutrition.
Nutrition
- Serving Size: 1 serving
- Calories: 450
- Sugar: 6g
- Sodium: 600mg
- Fat: 25g
- Saturated Fat: 14g
- Unsaturated Fat: 8g
- Trans Fat: 0g
- Carbohydrates: 35g
- Fiber: 3g
- Protein: 15g
- Cholesterol: 60mg
Keywords: Baked Ziti, Comfort Food, Italian Pasta, Vegetarian Recipe