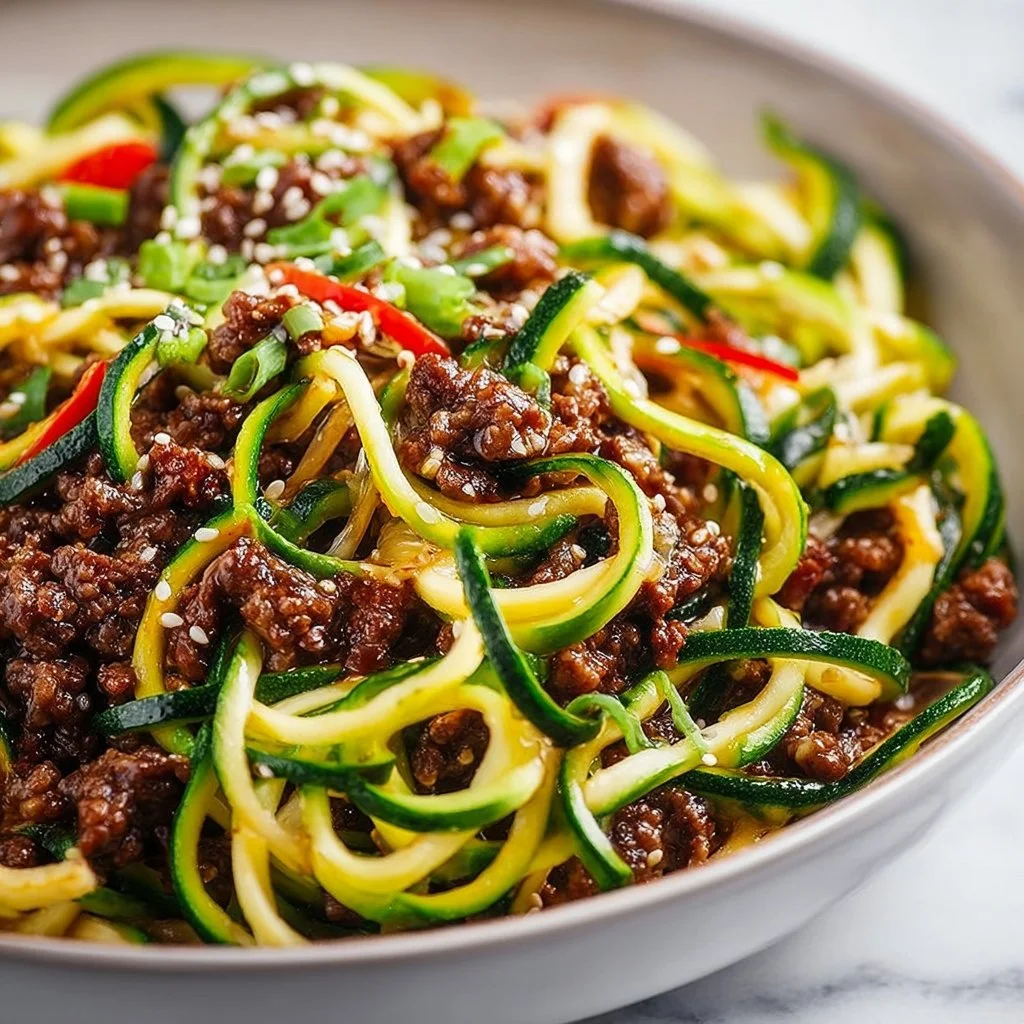
Hearty Korean Beef Zucchini Noodles
Hearty Korean Beef Zucchini Noodles: A Wholesome Twist on a Classic Dish
Welcome back to Clean Plate Cravings, where we’re all about mealtime happiness! Today, I am super excited to share a dish that hits all the right notes—Hearty Korean Beef Zucchini Noodles. If you’ve ever craved a satisfying meal that makes you feel good without compromising on flavor, buckle up because I’ve got something special for you!
Picture this: it’s a busy weekday evening, and the last thing you want to do is spend hours cooking. Yet, you’re starving for something that fuels you and delights your taste buds. That’s where my take on Korean Beef with Zucchini Noodles comes in—quick, easy, and utterly delicious! With the tender, savory beef and fresh zucchinis twirling like little green noodles in rich, bold sauce, you’re going to be hooked. And the best part? It’s all prepared in under 30 minutes!
This dish captures the essence of Korean cuisine—sweet, savory, and just a bit spicy—with the added benefit of being lighter and veggie-packed. Zucchini noodles are not only a fantastic low-carb alternative to traditional noodles, but they also soak up all those incredible flavors beautifully. Let’s dive into this culinary adventure together!
A Nostalgic Memory with Korean Flavors
Now, let me take you on a little trip down memory lane. Growing up, my family was all about gathering around the table for hearty meals. My mom was a queen of making flavors dance—especially when it came to Korean-inspired dishes. I still remember one particular meal where she introduced us to her take on beef bulgogi. The smell of marinated beef sizzling in the pan mingled with garlic and ginger filled the kitchen, turning it into a magical haven.
We’d often grab our chopsticks and dig in, but I distinctly recall the moment I realized that traditional dishes like this could fit into a healthier lifestyle. It was during one of my culinary explorations when I came across spiralizing veggies and thought, “Why not give our beloved classic a fresh twist?” And so, Korean Beef Zucchini Noodles were born—a dish that combines nostalgia with vibrant ingredients to create something truly scrumptious!
Ingredients
Here’s what you’ll need to whip up this delightful dish:
-
1 pound ground beef: Opt for lean ground beef for a healthier rendition. If you’re looking to go meatless, try ground turkey or tempeh for a plant-based twist.
-
2 medium zucchinis, spiralized: Zucchini noodles are light and full of moisture! No spiralizer? No problem—use a vegetable peeler or even buy ready-to-use spiralized zucchini from the store.
-
1 tablespoon sesame oil: This oil adds a nutty depth to the dish. For a different flavor, avocado oil works too!
-
3 cloves garlic, minced: Garlic infuses everything with flavor! If fresh isn’t available, you can use 1 teaspoon of garlic powder as a substitute.
-
1 onion, sliced: Sweet and slightly caramelized onions elevate the overall taste. Red or yellow onions work well; if you want a sharper taste, go for white onions.
-
1 red bell pepper, sliced: Bell peppers add a sweet crunch and color to our dish! Feel free to mix it up with yellow or orange bell peppers for variety.
-
1/4 cup soy sauce: This is the secret to that umami flavor! For a gluten-free option, substitute with tamari or coconut amino.
-
2 tablespoons brown sugar: It balances the savory and salty elements. You can use honey or coconut sugar for a healthier alternative.
-
1 tablespoon rice vinegar: A dash of acidity brightens the dish. Apple cider vinegar or white wine vinegar makes a good substitute.
-
1 teaspoon ginger, grated: Fresh ginger gives an aromatic kick! Ground ginger could work in a pinch if you don’t have fresh.
-
Sesame seeds, for garnish: These little beauties not only look fabulous but add a delightful crunch. You can also use chopped nuts like peanuts or cashews for extra texture.
-
Green onions, for garnish: Bright and vibrant, green onions add a fresh finish to your dish. If you’re not a fan, fresh cilantro works too!
Step-by-Step Instructions
Let’s get cooking! Here’s how to bring this Hearty Korean Beef Zucchini Noodles dish to life.
1. Prepare Your Veggies
Start by spiralizing your zucchinis if you haven’t done so already. I love using fresh veggies, as they provide a lovely crunch! If you’re using store-bought, just make sure to drain any excess water to keep your dish from getting soupy.
2. Heat the Pan
In a large skillet, heat that tablespoon of sesame oil over medium-high heat. Once it’s shimmering (but not smoking), toss in the minced garlic and sliced onion. Sauté for about 2-3 minutes until fragrant—oh, the heavenly aroma!
3. Brown the Beef
Next up, add the ground beef. Use a wooden spoon to break it up as it cooks. This should take about 5-7 minutes until it’s nice and browned. Keep stirring occasionally, ensuring even cooking. If there’s excess fat, feel free to drain it!
4. Add the Veggies
After the beef is ready, introduce the sliced bell pepper and sauté for another 2-3 minutes. You want those peppers to just soften while still holding onto their crunch.
5. Stir in the Saucy Goodness
Now, it’s time to mix in the soy sauce, brown sugar, rice vinegar, and grated ginger. Stir well to ensure everything gets coated; let it simmer for about 2 minutes.
6. Fold in the Zucchini Noodles
Finally, toss in those spiralized zucchinis. Give everything a good toss for 2-3 minutes, just until the zoodles are heated through but still retain a bit of bite. We don’t want them mushy—nobody likes soggy noodles!
7. Garnish and Serve!
Plate your masterpiece, garnishing with sesame seeds and sliced green onions. Trust me, it’ll look like something straight out of a culinary magazine.
Serving Suggestions
Serve your Hearty Korean Beef Zucchini Noodles in large bowls for a cozy presentation. Drizzle a little extra sesame oil over the top for that nutty aroma. Pair this dish with a side of kimchi or a fresh cucumber salad for a full, vibrant meal. And don’t forget to put out some chopsticks—it makes everything more fun!
Recipe Variations
Here are a few creative twists to switch things up:
- Spicy Kick: Add a teaspoon of gochujang (Korean chili paste) for a fiery explosion.
- Add More Veggies: Toss in some sliced mushrooms or snap peas for extra crunch and nutrition.
- Switch the Protein: Go for chicken or shrimp instead of beef, or even a plant-based protein like lentils or tofu.
- Whole Wheat or Gluten-Free Noodles: If you’re not feeling zoodles, opt for whole wheat or gluten-free noodles like rice noodles for a heartier base.
- Herbaceous Twist: Fresh basil or mint can be added at the end for a refreshing finish.
Chef’s Notes
As I experimented with this recipe over the years, I’ve learned that the best kitchen outcomes often come with a bit of trial and error. Initially, I was worried zucchini noodles would taste bland or watery, but I quickly discovered that with the right seasonings, they truly shine! You learn to embrace the unpredictability of cooking, which is the beauty of it—adding your personal twist makes every dish unique.
One of my favorite moments while preparing this dish occurred when I invited a few friends over for dinner. They were skeptical about substituting traditional noodles with zoodles, but by the time they took a bite, I saw their skeptical faces light up with delight. That’s a chef’s dream, my friends!
FAQs and Troubleshooting
Q: Can I make this ahead of time?
Absolutely! You can prepare the beef mixture in advance and store it in the fridge. Just reheat and add the zucchini noodles right before serving.
Q: What if my zucchini noodles are too watery?
Zucchini has a high water content, so it’s best to salt the noodles and let them sit in a colander for 10 minutes before cooking. This will help draw out excess moisture!
Q: Can I use other vegetables?
Definitely! Feel free to toss in whatever veggies you love or have on hand. Carrots, broccoli, or even cauliflower rice would work great too!
Q: How can I make this dish spicier?
Add more ginger, toss in red pepper flakes, or use a spicier soy sauce. Tweak it to your heat preference!
Nutritional Info
This Hearty Korean Beef Zucchini Noodles recipe is not only delicious but also packed with nutrients:
- Calories: Approximately 300 per serving
- Protein: 25g
- Carbohydrates: 15g
- Fat: 15g
- Fiber: 3g
Packed with protein and vitamins from the vegetables, this dish is a stellar choice for lunch or dinner!
And there you have it—a delightful journey into making Hearty Korean Beef Zucchini Noodles! I hope you feel inspired to give this dish a try in your own kitchen. Happy cooking, and don’t forget to share your culinary creations with me! Remember, cooking is all about joy, exploration, and connecting with those you love around the table. Until next time, keep it fresh, simple, and absolutely delicious!
PrintHearty Korean Beef Zucchini Noodles

A quick and delicious twist on Korean beef made with spiralized zucchini noodles, perfect for a healthy meal.
- Prep Time: 10 minutes
- Cook Time: 20 minutes
- Total Time: 30 minutes
- Yield: 4 servings 1x
- Category: Main Course
- Method: Stovetop
- Cuisine: Korean
- Diet: Paleo
Ingredients
- 1 pound ground beef
- 2 medium zucchinis, spiralized
- 1 tablespoon sesame oil
- 3 cloves garlic, minced
- 1 onion, sliced
- 1 red bell pepper, sliced
- 1/4 cup soy sauce
- 2 tablespoons brown sugar
- 1 tablespoon rice vinegar
- 1 teaspoon ginger, grated
- Sesame seeds, for garnish
- Green onions, for garnish
Instructions
- Prepare your veggies by spiralizing zucchinis if you haven’t done so already.
- Heat the pan over medium-high heat and add sesame oil.
- Brown the ground beef for about 5-7 minutes.
- Add the sliced bell pepper and sauté for another 2-3 minutes.
- Stir in soy sauce, brown sugar, rice vinegar, and ginger, and let it simmer.
- Fold in zucchini noodles and cook for an additional 2-3 minutes.
- Garnish with sesame seeds and green onions before serving.
Notes
If zucchini noodles become too watery, salt and let them sit for 10 minutes before cooking.
Nutrition
- Serving Size: 1 serving
- Calories: 300
- Sugar: 6g
- Sodium: 800mg
- Fat: 15g
- Saturated Fat: 6g
- Unsaturated Fat: 8g
- Trans Fat: 0g
- Carbohydrates: 15g
- Fiber: 3g
- Protein: 25g
- Cholesterol: 80mg
Keywords: Korean beef, zucchini noodles, healthy recipe, quick dinner, low-carb meal