
Beef Taco Soup
Deliciously Zesty Beef Taco Soup: A Warm Hug in a Bowl
Welcome back, food lovers! Today, we’re diving into a comforting bowl of beef taco soup that’s sure to satisfy your cravings and warm your heart. Have you ever craved that bold, zesty flavor of tacos but felt like sticking to a simple bowl of chili? Well, my friends, this dish is where those dreams meet a delicious reality! A fusion of all the best taco flavors braised into a hearty soup makes this recipe perfect for busy weeknights, game day gatherings, or any chilly evening when you need a little dish of comfort.
Imagine this: You come home after a long day, and the aroma of spices starts to waft through your kitchen, captivating every ounce of your existence. Your tummy rumbles, and suddenly, dinner feels like a fiesta. That’s the magic of this beef taco soup! It’s loaded with ground beef, beans, corn, and tomatoes, all coming together for a vibrant flavor explosion that will make you want to whip this up on repeat!
This recipe is not only simple but also adjustable—perfect for all kinds of eaters. You can customize it to be as spicy (or not) as you like, and it’s an excellent way to sneak in those secret veggies if you want to elevate your health game without sacrificing taste. And hey, you know we like to keep it real here—clean, wholesome, and bursting with flavor! So, grab your favorite apron, and let’s get cooking. You’ll be dishing out this delightful soup in no time!
Personal Story
Before we jump into the nitty-gritty of this awesome taco soup, let me share a little story with you. Growing up, my mom would make a version of taco soup on rainy days, and the smell would waft through the house like a cozy embrace. She was the queen of easy meals, and this one was hands-down my favorite.
As a child, I remember running home from school, excited about the bubbling pot on the stove. Mom would let me stir the pot while she added the spices, and I could barely contain my excitement as I knew dinner was going to be a flavor-packed adventure. I learned the importance of layering flavors and the beauty of using whatever we had in the pantry.
Years later, I’ve taken those lessons to heart, and I’ve tweaked the recipe countless times. Each variation brought back joyful memories while keeping that nostalgic essence alive. Now, I love sharing this recipe with you all because it’s more than just soup; it’s a trip down memory lane, and I hope it brings you the same warmth it brought me.
Ingredients
Here’s what you’ll need to whip up this fantastic beef taco soup. Each ingredient plays a crucial role, and I’ll share little tips along the way:
-
Ground Beef: The star of the show! Choose a lean ground beef for a healthier option. If you’re looking for a substitution, ground turkey or even plant-based meat crumbles work beautifully!
-
Canned Beans (black beans and kidney beans): Packed with protein and fiber, beans give our soup texture and heartiness. If you’re looking to go low-carb, you can use cauliflower rice instead!
-
Frozen or Canned Corn: Sweet corn adds a pop of color and a slight sweetness that balances the spices beautifully. If you’re avoiding corn, diced bell peppers will add color and crunch!
-
Canned Diced Tomatoes: These provide the soup base and a juicy tang. Fire-roasted tomatoes will kick it up a notch! For a fresher flavor, you can substitute with fresh diced tomatoes—just adjust your cooking time slightly.
-
Onion & Garlic: The aromatic duo that brings depth to the flavor. Don’t skip these! If you’re short on time, onion powder and garlic powder can work as quick alternatives, but fresh is always best!
-
Taco Seasoning: Store-bought or homemade, this spice blend is what makes our soup taste like tacos! If you make your own, you can customize the heat to your liking!
-
Chicken or Vegetable Broth: This provides a savory base. Go for low-sodium broth if you want to control the salt! Homemade broth adds another layer of flavor, but store-bought is perfectly acceptable too.
-
Olive Oil: A splash of oil for sautéing ties it all together. I love using extra virgin for that rich flavor, but any cooking oil works.
-
Salt and Pepper: Simple, but essential for bringing out all the flavors!
Step-by-Step Instructions
Now that we’ve gathered our ingredients, let’s embark on the soup-making journey! Here’s how you’re going to bring all these flavors together, step by step:
-
Sauté the Aromatics:
- In a large pot or Dutch oven, drizzle about 2 tablespoons of olive oil over medium heat. Let that heat for a minute or two—this is where the magic starts to happen! Then, add one finely chopped onion. Sauté it for about 3-4 minutes until it turns translucent.
- Toss in 2-3 minced garlic cloves and sauté for an additional minute. Keep an eye on it to prevent burning! (Pro tip: if the garlic starts to smell burnt, discard the whole base and start over—trust me, no one wants bitter garlic soup!)
-
Brown the Beef:
- Next, add 1 pound of ground beef to the pot. Break it apart with a wooden spoon and stir keep stirring until browned—about 5-7 minutes. Remember, browning beef adds tons of flavor, so don’t rush this step! If there’s excess fat in your pot, drain it, but leave a bit for flavor.
-
Add the Seasoning:
- Time to spice things up! Stir in 2 tablespoons of taco seasoning along with about a teaspoon of salt and pepper. This is where you can adjust flavors based on your personal preferences. Mix everything well and let it cook for about 1 minute, until it’s fragrant. Your kitchen should be smelling like a taco joint by now!
-
Incorporate the Veggies:
- Next up, throw in 1 can of drained black beans, 1 can of drained kidney beans, and 1 can of corn (or frozen corn if that’s what you have on hand). Then, add 1 can of diced tomatoes (with all the juice!) and about 4 cups of broth. Give it a good stir to combine.
-
Simmer and Develop Flavor:
- Bring this glorious mixture to a gentle boil. Once bubbling, reduce the heat to low, cover, and allow it to simmer for about 20-30 minutes. This step is essential as it allows all those delicious flavors to meld together. You can even let it simmer longer if you have the time—it gets better with patience!
-
Final Taste Adjustments:
- After simmering, taste your soup! This is your chance to adjust. Add more salt, pepper, or taco seasoning as needed. Feeling adventurous? A splash of lime juice or hot sauce at this stage can elevate it even more.
-
Serve Up the Goodness:
- Spoon out your beef taco soup into cozy bowls and top with your favorite garnishes like shredded cheese, avocado slices, or fresh cilantro. The vibrant toppings add a beautiful finishing touch!
Serving Suggestions
When it comes to serving this delightful beef taco soup, keep it casual but visually inviting. A chunky bowl topped with shredded cheese, a dollop of sour cream, some crushed tortilla chips, and chopped cilantro really elevates the presentation. A squeeze of fresh lime over the top adds a burst of zesty freshness. If you’re feeling fancy, serve with warm corn tortillas on the side for that authentic taco experience!
Recipe Variations
One of the joys of this beef taco soup is its versatility! Here are some fun ideas to switch things up:
-
Spicy Kick: Add diced jalapeños or a splash of hot sauce for those who appreciate a little heat.
-
Veggie Delight: Load it up with diced bell peppers, zucchini, or even some spinach for an extra serving of veggies.
-
Creamy Version: Stir in a cup of cream or Greek yogurt at the end for a creamy finish (perfect with a little of that lime!).
-
Quinoa or Rice Base: For a heartier meal, serve over cooked rice or quinoa.
-
Vegan Twist: Leave out the beef and replace it with lentils or diced mushrooms for a delicious vegan version.
Chef’s Notes
I’ve made this beef taco soup so many times that it almost feels second nature now! One of my funniest culinary encounters happened when I decided to experiment with a slow cooker version. I tossed in everything, set it, and completely forgot I had added an extra tablespoon of chili powder. Let’s just say my friends still tease me about the “unintentional magma chili” incident!
Over the years, I’ve refined the recipe to cater to all kinds of palates, making it a family favorite. I love how easy it is to adjust to different dietary needs without sacrificing flavor. It’s a testament to how food can evolve and adapt, just like our tastes!
FAQs and Troubleshooting
1. What’s the best way to store leftovers?
Simply transfer your cooled soup into an airtight container in the fridge. It should last about 3-4 days. You can also freeze it for up to 3 months! Just make sure to let it thaw overnight in the fridge before reheating.
2. My soup is too thick; what should I do?
No worries! You can easily thin it out by adding a little more broth or water until you reach your desired consistency. Stir it well, and it’ll be as good as new!
3. Can I make this soup in advance?
Absolutely! In fact, the flavors deepen and improve after a day or two in the fridge. Just make sure to hold off on adding any fresh toppings until you’re ready to serve!
4. How do I make it more flavorful?
If you find that your soup is missing flavor, try adding a splash of vinegar or lime juice at the end. It can really brighten and lift those deeper flavors!
Nutritional Info
This beef taco soup is not only satisfying but also packed with protein, fiber, and essential nutrients! One serving (about 1.5 cups):
- Calories: ~350
- Protein: 25g
- Carbohydrates: 30g
- Fiber: 10g
- Fats: 15g
Feel free to adjust the ingredients to fit your nutritional goals!
And there you have it—a delicious, hearty beef taco soup that’s perfect for any occasion! I hope you enjoy every spoonful as much as I do. Happy cooking, and until next time!
PrintDeliciously Zesty Beef Taco Soup

A comforting beef taco soup that combines all the best taco flavors into a hearty bowl, perfect for any chilly evening.
- Prep Time: 15 minutes
- Cook Time: 30 minutes
- Total Time: 45 minutes
- Yield: 6 servings 1x
- Category: Soup
- Method: Stovetop
- Cuisine: Mexican
- Diet: None
Ingredients
- 1 pound ground beef
- 1 can black beans, drained
- 1 can kidney beans, drained
- 1 can corn (or frozen corn)
- 1 can diced tomatoes
- 1 finely chopped onion
- 2–3 minced garlic cloves
- 2 tablespoons taco seasoning
- 4 cups chicken or vegetable broth
- 2 tablespoons olive oil
- Salt to taste
- Pepper to taste
Instructions
- Sauté the aromatics: In a large pot, heat olive oil over medium heat, add onion, and sauté until translucent. Add garlic and sauté for an additional minute.
- Brown the beef: Add ground beef and cook until browned, about 5-7 minutes. Drain excess fat if necessary.
- Add the seasoning: Stir in taco seasoning, salt, and pepper, cooking for 1 minute until fragrant.
- Incorporate the veggies: Add black beans, kidney beans, corn, diced tomatoes, and broth. Stir to combine.
- Simmer and develop flavor: Bring to a gentle boil, then reduce heat and simmer for 20-30 minutes.
- Final taste adjustments: Taste and adjust seasonings as desired.
- Serve up the goodness: Ladle into bowls and top with your favorite garnishes like shredded cheese or avocado.
Notes
Feel free to customize the spice level or add extra veggies to your soup. This dish can also be made in a slow cooker for convenience.
Nutrition
- Serving Size: 1.5 cups
- Calories: 350
- Sugar: 5g
- Sodium: 600mg
- Fat: 15g
- Saturated Fat: 6g
- Unsaturated Fat: 7g
- Trans Fat: 0g
- Carbohydrates: 30g
- Fiber: 10g
- Protein: 25g
- Cholesterol: 80mg
Keywords: beef taco soup, taco soup, easy soup recipe, comfort food, cozy dinner

Weeknight One-Pan Chicken Fajita Soup in 30 Minutes
Chicken Fajita Soup: A Flavorful Bowl of Comfort
Welcome to the cozy corner of Clean Plate Cravings! Today, we’re diving into a recipe that will warm both your heart and your tummy—Chicken Fajita Soup! Think of this dish as a big hug in a bowl. It’s packed with vibrant flavors, colorful veggies, and a warm spice blend that will make your taste buds dance. Whether you’re enjoying a laid-back lunch at home, feeding the family, or hosting a casual gathering with friends, this soup is sure to impress.
If you’ve ever bitten into a sizzling chicken fajita, you know that magical combination of smokiness and spice. Now imagine that deliciousness in a soup! This dish brings all those fantastic fajita flavors together in a warming broth that’s easy to prepare and, most importantly, totally comforting. Plus, it’s a great way to sneak in some extra veggies without anyone noticing.
So grab your apron, put on your favorite playlist, and let’s get cooking!
Personal Story
Growing up, my family had this tradition of "Fajita Friday." I remember the smells wafting through the house as my mom marinated chicken in a savory medley of spices. As the grill sizzled and the peppers charred, we all gathered around the kitchen island, filling soft tortillas with beautifully seasoned chicken, onions, and peppers. We’d laugh, share stories about our week, and savor each bite.
One rainy day, however, we found ourselves craving those beloved fajitas—but who wants to grill under an umbrella? So, we decided to get creative and turned our favorite flavors into a soup. The result was a deliciously smoky broth filled with tender chicken and colorful veggies. It was love at first spoonful! Since then, this Chicken Fajita Soup has remained a staple, making it a warm reminder of those family nights filled with love, laughter, and flavorful food.
Ingredients
Here’s what you’ll need to create this mouthwatering Chicken Fajita Soup:
-
Chicken (breast or thighs): Use boneless skinless chicken breasts or thighs, depending on your preference. If you’re in a rush, rotisserie chicken can be a great shortcut.
-
Bell Peppers: A mix of red, yellow, and green bell peppers adds an explosion of color. Feeling adventurous? Any bell pepper will do, or toss in some poblano or jalapeño for extra spice!
-
Fajita Seasoning: You can use store-bought fajita seasoning or whip up your own with chili powder, cumin, garlic powder, and paprika. This is the magic that brings those Tex-Mex vibes to the soup!
-
Beans: Black beans or pinto beans work beautifully in this recipe. They add protein and creaminess. Canned beans are super convenient, but if you prefer dry beans, don’t forget to soak and cook them first!
-
Chicken Broth: This will be your flavorful base. Homemade is always preferred, but store-bought is perfectly fine. Swapping for vegetable broth can easily make this soup vegetarian.
-
Onion: Sweet onions, like Vidalia or yellow onions, lend a lovely sweetness to the dish. White onions are a good alternative if you want a sharper flavor.
-
Garlic: Fresh minced garlic will add a fragrant punch. If you’re short on time, garlic powder works in a pinch—just cut down the amount to about half a teaspoon.
-
Olive Oil: For sautéing, use high-quality extra virgin olive oil to elevate the dish’s flavor. Alternatively, avocado oil or any neutral oil will work.
-
Lime Juice: A splash of fresh lime juice at the end brightens everything up! This is non-negotiable, so make sure to have it!
-
Cilantro (optional): Fresh cilantro adds a refreshing finish. If you’re one of those who find cilantro soapy, leave it out! A sprinkle of green onion will work too!
Step-by-Step Instructions
Now, let’s get down to the cooking! Follow these steps, and you’ll have a steaming bowl of Chicken Fajita Soup ready to satisfy your cravings.
-
Prep Your Ingredients: Before you start cooking, it’s key to chop your onions, bell peppers, and garlic. Having everything ready to go makes the process so much smoother. This is called mise en place, and it’s a chef’s best friend!
-
Sauté the Aromatics: In a large pot, heat 2 tablespoons of olive oil over medium heat. Toss in the chopped onion and sauté for about 3-4 minutes until softened. Then, add the minced garlic and sauté for an additional minute, just until fragrant. If the garlic burns, it can taste bitter, so keep an eye on it!
-
Add the Peppers: Now, it’s time to introduce the beautiful bell peppers into the mix! Cook them for about 5-7 minutes until they soften up and start to play with the heat. They’ll be a lovely rainbow in your pot!
-
Season the Chicken: Cut your chicken into bite-sized pieces and sprinkle a generous amount of fajita seasoning over it. I recommend using about 2 tablespoons, but feel free to adjust based on how spicy you want the soup! If you’re using rotisserie chicken, skip this step and move on to the next one!
-
Brown the Chicken: Add the seasoned chicken pieces to the pot and cook for about 5 minutes until they get a nice golden brown on the edges. This step enhances flavor, so don’t skip it! If you’re using pre-cooked chicken, just stir it in with the broth and beans later.
-
Pour in Chicken Broth: Once the chicken is browned, pour in 4 cups of chicken broth. Bring the mixture to a gentle boil, stirring occasionally. The broth is where all the magic happens, so make sure it bubbles away happily!
-
Add the Beans: Rinse and drain your black beans, then toss them into the pot. They’ll contribute creaminess and heartiness to the soup. If you fancy a bit of kick, this is the moment to add a chopped jalapeño!
-
Simmer Away: Let the soup simmer for 20-25 minutes on low heat. This is a great time to kick back, relax, and let those flavors meld together beautifully. If you’re feeling fancy, you can also add a bay leaf for an extra depth of flavor.
-
Finish with Lime Juice: Before serving, squeeze in the juice of one lime to give it that fresh, zesty uplift—trust me, it’s a game changer!
-
Taste and Adjust: Give the soup a taste and see if it needs any salt or extra spices. Every palate is different, so adjust the seasonings until it’s perfect for you!
Serving Suggestions
This Chicken Fajita Soup is best served hot and fresh! Ladle it into bowls, and if you’re feeling indulgent, top each serving with a dollop of sour cream or Greek yogurt, a sprinkle of shredded cheese, and fresh cilantro. You can also serve it with crispy tortilla chips for added crunch or alongside some warm, crusty bread for soaking up every last drop.
Recipe Variations
Looking to switch things up? Here are a few fun variations to try:
-
Spicy Chicken Fajita Soup: Add chopped jalapeños during the sauté process or toss in a pinch of cayenne pepper to heat things up!
-
Vegetarian Option: Swap chicken for hearty vegetables like zucchini or mushrooms and use vegetable broth. You could also add tofu for extra protein!
-
Creamier Soup: Stir in 1 cup of coconut milk or heavy cream towards the end of cooking for a luxuriously creamy texture.
-
Fajita Tortilla Soup: Serve the soup over crispy tortilla strips and top with avocado slices for a delicious twist on traditional tortilla soup.
-
Southwest Fajita Soup: Toss in corn and diced tomatoes for a sweeter flavor and added texture.
Chef’s Notes
This Chicken Fajita Soup is a bit of a crowd-pleaser in my home! It’s easy to customize, and honestly, it never comes out exactly the same way twice—each batch is a new flavor adventure. I remember one time when I figured I could use up leftover steak instead of chicken. The result was fantastic! I love that this recipe evolves with the seasons and what’s in my pantry. Whether I’m using fresh produce from the farmer’s market or just the last bits of veggies hiding in my fridge, it always transforms into something delicious.
FAQs and Troubleshooting
Q: Can I make this soup ahead of time?
A: Absolutely! This soup stores great in the fridge for up to 3 days. Just reheat it before serving! The flavors actually get better as they sit.
Q: What if I don’t have fajita seasoning?
A: No problem! You can make your own by mixing together chili powder, cumin, garlic powder, paprika, and a pinch of salt.
Q: My soup is too salty! What can I do?
A: Try adding a few slices of potato to the pot and simmer for 10 minutes; the potato will absorb some salt. Just remember to remove them before serving!
Q: How can I thicken my soup?
A: If you want a thicker texture, you can blend a cup of the soup in a blender and return it to the pot. Alternatively, you can mix a tablespoon of cornstarch with cold water to create a slurry and stir it into the soup to thicken!
Nutritional Info
(Approximate per serving)
- Calories: 320
- Protein: 30g
- Carbohydrates: 30g
- Fat: 10g
- Fiber: 7g
So there you have it, my friends—your ultimate guide to Chicken Fajita Soup! I hope you enjoy making and savoring this delightful dish as much as I do. Remember, cooking is all about having fun and experimenting. Let your taste buds lead the way, and don’t hesitate to make this recipe your own. Happy cooking!
PrintChicken Fajita Soup

A flavorful and comforting Chicken Fajita Soup packed with vibrant flavors and colorful veggies.
- Prep Time: 15 minutes
- Cook Time: 30 minutes
- Total Time: 45 minutes
- Yield: 4 servings 1x
- Category: Soup
- Method: Stovetop
- Cuisine: Mexican
- Diet: Gluten-Free
Ingredients
- 2 boneless skinless chicken breasts or thighs
- 1 red bell pepper
- 1 yellow bell pepper
- 1 green bell pepper
- 2 tablespoons fajita seasoning
- 1 can (15 oz) black beans
- 4 cups chicken broth
- 1 sweet onion
- 2 cloves garlic, minced
- 2 tablespoons olive oil
- Juice of 1 lime
- Cilantro (optional)
Instructions
- Prep your ingredients: Chop onions, bell peppers, and garlic.
- Sauté the aromatics: Heat olive oil, add onion, and sauté for 3-4 minutes. Then add garlic and sauté for 1 more minute.
- Add the peppers and cook for 5-7 minutes until softened.
- Season the chicken with fajita seasoning.
- Brown the chicken for about 5 minutes until golden brown.
- Pour in the chicken broth and bring to a gentle boil.
- Add the black beans and optional jalapeños.
- Simmer for 20-25 minutes on low heat.
- Finish with lime juice and adjust seasoning to taste.
Notes
This soup is great served with a dollop of sour cream, shredded cheese, and crispy tortilla chips.
Nutrition
- Serving Size: 1 serving
- Calories: 320
- Sugar: 5g
- Sodium: 800mg
- Fat: 10g
- Saturated Fat: 2g
- Unsaturated Fat: 8g
- Trans Fat: 0g
- Carbohydrates: 30g
- Fiber: 7g
- Protein: 30g
- Cholesterol: 75mg
Keywords: chicken, fajita, soup, comfort food, Mexican

One-Pot Creamy Roasted Red Pepper Soup in 25 Minutes
Roasted Red Pepper Soup: A Hug in a Bowl
Welcome back to Clean Plate Cravings, my foodie friends! Today, we’re diving into one of my all-time favorite comfort dishes—Roasted Red Pepper Soup. There’s something magical about this soup; it’s creamy, rich, and packed with flavor while still being wholesome and nourishing. Plus, it’s a dish that evokes fond memories.
Picture this: It was a chilly autumn evening, and I was back home from college for a weekend visit. My mom, the original culinary queen, had been experimenting with different flavors that week. She whipped up a bowl of roasted red pepper soup that enveloped our kitchen with a warm and inviting aroma. As we sat at the table, sharing stories and laughter, one taste of that soup made me feel like coming home again.
Now, let’s fast forward to today. I’ve made this creamy delight countless times, each with its own special twist. Whether it’s a quick weeknight dinner or an elegant starter for a dinner party, Roasted Red Pepper Soup always impresses. Let’s roll up our sleeves and cook up this deliciousness together!
Ingredients
To make this hearty soup, you’ll need the following ingredients:
-
Roasted Red Peppers: The star of the show! You can use jarred roasted peppers or roast your own. If you’re looking for a smoky flavor, opt for those from a can or jar. Alternatively, you can roast your peppers on an open flame or in the oven—just remember to peel off the skin afterward!
-
Fresh Tomatoes: Adds a rich depth and brightness to the soup. You can replace fresh tomatoes with canned tomatoes if you’re short on time. Look for whole or diced tomatoes for best results.
-
Heavy Cream: This gives the soup a velvety texture. If you’re looking for a lighter version, feel free to swap it for coconut milk or a dairy-free cream alternative. You could even use Greek yogurt for a tangy kick.
-
Onion: A classic base for almost any savory dish. Sweet or yellow onions work well here. If you prefer a mild flavor, try using leeks instead.
-
Garlic: This little bulb adds a punch of flavor. For a twist, you can experiment with roasted garlic for a sweeter, caramelized taste!
-
Vegetable Broth: This keeps the soup light but flavorful. Chicken broth is a great substitute if you’re not sticking to a vegetarian diet.
-
Olive Oil: Use it to sauté onions and garlic for a beautifully aromatic base. Avocado oil is a great alternative since it has a high smoke point.
-
Salt and Pepper: Essential for flavoring your dish! Kosher salt and freshly cracked black pepper elevate the taste to the next level.
-
Basil: Fresh basil adds that perfect herbaceous note. If fresh isn’t available, a sprinkle of dried basil works as a substitute.
Step-by-Step Instructions
Ready to transform these ingredients into something irresistibly delicious? Let’s get cooking!
-
Prep the Ingredients: Start by gathering all your ingredients and chopping them up. Dice the onion and mince the garlic. If you’re using fresh tomatoes, chop those up too. For those roasting your own peppers, pop them in the oven or over an open flame until they’re blistered and charred.
-
Sauté the Aromatics: In a large pot, heat 2 tablespoons of olive oil over medium heat. Toss in your diced onions and cook until they’re soft, about 5 to 7 minutes. Add in the minced garlic and cook for an additional minute, stirring constantly to prevent burning. This is where your kitchen will start smelling heavenly!
-
Add the Tomatoes and Peppers: Once the onions and garlic are beautifully aromatic, it’s time to add the fresh tomatoes and roasted peppers into the pot. Stir them around for about 5 minutes until everything is well combined and the tomatoes have released some juices.
-
Pour in the Broth: Now, grab your veggie broth and pour it all in. Bring everything to a gentle boil, then reduce the heat to a simmer. Allow this mixture to bubble away for 15 to 20 minutes, letting all those flavors meld together.
-
Blend it Up: After simmering, it’s blending time! Use an immersion blender right in the pot for convenience or transfer your soup to a blender in batches. Blend until smooth and creamy. If you like a chunkier soup, feel free to leave some bits unblended for texture.
-
Stir in the Cream: Return the blended soup to low heat and stir in the heavy cream. If you’re opting for a dairy-free version, add your coconut or almond milk at this stage. Taste and adjust the seasoning with salt and pepper as needed.
-
Garnish and Serve: Ladle your beautiful soup into bowls and garnish with fresh basil leaves. A drizzle of olive oil on top adds a nice rich finish, too. Serve with crusty whole-grain bread for dipping.
Serving Suggestions
Serve up your Roasted Red Pepper Soup in deep bowls and add a garnish of fresh basil leaves. Want to take it up a notch? Add a dollop of Greek yogurt or a sprinkle of feta cheese for that extra layer of yumminess. Ah, it’s the kind of dish that hugs you from the inside!
Recipe Variations
Now, who doesn’t love a little variety? Here are a few creative twists to keep your Roasted Red Pepper Soup fresh and exciting:
- Spicy Version: Add a pinch of red pepper flakes or a dash of cayenne pepper for a spicy kick.
- Add Some Protein: Throw in some cooked shredded chicken or chickpeas for a heartier meal.
- Herb It Up: Try incorporating different herbs such as thyme or cilantro for a unique flavor profile.
- Smoke It Out: Use smoked paprika instead of regular paprika to enhance the smoky taste of the roasted peppers.
- Zest It Up: A splash of lemon juice or a hint of lime can brighten up the flavors perfectly.
Chef’s Notes
This recipe has seen many iterations over the years, and it’s always evolving! The first time I made it, I roasted the peppers in a pan (a little too close to the flame!). As you can imagine, it turned into quite the kitchen adventure! Now I roast them on a baking sheet—the end result is smoother and definitely less frantic. Don’t be afraid to play around with the ingredients! The beauty of this soup is its flexibility, and I can guarantee that any version you make will still leave your friends guessing your secrets.
FAQs and Troubleshooting
Q: My soup turned out too thick. What can I do?
A: No worries! Simply add more broth or a splash of water until you reach your desired consistency.
Q: Can I freeze this soup?
A: Absolutely! Just store it in an airtight container, leaving some space at the top. When ready to enjoy, thaw it in the fridge overnight and heat it up on the stove.
Q: What can I use instead of cream?
A: Great question! You can substitute with coconut milk or even a non-dairy yogurt. Both will provide creaminess without dairy.
Q: How can I make this vegan?
A: Swap the heavy cream for coconut milk and omit any chicken broth—ensure you use vegetable broth!
Nutritional Info (Optional)
This soup is not only delicious but also nourishing! A single serving provides a balance of vitamins A and C from the peppers and tomatoes, healthy fats from the olive oil, and protein if you opt to add chicken or beans. Enjoy guilt-free!
And there you have it! The perfect bowl of Roasted Red Pepper Soup that’s sure to warm your heart and tickle your taste buds. Remember, this recipe is about creating joy and bringing people together, so do share it with loved ones! Happy cooking, foodies!
PrintRoasted Red Pepper Soup

A creamy and rich Roasted Red Pepper Soup that’s perfect for chilly evenings and evokes cozy memories.
- Prep Time: 10 minutes
- Cook Time: 30 minutes
- Total Time: 40 minutes
- Yield: 4 servings 1x
- Category: Soup
- Method: Blending
- Cuisine: Italian
- Diet: Vegetarian
Ingredients
- 4 Roasted Red Peppers
- 2 Fresh Tomatoes
- 1 cup Heavy Cream
- 1 Onion
- 3 cloves Garlic
- 4 cups Vegetable Broth
- 2 tbsp Olive Oil
- Salt to taste
- Pepper to taste
- Fresh Basil for garnish
Instructions
- Prep the Ingredients: Gather and chop the ingredients, dice the onion, and mince the garlic. Roast the peppers if using fresh.
- Sauté the Aromatics: Heat olive oil in a large pot, add onions, and cook until soft. Stir in minced garlic.
- Add the Tomatoes and Peppers: Combine the tomatoes and roasted peppers, cooking for about 5 minutes.
- Pour in the Broth: Add vegetable broth, bring to a boil, then reduce to a simmer for 15-20 minutes.
- Blend it Up: Use an immersion blender or transfer to a blender, blend until smooth.
- Stir in the Cream: Return to low heat and mix in the heavy cream, adjusting seasoning if needed.
- Garnish and Serve: Ladle into bowls, garnish with basil, and add a drizzle of olive oil.
Notes
For a lighter version, substitute heavy cream with coconut milk. Feel free to add protein like chicken or chickpeas.
Nutrition
- Serving Size: 1 serving
- Calories: 290
- Sugar: 6g
- Sodium: 800mg
- Fat: 18g
- Saturated Fat: 10g
- Unsaturated Fat: 8g
- Trans Fat: 0g
- Carbohydrates: 25g
- Fiber: 4g
- Protein: 5g
- Cholesterol: 40mg
Keywords: soup, roasted red pepper, comfort food

One-Pot Creamy Pumpkin Sausage Soup in 40 Minutes!
Cozy Up with a Bowl of Pumpkin Sausage Soup
As the leaves start to change and the air gets that lovely crispness, there’s nothing quite like a steaming bowl of soup to make you feel all warm and fuzzy inside. Imagine the aroma of Italian sausage mingling with the sweet, earthy notes of pumpkin, spiced just right with fresh sage—it’s like a cozy hug for your soul. Welcome to my kitchen, where we’re embracing fall flavors with open arms and a big spoon!
I’ve always loved soup—maybe it’s the nostalgia of coming home to a bubbling pot on the stove or those rainy days when you just want something hearty and nourishing. Soup feels like an invitation to slow down and savor the moment, doesn’t it? Plus, it’s the perfect excuse to gather friends and family around the table, share some laughter, and indulge in flavorful, wholesome goodness.
Today, we’re diving into a recipe that has become a staple in my home during the fall months: Pumpkin Sausage Soup. It’s sinful yet wholesome, simple yet surprisingly elegant. You will not believe how easy it is to whip up this dish, and let me tell you, your taste buds are in for a treat!
There’s something so comforting about the marriage of savory sausage and sweet pumpkin. This soup is not only rich in flavors but also packed with nutrients, thanks to the pumpkin, which is a fantastic source of vitamins and minerals. So, let’s roll up our sleeves and gather our ingredients because this is a bowl of goodness you won’t want to miss out on!
A Nostalgic Bowl of Comfort
Growing up, my family had a tradition of making a big pot of soup every Sunday. It was our way of prepping for the week ahead, and each week featured a different recipe. One chilly autumn day, my grandmother decided to combine her love for Italian flavors with the abundance of pumpkins we had harvested from the garden.
She infused her signature sausage and spices into a creamy pumpkin concoction that instantly became a family favorite. As we gathered around the dinner table, I remember slurping up that creamy, vibrant soup and feeling the warmth spreading through me. It was more than just food; it was a connection to my roots and a shared experience with loved ones.
Now, every time I make Pumpkin Sausage Soup, I’m transported back to those joyful Sundays, the laughter echoing in the kitchen, and the aroma that filled our home. Today, I invite you to create your own memories with this charming dish. Trust me; you’ll want to share this recipe far and wide!
Ingredients
-
Italian Sausage: The star of the show! You can use either sweet or spicy sausage to elevate the flavor. For a lighter version, feel free to swap with turkey or chicken sausage.
-
Pumpkin Puree: This brings a rich, creamy texture and a naturally sweet flavor. Canned pumpkin puree is a great time-saver, but if you feel adventurous, roast fresh pumpkin for a more intense flavor!
-
Fresh Sage: The aromatic herb adds depth to the soup. If you don’t have fresh sage, dried sage works, but use it sparingly as it has a stronger flavor.
-
Broth: Chicken or vegetable broth forms the base of the soup. You can make it from scratch, but store-bought is just as good! For a richer flavor, use bone broth.
Step-by-Step Instructions
Step 1: Brown the Sausage
Start by heating a large pot over medium heat. Add the Italian sausage and break it apart with a wooden spoon. Cook until it’s browned and lovely, about 5-7 minutes. Here’s a little tip: For extra flavor, let the sausage caramelize a bit before you add any other ingredients! This browning process develops a depth of flavor that you don’t want to skip.
Step 2: Sauté the Aromatics
Once the sausage is browned, add a chopped onion and a couple of minced garlic cloves to the pot. Sauté until the onion is translucent, which should take about 3-4 minutes. Ah, the smell of onion and garlic wafting through the air is pure bliss! It adds that foundational flavor that makes your soup sing.
Step 3: Add the Pumpkin and Broth
Stir in the pumpkin puree, making sure it’s well combined with the sausage and onions. Pour in 4 cups of your choice of broth and give it a good stir. Bring this delicious mixture to a simmer. You’ll want to let it simmer for about 10-15 minutes to allow the flavors to meld beautifully.
Step 4: Season with Sage
Chop up a handful of fresh sage and toss it into the pot. Cook it for another 5 minutes or so. If you’re using dried sage, add it earlier—when you first introduce the broth—so the flavors can infuse fully. The sage’s earthy aroma will fill your kitchen, making it feel like fall in full bloom!
Step 5: Taste and Adjust
Now comes the fun part—taste your soup! This is your moment to tweak those flavors. If you want a little more zing, add a pinch of salt and pepper or a dash of red pepper flakes for heat. If your soup needs a touch more sweetness, a splash of maple syrup or a drizzle of honey can work wonders.
Step 6: Blend for Creaminess (Optional)
If you prefer a creamy texture, you can use an immersion blender directly in the pot. Blend until it’s as smooth or chunky as you like! If you don’t have an immersion blender, carefully transfer portions of the soup to a regular blender—just be sure to let it cool slightly before blending to avoid any hot splashes!
Step 7: Serve and Enjoy!
Ladle your delicious soup into bowls, finishing each with a sprinkle of fresh sage or a drizzle of olive oil for an extra touch of flair. You could even top it off with some grated Parmesan cheese if you’re feeling indulgent.
Serving Suggestions
This Pumpkin Sausage Soup is delicious on its own, but it pairs beautifully with crusty bread or a side salad. If you’re serving it at a gathering, consider providing a variety of toppings like sunflower seeds, croutons, or extra cheese to allow guests to customize their bowls. You can also serve it in hollowed-out bread bowls for a fun and visually appealing twist!
Recipe Variations
-
Spicy Pumpkin Sausage Soup: Add some chopped jalapeños or a splash of hot sauce for an extra kick!
-
Vegetarian Twist: Swap out the sausage for a variety of beans—cannellini or chickpeas work well and add protein without the meat.
-
Creamy Version: Stir in a splash of coconut milk or heavy cream at the end of cooking for a velvety finish.
-
Herb Infusion: Experiment with different herbs. Thyme or rosemary can add a lovely earthy flavor to the soup.
-
Add Greens: Stir in a handful of fresh spinach or kale right before serving for a nutritional boost!
Chef’s Notes
Whenever I make this soup, I like to reminisce about those spicy discussions about recipes with my grandmother. This soup has evolved over the years—I’ve added my own twists here and there—but the essence remains the same: comfort, flavor, and the ability to gather people together. I still use a touch of her secret seasoning mix (don’t ask—it’s a family treasure!), and the memories of cooking alongside her make every bowl even more special.
FAQs and Troubleshooting
-
Can I use fresh pumpkin instead of canned pureé?
Absolutely! Just make sure to roast your pumpkin first until tender, then scoop out the flesh for the soup. -
What if my soup is too thick?
Simply add more broth or water, and stir it in until you reach your desired consistency. -
Can I make this ahead of time?
Yes! This soup actually tastes better the next day once the flavors have melded. Just store it in the fridge, and reheat before serving. -
How do I store leftovers?
Pour leftover soup into an airtight container, and it will keep well in the refrigerator for about 3-4 days. You can also freeze it for up to three months—just make sure to allow it to cool completely before freezing.
Nutritional Info
This Pumpkin Sausage Soup is rich in healthy fats, fiber, and a plethora of vitamins. Each serving offers a good balance of protein from the sausage and nutrients from the pumpkin and sage. It’s a hearty meal with the warmth and comfort you crave, all while embracing wholesome ingredients!
Now that you have this delightful recipe up your sleeve, all that’s left to do is gather your ingredients, fluff up your apron, and get cookin’! Trust me, this Pumpkin Sausage Soup will not only fill your belly but also provide ample memories to cherish. Enjoy, and happy cooking!
PrintPumpkin Sausage Soup

A cozy bowl of Pumpkin Sausage Soup combining savory sausage and sweet pumpkin, perfect for fall.
- Prep Time: 15 minutes
- Cook Time: 30 minutes
- Total Time: 45 minutes
- Yield: 4 servings 1x
- Category: Soup
- Method: Cooking
- Cuisine: Italian
- Diet: Paleo
Ingredients
- 1 lb Italian sausage
- 1 can (15 oz) pumpkin puree
- 1/2 cup fresh sage, chopped (or dried sage)
- 4 cups chicken or vegetable broth
- 1 onion, chopped
- 2 cloves garlic, minced
- Salt and pepper, to taste
- Red pepper flakes, optional
- Maple syrup or honey, optional
- Olive oil, for drizzling
- Parmesan cheese, for serving (optional)
Instructions
- Brown the sausage by heating a large pot over medium heat. Add the Italian sausage and cook until it’s browned, about 5-7 minutes.
- Sauté the chopped onion and minced garlic until the onion is translucent, about 3-4 minutes.
- Add the pumpkin puree and stir well, then pour in the broth and bring to a simmer for 10-15 minutes.
- Season with chopped fresh sage, cooking for another 5 minutes.
- Taste and adjust flavors with salt, pepper, and optional sweeteners.
- Blend the soup with an immersion blender for a creamier texture, if desired.
- Serve in bowls, garnished with fresh sage and a drizzle of olive oil.
Notes
For variations, consider adding jalapeños for spice or replacing sausage with beans for a vegetarian option.
Nutrition
- Serving Size: 1 bowl
- Calories: 350
- Sugar: 5g
- Sodium: 400mg
- Fat: 20g
- Saturated Fat: 6g
- Unsaturated Fat: 14g
- Trans Fat: 0g
- Carbohydrates: 30g
- Fiber: 5g
- Protein: 15g
- Cholesterol: 60mg
Keywords: pumpkin soup, sausage soup, fall recipes, comfort food
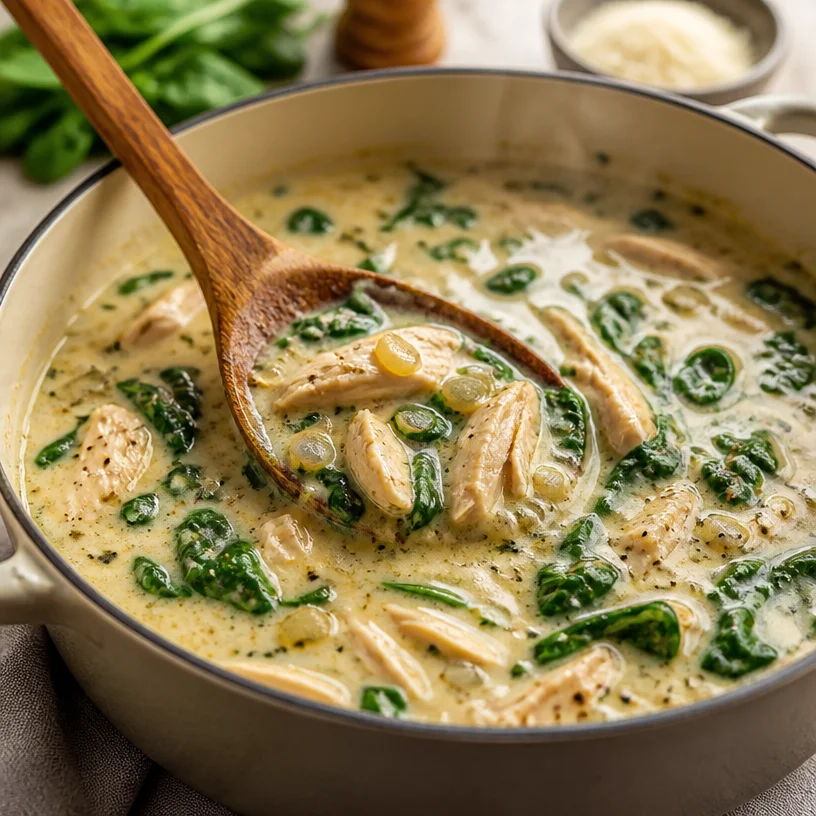
One-Pot Creamy Spinach Chicken Soup for Weeknights
Creamy Spinach Chicken Soup: A Cozy Delight!
Introduction
Oh, hey there, fellow food enthusiasts! Welcome back to another exciting culinary adventure in my cozy kitchen. Today, we’re diving into a dish that’s as wholesome as it is delightful: Creamy Spinach Chicken Soup. Picture this: a warm bowl of goodness, brimming with tender pieces of chicken, vibrant green spinach, and a rich, creamy broth that makes your heart sing. It’s the ultimate comfort food, perfect for those chilly evenings or whenever you simply need a hug in a bowl.
I’ve always believed that a good soup can transform even the dreariest of days. This Creamy Spinach Chicken Soup is not just another recipe in my collection—it’s a delicious reminder of home, family, and the warmth that a truly great meal can bring. The best part? It’s super easy to whip up, so even on the busiest of days, you can treat yourself and your loved ones to something special.
As we navigate our fast-paced lives, it’s all too easy to let healthy eating take a back seat. But I’m here to tell you: eating well doesn’t have to be boring or complicated! When you cook with fresh, simple ingredients and a sprinkle of love, you get a meal that is both nourishing and utterly satisfying. So, roll up your sleeves, grab your apron, and let’s get cooking—you’re going to love how easy and rewarding this Creamy Spinach Chicken Soup is!
Personal Story
I’ll never forget the very first time I made this creamy delight. It was a brisk fall evening, and the leaves outside swirled in shades of amber and gold. My grandma had just come to visit, and we decided to cook together. As we gathered all the ingredients, the delightful aroma of garlic sautéing in butter filled the kitchen. With the radio softly playing our favorite tunes, we reminisced about family dinners and the delightful recipes passed down through generations.
Grandma shared her secret ingredient—an extra dash of love, of course! As we stirred the pot, I felt a wave of nostalgia wash over me. We giggled and swapped stories about the mishaps in the kitchen (like the time I mistook salt for sugar in her famous cake recipe!). That day, in that warm, bustling kitchen, I didn’t just learn to make a fantastic soup; I learned the importance of creating memories around food. With each slurp of that first spoonful, I knew this was going to be a go-to dish in my kitchen for years to come.
Ingredients
Here’s a rundown of what you’ll need to bring this creamy masterpiece to life:
-
Chicken (boneless, skinless thighs or breasts)
- Chef Insight: I prefer thighs for their juicy flavor, but chicken breasts work just fine! Feel free to use pre-cooked chicken if you’re in a pinch—just add it at the end to heat through.
-
Fresh Spinach
- Substitution Tip: No fresh spinach? No problem! You can use frozen spinach; just thaw and drain it well to avoid watery soup.
-
Heavy Cream
- Chef Insight: For an extra indulgent soup, go with heavy cream. If you’re looking for a lighter version, half-and-half or even coconut milk can work beautifully.
-
Parmesan Cheese
- Chef Insight: Freshly grated is best! It melts into the soup and adds a wonderful nutty flavor. If you’re dairy-free, try nutritional yeast for a cheesy flavor profile.
-
Chicken Broth
- Chef Insight: Homemade broth is always ideal, but store-bought works perfectly. Just watch the sodium levels if you’re keeping it heart-healthy.
-
Garlic and Onion
- Substitution Tip: Fresh is best, but you can use garlic and onion powder if that’s all you have on hand.
-
Olive Oil or Butter
- Chef Insight: Both work well! Olive oil is great for heart health, while butter adds a lovely richness.
-
Salt and Pepper
- Simple Tip: Always season as you go! It helps build flavor layer by layer.
Step-by-Step Instructions
Alright, let’s get down to the nitty-gritty of creating this luscious soup!
-
Prep Your Ingredients: Start by cubing your chicken into bite-sized pieces. Chop the garlic and onion. If using fresh spinach, give it a good rinse and roughly chop it. Tip: Having everything ready before you start cooking makes the process smoother and more enjoyable!
-
Cook the Chicken: In a large pot, heat 2 tablespoons of olive oil over medium heat. Once hot, add the chicken and season with salt and pepper. Sauté for about 5-7 minutes until lightly browned and cooked through. Chef Hack: If you want extra flavor, consider marinating the chicken ahead of time with some lemon juice and herbs!
-
Add the Aromatics: Once your chicken is nicely cooked, add the chopped onions and garlic to the pot. Sauté for another 2-3 minutes until they’re translucent and fragrant. Smart Tip: Garlic can burn quickly, so keep an eye on it! Stir, stir, stir!
-
Pour in the Broth: Now, let’s bring the soup together. Pour in 4 cups of chicken broth and let it come to a gentle simmer. Pro Tip: Scrape the bottom of the pot to deglaze and release those flavorful bits!
-
Incorporate the Spinach: Once simmering, stir in the fresh spinach. It will wilt quickly, so don’t worry! This adds vibrant color and nutrients to your soup. Cook for an additional 2-3 minutes. Tip: If you’re using frozen spinach, add it now—just give it a few extra minutes to heat through.
-
Make it Creamy: Lower the heat and pour in 1 cup of heavy cream. Stir well, and let the flavors meld for about 5 minutes. You’ll start to see that beautiful, creamy texture come together! Chef Insight: Always taste before serving! Adjust seasoning as needed.
-
Add Parmesan: Stir in ½ cup of grated Parmesan cheese until melted and fully combined. This is where the magic happens, my friends! Cheese Lover Tip: Reserve some Parmesan for garnishing right before serving for a beautiful finish!
-
Serve It Up: Once it’s all combined, remove the pot from the heat. Ladle the soup into bowls and get ready to enjoy! Tip: A sprinkle of freshly cracked black pepper adds a lovely finishing touch!
Serving Suggestions
Served hot, this Creamy Spinach Chicken Soup pairs excellently with a crusty piece of garlic bread or a simple side salad. For an artistic flair, drizzle a little extra cream on top or sprinkle with fresh herbs like parsley or basil. Add a wedge of lemon on the side for those who love a zesty kick—it’s sure to brighten up every spoonful!
Recipe Variations
Feeling a little adventurous? Here are some fun twists on this classic recipe:
- Add More Veggies: Toss in diced carrots, celery, or zucchini for added texture and nutrition.
- Spicy Kick: Add a pinch of red pepper flakes or a splash of hot sauce for those who like it spicy!
- Herbal Delight: Experiment with fresh herbs like dill or thyme to elevate the flavor.
- Creamy Vegan Version: Swap chicken for cannellini beans, use coconut milk, and nutritional yeast for a vegan twist.
- Curry Flavor: Stir in a tablespoon of curry powder for a unique and exotic flavor profile.
Chef’s Notes
Oh, the memories tied to this soup! Over the years, I’ve made countless variations, sometimes adding leftover veggies or experimenting with different cheeses. What began as my grandma’s recipe has evolved into a versatile dish that changes with the seasons. I remember one Thanksgiving when I had a plethora of leftover turkey—who knew turkey could be a fantastic substitute in this creamy soup? It was a hit!
And let’s face it, who doesn’t love the cozy warmth of a bowl of soup on a chilly evening? No matter how it’s made or what it includes, a little soup always seems to solve life’s little woes.
FAQs and Troubleshooting
-
Q: Why is my soup too thick?
- A: No worries! Just add a bit more broth or water to reach your desired consistency. Stir well, and it should come together nicely.
-
Q: Can I make this soup in advance?
- A: Absolutely! You can store it in an airtight container in the refrigerator for up to 3 days. Just keep in mind that it may thicken, so you might need to add a splash of broth when reheating.
-
Q: What if I don’t have all the ingredients?
- A: This recipe is super flexible! Use what you have. Don’t stress over exact measurements—cooking is all about creativity.
-
Q: How can I make this dish gluten-free?
- A: This recipe is naturally gluten-free! Just be sure to check your broth and any additional ingredients you might add.
Nutritional Info
Serving Size: 1 cup
- Calories: Approx. 350
- Protein: 30g
- Fat: 22g
- Carbohydrates: 8g
- Fiber: 2g
- Sugar: 2g
And there you have it, my fellow foodies! A delicious, creamy bowl of Spinach Chicken Soup that’s sure to bring comfort and joy to your dining table. Remember, cooking is more than just combining ingredients—it’s about creating memories, nourishing our bodies, and savoring every moment. So grab your spoon, gather around the table, and enjoy every spoonful of this tasty creation! Happy cooking!
PrintCreamy Spinach Chicken Soup

A warm and cozy soup filled with tender chicken, vibrant spinach, and a rich, creamy broth.
- Prep Time: 15 minutes
- Cook Time: 30 minutes
- Total Time: 45 minutes
- Yield: 4 servings 1x
- Category: Main Course
- Method: Stovetop
- Cuisine: American
- Diet: Gluten-Free
Ingredients
- 1 lb Chicken (boneless, skinless thighs or breasts)
- 4 cups Fresh Spinach
- 1 cup Heavy Cream
- ½ cup Parmesan Cheese (freshly grated)
- 4 cups Chicken Broth
- 3 cloves Garlic (minced)
- 1 Onion (chopped)
- 2 tbsp Olive Oil or Butter
- Salt and Pepper to taste
Instructions
- Prep your ingredients: Start by cubing your chicken into bite-sized pieces. Chop the garlic and onion. If using fresh spinach, give it a good rinse and roughly chop it.
- Cook the chicken: In a large pot, heat 2 tablespoons of olive oil over medium heat. Add the chicken and season with salt and pepper. Sauté for about 5-7 minutes until lightly browned and cooked through.
- Add the aromatics: Once your chicken is cooked, add the chopped onions and garlic to the pot. Sauté for another 2-3 minutes until they’re translucent and fragrant.
- Pour in the broth: Pour in 4 cups of chicken broth and let it come to a gentle simmer.
- Incorporate the spinach: Once simmering, stir in the fresh spinach. Cook for an additional 2-3 minutes.
- Make it creamy: Lower the heat and pour in 1 cup of heavy cream. Stir well and let the flavors meld for about 5 minutes.
- Add Parmesan: Stir in ½ cup of grated Parmesan cheese until melted and fully combined.
- Serve it up: Ladle the soup into bowls and enjoy!
Notes
Pairs well with garlic bread or a side salad. For a zesty kick, add lemon wedges.
Nutrition
- Serving Size: 1 cup
- Calories: 350
- Sugar: 2g
- Sodium: 600mg
- Fat: 22g
- Saturated Fat: 10g
- Unsaturated Fat: 9g
- Trans Fat: 0g
- Carbohydrates: 8g
- Fiber: 2g
- Protein: 30g
- Cholesterol: 90mg
Keywords: Creamy Soup, Chicken Soup, Spinach Soup, Comfort Food, Easy Recipes
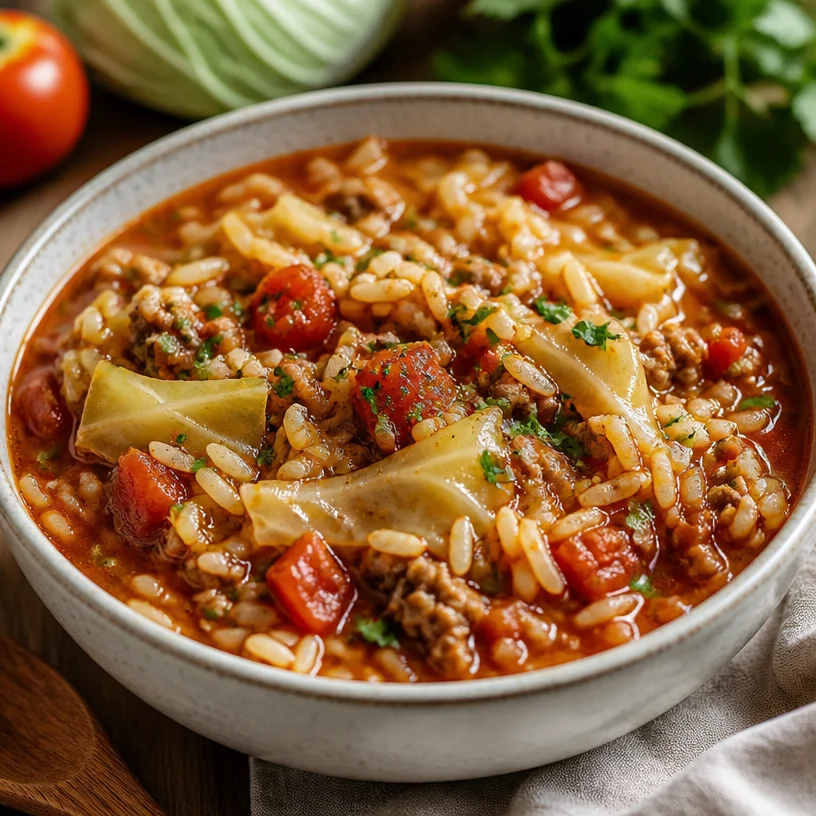
One-Pot Cabbage Roll Soup: 30-Minute Weeknight Comfort
Cabbage Roll Soup: A Comforting Bowl of Joy
Welcome back, my fellow food lovers! Today, we’re diving into a bowl of warmth and nostalgia with a hearty recipe for Cabbage Roll Soup. If you’ve ever enjoyed the comforting flavors of traditional cabbage rolls but wanted a quicker, more manageable version, you’re in for a treat. This dish hits all the right notes: it’s packed with savory goodness, simple to prepare, and utterly satisfying. So grab your apron, get cozy, and let’s cook up something delicious!
Personal Story: A Family Tradition Reimagined
Growing up, cabbage rolls were a staple at our family gatherings. My grandma would spend hours in the kitchen, her apron dusted with flour and spices, while we eagerly awaited the delicious aromas wafting from the oven. There was something magical about those tightly wrapped rolls, bursting with flavor and served alongside a dollop of sour cream.
As I transitioned into adulthood, I adored recreating this memory in my own kitchen. However, life got busy, and those cherished cabbage rolls began to feel like a weekend-only project. That’s when Cabbage Roll Soup came to my rescue! It combines all those nostalgic flavors into a cozy, one-pot meal that’s perfect for weeknight dinners. Now, whenever I make this soup, I’m reminded of my grandma’s loving touch and how food has a way of connecting us across generations.
Ingredients
Here’s what you need to whip up this comforting dish:
-
Ground Beef: This is the hearty base of your soup, contributing rich flavor and protein. If you want a leaner option, try substituting with ground turkey or chicken!
-
Cabbage: The star of the show! Use green cabbage for traditional flavors, but feel free to mix in some savoy or napa cabbage for a twist.
-
Rice: This adds texture and heartiness. I prefer long-grain white or brown rice, but quinoa or cauliflower rice are fantastic alternatives for a gluten-free option.
-
Canned Tomatoes: Diced tomatoes bring in acidity and sweetness. If you’re feeling adventurous, crushed tomatoes or even fire-roasted tomatoes can elevate the flavor profile, or use fresh tomatoes in season.
-
Vegetable Broth: The liquid base for your soup. Chicken broth works too, and you could even use water if you’re in a pinch, but the broth adds a depth of flavor you won’t want to skip.
-
Onion & Garlic: These aromatics are the underpinning of any flavorful dish. They’re indispensable! Shallots can stand in for onions, while garlic powder can replace fresh if needed.
-
Spices: Salt, pepper, Italian seasoning, and a dash of paprika will season the soup beautifully. These can be adjusted according to your taste—feel free to add more or swap with your favorite herbs!
-
Sugar: Just a pinch to balance the acidity of the tomatoes. Brown sugar can be used for a different nuance, or even maple syrup for a touch of sweetness!
Step-by-Step Instructions
-
Sauté the Aromatics: In a large pot, warm up a splash of olive oil over medium heat. Toss in diced onion and minced garlic, stirring frequently until they’re soft and fragrant—about 3-4 minutes. This is where your flavor base starts to bloom!
-
Brown the Beef: Push the aromatics to the side, then add your ground beef into the pot. Break it up with a wooden spoon and cook until it’s no longer pink. This usually takes about 5-7 minutes. Don’t forget to season with salt and pepper at this stage to build layers of flavor!
-
Incorporate the Cabbage: Once the beef is browned, stir in the chopped cabbage. It might seem like a lot, but remember, it wilts down significantly when cooked. Sauté for another 5 minutes until it starts to soften.
-
Add the Liquids: Pour in the canned tomatoes along with their juices and the vegetable broth. Stir everything gently to combine. The vibrant colors alone will make your kitchen feel cozy!
-
Season It Up: Sprinkle the Italian seasoning and paprika into the mix. This is where you can adjust according to your preference. Love it spicy? Try adding red pepper flakes!
-
Simmer and Cook the Rice: Bring the soup to a gentle boil, then reduce the heat to low. Add in the rice, stirring to combine. Cover and let it simmer for about 20-25 minutes or until the rice is tender. Be sure to stir occasionally—this soup loves attention!
-
Final Touches: Toward the end of cooking, taste your soup and adjust the seasoning if necessary. Remember the pinch of sugar? Toss it in! It’ll help to mellow out the acidity of the tomatoes.
-
Serve It Up: Your Cabbage Roll Soup is ready! Ladle it into bowls and garnish with fresh parsley or a dollop of sour cream for that classic cabbage roll experience.
Serving Suggestions
This soup is best enjoyed warm, ideally with some crusty bread for dipping. You could also serve it over a bed of rice or with a side salad for a more rounded meal. For those cozy nights in, why not curl up on the couch with a big bowl of soup and your favorite show?
Recipe Variations
- Spicy Kick: Add diced jalapeños or a splash of hot sauce for those who love extra heat.
- Vegetarian Delight: Substitute ground beef for lentils or chickpeas, and use vegetable broth to keep it plant-based.
- Dairy-Free: Omit any creamy toppings or use a dairy-free sour cream alternative for a vegan version.
- Extra Veggies: Stir in some carrots or bell peppers for added nutrition and color.
- Herb Infusion: Try adding fresh herbs like dill or thyme for an extra layer of flavor.
Chef’s Notes
This soup has come a long way from Grandma’s stove to my modern-day kitchen! Originally, I followed a very traditional route, but with time, I’ve learned to be adventurous with flavors and textures. It’s become a beloved dish for family dinners, potlucks, and meal prep. The best part? It all comes together in one pot, making cleanup a breeze!
Every time I cook this soup, I can’t help but smile. It takes me back to those joyful family moments, reminding me that cooking is not just about the food; it’s about connections, stories, and the love that goes into every meal.
FAQs and Troubleshooting
Q: Can I freeze Cabbage Roll Soup?
A: Absolutely! This soup freezes beautifully. Just let it cool completely before portioning it out into airtight containers. It can last up to 3 months in the freezer!
Q: What if my soup is too thick?
A: If your soup turns out thicker than you’d like, simply stir in a bit more broth or water until you reach your desired consistency.
Q: Can I make this soup in a slow cooker?
A: Yes! Brown the beef and sauté the aromatics first, then transfer everything to a slow cooker. Cook on low for 6-8 hours or on high for 3-4 hours. Just add the cooked rice at the end, or serve it alongside.
Q: Is there a way to make this soup ahead of time?
A: Definitely! You can prepare everything up to cooking the rice the day before. Just store it in the fridge and finish cooking when you’re ready to serve.
Nutritional Info
As a bonus, here are the approximate nutritional values per serving (this may vary based on specific ingredients and quantities):
- Calories: 350
- Protein: 20g
- Carbohydrates: 40g
- Fat: 15g
- Fiber: 5g
- Vitamin C: 50% of Daily Value
Now you’re all set to create a memorable meal that not only satisfies your hunger but also warms your heart! I can’t wait for you to delve into this recipe and make some of your own memories around the dinner table. Happy cooking, and remember—keep it fresh, simple, and delicious!
PrintCabbage Roll Soup

A comforting bowl of Cabbage Roll Soup packed with savory flavors and perfect for weeknight dinners.
- Prep Time: 15 minutes
- Cook Time: 35 minutes
- Total Time: 50 minutes
- Yield: 6 servings 1x
- Category: Main Course
- Method: Stovetop
- Cuisine: American
- Diet: Gluten-Free
Ingredients
- 1 lb Ground Beef
- 1 head Green Cabbage, chopped
- 1 cup Long-grain Rice
- 1 can (14 oz) Diced Tomatoes
- 4 cups Vegetable Broth
- 1 Onion, diced
- 3 cloves Garlic, minced
- Salt, to taste
- Pepper, to taste
- 1 tsp Italian Seasoning
- 1/2 tsp Paprika
- 1 tsp Sugar
- Olive Oil, for sautéing
Instructions
- Sauté the aromatics: Warm olive oil in a large pot over medium heat. Add diced onion and minced garlic, stirring until soft, about 3-4 minutes.
- Brown the beef: Push aromatics to the side, add ground beef and cook until no longer pink, about 5-7 minutes. Season with salt and pepper.
- Incorporate the cabbage: Stir in chopped cabbage and sauté for another 5 minutes until it starts to soften.
- Add the liquids: Pour in diced tomatoes and vegetable broth, stirring to combine.
- Season it up: Sprinkle in Italian seasoning and paprika, adjusting to taste.
- Simmer and cook the rice: Bring to a boil, then reduce heat to low. Add rice, cover, and simmer for 20-25 minutes until rice is tender.
- Final touches: Taste and adjust seasoning as necessary, adding sugar to mellow out acidity.
- Serve it up: Ladle into bowls and garnish with parsley or sour cream.
Notes
This soup can be frozen for up to 3 months. It can also be adapted to be vegetarian by replacing ground beef with lentils or chickpeas.
Nutrition
- Serving Size: 1 serving
- Calories: 350
- Sugar: 5g
- Sodium: 500mg
- Fat: 15g
- Saturated Fat: 5g
- Unsaturated Fat: 8g
- Trans Fat: 0g
- Carbohydrates: 40g
- Fiber: 5g
- Protein: 20g
- Cholesterol: 70mg
Keywords: Cabbage Roll Soup, Comfort Food, Hearty Soup, Family Recipe
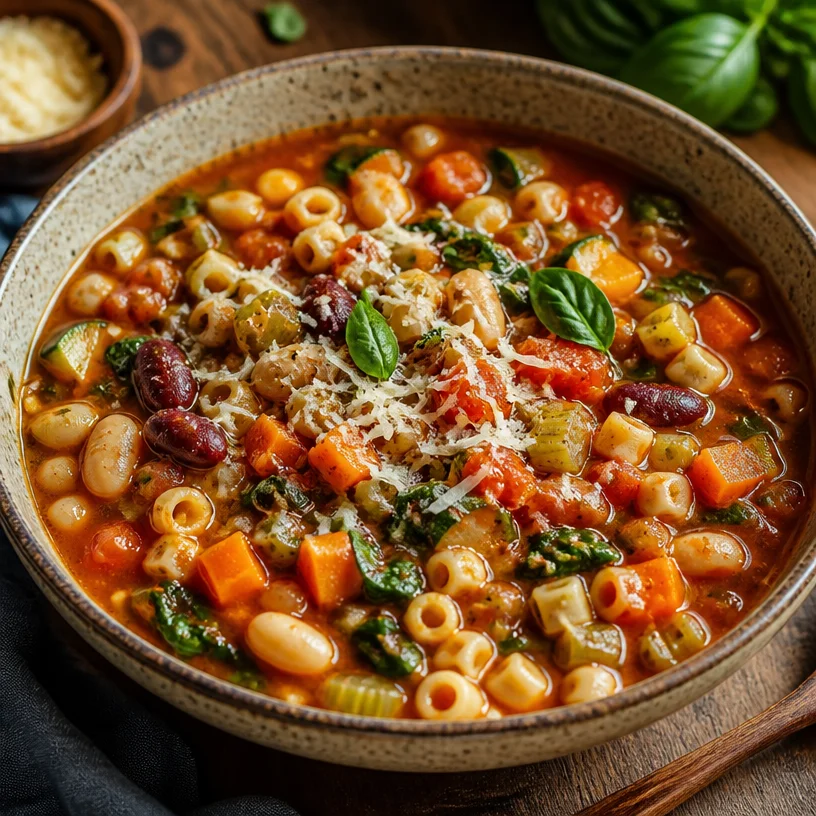
Minestrone
A Hearty Bowl of Comfort: The Ultimate Minestrone Recipe
Welcome to Clean Plate Cravings! Today, we’re diving into a delightful classic that warms the soul and fills the belly—minestrone soup. This isn’t just any bowl of soup; it’s a vibrant, chunky, and incredibly satisfying medley of flavors that not only keeps you cozy but also nourishes you with wholesome ingredients. One whiff of this simmering goodness and you’ll feel like you’ve been wrapped in a warm hug on a chilly day.
Minestrone is the perfect dish for those moments when you’re craving comfort but want something healthy and filling. With its roots in Italian cuisine, this substantial soup is an inviting swirl of fresh vegetables, beans, and pasta, each ingredient telling its own delightful story. Fast, flexible, and downright delicious, minestrone is just as much about the journey of cooking as it is about the final result in your bowl.
As you get ready to cook up this delicious masterpiece, let’s roll up our sleeves and explore the heartwarming tale of how a simple bowl of minestrone is not just food, but a vessel for camaraderie, memories, and a zest for life.
A Culinary Memory: My First Taste of Minestrone
Growing up, Sundays were reserved for family and food—and boy, did we feast! My grandmother, a fierce Italian matriarch, would spend hours in her cozy kitchen, stirring up pots of minestrone that could comfort even the weariest of souls. The aroma would spread through the house like a warm embrace, inviting everyone to gather around the table.
I remember the vibrant colors of fresh vegetables she would chop—green beans, carrots, and the occasional zucchini. But it wasn’t just about the beautiful ingredients or her perfectly executed technique. It was the stories we shared over that meal: stories of our family history, childhood shenanigans, and dreams for the future. Each bowl of minestrone was an offering of love and laughter, served alongside crusty bread, and of course, her infamous chocolate cake for dessert.
That first taste was pure magic—each spoonful packed with flavor, warmth, and a sprinkle of nostalgia. Little did I know back then that I would grow up to share my own version of this recipe, carrying forward those beautiful memories while adding my personal twist. So, let’s whip up a batch of my cherished minestrone soup, bringing people together over a wholesome and delicious dish!
Ingredients
Let’s gather our ingredients and embrace the hearty goodness of minestrone. Here’s what you’ll need to whip up your own comforting bowl:
-
Beans (Cannellini or Kidney Beans)
- These creamy legumes are the protein-packed stars of the show. They add texture and heartiness. If you’re not a fan of canned beans, you can soak and cook dried beans beforehand. For a swap, try using lentils or chickpeas!
-
Pasta (Ditalini, or any small variety)
- Short and sturdy, these tiny pasta pieces are perfect for scooping up soup with your spoon. You can swap this with gluten-free pasta or even quinoa for a twist. Just remember to adjust cooking times accordingly!
-
Tomatoes (Canned diced or crushed)
- The base of your soup’s rich flavor. I prefer using canned tomatoes for that deep, roasted taste, but fresh tomatoes can work beautifully too. For those avoiding nightshades, try using pureed carrots or pumpkin for a unique twist!
-
Vegetables (Carrots, Celery, Zucchini, Spinach, etc.)
- The backbone of your minestrone! Any combination of seasonal veggies works here—get creative! If you’re missing an ingredient, feel free to substitute with whatever you have in the fridge. Squash, kale, or even some leftover roasted veggies would be right at home here.
-
Olive Oil, Garlic, and Onion
- The Holy Trinity of flavor! These add depth and aroma that will make your kitchen smell divine. Don’t skimp on them! If you’re in a pinch, aromatics like shallots or leeks could substitute well.
-
Vegetable Broth
- A must for that rich, savory base! Make your own or use store-bought. Choose low-sodium to control the saltiness of the final dish, or try a homemade mushroom broth for a deeper, earthier flavor.
-
Herbs (Basil, Thyme, Parsley)
- Fresh herbs elevate any dish. They add bright flavors and freshness. If you only have dried herbs, adjust the quantity to about one-third of what you’d use fresh.
Step-by-Step Instructions
Are you ready to bring this minestrone soup to life? Let’s get cooking!
-
Prep Your Ingredients:
- Start by washing and chopping all your veggies into bite-sized pieces. This not only speeds up the cooking process but also creates an aesthetically pleasing dish. Pro Tip: When chopping, put on some music or a podcast; it makes the prep work feel less like a chore!
-
Sauté Aromatics:
- In a large pot, heat a couple of tablespoons of olive oil over medium heat. Toss in chopped onions and minced garlic. Stir frequently and let them sweat it out for about 5 minutes until they become translucent and fragrant. Here’s a fun chef hack: If you want a deeper garlic flavor, add it towards the end of the sautéing process!
-
Add the Vegetables:
- Next, add your chopped carrots, celery, and zucchini. Sauté these beauties for about 5 to 7 minutes until slightly softened. You want them to maintain some crunch for texture—nobody likes mushy veggies!
-
Mix in the Beans and Tomatoes:
- Toss in your beans and canned tomatoes along with a splash of their juice. Stir everything together and let it dance for a minute, coating the veggies in that rich tomato goodness. If you have leftover roasted vegetables from dinner, now’s the time to throw them in!
-
Pour the Broth:
- Add about 4 to 6 cups of vegetable broth, depending on how thick or soupy you like your minestrone. Bring to a rapid simmer! The exciting bubbling will help meld the flavors together. Tip: If you like a bit of heat, add a pinch of red pepper flakes now!
-
Season and Simmer:
- Season your soup generously with salt, pepper, and herbs. Let it simmer for about 20-30 minutes, uncovered, allowing those flavors to develop beautifully. Stir occasionally and get ready for the aroma to whisk you away! Remember, tasting is key. Adjust seasoning as needed.
-
Cook the Pasta:
- While your soup simmers, boil a small pot of salted water for the pasta. Cook it al dente according to the package instructions. If you’re making this soup ahead of time, consider cooking the pasta separately and adding it when you reheat to prevent it from getting mushy.
-
Add Greens:
- Finally, stir in the spinach (or kale) a few minutes before serving. Let it wilt down in the hot broth—this not only adds color but also gives a nutritional boost.
-
Serve and Enjoy:
- Serve hot with a sprinkle of fresh parsley and a drizzle of olive oil. Pair it with crusty bread or a simple green salad for a complete meal. If you’re feeling fancy, a sprinkle of grated Parmesan cheese on top is always a warm welcome!
Serving Suggestions
When it comes to serving minestrone, presentation can elevate the experience. Ladle the soup into warm bowls, and for a little extra pop, chop fresh basil or parsley to sprinkle on top. A drizzle of high-quality olive oil or a sprinkle of Parmesan adds a touch of elegance! Pair this gorgeous bowl with some crusty sourdough bread or a fresh green salad for a delightful meal.
Recipe Variations
Here are some fun twists to make your minestrone even more exciting!
-
Pesto Twist: Stir in a couple of tablespoons of pesto just before serving for an herbaceous kick.
-
Spicy Kick: Add diced jalapeños or crushed red pepper flakes for a spicy version that will warm your soul!
-
Protein Boost: Mix in some shredded rotisserie chicken or Italian sausage for an added protein punch.
-
Savory Mushroom: Swap half of the broth with mushroom broth for an earthy, robust flavor.
-
Creamy Delight: Stir in a splash of coconut milk for a creamy, dairy-free option, perfect for a different flavor profile!
Chef’s Notes
Minestrone is a dish that has come a long way since my grandmother’s kitchen. Over the years, I’ve learned to embrace seasonal veggies and local ingredients. I love experimenting with flavors from different cuisines that inspire me. Remember, recipes are starting points—feel free to improvise and make it your own. And let’s be real—cooking sometimes leads to kitchen blunders too! One time, I may have accidentally grabbed the cayenne instead of black pepper. Let’s say we had a “fiery” soup that evening.
Embrace the joy of cooking, the laughter of family, and the endless possibilities waiting for you with every pot of minestrone!
FAQs and Troubleshooting
Q: Why is my minestrone soup too salty?
- If the soup becomes too salty, add a peeled potato to the pot while it simmers. The potato will absorb excess salt. Remove it before serving!
Q: Can I freeze minestrone soup?
- Absolutely! Just make sure to undercook the pasta slightly as it will continue to cook when reheated. Freeze in airtight containers, and it will keep for up to 3 months.
Q: How can I make this recipe vegan?
- This minestrone is naturally vegan! Just ensure your vegetable broth is free from any animal products.
Q: Can I add other vegetables?
- Yes! This is the beauty of minestrone—you can use whatever veggies are in season or leftover in your fridge. Broccoli, bell peppers, or peas are great additions!
Nutritional Info (Optional)
While each ingredient is packed with nourishment, a typical serving of minestrone contains a balance of protein, fiber, vitamins, and minerals, making it a wholesome meal option.
Remember, eating should be enjoyable, never restrictive—but with a little creativity and a dash of love, you can maintain balance while savoring every bite! So, gather your ingredients, channel your inner chef, and let the magic of minestrone transform your kitchen into a place of comfort and joy. Happy cooking!
PrintThe Ultimate Minestrone Recipe

A vibrant, chunky, and comforting Italian minestrone soup filled with fresh vegetables, beans, and pasta.
- Prep Time: 15 minutes
- Cook Time: 30 minutes
- Total Time: 45 minutes
- Yield: 4 servings 1x
- Category: Soup
- Method: Simmering
- Cuisine: Italian
- Diet: Vegan
Ingredients
- 2 cups Beans (Cannellini or Kidney Beans)
- 1 cup Pasta (Ditalini or any small variety)
- 2 cups Tomatoes (Canned diced or crushed)
- 2 cups Vegetables (Carrots, Celery, Zucchini, Spinach, etc.)
- 2 tablespoons Olive Oil
- 3 cloves Garlic, minced
- 1 Onion, chopped
- 4–6 cups Vegetable Broth
- Fresh Herbs (Basil, Thyme, Parsley)
Instructions
- Prep your ingredients: Wash and chop all veggies into bite-sized pieces.
- Sauté aromatics: Heat olive oil in a large pot and add onions and garlic, cooking until translucent.
- Add the vegetables: Toss in carrots, celery, and zucchini; sauté for 5-7 minutes.
- Mix in the beans and tomatoes with a splash of juice.
- Pour the broth in and bring to a rapid simmer.
- Season and let it simmer for 20-30 minutes, stirring occasionally.
- Cook the pasta in a separate pot according to package instructions.
- Add greens: Stir in spinach a few minutes before serving.
- Serve hot with fresh parsley and a drizzle of olive oil.
Notes
Feel free to improvise with seasonal veggies and different herbs. Enjoy with crusty bread or a salad.
Nutrition
- Serving Size: 1 serving
- Calories: 300
- Sugar: 5g
- Sodium: 800mg
- Fat: 10g
- Saturated Fat: 1g
- Unsaturated Fat: 7g
- Trans Fat: 0g
- Carbohydrates: 45g
- Fiber: 10g
- Protein: 12g
- Cholesterol: 0mg
Keywords: minestrone, soup, healthy comfort food, Italian soup, vegan recipe
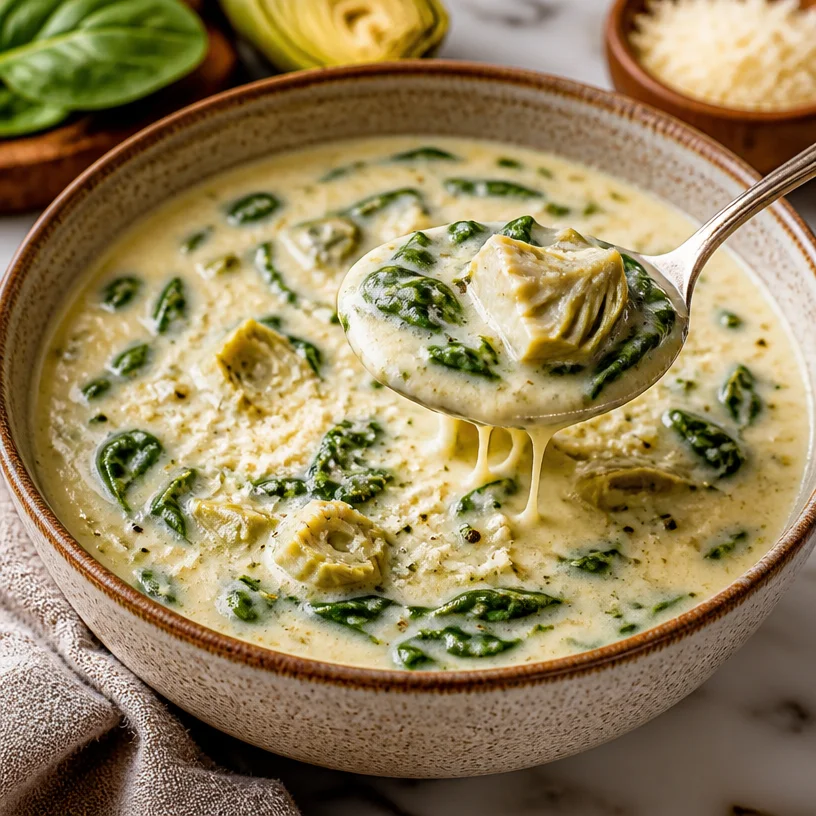
Creamy Spinach Artichoke Soup in 20 Minutes (Weeknight)
Spinach Artichoke Soup: A Warm Embrace in a Bowl
Welcome, dear foodies! Let’s take a cozy journey together through the world of flavors, warmth, and comfort as we dive into a bowl of Spinach Artichoke Soup. If you’ve never experienced the creamy, savory delight of this dish, then prepare yourselves! This isn’t just any soup; it’s a hug in a bowl, perfect for chilly nights or whenever you need a little pick-me-up.
If I’ve learned anything from my years swaying with my wooden spoon in the kitchen, it’s that certain dishes hold memories that stick with us like the smell of warm bread wafting through the house. Spinach Artichoke Soup is one of those nostalgic treasures for me. I remember the first time I made it for my friends during a dinner party at my tiny apartment. At the time, I was a little overwhelmed by fancy recipes, but the beauty of this soup lay in its simplicity. It required minimal effort and maximum flavor, making it a star of the evening.
The aroma filled the air, and as my friends gathered around the table, we shared not just a meal but bursts of laughter, stories, and the kind of connection that stays etched in our hearts. Each spoonful was like wrapping my taste buds in a velvety embrace—rich, creamy, and utterly satisfying. So, grab your favorite apron, and let’s re-create that magical moment in your kitchen!
Personal Story: The Dinner Party that Sparked a Tradition
Picture this: a dimly lit apartment with an eclectic mix of mismatched chairs and a table overflowing with my latest culinary experiments. It was a crisp autumn evening, and I invited a few close friends over to catch up and share my latest kitchen creations. The evening took a delightful turn when I decided to whip up my Spinach Artichoke Soup.
I vividly remember scooping the creamy goodness into bowls, steam rising up like a little cloud of happiness. The moment everyone took their first spoonful, the room erupted in a chorus of "Mmm!" and "Wow!" Laughter filled the air as we reminisced about our college days, and I felt like a real chef for the first time.
As the years went by, my Spinach Artichoke Soup became a staple at all gatherings, evolving into a tradition. It was the go-to dish for game nights, movie marathons, and even comforting rainy day lunches. That night, I discovered the power of food to bring people together, and I’ve carried that lesson with me ever since. Now, let’s create those beautiful moments in your home!
Ingredients
Let’s gather our ingredients! This vibrant soup is made with a few simple, wholesome ingredients. Each one adds something special to the dish, so let’s take a closer look:
-
Fresh Spinach: The star of our show! Spinach is packed with nutrients and offers a mild, earthy flavor that blends beautifully in a creamy soup. If you’re out of fresh spinach, you can substitute with frozen spinach—just ensure to thaw and drain it well!
-
Artichoke Hearts: These tender hearts contribute a unique, slightly tangy flavor that complements the richness of the cheese. Canned or frozen artichoke hearts work perfectly, but if you have fresh ones, feel free to use them as well—just make sure to prep them properly!
-
Cream Cheese: This creamy delight gives our soup a luscious texture. It melts smoothly into the broth, making every spoonful feel indulgent. For a lighter option, try using Neufchâtel cheese, or for a vegan version, coconut cream can work in a pinch.
-
Parmesan Cheese: The finishing touch! Parmesan adds a nutty, salty depth of flavor that rounds out the soup beautifully. If you’re dairy-free, try nutritional yeast for that cheesy umami kick!
Step-by-Step Instructions
Now that we have our ingredients lined up, let’s get cooking! Follow me, and I’ll share my step-by-step guide to making the most delicious Spinach Artichoke Soup.
Step 1: Sautéing the Base
In a large pot, heat about 2 tablespoons of olive oil over medium heat. Once it’s shimmering, toss in one chopped onion and three cloves of minced garlic. Sauté for about 3–5 minutes until the onions are translucent and fragrant. Chef’s tip: Always keep a close eye on your garlic to avoid burning it—it can go from golden to bitter in a heartbeat!
Step 2: Adding Spinach
Once the onion and garlic are ready, it’s time to toss in 8 ounces of fresh spinach. Stir for about 2–3 minutes, or until the spinach has wilted down. If you’re using frozen spinach, let it thaw slightly before adding it in. A great way to enhance flavor is to sprinkle in a bit of salt while cooking; it brings out the moisture!
Step 3: Incorporating Artichokes
Next, drain and chop 1 can (or about 14 ounces) of artichoke hearts and add them to the pot. Stir to combine and let them mingle with our sautéed goodness for an additional 2 minutes. Those artichokes are like little pockets of flavor just waiting to shine!
Step 4: Creamy Bliss
Now for the creamy part! Add 8 ounces of cream cheese (you can let it soften slightly beforehand) into the pot, along with 4 cups of vegetable broth and a bit of black pepper and red pepper flakes to taste. Stir everything together, allowing the cream cheese to melt and blend into the broth. Chef’s hack: If you want an ultra-smooth soup, you can use an immersion blender at this stage to get rid of any lumps!
Step 5: Finishing Touches
Once it’s all simmered together, slowly stir in ½ cup of grated Parmesan cheese until it’s melted and incorporated. Taste and adjust seasoning if needed—maybe a pinch of salt or a squeeze of fresh lemon juice to brighten it up? Simmer the soup for about 10 minutes, allowing all the flavors to marry beautifully.
Step 6: Serving It Up
When you’re ready to serve, ladle the soup into bowls. You can garnish it with a sprinkle of extra Parmesan and a few cracks of black pepper for presentation. Maybe even some fresh herbs like parsley or basil for a pop of color!
Serving Suggestions
This soup can be enjoyed on its own, but it pairs beautifully with crusty bread, a side salad, or even your favorite grilled cheese sandwich! I love serving it with a slice of sourdough, letting that crusty goodness soak up the creamy soup. Trust me, nothing warms the soul quite like this combination!
Recipe Variations
Feel like mixing things up? Here are a few ways you can add your own twist to this Spinach Artichoke Soup recipe:
- Add Protein: Toss in some cooked chicken, turkey, or even white beans for added heartiness.
- Spice It Up: Want a kick? Experiment with different spices like smoked paprika or cayenne pepper for an added layer of flavor.
- Swap the Greens: Don’t have spinach? Try kale or Swiss chard for a different texture and taste.
- Vegan Version: Substitute the cream cheese and Parmesan with cashew cream and nutritional yeast for a plant-based delight!
Chef’s Notes
This recipe has truly come a long way since that cozy dinner party. I’ve had my fair share of experiments—once I accidentally used feta cheese instead of Parmesan, and while it was a happy accident, I still love my classic version best. Each iteration taught me something new about flavor balance, and I love sharing these experiences with fellow food lovers.
Food is a journey, and this Spinach Artichoke Soup has proven to be the perfect vehicle for creating memories. So go ahead and make it your own. It’s perfect for sharing and is guaranteed to make your kitchen feel like home!
FAQs and Troubleshooting
Q1: Why is my soup too thick?
If your soup turns out too thick, simply whisk in more vegetable broth until you reach your desired consistency.
Q2: Can I use frozen artichokes?
Absolutely! Just be sure to thaw and drain them well before adding them to the soup.
Q3: How long will leftovers last?
This soup keeps well in the refrigerator for about 3-4 days. Just make sure to store it in an airtight container!
Q4: Can I freeze this soup?
Yes! Allow the soup to cool completely, then store it in freezer-safe containers. It can last for up to 3 months. Just be cautious about the cream cheese—freezing might alter its texture slightly.
Nutritional Info
While I’m not one to focus solely on numbers in the kitchen, a serving of this Spinach Artichoke Soup is packed with nutrients, including vitamins A, C, and K, and offers a nice amount of calcium from the cheese. It’s the perfect way to feel good while enjoying something utterly delicious!
So there you have it—your ultimate guide to crafting a hearty, creamy Spinach Artichoke Soup that warms more than just your belly. Gather your favorite people around the table, share some stories, and savor this delightful dish that’s sure to become a cherished recipe in your home. Happy cooking!
PrintSpinach Artichoke Soup

A creamy and savory Spinach Artichoke Soup that’s perfect for chilly nights or whenever you need comfort in a bowl.
- Prep Time: 10 minutes
- Cook Time: 30 minutes
- Total Time: 40 minutes
- Yield: 4 servings 1x
- Category: Soup
- Method: Stovetop
- Cuisine: American
- Diet: Vegetarian
Ingredients
- 8 ounces fresh Spinach
- 1 can (14 ounces) Artichoke Hearts
- 8 ounces Cream Cheese
- ½ cup grated Parmesan Cheese
- 1 chopped Onion
- 3 cloves minced Garlic
- 4 cups Vegetable Broth
- 2 tablespoons Olive Oil
- Black Pepper to taste
- Red Pepper Flakes to taste
- Salt to taste
Instructions
- Heat 2 tablespoons of olive oil in a large pot over medium heat. Add chopped onion and minced garlic, and sauté for about 3–5 minutes until translucent.
- Toss in 8 ounces of fresh spinach and stir for about 2–3 minutes until wilted.
- Add drained and chopped artichoke hearts to the pot, stir to combine, and let mingle for 2 minutes.
- Incorporate 8 ounces of cream cheese, 4 cups of vegetable broth, and season with black pepper and red pepper flakes. Stir until cream cheese melts.
- Slowly stir in ½ cup of grated Parmesan cheese until melted. Taste and adjust seasoning as needed.
- Simmer the soup for about 10 minutes to allow flavors to marry. Serve hot.
Notes
For a lighter option, substitute cream cheese with Neufchâtel cheese. For a vegan version, use coconut cream for cream cheese and nutritional yeast for Parmesan.
Nutrition
- Serving Size: 1 bowl
- Calories: 320
- Sugar: 4g
- Sodium: 600mg
- Fat: 22g
- Saturated Fat: 10g
- Unsaturated Fat: 8g
- Trans Fat: 0g
- Carbohydrates: 24g
- Fiber: 5g
- Protein: 10g
- Cholesterol: 40mg
Keywords: soup, spinach, artichoke, comfort food, creamy soup

One-Pot Creamy Chicken Corn Chowder for Weeknights
The Comfort of Chicken Corn Chowder: A Cozy Bowl of Happiness
Nothing says comfort food quite like a warm bowl of chicken corn chowder. As a self-proclaimed soup enthusiast, I can confidently declare that there’s a magic about this dish that warms the soul and brings back fond memories. Whether it’s a chilly evening or you’re just craving something hearty, this creamy concoction is guaranteed to hit the spot!
I remember the first time I had chicken corn chowder. I was a child, curled up on the couch after a long day of playing outside. My grandma would whip up a big pot of it, and that smell wafting through the kitchen was the ultimate signal that it was time to gather around the table. Each spoonful was filled with tender chicken, sweet corn, and creamy goodness, making me feel safe and adored. To this day, no matter where I am, if I have a bowl of chicken corn chowder in front of me, I’m transported back to those cozy evenings with my family.
A Journey Through Flavors: What You’ll Need
To make this delightful chicken corn chowder, gather these simple yet impactful ingredients. Each of them plays a special role in making this dish bright, creamy, and utterly satisfying.
-
Chicken: Use boneless, skinless chicken breasts or thighs. Breasts are leaner, while thighs bring more flavor. If you want to save time, use a rotisserie chicken!
-
Corn: Fresh is best, but frozen or canned corn can work beautifully too. Always rinse canned corn to reduce sodium.
-
Potatoes: Yukon gold or russet potatoes add a creamy texture. If you’re looking for a twist, try sweet potatoes for a hint of natural sweetness.
-
Cream: Heavy cream adds the rich, velvety texture we love in chowder. You can use half-and-half for a lighter version, or even coconut milk for dairy-free!
-
Onions: Sweet onions like Vidalia or yellow onions will caramelize beautifully for that sweet base flavor.
-
Garlic: Fresh garlic brings depth to your dish. Feel free to add extra—more garlic, more love!
-
Broth: Chicken or vegetable broth enhances the flavor profile. Homemade broth works wonders but store-bought is just fine for weeknight ease.
-
Seasonings: Fresh thyme, salt, and pepper enhance the overall flavor. If you want a hint of spice, throw in some paprika!
-
Optional Toppings: Fresh herbs, crispy bacon, or a dollop of sour cream add that extra special touch before serving.
Step-by-Step Instructions: Let’s Get Cooking!
Ready to dive into this comfort food magic? Grab your apron and let’s get started!
-
Prep the Ingredients: Start by dicing your chicken into bite-sized pieces. This will help it cook evenly. Also, chop your onion, mince the garlic, and dice the potatoes. This step is crucial because we want everything prepped and ready for a smooth cooking experience!
-
Cook the Chicken: In a large pot or Dutch oven, heat a drizzle of olive oil over medium heat. Add the chicken pieces and season with a pinch of salt and pepper. Cook until golden brown, about 5-7 minutes. Chef tip: Don’t overcrowd the pan; cook in batches if needed. This ensures that the chicken has a nice sear!
-
Sauté the Aromatics: Once the chicken is cooked through, add the chopped onion and minced garlic to the pot. Sauté for about 3-4 minutes until the onions are translucent and the garlic is fragrant. Those aromas will make your kitchen smell divine!
-
Add the Potatoes and Broth: Toss in the diced potatoes and pour in your broth. You want just enough broth to cover the ingredients. Bring it to a gentle simmer, cover, and let it cook for about 15 minutes, or until the potatoes are fork-tender. Quick chef hack: If you want to speed this process up, dice your potatoes into smaller pieces!
-
Stir in the Corn and Cream: After the potatoes are tender, stir in the corn and pour in the cream. Allow it to simmer for another 5-10 minutes. This is where the magic happens, and your chowder begins to thicken beautifully. Note: For a thicker chowder, mash a few of the potatoes against the side of the pot—instant creamy texture!
-
Season to Taste: Taste the chowder and adjust seasonings to your liking. A little more salt? A sprinkle of fresh thyme? Maybe even a pinch of cayenne for some heat?
-
Serve Warm: Once the chowder has reached your desired flavor and thickness, ladle it into bowls. Top with fresh herbs, crispy bacon, or a drizzle of olive oil for that finishing touch.
Serving Suggestions: A Beautiful Bowl
Presentation matters! Serve your chicken corn chowder in deep, rustic bowls for that cozy appeal. Garnish with freshly chopped chives or parsley for color and brightness. A slice of crusty bread on the side will elevate the whole experience. Trust me, you’ll want to soak up every last drop!
Recipe Variations: Switch It Up!
Looking to customize this chowder to your taste? Here are some fun variations:
-
Spicy Twist: Add some diced jalapeños for a delicious kick.
-
Herbastic Blend: Swap out thyme for fresh dill or add in fresh basil for a bright flavor.
-
Vegetarian Delight: Substitute chicken for chickpeas or white beans, and use vegetable broth for a meatless option.
-
Cheesy Goodness: Stir in shredded cheddar cheese for a rich, cheesy version. Just be careful not to boil once it’s added—nobody likes curdled cheese!
Chef’s Notes: A Personal Touch
This chicken corn chowder has evolved over the years in my kitchen. I originally followed my grandma’s traditional recipe, but as I started cooking for my friends, I experimented! Adding different spices, using bold flavors, and even prepping my ingredients differently made this dish truly my own. One time, I attempted to make it "skinny" by cutting down on the cream, but my friends insisted I kick it up a notch. Sometimes, you just need to embrace the yum!
FAQs and Troubleshooting: Your Cooking Questions Answered
-
Can I make this chowder ahead of time? Absolutely! In fact, it often tastes even better the next day as the flavors meld together. Just store it in the fridge and reheat gently.
-
Why did my chowder come out too thin? If your chowder is too thin, try mashing some of the potatoes against the side of the pot or let it simmer uncovered for a bit to help thicken.
-
Can I freeze the chowder? Yes, but be aware that the cream may separate when reheating. If you plan to freeze it, consider adding the cream when you reheat.
-
What can I use instead of chicken? You can substitute with tofu, beans, or more vegetables. Just make sure to adjust cooking times accordingly!
Nutritional Info (Optional)
This chicken corn chowder is a hearty meal that packs a nutritional punch. While specific values will depend on the exact ingredients and portions used, you can expect a dish that’s high in protein (thanks to the chicken), carbohydrates (from potatoes and corn), and a satisfying amount of healthy fats from the cream.
Chicken corn chowder isn’t just a recipe; it’s a story, a memory, a moment of connection with the people we love. I hope this dish warms your heart and fills your belly with joy. So grab a bowl—it’s time to enjoy some cozy comfort food! Happy cooking!
PrintChicken Corn Chowder

A warm and comforting bowl of chicken corn chowder, perfect for chilly evenings and family gatherings.
- Prep Time: 15 minutes
- Cook Time: 30 minutes
- Total Time: 45 minutes
- Yield: 4 servings 1x
- Category: Soup
- Method: Stovetop
- Cuisine: American
- Diet: Gluten Free
Ingredients
- 1 lb boneless, skinless chicken breasts or thighs
- 2 cups fresh or frozen corn
- 2 medium Yukon gold or russet potatoes, diced
- 1 cup heavy cream or half-and-half
- 1 large sweet onion, chopped
- 3 cloves garlic, minced
- 4 cups chicken or vegetable broth
- Salt and pepper to taste
- 1 tsp fresh thyme
- Optional: diced jalapeños, fresh herbs, crispy bacon, or sour cream for topping
Instructions
- Prep the ingredients: Dice the chicken, chop the onion, mince the garlic, and dice the potatoes.
- Cook the chicken: In a large pot, heat olive oil over medium heat, add chicken and season with salt and pepper, cooking until golden brown (5-7 minutes).
- Sauté the aromatics: Add onion and garlic to the pot and sauté for 3-4 minutes until translucent.
- Add the potatoes and broth, cover, bringing to a gentle simmer for about 15 minutes or until potatoes are fork-tender.
- Stir in the corn and cream, allowing it to simmer for 5-10 minutes to thicken.
- Season to taste and adjust as preferred.
- Serve warm, garnished with fresh herbs or toppings of choice.
Notes
For a thicker chowder, mash some of the potatoes against the side of the pot. This chowder can be made ahead of time and reheats well.
Nutrition
- Serving Size: 1 bowl
- Calories: 400
- Sugar: 6g
- Sodium: 450mg
- Fat: 18g
- Saturated Fat: 10g
- Unsaturated Fat: 6g
- Trans Fat: 0g
- Carbohydrates: 35g
- Fiber: 4g
- Protein: 22g
- Cholesterol: 70mg
Keywords: chicken chowder, corn chowder, comfort food, soup recipe, cozy meals
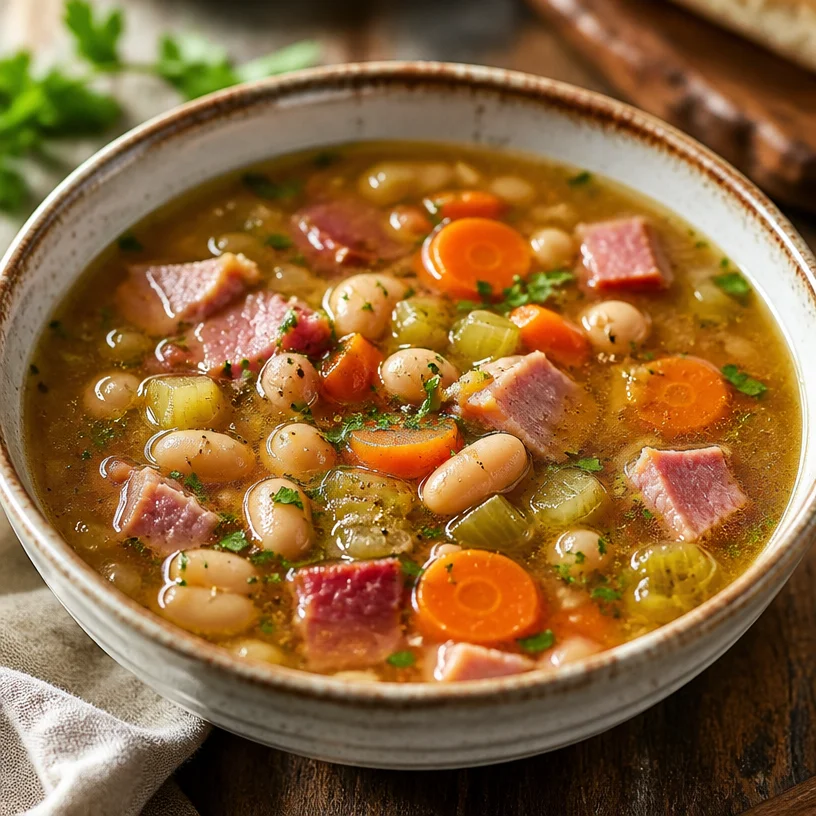
Ham & Bean Soup
Warm Up Your Kitchen with Ham & Bean Soup
Welcome back to Clean Plate Cravings! Today, I’m excited to share a cozy recipe that’s practically a warm hug in a bowl: Ham & Bean Soup. If you’re looking for a healthy, hearty dish that can make you feel nostalgic and comforted in an instant, you’ve stumbled upon the right spot. This soup is not just delicious; it’s also loaded with wholesome ingredients that give your body what it needs to thrive.
There’s something so special about a simmering pot of soup; its aroma wafts through the house, inviting everyone to gather around the kitchen table. It’s like a kind of edible magic, such a simple yet satisfying way to bring good vibes into your home. And the best part? Ham & Bean Soup can be easily tailored to your tastes and whatever you have on hand—no rigid recipes required here! So, grab your apron and let’s dive into this delightful dish.
A Little Slice of Nostalgia
Let’s rewind the clock a bit. I’ll never forget the first time I made Ham & Bean Soup. I was a young chef-in-training, eagerly experimenting in my mom’s kitchen. It was the middle of winter, and the winds outside were howling. I had just come in from the cold, and the smell of something warm bubbling away on the stove immediately caught my attention.
My mom had taken some leftover holiday ham and transformed it into this wonderful soup. I watched her toss in the veggies like she was orchestrating a symphony in the kitchen. The blend of textures and flavors was astonishing to me! Those tender beans paired perfectly with the savory ham, while the vibrant carrots and fresh celery created a colorful medley. It was a moment that perfectly captures the essence of family cooking—warmth, love, and deliciousness.
From that point on, Ham & Bean Soup became a staple in our home. It wasn’t just a clever way to use leftovers; it was a daily reminder of love, craft, and togetherness. Years later, I find myself making it almost weekly, filling my house with that same magical aroma. Sure, it’s simple, but it’s anything but basic. And I’m here to share it with you, so you can have your own bowl of comfort!
Gather Your Ingredients
Let’s talk ingredients! Here’s what you’ll need for this delightful soup:
-
Ham: Use leftover cooked ham or a ham hock for extra flavor. If you’re not a ham lover, feel free to substitute with smoked turkey or a plant-based protein like tempeh.
-
White beans: Canned white beans, like Great Northern or Cannellini, work beautifully. You can also use dried beans by soaking and cooking them beforehand, but the canned variety saves tons of time!
-
Carrots: They add sweetness and color to the soup, making it visually appealing. You can swap them for sweet potatoes or parsnips if you want different flavors.
-
Celery: This brings a lovely crunch and depth to the soup. If you need a substitute, feel free to use fennel or bell peppers.
Simple, wholesome, and packed with flavor; these ingredients create a fabulous base for Ham & Bean Soup!
Step-by-Step Instructions
Now that we’ve gathered our ingredients, it’s time to turn them into something magical. Here’s how to make Ham & Bean Soup, the step-by-step way:
-
Sauté the Aromatics: In a large pot or Dutch oven, heat 1-2 tablespoons of olive oil over medium heat. Add diced onions and sauté for about 5 minutes until they’re translucent. This step is crucial; it builds the foundation of flavor for our soup!
-
Add the Celery and Carrots: Toss in your chopped celery and carrots. Sauté them along with the onions for another 4-5 minutes until they soften slightly. This mix creates a delightful aroma that you just can’t resist—it’s the essence of comfort!
-
Incorporate the Ham: Now, add in your diced ham (or your protein of choice) and cook for about 2-3 minutes. Let those flavors meld; you’ll start to hear some sizzling. If you’re using a ham hock, put it in now to ensure the delicious juices are infused into the soup.
-
Pour in the Broth: It’s time for the liquid gold! Add 4 cups of low-sodium chicken or vegetable broth to the pot. If you want a richer soup, using bone broth is a fantastic option.
-
Add the Beans: In go the white beans! If you’re using canned beans, be sure to drain and rinse them first. This helps remove excess sodium and gives a cleaner flavor to your soup.
-
Season It Up: Sprinkle in your favorite herbs—dried thyme, bay leaves, and a pinch of red pepper flakes for a little heat. Don’t forget to add salt and pepper to taste! Remember, you can always add more later, but it’s hard to take it out once it’s in.
-
Bring to a Simmer: Allow the mixture to come to a gentle simmer. Lower the heat and let it cook uncovered for about 30-40 minutes. This is the part where you can relax; let the soup work its magic.
-
Final Touches: After simmering, check the consistency. If you like it thicker, mash a few beans with a fork! Adjust the seasoning to your liking and remove the bay leaves before serving.
And just like that, your Ham & Bean Soup is ready to warm those hearts!
Serving Suggestions
Ready to serve? Ladle the soup into deep bowls and garnish with a sprinkle of fresh parsley or a few croutons for added crunch. Pair it with a slice of crusty whole-grain bread to soak up all that flavorful goodness. Trust me, this isn’t just a meal; it’s a celebration!
Recipe Variations
If you’re feeling creative, here are some fun variations to try with your Ham & Bean Soup:
-
Spicy Kick: Add in some diced jalapeños or a dash of hot sauce for an extra heat factor.
-
Herby Twist: Experiment with different herbs! Fresh rosemary or sage adds an aromatic layer that elevates the dish.
-
Veggie Delight: Toss in whatever veggies you have on hand—zucchini, spinach, or kale are excellent additions that boost nutrients and flavor.
-
Creamy Comfort: Stir in a splash of cream or coconut milk at the end for a richer, creamier version of this classic soup.
-
Greek Flair: Consider adding lemon juice and feta cheese to turn your soup into a Mediterranean-inspired dish!
Chef’s Notes
This Ham & Bean Soup has a special place in my heart. It evolves each time I make it based on what I have in my pantry or my mood for the day. I remember one winter, I added a hint of smoked paprika, and it transformed the entire flavor profile. It’s amazing how a tiny tweak can lead to such delicious results!
So don’t be afraid to put your spin on this recipe; it’s designed to be flexible and accommodating! When you cook with love, the flavors of your food will reflect that effort.
FAQs and Troubleshooting
1. How long does this soup last in the fridge?
Ham & Bean Soup can last 4-5 days in the refrigerator in an airtight container. It often tastes even better the next day as the flavors have time to meld!
2. Can I freeze Ham & Bean Soup?
Absolutely! This soup freezes beautifully. Just let it cool completely before transferring it to freezer-safe containers. It will keep well for 3-4 months.
3. What if my soup is too salty?
If you find that your soup is saltier than you’d like, you can balance it out by adding more low-sodium broth or water. Adding a peeled potato and letting it cook for 10-15 minutes can also absorb some of the salt.
4. Can I make this vegetarian?
Yes, swap the ham for smoked tofu or a variety of your favorite beans. Use vegetable broth to keep it entirely plant-based.
Nutritional Info
While I usually keep nutritional specifics less rigid, a typical serving of Ham & Bean Soup contains approximately:
- Calories: 250
- Protein: 19g
- Carbohydrates: 35g
- Fat: 7g
- Fiber: 10g
Healthy, hearty, and comforting—now that’s what we like to see on our plates!
I hope you find joy and warmth in making this Ham & Bean Soup, just like I do. Every bite is filled with love, comfort, and a touch of household magic. So cozy up, and let the good flavors fill your heart and home! Enjoy!
PrintHam & Bean Soup

A cozy, hearty ham and bean soup perfect for warming up on cold days.
- Prep Time: 15 minutes
- Cook Time: 40 minutes
- Total Time: 55 minutes
- Yield: 6 servings 1x
- Category: Soup
- Method: Stovetop
- Cuisine: American
- Diet: Paleo
Ingredients
- 2 cups leftover cooked ham, diced
- 2 cans white beans (Great Northern or Cannellini), drained and rinsed
- 2 large carrots, chopped
- 2 stalks celery, chopped
- 1 onion, diced
- 4 cups low-sodium chicken or vegetable broth
- 1–2 tablespoons olive oil
- 1 teaspoon dried thyme
- 1 bay leaf
- Salt and pepper to taste
- Croutons and fresh parsley for garnish
Instructions
- Sauté the Aromatics: In a large pot or Dutch oven, heat olive oil over medium heat. Add diced onions and sauté for about 5 minutes until translucent.
- Add the Celery and Carrots: Toss in chopped celery and carrots. Sauté for another 4-5 minutes until softened.
- Incorporate the Ham: Add diced ham and cook for about 2-3 minutes. If using a ham hock, put it in now.
- Pour in the Broth: Add 4 cups of broth to the pot.
- Add the Beans: Stir in the white beans.
- Season It Up: Add herbs, salt, and pepper to taste.
- Bring to a Simmer: Allow the mixture to come to a gentle simmer, then cook uncovered for 30-40 minutes.
- Final Touches: Check consistency and mash some beans for thickness. Adjust seasoning and remove bay leaves before serving.
Notes
Feel free to adapt the ingredients to your taste or dietary needs. This soup keeps well in the fridge for 4-5 days and can be frozen for 3-4 months.
Nutrition
- Serving Size: 1 serving
- Calories: 250
- Sugar: 3g
- Sodium: 600mg
- Fat: 7g
- Saturated Fat: 2g
- Unsaturated Fat: 3g
- Trans Fat: 0g
- Carbohydrates: 35g
- Fiber: 10g
- Protein: 19g
- Cholesterol: 30mg
Keywords: soup, ham, bean, comfort food, winter recipe