Minute Black Pepper Chicken Skillet for Weeknights
Black Pepper Chicken: A Wholesome Delight You’ll Keep Coming Back To
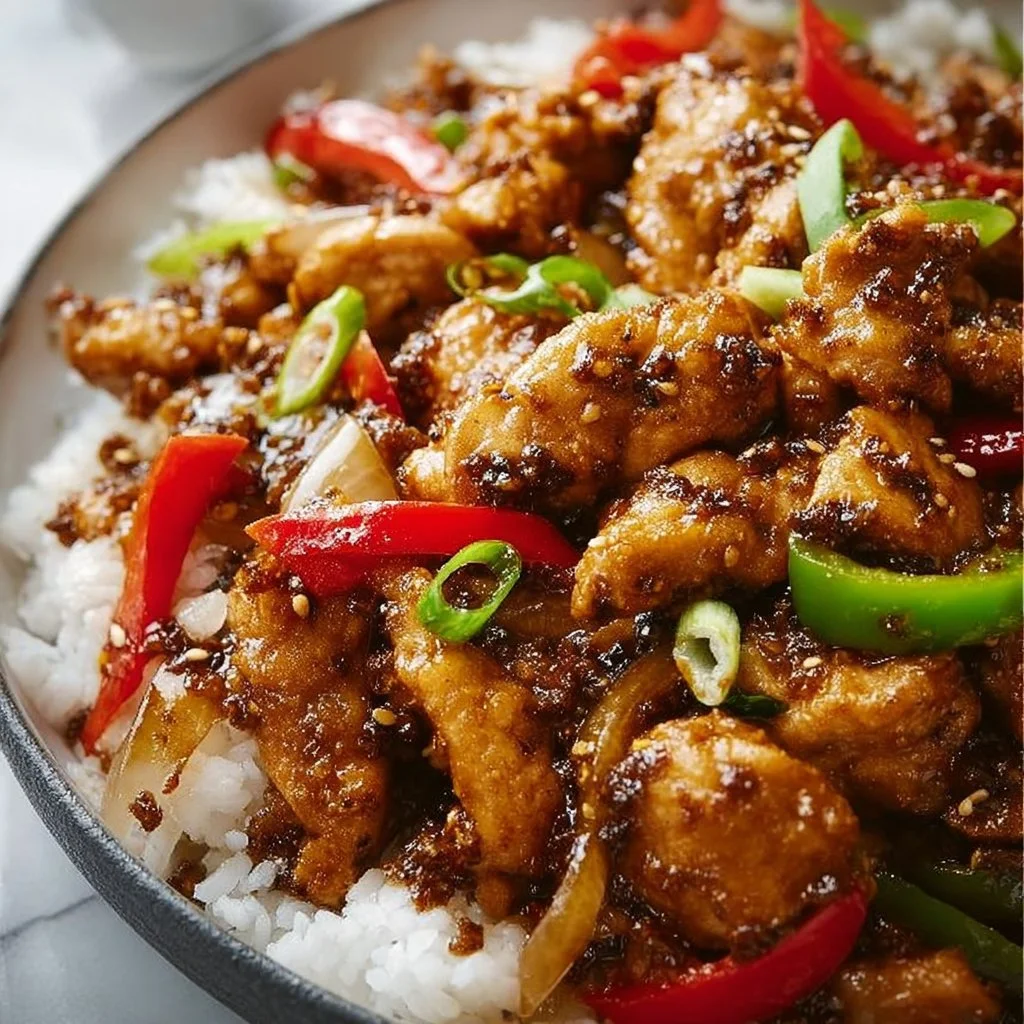
Hey there, food-loving friends! If there’s one dish that can transform a simple weeknight dinner into something special, it’s Black Pepper Chicken. It’s a dish that strikes the perfect balance between vibrant flavors and wholesome ingredients. With a crisp golden exterior, juicy chicken, and a fragrant black pepper kick, every bite feels like a cozy hug from the kitchen. So, grab your apron and let’s dive into this delicious culinary adventure!
A Taste of Nostalgia
When I think of Black Pepper Chicken, I’m instantly transported back to my childhood kitchen, where the aroma of spices danced in the air. My dad used to whip up a version of this dish every time we had family over for dinner. I can still see the sheer joy on everyone’s faces as they gathered around our old oak dining table, each plate piled high with his spicy chicken.
He always had this way of making everything feel like a celebration—the sizzle of the chicken in the pan, the laughter echoing through the room, and the clinking of glasses filled with refreshing lemonade. There was this delightful camaraderie that came alive in those moments, as we all dug into delicious food, swapping stories and laughter. Black Pepper Chicken became a staple for us, and it was so much more than just a meal; it was a symbol of love, family, and connection.
As I honed my cooking skills over the years, I embraced my dad’s love for this dish and set out to create a lighter, healthier version without sacrificing that classic punch of flavor. Now, I invite you to share some of that joy at your own table. Let’s make some Black Pepper Chicken that’ll have your loved ones gathering close and savoring every bite!
Ingredients
Here’s what you’ll need to make this bold flavor-packed dish:
-
Chicken Breasts:
- The star of the show! Opt for boneless, skinless chicken breasts. They’re lean and easy to work with. If you’re looking for a substitution, feel free to use thighs for a richer flavor, or even tofu for a plant-based option.
-
Black Pepper:
- This is where the magic happens! Freshly cracked black pepper brings the spice, unlike pre-ground. If you’re sensitive to heat, you can reduce the amount or use white pepper for a milder flavor.
-
Soy Sauce:
- Soy sauce adds depth and umami. Low-sodium soy sauce is a great substitute if you want to keep the sodium in check. For a gluten-free version, use tamari or coconut aminos.
-
Garlic:
- Fresh garlic provides aromatic notes that complement the chicken beautifully. If you’re in a pinch, garlic powder can work, but fresh is always best!
-
Ginger:
- Minced fresh ginger adds a touch of warmth. If you can’t find fresh ginger, a little ground ginger can do the trick—remember, it’s more concentrated!
-
Bell Peppers:
- Use a mix of colors (red, yellow, green) for visual appeal and sweetness. You can swap them out for broccoli or snap peas if you prefer.
-
Onion:
- Sweet onion or shallots work well to provide a gentle sweetness. Red or green onions make for a lovely flavor twist!
-
Cornstarch:
- A little cornstarch helps achieve that glossy, saucy texture. You can substitute it with arrowroot powder if you need a paleo-friendly option.
-
Oil:
- A high smoke point oil like vegetable or canola oil is best for frying. If you want to keep it wholesome, opt for avocado oil or a splash of sesame oil for added flavor.
Step-by-Step Instructions
Let’s get cooking! Follow these steps for a simple yet delightful Black Pepper Chicken:
-
Prep Your Ingredients:
Start by gathering everything. Chop your bell peppers and onion into bite-sized pieces, mince the garlic and ginger, and slice the chicken into thin strips. A sharp knife and cutting board will make this a breeze! -
Marinate the Chicken:
In a mixing bowl, toss the chicken strips with soy sauce, minced garlic, ginger, and a generous amount of black pepper. Let it marinate for at least 15-20 minutes. This is where the magic happens—the more time the chicken has to soak up those flavors, the better! -
Dust with Cornstarch:
After marinating, sprinkle a thin layer of cornstarch over the chicken. This coats the chicken and gives it that crispy texture when cooking. Use your hands to evenly coat each piece, shaking off any excess. -
Heat the Pan:
In a large skillet or wok, heat your oil over medium-high heat. Give it a moment to come to temperature—you’ll know it’s ready when the oil shimmers and dances in the pan. -
Cook the Chicken:
Carefully add the chicken strips in a single layer, being careful not to overcrowd the pan. Let them cook undisturbed for about 3-4 minutes until they get a beautiful golden brown crust. Flip them to the other side and let them cook for another 2-3 minutes until they’re cooked through. A little chef hack: make sure the chicken doesn’t touch each other too much when cooking so they get that nice sear! -
Toss in the Veggies:
Once the chicken is cooked, remove it from the pan and set it aside. Add a splash more of oil if needed, and toss in the chopped onion and bell peppers. Sauté for 2-3 minutes until the veggies are tender-crisp and vibrant in color. The smell will be divine! -
Combine Everything:
Return the cooked chicken to the pan, toss everything to combine, and stir-fry for another minute. Take a moment to taste and adjust the seasoning with more soy sauce or black pepper if you wish. -
Serve and Enjoy:
Plate your Black Pepper Chicken over a bed of steamed rice or quinoa. Drizzle the savory sauce from the pan over the top and garnish with sesame seeds or sliced green onions for a finished touch.
Serving Suggestions
To serve this dish beautifully, consider plating it in a large shallow bowl with the chicken and veggies artfully arranged atop a bed of fluffy rice. Sprinkle some sesame seeds for a touch of elegance. If you’re feeling extra fancy, pair it with a side of steamed broccoli or a bright cucumber salad to balance those robust flavors.
Recipe Variations
Feeling adventurous? Here are some creative twists to elevate your Black Pepper Chicken:
- Spicy Black Pepper Chicken: Add a sprinkle of crushed red pepper flakes to the marinade for an extra kick!
- Honey Ginger Glaze: Drizzle with honey or maple syrup in the last minute of cooking for a sweet and savory combo.
- Add Pineapple: Toss in some diced pineapple for a delightful sweet contrast to the peppery chicken.
- Vegetable-Heavy: Load it up with even more veggies like snap peas, carrots, or zucchini for a colorful and nutritious twist.
- Mediterranean Flair: Swap soy sauce for lemon juice and add olives and artichokes for a Mediterranean-inspired dish.
Chef’s Notes
This recipe has evolved quite a bit over time! I initially started with a more traditional take, but I realized that my love for freshness and health needed to shine through. I experimented with different marinades, added more veggies, and now it’s a dish I can make any day of the week without guilt. If you find yourself adapting it over time, I’d love to hear about your variations!
The best advice I can share when making this dish is to have fun with it! Don’t stress over the details; cooking is about enjoying the process and the flavors. Whether you’re making it for yourself or hosting friends, it’s sure to bring everyone to the table with a smile.
FAQs and Troubleshooting
1. Why is my chicken rubbery?
If your chicken ends up rubbery, it could be overcooked. Chicken breasts can dry out quickly, so ensure you’re cooking them just until they’re no longer pink inside. Invest in a meat thermometer if you can—we’re aiming for 165°F (75°C) for perfectly cooked chicken!
2. Can I use chicken thighs instead of breasts?
Absolutely! Chicken thighs are more forgiving and tend to stay juicier. They will also add a nice richness to your dish.
3. How can I make this dish gluten-free?
Simply substitute soy sauce with tamari or coconut aminos, and always check that your cornstarch is certified gluten-free. You can enjoy this dish without the gluten!
4. What can I serve with Black Pepper Chicken?
This dish is wonderful served over rice, quinoa, or even noodles. If you’re going lighter, a refreshing salad or steamed veggies on the side complement the meal beautifully.
Nutritional Info
This recipe, as prepared, provides a balanced meal full of protein, fiber, and essential vitamins from the veggies. For a rough estimate:
- Calories: ~350 per serving
- Protein: 30g
- Carbohydrates: 30g
- Fat: 14g
Now, fellow foodies, it’s your turn! Dive into this recipe, relish the process, and share the joy at your table. Black Pepper Chicken isn’t just about the food; it’s about creating connections and savoring every moment—a true Clean Plate Cravings experience! Happy cooking!
PrintBlack Pepper Chicken

A bold flavor-packed dish featuring juicy chicken breasts, aromatic spices, and vibrant vegetables.
- Prep Time: 20 minutes
- Cook Time: 15 minutes
- Total Time: 35 minutes
- Yield: 4 servings 1x
- Category: Main Course
- Method: Stir-frying
- Cuisine: Asian
- Diet: Gluten-Free
Ingredients
- 1 lb boneless, skinless chicken breasts
- 1 tbsp freshly cracked black pepper
- 1/4 cup soy sauce
- 3 cloves garlic, minced
- 1 tbsp fresh ginger, minced
- 1 cup bell peppers, chopped
- 1 medium onion, chopped
- 2 tbsp cornstarch
- 2 tbsp vegetable oil
Instructions
- Prep your ingredients: Chop bell peppers and onion, mince garlic and ginger, slice chicken into thin strips.
- Marinate the chicken: Toss chicken strips with soy sauce, garlic, ginger, and black pepper. Marinate for 15-20 minutes.
- Dust with cornstarch: Coat chicken with cornstarch, shaking off excess.
- Heat the pan: Warm oil in a skillet over medium-high heat.
- Cook the chicken: Add chicken strips in a single layer, cook until golden brown, about 3-4 minutes per side.
- Toss in the veggies: Remove chicken, sauté onion and bell peppers for 2-3 minutes.
- Combine everything: Return chicken, mix well, taste, and adjust seasoning.
- Serve and enjoy: Plate over rice or quinoa, garnishing as desired.
Notes
Feel free to experiment with different vegetables or add crushed red pepper for a spicier kick.
Nutrition
- Serving Size: 1 serving
- Calories: 350
- Sugar: 5g
- Sodium: 800mg
- Fat: 14g
- Saturated Fat: 2g
- Unsaturated Fat: 10g
- Trans Fat: 0g
- Carbohydrates: 30g
- Fiber: 3g
- Protein: 30g
- Cholesterol: 85mg
Keywords: Black Pepper Chicken, Asian Cooking, Quick Dinner, Family Recipe, Weeknight Meals
One-Pan Honey-Lime Chicken with Avocado Rice (Weeknight)
Honey Lime Chicken with Avocado Rice: A Vibrant and Satisfying Meal
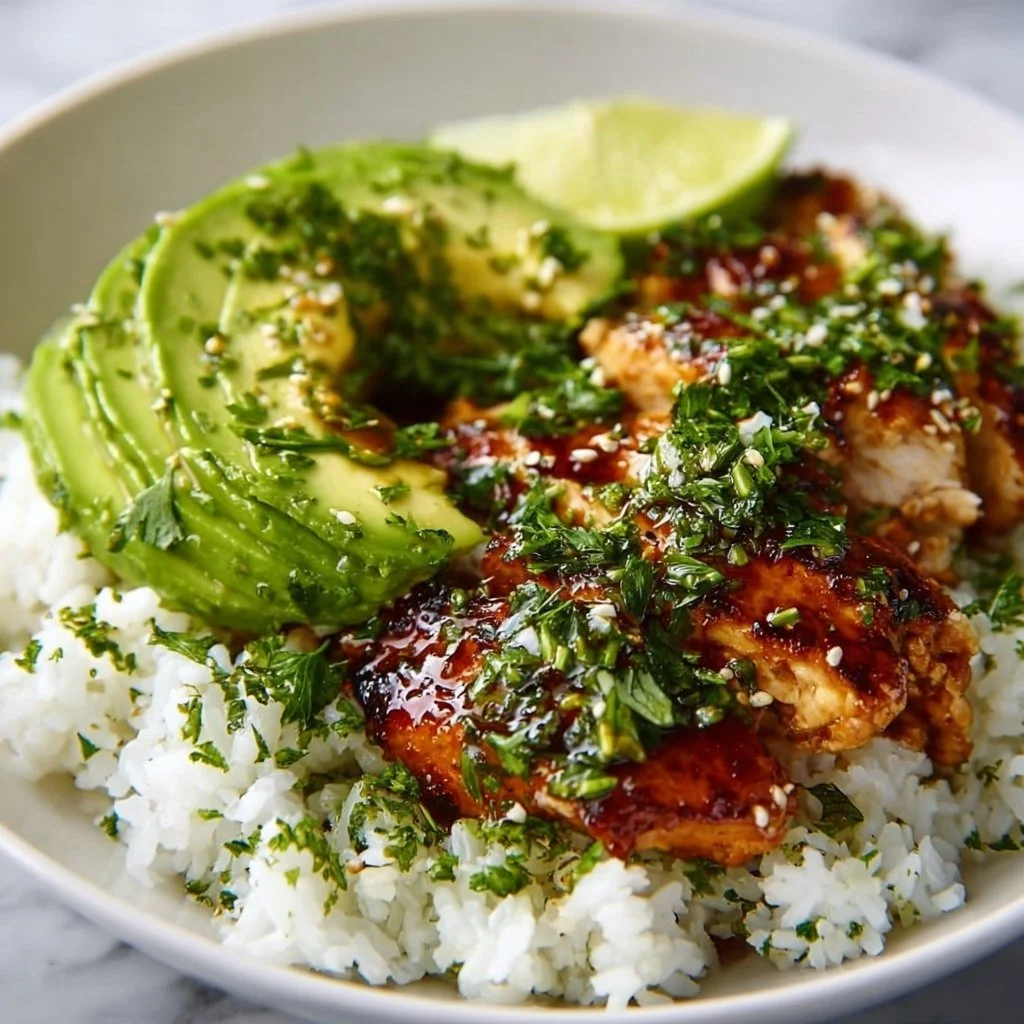
Welcome, food lovers! Today, we’re whipping up something that’s not just a feast for your taste buds but a total delight for your senses. Picture this: succulent, sticky honey lime chicken drizzled with a zesty glaze, layered on a bed of creamy avocado rice—it’s like a sunny day on a plate! This dish isn’t just perfect for a weeknight meal; it invites that warm, feel-good vibe we all crave after a long day. And trust me, no complicated techniques involved here—just pure, clean goodness.
What makes this meal stand out? It’s all about balance. You have the sweetness of honey marrying beautifully with the bright acidity of lime, while the creamy avocado rice has just the right amount of richness to round it all out. It’s simple, it’s delicious, and I know you’re going to look forward to making it often. So, grab your apron and let’s get started!
A Culinary Memory
Growing up in a bustling household, dinner time was the most exciting event of the day. My parents had a knack for getting everyone involved in the kitchen, and that’s where my love for cooking was born. I distinctly remember one summer when we decided to transform our backyard into a mini taco stand for family friends. We served chicken marinated in an array of flavors, but my favorite was always the honey-lime marinade.
Everyone would gather around, chatting and laughing while we grilled the chicken to juicy perfection. The aroma of that sweet and tangy mixture wafted through the air, and nothing could make you happier than biting into a piece of grilled chicken sprinkled with fresh cilantro. These moments shaped my love for food—specifically, dishes that bring people together and create lasting memories. And now, I’m sharing that love with you through this honey lime chicken recipe, paired with creamy avocado rice to bring a bit of those summer vibes right into your kitchen.
Ingredients
For our delicious honey lime chicken with avocado rice, these vibrant ingredients will bring this dish to life. Here’s what you’ll need:
- 2 chicken breasts: Opt for skinless, boneless for ease. You can also use thighs if you prefer dark meat!
- 1/4 cup honey: This sweet nectar not only fuels your body but gives the chicken that drool-worthy glaze. Use agave syrup for a vegan alternative!
- 2 tablespoons lime juice: Fresh squeezed is always best, but bottled will do in a pinch. It adds the perfect zing to the honey!
- 2 avocados: Creamy and nutritious, they’re the star of our rice! Using ripe ones makes all the difference.
- 1 cup cooked rice: Any rice will work—brown, white, or even quinoa for a twist!
- 1 tablespoon olive oil: A heart-healthy fat that helps sauté the chicken and adds flavor.
- Salt and pepper to taste: Always essential for enhancing flavors!
- Chopped cilantro (optional, for garnish): A fresh finish that livens up the dish and adds a pop of color.
Step-by-Step Instructions
Now, let’s dive into the cooking process! It’s easier than you might think, and I’m here to guide you through every step.
-
Marinate the Chicken:
- In a bowl, combine the honey, lime juice, salt, and pepper. This is your marinade! Add the chicken breasts, ensuring they’re well-coated.
- Let them marinate for at least 30 minutes. If you’re short on time, even 10 minutes will add flavor, but letting it sit longer helps the magic happen. The chicken absorbs all that sweet and tangy goodness.
-
Cook the Rice:
- If you’re using leftover rice, simply reheat it up while you cook the chicken. If starting from scratch, cook according to the package directions, and then fluff it up with a fork when done.
- While your rice cooks, pulse up those avocados!
-
Sauté the Chicken:
- Heat the olive oil in a skillet over medium-high heat. Once the oil shimmers, add your marinated chicken.
- Cook for about 5-7 minutes on one side until golden and then flip. Here’s a little chef hack: resist the urge to poke or move the chicken around too much; let it develop a nice crust!
-
Glaze It Up:
- Once flipped, pour any remaining marinade into the pan. This will create a fabulous glaze. Continue to cook for another 5-7 minutes or until the chicken reaches an internal temperature of 165°F.
- Make sure to baste the chicken with the glaze as it cooks. This extra tenderizes the meat and enhances that sticky, delicious flavor.
-
Prepare the Avocado Rice:
- As the chicken finishes cooking, in a bowl, mash the avocados with a fork until creamy yet a little chunky for texture. Mix in the cooked rice, salt, and a squeeze of lime juice for brightness.
- I like to allow the rice to come to room temp—this makes it light and fluffy!
-
Serve Up:
- Once everything is ready, slice the chicken into strips to reveal those juicy, marinated layers. Serve over the avocado rice and garnish with fresh cilantro for that pop of green freshness.
Serving Suggestions
When plating this dish, I like using a shallow bowl for a beautiful presentation—the creamy avocado rice acts as a cushion for the juicy chicken. Make sure to drizzle extra honey-lime sauce over the top for an enticing shine. A sprinkle of cilantro adds color and fragrant freshness that’s impossible to resist. To elevate, serve it with lime wedges on the side for a little extra zing!
Recipe Variations
I love flexibility in cooking! Here are some creative ideas to play with the honey lime chicken and avocado rice:
-
Spice it Up: Add a touch of chili powder or cayenne pepper to the marinade for a kick. Alternatively, sprinkle red pepper flakes in the avocado rice for an added zing!
-
Tropical Twist: Mix in chopped pineapple or mango to the rice for a tropical version of this dish. It pairs beautifully with the honey and lime!
-
Herb it Up: Use fresh basil or parsley instead of cilantro if you’re not a fan! Fresh herbs lighten up the dish and keep it fresh.
-
Grain-Free Option: Swap the rice for cauliflower rice to keep things low-carb. Just sauté it with a bit of lime juice for flavor!
-
Veggie Power: Add grilled vegetables like bell peppers and zucchini to create a complete meal. The colorful veggies bring extra nutrients and crunch!
Chef’s Notes
Over the years, this honey lime chicken has evolved from a quick summer dish into one of my go-to meals for entertaining. I remember making it for friends and seeing their eyes light up after the first bite. It’s that reaction that keeps me experimenting! The avocados were an inspired addition one day after I had leftovers from a guacamole-making session. They perfectly balance the dish and give it that creamy texture we all love. Plus, it’s a great way to use avocados—because who doesn’t want more greens on their plate?
FAQs and Troubleshooting
-
What if my chicken isn’t cooking evenly?
- Make sure to flatten the chicken breasts a bit with a meat mallet for even cooking. If they’re uneven in thickness, they’ll cook differently—thicker parts will take longer, leading to dryness.
-
Can I use frozen chicken?
- Yes, but I recommend thawing it completely before marinating and cooking to ensure the flavors penetrate properly and for even cooking throughout.
-
What if my rice turns out mushy?
- Ensure you’re measuring water correctly based on the type of rice you’re using. For fluffy rice, rinse the grains before cooking to remove excess starch.
-
How can I prevent my avocados from browning?
- The key is to squeeze some lime juice on the mashed avocado immediately. The acidity helps slow down oxidation!
Nutritional Info
(Hypothetical serving size for readers—adjust based on your portioning)
- Calories: 480
- Protein: 30g
- Carbs: 55g
- Fat: 15g
- Fiber: 10g
Now that you’ve got the scoop on this delicious Honey Lime Chicken with Avocado Rice, there’s nothing stopping you from diving into this scrumptious creation! Remember, cooking is about having fun, experimenting, and sharing—so don’t hesitate to make it your own. I can’t wait to hear how you enjoyed this recipe and the memories you create along the way. Happy cooking, my friends!
PrintHoney Lime Chicken with Avocado Rice

A vibrant and satisfying meal with succulent honey lime chicken layered on creamy avocado rice.
- Prep Time: 10 minutes
- Cook Time: 20 minutes
- Total Time: 30 minutes
- Yield: 4 servings 1x
- Category: Main Course
- Method: Sautéing
- Cuisine: Mexican
- Diet: Paleo
Ingredients
- 2 skinless, boneless chicken breasts
- 1/4 cup honey
- 2 tablespoons lime juice
- 2 ripe avocados
- 1 cup cooked rice
- 1 tablespoon olive oil
- Salt and pepper to taste
- Chopped cilantro (optional, for garnish)
Instructions
- Marinate the chicken: In a bowl, combine the honey, lime juice, salt, and pepper. Add the chicken, ensuring they’re well-coated, and let them marinate for 30 minutes.
- Cook the rice: If using leftover rice, reheat it while cooking the chicken. If starting from scratch, cook according to package directions.
- Sauté the chicken: Heat olive oil in a skillet over medium-high heat. Add marinated chicken and cook for 5-7 minutes on one side until golden, then flip.
- Glaze the chicken: Pour remaining marinade into the pan and cook for another 5-7 minutes or until the chicken reaches an internal temperature of 165°F.
- Prepare the avocado rice: Mash the avocados, mix in the cooked rice, salt, and a squeeze of lime juice.
- Serve up: Slice the chicken and serve it over the avocado rice, garnished with fresh cilantro.
Notes
For a kick, add chili powder to the marinade or red pepper flakes to the rice.
Nutrition
- Serving Size: 1 serving
- Calories: 480
- Sugar: 12g
- Sodium: 500mg
- Fat: 15g
- Saturated Fat: 2g
- Unsaturated Fat: 10g
- Trans Fat: 0g
- Carbohydrates: 55g
- Fiber: 10g
- Protein: 30g
- Cholesterol: 70mg
Keywords: chicken, avocado, lime, honey, healthy recipe
Garlic Parmesan Chicken Meatloaf
Garlic Parmesan Chicken Meatloaf: A Wholesome Twist on a Classic Favorite
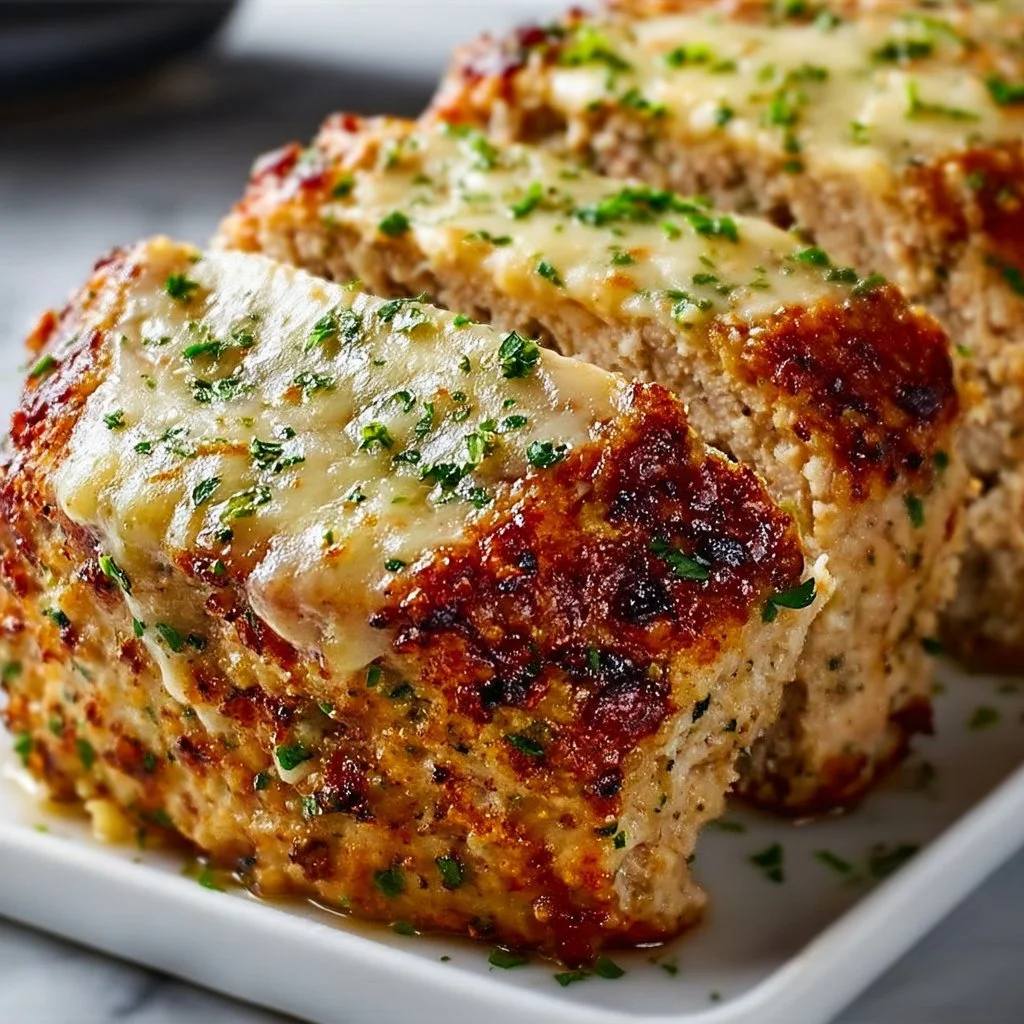
Welcome to Clean Plate Cravings! If you’re looking for a dish that captures comfort food in a healthier setting, you’ve landed in just the right spot. Today, we’re diving into the world of deliciousness with a twist on a beloved classic: Garlic Parmesan Chicken Meatloaf. Yes, you heard that right! Think juicy chicken blended with savory garlic and nutty Parmesan, all packed into a hearty loaf that’s just bursting with flavor.
Now, you might be wondering, “Meatloaf with chicken?” The answer is a resounding yes! While traditional meatloaf often calls for beef (and trust me, I love a good beef meatloaf), ground chicken brings a lighter, leaner profile that perfectly absorbs the flavors of garlic and Parmesan. You’ll find this dish not only satisfies that craving for something hearty but also aligns beautifully with a clean and straightforward eating approach.
Imagine slicing into a warm loaf, the aroma of roasted garlic wafting up as you cut each perfectly portioned piece. Pair it with a refreshing side salad or some roasted veggies, and you’ve got yourself a meal that feels both comforting and invigorating. Perfect for busy weeknight dinners or a casual weekend feast, this Garlic Parmesan Chicken Meatloaf is your new go-to recipe! Let’s get started.
A Little Kitchen Story from My Life
Meatloaf has always held a special place in my heart. I remember the first time I made it—my mom’s classic recipe. There she was, apron-clad, guiding me in the kitchen, as we mixed the ingredients together in a big bowl. I had my hands smeared with a mix of ground beef and spices, and I thought it was the most fun I could have while cooking. It was messy, sure, but there’s something magical about getting your hands dirty in the kitchen and creating something delicious.
Years later, I decided to switch things up and experiment with lighter proteins, inspired by my journey towards healthier dining habits. The first time I made chicken meatloaf infused with garlic and Parmesan, it brought back waves of nostalgia, reminding me of those warm evenings spent cooking with my mom. This recipe is more than just food; it’s a celebration of family, flavor, and the joy of eating well. So, let’s channel those good vibes and bring some wholesome, flavorful magic to your kitchen!
Ingredients
Here’s what you’ll need to whip up this tasty Garlic Parmesan Chicken Meatloaf:
-
1 lb ground chicken
The star of the show! Ground chicken is leaner than beef or pork, making it a healthier choice. If you prefer, ground turkey works well as a substitute, just ensure it’s not too lean to keep the meatloaf moist. -
1/2 cup grated Parmesan cheese
This adds a punch of savory goodness! Use fresh grated Parmesan for the best flavor. If you’re looking for a dairy-free option, try nutritional yeast for a similar umami kick. -
2 cloves garlic, minced
Garlic brings a warm, aromatic flavor to the dish. If you’re a garlic lover (like me!), feel free to double this! Alternatively, garlic powder can be used, but fresh garlic offers a more robust taste. -
1/4 cup chopped fresh herbs (like parsley or basil)
Fresh herbs not only enhance the flavor but also add a pop of color. Swap in your favorites—thyme or oregano would work wonderfully, too. -
1/2 cup breadcrumbs
These help bind the meatloaf and ensure it stays moist. Whole wheat bread crumbs add a nice texture, or you can use gluten-free alternatives to accommodate dietary preferences. -
1 large egg
The egg acts as a binder, bringing everything together nicely. If you want an egg-free option, flaxseed meal mixed with water is a great substitution! -
Salt and pepper to taste
Simple yet essential! Don’t be shy with the seasoning; it brings out the flavors of all the other ingredients.
Step-by-Step Instructions
1. Prepare Your Baking Dish
Start by preheating your oven to 375°F (190°C). While it’s heating up, lightly grease a loaf pan with cooking spray or olive oil. This little step ensures your meatloaf won’t stick and makes for an easier cleanup later!
2. Combine the Ingredients
In a large mixing bowl, combine the ground chicken, grated Parmesan cheese, minced garlic, fresh herbs, breadcrumbs, beaten egg, salt, and pepper. Here’s a little chef hack: use your hands to mix everything! Yes, it’s messy, but mixing by hand ensures the meatloaf comes together smoothly without overworking the chicken, which can lead to a rubbery texture.
3. Shape the Meatloaf
Once everything is well combined, transfer the mixture to your prepared loaf pan. Gently press it down to form a loaf shape that’s about 1-1.5 inches high. The height matters! A thicker loaf will take longer to cook, so keep that in mind to ensure it cooks evenly.
4. Bake and Glaze
Pop your meatloaf in the oven and let it bake for about 45 minutes. A few minutes before it’s done, you can add a simple glaze of your choice. My favorite is a mix of ketchup with a splash of balsamic vinegar for some extra zing!
5. Check for Doneness
You’ll know your meatloaf is ready when the internal temperature reaches 165°F (74°C). Use a meat thermometer to check! If you don’t have one handy, simply make a small cut through the center—the juices should run clear.
6. Let It Rest
After pulling it out of the oven, let your meatloaf rest for 10-15 minutes before slicing. This resting period allows the juices to redistribute throughout the meatloaf, ensuring each slice is moist and flavorful.
Serving Suggestions
Slice your Garlic Parmesan Chicken Meatloaf and serve it hot on a plate. Pair it with a fresh salad drizzled with a light vinaigrette, or perhaps some seasoned roasted vegetables for a colorful side. A dollop of homemade pesto on top can also elevate your presentation while adding a vibrant, zesty flavor. It’s all about making it visually appealing, so don’t hesitate to add some herbs for garnish!
Recipe Variations
-
Italian-Style Meatloaf: Add diced sun-dried tomatoes and Italian seasoning for a Mediterranean twist.
-
Spicy Kick: Mix in chopped jalapeños or red pepper flakes for a spicy version.
-
Low-Carb Option: Swap breadcrumbs for finely grated cauliflower for a keto-friendly version.
-
Mushroom Medley: Incorporate finely chopped mushrooms into the mix for an earthy flavor boost.
-
Herb-Infused: Experiment with a variety of fresh herbs like rosemary and thyme for a flavor explosion.
Chef’s Notes
Cooking this Garlic Parmesan Chicken Meatloaf has truly evolved over the years for me! Initially, I started experimenting because I wanted to create a recipe that my kids would love without compromising our family’s health goals. They loved the original beef version, but I knew I could revamp it. This dish has been the perfect solution! Plus, it has become a staple at gatherings with friends and family. I still have to remind them it’s made with chicken because no one can believe something so flavorful can come from poultry!
FAQs and Troubleshooting
Q: Why is my meatloaf too dry?
A: Dry meatloaf typically comes from overcooking or too much breadcrumbs. Ensure you’re monitoring the cooking time and using enough moist ingredients.
Q: Can I freeze meatloaf?
A: Absolutely! This Garlic Parmesan Chicken Meatloaf freezes beautifully. Just wrap it tightly and store it in the freezer for up to three months. Thaw it in the refrigerator overnight before reheating.
Q: What if I don’t have fresh herbs?
A: No worries! You can use dried herbs instead; just remember that dried herbs have a stronger flavor, so use about one-third of the amount.
Q: How can I tell when my meatloaf is done?
A: Use a meat thermometer! The internal temperature should reach 165°F (74°C). If you don’t have a thermometer, cutting into the center should reveal clear juices and no pink.
Nutritional Info
This Garlic Parmesan Chicken Meatloaf offers a great balance of protein and flavor. A typical serving contains approximately:
- Calories: 220
- Protein: 30g
- Carbohydrates: 15g
- Fat: 8g
Feel free to adjust ingredients according to your dietary needs, and don’t forget to enjoy every bite!
Cooking should always be a joyful experience, and I’m thrilled to share this Garlic Parmesan Chicken Meatloaf with you. Whether it becomes a new family favorite or a dish to impress your friends, it’s a great step toward embracing delicious, feel-good food. Let’s keep it fresh and uncomplicated—because you deserve to enjoy meals that nourish and excite you! Happy cooking!
PrintGarlic Parmesan Chicken Meatloaf

A wholesome twist on a classic favorite, this Garlic Parmesan Chicken Meatloaf blends juicy chicken with savory garlic and nutty Parmesan for a flavorful meal.
- Prep Time: 15 minutes
- Cook Time: 45 minutes
- Total Time: 60 minutes
- Yield: 4 servings 1x
- Category: Main Course
- Method: Baking
- Cuisine: American
- Diet: Paleo
Ingredients
- 1 lb ground chicken
- 1/2 cup grated Parmesan cheese
- 2 cloves garlic, minced
- 1/4 cup chopped fresh herbs (like parsley or basil)
- 1/2 cup breadcrumbs
- 1 large egg
- Salt and pepper to taste
Instructions
- Prepare your baking dish by preheating the oven to 375°F (190°C) and greasing a loaf pan.
- Combine the ground chicken, grated Parmesan, minced garlic, fresh herbs, breadcrumbs, beaten egg, salt, and pepper in a large bowl.
- Shape the mixture into a loaf and transfer it to the prepared loaf pan.
- Bake the meatloaf for about 45 minutes, adding a simple glaze a few minutes before it’s done.
- Check for doneness with a meat thermometer; internal temperature should reach 165°F (74°C).
- Let the meatloaf rest for 10-15 minutes before slicing.
Notes
Pair with a fresh salad or roasted vegetables for a complete meal. This meatloaf freezes well, making it perfect for meal prep.
Nutrition
- Serving Size: 1 serving
- Calories: 220
- Sugar: 1g
- Sodium: 300mg
- Fat: 8g
- Saturated Fat: 3g
- Unsaturated Fat: 3g
- Trans Fat: 0g
- Carbohydrates: 15g
- Fiber: 1g
- Protein: 30g
- Cholesterol: 90mg
Keywords: meatloaf, healthy dinner, chicken recipe, garlic, parmesan
High Protein Chicken Pot Pie Soup
High Protein Chicken Pot Pie Soup: A Comfort Food Classic Made Healthy
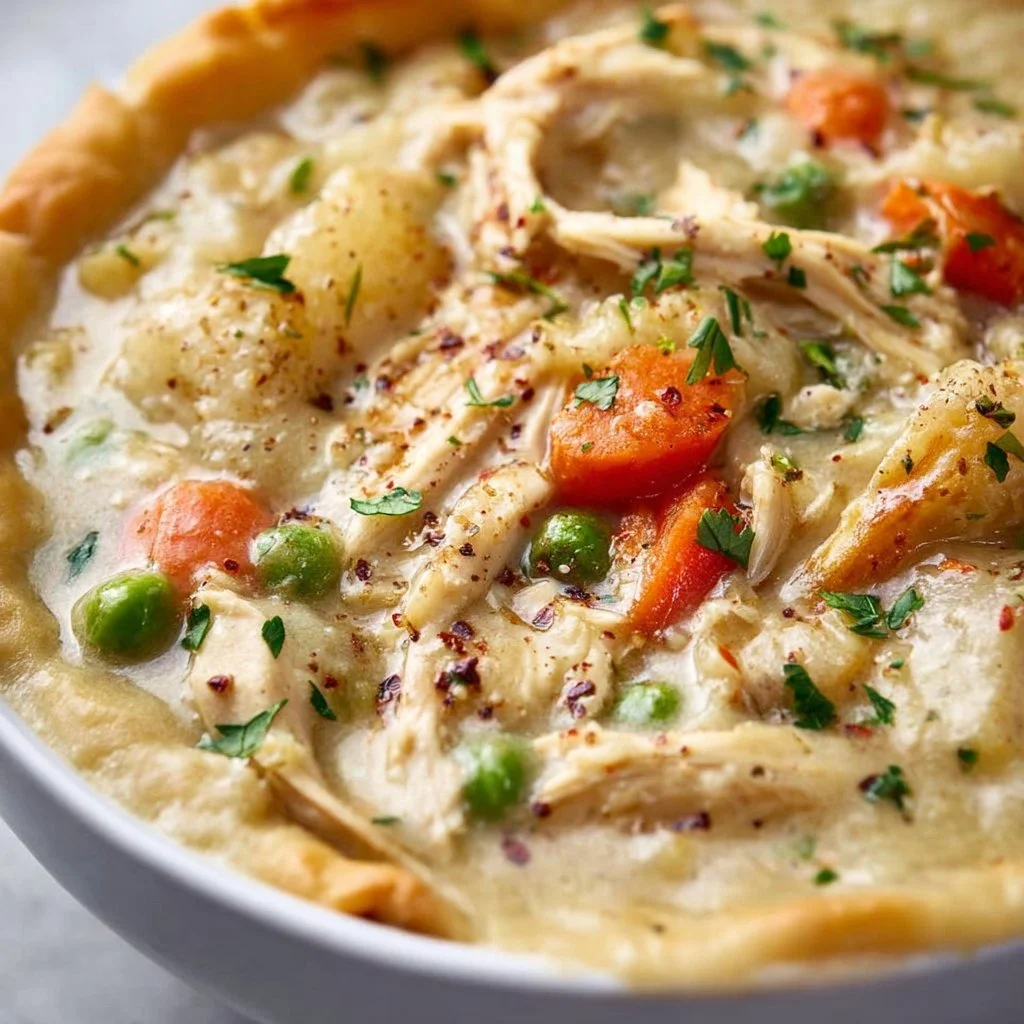
Welcome back to Clean Plate Cravings, my dear food enthusiasts! Today, we’re diving into a recipe that wraps you up in all the warmth and nostalgia of home-cooked meals—High Protein Chicken Pot Pie Soup. As the temperatures start to drop, it’s only fitting to bring out those cozy comfort foods, and what’s better than a hearty soup infused with the classic flavors of a chicken pot pie? It’s filling, it’s nutritious, and it might just become your new favorite dish to whip up in your cozy kitchen!
Now, when I think about pot pie, I can’t help but drift back to my childhood. Picture this: chilly afternoons after school, the smell of something savory wafting through the house, calling me from the front door. My mom would be busy in the kitchen, her apron dusted with flour, gently stirring a bubbling pot on the stove. It was a weekly ritual—something about that creamy, chicken-filled goodness made my heart feel lighter and my spirit a little brighter. Fast forward to now, and I’ve taken that childhood favorite and transformed it into a lighter, high-protein soup that’s perfect for any day of the week.
So grab your favorite chopping board, roll up your sleeves, and let’s create something delicious that brings a smile not only to your face but also to your loved ones!
A Trip Down Memory Lane
I’ll never forget those snowy winter nights when my mom would pull out the big, heavy pot for her famous chicken pot pie. There was always a rush of excitement in the air, a sense of warmth, and the promise of a dinner filled with laughter and stories. I’d sneak in small bites of the chicken filling while it was still simmering—totally guilty as charged! The combination of tender chicken, creamy sauce, and colorful vegetables was nothing short of perfection.
Years later, as I began experimenting in my own kitchen, I wanted to recreate that same magic but with a healthier twist. This is how my High Protein Chicken Pot Pie Soup was born! It’s a dish that still pays homage to those cherished memories while also being packed with protein and wholesome ingredients. So, let’s get cooking!
Ingredients
To craft this delectable High Protein Chicken Pot Pie Soup, we’ll gather the following ingredients:
-
1 lb chicken breast, diced: The star of our show! Chicken breast provides lean protein that keeps you full and satisfied. For a twist, you could use turkey breast or even rotisserie chicken for a quicker option.
-
1 cup carrots, diced: These bring a natural sweetness and a pop of color. If you’re short on time, you can use pre-chopped carrots or even frozen ones.
-
1 cup celery, diced: Adding a refreshing crunch and a nice contrast to the creamy soup. Leeks or fennel can also be great substitutes for a unique flavor!
-
1 onion, diced: The aromatic base that hits all the right notes. If you’re not an onion fan, shallots or green onions can work well too.
-
3 cloves garlic, minced: Garlic elevates any dish with its pungent and savory vibes. For those who prefer milder flavors, you can reduce it to one or two cloves.
-
4 cups chicken broth: This adds depth and richness to our soup. Homemade is ideal, but low-sodium boxed broth works perfectly too. You can even use vegetable broth for a vegetarian option!
-
1 cup coconut milk: For that creamy, luscious finish. If you prefer a lighter version, you can swap it for unsweetened almond milk, but it won’t be as thick.
-
1 cup frozen peas: Adding a splash of color and texture to our soup. Fresh peas are fantastic, but frozen work great for convenience!
-
1 tsp thyme: A lovely herb that complements the flavors beautifully. If you don’t have fresh thyme, dried will do just fine.
-
1 tsp rosemary: A fragrant touch that pairs perfectly with chicken. Feel free to substitute it with Italian seasoning or all-purpose herbs if you prefer.
-
Salt and pepper to taste: For seasoning, always add to your taste preference—don’t shy away from seasoning generously!
-
1/4 cup almond flour (optional, for thickening): This is optional but adds a nice thickness to your soup. If you’re gluten-free, this is a perfect alternative. You can also use cornstarch or all-purpose flour as a substitute.
Step-by-Step Instructions
Are you ready to dive into the cooking process? Let’s get saucy!
-
Sauté the Aromatics: In a large pot, heat a drizzle of olive oil over medium-high heat. Once hot, add the diced onion and garlic. Sauté for about 3-4 minutes, or until the onions become translucent. This is where the magic starts, filling your kitchen with that heavenly aroma.
-
Add the Chicken: Toss in the diced chicken breast with a sprinkle of salt and pepper. Cook, stirring occasionally, for about 5-7 minutes until the chicken is browned and cooked through. Here’s a tip: if you want a deeper flavor, consider browning the chicken in batches so they get a golden crust.
-
Mix in the Veggies: Adding in the carrots and celery now! Sauté for another 3-4 minutes until they’re slightly softened. This step is crucial as it develops the flavor base further.
-
Pour in the Broth: Now, it’s time to bring on the liquid love! Pour in the chicken broth, stirring to combine everything. Bring this to a gentle simmer, and get ready to cozy up as the wonderful smells intensify.
-
Coconut Milk & Peas: Stir in the coconut milk and frozen peas. Reduce the heat to medium-low. Let the soup simmer for another 5-10 minutes, allowing all flavors to meld beautifully.
-
Add the Herbs: Sprinkle in the thyme, rosemary, and additional salt and pepper if needed. Here’s a helpful chef hack: tasting as you go is essential! Adjust the seasonings until it feels just right.
-
Thickening the Soup: If you prefer a thicker soup, mix the almond flour with a little water to create a slurry, and stir it into the pot. Allow it to cook for an additional 2-3 minutes until thickened.
-
Final Touches: Once the soup reaches your desired consistency, it’s time to serve! Check the flavor once more, and adjust anything according to your taste.
This High Protein Chicken Pot Pie Soup is comforting, healthy, and bursting with flavor. Perfect for serving on a cozy night in or meal prepping for those busy weekdays ahead!
Serving Suggestions
When it’s time to serve, ladle the soup into bowls and consider garnishing with fresh herbs like parsley or thyme for a pop of color. Pair it with some crusty bread or a simple side salad for a wholesome meal. You might even enjoy sprinkling a bit of crushed red pepper or some fresh lemon juice for an extra zing!
Recipe Variations
Feel free to mix up this recipe based on your mood or dietary preferences! Here are some fun variations:
-
Swap the Protein: Use shredded turkey or even plant-based chicken alternatives for a vegetarian version.
-
Veggie Power-Up: Sneak in different veggies like green beans or corn for added flavor and nutrition.
-
Dairy-Free Version: If you want to skip the coconut milk, use cashew cream or more broth instead for a lighter soup.
-
Herb Fusion: Experiment with different herbs like dill or basil for a unique twist that sings of summer.
-
Spicy Kick: Add chopped jalapeños or crushed red pepper flakes to elevate the heat level!
Chef’s Notes
Cooking is an art, and every recipe evolves over time. I remember the first time I made this soup—it was a messy but delicious affair, and I learned a lot about balancing flavors. The key is not to rush—let the ingredients shine through. You may find different knacks that work for you in the kitchen, and that’s the beauty of it!
I have a funny story too; once, I accidentally added way too much rosemary (whoops!), but instead of tossing it, I turned it into a flavorful sauce for roasted potatoes later. There are no mistakes, just delicious discoveries waiting to happen!
FAQs and Troubleshooting
1. My soup is too thin; how can I thicken it?
Don’t fret! You can create a slurry with almond flour or cornstarch mixed with cold water and add it to the simmering soup. Let it cook for a few more minutes, and it should thicken up nicely.
2. Can I use frozen chicken?
Absolutely! Just make sure to thaw it properly before cooking. You might need to add a few extra minutes to the cooking time to make sure it’s cooked through.
3. What if I don’t have coconut milk?
No worries! You can replace it with heavy cream, milk, or even vegetable broth for a lighter version.
4. Can I make this soup in advance?
Definitely! It stores beautifully in the fridge for up to three days. Just reheat gently on the stove. If you plan to freeze it, consider leaving the almond flour out and thickening it when you reheat—it keeps the texture nicer!
Nutritional Info (Optional)
While I typically keep nutritional information optional, I can tell you that this soup is packed with protein thanks to the chicken, while the inclusion of veggies ensures a multitude of vitamins and minerals. Each serving can provide a hearty punch of nutrition.
So there you have it—my ultimate High Protein Chicken Pot Pie Soup recipe, a comforting hug in a bowl that’s not just for chilly nights but for any day you need a little warmth and nourishment. Enjoy cooking, stay creative, and most importantly, keep those cravings clean and delicious!
Happy cooking, and let me know how your soup turns out!
PrintHigh Protein Chicken Pot Pie Soup

A hearty and healthy soup infused with the classic flavors of chicken pot pie, filled with protein and wholesome ingredients.
- Prep Time: 15 minutes
- Cook Time: 30 minutes
- Total Time: 45 minutes
- Yield: 4 servings 1x
- Category: Soup
- Method: Stovetop
- Cuisine: American
- Diet: High Protein
Ingredients
- 1 lb chicken breast, diced
- 1 cup carrots, diced
- 1 cup celery, diced
- 1 onion, diced
- 3 cloves garlic, minced
- 4 cups chicken broth
- 1 cup coconut milk
- 1 cup frozen peas
- 1 tsp thyme
- 1 tsp rosemary
- Salt and pepper to taste
- 1/4 cup almond flour (optional, for thickening)
Instructions
- Sauté the Aromatics: In a large pot, heat a drizzle of olive oil over medium-high heat. Once hot, add the diced onion and garlic. Sauté for about 3-4 minutes, or until the onions become translucent.
- Add the Chicken: Toss in the diced chicken breast with a sprinkle of salt and pepper. Cook, stirring occasionally, for about 5-7 minutes until the chicken is browned and cooked through.
- Mix in the Veggies: Adding in the carrots and celery now! Sauté for another 3-4 minutes until they’re slightly softened.
- Pour in the Broth: Pour in the chicken broth, stirring to combine everything. Bring this to a gentle simmer.
- Coconut Milk & Peas: Stir in the coconut milk and frozen peas. Reduce the heat to medium-low and let the soup simmer for another 5-10 minutes.
- Add the Herbs: Sprinkle in the thyme, rosemary, and additional salt and pepper if needed.
- Thickening the Soup: If you prefer a thicker soup, mix the almond flour with a little water to create a slurry, and stir it into the pot.
- Final Touches: Once the soup reaches your desired consistency, serve!
Notes
Garnish with fresh herbs and pair with crusty bread or a salad. You can also adjust ingredients based on dietary preferences.
Nutrition
- Serving Size: 1 serving
- Calories: 350
- Sugar: 6g
- Sodium: 800mg
- Fat: 14g
- Saturated Fat: 9g
- Unsaturated Fat: 5g
- Trans Fat: 0g
- Carbohydrates: 30g
- Fiber: 4g
- Protein: 30g
- Cholesterol: 75mg
Keywords: chicken pot pie, soup, high protein, comfort food, healthy recipes

Cajun Chicken with Bell Peppers
Cajun Chicken with Bell Peppers: A Flavorful Journey in Every Bite
Welcome back to Clean Plate Cravings, food lovers! Today, we’re diving into a dish that dances with flavors and brings a little bit of southern charm right to your kitchen—Cajun Chicken with Bell Peppers. This recipe is bright, bold, and packed with vibrant ingredients that not only taste good but also make you feel good. Imagine succulent chicken coated in fragrant spices, tossed with sweet bell peppers and aromatic onions. It’s a dish that transports you to a cozy kitchen in Louisiana, even if you’re just cooking in your little apartment.
Food has this magical ability to evoke memories, emotions, and sometimes, even whole stories. It’s a universal language that connects us all. Whenever I whip up this Cajun Chicken, I can’t help but think of my childhood visits to a family friend’s house in New Orleans. The air was filled with the sound of laughter and the tantalizing aroma of spices wafting from the kitchen. I remember sneaking in to steal bites of her famous jambalaya and watching her as she skillfully mixed herbs and spices, making it all look so effortless. It’s those warm memories and the love behind the meals that inspire me to recreate those delicious experiences in my own kitchen today.
So, if you’re ready to embark on a flavor-packed journey and bring some Louisiana flair to your dining table, let’s roll up our sleeves and get cooking!
Personal Story
Every time I make Cajun Chicken with Bell Peppers, it takes me back to my youthful days visiting family in New Orleans. Picture this: My friend’s grandmother, her hands deftly moving through the spices, cooking up a storm with an infectious grin on her face. I was always in awe of how she seemed to know exactly how much seasoning to add, never measuring—just relying on her instincts.
One afternoon, as we gathered around the table filled with gumbo and jambalaya, she served us her take on Cajun chicken. It was spicy, sizzling, and just downright glorious! The combination of juicy chicken, crisp bell peppers, and a dash of heat had me hooked. What struck me the most was the way everyone around the table savored each bite, laughing and sharing stories between mouthfuls. Over the years, I’ve made my own adjustments to that beloved dish, and every time I do, I feel a little closer to those cherished moments and the warmth of that vibrant kitchen.
Ingredients
Now, let’s check out the ingredients you’ll need for this scrumptious dish. Each one brings its own unique character to the table!
-
2 boneless, skinless chicken breasts: Choose quality chicken for the best flavor—organic or free-range varieties are fantastic options. You can swap these out for chicken thighs if you prefer a richer taste.
-
1 tablespoon Cajun seasoning: This spice blend packs a punch! If you’re in a pinch, you can make your own blend using paprika, cayenne pepper, garlic powder, onion powder, and dried thyme. Adjust the heat to your liking!
-
2 tablespoons olive oil: A healthy fat that helps in achieving that perfect sear. Canola or avocado oil can be used as alternatives if you want a different flavor profile.
-
1 red bell pepper, sliced: Sweet and crunchy! You can use yellow or orange bell peppers for a slightly different color and flavor.
-
1 green bell pepper, sliced: Adds a nice contrast to the sweetness of the red pepper. Feel free to leave it out if you prefer just one type or add other veggies like zucchini for a twist!
-
1 onion, sliced: Offers a mild sweetness when cooked. Yellow or sweet onions are great options, but if you’re feeling adventurous, shallots can add a unique taste.
-
2 cloves garlic, minced: Garlic brings a warm, aromatic flavor that complements everything beautifully. Fresh is best, but jarred minced garlic can be used in a pinch.
-
Salt and pepper to taste: These two are your best friends in the kitchen, enhancing flavors like nothing else. Don’t be shy—season to your heart’s content!
-
Fresh parsley for garnish: This bright herb adds a pop of color and freshness. If you want a more robust flavor, consider using cilantro instead.
Step-by-Step Instructions
Ready to get your hands dirty (in the best way possible)? Let’s walk through the delicious process of making Cajun Chicken with Bell Peppers!
-
Heat the Oil: Start by heating the olive oil in a large skillet over medium heat. Make sure it’s hot but not smoking—this ensures a beautiful sear on the chicken. Pro tip: Add a splash of water to the pan; if it sizzles, you’re good to go!
-
Season the Chicken: While the oil is heating, take your chicken breasts and pat them dry with paper towels. This is crucial; moisture will prevent that lovely browning. Sprinkle the Cajun seasoning generously on both sides, rubbing it into the chicken to make sure every bite is packed with flavor.
-
Sear the Chicken: Once the oil is shimmering, carefully add the chicken breasts to the skillet. Avoid overcrowding the pan. Let them cook undisturbed for about 6-7 minutes on one side until it’s golden brown. Flip and cook for an additional 6-7 minutes. You’ll know it’s done when the internal temperature reaches 165°F (75°C). Chef hack: Use an instant-read thermometer for accuracy!
-
Remove and Rest: Once cooked, remove the chicken from the skillet and place it on a plate to rest. This keeps the juices from spilling out when you cut into it—trust me, your taste buds will thank you!
-
Sauté the Veggies: In the same skillet (don’t clean it; that’s where the flavor lives!), add your sliced onions and bell peppers. Sprinkle with a little salt and pepper. Sauté for about 5-7 minutes until they’re tender but still vibrant.
-
Add Garlic: Toss in the minced garlic and sauté for another minute. The smell will be phenomenal! Keep an eye on the garlic; it can burn quickly, so stir it often.
-
Combine and Serve: Slice your rested chicken and return it to the skillet, tossing everything together to marry the flavors. Cook for another 1-2 minutes to heat through.
-
Plate It Up: Serve your Cajun Chicken on a colorful plate, garnished with fresh parsley for that beautiful finishing touch.
Serving Suggestions
For a delightful presentation, serve your Cajun Chicken with a side of fluffy rice or over a bed of sautéed greens like spinach or kale. You can also pair it with some crusty bread to soak up all those tasty juices. Plus, a light drizzle of lemon juice over the top adds a zing!
Recipe Variations
-
Vegetarian Option: Swap out the chicken for tofu or tempeh marinated in Cajun seasoning for a delicious plant-based option.
-
Pasta Delight: Toss the cooked Cajun Chicken and veggies with your favorite pasta for a hearty twist!
-
Cajun Fajitas: Use tortillas to wrap everything up for a fun fajita night—don’t forget the guacamole!
-
Spicy Kick: Add sliced jalapeños or a pinch of red pepper flakes if you want an extra kick of heat.
-
Creamy Sauce: Stir in a dollop of sour cream or Greek yogurt at the end for a creamy finish.
Chef’s Notes
This recipe has become a staple in my home, both for its flavor and its simplicity. I’ll never forget the time I tried to impress my friends with this dish, only to realize I had run out of Cajun seasoning midway. In a moment of desperation, I improvised with a mix of chili powder and Italian herbs! Surprisingly, it turned out delicious, and that’s what I love about cooking—you can really adjust as you go!
I’ve watched this recipe evolve, from humble family meals to dinner parties where everyone asks for seconds. Cooking is all about playing with flavors and having fun, so don’t be afraid to make this recipe your own!
FAQs and Troubleshooting
1. Why is my chicken dry?
If your chicken dries out, it might have been overcooked. Use a thermometer to help avoid this; it should be at 165°F (75°C) when finished.
2. Can I make this dish ahead of time?
Absolutely! It’s great for meal prep. Just store in an airtight container in the fridge and reheat on the stove.
3. What if I don’t have Cajun seasoning?
You can mix up your own with spices like paprika, garlic powder, cayenne pepper, and oregano. Get creative with what you have on hand!
4. Can I freeze leftovers?
Yes, this dish freezes well. Just let it cool completely before transferring it to a freezer-safe container for up to 3 months. Thaw in the fridge before reheating.
Nutritional Info
Here’s a quick glance at the nutritional profile of this dish (per serving):
- Calories: 320
- Protein: 30g
- Fat: 17g
- Carbohydrates: 10g
- Fiber: 3g
Now that you have the lowdown, it’s time to gather your ingredients and embrace the delicious adventure of cooking this Cajun Chicken with Bell Peppers. It’s time to fill your kitchen with that unforgettable aroma and enjoy every bite of this vibrant dish. Remember, cooking is not just about feeding your body; it’s about nourishing your spirit. Bon appétit!
PrintCajun Chicken with Bell Peppers

A flavorful dish featuring succulent chicken coated in Cajun spices, tossed with vibrant bell peppers and onions.
- Prep Time: 15 minutes
- Cook Time: 20 minutes
- Total Time: 35 minutes
- Yield: 4 servings 1x
- Category: Main Course
- Method: Sautéing
- Cuisine: Southern
- Diet: Gluten-Free
Ingredients
- 2 boneless, skinless chicken breasts
- 1 tablespoon Cajun seasoning
- 2 tablespoons olive oil
- 1 red bell pepper, sliced
- 1 green bell pepper, sliced
- 1 onion, sliced
- 2 cloves garlic, minced
- Salt and pepper to taste
- Fresh parsley for garnish
Instructions
- Heat the olive oil in a large skillet over medium heat.
- Season the chicken breasts with Cajun seasoning on both sides.
- Sear the chicken in the skillet for about 6-7 minutes on each side until golden brown.
- Remove the chicken and let it rest on a plate.
- Sauté the onions and bell peppers in the same skillet for about 5-7 minutes.
- Add minced garlic and sauté for an additional minute.
- Combine the sliced chicken with the veggies and heat through for 1-2 minutes.
- Plate your Cajun Chicken and garnish with fresh parsley.
Notes
Serve with rice or sautéed greens for a complete meal. You can also add a squeeze of lemon juice for an extra kick.
Nutrition
- Serving Size: 1 serving
- Calories: 320
- Sugar: 5g
- Sodium: 500mg
- Fat: 17g
- Saturated Fat: 3g
- Unsaturated Fat: 10g
- Trans Fat: 0g
- Carbohydrates: 10g
- Fiber: 3g
- Protein: 30g
- Cholesterol: 70mg
Keywords: Cajun Chicken, Bell Peppers, Southern Cooking, Quick Dinner, Healthy Recipe
Creamy Garlic Chicken with Roasted Baby Potatoes
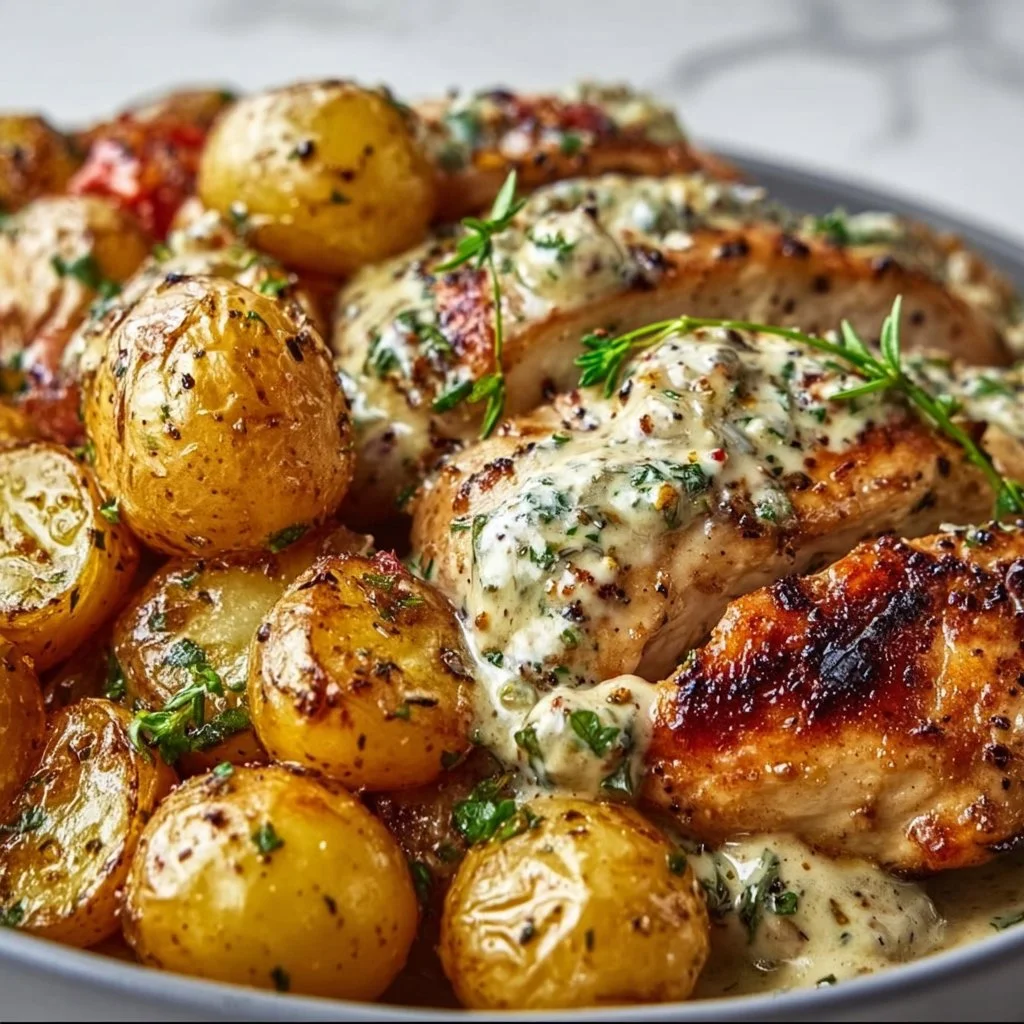
Creamy Garlic Chicken with Roasted Baby Potatoes: A Delicious Dream Come True
Hey there, fellow food lovers! Welcome back to Clean Plate Cravings! Today, I’m super excited to share one of my all-time favorite recipes: Creamy Garlic Chicken with Roasted Baby Potatoes. This dish has a way of wrapping you in a comforting embrace, bringing the richness of flavor while keeping things light and wholesome (you won’t be feeling too heavy afterward!).
Imagine coming home after a long day, the aroma of garlic wafting through the air, and knowing that a delectable meal awaits you. Sounds amazing, right? Well, this dish is just that! With tender chicken breasts drenched in a creamy, garlicky sauce and served alongside perfectly roasted baby potatoes, it’s a joyful experience for your taste buds that’s as easy to prepare as it is enjoyable to eat. Let’s dive into the magic of this recipe!
A Timeless Kitchen Memory
Growing up, Sundays were sacred in our household. My family had a tradition where we’d gather around the dinner table for a home-cooked meal. One of the stars of those meals was my mom’s creamy garlic chicken. It had this magical way of making the entire house smell heavenly. I would sit at the table, waiting impatiently, desperately hoping she’d make enough so we could have leftovers!
One particular Sunday, I remember sneaking into the kitchen, trying to watch her work her magic. I was fascinated by how simple ingredients transformed into such a luscious dish. The way she effortlessly minced garlic and blended cream with fragrant seasonings was pure artistry to me. Those moments inspired my love for cooking and these family recipes, and that feeling of togetherness is something I aim to recreate with every meal I share today.
Now, as an adult, I’ve put my own spin on that classic dish, marrying it with delicious roasted baby potatoes that are almost irresistible on their own. Are you ready to recreate this cozy meal with me? Let’s get started!
Ingredients
Here’s what you’ll need to whip up your very own Creamy Garlic Chicken with Roasted Baby Potatoes:
-
4 boneless, skinless chicken breasts
- Tender and quick-cooking, chicken breasts are the perfect canvas for our creamy sauce. If you’re looking for a lighter protein, feel free to swap for turkey cutlets or even tofu for a vegetarian version.
-
Salt, to taste
- A crucial ingredient that enhances all other flavors. For a fragrant twist, try using sea salt or Himalayan salt.
-
Black pepper, to taste
- Adds a touch of heat and depth. If you’re feeling adventurous, fresh cracked peppercorns will elevate the meal even more!
-
2 teaspoons garlic powder, divided
- Adds a lovely background flavor. If you have fresh garlic instead, use 6-8 cloves for that bold, fresh taste.
-
4 cloves garlic, minced
- Fresh garlic is where the real flavor party happens! Always mince it just before cooking to maximize its aromatic effects.
-
3 tablespoons olive oil, divided
- A heart-healthy choice for cooking and drizzling, olive oil lends a nice richness. You can also substitute avocado or coconut oil.
-
1 cup chicken broth
- Provides a deep, savory base for your sauce. Homemade is great, but go for low-sodium store-bought for convenience.
-
1 cup heavy cream
- This is the star player that makes the sauce so luscious! If you want a lighter option, you can use half-and-half or a plant-based cream.
-
1/2 cup grated Parmesan cheese
- Adds a rich umami flavor that marries beautifully with the garlic. Pecorino Romano works just as well if you’re after a sharper taste.
-
1 tablespoon Dijon mustard
- This adds a subtle tang that cuts through the creaminess. For a milder option, you can use yellow mustard.
-
1 teaspoon Italian seasoning
- A blend of herbs that brings a taste of the Mediterranean to the dish. Feel free to adjust the blend with your favorites, like basil or oregano.
-
2 cups baby potatoes, halved
- These little gems are perfect for roasting and absorbing flavors. If you can’t find baby potatoes, try using Yukon Gold or fingerlings cut into smaller pieces.
Step-by-Step Instructions
-
Preheat Your Oven:
First things first, preheat your oven to 400°F (200°C). This will make sure it’s nice and hot to get those baby potatoes perfectly roasted. -
Prep the Baby Potatoes:
Start by placing the halved baby potatoes in a large mixing bowl. Drizzle with 2 tablespoons of olive oil, and sprinkle with salt, black pepper, and a teaspoon of garlic powder. Toss everything together until the potatoes are evenly coated. This little step gets them seasoned and ready for roasting! -
Roast Them Up:
Spread the potatoes out on a baking sheet (line it with parchment for easy cleanup!). Make sure they’re in a single layer to ensure even roasting; no one likes mushy potatoes! Pop them in the oven and roast for about 25-30 minutes or until they’re golden and crispy. Flip them halfway through for that perfect roast! -
Cook the Chicken:
While those delicious potatoes are roasting, let’s move on to the chicken. Heat the remaining tablespoon of olive oil in a large skillet over medium heat. Season both sides of the chicken breasts with salt, black pepper, and the remaining teaspoon of garlic powder. -
Sear the Chicken:
Once your skillet is hot, add the chicken breasts. Sear them for about 5-7 minutes on each side, or until they’re beautifully browned and cooked through. They’ll develop a lovely crust, keeping all those juices locked in. Remove them from the skillet and set them aside on a plate for now. -
Make the Creamy Sauce:
Lower the heat to medium-low. In the same skillet, add the minced garlic. Sauté it for about 30 seconds until it becomes fragrant (but make sure not to burn it!). Add the chicken broth and scrape the bottom of the pan to get all those tasty bits mixed in. -
Add Cream and Cheese:
Stir in the heavy cream, Dijon mustard, Italian seasoning, and grated Parmesan cheese. Keep stirring until it’s nice and bubbly. Let it simmer for about 3-5 minutes until it thickens slightly. -
Return Chicken to Pan:
Add the chicken back into the skillet, making sure it’s coated in that creamy goodness. Let it cook for another 5 minutes, allowing all those flavors to combine.
Serving Suggestions
To plate this dish, serve the creamy garlic chicken on a generous bed of the roasted baby potatoes. I love garnishing with a sprinkle of fresh herbs—like parsley or basil—on top for a pop of color and freshness. You can never go wrong with a side of steamed veggies for a vibrant meal!
Recipe Variations
-
Herb-Infused: Add fresh thyme or rosemary to the creamy sauce for an aromatic twist.
-
Zesty Lemon: For a bright flavor, squeeze some fresh lemon juice into the sauce and add lemon zest before serving.
-
Mushroom Medley: Sauté some sliced mushrooms along with the garlic for a hearty, earthy flavor.
-
Spicy Kick: Add a pinch of red pepper flakes or a splash of hot sauce for some heat!
-
Dairy-Free: Substitute the heavy cream with coconut cream and the cheese with nutritional yeast for a creamy, dairy-free alternative.
Chef’s Notes
Oh boy, this recipe has gone through quite the evolution in my kitchen! The first time I made it, I went a little overboard with the garlic (impressive, but not exactly palatable!). Now, years later, I’ve perfected the balance between creamy and garlicky goodness, and it’s a staple at my gatherings. I love adding little personal touches here and there—like playing around with different herbs or finding new sides that pair well. It’s incredible how a simple dish can tell a story and evolve over time, just like our appreciation for food!
FAQs and Troubleshooting
Q1: What if my sauce is too thick?
A1: No worries! Simply add a splash more chicken broth or cream until you reach your desired consistency.
Q2: How can I ensure my chicken doesn’t dry out?
A2: Don’t overcook the chicken! Use a meat thermometer to check for doneness; it should read 165°F internally. Also, let your chicken rest for a few minutes after cooking to retain its juices.
Q3: Can I make this recipe ahead of time?
A3: Absolutely! You can prepare the sauce and chicken in advance and store them separately in the fridge. Just reheat the chicken and sauce on the stove before serving.
Q4: What’s a good substitute for baby potatoes?
A4: You can use regular-sized potatoes cut into smaller pieces, or even sweet potatoes if you want a healthier twist. Just adjust the cooking time accordingly!
Nutritional Info (if applicable)
This Creamy Garlic Chicken with Roasted Baby Potatoes is packed with protein, flavorful fats, and healthy carbs, making it a balanced dish for any meal. Plus, it’s filled with vitamins from the herbs and garlic, bringing health benefits along with its irresistible taste!
And there you have it—my take on Creamy Garlic Chicken with Roasted Baby Potatoes! I hope this dish warms your kitchen and heart, just like it has mine. Enjoy the process, explore your own creative twists, and remember: cooking is always about bringing joy—not just to your plate, but to everyone you love. Happy cooking, and cheers to flavorful adventures ahead!
PrintCreamy Garlic Chicken with Roasted Baby Potatoes

Tender chicken breasts in a creamy garlic sauce served with perfectly roasted baby potatoes.
- Prep Time: 15 minutes
- Cook Time: 30 minutes
- Total Time: 45 minutes
- Yield: 4 servings 1x
- Category: Main Course
- Method: Baking
- Cuisine: Italian
- Diet: Gluten-Free
Ingredients
- 4 boneless, skinless chicken breasts
- Salt, to taste
- Black pepper, to taste
- 2 teaspoons garlic powder, divided
- 4 cloves garlic, minced
- 3 tablespoons olive oil, divided
- 1 cup chicken broth
- 1 cup heavy cream
- 1/2 cup grated Parmesan cheese
- 1 tablespoon Dijon mustard
- 1 teaspoon Italian seasoning
- 2 cups baby potatoes, halved
Instructions
- Preheat your oven to 400°F (200°C).
- Place the halved baby potatoes in a bowl, drizzle with 2 tablespoons of olive oil, and sprinkle with salt, black pepper, and 1 teaspoon of garlic powder. Toss to coat.
- Spread the potatoes out on a baking sheet and roast for about 25-30 minutes, flipping halfway through.
- Heat the remaining tablespoon of olive oil in a skillet over medium heat. Season the chicken breasts with salt, black pepper, and the remaining garlic powder.
- Sear the chicken in the skillet for 5-7 minutes on each side until browned and cooked through. Remove from the skillet.
- Sauté the minced garlic in the same skillet for 30 seconds, then add chicken broth.
- Stir in heavy cream, Dijon mustard, Italian seasoning, and Parmesan cheese. Simmer for 3-5 minutes until thickened.
- Add the chicken back to the skillet, ensuring it’s coated in the sauce, and cook for another 5 minutes.
Notes
Garnish with fresh herbs for added flavor and color. Best served with steamed vegetables for a complete meal.
Nutrition
- Serving Size: 1 serving
- Calories: 450
- Sugar: 5g
- Sodium: 600mg
- Fat: 20g
- Saturated Fat: 10g
- Unsaturated Fat: 8g
- Trans Fat: 0g
- Carbohydrates: 36g
- Fiber: 4g
- Protein: 30g
- Cholesterol: 90mg
Keywords: Creamy Garlic Chicken, Roasted Baby Potatoes, Comfort Food, Easy Dinner, Family Recipe
Keto Tiramisu
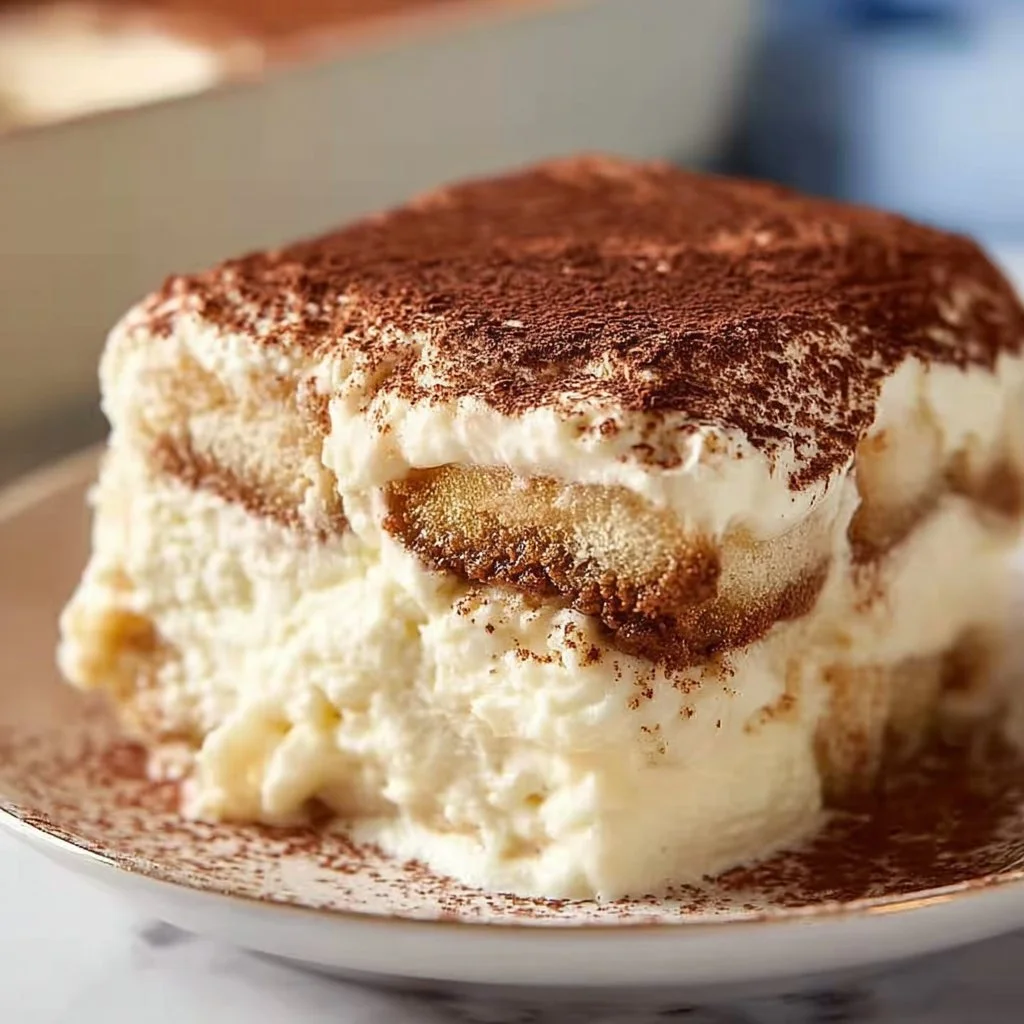
Indulge Without Guilt: Keto Tiramisu
Welcome back to Clean Plate Cravings! Today, we’re diving into a dessert that’s synonymous with indulgence yet adheres to that oh-so-coveted keto lifestyle! Yes, I’m talking about Keto Tiramisu. This classic Italian dessert has been revamped into a low-carb delight that still captures the essence, flavors, and sheer joy of sweet moments—without the sugar crash. Not only is it rich and creamy, but it also sparkles with the warmth of nostalgia and hints of espresso that dance on your palate.
Now, let’s face it: if you’ve ever had a full-on sugar high (or crash), it’s time to embrace a healthier way to enjoy desserts. Picture this: It’s a relaxed Sunday afternoon, and you’ve whipped together a delectable Keto Tiramisu that fills your kitchen with fragrant notes of coffee and cocoa. Your friends gather excitedly around the kitchen island, each slice dripping with creamy goodness, and laughter fills the air. That’s what I’m talking about—perfect moments where food brings us together and nourishes both body and spirit!
A Sweet Memory
Let me whisk you back to a bright summer afternoon when my Italian grandmother, Nonna Rosa, took me under her wing in her cozy kitchen. The sun filtered through the window, illuminating the dust motes dancing in the air as nonna graciously prepped for our family gathering. There was always a sense of excitement when dessert was involved. "Ava," she called, her voice lilting with warmth. “You must help me make tiramisu today.”
I watched as she expertly layered espresso-soaked ladyfingers and rich mascarpone while sharing stories of each ingredient and the love that went into making them. The best part? Laughter, lots of laughter. I remember her saying, “Life is sweet; it should taste sweet!” Fast forward years later, and I find myself crafting a keto version that captures those cherishable moments, allowing everyone to indulge in the flavor without the guilt.
Ingredients
When making this delightful Keto Tiramisu, you’ll need a medley of simple yet powerful ingredients. Here’s what you’ll need:
-
1 cup almond flour
- This nutty flour is not only low in carbs but also gives a beautiful base for our layers. If you want to experiment, you can swap it with coconut flour, but it will require adjustments in quantities since coconut flour is more absorbent.
-
1/2 cup erythritol
- This natural sweetener is my go-to for keto recipes, as it provides a sweet taste without the added sugars. If you prefer a different sweetener, monk fruit or stevia can also work, but adjust to taste since they can be sweeter.
-
4 large eggs
- Eggs bring richness and act as a binding agent here. Always use fresh eggs for the best flavor—organic if possible! And remember, the egg’s temperature matters; room temperature eggs blend better.
-
1 cup mascarpone cheese
- Mascarpone is the luscious heart of tiramisu, giving it that creamy texture. If you can’t find mascarpone, a mixture of cream cheese and heavy cream can be a good substitute.
-
1 cup heavy cream
- This ingredient adds a dreamy texture that elevates our dessert. You can replace it with coconut cream for a dairy-free option—just make sure it’s well-chilled!
-
1 teaspoon vanilla extract
- Vanilla is like the fairy dust of baking. It enhances everything! Use pure vanilla extract if you can; imitation vanilla just doesn’t hold a candle to the real deal.
-
1 cup brewed coffee
- Strong, robust coffee is essential for that genuine tiramisu flavor. Feel free to use decaf if you prefer! Instant coffee can work, but brew up your favorite cup.
-
Cocoa powder for dusting
- A dusting of cocoa on top adds not only the signature look but also a hint of bitterness that perfectly balances the sweetness of the dessert. Dutch-processed cocoa adds richness if you want to go that route!
Step-by-Step Instructions
Now that we have our ingredients lined up, let’s bring this Keto Tiramisu together, step by step!
1. Prepare the Coffee:
Start by brewing a strong cup of coffee and let it cool to room temperature. You want to ensure that the coffee isn’t too hot when we dip our ladyfingers (or almond flour substitute!). For a fun spin, consider adding a splash of your favorite liqueur like Kahlúa or Amaretto, but make sure to measure to keep it keto-friendly!
2. Make the Almond Flour Mixture:
In a medium-sized bowl, mix together 1 cup of almond flour and 1/2 cup of erythritol. This blend will help form the base. Stir until well combined, then set it aside.
3. Whip the Eggs:
In a large mixing bowl, crack 4 large eggs and whip them with an electric mixer for about 5-7 minutes until you see that beautiful pale and fluffy texture. This step is important to incorporate air into the batter, giving your tiramisu an airy quality!
4. Fold in the Mascarpone:
Gently fold in 1 cup of mascarpone cheese into your whipped eggs using a spatula. Be patient here! You want that creamy cheese to blend beautifully without losing the fluffiness.
5. Fold in the Heavy Cream:
Whip 1 cup of heavy cream in another bowl until it forms stiff peaks. Carefully fold this whipped cream into the egg and mascarpone mixture. This step is crucial as it gives us that light, cloud-like consistency we crave in tiramisu!
6. Assemble Your Layers:
In a shallow dish, pour your cooled coffee. Quickly dip each cookie or almond flour layer in the coffee, ensuring they get a good soaking but don’t turn mushy. Layer them in the bottom of a serving dish, then add half of your mascarpone mixture on top. Repeat the process for the second layer.
7. Chill and Dust:
Now, it’s time for the hardest part—patience! Cover your tiramisu with plastic wrap and chill it in the refrigerator for at least 4 hours, or ideally, overnight. Once ready to serve, dust a generous layer of cocoa powder on top, and voilà!
Serving Suggestions
When it comes to serving your Keto Tiramisu, simple is key. Scoop generous portions onto dessert plates, and consider adding a fresh mint leaf or a sprinkle of extra cocoa for that gourmet touch. For a fun presentation, you can even serve in small individual cups or glasses, allowing each guest to have their own little tiramisu!
Recipe Variations
- Mocha Twist: Add 2 tablespoons of cocoa powder directly to the mascarpone mixture for a rich, mocha flavor.
- Nutty Delight: Incorporate toasted chopped hazelnuts or walnuts between layers for an added crunch.
- Fruit Infusion: Layer on some fresh berries or a fruit purée between the layers for a fruity surprise.
- Chocolate Lover’s Dream: Drizzle some melted sugar-free dark chocolate on top right before serving—decadent and delicious!
- Dairy-Free Option: Use a blend of vegan cream cheese and coconut cream as an alternative to mascarpone and heavy cream.
Chef’s Notes
Keto Tiramisu has become a staple in my kitchen, and it never fails to impress. I’ve experimented a lot with this recipe, and I can confidently say that the key is to find balance in all elements—sweetness, creaminess, and coffee flavor must sing together. Remember that it also improves in flavor after a night in the fridge. On those busy weekdays when I need a quick pick-me-up, sometimes, I even make it for breakfast—shhh! Your secret’s safe with me!
FAQs and Troubleshooting
1. My tiramisu turned out too runny! What did I do wrong?
If your tiramisu is too runny, it could be due to over-whipping the cream or not letting it chill long enough. Ensure you whip the cream to stiff peaks and allow proper chilling for the ganache to set.
2. Can I use decaf coffee in this recipe?
Absolutely! Decaf coffee works beautifully if you’re looking to keep your tiramisu on the lighter side without the caffeine giggle.
3. How do I store leftovers?
Leftover Keto Tiramisu can last in the fridge for up to 4 days, covered with plastic wrap. However, I doubt there will be any leftovers, given how delicious this dessert is!
4. Why is my mascarpone mixture grainy?
This could be due to overmixing the mascarpone. When folding it into the egg mixture, do so gently to maintain a smooth consistency.
Nutritional Info
While I always recommend consulting with a nutritionist for personalized dietary info, here’s a quick breakdown for one serving (1/8 of the recipe):
- Calories: Approximately 220
- Carbs: 5g
- Protein: 6g
- Fat: 20g
And that’s a wrap on my Keto Tiramisu! You’ll love the balance of flavors and the joy it brings. Remember, cooking is about enjoying the moment, so gather your loved ones, whip out those ingredients, and create your delicious masterpiece! Until next time, keep it fresh, simple, and satisfyingly delicious. Happy cooking!
PrintKeto Tiramisu

A delightful low-carb version of the classic Italian dessert that lets you indulge without the guilt.
- Prep Time: 20 minutes
- Cook Time: 15 minutes
- Total Time: 4 hours 35 minutes
- Yield: 8 servings 1x
- Category: Dessert
- Method: Chilling
- Cuisine: Italian
- Diet: Keto
Ingredients
- 1 cup almond flour
- 1/2 cup erythritol
- 4 large eggs
- 1 cup mascarpone cheese
- 1 cup heavy cream
- 1 teaspoon vanilla extract
- 1 cup brewed coffee
- Cocoa powder for dusting
Instructions
- Prepare the Coffee: Brew a strong cup of coffee and let it cool to room temperature.
- Make the Almond Flour Mixture: In a bowl, mix together almond flour and erythritol until combined.
- Whip the Eggs: In a large mixing bowl, whip eggs until pale and fluffy, about 5-7 minutes.
- Fold in the Mascarpone: Gently fold mascarpone into the whipped eggs using a spatula.
- Fold in the Heavy Cream: Whip heavy cream until stiff peaks form, then carefully fold into the egg and mascarpone mixture.
- Assemble Your Layers: Dip ladyfingers or almond flour layer in cooled coffee, layer in a dish, add half of the mascarpone mixture, and repeat.
- Chill and Dust: Cover with plastic wrap and chill for at least 4 hours, dust with cocoa before serving.
Notes
This dessert can be made a day ahead to enhance the flavors. Serve with a fresh mint leaf for garnish.
Nutrition
- Serving Size: 1 serving
- Calories: 220
- Sugar: 1g
- Sodium: 150mg
- Fat: 20g
- Saturated Fat: 10g
- Unsaturated Fat: 6g
- Trans Fat: 0g
- Carbohydrates: 5g
- Fiber: 3g
- Protein: 6g
- Cholesterol: 160mg
Keywords: Keto Tiramisu, Low-Carb Dessert, Italian Dessert, Keto Desserts, Sugar-Free Tiramisu
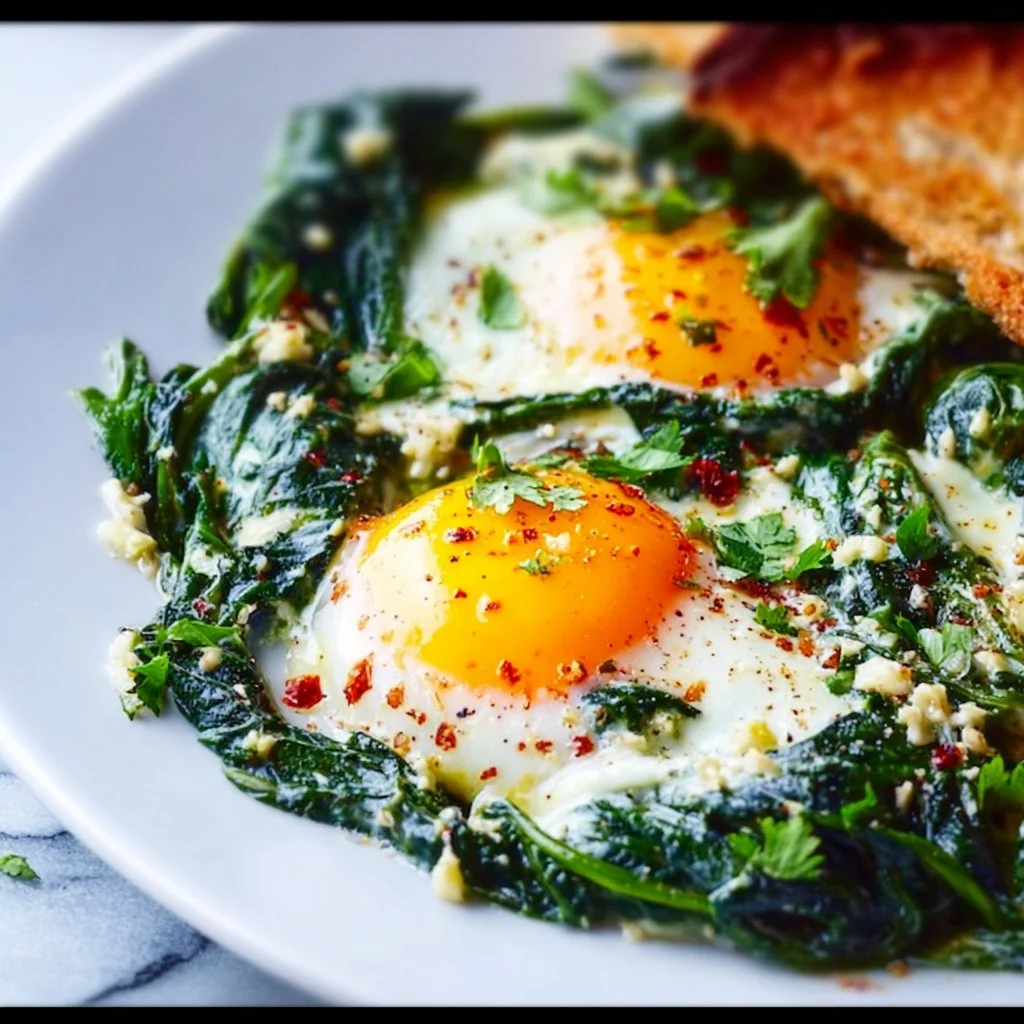
Creamy Spinach and Eggs
Creamy Spinach and Eggs: A Breakfast Delight
Welcome to another delicious installment here at Clean Plate Cravings! Today, we’re diving into a colorful, nutritious dish that’s perfect for breakfast, brunch, or even a light dinner—Creamy Spinach and Eggs. This dish is not just a treat for your taste buds; it’s a warm embrace for your soul. Imagine starting your day with creamy, luscious eggs nestled in vibrant sautéed spinach, all brought together with a dollop of tangy Greek yogurt. Trust me, this dish will have you singing for joy!
You know, breakfast has always held a special place in my heart. Growing up in a bustling household, mornings were a mix of laughter, the aroma of brewing coffee, and the inevitable clatter of plates and pans. My mom had a knack for transforming simple ingredients into something extraordinary. One dish that sticks out in my memory is her creamy scrambled eggs. She would whip up fluffy eggs with whatever greens we had on hand—spinach, kale, or even a handful of freshly chopped herbs from our garden. It was a simple yet magical way to start the day, filling our bellies and hearts with love.
Fast-forward to today, and I’ve taken a page from her book with my own spin—quite literally! This Creamy Spinach and Eggs recipe is inspired by those cozy mornings filled with family. It’s quick to prepare, loaded with nutrients, and bursting with flavor. Let’s get started on this delightful journey into the kitchen where wholesome ingredients come together in a joyful symphony.
Ingredients
Let’s gather our ingredients, shall we? Here’s what you’ll need to whip up this creamy masterpiece:
-
1 tablespoon extra-virgin olive oil
A healthy fat that not only adds delicious flavor but also helps keep our hearts happy. You can substitute this with avocado oil or coconut oil if you prefer a different flavor profile. -
3-4 green onions (thinly sliced, both white and green parts)
These bring a mild onion flavor that complements the creaminess of the eggs. If you’re out of green onions, feel free to use shallots or chives—they’ll work beautifully! -
5 oz. baby spinach (about 4 cups)
Fresh spinach is the star of this dish! Not only does it provide vibrant color and nutrients, but it also wilts down considerably when cooked. You can swap this with kale or arugula for a twist, but they may require slight adjustments in cooking time. -
½ teaspoon kosher salt (plus more if needed)
Salt brings out the flavors in our dish, so don’t skimp! If you’re watching your sodium intake, opt for low-sodium seasoning or omit extra salt until the end. -
¼ teaspoon black pepper (plus more if needed)
A pinch of this gives a lovely bite to our creamy dish. You can spice it up with a dash of red pepper flakes or smoked paprika if you love a little heat. -
½ cup Greek yogurt (I prefer Fage 5%)
This not only adds creaminess but also a tangy kick that takes the flavors up a notch! If you’re avoiding dairy, consider using a non-dairy yogurt, like coconut or almond yogurt—just taste to ensure it matches your flavor preference. -
4 eggs
Eggs are packed with protein and healthy fats. You can also use egg whites or a plant-based egg substitute if you’re looking to lower the cholesterol or make it vegan. -
Crusty bread (for serving, optional)
Nothing pairs better with creamy eggs than a slice of toasted, crusty bread. Choose whole grain for added fiber, or go gluten-free if you need to!
Step-by-Step Instructions
Now that we have everything prepped and ready, it’s time for the fun part—cooking! Follow my steps below to create your delicious Creamy Spinach and Eggs:
-
Heat the Oil
In a large skillet, heat the tablespoon of extra-virgin olive oil over medium heat. You want it to shimmer, but not smoke. A good chef tip: if you’re unsure whether your oil is hot enough, toss in a tiny piece of onion; if it sizzles, you’re ready to go! -
Sauté the Green Onions
Add the thinly sliced green onions (both the white and green parts) to the skillet. Sauté for about 2-3 minutes until they’re tender and fragrant. This step releases their delicious flavors. If you notice they’re browning too quickly, reduce the heat! -
Add the Spinach
Next, add the baby spinach to the skillet. It may seem like a lot at first, but trust me—it will wilt down significantly. Stir gently for about 2 minutes until the spinach is wilted and vibrant. Remember, you want it to maintain its bright green color. Here’s a little chef hack: if you want to save time, you can use pre-washed and pre-chopped spinach, though fresh is always best! -
Season the Greens
Sprinkle in the kosher salt and black pepper. Stir well to combine and let the mixture cook for another minute. Give it a taste—this is your chance to adjust the seasoning to your liking! -
Incorporate the Greek Yogurt
Reduce the heat to low and stir in the Greek yogurt, mixing everything until it’s well combined. This is where the magic happens—the creamy yogurt turns the whole dish into a luscious delight. If you want it extra creamy, don’t be shy to add a bit more yogurt! -
Cook the Eggs
Crack the eggs directly over the spinach mixture, spacing them evenly apart. Cover the skillet with a lid and let the eggs cook for around 3-5 minutes or until the whites are set but the yolks are still runny. Here’s a little tip: if you prefer your eggs more cooked, just keep them covered a bit longer, but be careful not to overcook! -
Serve It Up
Once the eggs are cooked to your liking, remove the skillet from heat. You can either serve the eggs directly from the skillet or gently slide them onto plates. I like to spoon some of that creamy spinach underneath the eggs for a beautiful presentation.
Serving Suggestions
Serve your Creamy Spinach and Eggs with a side of crusty bread—trust me, you’ll want to mop up every bit of goodness on your plate! For an extra touch, sprinkle some additional black pepper or a few chilies on top to kick things up a notch. Enjoy with a side of fresh fruit or a simple salad for a well-rounded meal!
Recipe Variations
Now, let’s get creative! Here are some fun twists you can try with this recipe:
-
Cheesy Spinach and Eggs
Add shredded cheese (like feta or cheddar) to the creamy mixture for a rich, cheesy flavor that’ll have you dreaming about breakfast all day. -
Mediterranean Flair
Toss in some diced sun-dried tomatoes and black olives for a Mediterranean twist that’s bursting with flavor. -
Herbed Up
Incorporate fresh herbs like dill, parsley, or basil to elevate the dish. Herbs bring freshness that pairs beautifully with the creamy spinach. -
Spicy Kick
Add a dash of sriracha or hot sauce on top before serving for a delightful heat that wakes up your palate. -
Vegan Version
Replace the eggs with scrambled tofu and use a non-dairy yogurt for a completely plant-based version that doesn’t skimp on flavor.
Chef’s Notes
This recipe has a special place in my heart because it reminds me of lazy Sunday mornings spent in my mom’s kitchen. Over the years, I’ve fiddled with the ratios and ingredients to create a dish that fits my personal taste. The combination of creamy yogurt, bright greens, and rich eggs is the perfect morning pick-me-up! And as always, don’t hesitate to get creative—cooking should be a fun adventure, so put your unique spin on it!
FAQs and Troubleshooting
1. My eggs turned out rubbery. What went wrong?
This can happen if the eggs are overcooked or if the heat is too high. For perfect eggs, keep the heat low and remove them from the heat while they’re still slightly runny!
2. Can I make this recipe in advance?
While this dish is best enjoyed fresh, you can prep the spinach and yogurt mixture a day in advance. Simply reheat in a skillet and add fresh eggs when ready to serve.
3. How can I make this dish more filling?
Add some cooked quinoa or roasted sweet potatoes on the side for extra heartiness!
4. What’s a good substitute for Greek yogurt if I don’t have any?
You can use sour cream or a thick plant-based yogurt as an alternative, or simply skip it if preferred!
Nutritional Info
While I typically don’t focus on specific statistics, it’s worth noting this dish is rich in protein and packed with vitamins from the spinach. Plus, it’s low in carbs, if that’s something you’re mindful of in your meals.
There you have it! A warm, nutritious, and absolutely delicious Creamy Spinach and Eggs that’s sure to brighten up your mornings. I hope you enjoyed cooking along with me today—let’s keep these kitchen stories going. Share your creations with me, and let’s inspire each other to make every meal a celebration of vibrant, fresh flavors! Happy cooking!
PrintCreamy Spinach and Eggs

A colorful, nutritious dish perfect for breakfast, brunch, or a light dinner, featuring creamy eggs nestled in sautéed spinach and Greek yogurt.
- Prep Time: 10 minutes
- Cook Time: 15 minutes
- Total Time: 25 minutes
- Yield: 2 servings 1x
- Category: Breakfast
- Method: Sautéing
- Cuisine: American
- Diet: Vegetarian
Ingredients
- 1 tablespoon extra-virgin olive oil
- 3–4 green onions (thinly sliced, both white and green parts)
- 5 oz. baby spinach (about 4 cups)
- ½ teaspoon kosher salt (plus more if needed)
- ¼ teaspoon black pepper (plus more if needed)
- ½ cup Greek yogurt
- 4 eggs
- Crusty bread (for serving, optional)
Instructions
- Heat the oil in a large skillet over medium heat.
- Add the green onions and sauté for about 2-3 minutes.
- Include the baby spinach and stir gently for about 2 minutes until wilted.
- Season the greens with kosher salt and black pepper, mixing well.
- Incorporate the Greek yogurt, stirring until well combined.
- Crack the eggs over the spinach mixture, cover the skillet, and let cook for 3-5 minutes.
- Serve directly from the skillet or slide onto plates, spooning the creamy spinach underneath.
Notes
This dish is versatile—try adding cheese, sun-dried tomatoes, or fresh herbs for variations.
Nutrition
- Serving Size: 1 serving
- Calories: 300
- Sugar: 5g
- Sodium: 350mg
- Fat: 20g
- Saturated Fat: 5g
- Unsaturated Fat: 10g
- Trans Fat: 0g
- Carbohydrates: 15g
- Fiber: 3g
- Protein: 14g
- Cholesterol: 200mg
Keywords: spinach, eggs, breakfast, creamy, healthy, quick recipe

Greek Chicken Tenders
Greek Chicken Tenders: A Flavorful Journey to the Mediterranean
Welcome to the vibrant world of Clean Plate Cravings, where we dive into the irresistible and exciting realm of healthy, taste-packed meals! Today, we’re whipping up something that’s not just a crowd pleaser but also a dish that’ll make your weeknight dinners feel a bit more special without any fuss. I’m talking about Greek Chicken Tenders, tender, juicy morsels of chicken infused with bright Mediterranean flavors that transport you right to a sun-soaked paradise.
Eating well doesn’t mean sacrificing flavor or fun! In fact, it should enhance our lives and bring joy to our tables. These chicken tenders are perfect for anyone looking to jazz up their mealtime routine with something that’s both clean and utterly delicious. Ready to embark on a culinary adventure? Let’s go!
A Taste of Nostalgia
Growing up, my family often gathered around the table for homemade dinners, where the air was filled with laughter and the aromas of fantastic food. One summer, my parents decided to host what they called "Greek Night." They transformed our backyard into a Mediterranean oasis with fairy lights, colorful table linens, and, most importantly, a spread of scrumptious Greek dishes.
I remember my mom marinating chicken with tons of garlic, lemon, and herbs—her secret ingredients that brought magic to every bite. We grilled that chicken until it was golden brown and charred, served it with tzatziki and fresh pita, and danced the night away under the stars. It was one of those moments that made me realize how food creates lasting memories and connections.
That summer inspired my version of Greek Chicken Tenders, which keeps those beloved flavors alive while simplifying the cooking process. It’s not merely a recipe; it’s a way to evoke joy and warmth at your own dining table!
Ingredients You’ll Need
Here’s what you’ll be gathering for these delicious Greek Chicken Tenders:
-
1 lb chicken tenders: These are the stars of our show. Tender cuts of chicken make for quick cooking and are perfect for making flavorful bites. If chicken tenders aren’t available, you can use chicken breasts, thinly sliced for similar results.
-
2 tablespoons olive oil: A must-have for marinating and cooking. It adds a beautiful richness and depth to the chicken. You can substitute it with avocado oil if you prefer a higher smoke point.
-
1 teaspoon dried oregano: This herb brings that classic Greek flavor. If you don’t have oregano, try using thyme or rosemary for a different twist.
-
1 teaspoon garlic powder: Garlic is essential in Greek cuisine! It adds flavor without the need for fresh garlic. You can substitute with minced fresh garlic, using about two cloves if you want that extra punch.
-
1 teaspoon onion powder: This helps deepen the flavor profile without the texture of onions. If you’d like, you can use finely chopped fresh onions for more texture but note that it might alter the cook time slightly.
-
1 teaspoon salt: Essential for enhancing all the flavors. If you’re watching sodium intake, you can use sea salt or reduce the amount according to your preference.
-
1/2 teaspoon black pepper: Freshly cracked provides a nice kick. If you enjoy a bit more spice, feel free to add cayenne pepper for an additional punch!
-
1 tablespoon lemon juice: Freshly squeezed lemon juice brightens the entire dish. You can use lime juice if that’s what you have handy.
-
1/4 cup plain Greek yogurt (optional for serving): Perfect for a creamy dip! If you’re looking for a lighter option, you can substitute low-fat yogurt or even a dollop of hummus.
-
Lemon wedges (for serving): These are fantastic for squeezing over the tenders right before serving, adding a refreshing zing.
Step-by-Step Instructions
Now that you’ve gathered all your ingredients, let’s bring this dish to life! Follow these simple steps to make your Greek Chicken Tenders:
-
Marinate the Chicken: In a large bowl, mix together the olive oil, dried oregano, garlic powder, onion powder, salt, black pepper, and lemon juice. Add the chicken tenders, making sure they’re well-coated. Let them marinate for at least 30 minutes at room temperature, or longer in the refrigerator for deeper flavor (up to 4 hours is ideal). Chef tip: The longer you let it marinade, the juicier and tastier your chicken will be!
-
Prep Your Cooking Surface: Heat a large skillet or grill pan over medium-high heat. Make sure it’s hot before adding the chicken; this ensures a nice sear. If you’re grilling, preheat your grill to medium-high as well. Little hack: To check if your skillet is hot enough, sprinkle a few drops of water on it. If they sizzle and evaporate, you’re ready!
-
Cook the Chicken: Add the marinated chicken tenders to the hot pan in a single layer. Cook for 4-5 minutes on each side, or until cooked through (internal temperature should reach 165°F). Pro tip: Resist the urge to flip the chicken too soon; let it get a lovely crust for maximum flavor!
-
Rest the Chicken: Once cooked, transfer the tenders to a plate and cover with foil. Let them rest for about 5 minutes. This step is crucial for keeping the chicken moist and tender. Chef insider info: Resting is essential! If you cut into the chicken too soon, all those delicious juices will escape!
-
Serve Up: Plate your chicken tenders, drizzle with leftover marinade if you have any, and serve alongside a bowl of Greek yogurt and lemon wedges. Fun idea: You can also serve these tenders over a bed of greens or alongside a simple Greek salad for a complete meal.
Serving Suggestions
Plating is just as important as cooking! To serve your Greek Chicken Tenders, stack a few tenders on a plate, then add a generous scoop of Greek yogurt on the side—don’t forget those fresh lemon wedges for an extra burst of flavor. To elevate your dish even further, toss a handful of cherry tomatoes and cucumber slices on the plate. Voilà, you’ve got a meal that not only tastes amazing but also looks like a work of art!
Recipe Variations
Want to switch things up? Here are a few fun variations you can try to keep this dish exciting!
-
Mediterranean Spice: Add some smoked paprika or cumin to the marinade for a different flavor profile.
-
Zesty Pesto: Swap out the olive oil for a tablespoon of pesto, mixing in some fresh basil for an herbaceous twist.
-
Greek Chicken Tacos: Serve the chicken tenders in pita or tortillas with tzatziki, chopped peppers, and cucumber for a fun twist on traditional tacos!
-
Baked Option: For an oven-baked version, preheat the oven to 425°F, place the chicken on a lined baking sheet, and bake for 15-20 minutes until cooked through.
-
Vegetarian-Friendly Alternative: Use marinated portobello mushrooms or tofu instead of chicken for a plant-based version!
Chef’s Notes
This recipe holds a special place in my heart, not just for its nostalgic ties but also for how it has evolved over the years. I started with a simple marinade and later added layers of flavor, making it versatile for any occasion. Whenever I make it for friends or family, they can’t help but rave about it! I also love how easy it is to double the batch for meal prep—having these juicy tender pieces ready to go sets you up for success all week long!
FAQs and Troubleshooting
1. My chicken came out dry, what happened?
- This can happen if you overcook the chicken. Always use a meat thermometer to check for doneness. If you cook it until it reaches 165°F and let it rest as instructed, you’ll avoid dryness.
2. Can I use frozen chicken tenders?
- Yes! Just ensure they’re thoroughly thawed before marinating. Frozen chicken should not be cooked in the marinade directly as it can lead to uneven cooking.
3. How do I store leftovers?
- Store any leftovers in an airtight container in the fridge for up to 3-4 days. To reheat, just give them a quick warm-up in a skillet or microwave.
4. Can I freeze these chicken tenders?
- Absolutely! You can freeze the marinated chicken before cooking. Just remember to thaw them in the fridge overnight before cooking them as per the instructions.
Nutritional Info (optional)
As a rough estimate, a serving of Greek Chicken Tenders (based on a standard serving size) contains approximately:
- Calories: 200
- Protein: 26g
- Fat: 9g
- Carbohydrates: 0g
These tenders are packed with protein and provide healthy fats, making them a fantastic choice for a nourishing meal!
Conclusion
And there you have it—the marvelous journey of Greek Chicken Tenders from my kitchen to yours! This simple yet flavorful dish proves that eating well can be easy, enjoyable, and endlessly versatile. I hope you create your own memories with this recipe, just as I did many years ago on that unforgettable Greek Night. Happy cooking, and may every meal be a celebration of flavor and joy!
PrintGreek Chicken Tenders

Tender, juicy chicken tenders marinated in Mediterranean flavors, perfect for a healthy dinner.
- Prep Time: 30 minutes
- Cook Time: 10 minutes
- Total Time: 40 minutes
- Yield: 4 servings 1x
- Category: Main Course
- Method: Grilling
- Cuisine: Mediterranean
- Diet: Paleo
Ingredients
- 1 lb chicken tenders
- 2 tablespoons olive oil
- 1 teaspoon dried oregano
- 1 teaspoon garlic powder
- 1 teaspoon onion powder
- 1 teaspoon salt
- 1/2 teaspoon black pepper
- 1 tablespoon lemon juice
- 1/4 cup plain Greek yogurt (optional for serving)
- Lemon wedges (for serving)
Instructions
- Marinate the Chicken: In a large bowl, mix together the olive oil, dried oregano, garlic powder, onion powder, salt, black pepper, and lemon juice. Add the chicken tenders, making sure they’re well-coated. Let them marinate for at least 30 minutes at room temperature.
- Prep Your Cooking Surface: Heat a large skillet or grill pan over medium-high heat. Make sure it’s hot before adding the chicken.
- Cook the Chicken: Add the marinated chicken tenders to the hot pan in a single layer. Cook for 4-5 minutes on each side, or until cooked through.
- Rest the Chicken: Once cooked, transfer the tenders to a plate and cover with foil. Let them rest for about 5 minutes.
- Serve Up: Plate your chicken tenders, drizzle with leftover marinade if you have any, and serve alongside a bowl of Greek yogurt and lemon wedges.
Notes
For added flavor, serve with a salad or over greens. Feel free to experiment with spices for different variations.
Nutrition
- Serving Size: 1 serving
- Calories: 200
- Sugar: 1g
- Sodium: 600mg
- Fat: 9g
- Saturated Fat: 1g
- Unsaturated Fat: 4g
- Trans Fat: 0g
- Carbohydrates: 0g
- Fiber: 0g
- Protein: 26g
- Cholesterol: 75mg
Keywords: Greek chicken, Mediterranean meal, healthy dinner, chicken tenders
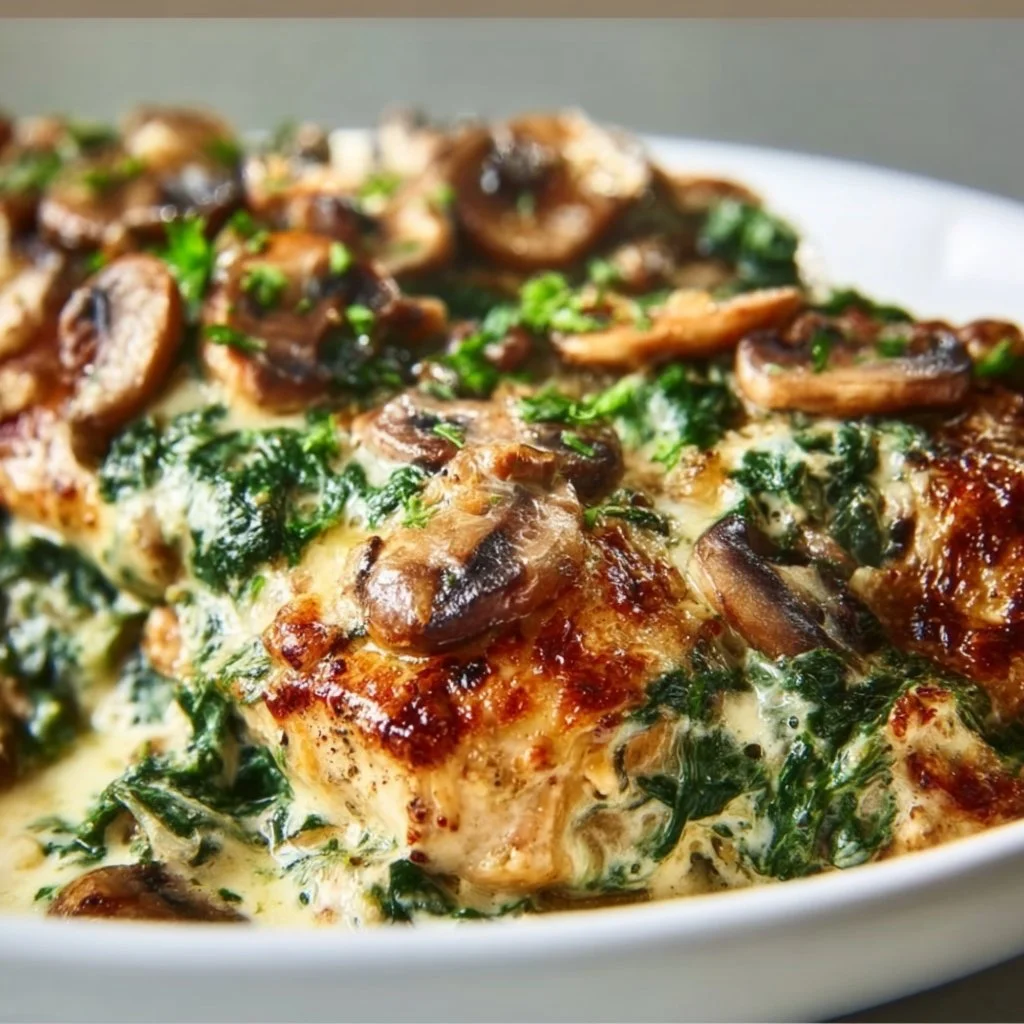
Easy Low-Carb Chicken Spinach Mushroom Bake
Easy Low-Carb Chicken Spinach Mushroom Bake
Introduction
Hey there, food lovers! Welcome back to my cozy kitchen here at Clean Plate Cravings! Today, I’m excited to share a dish that’s not only bursting with flavor but is also low-carb and a breeze to whip up—my Easy Low-Carb Chicken Spinach Mushroom Bake. This comforting recipe is perfect for a busy weeknight but fancy enough to impress those special guests on the weekends!
Picture this: It’s a chilly evening, and after a long day filled with meetings and errands, you crave something warm and satisfying. But here’s the kicker—you also want to keep it healthy and light. That’s where this one-dish wonder comes into play! With tender shredded chicken, vibrant spinach, earthy mushrooms, and a creamy Parmesan sauce, this bake hits all the right notes without weighing you down.
And let me tell you, this dish comes with a little nostalgia. It reminds me of weekends spent cooking with my grandma in her bustling kitchen, where everything was homemade, and flavors mingled like old friends. She would often throw together a casserole filled with whatever vegetables we had on hand, and we’d savor every last bite. That’s the spirit I channel when I craft recipes today—good food, good vibes, and a lot of love.
So, roll up your sleeves, and let’s dive into this easy low-carb bake that’s sure to become a staple in your kitchen! You’ll find that it’s not only delicious but incredibly versatile, too. Let’s get cooking!
Personal Story
Growing up, my family kitchen was always filled with the aromas of delicious home-cooked meals. My grandma was a master of casseroles. She never shied away from throwing whatever was left in the fridge into a baking dish, and her motto was always, "You won’t know until you try!" One chilly autumn evening, I watched her create a creamy chicken and spinach bake that would later become one of our family favorites.
I still remember how she’d let me stir the pot, teaching me her secrets with the warmest smile. "Always taste as you go, dear," she’d say, her eyes twinkling. That day, our kitchen was alive with laughter and the tantalizing smell of garlic sautéing—an irresistible combination I’ve never forgotten.
This Easy Low-Carb Chicken Spinach Mushroom Bake is inspired by those cherished moments in my Grandma’s kitchen. It captures the essence of comfort food while keeping it light and fresh. It’s a reminder that food is not just nourishment; it’s also connection, warmth, and love shared around the table.
Ingredients
Here’s what you’ll need to create this delightful dish:
-
2 cups cooked chicken, shredded
The star of our show! Feel free to use leftover rotisserie chicken, grilled chicken, or even poach chicken breast specifically for this dish. -
2 cups fresh spinach
Spinach adds a beautiful pop of color and a ton of nutrients. Fresh is best, but you can easily substitute with frozen spinach—just make sure to thaw and squeeze out excess moisture. -
1 cup mushrooms, sliced
I love using cremini or button mushrooms for their rich umami flavor. If you’re feeling adventurous, try shiitake for an earthy twist! -
1 cup heavy cream
This creamy base is what ties everything together. For a lighter option, you can substitute with coconut cream or half-and-half, although the flavor will differ slightly. -
1 cup Parmesan cheese, grated
Parmesan brings a salty, nutty flavor to the dish. If you’re not a fan of Parmesan, any cheese that melts well, like mozzarella or goat cheese, can work in a pinch. -
2 cloves garlic, minced
Garlic is a must for adding depth and aroma. For a milder flavor, try roasted garlic. -
Salt and pepper to taste
Simple seasonings that elevate every dish. Don’t be shy—taste as you season! -
Olive oil for cooking
A splash of olive oil helps sauté the veggies and brings a lovely richness. Avocado oil is a great alternative, with a higher smoke point.
Step-by-Step Instructions
Now that we have our ingredients, let’s get to the fun part—cooking this delightful bake!
-
Preheat Your Oven
Preheat your oven to 375°F (190°C). This step is crucial for achieving that beautifully baked, golden top. -
Sauté the Aromatics
In a large skillet, heat about 2 tablespoons of olive oil over medium heat. Add the minced garlic and sauté until fragrant, about 1 minute. This sizzles up the kitchen and sends greetings to all your taste buds! -
Add the Mushrooms
Toss in your sliced mushrooms and sauté for about 3-4 minutes until they’re tender and have released their moisture. Chef’s Tip: Don’t overcrowd the pan; otherwise, the mushrooms will steam instead of sauté! -
Incorporate the Spinach
Add the fresh spinach to the skillet and cook until wilted, about 2-3 minutes. It feels like magic watching it shrink down! Season with salt and pepper to enhance the flavors. -
Combine the Chicken and Cream
Stir in the shredded chicken and pour in the heavy cream, mixing everything together. Allow it to simmer for another 2-3 minutes until everything is well coated. If you want to add a bit of zest, squeeze a little lemon juice into the mix—trust me, it elevates the flavor! -
Cheesy Goodness
Gradually fold in the Parmesan cheese until melted and creamy. Chef Hack: Save a bit of cheese for topping—this will give you a delicious, crispy layer! -
Transfer to Baking Dish
Pour the mixture into a greased 9×13 inch baking dish, spreading it evenly. Top with the remaining Parmesan cheese for a golden crust. -
Bake
Pop it into your preheated oven and bake for 25-30 minutes or until the top is bubbly and golden brown. The delightful aroma will fill your kitchen, making it hard to resist! -
Cool and Serve
Once ready, let it cool for about 5 minutes to set. Serve warm, and enjoy every bite!
Serving Suggestions
This Chicken Spinach Mushroom Bake is perfect all on its own, but if you’re looking to dress it up a bit for serving, here are a couple of ideas! Plate it in individual baking ramekins for a rustic touch. Add a sprinkle of fresh herbs, like parsley or basil, for that pop of freshness. It pairs beautifully with a simple garden salad dressed in balsamic vinaigrette.
Recipe Variations
Now, let’s get creative! Here are a few fun variations to keep this dish exciting:
-
Spicy Kick: Add a pinch of red pepper flakes to the sautéed mushrooms for a spicy version.
-
Herb Infusion: Experiment with different herbs like thyme or rosemary for a gourmet touch.
-
Cauliflower Upgrade: Add roasted cauliflower florets to the bake for an extra veggie boost and delicious texture.
-
Zucchini Noodles: Swap out half of the chicken for spiraled zucchini for a fun twist on the classic!
-
Dairy-Free Delight: Use coconut cream and nutritional yeast instead of Parmesan for a creamy, dairy-free option.
Chef’s Notes
This recipe has evolved from my grandmother’s original version, which was a bit heavier and less health-conscious. I love how we can take traditional comfort foods and make them into healthier options while preserving those beloved flavors. And honestly, I can’t help but giggle sometimes in the kitchen when I try creative combinations—some of which go wonderfully wrong but lead me to even better discoveries. Kitchen experimentation is truly where the magic happens!
FAQs and Troubleshooting
Q: Can I use leftover shredded chicken?
A: Absolutely! This dish is perfect for using up leftover chicken. Just make sure it’s seasoned to your tasting!
Q: Can I make this dish ahead of time?
A: Yes! You can prepare everything a day in advance and store it in the fridge. Just bake it right before serving.
Q: What if my bake is too dry?
A: If your bake comes out a bit dry, it might be because it was cooked for too long. Try not to overbake it, and if needed, add a splash more cream before baking.
Q: How do I store leftovers?
A: Store it in an airtight container in the fridge for up to 3 days. Reheat gently in the oven or microwave!
Nutritional Info
While I always encourage enjoying food without guilt, here’s a rough estimate of the nutritional info per serving (assuming 6 servings):
- Calories: 380
- Protein: 30g
- Fat: 27g
- Carbohydrates: 6g
- Fiber: 2g
Remember, these values can vary based on ingredient substitutions and portion sizes!
And there you have it—a cozy, easy Low-Carb Chicken Spinach Mushroom Bake that’s filled with flavor, nostalgia, and love. Grab your apron and give this recipe a try—you won’t be disappointed! Happy cooking!
PrintEasy Low-Carb Chicken Spinach Mushroom Bake

A delightful low-carb bake featuring tender shredded chicken, vibrant spinach, earthy mushrooms, and a creamy Parmesan sauce, perfect for busy weeknights or impressing guests.
- Prep Time: 15 minutes
- Cook Time: 30 minutes
- Total Time: 45 minutes
- Yield: 6 servings 1x
- Category: Main Course
- Method: Baking
- Cuisine: American
- Diet: Low-Carb, Gluten-Free
Ingredients
- 2 cups cooked chicken, shredded
- 2 cups fresh spinach
- 1 cup mushrooms, sliced
- 1 cup heavy cream
- 1 cup Parmesan cheese, grated
- 2 cloves garlic, minced
- Salt and pepper to taste
- Olive oil for cooking
Instructions
- Preheat your oven to 375°F (190°C).
- Sauté the minced garlic in olive oil over medium heat until fragrant, about 1 minute.
- Add the sliced mushrooms and sauté for about 3-4 minutes until tender.
- Incorporate the fresh spinach and cook until wilted, about 2-3 minutes; season with salt and pepper.
- Combine the shredded chicken and heavy cream, mixing well.
- Cheesy goodness: fold in the Parmesan cheese until melted and creamy.
- Transfer the mixture to a greased 9×13 inch baking dish, top with remaining Parmesan cheese.
- Bake for 25-30 minutes until bubbly and golden brown.
- Cool for 5 minutes and serve warm.
Notes
This dish is versatile; you can add red pepper flakes for spice or substitute with vegetables like cauliflower or zucchini noodles.
Nutrition
- Serving Size: 1 serving
- Calories: 380
- Sugar: 2g
- Sodium: 600mg
- Fat: 27g
- Saturated Fat: 13g
- Unsaturated Fat: 12g
- Trans Fat: 0g
- Carbohydrates: 6g
- Fiber: 2g
- Protein: 30g
- Cholesterol: 90mg
Keywords: low-carb, chicken, bake, easy recipe, comfort food, healthy