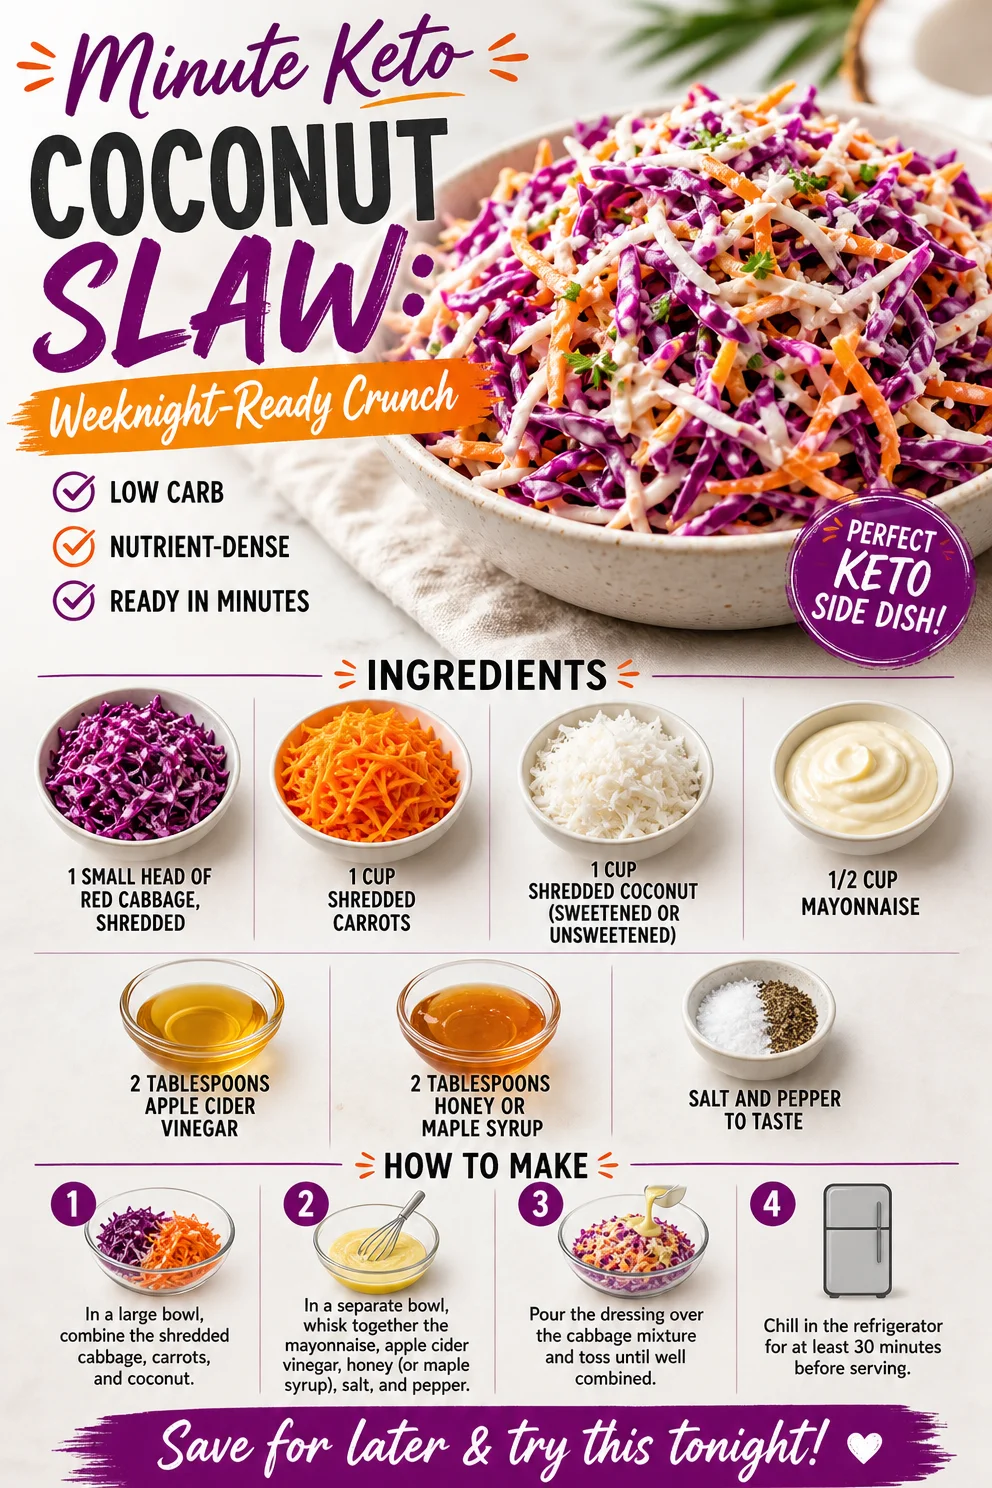
Minute Keto Coconut Slaw: Weeknight-Ready Crunch
Irresistible Coconut Slaw: A Fresh Twist on a Classic
Hey there, food fam! Today, we’re diving into a dish that perfectly combines crunch, sweetness, and a tropical vibe that will transport you right to the sandy beaches—yes, I’m talking about Irresistible Coconut Slaw. This slaw isn’t just any side dish; it’s a vibrant explosion of color and flavor, destined to become your new favorite accompaniment to summer barbecues, picnics, or even just a weeknight dinner.
Now, I know slaw often gets a bad rap as a soggy, tedious side, but trust me: this Coconut Slaw is anything but boring. It’s refreshing, satisfying, and oh-so-easy to whip up. Plus, it’s a fantastic way to get your veggies in without feeling like you’re sacrificing any taste. Let’s chat a bit about what makes this slaw so special.
A Trip Down Memory Lane
One of my favorite kitchen memories comes from a summer spent at my grandmother’s beach house. Every Sunday, we would have a family gathering at her place—uncles flipping burgers on the grill, aunts setting up blankets on the sand, and kids running wild. One of my grandma’s signature dishes was her creamy coleslaw, and my cousin and I would always sneak into the kitchen, waiting for that first taste of the tangy goodness.
As the years went by, my palate evolved, and I began playing around with flavors and ingredients. That nostalgia for my grandma’s coleslaw, mixed with my love for tropical flavors, inspired me to create this Coconut Slaw. It’s got that same crunchy texture I loved but with an exciting twist that’s perfect for any occasion.
Ingredients
Here’s what you’ll need to make this Coconut Slaw:
-
1 small head of red cabbage, shredded
Red cabbage not only adds a beautiful color but also packs a punch in nutrition. Rich in antioxidants and vitamin C, it helps keep everything balanced and healthy! If you don’t have red cabbage on hand, green cabbage works just as well. -
1 cup shredded carrots
Carrots bring both sweetness and crunch. They’re loaded with beta-carotene and are a fantastic way to sneak some extra veggies in. You can use pre-shredded carrots for convenience or grate your own for a fresh touch. -
1 cup shredded coconut (sweetened or unsweetened)
Coconut adds a delightful tropical flair! If you’re looking for a less sweet option, go for unsweetened coconut flakes. For a decadent twist, try using toasted coconut! -
1/2 cup mayonnaise
A creamy base that binds everything together. You can use traditional mayonnaise or make it lighter by swapping in Greek yogurt or a vegan mayo for a plant-based option. -
2 tablespoons apple cider vinegar
This ingredient brings a pleasant tang that balances the sweetness of the coconut. For a slightly different flavor, substitute with white wine vinegar or lemon juice. -
2 tablespoons honey or maple syrup
Whether you choose honey or maple syrup, this adds a natural sweetness that enhances all the flavors. If you prefer to keep things vegan, definitely opt for maple syrup. -
Salt and pepper to taste
Always use seasoning to elevate your dish! Just a pinch of salt and a dash of pepper can make a world of difference.
Step-by-Step Instructions
Now that we have our ingredients sorted, let’s get cooking! Follow these simple steps to whip up your Coconut Slaw:
-
Prepare Your Ingredients:
First things first, let’s get everything prepped. Shred the red cabbage and carrots if you haven’t bought pre-shredded versions. Think of it as your mid-week workout—getting those veggies ready is half the fun! -
Combine the Veggies:
In a large mixing bowl, toss together the shredded cabbage and carrots. This is where the color magic happens! Feel free to add in some bell peppers or scallions for an even more colorful slaw! -
Make the Dressing:
In a separate bowl, combine the mayonnaise, apple cider vinegar, and honey (or maple syrup). Whisk until smooth—show that dressing some love! If you want a thinner dressing, add a teaspoon of warm water at a time until you reach the desired consistency. -
Add the Coconut:
Once your dressing is ready, pour it over the cabbage and carrot mixture. Sprinkle in the shredded coconut and mix everything well. Get in there with your hands for the best results! The warmth from your hands helps combine everything beautifully—almost like a hug for your slaw. -
Season to Taste:
Now, it’s time for salt and pepper! Season to your liking—this is where you can let your personality shine through. Remember, seasoning is key, so don’t skip this step! -
Chill:
Cover your slaw and let it chill in the fridge for about 30 minutes. This helps the flavors meld together. Plus, it’s great to serve cold on a hot day! -
Taste Test:
Before serving, give your slaw a little taste. If you feel like it needs a bit more zing, go ahead and add more vinegar or a touch more sweetener. Always adjust to make it just right for you!
Serving Suggestions
When it comes to serving your Coconut Slaw, think about presentation. Transfer it to a beautiful serving bowl for that wow factor. You can add some extra toasted coconut on top for garnish—a little sprinkle goes a long way! Serve it alongside grilled chicken, fish tacos, or even as a vibrant topping on pulled pork sandwiches. Trust me, this slaw pairs well with anything!
Recipe Variations
Get creative! Here are a few variations you can try with this Coconut Slaw:
- Tropical Twist: Add diced pineapple for added sweetness and juiciness.
- Spicy Kick: Toss in some finely chopped jalapeños for those who love a bit of heat.
- Nutty Crunch: Throw in some slivered almonds or sunflower seeds for an extra crunch.
- Herbaceous Flair: Add in fresh mint or cilantro for a refreshing twist.
- Fruit Facelift: Swap out the coconut for diced apples or pears for a different flavor profile!
Chef’s Notes
This Coconut Slaw has evolved over the years thanks to my travels and culinary explorations. I once had a similar dish at a beachside café while visiting Hawaii, and it forever changed my view on slaw! Since then, I’ve taken inspiration from that experience. Each time I make it, I add a little twist or further tweak the dressing until it’s just right. Plus, it reminds me of those joyful summers at my grandmother’s beach house.
FAQs and Troubleshooting
Q: How long can I store leftover Coconut Slaw in the fridge?
A: It typically lasts for about 3-5 days in an airtight container. Just keep an eye on the texture—sometimes the cabbage might wilt after a few days.
Q: Can I make this slaw ahead of time?
A: Absolutely! Just make sure to store it in the refrigerator. If you want to keep the cabbage crunchy, mix the dressing in right before serving.
Q: My slaw was too watery; what happened?
A: This can happen when the cabbage releases too much moisture. To catch this, you can sprinkle the cabbage with salt beforehand and let it sit for 10 minutes. This draws out some moisture and helps keep the slaw from getting soggy!
Q: Can I make this recipe vegan?
A: Definitely! Use a plant-based mayonnaise and substitute maple syrup for honey. Easy peasy!
Nutritional Info
- Calories: Approximately 150 per serving
- Protein: 2g
- Carbohydrates: 12g
- Total Fat: 10g
- Fiber: 3g
- Sugar: 5g
So there you have it, my delightful foodies! This Irresistible Coconut Slaw is as easy to make as it is delicious. Whether you’re looking for a side dish, a topping, or even a light meal by itself, this slaw will not disappoint. Now, get cooking, and let me know how yours turns out! Happy eating!
PrintIrresistible Coconut Slaw
A vibrant and refreshing Coconut Slaw that combines crunch, sweetness, and a tropical flair, perfect for summer barbecues and picnics.
- Prep Time: 15 minutes
- Cook Time: 0 minutes
- Total Time: 30 minutes
- Yield: 4 servings 1x
- Category: Side Dish
- Method: Mixing
- Cuisine: Tropical
- Diet: Vegetarian
Ingredients
- 1 small head of red cabbage, shredded
- 1 cup shredded carrots
- 1 cup shredded coconut (sweetened or unsweetened)
- 1/2 cup mayonnaise
- 2 tablespoons apple cider vinegar
- 2 tablespoons honey or maple syrup
- Salt and pepper to taste
Instructions
- Prepare your ingredients: Shred the red cabbage and carrots if you haven’t bought pre-shredded versions.
- Combine the veggies: In a large mixing bowl, toss together the shredded cabbage and carrots.
- Make the dressing: In a separate bowl, combine the mayonnaise, apple cider vinegar, and honey (or maple syrup). Whisk until smooth.
- Add the coconut: Pour the dressing over the cabbage and carrot mixture. Mix everything well.
- Season to taste: Add salt and pepper to your liking.
- Chill: Cover your slaw and let it chill in the fridge for about 30 minutes.
- Taste test: Adjust the seasoning or acidity to your preference before serving.
Notes
This slaw pairs well with grilled chicken, fish tacos, or as a topping for pulled pork sandwiches. Consider adding toasted coconut on top for garnish.
Nutrition
- Serving Size: 1 serving
- Calories: 150
- Sugar: 5g
- Sodium: 200mg
- Fat: 10g
- Saturated Fat: 5g
- Unsaturated Fat: 5g
- Trans Fat: 0g
- Carbohydrates: 12g
- Fiber: 3g
- Protein: 2g
- Cholesterol: 15mg
Keywords: coconut slaw, tropical salad, summer side dish, refreshing coleslaw
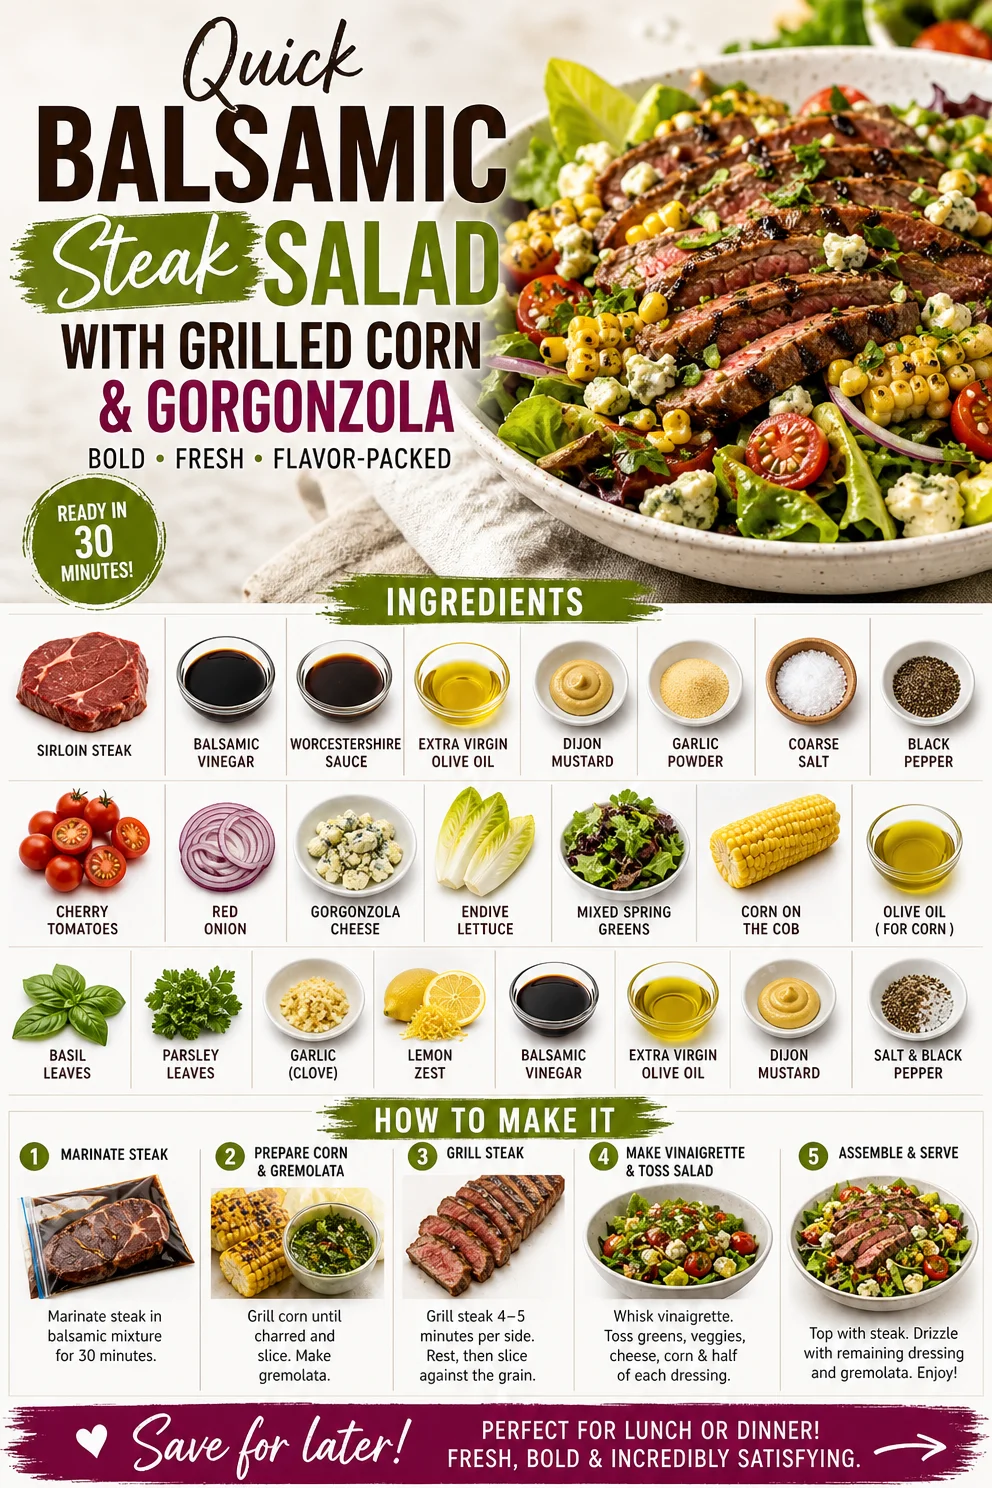
Quick Balsamic Steak Salad with Grilled Corn & Gorgonzola
Balsamic Steak Gorgonzola Salad with Grilled Corn: A Delicious Journey
Welcome to the vibrant world of Clean Plate Cravings! Today, we’re diving into the delightful flavors of a Balsamic Steak Gorgonzola Salad topped with Grilled Corn. This dish is not only a flavor powerhouse but also a bright, colorful addition to your table. Imagine a salad that combines juicy steak, creamy Gorgonzola, sweet grilled corn, and crunchy fresh greens. Yes, please!
Eating healthy shouldn’t mean a compromise on taste, and this salad is proof of that. You get the richness of the steak paired with the tangy notes of balsamic, the creaminess of the cheese, and a hint of smokiness from that perfectly grilled corn. Not to mention, it’s visually stunning—the kind of dish that looks just as good on your table as it tastes. So, grab your apron and let’s get cooking!
Personal Story
You know that feeling when you discover a recipe that just clicks and becomes a staple in your household? That happened to me when I first grilled up this balsamic steak salad a few summers ago. I remember it vividly—hosting a barbecue in my backyard with friends and family gathered around, laughter, and the mouth-watering aroma of grilled meat wafting through the air.
I decided to whip up this salad as a refreshing side dish, thinking it would be a nice complement to all the grilled goodies. As I tossed everything together, I couldn’t help but smile at how the vibrant colors and crisp textures came together. When my friends took their first bites, I could practically see their taste buds dancing with joy!
It quickly became a summer favorite, and every time I make it, I’m transported back to that sunny day filled with laughter and delicious food. The best part? It’s a dish that impresses without keeping you in the kitchen all day.
Ingredients
Let’s talk about the ingredients that come together to create this flavor-packed salad:
-
1 lb sirloin steak: A great cut for grilling! If sirloin isn’t your thing, try flank or skirt steak for a different texture and flavor.
-
2 tablespoons balsamic vinegar: This adds a lovely tanginess. Don’t have balsamic? A red wine vinegar would also work well, though the flavor won’t be as rich.
-
1 tablespoon Worcestershire sauce: This adds depth to the marinade. If gluten-free, look for a gluten-free version.
-
1/4 cup extra virgin olive oil: For richness and smoothness. You may substitute with avocado oil for a different flavor profile.
-
1/2 teaspoon dijon mustard: For some zing! You can ease off and use yellow mustard if that’s all you have on hand.
-
1/4 teaspoon garlic powder: This enhances the savory notes. Fresh garlic works too if you prefer a more robust flavor—just one clove minced will do.
-
1/2 teaspoon coarse salt: Essential for seasoning the steak! Feel free to adjust based on your salt preference.
-
1/4 teaspoon ground black pepper: A little heat goes a long way! Adjust to taste.
-
1 cup cherry tomatoes, halved: Sweet and juicy—they add a fresh pop. Any variety of grape or Campari tomatoes works in a pinch.
-
1/2 red onion, thinly sliced: Adds a nice crunch and a hint of sharpness. Regular yellow onion could work if that’s what you have.
-
4 ounces Gorgonzola cheese, crumbled: Creamy and tangy—this really elevates the dish. If you’re not a fan, feta could be a milder substitute.
-
2 heads endive lettuce, outer leaves removed, halved and roughly chopped into 2-inch pieces: Adds a unique crunch and some bitterness. You could use romaine or arugula instead for different taste profiles.
-
6 cups mixed spring greens: Fresh, crisp, and a mix of colors! Spinach or kale is another excellent option if you’d like a sturdier green.
-
1 corn on the cob, husk removed: Grilled corn adds sweetness and a lovely char. Frozen corn can be used in a pinch, just sauté it!
-
1 tablespoon extra virgin olive oil, for drizzling corn: Helps achieve that golden char.
-
2 tablespoons basil leaves, minced: Fragrant and fresh, this will uplift the salad. If basil is unavailable, fresh parsley or cilantro are great alternatives.
-
2 tablespoons parsley, minced: Adds fresh herbaceousness! Again, feel free to switch it up based on your herby preferences.
-
1 clove garlic, minced: For that robust flavor. It’ll build upon the garlic powder, bringing an extra layer of flavor to the dish.
-
1 tablespoon lemon zest: Brightens up the flavors. Fresh lime zest can work too!
-
3 tablespoons balsamic vinegar: Use this in the dressing for extra tang.
-
½ cup extra virgin olive oil: The base of our dressing!
-
½ teaspoon dijon mustard: Just a splash adds depth!
-
Dash of salt and fresh ground black pepper: Always important to season to taste!
Step-by-Step Instructions
Now that you have all your ingredients prepped, let’s get into the cooking process. Don’t worry; I’ll guide you through every step!
-
Marinate the Steak: In a mixing bowl, combine the balsamic vinegar, Worcestershire sauce, 1/4 cup of olive oil, dijon mustard, garlic powder, salt, and pepper. Whisk until well blended. Place the sirloin steak in a resealable plastic bag or a shallow dish, and pour the marinade over the top. Seal the bag and let it marinate in the fridge for at least 30 minutes or, preferably, a few hours (overnight is even better!).
Chef tip: The longer you let it marinate, the more flavors penetrate the meat. So if you’ve got the time, go for it!
-
Grill the Corn: Preheat your grill to medium-high heat. Drizzle a touch of olive oil on the corn and sprinkle with a little salt. Grill the corn for 2-3 minutes on each side, turning occasionally, until tender and slightly charred (about 10-12 minutes total). When it’s done, remove it from the grill and let it cool. Once cooled, cut the kernels off the cob and set aside.
Little hack: If you’re short on time or don’t have a grill, you can microwave the corn for about 5-7 minutes in a damp towel to steam it, then cut!
-
Grill the Steak: Remove the steak from the marinade and let the excess drip off. Place the steak on the grill (make sure it’s preheated) and cook for about 5-6 minutes on each side for medium-rare, depending on thickness. Use a meat thermometer if you want to be precise—135°F for medium-rare, 145°F for medium.
Chef insight: Let your steak rest for about 5-10 minutes after grilling. It helps the juices redistribute!
-
Prepare the Dressing: While the steak is grilling, prepare your dressing. In a small bowl, whisk together the balsamic vinegar, remaining olive oil, dijon mustard, garlic, lemon zest, salt, and pepper. Taste and adjust seasoning as needed.
-
Assemble the Salad: In a large bowl, combine the spring greens and endive lettuce. Add the sliced red onion, cherry tomatoes, grilled corn, and crumbled Gorgonzola cheese. Slice the rested steak thinly against the grain and place it on top of the salad.
Packaging tip: Use a combination of hand-tossing and a gentle spatula to avoid bruising the greens!
-
Serve: Drizzle your glorious dressing over the salad, toss gently to combine, and top with minced basil and parsley for a pop of freshness.
Serving Suggestions
Time to plate! This salad is quite beautiful on its own, but you can serve it on a large platter for a family-style presentation, allowing everyone to dig in. For a more refined look, serve in individual bowls. A sprinkle of extra Gorgonzola or a few extra cherry tomatoes on top can elevate it even further.
Recipe Variations
Feeling creative? Here are some fun variations to keep things fresh:
-
Swap Proteins: Try grilled chicken or shrimp in place of steak for a lighter version.
-
Vegan-Friendly: Use marinated tofu in place of steak, and substitute the cheese with avocado or a cashew cream for creaminess.
-
Switch the Greens: If you want a more robust salad, kale can add texture and nutrition.
-
Add Fruits: Toss in some sliced peaches or strawberries for a sweet contrast to the savory elements.
-
Nuts and Seeds: A sprinkle of toasted walnuts or sunflower seeds adds a lovely crunch and even more nutrients!
Chef’s Notes
Every time I whip up this salad, it reminds me of summer evenings spent outside with friends, sipping on a cold drink, and laughing until the sun sets. The combination of flavors and textures evokes such a joyful experience! Over time, I’ve switched up the ingredients based on what’s in season or what I have in the fridge. This recipe is all about flexibility—experiment and make it your own!
FAQs and Troubleshooting
Q: Can I make this salad ahead of time?
A: You can prep most of the components ahead! Marinate the steak and cut veggies the night before. Just assemble the salad and add the dressing right before serving to keep it fresh.
Q: How do I prevent my steak from being tough?
A: The key is to let it rest after grilling. This ensures the juices are evenly distributed throughout the meat!
Q: What can I do if I don’t have a grill?
A: No grill? No problem! A cast-iron skillet or grill pan can work beautifully too. Heat it over medium-high heat and add a splash of oil for a nice sear.
Q: How do I store leftovers?
A: Store any leftovers in an airtight container in the fridge. The salad will keep for about 1-2 days. Note that the greens may become a bit wilted, but the flavors will still be fantastic!
Nutritional Info
(If you prefer to skip this section, just omit it!)
This salad is packed with protein, healthy fats, and plenty of vitamins from the fresh greens and veggies. Approximate nutritional info per serving (without dressing, based on 4 servings):
- Calories: 400
- Fat: 28g
- Carbohydrates: 15g
- Protein: 30g
Embrace the fresh, vibrant flavors of this Balsamic Steak Gorgonzola Salad with Grilled Corn. It’s more than just a dish; it’s a celebration of food, friendship, and fun! So gather your favorite people, savor each bite, and enjoy a meal worth sharing. Bon appétit!
PrintBalsamic Steak Gorgonzola Salad with Grilled Corn
A vibrant salad featuring juicy steak, creamy Gorgonzola, grilled corn, and fresh greens, topped with a tangy balsamic dressing.
- Prep Time: 15 minutes
- Cook Time: 30 minutes
- Total Time: 45 minutes
- Yield: 4 servings 1x
- Category: Salad
- Method: Grilling
- Cuisine: American
- Diet: None
Ingredients
- 1 lb sirloin steak
- 2 tablespoons balsamic vinegar
- 1 tablespoon Worcestershire sauce
- 1/4 cup extra virgin olive oil
- 1/2 teaspoon dijon mustard
- 1/4 teaspoon garlic powder
- 1/2 teaspoon coarse salt
- 1/4 teaspoon ground black pepper
- 1 cup cherry tomatoes, halved
- 1/2 red onion, thinly sliced
- 4 ounces Gorgonzola cheese, crumbled
- 2 heads endive lettuce, halved and roughly chopped
- 6 cups mixed spring greens
- 1 corn on the cob, husk removed
- 1 tablespoon extra virgin olive oil, for drizzling corn
- 2 tablespoons basil leaves, minced
- 2 tablespoons parsley, minced
- 1 clove garlic, minced
- 1 tablespoon lemon zest
- 3 tablespoons balsamic vinegar (for dressing)
- ½ cup extra virgin olive oil (for dressing)
- ½ teaspoon dijon mustard (for dressing)
- Dash of salt and fresh ground black pepper (for dressing)
Instructions
- Marinate the steak by combining balsamic vinegar, Worcestershire sauce, 1/4 cup of olive oil, dijon mustard, garlic powder, salt, and pepper in a bowl. Whisk and pour over steak. Marinate for at least 30 minutes.
- Grill the corn on medium-high heat, drizzled with olive oil and sprinkled with salt, until tender (about 10-12 minutes).
- Grill the steak for about 5-6 minutes on each side for medium-rare.
- Prepare the dressing by whisking balsamic vinegar, remaining olive oil, dijon mustard, garlic, lemon zest, salt, and pepper in a small bowl.
- Assemble the salad by combining spring greens and endive. Top with red onion, cherry tomatoes, grilled corn, and Gorgonzola cheese. Add sliced steak on top.
- Serve with dressing drizzled over the top, and garnish with minced basil and parsley.
Notes
Marinate the steak longer for deeper flavors. Use a grill pan or cast-iron skillet if you don’t have a grill.
Nutrition
- Serving Size: 1 serving
- Calories: 400
- Sugar: 5g
- Sodium: 600mg
- Fat: 28g
- Saturated Fat: 8g
- Unsaturated Fat: 16g
- Trans Fat: 0g
- Carbohydrates: 15g
- Fiber: 3g
- Protein: 30g
- Cholesterol: 100mg
Keywords: salad, steak, gorgonzola, balsamic, grilled corn, summer recipes, healthy eating
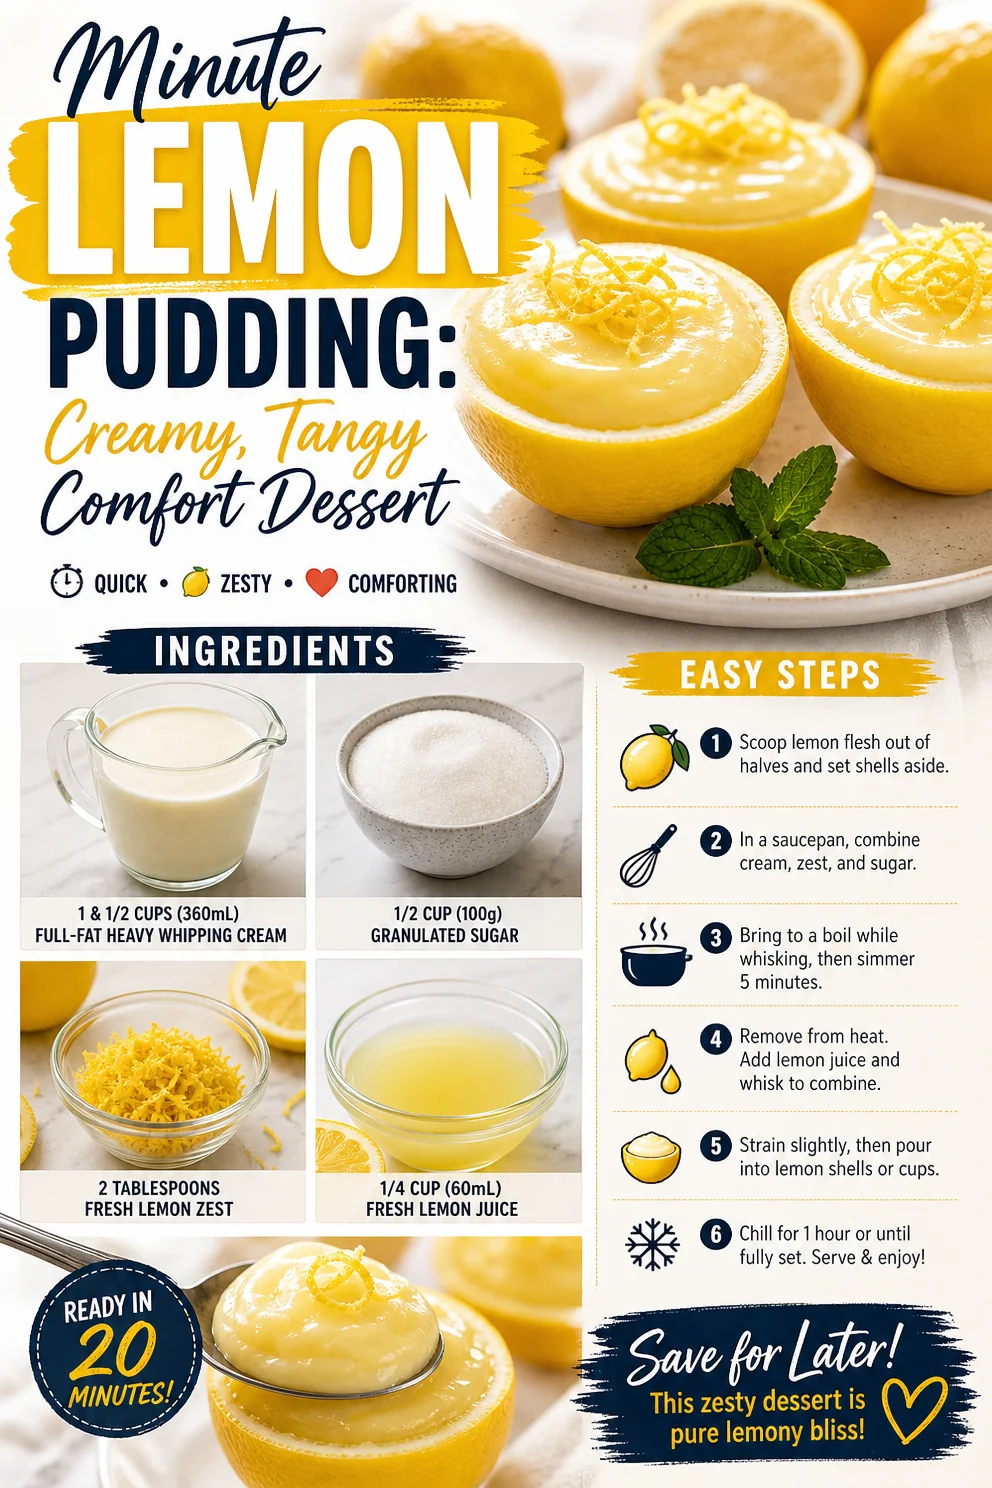
Minute Lemon Pudding: Creamy, Tangy Comfort Dessert
Easy Lemon Pudding: A Bright Delight for Every Occasion
Welcome to the sweet side of clean eating! Today, we’re diving into a dish that perfectly balances simplicity with flavor—Easy Lemon Pudding. This delightful dessert is not only a treat for your taste buds but also a comforting reminder of sunny days and special moments. So, let’s make a fresh batch that will brighten up any gathering or simply elevate your weeknight dinner!
When it comes to desserts, I’ve always been a fan of those that feel indulgent but can also fit into a more wholesome lifestyle. I remember the first time I tasted homemade lemon pudding; it was at my grandmother’s summer barbecue, where laughter filled the air and the sun kissed our cheeks. There was something magical about that cool, creamy pudding topped with a dusting of fresh zest that danced on the palate. It was one of those dishes that seemed to embody joy and warmth, and I’ve carried that memory with me ever since.
This recipe is my take on that nostalgic treat, infused with all the bright flavors of fresh lemons. I promise you that each spoonful will not only transport you back to carefree summer days but also leave you feeling satisfied, not deprived. Now, let’s get cooking!
Personal Story
Lemon pudding takes me back to my childhood—specifically, to afternoons spent in my grandmother’s sunlit kitchen. She was a master of simple yet delightful desserts, and lemon pudding was one of her best creations. I still remember clutching the edges of the wooden table, waiting for that first taste as she poured the silky mixture into bowls. The tangy brightness was like sunshine in my mouth, making every scoop feel like a treat. My grandma always said that food is best when shared, and this lemon pudding became a family favorite, often requested for gatherings and celebrations. Now, I love recreating that joy in my kitchen, passing down the tradition of sharing love through food. Every time I whip up this pudding, I channel those fond memories of my grandma, and I hope you get a bit of that warmth in your own kitchen too!
Ingredients
Here’s what you’ll need to whip up your very own Easy Lemon Pudding. Think of each ingredient as a building block of flavor.
-
1 & 1/2 cups (360mL) full-fat heavy whipping cream: This gives the pudding its rich, creamy texture. You can substitute it with coconut cream for a dairy-free version, or use half and half for a lighter option.
-
1/2 cup (100g) granulated sugar: The sweetness balances the tartness of lemon. If you prefer a healthier choice, you can replace it with honey or maple syrup, but adjust to taste as they can vary in sweetness.
-
2 tablespoons fresh lemon zest: Freshly grated zest adds a fragrant citrus note that elevates the pudding. If you’re in a pinch, you can use bottled lemon zest but fresh is always better for flavor.
-
1/4 cup (60mL) fresh lemon juice: Lemon juice provides the zing and acidity that makes this pudding bright. Bottled lemon juice works in a hurry, but squeezing fresh lemons gives you way more flavor!
Step-by-Step Instructions
Alright, let’s bring this delicious pudding to life! Follow along with these simple steps:
-
Prep Your Ingredients: Before we start cooking, gather all your ingredients and have them at your fingertips. It makes the process smoother and more enjoyable—plus, it keeps you from scrambling around looking for the sugar mid-recipe!
-
Whip the Cream: In a medium mixing bowl, pour in that luscious heavy cream. Using a hand mixer or a whisk, whip the cream until soft peaks form. You want it to be thick yet still smooth—be careful not to over-whip or you’ll end up with butter! (Trust me, I’ve made that mistake before!)
-
Mix the Sugar and Lemon: In another mixing bowl, combine the granulated sugar, lemon zest, and fresh lemon juice. Stir them together until the sugar begins to dissolve. This step is crucial because it allows those zesty flavors to bloom.
-
Combine Everything: Gently fold the whipped cream into the lemon mixture. Use a spatula to lift and fold rather than stir too vigorously. This keeps the cream airy and light, giving your pudding that delightful texture.
-
Chill: Once everything is well combined, transfer the pudding into your serving dishes (think cute ramekins or small glasses for a more refined presentation). Cover with plastic wrap and pop them in the fridge for at least 2 hours—or overnight for the best flavor infusion!
-
Serve and Enjoy: When you’re ready to serve your lemon pudding, remove it from the fridge and remove the wrap. For an extra touch, you can top it with additional lemon zest or a dollop of whipped cream.
Serving Suggestions
Presentation can elevate any dish, and your Easy Lemon Pudding is no exception! Serve it in individual ramekins, topped with fresh berries or a sprinkle of mint for a pop of color. You could also drizzle a little honey over the top for added sweetness and visual flair. If you’re feeling stylish, use glass cups to showcase the beautiful layers, making it even more tempting for everyone at the table.
Recipe Variations
Want to switch things up a bit? Here are some fun variations to consider:
-
Berry Bliss: Fold in some pureed strawberries or blueberries into the pudding for a fruity twist.
-
Coconut Cream Dream: Replace the heavy cream with coconut cream for a tropical version.
-
Spiced Surprise: Add a pinch of ground ginger or cinnamon to the lemon mixture for a subtle kick.
-
Lemon-Lavender: Incorporate a teaspoon of culinary lavender for a floral hint.
-
Vegan Option: Substitute the cream with coconut whipped cream and replace sugar with agave syrup for a plant-based treat.
Chef’s Notes
You know, this lemon pudding recipe has evolved quite a bit since I first started making it! I initially followed a rather complicated recipe with cornstarch and eggs, but I learned to simplify it over the years. The magic of this version is how easy and quick it is to prepare—it’s almost foolproof! Plus, I can now whip up a batch much faster; the hardest part is waiting for it to chill before indulging! Remember, the cleaner your ingredients, the better the flavors will shine through, so always use fresh lemons if you can. Enjoy each moment spent in the kitchen, and don’t forget to share your creations with loved ones—they’ll appreciate the effort and love that went into it!
FAQs and Troubleshooting
-
Q: Can I use bottled lemon juice instead of fresh?
A: While bottled lemon juice works in a pinch, fresh lemon juice gives you a much brighter and more vibrant flavor. If you get the chance, opt for fresh lemons! -
Q: What if my pudding is too runny?
A: If your pudding doesn’t set properly, it might be due to insufficient chilling time, or the cream wasn’t whipped enough. Make sure to whip until soft peaks form and give the pudding enough time in the fridge. -
Q: How can I make this recipe keto-friendly?
A: Simply substitute the granulated sugar with a keto-friendly sweetener like erythritol or monk fruit. The result will still be delicious and guilt-free! -
Q: Can I make this pudding ahead of time?
A: Absolutely! In fact, it’s best when made a day in advance. Just store it in the fridge until you’re ready to serve. It’ll be a refreshing treat that you can enjoy at any time!
Nutritional Info
(Optional, but here’s a sample layout if you want it included.)
- Calories: Approximately 250 per serving
- Fat: 22g
- Carbohydrates: 16g
- Protein: 2g
- Sugar: 10g (if using granulated sugar)
Now that you have all the tools and stories to create this joyful Easy Lemon Pudding, it’s your turn to bring a bit of sunshine into your kitchen! Dive in, enjoy the process, and share the love with those you care about. Happy cooking!
PrintEasy Lemon Pudding

A delightful and creamy lemon pudding that captures the essence of sunshine in every spoonful.
- Prep Time: 15 minutes
- Cook Time: 0 minutes
- Total Time: 120 minutes
- Yield: 4 servings 1x
- Category: Dessert
- Method: Chilling
- Cuisine: American
- Diet: Vegetarian
Ingredients
- 1 & 1/2 cups (360mL) full-fat heavy whipping cream
- 1/2 cup (100g) granulated sugar
- 2 tablespoons fresh lemon zest
- 1/4 cup (60mL) fresh lemon juice
Instructions
- Prep your ingredients: Gather all your ingredients for a smoother cooking process.
- Whip the cream: Pour the heavy cream into a mixing bowl and whip until soft peaks form.
- Mix the sugar and lemon: In another bowl, combine sugar, lemon zest, and lemon juice until the sugar begins to dissolve.
- Combine everything: Gently fold the whipped cream into the lemon mixture until well incorporated.
- Chill: Transfer the pudding into serving dishes, cover, and chill in the fridge for at least 2 hours.
- Serve and enjoy: Remove from the fridge and top with extra lemon zest or whipped cream if desired.
Notes
For variations, consider folding in pureed berries, using coconut cream, or adding spices such as ginger or cinnamon.
Nutrition
- Serving Size: 1 serving
- Calories: 250
- Sugar: 10g
- Sodium: 50mg
- Fat: 22g
- Saturated Fat: 14g
- Unsaturated Fat: 6g
- Trans Fat: 0g
- Carbohydrates: 16g
- Fiber: 0g
- Protein: 2g
- Cholesterol: 70mg
Keywords: lemon pudding, dessert, easy recipe, summer dessert, creamy pudding
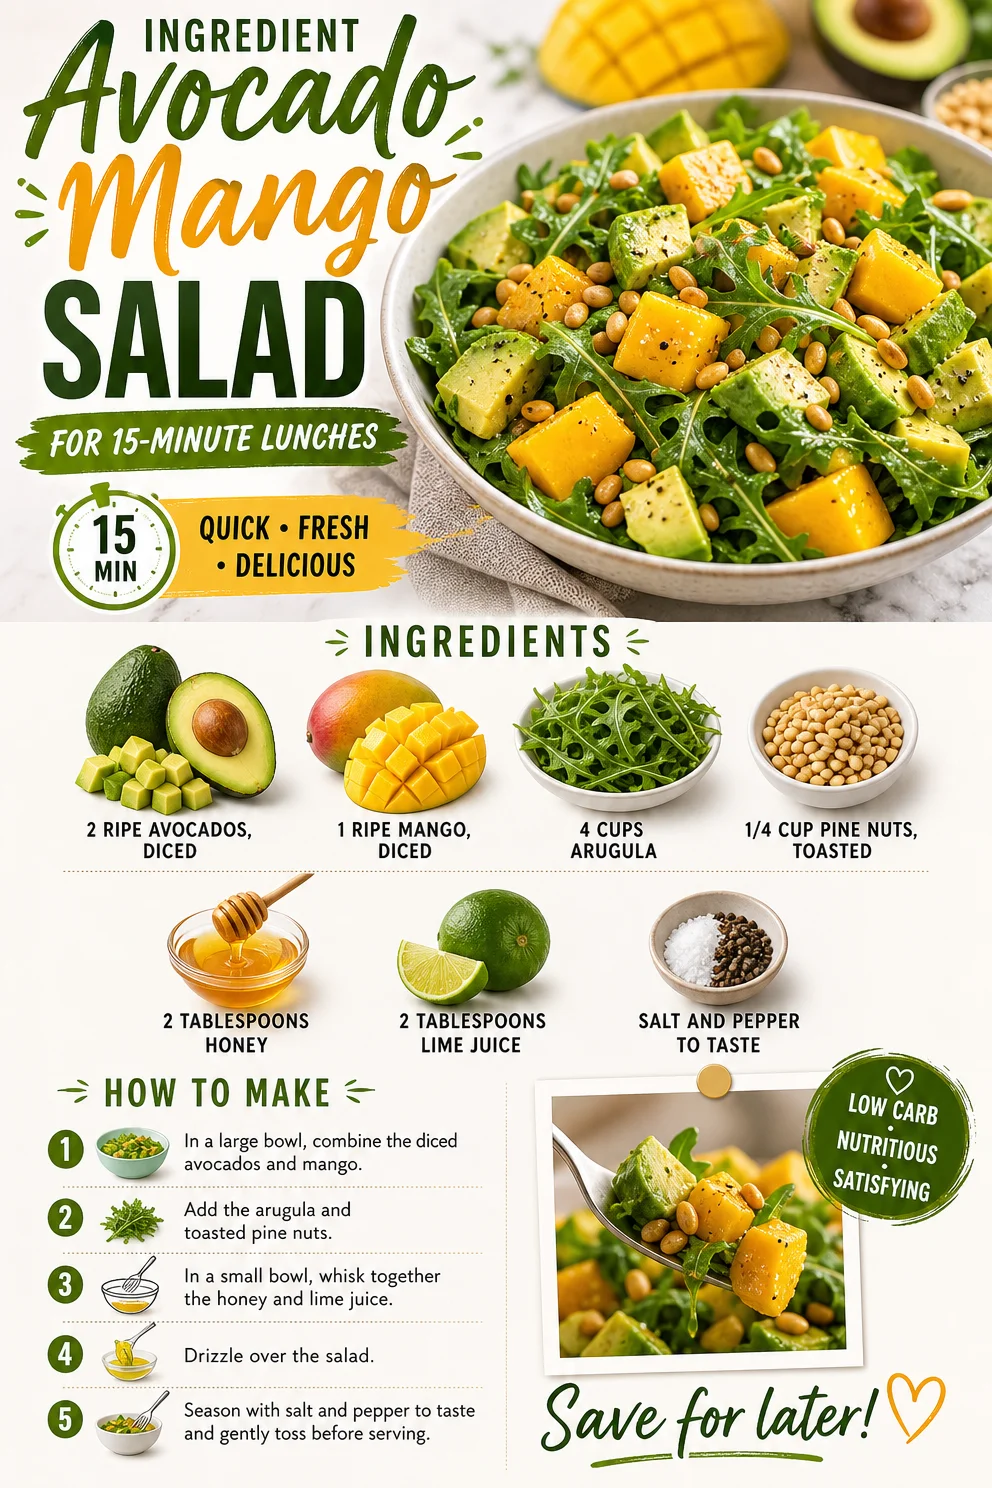
Ingredient Avocado Mango Salad for 15-Minute Lunches
Avocado Mango Healthy Salad: A Fresh Spin on Flavor
Welcome back, food lovers! Today, we’re diving into a recipe that’s as vibrant as it is nutritious—the Avocado Mango Healthy Salad. This dish is much more than just a salad; it’s a celebration of fresh, wholesome ingredients coming together to create magic on your plate. If you’re looking for a dish that’s bursting with flavor and will make your taste buds dance, you’re in the right place.
If there’s anything I love as much as cooking, it’s crafting meals that spark joy and togetherness. Imagine sitting outdoors on a sunny afternoon, perhaps under the shade of a tree, with a plate of this incredible salad in front of you. The juicy sweetness of ripe mango and the creamy goodness of avocado create a flavor combination that’s simply out of this world. Add in the peppery bite of arugula and the crunch of toasted pine nuts, and you’ve got an experience that’s truly delightful.
What makes this salad even better is how quick and easy it is to whip up. Whether you’re prepping a refreshing lunch, a light dinner, or a side dish for a barbecue, this Avocado Mango Healthy Salad is perfect. Plus, it’s packed with healthy fats, vitamins, and minerals, so you’ll feel great enjoying it. No more boring green salads—this dish will make you actually crave wholesome food!
So grab your cutting board and your favorite knife, and let’s create a colorful masterpiece that’s as good for your body as it is for your soul. You’re going to love it!
Personal Story
Growing up, our family gatherings always centered around food, and no dish was ever as highly anticipated as my mom’s summer salads. Every May, she’d hit the farmers’ market and come home with bags brimming with the freshest summer produce. I distinctly remember that one year when we had an abundant supply of avocados and ripe mangoes. My mom, ever experimental, decided to combine these two gems into a salad for a family BBQ.
As she sliced the avocados and cubed the mangoes, the sweet, fruity aroma filled the kitchen, and my excitement built. I can still see our entire family sitting around the picnic table, laughter echoing through the air as we tossed the salad together. That day, I learned that food is more than just sustenance; it’s a canvas for memories, laughter, and connection. Those vibrant flavors and colorful ingredients danced in our mouths as the sun set, marking that summer day as one of my favorites.
This Avocado Mango Healthy Salad is my homage to that sweet summer nostalgia. It reminds me of the simple joy of good food, shared company, and carefree afternoons. Each bite transports me back to those beautiful moments, and I can’t wait for you to experience it too!
Ingredients
-
2 ripe avocados, diced
Avocados are rich in healthy fats and provide a creamy texture that makes any salad feel luxurious. When selecting avocados, look for ones that yield slightly to pressure—this indicates ripeness. If you can’t find ripe avocados, you can speed up the ripening process at home by placing them in a brown paper bag with a banana! -
1 ripe mango, diced
Mangoes are not only delicious but also packed with vitamins A and C. Make sure to choose a mango that’s slightly soft when you press it. If you can’t find a ripe mango, consider using peaches or ripe nectarines for a similar sweetness. -
4 cups arugula
This peppery green adds a lovely bite to the salad, complementing the creaminess of the avocado. If arugula isn’t your thing, swap it out for spinach or mixed greens instead! -
1/4 cup pine nuts, toasted
Toasting the pine nuts brings out their rich flavor and adds a satisfying crunch. If you’re not a fan of pine nuts, try substituting walnuts or sunflower seeds for a different texture and taste. -
2 tablespoons honey
Honey adds a natural sweetness that balances the flavors of the salad beautifully. For a vegan alternative, feel free to use agave nectar or maple syrup. -
2 tablespoons lime juice
A squeeze of lime juice brightens up the salad, enhancing all the flavors. Freshly squeezed lime juice is always best, but bottled juice will do in a pinch. -
Salt and pepper to taste
Simple seasonings can make a huge impact. Always taste as you go to ensure you’ve reached that delicious balance!
Step-by-Step Instructions
-
Prepare Your Ingredients
Start by gathering all your ingredients and washing them thoroughly. Dice the avocados and mango into bite-sized pieces. A sharp knife will make this task easier, especially when it comes to the mango’s slippery skin! -
Toast the Pine Nuts
In a dry skillet over medium heat, add the pine nuts. Toast them for about 3-5 minutes until they’re golden and fragrant, stirring frequently to prevent burning. This step is simply magical—those little nuts will transform with a warm, nutty flavor! -
Combine the Greens
In a large mixing bowl, add the arugula. If you love a well-dressed salad, a bowl with a wide opening will allow for easier tossing. -
Mix the Avocado and Mango
Gently add the diced avocado and mango to the arugula. Be careful not to stir too aggressively, as the avocados can break apart easily. Instead, use a big spoon and fold the ingredients together. -
Add Honey and Lime Juice
In a small bowl, whisk together the honey and lime juice until smooth. Pour this delightful mixture over your salad. It’s where the magic happens—this dressing is going to bring everything together beautifully. -
Season
Season your salad with salt and pepper to taste. I always recommend starting with a pinch and adding more as you go. The right seasoning can elevate the flavors immensely. -
Fold It All Together
Gently toss everything together, ensuring every leaf is coated in that vibrant dressing and the ingredients mingle beautifully. You want to maintain the integrity of the avocados, so be gentle here! -
Serve Immediately
This salad is best when served right away, so plate it up while the flavors are fresh. Presentation can elevate any meal—consider serving it in a large bowl in the center of the table and let everyone dig in!
Serving Suggestions
When it comes to serving this gorgeous salad, feel free to get a little creative! You can serve it family-style in a large bowl or individually plated for a more refined touch. Drizzle a little extra lime juice over each serving for a zesty finish and scatter the toasted pine nuts on top for that added crunch and visual allure. Pair it with a refreshing beverage like sparkling water infused with lime or a light white wine for an elevated dining experience.
Recipe Variations
-
Grilled Chicken Avocado Mango Salad
For a heartier option, toss in some sliced, grilled chicken. The smokiness of the grilled meat pairs beautifully with the fresh ingredients. -
Quinoa Base
Want to add some whole grains? Serve the salad over a bed of cooked quinoa. It brings a nice chewiness and turns this light salad into a filling meal. -
Replace Pine Nuts with Feta Cheese
If you’re in the mood for a savory twist, crumble some feta cheese over the top before serving. The salty bite complements the sweetness of the mango perfectly. -
Add Some Heat
Spice things up! Toss in some chopped fresh jalapeños or a sprinkle of red pepper flakes for a pop of heat that will wake up your palate. -
Herb Infusion
Incorporate fresh herbs like cilantro or mint to add a fresh layer of flavor and aroma. They make the salad feel even more vibrant and alive!
Chef’s Notes
Cooking is such a beautiful and fluid art form! While my mom inspired my love for this salad, I’ve continued to evolve it over the years. Sometimes, I’ll switch up the fruits based on the seasons or even add more nuts for crunch. The variations are endless, and that’s what makes it so fun.
I remember one time I invited friends over for a picnic, and we ended up having an impromptu salad bar, where everyone could customize their plate with different toppings. We ended up with the most colorful spread, and it turned out to be such a hit! This salad became a staple in our get-togethers, reminding me that food is meant to be shared and enjoyed—while also sparking imagination in the kitchen!
FAQs and Troubleshooting
-
Can I prepare this salad ahead of time?
While it’s best enjoyed fresh, you can prep the ingredients a few hours in advance and keep them separately in the refrigerator. Just wait until serving time to assemble and dress the salad—this keeps the arugula crisp! -
What if my avocados aren’t ripe?
If you find yourself with unripe avocados, don’t fret! You can either let them ripen at room temperature or use them in a different dish where they’ll be blended or cooked, such as in smoothies or guacamole. -
How do I toast pine nuts without burning them?
It’s all about keeping an eye on them! Stir them frequently, and as soon as you start smelling their nutty aroma and they turn golden, remove them from the heat immediately. They can go from perfect to burnt in seconds! -
Can I use frozen mango?
Absolutely! Frozen mango is a great alternative; just make sure it’s thawed and drained before adding it to your salad. It might be a bit softer than fresh, but the flavor remains delicious!
This Avocado Mango Healthy Salad is not just a dish; it’s an experience. It’s the perfect blend of fresh ingredients, crunchy textures, and sweet flavors that dance together on the plate. I hope this recipe brings you as much joy as it has brought me and my loved ones. Enjoy each bite, the memories made around the table, and remember—you’re doing great just by nourishing your body and soul. Happy cooking!
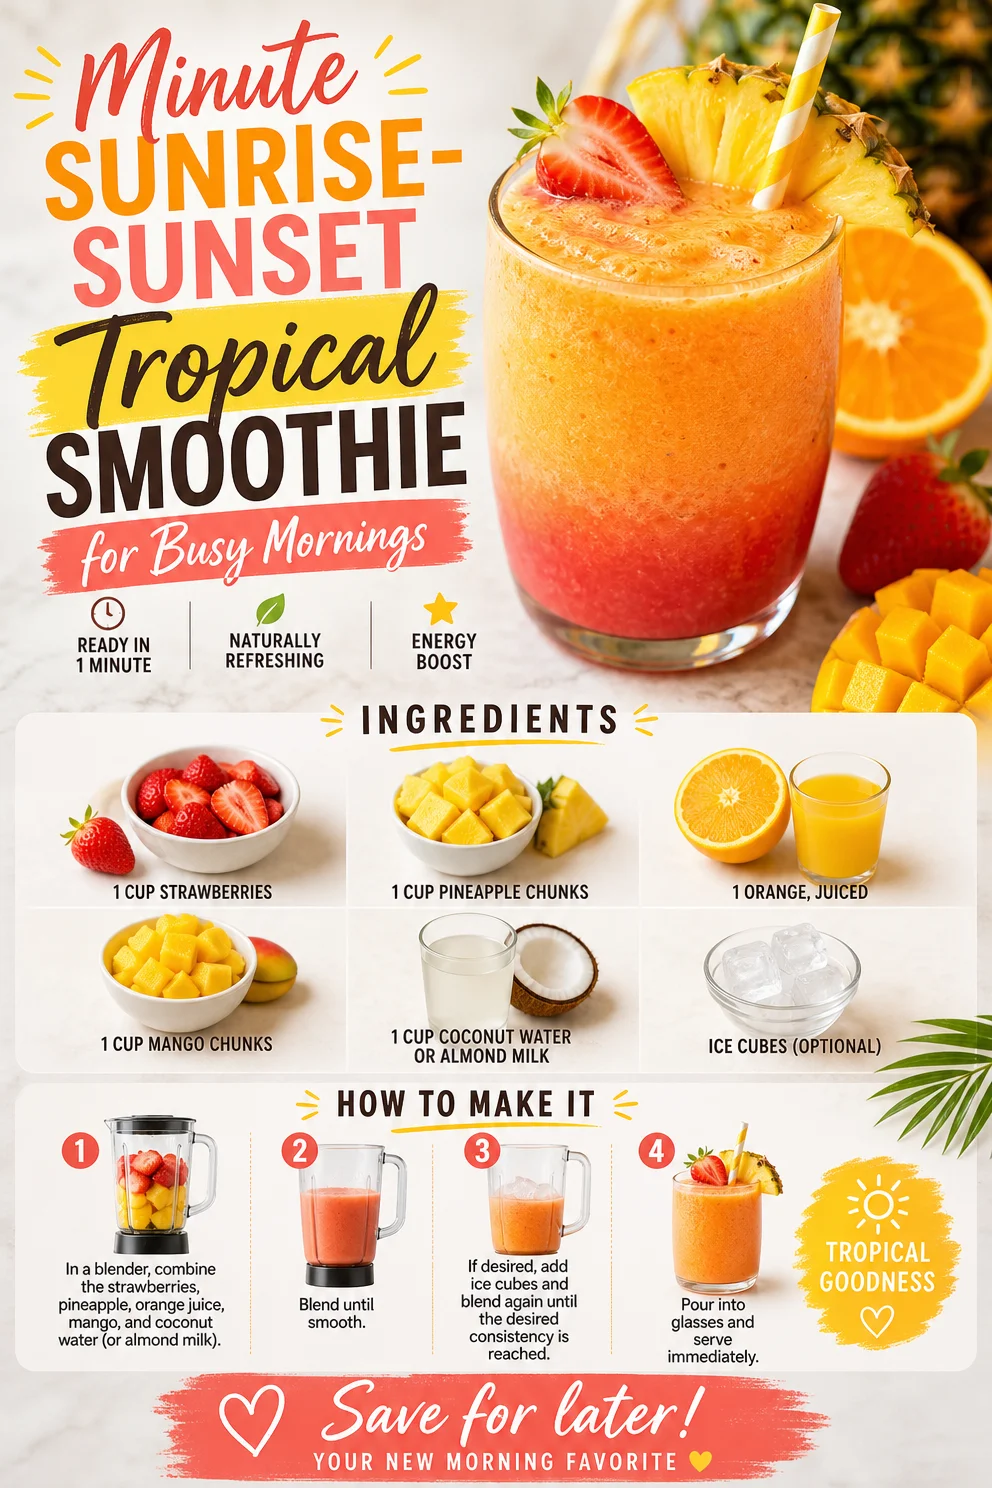
Minute Sunrise-Sunset Tropical Smoothie for Busy Mornings
Sunrise Sunset Tropical Smoothie: Your Perfect Morning Boost
Let’s talk about mornings! You know, that magical time of day when you wake up, and the sun is just beginning to spill golden light across the horizon. There’s something about that morning glow that makes everything feel fresh and full of potential. Whether you’re a busy bee rushing to work or someone who loves to linger over breakfast, there’s one thing we can all agree on: a bright and cheerful morning smoothie can set the tone for a wonderful day ahead. Say hello to the Sunrise Sunset Tropical Smoothie—your new breakfast buddy!
This smoothie is a delightful whirlpool of sweetness and a burst of flavor that’ll transport you straight to a tropical island, no passport required! Packed with vibrant strawberries, luscious pineapple, zesty orange, and creamy mango, it’s like taking a mini-vacation right in your kitchen. Not only is it a feast for your taste buds, but it’s also a nutritional powerhouse, giving you the energy boost you need to tackle whatever lies ahead in your day.
But wait! Let me share a little story that makes this smoothie even more special for me. Picture this: it’s a warm summer morning, and I’m at my favorite beachside café in Bali. The aroma of fresh fruits fills the air, and the gentle sound of waves crashing on the shore sets a soothing backdrop. I remember ordering a tropical smoothie that was so bright and flavorful; it was like a hug in a glass. That experience inspired my version of the Sunrise Sunset Tropical Smoothie, perfect for those moments when you want to capture that vacation vibe at home. Whether you sip it on your porch or prep it for a quick breakfast, this smoothie will bring that same sunny joy to your day.
Ingredients
Here’s what you’ll need to whip up this tropical delight:
-
1 cup strawberries, hulled and sliced
Fresh strawberries are the star of this smoothie. They add a lovely sweetness and vibrant color. If strawberries are out of season, you can swap them for frozen strawberries to keep the texture perfect! -
1 cup pineapple chunks
Pineapple brings a juicy, tropical flavor that brightens every sip. Don’t have fresh pineapple? Canned pineapple works too—just make sure it’s packed in juice or water, not syrup. -
1 orange, juiced
Freshly squeezed orange juice adds a zesty kick and a dose of vitamin C that’ll have you feeling refreshed. If oranges aren’t handy, you can use store-bought orange juice—just go for the no-sugar-added kind! -
1 cup mango chunks
Ah, mango! The creamy superstar of tropical fruits. It elevates your smoothie with its sweetness and velvety texture. Frozen mango is a fantastic substitute and gives the smoothie that refreshing chill! -
1 cup coconut water or almond milk
Coconut water is wonderful for hydration and adds a light tropical flavor. If you prefer almond milk for creaminess, it’s a great alternative. You can also use any plant-based milk you love! -
Ice cubes (optional)
If you want your smoothie to have a frosty texture, add a handful of ice cubes. I personally love it chilled!
Step-By-Step Instructions
Now, let’s get blending! Here’s a simple breakdown of how to make this Sunrise Sunset Tropical Smoothie:
-
Prep Your Ingredients
Start by hulking (removing the green tops) and slicing your strawberries. It’s so satisfying to see fresh fruit ready to go! Make sure you have everything within arm’s reach so you won’t have to pause mid-blend. -
Juice the Orange
Cut the orange in half and juice it right into your blender. If you don’t have a juicer, simply squeeze it with your hands. Just keep an eye out for those pesky seeds—nobody wants a surprise crunch! -
Add the Fruits
Toss in the strawberries, pineapple chunks, and mango. I like to add the soft fruits like mango and strawberries first so that they blend up nicely without clumping together. -
Pour in the Coconut Water or Almond Milk
Now pour in your coconut water or almond milk for that smooth texture. If you’re using ice, you can add that at the same time or delay it until later for a thicker consistency. -
Blend Until Smooth
Put the lid on your blender and blend on high until everything is completely smooth—usually, about 30 seconds to a minute should do the trick. If you notice it’s too thick, add a little more coconut water or almond milk until you reach your desired consistency. -
Taste and Adjust
Give your smoothie a quick taste! If you’d like it sweeter, feel free to add a bit of honey or agave syrup. Or if it needs a bit more zest, a squeeze of lime can brighten it up even more! -
Pour and Enjoy
Pour your vibrant smoothie into a glass or bowl, and take a moment to admire that stunning sunset-like color! Serve it immediately for the best taste and texture.
Serving Suggestions
For an extra flair, garnish your smoothie with a few slices of fresh fruit or a sprinkle of shredded coconut on top. A cute straw doesn’t hurt either! If you’re feeling fancy, you can even top it off with some granola for a bit of crunch. Serve it with your favorite whole-grain toast or a handful of nuts for a well-rounded breakfast.
Recipe Variations
If you’re ready to get creative, here are a few easy twists you can try with this Sunrise Sunset Tropical Smoothie:
-
Tropical Green Boost: Add a handful of spinach or kale for a nutritional punch without sacrificing flavor!
-
Chia Seed Power-Up: Toss in a tablespoon of chia seeds for a boost of omega-3s and added texture.
-
Creamy Avocado Delight: Swap out 1/2 cup of mango for half an avocado. It gives a rich creaminess and sneaks in healthy fats.
-
Berry Medley: Exchange the strawberries and pineapple for a mix of blueberries, raspberries, or blackberries for a delightful twist.
-
Coconut Milk Creaminess: Switch the coconut water for full-fat coconut milk for an indulgent treat that’s really rich and creamy.
Chef’s Notes
Years ago, I first experimented with tropical smoothies while dreaming of sandy beaches and sunshine during a chilly winter day. It’s funny how that one sunny morning inspired such a bright recipe! Over the years, I’ve adapted this particular blend many times, letting seasonal fruits dictate my choices. Sometimes I even sneak in a bit of Greek yogurt for a protein boost. No matter how I change it up, this smoothie never fails to lift my spirits and remind me of warmer days!
FAQs and Troubleshooting
-
Can I make this smoothie ahead of time?
Absolutely! Just blend your smoothie and store it in an airtight container in the fridge. It’s best consumed within 24 hours for optimal freshness. -
Why is my smoothie too thick?
If you find your smoothie is too thick, simply add more coconut water, almond milk, or even a bit of juice until you reach the desired consistency. You can also blend in a few more ice cubes for a lighter texture. -
Can I replace the fruit with frozen versions?
Yes, using frozen fruit is a great way to achieve that frosty texture! It can also help you keep your smoothie colder for longer. -
How can I make it sweeter?
If you prefer a sweeter smoothie, consider adding a bit of honey, agave nectar, or even a few medjool dates. Remember to blend those right in!
Nutritional Info (Optional)
While I won’t dive too deep into numbers, here’s a quick heads-up—this smoothie is loaded with vitamin C, antioxidants, and hydration thanks to the fruits and coconut water. It’s a fantastic option that helps kickstart your metabolism while keeping your energy levels high throughout the day.
So there you have it—a delicious, energizing Sunrise Sunset Tropical Smoothie that’s just waiting to brighten up your mornings. Whatever your day may hold, this little glass of sunshine might be just what you need. Cheers to fresh, feel-good food that empowers you and keeps you craving more! Enjoy your tasty journey in the kitchen! 🌞🍹
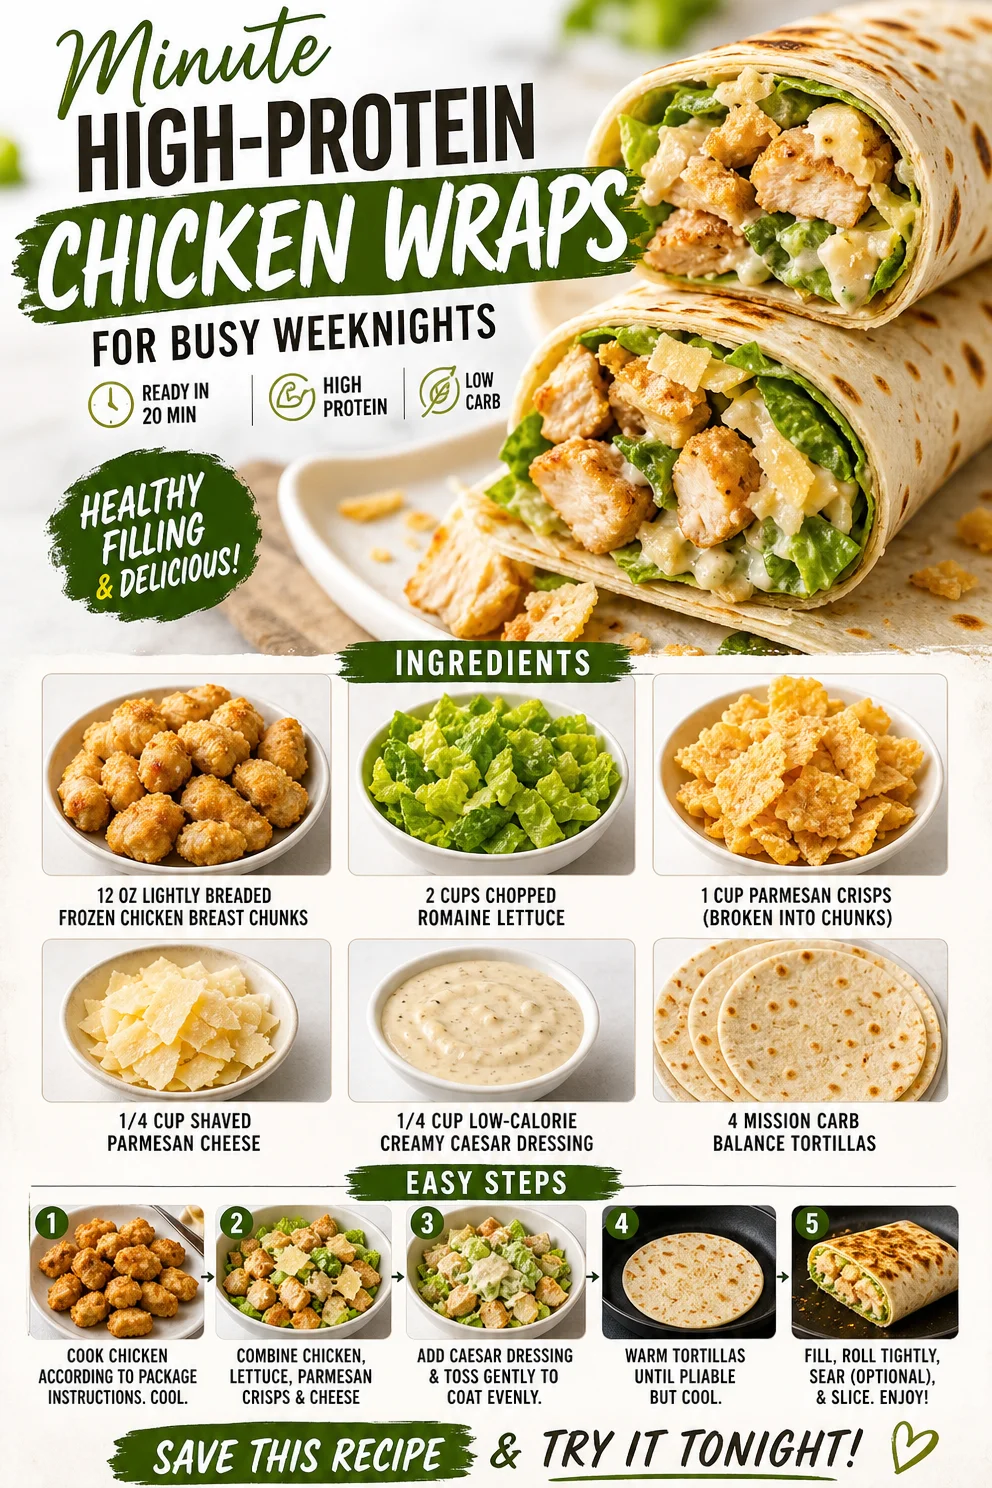
Minute High-Protein Chicken Wraps for Busy Weeknights
High Protein Chicken Wraps: Your Go-To for Flavorful Fuel
Hey there, food lovers! Welcome back to Clean Plate Cravings, where we embrace vibrant, delicious meals that keep our energy levels high without driving us to the brink of madness in the kitchen. Today, I’m thrilled to share a recipe for high protein chicken wraps that are not just delightful to the taste buds but also super simple to whip up, making them perfect for busy days and hungry bellies.
Imagine biting into a wrap filled with crispy chicken, crunchy romaine, savory Parmesan, and a creamy Caesar dressing that dances across your palate. Sounds divine, right? Well, that’s exactly what we’re creating today. Whether you’re meal prepping for the week, looking for a quick lunch, or just want to impress a friend with your culinary skills (we won’t tell anyone how easy this is!), these wraps have got your back!
Let’s get into why high protein chicken wraps should be your new favorite go-to meal. First of all, they’re a fantastic way to pack in nutrients—specifically, protein! Chicken is not only filling but also supports muscle health and keeps you feeling satisfied for longer. Plus, these wraps are loaded with fresh veggies and a punch of flavor that will make you want to rave about them to all your friends.
So, roll up those sleeves, grab your apron, and let’s create some magic in the kitchen!
A Bite of Nostalgia
Growing up, I have vivid memories of Sundays spent gathering around the kitchen table with my family. While my mom busied herself with her famous lemon rosemary chicken, my dad would be wrapping up leftovers for lunch the next day. It was a delightful chaos of flavors, laughter, and the comforting aroma of homemade meals wafting through our home.
One day, in the rush of Sunday dinner, I decided to take matters into my own hands. I found some leftover chicken breast from the night before (one of my mom’s ingenious tricks to save time) and, inspired by my parents, I decided to make my own wraps. Using whatever I could find in the fridge—romaine, some cheese, and that glorious Caesar dressing—we had an impromptu high-protein meal that we all enjoyed. It was quick, delicious, and the perfect way to use up leftovers! Fast forward to today, and I still channel that inspiration for my chicken wraps. They’re now a staple in my meal plan, reminding me of those beautiful family moments while also fueling the busy lifestyle I lead as a food enthusiast.
Ingredients
To create these amazing high protein chicken wraps, you’ll need the following ingredients:
-
12 oz lite breaded frozen chicken breast chunks
A convenient option that you can toss in the oven or air fryer. If you’re looking for a healthier version, opt for grilled chicken breast cut into chunks as a great substitute. -
2 cups chopped romaine lettuce
Fresh and crunchy, romaine adds a refreshing element to each bite. If you want to switch it up, try spinach or kale for an extra nutrient boost! -
1 cup parmesan crisps (broken into chunks)
These savory bites are the perfect crunch! For a low-carb option, you could substitute with crushed nuts or seeds. -
1/4 cup shaved Parmesan cheese
A little more cheesy goodness never hurt anyone! If you’re dairy-free, nutritional yeast can offer a cheesy flavor without the milk. -
1/4 cup low-calorie creamy Caesar dressing
This dressing ties all the flavors together. For a homemade touch, try a yogurt-based dressing or a drizzle of olive oil and lemon juice for a lighter option. -
4 Mission Carb Balance tortillas
These low-carb tortillas are flexible and delicious. Feel free to use whole-grain wraps or even lettuce leaves for a lighter, grain-free option.
Step-by-Step Instructions
Let’s dive into the how-to! Get ready to turn your kitchen into a flavor factory with these delightful chicken wraps.
Step 1: Preheat and Prepare
Start by preheating your oven according to the package instructions for the frozen chicken breast chunks. Typically, this will be around 400°F (200°C) and takes about 20-25 minutes to ensure they’re perfectly crispy.
Chef’s Tip: While that’s heating up, you can multitask—set the table or chop your romaine!
Step 2: Bake Those Chicken Chunks
Once your oven is hot and ready to go, spread your frozen chicken chunks evenly on a baking sheet. Pop them in the oven and let them bake until golden brown and crispy. Remember, you want them to have that delightful crunch!
Chef’s Insight: If you have an air fryer, feel free to use that for an even quicker prep time and an ultra-crispy finish!
Step 3: Chop the Romaine
While the chicken is baking, grab your chopping board and toss the romaine lettuce into a large bowl. Make sure to chop to your desired size—some like it big and crunchy while others prefer smaller bites.
Fun Fact: Did you know that romaine is packed with vitamins A and K? It not only adds crunch but also a nutritional punch!
Step 4: Prepare the Extras
While your chicken cooks and your romaine is cut, break up the parmesan crisps into chunks. Add those to your bowl along with the shaved Parmesan cheese for some gourmet flair.
Little Chef Hack: If you’re a cheese lover (who isn’t?), go ahead and add a sprinkle of your favorite cheese for an added creaminess!
Step 5: Combine Ingredients
Once your chicken is done and has had a minute to cool (you don’t want any major heat accidents!), toss those crispy chunks into the bowl with the romaine and cheeses. Pour in the Caesar dressing and mix it all up until everything is coated and happy!
Quick Tip: Don’t overmix! Just enough to coat evenly is perfect.
Step 6: Wrap It Up
Now for the fun part! Grab one of your tortillas and lay it flat. Spoon a generous amount of your chicken and salad mixture into the center of the wrap, leaving enough space to fold over the edges and roll it up neatly.
Chef’s Note: If you want the wrap to hold better, heat the tortillas for about 10 seconds in the microwave. This will soften them up!
Step 7: Serve and Enjoy
After you’ve successfully rolled your wraps, slice them in half if you’d like. Arrange them on a plate, and voilà, you have a beautiful meal that’s as eye-catching as it is tasty!
Serving Suggestions
For a fun and inviting presentation, serve your chicken wraps on a colorful platter with a small bowl of extra Caesar dressing for dipping. You can add a side of veggie sticks or baked sweet potato fries for a complete meal that’s nothing short of amazing!
Recipe Variations
Feeling inspired? Here are a few ways to jazz up your chicken wraps:
- Buffalo Chicken Twist: Add some buffalo sauce to the chicken before combining it with the other ingredients for a spicy kick.
- Mediterranean Style: Swap the dressing for tzatziki, add diced cucumbers, and feta cheese for a Mediterranean feast.
- Vegan Delight: Replace the chicken with chickpeas or marinated tofu and use a vegan dressing.
- Southwest Flair: Toss in black beans and corn, and switch the cheese for pepper jack for some heat.
- Breakfast Wrap: Enjoy this recipe as a breakfast option by including scrambled eggs and avocado for a protein-packed start to your day.
Chef’s Notes
This recipe has evolved over the years—from a simple family dinner to a versatile staple in my kitchen. I love how it encourages creativity! Last week, I found myself combining leftover veggies and chicken, and that’s when it hit me: these wraps are perfect for cleaning out the fridge! Additionally, they make for great meals on the go, whether that be a road trip or a busy workday.
And honestly, every time I take a bite, I’m transported back to those Sunday dinners with my family. It warms my heart knowing that those memories continue to inspire my love for cooking!
FAQs and Troubleshooting
-
What if my chicken isn’t crispy?
- If your chicken chunks aren’t crispy, try increasing the oven temperature slightly and give them a few more minutes. An air fryer also works wonders for achieving the perfect crunch!
-
What’s the best way to store leftovers?
- Store your wraps in an airtight container in the fridge for up to two days. I recommend keeping the dressing separate until you’re ready to enjoy!
-
Can I use different sauces?
- Absolutely! Any dressing you love will work. A ranch or a creamy garlic sauce could add a delightful touch as well.
-
What can I substitute for the tortillas?
- Try lettuce leaves or collard greens for a low-carb option, or use whole grain tortillas for more fiber.
Nutritional Info (Optional)
If you’re tracking your macros, one wrap (including the chicken, dressing, and toppings) typically contains around 450 calories, with approximately 30 grams of protein, making it a filling meal option!
So there you have it, foodies! High protein chicken wraps that are as flavorful as they are filling, perfect for any day of the week. Get creative, have fun, and remember, the kitchen is your playground! Happy cooking!
PrintHigh Protein Chicken Wraps
Delicious and easy high protein chicken wraps made with crispy chicken, fresh romaine, cheeses, and creamy Caesar dressing, perfect for busy days.
- Prep Time: 15 minutes
- Cook Time: 25 minutes
- Total Time: 40 minutes
- Yield: 4 servings 1x
- Category: Main Course
- Method: Baking
- Cuisine: American
- Diet: High Protein
Ingredients
- 12 oz lite breaded frozen chicken breast chunks
- 2 cups chopped romaine lettuce
- 1 cup parmesan crisps (broken into chunks)
- 1/4 cup shaved Parmesan cheese
- 1/4 cup low-calorie creamy Caesar dressing
- 4 Mission Carb Balance tortillas
Instructions
- Preheat your oven according to the package instructions for the frozen chicken breast chunks.
- Bake the chicken chunks on a baking sheet until golden brown and crispy.
- Chop the romaine lettuce into a large bowl.
- Prepare the parmesan crisps and shaved Parmesan cheese, adding them to the bowl.
- Combine the baked chicken, romaine, and cheeses with the Caesar dressing.
- Wrap a generous amount of the mixture in a tortilla.
- Serve and enjoy your delicious wraps!
Notes
Store leftovers in an airtight container in the fridge for up to two days. Keep the dressing separate until ready to eat.
Nutrition
- Serving Size: 1 wrap
- Calories: 450
- Sugar: 3g
- Sodium: 600mg
- Fat: 20g
- Saturated Fat: 6g
- Unsaturated Fat: 10g
- Trans Fat: 0g
- Carbohydrates: 35g
- Fiber: 5g
- Protein: 30g
- Cholesterol: 60mg
Keywords: chicken wraps, high protein, lunch, easy recipes, meal prep
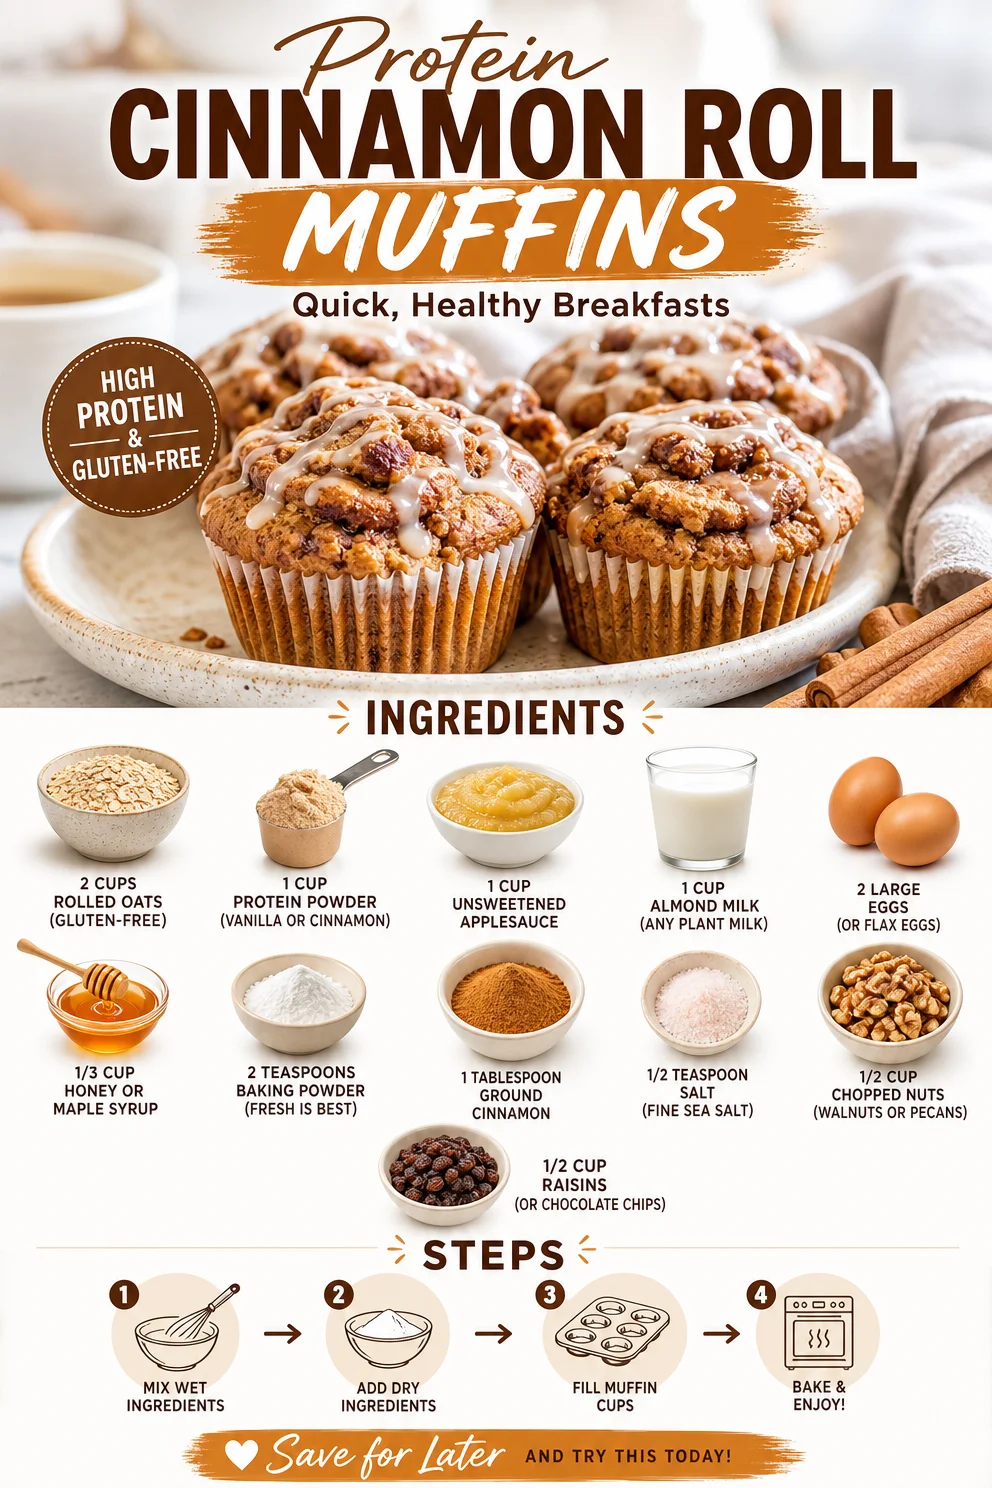
Protein Cinnamon Roll Muffins: Quick, Healthy Breakfasts
Cinnamon Roll Protein Muffins: Your Healthier Breakfast Dream
Welcome to another deliciously healthy adventure with Clean Plate Cravings! Today, we’re whipping up something that combines the comfort of a classic pastry with the power of a nutrient-packed muffin: Cinnamon Roll Protein Muffins. Seriously, they’re a breakfast lover’s dream come true. Imagine soft, moist muffins with that warm, cinnamon swirl just like your favorite cinnamon roll, but without the guilt!
But before we jump into the recipe, let’s chat a little about what makes these muffins so special. I believe that breakfast should be a joyful experience, setting the tone for the rest of your day. You shouldn’t feel like you have to choose between health and flavor—why not have both? These muffins come together quickly, making them perfect for busy mornings when you want something nourishing but satisfying. And trust me, your taste buds will thank you!
Now, let’s get cozy in the kitchen. Grab your mixing bowls and your favorite whisk, and let’s make some magic happen!
A Sweet Memory in Every Bite
Growing up, my weekends were often filled with the sweet aroma of cinnamon wafting through the house. My mom had a special knack for baking, especially when it came to cinnamon rolls. Saturday mornings felt like a feast, with the gooey rolls and a heaping dollop of cream cheese frosting that we would eagerly lick off the spoon. Those mornings were always filled with laughter, family, and a sense of comfort that came from sharing good food.
As I grew older, I realized that not every Saturday needed to be a sugar-laden festival. I wanted to capture that nostalgic flavor in a healthier way. That’s how these Cinnamon Roll Protein Muffins came to be! They bring back all those wonderful childhood memories but are packed with protein and wholesome ingredients. Now, I can enjoy my mornings even more, knowing that I’m fueling my body right.
Ingredients
Here’s what you’ll need to create these yummy muffins:
-
2 cups rolled oats
Rolled oats provide a fabulous base for your muffins, offering fiber and a heartiness that keeps you full. If you’re going gluten-free, just make sure to grab certified gluten-free oats! -
1 cup protein powder
For that extra protein boost! I prefer vanilla or cinnamon-flavored powder to complement the taste of the muffins. You can substitute it with a plant-based protein powder if that’s your jam. -
1 cup unsweetened applesauce
This natural fruit puree replaces oil or butter, keeping the muffins moist while adding some natural sweetness. If you’re not a fan of applesauce, mashed bananas work beautifully too! -
1 cup almond milk
This plant-based milk keeps things light and fluffy. Feel free to use any milk you have on hand; oat, soy, or regular dairy milk all work well. -
2 large eggs
These help bind the ingredients and create a fluffy texture. If you’re looking for an egg-free version, flax eggs are fantastic! Just mix one tablespoon of ground flaxseed with three tablespoons of water and let it sit for a few minutes. -
1/3 cup honey or maple syrup
To sweeten things up! Honey or maple syrup gives these muffins that delightful sweetness with a hint of flavor. Brown sugar is a great alternative too if you prefer. -
2 teaspoons baking powder
Make sure your baking powder is fresh for the best rise! -
1 tablespoon ground cinnamon
The star ingredient! You can add extra for swirls if you like a little more cinnamon magic in every bite. -
1/2 teaspoon salt
A dash of fine sea salt enhances all the lovely flavors going on! -
1/2 cup chopped nuts
Walnuts or pecans add a delightful crunchy texture. You can also skip them if you prefer a nut-free muffin. -
1/2 cup raisins
These add a natural sweetness reminiscent of traditional cinnamon rolls. If you want to kick it up a notch, chocolate chips work just as well for a decadent twist!
Step-by-Step Instructions
Ready to get baking? Here’s how to make these fabulous muffins step by step:
1. Preheat Your Oven
Preheat your oven to 350°F (175°C). This helps to ensure your muffins rise beautifully and bake evenly.
2. Prepare the Muffin Pan
Grease a muffin tin with cooking spray or line with paper liners for easy removal. Your muffins will thank you for it!
3. Mix the Dry Ingredients
In a large mixing bowl, combine the rolled oats, protein powder, baking powder, ground cinnamon, and salt. Whisk it all together until evenly mixed. This step is crucial as it ensures all the dry ingredients are well-distributed.
4. Combine the Wet Ingredients
In another bowl, mix the unsweetened applesauce, almond milk, eggs, and honey (or maple syrup). Whisk until well combined. Fun chef hack: you can use a hand mixer for a fluffier texture but whisking by hand works just fine too!
5. Mix it All Together
Pour the wet ingredients into the dry ingredients. Stir gently until just combined; be careful not to overmix. Your batter should be thick and a little lumpy, which is exactly what we want!
6. Add Nuts and Raisins
Gently fold in the chopped nuts and raisins (or chocolate chips). This is where the magic happens, baby!
7. Swirl the Cinnamon
If you want that classic cinnamon roll swirl, take a small bowl and mix a little extra cinnamon with a teaspoon of honey or maple syrup. Once you pour the batter into the muffin tins, use a toothpick to swirl this mixture into the batter for a beautiful presentation.
8. Fill the Muffin Tins
Scoop your batter into each muffin cup, filling them about 3/4 full. This allows them to rise nicely without overflowing.
9. Bake
Pop your muffin tin into the preheated oven and bake for 18–20 minutes, or until a toothpick inserted into the center comes out clean. The aroma wafting through your kitchen is going to be heavenly, trust me!
10. Cool Down
Once baked, let the muffins cool in the pan for about 5 minutes, then transfer them to a wire rack to cool completely. You can indulge while they’re still warm, but be careful—they’ll be soft and delicate!
Serving Suggestions
These Cinnamon Roll Protein Muffins are perfect as they are, but for a little extra flair, serve them warm with a light drizzle of honey or a smear of almond butter. You could even sprinkle a few chopped nuts or coconut flakes on top for a delightful crunch. Grab your favorite coffee or tea, and you’ve got yourself a fulfilling breakfast or snack!
Recipe Variations
Feeling adventurous? Here are a few fun variations you can try:
-
Stuffed Muffins: Add a dollop of cream cheese or nut butter in the center of each muffin before baking for a surprise filling.
-
Fruity Muffins: Toss in some chopped apples or blueberries for a fruity burst.
-
Chocolate Lover: Swap in chocolate protein powder and add chocolate chips for a richer, dessert-like muffin!
-
Spicy Kick: Add a pinch of nutmeg or allspice for a more complex flavor profile.
-
Vegan Version: Make the muffins plant-based using flax eggs and dairy alternatives as noted in the ingredient list.
Chef’s Notes
Cinnamon Roll Protein Muffins have come a long way since I first started experimenting in my kitchen. It’s amazing how you can take a classic, sugar-loaded treat and transform it into something nutritious yet delicious! I once had a muffin explosion when I forgot the baking powder, and let’s just say the results were… not pretty! So trust me when I say, don’t skip any step—each one is important for flavor and structure.
Also, feel free to adjust the sweetness to your liking! Everyone’s palate is different, and that’s what makes cooking exciting. My goal is for you to feel empowered to make this dish uniquely your own.
FAQs and Troubleshooting
1. Why did my muffins sink in the middle?
This usually happens when you overmix the batter or use stale baking powder. Make sure to mix just until combined and check that your baking powder is fresh.
2. Can I make these muffins ahead of time?
Absolutely! These muffins store well in an airtight container for up to 3 days at room temperature or can be refrigerated for a week. You can also freeze them for up to 3 months; just pop them in the microwave for a quick breakfast!
3. What if I don’t have protein powder?
You can substitute with an additional cup of rolled oats, but the muffins will lose some protein content. Alternatively, you could look for a flour alternative, like whole wheat flour, but it might require adjustments in liquid levels.
4. Can I skip the nuts/r raisins?
Definitely! You can leave them out or replace with other additions that you prefer. Think about seeds or coconut flakes for different textures!
Nutritional Info
While the exact nutritional info can vary based on specific ingredients used, each muffin provides a balance of healthy carbs, proteins, and fats, along with lots of fiber!
And there you have it! Scrumptious, Cinnamon Roll Protein Muffins that not only taste amazing but also nourish your body! So, what are you waiting for? Gather those ingredients, and let’s make this breakfast dream a reality! Happy baking, my fellow foodies!
PrintCinnamon Roll Protein Muffins
A healthier take on classic cinnamon rolls, these protein-packed muffins are soft, moist, and full of that warm cinnamon flavor.
- Prep Time: 10 minutes
- Cook Time: 20 minutes
- Total Time: 30 minutes
- Yield: 12 muffins 1x
- Category: Breakfast
- Method: Baking
- Cuisine: American
- Diet: Vegetarian
Ingredients
- 2 cups rolled oats
- 1 cup protein powder
- 1 cup unsweetened applesauce
- 1 cup almond milk
- 2 large eggs
- 1/3 cup honey or maple syrup
- 2 teaspoons baking powder
- 1 tablespoon ground cinnamon
- 1/2 teaspoon salt
- 1/2 cup chopped nuts
- 1/2 cup raisins
Instructions
- Preheat your oven to 350°F (175°C).
- Prepare a muffin tin by greasing it with cooking spray or lining with paper liners.
- Mix the dry ingredients in a large bowl: rolled oats, protein powder, baking powder, ground cinnamon, and salt.
- Combine the wet ingredients in another bowl: unsweetened applesauce, almond milk, eggs, and honey (or maple syrup).
- Pour the wet mixture into the dry mixture and stir gently until just combined.
- Add the chopped nuts and raisins, folding them in gently.
- Swirl a small bowl of cinnamon with honey or maple syrup into the batter using a toothpick.
- Fill the muffin cups about 3/4 full with the batter.
- Bake for 18–20 minutes, or until a toothpick comes out clean.
- Cool in the pan for 5 minutes, then transfer to a wire rack to cool completely.
Notes
Serve warm with a drizzle of honey or a smear of almond butter for added flavor.
Nutrition
- Serving Size: 1 muffin
- Calories: 180
- Sugar: 8g
- Sodium: 150mg
- Fat: 5g
- Saturated Fat: 0.5g
- Unsaturated Fat: 4g
- Trans Fat: 0g
- Carbohydrates: 26g
- Fiber: 4g
- Protein: 8g
- Cholesterol: 50mg
Keywords: cinnamon roll, protein muffins, healthy breakfast, quick muffins
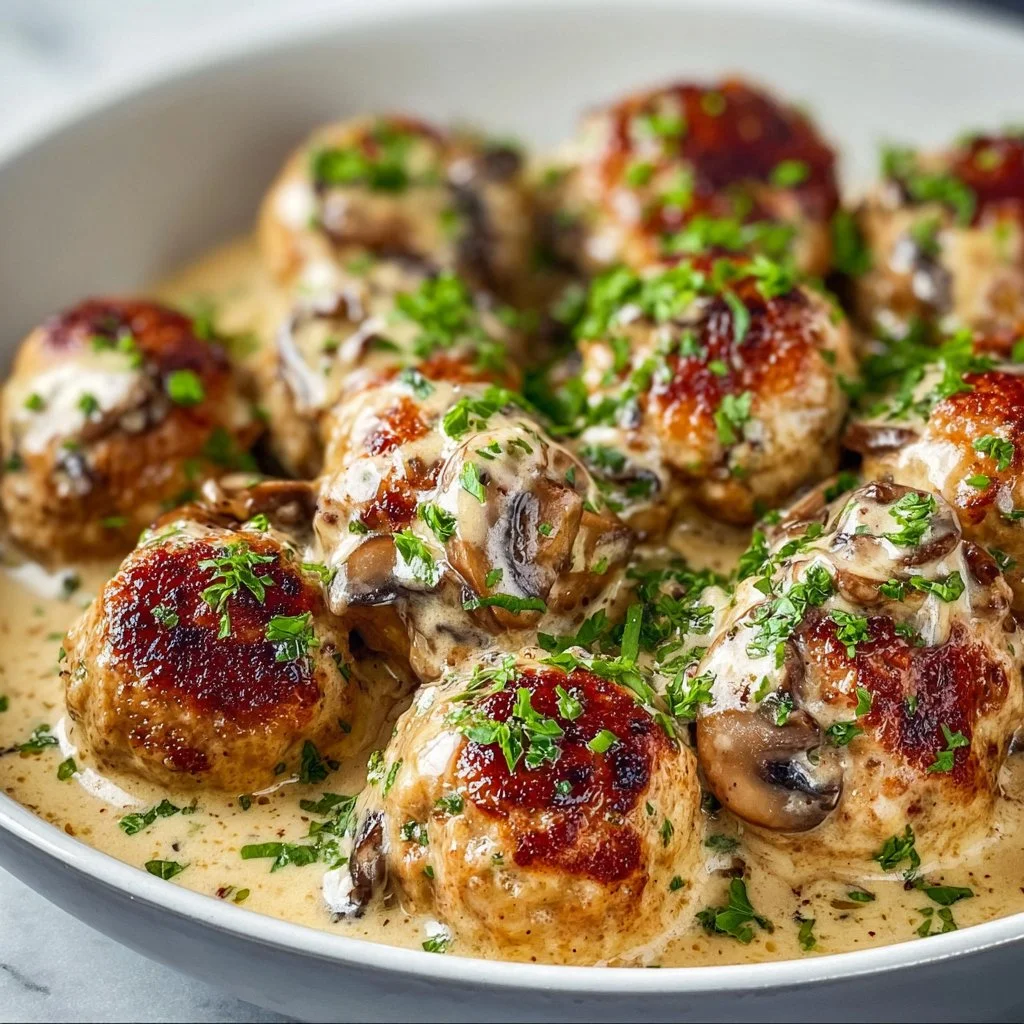
One-Pan Creamy Mushroom Chicken Meatballs in 25 Minutes
Creamy Mushroom Chicken Meatballs: A Comforting Delight
Welcome to Clean Plate Cravings! Today, I’m thrilled to share one of my all-time favorite recipes: Creamy Mushroom Chicken Meatballs. This dish is the epitome of comfort food, with a twist of sophistication that makes it perfect for weeknight dinners or special occasions. Now, who can resist tender meatballs enveloped in a luscious, creamy mushroom sauce? It’s simply divine!
When I first created this recipe, I wanted to blend the warmth of a traditional spaghetti and meatballs dish with the richness of gourmet flavors. I couldn’t wait to make it for family and friends. Picture this: a cozy afternoon, the aroma of garlic and mushrooms wafting through the kitchen, and laughter ringing out from the dining room. It’s these little moments that make cooking so magical to me.
As I stirred the sauce and formed the meatballs, I was flooded with memories of my grandmother’s kitchen. She had this incredible ability to turn simple ingredients into crowd-pleasing meals. I remember her deft hands shaping meatballs, every one perfectly rounded, as she hummed a tune while whisking together a velvety sauce. It was a dance of flavors and love, which undoubtedly inspired my culinary journey.
So, let’s dive into this flavorful recipe that’s not only delicious but also brings a slice of my childhood into your home. Whether you’re cooking for yourself, your family, or a group of friends, these Creamy Mushroom Chicken Meatballs will surely become a cherished addition to your recipe repertoire!
Ingredients
Here’s what you’ll need to whip up these flavorful meatballs:
-
1 pound ground chicken
- A lean meat option that keeps the meatballs juicy while allowing the creamy sauce to shine. If you want a richer flavor, you can substitute with ground turkey or even a mix of chicken and pork.
-
1/2 cup breadcrumbs
- These provide structure and help keep the meatballs tender. You can use regular or panko breadcrumbs. For a gluten-free option, try almond flour or gluten-free breadcrumbs.
-
1/4 cup grated Parmesan cheese
- This adds a savory depth to the meatballs. Feel free to substitute with Pecorino Romano or omit it for a dairy-free version.
-
1 egg
- The binding agent that holds everything together. If you need an egg substitute, use a flaxseed meal mixture (1 tablespoon flaxseed meal + 3 tablespoons water) per egg.
-
2 cloves garlic, minced
- Adds a delightful aroma and flavor. More garlic lovers can add an extra clove or two!
-
Salt and pepper, to taste
- Essential for enhancing the flavors of your dish. Don’t be shy—season generously!
-
2 tablespoons olive oil
- Perfect for browning the meatballs. Can be replaced with avocado oil or melted butter for a richer taste.
-
8 ounces mushrooms, sliced
- Use your favorite variety, I love cremini or button mushrooms for their texture and flavor. Portobello can also add a nice, meaty base.
-
1 cup heavy cream
- This creates the rich, creamy sauce that makes this dish indulgent. For a lighter option, you can use half-and-half or coconut cream for a dairy-free alternative.
-
1/2 cup chicken broth
- Adds depth to the sauce. If you prefer vegetarian, go for vegetable broth instead.
-
1 teaspoon thyme
- Fresh or dried, this herb pairs beautifully with the creamy sauce and mushrooms. You can substitute with rosemary or Italian seasoning if that’s what you have on hand.
Step-by-Step Instructions
Ready to get started? Grab your apron, and let’s make these creamy mushroom chicken meatballs!
-
Prepare the meatball mixture: In a mixing bowl, combine the ground chicken, breadcrumbs, grated Parmesan cheese, egg, minced garlic, salt, and pepper. Use your hands to gently mix until everything is just combined—be careful not to overwork it!
Chef’s Tip: Using your hands is the best way to ensure all ingredients blend well, but don’t forget to wash them afterward!
-
Shape the meatballs: Roll the mixture into golf ball-sized meatballs (about 1.5 inches in diameter). Place them on a plate or baking sheet as you work.
Pro Tip: For even cooking, try to make them all the same size. If you want to be extra fancy, use a small cookie scoop!
-
Brown the meatballs: In a large skillet, heat the olive oil over medium heat. Once hot, gently add the meatballs in batches, making sure not to overcrowd the pan. Brown them on all sides for about 5-7 minutes.
Chef Hack: If they stick to the pan, give them a little extra time to sear, and they should release beautifully!
-
Cook the mushrooms: Once browned, remove the meatballs from the skillet and set aside. In the same skillet, add the sliced mushrooms. Sauté them for about 5 minutes or until they’re tender and browned.
Tip: If the pan seems dry, add a splash more oil. Get those mushrooms nice and caramelized for extra flavor!
-
Make the sauce: Pour in the heavy cream and chicken broth. Stir well to combine with the mushrooms. Sprinkle in the thyme, and let it simmer for about 3-4 minutes until it thickens slightly.
Cooking Hack: If you prefer a super creamy sauce, feel free to whisk in a little more cream as you go!
-
Bring it all together: Return the browned meatballs to the skillet, gently nestling them in the creamy sauce. Cover and let simmer for an additional 10 minutes, allowing the meatballs to cook through and absorb the flavors.
Tip: You can temp the meatballs with a meat thermometer—165°F ensures they are perfectly cooked!
-
Taste and season: Give the sauce a final taste and adjust the salt and pepper as needed. If you’d like, throw in some fresh parsley or chives at this stage for an extra burst of color and flavor.
Chef Note: A squeeze of lemon at the end really brightens up the dish!
Serving Suggestions
To serve these creamy mushroom chicken meatballs, I love to plate them over a bed of buttery mashed potatoes, creamy polenta, or even whole wheat spaghetti for that classic touch! Drizzle some of the luscious sauce over the top and garnish with fresh herbs like parsley or thyme.
Pair it with a crisp, green salad dressed with a tangy vinaigrette to cut through the creaminess, or some roasted veggies for a colorful side. The options are limitless!
Recipe Variations
Feel free to play around with this recipe! Here are a few fun twists to consider:
-
Add Spinach or Kale: Stir in some fresh spinach or kale into the sauce for added nutrients and color.
-
Cheesy Version: Mix in some shredded mozzarella or fontina cheese with the sauce for a melty finish that’s irresistible.
-
Spicy Kick: Add a sprinkle of red pepper flakes or some diced jalapeños into the meatball mixture for a spicy twist.
-
Herb Variations: Try using fresh basil or oregano instead of thyme for a different flavor profile.
-
Mushroom Medley: Use a variety of mushrooms like shiitake, portobello, and oyster for an earthy, sophisticated flavor.
Chef’s Notes
Every recipe has a story, and this one is no different! I remember the countless evenings spent experimenting with different sauces and spices as I tried to recreate my grandmother’s famous meatballs. The journey of discovering what works, what doesn’t, and remembering the people you love along the way is what makes cooking magical.
I’ve evolved this recipe over the years, starting with a classic beef meatball version when I was a kid. Now, I adore how light ground chicken feels while still being flavorful and hearty. Plus, the creamy sauce makes everything feel like a warm hug!
FAQs and Troubleshooting
1. My meatballs fell apart while cooking! What did I do wrong?
It’s likely that they needed an extra binding agent. Make sure to measure your breadcrumbs and egg accurately. If they feel too loose, a little more breadcrumb or even some grated cheese can help bind them better.
2. Can I make this recipe ahead of time?
Absolutely! You can prepare the meatballs and sauce, then store them separately in the refrigerator for up to 2 days. Reheat gently before serving.
3. How do I store leftovers?
Store any leftover meatballs in an airtight container in the fridge for up to 3 days. You can also freeze them—just make sure to separate them before putting them in a freezer bag for easier thawing!
4. Can I use other meats instead of chicken?
Yes, you can substitute ground turkey, pork, or beef for a different flavor and texture experience!
Nutritional Info
While the exact nutritional content can vary based on specific ingredients used, here’s a rough estimate for one serving of Creamy Mushroom Chicken Meatballs (based on six servings):
- Calories: 360
- Protein: 25g
- Fat: 25g
- Carbohydrates: 14g
- Fiber: 1g
Note: Adjustments in ingredients may alter nutritional values, so be sure to keep track of substitutions!
And there you have it—Creamy Mushroom Chicken Meatballs that will make you feel right at home, whether you’re cooking for yourself or for a crowd. Thanks for joining me in this kitchen adventure, and happy cooking! Here’s to many delicious meals ahead!
PrintCreamy Mushroom Chicken Meatballs

Tender meatballs enveloped in a luscious, creamy mushroom sauce, blending traditional comfort food with gourmet flavors.
- Prep Time: 15 minutes
- Cook Time: 30 minutes
- Total Time: 45 minutes
- Yield: 6 servings 1x
- Category: Main Course
- Method: Baking
- Cuisine: Italian
- Diet: Gluten-Free
Ingredients
- 1 pound ground chicken
- 1/2 cup breadcrumbs
- 1/4 cup grated Parmesan cheese
- 1 egg
- 2 cloves garlic, minced
- Salt and pepper, to taste
- 2 tablespoons olive oil
- 8 ounces mushrooms, sliced
- 1 cup heavy cream
- 1/2 cup chicken broth
- 1 teaspoon thyme
Instructions
- Prepare the meatball mixture: In a mixing bowl, combine the ground chicken, breadcrumbs, grated Parmesan cheese, egg, minced garlic, salt, and pepper. Use your hands to gently mix until everything is just combined.
- Shape the meatballs: Roll the mixture into golf ball-sized meatballs (about 1.5 inches in diameter). Place them on a plate or baking sheet.
- Brown the meatballs: In a large skillet, heat the olive oil over medium heat. Once hot, gently add the meatballs in batches, browning them on all sides for about 5-7 minutes.
- Cook the mushrooms: Once browned, remove the meatballs and set them aside. In the same skillet, add the sliced mushrooms and sauté for about 5 minutes or until tender.
- Make the sauce: Pour in the heavy cream and chicken broth, stir well with the mushrooms, and sprinkle in the thyme. Let it simmer for about 3-4 minutes until it thickens slightly.
- Bring it all together: Return the meatballs to the skillet, gently nestling them in the sauce. Cover and let simmer for an additional 10 minutes.
- Taste and season: Adjust the salt and pepper as needed and add fresh parsley or chives for extra flavor.
Notes
Serve over buttery mashed potatoes, creamy polenta, or whole wheat spaghetti. Pair with a crisp salad or roasted veggies.
Nutrition
- Serving Size: 1 serving
- Calories: 360
- Sugar: 5g
- Sodium: 600mg
- Fat: 25g
- Saturated Fat: 10g
- Unsaturated Fat: 10g
- Trans Fat: 0g
- Carbohydrates: 14g
- Fiber: 1g
- Protein: 25g
- Cholesterol: 90mg
Keywords: chicken meatballs, creamy sauce, comfort food, Italian recipe, easy dinner
Minute Coconut Chia Pudding Recipe (Raffaello Flavor)
The Ultimate Easy Coconut Chia Pudding Recipe (Coconut Raffaello)
Welcome back, food lovers! Today, I’m thrilled to share one of my absolute favorite recipes—a creamy, dreamy Coconut Chia Pudding that’s inspired by the delightful flavors of Raffaello coconut candies. This dessert not only delights your taste buds but is also packed with nourishing ingredients that will leave you feeling energized and satisfied. Let’s dig in!
Introduction
Now, who doesn’t love a simple, satisfying dessert that tastes like a tropical vacation? There’s something about the sweet, nutty flavor of coconut combined with the simplistic charm of chia pudding that strikes a nostalgic chord for many of us.
Growing up, I remember my family indulging in coconut treats during the summer, each bite reminiscent of sunny beach days and carefree laughter. Coconut Chia Pudding brings me back to those moments, with the added bonus of being a healthy alternative to traditional desserts. It’s made with real, wholesome ingredients that are easy to find and even easier to prepare.
I know many of you are navigating a busy life and might feel challenged when it comes to preparing healthier meals. That’s where this recipe comes in! This Coconut Raffaello Chia Pudding is not only a guilt-free treat but also an incredibly adaptable one. Whether you prefer it for breakfast, as a snack, or even a dessert, you’ll find that it fits perfectly in your day-to-day routine.
With just a handful of ingredients and minimal prep time, this recipe is designed to reduce your stress in the kitchen while delivering maximum flavor. Are you ready to impress your friends and family with this delightful dish that’s sure to bring smiles and satisfaction all around? Let’s get cooking!
Personal Story
Let me share a little background story that embodies my love for coconut desserts. A few summers ago, I packed my bags for a tropical getaway with friends. One afternoon, we found ourselves in a charming little café on the beach, where I first tasted a homemade coconut dessert that would make me swoon. Picture this: a bowl of creamy coconut pudding topped with fresh mango slices and a sprinkle of toasted coconut!
I was instantly hooked. It was light, refreshing, and perfectly sweet—the ideal treat after a day soaking up the sun. As I savored each bite, I knew I had to recreate this experience in my own kitchen. Thus began my journey to perfect homemade coconut desserts.
Fast forward to today, and here we are with this Coconut Chia Pudding recipe. It’s quick and easy to make, allowing you to recreate that beachy bliss any time you please!
Ingredients
Let’s break down the ingredients needed for this delightful Coconut Chia Pudding:
-
3 tbsp oats
Oats add heartiness and fiber to your pudding. If you need a gluten-free option, replace them with gluten-free oats or skip them entirely for a smoother texture! -
4 tbsp shredded coconut
Choose unsweetened shredded coconut for a more authentic taste. Feel free to toast it lightly in a pan for added flavor! -
1 tbsp chia seeds
Chia seeds are little powerhouses of nutrition, packed with omega-3 fatty acids. If you’re not a fan, try flaxseeds as a substitute! -
2 tbsp honey
Honey adds a touch of natural sweetness. If you prefer, agave syrup or maple syrup work wonderfully too! -
2 tbsp Greek yogurt
Greek yogurt brings a creamy texture and a protein boost. You can replace it with a non-dairy yogurt if you’re going plant-based. -
1 tsp vanilla extract
Vanilla extract enhances the overall flavor of the pudding. For a little twist, try almond extract or coconut extract instead! -
1 cup milk
Use any milk of your choice—almond, coconut, or dairy! The milk offers a creamy base for the pudding; opt for full-fat for extra richness or a lower-fat version if you’d like.
Step-by-Step Instructions
Alright, let’s get our cook on! Here’s how to whip up this Coconut Chia Pudding in no time:
-
Gather Your Ingredients: Make sure you’ve got everything out and ready. This will make the process much smoother.
-
Mix the Dry Ingredients: In a medium-sized bowl, combine the oats, shredded coconut, and chia seeds. Give them a good stir to mix everything together. This is where the magic begins!
-
Create the Wet Mixture: In a separate bowl, whisk together the honey, Greek yogurt, vanilla extract, and milk until smooth. Watch as the creamy yogurt blends harmoniously with the milk, creating a dreamy base.
-
Combine: Pour the wet mixture into the dry ingredients. Stir well until everything is well combined. The chia seeds will start to absorb liquid, thickening the mixture as you let it sit.
-
Chill Time: Transfer your mixture to a jar or individual serving cups, cover, and refrigerate for at least two hours or overnight if you can wait! This is when the chia seeds do their magic and turn your mixture into a luscious pudding.
-
Enjoy the Transformation: Once it’s set, give it a good stir, and you’ll see it gains a delightful pudding-like consistency. Dive in with a spoon, and you’re all set!
Serving Suggestions
To serve this delightful Coconut Chia Pudding, you can layer it in cute glasses for an elegant touch. Top with additional shredded coconut, a sprinkle of cocoa nibs, or fresh fruit like berries or mango slices for a gorgeous finish. It’s not just about taste but also presentation—because we eat with our eyes first!
Recipe Variations
Here are a few fun ways to switch it up and keep things exciting:
-
Chocolate Coconut Chia Pudding: Add a tablespoon of cocoa powder to the wet mixture for a chocolate twist. You can even add a few chocolate chips on top!
-
Tropical Fruit Medley: Layer with chopped tropical fruits like pineapple, papaya, or kiwi for that ultimate beach vibe.
-
Nutty Delight: Stir in a tablespoon of almond or peanut butter before letting the pudding set for a nutty flavor.
-
Spiced Option: Add a pinch of cinnamon or nutmeg to the mixture for a warm, cozy feel.
-
Alternative Sweeteners: Try using date syrup or stevia for sweetness if you’re on a low-sugar kick.
Chef’s Notes
I’ve come a long way in my culinary journey, and this Coconut Chia Pudding is a testament to my philosophy of simplicity and flavor. One funny story I have relates to my earlier attempts at making chia pudding. I eagerly made a large batch, thinking a day of soaking would do the trick. But I got busy and ended up leaving it for two days. Let me tell you, the consistency was nothing short of a science experiment! I couldn’t have imagined that the little seeds would absorb so much liquid!
But with each experiment, I learned: patience is key, and perfection comes with practice. Now, I have my foolproof method that never fails. And honestly, it still astonishes me how something so simple can be so delicious!
FAQs and Troubleshooting
1. My chia pudding isn’t thickening as expected! What went wrong?
Chia seeds need enough liquid and time to fully absorb it. Make sure you’re using a good ratio of chia seeds to liquid and refrigerate long enough. If it’s taking too long, try adding a bit more chia seeds and let it sit longer.
2. Can I make this vegan?
Absolutely! Simply swap Greek yogurt with a plant-based yogurt, and use maple syrup or agave as your sweetener. Use almond milk or coconut milk for a truly decadent vegan treat.
3. How long can I store leftovers?
Your Coconut Chia Pudding will last up to 5 days in the fridge, making it a perfect meal prep option for busy weekdays!
4. Can I eat chia pudding daily? Is it healthy?
Yes! Chia seeds are packed with fiber, omega-3s, and antioxidants. Just be mindful of the added sweeteners and toppings to keep it balanced.
Nutritional Info
For those curious about the nutritional aspect, each serving of this delightful Coconut Chia Pudding gives you a hearty dose of fiber, healthy fats, and protein. Perfect for keeping you fueled throughout the day!
There you have it! An easy, delicious Coconut Chia Pudding that’s not just a treat but a celebration of simple ingredients and joyful cooking. So, gather your ingredients, make a batch, and enjoy that flavorful tropical bliss right at home. Happy cooking, my friends!
PrintUltimate Easy Coconut Chia Pudding

A creamy, dreamy Coconut Chia Pudding inspired by Raffaello coconut candies, perfect for any time of the day.
- Prep Time: 10 minutes
- Cook Time: 0 minutes
- Total Time: 120 minutes
- Yield: 2 servings 1x
- Category: Dessert
- Method: Chilling
- Cuisine: Tropical
- Diet: Vegan
Ingredients
- 3 tbsp oats
- 4 tbsp shredded coconut
- 1 tbsp chia seeds
- 2 tbsp honey
- 2 tbsp Greek yogurt
- 1 tsp vanilla extract
- 1 cup milk
Instructions
- Gather your ingredients: Make sure you’ve got everything out and ready.
- Mix the dry ingredients: In a medium-sized bowl, combine the oats, shredded coconut, and chia seeds.
- Create the wet mixture: In a separate bowl, whisk together the honey, Greek yogurt, vanilla extract, and milk until smooth.
- Combine: Pour the wet mixture into the dry ingredients and stir well.
- Chill Time: Transfer your mixture to a jar, cover, and refrigerate for at least two hours or overnight.
- Enjoy the transformation: Once set, give it a good stir, and dive in with a spoon!
Notes
Serve layered in glasses with additional toppings like fruit or cocoa nibs for added elegance.
Nutrition
- Serving Size: 1 serving
- Calories: 250
- Sugar: 10g
- Sodium: 50mg
- Fat: 10g
- Saturated Fat: 5g
- Unsaturated Fat: 4g
- Trans Fat: 0g
- Carbohydrates: 30g
- Fiber: 8g
- Protein: 6g
- Cholesterol: 5mg
Keywords: coconut, chia pudding, healthy dessert, tropical treat, vegan dessert
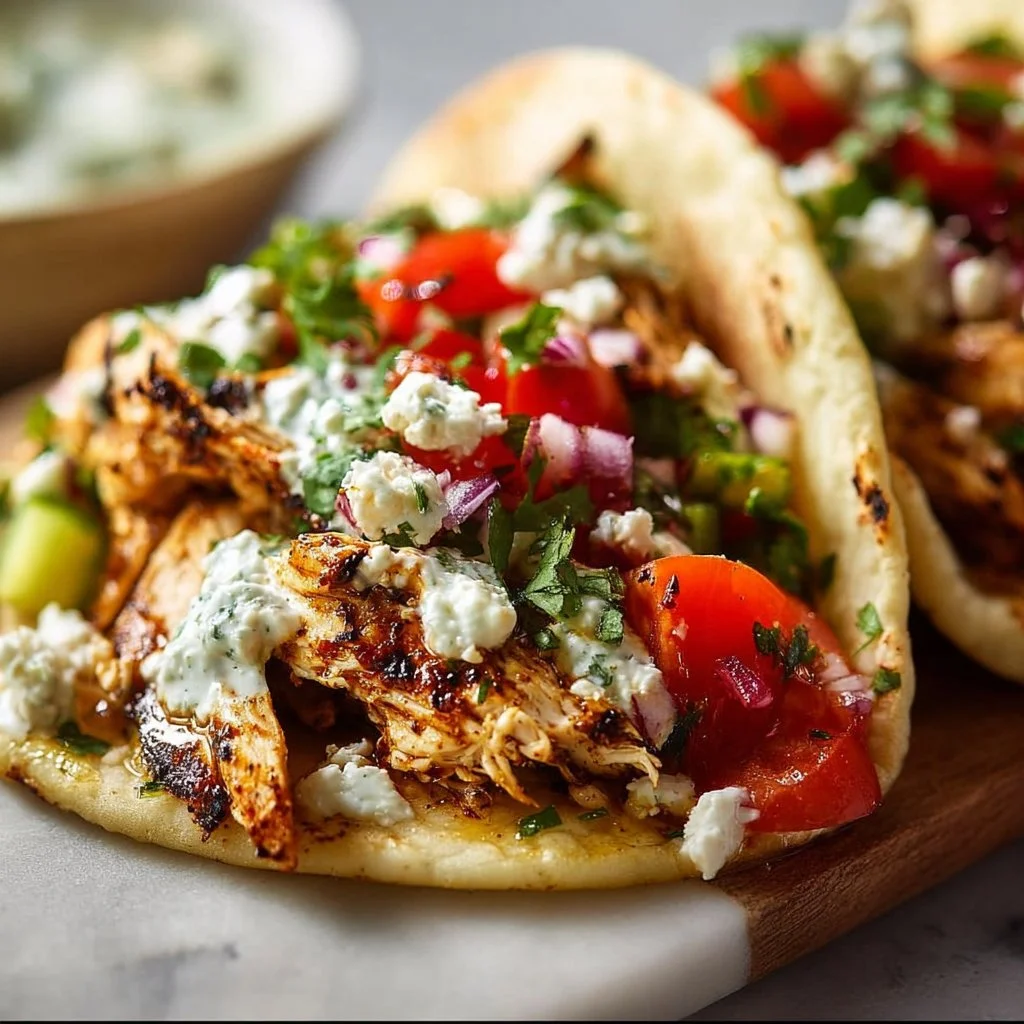
Quick Mediterranean Chicken Tacos
Quick Mediterranean Chicken Tacos: A Flavorful Journey
Welcome to Clean Plate Cravings! If you’ve ever found yourself juggling a busy schedule while still dreaming of wholesome meals that sparkle with flavor, you’re in for a treat today. These Quick Mediterranean Chicken Tacos are about to become your new favorite dish—a tantalizing blend of savory chicken, fresh veggies, and punchy flavors all wrapped in a warm tortilla. Sounds dreamy, right? Trust me; it’s as effortless as it is delicious.
Life can get hectic, right? Between work, family, and a never-ending to-do list, we often find ourselves settling for less-than-stellar meals. But eating well shouldn’t be a chore! My mission here is simple: to empower you with recipes that are not only nourishing but also bring joy to your kitchen. Mediterranean cuisine is particularly close to my heart, with its vibrant ingredients and flavors that just sing of summer.
So, let’s roll up our sleeves and get cooking together! I promise this will be a dish that adds some sunshine to your day—even if the weather outside says otherwise.
A Taste of Nostalgia: My First Encounter with Mediterranean Cuisine
I still remember the first time I tasted Mediterranean flavors. I was a teenager, and my family took a trip to Greece. As we wandered through the vibrant streets of Santorini, the aroma of grilled meats and fresh herbs filled the air, begging us to explore every little taverna along the way. The moment I sank my teeth into a juicy chicken gyro topped with tangy tzatziki and vibrant veggies, I was hooked.
That first bite opened a whole new world of flavors for me—one bursting with color and nutrition. The way the juicy chicken mingled with the bright vegetables and creamy feta was nothing short of magical. When I came back home, I knew I had to recreate that experience in my own kitchen. Over the years, I’ve crafted various dishes that reflect my love for Mediterranean flavors, and these Quick Mediterranean Chicken Tacos are one of my most cherished creations.
Ingredients: What You’ll Need
Here’s what you’ll need to whip up these delightful tacos:
-
1 pound chicken breast, diced
Juicy, tender chicken breast is the star of the show! You can substitute with turkey breast or even chickpeas if you want a meatless option. -
1 tablespoon olive oil
A staple in Mediterranean diets, olive oil brings richness and depth to the dish. Avocado oil is a great alternative if you’re looking for a neutral flavor. -
1 teaspoon garlic powder
For that delicious savory kick! If you love fresh garlic, feel free to swap this for 2 minced garlic cloves. -
1 teaspoon paprika
Adds a hint of smokiness and color. Smoked paprika can elevate the flavor even more with its warm undertones. -
Salt and pepper to taste
Simple seasonings that bring everything to life! Always taste and adjust according to your preference. -
8 small tortillas
Flour or corn, these delicious wraps hold everything together. You can even use lettuce wraps for a low-carb option! -
1 cup cherry tomatoes, halved
Sweet and juicy, cherry tomatoes brighten up the dish. Any tomato varieties can work, but fresh is always best. -
1/2 cucumber, diced
Refreshing and crisp! Sub for zucchini if you’re looking for a twist. -
1/4 red onion, thinly sliced
Adds crunch and a sharp bite. If red onion is too pungent for you, try a sweet onion instead. -
1/2 cup feta cheese, crumbled
This salty, tangy cheese perfectly complements the fresh veggies. Goat cheese is a lovely substitute if you prefer a creamier option. -
Fresh parsley or cilantro for garnish
A sprinkle of fresh herbs always elevates a dish! You can mix it up with dill if you’re feeling adventurous.
Step-by-Step Instructions: Let’s Get Cooking!
Alright, foodies, it’s time to bring this dish to life with some straightforward steps! Gather your ingredients and let’s get started.
-
Prepare the Chicken
In a mixing bowl, toss the diced chicken breast with olive oil, garlic powder, paprika, salt, and pepper. Make sure each piece is evenly coated—this is where the flavor adventure begins! Let it marinate for about 15 minutes. If you have the time, letting it sit for an hour makes for even juicier chicken. -
Cook the Chicken
Head over to the stove and heat a skillet on medium-high heat. Once it’s hot, add the chicken mixture. Sizzling sounds? That’s music to your ears! Cook for about 6-8 minutes until the chicken is golden and cooked through, stirring occasionally to ensure even browning. If you have a meat thermometer, you’re looking for an internal temperature of 165°F. -
Warm the Tortillas
While the chicken is cooking, warm up your tortillas. You can do it in a dry skillet over medium heat (about 30 seconds per side) or wrap them in foil and pop them in a 350°F oven for about 10 minutes. Warming prevents them from cracking and makes for the perfect taco experience! -
Prepare the Toppings
While everything is cooking, wash and prepare your veggies. Halve the cherry tomatoes, dice the cucumber, and thinly slice the red onion. Have them ready to go in little bowls; this makes for a beautiful taco assembly moment! -
Assemble the Tacos
Now comes the best part—layering your creation! Take a warm tortilla and add a generous spoonful of the chicken mixture in the center. Top it off with your fresh veggies, crumbled feta cheese, and finally, a sprinkle of parsley or cilantro. Don’t be shy; load them up! -
Serve and Enjoy!
Plate your tacos with a beautiful presentation, and maybe add some extra cherry tomatoes and cucumber on the side. Why not grab some lemon wedges for an extra zing? Enjoy the burst of flavors as you take a bite!
Serving Suggestions: Plate it Like a Pro
Presenting your tacos beautifully can elevate the entire meal experience. Use a platter and arrange your tacos in a row, garnishing them with fresh herbs and an extra sprinkle of feta. You could even add a colorful bowl of homemade tzatziki or a spicy salsa on the side for extra dipping fun! A sprig of parsley or cilantro also goes a long way in making your dish visually appealing.
Recipe Variations: Get Creative!
Looking to mix things up? Here are some creative variations you might consider:
-
Spicy Kick: Add some diced jalapeños or top with a harissa sauce for an extra heat!
-
Herb Infused: Swap out the standard spice blend for a za’atar seasoning mix to really deepen the Mediterranean flavors.
-
Creamy Avocado: Replace the feta with sliced avocado for a rich, creamy texture.
-
Mediterranean Bowl: Pile the chicken and veggies over a bed of quinoa or brown rice for a hearty meal.
-
Grilled Option: Skip the skillet and grill the chicken for those beautiful char marks and smoky flavor.
Chef’s Notes: My Kitchen Adventures
This recipe has traveled a path of creativity since its inception. It started as a simple meal idea on a busy Wednesday night when I couldn’t decide whether to make tacos or a Mediterranean dish—why not combine both? I’ve played around with different spices, toppings, and even tortillas to make these tacos more exciting while keeping them healthy and approachable. It’s been such a fun journey learning what works and what doesn’t in the kitchen.
One time, I accidentally used expired chicken broth instead of olive oil when preparing my marinade (Note to self: ALWAYS check the labels!). Let’s just say, those tacos took a detour; we ended up ordering pizza instead!
FAQs and Troubleshooting
1. Can I use chicken thighs instead of breast?
Absolutely! Chicken thighs are wonderfully juicy and make for a more flavorful taco experience. Just be sure to adjust the cooking time slightly since thighs can take a few extra minutes.
2. What if I don’t have tortillas?
No worries! You could serve the chicken and veggies over a bed of greens for a fresh, taco-inspired salad. Or, use pita bread for a fun twist.
3. How do I make this dish gluten-free?
Simply swap out regular tortillas for gluten-free ones or use lettuce wraps. Your taste buds won’t miss a beat!
4. Can I prep this meal in advance?
Definitely! You can marinate the chicken overnight, and the fresh toppings can be prepped and stored in airtight containers. Just warm everything up when you’re ready to eat!
Nutritional Info
Per serving (1 taco):
- Calories: 265
- Protein: 22g
- Fat: 12g
- Carbohydrates: 22g
- Fiber: 3g
Now that you have your Quick Mediterranean Chicken Tacos ready, I hope you enjoy every single bite! Remember, cooking is all about experimenting, so don’t hesitate to make this recipe your own. Whether you stick to the classic version or play with fresh ingredients, I’m confident it will quickly become a staple in your home. Happy cooking!
PrintQuick Mediterranean Chicken Tacos

A tantalizing blend of savory chicken, fresh veggies, and punchy flavors all wrapped in a warm tortilla.
- Prep Time: 15 minutes
- Cook Time: 10 minutes
- Total Time: 25 minutes
- Yield: 4 servings 1x
- Category: Main Course
- Method: Stovetop
- Cuisine: Mediterranean
- Diet: Gluten-Free, High-Protein
Ingredients
- 1 pound chicken breast, diced
- 1 tablespoon olive oil
- 1 teaspoon garlic powder
- 1 teaspoon paprika
- Salt and pepper to taste
- 8 small tortillas
- 1 cup cherry tomatoes, halved
- 1/2 cucumber, diced
- 1/4 red onion, thinly sliced
- 1/2 cup feta cheese, crumbled
- Fresh parsley or cilantro for garnish
Instructions
- Prepare the chicken by tossing the diced chicken breast with olive oil, garlic powder, paprika, salt, and pepper. Let it marinate for about 15 minutes.
- Cook the chicken in a heated skillet on medium-high for about 6-8 minutes until golden and cooked through.
- Warm the tortillas either in a dry skillet for 30 seconds per side or in the oven wrapped in foil for 10 minutes.
- Prepare the toppings by washing and chopping the cherry tomatoes, cucumber, and red onion.
- Assemble the tacos by layering the chicken mixture, fresh veggies, crumbled feta, and parsley or cilantro onto the tortillas.
- Serve the tacos on a platter and enjoy with extra cherry tomatoes and cucumber on the side.
Notes
Add jalapeños for spice or avocado for creaminess. Can also be made gluten-free with appropriate tortillas.
Nutrition
- Serving Size: 1 taco
- Calories: 265
- Sugar: 4g
- Sodium: 350mg
- Fat: 12g
- Saturated Fat: 4g
- Unsaturated Fat: 6g
- Trans Fat: 0g
- Carbohydrates: 22g
- Fiber: 3g
- Protein: 22g
- Cholesterol: 60mg
Keywords: chicken tacos, Mediterranean cuisine, quick recipes, wholesome meals, summer flavors