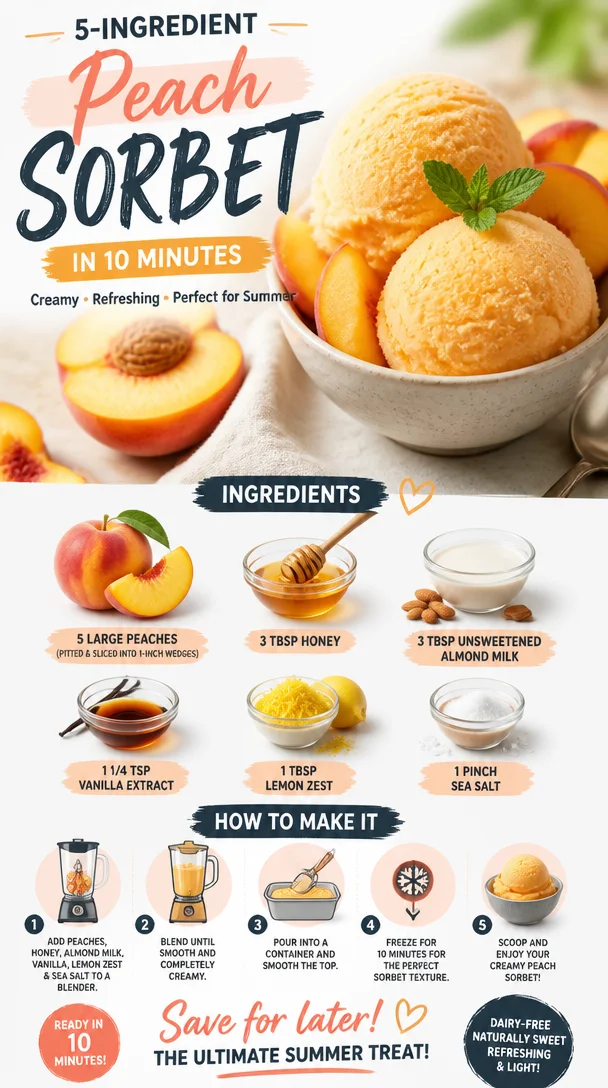
Ingredient Peach Sorbet in 10 Minutes: Creamy Summer Treat
The Best Peach Sorbet: A Summer Delight
As the sun begins to warm the days and the sweet scent of summer fills the air, there’s nothing quite like the juicy burst of a ripe peach. For me, peaches are the quintessential summer fruit—a nostalgic reminder of childhood summers spent roaming orchards and indulging in sweet, messy peach slices. That’s why I’m thrilled to share my simple, dreamy Peach Sorbet recipe with you.
Imagine this: you’ve just spent a sun-soaked day at the beach, and the golden hour is painting the sky in shades of pink and orange. You come home and whip up this refreshing sorbet that not only cools you down but also brings the fresh flavors of summer right to your kitchen. This is the magic of making your own sorbet! Best of all, it’s incredibly easy and uses just a handful of simple ingredients.
The beauty of this recipe is that it captures the sweet, fragrant essence of fresh peaches without any fuss—no ice cream maker required! Whether you’re looking for a delightful dessert to impress your friends, a refreshing treat for kids, or a simple way to utilize those juicy peaches before they spoil, this Peach Sorbet checks all the boxes. Plus, it’s a great way to enjoy a lighter dessert without sacrificing flavor.
So grab those peaches from your local farmers’ market (or your backyard tree if you’re lucky!) and let’s dive into this deliciously fresh adventure. I promise you; this sorbet will become your go-to summer treat!
A Nostalgic Memory with Peaches
Let me take you back to my grandmother’s backyard in the heart of summer. It was a riot of color—vibrant flowers blooming, grass so green it almost felt electric underfoot, and those charmingly crooked peach trees laden with fruit. My cousins and I spent endless hours climbing those trees, trying to reach the highest peaches. How many times did we tumble, giggling, into the grass, red juice dripping down our chins? Too many to count!
One memorable day, my grandmother decided it was time to put our peach-picking spoils to good use. She gathered us into the kitchen, where the aromas of vanilla and citrus filled the air. Together, we sliced up the peaches and made a simple sorbet that would cool us down after our adventures. It became a family tradition—a sweet way to celebrate summer while passing down wisdom and laughter.
This memory stayed with me, fueling my love for fresh, light desserts. Today, every spoonful of that peach sorbet takes me right back to those blissful summer afternoons spent in my grandmother’s kitchen.
Ingredients You’ll Need
-
5 large peaches: The star of the show! Opt for ripe, juicy peaches for the best flavor. If peaches are out of season, feel free to substitute with nectarines or frozen peaches for a brisk flavor.
-
3 tbsp honey: A natural sweetener that enhances the peach’s natural sugars. Agave syrup or maple syrup works as an excellent alternative.
-
3 tbsp unsweetened almond milk: This keeps things creamy while keeping it dairy-free. If you prefer, you can substitute with coconut milk or regular milk for a richer texture.
-
1 1/4 tsp vanilla extract: Adds a lovely depth of flavor. If you’re feeling adventurous, try using a splash of almond extract for a different twist.
-
1 tbsp lemon zest: This ingredient brings brightness to the dessert and balances the sweetness of the peaches. If you don’t have lemon, lime zest adds a fun twist!
-
1 pinch sea salt: Just a touch to enhance all the flavors. Never underestimate the power of salt in sweet dishes!
Step-by-Step Instructions
-
Prepare the Peaches: Start by washing the peaches thoroughly. Using a sharp knife, slice them into wedges and remove the pits. This is the time to get your hands a little sticky! The more ripe the peaches, the easier they’ll slice.
-
Sweeten It Up: Place the peach wedges into a blender or food processor. Add the honey, almond milk, vanilla extract, lemon zest, and sea salt. Blend until incredibly smooth. Think of this as peach purée magic!
-
Taste and Adjust: Here’s a little chef’s hack—always taste the mixture! If you feel it needs a tad more sweetness, add a bit more honey. If you want more zesty flavor, go ahead and add a squeeze of lemon juice.
-
Chill It Down: Once blended, pour the mixture into a shallow dish or a freezer-safe container. This will help it freeze faster and more evenly.
-
Freeze: Pop the container into the freezer for about 2-3 hours. Every 30 minutes, give it a gentle stir with a fork to break up any ice crystals and create a smoother texture. This step is key to a creamy sorbet!
-
Serve and Enjoy: After 2-3 hours, your sorbet should have firmed up beautifully. Now it’s time to scoop! Use an ice cream scoop to serve it up in bowls or cones. If the sorbet is too hard after freezing, let it sit at room temperature for a few minutes to soften before serving.
Serving Suggestions
Scoop your gorgeous peach sorbet into a pretty bowl or a fun ice cream cone. Drizzle a little extra honey over the top for an elegant touch, or garnish with fresh mint leaves for a pop of color. You could also serve it alongside a slice of almond cake or as a topping for yogurt for a refreshing breakfast treat.
Recipe Variations
-
Raspberry Peach Sorbet: Mix in a cup of fresh raspberries to add a bright tartness to your peach sorbet. This duo is juicy and vibrant!
-
Peach Basil Sorbet: For a unique twist, incorporate freshly chopped basil into the mixture before freezing. The result? A refreshing garden-inspired treat.
-
Peach Mango Magic: Substitute half of the peaches with ripe mangoes for a tropical take on this classic recipe.
-
Spicy Ginger Peach: For a kick, add a teaspoon of finely grated ginger. It elevates the flavors to a whole new level, and you’ll love the zing!
-
Coconut Peach Sorbet: Use coconut milk instead of almond milk for a creamy, tropical flavor that’s reminiscent of vacations by the beach.
Chef’s Notes
This recipe is one of those delightful concoctions that has evolved with me over the years. I started with a basic sorbet recipe years ago and have tinkered with it to create my version that is not only scrumptious but also healthy, relying on natural ingredients.
Oh, and here’s a funny little kitchen story: the first time I tried making it, I was too impatient and didn’t stir it enough while freezing. I ended up with a solid block of ice! Lesson learned: patience is key when it comes to creating the perfect sorbet!
FAQs and Troubleshooting
Can I use frozen peaches?
Absolutely! Frozen peaches work wonderfully; just let them thaw for a bit before blending. The flavor will still be delightful, just like summer!
Why is my sorbet icy instead of smooth?
If you didn’t stir it enough while freezing, ice crystals can form, leading to a grainy texture. To avoid this, remember to break it up with a fork every 30 minutes.
How can I store leftovers?
Keep any leftover sorbet in a tightly sealed container. If it hardens too much, let it sit at room temperature for a few minutes before scooping.
Can I make this ahead of time?
Definitely! You can make this up to a week in advance. Just make sure to store it properly in the freezer.
Nutritional Info
This delightful sorbet is not only refreshing but also packed with nutrients. Each serving is low in calories, contains natural sugars from the peaches, and is free from dairy and artificial additives. Enjoy guilt-free!
In conclusion, this Peach Sorbet is a fresh, delicious, and easy way to celebrate summer’s bounty. I hope it brings back sweet memories for you, just as it does for me. So grab those peaches, blend away, and treat yourself—summer is waiting! Enjoy every flavorful spoonful!
PrintThe Best Peach Sorbet
A refreshing peach sorbet that captures the sweet essence of summer with just a handful of simple ingredients.
- Prep Time: 15 minutes
- Cook Time: 180 minutes
- Total Time: 195 minutes
- Yield: 4 servings 1x
- Category: Dessert
- Method: Freezing
- Cuisine: American
- Diet: Vegan
Ingredients
- 5 large peaches, sliced
- 3 tbsp honey
- 3 tbsp unsweetened almond milk
- 1 1/4 tsp vanilla extract
- 1 tbsp lemon zest
- 1 pinch sea salt
Instructions
- Prepare the peaches by washing and slicing them into wedges.
- Sweeten it up by placing the peach wedges into a blender and adding honey, almond milk, vanilla, lemon zest, and salt.
- Taste and adjust as needed for sweetness or zestiness.
- Chill the blended mixture in a shallow dish or freezer-safe container.
- Freeze for about 2-3 hours, stirring every 30 minutes to break up ice crystals.
- Serve and enjoy scooping it into bowls or cones.
Notes
For extra elegance, drizzle honey or garnish with mint leaves before serving. This recipe is versatile with variations like Raspberry Peach or Spicy Ginger Peach.
Nutrition
- Serving Size: 1 serving
- Calories: 150
- Sugar: 20g
- Sodium: 5mg
- Fat: 2g
- Saturated Fat: 0g
- Unsaturated Fat: 2g
- Trans Fat: 0g
- Carbohydrates: 35g
- Fiber: 2g
- Protein: 1g
- Cholesterol: 0mg
Keywords: peach, sorbet, summer dessert, fruity dessert, vegan

Minute Banana Scones with Cinnamon Cream Cheese Glaze
The Ultimate Banana Scones with Cinnamon Cream Cheese Glaze: A Delicious Twist on a Classic
Welcome, fellow food lovers! Today, we’re diving into the scrumptious world of Banana Scones with Cinnamon Cream Cheese Glaze, a recipe that holds a special place in my heart and my kitchen. If you’re anything like me, there’s something magical about the aroma of baked goods wafting through your home. And what could be better than combining the rich flavor of ripe bananas with the indulgence of creamy frosting? Trust me, these scones are the perfect blend of comfort and delight.
Growing up, the highlight of my Saturdays was visiting my grandma’s cozy kitchen. With flour dust dancing in the sunlight streaming through the window, we would whip up all kinds of treats, but it was her banana recipes that always stole the show. She had this magical way of turning ripe bananas into soft, fluffy desserts that seemed to melt in your mouth. I remember giggling as I mashed those bananas, and I always tried to sneak a taste of the batter before it made its way into the oven. That joyous experience is what inspired me to create these Banana Scones, to bring a taste of nostalgia back into my modern kitchen.
So, whether you’re looking for a delightful snack to share with friends or simply want to treat yourself to something special, these scones are calling your name. They’re light, fluffy, and topped with a creamy glaze that’ll make your taste buds sing. Let’s gather our ingredients and jump into making this deliciousness together!
Ingredients
Here’s what you’ll need to whip up these fabulous Banana Scones with Cinnamon Cream Cheese Glaze:
-
2 ripe bananas, mashed: The real star of the show! Ripe bananas are naturally sweet and full of moisture, giving your scones a wonderful flavor. If you’re in a pinch, you can substitute with unsweetened applesauce (1/2 cup) for a similar texture, though the flavor will differ.
-
2 cups all-purpose flour: This is our base, providing structure and fluffiness. If you need a gluten-free option, you can use a 1:1 gluten-free flour blend.
-
1/4 cup granulated sugar: Just a touch of sweetness for that perfect bite. For a healthier alternative, consider coconut sugar or a zero-calorie sweetener, adjusting according to your taste preferences.
-
1 tablespoon baking powder: This will help those scones rise beautifully in the oven. Ensure your baking powder is fresh for optimal fluffiness!
-
1/2 teaspoon salt: A crucial ingredient that enhances all the other flavors. If you’re watching your sodium intake, you can reduce this to a pinch.
-
1/2 teaspoon ground cinnamon: This adds warmth and flavor. If you love a little more spice, feel free to add an extra dash or combine with nutmeg for a unique twist.
-
1/4 cup unsalted butter, cold and diced: The secret to flaky scones! The cold butter creates little pockets of steam as it melts, making your scones tender. For a dairy-free option, you can swap in coconut oil.
-
1/2 cup milk: This hydrates our dry ingredients. You can use any non-dairy milk (like almond or oat milk) for a lactose-free version.
-
1 egg: A binding agent and a source of richness. To make it vegan, substitute with 1/4 cup of unsweetened applesauce.
-
4 oz cream cheese, softened: This creates the luscious glaze that takes these scones from good to drool-worthy. If you prefer a dairy-free version, vegan cream cheese can work just as well.
-
1 cup powdered sugar: For sweetness in our glaze. You can use coconut powdered sugar as an alternative for a healthier version.
-
1 teaspoon vanilla extract: This adds a delightful depth to the glaze. Feel free to experiment with almond extract for a different flavor profile.
-
1 tablespoon milk (for glaze): This helps adjust the consistency of the glaze to your liking.
-
1/4 teaspoon ground cinnamon (for glaze): A sprinkle of warmth and spice for the finishing touch!
Step-by-Step Instructions
Now, let’s dive into the baking process! Follow these steps, and you’ll soon be enjoying the fruits of your labor (pun intended!).
-
Preheat your oven to 400°F (200°C). This high temperature is key to a golden-brown scone, so don’t skip this step!
-
Mash the bananas in a large mixing bowl. Use a fork to get them nice and smooth. You want about 1 cup of banana puree, so grab those ripest bananas you can find! Remember, the riper they are, the sweeter they will be.
-
In another bowl, whisk together the flour, sugar, baking powder, salt, and ground cinnamon. This dry mix lays the foundation for your scones. Make sure to sift if your flour has lumps—that extra step goes a long way!
-
Add the diced cold butter to the flour mixture. Using a pastry cutter or your fingertips, cut the butter into the flour until it resembles coarse crumbs. You want to see tiny pea-sized pieces of butter scattered throughout. This step is crucial for achieving that flaky texture!
-
In a separate bowl, combine the milk, egg, and mashed bananas. Whisk until well blended.
-
Pour the wet ingredients into the dry ingredients. Gently mix with a spatula or wooden spoon until just combined. Be careful not to overmix—overworking the dough can lead to tough scones.
-
Turn the dough out onto a floured surface and gently pat it into a rectangle about 1 inch thick. For that rustic look, no need for perfection here!
-
Cut your scones into triangles (or use a round cutter if you’re feeling fancy!). Place them on a parchment-lined baking sheet. Give them a little space, as they’ll puff up during baking.
-
Bake in the preheated oven for 15-20 minutes or until golden brown. Keep an eye on them towards the end! The edges should turn a lovely amber hue, and your kitchen will smell heavenly.
-
While the scones are baking, let’s prepare the cinnamon cream cheese glaze! In a mixing bowl, combine the softened cream cheese, powdered sugar, vanilla extract, milk, and ground cinnamon. Whisk until smooth and creamy. Adjust the milk for your desired glaze consistency—more for a thinner glaze, less for drizzling.
-
Once the scones are done, let them cool on a wire rack for about 10 minutes. As they cool, you might be tempted to dive right in—resist the urge! The glaze is worth the wait.
-
Drizzle the glaze over the scones once they’ve cooled. I like to go wild with it, but feel free to be more controlled if you prefer. The sticky sweetness of the glaze will seep into every nook and cranny, elevating your scones to heavenly heights.
Serving Suggestions
To serve these Banana Scones, arrange them on a charming platter for a delightful brunch or afternoon tea. Pair with a cup of hot coffee or tea for a perfect pairing! You can even wedge some fresh banana slices or a sprinkle of chopped nuts, like pecans or walnuts, on the sides for a beautiful presentation.
Recipe Variations
Feel like customizing your scones further? Here are a few creative twists:
- Nutty Banana Scones: Toss in some chopped walnuts or pecans for an added crunch.
- Chocolate Chip Twist: Fold in half a cup of chocolate chips for a rich, sweet surprise in every bite.
- Berrylicious: Replace one banana with 1/2 cup of your favorite berries (strawberries or blueberries work beautifully).
- Coconut Flavored: Add shredded coconut to the dough and use coconut milk for a tropical flair.
- Spiced Up: Add a pinch of nutmeg or ginger for additional depth of flavor in both the scones and the glaze.
Chef’s Notes
Every time I make these scones, I can’t help but reminisce about my grandma’s kitchen and the laughs we shared. I’ve tried various incarnations of this recipe over the years, but none evoke the warmth as well as the classic banana and cinnamon combo. These scones have become a staple in my own home, loved by friends and family alike.
The best part? They freeze beautifully! Just bake, cool, and pop them in a freezer-safe bag. When you’re ready to enjoy, simply reheat in a toaster oven for a warm, fresh taste anytime.
FAQs and Troubleshooting
Q: My scones turned out too dry. What happened?
A: The most likely culprit is overmixing or possibly not enough moisture from the bananas. Be sure to mix until just combined and ensure your bananas are ripe enough to provide ample moisture.
Q: Can I make these scones ahead of time?
A: Absolutely! You can prepare the dough in advance and refrigerate it for up to 24 hours before baking. You can also bake them, cool, and store them in an airtight container for up to three days.
Q: Can I use other flavors in the glaze?
A: Definitely! Feel free to swap out the vanilla extract with almond extract or even a citrus zest for a refreshing twist.
Q: My glaze didn’t set properly. What can I do?
A: If your glaze is too thin, try adding more powdered sugar to thicken it. If too thick, a splash of milk can help loosen it up!
Nutritional Info
While indulgent, these scones are a delightful way to enjoy a treat with a side of nutrition from the bananas. Each scone provides a good dose of potassium and fiber, making them a more wholesome indulgence than your average dessert.
I hope this recipe brings as much joy to your kitchen as it does to mine. There’s nothing quite like baking something from scratch, especially when it’s shared with loved ones. So gather your ingredients, turn up the music, and enjoy every bite of these Banana Scones with Cinnamon Cream Cheese Glaze! Happy baking! 🥳
PrintUltimate Banana Scones with Cinnamon Cream Cheese Glaze

Delightful banana scones topped with a creamy cinnamon glaze, perfect for a comforting snack or brunch.
- Prep Time: 20 minutes
- Cook Time: 20 minutes
- Total Time: 40 minutes
- Yield: 8 servings 1x
- Category: Snack
- Method: Baking
- Cuisine: American
- Diet: Vegetarian
Ingredients
- 2 ripe bananas, mashed
- 2 cups all-purpose flour
- 1/4 cup granulated sugar
- 1 tablespoon baking powder
- 1/2 teaspoon salt
- 1/2 teaspoon ground cinnamon
- 1/4 cup unsalted butter, cold and diced
- 1/2 cup milk
- 1 egg
- 4 oz cream cheese, softened
- 1 cup powdered sugar
- 1 teaspoon vanilla extract
- 1 tablespoon milk (for glaze)
- 1/4 teaspoon ground cinnamon (for glaze)
Instructions
- Preheat your oven to 400°F (200°C).
- Mash the bananas in a large mixing bowl until smooth.
- Whisk together the flour, sugar, baking powder, salt, and ground cinnamon in another bowl.
- Add the diced cold butter to the flour mixture, cutting it in until it resembles coarse crumbs.
- Combine milk, egg, and mashed bananas in a separate bowl and whisk until blended.
- Pour the wet ingredients into the dry ingredients and gently mix until just combined.
- Turn the dough out onto a floured surface and pat it into a rectangle about 1 inch thick.
- Cut the dough into triangles and place them on a parchment-lined baking sheet.
- Bake for 15-20 minutes or until golden brown.
- Prepare the glaze by mixing cream cheese, powdered sugar, vanilla, milk, and ground cinnamon until smooth.
- Cool the scones on a wire rack for 10 minutes before drizzling with glaze.
Notes
These scones freeze beautifully; bake, cool, and store them in a freezer-safe bag.
Nutrition
- Serving Size: 1 scone
- Calories: 250
- Sugar: 15g
- Sodium: 200mg
- Fat: 10g
- Saturated Fat: 5g
- Unsaturated Fat: 5g
- Trans Fat: 0g
- Carbohydrates: 35g
- Fiber: 2g
- Protein: 4g
- Cholesterol: 50mg
Keywords: banana scones, cinnamon glaze, baked goods, brunch, snack
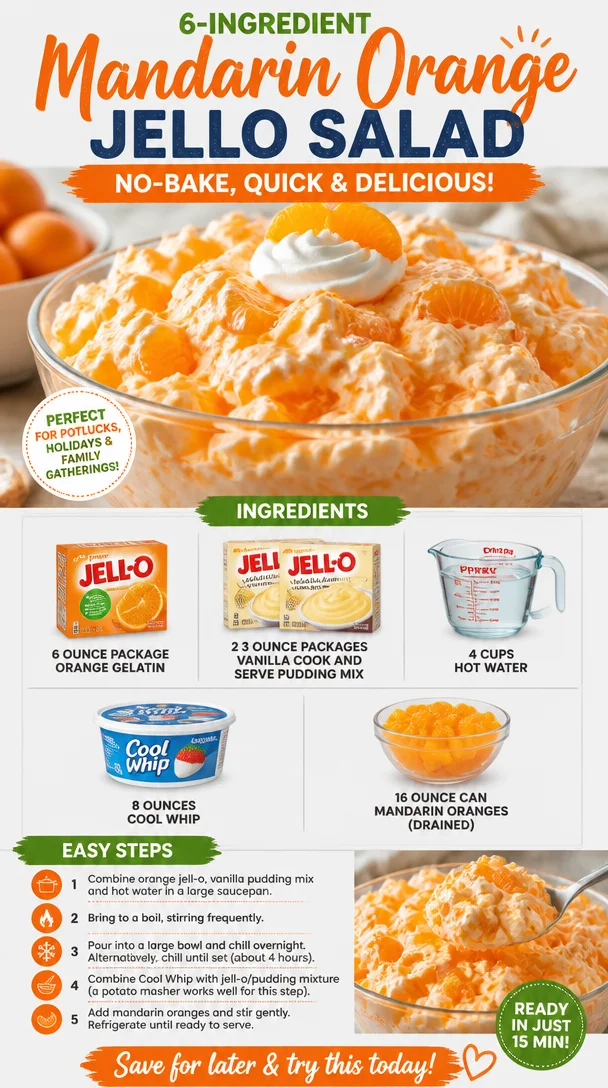
Ingredient Mandarin Orange Jello Salad (No-Bake, Quick)
Whip Up Nostalgia with Mandarin Orange Jello Salad
Hey there, fellow foodies! Today, I’m diving into those nostalgic recipes that not only bring a smile to our faces but also a little warmth to our hearts. You know which one I’m talking about—Mandarin Orange Jello Salad! This delightful, colorful dish is the ultimate throwback to family gatherings and potlucks, where it often sat proudly among the main dishes and desserts. It’s a dish that screams comfort with a hint of whimsy, and trust me, it’s as easy to make as it is to enjoy.
Picture this: a vibrant salad made with orange gelatin, creamy pudding, and bursts of fruity goodness from mandarin oranges, all jazzed up with a fluffy blanket of Cool Whip. It’s the perfect combination of flavors and textures—it’s bright, it’s creamy, and let’s be honest, it’s just plain fun to eat! Whether you’re whipping it up for a family dinner or a summer barbecue, this dish will quickly become a favorite for all ages.
And here’s the best part: this recipe is more than just a dish. It’s a walk down memory lane. The colors remind me of summer picnics under the sun—not a care in the world! The laughter and chatter of family around the table, the clinking of spoons against glass dishes, and my aunt declaring that yes, she makes the best version of this salad. It’s a festival of flavors and textures that adds joy to any meal.
So, are you ready to roll up your sleeves and bring some sunshine into your kitchen? Let’s get started!
Personal Story
While I was growing up, our family gatherings were rich with tradition and filled with beloved recipes passed down through generations. But then there was this one dish—my grandmother’s Mandarin Orange Jello Salad—that became a legend all on its own. I can’t tell you how many times I heard my relatives debating whose version was the best!
I still remember standing on my tiptoes to sneak a taste of the salad before it made its way to the dinner table, its vibrant orange hue practically beckoning me. The tangy sweetness of the orange gelatin coupled with the smooth, creamy pudding was an irresistible combination. It was more than a side dish; it was a cherished recipe that evoked joy and laughter, and it was always the first to disappear!
As I started cooking, I vowed to make this dish my own—modernizing it just a bit while still holding onto its nostalgic roots. Today, I’m excited to share that version with you, seasoned with love and my own personal twists!
Ingredients
-
6-ounce package orange gelatin
The star of the show! This adds a sweet, tangy flavor and a vibrant color to your salad. If you’re looking for an alternative, you can try using sugar-free gelatin for a lighter option. -
2 (3-ounce) packages vanilla cook and serve pudding mix
This gives the salad its creaminess. You can substitute with a sugar-free version if you’re aiming to cut down on sugar or use a different flavor like coconut for a fun twist. -
4 cups hot water
Needed to dissolve the gelatin and pudding mix properly. Make sure the water is hot, not boiling, to ensure everything combines smoothly. -
8 ounces Cool Whip
This fluffy topping brings everything together. You can easily swap this with homemade whipped cream if you’re feeling adventurous! -
16-ounce can mandarin oranges (drained)
These little gems add a fresh, fruity burst. If you can’t find canned, fresh mandarin oranges (or even peaches!) make a great alternative.
Step-by-Step Instructions
-
Dissolve the gelatin
Start by boiling 4 cups of water. In a large mixing bowl, pour in the 6-ounce package of orange gelatin. Once the water is hot, gradually pour it into the bowl, stirring continuously until the gelatin is fully dissolved. You’ll know it’s ready when the mixture is smoothly bright orange. Chef’s tip: using a whisk instead of a spoon can speed up this process! -
Add the pudding mix
Next, sprinkle in the 2 packages of vanilla cook and serve pudding mix. Stir well to combine, ensuring there are no lumps. The pudding will start to thicken as you mix. Pro tip: if it seems too thick, it’s okay to add a little more hot water. -
Cool the mixture
Allow your gelatin and pudding mixture to cool at room temperature for about 10 minutes. This step is important because you don’t want to melt the Cool Whip when you mix it in! Remember, patience is key here! -
Fold in the Cool Whip
After cooling, gently fold in the 8 ounces of Cool Whip until it’s evenly combined. This step adds that heavenly creaminess while keeping the mix light and airy. Be gentle—overmixing will deflate the beautiful texture you’ve created! -
Incorporate the oranges
Now, it’s time to add the star fruit! Carefully fold in the 16-ounce can of drained mandarin oranges. Take a moment to admire how the round golden pieces pop against the orange backdrop—it’s like sunshine in a bowl! Hint: reserve a few oranges for garnish later! -
Refrigerate
Transfer the mixture to a lovely serving dish or individual cups for a classy touch. Cover with plastic wrap and refrigerate for at least 4 hours or until it’s set. Chef’s note: overnight chilling is even better! Allergies? Make sure to check your canned fruits for any additives! -
Serve and enjoy
Once the salad is set and delightful, scoop it into bowls. You can garnish with a few extra mandarin oranges or even a sprig of mint for a pop of color. Grab your favorite spoon, and dive in! This is the best part—enjoying the fruits of your labor with friends and family is what it’s all about!
Serving Suggestions
When it comes to serving this Mandarin Orange Jello Salad, it’s all about presentation! Serve it in a glass bowl or individual dessert cups for a fun, party-ready feel. You can even add a drizzle of honey or sprinkle some chopped nuts on top for a little crunch. Pair it with a savory dish like grilled chicken or a fresh salad, and you have a winning combination perfect for any gathering!
Recipe Variations
Now, let’s spice things up a bit! Here are a few fun twists to this classic recipe:
-
Berry Bliss: Replace the mandarin oranges with a mix of fresh berries (strawberries, blueberries, and raspberries) for a tangy twist.
-
Tropical Paradise: Add crushed pineapple and a splash of coconut extract for an island-inspired version.
-
Nutty Delight: Fold in some chopped walnuts or pecans for added crunch and nuttiness.
-
Citrus Medley: Mix in some lemon or lime zest along with the oranges for an extra burst of zesty flavor.
-
Light and Fresh: Use Greek yogurt instead of some of the Cool Whip to make it even more nutritious while keeping that lovely creaminess!
Chef’s Notes
My journey with Mandarin Orange Jello Salad has certainly evolved over the years. I used to make it just like my grandmother did, but as my cooking skills grew, I started experimenting a bit—adding a hint of lime zest here, swapping in fresh fruit there.
One of my most memorable kitchen fails was when I decided to try a low-carb version using gelatin and cream cheese. Let’s just say, the texture wasn’t quite what I hoped for, and my family dubbed it "orange sludge." Lesson learned, right? Sometimes, sticking to tradition holds its own charm!
FAQs and Troubleshooting
1. Can I make this salad ahead of time?
Absolutely! In fact, it tastes even better the next day after the flavors have had time to meld together. Just cover it well and store it in the refrigerator.
2. What do I do if my Jello doesn’t set?
This can happen if the gelatin wasn’t fully dissolved or if the mixture didn’t cool adequately before adding the Cool Whip. Keep it in the fridge longer to see if it firms up.
3. Can I replace the Cool Whip?
Yes! You can whip heavy cream until soft peaks form and fold it in instead, but keep in mind that it may not be as sweet. Adjust sugar to taste if needed.
4. What’s the best way to store leftovers?
Keep any leftovers in an airtight container in the refrigerator for up to 3 days. Just be aware that the texture might change slightly, but it’ll still be delicious!
Nutritional Info
While I won’t get too bogged down in numbers, this refreshing salad is a delightful treat that’s perfect for special occasions without the guilt. It packs a punch of vitamins from the oranges and can easily be adjusted to fit various dietary needs!
I hope you are as excited to make this Mandarin Orange Jello Salad as I am to share it! It’s not just a recipe, but a way to celebrate the connections between food, family, and friends. Enjoy this light, refreshing dish with loved ones, and may it become a cherished favorite in your home just like it did in mine! Happy cooking! 🍊✨
PrintMandarin Orange Jello Salad

A vibrant, nostalgic salad featuring orange gelatin, creamy pudding, and mandarin oranges, all topped with Cool Whip.
- Prep Time: 15 minutes
- Cook Time: 0 minutes
- Total Time: 240 minutes
- Yield: 8 servings 1x
- Category: Dessert
- Method: Refrigeration
- Cuisine: American
- Diet: Vegetarian
Ingredients
- 1 (6-ounce) package orange gelatin
- 2 (3-ounce) packages vanilla cook and serve pudding mix
- 4 cups hot water
- 8 ounces Cool Whip
- 1 (16-ounce) can mandarin oranges (drained)
Instructions
- Dissolve the gelatin by boiling 4 cups of water and pouring it over the orange gelatin in a mixing bowl, stirring until fully dissolved.
- Add the pudding mix and stir well to combine, ensuring no lumps remain.
- Cool the mixture at room temperature for about 10 minutes.
- Fold in the Cool Whip gently until combined.
- Incorporate the drained mandarin oranges, folding them in carefully.
- Refrigerate for at least 4 hours or until set.
- Serve the salad in bowls, optionally garnishing with extra mandarin oranges or mint.
Notes
For variations, try adding fresh berries, crushed pineapple, or nuts for added crunch. Make ahead for best flavor.
Nutrition
- Serving Size: 1 serving
- Calories: 200
- Sugar: 25g
- Sodium: 150mg
- Fat: 6g
- Saturated Fat: 3g
- Unsaturated Fat: 3g
- Trans Fat: 0g
- Carbohydrates: 35g
- Fiber: 1g
- Protein: 2g
- Cholesterol: 10mg
Keywords: jello salad, orange salad, dessert, nostalgic recipes, family gatherings
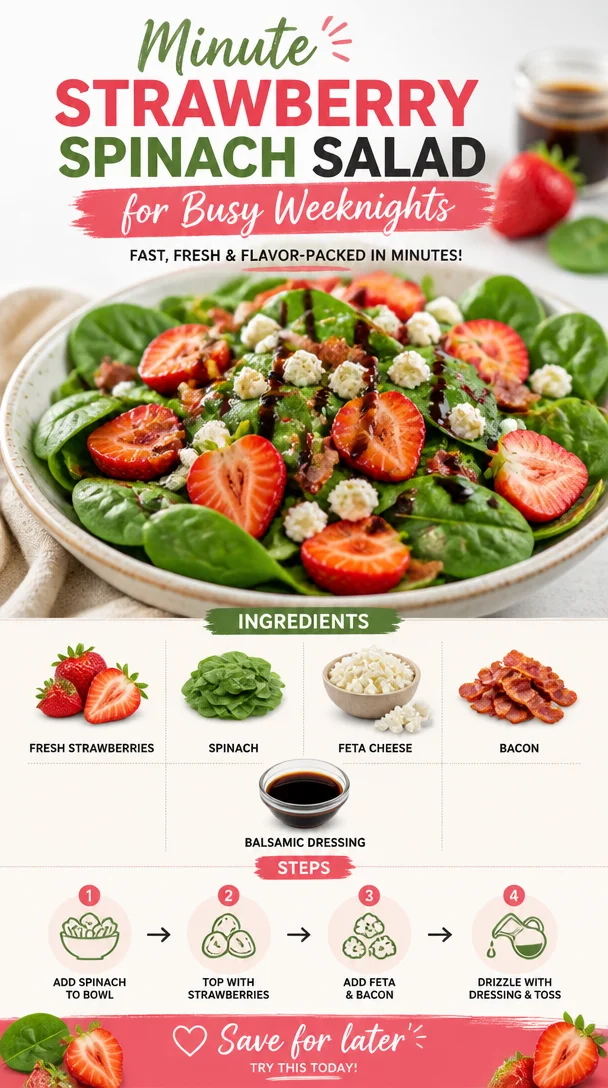
Minute Strawberry Spinach Salad for Busy Weeknights
Fresh, Irresistible Strawberry Spinach Salad: A Love Letter to Summer Flavors
Welcome to another culinary adventure with Clean Plate Cravings! Today, I’m excited to share a dish that epitomizes freshness and vibrance: the Strawberry Spinach Salad. This isn’t just any salad; it’s a symphony of flavors bursting with the goodness of ripe strawberries, crisp spinach, tangy feta cheese, crunchy bacon, and a luscious balsamic dressing. If you’re looking for a feel-good meal that sparks joy and nourishes your body, you’ve clicked on the right recipe!
But first, let’s talk about salads. They often get a bad rap for being boring or lacking personality, don’t you think? I mean, salads shouldn’t have to be mundane; they can be exciting, soon-to-be favorites that dance on your taste buds. When I think of summer, I think of long, lazy days, sunshine, and fresh produce that practically calls my name at the market. That’s how this beautiful Strawberry Spinach Salad came to life—a celebration of seasonal flavors that’ll keep you coming back for more.
Picture this: it’s a sunny afternoon, and the world outside is a cheerful tapestry of blooming flowers and buzzing bees. As I stroll through the farmers’ market, there’s something magical about being surrounded by vibrant colors and intoxicating aromas. The strawberries? They’re plump, juicy, and gleaming red, begging to be picked. The spinach? Dark green and crisp, ready to provide the perfect backdrop for this delightful salad. It was one of those moments that reminded me of childhood summers spent in my grandma’s garden, where the best meals came straight from the earth.
This salad combines the sweetness of strawberries, the earthiness of spinach, the creaminess of feta, and the savory crunch of bacon. Toss in a drizzle of balsamic dressing, and you’ve got a winning dish that’s as lovely to look at as it is delicious to eat. Whether you’re serving it alongside grilled chicken for dinner or enjoying it as a light lunch, this Strawberry Spinach Salad is sure to become a new staple in your culinary repertoire.
So, grab your apron and let’s dive into this refreshing recipe that’s perfect for brunch, picnics, or simply treating yourself to something delightful!
A Culinary Memory: Summer Orchard Pickings
Growing up, summers meant plenty of time spent outdoors, but nothing was more exhilarating than picking strawberries with my family. Imagine a warm day, the sun shining vibrant rays, and rows of strawberry plants stretching as far as the eye can see. With every ripe berry I plucked, there was a perfect fracture of sweetness, accompanied by a satisfying crunch. After our baskets were full, my mom would whip up her famous strawberry salad—her signature dish served at every family gathering.
The flavors of the salad remind me of those sunny afternoons spent with my family—the laughter, the sibling rivalries over who could pick the biggest berries, and the inevitable food fight that ensued when we got back home. We’d sit around the table, enjoying our colorful salad while sharing stories and building memories. Those moments of connection and joy are what I cherish most, and I hope that this Strawberry Spinach Salad brings a little bit of that magic into your kitchen too!
Ingredients
Here’s what you’ll need to create this vibrant Strawberry Spinach Salad:
-
Fresh Strawberries
- The star of the show! Look for strawberries that are bright red and fragrant. If fresh strawberries are unavailable, feel free to use frozen ones, but let them thaw first for the best flavor.
-
Spinach
- Baby spinach is my go-to, as it’s tender and mild. If spinach isn’t your thing, you can swap it for arugula or mixed greens for a peppery twist.
-
Feta Cheese
- Feta brings a wonderful creaminess and tang. You can substitute feta with goat cheese for a different flavor profile, or use a dairy-free feta if you’re keeping dairy out of your diet.
-
Bacon
- The crispy element that adds depth! For a healthier take, feel free to use turkey bacon or even leave it out entirely for a vegetarian version. Crunchy chickpeas make a great alternative if you’re looking for plant-based protein!
-
Balsamic Dressing
- A homemade balsamic dressing (combine balsamic vinegar, olive oil, honey, and a pinch of salt) elevates the salad. Store-bought dressings work in a pinch too; just make sure they’re high-quality for the best flavor.
Step-by-Step Instructions
-
Prepare the Ingredients
Start by washing the spinach thoroughly under cold water to remove any dirt or grit. Pat it dry with a paper towel or salad spinner. Fresh and clean spinach is key to a refreshing salad. While you’re at it, rinse the strawberries, hull them, and slice them into quarters or halves depending on their size. -
Cook the Bacon
In a skillet over medium heat, cook the bacon until it’s crispy. This usually takes about 6-8 minutes. Keep an eye on it to prevent burning! Once cooked, transfer the bacon to a plate lined with paper towels to absorb excess grease. Once cooled, crumble it into bite-sized pieces. Not only does bacon amp up the flavor, but the crunch is essential too! -
Make the Dressing
While the bacon is cooking, let’s whip up that balsamic dressing! In a small bowl, whisk together 3 tablespoons of balsamic vinegar, 1 tablespoon of honey (or maple syrup for a vegan option), and 3 tablespoons of extra virgin olive oil. Season with salt and pepper. Adjust the sweetness or acidity to your taste—remember, you’re the chef! -
Mix the Salad
In a large bowl, combine the fresh spinach and sliced strawberries. Sprinkle in the crumbled feta cheese and bacon. Drizzle the homemade dressing over the salad and toss gently using tongs or your hands (my favorite method for ensuring an even distribution). Pro tip: don’t dress the salad too far in advance—a fresh salad is always best! -
Serve the Salad
Transfer the tossed salad to a serving platter or individual bowls. For extra flair, consider garnishing with a few whole strawberries or additional feta crumbles. If you’re feeling fancy, sprinkle some nuts on top for a delightful crunch!
Serving Suggestions
This Strawberry Spinach Salad shines when plated beautifully. You can serve it as a side dish alongside grilled chicken or fish, or enjoy it as a vibrant main course. To elevate your presentation, consider using a mix of textured serving plates or bowls—the contrast will make your dish pop visually! Don’t forget to add some fresh mint leaves on top for a refreshing aroma.
Recipe Variations
Here are a few variations you can try to keep things exciting:
- Berry Medley: Incorporate other berries like blueberries or raspberries for a mixed berry salad.
- Avocado Boost: Add sliced avocados for a creamy texture and healthy fats.
- Citrus Twist: Toss in some orange segments for a sweet acidity that pairs perfectly with the strawberries.
- Nuts or Seeds: Include a handful of walnuts, pecans, or sunflower seeds for extra crunch and nutrition.
- Herbed Dressing: Try adding fresh herbs, such as basil or mint, to the dressing for an aromatic lift.
Chef’s Notes
This Strawberry Spinach Salad has been a staple in my home and evolves with the seasons. When strawberries are out of season, I switch things up. In the fall, I replace strawberries with apples or pears, and in the winter, I’ll toss in some roasted butternut squash. Each variation has its own charm, but the essence of enjoying fresh produce remains the same. Creating this salad has become an annual tradition in my household, and I love how it sparks conversations and memories just like in my childhood.
FAQs and Troubleshooting
Q: Can I make this salad ahead of time?
A: While the salad can be prepped ahead, I recommend waiting to dress it until just before serving. This will keep the spinach fresh and crispy.
Q: What should I do if my bacon is too greasy?
A: If your bacon has rendered too much grease, simply drain it on a paper towel. This will help soak up any excess fat, leaving you with crispy bites.
Q: How do I store leftover salad?
A: Store any leftovers in an airtight container in the refrigerator for up to a day. However, be aware that the spinach might wilt. For best results, keep the dressing separate and add it right before eating.
Q: Can this salad be made vegan?
A: Absolutely! Omit the bacon and feta, and substitute with avocado and chickpeas for protein. Use a plant-based dressing or a simple olive oil and vinegar blend instead.
Nutritional Info (Optional)
While I believe in enjoying food without any guilt, it’s good to know how nutritious this Strawberry Spinach Salad can be. One serving (without added bacon) provides about 150 calories, 9g of fat, 10g of carbs, and 4g of protein, depending on the portion sizes and specific ingredients used. It’s packed with vitamins A and C, fiber, and antioxidants—perfect for keeping you energized and healthy!
So there you have it—a fresh, delightful Strawberry Spinach Salad that not only satisfies your taste buds but also brings a sprinkle of nostalgia to the table. I hope this recipe inspires you to explore the vibrant flavors of summer and create some fabulous kitchen memories of your own. Happy cooking, my friends!
PrintStrawberry Spinach Salad
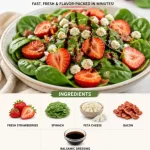
A vibrant salad combining fresh strawberries, crisp spinach, tangy feta, crunchy bacon, and a luscious balsamic dressing.
- Prep Time: 15 minutes
- Cook Time: 8 minutes
- Total Time: 23 minutes
- Yield: 4 servings 1x
- Category: Salad
- Method: Mixing
- Cuisine: American
- Diet: Vegetarian
Ingredients
- 2 cups fresh strawberries, hulled and sliced
- 4 cups baby spinach, cleaned
- 1/2 cup feta cheese, crumbled
- 4 slices bacon, cooked and crumbled
- 3 tablespoons balsamic vinegar
- 3 tablespoons extra virgin olive oil
- 1 tablespoon honey (or maple syrup)
- Salt and pepper to taste
Instructions
- Prepare the ingredients: Wash the spinach and strawberries, and slice the strawberries.
- Cook the bacon in a skillet over medium heat until crispy, about 6-8 minutes.
- Make the dressing by whisking together balsamic vinegar, honey, olive oil, salt, and pepper.
- Mix the salad: Combine spinach, strawberries, feta, and bacon in a large bowl. Drizzle dressing and toss gently.
- Serve the salad on a platter or in bowls, garnishing with whole strawberries or nuts if desired.
Notes
For a vegan option, omit bacon and feta, and use chickpeas for protein. Dress the salad just before serving to keep it fresh.
Nutrition
- Serving Size: 1 serving
- Calories: 150
- Sugar: 5g
- Sodium: 400mg
- Fat: 9g
- Saturated Fat: 2g
- Unsaturated Fat: 4g
- Trans Fat: 0g
- Carbohydrates: 10g
- Fiber: 4g
- Protein: 4g
- Cholesterol: 15mg
Keywords: salad, strawberry salad, spinach salad, summer salad, healthy recipes
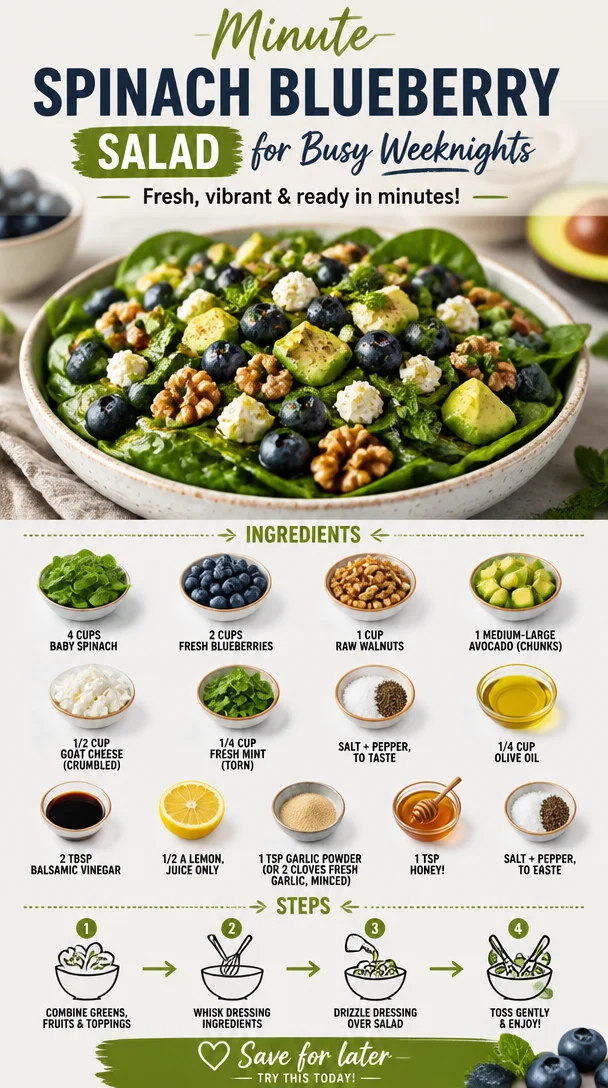
Minute Spinach Blueberry Salad for Busy Weeknights
20-Minute Spinach Blueberry Salad: A Fresh Take on a Classic Delight
Hey there, food lovers! Welcome to my kitchen, where the aromas are mouthwatering, the colors are vibrant, and the stories are just as delicious as the dishes we whip up. Today, we’re diving into the wonderful world of salads, specifically my quick and fabulous Spinach Blueberry Salad. It’s that delightful blend of sweet and savory, and trust me when I say it’s bursting with flavor!
Picture this: You’ve had a long day, and you’re craving something fresh and vibrant that won’t take ages to prepare. Enter this salad! With just 20 minutes of your time, you’ll create a dish that not only tastes like sunshine but also nourishes your body. The combination of baby spinach, juicy blueberries, creamy avocado, and crunchy walnuts makes this salad a feast for your taste buds—and don’t even get me started on the dressing! It’s a heavenly concoction of olive oil, balsamic vinegar, and a hint of garlic that pulls everything together beautifully.
Salads often get a bad rap, right? People think they’re bland or boring, but I’m here to change that perception. This Spinach Blueberry Salad will have you doing a happy dance in the kitchen! Plus, it’s easily customizable, meaning you can tweak it based on what you have on hand. Whether you’re having it as a light lunch, a side dish at dinner, or prepping for meal prep for the week, this salad is super versatile. So grab your apron and let’s get cooking!
Personal Story
I’ll never forget the first time I whipped up a blueberry salad. It was a sunny afternoon at my grandmother’s house—she had a garden brimming with fresh produce, and blueberries were in peak season. I remember her handing me a basket and sending me into the garden to gather the ripest fruit. The excitement of plucking those plump, sweet berries off the bush had me feeling like a treasure hunter.
Later, we tossed them with some spinach from her garden and a simple dressing she taught me. The first bite was like the sun bursting through the clouds. The sweetness of the blueberries perfectly contrasted the earthiness of the spinach. It became our little tradition to make that salad together every summer, sharing stories about our days while enjoying the simple yet unforgettable flavors. This recipe takes me back to that joyful time, reminding me of the importance of fresh ingredients and good company.
Ingredients
Here’s what you’ll need for this vibrant spinach blueberry salad:
-
4 cups baby spinach: Fresh, tender, and just the right base for our salad. Baby spinach is packed with nutrients and has a mild flavor. If you can’t find baby spinach, regular spinach works, too—just be sure to chop it into smaller pieces.
-
2 cups fresh blueberries: Sweet and juicy, these little gems bring a burst of flavor. Blueberries are also packed with antioxidants! Don’t have fresh? Frozen blueberries can work in a pinch; just be sure to thaw and drain them first.
-
1 cup raw walnuts: They add a delightful crunch and a dose of healthy fats. If walnuts aren’t your favorite, try pecans or almonds instead. Toast them lightly in a pan for extra flavor!
-
1 medium-large avocado: Creamy and nourishing, avocado brings richness to this salad. You can substitute with diced cucumber if you want a lighter crunch.
-
1/2 cup goat cheese: Adding a tangy note to the salad, goat cheese takes it to the next level! If you’re not a fan, feta can work beautifully, or you can skip the cheese for a dairy-free option.
-
1/4 cup fresh mint: Slightly sweet and refreshing, mint adds a delightful twist. Feel free to switch it up with basil or even parsley if you prefer.
-
Salt + pepper, to taste: Always a must for seasoning!
For the Dressing:
-
1/4 cup olive oil: A staple in any kitchen. It provides a rich base. If you need a lighter option, avocado oil is a great substitute.
-
2 Tbsp balsamic vinegar: Adds depth and sweetness to the dressing. Apple cider vinegar can be a delicious alternative if that’s what you have on hand.
-
1/2 a lemon, juice only: A splash of acidity brightens everything up. Lime juice works, too, if you’re feeling adventurous.
-
1 tsp garlic powder: A hint of garlic elevates the flavor. If you prefer fresh, minced garlic is fabulous—just use about 2 cloves.
-
1 tsp honey: A touch of sweetness to balance out the acidity and bitterness. Agave syrup can be used for a vegan alternative.
-
Salt + pepper, to taste: Always essential for bringing flavors together!
Step-by-Step Instructions
Now, let’s get our hands a little dirty and bring this beautiful salad to life! The steps are simple and quick, so follow along:
-
Prep Your Ingredients: First things first, wash and dry your baby spinach and blueberries. Dry spinach helps the dressing stick, and we want all that tasty goodness in every bite.
-
Chop and Slice: Next, it’s time to dice your avocado and crumble your goat cheese. To easily cut an avocado, slice it in half, remove the pit, and use a spoon to scoop out chunks—or you can slice it while it’s still in the skin and then scoop it out!
-
Toast the Walnuts (Optional): If you like extra flavor, this is the perfect time to toast your walnuts! Place them in a dry skillet over medium heat, tossing frequently for about 3–5 minutes until they’re golden and fragrant. Watch closely; they can burn quickly!
-
Make the Dressing: In a small bowl or a jar with a lid, whisk together the olive oil, balsamic vinegar, lemon juice, garlic powder, honey, salt, and pepper. If you’re using jar, just shake it until everything is combined. Easy peasy!
-
Assemble the Salad: In a large bowl, add the baby spinach, followed by the blueberries, walnuts, avocado, and goat cheese. Drizzle about half of the dressing over the salad so it’s not swimming, and give it a gentle toss to combine—be careful not to mash the avocado!
-
Adjust and Serve: Taste your salad. If it needs more salt, pepper, or dressing, now’s the time to adjust. Once you’re happy, it’s ready to serve!
-
Garnish with Fresh Mint: Sprinkle the torn mint leaves right before serving for a fresh burst of flavor.
And voilà, you’ve got yourself a gorgeous Spinach Blueberry Salad that’s ready to impress!
Serving Suggestions
To serve this dish beautifully, plate it in a large bowl to showcase the colorful ingredients or portion it into smaller bowls for individual servings. Drizzle a little extra dressing over the top and garnish with a few additional blueberries and mint leaves. This salad is fantastic on its own, but you can pair it with grilled chicken or shrimp for a heartier meal, or enjoy it as a side dish alongside your favorite protein.
Recipe Variations
Feeling adventurous? Here are some fun variations to shake things up!
-
Add Protein: Toss in grilled chicken, shrimp, or chickpeas for a protein boost. This makes it a more filling option!
-
Swap the Cheese: If you’re looking for different flavors, try crumbled feta or even sliced strawberries for a sweet twist.
-
Change the Nuts: Use pumpkin seeds instead if you have a nut allergy or want a different crunch.
-
Go Tropical: Add in diced mango or papaya for a vibrant fruit salad twist!
-
Vegan Version: Skip the cheese and swap honey with maple syrup for a completely plant-based dish.
Chef’s Notes
This salad is close to my heart, but it’s also a blank canvas! I love that I can swap in whatever ingredients I have on hand, often leading to delicious surprises. One time, I ended up tossing in leftover grilled chicken from dinner, and it transformed the salad into a satisfying meal.
An embarrassing kitchen moment? Let’s just say I mistook garlic powder for cinnamon once—yikes! But that mistake taught me always to double-check my spices, and the learning continues every day in the kitchen!
FAQs and Troubleshooting
-
Can I make this salad ahead of time?
While the salad is best fresh, you can prep the ingredients in advance. Keep the dressing separate until you’re ready to serve to prevent the spinach from wilting. -
What if I don’t like blueberries?
No worries! You can substitute with any seasonal fruit such as strawberries, raspberries, or even sliced apples. -
What should I do if the salad feels too bland?
Always taste as you go! You can add more dressing, a sprinkle of lemon juice, or more seasoning. A pinch of sea salt can elevate everything! -
How do I store leftovers?
Store any leftover salad in an airtight container for up to 2 days, but be aware that the spinach will wilt. If possible, keep the dressing separate until serving.
Nutritional Info
This Spinach Blueberry Salad not only packs a punch of flavor but is also nutrient-dense. A rough estimate for one serving includes:
- Calories: ~280
- Protein: ~6g
- Fat: ~20g (mostly from healthy sources)
- Carbohydrates: ~24g
It’s a delightful dish that provides a well-rounded meal or side full of vitamins and minerals!
Let’s wrap it up here, friends—this Spinach Blueberry Salad is all about fresh ingredients coming together to create a beautiful dish that can brighten any meal. So gather your ingredients, roll up your sleeves, and let’s get cooking! Enjoy the flavors, and remember to share your creations! Happy eating!
Print20-Minute Spinach Blueberry Salad
A fresh and vibrant salad combining baby spinach, juicy blueberries, creamy avocado, and crunchy walnuts, drizzled with a delicious homemade dressing.
- Prep Time: 10 minutes
- Cook Time: 10 minutes
- Total Time: 20 minutes
- Yield: 4 servings 1x
- Category: Salad
- Method: No cooking required
- Cuisine: American
- Diet: Vegetarian
Ingredients
- 4 cups baby spinach
- 2 cups fresh blueberries
- 1 cup raw walnuts
- 1 medium-large avocado
- 1/2 cup goat cheese
- 1/4 cup fresh mint
- Salt and pepper, to taste
- 1/4 cup olive oil
- 2 Tbsp balsamic vinegar
- 1/2 a lemon, juice only
- 1 tsp garlic powder
- 1 tsp honey
- Salt and pepper, to taste
Instructions
- Prep your ingredients: Wash and dry spinach and blueberries.
- Chop and slice the avocado and crumble the goat cheese.
- Toast the walnuts in a dry skillet over medium heat for 3–5 minutes (optional).
- Make the dressing by whisking together olive oil, balsamic vinegar, lemon juice, garlic powder, honey, salt, and pepper.
- Assemble the salad in a large bowl and drizzle with half the dressing.
- Adjust the seasoning with more salt, pepper, or dressing to taste.
- Garnish with torn mint leaves before serving.
Notes
This salad is quick to prepare and can be customized with various proteins or fruits.
Nutrition
- Serving Size: 1 serving
- Calories: 280
- Sugar: 10g
- Sodium: 200mg
- Fat: 20g
- Saturated Fat: 3g
- Unsaturated Fat: 17g
- Trans Fat: 0g
- Carbohydrates: 24g
- Fiber: 4g
- Protein: 6g
- Cholesterol: 10mg
Keywords: salad, spinach, blueberry, healthy, quick, fresh, vegetarian
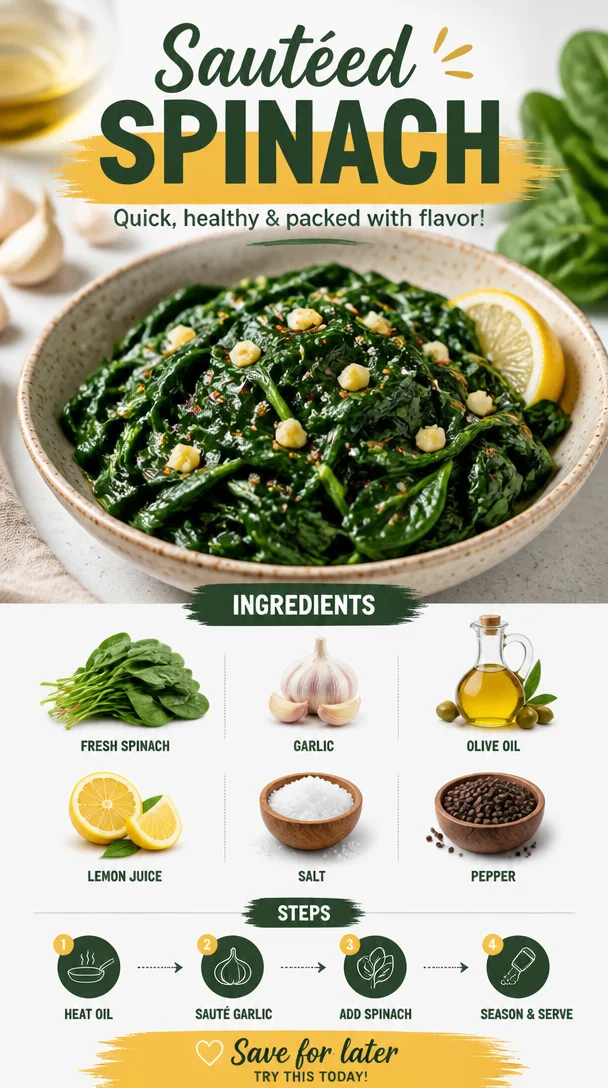
Sautéed Spinach
Sautéed Spinach: Your New Go-To Side Dish
Welcome to Clean Plate Cravings! Today, we’re diving into the world of greens with one of the simplest and yet most flavorful dishes you can whip up in a matter of minutes: sautéed spinach! If you’re looking for a dish that’s quick to prepare, packed with nutrients, and bursting with flavor, then this one is sure to steal the show.
Spinach is the unsung hero of the vegetable world. Its versatility is unmatched, and today, we’ll explore how a handful of ingredients can turn this leafy green into an irresistible side that pairs beautifully with just about anything. Whether you’re a seasoned chef or a kitchen newbie, sautéing spinach is an essential skill that will elevate your home cooking and keep your meals fresh and exciting.
But let me ask you this: How often do you find yourself racing against the clock and resorting to frozen sides or takeout because preparing a vegetable dish feels too complicated? Spoiler alert: It doesn’t have to be. With just a few fresh ingredients and a dash of culinary intuition, we can create something that’s not only nutritious but also downright delicious! So roll up your sleeves, grab your pan, and let’s sauté our way to a tastier plate!
A Trip Down Memory Lane
Growing up, my grandmother had this magical way of making simple ingredients shine. I’ll never forget the summer afternoons spent in her cozy kitchen, the warm sunlight streaming through the window as the tantalizing aroma of garlic filled the air. My grandmother’s sautéed spinach was our go-to side dish at every family gathering, and it was like no other. She always joked that it was "green goodness" that made us strong like Popeye!
One particular memory stands out. It was my little cousin’s birthday, and our family gathered in her kitchen, buzzing with laughter and excitement. As she gracefully tossed the spinach in her cast iron skillet, she playfully sparked a mini spinach fight, inviting giggles from the little ones while the older folks rolled their eyes. But as the greens wilted in the pan and mingled with the warm scent of garlic and olive oil, everyone’s attention shifted back to her crafting this beloved dish. I think that’s when I realized that cooking truly has a way of bringing joy and connection into our lives. Today, whenever I make sautéed spinach, it’s like I’m sharing a piece of my grandmother’s legacy—and a pinch of that magical kitchen atmosphere with my loved ones too.
Ingredients
For this delectable sautéed spinach, you’ll need:
-
Fresh Spinach: The star of the show! Look for vibrant, crisp leaves. If fresh isn’t available, you can use frozen spinach. Just make sure to thaw and drain it well.
-
Garlic: Freshly minced garlic adds an aromatic depth that elevates the dish. If you’re out of fresh garlic, you can use garlic powder (about 1/4 teaspoon will do).
-
Olive Oil: A high-quality extra virgin olive oil brings a fruity richness to the dish. If olive oil isn’t your preference, feel free to use avocado oil or another light oil.
-
Lemon Juice: A squeeze of fresh lemon juice adds a bright zing that perfectly balances the earthiness of the spinach. If you’re out of lemons, you can substitute with a splash of apple cider vinegar for a different tangy flavor.
-
Salt: Enhances all the flavors. You can adjust this to taste or use sea salt for a more gourmet touch.
-
Pepper: Freshly cracked black pepper brings a gentle kick. You can use red pepper flakes if you enjoy a bit of spice instead.
These ingredients come together like a symphony, each playing its part in creating a harmonious dish that is as healthy as it is satisfying!
Step-by-Step Instructions
Let’s get cooking! Follow these steps to master the art of sautéing spinach.
-
Prep Your Ingredients:
Start by thoroughly washing the fresh spinach under cold water to remove any dirt or grit. Spin dry in a salad spinner or pat gently with a clean towel. Mince your garlic (aim for about 3-4 cloves) and have your lemon juice ready to go. -
Heat the Pan:
Grab a large skillet (preferably a non-stick or cast iron pan) and heat it over medium heat. Add about 1 tablespoon of olive oil to the pan. A good tip here: Allow the oil to warm up but avoid overheating it, which can cause the oil to burn and affect the flavor. -
Add Garlic:
Once the oil is shimmering, toss in the minced garlic. Sauté the garlic for about 30 seconds until fragrant—that golden aroma will dance around your kitchen and entice anyone nearby! -
Add Spinach:
Now it’s time for the main attraction. Add the fresh spinach to the skillet, a large handful at a time, allowing it to wilt down. Don’t be surprised at how much it shrinks! Stir constantly for about 2-3 minutes. Pro tip: If you like your spinach less wilted, you can remove it from the pan once it’s just tender. -
Season the Spinach:
Once the spinach is vibrant green and wilted, sprinkle in salt and freshly cracked black pepper to taste. The perfect seasoning can take this dish from good to irresistible. -
Finish with Lemon Juice:
Remove the skillet from heat and drizzle fresh lemon juice over the sautéed spinach. Give it a good toss to ensure all the flavors are well combined and to let that citrusy brightness shine through. -
Serve Immediately:
Serve your sautéed spinach while it’s warm, either as a side or as a topping for your favorite protein. Trust me; you’ll want to dig in right away!
Serving Suggestions
Sautéed spinach makes an excellent complement to grilled chicken, roasted salmon, or a hearty grain bowl. When plating, pile a generous serving on the plate and squeeze a little extra lemon over the top for visual appeal. Pair it with some toasted pine nuts or a sprinkle of feta for an upscale touch!
Recipe Variations
Feel free to get creative! Here are a few fun variations you can try:
-
Nutty Spinach: Add a handful of toasted walnuts or pecans for a crunchy twist.
-
Spicy Spinach: Incorporate red pepper flakes or a dash of cayenne pepper for some heat.
-
Creamy Spinach: Stir in a splash of heavy cream or vegan cream alternative to create a rich, creamy sauce.
-
Herbed Spinach: Toss in fresh herbs like basil, parsley, or thyme at the end for an aromatic boost.
-
Spinach & Cheese: Mix in some grated Parmesan or crumbled goat cheese right before serving for a decadent finish.
Chef’s Notes
Every time I make sautéed spinach, I can’t help but chuckle at my early kitchen disasters. There was one time when I accidentally set off the smoke alarm while trying to sauté garlic, thinking it’d infuse quicker! Lesson learned: patience is key in the kitchen! Over the years, my sautéed spinach technique has evolved into the delightful recipe I’m sharing today, and I’m proud to say it’s become a staple in my household.
Each plate of sautéed spinach brings a comforting reminder of how simple ingredients can create something magical, connecting me back to those cherished moments in my grandmother’s kitchen.
FAQs and Troubleshooting
-
Can I use frozen spinach?
Absolutely! Just make sure to thaw and drain it well to remove excess moisture before sautéing. -
What if my spinach is too watery?
If excess water is released from the spinach, simply increase the heat to evaporate the liquid. This will enhance the flavor, too! -
How do I prevent burning garlic?
Keep a close watch on the garlic while it’s sautéing and reduce the heat if it browns too fast. You want it golden but not too dark. -
Can I prepare this dish in advance?
While it’s best fresh, you can prepare sautéed spinach ahead of time. Just store it in an airtight container in the fridge for up to 3 days and reheat gently on the stovetop.
Nutritional Info
Sautéed spinach is not only delicious—it’s also packed with nutrients! A standard serving (approximately one cup) contains:
- Calories: 40
- Protein: 5 grams
- Fat: 3 grams
- Carbohydrates: 7 grams
- Fiber: 4 grams
- Vitamin A: 370% DV
- Vitamin C: 25% DV
- Iron: 15% DV
This nutrient powerhouse fits perfectly within a balanced eating plan, making it an ideal side dish whether you’re cooking for yourself or entertaining guests.
So there you have it—your guide to making the perfect sautéed spinach! I hope you give it a try and make it a part of your regular rotation. It’s quick, easy, and undeniably delicious. Happy cooking! 🍽️
PrintSautéed Spinach
A quick, nutritious, and flavorful side dish that transforms fresh spinach with garlic and lemon.
- Prep Time: 10 minutes
- Cook Time: 5 minutes
- Total Time: 15 minutes
- Yield: 4 servings
- Category: Side Dish
- Method: Sautéing
- Cuisine: Mediterranean
- Diet: Vegetarian
Ingredients
- Fresh Spinach
- Garlic (3-4 cloves, minced)
- Olive Oil (1 tablespoon)
- Lemon Juice (to taste)
- Salt (to taste)
- Freshly Cracked Black Pepper (to taste)
Instructions
- Prep your ingredients: Wash the spinach and mince the garlic.
- Heat the pan: Warm olive oil in a large skillet over medium heat.
- Add garlic: Sauté minced garlic for about 30 seconds until fragrant.
- Add spinach: Toss in spinach and stir for about 2-3 minutes until wilted.
- Season: Sprinkle with salt and pepper to taste.
- Finish with lemon juice: Drizzle lemon juice over the spinach and toss to combine.
- Serve immediately: Enjoy warm as a side dish or topping.
Notes
Feel free to experiment with variations like adding nuts, spices, cream, herbs, or cheese.
Nutrition
- Serving Size: 1 serving
- Calories: 40
- Sugar: 0g
- Sodium: 200mg
- Fat: 3g
- Saturated Fat: 0.5g
- Unsaturated Fat: 2.5g
- Trans Fat: 0g
- Carbohydrates: 7g
- Fiber: 4g
- Protein: 5g
- Cholesterol: 0mg
Keywords: sautéed spinach, easy side dish, vegetarian recipes, healthy cooking
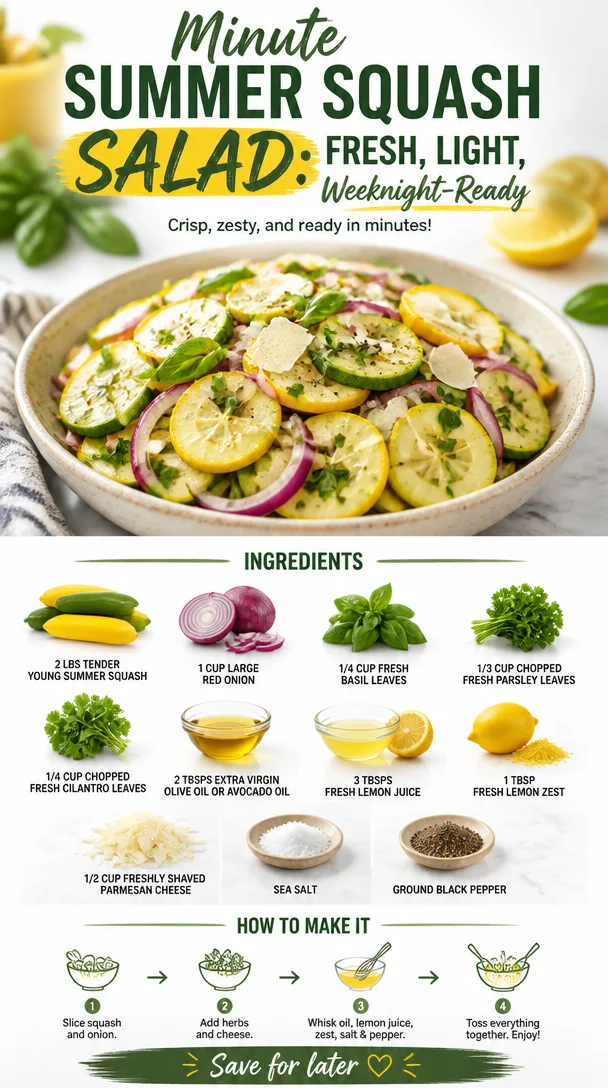
Minute Summer Squash Salad: Fresh, Light, Weeknight-Ready
Welcome to the Summer Squash Salad: A Quick and Fresh Delight!
Summer is a magical season, full of vibrant colors, sun-kissed days, and, of course, an abundance of fresh produce. There’s something about this time of year that puts a little skip in your step and a whole lot of flavor on your plate! Today, I’m excited to share with you a dish that perfectly embodies all the joys of summer: my Quick and Fresh Summer Squash Salad. This salad is not just a side; it’s a celebration of summer’s bounty in every bite!
Imagine biting into tender young squash, mingled with the crispness of red onion and the aromatic freshness of herbs. The vibrant colors and the fragrant scents will transport you to a sunny farmers market, even if you’re just at home! This salad is perfect for those backyard BBQs, picnics in the park, or simply as a light meal to enjoy on a warm summer evening.
But here’s the kicker: this salad is incredibly easy to whip up. In under 30 minutes, you’ll have a radiant dish that is healthy, satisfying, and oh-so-delicious. It’s all about keeping it fresh, simple, and fun! So, roll up your sleeves, grab your favorite cutting board, and let’s dive into this heavenly summer creation.
A Slice of Nostalgia
Growing up, summer meant spending lazy days at my grandma’s house, where the garden was bursting with life. Her prized possession? An incredible array of summer squash. I can still picture those golden zucchinis and vibrant yellow squash stacked in the kitchen, ready to be transformed into something amazing. One warm afternoon, I remember her teaching me how to make a simple salad that showcased all that garden goodness. It was the first time I realized how a few fresh ingredients could sing on your taste buds! We tossed the squash with herbs she’d just picked, drizzled in the best olive oil, and topped it with a generous helping of Parmesan cheese.
We hardly needed anything else—just that fresh salad, a few slices of crusty bread, and laughter as we recounted stories from her youth. I knew then that summer squash wasn’t just a vegetable; it was a bridge to memories, flavors, and happiness. That spirit is what I aim to capture in this recipe, and I can’t wait for you to create your own beautiful memories around the table with this salad!
Ingredients
Let’s gather our stars—the ingredients that make this salad shine:
-
2 lbs tender young summer squash
Perfectly fresh squash should be tender and lightly firm. Look for ones that are shiny and vibrant in color. You can use zucchini or yellow squash (or a mix of both!) for an eye-catching and delightful salad. -
1 cup large red onion
Red onion adds a sweet crunch to the salad. If you’re sensitive to the sharpness of raw onions, soak the slices in cold water for a bit, then drain to mellow their flavor. -
1/4 cup fresh basil leaves
Basil offers a fragrant aromatic note. If you don’t have basil, fresh mint or parsley can also lend a delightful freshness. -
1/3 cup chopped fresh parsley leaves
Parsley is like nature’s seasoning. Trust me, it adds zest! You can substitute it with arugula or even some microgreens for a peppery kick. -
1/4 cup chopped fresh cilantro leaves
A burst of cilantro really brightens this dish. If cilantro isn’t your thing, try swapping it out with dill for another herbal dimension. -
2 Tbsps extra virgin olive oil or avocado oil
I love the smooth richness of good olive oil. Alternatively, avocado oil has a neutral flavor while still delivering healthy fats. -
3 Tbsps fresh lemon juice
This acidity balances the richness of the squash. Fresh is a must! If you’re out of lemons, a splash of white wine vinegar can also do the trick. -
1 Tbsps fresh lemon zest
Zest adds that punch of citrus flavor perfectly! Don’t skip it; it’s where the real flavor lies. -
1/2 cup freshly shaved parmesan cheese
Adding a hit of umami, fresh Parm enhances the flavor of the salad. You can replace it with nutritional yeast for a vegan option or Pecorino for a different cheese angle! -
Sea salt and ground black pepper
Essential for seasoning! Be generous but taste as you go. Adding a pinch can elevate the flavors beautifully.
Step-by-Step Instructions
Are you ready to dive into the joyous task of creating this salad? Let’s break it down step by step!
-
Prep Your Squash
Start by washing your summer squash under cool running water. Pat them dry and slice them into thin rounds—about 1/4 inch thick. This allows for even cooking and a delightful crunch. If you want a twist, try spiralizing the squash to create “noodles.” It adds a fun texture! -
Slice The Onions
Grab your red onion and slice it into thin crescents. Aim for uniform pieces; this way, they mix evenly throughout the salad. If you prefer a milder flavor, I suggest soaking them in cold water while you prepare the other ingredients. -
Chop The Herbs
Now, onto the herbs! Stack a few basil leaves, parsley, and cilantro atop each other, roll them tightly, and slice them into ribbons (this technique is called chiffonade). It creates a beautiful presentation! -
Whisk Your Dressing
In a small bowl, combine the olive oil, fresh lemon juice, lemon zest, sea salt, and black pepper. Whisk them together until well blended. This dressing will add brightness and flavor, bringing the salad’s ingredients to life! -
Combine Everything
In a large mixing bowl, add your sliced squash, red onion, chopped herbs, and the dressing. Toss everything gently but thoroughly; you want every piece of squash to be coated with that delicious dressing—so no one is left out! -
Plate & Finishing Touches
Now comes the fun part! Transfer the salad to a beautiful serving platter or large bowls. Finally, sprinkle the shaved parmesan on top. Alternatively, you can mix it in before plating if you prefer a more thorough distribution.
And voilà! Your summer squash salad is ready to be savored!
Serving Suggestions
When serving this refreshing salad, consider pairing it with grilled chicken or fish for a wholesome meal. It’s also fantastic alongside crusty artisan bread for soaking up that delectable dressing! For an extra touch, garnish with a few extra herb leaves or a sprinkle of additional Parmesan on top right before serving. This will make it pop visually, turning it into a feast for the eyes as well as the palate.
Recipe Variations
Feeling adventurous? Here are a few fun and creative twists you can try:
- Add Color: Include diced cherry tomatoes or bell peppers for extra color and sweetness.
- Whole Grains: Toss in cooked quinoa or farro for a heartier salad that packs a nutritional punch.
- Spicy Kick: Add a sprinkle of red pepper flakes or diced jalapeños for those who enjoy a little heat!
- Nuts & Seeds: For added texture, throw in some toasted sunflower seeds or slivered almonds.
- Creamy Version: Mix in a dollop of Greek yogurt or a vegan option for a creamy, tangy twist.
Chef’s Notes
This summer squash salad is one of those recipes that’s evolved with me over the years. What started as a simple mix with grandma in her kitchen has transformed into something I create for friends, family, and everyone who shares a meal with me. I love how versatile this salad is; every summer, I find new ways to make it my own, adjusting it based on what’s fresh and seasonal.
And let’s be honest—there’s something satisfying about throwing together whatever vegetables are lingering in the fridge to create a stunning dish. I want you to feel that same joy in your kitchen, knowing there are no rigid rules here—only delicious flavors waiting to be explored!
FAQs and Troubleshooting
-
Can I make this salad ahead of time?
Absolutely! The salad holds up well in the refrigerator. However, I’d recommend adding the cheese just before serving to keep it from getting soggy. -
What if I can’t find fresh herbs?
While fresh herbs are best, you can use dried versions. Just remember that dried herbs are more concentrated, so reduce the quantity to about one-third of what the recipe calls for. -
How do I choose the best summer squash?
Look for squash that is firm to the touch and free of blemishes or soft spots. Smaller squash often have better flavor and texture! -
Can I use cooked squash?
For this recipe, fresh squash is best to retain its crunch, but if you prefer cooked squash, consider briefly sautéing it for a warm salad experience!
Nutritional Info
This vibrant salad packs a nutritional punch, filled with vitamins and minerals from fresh veggies and herbs. It is low in calories and high in fiber, making it a fantastic option for those looking to incorporate more wholesome ingredients into their diets.
I hope you’re as excited to make this Quick and Fresh Summer Squash Salad as I am to share it with you! Remember, cooking should be enjoyable and rewarding, so have fun with it and make it your own. Here’s to delicious, fresh meals that bring us together and create lasting memories—cheers!
PrintQuick and Fresh Summer Squash Salad
A vibrant summer salad featuring tender young squash, fresh herbs, and a zesty dressing, perfect for warm weather meals.
- Prep Time: 15 minutes
- Cook Time: 0 minutes
- Total Time: 15 minutes
- Yield: 4 servings 1x
- Category: Salad
- Method: Mixing
- Cuisine: American
- Diet: Vegetarian
Ingredients
- 2 lbs tender young summer squash
- 1 cup large red onion
- 1/4 cup fresh basil leaves
- 1/3 cup chopped fresh parsley leaves
- 1/4 cup chopped fresh cilantro leaves
- 2 Tbsps extra virgin olive oil or avocado oil
- 3 Tbsps fresh lemon juice
- 1 Tbsps fresh lemon zest
- 1/2 cup freshly shaved parmesan cheese
- Sea salt and ground black pepper
Instructions
- Prep your squash: Wash and slice the summer squash into thin rounds.
- Slice the onions: Cut the red onion into thin crescents.
- Chop the herbs: Stack the basil, parsley, and cilantro, roll, and slice into ribbons.
- Whisk your dressing: Combine olive oil, lemon juice, lemon zest, salt, and pepper in a small bowl.
- Combine everything: In a large mixing bowl, add squash, onion, herbs, and dressing; toss to coat.
- Plate & finishing touches: Transfer to a serving platter and sprinkle with parmesan.
Notes
Add cherry tomatoes or cooked quinoa for variations. Can be made ahead; add cheese just before serving.
Nutrition
- Serving Size: 1 serving
- Calories: 250
- Sugar: 4g
- Sodium: 200mg
- Fat: 15g
- Saturated Fat: 3g
- Unsaturated Fat: 7g
- Trans Fat: 0g
- Carbohydrates: 20g
- Fiber: 4g
- Protein: 6g
- Cholesterol: 10mg
Keywords: summer salad, fresh salad, quick salad, vegetarian salad, healthy salad
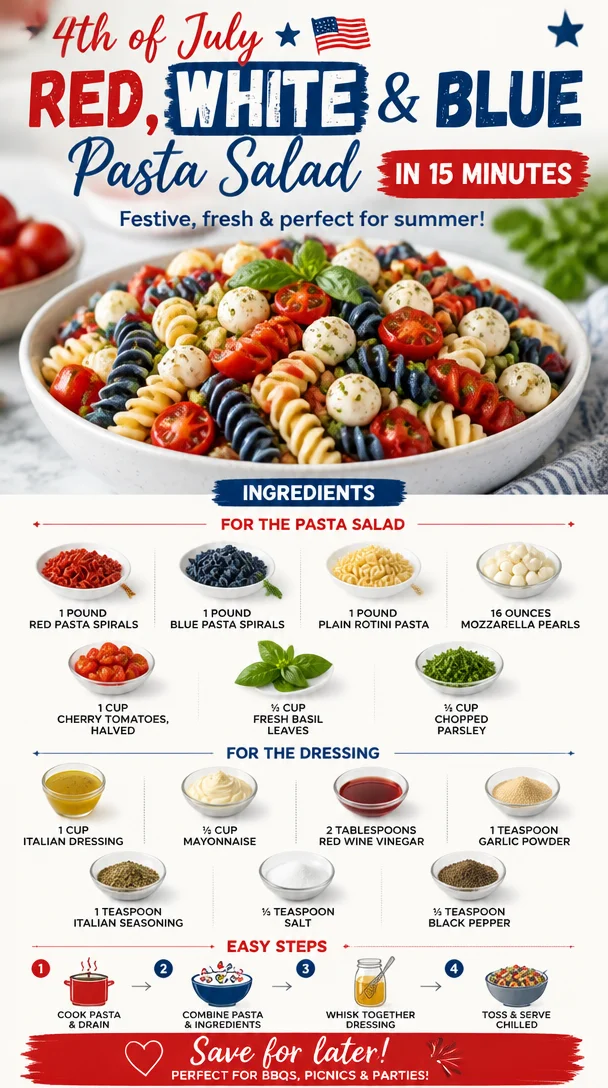
4th of July Red, White & Blue Pasta Salad in 15 Minutes
Red, White, and Blue Pasta Salad: A Celebration of Flavor and Fun
Hello, fellow foodies! Ava here, and I am beyond excited to share with you a dish that not only brings a pop of color to your table but also celebrates the freshness of summer in every bite. Get ready for my glorious Red, White, and Blue Pasta Salad that’s perfect for picnics, barbecues, or just because you deserve something delicious today!
This vibrant pasta salad captures the spirit of summer, combining the playful colors of fresh ingredients with a tangy dressing that will have everyone asking for seconds. The best part? It’s quick, easy, and absolutely instagrammable—your friends will be raving about it long after the last bite. So let’s dive in!
A Nostalgic Culinary Adventure
Whenever I think of the Red, White, and Blue Pasta Salad, I’m instantly transported to my childhood summers spent at family barbecues. Picture this: the sun shining, the smell of chargrilled burgers in the air, and a table overflowing with colorful dishes. I remember my aunt preparing her famous pasta salad, a family favorite that always seemed to disappear as quickly as she could make it.
While her version was a little more traditional, I’ve jazzed it up with a twist that makes it perfect for any occasion. I wanted to create something that reflects not just my love for cooking but also that sense of connection and joy that comes from sharing a meal. This pasta salad does just that—it’s full of vibrant flavors, nostalgic feelings, and a sprinkle of creativity. Plus, it’s super easy to whip up, so you can enjoy those sunny days without being stuck in the kitchen!
Ingredients You’ll Need
To make the magic happen, here’s what you’ll need for the Red, White, and Blue Pasta Salad:
For the Pasta Salad:
-
1 pound red pasta spirals
Perfect for adding that festive color and a slightly sweet flavor. If you can’t find red pasta, feel free to use regular rotini or a mix of other fun shapes. -
1 pound blue pasta spirals
These will add a pop of blue and uniqueness to your salad. They can be a little harder to find, but don’t fret! If you can’t source blue pasta, use regular pasta and throw in some blue cheese crumbles for a fun touch. -
1 pound plain rotini pasta
The base of your salad! Rotini holds onto the dressing beautifully, making every bite flavorful. -
16 ounces mozzarella pearls
Creamy and delightful, mozzarella pearls bring a mild flavor that balances out the tangy dressing. If you’re looking for a dairy-free option, try cashew cheese or omit entirely! -
1 cup cherry tomatoes, halved
Sweet and juicy, these little gems add a burst of flavor. Any fresh tomato variety will do—just keep that vibrant red color! -
½ cup fresh basil leaves
Basil adds a fragrant, herbaceous note. You can substitute with fresh parsley or even arugula if that’s what you have on hand! -
¼ cup chopped parsley
This not only adds flavor but also a nice contrast to the other ingredients. Don’t have fresh? Dried parsley will work in a pinch.
For the Dressing:
-
1 cup Italian dressing
A zesty base that pairs perfectly with the pasta. Feel free to make your own if you’re feeling adventurous! -
½ cup mayonnaise
For creaminess and richness; you can use Greek yogurt for a lighter, healthier twist without sacrificing taste. -
2 tablespoons red wine vinegar
This adds a tangy kick! Lemon juice is a great alternative if you want something a bit fresher. -
1 teaspoon garlic powder
A must for that extra flavor punch—fresh minced garlic works beautifully, too, if you want something more robust. -
1 teaspoon Italian seasoning
This blends all the flavors together. You can swap it out for any dried herbs you prefer, such as oregano or thyme. -
½ teaspoon salt
To enjoy the full flavor of your ingredients—always taste as you go! -
½ teaspoon black pepper
A basic seasoning that makes all the difference. Spice it up with red pepper flakes if you like a bit of heat!
Cooking Up a Storm: Step-by-Step Instructions
Step 1: Boil Your Pasta
Start by bringing a large pot of salted water to a boil. Add in your red, blue, and rotini pasta. Cook according to package instructions until al dente, usually around 8-10 minutes. Remember to stir occasionally to prevent sticking! A little tip: rinse the pasta in cold water after draining to stop the cooking process and cool it down for the salad.
Step 2: Prepare the Dressing
While the pasta is cooking, whisk together the Italian dressing, mayonnaise, red wine vinegar, garlic powder, Italian seasoning, salt, and black pepper in a large bowl. (Trust me, this dressing is where the magic happens!) Make sure to taste and adjust any flavors according to your preference. If you like it tangier, add more vinegar; for creaminess, throw in more mayo.
Step 3: Chop the Veggies
While waiting for the pasta, go ahead and halve the cherry tomatoes, chop the fresh basil, and parsley. Aim for sizes they’ll mix well with the pasta but not too small that they lose their identity—nobody wants mush in their salad!
Step 4: Combine Ingredients
Once the pasta is cooked and cooled, add it to the bowl with your dressing. Toss gently to coat. Then, add in the mozzarella pearls, cherry tomatoes, basil, and parsley. Mix everything nicely until everything is just combined.
Step 5: Chill and Serve
For the best flavor, cover the salad and let it chill in the fridge for at least 30 minutes before serving. This allows the flavors to meld beautifully, making every bite incredibly tasty! When ready to serve, give it a quick stir and adjust seasoning if needed.
Serving Suggestions
When it’s time to dig in, presentation is key! You can serve the pasta salad in a big, colorful bowl, garnished with extra basil leaves for that pop of green. Pair it with some grilled chicken or shrimp for a protein boost and a light drizzle of olive oil. For a fun twist, serve it in mason jars for individual portions—great for picnics!
Recipe Variations
Want to switch things up? Here are a few fun variations to experiment with:
- Add Protein: Toss in some cooked chicken, shrimp, or chickpeas for a more filling meal.
- Switch the Cheese: Try feta or goat cheese instead of mozzarella for a tangy flavor.
- Spice It Up: Add chopped jalapeños or a dash of hot sauce to give it a kick!
- Go Green: Mix in some spinach or arugula for added nutrients and color.
- Noodle-Free Option: Use zucchini noodles for a gluten-free, veggie-packed version.
Chef’s Notes
This pasta salad has really evolved over the years for me. What started as a simple family recipe quickly turned into an adventurous canvas! I’ve played with flavorings, tried various veggies, and even switched up the dressings. But the heart of this dish—color, freshness, and joy—remains the same. And I love how interactive it is; grab a friend or family member, and let’s whip this up together! Cooking is about the journey as much as it is the destination.
FAQs and Troubleshooting
1. Can I make this salad ahead of time?
Absolutely! This salad tastes even better the next day as it really allows the flavors to meld together. Just keep it covered in the fridge, and it should last 3-5 days.
2. What if the dressing is too thick?
If your dressing ends up too thick, simply whisk in a tablespoon or two of water or extra olive oil until you reach your desired consistency.
3. How can I keep my pasta from sticking together?
Make sure to rinse your pasta in cold water after cooking! This not only stops the cooking process but also reduces stickiness, giving you lovely, separate pasta spirals.
4. Can I use different types of pasta?
Absolutely! Feel free to mix and match your favorite pasta shapes—just make sure they cook evenly so everything blends beautifully!
Nutritional Info (Optional)
- Calories: Approximately 410 per serving (for a serving size of 1 cup)
- Protein: 12g
- Fat: 22g
- Carbohydrates: 40g
- Fiber: 2g
And there you have it—a colorful, delicious Red, White, and Blue Pasta Salad that is sure to impress your family and friends! Remember, the kitchen is a playground—have fun with your food and don’t be afraid to get creative. If you try this recipe, I’d love to hear how it turned out for you. Happy cooking, and enjoy every bite!
PrintRed, White, and Blue Pasta Salad
A vibrant pasta salad celebrating summer with colorful ingredients and a tangy dressing, perfect for picnics and barbecues.
- Prep Time: 15 minutes
- Cook Time: 10 minutes
- Total Time: 45 minutes
- Yield: 8 servings 1x
- Category: Salad
- Method: Mixing
- Cuisine: American
- Diet: Vegetarian
Ingredients
- 1 pound red pasta spirals
- 1 pound blue pasta spirals
- 1 pound plain rotini pasta
- 16 ounces mozzarella pearls
- 1 cup cherry tomatoes, halved
- ½ cup fresh basil leaves
- ¼ cup chopped parsley
- 1 cup Italian dressing
- ½ cup mayonnaise
- 2 tablespoons red wine vinegar
- 1 teaspoon garlic powder
- 1 teaspoon Italian seasoning
- ½ teaspoon salt
- ½ teaspoon black pepper
Instructions
- Boil your pasta by bringing a large pot of salted water to a boil. Add the red, blue, and rotini pasta. Cook until al dente, about 8-10 minutes. Rinse in cold water after draining.
- Prepare the dressing by whisking together the Italian dressing, mayonnaise, red wine vinegar, garlic powder, Italian seasoning, salt, and black pepper in a large bowl.
- Chop the cherry tomatoes, basil, and parsley while the pasta is cooking.
- Combine the cooked pasta with the dressing and toss gently to coat. Add mozzarella, cherry tomatoes, basil, and parsley, mixing until combined.
- Chill the salad in the fridge for at least 30 minutes before serving.
Notes
This salad improves in flavor the next day. Keep it covered in the fridge, and it should last 3-5 days.
Nutrition
- Serving Size: 1 serving
- Calories: 410
- Sugar: 3g
- Sodium: 600mg
- Fat: 22g
- Saturated Fat: 4g
- Unsaturated Fat: 14g
- Trans Fat: 0g
- Carbohydrates: 40g
- Fiber: 2g
- Protein: 12g
- Cholesterol: 15mg
Keywords: pasta salad, summer recipes, picnic food, vibrant colors, easy recipes
Minute Creamy Macaroni Salad for Busy Weeknights
The Best Macaroni Salad: A Nostalgic Twist on a Classic Favorite
Welcome to Clean Plate Cravings! Today, I’m excited to share a recipe that holds a special place in my heart—none other than the best macaroni salad. This isn’t just any macaroni salad; it’s a vibrant, flavor-packed dish that’s perfect for picnics, potlucks, or simply enjoying at home with family. We’re talking creamy, tangy goodness with a delightful crunch—the kind of salad that makes your taste buds dance!
Now, macaroni salad has a way of transporting you back in time. For me, it brings back sunny afternoons in my grandmother’s backyard, where the air was filled with laughter, the smell of grilled burgers, and the comforting aroma of her famous macaroni salad wafting from the kitchen. Grandma would whip up batch after batch, and no barbecue was complete without it. Her secret? A splash of apple cider vinegar and a sprinkle of love. Growing up, I remember sneaking spoonfuls before it even made it to the serving bowl—my little way of ensuring I got my fill!
What I love about macaroni salad is its versatility. You can enjoy it creamy or with a lighter touch. It’s all about balance. This recipe calls for simple, wholesome ingredients that create a dish bursting with flavor without sacrificing nutrition. Plus, I’m here to guide you every step of the way, sharing snippets from my kitchen adventures, so let’s dive right in!
Ingredients
Here’s what you’ll need to create your very own macaroni salad:
-
2 cups elbow macaroni
- The classic choice! Feel free to experiment with whole wheat or gluten-free pasta for a healthier twist.
-
1 cup mayonnaise
- This gives the salad its creamy base. If you want a lighter version, swap with Greek yogurt or a vegan mayo alternative.
-
1 tablespoon apple cider vinegar
- A game-changer! This adds a nice tangy kick. If you don’t have apple cider vinegar, white wine vinegar or lemon juice can work, too.
-
1 teaspoon mustard
- I use Dijon for a bit of zing, but yellow mustard works just as well. Mustard is key to enhancing flavors!
-
2 hard-boiled eggs, chopped
- These add protein and a delicious richness. You can skip these for a vegan version without compromising the taste.
-
1 cup celery, diced
- The celery brings that desired crunch. If you’re not a fan, diced cucumbers can be a refreshing substitute.
-
1 cup red bell pepper, diced
- Sweet and colorful; bell peppers add a pop of color and flavor. Other options include diced green bell peppers or even cherry tomatoes for a burst of juiciness!
-
1 cup green peas (optional)
- Not everyone adds peas, but they’re nice for color and sweetness. Frozen peas work perfectly and don’t need cooking!
-
Salt and pepper to taste
- Always finish with a seasoning check! A touch of smoked paprika or cayenne can add an unexpected depth if you’re feeling adventurous.
Step-by-Step Instructions
Now, let’s get cooking! I promise this process is as fun as it is delicious.
-
Boil the Elbow Macaroni
Bring a large pot of salted water to a boil. Add the elbow macaroni and cook according to package instructions until al dente, usually about 7-9 minutes. Tip: Don’t forget to stir occasionally to prevent sticking! -
Drain and Rinse
Once the pasta is cooked, drain it in a colander and give it a quick rinse under cold water. This stops the cooking process and helps keep the pasta from getting mushy! -
Prepare the Dressing
In a large mixing bowl, whisk together the mayonnaise, apple cider vinegar, mustard, salt, and pepper until smooth. Taste and adjust to your liking! It should be creamy with just enough tang. -
Mix in the Veggies
Add the diced celery, red bell pepper, and optional green peas to the bowl. Stir it gently to coat everything in that creamy dressing. You want each piece to shine—no lonely vegetables here! -
Add the Eggs
Gently fold in the chopped hard-boiled eggs. Careful while mixing, as we want those beautiful chunks of egg to remain intact! -
Combine with Pasta
Finally, add the rinsed macaroni to the bowl. It’s time for the star of the show! Mix everything together until the pasta is well-coated. If your salad looks a bit dry, add a little more mayo or vinegar to elevate it. -
Chill and Serve
Cover the bowl with plastic wrap and refrigerate for at least an hour. This allows the flavors to meld together, creating that deli-style taste we all crave. Serve chilled! Sometimes, I grab a digital kitchen timer and set it for an hour—a friendly reminder to stay patient!
Serving Suggestions
When it’s time to serve, scoop generous portions into colorful bowls. A sprinkle of fresh herbs like parsley or chives on top adds that final touch of brightness. If you’re feeling fancy, serve it on a bed of crisp lettuce for a lovely presentation. Pair it with grilled chicken or serve it alongside hot dogs for the perfect summer spread!
Recipe Variations
To keep things fresh, here are some creative twists you can try:
-
Mediterranean Style: Add chopped olives, sun-dried tomatoes, and feta for a savory Italian flair.
-
Spicy Macaroni Salad: Stir in diced jalapeños or a pinch of cayenne pepper for a kick of heat.
-
Herbed Lemon Macaroni Salad: Mix in fresh dill, parsley, and a squeeze of lemon juice for a zesty twist.
-
BBQ Macaroni Salad: Incorporate some shredded grilled chicken and a dash of barbecue sauce for a smoky flavor.
-
Mexican Macaroni Salad: Toss in black beans, corn, diced avocado, and cilantro for a Southwest adventure.
Chef’s Notes
Oh, macaroni salad, where do I start? This recipe has evolved over the years. I remember the first time I attempted macaroni salad on my own. I was a nervous teenager, wearing an apron that was just slightly too big. I overcooked the pasta and added way too much mayo! But after many experiments and tweaks, I’ve landed on this crowd-pleasing version that folks ask for every summer.
Interestingly, I’ve learned that everyone has their personal spin on macaroni salad. No two plates are exactly the same, and that’s the beauty of it! It invites creativity, and you can tailor it to your taste buds or dietary needs—making it a timeless dish that continuously evolves.
FAQs and Troubleshooting
Q: Can I make this macaroni salad ahead of time?
A: Absolutely! In fact, the flavors get even better as they sit. Just be sure to cover it well and store it in the fridge for up to three days.
Q: What if my macaroni salad is too dry?
A: No worries! Simply add a little more mayo or a teaspoon of vinegar to loosen things up. A splash of hot water can also help if you’re looking to keep it light.
Q: How do I prevent my pasta from getting mushy?
A: Always cook pasta al dente, and ensure you rinse it under cold water right after draining. This stops the cooking process and keeps it firm!
Q: Can I use other types of pasta?
A: Definitely! Feel free to experiment with other pasta shapes like rotini, fusilli, or even gluten-free options.
Q: Can I skip the eggs to make this vegan?
A: Yes! Just skip the eggs and consider adding a few extra veggies or chickpeas for added protein.
Nutritional Info
While I don’t always include this, a serving of macaroni salad (about 1 cup) typically contains around 300 calories, depending on your mayonnaise choice and additional ingredients. It’s a delightful treat that balances out with loads of vibrant veggies!
So there you have it—my go-to recipe for the best macaroni salad! Whether it’s a sunny day or a simple dinner at home, I hope this dish brings joy and nostalgia to your table, just as it does to mine. Remember, cooking is all about love and flair, so get creative and make it your own! Happy cooking!
PrintThe Best Macaroni Salad
A vibrant and creamy macaroni salad with a delightful crunch, perfect for any gathering or simple family dinner.
- Prep Time: 15 minutes
- Cook Time: 10 minutes
- Total Time: 75 minutes
- Yield: 4 servings 1x
- Category: Salad
- Method: Mixing
- Cuisine: American
- Diet: Vegetarian
Ingredients
- 2 cups elbow macaroni
- 1 cup mayonnaise
- 1 tablespoon apple cider vinegar
- 1 teaspoon mustard
- 2 hard-boiled eggs, chopped
- 1 cup celery, diced
- 1 cup red bell pepper, diced
- 1 cup green peas (optional)
- Salt and pepper to taste
Instructions
- Boil the elbow macaroni in salted water until al dente, about 7-9 minutes.
- Drain and rinse the pasta under cold water.
- Prepare the dressing by whisking together mayonnaise, apple cider vinegar, mustard, salt, and pepper in a large mixing bowl.
- Mix in the diced celery, red bell pepper, and optional green peas.
- Add the chopped hard-boiled eggs and gently fold them into the mixture.
- Combine the rinsed macaroni with the dressing, ensuring everything is well-coated.
- Chill the salad for at least an hour before serving.
Notes
Consider adding chopped olives or different vegetables for variations.
Nutrition
- Serving Size: 1 cup
- Calories: 300
- Sugar: 3g
- Sodium: 450mg
- Fat: 20g
- Saturated Fat: 3g
- Unsaturated Fat: 15g
- Trans Fat: 0g
- Carbohydrates: 36g
- Fiber: 2g
- Protein: 8g
- Cholesterol: 60mg
Keywords: macaroni salad, picnic food, summer salad, creamy salad, side dish
One-Bowl Lemon Blueberry Cake: Weeknight-Ready in 30 Minutes
Indulge in the Zesty Delight of Lemon Blueberry Cake
Hey there, food lovers! Today, I’m so excited to share one of my all-time favorite recipes with you: Lemon Blueberry Cake. This cake is a slice of sunshine, bringing together the tangy brightness of lemon and the sweet juiciness of blueberries. It’s perfect for any occasion—be it a sunny brunch with friends, a cozy family dinner, or just an indulgent treat to brighten up your day. But enough about why I love it; let’s dive into the deliciousness and the memories it brings!
A Taste of Nostalgia
Growing up, summer weekends were all about family gatherings at my grandmother’s house, where the aroma of baked goods would greet you at the door. One particular Saturday stands out in my mind. My grandma would whip up her famous lemon dessert, which always made a special appearance during berry-picking season. Usually, she’d take the juiciest blueberries we picked from the garden and fold them into a buttery lemon batter, and the result was pure magic.
I can still picture her mixing things up in the kitchen, her hands dusted with flour and a twinkle in her eyes. She had this special technique: she’d zest and squeeze lemons like they were the last on Earth, and you could hardly resist sneaking spoonfuls of that heavenly batter. Once baked, the treats would disappear almost as quickly as she could make them.
Inspired by those sweet moments, I’ve created my own version of a lemon blueberry cake. Each bite is a reminder of simpler times, filled with zest and sweet nostalgia that makes any gathering special. So, roll up your sleeves, grab your apron, and let’s create something beautiful together!
Ingredients You’ll Need
Here’s what you’ll need to bake this delightful Lemon Blueberry Cake:
-
2 cups all-purpose flour
A staple for this cake, providing structure and a light texture. You can substitute with gluten-free flour if needed. -
1 ½ cups sugar
This gives the cake its sweetness. For a healthier option, consider coconut sugar or a sugar substitute like erythritol. -
½ cup unsalted butter, softened
It adds richness and flavor. If you want to lighten the recipe, try using applesauce or Greek yogurt instead. -
1 cup milk
Whole milk enhances moisture, but feel free to swap with almond, soy, or oat milk for a dairy-free version. -
3 large eggs
Eggs are essential for structure and moisture. Aquafaba is an excellent egg substitute for our vegan friends! -
2 teaspoons baking powder
This leavening agent makes your cake light and fluffy. Check that it’s fresh for the best rise! -
1 teaspoon vanilla extract
Adds a warm note to the flavor profile. Make your own or use a quality store-bought version. -
Zest of 1 lemon
The zest brings that bright, citrusy punch! If you’re in a pinch, bottled lemon juice can also be used but won’t pack the same punch. -
1 cup fresh blueberries
Juicy and sweet, they burst in your mouth with every bite. If fresh isn’t available, frozen blueberries can work too, just toss them in a bit of flour to prevent sinking. -
Cream cheese frosting (for topping)
This luscious frosting adds the final touch. You can also use whipped cream for a lighter option.
Step-by-Step Instructions
Now that we have our ingredients ready, let’s bake this beauty! Follow these steps for the ultimate Lemon Blueberry Cake:
-
Preheat the Oven
Start by preheating your oven to 350°F (175°C). This ensures that your cake will rise beautifully as soon as it hits the oven. Pro tip: Always preheat your oven for the best results! -
Prepare the Pans
Grease and flour two 9-inch round cake pans. This is crucial; nobody wants a cake that sticks! A little parchment paper on the bottom helps too—extra insurance that it will slide right out. -
Mix the Dry Ingredients
In a medium bowl, whisk together the flour, baking powder, and a pinch of salt. This step is vital to evenly distribute the baking powder and prevent lumps—nobody likes a dense cake! -
Cream the Butter and Sugar
In a large mixing bowl, beat the softened butter and sugar together until light and fluffy. This usually takes about 3-4 minutes. This step incorporates air into your batter, making the cake light and airy. -
Add the Eggs and Vanilla
Next, beat in the eggs, one at a time, mixing well after each addition. Then add your vanilla extract. This is where the magic starts—your batter will transform into something much smoother and fragrant. -
Incorporate Lemon Zest
Stir in the lemon zest for that zesty kick! It’s like sunshine in your bowl. Don’t skimp on this step; zesting releases those lovely oils that will enhance the flavor. -
Combine with Dry Ingredients and Milk
Gradually add the dry mixture to the butter mixture, alternating with the milk. Start and end with the dry ingredients. Mix just until everything is combined—overmixing can lead to a tough cake. -
Fold in the Blueberries
Gently fold in the fresh blueberries using a rubber spatula. Be careful not to crush them too much; we want those juicy bursts in your cake! -
Bake
Pour the batter evenly into the prepared pans. Bake for 25-30 minutes, or until a toothpick inserted in the center of the cakes comes out clean. While they bake, your kitchen will smell like a fruity bakery—trust me! -
Cool
Once baked, let the cakes cool in their pans for about 10 minutes, then transfer to a wire rack to cool completely. Patience is key, as frosting a warm cake is a no-no! -
Frost
Once cooled, generously spread cream cheese frosting on top of one cake layer, carefully placing the second layer on top before frosting the top and sides. Decorate with extra blueberries and lemon zest if you’re feeling fancy!
Serving Suggestions
To serve, slice your glorious Lemon Blueberry Cake and plate it with a fresh mint sprig or a dollop of whipped cream for added flair. It pairs beautifully with a cup of tea or coffee, making it not just a dessert, but a full experience!
Recipe Variations
If you’re feeling adventurous, here are some creative twists for your Lemon Blueberry Cake:
- Lemon Poppy Seed Switch-Up: Add 2 tablespoons of poppy seeds for a delightful crunch and flavor contrast.
- Berry Blast: Mix in different berries, like raspberries or blackberries, for a mixed berry cake!
- Coconut Lemon: Replace some of the butter with coconut oil and add shredded coconut for a tropical vibe.
- Almond Joy: Substitute almond extract for the vanilla and sprinkle sliced almonds on top for an extra layer of flavor.
Chef’s Notes
This recipe has evolved over the years based on trial and error. I remember the first time I tried to bake this cake; it turned into more of a lemon pudding than a cake! But with each attempt, I learned to balance the flavors and perfect the technique. And now, it’s a staple in my kitchen and with my friends, who can’t resist a slice! Remember, cooking is about experimenting and finding your own voice in the kitchen. Don’t worry about perfection—just love what you make!
FAQs and Troubleshooting
1. Why is my cake dense?
If your cake comes out dense, it might be due to overmixing the batter. Mix just until combined!
2. Can I use frozen blueberries?
Absolutely! Just toss them in a little flour before folding them into the batter to prevent them from sinking.
3. How do I prevent my cake from sticking to the pan?
Greasing and flouring your pans or using parchment paper at the bottom will help keep your cake intact.
4. How can I make it dairy-free?
Substitute the milk with almond milk and the butter with coconut oil or unsweetened applesauce.
Nutritional Info (Optional)
Calories: ~320 per slice (based on 12 servings per cake), Fat: 15g, Carbs: 45g, Protein: 4g. This is a treat, so savor each bite!
So there you have it, my delightful Lemon Blueberry Cake! I hope this recipe brings you as much joy in recreating it as it has brought into my life. Happy baking, and remember, keep it fresh, simple, and seriously delicious! 🍋🫐
PrintLemon Blueberry Cake

A delightful blend of tangy lemon and sweet blueberries, perfect for any occasion.
- Prep Time: 15 minutes
- Cook Time: 30 minutes
- Total Time: 45 minutes
- Yield: 12 servings 1x
- Category: Dessert
- Method: Baking
- Cuisine: American
- Diet: Vegetarian
Ingredients
- 2 cups all-purpose flour
- 1 ½ cups sugar
- ½ cup unsalted butter, softened
- 1 cup milk
- 3 large eggs
- 2 teaspoons baking powder
- 1 teaspoon vanilla extract
- Zest of 1 lemon
- 1 cup fresh blueberries
- Cream cheese frosting (for topping)
Instructions
- Preheat the oven to 350°F (175°C).
- Prepare two 9-inch round cake pans by greasing and flouring them.
- Mix the dry ingredients: whisk together the flour, baking powder, and a pinch of salt.
- Cream the softened butter and sugar together until light and fluffy.
- Add the eggs one at a time, mixing well after each addition, then stir in the vanilla extract.
- Incorporate the lemon zest into the batter.
- Combine the dry mixture with the butter mixture, alternating with the milk.
- Fold in the blueberries gently.
- Bake for 25-30 minutes, or until a toothpick comes out clean.
- Cool the cakes in their pans for about 10 minutes, then transfer to a wire rack to cool completely.
- Frost the cakes with cream cheese frosting once cooled.
Notes
For a lighter option, whipped cream can be used instead of cream cheese frosting. If using frozen blueberries, toss them in flour before folding into the batter.
Nutrition
- Serving Size: 1 slice
- Calories: 320
- Sugar: 20g
- Sodium: 150mg
- Fat: 15g
- Saturated Fat: 8g
- Unsaturated Fat: 7g
- Trans Fat: 0g
- Carbohydrates: 45g
- Fiber: 1g
- Protein: 4g
- Cholesterol: 50mg
Keywords: cake, lemon, blueberry, dessert, baking