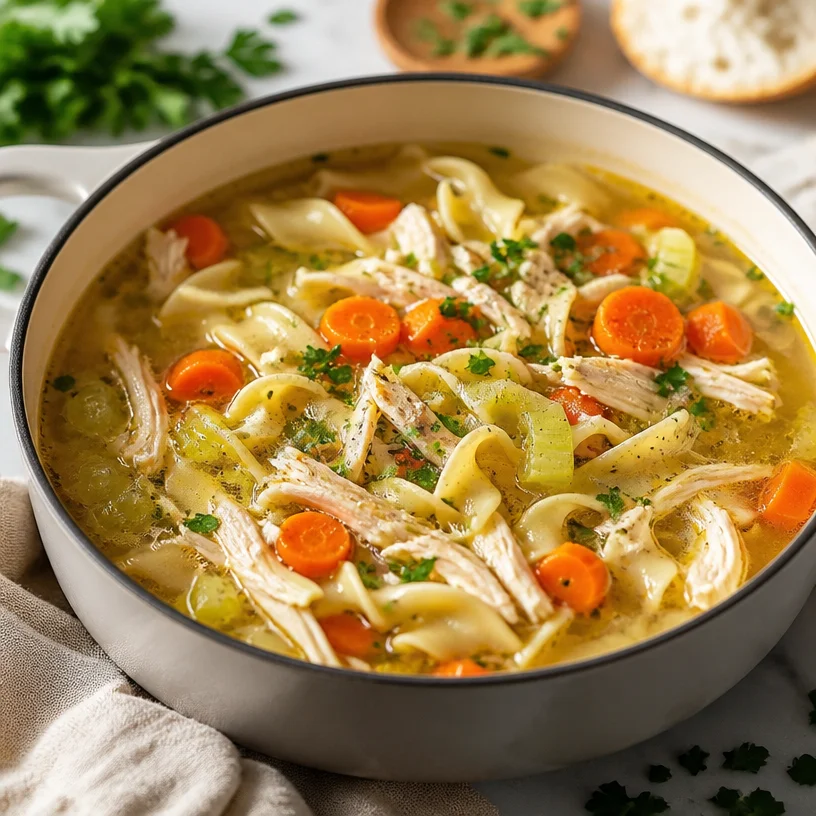
One-Pot 30-Minute Chicken Noodle Soup for Weeknights
The Ultimate Comfort Dish: Chicken Noodle Soup
Welcome to Clean Plate Cravings! Today, we’re diving into a classic dish that warms both the heart and soul: Chicken Noodle Soup. As the leaves turn golden and the air gets crisp, there’s nothing quite like a bowl of steaming chicken noodle soup to soothe your spirit and fill your belly. This dish is not just food; it’s a hug in a bowl and a cherished memory that connects us all. So, grab your apron and let’s get cozy in the kitchen together!
A Nostalgic Chicken Noodle Soup Memory
When I think of chicken noodle soup, I’m immediately transported back to my grandmother’s kitchen. The aromatic scent of her simmering broth filled the entire house, drawing family members in as if by some magical force. I can still picture her standing at the stove, her hair tied up, wearing that old apron she insisted on using for every meal. She’d chop the vegetables with flair, and as she sprinkled herbs in the pot, she’d share stories from her childhood—tales of how meals brought people together.
One rainy afternoon, I remember her letting me help stir the pot. I was so proud of my contribution, even if it was just a little. As we ladled the soup into bowls, she’d say, “Ava, every bowl of soup tells a story.” And that’s exactly what I want to share with you today! This chicken noodle soup has become my go-to recipe for comfort and connection.
Ingredients
Here’s what you’ll need to make this fantastic chicken noodle soup. Each ingredient plays a vital role in building the rich, deep flavors that we all love.
-
Raw Chicken (preferably bone-in for richer flavor): The star of the soup! Use a whole chicken or chicken thighs. Bone-in chicken adds more depth and is incredibly flavorful, but you can substitute with boneless if you’re short on time.
-
Noodles (egg noodles work best): These are essential for that classic feel! They have a lovely texture and soak up the broth beautifully. If you prefer a gluten-free option, try rice noodles or gluten-free pasta.
-
Carrots: They provide sweetness and color. Fresh is best, but you can use frozen carrots in a pinch. Don’t forget to give them a rough chop for a rustic feel!
-
Celery: This adds a nice crunch and depth to the broth. If celery isn’t your thing, you can substitute it with bell peppers or even zucchini for a different twist.
-
Onion: Offers a solid flavor base. Yellow onions are great, but feel free to switch to shallots for a milder taste.
-
Garlic: A must for depth of flavor! Fresh minced garlic is preferable, but garlic powder works in a pinch.
-
Herbs (thyme, parsley, bay leaf): These are the secret to an aromatic broth! Fresh herbs are delightful, though dried can be used if that’s what you have on hand.
-
Salt and Pepper: Essential seasonings. Season to your taste, keeping in mind that you can always add more but can’t take it out once it’s in!
-
Chicken Stock or Broth: Using homemade is ideal, but store-bought works just fine. For a richer flavor, go for low-sodium.
Step-by-Step Instructions
Ready to make some delicious chicken noodle soup? Follow these simple steps, and I’ll sprinkle in some chef tips for extra flair!
-
Prepare the Base
In a large pot, heat a splash of olive oil over medium heat. Add your chopped onions, carrots, and celery. Sauté for about 5-7 minutes until the vegetables are softened. Chef Tip: Adding a pinch of salt while sautéing helps draw out moisture and brings out the veggies’ natural sweetness. -
Introduce the Chicken
Add your chicken—either whole or chopped—as well as minced garlic to the pot. Sear it for about 3-4 minutes just until it starts getting a little golden. Chef Insight: Searing the chicken first locks in those flavorful juices, giving you a richer broth later. -
Stock it Up
Pour in your chicken broth until everything is submerged. Toss in your bay leaf, thyme, salt, and pepper. Bring the mixture to a boil, then reduce to a simmer. Cook for about 30-40 minutes if using a whole chicken, or 20-25 minutes for chicken pieces. Pro Tip: Skim off any foam that forms at the top for a clearer broth. -
Time for Noodles
Once the chicken is cooked through, carefully remove it from the pot and set it aside to cool slightly. Add the noodles to the broth and let them cook according to package directions—this usually takes about 5-7 minutes. Chef Hack: If you love full noodle flavor, stir in a dash of soy sauce or Worcestershire sauce while they cook! -
Shred and Return
Once the chicken is cool enough to handle, shred it into bite-sized pieces, discarding the bones and skin. Return the shredded chicken to the pot and stir well to combine. Tip: If you’re feeling fancy, toss in a squeeze of fresh lemon juice for brightness! -
Final Seasoning
Before serving, taste the broth and adjust the seasoning—this is where you can make it just right! Remove the bay leaf and stir in chopped parsley for a fresh finish.
Serving Suggestions
Your comforting chicken noodle soup deserves a beautiful presentation! Ladle the steaming soup into your favorite bowls and garnish with a sprinkle of fresh parsley. Serve it alongside warm, crusty bread or a fresh garden salad for a wholesome meal. And don’t forget a cozy blanket to wrap around yourself as you enjoy!
Recipe Variations
Let’s spice things up! Here are a few fun twists you can take with your chicken noodle soup:
-
Spicy Chicken Noodle Soup: Add a bit of crushed red pepper or diced jalapeños for a kick.
-
Creamy Chicken Noodle Soup: Stir in a splash of heavy cream or coconut milk for a rich and indulgent twist.
-
Vegetable-Packed Soup: Toss in some diced zucchini, green peas, or spinach for added nutrition.
-
Ginger-Lemongrass Chicken Soup: Infuse Asian flavors by adding sliced ginger and lemongrass for a refreshing twist.
-
Herbed Variations: Use fresh dill or basil instead of parsley for a flavorful change!
Chef’s Notes
This chicken noodle soup recipe has been a staple in my household since those childhood days in Grandma’s kitchen. Over the years, I’ve experimented with countless variations—from adding different herbs to experimenting with the types of noodles. I’ve even considered letting my friends cook alongside me, which led to plenty of hilarious kitchen bloopers! The key takeaway? Never take yourself too seriously in the kitchen; cooking is all about laughter and sharing!
FAQs and Troubleshooting
1. My broth doesn’t taste flavorful enough. What can I do?
Add more salt gradually and consider a splash of soy sauce or Worcestershire sauce to enhance the flavor.
2. The noodles are too mushy. How can I avoid this next time?
Try cooking the noodles separately and adding them just before serving. This keeps them from overcooking in the broth.
3. Can I freeze chicken noodle soup?
Absolutely! Let it cool completely, then store in airtight containers. It can last in the freezer for up to three months. Thaw and reheat over low heat on the stove when ready to enjoy!
4. I prefer a vegetarian version; how can I modify the recipe?
Swap the chicken for chickpeas or tofu, and use vegetable broth instead of chicken broth. You can add more veggies for extra texture!
Nutritional Info (Optional)
Chicken noodle soup is not only comforting but also nutritious! A typical serving provides a good source of protein from the chicken, vitamins from the vegetables, and carbohydrates from the noodles. Each bowl is comforting while supporting your dietary needs!
And there you have it—a warm, comforting chicken noodle soup that’s not just a meal but a memory to cherish. Cooking is all about the love and stories we share around the table. So gather your loved ones, savor the flavors, and keep it fresh, simple, and seriously delicious! Happy cooking!
PrintChicken Noodle Soup

A warm, hearty chicken noodle soup that brings comfort and connection, perfect for chilly days.
- Prep Time: 15 minutes
- Cook Time: 40 minutes
- Total Time: 55 minutes
- Yield: 4 servings 1x
- Category: Soup
- Method: Stovetop
- Cuisine: American
- Diet: Standard
Ingredients
- 1 whole chicken or chicken thighs (bone-in preferred)
- 8 oz egg noodles
- 2 carrots, chopped
- 2 celery stalks, chopped
- 1 onion, chopped
- 3 cloves garlic, minced
- 1 tsp dried thyme
- 1 bay leaf
- Salt, to taste
- Pepper, to taste
- 8 cups chicken stock or broth
Instructions
- Heat a splash of olive oil in a large pot over medium heat. Add onions, carrots, and celery. Sauté for 5-7 minutes until softened.
- Add the chicken and minced garlic to the pot. Sear for 3-4 minutes until lightly golden.
- Pour in the chicken broth, add bay leaf, thyme, salt, and pepper. Bring to a boil, then reduce to a simmer. Cook for 30-40 minutes for whole chicken or 20-25 minutes for pieces.
- Remove the chicken, let it cool slightly, and then add noodles to the broth, cooking according to package directions (about 5-7 minutes).
- Shred the chicken into bite-sized pieces, discarding bones and skin. Return chicken to the pot and stir to combine.
- Taste the broth and adjust seasoning as needed. Remove bay leaf and stir in chopped parsley.
Notes
Serve hot with a sprinkle of fresh parsley and warm, crusty bread. Can be frozen for up to three months.
Nutrition
- Serving Size: 1 bowl
- Calories: 350
- Sugar: 4g
- Sodium: 800mg
- Fat: 12g
- Saturated Fat: 3g
- Unsaturated Fat: 4g
- Trans Fat: 0g
- Carbohydrates: 30g
- Fiber: 3g
- Protein: 25g
- Cholesterol: 80mg
Keywords: chicken noodle soup, comfort food, winter recipes, hearty soup
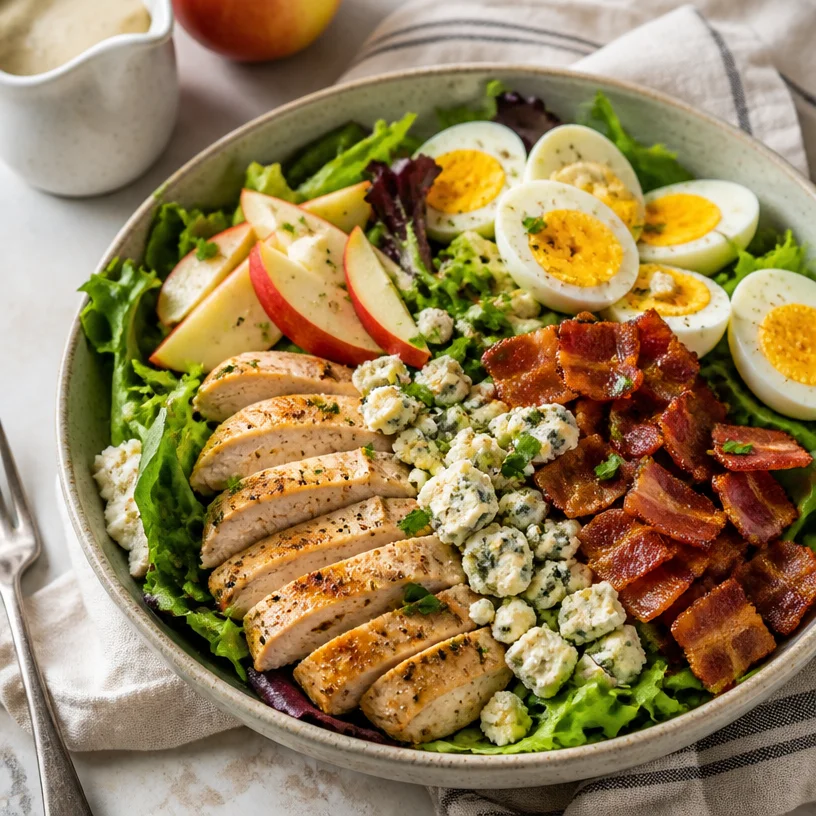
Minute Harvest Cobb Salad for Easy Weeknight Meal Prep
Harvest Cobb Salad: A Celebration of Fall Flavors
Welcome to Clean Plate Cravings! Today, I’m excited to share a dish that captures the heart and soul of autumn—a Harvest Cobb Salad. This vibrant medley of ingredients isn’t just a salad; it’s an experience, a celebration of harvest bounty that literally bursts with flavor. Whether you’re winding down after a long day or hosting friends for a cozy dinner, this dish fits the bill perfectly.
Let’s face it: salads often get the short end of the stick when it comes to excitement in the kitchen. But that’s where I come in! My mission is to transform your perception of salads from boring, bland green bowls into something fresh, inviting, and downright delicious. Here, we’ll layer hearty ingredients like succulent chicken, crispy bacon, and crisp apples atop a bed of mixed greens before drizzling it all with your favorite dressing. Can you say “yum”?
A Slice of Nostalgia: My Early Kitchen Adventures
Growing up, my kitchen was a hub of activity and flavor. My mom was a magician in the kitchen, whipping up meals that were hearty yet wholesome. One fall afternoon, I remember her making a big version of what I would later recognize as my beloved Harvest Cobb Salad. She’d laid out all the ingredients in colorful bowls on the kitchen counter—vibrant greens, crunchy apples, and the irresistible aroma of sizzling bacon.
As a little chef in training, I would eagerly reach for the ingredients, thinking about how each added flavor and texture would come together in a delicious medley. It was then that I understood the beauty of combining simple ingredients into something extraordinary. The sounds of sizzling, the smell of fall, and the joy of creating something delightful together made that day unforgettable. Now, I channel all those heartwarming memories when I whip up my version of Harvest Cobb Salad, proving once again that food kindles both comfort and joy.
Ingredients
-
Chicken Breast
Tender and juicy, chicken breast can be grilled, baked, or even pan-seared for added flavor. If you’re short on time, rotisserie chicken makes a great shortcut! -
Bacon
Crispy bacon brings a salty crunch to the salad. For a healthier option, you can use turkey bacon or skip it altogether—it’ll still taste fantastic. -
Hard-Boiled Eggs
Creamy and rich, eggs add protein and a nice texture. If you want to jazz it up, try poached eggs or even avocado slices for that creamy goodness. -
Apples
Sweet, crisp, and colorful—apples add a refreshing crunch. Granny Smith apples bring a tartness, but feel free to swap for Fuji or Honeycrisp for a sweeter salad. -
Blue Cheese
Rich and tangy, blue cheese pairs perfectly with fruity elements. For a milder option, try feta or goat cheese—for those of you who might not be on team blue! -
Mixed Greens
A blend of lettuce adds freshness and vibrancy. I love using arugula and spinach for their peppery flavor, but you can also use your favorite greens. Even kale works beautifully if massaged first! -
Dressing
Choose your favorite dressing—whether it’s a homemade vinaigrette or your go-to store-bought option. A balsamic vinaigrette or honey mustard dressing enhances the fall flavors beautifully.
Step-by-Step Instructions
-
Prepare the Chicken
Start by seasoning your chicken breast with salt, pepper, and a drizzle of olive oil. Preheat your grill (or skillet) to medium-high. Grill the chicken for about 6-7 minutes per side, or until the internal temperature reaches 165°F (75°C). Chef tip: Let it rest for a few minutes before slicing to lock in those juicy flavors! -
Cook the Bacon
While the chicken cooks, place your bacon in a skillet over medium heat. Fry until crispy and golden. This will take about 5-6 minutes. Once done, transfer it to a plate lined with paper towels to absorb excess grease. Pro tip: Save a tablespoon of bacon fat for an extra touch of flavor in your dressing! -
Hard-Boil the Eggs
Place eggs in a pot and cover them with cold water. Bring to a boil! Once boiling, cover the pot and remove from heat. Let it sit for 12 minutes, then transfer the eggs to an ice bath for easy peeling. -
Chop the Ingredients
While everything cooks, slice your apples and crumble your blue cheese. I recommend slicing the apples just before serving to prevent browning, or toss them in a bit of lemon juice to keep them vibrant. -
Assemble the Delight
In a large salad bowl or serving platter, lay down your mixed greens as a base. Pile on the sliced chicken, crispy bacon, hard-boiled eggs (sliced), crunchy apples, and blue cheese. -
Dress It Up
Drizzle your dressing over the salad right before serving. Toss gently to combine, ensuring everything is coated in deliciousness. Remember, you can always start with less dressing—it’s easier to add more than to remove!
Serving Suggestions
To plate your Harvest Cobb Salad, serve it in a large bowl family-style or plate individual servings to show off the colorful layers. You could garnish with a sprinkle of nuts or seeds for an added crunch, and perhaps a few extra apple slices on top for decorative flair. Trust me, it looks as good as it tastes!
Recipe Variations
- Southwest Cobb: Add black beans, corn, and avocado, and dress with a creamy jalapeño dressing for a twist.
- Mediterranean Delight: Swap apples and blue cheese for roasted red peppers and feta, incorporating olives and a lemon-herb vinaigrette.
- Vegan Vibe: Replace chicken with chickpeas, bacon with tempeh, and cheese with avocado or nutritional yeast.
- Grilled Veggie Medley: Add grilled zucchini, bell peppers, or asparagus to bring in some seasonal veggies.
- Quinoa Boost: Top your salad with cooked quinoa to add fiber and make it even more filling.
Chef’s Notes
This recipe has evolved over the years, and I love the freedom it brings to experiment. One of my most memorable kitchen moments was when I accidentally spilled some apple cider vinegar into the dressing—what a happy accident! The tangy sweetness gave the salad a complexity I never expected. Now, it’s a staple ingredient that I always include. Food is all about discovery, and I encourage you to make this dish your own!
FAQs and Troubleshooting
-
What if my chicken turns out dry?
Be sure to let your chicken rest after cooking. This allows juices to redistribute. Also, marinating ahead of time can help. -
How can I store leftovers?
Store leftover salad components separately. Mixed greens don’t hold up well, so keep everything packed tightly in airtight containers. Assemble fresh portions the next day! -
Can I meal prep this salad?
Absolutely! Cook and prepare all your ingredients, and store them in separate containers. Just mix and dress when you’re ready to eat. -
What if I don’t have blue cheese?
That’s totally fine! Substitute with your favorite cheese or simply omit it. The salad will still be delicious!
Nutritional Info
This Harvest Cobb Salad is packed with nutrients! It provides a balanced meal rich in protein, healthy fats, and fiber. For a single serving, you’re looking at approximately:
- Calories: 450
- Protein: 30g
- Carbohydrates: 20g
- Fat: 30g
Ready to taste the flavors of fall? Grab your ingredients and let’s get cooking! Let this Harvest Cobb Salad bring joy back to your dining table with its mix of colors, textures, and tastes. Here’s to fresh, simple, and seriously delicious food! Cheers!
PrintHarvest Cobb Salad: A Celebration of Fall Flavors
A vibrant medley of fall flavors, this Harvest Cobb Salad features chicken, crispy bacon, crunchy apples, and blue cheese atop a bed of mixed greens, drizzled with your favorite dressing.
- Prep Time: 15 minutes
- Cook Time: 30 minutes
- Total Time: 45 minutes
- Yield: 4 servings 1x
- Category: Salad
- Method: Grilling
- Cuisine: American
- Diet: Gluten-Free, Nut-Free
Ingredients
- 1 pound Chicken Breast
- 6 strips Bacon
- 2 Hard-Boiled Eggs
- 2 Apples (Granny Smith or Fuji)
- ½ cup Blue Cheese
- 4 cups Mixed Greens (arugula, spinach, or kale)
- ½ cup Dressing (balsamic vinaigrette or honey mustard)
Instructions
- Prepare the Chicken: Start by seasoning your chicken breast with salt, pepper, and a drizzle of olive oil. Preheat your grill (or skillet) to medium-high. Grill the chicken for about 6-7 minutes per side, or until the internal temperature reaches 165°F (75°C). Let it rest for a few minutes before slicing to lock in those juicy flavors!
- Cook the Bacon: While the chicken cooks, place your bacon in a skillet over medium heat. Fry until crispy and golden, about 5-6 minutes. Transfer to a plate lined with paper towels to absorb excess grease.
- Hard-Boil the Eggs: Place eggs in a pot and cover them with cold water. Bring to a boil. Once boiling, cover and remove from heat. Let it sit for 12 minutes, then transfer the eggs to an ice bath for easy peeling.
- Chop the Ingredients: While everything cooks, slice your apples and crumble your blue cheese. Slice the apples just before serving to prevent browning, or toss them in lemon juice.
- Assemble the Delight: In a large salad bowl, lay down your mixed greens as a base. Pile on sliced chicken, crispy bacon, hard-boiled eggs (sliced), crunchy apples, and blue cheese.
- Dress It Up: Drizzle your dressing over the salad right before serving. Toss gently to combine, ensuring everything is coated in deliciousness.
Notes
This recipe is versatile; feel free to substitute ingredients to fit your preferences or dietary needs.
Nutrition
- Serving Size: 1 serving
- Calories: 450
- Sugar: 10g
- Sodium: 900mg
- Fat: 30g
- Saturated Fat: 10g
- Unsaturated Fat: 15g
- Trans Fat: 0g
- Carbohydrates: 20g
- Fiber: 4g
- Protein: 30g
- Cholesterol: 225mg
Keywords: Harvest Cobb Salad, Fall Salad, Healthy Salad, Autumn Recipe
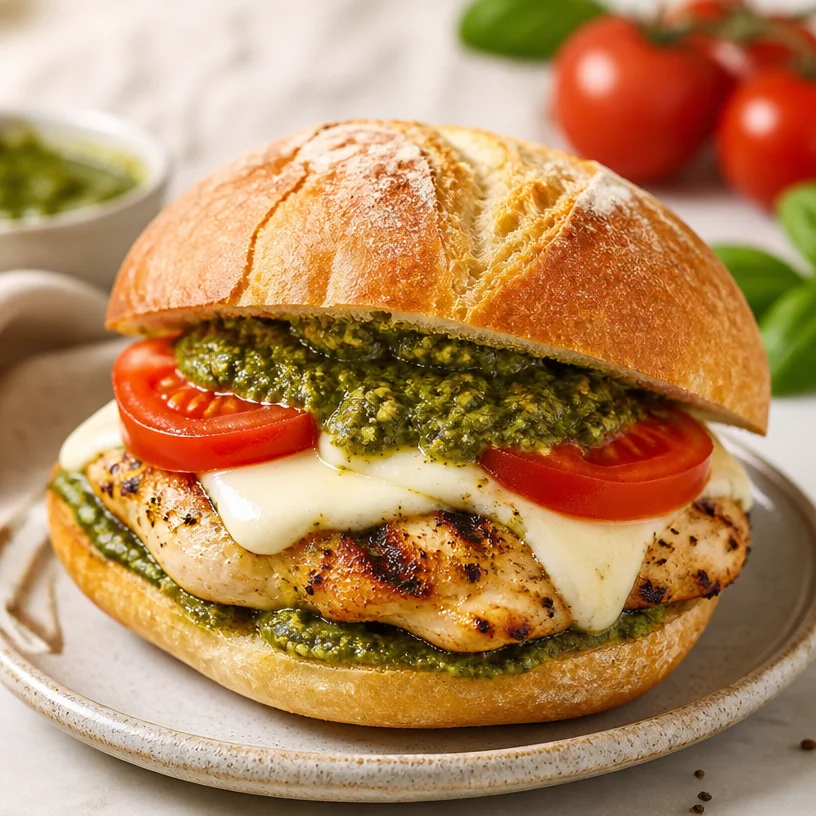
Minute Caprese Chicken Sandwich for Easy Weeknight Dinner
Caprese Chicken Sandwich: A Delightful Twist on a Classic
Welcome to another vibrant chapter of Clean Plate Cravings! Today, I’m so excited to share a dish that embodies the spirit of summer and freshness—Caprese Chicken Sandwich. It beautifully marries the classic Caprese salad with juicy, succulent chicken, transforming a simple sandwich into a flavorful adventure.
A Slice of Memory
I still remember my first encounter with Caprese salad. It was during a summer vacation in Italy, sitting at a sun-drenched café with an incredible view of the countryside. I was a young culinary enthusiast, and as I watched the chef prepare a classic Caprese salad, I was mesmerized. The vibrant green basil, glistening ripe tomatoes, and creamy mozzarella were like a visual symphony. I took my first bite, and the burst of flavors transported me to food heaven.
Fast forward to today, I’ve taken that inspiration and created my take on the classic dish—a Caprese Chicken Sandwich. It captures the essence of those fresh Italian ingredients while adding a hearty side of protein. Whether it’s for a quick weekday lunch or a casual weekend get-together, this sandwich always feels special. Join me on this delightful journey as we craft the perfect Caprese Chicken Sandwich together!
Ingredients
Here’s what you’ll need to create this scrumptious sandwich:
-
Chicken Breast: A lean, protein-packed delight that can be grilled, baked, or sautéed. You can substitute it with turkey breast or even grilled tofu for a plant-based option.
-
Fresh Mozzarella: Creamy and mild, it melts beautifully! For a twist, try burrata for an extra rich texture or mozzarella di bufala for that authentic Italian flavor.
-
Ripe Tomatoes: Choose juicy, in-season tomatoes for the best flavor. Heirloom tomatoes are an excellent alternative as they add color and sweetness.
-
Basil Pesto: A vibrant sauce that adds depth and aromatic flavor. You can make your own or opt for store-bought. If you’re looking for a dairy-free option, use nutritional yeast for flavor enhancement.
-
Bread: A sturdy choice is essential for holding all that filling. Ciabatta or focaccia works wonderfully. For gluten-free options, try gluten-free bread or lettuce wraps for a lighter touch.
Each ingredient plays a crucial role in bringing this sandwich together while allowing for personal touches. If you have a favorite flavor, feel free to experiment!
Step-by-Step Instructions
Ready to dive into the kitchen? Here’s how you make this Caprese Chicken Sandwich:
-
Prepare the Chicken:
- Season the chicken breast with salt, pepper, and a drizzle of olive oil. Let it marinate for at least 15-30 minutes for the flavors to mingle. This step will ensure flavor penetration. If you’re short on time, even 10 minutes will work!
-
Cook the Chicken:
- Heat a grill pan or outdoor grill over medium-high heat. Place the chicken on the grill and cook for about 6-7 minutes on each side until the internal temperature reaches 165°F (75°C). Tip: If using a meat thermometer, this takes out the guesswork!
-
While the Chicken Cooks:
- Slice your tomatoes and mozzarella. Aim for uniform slices to create a beautiful layered effect in your sandwich.
-
Toast the Bread:
- Split your chosen bread in half and toast it lightly. This will give your sandwich a lovely crunch. You can use a toaster or a grill—just don’t forget to keep an eye on it to avoid burning.
-
Assemble the Sandwich:
- Spread a generous amount of pesto on the bottom half of the toasted bread. Place the cooked chicken on top. Layer with the mozzarella and tomatoes. Add fresh basil leaves generously for that aromatic touch. Drizzle with extra pesto or balsamic glaze for a flavor kick!
-
Top It Off:
- Cap the sandwich with the other half of the bread. For extra warmth and melted goodness, you can wrap the assembled sandwich in foil and warm it in a preheated oven at 350°F (175°C) for about 5-7 minutes.
-
Slice & Enjoy:
- Cut the sandwich in half for sharing (or for that perfect Instagram shot!). Serve it with a side of crispy salad or some sweet potato fries for a delightful meal.
Serving Suggestions
Presentation is key! Serve your Caprese Chicken Sandwich on a rustic wooden board or a crisp white plate. A sprinkle of freshly cracked pepper or a few torn basil leaves on the side can elevate the dish visually and gastronomically. To make it a complete meal, pair it with a light arugula salad dressed in lemon vinaigrette!
Recipe Variations
-
Mediterranean Twist: Add roasted red peppers and olives to your sandwich for a Mediterranean kick.
-
Spicy Kick: Drizzle your sandwich with a bit of sriracha or add spicy arugula for those who love a bit of heat.
-
Caprese Salad: If you want a lighter option, skip the bread and create a Caprese salad with the same fantastic flavors.
-
Chicken Marinade: Try marinating your chicken in balsamic vinegar or lemon juice for added zest before cooking.
-
Grilled Vegetables: Layer in grilled zucchini or eggplant for a delightful veggie addition to your sandwich!
Chef’s Notes
Oh, the memories I have in the kitchen! This recipe has evolved over the years. Initially, I was all about the classic Caprese salad, but it didn’t take long before I wanted more substance. The idea of pairing tender chicken with those beloved flavors was a game-changer for my meal routine!
And here’s a funny story: During one of my early attempts at making this sandwich, I forgot to buy mozzarella. I ended up using goat cheese instead, which transformed it entirely, leading to a whole new obsession. Cooking is about exploration, which is why I encourage you to have fun with it!
FAQs and Troubleshooting
-
What can I use instead of chicken?
If you’re looking for alternatives, grilled eggplant, chickpeas, or even shrimp can work wonderfully to keep that protein punch while catering to different diets. -
My bread is getting soggy. What can I do?
Make sure to toast your bread well. You can also spread a thin layer of cream cheese as a barrier between the meat and the bread, keeping it crispier for longer! -
How do I store leftovers?
If you have any leftovers (which I doubt because it’s just so good!), store them in an airtight container in the fridge. To reheat, pop it in the oven for a few minutes to revive that crispy texture. -
What’s the best way to cut the tomatoes?
A serrated knife is your best friend! It’s perfect for all those juicy tomatoes, giving you slices without squishing them.
Nutritional Info
While the specific values can vary based on ingredient choices, here’s a rough idea per serving for the Caprese Chicken Sandwich:
- Calories: Approximately 450
- Protein: 30g
- Carbohydrates: 40g
- Fat: 20g
Now you have all you need to make a scrumptious Caprese Chicken Sandwich! I can’t wait for you to try it and create your own memories in the kitchen. Remember, this dish is not just about satisfying your hunger; it’s about enjoying the process and celebrating fresh ingredients. Happy cooking!
PrintCaprese Chicken Sandwich

A delightful twist on the classic Caprese salad, marrying juicy chicken with fresh ingredients for a flavorful sandwich.
- Prep Time: 30 minutes
- Cook Time: 15 minutes
- Total Time: 45 minutes
- Yield: 2 servings 1x
- Category: Sandwich
- Method: Grilling
- Cuisine: Italian
- Diet: Non-Vegetarian
Ingredients
- 1 Chicken Breast
- Fresh Mozzarella
- Ripe Tomatoes
- Basil Pesto
- Ciabatta or Focaccia Bread
Instructions
- Prepare the chicken: Season the chicken breast with salt, pepper, and olive oil, marinating for at least 15-30 minutes.
- Cook the chicken on a grill over medium-high heat for 6-7 minutes on each side until cooked through.
- While the chicken cooks, slice your tomatoes and mozzarella for layering.
- Toast the bread halves lightly to give it a crunchy texture.
- Assemble the sandwich with pesto on the bottom half, followed by chicken, mozzarella, tomatoes, basil leaves, and drizzle with pesto or balsamic glaze.
- Top the sandwich with the other half of the bread, and warm in foil in the oven if desired.
- Slice and serve with a side of salad or sweet potato fries.
Notes
Serve on a rustic wooden board with freshly cracked pepper and torn basil leaves for an elevated presentation.
Nutrition
- Serving Size: 1 sandwich
- Calories: 450
- Sugar: 5g
- Sodium: 600mg
- Fat: 20g
- Saturated Fat: 8g
- Unsaturated Fat: 10g
- Trans Fat: 0g
- Carbohydrates: 40g
- Fiber: 2g
- Protein: 30g
- Cholesterol: 70mg
Keywords: Caprese, Chicken, Sandwich, Italian, Summer, Fresh, Grilled Chicken
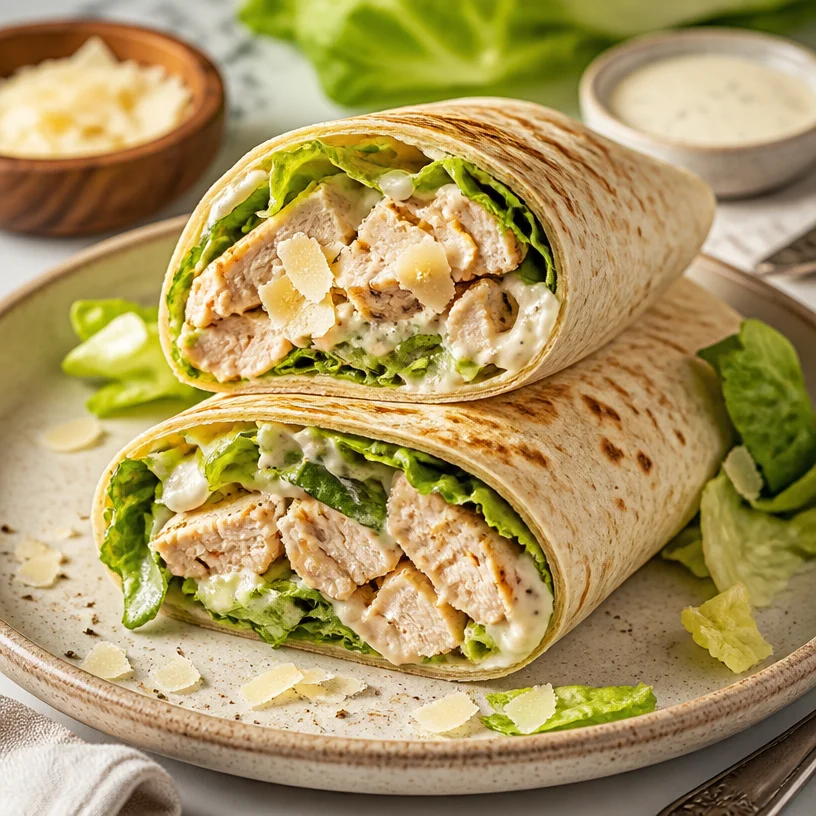
Minute Chicken Caesar Wrap for Busy Weeknights
Chicken Caesar Wrap: A Delicious Journey into Flavor Town!
Welcome, food lovers! If you’re looking for a dish that combines freshness, simplicity, and an explosion of flavor, you’ve come to the right place. Today, we’re diving into a recipe that has earned its spot at the top of my lunch favorites: the Chicken Caesar Wrap. This straightforward meal encapsulates everything I believe in about cooking—it’s healthy, satisfying, and oh-so-delicious!
As a chef who thrives on creativity, I love reinventing classic flavors to make them more accessible for everyday dining. The Chicken Caesar Wrap transforms the traditional Caesar salad into a convenient, handheld delight. Whether you’re packing lunch for work, feeding a family, or just treating yourself, this recipe is your ticket to flavor town without the fuss.
There’s something incredibly fulfilling about wrapping up your favorite ingredients in a soft tortilla and getting ready to take that first bite. The crunch of romaine lettuce, the savory notes of chicken, the nutty hit of Parmesan, and the creamy Caesar dressing come together in a harmonious embrace. It’s a dish that not only fills your belly but also lifts your spirits.
Now, let’s embark on this culinary adventure together! I’ll share my personal story behind this beloved wrap and guide you through every step of making it. So grab your apron, and let’s get cooking!
A Nostalgic Kitchen Memory
Growing up, my family had a tradition of Sunday lunches that were more like a feast. My mom, a cooking enthusiast, would whip up anything from homemade pasta to rich, hearty casseroles. One of the dishes that always stood out and made an appearance on our table was her classic Caesar salad. It was fresh, zesty, and packed with flavor.
I remember sitting at the kitchen table with my siblings, eagerly waiting for that salad to pop up alongside crispy garlic bread and succulent roasted chicken. My mom would toss everything together with such finesse, turning even the simplest ingredients into something magical.
As I grew older and started to experiment in the kitchen, I realized I wanted to take that nostalgia and give it a modern twist. Thus, the Chicken Caesar Wrap was born! It was my way of turning a beloved family recipe into a trendy, on-the-go meal that anyone could enjoy. Now, whenever I wrap it up in a tortilla, I feel that warm sense of family connection and comfort.
Ingredients
Here’s what you’ll need to create the perfect Chicken Caesar Wrap:
-
Chicken Breast:
- Grilled or roasted, it’s the star of the show! You can substitute with grilled tofu for a vegetarian option or canned chickpeas for a protein-packed twist.
-
Romaine Lettuce:
- Crisp and refreshing, it adds that essential crunch. Feel free to swap it out for kale or spinach for a different leafy green.
-
Parmesan Cheese:
- This nutty cheese elevates the dish. If you’re dairy-free, try nutritional yeast or a dairy-free cheese alternative.
-
Caesar Dressing:
- Creamy and tangy, it ties all the flavors together. You can use store-bought dressing or whip up a homemade version for an extra touch.
-
Wraps or Tortillas:
- Whole wheat or gluten-free options work wonderfully. I love using spinach tortillas for a pop of color!
These ingredients come together to create a wrap that’s as nutritious as it is delectable. Remember, cooking is all about flexibility, so feel free to experiment with your favorite ingredients!
Step-by-Step Instructions
Ready to make an irresistible Chicken Caesar Wrap? Let’s get down to business!
-
Prep the Chicken:
- Start with about 2 boneless, skinless chicken breasts. Season them with salt and pepper—simple but effective! If you want to elevate the flavor, try marinating your chicken in lemon juice, garlic, and olive oil for about 30 minutes. This adds depth and keeps the chicken moist.
-
Cook the Chicken:
- Preheat your grill (or stovetop skillet) to medium-high heat. Grill the chicken for approximately 6–7 minutes on each side, or until it’s cooked through (internal temperature should reach 165°F). Let it rest for a few minutes to lock in those juices, then slice it into bite-sized pieces.
-
Prepare the Vegetables:
- While your chicken is resting, wash and chop 1 head of romaine lettuce. I like to slice it finely for easy wrapping, but feel free to tear it into bigger pieces if that’s your style.
-
Mix the Dressing:
- If you’re going the homemade route, whisk together 1/2 cup of mayonnaise, 2 tablespoons of Dijon mustard, 1 tablespoon of Worcestershire sauce, a squeeze of lemon juice, and a pinch of salt and pepper. Toss in about 1/4 cup of grated Parmesan cheese for that authentic Caesar taste.
-
Assemble the Wrap:
- Grab your tortilla or wrap and spread a generous spoonful of Caesar dressing as a base. Layer on your sliced chicken, followed by the romaine lettuce, and finish with an extra sprinkle of Parmesan cheese.
-
Roll It Up:
- Fold in the sides of the tortilla, then roll it tightly from the bottom to the top. Give it a gentle squeeze to hold everything together.
-
Slice and Serve:
- Cut your wrap in half—because who doesn’t love a good presentation? Place it seam-side down on a plate.
-
Enjoy!
- Take a moment to admire your creation. Dive in and taste that delicious harmony of flavors with each bite!
Serving Suggestions
For a beautiful presentation, serve your Chicken Caesar Wrap with a side of sweet potato fries or a simple fruit salad. You could also pair it with a light soup for a comforting meal. To up the visual appeal, garnish your plate with fresh herbs or a lemon wedge. Your dinner guests will be impressed!
Recipe Variations
Feeling adventurous? Here are some fun twists you can add to your Chicken Caesar Wrap for a new experience:
- Spicy Kick: Add sliced jalapeños or a drizzle of sriracha to the wrap for a zesty kick.
- Mediterranean Vibes: Swap out the Caesar dressing for a tangy tahini sauce and sprinkle on feta cheese with kalamata olives.
- BBQ Flavor: Use BBQ chicken instead of traditional Caesar chicken to create a fusion of flavors.
- Vegan Delight: Replace chicken with roasted chickpeas or jackfruit and opt for a vegan Caesar dressing to keep it plant-based.
- Herb Infusion: Incorporate fresh basil or cilantro into the wrap for an added layer of flavor.
These variations will keep your meals exciting and help you discover new favorite flavors!
Chef’s Notes
I’ve made this wrap countless times, and each time it feels special. One of my favorite kitchen stories involves a friend who claimed she could never cook. When I invited her over for a cooking session, we tackled these wraps together. After a few laughs and a couple of mishaps (including some rogue chicken pieces that hit the floor), she ended up surprising herself with how delicious her wrap turned out! It’s stories like these that show the beauty of cooking—the joy, the creativity, and the shared laughter.
Through the years, I’ve played around with this recipe, tweaking and refining until it became foolproof. Cooking is all about discovery; every dish tells a story of learning and growth!
FAQs and Troubleshooting
-
How do I store leftovers?
- Wrap tightly in foil or place in an airtight container. Store in the refrigerator for up to two days. Reheat the chicken to maintain flavor and safety before reassembling the wrap.
-
Can I prep this ahead of time?
- Absolutely! You can cook the chicken a day in advance. Just keep the ingredients separate until you’re ready to assemble to prevent sogginess.
-
What can I use instead of wraps?
- Lettuce leaves make for a fantastic low-carb alternative! You can also try using pita bread or grain-free tortillas.
-
Why is my wrap falling apart?
- If your wrap isn’t holding together, it might be overstuffed or lacking the proper binding from the dressing. Keep the filling modest and ensure you’re wrapping tightly.
Nutritional Info
(For a single wrap)
- Calories: 400
- Protein: 30g
- Carbohydrates: 30g
- Fat: 20g
- Fiber: 5g
Now that you’re armed with an incredible Chicken Caesar Wrap recipe and lots of stories, I hope you’ll bring this dish into your kitchen and make it your own. Cooking is a journey we take through flavors, and I’m thrilled to have shared this ride with you! Remember, no matter how many tweaks you make, the best part is enjoying every bite. Until next time, happy cooking!
PrintChicken Caesar Wrap
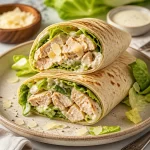
A fresh and flavorful wrap that transforms the classic Caesar salad into a convenient meal, perfect for lunch or a quick dinner.
- Prep Time: 15 minutes
- Cook Time: 14 minutes
- Total Time: 29 minutes
- Yield: 4 servings 1x
- Category: Lunch
- Method: Grilling
- Cuisine: American
- Diet: Protein-rich
Ingredients
- 2 boneless, skinless chicken breasts
- 1 head of romaine lettuce
- 1/2 cup Caesar dressing
- 1/4 cup grated Parmesan cheese
- 4 whole wheat or gluten-free wraps or tortillas
Instructions
- Prep the chicken: Season the chicken breasts with salt and pepper, and marinate in lemon juice, garlic, and olive oil for 30 minutes.
- Cook the chicken: Preheat grill to medium-high heat, grill chicken for 6–7 minutes on each side until cooked through.
- Prepare the vegetables: Wash and chop the romaine lettuce finely.
- Mix the dressing: Whisk together mayonnaise, Dijon mustard, Worcestershire sauce, lemon juice, salt, pepper, and Parmesan cheese.
- Assemble the wrap: Spread Caesar dressing on a tortilla, layer with sliced chicken, romaine lettuce, and Parmesan cheese.
- Roll it up: Fold in the sides of the tortilla and roll tightly from the bottom to the top.
- Slice and serve: Cut the wrap in half and place seam-side down on a plate.
Notes
Store leftovers tightly wrapped in foil or in an airtight container in the refrigerator for up to two days. The ingredients can be prepped ahead of time to save on assembly time.
Nutrition
- Serving Size: 1 wrap
- Calories: 400
- Sugar: 3g
- Sodium: 600mg
- Fat: 20g
- Saturated Fat: 5g
- Unsaturated Fat: 10g
- Trans Fat: 0g
- Carbohydrates: 30g
- Fiber: 5g
- Protein: 30g
- Cholesterol: 70mg
Keywords: chicken wrap, Caesar salad, quick lunch, healthy recipe, easy dinner

Minute Turkey Cranberry Panini for Busy Weeknights
Turkey Cranberry Panini: A Deliciously Nostalgic Twist
Welcome, fellow food lovers! I’m thrilled to have you here at Clean Plate Cravings, where we believe that fresh food should fit seamlessly into our lives—full of flavor and no fuss. Today, I’m excited to talk about a delightful sandwich that gives a nod to the classic holiday spread: the Turkey Cranberry Panini. This is not just a recipe; it’s a celebration of taste, simplicity, and the cherished moments around our dining tables.
The Turkey Cranberry Panini is the perfect balance of savory and sweet. With tender turkey, tangy cranberry sauce, melty Swiss cheese, and crispy sourdough bread, it’s a dish that really hits the mark, whether you’re reminiscing about family gatherings or just wanting something delicious for lunch. Let’s dive into this culinary adventure together as I share the cozy story behind this delightful meal, the simple ingredients that make it shine, and all the tips you need to whip it up in your kitchen.
A Slice of Nostalgia
Growing up, Thanksgiving was always a big deal at my house. The aroma of roasted turkey filled the air as we gathered around the kitchen, chatting and laughing while my mom worked her magic. Every year, we would pile our plates high with turkey, stuffing, and a generous dollop of homemade cranberry sauce. After the meal, we might have some leftovers, but nothing compared to the joy of enjoying it all fresh off the table.
One year, inspired by my family’s post-Thanksgiving conversations, I took it upon myself to create something new out of those leftover holiday treasures. Armed with some sourdough bread, turkey, Swiss cheese, and cranberry sauce, I decided to make a panini. I still remember the thrill of pressing that sandwich down, waiting for it to crisp and melt in all the right places. Each bite delivered that nostalgic taste of Thanksgiving, but in a warm, comforting sandwich form. From that day on, the Turkey Cranberry Panini became a beloved staple, enjoyed anytime we craved a dash of festive flavor.
Ingredients
Before we embark on our sandwich-making journey, let’s gather our ingredients! Here’s what you’ll need:
-
Turkey: Tender turkey slices are the star of our dish. Feel free to use deli turkey or leftovers from your holiday feast! For a vegetarian twist, swap it out for roasted veggies or savory mushrooms.
-
Cranberry Sauce: Sweet and tangy, this is what brings the festive spirit to our panini. You can use store-bought or homemade; both work beautifully! If you want a twist, try using a spiced cranberry chutney for a flavor boost.
-
Swiss Cheese: Melty, creamy, and slightly nutty, Swiss cheese pulls the panini together beautifully. Need to switch it up? Gruyère works great as a substitute, or for a sharp twist, try sharp cheddar.
-
Sourdough Bread: The foundation of our sandwich! Sourdough has a lovely tangy flavor and sturdy crust that holds everything together. If sourdough isn’t your jam, feel free to use whole grain or even a gluten-free bread option.
Step-by-Step Instructions
Now that we have our ingredients ready, let’s get cooking! Follow these steps to create the most delicious Turkey Cranberry Panini:
-
Preheat Your Panini Press (or skillet): If you’re using a panini press, preheat it according to the manufacturer’s instructions. For skille, heat it over medium heat. This ensures that our bread gets that gorgeous golden crust.
-
Prepare the Bread: Start by laying out two slices of sourdough bread. This is where the magic begins! Use a pastry brush or your fingers to lightly spread a thin layer of butter or olive oil on one side of each slice. This will help us achieve that irresistible crunch!
-
Layer It Up: On the unbuttered side of one slice, layer a generous amount of turkey. Don’t skimp on this—this is the heart of our panini! Follow it with a spoonful of cranberry sauce. You can add more or less to taste, depending on how sweet-tart you like it.
-
Cheese, Please: Now it’s time for the cheese! Add a couple of slices of Swiss cheese on top of the cranberry sauce. This melty goodness will elevate our sandwich from good to unforgettable.
-
Top It Off: Place the second slice of sourdough bread on top, ensuring that the buttered sides are facing out. Press down gently—this will help everything meld together while cooking.
-
Cook It Right: If using a panini press, simply close it and let it cook for about 5–7 minutes, or until golden. If using a skillet, cook for about 3-4 minutes per side, flipping carefully with a spatula. You can place a heavy skillet on top of your panini to help it cook evenly and achieve that crispy texture.
-
Check for Melty Goodness: After cooking, take a peek to ensure the cheese is all melted and the bread is wonderfully golden. If it’s not quite there, give it another minute or two.
-
Slice and Serve: Once perfectly cooked, remove the panini from your press or skillet, and let it sit for a minute. Slice it in half diagonally, revealing the delicious layers within.
Serving Suggestions
Plate your Turkey Cranberry Panini with a side of crunchy chips or a simple side salad to add some freshness! Drizzle a bit of balsamic reduction on the plate for a gourmet touch, or serve it with a dollop of extra cranberry sauce on the side for dipping. It’s the little touches that make your meal feel that much more special!
Recipe Variations
The beauty of the Turkey Cranberry Panini is that it’s incredibly versatile! Here are a few creative twists you can try:
-
Apple Slices: Add thin slices of crisp apple for a touch of sweetness and crunch.
-
Avocado Smash: Spread some creamy avocado on one slice of bread for extra richness.
-
Spice It Up: Incorporate some arugula or spinach for a peppery bite, or add spicy mustard for a tangy kick.
-
Switch the Cheese: Experiment with other cheeses like pepper jack for a little heat or creamy mozzarella for a melty delight.
-
Savory Sauté: Sautéed onions or mushrooms can add deep, rich flavors to your panini.
Chef’s Notes
As with any cherished recipe, the Turkey Cranberry Panini has evolved over time in my kitchen. Originally crafted from holiday leftovers, I’ve come to appreciate experimenting with different flavors and ingredients. Each time I make it, I find that little tweaks make it feel new! I love to invite friends over and have a panini-making night, where we share our favorite ingredients and create our own custom versions. It’s a party and a wonderful way to explore new tastes!
FAQs and Troubleshooting
-
What if my panini is soggy?
- Make sure to use just the right amount of cranberry sauce—not too much! Also, ensure your bread is dry and not too thick, as this can lead to sogginess.
-
Can I use frozen turkey?
- Absolutely! Just make sure it’s fully thawed and well-drained before adding it to your sandwich.
-
Why isn’t the cheese melting?
- If you’re having trouble with cheese melting, try covering the sandwich with a lid during cooking or using a lower heat to allow more time for melting without burning the bread.
-
Can I meal prep this panini?
- Definitely! Assemble your panini, wrap it in foil or parchment paper, and store it in the refrigerator. When you’re ready to enjoy, you can grill it fresh.
Nutritional Info
Here’s a rough nutritional breakdown for one Turkey Cranberry Panini (not including additional sides):
- Calories: Approximately 400
- Protein: 28g
- Carbohydrates: 38g
- Fat: 15g
- Fiber: 3g
- Sugar: 4g
Enjoy the process, and don’t forget to savor each bite! The Turkey Cranberry Panini is not just about filling your stomach; it’s also about filling your heart with the warmth and joy of good company and delicious food. So roll up your sleeves, get your aprons on, and let’s make some tasty memories in the kitchen! Happy cooking!
PrintTurkey Cranberry Panini

A delightful sandwich featuring tender turkey, tangy cranberry sauce, and melty Swiss cheese on crispy sourdough bread.
- Prep Time: 10 minutes
- Cook Time: 7 minutes
- Total Time: 17 minutes
- Yield: 1 serving
- Category: Main Course
- Method: Grilling
- Cuisine: American
- Diet: None
Ingredients
- Tender turkey slices
- Cranberry sauce
- Swiss cheese
- Sourdough bread
- Butter or olive oil
Instructions
- Preheat your panini press (or skillet).
- Prepare the bread by spreading butter or oil on one side of each slice.
- Layer turkey on the unbuttered side of one slice.
- Add a spoonful of cranberry sauce.
- Top with slices of Swiss cheese.
- Place the second slice of bread on top, buttered sides out.
- Cook in the press or skillet until golden, about 5-7 minutes.
- Check for melted cheese and golden bread.
- Slice and serve with sides!
Notes
For extra richness, consider adding avocado or experimenting with different cheeses.
Nutrition
- Serving Size: 1 sandwich
- Calories: 400
- Sugar: 4g
- Sodium: 500mg
- Fat: 15g
- Saturated Fat: 7g
- Unsaturated Fat: 5g
- Trans Fat: 0g
- Carbohydrates: 38g
- Fiber: 3g
- Protein: 28g
- Cholesterol: 60mg
Keywords: panini, turkey sandwich, cranberry sauce, comfort food
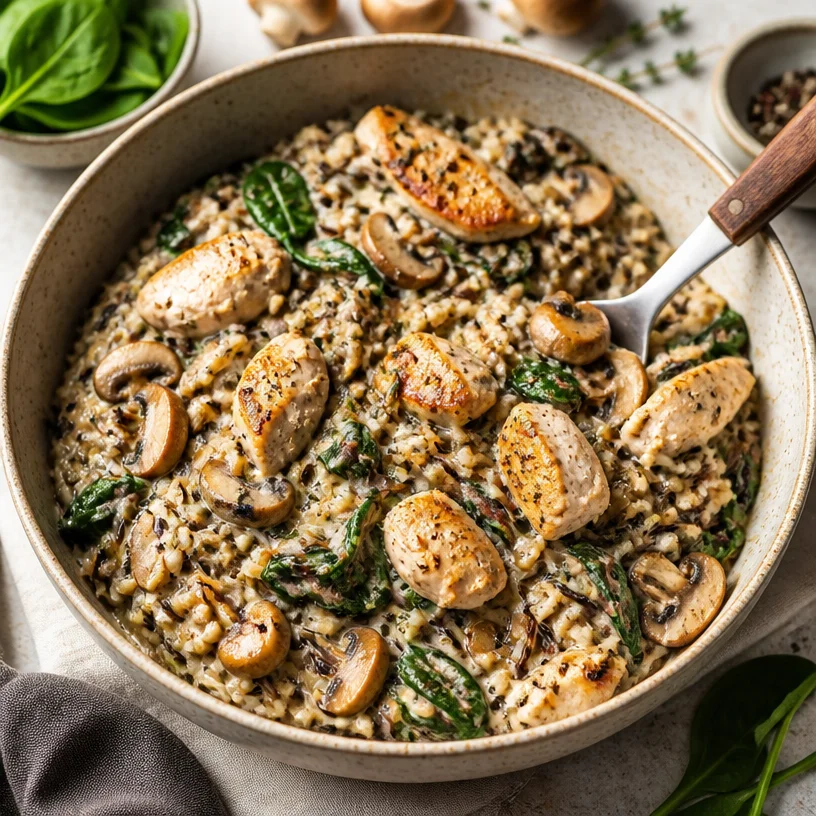
Minute One-Pan Chicken Wild Rice Bowl for Weeknights
Chicken Wild Rice Bowl: A Wholesome Delight
Welcome to the cozy corner of our kitchen! Today, we’re diving into a dish that perfectly embodies everything I stand for here at Clean Plate Cravings: the Chicken Wild Rice Bowl. This vibrant, nourishing meal isn’t just delicious, it’s an experience, a warm hug in a bowl, if you will. Imagine sinking your fork into tender chicken, earthy mushrooms, and wholesome wild rice, all topped off with fresh spinach. Are you ready for this culinary adventure? Let’s get to it!
A Nostalgic Kitchen Memory
When I think of wild rice, I’m transported back to my childhood kitchen, where the aroma of something bubbling away on the stove would set the scene. My mom often cooked with wild rice, believing it to be the jewel of grains. I remember one evening in particular, she invited our neighbor, Mrs. Hargrove, over for dinner. Now, Mrs. Hargrove was a culinary force in our neighborhood—her apple pie was scandalously good! That evening, Mom made her famous chicken and wild rice dish, packed with goodies from our garden. The clinking of pots, the rhythmic chopping of garlic, and the laughter in our kitchen made it unforgettable.
As we sat around the table, Mrs. Hargrove marveled at the wild rice, “This isn’t just food; it’s love on a plate!” That memory stuck with me, and today, I believe in that same idea. Cooking is about nourishment, yes, but also about connection—sharing moments, stories, flavors. So, let’s recreate that love today!
Ingredients You’ll Need
For our Chicken Wild Rice Bowl, here’s what you’ll need:
-
Chicken Breast (or thighs): Protein-packed and juicy, chicken can be easily substituted with tofu or chickpeas for a vegetarian version. A simple marinade of olive oil and herbs can elevate the flavor!
-
Wild Rice: This nutty, fiber-rich grain is the star of our dish. If you can’t find wild rice, brown rice, or quinoa can make a great substitute, just be mindful of cooking times!
-
Mushrooms (button or cremini): Earthy mushrooms add depth to the dish. Feel free to swap them out for zucchini or bell peppers if you’re in the mood for something different.
-
Fresh Spinach: This leafy green packs a nutritional punch. You can use kale or Swiss chard in its place, but you may want to cook them a bit longer as they’re heartier than spinach.
-
Chicken Broth (or vegetable broth): Using broth instead of water enhances the flavor! Homemade broth is ideal, but a good-quality store-bought version works just as well.
Step-by-Step Instructions
Ready to bring this dish to life? Let’s get started!
-
Cook the Wild Rice: Begin by rinsing the wild rice under cold water. In a medium pot, combine 1 cup of wild rice with 3 cups of chicken or vegetable broth. Bring to a boil, then reduce the heat to low, cover, and simmer for 40-50 minutes until the rice is tender. Chef’s tip: If the rice is not all cooked after 50 minutes, don’t worry! Just add a bit more liquid and keep cooking until it’s done.
-
Prep the Chicken: While the rice is cooking, take 1 pound of chicken breast or thighs. Season them generously with salt, pepper, and your favorite herbs like thyme or rosemary. Little hack: Let the chicken rest at room temperature for about 15 minutes before cooking for even cooking.
-
Sear the Chicken: Heat 2 tablespoons of olive oil in a large skillet over medium-high heat. Add the chicken and cook for about 5-7 minutes on each side until golden brown and fully cooked. Use a meat thermometer to ensure the internal temperature reaches 165°F (75°C). Once cooked, remove from the pan and let it rest for about 10 minutes before slicing. Pro tip: This rest time allows the juices to redistribute, keeping your chicken moist!
-
Sauté the Mushrooms: In the same skillet, add another drizzle of olive oil if needed, and toss in about 8 ounces of sliced mushrooms. Sauté them for 5-6 minutes until they’re nicely browned. Chef’s insight: Adding a sprinkle of salt while cooking mushrooms helps to draw out their moisture, making them more flavorful!
-
Add the Spinach: Toss in a hefty handful of fresh spinach, about 4 cups. Stir until just wilted. This will take just a minute or two. Hack: If you want more color and nutrients, throw in some cherry tomatoes or bell peppers with the spinach!
-
Combine: Once the wild rice is ready, fluff it with a fork, and then stir it into the mushroom and spinach mixture. Slice the resting chicken and gently mix it that wholesome rice medley. Note: Save a few mushroom pieces and spinach for garnish!
Serving Suggestions
To present this dish beautifully, scoop generous portions of the chicken wild rice mixture into bowls. You can drizzle a little olive oil on top or a squeeze of lemon for brightness. Don’t forget to garnish with those reserved mushrooms and spinach, and maybe a sprinkle of fresh herbs like parsley or chives to put a little flourish on your creation!
Recipe Variations
-
Mediterranean Twist: Add some sun-dried tomatoes, kalamata olives, and feta cheese to the mix for a Mediterranean flair.
-
Spicy Kick: Incorporate a teaspoon of red pepper flakes or a dollop of spicy harissa paste to the sautéed mushrooms for a little heat!
-
Savory Flavor: You could also experiment with different herbs like dill or cilantro. They offer unique flavors that can completely change the dish while keeping it fresh and fun.
-
Nutty Crunch: Before serving, sprinkle some toasted walnuts or pecans for an added crunch and healthy fats!
-
Summer Fresh: In the warm months, consider adding grilled zucchini or fresh corn off the cob for a seasonal touch.
Chef’s Notes
This recipe really is a canvas—don’t hesitate to make it your own! Over the years, I’ve watched this dish evolve in my kitchen, adapting to whatever I have on hand. One day, I had leftover roasted sweet potatoes, and the dish transformed into an unexpected delight. Cooking is all about creativity, and I encourage you to experiment!
And let’s be real—that’s half the fun! And oh, those evenings spent with family, laughing over a hearty bowl of chicken wild rice? That’s what it’s all about, folks. Food is about connection, memories, and expressions of love.
FAQs and Troubleshooting
Q1: Why is my wild rice not cooking properly?
A: Sometimes, wild rice can be a little fickle. If it’s still hard after cooking, add a little more broth or water and give it extra time. Just remember to cover it so the steam keeps it tender!
Q2: Can I make this dish ahead of time?
A: Absolutely! You can prepare everything in advance and store each component in the fridge. Simply reheat when ready to serve, and this makes for a fantastic meal prep option!
Q3: How do I ensure my chicken stays juicy?
A: The two key factors here are resting and cooking at the right temperature. Also, don’t overcook it—using a meat thermometer takes the guesswork out and helps achieve that perfect juicy bite!
Q4: What if I want to make it vegan?
A: Great question! You can swap the chicken for your favorite plant-based protein like chickpeas or lentils, and use vegetable broth. The mushrooms and spices will keep it packed with flavor!
Nutritional Info (per serving, approx)
- Calories: 450
- Protein: 35g
- Carbs: 45g
- Fat: 15g
- Fiber: 6g
And there you have it! Your Chicken Wild Rice Bowl is more than just a meal; it’s a celebration of flavors and memories. Thank you for joining me today, and I can’t wait to hear how your culinary adventure turns out! Keep it fresh, simple, and delicious, my foodie friends!
PrintChicken Wild Rice Bowl
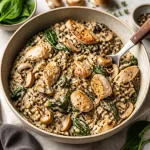
A vibrant and nourishing Chicken Wild Rice Bowl packed with tender chicken, earthy mushrooms, and wholesome wild rice topped with fresh spinach.
- Prep Time: 15 minutes
- Cook Time: 50 minutes
- Total Time: 65 minutes
- Yield: 4 servings 1x
- Category: Main Course
- Method: Stovetop
- Cuisine: American
- Diet: Gluten-Free
Ingredients
- 1 pound Chicken Breast (or thighs)
- 1 cup Wild Rice
- 8 ounces Mushrooms (button or cremini)
- 4 cups Fresh Spinach
- 3 cups Chicken Broth (or vegetable broth)
- 2 tablespoons Olive Oil
- Salt and pepper to taste
- Your favorite herbs (thyme, rosemary)
Instructions
- Cook the Wild Rice: Rinse the wild rice under cold water. In a medium pot, combine wild rice with chicken or vegetable broth. Bring to a boil, reduce heat to low, cover, and simmer for 40-50 minutes until tender.
- Prep the Chicken: Season chicken with salt, pepper, and herbs. Let it rest at room temperature for 15 minutes.
- Sear the Chicken: Heat olive oil in a large skillet over medium-high heat. Add chicken and cook for about 5-7 minutes on each side until golden brown and fully cooked. Let it rest before slicing.
- Sauté the Mushrooms: In the same skillet, add more olive oil if needed and add sliced mushrooms. Sauté for 5-6 minutes until browned.
- Add the Spinach: Toss in spinach and stir until just wilted, about 1-2 minutes.
- Combine: Fluff the wild rice and stir it into the mushroom and spinach mixture. Slice the resting chicken and mix into the rice medley.
Notes
For extra flavor, consider drizzling some olive oil or squeezing lemon juice on top before serving. Garnish with fresh herbs.
Nutrition
- Serving Size: 1 bowl
- Calories: 450
- Sugar: 2g
- Sodium: 600mg
- Fat: 15g
- Saturated Fat: 3g
- Unsaturated Fat: 10g
- Trans Fat: 0g
- Carbohydrates: 45g
- Fiber: 6g
- Protein: 35g
- Cholesterol: 75mg
Keywords: chicken, wild rice, bowl, healthy, comforting, family meal
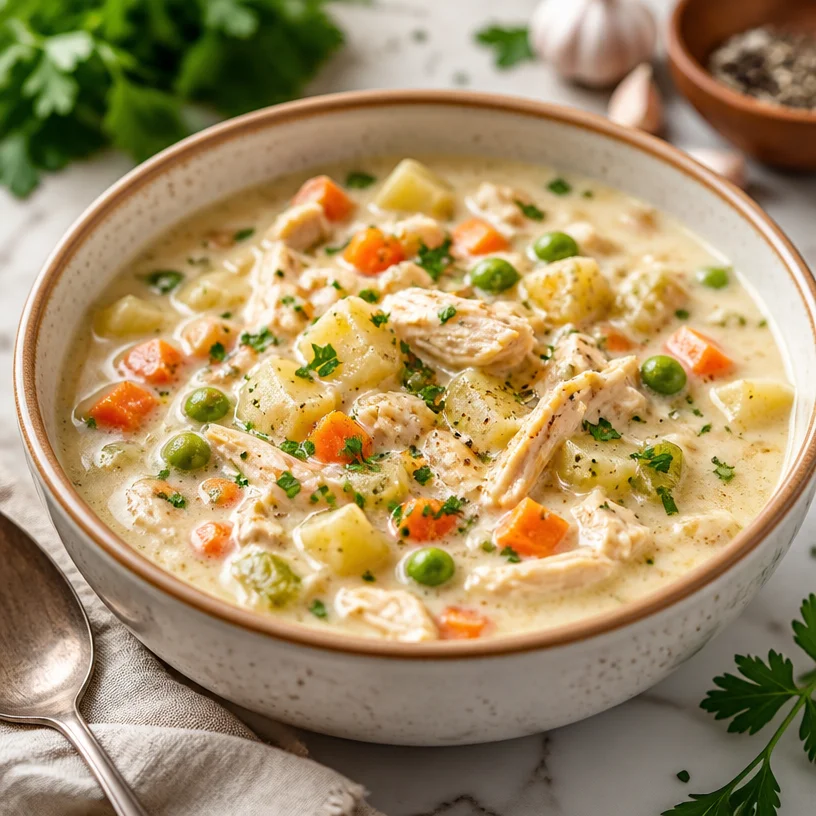
One-Pot Chicken Pot Pie Soup: Creamy Weeknight Comfort
Cozy Up with Chicken Pot Pie Soup: A Heartwarming Dish
Welcome back, foodies! Today, we’re diving into a bowlful of nostalgia and comfort with a delightful Chicken Pot Pie Soup that will warm your heart and satisfy your cravings. It’s creamy, hearty, and bursting with flavors that take you straight to your happy place. This soup is like a hug in a bowl and is perfect for those chilly evenings when you want something nourishing yet incredibly satisfying.
So grab your apron, and let’s cook up something that not only fills your belly but also brings a smile to your face. As always, I assure you it won’t be complicated. We’re keeping it real, fresh, and absolutely delicious!
A Bite of Nostalgia
One of my fondest culinary memories dates back to my childhood kitchen, where every Sunday was a cooking adventure. My mom would whip up her famous chicken pot pie, its flaky crust golden and inviting. The aroma of her savory filling—chicken mingling with vegetables, spices, and that rich, creamy base—would fill our home, making it impossible to resist sneaking spoonfuls before dinner.
Fast forward to today, and while I adore the original pie, I wanted to give it a modern twist with this soup version. It retains that same comforting essence but with the ease of a bowlful of goodness that’s perfect for today’s busy lives. Plus, there’s no fussing with pie crust; just hearty goodness that fills you from the inside out.
Ingredients You’ll Need
Here’s what you’ll need to make your Chicken Pot Pie Soup:
-
2 cups cooked chicken, shredded
Use rotisserie chicken for a quick start, or poach some chicken breasts in chicken broth until cooked—super juicy and flavorful! -
4 cups chicken broth
Homemade is always ideal, but store-bought works just as well. Look for low-sodium varieties to control the saltiness of your soup. -
2 cups potatoes, diced
Yukon Gold or red potatoes hold their shape well and add creaminess. For a lighter option, try using cauliflower instead! -
1 cup carrots, diced
Sweet and colorful, they add texture. Substitute with parsnips for an earthier taste. -
1 cup celery, diced
Adds a crunch and depth of flavor. You can swap it out for leeks if you want a milder, onion-like flavor. -
1 cup green peas
Frozen peas are perfect and easy! Fresh peas can also be used when in season. -
1 onion, chopped
A staple that adds sweetness and depth. Try shallots for a more delicate flavor. -
3 cloves garlic, minced
Fresh minced garlic enhances the savory profile. Garlic powder can be used, but fresh is always best! -
1 cup heavy cream
This gives the soup its rich, creamy texture. For a lighter version, use half-and-half or coconut milk for a dairy-free option. -
2 tablespoons olive oil
To sauté your veggies! Feel free to use butter for an even richer flavor. -
1 teaspoon dried thyme
A classic herb that complements the dish beautifully. Fresh thyme is always a great substitution! -
Salt and pepper to taste
Essential for bringing out all the flavors. Always season as you go for the best results. -
Fresh parsley for garnish
Brightens up the dish and adds a pop of color. Chives or dill also work nicely here.
Step-by-Step Instructions
Let’s bring everything together for this soul-warming soup!
-
Sauté the Veggies
In a large pot, heat the olive oil over medium heat. Add the chopped onions and sauté until they’re translucent, about 3-4 minutes. There’s something magical about the smell of onions hitting the pan—it’s the fragrance of home! Just like my mom’s kitchen filled with comforting scents. -
Add Your Garlic
Stir in your minced garlic and cook for an additional minute. This step is crucial! You want to release all that garlicky goodness without letting it burn. -
Stir in the Veggies
Toss in your diced carrots, celery, and potatoes. Give everything a good stir and let it cook for about 5-7 minutes. This allows the veggies to soften and enhances their flavors. The colors alone will brighten your day! -
Pour in the Broth
Now, pour in the chicken broth and bring everything to a simmer. This is where the magic starts! As it bubbles away, the broth will absorb all those lovely flavors. -
Add Chicken and Peas
After about 15 minutes, when the potatoes are fork-tender, stir in your shredded chicken and green peas. Allow it to simmer for an additional few minutes until everything is well combined and heated through. -
Pour in the Cream
Finally, add the heavy cream and dried thyme. Stir gently to combine, and let it simmer for an additional 5 minutes. This will thicken up the soup and make it ultra-creamy. Taste it—add salt and pepper as needed. -
Garnish and Serve
Ladle the soup into bowls and garnish with freshly chopped parsley. Enjoy the well-deserved culinary moment!
Serving Suggestions
Serving up this Chicken Pot Pie Soup is simple yet satisfying. I like to dig out my favorite rustic bowls, ladle in a generous portion, and finish with a sprinkle of fresh parsley. Serve it alongside some crusty bread or a side salad to balance things out. Pair it with a glass of white wine or your favorite sparkling water for a cozy dinner experience!
Recipe Variations
Get creative with your Chicken Pot Pie Soup! Here are some delicious variations to consider:
- Herb Infusion: Add fresh herbs like rosemary or dill for an exciting flavor twist.
- Spice it Up: Add a pinch of red pepper flakes for a hint of heat.
- Vegetarian Option: Replace chicken with hearty mushrooms or chickpeas for a fulfilling meatless version.
- Dumplings Delight: Top the soup with biscuit or dumpling dough and bake for a delightful twist on traditional pot pie.
- Slow Cooker Magic: Prepare the soup in a slow cooker for an even easier option—just toss everything in, and let it cook on low for 6-8 hours.
Chef’s Notes
This Chicken Pot Pie Soup has come a long way since that inspiring moment in my childhood kitchen! I’ve played with textures and flavors over the years, always striving to keep it comforting and nourishing. The best part? It’s fridge-friendly! I often make a big pot and enjoy it for days. Just be mindful that it thickens as it sits; a splash of broth or cream during reheating works wonders.
And if you ever find yourself with a little leftover, guess what? A spoonful of homemade biscuit dough placed on top can turn your soup into a pot pie-style dish that is just as cozy and comforting!
FAQs and Troubleshooting
1. Can I make this soup gluten-free?
Definitely! Just ensure you use gluten-free chicken broth, and you’re good to go. The recipe is naturally gluten-free as it stands.
2. What can I do if my soup is too thick?
Simply stir in some additional broth or water, a splash at a time until it reaches your desired consistency.
3. How can I make this dish more filling?
For a heartier meal, add some cooked rice or noodles to the soup. Quinoa is also a fantastic, protein-packed option.
4. Can I freeze Chicken Pot Pie Soup?
Yes! This soup freezes beautifully. Just cool it completely before transferring it to airtight containers, and it should last up to three months in the freezer. Remember to leave a little space at the top of the container, as it will expand when frozen.
Nutritional Info
For those interested in the nutritious side of things, each serving provides a wholesome balance of protein, healthy fats, and a variety of vitamins from the veggies. It’s the perfect meal to refuel after a busy day!
So there you have it, friends! A classic Chicken Pot Pie Soup that’s cozy, creamy, and bursting with flavor, just like my mom’s. I hope you whip up a batch soon and enjoy not only the deliciousness but the memories it brings. Happy cooking!
PrintChicken Pot Pie Soup

A creamy and hearty chicken pot pie soup that warms your heart and satisfies your cravings, perfect for chilly evenings.
- Prep Time: 10 minutes
- Cook Time: 30 minutes
- Total Time: 40 minutes
- Yield: 4 servings 1x
- Category: Main Course
- Method: Stovetop
- Cuisine: American
- Diet: None
Ingredients
- 2 cups cooked chicken, shredded
- 4 cups chicken broth
- 2 cups potatoes, diced
- 1 cup carrots, diced
- 1 cup celery, diced
- 1 cup green peas
- 1 onion, chopped
- 3 cloves garlic, minced
- 1 cup heavy cream
- 2 tablespoons olive oil
- 1 teaspoon dried thyme
- Salt and pepper to taste
- Fresh parsley for garnish
Instructions
- Sauté the Veggies: In a large pot, heat the olive oil over medium heat. Add the chopped onions and sauté until they’re translucent, about 3-4 minutes.
- Add Your Garlic: Stir in your minced garlic and cook for an additional minute.
- Stir in the Veggies: Toss in your diced carrots, celery, and potatoes. Give everything a good stir and let it cook for about 5-7 minutes.
- Pour in the Broth: Pour in the chicken broth and bring everything to a simmer.
- Add Chicken and Peas: After about 15 minutes, stir in your shredded chicken and green peas.
- Pour in the Cream: Finally, add the heavy cream and dried thyme. Stir gently to combine.
- Garnish and Serve: Ladle the soup into bowls and garnish with freshly chopped parsley.
Notes
This soup thickens as it sits; add a splash of broth or cream during reheating. Freezes well for up to three months.
Nutrition
- Serving Size: 1 serving
- Calories: 400
- Sugar: 6g
- Sodium: 600mg
- Fat: 20g
- Saturated Fat: 10g
- Unsaturated Fat: 8g
- Trans Fat: 0g
- Carbohydrates: 30g
- Fiber: 4g
- Protein: 20g
- Cholesterol: 60mg
Keywords: chicken pot pie, soup, comfort food, creamy soup, cozy recipe
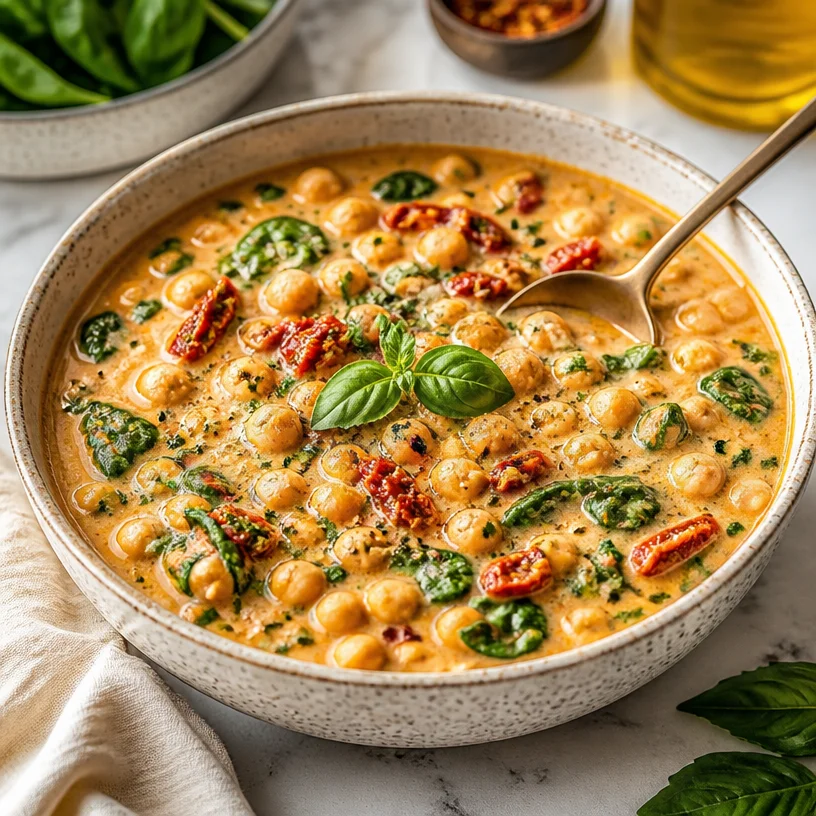
One-Pot Tuscan Garbanzo Bean Soup: Weeknight Comfort
Welcome to the World of Tuscan Garbanzo Bean Soup!
Hey there, food lovers! If you’re looking for a cozy, delicious dish that fills your kitchen with warmth and your heart with joy, you’re in the right place. Today, we’re diving into a comforting bowl of Tuscan Garbanzo Bean Soup, a recipe that’s not only packed with flavor but also overflows with love and memories. Cooking should never feel like a chore—it’s about creating moments, nourishing yourself and those you love, and of course, enjoying every single bite.
Now, let’s take a moment to appreciate the beauty of this soup. It’s rich, creamy, and oh-so-satisfying. Picture this: it’s a chilly evening, and you walk into your kitchen, greeted by the fragrant aroma of garlic and herbs mingling in the air. The vibrant greens of fresh spinach and the delightful pop of chickpeas bring a smile to your face. It’s a dish that invites you to gather around the table, share stories, and savor the flavors of life. Ready to create this culinary masterpiece? Let’s roll up our sleeves and get cooking!
A Memory in a Bowl
As I sit here reminiscing, I can’t help but think of my grandmother, who introduced me to the heartwarming world of soups. Growing up, her kitchen was the place to be, filled with laughter, stories, and, of course, the aromatic scents of her famous recipes. One of my favorites was her chickpea stew, which she cooked on rainy days—those moments became my fondest memories.
I remember one particular afternoon when my cousins and I gathered for our usual Sunday dinner at her cozy farmhouse. She had prepared a big pot of her chickpea soup, and as we sat at the table, she shared stories of her childhood in Tuscany, where fresh ingredients were always at our fingertips. The way she described the rustic markets, vibrant with colors, made the food taste even better. That soup brought us together, and though I didn’t realize it at the time, it sparked my passion for cooking.
These days, I carry on her legacy with this Tuscan Garbanzo Bean Soup recipe. Each spoonful is a nod to her love, and it brings me right back to those happy gatherings. So, let’s get the flavors dancing in our kitchens and create something that’s not just a meal, but a memory.
Ingredients
Here’s what you’ll need to whip up this soul-soothing soup:
-
1 tablespoon olive oil
A staple in Italian cooking! This adds a rich, fruity flavor. Try using extra-virgin olive oil for the best taste. Feel free to substitute with avocado oil if you want something with a higher smoke point. -
1/2 cup diced onion
Onions are the backbone of flavor in many dishes. If you’re in a pinch, shallots or leeks work great too! -
2 cloves garlic (minced)
Garlic adds that irresistible punch and aroma. Always use fresh for maximum flavor! You can swap in garlic powder in a pinch, but it won’t pack the same punch. -
1 teaspoon dried oregano
This herb brings a classic Italian taste to the soup. If you don’t have oregano, basil or thyme can be lovely alternatives. -
1/2 teaspoon red pepper flakes (adjust to taste)
For a hint of heat! Add more if you like things spicy, or leave it out altogether for a milder flavor. -
2 tablespoons tomato paste
Tomato paste thickens the soup and enhances the flavor. You can use crushed tomatoes if you’re out—just add them earlier in the cooking process. -
2 (15 oz) cans chickpeas (drained and rinsed)
Chickpeas provide protein and texture. If canned beans aren’t an option, dried ones can be cooked until tender instead. -
3-4 cups low sodium vegetable broth
A great base for your soup. You can use chicken broth if you’re not vegetarian or vegan, or water for a lighter option. -
1/3 cup sundried tomatoes in oil (chopped)
These add a sweet and tart flavor! If you prefer a fresher taste, try diced fresh tomatoes. -
Juice of 1/2 lemon
This brightens the entire dish! You can use lime juice if you’re looking for a different twist. -
1 cup full-fat coconut milk from a can (OR 1/2 cup heavy cream)
For that creamy texture! Full-fat coconut milk is vegan, while heavy cream provides a rich flavor. You could also try nut milk for a lighter version. -
2-3 cups fresh spinach
Spinach adds a burst of color and nutrients. Kale or Swiss chard can work if you’d like a change. -
Salt and black pepper to taste
Essential for bringing out all the flavors! -
Fresh basil leaves (for garnish)
Nothing says "fresh" like a sprinkle of basil on top!
Step-by-Step Instructions
Alright, let’s get cooking! Follow these detailed steps, and let’s turn those ingredients into a bowl of pure happiness.
-
Heat the Olive Oil
Start by drizzling a tablespoon of olive oil into a large pot over medium heat. Let it warm up for about a minute—it should shimmer but not smoke. This is that lovely moment where the aroma starts to fill your kitchen, setting the stage for an epic meal. -
Sauté the Aromatics
Toss in the diced onion and sauté for about 5 minutes, or until it’s translucent. This is the base of your soup, so take a moment to relish that fragrant onion-y goodness. Stir frequently to prevent sticking. Once it’s soft, add the minced garlic and red pepper flakes. Sauté for another minute until fragrant—it’ll feel like you’re walking through an Italian market! -
Add the Tomato Paste
Stir in the tomato paste and let it cook for about 2 minutes. This step is crucial because it caramelizes the sugars in the paste, bringing out a deeper umami flavor. You should see the ingredients clumping together nicely and smelling divine! -
Incorporate the Chickpeas
Now it’s time to add those drained and rinsed chickpeas. Stir them in well, mixing with the tomatoes and onions. Cook for about 2 more minutes, allowing the chickpeas to soak up some of that tomatoey goodness. Your kitchen should smell amazing by now! -
Pour in the Broth
It’s broth time! Gradually add in 3-4 cups of low-sodium vegetable broth, stirring continuously. If you want a thicker consistency, go with 3 cups. Let it come to a gentle boil, then reduce the heat to simmer. This is where the magic begins! -
Stir in Sundried Tomatoes
Toss in your chopped sundried tomatoes and keep simmering for about 10-15 minutes. This allows all the flavors to meld together beautifully. I love stirring occasionally and watching those vibrant colors turn into a harmony of rich flavors. -
Creamy Delight
After simmering, it’s time to add the full-fat coconut milk (or heavy cream). This makes your soup luxuriously creamy! Stir it in and let it simmer for another 5-10 minutes on low heat. You’re going to want to dip some crusty bread into this! -
Toss in Fresh Spinach
Just a few minutes before serving, throw in the fresh spinach. It wilts down quickly, keeping that gorgeous green color. Stir until it’s just wilted—no more than a couple of minutes. -
Finish with Lemon Juice
Squeeze in the juice of half a lemon—this is the finishing touch! Taste and adjust with salt and black pepper as needed. This small step brightens everything up and adds that pop of freshness! -
Serve It Up!
Ladle your Tuscan Garbanzo Bean Soup into bowls and garnish with fresh basil leaves. I like to add a drizzle of olive oil on top for that extra flair. Ready to serve!
Serving Suggestions
When it comes to serving this soup, I like to keep it simple yet stunning. Use deep bowls to hold all that goodness. A sprinkle of freshly chopped basil or a drizzle of balsamic glaze on top makes everything look gourmet. Pair it with a slice of crusty bread, perfect for dipping, or a light salad for a fuller meal. Trust me, you’ll impress your guests or simply treat yourself to a feast fit for a Tuscan kitchen!
Recipe Variations
Let’s spice things up! Here are some creative twists you can try with your Tuscan Garbanzo Bean Soup:
- Add Protein: Toss in some cooked chicken, sausage, or crispy bacon for a meaty version.
- Herb Adventure: Experiment with different herbs like thyme, rosemary, or even a bay leaf for a unique flavor profile.
- Creamy Alternative: Swap coconut milk with almond or cashew cream for a nutty flavor if you’re looking for non-dairy options.
- Vegetable Boost: Add in carrots, zucchini, or bell peppers for some added crunch and nutrients.
- Spice it Up: For more heat, experiment with different peppers or even a splash of hot sauce.
Chef’s Notes
This recipe is close to my heart, and every time I make it, I think of my grandmother stirring her big pot, teaching me how to make her beloved chickpea stew. Over the years, I’ve adapted it to suit my style and to include pantry staples I always have on hand. The beauty of this soup is that it’s flexible—feel free to make it your own! One of my favorite things about it is how it tastes even better the next day; it gives the flavors more time to mingle and becomes even more comforting.
Kitchens can be a wild adventure, though! I remember one time I accidentally mistook cayenne for paprika and ended up with a very spicy, albeit delicious, version of this soup. Sometimes, mistakes in the kitchen create the most memorable meals! Here’s a tip: embrace the mess and learn to laugh at your culinary trials.
FAQs and Troubleshooting
1. Can I make this soup ahead of time?
Absolutely! This soup is ideal for meal prep. Store it in the fridge for up to 5 days, and feel free to freeze it in portions for later enjoyment.
2. What if I don’t have vegetable broth?
No worries! You can use chicken broth, or simply add water and season with a bit more salt and spice until it suits your taste.
3. My soup is too thick; what can I do?
If your soup is thicker than you’d like, simply add more broth or water, stirring until you reach your desired consistency.
4. Can I blend the soup?
Definitely! For a creamier texture, you can blend part or all of the soup using an immersion blender or by transferring batches to a stand blender. Just be cautious with hot liquids.
Nutritional Info
While I won’t bore you with all the details, I can tell you that this Tuscan Garbanzo Bean Soup is packed with plant-based protein, healthy fats, and lots of vitamins! It’s vegetarian-friendly and can easily be made vegan or gluten-free with just a few clever swaps.
So, there you have it! A hearty, warm bowl of Tuscan Garbanzo Bean Soup that’s easy to make and full of love. I hope you find joy in every simmer and savor every spoonful. Happy cooking, my friends! Let the flavors of Tuscany come to life in your kitchen, and remember—what matters is that you share it with love!
PrintTuscan Garbanzo Bean Soup

A comforting and creamy Tuscan Garbanzo Bean Soup packed with flavors of garlic, herbs, and fresh spinach.
- Prep Time: 15 minutes
- Cook Time: 30 minutes
- Total Time: 45 minutes
- Yield: 4 servings 1x
- Category: Main Course
- Method: Stovetop
- Cuisine: Italian
- Diet: Vegetarian
Ingredients
- 1 tablespoon olive oil
- 1/2 cup diced onion
- 2 cloves garlic (minced)
- 1 teaspoon dried oregano
- 1/2 teaspoon red pepper flakes (adjust to taste)
- 2 tablespoons tomato paste
- 2 (15 oz) cans chickpeas (drained and rinsed)
- 3–4 cups low sodium vegetable broth
- 1/3 cup sundried tomatoes in oil (chopped)
- Juice of 1/2 lemon
- 1 cup full-fat coconut milk from a can (OR 1/2 cup heavy cream)
- 2–3 cups fresh spinach
- Salt and black pepper to taste
- Fresh basil leaves (for garnish)
Instructions
- Heat the olive oil in a large pot over medium heat for about a minute.
- Toss in the diced onion and sauté for about 5 minutes until translucent.
- Add the minced garlic and red pepper flakes, sautéing for another minute.
- Stir in the tomato paste and cook for about 2 minutes.
- Incorporate the drained chickpeas and cook for 2 more minutes.
- Pour in 3-4 cups of vegetable broth and let it come to a gentle boil.
- Toss in the chopped sundried tomatoes and simmer for about 10-15 minutes.
- Add the coconut milk (or heavy cream) and simmer for another 5-10 minutes.
- Stir in the fresh spinach and cook until just wilted.
- Squeeze in the lemon juice, adjusting seasonings as needed.
- Serve in bowls, garnished with fresh basil leaves.
Notes
The soup tastes even better the next day as flavors meld together. Perfect for meal prep!
Nutrition
- Serving Size: 1 serving
- Calories: 350
- Sugar: 6g
- Sodium: 600mg
- Fat: 15g
- Saturated Fat: 11g
- Unsaturated Fat: 4g
- Trans Fat: 0g
- Carbohydrates: 45g
- Fiber: 10g
- Protein: 12g
- Cholesterol: 0mg
Keywords: garbanzo bean soup, Tuscan soup, vegetarian recipe, comfort food
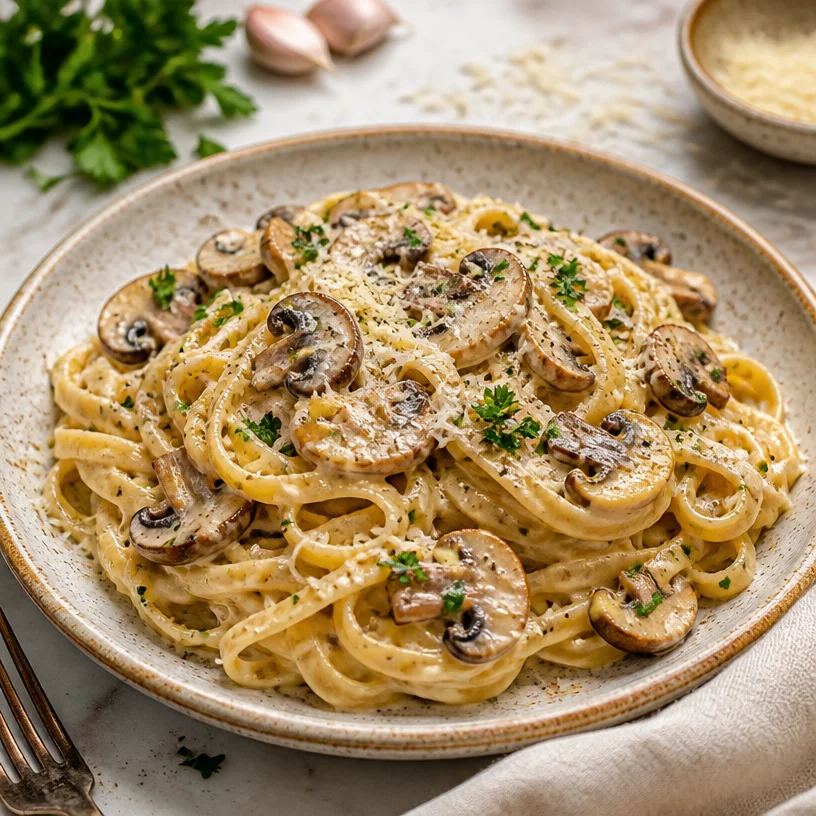
Minute Creamy Mushroom Pasta for Cozy Weeknights
Irresistibly Creamy Mushroom Pasta for Cozy Nights
There’s something magical about cozy nights in, especially when they’re infused with the warmth of good food and great company. Imagine the scene: it’s a chilly evening, and the glow from the kitchen fills the air with mouthwatering aromas. What’s cooking? Oh, just a pot of Irresistibly Creamy Mushroom Pasta that’s so delightful, it’ll have you saying goodbye to any takeout dreams for the night.
This dish is all about celebrating the simple ingredients that come together to create a comforting, creamy hug in a bowl. I’m Ava Carter, your friendly kitchen guide, and today I’m here to share my all-time favorite pasta recipe, infused with earthy mushrooms and luxurious cream that’ll leave you feeling nourished, satisfied, and utterly cozy.
Personal Story
I have a heartfelt memory tied to this creamy mushroom pasta recipe, one that I treasure deeply. It all started in my college days, when budget cuts meant relying on pantry staples. On one particular rainy evening, my friends and I huddled in our small kitchen, trying to figure out what to whip up for dinner. We rummaged through our meager supplies and what did we find? A package of pasta, a few mushrooms lurking in the fridge, and some heavy cream.
With a gentle drizzle of olive oil and the aromatic symphony of sautéing onions and garlic, we transformed those simple ingredients into a dish that felt like a gourmet meal. Laughter filled the kitchen as we twirled our pasta, savoring each bite as if we were dining in a high-end restaurant. The memories of those laughter-filled dinners still warm my heart, just like this pasta warms my belly.
Ingredients
Here’s what you’ll need to create your own cozy bowl of Irresistibly Creamy Mushroom Pasta:
-
200 grams Pasta (Any type you love, like fettuccine or penne.)
Pasta is the foundation of this dish. Feel free to opt for whole grain or gluten-free options if you prefer! -
2 tablespoons Olive Oil
This beautiful oil enhances the flavor wonderfully, but feel free to use any neutral oil, like canola or sunflower. -
1 medium Onion (Finely chopped.)
Onions bring a subtle sweetness and depth of flavor. If you’re not keen on onions, leeks or shallots make great substitutes! -
2 cloves Garlic (Minced.)
Garlic adds that unmistakable zing! Fresh is best, but you can use garlic powder if you’re in a pinch – just around half a teaspoon should do! -
250 grams Mushrooms (Cremini or Button.)
Mushrooms are the stars of our dish, lending an earthy and umami-rich flavor. Don’t shy away from shiitake or portobello for a twist! -
1 cup Heavy Cream
This is what makes the sauce luxuriously creamy. If you want a lighter version, try substituting part of it with Greek yogurt or coconut cream for a dairy-free option! -
100 grams Parmesan Cheese
Not only does this add flavor, but it creates a nice creamy texture. Reserve some for garnishing! If you’re avoiding dairy, nutritional yeast is a great alternative. -
Salt, to taste
Always taste as you go! A little pinch makes a huge difference in enhancing flavors. -
Pepper, to taste
A dash of freshly cracked pepper adds a warmth that complements the creaminess beautifully! -
1 teaspoon Thyme (Dried or Fresh)
Thyme brings a subtle earthy note. If you don’t have thyme, Italian seasoning works like a charm too! -
1 tablespoon Fresh Parsley (Chopped.)
The final touch! It adds a vibrant pop of color and freshness to the dish. You could also use basil if you prefer!
Step-by-Step Instructions
Ready to get cooking? Let’s dive into the magic of making this creamy pasta!
-
Boil the Pasta:
Start by bringing a large pot of salted water to a rolling boil. Toss in your pasta and cook it according to package instructions until al dente. Remember, you want it just right—slightly firm to the bite! Once done, reserve about a cup of pasta water and drain the rest. Set the pasta aside while we whip up that creamy sauce. -
Sauté Onions and Garlic:
In a large skillet, heat the olive oil over medium heat. Add the finely chopped onion and sauté until it becomes translucent—about 3-4 minutes. This is where the kitchen starts to smell heavenly! Stir in the minced garlic, cooking just until fragrant, about 30 seconds. Don’t let it burn; we want it aromatic, not bitter! -
Cook the Mushrooms:
Time for our delicious mushrooms! Add them to the skillet, stirring occasionally until they’re golden brown and have released their moisture (around 5-7 minutes). This process concentrates their flavor and adds that irresistible umami punch. Pro tip: Don’t overcrowd the pan; if necessary, cook them in batches for the best results. -
Whip up the Cream Sauce:
Now, lower the heat slightly and pour in that luscious heavy cream. Stir well, allowing it to gently bubble. Add the thyme, salt, and pepper. If you love a hint of nutty flavor, grating in some fresh nutmeg will elevate your sauce beautifully. Turn the heat to low and let it simmer to thicken a bit—about 5 minutes. If you feel your sauce is too thick, you can always add a splash of reserved pasta water! -
Combine and Serve:
Toss your cooked pasta right into the skillet, making sure every strand is enveloped in that creamy goodness! Stir in the grated Parmesan cheese gradually until it melts and merges with the sauce. If you’re feeling indulgent, add more cheese! Season again to taste—every chef knows that tasting is vital in the kitchen. -
Plate It Up!
Ah, the grand finishing touch! Plate your creamy mushroom pasta, and don’t forget to sprinkle the reserved Parmesan and fresh parsley on top for that restaurant-style feel. Trust me, your friends (or family) will be swooning over the presentation!
Serving Suggestions
Serve this creamy pasta with a simple side of garlic bread or a crisp green salad drizzled with lemon vinaigrette. The bright acidity from the lemon pairs wonderfully with the richness of the pasta, cutting through the creaminess just right. Share it with friends, light a few candles, and create a cozy atmosphere—dinner is truly served!
Recipe Variations
Feeling adventurous? Here are some fun variations to try out:
-
Add Protein: Pan-seared chicken or shrimp can easily be tossed in for a heartier meal.
-
Veggie Power: Toss in some spinach, kale, or roasted cherry tomatoes for added nutrition and color.
-
Herby Twist: Switch out thyme for fresh basil or oregano for a different flavor profile.
-
Spicy Kick: Add a pinch of red pepper flakes or a dash of hot sauce to the sauce for a spicy kick!
-
Citrus Zing: A splash of lemon juice at the end can give a refreshing twist to the dish.
Chef’s Notes
This creamy mushroom pasta recipe has evolved over time, starting from those haphazard college days. I’ve experimented with different mushrooms and cream ratios, and each version has been saved in my little recipe box as a cherished memory. One time, I even added a splash of white wine to the sauce, and let me tell you, it transformed the dish! The beauty of cooking is that it’s all about experimenting. So go ahead, make it your own!
FAQs and Troubleshooting
1. My sauce is too thick; what should I do?
If your sauce becomes overly thick, simply add a bit of the reserved pasta water until you reach your desired consistency. This not only thins it out but also adds a touch of starchy flavor that helps bind the sauce to the pasta.
2. How can I store leftovers?
Store any leftover pasta in an airtight container in the fridge for up to 3 days. Just remember, the pasta may absorb some of the sauce, so you might want to add a splash more cream or water when reheating to bring it back to life!
3. I don’t like mushrooms; what else can I use?
No problem at all! You can replace mushrooms with cooked spinach, zucchini, or even sautéed bell peppers for a delightful twist!
4. Can I use whole wheat or gluten-free pasta?
Absolutely! Whole wheat and gluten-free pastas work beautifully in this dish. Just make sure to adjust the cooking times as needed since these alternatives can vary in texture and cooking length.
Nutritional Info
(Per serving, approximate):
Calories: 590
Protein: 18g
Fat: 30g
Carbohydrates: 60g
Fiber: 3g
There you have it! Your ultimate guide to creating an unforgettable bowl of Irresistibly Creamy Mushroom Pasta. It’s more than just a meal—it’s a celebration of flavor, nostalgia, and cozy moments shared around the table. So roll up those sleeves, grab a fork, and let’s get cooking, my culinary friend! Happy cooking!
PrintIrresistibly Creamy Mushroom Pasta
Creamy mushroom pasta that brings comfort and warmth, perfect for cozy nights in.
- Prep Time: 15 minutes
- Cook Time: 30 minutes
- Total Time: 45 minutes
- Yield: 4 servings 1x
- Category: Main Course
- Method: Baking
- Cuisine: Italian
- Diet: Vegetarian
Ingredients
- 200 grams Pasta (Any type you love, like fettuccine or penne.)
- 2 tablespoons Olive Oil
- 1 medium Onion (Finely chopped.)
- 2 cloves Garlic (Minced.)
- 250 grams Mushrooms (Cremini or Button.)
- 1 cup Heavy Cream
- 100 grams Parmesan Cheese
- Salt, to taste
- Pepper, to taste
- 1 teaspoon Thyme (Dried or Fresh)
- 1 tablespoon Fresh Parsley (Chopped.)
Instructions
- Boil the Pasta: Start by bringing a large pot of salted water to a rolling boil. Toss in your pasta and cook it according to package instructions until al dente. Reserve about a cup of pasta water and drain the rest.
- Sauté Onions and Garlic: In a large skillet, heat the olive oil over medium heat. Add the finely chopped onion and sauté until it becomes translucent—about 3-4 minutes. Stir in the minced garlic, cooking just until fragrant, about 30 seconds.
- Cook the Mushrooms: Add the mushrooms to the skillet, stirring until they’re golden brown and have released their moisture (around 5-7 minutes).
- Whip up the Cream Sauce: Lower the heat slightly and pour in the heavy cream. Stir well and allow it to gently bubble. Add the thyme, salt, and pepper.
- Combine and Serve: Toss your cooked pasta right into the skillet, stirring in the grated Parmesan cheese gradually until it melts and merges with the sauce.
- Plate It Up: Plate your creamy mushroom pasta and sprinkle the reserved Parmesan and fresh parsley on top.
Notes
Serve with garlic bread or a crisp green salad for a complete meal.
Nutrition
- Serving Size: 1 serving
- Calories: 590
- Sugar: 4g
- Sodium: 500mg
- Fat: 30g
- Saturated Fat: 15g
- Unsaturated Fat: 12g
- Trans Fat: 0g
- Carbohydrates: 60g
- Fiber: 3g
- Protein: 18g
- Cholesterol: 80mg
Keywords: creamy pasta, mushroom pasta, cozy dinner, vegetarian pasta, Italian cuisine
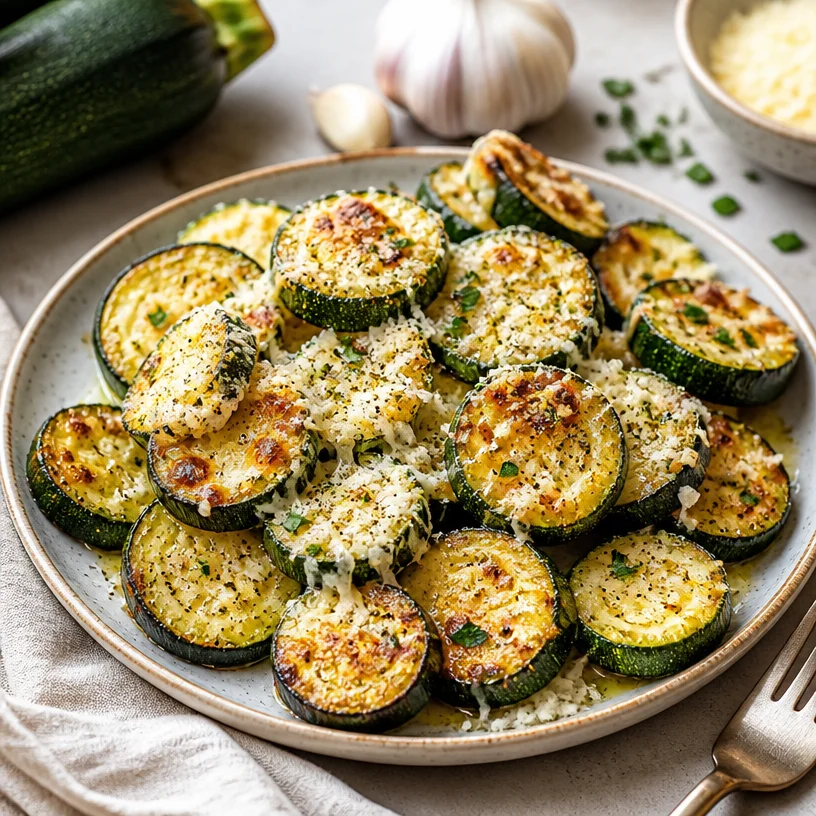
One-Pan Garlic Parmesan Roasted Zucchini (Crispy Weeknight)
Garlic Parmesan Roasted Zucchini: A Flavorful Approach to Healthy Eating
Welcome back to Clean Plate Cravings, where we believe that fresh, feel-good food shouldn’t just fuel your body—it should ignite your taste buds too! Today, we’re diving into a delightful dish that’s both simple and packed with flavor: Garlic Parmesan Roasted Zucchini. This dish is not just another vegetable side—it’s a savory, satisfying delight that pairs perfectly with almost any meal. So, let’s roll up our sleeves and get cooking!
A Taste of Home: My Zucchini Journey
I’ll let you in on a little secret: zucchini wasn’t always my favorite vegetable. In fact, growing up, the thought of zucchini conjured images of soggy, bland dishes that seemed to appear at every family gathering. It wasn’t until I visited my grandmother’s garden one summer that my feelings about this green squash began to change.
The sun was shining, and the garden was alive with vibrant colors and scents. My grandmother, a kitchen wizard in her own right, called me over to where she was pulling fresh zucchini off the vine. "Ava, come here! Let’s make something special!" she exclaimed.
That day, she taught me how to roast zucchini with garlic and Parmesan. Being just a kid at the time, I was fascinated as she minced garlic, grated cheese, and drizzled olive oil over the perfectly sliced zucchini. The aroma wafting from the oven as those zucchini pieces roasted was completely intoxicating. The simple act of roasting transformed the zucchini into a caramelized, garlicky treat that I could not get enough of.
From that moment on, zucchini became a staple in my kitchen, and I learned to appreciate its adaptable nature. This Garlic Parmesan Roasted Zucchini recipe is a tribute to that cherished memory, a reminder that the simplest ingredients can create something truly wonderful.
Ingredients: The Building Blocks of Flavor
To whip up this fabulous dish, you’ll need the following ingredients:
-
2 medium zucchini: Packed with fiber, vitamins, and minerals, zucchini is light yet filling. Look for firm, shiny zucchinis without soft spots. If you need a substitute, yellow squash works beautifully too!
-
2 tablespoons olive oil: This heart-healthy fat enhances flavor while helping the zucchini caramelize beautifully. You could swap it for avocado oil or melted coconut oil if you prefer.
-
1/2 cup Parmesan cheese, grated: The salty, nutty flavor of Parmesan adds a savory depth to the dish. If you’re feeling adventurous, try Pecorino Romano for a sharper taste, or nutritional yeast for a vegan option!
-
2-3 cloves garlic, minced: Garlic infuses the zucchini with its aromatic charm. If you’re a garlic enthusiast (like I am), feel free to throw in an extra clove or two. No fresh garlic? Garlic powder works, but start with half a teaspoon and adjust to your taste.
-
Salt, to taste: A good sprinkle of salt brings out the natural flavors of the zucchini. Sea salt or kosher salt are great choices here.
-
Pepper, to taste: Freshly cracked black pepper adds that warm, slight spice. If you enjoy heat, consider adding red pepper flakes for an extra kick!
-
1 teaspoon Italian seasoning (optional): This blend of dried Italian herbs (oregano, basil, thyme) is a great addition if you want to elevate those Mediterranean flavors. Don’t have it on hand? A mix of dried oregano and thyme will suffice!
Step-by-Step Instructions: Let’s Get Cooking
Now that we’ve gathered our ingredients, it’s time to bring this dish to life! Follow these step-by-step instructions for Garlic Parmesan Roasted Zucchini:
-
Preheat the oven: Preheat your oven to 425°F (220°C). This ensures the zucchini gets that perfect roasted texture—crispy on the outside, tender on the inside.
-
Prepare the zucchini: Rinse and dry the zucchinis thoroughly. Cut off the ends, then slice each zucchini in half lengthwise. For bite-sized pieces, cut each half into half-moons (about 1-inch thick). This shape allows for more crispy edges!
-
Mix the seasoning: In a large bowl, combine the sliced zucchini with olive oil, minced garlic, salt, pepper, and Italian seasoning (if using). Toss everything together until the zucchini is evenly coated. Pro tip: Use your hands! Get in there and massage the seasoning into each piece.
-
Arrange on a baking sheet: Spread the seasoned zucchini in a single layer on a baking sheet lined with parchment paper. Leaving space between the pieces allows for that delicious roasting—no steaming allowed!
-
Add the Parmesan: Sprinkle the grated Parmesan cheese evenly over the zucchini. For an added flavor boost, reserve a little of the cheese to sprinkle on halfway through cooking.
-
Roast: Place the baking sheet in the preheated oven and roast for about 15-20 minutes. Halfway through, give the zucchini a toss to ensure even cooking and sprinkle on any reserved cheese. You’ll know it’s ready when the cheese is golden and the zucchini is tender with some lovely caramelized spots.
-
Serve and enjoy: Once roasted, remove the zucchinis from the oven and let them cool for a minute. Serve them hot as a side dish, or enjoy them cold as a snack. They’re seriously addictive!
Serving Suggestions: Make it a Meal
When it comes to serving this Garlic Parmesan Roasted Zucchini, the options are endless! You can serve it alongside grilled chicken or fish for a balanced meal, toss it into a grain bowl for added texture, or heap it onto a bed of pasta for a delightfully fresh twist. It also makes a stellar addition to salads—just toss it with some greens, nuts, and a drizzle of balsamic glaze. Trust me; your plate will look as vibrant as it tastes!
Recipe Variations: Get Creative
Feel free to mix things up! Here are a few creative twists you can try with this recipe:
-
Mediterranean Style: Add sun-dried tomatoes and olives to the mix for a Mediterranean flair. A squeeze of fresh lemon juice before serving brightens the flavors wonderfully.
-
Spicy Garlic Zucchini: If you love a bit of heat, add red pepper flakes with the garlic before roasting, or drizzle some Sriracha over the finished dish.
-
Herb Infusion: Try using fresh herbs like basil, rosemary, or thyme instead of Italian seasoning. Just add them after roasting for a fresh touch.
-
Cheesy Zucchini Bake: Layer the zucchini in a baking dish, add marinara sauce, more cheese, and bake until bubbly for a yummy zucchini gratin!
-
Vegan Twist: Substitute the Parmesan with nutritional yeast and use olive oil spray for a low-fat alternative.
Chef’s Notes: A Journey in Simplicity
As a chef, I find beauty in simplicity. This Garlic Parmesan Roasted Zucchini recipe has traveled with me over the years, adapting to whatever fresh ingredients I have on hand. Some days, I may add a touch of balsamic glaze; others, I keep it classic. If there’s one lesson I’ve learned from cooking, it’s that recipes don’t always have to be rigid. They should be fun, flexible, and above all, fulfilling!
If you ever have a kitchen fail, let it inspire your creativity! I remember a time when I roasted zucchini but accidentally grabbed the cayenne instead of the Italian seasoning. Let’s just say it turned into a fiery surprise! I learned a valuable lesson that night—always double-check your spices!
FAQs and Troubleshooting
1. My zucchini turned out soggy. What did I do wrong?
Soggy zucchini can happen when there’s too much moisture. Make sure to pat the zucchini dry before seasoning, and don’t overcrowd your baking sheet. Leaving space lets them roast instead of steam!
2. Can I make this ahead of time?
While zucchini is best enjoyed fresh, you can roast it ahead of time and store it in the fridge for about 3 days. Reheat it in the oven to regain some crispiness!
3. What if I don’t have fresh garlic?
No worries! Garlic powder works too, just remember it’s more potent. Start with half a teaspoon and adjust according to taste.
4. Can I use other vegetables?
Absolutely! This roasting technique works brilliantly with asparagus, bell peppers, or even broccoli. Just adjust the cooking time according to the vegetable’s size!
Nutritional Info
This dish is not only tasty but nutritious! Per serving (assuming 4 servings), you can expect approximately:
- Calories: 120 kcal
- Protein: 5g
- Carbohydrates: 8g
- Fiber: 2g
- Fat: 8g
Conclusion
There you have it—my delightful Garlic Parmesan Roasted Zucchini recipe! It’s a wonderful reminder of how easy it is to transform simple ingredients into something special. Whether you’re enjoying it at home or bringing it to a gathering, I can guarantee it will be a hit! So, roll up your sleeves, fire up your oven, and let’s keep our plates clean while enjoying every bite! Happy cooking!
PrintGarlic Parmesan Roasted Zucchini
A flavorful and healthy side dish featuring roasted zucchini infused with garlic and topped with Parmesan cheese.
- Prep Time: 10 minutes
- Cook Time: 20 minutes
- Total Time: 30 minutes
- Yield: 4 servings 1x
- Category: Side Dish
- Method: Roasting
- Cuisine: Italian
- Diet: Vegetarian
Ingredients
- 2 medium zucchini
- 2 tablespoons olive oil
- 1/2 cup Parmesan cheese, grated
- 2–3 cloves garlic, minced
- Salt, to taste
- Pepper, to taste
- 1 teaspoon Italian seasoning (optional)
Instructions
- Preheat the oven to 425°F (220°C).
- Prepare the zucchini by rinsing and drying them, then slice them in half lengthwise and cut into half-moons.
- Mix the zucchini with olive oil, minced garlic, salt, pepper, and Italian seasoning in a bowl until evenly coated.
- Arrange the zucchini in a single layer on a baking sheet lined with parchment paper.
- Add the grated Parmesan cheese evenly over the zucchini.
- Roast for about 15-20 minutes, tossing halfway through, until the cheese is golden and zucchini is tender.
- Serve and enjoy hot or cold as a snack.
Notes
For added flavor, reserve some cheese to sprinkle on halfway through roasting. Try variations like adding sun-dried tomatoes or using fresh herbs.
Nutrition
- Serving Size: 1 serving
- Calories: 120
- Sugar: 2g
- Sodium: 150mg
- Fat: 8g
- Saturated Fat: 3g
- Unsaturated Fat: 4g
- Trans Fat: 0g
- Carbohydrates: 8g
- Fiber: 2g
- Protein: 5g
- Cholesterol: 15mg
Keywords: zucchini, garlic, parmesan, roasted vegetables, healthy side dish