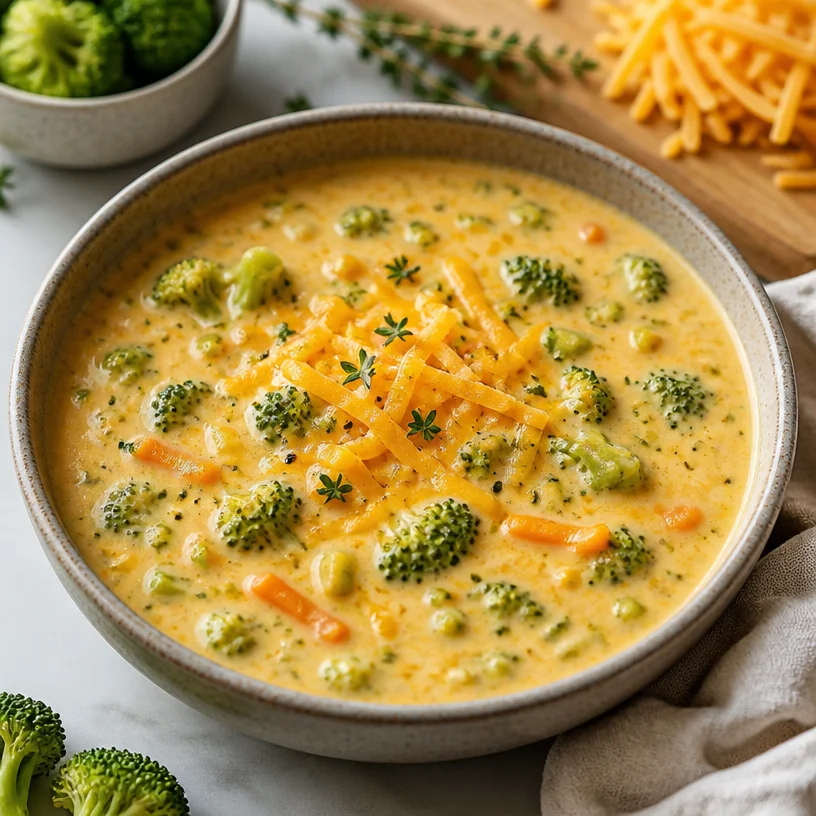
One-Pot Creamy Broccoli Cheddar Soup in 30 Minutes
Delight in a Bowl: My Creamy Broccoli Cheddar Soup Recipe
Welcome to Clean Plate Cravings! Today we’re diving into one of my all-time comfort food favorites—Broccoli Cheddar Soup. Picture this: a warm, vibrant bowl brimming with creamy goodness, where luscious cheese meets nutrient-packed broccoli. This soup is not just about nourishing your body; it’s about treating your taste buds to a delightful experience every single spoonful. So grab your favorite ladle and let’s get cooking!
A Warm Whiff of Nostalgia
Let me take you back for a moment. Growing up in a bustling kitchen, I have vivid memories of my mom whipping up pots of soup during the cool autumn evenings. One dish that always stood out was her delightful Broccoli Cheddar Soup. I remember the way she’d hum her favorite tunes while stirring the pot, and oh, that aromatic blend of sautéed onions and garlic wafting through our home—it felt like a warm hug in a bowl!
I was drawn to how she effortlessly turned simple ingredients into something magical. Even as a kid, I realized how food could bring people together. I’d always beg her for the secret ingredient, thinking there had to be something mysterious that made it taste so divine. Spoiler alert: it was love (and a sprinkle of good ol’ cheese). Now, I’m sharing my own take on that delicious memory, so you too can recreate a piece of nostalgia in your kitchen.
Ingredients You’ll Need
-
Broccoli: The star of our show! Broccoli is not only vibrant in color but is loaded with vitamins K and C. Look for firm, bright green florets. If you’re in a pinch, you can use frozen broccoli instead—just thaw and drain it well before adding!
-
Cheddar Cheese: This is what gives our soup that rich, cheesy goodness. Aged cheddar will give you a sharper flavor while mild cheddar offers creaminess. If you prefer alternatives, try using Gruyère or a dairy-free cheese for a vegan option!
-
Carrots: Adding sweetness and a pop of color, carrots not only enhance the flavor but also boost the nutrition. If you’re short on carrots, parsnips or sweet potatoes work great as substitutes.
-
Cream: This elevates our soup’s texture to silky perfection! Heavy cream is traditional, but if you want to lighten it up a bit, half-and-half or even coconut cream can do the trick. Non-dairy options include cashew cream for a creamy vegan alternative.
-
Onions: Essential for flavor, they add a subtle sweetness when sautéed. Yellow or white onions are perfect here, but shallots can also be a great twist.
-
Garlic: A must for depth of flavor. Always use fresh garlic when you can, but in a pinch, garlic powder is a decent substitute.
-
Vegetable Broth: This is the base of our soup. A good-quality vegetable broth will keep the flavor bright and wholesome. Homemade broth is ideal, but store-bought works just as well!
Step-by-Step Instructions
Alright, let’s get down to the heart of the matter—cooking up this delightful soup!
-
Prepare the Veggies: Start by washing and chopping the broccoli into small florets. Don’t forget to dice the carrots and onions finely. Like my mom used to say, uniform sizes mean even cooking.
-
Sauté Aromatics: In a large pot, add a drizzle of olive oil (about 2 tablespoons) over medium heat. Once heated, toss in the diced onions and sauté for about 3-4 minutes until they become translucent. You’ll love the fragrant aroma filling your kitchen. Next, add minced garlic—don’t skip this step! Let it cook for another minute, stirring continuously to avoid burning.
-
Add the Broccoli and Carrots: Throw in your chopped broccoli and diced carrots into the mix. Sauté for another 5-6 minutes, stirring frequently. This step softens them up just enough, allowing their flavors to shine.
-
Pour in the Broth: Now, it’s time to pour in 4 cups of vegetable broth. Bring it to a simmer, then cover and let it cook for about 15 minutes until the broccoli and carrots are tender. Remember, patience is key here; the veggies need to soften well for a creamy texture.
-
Blend It Up: If you want a smooth soup, it’s time to blend! Using an immersion blender, blend the soup directly in the pot until you reach your desired consistency. For a chunkier texture, you can blend only half of the soup or use a regular blender. Just be careful with hot liquids!
-
Cheese It Up: After blending, return the pot to low heat. Slowly stir in about 2 cups of shredded cheddar cheese, letting it melt into the warm soup. This is where the magic happens! If you want it extra cheesy (who doesn’t?), feel free to add more. Blend in the cream next, stirring until well combined.
-
Final Seasoning: Taste your soup and season it with salt and pepper to your liking. Boost it with a squeeze of lemon juice if desired for a refreshing zing, or even a pinch of red pepper flakes for an extra kick!
-
Serve It Up: Ladle that creamy goodness into bowls, garnishing with a sprinkle of extra cheddar or a few broccoli florets for flair. You just made yourself a bowl of pure comfort!
Serving Suggestions
For a lovely presentation, serve your Broccoli Cheddar Soup in colorful bowls topped with a dollop of cream or a sprinkle of fresh herbs like parsley for that pop of color. Pair it with crusty whole-grain bread or some crunchy croutons for texture. This combo not only looks appealing but turns your meal into a feast!
Recipe Variations
-
Add Protein: Spice things up by adding cooked chicken, sausage, or even beans for an extra boost of protein.
-
Spicy Twist: Incorporate some diced jalapeños or a dash of hot sauce for a spicy flair!
-
Herb It Up: Rev up the flavors by adding fresh herbs—thyme, dill, or basil can elevate your soup game.
-
Creamy Vegan: For a plant-based version, use cashew cream instead of dairy and nutritional yeast for a cheesy flavor without the cheese!
-
Grilled Cheese Sidekick: Serve this soup alongside a melty grilled cheese sandwich for the ultimate comfort food experience!
Chef’s Notes
This recipe has evolved over the years, and I’ve played with different ingredients and techniques to perfect it. Initially, I used only cheddar, but then I discovered the magic of blending cheeses. Now, I love mixing sharp cheddars with creamy, mild varieties for a layered flavor profile. And oh boy, it’s been a hit! I keep the core ingredients but enjoy switching things up depending on what I have in my fridge. One day the soup may have a hint of nutmeg, and the next, it could flaunt a splash of sherry. Variety keeps my cooking exciting!
FAQs and Troubleshooting
-
Why is my soup too thick?: If your soup is thicker than desired, add more broth or cream to achieve your preferred consistency. Remember to stir well!
-
Can I make this soup in advance?: Absolutely! This soup tastes even better the next day! Just store it in the fridge for up to 3 days and reheat on a stovetop with a splash of broth to loosen it up.
-
What if my cheddar isn’t melting well?: Make sure you’re using high-quality cheese without additives, as processed cheeses don’t melt as beautifully. Shredding your cheese instead of cubing it helps it melt faster and more evenly too.
-
Is it okay to freeze leftover soup?: Yes! This soup freezes well. Just store it in a freezer-safe container, ensuring to leave some space for the soup to expand. Thaw it overnight in the fridge for best results when you’re ready to enjoy!
Nutritional Info (optional)
- Calories: 350 per serving
- Protein: 15g
- Fat: 25g
- Carbohydrates: 25g
- Fiber: 4g
So there you have it, my delightful Broccoli Cheddar Soup that’s perfect for any occasion! Remember, cooking is all about having fun, so don’t sweat the small stuff. Share those bowls of comforting goodness with loved ones, and create new memories around the dinner table. Cheers to fresh, feel-good food!
PrintCreamy Broccoli Cheddar Soup

A warm and vibrant bowl of creamy broccoli cheddar soup that nourishes your body and delights your taste buds.
- Prep Time: 15 minutes
- Cook Time: 30 minutes
- Total Time: 45 minutes
- Yield: 4 servings 1x
- Category: Soup
- Method: Stovetop
- Cuisine: American
- Diet: Vegetarian
Ingredients
- 4 cups broccoli florets
- 2 cups shredded cheddar cheese
- 2 medium carrots, diced
- 1 cup heavy cream
- 1 cup diced onions
- 2 cloves garlic, minced
- 4 cups vegetable broth
- 2 tablespoons olive oil
- Salt and pepper to taste
- Lemon juice (optional)
- Red pepper flakes (optional)
Instructions
- Prepare the veggies: Start by washing and chopping the broccoli into small florets and dicing the carrots and onions finely.
- Sauté aromatics: In a large pot, add olive oil and sauté the onions for about 3-4 minutes until translucent. Add minced garlic and cook for another minute.
- Add the broccoli and carrots: Sauté for another 5-6 minutes, stirring frequently.
- Pour in the broth: Add vegetable broth, simmer, cover, and cook for about 15 minutes until veggies are tender.
- Blend it up: Use an immersion blender to blend the soup to your desired consistency.
- Cheese it up: Stir in shredded cheddar cheese until melted, then blend in the cream.
- Final seasoning: Taste and add salt, pepper, and optional lemon juice or red pepper flakes.
- Serve it up: Ladle into bowls and garnish with extra cheddar or broccoli florets.
Notes
This soup can be made ahead and tastes even better the next day. Store in the fridge for up to 3 days and reheat on the stovetop.
Nutrition
- Serving Size: 1 serving
- Calories: 350
- Sugar: 5g
- Sodium: 400mg
- Fat: 25g
- Saturated Fat: 15g
- Unsaturated Fat: 5g
- Trans Fat: 0g
- Carbohydrates: 25g
- Fiber: 4g
- Protein: 15g
- Cholesterol: 80mg
Keywords: broccoli soup, cheddar soup, creamy soup, comfort food, vegetarian recipes
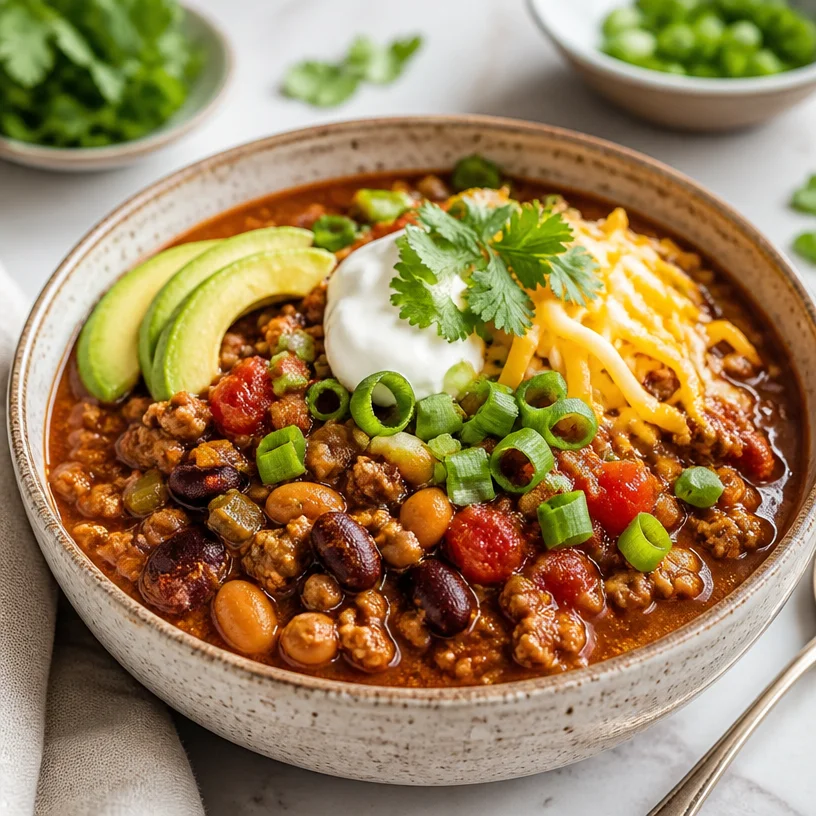
One-Pot Turkey Chili Bowl: 30-Minute Weeknight Dinner
Welcome to My Turkey Chili Bowl Adventure!
Hey there, fellow foodies! I’m Ava Carter, and I’m super excited to dive into a delicious and soul-warming dish with you today—Turkey Chili Bowl! There’s seriously nothing like a hearty bowl of chili when the weather starts to turn crisp, or when you’re simply in the mood for some comfort food that won’t weigh you down.
Chili has a special place in my heart, with its rich flavors, vibrant colors, and the sheer joy of sharing it with family and friends. Growing up, my family had a tradition of gathering around the dinner table every Sunday, with a big pot of chili simmering away. The aromas would waft through the house, and by the time it was ready, everyone was buzzing with excitement. In those moments, I learned that food isn’t just about sustenance; it’s about connection, laughter, and shared experiences.
What I love most about this Turkey Chili Bowl recipe is how approachable it is. We’re using ground turkey instead of traditional beef, making it a lighter option packed with flavor. Plus, it’s a one-pot wonder, so cleanup is a breeze. You can throw in your favorite beans, toss in some spices, and let it simmer while you sip on a cozy drink. How delightful does that sound?
So grab your apron, because we’re about to embark on this culinary journey together! I promise you’ll end up with a bowl of chili that’s not only delicious but also keeps you feeling great!
A Little Chili Nostalgia
Ah, the memories I have of my first chili-making experience! I was probably about twelve years old, tasked by my mom with preparing dinner for the family. She handed me a well-loved cookbook and said, "Here’s your adventure for the evening!" I was both excited and nervous, pacing in front of the spice cabinet, unsure of where to start.
With a healthy dose of trial and error (and a bit of advice from my mom), I whipped up my first chili: beef, beans, and canned tomatoes galore. As it simmered, I could hardly contain my excitement. Would they like it? Would I pull it off? Spoiler alert: they devoured it! That evening not only boosted my confidence in the kitchen but also set me on a path to discovering my passion for cooking.
Fast forward a few years, and here I am, sharing my lighter turkey version of that cherished chili with all of you. Cooking should inspire, and if I can help you create a delicious memory in your kitchen, then I’m beyond thrilled!
Ingredients: Let’s Get Cooking!
Here’s what you’ll need to whip up this fabulous Turkey Chili Bowl:
-
Ground Turkey: The star of our show! Leaner than beef but still packed with that satisfying protein, ground turkey is a fantastic base. For a bit of a flavor twist, you could also use ground chicken or even plant-based meat alternatives.
-
Beans: Choose your favorite! Black beans, kidney beans, or pinto beans—each adds a unique texture and taste. If you’re looking for a lighter option, you can skip the beans entirely or substitute with lentils for a different flair.
-
Tomatoes: Diced tomatoes (canned or fresh) serve as the broth base, infusing the dish with not only moisture but vibrant flavor. If you prefer a chunkier chili, go for diced fresh tomatoes, or if you’re after smoothness, crushed tomatoes will do the trick.
-
Spices: A mix of chili powder, cumin, and smoked paprika brings the heat and depth to the dish. Feel free to adjust these levels according to your spice tolerance. If you like it smoky, a dash of chipotle powder can elevate the experience!
-
Onion and Garlic: These aromatic staples form the foundation of flavor. Seasoned to your liking, they beautifully enhance the chili’s taste. For a milder option, you can use green onions.
-
Bell Peppers: Colorful and crunchy, they offer a lovely sweetness and texture. Use any combination of colors you like, and if you’re not a fan of peppers, feel free to skip them or replace them with zucchini or carrots.
-
Broth: Use vegetable or chicken broth to add richness. If you prefer a vegetarian version, just replace the broth with vegetable stock!
Now that we’ve got our ingredients lined up, let’s dive into the step-by-step cooking process!
Step-by-Step Instructions: Let’s Cook Up a Storm!
Step 1: Sauté the Aromatics
In a large pot or Dutch oven, heat about a tablespoon of olive oil over medium heat. Once it’s shimmering, toss in a diced onion and two minced garlic cloves. Sauté them for about 3-4 minutes until they’re soft and fragrant. (Chef’s Tip: This step builds the foundation of flavor for your chili, so don’t rush it!)
Step 2: Brown the Turkey
Next up, add one pound of ground turkey to the pot. Use your spatula to break it apart, stirring often until it’s browned and cooked through—about 5-7 minutes. (Chef’s Hack: Season the turkey with a pinch of salt and pepper while it cooks; it helps deepen the flavor right from the get-go!)
Step 3: Add in the Peppers and Spices
Now, it’s time to introduce your chopped bell peppers (about one cup) into the mix. Stir them in and let them cook down for another 2-3 minutes. Then, sprinkle in 3 tablespoons of chili powder, 1 tablespoon of cumin, and 1 teaspoon of smoked paprika. Give everything a good stir to combine those spices evenly (trust me, your kitchen is going to smell incredible!).
Step 4: Combine the Beans and Tomatoes
Next, we’ll add in the star ingredients: one can each of diced tomatoes (28 ounces) and your choice of beans (about two cups, drained and rinsed). If you’re feeling adventurous, add a pinch of cayenne for an extra kick! Stir it all together until everything is well mixed.
Step 5: Pour in the Broth
Now pour in about 2 cups of broth—vegetable or chicken, your choice! This will help the chili reach that perfect consistency. Bring the chili to a gentle simmer, then reduce the heat to low. Cover the pot and let it bubble away for at least 30 minutes. (Chef’s Tip: The longer it simmers, the more the flavors meld together, so if you can, let it go for an hour!)
Step 6: Taste and Adjust
After your chili has simmered, give it a taste. This is the fun part! You might want to adjust the seasonings with salt, pepper, or an extra splash of lime juice for brightness. If it’s too thick, feel free to add a splash more of broth.
Step 7: Serve It Up!
Now that your chili is perfectly seasoned and delicious, it’s time to dish it out!
Serving Suggestions: How to Plate Your Bowls
Grab your favorite bowl (or a stack for serving friends and family) and ladle in the chili, filling it generously. For an extra special touch, top it with a dollop of Greek yogurt or sour cream, a sprinkle of shredded cheese, fresh cilantro, or jalapeños for that added kick. Serve it alongside warm cornbread or tortilla chips for a delightful crunch.
Recipe Variations: Get Creative!
-
Vegetarian Option: Swap out the ground turkey for a mix of diced mushrooms, zucchini, and eggplant. You’ll still get that hearty texture without the meat!
-
Sweet Corn Add-In: Toss in a cup of frozen corn for a touch of sweetness—perfect for those who love a little contrast in their chili.
-
Cheesy Chili: Stir in some cream cheese during the last few minutes of cooking for an ultra-creamy, dreamy chili!
-
Sweet and Spicy Kick: Drizzle some honey or maple syrup during cooking to balance the heat with a sweet touch. You can even enhance this with chipotle or jalapeño sauce!
-
Latin Twist: Add black beans, corn, and a sprinkle of cumin and cayenne for a Latin-inspired chili bowl experience!
Chef’s Notes: Thoughts from My Kitchen
Cooking is a journey, and this Turkey Chili Bowl has evolved over the years. I remember the first time I added roasted veggies—what a game changer! Roasting brings out the sweetness and deeper flavor, and it transforms the chili experience. I often experiment with different bean varieties or throw in seasonal veggies and discover new favorites each time I make it!
Also, I have to admit there have been moments where I forgot to put in the broth and ended up with chili so thick I could stand a spoon in it! Rather than being discouraged, I laughed it off and ended up calling it “Chili Dip,” which surprisingly became a household favorite! Cooking is about having fun, experimenting, and enjoying the process—so don’t take yourself too seriously!
FAQs and Troubleshooting: Your Chili Questions Answered
1. Why is my chili too watery?
If your chili turns out too watery, don’t fret! Let it simmer a little longer with the lid off. This will help to reduce excess liquid and thicken it up.
2. Can I make this ahead of time?
Absolutely! Chili actually tastes better the next day once the flavors have had time to meld together. Just store it in an airtight container in the fridge for up to 3 days.
3. Can I freeze the leftovers?
Yes! This chili freezes beautifully. Just cool it completely before transferring it to freezer-safe containers. It can last in the freezer for about 3 months.
4. How can I make it spicier?
If you love the heat, add diced jalapeños or more cayenne pepper during the cooking process. You can also offer hot sauce at the table for your spice-loving guests!
Nutritional Info
While specific calories can fluctuate depending on your exact ingredient choices, a typical serving of this turkey chili (about 1 cup) comes in around:
- Calories: 250
- Protein: 25g
- Carbs: 30g
- Fat: 8g
- Fiber: 10g
This chili is rich in protein and fiber, making it a satisfying and healthful meal option.
And there you have it! Your very own Turkey Chili Bowl that’s not only delicious but filled with love and memories. Cooking is about creating experiences, and I hope this recipe helps you create more beautiful moments in your kitchen. So turn up the heat, let the flavors meld, and enjoy every spoonful!
Happy cooking, friends!
PrintTurkey Chili Bowl

A hearty and soul-warming turkey chili bowl, perfect for cozy nights and sharing with loved ones.
- Prep Time: 15 minutes
- Cook Time: 45 minutes
- Total Time: 60 minutes
- Yield: 4 servings 1x
- Category: Main Course
- Method: Stovetop
- Cuisine: American
- Diet: Paleo
Ingredients
- 1 pound ground turkey
- 2 cups beans (black, kidney, or pinto)
- 28 ounces diced tomatoes (canned or fresh)
- 3 tablespoons chili powder
- 1 tablespoon cumin
- 1 teaspoon smoked paprika
- 1 diced onion
- 2 minced garlic cloves
- 1 cup chopped bell peppers
- 2 cups broth (vegetable or chicken)
- Olive oil for sautéing
- Salt and pepper to taste
Instructions
- Sauté the aromatics in olive oil over medium heat for 3-4 minutes.
- Brown the turkey, breaking it apart until cooked through, about 5-7 minutes.
- Add the bell peppers and spices, cooking for another 2-3 minutes.
- Combine the beans and tomatoes, stirring until mixed.
- Pour in the broth, bringing to a gentle simmer and cover for at least 30 minutes.
- Taste and adjust seasonings as needed.
- Serve hot with your favorite toppings.
Notes
For a vegetarian option, substitute ground turkey with diced mushrooms and zucchini. Chili tastes better the next day, and leftovers can be frozen for up to 3 months.
Nutrition
- Serving Size: 1 serving
- Calories: 250
- Sugar: 4g
- Sodium: 500mg
- Fat: 8g
- Saturated Fat: 2g
- Unsaturated Fat: 4g
- Trans Fat: 0g
- Carbohydrates: 30g
- Fiber: 10g
- Protein: 25g
- Cholesterol: 85mg
Keywords: turkey chili, comfort food, healthy chili, easy dinner, one-pot meal

French Onion Grilled Cheese
French Onion Grilled Cheese: A Deliciously Comforting Twist on a Classic
Welcome back, food lovers! Today, we’re diving into one of my absolute favorite comfort foods: the French Onion Grilled Cheese. Now, I know what you might be thinking. How can grilled cheese get any better than it already is? But trust me on this one—this dish combines the gooey, cheesy goodness we all know and love with the rich, savory flavors of French onion soup. It’s a nostalgic flavor explosion that will warm your heart and delight your taste buds!
Picture it: a chilly evening, the first leaves of fall starting to turn, and the scent of buttery onions caramelizing in the pan filling your kitchen. This grilled cheese isn’t just a sandwich; it’s an experience, a memory in the making—one you’ll want to share with friends and family. Whether you’re cozying up at home or impressing guests, this recipe is here to take your grilled cheese game to the next level. So grab your apron, and let’s get cooking!
A Nostalgic Kitchen Memory
Growing up, my family had a tradition of weekly “grilled cheese night.” We would gather around the kitchen table, chatting and laughing as my mom created endless variations of our cheesy favorite. Each week, she’d add a surprise ingredient—a slice of tomato here, a sprinkle of chili flakes there—but nothing ever quite compared to the classic combination of crispy bread and melted cheese.
One evening, I remember her experimenting with caramelized onions. The moment my mom lifted the lid off the pot, a wave of sweet, savory aroma filled the air. She layered those golden, caramelized onions generously between buttery slices of toasted bread, and I was instantly hooked. That first bite was pure bliss—the crunch of the toast giving way to the gooey cheese and sweet onions was a moment I’ll never forget. It brought our family together in the best way, and that’s the essence I want to share with you today.
Ingredients
To whip up this delightful French Onion Grilled Cheese, you’ll need the following ingredients:
- Bread: Use a crusty sourdough, a robust whole grain, or even a classic white bread. Sourdough has a lovely tang that complements the savory onions beautifully. If you’re gluten-free, feel free to substitute with your favorite gluten-free bread!
- Onions: Sweet onions work best here—the natural sugars in onions will caramelize beautifully when cooked. You can also use yellow onions if that’s what you have on hand. Experimenting with red onions offers a slightly different flavor profile.
- Gruyère cheese: The melting capacity and nutty flavor of Gruyère is unparalleled. If you can’t find it or want to mix it up, try Emmental cheese for a similar taste, or even a sharp cheddar for an extra kick.
- Butter: You can’t make a great grilled cheese without good butter! It adds richness and helps to create that perfect, crispy crust. If you want to make it dairy-free, opt for vegan butter or even avocado oil for grilling.
Step-by-Step Instructions
Now that we have our ingredients ready, let’s get cooking! Follow these detailed steps to make your French Onion Grilled Cheese:
-
Caramelize the Onions:
- Heat a tablespoon of butter in a medium skillet over medium-low heat. Add 2-3 sliced onions and a pinch of salt.
- Keep it low and slow, allowing those onions to soften and caramelize for about 20-30 minutes, stirring occasionally.
- Chef tip: If your onions start to stick, add a splash of water or broth to help them along—don’t rush this step; it’s crucial for developing that rich flavor!
-
Prepare Your Bread and Cheese:
- While your onions are caramelizing, prepare the bread by spreading a thin layer of butter on one side of each slice.
- On the unbuttered side, layer on a generous mound of Gruyère cheese—don’t hold back here; you want gooeyness!
-
Layer the Good Stuff:
- Once your onions are beautifully caramelized and translucent, evenly distribute them on top of the cheese on one slice of bread, then top with a bit more cheese for extra gooeyness before placing the second slice of bread on top, buttered side out.
-
Heat the Skillet:
- Wipe the skillet clean, then heat it over medium heat. Place the sandwich in the skillet and cook for about 4-5 minutes until golden brown and crispy on one side.
- Chef hack: Use a spatula to press down on the sandwich slightly while it cooks to ensure even browning.
-
Flip and Finish:
- Carefully flip the sandwich and repeat. Once both sides are golden and the cheese is melty, remove it from the skillet and let it sit for a minute before slicing. Trust me; the wait will be worth it!
Serving Suggestions
To plate your French Onion Grilled Cheese, slice it diagonally for that classic presentation and serve on a rustic wooden board or a colorful plate. Pair it with a bowl of warm, brothy French onion soup for the ultimate flavor marriage and a sprinkle of fresh herbs like thyme or parsley for a pop of color!
Recipe Variations
- Herbed Capital: Add dried herbs like thyme or rosemary to the butter before spreading it on the bread for an aromatic twist.
- Bacon Bliss: Layer crispy bacon in between the cheese and onions for an added smokiness that takes this sandwich to the next level of indulgence.
- Vegetarian Delight: Swap out the bread for a veggie-based option like portobello mushrooms for a gluten-free, low-carb variation.
- Spicy Kick: Incorporate some sautéed jalapeños or a smear of spicy mustard to elevate your grilled cheese with some heat!
Chef’s Notes
Ah, the glorious evolution of the grilled cheese! This recipe came about as a way to merge my two favorite comfort foods: grilled cheese and French onion soup. Over the years, I’ve experimented with different cheeses, bread types, and even roasted garlic, and I can confidently say it’s a symphony of flavors that reminds me that cooking is a journey of exploration. Always remember that cooking is flexible—tweak this recipe until it’s your own masterpiece!
FAQs and Troubleshooting
-
What if my cheese doesn’t melt properly?
- Make sure your heat isn’t too high! Lower heat allows the bread to toast perfectly while giving the cheese time to melt. Also, if your cheese is too cold, let it sit out for a few minutes before using.
-
Can I make this in advance?
- I recommend enjoying it fresh, but you can prepare the caramelized onions ahead of time. Store them in the fridge for up to a week, and you’ll have a quick assembly ready to go!
-
What if my sandwich is too greasy?
- If your sandwich is too oily after cooking, try using less butter next time or wiping the pan excess grease before adding the sandwich.
-
How can I make this dairy-free?
- Opt for a dairy-free cheese and vegan butter for this recipe, ensuring you still get that meltiness without any dairy products!
Nutritional Info
This information can vary based on the exact ingredients used, but here’s a rough estimate for one sandwich:
- Calories: 350-400
- Protein: 15g
- Carbs: 30g
- Fat: 22g
Conclusion
There you have it—your ultimate guide to crafting a mouthwatering French Onion Grilled Cheese! Remember, cooking is all about joy, deliciousness, and the memories you build around the table. Drop me a comment below and let me know your thoughts, or share your own variations! I’d love to hear how this recipe becomes part of your culinary story. Happy cooking, foodies!
PrintFrench Onion Grilled Cheese

A deliciously comforting twist on a classic grilled cheese with rich, savory French onion flavors.
- Prep Time: 10 minutes
- Cook Time: 30 minutes
- Total Time: 40 minutes
- Yield: 1 serving 1x
- Category: Main Course
- Method: Grilling
- Cuisine: French
- Diet: Vegetarian
Ingredients
- Crusty sourdough or whole grain bread
- 2–3 sweet onions
- Gruyère cheese
- Butter
Instructions
- Heat a tablespoon of butter in a medium skillet over medium-low heat. Add the sliced onions and a pinch of salt.
- Cook for about 20-30 minutes, stirring occasionally, until onions are caramelized.
- Spread butter on one side of each slice of bread.
- Layer Gruyère cheese on the unbuttered side of one slice.
- Distribute caramelized onions on top of the cheese, then add more cheese before topping with the second slice of bread, buttered side out.
- Heat the skillet over medium heat and cook the sandwich for about 4-5 minutes until golden brown on one side.
- Flip the sandwich and repeat until both sides are golden and the cheese is melted.
- Let sit for a minute before slicing and serve.
Notes
Pair your grilled cheese with a bowl of warm French onion soup for a complete experience.
Nutrition
- Serving Size: 1 sandwich
- Calories: 375
- Sugar: 6g
- Sodium: 500mg
- Fat: 24g
- Saturated Fat: 12g
- Unsaturated Fat: 8g
- Trans Fat: 0g
- Carbohydrates: 40g
- Fiber: 2g
- Protein: 15g
- Cholesterol: 50mg
Keywords: grilled cheese, French onion, comfort food, sandwich
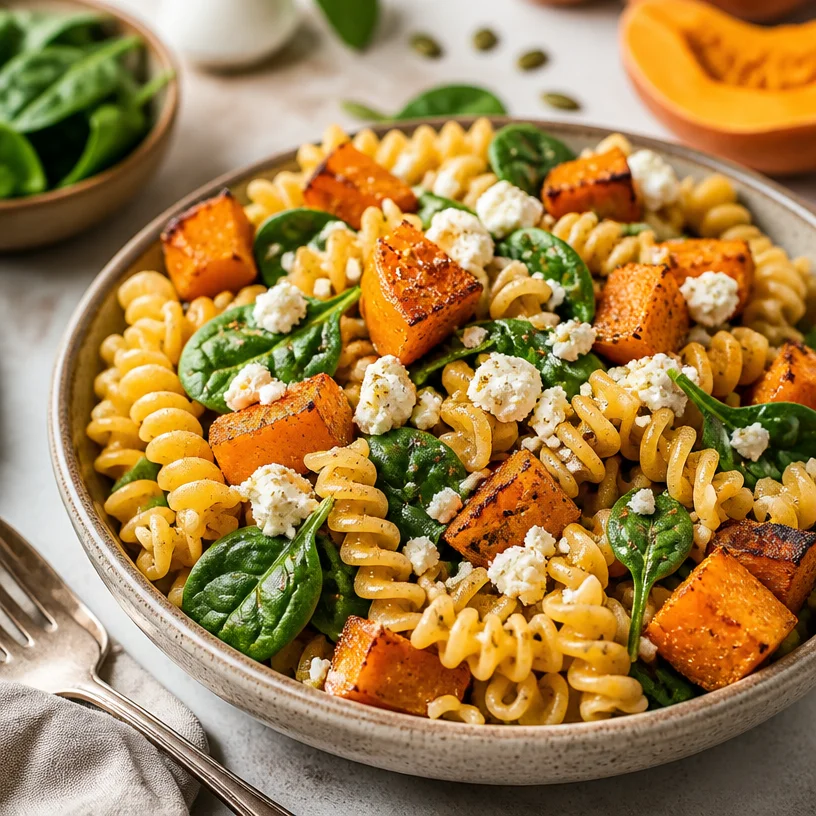
Autumn Pumpkin Pasta Salad: 15-Minute Meal-Prep Bowls
A Cozy Fall Recipe: Pumpkin Pasta Salad That’s Good for the Soul
Ah, autumn! The crisp air, vibrant foliage, and, of course, the delicious seasonal flavors that come with it. One of my absolute favorite ingredients to work with during this time is pumpkin. It brings a warm, earthy sweetness that perfectly complements a variety of dishes—from soups and pies to salads and pastas. Today, I’m excited to share my delightful Pumpkin Pasta Salad recipe. It’s a dish that embodies everything I believe in: fresh, wholesome ingredients coming together to create something that’s nutritious, absolutely delicious, and oh-so-satisfying.
Picture this: It’s a breezy fall evening, and the sun is beginning to set, painting the sky in hues of orange and pink. You’ve just returned home after a busy day, and you’re craving something comforting yet light. This is when the Pumpkin Pasta Salad swings into action. It’ll not only showcase the best of autumn’s bounty but also provide a burst of flavors that’ll make your taste buds dance. The creamy pumpkin mingles beautifully with the fresh spinach and salty feta, while the pasta serves as the perfect canvas.
Join me as we dive into this heartwarming recipe that’s not just easy to make but is also the perfect way to celebrate everything that makes fall so special. Let’s get those aprons on and make some kitchen magic together!
A Trip Down Memory Lane: Pasta and Family Gatherings
When I think of pasta salads, I’m immediately transported back to my childhood. Grandma Rose always had the biggest, warmest heart—and an equally big collection of recipes, passed down through generations. Every autumn, she would host our family gatherings, filling the house with the aroma of her delectable dishes. She wasn’t shy about experimenting with flavors—especially during pumpkin season.
One year, she whipped up a pumpkin pasta salad for our big family dinner. I still remember the way she smiled as she tossed together roasted pumpkin, vibrant greens, and that creamy feta. The salad brightened up the table, nestled next to her famous garlic bread and a hefty pot of creamy pumpkin soup. That night, we laughed, shared stories, and savored every bite as the world turned cooler outside.
Ever since that unforgettable evening, I’ve made it a tradition to recreate Grandma Rose’s pumpkin pasta salad whenever fall rolls around. Every bite is like a cozy hug, reminding me of family, togetherness, and the joy of sharing good food with loved ones.
Ingredients: What You’ll Need
Gathering the right ingredients is key to crafting this autumn masterpiece. Here’s what you’ll need:
-
Pasta (about 8 oz): I love using rotini or penne for this recipe because their shape holds onto the delicious flavors. Gluten-free options work great too—simply substitute with your favorite gluten-free pasta!
-
Roasted Pumpkin (2 cups): The star of the show! Roasting enhances the pumpkin’s natural sweetness and gives it a lovely caramelization. If you’re pressed for time, canned pumpkin puree can be used, but the texture will be different.
-
Fresh Spinach (4 cups): A leafy green powerhouse, fresh spinach adds a vibrant pop of color and essential nutrients. You can swap it for kale or arugula if you prefer a different flavor profile.
-
Feta Cheese (1 cup, crumbled): The tangy, creamy goodness of feta takes this salad to the next level. For a vegan option, you can use crumbled tofu mixed with a splash of lemon juice or nutritional yeast.
-
Olive Oil (3 tablespoons): A drizzle of extra virgin olive oil adds richness and helps bind the flavors together. Feel free to experiment with flavored oils for an extra twist.
-
Lemon Juice (from 1 lemon): A splash of acidity brightens up the flavors and helps balance the creaminess of the pumpkin. If lemon isn’t your thing, a dash of balsamic vinegar works well too.
-
Salt and Pepper: Essential for seasoning! Always taste as you go and adjust according to your preference.
Step-by-Step Instructions: Let’s Get Cooking!
Now that we have our ingredients ready, it’s time to dive into the cooking process! Follow these step-by-step instructions to create your very own Pumpkin Pasta Salad.
Step 1: Roast the Pumpkin
-
Preheat the oven to 400°F (200°C), and line a baking sheet with parchment paper.
-
Prepare the pumpkin: Cut your pumpkin into bite-sized cubes. If you’re using a sugar pumpkin, remove the seeds and skin—don’t forget to season them with a sprinkle of salt and a drizzle of olive oil before roasting!
-
Roast: Spread the cubed pumpkin on the baking sheet and roast for about 20-25 minutes, or until they’re tender and slightly caramelized, turning halfway through to ensure even cooking.
Chef Tip: Keep an eye on the pumpkin during the last few minutes of roasting to avoid burning. The sweet aroma will let you know when they’re perfectly done!
Step 2: Cook the Pasta
-
Boil water: While the pumpkin is roasting, bring a large pot of salted water to a boil.
-
Cook the pasta: Add your chosen pasta and cook according to the package instructions until al dente.
-
Drain the pasta: Be sure to reserve about a cup of the pasta water in case you need to loosen your salad later.
Chef Comment: Avoid overcooking the pasta—al dente is the goal here, as it will absorb the flavors without getting mushy.
Step 3: Combine the Ingredients
-
Mix it up: Once the pasta and pumpkin are done and slightly cooled, transfer them to a large mixing bowl.
-
Add spinach: Toss in the fresh spinach while the pasta is still warm. This will help wilt the spinach just enough to enhance its flavor without losing its vibrant color.
-
Crumbled feta: Sprinkle the crumbled feta on top. You may want to hold back a bit for garnishing later.
Step 4: Dress It Up
-
Prepare the dressing: Drizzle in the olive oil and freshly squeezed lemon juice. Mix gently to combine all the flavors.
-
Season: Taste and season with salt and pepper, adjusting to your preference. If the salad seems a bit dry, you can add a splash of the reserved pasta water to create a creamy consistency.
Chef Hack: The residual heat from the pasta will help warm the spinach and melt the feta slightly, creating a deliciously creamy texture that binds the salad.
Step 5: Serve and Enjoy
- Plate it up: Transfer the salad to your serving dish. A big, beautiful bowl works great for family-style dining, or you can portion it out onto individual plates. Drizzle with a little more olive oil and a sprinkle of feta, and you are ready to impress!
Serving Suggestions: Making It Picture-Perfect
To plate your Pumpkin Pasta Salad, try layering the roasted pumpkin and pasta at the bottom and creating a top layer of fresh spinach. Add a sprinkle of crumbled feta and a few pumpkin seeds for a delightful crunch. For an extra touch, garnish with fresh herbs like basil or parsley to add a pop of color. Serve it warm, or let it chill in the fridge for a refreshing cold salad.
Pair this delectable dish with crusty, warm bread or a cozy soup—think of it as an inviting hug on a fall evening. Your beautiful creation will not only look stunning on the table but will also fill your house with the heavenly scent of roasted pumpkin and earthy spices!
Recipe Variations: Get Creative!
Here are some fun ways to give this Pumpkin Pasta Salad your personal flair:
- Nutty Flavor: Add toasted pine nuts or walnuts for a nice crunch and a nutty flavor twist.
- Protein Boost: Toss in some grilled chicken or chickpeas for added protein and heartiness.
- Spicy Kick: If you love a bit of heat, add red pepper flakes or a dash of hot sauce to the dressing.
- Herbaceous Freshness: Experiment with different herbs, like sage or thyme, that tie in beautifully with pumpkin.
- Vegan Delight: To make it vegan-friendly, omit the feta and substitute with cashew cheese or leave it out altogether.
Chef’s Notes: A Recipe Worth Repeating
I’ve made this Pumpkin Pasta Salad countless times, and it always manages to whisk me back to those cherished family gatherings. It’s so rewarding to know that each time I make it, I’m not just feeding my body but also creating new memories at my table.
One funny kitchen story I’ll never forget involves my attempt to invite friends over for a “pumpkin-themed” dinner last year. I got so carried away with the pumpkin theme that I ended up with three different pumpkin dishes—pumpkin bread, pumpkin soup, and yes, this salad! Let’s just say not everyone was on board with a pumpkin overload, and there was a lot of laughter about my “pumpkin obsession”—but they all loved the pasta salad, and that’s all that mattered!
FAQs and Troubleshooting
1. Why is my pasta mushy?
Overcooking is often the culprit! For perfect pasta, cook just until al dente—about 1-2 minutes less than the package recommends.
2. Can I make this salad ahead of time?
Absolutely! This salad keeps well in the fridge for 2-3 days, and the flavors tend to deepen as it sits. Just give it a good stir before serving.
3. What if my pumpkin isn’t sweet enough?
Not all pumpkins are created equal! If you find that your pumpkin isn’t as sweet, try adding a splash of maple syrup or brown sugar to balance the flavors.
4. Can I use other vegetables?
Of course! Feel free to swap in roasted butternut squash, sautéed Brussels sprouts, or even roasted sweet potatoes for similar cozy vibes.
Nutritional Info
This dish is not only comforting but also packed with nutrients! Here’s a quick overview per serving:
- Calories: ~320
- Protein: 9g
- Carbohydrates: 45g
- Fats: 14g
- Fiber: 4g
Whether you’re gearing up for a gathering or simply indulging in a cozy night in, this Pumpkin Pasta Salad is sure to please. It seamlessly combines warmth, flavor, and nourishment, making it perfect for fall dining. So grab those ingredients and let’s keep it fresh, simple, and seriously delicious! Happy cooking!
PrintPumpkin Pasta Salad

A warm and earthy pumpkin pasta salad that captures the essence of autumn with fresh ingredients and a creamy dressing.
- Prep Time: 15 minutes
- Cook Time: 30 minutes
- Total Time: 45 minutes
- Yield: 4 servings 1x
- Category: Salad
- Method: Roasting
- Cuisine: American
- Diet: Vegetarian
Ingredients
- 8 oz Pasta (rotini or penne)
- 2 cups Roasted Pumpkin (or canned pumpkin puree)
- 4 cups Fresh Spinach
- 1 cup Feta Cheese (crumbled)
- 3 tablespoons Olive Oil
- Juice of 1 Lemon
- Salt and Pepper to taste
Instructions
- Preheat the oven to 400°F (200°C) and line a baking sheet with parchment paper.
- Prepare the pumpkin: Cut into bite-sized cubes and season with salt and olive oil.
- Roast the pumpkin for about 20-25 minutes until tender and caramelized.
- Boil a large pot of salted water.
- Cook the pasta according to package instructions until al dente.
- Drain the pasta, reserving a cup of pasta water.
- Combine the roasted pumpkin and pasta in a mixing bowl.
- Add fresh spinach and sprinkle crumbled feta on top.
- Dress with olive oil and lemon juice, mixing gently.
- Season with salt and pepper, adjusting to taste.
- Serve the salad in a dish, garnished with extra feta and a drizzle of olive oil.
Notes
This salad can be made ahead of time and stored in the fridge for 2-3 days. The flavors deepen as it sits.
Nutrition
- Serving Size: 1 serving
- Calories: 320
- Sugar: 5g
- Sodium: 400mg
- Fat: 14g
- Saturated Fat: 5g
- Unsaturated Fat: 9g
- Trans Fat: 0g
- Carbohydrates: 45g
- Fiber: 4g
- Protein: 9g
- Cholesterol: 30mg
Keywords: Pumpkin, Pasta Salad, Fall Recipe, Vegetarian, Comfort Food
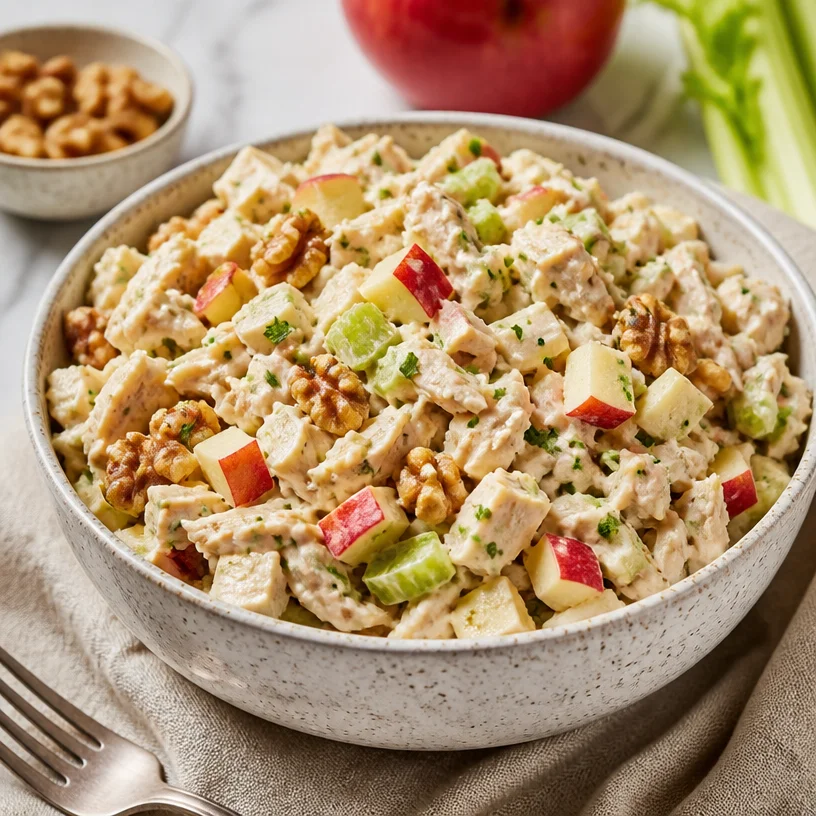
Minute Apple Walnut Chicken Salad for Meal Prep
Apple Walnut Chicken Salad: A Flavorful Medley of Freshness
Welcome back, my fellow food enthusiasts! Today, we’re diving into a delicious recipe that’s perfect for lunch, dinner, or even a picnic: Apple Walnut Chicken Salad. This dish is not only vibrant and refreshing; it packs a punch of flavor and nutrition that will make you feel energized throughout your day. So, grab your apron, and let’s get cooking!
Imagine a scene: it’s a sunny afternoon, and the kitchen is filled with the aroma of roasted chicken. My grandma used to whip up her special chicken salad on weekends, transforming leftover roasted chicken into a dish that dazzled our taste buds. We’d gather around the kitchen table, eagerly awaiting our turn to dig in. She had a knack for creating simple meals that were both comforting and crowd-pleasing, and this apple walnut chicken salad was always a star in her repertoire.
What I adore about this recipe is its versatility! The crispy apples, crunchy walnuts, and tender chicken come together like old friends, each bringing their unique flavor to create a dish that feels just right. Whether you’re serving it on a bed of greens, between two slices of bread, or even straight from the bowl, this salad is sure to please. Let’s not waste any more time; I’m excited to share it with you!
Personal Story
Growing up, weekends at my grandma’s house were always filled with laughter, warmth, and, of course, amazing food. One of my fondest memories was sitting on the kitchen counter, swinging my legs as I watched her toss together her famous chicken salad. Even as a kid, I loved the crunch of the walnuts and the sweetness of the apples mixed with the savory chicken. Those moments were more than just about eating; they were about family, connection, and the love added to every meal.
As I grew older and ventured out on my own, I realized how much I cherished those simple, delicious recipes. I started to experiment in my own kitchen, always trying to capture that same comforting feel my grandma’s chicken salad brought. Today, this Apple Walnut Chicken Salad is one of my go-to recipes, infused with nostalgia yet rich with my culinary twists. Each time I prepare it, I’m reminded of those sunny afternoons and how food has the power to bring us all together.
Ingredients
Here’s what you’ll need to whip up a scrumptious Apple Walnut Chicken Salad, along with some tips and insights on each ingredient:
-
Cooked Chicken: About 2 cups, shredded or cubed.
- Chef Insight: Using leftover roasted chicken is a game-changer! If you don’t have any on hand, you can easily poach a couple of chicken breasts or use rotisserie chicken from your local market.
-
Apples: 1 to 2 medium-sized, chopped (I prefer Granny Smith for a tart bite).
- Substitution Tip: Feel free to use any apple variety you love! Honeycrisp, Fuji, or Braeburn work beautifully for a sweet twist.
-
Walnuts: 1/2 cup, roughly chopped.
- Chef Insight: Toasting the walnuts can really elevate their flavor, bringing out a nutty aroma that complements the salad’s sweetness perfectly.
-
Celery: 1 cup, finely chopped.
- Substitution Tip: Don’t have celery? You could substitute it with chopped bell peppers or even cucumbers for a refreshing crunch!
-
Mayo: 1/2 cup (adjust according to your preference).
- Chef Insight: Consider using Greek yogurt for a lighter version, or add some Dijon mustard for an extra kick!
-
Lemon Juice: 1-2 tablespoons, to brighten up the flavors.
- Chef Trick: A splash of lemon juice can keep your apples from browning and add a zesty, fresh taste to the entire dish.
Step-by-Step Instructions
Ready to get your hands dirty? Here’s how to make a delightful Apple Walnut Chicken Salad:
-
Prep the Chicken: If you’re using leftover chicken, shred or cube it into bite-sized pieces. If you need to cook the chicken, season it with salt and pepper, and either roast, grill, or poach it until it’s completely cooked, about 20-30 minutes depending on your method. Let it cool before shredding it.
- Chef Tip: Always season your chicken before cooking—this infuses great flavor right from the start!
-
Chop Those Apples and Celery: While the chicken cools, chop your apples and celery into uniform pieces. This gives the salad a nice texture and makes for easy eating.
- Chef Hack: To prevent oxidation, drizzle your chopped apples with a bit of lemon juice!
-
Toast the Walnuts: Place walnuts in a dry skillet over medium heat. Toast them for about 5-7 minutes, stirring frequently until they are golden and fragrant.
- Reminder: Keep an eye on them; walnuts can go from perfect to burnt in a matter of seconds!
-
Mix it Up: In a large mixing bowl, combine the chicken, chopped apples, celery, and toasted walnuts. It’s time for the flavor party!
- Tip: Use a rubber spatula to gently fold the ingredients so you don’t mush any of the apple pieces.
-
Dress It: Add the mayonnaise and lemon juice. Mix everything together until it’s well coated. Taste and adjust seasoning; you might want a little salt, pepper, or more lemon juice!
- Chef Insight: A pinch of salt goes a long way in balancing the flavors. Don’t skip it!
-
Chill: For best flavor, let the salad chill in the refrigerator for at least 30 minutes before serving. This time allows all those beautiful flavors to marry together.
- Pro Tip: Make it ahead of time! This salad actually tastes better the next day after the ingredients have mingled together.
Serving Suggestions
When it comes to serving this Apple Walnut Chicken Salad, the possibilities are endless! Serve it in a large bowl for a family-style meal or in individual servings for a more elegant touch. Pair it with mixed greens or enjoy it as a sandwich filling in your favorite bread. You can also serve it atop a stuffed avocado for a low-carb option. The vibrant colors and textures are visually appealing and will impress your family and friends!
Recipe Variations
Looking to switch things up? Here are a few creative twists to make this salad your own:
- Add Dried Fruits: Toss in some dried cranberries or raisins for added texture and sweetness!
- Go Green: Mix in some fresh spinach or arugula for a more salad-focused dish.
- Cheese It Up: Crumbled feta or goat cheese can add a creamy and tangy element.
- Spice It Up: A dash of curry powder or smoked paprika can transform the flavor profile entirely.
- Nut-Free Option: Simply skip the walnuts and replace them with sunflower seeds or pumpkin seeds for crunch.
Chef’s Notes
This Apple Walnut Chicken Salad has evolved over the years. I’ve seen countless variations pop up and even created a few of my own! I remember trying a recipe at a potluck that used apples and pecans instead of walnuts, and it inspired me to play around with different nuts and fruits. The best part about this dish is its adaptability! You can take it in so many directions while keeping it delicious and wholesome.
As I share it with friends and family, I love hearing the stories behind their versions of chicken salad, each with different memories attached. Food has a way of connecting us, whether it’s through nostalgia or the joy of creating something special together.
FAQs and Troubleshooting
Q: Can I make this salad in advance?
A: Absolutely! It’s ideal for meal prepping. Just keep it stored in the fridge for 3-4 days.
Q: What if I don’t like mayonnaise?
A: No problem! Greek yogurt, avocado, or a vinaigrette can make for fantastic alternatives.
Q: What do I do if the salad seems dry?
A: If the salad feels dry after mixing, add a bit more mayo or yogurt until you reach your desired creaminess.
Q: Can I use different kinds of nuts?
A: Yes! Feel free to experiment with pecans, almonds, or even cashews for a unique twist.
Q: Can this salad be served warm?
A: While this dish is most often enjoyed chilled, you can serve it warm if you prefer. Just mix all the components together while the chicken is still warm for a cozy meal!
Nutritional Info
While the specific nutritional information will vary based on ingredient choices, a typical serving of this Apple Walnut Chicken Salad (approximately 1 cup) contains around:
- Calories: 350
- Protein: 25g
- Carbohydrates: 12g
- Fat: 22g
- Fiber: 3g
This salad is a great source of protein from the chicken and healthy fats from the walnuts, plus the added vitamins from the apples and celery makes it a well-rounded meal!
There you have it! A delicious, memory-filled Apple Walnut Chicken Salad recipe that’s not only easy to make but versatile enough to suit any occasion. I hope you enjoy making and sharing this dish as much as I do! Remember, cooking is about having fun, experimenting, and creating memories. So, roll up those sleeves, turn on some music, and let’s create something special together!
PrintApple Walnut Chicken Salad
A Flavorful Medley of Freshness, packed with vibrant flavors and nutrition.
- Prep Time: 15 minutes
- Cook Time: 30 minutes
- Total Time: 45 minutes
- Yield: 4 servings 1x
- Category: Salad
- Method: Mixing
- Cuisine: American
- Diet: Gluten-Free
Ingredients
- 2 cups Cooked Chicken, shredded or cubed
- 1 to 2 medium Apples, chopped (Granny Smith preferred)
- 1/2 cup Walnuts, roughly chopped
- 1 cup Celery, finely chopped
- 1/2 cup Mayo (adjust to preference)
- 1–2 tablespoons Lemon Juice
Instructions
- Prep the Chicken: If using leftover chicken, shred or cube it. If not, cook chicken until completely done, about 20-30 minutes. Let cool.
- Chop Those Apples and Celery: While chicken cools, chop apples and celery into uniform pieces.
- Toast the Walnuts: Place walnuts in a dry skillet over medium heat and toast for about 5-7 minutes, stirring frequently.
- Mix it Up: In a large bowl, combine chicken, apples, celery, and walnuts.
- Dress It: Add mayonnaise and lemon juice; mix until coated. Adjust seasoning if needed.
- Chill: Let salad chill in the fridge for at least 30 minutes before serving.
Notes
This salad tastes better the next day as flavors meld together.
Nutrition
- Serving Size: 1 cup
- Calories: 350
- Sugar: 10g
- Sodium: 400mg
- Fat: 22g
- Saturated Fat: 2g
- Unsaturated Fat: 17g
- Trans Fat: 0g
- Carbohydrates: 12g
- Fiber: 3g
- Protein: 25g
- Cholesterol: 60mg
Keywords: chicken salad, apple walnut, healthy salad, quick lunch, easy recipe
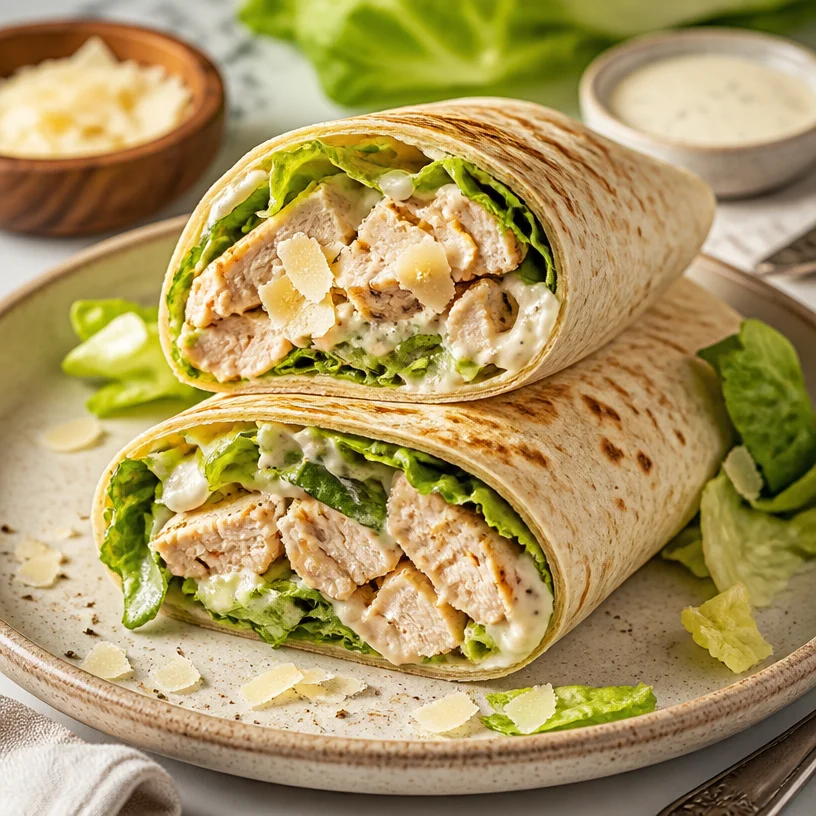
Minute Chicken Caesar Wrap for Busy Weeknights
Chicken Caesar Wrap: A Delicious Journey into Flavor Town!
Welcome, food lovers! If you’re looking for a dish that combines freshness, simplicity, and an explosion of flavor, you’ve come to the right place. Today, we’re diving into a recipe that has earned its spot at the top of my lunch favorites: the Chicken Caesar Wrap. This straightforward meal encapsulates everything I believe in about cooking—it’s healthy, satisfying, and oh-so-delicious!
As a chef who thrives on creativity, I love reinventing classic flavors to make them more accessible for everyday dining. The Chicken Caesar Wrap transforms the traditional Caesar salad into a convenient, handheld delight. Whether you’re packing lunch for work, feeding a family, or just treating yourself, this recipe is your ticket to flavor town without the fuss.
There’s something incredibly fulfilling about wrapping up your favorite ingredients in a soft tortilla and getting ready to take that first bite. The crunch of romaine lettuce, the savory notes of chicken, the nutty hit of Parmesan, and the creamy Caesar dressing come together in a harmonious embrace. It’s a dish that not only fills your belly but also lifts your spirits.
Now, let’s embark on this culinary adventure together! I’ll share my personal story behind this beloved wrap and guide you through every step of making it. So grab your apron, and let’s get cooking!
A Nostalgic Kitchen Memory
Growing up, my family had a tradition of Sunday lunches that were more like a feast. My mom, a cooking enthusiast, would whip up anything from homemade pasta to rich, hearty casseroles. One of the dishes that always stood out and made an appearance on our table was her classic Caesar salad. It was fresh, zesty, and packed with flavor.
I remember sitting at the kitchen table with my siblings, eagerly waiting for that salad to pop up alongside crispy garlic bread and succulent roasted chicken. My mom would toss everything together with such finesse, turning even the simplest ingredients into something magical.
As I grew older and started to experiment in the kitchen, I realized I wanted to take that nostalgia and give it a modern twist. Thus, the Chicken Caesar Wrap was born! It was my way of turning a beloved family recipe into a trendy, on-the-go meal that anyone could enjoy. Now, whenever I wrap it up in a tortilla, I feel that warm sense of family connection and comfort.
Ingredients
Here’s what you’ll need to create the perfect Chicken Caesar Wrap:
-
Chicken Breast:
- Grilled or roasted, it’s the star of the show! You can substitute with grilled tofu for a vegetarian option or canned chickpeas for a protein-packed twist.
-
Romaine Lettuce:
- Crisp and refreshing, it adds that essential crunch. Feel free to swap it out for kale or spinach for a different leafy green.
-
Parmesan Cheese:
- This nutty cheese elevates the dish. If you’re dairy-free, try nutritional yeast or a dairy-free cheese alternative.
-
Caesar Dressing:
- Creamy and tangy, it ties all the flavors together. You can use store-bought dressing or whip up a homemade version for an extra touch.
-
Wraps or Tortillas:
- Whole wheat or gluten-free options work wonderfully. I love using spinach tortillas for a pop of color!
These ingredients come together to create a wrap that’s as nutritious as it is delectable. Remember, cooking is all about flexibility, so feel free to experiment with your favorite ingredients!
Step-by-Step Instructions
Ready to make an irresistible Chicken Caesar Wrap? Let’s get down to business!
-
Prep the Chicken:
- Start with about 2 boneless, skinless chicken breasts. Season them with salt and pepper—simple but effective! If you want to elevate the flavor, try marinating your chicken in lemon juice, garlic, and olive oil for about 30 minutes. This adds depth and keeps the chicken moist.
-
Cook the Chicken:
- Preheat your grill (or stovetop skillet) to medium-high heat. Grill the chicken for approximately 6–7 minutes on each side, or until it’s cooked through (internal temperature should reach 165°F). Let it rest for a few minutes to lock in those juices, then slice it into bite-sized pieces.
-
Prepare the Vegetables:
- While your chicken is resting, wash and chop 1 head of romaine lettuce. I like to slice it finely for easy wrapping, but feel free to tear it into bigger pieces if that’s your style.
-
Mix the Dressing:
- If you’re going the homemade route, whisk together 1/2 cup of mayonnaise, 2 tablespoons of Dijon mustard, 1 tablespoon of Worcestershire sauce, a squeeze of lemon juice, and a pinch of salt and pepper. Toss in about 1/4 cup of grated Parmesan cheese for that authentic Caesar taste.
-
Assemble the Wrap:
- Grab your tortilla or wrap and spread a generous spoonful of Caesar dressing as a base. Layer on your sliced chicken, followed by the romaine lettuce, and finish with an extra sprinkle of Parmesan cheese.
-
Roll It Up:
- Fold in the sides of the tortilla, then roll it tightly from the bottom to the top. Give it a gentle squeeze to hold everything together.
-
Slice and Serve:
- Cut your wrap in half—because who doesn’t love a good presentation? Place it seam-side down on a plate.
-
Enjoy!
- Take a moment to admire your creation. Dive in and taste that delicious harmony of flavors with each bite!
Serving Suggestions
For a beautiful presentation, serve your Chicken Caesar Wrap with a side of sweet potato fries or a simple fruit salad. You could also pair it with a light soup for a comforting meal. To up the visual appeal, garnish your plate with fresh herbs or a lemon wedge. Your dinner guests will be impressed!
Recipe Variations
Feeling adventurous? Here are some fun twists you can add to your Chicken Caesar Wrap for a new experience:
- Spicy Kick: Add sliced jalapeños or a drizzle of sriracha to the wrap for a zesty kick.
- Mediterranean Vibes: Swap out the Caesar dressing for a tangy tahini sauce and sprinkle on feta cheese with kalamata olives.
- BBQ Flavor: Use BBQ chicken instead of traditional Caesar chicken to create a fusion of flavors.
- Vegan Delight: Replace chicken with roasted chickpeas or jackfruit and opt for a vegan Caesar dressing to keep it plant-based.
- Herb Infusion: Incorporate fresh basil or cilantro into the wrap for an added layer of flavor.
These variations will keep your meals exciting and help you discover new favorite flavors!
Chef’s Notes
I’ve made this wrap countless times, and each time it feels special. One of my favorite kitchen stories involves a friend who claimed she could never cook. When I invited her over for a cooking session, we tackled these wraps together. After a few laughs and a couple of mishaps (including some rogue chicken pieces that hit the floor), she ended up surprising herself with how delicious her wrap turned out! It’s stories like these that show the beauty of cooking—the joy, the creativity, and the shared laughter.
Through the years, I’ve played around with this recipe, tweaking and refining until it became foolproof. Cooking is all about discovery; every dish tells a story of learning and growth!
FAQs and Troubleshooting
-
How do I store leftovers?
- Wrap tightly in foil or place in an airtight container. Store in the refrigerator for up to two days. Reheat the chicken to maintain flavor and safety before reassembling the wrap.
-
Can I prep this ahead of time?
- Absolutely! You can cook the chicken a day in advance. Just keep the ingredients separate until you’re ready to assemble to prevent sogginess.
-
What can I use instead of wraps?
- Lettuce leaves make for a fantastic low-carb alternative! You can also try using pita bread or grain-free tortillas.
-
Why is my wrap falling apart?
- If your wrap isn’t holding together, it might be overstuffed or lacking the proper binding from the dressing. Keep the filling modest and ensure you’re wrapping tightly.
Nutritional Info
(For a single wrap)
- Calories: 400
- Protein: 30g
- Carbohydrates: 30g
- Fat: 20g
- Fiber: 5g
Now that you’re armed with an incredible Chicken Caesar Wrap recipe and lots of stories, I hope you’ll bring this dish into your kitchen and make it your own. Cooking is a journey we take through flavors, and I’m thrilled to have shared this ride with you! Remember, no matter how many tweaks you make, the best part is enjoying every bite. Until next time, happy cooking!
PrintChicken Caesar Wrap
A fresh and flavorful wrap that transforms the classic Caesar salad into a convenient meal, perfect for lunch or a quick dinner.
- Prep Time: 15 minutes
- Cook Time: 14 minutes
- Total Time: 29 minutes
- Yield: 4 servings 1x
- Category: Lunch
- Method: Grilling
- Cuisine: American
- Diet: Protein-rich
Ingredients
- 2 boneless, skinless chicken breasts
- 1 head of romaine lettuce
- 1/2 cup Caesar dressing
- 1/4 cup grated Parmesan cheese
- 4 whole wheat or gluten-free wraps or tortillas
Instructions
- Prep the chicken: Season the chicken breasts with salt and pepper, and marinate in lemon juice, garlic, and olive oil for 30 minutes.
- Cook the chicken: Preheat grill to medium-high heat, grill chicken for 6–7 minutes on each side until cooked through.
- Prepare the vegetables: Wash and chop the romaine lettuce finely.
- Mix the dressing: Whisk together mayonnaise, Dijon mustard, Worcestershire sauce, lemon juice, salt, pepper, and Parmesan cheese.
- Assemble the wrap: Spread Caesar dressing on a tortilla, layer with sliced chicken, romaine lettuce, and Parmesan cheese.
- Roll it up: Fold in the sides of the tortilla and roll tightly from the bottom to the top.
- Slice and serve: Cut the wrap in half and place seam-side down on a plate.
Notes
Store leftovers tightly wrapped in foil or in an airtight container in the refrigerator for up to two days. The ingredients can be prepped ahead of time to save on assembly time.
Nutrition
- Serving Size: 1 wrap
- Calories: 400
- Sugar: 3g
- Sodium: 600mg
- Fat: 20g
- Saturated Fat: 5g
- Unsaturated Fat: 10g
- Trans Fat: 0g
- Carbohydrates: 30g
- Fiber: 5g
- Protein: 30g
- Cholesterol: 70mg
Keywords: chicken wrap, Caesar salad, quick lunch, healthy recipe, easy dinner
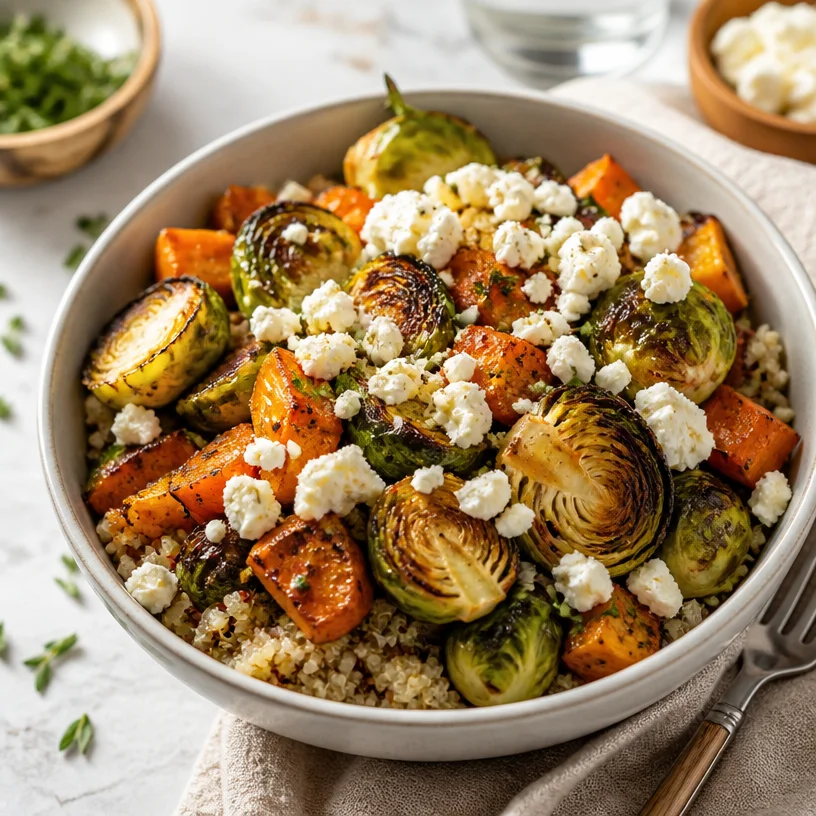
Roasted Veggie Quinoa Bowl
Roasted Veggie Quinoa Bowl: A Flavorful Journey to Wellness
Welcome, foodie friends! If you’re on a quest for a meal that nourishes both body and soul, you’ve stumbled upon the perfect post. Today, we’re diving into one of my all-time favorite dishes: the Roasted Veggie Quinoa Bowl. Picture this: crisp, caramelized veggies nestled on a fluffy bed of quinoa, drizzled with a zesty dressing, and topped with creamy feta. Heaven, right?
This dish is not just about eating; it’s about embracing vibrant flavors and celebrating the fresh ingredients that make each bite a joy. Whether you’re cooking for yourself, for friends, or even prepping healthy lunches for an entire week, this recipe is your ticket to flavor town without the fuss. Imagine enjoying a wholesome meal that’s quick to prepare, packed with nutrients, and undeniably delicious. This bowl has got your back!
The beauty of a Roasted Veggie Quinoa Bowl lies in its versatility. You can mix and match ingredients based on what’s in season or what you happen to have hanging out in your fridge. Plus, it’s a great way to sneak in those veggies we all know we should eat a bit more of—no judgment here! Let’s roll up our sleeves and get started on this culinary adventure together!
A Memory From the Kitchen
Ah, the first time I made a roasted veggie bowl! It was a crisp autumn afternoon, and I had just come back from the local farmers’ market, where gorgeous Brussels sprouts and vibrant carrots were practically singing my name. I remember tossing everything on a sheet pan, drizzled with olive oil and a sprinkle of salt—simple, yet so satisfying. The house filled with that irresistible nutty aroma as the veggies roasted away.
As a fresh-out-of-college culinary enthusiast, I had a penchant for experimenting in the kitchen. That day, I invited a few friends over to share the bounty of my roasted creation. We gathered around the table, bowls in hand, laughter spilling over as we mixed and matched toppings like feta, nuts, and dressings. It was pure joy; we were nourishing our bodies while sharing stories and bonding over food. Little did I know that this spontaneous cooking session would solidify my love for wholesome, veggie-packed meals, creating a tradition that still holds a special place in my heart. Now, every time I make this dish, it brings back those warmth-filled memories, infused with laughter and good food.
Ingredients You’ll Need
Let’s break down the ingredients for this delightful bowl. I’ve even thrown in some chef insights to help you make the best choices as you shop!
-
Quinoa (1 cup): This powerhouse grain is gluten-free and packed with protein. Rinse it before cooking to remove its natural coating, which can make it taste bitter. If you don’t have quinoa, try using brown rice or farro as substitutes!
-
Brussels Sprouts (2 cups, halved): These little green gems are rich in vitamins and minerals. Roasting them caramelizes the outer leaves, giving them a sweet and nutty flavor. If Brussels sprouts aren’t your thing, broccoli or cauliflower would also work beautifully.
-
Carrots (2 cups, sliced): These add a lovely sweetness and vibrant color to our bowl. Baby carrots can be used for convenience, or swap with sweet potatoes for a twist!
-
Feta Cheese (½ cup, crumbled): This salty, tangy cheese adds a wonderful creaminess. For a dairy-free option, try crumbled avocado or a sprinkle of nutritional yeast for a cheesy flavor.
-
Olive Oil (2 tablespoons): Great for roasting and drizzling alike, it provides healthy fats. You can replace olive oil with avocado oil, or even a bit of melted coconut oil if you prefer!
-
Salt and Pepper (to taste): Basic seasoning is crucial; feel free to get creative with spices! Garlic powder, paprika, or Italian seasoning can add extra flavor.
Step-by-Step Instructions
Ready to bring this delicious meal to life? Let’s get into the nitty-gritty!
-
Preheat Your Oven: Start by preheating your oven to 400°F (200°C). This high heat is essential for achieving that crispy texture on your veggies. Trust me; your taste buds will thank you!
-
Prepare the Quinoa: Rinse your quinoa under cold water in a fine-mesh strainer. Place it in a medium saucepan with 2 cups of water and a pinch of salt. Bring to a boil, then reduce to a simmer, cover, and let it cook for about 15 minutes or until all the liquid is absorbed. Fluff it with a fork and let it sit while your veggies roast.
-
Chop and Arrange the Veggies: While the quinoa cooks, wash and halve the Brussels sprouts and slice the carrots. Toss them in a large bowl with olive oil, salt, and pepper until they’re well coated. This step is crucial, as it helps the flavors meld during roasting.
-
Roast the Veggies: Spread the veggies evenly on a baking sheet, making sure they’re not overcrowded. This allows for even roasting and crispiness. Pop them in the oven and roast for 20-25 minutes, flipping halfway through, until they’re golden brown and tender.
-
Assemble the Bowl: Once the veggies are perfectly roasted, it’s time to assemble your bowl! Start with a base of fluffy quinoa, then pile on your roasted Brussels sprouts and carrots.
-
Add the Feta: Sprinkle the crumbled feta on top—so delicious! If you’re looking for a pop of color, you could garnish with some chopped fresh herbs like parsley or basil. This not only enhances the presentation but adds a burst of fresh flavor, too!
-
Finalize the Dish: Drizzle with your favorite dressing (lemon vinaigrette works wonderfully!) and get ready to dig in. Don’t forget to give it a gentle toss to mix everything together.
Serving Suggestions
There’s something so satisfying about a well-plated meal. For serving, choose a beautiful bowl that allows the vibrant colors of the veggies and quinoa to really pop. You can also add a wedge of lemon on the side for a zesty kick. This bowl is perfect as a hearty lunch or a light dinner, and pairs wonderfully with a glass of sparkling water or your favorite herbal tea!
Recipe Variations
Now that you’ve got the basic recipe down, let’s talk about some fun variations:
-
Add More Protein: Consider adding grilled chicken, chickpeas, or black beans for a boost of protein. This transformation makes the dish hearty enough for a satisfying dinner.
-
Herb-Infused Quinoa: Cook your quinoa in vegetable broth instead of water and add fresh herbs like rosemary or thyme for a fragrant twist.
-
Spice it Up: Add some cumin or red pepper flakes to the veggies before roasting for a spicy kick! Just adjust according to your heat preference.
-
Dressing Delight: Swap the lemon vinaigrette for a creamy tahini dressing or a zesty balsamic glaze for a completely different flavor profile.
-
Seasonal Changes: Substitute in seasonal veggies like zucchini in the summer or kale in the winter for a different spin each time you make this bowl.
Chef’s Notes
This recipe holds a special place in my kitchen. Over the years, I’ve had numerous friends come over for a cooking night, and this bowl is a crowd-pleaser every time! It’s also a fantastic clean-out-the-fridge meal—perfect for those days when you want to use up what you have. The key, I’ve learned, is not to stress too much about the ingredients. Everything fits together beautifully, and it’s all about what works for your taste buds!
A funny kitchen story? One time, I got so excited about roasting Brussels sprouts that I added an entire box of them to the oven—forgetting everything else. Let’s just say, I had a fair share of Brussels sprouts for a week, but they were SO delicious that I didn’t mind!
FAQs and Troubleshooting
Here are a few common questions and troubleshooting tips to help you along the way:
-
Why are my veggies not crispy? Make sure they’re not overcrowded on the baking sheet. Give them enough space to roast rather than steam!
-
Can I make this bowl ahead of time? Absolutely! You can prepare the quinoa and veggies ahead and store them in airtight containers in the fridge. Just reheat and drizzle with dressing when you’re ready to serve.
-
What can I do if my quinoa is mushy? If your quinoa ends up mushy instead of fluffy, try reducing the cooking time. It could be that you used too much water or cooked it too long.
-
How can I add more flavor? Feel free to experiment with different herbs and spices! A sprinkle of smoked paprika or freshly chopped basil can take the flavors to the next level.
Nutritional Info
While the specifics can vary based on portion size and ingredients, here’s a general breakdown for a serving of the Roasted Veggie Quinoa Bowl:
- Calories: Approximately 350-400
- Protein: 12g
- Carbohydrates: 35g
- Fat: 20g
- Fiber: 8g
So there you have it, a delightful journey through creating a Roasted Veggie Quinoa Bowl that nourishes the body while delighting the senses. I hope this recipe inspires you to get in the kitchen and whip up something delicious, whether it’s for yourself or someone you love. Remember, cooking should be a joyful experience! Keep it fresh, simple, and always delicious. Happy cooking, friends!
PrintRoasted Veggie Quinoa Bowl
A colorful and nutritious roasted veggie quinoa bowl topped with creamy feta and a zesty dressing.
- Prep Time: 15 minutes
- Cook Time: 25 minutes
- Total Time: 40 minutes
- Yield: 4 servings 1x
- Category: Main Course
- Method: Baking
- Cuisine: Mediterranean
- Diet: Vegetarian
Ingredients
- 1 cup Quinoa
- 2 cups Brussels Sprouts, halved
- 2 cups Carrots, sliced
- ½ cup Feta Cheese, crumbled
- 2 tablespoons Olive Oil
- Salt and Pepper, to taste
Instructions
- Preheat your oven to 400°F (200°C).
- Rinse your quinoa under cold water in a fine-mesh strainer.
- Place it in a medium saucepan with 2 cups of water and a pinch of salt. Bring to a boil, then reduce to a simmer, cover, and let it cook for about 15 minutes.
- Chop the Brussels sprouts and slice the carrots. Toss them in a large bowl with olive oil, salt, and pepper.
- Spread the veggies evenly on a baking sheet and roast for 20-25 minutes, flipping halfway through.
- Assemble your bowl with a base of fluffy quinoa, then pile on your roasted Brussels sprouts and carrots.
- Sprinkle the crumbled feta on top.
- Drizzle with your favorite dressing and give it a gentle toss to mix everything together.
Notes
This bowl is perfect for meal prep and can easily be customized based on seasonal veggies or personal preference.
Nutrition
- Serving Size: 1 serving
- Calories: 375
- Sugar: 5g
- Sodium: 350mg
- Fat: 20g
- Saturated Fat: 5g
- Unsaturated Fat: 15g
- Trans Fat: 0g
- Carbohydrates: 45g
- Fiber: 8g
- Protein: 12g
- Cholesterol: 20mg
Keywords: quinoa, roasted veggies, healthy bowl
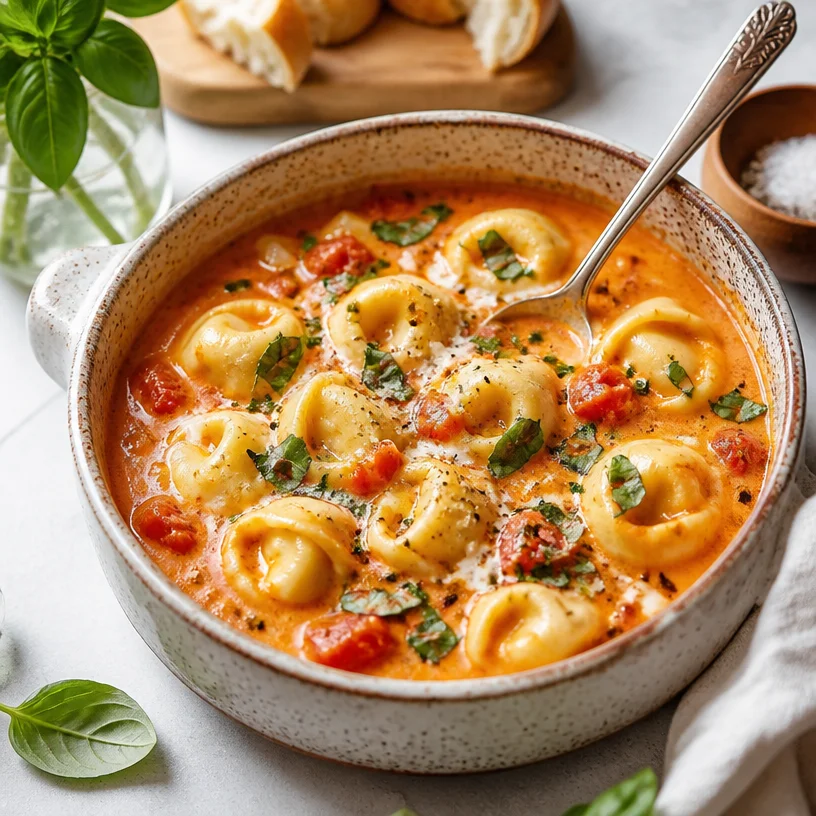
One-Pot Creamy Tomato Tortellini Soup for Weeknights
Creamy Tomato Tortellini Soup: A Cozy Bowl of Comfort
Welcome back to Clean Plate Cravings, food lovers! Today, I’m thrilled to share with you one of my all-time favorite recipes—Creamy Tomato Tortellini Soup. This dish is the epitome of comfort food, effortlessly blending the richness of cream with the vibrant flavors of tomatoes, all wrapped around tender, cheesy tortellini. It’s the kind of stew that wraps you in a warm hug on chilly nights or when you need a little extra love.
But beyond just the delicious flavors, this soup holds a special place in my heart. I remember the first time I made it, a rainy evening during my college days. With a tight budget but a burning desire to whip up something cozy, I found my little kitchen transformed into a haven of aroma and warmth. The bubbling pot on the stove filled the air with the sweet tang of tomatoes and the inviting scent of basil. As I savored each sip, I felt like a true chef, savoring an exquisite meal without breaking the bank.
This dish has since evolved, and every time I make it, the memories flood back, reminding me of the joy of cooking and sharing food with loved ones. So, whether you’re curling up on the couch or hosting a dinner party, this Creamy Tomato Tortellini Soup is the perfect bowl of happiness to share. Ready to dive in? Let’s get cooking!
Personal Story
Every time I prepare this Creamy Tomato Tortellini Soup, I’m whisked back to that cozy kitchen where I first learned the ropes of cooking. After a long day of classes, I craved something not just to fill my belly but to nourish my spirit. Armed with a couple of cans of tomatoes, a package of frozen tortellini, and a small carton of cream, I approached dinner with the enthusiasm of a culinary adventurer.
The rain pattered against my window as I stirred the pot, watching the vibrant colors swirl. I can still remember the joy of that first taste—a perfect balance of creamy goodness and tangy tomato. Even more special was the moment I invited some friends over to share it. As laughter filled the kitchen and spoons clinked against bowls, I knew I had created something magical. Those shared meals turned into a tradition, and what began as a humble soup turned into a beloved favorite amongst my circle.
Now, as I pass this recipe along to you, I hope it brings you the same warmth and comfort it brought me, reminding you that cooking is as much about creating memories as it is about the ingredients. Let’s dive into the heart of this dish—you’ll soon see why it has a special place in my heart!
Ingredients
Here’s what you’ll need to create this dreamy soup:
-
Cheese Tortellini: The star of the show! I prefer the refrigerated variety for that fresh taste, but frozen works just as well. Feel free to swap with spinach or mushroom tortellini for some added flavor.
-
Canned Tomatoes: I love using whole peeled tomatoes for that homemade feel. San Marzano tomatoes are particularly sweet and flavorful. Run out? Substitute with crushed tomatoes or even fresh tomatoes if it’s peak season!
-
Heavy Cream: This is where the magic happens, adding richness and a silky texture. If you’re looking for lighter options, half-and-half or even coconut milk can work, but they will alter the flavor profile slightly.
-
Basil: Fresh basil brings an aromatic layer to the soup that elevates the flavors. If fresh isn’t accessible, dried basil can be used—although use about a third of the amount since dried herbs are more concentrated.
-
Onion and Garlic (optional): These additions create a flavorful base. Consider sautéing one diced onion and a couple of minced garlic cloves before adding in the tomatoes for that deep, aromatic foundation.
-
Vegetable or Chicken Broth: This will help build the soup’s body and adds a depth of flavor. You can also use water in a pinch, but broth is highly recommended for richness.
Step-by-Step Instructions
Ready to simmer up some cozy vibes? Let’s get cooking:
-
Sauté the Aromatics: In a large pot, heat a drizzle of olive oil over medium heat. Toss in your chopped onion. Sauté, stirring occasionally, until the onion becomes translucent and fragrant (about 4-5 minutes). This first step brings out those sweet onion flavors!
-
Add Garlic: Add in your minced garlic, stirring for another 1-2 minutes. Be careful not to let it brown—it can turn bitter if you do! You’re looking for that lovely, inviting aroma to fill the kitchen.
-
Incorporate the Tomatoes: Open your cans of tomatoes, giving them a quick crush with your hand as you pour them into the pot. This will enhance their natural sweetness. Add in the broth, season with salt, pepper, and a pinch of sugar to balance the acidity of the tomatoes. Let this simmer for about 10-15 minutes. This simmering time allows the flavors to meld beautifully; the sugar helps cut through the acidity of the tomatoes.
-
Blend it Up: (Optional) For a creamier texture, you can blend the soup using an immersion blender directly in the pot or transfer to a regular blender in batches. Just be careful! If using a traditional blender, let it cool down slightly before blending to avoid any dangerous splashes.
-
Stir in the Cream: Pour in the heavy cream, stirring until well combined. You should see that gorgeous pinkish hue emerge!
-
Cook the Tortellini: Now, toss in the cheese tortellini. Let them cook according to package instructions, usually about 3-5 minutes until they’re tender and have floated to the top. Voila! You’re almost there!
-
Add Fresh Basil: Lastly, stir in fresh basil just before serving to keep it vibrant and aromatic. Taste and adjust seasoning as necessary.
And there you have it—a beautiful, creamy tomato tortellini soup ready to be enjoyed!
Serving Suggestions
Serve this delightful soup hot, ladled generously into bowls. A sprinkle of freshly cracked pepper on top adds a nice touch. Pair it with a side of crusty bread or a fresh green salad for a complete meal that feels a bit indulgent yet light. For an extra layer of flavor, consider sprinkling some grated Parmesan or a drizzle of balsamic reduction on top—trust me, it takes it to a whole new level!
Recipe Variations
Let’s mix it up! Here are a few creative ideas to customize your soup:
-
Spicy Twist: Add a pinch of red pepper flakes while sautéing the onions to kick up the heat.
-
Vegetable Boost: Toss in some chopped spinach or kale in the last couple of minutes of cooking for added nutrients and color.
-
Protein Power: Shredded rotisserie chicken or sautéed shrimp can amp up the protein factor. Just add them in near the end to warm through.
-
Herb Fusion: Switch up the basil for thyme, parsley, or even a touch of rosemary for a different flavor profile.
-
Creamy Vegan Version: Substitute heavy cream with coconut cream and the cheese tortellini with vegan pasta for a dairy-free delight.
Chef’s Notes
This recipe has evolved quite a bit since my college days. Initially, I used whatever pasta I had on hand, which led to some amusingly unique creations! I’ve also experimented with different herbs and ingredients, and I’ve found that each tweak brings its own little charm. The best part? Every version still delivers comfort in a bowl.
One kitchen mishap I’ll never forget involved an overly ambitious addition of spice that had my friends reaching for water instead of seconds! It’s moments like these that remind me, cooking is a journey filled with laughter, experimentation, and, of course, the occasional blunder—embrace them all!
FAQs and Troubleshooting
1. My soup is too thick; how do I fix it?
Don’t worry—this can easily be remedied! Simply add more broth or some water to loosen it up to your desired consistency. Stir well and heat until warmed through.
2. Can I use other types of pasta?
Absolutely! While cheese tortellini is the star, any small pasta shapes like mini shells or orzo will work great. Just adjust cooking times accordingly to ensure the pasta is cooked to al dente.
3. How do I store leftovers?
This soup can be stored in an airtight container in the fridge for up to 3 days. For longer storage, consider freezing it without the tortellini and cooking fresh pasta when ready to serve.
4. Can I make this soup in advance?
You certainly can! Make the soup base ahead of time without the cream and tortellini. When you’re ready to enjoy, reheat and stir in the cream and tortellini for a fresh, warm dish.
Nutritional Info
While I typically focus on the joy of cooking, I know many of you are interested in the nutrition side of things. Here’s a quick breakdown for one serving (about 1.5 cups) of this Creamy Tomato Tortellini Soup:
- Calories: Approximately 350
- Protein: 12g
- Carbohydrates: 40g
- Fat: 18g
- Fiber: 3g
Remember, these values can vary based on specific ingredients used and portion sizes. The joy of cooking is about balance, so feel free to modify the recipe as you see fit!
And there you have it! Your guide to creating a cozy, unforgettable bowl of Creamy Tomato Tortellini Soup. I hope you find joy in preparing and sharing this dish as much as I have. Happy cooking, food friends! Let me know how yours turns out—I can’t wait to hear your stories!
PrintCreamy Tomato Tortellini Soup

A cozy and comforting soup that blends rich cream with vibrant flavors of tomatoes and cheesy tortellini.
- Prep Time: 10 minutes
- Cook Time: 20 minutes
- Total Time: 30 minutes
- Yield: 4 servings 1x
- Category: Soup
- Method: Stovetop
- Cuisine: Italian
- Diet: Vegetarian
Ingredients
- 14 ounces cheese tortellini
- 28 ounces canned whole peeled tomatoes
- 1 cup heavy cream
- 1/4 cup fresh basil
- 1 medium onion, diced
- 2 cloves garlic, minced
- 4 cups vegetable or chicken broth
- Salt and pepper to taste
- 1 teaspoon sugar (optional)
- Olive oil for sautéing
Instructions
- Sauté the aromatics: In a large pot, heat a drizzle of olive oil over medium heat. Toss in your chopped onion and sauté for 4-5 minutes until translucent.
- Add garlic: Stir in the minced garlic for another 1-2 minutes, being careful not to brown.
- Incorporate the tomatoes: Pour in the canned tomatoes and crush them with your hand. Add the broth, seasoning, and sugar, then let this simmer for 10-15 minutes.
- Blend it up: (Optional) Blend the soup until creamy using an immersion blender or a regular blender.
- Stir in the cream: Add the heavy cream and stir until well combined.
- Cook the tortellini: Toss in the cheese tortellini and cook according to package instructions, usually about 3-5 minutes.
- Add fresh basil: Stir in the fresh basil just before serving and adjust seasoning as necessary.
Notes
For a lighter version, you can substitute heavy cream with half-and-half or coconut milk. Add extra veggies or proteins like shredded rotisserie chicken for variation.
Nutrition
- Serving Size: 1 serving
- Calories: 350
- Sugar: 5g
- Sodium: 800mg
- Fat: 18g
- Saturated Fat: 10g
- Unsaturated Fat: 6g
- Trans Fat: 0g
- Carbohydrates: 40g
- Fiber: 3g
- Protein: 12g
- Cholesterol: 40mg
Keywords: soup, comfort food, tortellini, creamy, tomato

Minute Turkey Cranberry Panini for Busy Weeknights
Turkey Cranberry Panini: A Deliciously Nostalgic Twist
Welcome, fellow food lovers! I’m thrilled to have you here at Clean Plate Cravings, where we believe that fresh food should fit seamlessly into our lives—full of flavor and no fuss. Today, I’m excited to talk about a delightful sandwich that gives a nod to the classic holiday spread: the Turkey Cranberry Panini. This is not just a recipe; it’s a celebration of taste, simplicity, and the cherished moments around our dining tables.
The Turkey Cranberry Panini is the perfect balance of savory and sweet. With tender turkey, tangy cranberry sauce, melty Swiss cheese, and crispy sourdough bread, it’s a dish that really hits the mark, whether you’re reminiscing about family gatherings or just wanting something delicious for lunch. Let’s dive into this culinary adventure together as I share the cozy story behind this delightful meal, the simple ingredients that make it shine, and all the tips you need to whip it up in your kitchen.
A Slice of Nostalgia
Growing up, Thanksgiving was always a big deal at my house. The aroma of roasted turkey filled the air as we gathered around the kitchen, chatting and laughing while my mom worked her magic. Every year, we would pile our plates high with turkey, stuffing, and a generous dollop of homemade cranberry sauce. After the meal, we might have some leftovers, but nothing compared to the joy of enjoying it all fresh off the table.
One year, inspired by my family’s post-Thanksgiving conversations, I took it upon myself to create something new out of those leftover holiday treasures. Armed with some sourdough bread, turkey, Swiss cheese, and cranberry sauce, I decided to make a panini. I still remember the thrill of pressing that sandwich down, waiting for it to crisp and melt in all the right places. Each bite delivered that nostalgic taste of Thanksgiving, but in a warm, comforting sandwich form. From that day on, the Turkey Cranberry Panini became a beloved staple, enjoyed anytime we craved a dash of festive flavor.
Ingredients
Before we embark on our sandwich-making journey, let’s gather our ingredients! Here’s what you’ll need:
-
Turkey: Tender turkey slices are the star of our dish. Feel free to use deli turkey or leftovers from your holiday feast! For a vegetarian twist, swap it out for roasted veggies or savory mushrooms.
-
Cranberry Sauce: Sweet and tangy, this is what brings the festive spirit to our panini. You can use store-bought or homemade; both work beautifully! If you want a twist, try using a spiced cranberry chutney for a flavor boost.
-
Swiss Cheese: Melty, creamy, and slightly nutty, Swiss cheese pulls the panini together beautifully. Need to switch it up? Gruyère works great as a substitute, or for a sharp twist, try sharp cheddar.
-
Sourdough Bread: The foundation of our sandwich! Sourdough has a lovely tangy flavor and sturdy crust that holds everything together. If sourdough isn’t your jam, feel free to use whole grain or even a gluten-free bread option.
Step-by-Step Instructions
Now that we have our ingredients ready, let’s get cooking! Follow these steps to create the most delicious Turkey Cranberry Panini:
-
Preheat Your Panini Press (or skillet): If you’re using a panini press, preheat it according to the manufacturer’s instructions. For skille, heat it over medium heat. This ensures that our bread gets that gorgeous golden crust.
-
Prepare the Bread: Start by laying out two slices of sourdough bread. This is where the magic begins! Use a pastry brush or your fingers to lightly spread a thin layer of butter or olive oil on one side of each slice. This will help us achieve that irresistible crunch!
-
Layer It Up: On the unbuttered side of one slice, layer a generous amount of turkey. Don’t skimp on this—this is the heart of our panini! Follow it with a spoonful of cranberry sauce. You can add more or less to taste, depending on how sweet-tart you like it.
-
Cheese, Please: Now it’s time for the cheese! Add a couple of slices of Swiss cheese on top of the cranberry sauce. This melty goodness will elevate our sandwich from good to unforgettable.
-
Top It Off: Place the second slice of sourdough bread on top, ensuring that the buttered sides are facing out. Press down gently—this will help everything meld together while cooking.
-
Cook It Right: If using a panini press, simply close it and let it cook for about 5–7 minutes, or until golden. If using a skillet, cook for about 3-4 minutes per side, flipping carefully with a spatula. You can place a heavy skillet on top of your panini to help it cook evenly and achieve that crispy texture.
-
Check for Melty Goodness: After cooking, take a peek to ensure the cheese is all melted and the bread is wonderfully golden. If it’s not quite there, give it another minute or two.
-
Slice and Serve: Once perfectly cooked, remove the panini from your press or skillet, and let it sit for a minute. Slice it in half diagonally, revealing the delicious layers within.
Serving Suggestions
Plate your Turkey Cranberry Panini with a side of crunchy chips or a simple side salad to add some freshness! Drizzle a bit of balsamic reduction on the plate for a gourmet touch, or serve it with a dollop of extra cranberry sauce on the side for dipping. It’s the little touches that make your meal feel that much more special!
Recipe Variations
The beauty of the Turkey Cranberry Panini is that it’s incredibly versatile! Here are a few creative twists you can try:
-
Apple Slices: Add thin slices of crisp apple for a touch of sweetness and crunch.
-
Avocado Smash: Spread some creamy avocado on one slice of bread for extra richness.
-
Spice It Up: Incorporate some arugula or spinach for a peppery bite, or add spicy mustard for a tangy kick.
-
Switch the Cheese: Experiment with other cheeses like pepper jack for a little heat or creamy mozzarella for a melty delight.
-
Savory Sauté: Sautéed onions or mushrooms can add deep, rich flavors to your panini.
Chef’s Notes
As with any cherished recipe, the Turkey Cranberry Panini has evolved over time in my kitchen. Originally crafted from holiday leftovers, I’ve come to appreciate experimenting with different flavors and ingredients. Each time I make it, I find that little tweaks make it feel new! I love to invite friends over and have a panini-making night, where we share our favorite ingredients and create our own custom versions. It’s a party and a wonderful way to explore new tastes!
FAQs and Troubleshooting
-
What if my panini is soggy?
- Make sure to use just the right amount of cranberry sauce—not too much! Also, ensure your bread is dry and not too thick, as this can lead to sogginess.
-
Can I use frozen turkey?
- Absolutely! Just make sure it’s fully thawed and well-drained before adding it to your sandwich.
-
Why isn’t the cheese melting?
- If you’re having trouble with cheese melting, try covering the sandwich with a lid during cooking or using a lower heat to allow more time for melting without burning the bread.
-
Can I meal prep this panini?
- Definitely! Assemble your panini, wrap it in foil or parchment paper, and store it in the refrigerator. When you’re ready to enjoy, you can grill it fresh.
Nutritional Info
Here’s a rough nutritional breakdown for one Turkey Cranberry Panini (not including additional sides):
- Calories: Approximately 400
- Protein: 28g
- Carbohydrates: 38g
- Fat: 15g
- Fiber: 3g
- Sugar: 4g
Enjoy the process, and don’t forget to savor each bite! The Turkey Cranberry Panini is not just about filling your stomach; it’s also about filling your heart with the warmth and joy of good company and delicious food. So roll up your sleeves, get your aprons on, and let’s make some tasty memories in the kitchen! Happy cooking!
PrintTurkey Cranberry Panini

A delightful sandwich featuring tender turkey, tangy cranberry sauce, and melty Swiss cheese on crispy sourdough bread.
- Prep Time: 10 minutes
- Cook Time: 7 minutes
- Total Time: 17 minutes
- Yield: 1 serving
- Category: Main Course
- Method: Grilling
- Cuisine: American
- Diet: None
Ingredients
- Tender turkey slices
- Cranberry sauce
- Swiss cheese
- Sourdough bread
- Butter or olive oil
Instructions
- Preheat your panini press (or skillet).
- Prepare the bread by spreading butter or oil on one side of each slice.
- Layer turkey on the unbuttered side of one slice.
- Add a spoonful of cranberry sauce.
- Top with slices of Swiss cheese.
- Place the second slice of bread on top, buttered sides out.
- Cook in the press or skillet until golden, about 5-7 minutes.
- Check for melted cheese and golden bread.
- Slice and serve with sides!
Notes
For extra richness, consider adding avocado or experimenting with different cheeses.
Nutrition
- Serving Size: 1 sandwich
- Calories: 400
- Sugar: 4g
- Sodium: 500mg
- Fat: 15g
- Saturated Fat: 7g
- Unsaturated Fat: 5g
- Trans Fat: 0g
- Carbohydrates: 38g
- Fiber: 3g
- Protein: 28g
- Cholesterol: 60mg
Keywords: panini, turkey sandwich, cranberry sauce, comfort food
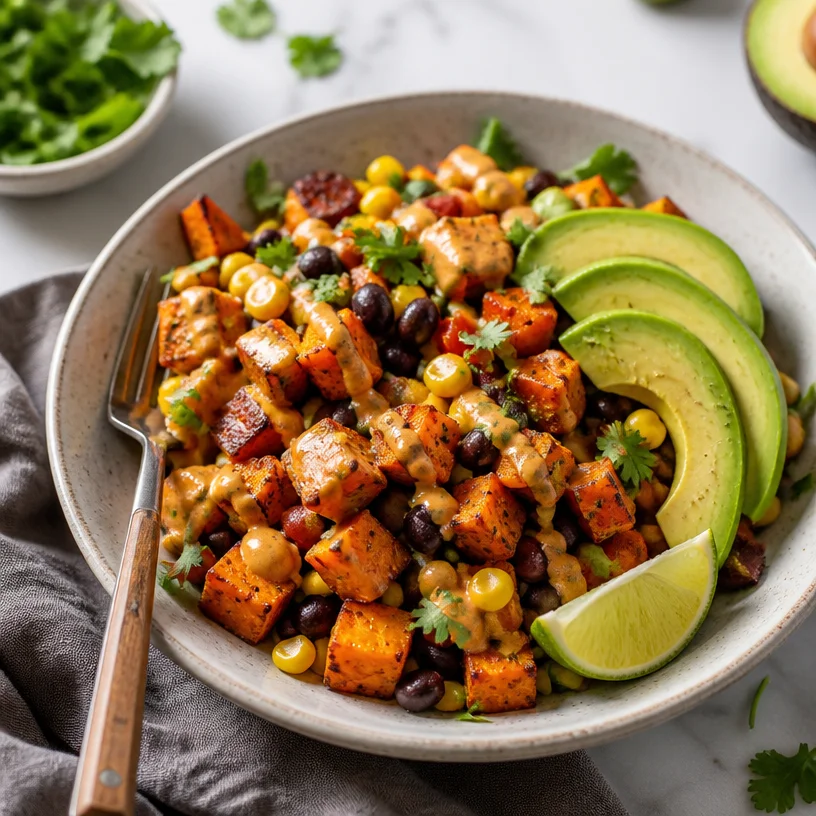
Minute One-Pan Sweet Potato Black Bean Bowl (Meal Prep)
Sweet Potato Black Bean Bowl: A Wholesome Delight
Welcome, food lovers! Today, we’re diving into a vibrant and wholesome dish that’s as colorful as it is delicious—the Sweet Potato Black Bean Bowl! If you’re looking for a meal that’s not just nourishing but also bursting with flavor, you’ve landed in the right place. This bowl is perfect for any time of the day, whether you need a hearty lunch, a satisfying dinner, or even a creative breakfast option!
I absolutely adore creating meals that make you feel good inside and out, and this dish does just that. It’s hearty enough to fill you up, yet light enough that you won’t feel sluggish afterwards. Plus, it showcases some of the best plant-based ingredients—sweet potatoes, black beans, corn, and avocado. These ingredients work together beautifully to create a meal that tingles your taste buds and satisfies your cravings.
So grab your apron, put on your favorite tunes, and let’s get cooking! Together, we’ll transform simple ingredients into a beautiful, nutrient-packed bowl that’s sure to impress. Whether you’re meal prepping for the week or looking for a way to impress your friends at dinner, this Sweet Potato Black Bean Bowl will do the trick!
A Personal Touch
Let me take you back to a particularly inspiring moment that made me fall in love with sweet potatoes. It was during a family gathering when my grandmother prepared a giant pot of her famous sweet potato chili. Now, chili is something we had often in my family, but this particular version included roasted sweet potatoes that caramelized beautifully in the oven. The rich, sweet flavor of the potatoes mingled perfectly with the spiciness of the chili, and it was a revelation.
Fast forward a few years, and I found myself recreating that moment in my own kitchen. I realized sweet potatoes had a special place in my heart—not just for their delicious taste but also for the memories they carried. With every bite, I could almost hear my grandmother’s laughter and feel the warmth of family gatherings.
So when I developed this Sweet Potato Black Bean Bowl, I made sure to capture that same essence—a mix of warmth, nourishment, and joy, all in one dish. It’s a reminder that food is often more than just sustenance; it’s a medium for love, memories, and connection.
Ingredients
Here’s what you’ll need to whip up your own Sweet Potato Black Bean Bowl. Each of these ingredients brings something special to the table:
-
Sweet Potatoes: These tubers are the star of our dish. They’re naturally sweet, packed with vitamins, and have a lovely creamy texture when cooked. For a twist, you can substitute with butternut squash if sweet potatoes are hard to find.
-
Black Beans: A fantastic source of plant-based protein and fiber, black beans contribute a rich, earthy flavor that pairs perfectly with sweet potatoes. Canned beans save time, but if you prefer, you can cook dried beans from scratch—just remember to soak them overnight!
-
Corn: Sweet corn adds a delightful crunch and natural sweetness. Fresh, frozen, or canned corn will all work fine, though I usually recommend frozen for convenience. Just make sure to thaw it before adding!
-
Avocado: Creamy and satisfying, avocado brings a luxurious texture to the bowl. If you’re in a pinch, Greek yogurt can work as a substitute, although it will change the flavor profile a bit.
With these wholesome ingredients, you’re well on your way to making a vibrant meal that your body—and taste buds—will thank you for!
Step-by-Step Instructions
Let’s get down to the nitty-gritty of cooking this delectable bowl! Follow these steps, and you’ll have a beautiful dish ready to nourish both your body and soul.
-
Preheat Your Oven: Start by preheating your oven to 400°F (200°C). A hot oven is essential for roasting those sweet potatoes to perfection.
-
Prepare the Sweet Potatoes: Peel and chop your sweet potatoes into bite-sized pieces. Aim for uniform sizing to ensure even cooking. Toss them in a bowl with a drizzle of olive oil, a pinch of salt, and a sprinkle of your favorite spices. I love using cumin and smoked paprika for extra flavor. Spread them out on a baking sheet and roast for about 25-30 minutes, until they’re tender and slightly caramelized. Pro tip: for a crispy finish, flip them halfway through cooking!
-
Cook the Black Beans: If you’re using canned black beans, simply drain and rinse them. If you’re cooking dried beans, soak them overnight, and then simmer them for about an hour until they’re tender. You can add a bit of onion and garlic to the water for extra flavor.
-
Sauté the Corn: In a skillet over medium heat, add a teaspoon of olive oil and toss in the corn. Sauté for 5-7 minutes until it’s heated through and starts to get some nice char marks. This will elevate the flavor significantly!
-
Mash the Avocado: While everything else is cooking, slice your avocado in half and remove the pit. Scoop the flesh into a bowl and mash it just a bit with a fork. You can add a squeeze of lime juice and a pinch of salt for extra flavor. Trust me, this step makes a difference!
-
Assemble your Bowl: Now it’s time for the fun part! Start with a base of black beans, then add a generous scoop of roasted sweet potatoes and sautéed corn. Top it off with a dollop of your mashed avocado. If you like, fresh cilantro or a sprinkle of feta cheese can make a beautiful finishing touch.
Serving Suggestions
Serve your Sweet Potato Black Bean Bowl warm, and don’t be shy about getting creative with the presentation. I love using a wide, shallow bowl—think of it as your canvas! Layer everything artfully, allowing the vibrant colors to shine. You can even drizzle a bit of lime vinaigrette or tahini dressing for an extra zing. Tasty, visually appealing, and nourishing—this bowl ticks all the boxes!
Recipe Variations
Now, let’s spice things up! Here are a few creative twists you can try with your Sweet Potato Black Bean Bowl:
-
Add a Protein Boost: Toss in some grilled shrimp or chicken for an extra protein kick.
-
Spicy Touch: Throw in some diced jalapeños or a splash of hot sauce if you like it hot!
-
Mediterranean Vibes: Swap the black beans for chickpeas, and add cucumber and a drizzle of tahini for a Mediterranean flair.
-
Seasonal Vegetables: Feel free to add seasonal greens like spinach or kale. Sauté them with the corn for some added nutrition.
-
Dressing Drizzle: Elevate flavor with a zesty cilantro-lime dressing or a creamy tahini drizzle.
Chef’s Notes
Cooking is about experimenting and having fun—never forget that! This Sweet Potato Black Bean Bowl didn’t come together overnight; it evolved as I discovered new ingredients and techniques. I once made a version with leftover roasted vegetables from a party, and it turned out to be a massive hit with friends! We never know where inspiration will strike, so keep an open mind in the kitchen.
And remember, you’re not just following a recipe here but creating a meal that’s uniquely yours. Listening to your palate and adapting as you go is key.
FAQs and Troubleshooting
1. My sweet potatoes turned out mushy. What did I do wrong?
This could happen if the sweet potatoes were cut too small or cooked for too long. Aim for uniform, bite-sized pieces, and keep an eye on them in the oven. They should feel tender but hold their shape!
2. Can I prepare this dish ahead of time?
Absolutely! You can roast the sweet potatoes and cook the black beans in advance. Store them in airtight containers in the fridge for up to four days. Just assemble your bowl when you’re ready to eat!
3. How can I keep avocado from browning?
To keep your avocado looking fresh, store it in an airtight container with a sprinkle of lime juice. The acidity slows down the browning process. You can also mash the avocado just before serving to keep it fresh.
4. What if I don’t have black beans?
If black beans aren’t available, feel free to substitute them with any bean you prefer, such as pinto beans or kidney beans. Each will bring a different yet delightful taste to your bowl!
Nutritional Info
This Sweet Potato Black Bean Bowl is not only delicious but also packed with nutrients. Each serving is rich in fiber, protein, and healthy fats, making it a well-balanced meal. With approximately 450 calories, it’s perfect for fueling your busy day!
In conclusion, I hope this Sweet Potato Black Bean Bowl becomes a regular in your meal rotation. It’s a refreshing reminder that healthy eating can be simple, enjoyable, and absolutely scrumptious! Now, go on, gather your ingredients, and start creating something magical in your kitchen. Happy cooking!
PrintSweet Potato Black Bean Bowl
A vibrant and wholesome bowl featuring sweet potatoes, black beans, corn, and avocado, perfect for any meal.
- Prep Time: 15 minutes
- Cook Time: 30 minutes
- Total Time: 45 minutes
- Yield: 4 servings 1x
- Category: Main Course
- Method: Baking
- Cuisine: Mexican
- Diet: Vegan
Ingredients
- 2 Sweet Potatoes, peeled and chopped
- 1 can Black Beans, drained and rinsed
- 1 cup Corn, fresh or frozen
- 1 Avocado
- 2 tablespoons Olive Oil
- Salt, to taste
- Spices (Cumin and Smoked Paprika, to taste)
- Lime Juice, to taste (optional)
- Fresh Cilantro or Feta Cheese for topping (optional)
Instructions
- Preheat your oven to 400°F (200°C).
- Prepare the sweet potatoes by peeling and chopping them into bite-sized pieces. Toss with olive oil, salt, and spices. Spread on a baking sheet and roast for 25-30 minutes.
- Cook the black beans if using dried, or simply drain and rinse canned beans.
- Sauté the corn in a skillet with olive oil for 5-7 minutes.
- Mash the avocado with a fork and add lime juice and salt.
- Assemble your bowl with a base of black beans, topped with roasted sweet potatoes, sautéed corn, and mashed avocado. Garnish with cilantro or feta cheese if desired.
Notes
For extra protein, consider adding grilled shrimp or chicken. Adjust spices to your taste and have fun experimenting!
Nutrition
- Serving Size: 1 serving
- Calories: 450
- Sugar: 5g
- Sodium: 400mg
- Fat: 15g
- Saturated Fat: 2g
- Unsaturated Fat: 9g
- Trans Fat: 0g
- Carbohydrates: 60g
- Fiber: 12g
- Protein: 15g
- Cholesterol: 0mg
Keywords: sweet potato, black bean, bowl, healthy, vegan, nourishing, recipe