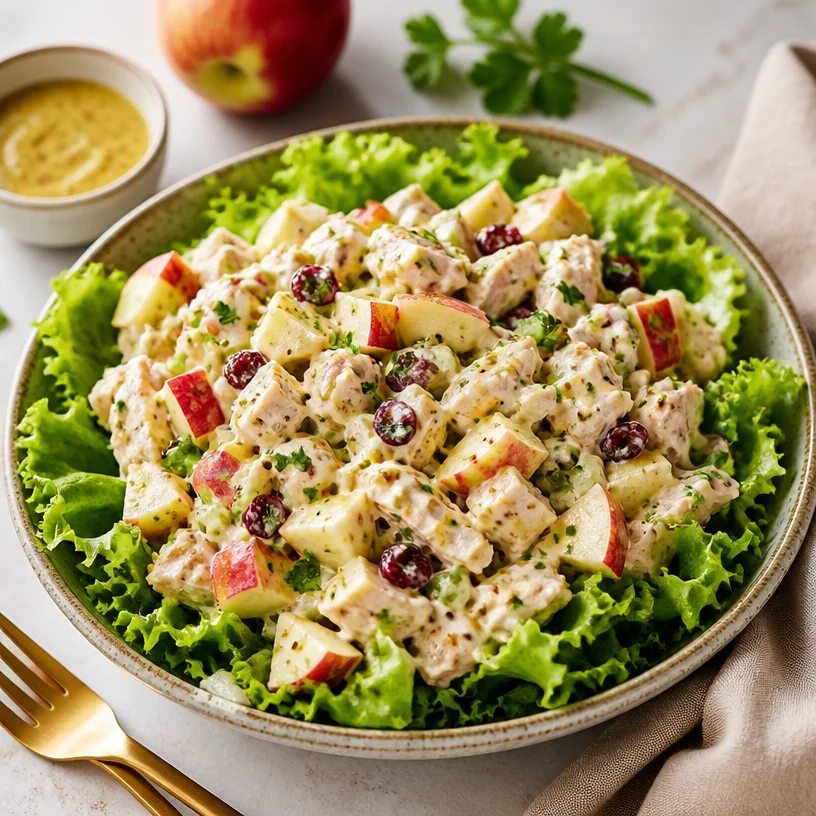
Minute Maple Dijon Chicken Salad (Fresh & Tangy)
Maple Dijon Chicken Salad: A Flavorful Feast for Every Occasion
Hello there, fellow food lovers! 🌟 Today, we’re diving into a dish that’s not just a symphony of flavors but also a celebration of wholesome ingredients and the joy of eating well. I’m talking about a delightful Maple Dijon Chicken Salad! This dish is all about balance—it’s light yet filling, tangy yet sweet, and oh-so-satisfying. So, whether you’re preparing a quick lunch for yourself or entertaining friends, this salad is sure to impress and nourish.
A Little Taste of Nostalgia
Growing up, salads were sometimes seen as the sidekick to a main dish, often ignored in favor of more glorious meals. But there was one special salad that always caught my attention: my mom’s Maple Dijon Chicken Salad. Whenever she made it, the whole house would be filled with the rich aroma of roasted chicken mingling with the sweet scent of maple syrup. I remember helping her in the kitchen, my little hands trying to whisk the dressing with as much enthusiasm as I could muster. The contrast of crisp lettuce, juicy apples, and succulent chicken, all drizzled in that tangy, sweet dressing, made it a standout in our household.
Every bite took me on a flavor adventure—sweetness from the maple syrup, a kick from the Dijon mustard, and the refreshing crunch of fresh produce. It’s that blend of nostalgic flavors and the comforting knowledge that I was eating something wholesome that stayed with me long after I left home. Now, every time I whip up this salad, I’m not just feeding my body; I’m indulging my memories, too.
Ingredients
To create this scrumptious Maple Dijon Chicken Salad, we’ll need:
-
Chicken Breasts
The star of our dish! Chicken is a great source of lean protein. If you’re in a pinch, rotisserie chicken works wonderfully as a flavorful shortcut. -
Fresh Lettuce
Use any variety you love—romaine, spinach, or mixed greens. The greens offer crunch and a fresh backdrop for our dressing. If you’re feeling adventurous, throw in some arugula for a peppery kick! -
Apples
Sweet, tart apples like Fuji or Honeycrisp add a delightful crunch and a splash of color. Feel free to swap in pears for a different flavor profile or even diced oranges for a citrusy twist. -
Maple Dijon Dressing
This dressing will tie it all together with rich sweetness and tang. If you’re looking to cut back on calories, try using Greek yogurt instead of oil in the dressing for a creamy texture without the guilt.
Now that we’ve got our ingredients lined up, it’s time to get our hands a little messy and start cooking!
Step-by-Step Instructions
Step 1: Prep the Chicken
Begin by preheating your oven to 375°F (190°C). While that warms up, season the chicken breasts with salt, pepper, and a drizzle of olive oil. This simple act amplifies the chicken’s flavor, making each bite worth savoring.
Chef’s Tip: If you have time, marinate the chicken in some maple syrup and Dijon mustard for at least 30 minutes. This will deepen the flavors and create a lovely glaze.
Step 2: Roast the Chicken
Place the chicken breasts onto a lined baking sheet and roast in the preheated oven for about 25-30 minutes, or until the internal temperature reaches 165°F (75°C). The chicken should be golden and juicy!
Little Hack: If you want to save time, cook a batch of extra chicken earlier in the week. Shredded or diced chicken keeps well in the fridge and can easily elevate your meals for a few days.
Step 3: Make the Maple Dijon Dressing
In a small bowl, whisk together 3 tablespoons of maple syrup, 2 tablespoons of Dijon mustard, and 1 tablespoon of apple cider vinegar. If you’d like a creamier texture, stir in a tablespoon of olive oil or Greek yogurt.
Kitchen Secret: Taste as you go! Feel free to adjust the sweetness or tanginess to suit your palate.
Step 4: Prep the Lettuce and Apples
While the chicken is roasting, wash and dry your lettuce. Tear it into bite-sized pieces and set aside in a large bowl. Thinly slice your apples, leaving the skin on for extra fiber and color.
Pro Tip: A simple trick to prevent your apples from browning quickly is to toss them with a little lemon juice before mixing them into the salad.
Step 5: Assemble the Salad
Once the chicken is done, let it rest for about 5 minutes before slicing or shredding. Add the chicken, apple slices, and prepared lettuce into the bowl. Drizzle the Maple Dijon dressing over the top and toss gently to combine.
Chef’s Insight: Don’t overmix! You want the ingredients to stay distinct but covered in that luscious dressing.
Serving Suggestions
When it comes to plating, the presentation is key. Serve this vibrant Maple Dijon Chicken Salad in large, colorful bowls to showcase the beautiful greens, crisp apples, and succulent chicken. You can sprinkle some toasted nuts, like walnuts or pecans, on top for an extra crunch and layer of flavor.
Recipe Variations
Here are a few fun twists you can explore with this recipe:
- Quinoa Addition: Incorporate cooked quinoa for a hearty grain boost.
- Cheese Lovers: Add crumbled feta or goat cheese for a creamy, tangy element.
- Vegan Option: Substitute chicken for grilled chickpeas or tofu, and use maple syrup in your dressing.
- Spicy Kick: Add a dash of red pepper flakes or a drizzle of hot sauce in the dressing for an extra layer of flavor.
- Seasonal Fruits: Swap out apples for seasonal fruits like peaches in the summer or pomegranate in the winter!
Chef’s Notes
This Maple Dijon Chicken Salad isn’t just a recipe; it’s a canvas for creativity in the kitchen! Over time, I’ve experimented with various ingredients and flavors, and every reinvention feels like a fresh adventure. I once added a hint of ginger to the dressing for an Asian-inspired twist that blew my mind!
And who doesn’t love a good kitchen story? Just last week, I forgot the chicken in the oven for an extra five minutes. I panicked but was pleasantly surprised to find it perfectly caramelized instead of dried out. Every mistake is a potential culinary surprise—embrace it!
FAQs and Troubleshooting
Q1: Can I prepare this salad in advance?
A1: Absolutely! Just keep the dressing separate until you’re ready to serve. This will prevent the lettuce from wilting.
Q2: What if my dressing is too sweet?
A2: Simply add a splash more vinegar or a squeeze of lemon juice to balance out the sweetness.
Q3: How do I store leftovers?
A3: Store any leftover salad in an airtight container in the fridge for up to two days. Keep the dressing separate to maintain freshness.
Q4: Can I use cooked chicken that I have from another meal?
A4: Yes, using leftover chicken is perfect! Just chop it up and toss it in—you’re saving time and getting creative!
Nutritional Info (Optional)
This Maple Dijon Chicken Salad is a well-rounded meal packed with protein, healthy fats, and fiber. Each serving can contain approximately:
- Calories: 350
- Protein: 30g
- Carbohydrates: 25g
- Fats: 15g
Remember, these are just estimates and can vary based on ingredient choices and portion sizes!
There you have it, friends! A delicious, heartwarming Maple Dijon Chicken Salad that’s as easy to make as it is to enjoy. Whether it’s a family dinner or a solo lunch affair, this salad is here to remind you that eating well can be joyful, fulfilling, and most importantly, tasty! Let’s keep it fresh, simple, and seriously delicious! Happy cooking! 🥗✨
PrintMaple Dijon Chicken Salad
A delightful Maple Dijon Chicken Salad that balances lightness and heartiness, perfect for a quick lunch or entertaining friends.
- Prep Time: 15 minutes
- Cook Time: 30 minutes
- Total Time: 45 minutes
- Yield: 4 servings 1x
- Category: Salad
- Method: Roasting
- Cuisine: American
- Diet: Healthy
Ingredients
- 2 Chicken Breasts
- 4 cups Fresh Lettuce (romaine, spinach, or mixed greens)
- 2 Apples (Fuji or Honeycrisp)
- 3 tablespoons Maple Syrup
- 2 tablespoons Dijon Mustard
- 1 tablespoon Apple Cider Vinegar
- 1 tablespoon Olive Oil or Greek Yogurt (for dressing)
- Salt and Pepper to taste
Instructions
- Prep the Chicken: Preheat your oven to 375°F (190°C). Season the chicken breasts with salt, pepper, and olive oil.
- Roast the Chicken: Place chicken on a lined baking sheet and roast for 25-30 minutes, until internal temperature reaches 165°F (75°C).
- Make the Maple Dijon Dressing: Whisk together maple syrup, Dijon mustard, apple cider vinegar, and olive oil or Greek yogurt.
- Prep the Lettuce and Apples: Wash and dry the lettuce, tear into pieces, and thinly slice the apples.
- Assemble the Salad: Once chicken is done, let it rest, then slice or shred. Combine chicken, apple slices, and lettuce in a bowl. Drizzle with dressing and toss gently.
Notes
Serve in colorful bowls and consider adding toasted nuts for extra crunch.
Nutrition
- Serving Size: 1 serving
- Calories: 350
- Sugar: 12g
- Sodium: 400mg
- Fat: 15g
- Saturated Fat: 2g
- Unsaturated Fat: 8g
- Trans Fat: 0g
- Carbohydrates: 30g
- Fiber: 5g
- Protein: 25g
- Cholesterol: 70mg
Keywords: salad, chicken, Maple Dijon, healthy, quick lunch
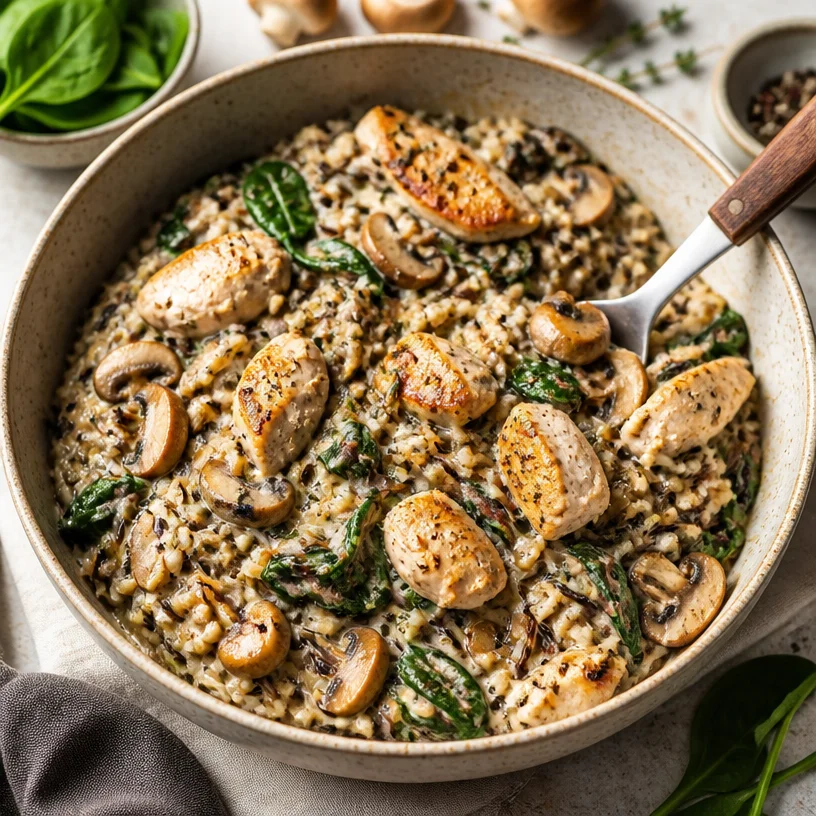
Minute One-Pan Chicken Wild Rice Bowl for Weeknights
Chicken Wild Rice Bowl: A Wholesome Delight
Welcome to the cozy corner of our kitchen! Today, we’re diving into a dish that perfectly embodies everything I stand for here at Clean Plate Cravings: the Chicken Wild Rice Bowl. This vibrant, nourishing meal isn’t just delicious, it’s an experience, a warm hug in a bowl, if you will. Imagine sinking your fork into tender chicken, earthy mushrooms, and wholesome wild rice, all topped off with fresh spinach. Are you ready for this culinary adventure? Let’s get to it!
A Nostalgic Kitchen Memory
When I think of wild rice, I’m transported back to my childhood kitchen, where the aroma of something bubbling away on the stove would set the scene. My mom often cooked with wild rice, believing it to be the jewel of grains. I remember one evening in particular, she invited our neighbor, Mrs. Hargrove, over for dinner. Now, Mrs. Hargrove was a culinary force in our neighborhood—her apple pie was scandalously good! That evening, Mom made her famous chicken and wild rice dish, packed with goodies from our garden. The clinking of pots, the rhythmic chopping of garlic, and the laughter in our kitchen made it unforgettable.
As we sat around the table, Mrs. Hargrove marveled at the wild rice, “This isn’t just food; it’s love on a plate!” That memory stuck with me, and today, I believe in that same idea. Cooking is about nourishment, yes, but also about connection—sharing moments, stories, flavors. So, let’s recreate that love today!
Ingredients You’ll Need
For our Chicken Wild Rice Bowl, here’s what you’ll need:
-
Chicken Breast (or thighs): Protein-packed and juicy, chicken can be easily substituted with tofu or chickpeas for a vegetarian version. A simple marinade of olive oil and herbs can elevate the flavor!
-
Wild Rice: This nutty, fiber-rich grain is the star of our dish. If you can’t find wild rice, brown rice, or quinoa can make a great substitute, just be mindful of cooking times!
-
Mushrooms (button or cremini): Earthy mushrooms add depth to the dish. Feel free to swap them out for zucchini or bell peppers if you’re in the mood for something different.
-
Fresh Spinach: This leafy green packs a nutritional punch. You can use kale or Swiss chard in its place, but you may want to cook them a bit longer as they’re heartier than spinach.
-
Chicken Broth (or vegetable broth): Using broth instead of water enhances the flavor! Homemade broth is ideal, but a good-quality store-bought version works just as well.
Step-by-Step Instructions
Ready to bring this dish to life? Let’s get started!
-
Cook the Wild Rice: Begin by rinsing the wild rice under cold water. In a medium pot, combine 1 cup of wild rice with 3 cups of chicken or vegetable broth. Bring to a boil, then reduce the heat to low, cover, and simmer for 40-50 minutes until the rice is tender. Chef’s tip: If the rice is not all cooked after 50 minutes, don’t worry! Just add a bit more liquid and keep cooking until it’s done.
-
Prep the Chicken: While the rice is cooking, take 1 pound of chicken breast or thighs. Season them generously with salt, pepper, and your favorite herbs like thyme or rosemary. Little hack: Let the chicken rest at room temperature for about 15 minutes before cooking for even cooking.
-
Sear the Chicken: Heat 2 tablespoons of olive oil in a large skillet over medium-high heat. Add the chicken and cook for about 5-7 minutes on each side until golden brown and fully cooked. Use a meat thermometer to ensure the internal temperature reaches 165°F (75°C). Once cooked, remove from the pan and let it rest for about 10 minutes before slicing. Pro tip: This rest time allows the juices to redistribute, keeping your chicken moist!
-
Sauté the Mushrooms: In the same skillet, add another drizzle of olive oil if needed, and toss in about 8 ounces of sliced mushrooms. Sauté them for 5-6 minutes until they’re nicely browned. Chef’s insight: Adding a sprinkle of salt while cooking mushrooms helps to draw out their moisture, making them more flavorful!
-
Add the Spinach: Toss in a hefty handful of fresh spinach, about 4 cups. Stir until just wilted. This will take just a minute or two. Hack: If you want more color and nutrients, throw in some cherry tomatoes or bell peppers with the spinach!
-
Combine: Once the wild rice is ready, fluff it with a fork, and then stir it into the mushroom and spinach mixture. Slice the resting chicken and gently mix it that wholesome rice medley. Note: Save a few mushroom pieces and spinach for garnish!
Serving Suggestions
To present this dish beautifully, scoop generous portions of the chicken wild rice mixture into bowls. You can drizzle a little olive oil on top or a squeeze of lemon for brightness. Don’t forget to garnish with those reserved mushrooms and spinach, and maybe a sprinkle of fresh herbs like parsley or chives to put a little flourish on your creation!
Recipe Variations
-
Mediterranean Twist: Add some sun-dried tomatoes, kalamata olives, and feta cheese to the mix for a Mediterranean flair.
-
Spicy Kick: Incorporate a teaspoon of red pepper flakes or a dollop of spicy harissa paste to the sautéed mushrooms for a little heat!
-
Savory Flavor: You could also experiment with different herbs like dill or cilantro. They offer unique flavors that can completely change the dish while keeping it fresh and fun.
-
Nutty Crunch: Before serving, sprinkle some toasted walnuts or pecans for an added crunch and healthy fats!
-
Summer Fresh: In the warm months, consider adding grilled zucchini or fresh corn off the cob for a seasonal touch.
Chef’s Notes
This recipe really is a canvas—don’t hesitate to make it your own! Over the years, I’ve watched this dish evolve in my kitchen, adapting to whatever I have on hand. One day, I had leftover roasted sweet potatoes, and the dish transformed into an unexpected delight. Cooking is all about creativity, and I encourage you to experiment!
And let’s be real—that’s half the fun! And oh, those evenings spent with family, laughing over a hearty bowl of chicken wild rice? That’s what it’s all about, folks. Food is about connection, memories, and expressions of love.
FAQs and Troubleshooting
Q1: Why is my wild rice not cooking properly?
A: Sometimes, wild rice can be a little fickle. If it’s still hard after cooking, add a little more broth or water and give it extra time. Just remember to cover it so the steam keeps it tender!
Q2: Can I make this dish ahead of time?
A: Absolutely! You can prepare everything in advance and store each component in the fridge. Simply reheat when ready to serve, and this makes for a fantastic meal prep option!
Q3: How do I ensure my chicken stays juicy?
A: The two key factors here are resting and cooking at the right temperature. Also, don’t overcook it—using a meat thermometer takes the guesswork out and helps achieve that perfect juicy bite!
Q4: What if I want to make it vegan?
A: Great question! You can swap the chicken for your favorite plant-based protein like chickpeas or lentils, and use vegetable broth. The mushrooms and spices will keep it packed with flavor!
Nutritional Info (per serving, approx)
- Calories: 450
- Protein: 35g
- Carbs: 45g
- Fat: 15g
- Fiber: 6g
And there you have it! Your Chicken Wild Rice Bowl is more than just a meal; it’s a celebration of flavors and memories. Thank you for joining me today, and I can’t wait to hear how your culinary adventure turns out! Keep it fresh, simple, and delicious, my foodie friends!
PrintChicken Wild Rice Bowl
A vibrant and nourishing Chicken Wild Rice Bowl packed with tender chicken, earthy mushrooms, and wholesome wild rice topped with fresh spinach.
- Prep Time: 15 minutes
- Cook Time: 50 minutes
- Total Time: 65 minutes
- Yield: 4 servings 1x
- Category: Main Course
- Method: Stovetop
- Cuisine: American
- Diet: Gluten-Free
Ingredients
- 1 pound Chicken Breast (or thighs)
- 1 cup Wild Rice
- 8 ounces Mushrooms (button or cremini)
- 4 cups Fresh Spinach
- 3 cups Chicken Broth (or vegetable broth)
- 2 tablespoons Olive Oil
- Salt and pepper to taste
- Your favorite herbs (thyme, rosemary)
Instructions
- Cook the Wild Rice: Rinse the wild rice under cold water. In a medium pot, combine wild rice with chicken or vegetable broth. Bring to a boil, reduce heat to low, cover, and simmer for 40-50 minutes until tender.
- Prep the Chicken: Season chicken with salt, pepper, and herbs. Let it rest at room temperature for 15 minutes.
- Sear the Chicken: Heat olive oil in a large skillet over medium-high heat. Add chicken and cook for about 5-7 minutes on each side until golden brown and fully cooked. Let it rest before slicing.
- Sauté the Mushrooms: In the same skillet, add more olive oil if needed and add sliced mushrooms. Sauté for 5-6 minutes until browned.
- Add the Spinach: Toss in spinach and stir until just wilted, about 1-2 minutes.
- Combine: Fluff the wild rice and stir it into the mushroom and spinach mixture. Slice the resting chicken and mix into the rice medley.
Notes
For extra flavor, consider drizzling some olive oil or squeezing lemon juice on top before serving. Garnish with fresh herbs.
Nutrition
- Serving Size: 1 bowl
- Calories: 450
- Sugar: 2g
- Sodium: 600mg
- Fat: 15g
- Saturated Fat: 3g
- Unsaturated Fat: 10g
- Trans Fat: 0g
- Carbohydrates: 45g
- Fiber: 6g
- Protein: 35g
- Cholesterol: 75mg
Keywords: chicken, wild rice, bowl, healthy, comforting, family meal
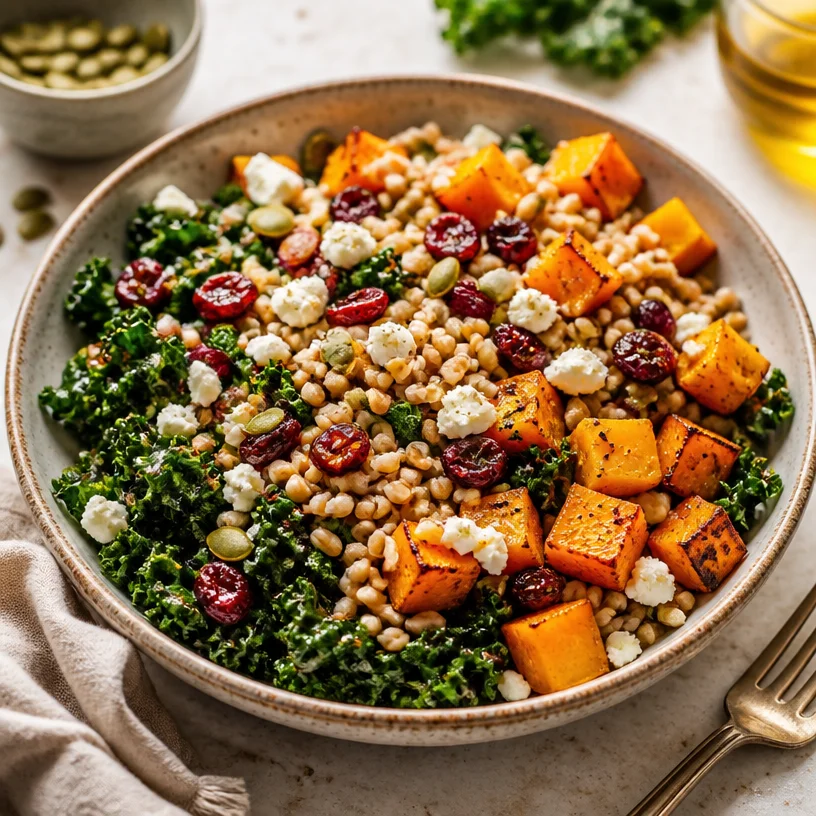
Autumn Grain Bowl: 15-Minute Cozy Meal Prep for Weeknights
Welcome the Season with an Autumn Grain Bowl
As the air turns crisp and the leaves begin to swirl in shades of amber and gold, it’s time to embrace the cozy flavors of autumn. Imagine digging into a warm, hearty grain bowl filled with roasted vegetables, vibrant greens, and a hint of sweetness. That’s exactly what I have in store for you today with my Autumn Grain Bowl—a nourishing dish that celebrates the best of the season while bursting with flavor.
In this bustling kitchen where I spend countless hours creating, every dish tells a story. This Autumn Grain Bowl, crafted with farro, roasted squash, kale, and cranberries, is a delightful reminder that simple, wholesome ingredients can transform into something extraordinary. Not only is it beautiful to behold, but it also offers a balance of textures and tastes that will leave you feeling satisfied and energized.
When I reflect on my love for grain bowls, I can’t help but think back to my childhood, perched on a stool by my grandmother’s counter, where she would whip up everything from hearty soups to vibrant salads. She had a way of showcasing the season’s bounty, whether it was fresh greens in the summer or warming root vegetables in the fall. The colors and aromas that danced around her kitchen captured my heart and ignited my passion for real food. Now, years later, I channel that nostalgic joy into each recipe I create—especially this one. So, grab your apron and let’s embark on this delicious journey together!
A Little Story from My Kitchen
I’ll never forget the first time I experimented with farro. It was a chilly autumn afternoon, and the skies were a moody gray. I wanted something warm and comforting, a meal that would wrap around me like a fuzzy blanket. I rummaged through my pantry and unearthed a bag of farro that I had been saving for a special occasion. Little did I know, that day was special enough.
I decided to roast a butternut squash—my favorite fall vegetable—alongside some kale that I had on hand. The scents wafting through the kitchen were intoxicating! As the squash caramelized and the kale crisped, I felt a sense of warmth fill my kitchen and heart. I ladled the farro into bowls, topped it with the roasted veggies, and sprinkled dried cranberries over the top for a pop of tartness. It was one of those ‘accidental genius’ moments that made me realize how a few simple ingredients could create such a harmony of flavors. That day marked the beginning of my love affair with grain bowls!
Ingredients You’ll Need
Let’s gather our ingredients for this fulfilling Autumn Grain Bowl! Each one is chosen with care, ensuring you achieve the right balance of flavor, texture, and nourishment.
- Farro: This ancient grain is the heart of our dish, offering a nutty flavor and chewy texture. It’s also rich in fiber and protein, making it a fantastic base.
- Butternut Squash: Sweet and buttery, this roasted vegetable not only adds flavor but also essential vitamins. If you can’t find butternut squash, you can easily substitute it with sweet potatoes or acorn squash.
- Kale: This leafy green is packed with nutrients and adds a slight bitterness that balances the sweetness of the squash. If kale isn’t your style, try spinach or Swiss chard instead.
- Dried Cranberries: These little gems bring a burst of tartness that lifts the entire dish. If cranberries are out of season, pomegranate seeds work wonderfully as a substitute.
- Extra Virgin Olive Oil: A drizzle of quality olive oil enhances flavor and helps with roasting; you can replace it with avocado oil if you prefer a neutral taste.
- Salt and Pepper: Always essential, these seasonings will elevate the flavors of every ingredient.
- Pumpkin Seeds (optional): A sprinkle of these at the end adds a satisfying crunch and a dose of healthy fats. If you’re out of pumpkin seeds, sunflower seeds are a great alternative.
Step-by-Step Instructions
Ready to get cooking? Follow these detailed steps to create your very own Autumn Grain Bowl. I’ll sprinkle in a few tips to help unleash your inner chef!
-
Prepare the Farro: Start by bringing a pot of water to a boil. Use about 2 cups of water for every 1 cup of farro. Once boiling, add a pinch of salt, then throw in the farro. Lower the heat and simmer for 25–30 minutes, or until tender. Brown farro retains a delightful chew, which I truly love. Pro tip: soak the farro in water for a couple of hours or overnight to speed up cooking time!
-
Preheat the Oven: While the farro is cooking, preheat your oven to 400°F (200°C). This allows the squash to roast to golden perfection, while you prepare the other ingredients.
-
Roast the Squash: Peel, seed, and cube a medium butternut squash into bite-sized pieces. Toss the cubes in a bowl with a tablespoon of olive oil, salt, and pepper. Spread the squash evenly on a baking sheet—make sure they have enough space to roast, not steam. Roast for 25–30 minutes, turning halfway through until they’re soft and caramelized. Keep an eye on them; those little bites of heaven can easily become even more deliciously charred!
-
Sauté the Kale: In the last 10 minutes of the roasting time, heat a splash of olive oil in a skillet over medium heat. Add chopped kale, stirring occasionally until it wilts and turns bright green, about 5–7 minutes. Add a pinch of salt to help soften it faster. Remember, sautéing makes the kale more palatable and digestible—it’s raw no more!
-
Combine it All: Once the farro is cooked, drain any excess water and fluff it with a fork. In a large bowl, combine the farro, roasted squash, and sautéed kale. Toss it gently to mix; you want that synergy of flavors to meld together.
-
Add the Cranberries: Drizzle in a little more olive oil if desired, and toss in a handful of dried cranberries. The contrast in texture and taste is where the magic happens!
-
Top with Crunch: Serve the grain bowl warm and finish with a sprinkle of pumpkin seeds for that extra crunch, if using.
Serving Suggestions
When serving your Autumn Grain Bowl, presentation is key! I love to layer the ingredients artfully in a deep bowl. Start with a generous base of farro, then twirl the roasted squash neatly on one side. Add a mound of kale beside it, and scatter cranberries over the top for that vibrant pop of color. To make it fancy, drizzle with a bit of additional olive oil or a splash of balsamic glaze for an irresistible, finish.
Recipe Variations
Feeling adventurous? Here are some fun variations to switch up your Autumn Grain Bowl:
- Add Protein: Toss in some roasted chickpeas or grilled chicken for an extra boost of protein.
- Creamy Element: Crumble feta or goat cheese on top for a creamy texture that pairs beautifully with the flavors.
- Herb Infusion: Incorporate fresh herbs like sage or thyme for an aromatic twist that celebrates fall.
- Spicy Kick: Add a pinch of chili flakes or diced jalapeños to give it a spicy edge.
- Vegan Delight: Swap the olive oil for a drizzle of tahini for a nutty richness that’s totally vegan!
Chef’s Notes
Over the years, this Autumn Grain Bowl has become a staple in my home kitchen. I love playing with the ingredients based on what’s in season or what I happen to have on hand. It feels liberating to let the produce inspire you rather than following a strict recipe. One time, I added roasted Brussels sprouts on a whim, and it was a game changer! Embrace your kitchen creativity—each bowl can tell a different story.
FAQs and Troubleshooting
-
Can I make this ahead of time?
Absolutely! The farro and roasted squash can be prepped in advance. Store each component in separate airtight containers in the refrigerator for up to 4 days. Just toss everything together before serving. -
What if I don’t have farro?
No worries! You can substitute farro with quinoa, brown rice, or even barley. Each grain has its own unique flavor, so feel free to experiment. -
How can I store leftovers?
Store any leftover grain bowl components in the fridge for up to 4 days. Keep the ingredients separate until you’re ready to reheat and enjoy. -
Can I use fresh cranberries instead?
While fresh cranberries are much more tart, you can certainly use them! Just remember to cook them down with a bit of sugar to balance their tartness before tossing them into the bowl.
Nutritional Info (Optional)
While specific nutritional values may vary depending on brands and portion sizes, here’s a rough estimate per serving:
- Calories: ~350
- Protein: 10g
- Carbohydrates: 55g
- Total Fat: 10g
- Fiber: 8g
And there you have it! This Autumn Grain Bowl is proof that healthy eating can be both delicious and exciting. With vibrant colors and layers of flavor, it captures the essence of the festive season while keeping things fresh, simple, and absolutely satisfying. So go ahead, enjoy your cooking adventure! Whether you’re feeding your family, hosting friends, or simply treating yourself, this bowl is a warm embrace with every, delightful bite. Happy cooking! 🍂
PrintAutumn Grain Bowl
A warm, hearty grain bowl filled with roasted vegetables, vibrant greens, and a hint of sweetness, celebrating the flavors of autumn.
- Prep Time: 15 minutes
- Cook Time: 45 minutes
- Total Time: 60 minutes
- Yield: 4 servings 1x
- Category: Main Course
- Method: Baking
- Cuisine: American
- Diet: Vegetarian
Ingredients
- 1 cup farro
- 1 medium butternut squash, peeled, seeded, and cubed
- 2 cups kale, chopped
- 1/2 cup dried cranberries
- 2 tablespoons extra virgin olive oil
- Salt and pepper to taste
- 1/4 cup pumpkin seeds (optional)
Instructions
- Prepare the farro: Bring 2 cups of water to a boil. Add a pinch of salt and the farro, then reduce heat and simmer for 25–30 minutes until tender.
- Preheat the oven to 400°F (200°C).
- Roast the squash: Toss the butternut squash cubes with olive oil, salt, and pepper. Spread on a baking sheet and roast for 25–30 minutes, turning halfway through.
- Sauté the kale: In the last 10 minutes of roasting, heat olive oil in a skillet over medium heat, add kale, and sauté for 5–7 minutes until wilted.
- Combine the farro, roasted squash, and sautéed kale in a large bowl, tossing gently.
- Add the dried cranberries and drizzle with more olive oil if desired.
- Top with pumpkin seeds if using, and serve warm.
Notes
Feel free to substitute ingredients based on your preferences or availability. Add protein, creamy elements, or fresh herbs for variations.
Nutrition
- Serving Size: 1 serving
- Calories: 350
- Sugar: 10g
- Sodium: 400mg
- Fat: 12g
- Saturated Fat: 2g
- Unsaturated Fat: 8g
- Trans Fat: 0g
- Carbohydrates: 55g
- Fiber: 8g
- Protein: 10g
- Cholesterol: 0mg
Keywords: grain bowl, autumn, vegetarian, healthy, farro, roasted vegetables
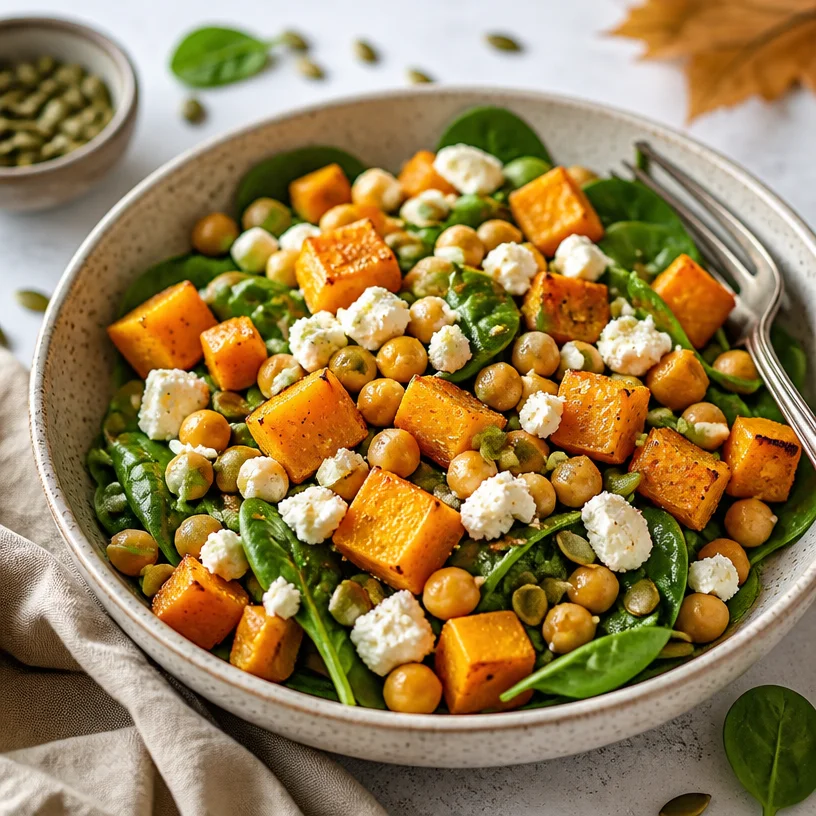
Minute Autumn Pumpkin Chickpea Salad (Meal-Prep)
Pumpkin Chickpea Salad: A Delightful Autumn Dish
As the leaves begin to turn golden and the air gets that refreshing chill, it’s time to cozy up with flavors that evoke the warmth and love of the season. I’m talking about my Pumpkin Chickpea Salad—a dish that’s not just a feast for the eyes but a hug for your belly. Picture this: vibrant orange pumpkin cubes, hearty chickpeas, creamy feta cheese, and crisp spinach all mingling together in a delightful dance of textures and tastes. Yes, please!
Every time I whip up this salad, I’m reminded that food is something to be celebrated—especially when it’s colorful, healthy, and brimming with flavor. I genuinely believe that meals should invigorate us, and this salad does just that! Together, we’re going to make a simple yet gorgeous dish that pays tribute to fall’s bounty, all while being super satisfying and easy to prepare. So grab your apron, and let’s dive into this culinary creation!
A Memory Worth Sharing
I’ll never forget the first time I had pumpkin in a salad. It was a sun-drenched afternoon at a local farmer’s market where I stumbled upon a vibrant food stall brimming with autumn veggies. The vendor cheerfully tossed roasted pumpkin with chickpeas and a sprinkle of fresh herbs. It was like a lightbulb went off in my head! The combination was revolutionary—sweet, nutty pumpkin paired with the heartiness of chickpeas, all tied together by a sharp bite of cheese. That vibrant mix sparked an idea in me that day, leading me to create my own version that’s perfect for a wholesome lunch, a hearty dinner, or even as a crowd-pleaser at gatherings. Fast forward to today, and this Pumpkin Chickpea Salad has become a staple in my kitchen, bringing that same warmth and joy every time I serve it.
Ingredients
Here’s what you will need for this fabulous dish:
-
Chickpeas:
Packed with protein and fiber, chickpeas are the unsung hero of many meals. They add a lovely creaminess and keep you feeling full. Canned chickpeas are convenient, but if you have the time, cooking dried chickpeas from scratch amps up the flavor! -
Pumpkin Cubes:
Sweet and earthy, pumpkin adds a wonderful depth to the salad. You can roast fresh pumpkin or use canned pumpkin puree if you’re short on time. Just note—canned pumpkin isn’t the same as pumpkin puree; the former is just deliciously cooked pumpkin! -
Feta Cheese:
Creamy and tangy, feta cheese elevates the flavor profile of this salad. If you’re looking for a dairy-free option, try crumbled tofu or a nut-based feta for a similar texture and taste. -
Spinach:
Tender, fresh spinach is perfect for adding that vibrant green magic to the salad. If spinach isn’t your thing, kale or arugula are delicious substitutes that can provide an extra kick. -
Pepitas (Pumpkin Seeds):
Crunchy and nutty, pepitas add texture and a delightful crunch. They’re also packed with nutrients. You can swap them for sunflower seeds if you prefer or if you’re dealing with nut allergies.
Step-by-Step Instructions
Now, let’s get cooking! Don your apron, and let’s walk through this recipe step by step.
-
Prep Your Ingredients:
Start by washing and chopping your fresh produce. Cube the pumpkin into bite-sized pieces for even roasting. If you’re using canned chickpeas, give them a good rinse under cold water to remove any brine. -
Roast the Pumpkin:
Preheat your oven to 400°F (200°C). Toss those pumpkin cubes with a drizzle of olive oil, salt, and pepper. Spread them out on a baking sheet lined with parchment paper, ensuring they are in a single layer—this allows for even roasting and caramelization. Roast for 20-25 minutes or until they’re tender and lightly browned. Pro tip: Halfway through, give the pan a shake or stir the cubes for that perfect golden finish. -
Prepare the Chickpeas:
While the pumpkin is roasting, in a skillet over medium heat, sauté the rinsed chickpeas for about 5-7 minutes until they’re slightly golden and warmed through. Add a pinch of smoked paprika or cumin for a warm kick. This small step makes all the difference, giving your chickpeas an incredible depth of flavor. -
Combine and Mix:
In a large mixing bowl, combine the roasted pumpkin, sautéed chickpeas, fresh spinach, and crumbled feta. Gentle mix to combine—I like using my hands for this part; it feels more personal! And you get to feel the textures as you blend everything together. -
Dress It Up:
Drizzle your favorite dressing over the salad. A simple vinaigrette made from olive oil, lemon juice, honey, and a pinch of salt works beautifully. Give everything another gentle toss to coat. -
Top It Off:
Finally, sprinkle the pepitas over the top for that satisfying crunch. And there you have it—a gorgeous Pumpkin Chickpea Salad that’s ready to be devoured!
Serving Suggestions
When it comes to serving, I love to plate this salad in a wide, shallow bowl to show off all its beautiful colors. You can also make individual servings in mason jars for an impressive lunch on the go—just layer the pumpkin, chickpeas, spinach, and then the dressing at the top, so the greens stay crisp. It’s that easy! Add a sprinkle of extra feta and a few more pepitas on top for a lovely finishing touch.
Recipe Variations
Feeling creative? Here are a few twists you can try to make this salad your own:
-
Add Some Protein:
Grilled chicken or roasted turkey can take this salad to a new protein-packed level. -
Sweeten the Deal:
Toss in some dried cranberries or pomegranate seeds for a lovely burst of sweetness. -
Go Vegan:
Replace feta with homemade cashew cheese or leave it out entirely for a lighter dish. -
Herbal Delight:
Throw in some parsley, cilantro, or mint for an added flavor dimension—fresh herbs can brighten the dish wonderfully. -
Spicy Kick:
A few slices of jalapeño or a drizzle of sriracha can turn up the heat!
Chef’s Notes
This recipe has a special place in my heart not only for the flavors but because it’s a versatile dish that, over the years, I’ve adapted to whatever I have on hand. I remember one holiday gathering when I switched the spinach for arugula and added some grilled chicken—everyone raved about it! It’s amazing what a few tweaks can do to transform a beloved recipe. And honestly, if you forget one flavor or ingredient, don’t sweat it; cooking is meant to be flexible and fun! The important part is that you’re enjoying the process and the food you create.
FAQs and Troubleshooting
Q: My pumpkin is mushy—what went wrong?
A: Make sure you don’t overcrowd the pan while roasting. This can cause steam, making the pumpkin mushy. Always give them some breathing space!
Q: Can I make this salad ahead of time?
A: Absolutely! Just keep the dressing separate until you’re ready to serve to keep everything fresh and crunchy.
Q: What if my chickpeas aren’t crunchy?
A: If you want that lovely crunch, you can roast them in the oven for an additional 10-15 minutes at the same temp after sautéing, or just make sure they’re golden and dry before adding to the salad.
Q: Can I use different beans?
A: Yes! Feel free to swap chickpeas with black beans, kidney beans, or even lentils—just consider how the flavors will blend!
Nutritional Info
While I don’t usually get bogged down by numbers, here’s a quick glance at the nutrition benefits of this salad per serving:
- Calories: ~350
- Protein: ~12g
- Fiber: ~10g
- Vitamins A & C: High, due to the pumpkin and spinach
- Calcium: Moderate amount from feta cheese
This Pumpkin Chickpea Salad is not just a dish; it’s an experience—one that’s colorful, nourishing, and delicious. So go ahead and embrace the fall flavors with this delightful salad, and may it bring warmth and joy to your table, just like it does to mine! Happy cooking!
PrintPumpkin Chickpea Salad
A delightful autumn salad featuring pumpkin, chickpeas, feta cheese, and spinach, bringing warmth and flavor to your table.
- Prep Time: 15 minutes
- Cook Time: 30 minutes
- Total Time: 45 minutes
- Yield: 4 servings 1x
- Category: Salad
- Method: Roasting
- Cuisine: American
- Diet: Vegetarian
Ingredients
- 1 can chickpeas, rinsed and drained
- 2 cups pumpkin cubes (fresh roasted or canned)
- 1/2 cup feta cheese, crumbled
- 2 cups fresh spinach
- 1/4 cup pepitas (pumpkin seeds)
- 2 tablespoons olive oil
- Salt and pepper to taste
- Optional spices: smoked paprika or cumin
Instructions
- Prep your ingredients: Wash and chop the fresh produce, cube the pumpkin, and rinse chickpeas.
- Roast the pumpkin: Preheat oven to 400°F (200°C). Toss pumpkin cubes with olive oil, salt, and pepper, then roast for 20-25 minutes.
- Prepare the chickpeas: Sauté chickpeas in a skillet over medium heat for about 5-7 minutes until slightly golden, adding spices as desired.
- Combine and mix: In a large bowl, combine roasted pumpkin, sautéed chickpeas, spinach, and feta.
- Dress it up: Drizzle with your favorite dressing and toss to coat.
- Top it off: Sprinkle pepitas over the salad.
Notes
This salad can be made ahead of time. Keep the dressing separate until serving for optimal freshness.
Nutrition
- Serving Size: 1 serving
- Calories: 350
- Sugar: 5g
- Sodium: 400mg
- Fat: 12g
- Saturated Fat: 4g
- Unsaturated Fat: 6g
- Trans Fat: 0g
- Carbohydrates: 45g
- Fiber: 10g
- Protein: 12g
- Cholesterol: 30mg
Keywords: pumpkin salad, chickpea salad, autumn recipes, healthy salads
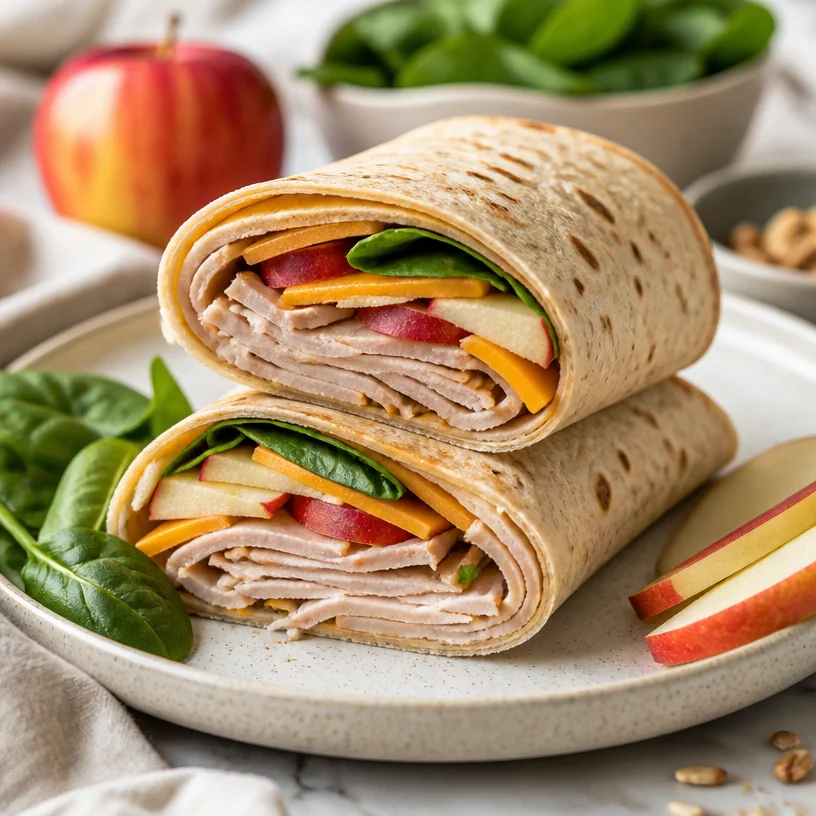
Minute Turkey Apple Wrap for Busy Weeknights and Lunches
Turkey Apple Wrap: A Fresh and Flavorful Delight
Welcome to the world of fresh flavors and simple pleasures! Today, we’re diving into a delightful recipe that rolls crunchy, sweet, and savory flavors into one delicious package: the Turkey Apple Wrap. This dish is not just a meal; it’s a celebration of how effortless healthy eating can be when you have the right ingredients and a bit of creativity!
Eating well doesn’t mean you have to give up on taste or leave behind your favorite flavors. With a combination of juicy turkey, crisp apple slices, creamy cheddar, and vibrant spinach wrapped in a soft tortilla, this wrap is the ultimate answer to your healthy lunch or snack dilemma. Get ready to elevate your wrap game—this dish is not only nourishing but also quick to make and fun to eat!
A Journey Back to Childhood
Let me take you back to a sunny afternoon during my childhood, a time filled with experimentation and creativity in my mom’s kitchen. I remember how she would often whip up these amazing wraps for lunch using whatever ingredients we had in the fridge. She had a knack for making even the simplest foods taste exquisite.
One day, we had leftover roast turkey from a family dinner, and she decided to build us these hearty wraps. The combination of turkey with sweet apple slices, crunchy lettuce, and a smear of mustard was magic! I recall the sensations—the soft, fluffy tortilla hugging the savory turkey, the sweet crunch of the apples, and the creamy texture of the cheese. Every bite was a bite of nostalgia and joy.
Years later, I still crave those wraps, but I’ve tweaked the recipe a bit to incorporate a few extra wholesome ingredients, making it even better! Today, I’ll show you how to make your own Turkey Apple Wrap, one that’s perfect for busy weekdays and light enough for a sunny picnic. Let’s wrap things up, shall we?
Ingredients
Here’s what you’ll need for your Turkey Apple Wrap, along with some chef insights on each ingredient:
-
Turkey: Lean turkey breast is best for this wrap. It’s packed with protein and low in fat, making it perfect for a balanced meal. If you’re looking for a healthier alternative, you can use turkey deli meat or leftover roasted turkey. Vegetarian? Try using hummus or roasted chickpeas instead!
-
Apple Slices: Crisp apples like Honeycrisp, Fuji, or Granny Smith add a refreshing crunch and a hint of sweetness. They offer a delicious contrast to the savory turkey. Opt for something in season for the best flavor. If you prefer a different fruit, pears or peaches work nicely, too!
-
Cheddar Cheese: Sharp or mild, cheddar cheese adds a creamy, tangy flavor. It melts beautifully if you decide to heat your wrap. For a dairy-free option, try using vegan cheese or even avocado for that creamy texture.
-
Spinach: Fresh spinach provides a pop of color and loads of nutrients. If you’re not a fan of spinach, feel free to swap it out for arugula or mixed greens, which can add a peppery bite.
-
Tortilla: Whole grain or spinach tortillas are great for added fiber and nutrients, but regular flour or corn tortillas work just fine. For a low-carb option, you can use lettuce leaves to wrap everything up!
Step-by-Step Instructions
Now that we have our fabulous ingredients ready, let’s roll them up into something special! Follow these steps for your Turkey Apple Wrap:
-
Prep Your Ingredients: Start by gathering all your ingredients. Wash the spinach and apple, and slice the apple into thin wedges. If you’re using deli turkey, stack the slices for easy assembly.
Chef Tip: Use a mandolin slicer for perfectly thin apple slices that not only look great but also make the wrap easier to bite into!
-
Lay Out Your Tortilla: Place your tortilla flat on a clean cutting board or plate. You want a good surface area to work with for wrapping.
Chef Insight: If you warm your tortilla for a few seconds in the microwave or on a skillet, it will be more pliable and less likely to crack when you fold it.
-
Add Your Ingredients: Start by layering a handful of fresh spinach right in the center of the tortilla. Next, pile on the turkey slices, followed by the apple slices, and top it off with a sprinkle of cheddar cheese.
Chef Hack: Don’t overload the wrap. If you pack in too much filling, it’s going to be hard to roll up. Less is more here!
-
Roll It Up: Begin rolling the tortilla away from you tightly, tucking in the sides as you go to keep everything secure. Once it’s all rolled up, place the seam side down on the cutting board.
Chef Tip: If you want it to look super neat, slice the wrap diagonally for a beautiful presentation.
-
Optional Toasting: If you love a warm wrap, toss it into a non-stick skillet over medium heat for about 2-3 minutes on each side, just until the cheese starts to melt and the tortilla gets a little golden.
Chef Insight: This step is completely optional, but it adds a lovely crispy exterior that’s hard to resist!
Serving Suggestions
Once your Turkey Apple Wrap is ready, you can serve it immediately. Plate it with a side of crunchy carrot sticks or a fresh salad for a well-rounded meal. Drizzle a bit of honey mustard or your favorite dipping sauce on the side for an extra flavor boost!
Recipe Variations
Here are a few creative spins on this Turkey Apple Wrap that you may want to try out:
-
BBQ Turkey Wrap: Swap the cheddar for pepper jack cheese, and replace the apple slices with BBQ sauce for a smoky twist!
-
Spicy Southwest: Add sliced jalapeños and swap the spinach for shredded lettuce. Use a spicy salsa as a dressing.
-
Mediterranean Twist: Replace turkey with grilled chicken, add feta cheese, olives, and cucumber instead of apple for a fresh Mediterranean vibe.
-
Nutty & Green: Spread a layer of almond butter on your tortilla and include sliced bananas instead of apples for a sweet and nutty flavor.
-
Breakfast Wrap: Use scrambled eggs and add bell peppers instead of turkey for a delicious breakfast option.
Chef’s Notes
Creating this Turkey Apple Wrap didn’t just come from a single moment; it evolved from my childhood love for experimenting in the kitchen. I still remember the unexpected joy of combining seemingly random ingredients to make something wonderful. It’s funny how much our palates change over time! Nowadays, I love playing around with different flavors and incorporating seasonal produce into my dishes.
The best part about this wrap is how flexible it is. You can use whatever you have on hand, making it a perfect go-to meal for busy days. Plus, it’s a fantastic recipe to get kids involved in the kitchen; they’ll enjoy assembling their wraps just as much as eating them!
FAQs and Troubleshooting
Q: My wrap came apart while eating it! What did I do wrong?
A: This can happen if the tortilla is overloaded with filling. Make sure you don’t add too much, and also ensure that your tortilla is fresh and pliable for wrapping.
Q: Can I make this ahead of time?
A: Absolutely! These wraps can be made ahead and stored in the refrigerator for a couple of days. Just wrap them tightly in plastic wrap to keep them fresh and avoid sogginess.
Q: What if I don’t like turkey?
A: No problem! You can use any protein you like, such as chicken, ham, or even a plant-based alternative like tempeh or tofu.
Q: What’s the best way to pack these for lunch?
A: Wrap them tightly in parchment paper or foil. To keep it fresh, store in an insulated lunch bag with an ice pack, especially if you’re packing it with perishable ingredients like cheese.
Nutritional Info
This Turkey Apple Wrap is not only delicious but also packed with nutrients! Here’s a quick overview of its nutritional benefits:
- Protein: The turkey offers lean protein, essential for muscle repair and growth.
- Fiber: Apples and whole grain tortillas provide fiber to support digestion.
- Vitamins: Spinach is a great source of vitamins A and K, while apples are rich in vitamin C.
Now you’re all set to whip up your own Turkey Apple Wrap! Remember, cooking is about joy and creativity, so have fun with it. Share your culinary adventures, and let’s keep the conversation going about how to make healthy eating accessible and enjoyable. Cheers to fresh flavors and happy wrapping! 🥙✨
PrintTurkey Apple Wrap
A delightful and healthy wrap combining juicy turkey, crisp apple slices, creamy cheddar, and vibrant spinach, all wrapped in a soft tortilla.
- Prep Time: 10 minutes
- Cook Time: 5 minutes
- Total Time: 15 minutes
- Yield: 1 serving 1x
- Category: Lunch
- Method: Wrapping
- Cuisine: American
- Diet: Healthy
Ingredients
- 8 oz lean turkey breast or deli turkey
- 1 medium Honeycrisp apple, sliced
- 2 oz cheddar cheese, shredded
- 1 cup fresh spinach
- 1 large tortilla (whole grain or spinach)
Instructions
- Prep your ingredients: Gather all your ingredients, wash the spinach, and slice the apple into thin wedges.
- Lay out your tortilla: Place your tortilla flat on a clean cutting board or plate.
- Add your ingredients: Layer spinach, turkey slices, apple slices, and cheddar cheese in the center of the tortilla.
- Roll it up: Start rolling the tortilla tightly, tucking in the sides.
- Optional toasting: Place the rolled wrap in a skillet over medium heat for 2-3 minutes on each side until golden.
Notes
Feel free to customize with different proteins or toppings. This wrap is perfect for busy days and can be made ahead of time.
Nutrition
- Serving Size: 1 wrap
- Calories: 300
- Sugar: 8g
- Sodium: 600mg
- Fat: 10g
- Saturated Fat: 5g
- Unsaturated Fat: 4g
- Trans Fat: 0g
- Carbohydrates: 34g
- Fiber: 4g
- Protein: 23g
- Cholesterol: 50mg
Keywords: Turkey Wrap, Healthy Lunch, Easy Wrap
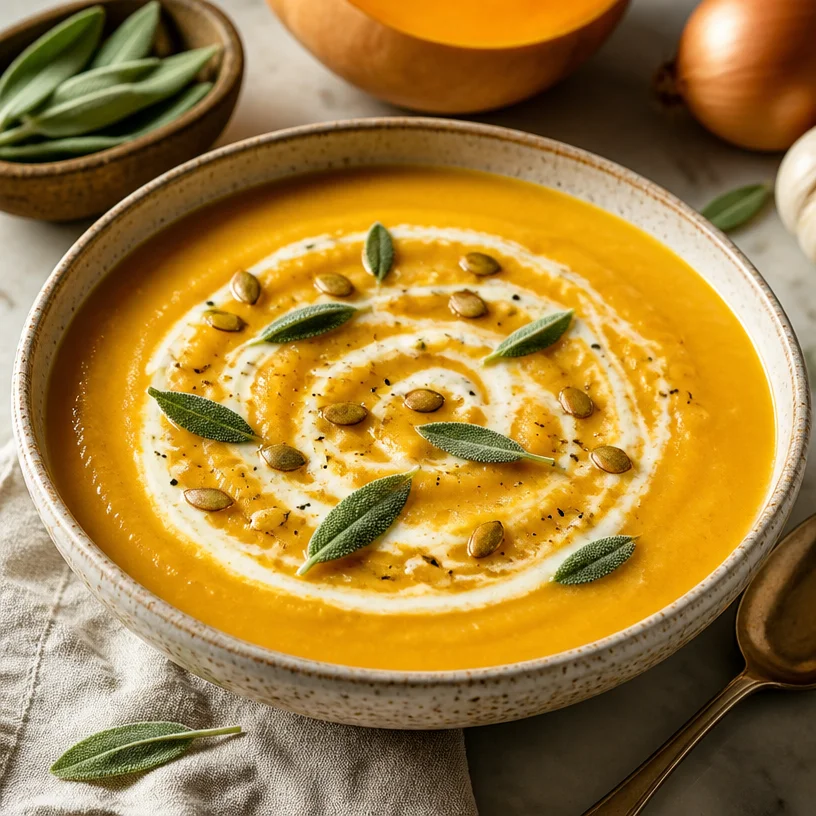
One-Pot Creamy Butternut Squash Soup in 30 Minutes
Discovering the Creamy Comfort of Butternut Squash Soup
Hello, my lovely foodies! Today, we’re diving into a bowl of pure comfort with a heartwarming recipe for Butternut Squash Soup. This dish is like a hug in a bowl—smooth, creamy, and bursting with flavor. Butternut squash has a naturally sweet and nutty profile, and when you blend it up with some aromatic onion, fresh sage, and a splash of cream, you end up with a dish that’s perfect for any occasion.
Imagine it: a chilly autumn day, the leaves painted with nature’s vibrant colors, and you cozy up with a warm bowl of butternut squash soup. There’s something magical about this time of year that makes this dish feel especially inviting. This soup is not just a meal; it’s a moment of pause and reflection. Plus, it’s super simple to make, which means you can whip it up on those busy weeknights without breaking a sweat!
Let me take you on a journey where comfort meets creativity in the kitchen. I promise this recipe will not only nourish your body but also delight your taste buds. So grab your apron, put on some good tunes, and let’s get cooking!
A Spoonful of Nostalgia
My love for butternut squash soup began in my grandmother’s kitchen. She had a way of turning the simplest ingredients into something magical. I remember standing on a stool beside her, mesmerized as she peeled, chopped, and roasted fresh squash from her garden. The air would fill with the warm, nutty aroma, tantalizing my senses.
One chilly evening, we made butternut squash soup together for the first time. It was the kind of day where the brisk wind made you crave comfort food. We chopped everything from scratch, giggling at the occasional splash of broth and dancing to the old records playing in the background. The soup quickly became our favorite, passing down from generation to generation—always a staple at family dinners during the fall and winter months.
That first taste? Oh, it was pure bliss. The silky texture coated my tongue, and the warmth radiated through me, just like the love and laughter that we shared in that little kitchen. Today, every time I make butternut squash soup, I channel that same carefree spirit and warmth that my grandmother instilled in me. Now, let’s create some memories of our own, shall we?
Ingredients
Here’s what you’ll need to whip up this delicious butternut squash soup:
-
Butternut Squash: The star of the show! Choose one that feels heavy for its size and has a deep, even color. If you can’t find butternut squash, pumpkin or acorn squash can be great alternatives, though they may have different flavor profiles.
-
Onion: A classic aromatics powerhouse, onion adds depth and sweetness to the soup. Yellow onion is my go-to, but feel free to experiment with shallots for a milder flavor or red onion for a pop of color.
-
Broth: This is where your soup gets its savory goodness. Vegetable or chicken broth works beautifully. If you’re looking for a lighter option, try low-sodium broth to control the saltiness, which can always be adjusted later.
-
Cream: Just a splash for that dreamy, velvety texture! You can use heavy cream for richness or opt for half-and-half for a lighter version. If you need a dairy-free option, coconut milk adds a lovely creaminess with a hint of tropical flavor.
-
Sage: This herb adds an earthy, aromatic touch that pairs beautifully with the squash. Fresh sage is preferred for its brighter flavor, but dried sage will also do the job! Just remember, if using dried, you’ll need less as it’s more concentrated.
Step-by-Step Instructions
Alright, let’s roll up those sleeves and get to work!
-
Prep the Squash:
- Start by slicing your butternut squash in half lengthwise. Be cautious—those squash can be tough! Use a sharp knife and a sturdy cutting board. Once halved, scoop out those seeds with a spoon.
- Next, cut it into cubes (about 1-inch pieces). This helps the squash cook down more quickly, making your life easier. Pro tip: you can roast the squash halves directly in the oven at 400°F (200°C) for about 30 minutes until fork-tender, or you can use the stovetop method for an even simpler approach.
-
Sauté the Aromatics:
- In a large pot, heat a drizzle of olive oil (or butter if you prefer) over medium heat. Toss in the chopped onion and sauté until golden and translucent, about 5-7 minutes.
- Here’s a little chef hack: sprinkle a pinch of salt over the onions while they cook. This will help draw out their moisture, allowing them to caramelize nicely.
-
Add the Squash:
- Once your onions are glowing with flavor, add in the cubed butternut squash. Stir well to combine and let this mixture sauté for another 5 minutes. The squash will start to soften just a bit, and trust me—it’s going to smell divine!
-
Pour in the Broth:
- Next up, grab your broth and pour it over the squash and onion mixture. Just enough to cover the squash should do! Bring this to a gentle boil, then reduce heat to a simmer. Let it cook until the squash is tender, which should be around 15-20 minutes.
- During this time, feel free to reflect on your day or even dance it out a little. Cooking should be fun!
-
Blend It Up:
- Once the squash is tender, it’s blending time! If you have an immersion blender, that’s the easiest way to go. Blend until completely smooth. If using a regular blender, be careful to allow some steam to escape, and blend in batches if necessary to prevent overflow.
- After blending, return the soup to the pot. If you want to get really velvety, you can pass it through a fine-mesh sieve, but that’s up to you!
-
Stir in the Cream and Sage:
- Here comes the magic—stir in the cream and chopped fresh sage. Allow the soup to gently warm through, and taste to adjust seasoning. A touch of salt and pepper can go a long way!
-
Serve and Enjoy:
- Ladle your creamy soup into bowls. Consider drizzling a little extra cream on top or adding some crispy sage leaves for garnish. Voilà! You’ve created a soul-soothing dish that’s ready to be devoured.
Serving Suggestions
For a beautiful presentation, serve your butternut squash soup in deep bowls or rustic mugs. It’s perfect alongside a crusty piece of bread, perfect for dipping. You could also sprinkle a handful of roasted pumpkin seeds or a drizzle of balsamic glaze on top for that gourmet touch.
Recipe Variations
-
Spicy Kick: Add a pinch of cayenne or red pepper flakes to the pot for a touch of heat!
-
Apple Delight: For a touch of sweetness, toss in a chopped apple (like Granny Smith) while cooking the squash. It gives a lovely tartness that balances the flavors.
-
Herb Infusion: Experiment by adding thyme or rosemary alongside the sage for an herbal explosion.
-
Nutty Flavor: Stir in a spoonful of nut butter (like almond or cashew) while blending for a rich, nutty flavor.
-
Garnish Game: Top with crispy bacon bits or a dollop of yogurt for added crunch and texture.
Chef’s Notes
Every time I make this soup, I adapt it depending on what I have on hand, making it a canvas for creativity! One time, I threw in some roasted garlic, and let me tell you, the flavor was next-level delicious. Sometimes cooking isn’t so much about following a rigid recipe; it’s about feeling free to experiment. I cherish these moments as they always lead to delightful surprises in the kitchen, just like the one I had with my grandmother.
FAQs and Troubleshooting
-
Why is my soup too thick?
- If your soup ends up a bit thicker than you prefer, simply add a splash of broth or water and blend again until you achieve your desired consistency!
-
Can I freeze butternut squash soup?
- Absolutely! This soup freezes beautifully. Just let it cool completely before transferring to airtight containers or freezer bags. It can last up to three months in the freezer. When ready to serve, let it thaw overnight in the fridge and then reheat on the stove.
-
Can I make this soup vegan?
- Yes! Swap the cream for coconut milk (about a cup) and use vegetable broth. It’s equally creamy and delicious!
-
What if I don’t have fresh sage?
- No worries! Dried sage works just as well—use about half a teaspoon in place of fresh. You can always add more to taste.
Nutritional Info (Optional)
While it may vary depending on the specific brands and quantities you use, here’s a rough estimate for a serving of this butternut squash soup (without cream):
- Calories: 150
- Protein: 2g
- Fat: 5g
- Carbohydrates: 26g
- Fiber: 5g
- Sugar: 6g
So there you have it, my lovely friends—your go-to recipe for a heartwarming Butternut Squash Soup! I hope it brings as much joy to your kitchen as it does to mine. Remember, cooking is not just about feeding your body; it’s also about creating memories, sharing stories, and always—always—having fun. Happy cooking!
PrintCreamy Butternut Squash Soup

A heartwarming recipe for creamy butternut squash soup, perfect for chilly days.
- Prep Time: 15 minutes
- Cook Time: 30 minutes
- Total Time: 45 minutes
- Yield: 4 servings 1x
- Category: Soups
- Method: Blending
- Cuisine: American
- Diet: Vegetarian
Ingredients
- 1 butternut squash, halved and cubed
- 1 yellow onion, chopped
- 4 cups vegetable or chicken broth
- 1/2 cup heavy cream or coconut milk
- 1 tablespoon fresh sage, chopped (or 1 teaspoon dried)
- Olive oil or butter for sautéing
Instructions
- Prep the squash: Slice butternut squash in half lengthwise and scoop out seeds. Cut into 1-inch cubes.
- Sauté the aromatics: Heat olive oil in a large pot, add chopped onion, and sauté until golden, about 5-7 minutes.
- Add the squash: Stir in cubed butternut squash, sauté for another 5 minutes.
- Pour in the broth: Add broth to cover the squash, bring to a boil, then simmer until tender, about 15-20 minutes.
- Blend it up: Blend the soup until smooth. Return to pot.
- Stir in the cream and sage: Warm through and adjust seasoning as needed.
- Serve and enjoy: Ladle into bowls, garnish with extra cream or crispy sage, and serve with bread.
Notes
This soup can be frozen for up to three months. Just cool completely before storing.
Nutrition
- Serving Size: 1 serving
- Calories: 150
- Sugar: 6g
- Sodium: 500mg
- Fat: 5g
- Saturated Fat: 2g
- Unsaturated Fat: 3g
- Trans Fat: 0g
- Carbohydrates: 26g
- Fiber: 5g
- Protein: 2g
- Cholesterol: 10mg
Keywords: butternut squash soup, fall recipes, comfort food, vegan options, easy recipes
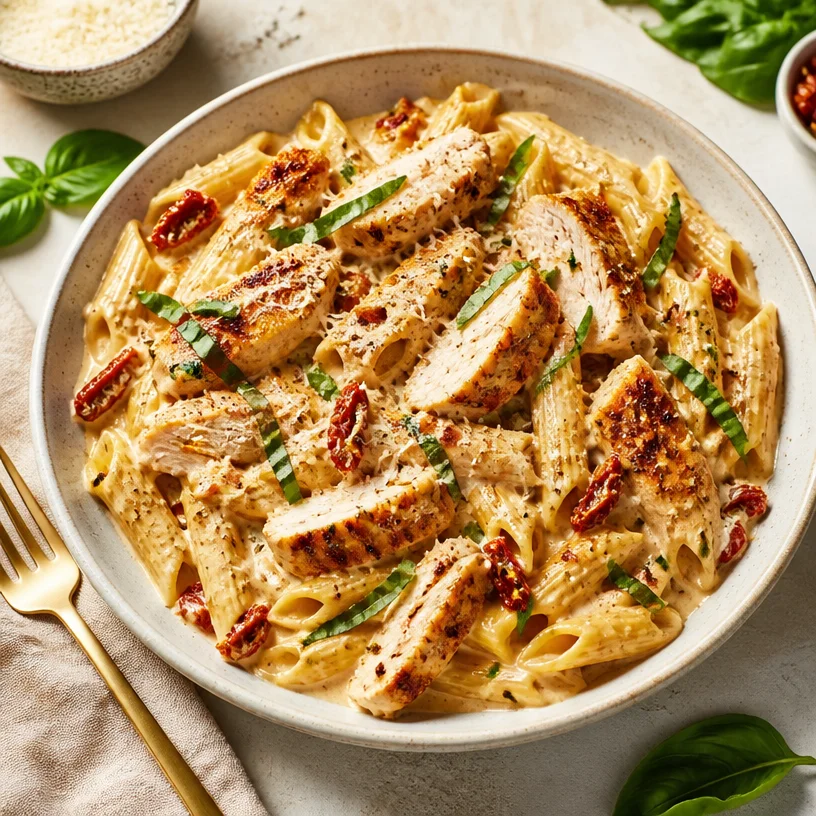
One-Pot Creamy Garlic Chicken Pasta (Ready in 20 Minutes)
Welcome to the World of Marry Me Chicken Pasta!
Hey there, fellow food lovers! If you’ve wandered into my little corner of the culinary universe, you’re in for a treat that can only be described as a culinary love letter: Marry Me Chicken Pasta. Now, grab a fork, because we’re diving headfirst into a dish that sings with flavor, wraps you in comfort, and might just make someone propose at the dinner table!
Imagine this: It’s a cozy Sunday evening, the kind where you don’t have a care in the world. You’re lounging in your favorite sweatpants, the scent of something delicious wafting through the air, making your stomach growl a little louder than usual. That’s what Marry Me Chicken Pasta does—it transforms an ordinary day into a delicious celebration of life, love, and comfort.
I whipped up this recipe early one summer evening while reminiscing about the flavors that bring people together. It was inspired by countless dinner parties, shared laughter, and the delight of good food among friends and family. Seriously, this dish has a way of making any gathering feel special, whether it’s a romantic dinner, a family feast, or a casual get-together with pals.
So, without further ado, let’s turn those kitchen dreams into reality, create some kitchen magic, and explore why Marry Me Chicken Pasta deserves a spot on your table. Trust me; this dish is not just about the food; it’s about the experience, the memories, and of course, the love that goes into every single bite!
A Personal Story: The Proposal that Never Was… Yet!
Let me take you back to a warm summer evening, illuminated by fairy lights strung across the backyard. My best friend had just gotten into a new relationship that sparked excitement among our whole friend group. Naturally, I wanted to impress her new partner at our weekly dinner gathering. With a little brainstorming and a dash of inspiration, I decided to surprise everyone with Marry Me Chicken Pasta.
As I stirred the creamy sauce, I couldn’t help but remember how my grandmother used to cook for our big family reunions, always pouring love into her recipes. She believed food was a bridge that brought people closer together. As a nod to her teachings, I plated the pasta with a sprinkle of fresh basil, just like she would—because presentation matters, and so does heart!
By the end of the night, there was a lot of oohing and aahing, followed by a few playful nudges about proposals—because let’s be real, this dish had the room buzzing! While there were no actual engagements that night, it was a lovely reminder of how food can foster connections and inspire romance. It made me realize that Marry Me Chicken Pasta is more than just a recipe; it’s a beautiful way to share love through deliciousness.
Ingredients to Gather
Alright, culinary adventurer! Grab your aprons, and let’s gather our ingredients. Each component of this dish plays a crucial role in creating that creamy, flavorful magic.
-
2 boneless, skinless chicken breasts
Tip: Choose fresh chicken for the best flavor. If you’re short on time, you can use precooked chicken or even shredded rotisserie chicken for a quick swap! -
8 ounces penne pasta
Substitute: Any pasta shape will do! Fusilli, rigatoni, or even gluten-free pasta can work well if you have dietary preferences. -
1 cup sun-dried tomatoes, diced
Flavor Insight: They bring a tangy sweetness to this dish! Feel free to use oil-packed sun-dried tomatoes to enhance the flavor even further. -
1 cup heavy cream
Substitute: Don’t have heavy cream on hand? Try using half-and-half or a plant-based cream for a lighter take! -
1 cup grated Parmesan cheese
Chef’s Insight: Freshly grated cheese always tastes better than pre-packaged! If you’re lactose-intolerant, look for a dairy-free Parmesan alternative. -
2 tablespoons olive oil
Quick Hack: Extra virgin olive oil is the best for flavor, but avocado oil is a great alternative with a higher smoke point. -
2 cloves garlic, minced
Tip: Fresh garlic is always best, but if you don’t have any, garlic powder can be used in a pinch (1/8 teaspoon for each clove). -
Salt and pepper to taste
Chef’s Note: Always start with a pinch of salt and pepper. You can adjust later, but under-seasoning won’t earn you culinary accolades! -
Fresh basil for garnish
Bonus Tip: The fresh basil is optional but really elevates the dish with its aromatic flavors. If you can, grow your own for an endless supply!
Step-by-Step Instructions: Let’s Get Cooking!
Ready to bring this Marry Me Chicken Pasta to life? Follow along as I walk you through each step with a few little chef hacks to ensure your dish turns out perfectly!
Step 1: Cook the Pasta
- Bring a large pot of salted water to a boil, then add the penne pasta. Cook according to package instructions until al dente.
- Chef’s Tip: Remember to reserve about a cup of pasta water before draining! It’s a magical ingredient for later.
Step 2: Sauté the Chicken
-
While the pasta is cooking, heat olive oil in a large skillet over medium heat. Season your chicken breasts with salt and pepper, and then add to the skillet.
- Chef’s Hack: Let the chicken sit in the pan undisturbed for about 5-7 minutes to get a nice sear before flipping.
-
Cook the chicken until it’s golden brown and cooked through, about 6-7 minutes on each side. Once done, remove from the skillet and set aside to rest before slicing.
- Chef’s Note: Resting is essential; it keeps the juices inside and makes for tender chicken.
Step 3: Create the Sauce
-
In the same skillet, add minced garlic and sauté for about 30 seconds until fragrant.
- Tip: Be careful not to burn the garlic; keep it moving in the pan!
-
Pour in the heavy cream and stir well, letting it come to a gentle simmer. Then, add the sun-dried tomatoes and half of the Parmesan cheese.
- Flavor Insight: You can add in a splash of white wine before the cream for an extra depth of flavor!
Step 4: Combine It All
-
Slice the rested chicken breasts into strips and return them to the skillet. Toss everything to combine, then add the cooked pasta.
- Chef’s Hack: If the sauce seems too thick, gradually mix in some reserved pasta water until you reach your desired creaminess.
-
Stir in the remaining Parmesan cheese to thicken the sauce and coat the pasta beautifully.
- Final Touch: Taste and adjust seasoning with salt and pepper as needed.
Step 5: Time to Serve!
- Serve the pasta hot, garnished with fresh basil. You can also sprinkle a bit more Parmesan on top for that irresistible cheesy finish.
- Plating Tip: A dollop of extra cream can add an elegant touch to your plating!
Serving Suggestions
When it’s time to serve Marry Me Chicken Pasta, presentation is everything! Use wide pasta bowls for that cozy family vibe, and finish with a sprinkle of fresh basil and a drizzle of olive oil. You might want to have a side of garlic bread or a simple green salad to complete the meal, ensuring the love keeps flowing at your dinner table.
Recipe Variations
Now, let’s spice things up a bit! Here are some creative variations to make this dish your own:
-
Vegetarian Option: Swap out the chicken for sautéed mushrooms, zucchini, or eggplant for a delectable plant-based version!
-
Spicy Kick: Add crushed red pepper flakes during the garlic sauté stage for a delightful heat that pairs beautifully with the creamy sauce.
-
Extra Veggies: Toss in some spinach, kale, or even bell peppers for added nutrition and explosion of colors.
-
Herb-Infused: Replace basil with fresh parsley or thyme for a different botanical twist.
Chef’s Notes: A Dash of Nostalgia
Every recipe has its journey, and Marry Me Chicken Pasta has certainly traveled. This dish has evolved over the years, inspired by Mediterranean flavors and creamy sauces, all with the goal of creating a meal that is both comforting and invigorating. My journey in the kitchen has been filled with colorful ingredients, friendly laughter, and delightful mishaps, from the time I mistook sugar for salt (big yikes!) to the moments of triumph when I finally nailed this recipe. It’s a continual love affair, and each time I whip up this dish, I fondly remember those gatherings that celebrated love, friendship, and good food!
FAQs and Troubleshooting
Here are some common questions you might have while making Marry Me Chicken Pasta, along with solutions!
-
Why is my sauce too thin?
- No worries! If your sauce turned out thin, gradually add more Parmesan or a splash of cream to thicken it up. Flour can also help; whisk a bit into the sauce.
-
How do I store leftovers?
- Store leftovers in an airtight container in the refrigerator for up to 3 days. Reheat gently on the stovetop or in the microwave with a splash of cream or broth to loosen it up.
-
Can I freeze this dish?
- Yes! Freeze the unbaked pasta with the sauce in a freezer-safe container for up to 2 months. Thaw overnight in the refrigerator before baking.
-
My chicken is dry! What happened?
- Dry chicken often comes from overcooking. Use a meat thermometer (165°F is perfect) and remember to let it rest before slicing!
Nutritional Info
Each serving of Marry Me Chicken Pasta is packed with protein and creamy goodness, providing about:
- Calories: 650
- Protein: 35g
- Carbs: 60g
- Fat: 32g
(Please note that these figures can vary based on ingredient brands and specific quantities.)
As you savor each bite of this Marry Me Chicken Pasta, remember that cooking is all about passion and creativity! Enjoy the love that comes from crafting delicious meals, and may your table always be filled with laughter, love, and a little bit of magic. Happy cooking! 🍽️
PrintMarry Me Chicken Pasta

A creamy and flavorful pasta dish that transforms ordinary days into delicious celebrations of love and life.
- Prep Time: 15 minutes
- Cook Time: 30 minutes
- Total Time: 45 minutes
- Yield: 4 servings 1x
- Category: Main Course
- Method: Sautéing
- Cuisine: Italian
- Diet: Non-Vegetarian
Ingredients
- 2 boneless, skinless chicken breasts
- 8 ounces penne pasta
- 1 cup sun-dried tomatoes, diced
- 1 cup heavy cream
- 1 cup grated Parmesan cheese
- 2 tablespoons olive oil
- 2 cloves garlic, minced
- Salt and pepper to taste
- Fresh basil for garnish
Instructions
- Bring a large pot of salted water to a boil, then add the penne pasta. Cook according to package instructions until al dente.
- Heat olive oil in a large skillet over medium heat. Season your chicken breasts with salt and pepper, and then add to the skillet.
- Cook the chicken until it’s golden brown and cooked through, about 6-7 minutes on each side. Remove from the skillet and set aside to rest before slicing.
- Add minced garlic to the same skillet and sauté for about 30 seconds until fragrant.
- Pour in the heavy cream and stir well, then add the sun-dried tomatoes and half of the Parmesan cheese.
- Slice the rested chicken breasts into strips and return them to the skillet. Toss everything to combine, then add the cooked pasta.
- Stir in the remaining Parmesan cheese to thicken the sauce and coat the pasta beautifully.
- Serve the pasta hot, garnished with fresh basil and additional Parmesan cheese if desired.
Notes
For additional flavor, consider adding a splash of white wine to the sauce. You can also customize the dish by adding more vegetables or spices.
Nutrition
- Serving Size: 1 serving
- Calories: 650
- Sugar: 5g
- Sodium: 600mg
- Fat: 32g
- Saturated Fat: 16g
- Unsaturated Fat: 8g
- Trans Fat: 0g
- Carbohydrates: 60g
- Fiber: 3g
- Protein: 35g
- Cholesterol: 100mg
Keywords: pasta, chicken, creamy, Italian, comfort food, Marry Me Chicken Pasta
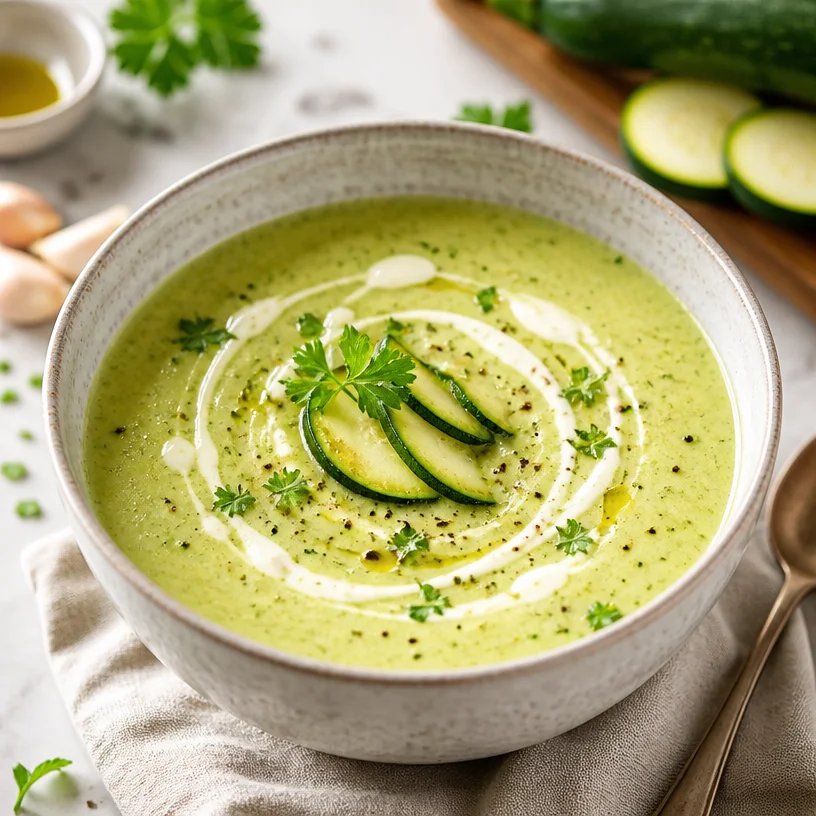
Zucchini Soup Recipe
Comfort in a Bowl: Creamy Zucchini Soup Recipe
Welcome to Clean Plate Cravings! Today, I’m excited to share with you a delightful bowl of warmth and nourishment: my creamy zucchini soup. This recipe embodies everything I believe about eating well—it’s fresh, easy to prepare, and absolutely delicious. Whether you’re looking for a comforting meal after a long day or a light dish that celebrates the flavors of summer vegetables, this zucchini soup fits the bill perfectly.
Take a moment to imagine a bowl of velvety soup, infused with the subtle sweetness of zucchini and a hint of garlic, topped with a dollop of creamy goodness. Sounds wonderful, right? This dish is a great way to enjoy the health benefits of zucchini while indulging in a flavor-packed experience. So grab your apron, a cutting board, and let’s dive into the comforting world of creamy zucchini soup!
A Taste of My Childhood
Before diving into the recipe, let me share a quick personal story that always brings a smile to my face whenever I think of zucchini soup. It was a brisk autumn evening back in my childhood home when my mom decided to whip up her famous zucchini soup. We had an overabundance of zucchini from the summer garden, and she was determined to turn it into something magical.
The kitchen was filled with the wonderful aroma of sizzling garlic and onions, mingling with the earthy scent of fresh zucchinis. I remember her laughter as she tried to keep my little brother and me entertained while stirring a big pot. The warmth of the soup and the giggles echoed through our cozy kitchen. As we gathered around the table, each spoonful of that creamy soup was a taste of love and tradition. That dinner united us and created memories that I carry to this day. It’s these moments that inspired my passion for food and the joy it brings to life.
Ingredients
Here’s what you’ll need for this creamy zucchini soup:
-
1 tablespoon olive oil or butter
Perfect for sautéing the onions and garlic, olive oil adds healthy fats while butter contributes a rich flavor. You can swap it based on dietary preferences. -
2 large zucchini (about 6 cups, chopped into small pieces)
The star of the show, zucchini is light, packed with nutrients, and has a subtle flavor. Feel free to use yellow squash if you need a substitution! -
1 large onion (chopped)
Onions provide that savory base flavor that elevates the soup. Yellow onions are great here, but red onions can add a fun twist! -
3 cloves garlic (minced)
Garlic adds depth and aroma. If you’re a fan, don’t hesitate to add more—more garlic means more flavor! -
3 cups vegetable stock (or chicken broth)
This is the foundation of your soup’s flavor. Homemade stock is ideal, but store-bought works wonders too. Need it to be gluten-free? Just check the label! -
½ teaspoon salt (or to taste)
Essential for enhancing the flavor of the soup! Adjust according to your taste preferences. -
¼ teaspoon black pepper
A little kick goes a long way. You can use white pepper for a milder flavor. -
¼ teaspoon dried thyme (optional, or substitute with basil)
Thyme compliments zucchini beautifully, but feel free to experiment with fresh herbs like basil or even dill for a fresh twist. -
1 cup sour cream or heavy whipping cream (use coconut milk for dairy-free)
This ingredient brings creaminess to the soup. If you’re dairy-free, coconut milk will provide a similar texture with a hint of sweetness. -
Olive oil, sour cream, or chopped parsley—for garnish
A little garnish goes a long way in presentation. You can add a drizzle of olive oil or a sprinkle of fresh parsley for added freshness!
Step-by-Step Instructions
Now that you have your ingredients ready, let’s get cooking! Here’s how to create this creamy zucchini soup step by step:
-
Heat the oil or butter
In a large pot, heat up the olive oil or butter over medium heat. It should shimmer or melt. This is where the flavor-building magic begins! -
Sauté the onions
Add the chopped onion to the pot and sauté them for about 5 minutes until they become translucent. This step is vital—caramelizing the onions gives your soup a sweet, rich base. -
Add the garlic
Toss in the minced garlic and sauté for an additional 1-2 minutes, until fragrant. Make sure you don’t let it burn; burnt garlic can turn your soup bitter! Keep stirring for that mouth-watering aroma. -
Incorporate the zucchini
Now, add the chopped zucchini to the pot. Stir everything together, allowing the zucchini to mingle with the onions and garlic for about 5-7 minutes. You’re looking to soften them up, but not fully cooked just yet. -
Pour in the stock
Gently pour in the vegetable stock. This will make the flavors burst! Raise the heat to bring the soup to a boil, then lower the heat and let it simmer for about 10-15 minutes, or until the zucchini is tender and easily pierced with a fork. -
Blend it up
Once the zucchini is tender, remove the pot from heat. Using an immersion blender, carefully blend the soup until it’s smooth and creamy. If you don’t have an immersion blender, you can transfer the mixture to a stand blender in batches. Just remember to let it cool slightly before blending to avoid any messy explosions! -
Stir in the cream
Return the soup to low heat, and stir in the sour cream, heavy whipping cream, or coconut milk. Let it heat through, but don’t let it boil. This is where the magic happens—the creaminess elevates the soup to a whole new level! -
Season to taste
Finally, taste the soup and add salt, pepper, or more herbs as needed. This step is important—everyone’s taste buds are different, so adjust according to your preference!
Serving Suggestions
When it comes to serving your creamy zucchini soup, presentation is key! Ladle the soup into vibrant bowls, then garnish with a drizzle of olive oil, a dollop of sour cream, or a sprinkle of fresh parsley. You can pair it with warm, crusty bread or a fresh salad for a complete meal. The colors and textures will surely make it a feast for both the eyes and the palate!
Recipe Variations
Feel free to customize this creamy zucchini soup to suit your tastes or dietary needs! Here are some creative twists to consider:
-
Add Spinach or Kale: Stir in a handful of fresh spinach or kale during the last few minutes of cooking for an added nutrient boost!
-
Zucchini and Corn Combo: Toss in some fresh corn kernels for a sweet crunch. It’s like summer in a bowl!
-
Spicy Kick: Add a pinch of red pepper flakes or a dash of hot sauce for some heat.
-
Cheesy Delight: Sprinkle in grated Parmesan or sharp cheddar right before serving for a cheesy twist—feel free to melt it for an even creamier soup!
-
Herb Infusion: Try fresh herbs like basil or dill for a sophisticated flavor profile that enhances the zucchini.
Chef’s Notes
This creamy zucchini soup has evolved over time, adapting to seasonal ingredients and the little love notes I continue to add. There was a time when I experimented with roasted zucchini, which gave the soup an incredible depth of flavor. I’ve also swapped the cream and added a splash of lemon juice for a bright finish—don’t be afraid to play around with flavors!
And a funny story: I once blended the soup too early, and it exploded all over my kitchen. Lesson learned: always allow it to cool first! Now, I always remind my friends to be cautious while blending.
FAQs and Troubleshooting
Q: My soup is too thick; what do I do?
A: No worries! Just add more broth or water gradually until you reach your desired consistency.
Q: Can I freeze this soup?
A: Absolutely! Just allow it to cool completely, then portion it into freezer-safe containers. It’s a lifesaver for busy days!
Q: How can I store leftovers?
A: Keep leftover soup in an airtight container in the fridge for up to 3-4 days. Just reheat when you’re ready to enjoy!
Q: What if I don’t have fresh zucchini?
A: Frozen zucchini will do in a pinch! Just sauté it a bit longer to release excess moisture.
Nutritional Info
(Per serving, based on 6 servings):
- Calories: ~180
- Protein: 4g
- Carbs: 10g
- Fat: 15g
- Fiber: 2g
So there you have it! A creamy and comforting zucchini soup that speaks to my heart and nourishes the body. I hope this recipe brings you joy, warmth, and a bit of nostalgia just like it does for me. Remember, cooking is all about having fun and bringing flavor into your life! I can’t wait to hear how you make this recipe your own! Happy cooking, my friend!
PrintCreamy Zucchini Soup
A comforting and creamy zucchini soup, perfect for a nourishing meal on a chilly day.
- Prep Time: 10 minutes
- Cook Time: 25 minutes
- Total Time: 35 minutes
- Yield: 6 servings 1x
- Category: Soup
- Method: Blending
- Cuisine: American
- Diet: Vegetarian
Ingredients
- 1 tablespoon olive oil or butter
- 2 large zucchini (about 6 cups, chopped into small pieces)
- 1 large onion (chopped)
- 3 cloves garlic (minced)
- 3 cups vegetable stock (or chicken broth)
- ½ teaspoon salt (or to taste)
- ¼ teaspoon black pepper
- ¼ teaspoon dried thyme (optional, or substitute with basil)
- 1 cup sour cream or heavy whipping cream (use coconut milk for dairy-free)
- Olive oil, sour cream, or chopped parsley—for garnish
Instructions
- Heat the oil or butter
- Sauté the onions
- Add the garlic
- Incorporate the zucchini
- Pour in the stock
- Blend it up
- Stir in the cream
- Season to taste
Notes
Feel free to customize this soup with additional vegetables or spices, and serve with warm bread.
Nutrition
- Serving Size: 1 serving
- Calories: 180
- Sugar: 3g
- Sodium: 350mg
- Fat: 15g
- Saturated Fat: 7g
- Unsaturated Fat: 8g
- Trans Fat: 0g
- Carbohydrates: 10g
- Fiber: 2g
- Protein: 4g
- Cholesterol: 20mg
Keywords: zucchini soup, creamy soup, comfort food, vegetarian recipe
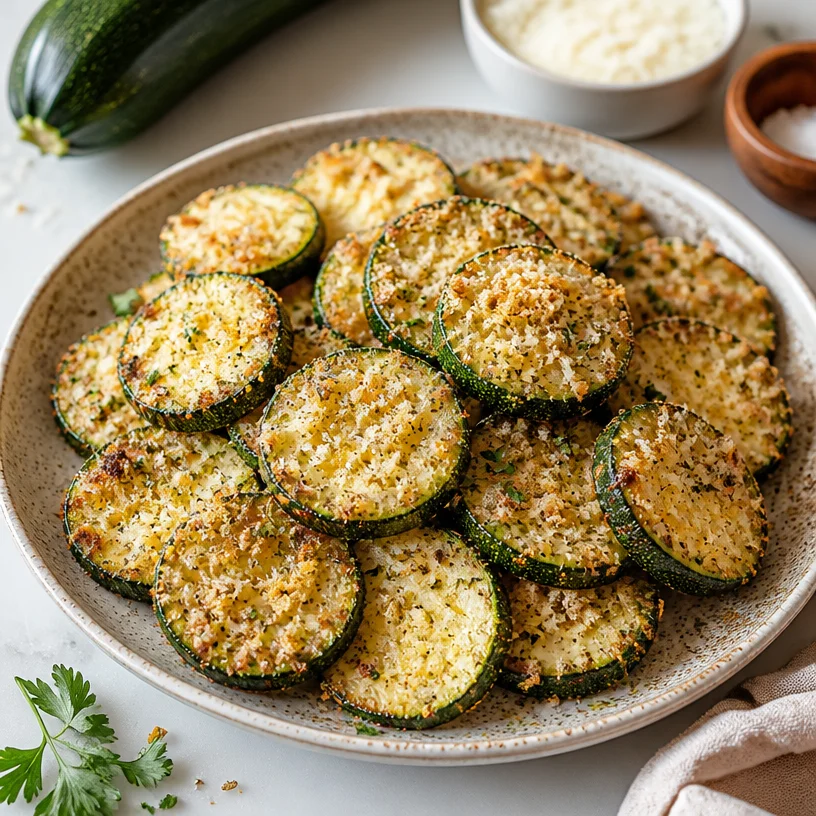
Minute Crispy Air Fryer Zucchini Parmesan, Weeknight Side
Crispy Air Fryer Zucchini Parmesan: A Flavorful Crunch in Every Bite
Welcome, fellow food enthusiasts! Are you ready to bring a little extra crunch to your next meal? Today, we’re diving into the wonderful world of air frying, and I’ll be sharing one of my all-time favorite recipes: Crispy Air Fryer Zucchini Parmesan. This dish is not just a side; it’s a delicious way to celebrate vibrant summer zucchini while keeping things light and wholesome. Flavorful, satisfying, and super easy to whip up—this recipe embodies everything Clean Plate Cravings stands for!
I remember the first time I tried crispy zucchini. It was at a little Italian bistro where I spent many summer evenings with friends, laughing, chatting, and indulging in the freshest of dishes. The zucchini came out golden and crispy, paired perfectly with a tangy marinara that just made my taste buds dance. I was mesmerized by its simple perfection—who would have thought that humble zucchini could transform into a dish so delightful? I promised myself I would try to recreate that crispy goodness in my kitchen one day. And here we are!
Using an air fryer is an absolute game-changer; it gives you the satisfying crunch of frying but retains a healthy twist. By the end of this blog post, you’ll learn how to make these crispy bites and create lasting memories around the dinner table. So grab that zucchini, and let’s get cooking!
A Nostalgic Kitchen Memory
Let’s take a moment to rewind to my childhood kitchen, where culinary adventures sparked my love for cooking. I can vividly remember the summer evenings with my family gathered in our cozy kitchen, the scent of garlic wafting through the air. One of my mom’s go-to recipes was her crispy vegetable fritters, which always included zucchini when they were in season. My siblings and I would eagerly help her grate the zucchini, and we often ended up in a playful fight over who got to use the biggest grater.
Once the batter was mixed, it was an exercise in patience (and restraint) to wait for them to finish cooking. The crazy anticipation turned into joyful laughter as we devoured those crispy bites, dipping them into homemade marinara sauce. Those memories of warmth, sharing, and delicious food inspired my love of cooking. It’s that feeling of connection that always drives me to create meals that not only taste great but also make you feel good.
Ingredients
Here’s what you will need to create these delightful air-fried zucchini bites:
-
1 medium-sized zucchini: Fresh and versatile, zucchini adds a mild flavor while soaking up seasoning beautifully. If you can’t find zucchini, yellow squash works great too!
-
1 tablespoon olive oil: A healthy fat that helps achieve that crispy texture we all love. Feel free to substitute with avocado oil if you’re looking for a neutral flavor or a high smoke point.
-
1 teaspoon Italian seasoning: A blend of herbs that brings a delicious Italian flair—and it’s super convenient! You can use a homemade mix or switch it up with your favorite herbs like oregano or basil.
-
2 tablespoons Parmesan cheese: This adds a savory depth and an irresistible umami kick to the zucchini. If you’re vegan or dairy-free, consider using nutritional yeast for a cheesy flavor without the dairy!
-
Salt and black pepper to taste: Essential for enhancing all the flavors. Sea salt or Himalayan salt can provide nice crunch and flavor, while freshly cracked black pepper adds a delightful spiciness.
Step-by-Step Instructions
Now, let’s get into the delicious details of whipping up these crispy delights!
-
Prep the Zucchini: Start by washing your zucchini under cold water and patting it dry. Trim off both ends, then slice it into rounds or stick shapes, around ½ inch thick. The thicker the slice, the longer it will take to cook, and you want it crispy! If you prefer, you can also spiralize the zucchini for an interesting shape.
-
Mix the Coating: In a mixing bowl, whisk together the olive oil, Italian seasoning, salt, and pepper. You can do this by hand or use a whisk for a quick mix. This step is essential—so don’t skip it! The oil will help the spices coat the zucchini evenly and aid in that delightful crunch.
-
Coat the Zucchini: Add your zucchini slices into the bowl and give them a gentle toss, ensuring each piece is coated well. This is where you might want to get your hands in there! Make sure they’re nicely coated but not drenched in oil.
-
Add the Parmesan: Once your zucchini is coated, sprinkle the Parmesan on top and give it another gentle toss. The cheese will crank up the deliciousness factor, and who doesn’t love a bit of cheesy goodness?
-
Preheat the Air Fryer: Preheat your air fryer to 400°F (200°C) for about 5 minutes. This step isn’t just a formality; preheating ensures that your zucchini gets that golden crisp right from the start!
-
Air Fry the Zucchini: Place the coated zucchini pieces in the air fryer basket in a single layer, making sure not to overcrowd them—let them breathe! You may need to work in batches depending on your air fryer’s capacity. Cook them for about 8-10 minutes, flipping halfway through, until they are crispy and golden brown.
-
Serve and Enjoy: Once they’re done, remove them carefully (they’ll be hot!) and let them cool for a minute. Serve with marinara sauce for dipping or enjoy them plain. Either way, you’re in for a treat!
Serving Suggestions
To plate these crispy bites, you can arrange them on a beautiful platter with a small bowl of warm marinara nestled in the center for dipping. A sprinkle of fresh parsley on top adds a pop of color and freshness. These little beauties are perfect for sharing as an appetizer, alongside a salad, or even as a healthy snack during movie night!
Recipe Variations
While the classic Crispy Air Fryer Zucchini Parmesan is a surefire winner, here are a few variations to keep things exciting:
-
Spicy Crunch: Add a pinch of red pepper flakes to the coating for an extra kick!
-
Herbed Delight: Substitute Italian seasoning with a mix of fresh herbs like dill or cilantro for a fresh twist.
-
Cheesy Italian Trio: Mix Parmesan with a little mozzarella and cheddar for a cheesier layer of flavor.
-
Balsamic Glaze Drizzle: After air frying, drizzle some balsamic glaze over the zucchini for a tangy finish.
-
Sweet Potato Zucchini Bake: Layer slices of zucchini with sweet potatoes, some cheese, and bake for a tasty casserole version!
Chef’s Notes
Creating this recipe has been a journey! Over the years, I experimented with various seasonings, and different cooking methods (including pan-frying!). The air fryer truly delivers on the promise of crispy without the guilt, making it my go-to method for veggie cooking. One of those times, I accidentally grabbed smoked paprika instead of regular paprika, and I have to say—the smoky flavor added a whole new dimension! Play around and make it your own—kitchen experiments lead to delightful discoveries.
FAQs and Troubleshooting
Can I make this recipe gluten-free?
Absolutely! This recipe is naturally gluten-free. However, if you want some extra crunch, you can use gluten-free breadcrumbs instead of Parmesan cheese.
My zucchini turned out soggy. What happened?
Soggy zucchini can happen if they were too wet before cooking. Make sure to pat them dry after washing. Additionally, ensure they’re not crowded in the air fryer; space them out for optimal crispiness!
Can I store leftovers?
While these zucchini bites are best enjoyed fresh, you can store leftovers in an airtight container in the fridge for up to two days. They might lose some crispiness, but you can pop them back in the air fryer for a few minutes to revive that crunch!
What other vegetables can I air fry?
Oh, the possibilities are endless! You can try this technique with eggplant, bell peppers, or even asparagus. Just adjust your cooking time as needed, and enjoy creating a whole platter of air-fried veggies!
Nutritional Info
While exact nutritional info might depend on specifics like brand and measurements, rest assured that this dish is low in calories, rich in fiber, and packed with vitamins A and C from the zucchini.
I hope this recipe inspires you to embrace your inner chef and whip up these Crispy Air Fryer Zucchini Parmesan bites! Food is an adventure, and I’m thrilled to share this one with you. Happy cooking, and don’t forget to savor every delightful bite!
PrintCrispy Air Fryer Zucchini Parmesan
A deliciously crispy air-fried zucchini dish that celebrates summer flavors while keeping things light and wholesome.
- Prep Time: 10 minutes
- Cook Time: 10 minutes
- Total Time: 20 minutes
- Yield: 4 servings 1x
- Category: Appetizer
- Method: Air Frying
- Cuisine: Italian
- Diet: Vegetarian
Ingredients
- 1 medium-sized zucchini
- 1 tablespoon olive oil
- 1 teaspoon Italian seasoning
- 2 tablespoons Parmesan cheese
- Salt and black pepper to taste
Instructions
- Prep the zucchini: Wash under cold water and pat dry. Trim off both ends and slice into rounds or sticks, around ½ inch thick.
- Mix the coating: Whisk together olive oil, Italian seasoning, salt, and pepper in a mixing bowl.
- Coat the zucchini: Toss zucchini slices in the bowl, ensuring each piece is well-coated.
- Add the Parmesan: Sprinkle Parmesan on top and toss gently to coat.
- Preheat the air fryer: Set to 400°F (200°C) for about 5 minutes.
- Air fry the zucchini: Place coated zucchini in a single layer in the air fryer basket. Cook for 8-10 minutes, flipping halfway.
- Serve and enjoy: Remove carefully and serve with marinara sauce for dipping.
Notes
Store leftovers in an airtight container in the fridge for up to two days. To revive crispiness, reheat in the air fryer for a few minutes.
Nutrition
- Serving Size: 1 serving
- Calories: 180
- Sugar: 3g
- Sodium: 200mg
- Fat: 10g
- Saturated Fat: 3g
- Unsaturated Fat: 5g
- Trans Fat: 0g
- Carbohydrates: 12g
- Fiber: 3g
- Protein: 5g
- Cholesterol: 10mg
Keywords: zucchini, air fryer, crispy snacks, vegetarian appetizer, healthy eating
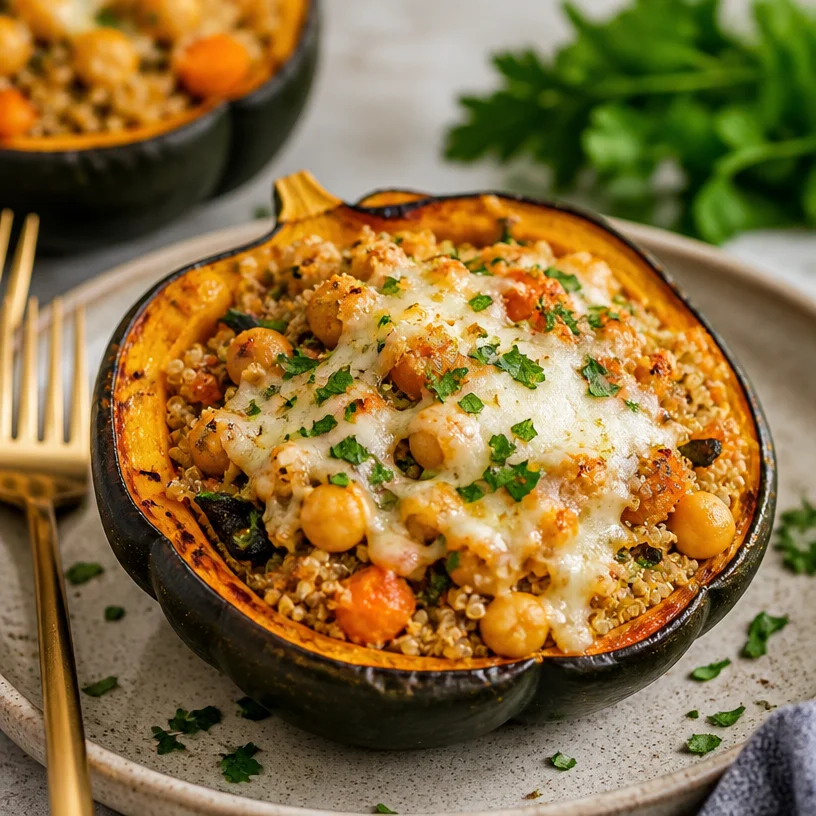
High-Protein Quinoa Stuffed Acorn Squash for Weeknight Meals
Quinoa Stuffed Acorn Squash: A Heartwarming Culinary Journey
Hey there, fellow food lovers! Today, I’m excited to share a dish that’s not just delicious but also packed with wholesome ingredients: Quinoa Stuffed Acorn Squash. If you’ve never tried cooking with acorn squash, let me tell you—this little gem is the perfect canvas for flavors and textures. Imagine tender, sweet squash halves filled to the brim with a savory quinoa mixture that sings with joy in every bite. Sounds amazing, right?
When I first discovered the wonders of acorn squash, it was love at first taste! Growing up, my mom often made roasted vegetables during fall, and while they were always delicious, it was the acorn squash that caught my attention. Its beautiful shape and slightly nutty taste added a delightful touch to our dinner table, sparking my enthusiasm for cooking and experimenting in the kitchen. As the seasons change and the chill in the air grows stronger, there’s something so comforting about a warm, hearty meal that nourishes both body and soul.
This Quinoa Stuffed Acorn Squash is not only a feast for the eyes but also a healthy, filling option that you can easily whip up on a busy weeknight or impress your friends at a dinner party. It combines wholesome ingredients like quinoa, chickpeas, and cheese with the sweet richness of roasted acorn squash. Trust me, your taste buds are in for a treat! So grab your chef’s apron, and let’s dive into this cozy, feel-good recipe.
Personal Story
I remember the first time I made stuffed acorn squash. It was a chilly October evening, and I wanted to create something special for my friends who were visiting for the weekend. We had spent the day at a local pumpkin patch, laughing, picking out pumpkins, and inevitably becoming a little dirty with the autumn joy that surrounded us. As the sun dipped below the horizon, I still had no idea what I was going to cook. After rummaging through my pantry, I spotted those lovely acorn squashes tucked away, and everything clicked!
That night, I took my time, carefully scooping out the squash seeds and imagining the flavorful filling I would create. I made a savory quinoa blend with chickpeas, a hint of spice, and a sprinkle of cheese—a recipe born out of sheer excitement and a dash of creativity. We laughed, shared stories, and enjoyed every juicy bite around the table. The laughter blended with the aroma of roasted squash filled the room, creating a bubbly atmosphere that still makes my heart smile today.
That memory forever tied me to this simple yet extraordinary dish. Now, whenever I make Quinoa Stuffed Acorn Squash, it’s not just a meal. It’s a blend of nostalgia, warmth, and a love for sharing food with the people I care about. I hope you’ll find that same joy when you make this dish!
Ingredients
Here’s what you’ll need to create this delicious Quinoa Stuffed Acorn Squash:
-
2 acorn squashes: These little beauties are sweet, tender, and the perfect vessel for stuffing. Make sure they are fresh and firm—this will guarantee a great texture when cooked.
-
2 tablespoons olive oil: A luscious, healthy fat that adds richness and enhances the flavors. You could swap this with melted coconut oil for a fun twist!
-
1 teaspoon sea salt (divided): Sea salt enhances all the natural flavors in your dish. You can use Himalayan or kosher salt as alternatives, but ensure it’s coarse if possible.
-
1/4 teaspoon freshly ground black pepper: Just a pinch adds a nice contrast to the sweetness of the squash. Feel free to use white pepper for a milder taste.
-
1/2 cup quinoa (uncooked and rinsed): Quinoa is a fantastic source of protein and fiber. Make sure to rinse it well before cooking to remove any bitterness. If you’re gluten-free, quinoa is a perfect grain for you!
-
1 cup water: This is needed to cook the quinoa. You could also use vegetable broth for added flavor.
-
1 15-ounce can chickpeas (rinsed and drained): Chickpeas give a delightful creaminess and texture. You can substitute with black beans or lentils if desired.
-
1 cup shredded mozzarella cheese (plus more for topping): The gooey, melty goodness of mozzarella takes this dish to another level. For a dairy-free option, you can use vegan cheese or leave it out completely.
-
1/2 cup dried apricots (chopped): These add a sweet-tart contrast to the savory filling. If you’re not a fan, dried cranberries or raisins work beautifully too!
-
1/2 red onion (chopped): The aromatic sweetness of onions balances with other ingredients. Use yellow onion or shallots for a milder flavor.
-
1/4 cup fresh parsley (chopped): Bright, fresh parsley not only adds color but rich flavor. Feel free to swap with cilantro if that’s more to your taste.
-
2 tablespoons freshly squeezed lemon juice: A burst of acidity to brighten up everything! Lime juice is a fantastic substitute or for an added zing.
-
1/2 teaspoon dried oregano: A classic herb that complements the flavors beautifully. Italian seasoning can also be a great alternative!
-
1/2 teaspoon smoked paprika: This gives a warm, smoky flavor. If you prefer less spice, sweet paprika works too!
-
2 garlic cloves (minced): Because garlic is life! It adds a cozy warmth and depth of flavor to your filling. You can use garlic powder if you’re in a pinch.
-
1 tablespoon honey: A touch of natural sweetness to balance flavors. Maple syrup or agave nectar can serve as excellent replacements.
-
1/4 cup panko bread crumbs (gluten-free if necessary): This creates a delightful crunch on top. If you’re looking for a gluten-free alternative, crushed cornflakes can work wonders!
Step-by-Step Instructions
Now that you have everything ready, let’s walk through the steps to create your Quinoa Stuffed Acorn Squash!
-
Preheat your oven:
Set your oven to 400°F (200°C). This temperature will perfectly roast your acorn squash, creating a lovely caramelized exterior. -
Prepare the acorn squashes:
Cut the acorn squash in half lengthwise. If you’re having a tough time cutting through the tough skin, carefully microwave the squash for about 2-3 minutes to soften it slightly. Use a spoon to scoop out the seeds, saving them for roasting if you like crunchy snacks! -
Season the squashes:
Brush the insides of the squash halves with olive oil, sprinkle with 1/2 teaspoon of sea salt and black pepper. This step helps to infuse flavor while roasting and ensures a delightful, slightly crispy texture. -
Roast the squashes:
Place your acorn squash halves cut side down on a baking sheet lined with parchment paper. Roast in the preheated oven for 25-30 minutes or until they are fork-tender (the flesh should easily break apart). Check them halfway through—no one likes a soggy squash! -
Cook the quinoa:
While your squash is roasting, rinse quinoa under cold water until the water runs clear. In a small saucepan, combine rinsed quinoa and 1 cup of water. Bring it to a gentle boil. Once boiling, reduce to a simmer, cover, and let it cook for about 15 minutes or until all the water has absorbed. Once finished, fluff with a fork for that perfect grainy texture. -
Prepare the filling:
In a large mixing bowl, combine cooked quinoa, chickpeas, shredded mozzarella cheese, chopped dried apricots, chopped red onion, parsley, lemon juice, oregano, smoked paprika, minced garlic, honey, and the remaining sea salt. Mix until all the ingredients are evenly combined. The aroma will leave you drooling! -
Stuff the squash:
Carefully flip the roasted squash halves over (watch out—they’ll be hot!) and generously fill each half with the quinoa mixture. Press down gently to pack it in. -
Top with breadcrumbs:
Sprinkle panko bread crumbs and a little extra mozzarella cheese on top of your stuffed squashes. This will create a beautifully golden crust when baked! -
Final bake:
Return the stuffed squashes to the oven and bake for an additional 10-15 minutes, or until the tops are golden brown and crispy. Allow them to cool for a few minutes after baking—you’ll be tempted, but patience is key here! -
Serve and enjoy:
Plate those gorgeous filled acorn squashes, and prepare for compliments! A drizzle of extra lemon juice on top can add a zesty finish.
Serving Suggestions
When plating your Quinoa Stuffed Acorn Squash, feel free to get creative! Serve these beauties on a colorful platter, adding fresh herbs for a pop of color. You can also accompany the squash with a light salad or side of roasted vegetables for a balanced meal. Pair it with a crisp glass of white wine or herbal iced tea for a delightful culinary experience!
Recipe Variations
- Mediterranean Twist: Substitute dried apricots with sun-dried tomatoes and add feta cheese for a tangy flavor.
- Spicy Kick: Introduce chopped jalapeños to your quinoa mixture for some heat and flavor.
- Vegan Delight: Omit cheese and add more chickpeas or nuts like walnuts or almonds for protein.
- Hearty Add-ins: Toss in chopped spinach or kale in your filling for extra greens.
- Fall Favorite: Mix in roasted pumpkin or sweet potato pieces to bring even more seasonal flavors.
Chef’s Notes
One of the best parts about cooking is the ability to adapt and change recipes based on what you have in your kitchen or what flavors you crave. This Quinoa Stuffed Acorn Squash has evolved over time as I’ve played with different flavors and ingredients. I started using feta cheese once I fell in love with Mediterranean flavors, and even added cranberries for a festive touch during the holidays!
And let me be honest—sometimes, I’m just tempted to snag a spoon and dig right into the filling before it even makes it to the squash! So keep an eye on your filling as you assemble—trust me, you don’t want to be caught with an empty bowl!
FAQs and Troubleshooting
1. Can I make the filling in advance?
Absolutely! You can prepare the quinoa filling the day before and store it in the fridge. Just assemble and bake when you’re ready to enjoy!
2. How do I know when the acorn squash is done roasting?
The squash is ready when it’s tender and can be easily pierced with a fork. If you prefer a caramelized flavor, you can roast it a bit longer.
3. What if my filling is too dry?
If your filling feels dry, try adding a splash of vegetable broth or a bit more lemon juice to moisten it.
4. Can I use a different type of squash?
Of course! Butternut or pumpkin can also work; just adjust the cooking time since different squashes cook at different rates.
Nutritional Info
(For those counting macros, here’s a rough estimate per serving based on 4 servings):
- Calories: 300
- Protein: 12g
- Carbohydrates: 40g
- Fat: 10g
- Fiber: 8g
Enjoy your cooking journey with this incredible Quinoa Stuffed Acorn Squash and feel the love in each bite! Whether you’re making it for a cozy dinner, a gathering with friends, or just for yourself, remember—good food is all about sharing and connecting. I can’t wait to hear how yours turns out! Happy cooking!
PrintQuinoa Stuffed Acorn Squash

A heartwarming dish featuring tender, sweet acorn squash filled with a savory quinoa mixture, perfect for cozy dinners or impressing guests.
- Prep Time: 30 minutes
- Cook Time: 45 minutes
- Total Time: 75 minutes
- Yield: 4 servings 1x
- Category: Main Course
- Method: Baking
- Cuisine: American
- Diet: Vegetarian
Ingredients
- 2 acorn squashes
- 2 tablespoons olive oil
- 1 teaspoon sea salt (divided)
- 1/4 teaspoon freshly ground black pepper
- 1/2 cup quinoa (uncooked and rinsed)
- 1 cup water
- 1 15-ounce can chickpeas (rinsed and drained)
- 1 cup shredded mozzarella cheese (plus more for topping)
- 1/2 cup dried apricots (chopped)
- 1/2 red onion (chopped)
- 1/4 cup fresh parsley (chopped)
- 2 tablespoons freshly squeezed lemon juice
- 1/2 teaspoon dried oregano
- 1/2 teaspoon smoked paprika
- 2 garlic cloves (minced)
- 1 tablespoon honey
- 1/4 cup panko bread crumbs (gluten-free if necessary)
Instructions
- Preheat your oven: Set your oven to 400°F (200°C).
- Prepare the acorn squashes: Cut the acorn squash in half lengthwise and scoop out the seeds.
- Season the squashes: Brush the insides with olive oil, sprinkle with 1/2 teaspoon of sea salt and black pepper.
- Roast the squashes: Place cut side down on a baking sheet and roast for 25-30 minutes.
- Cook the quinoa: Rinse quinoa, combine with water, bring to a gentle boil, then cover and simmer for about 15 minutes.
- Prepare the filling: In a large mixing bowl, combine cooked quinoa, chickpeas, mozzarella, dried apricots, red onion, parsley, lemon juice, oregano, smoked paprika, garlic, honey, and remaining salt.
- Stuff the squash: Flip the roasted squash halves and fill them with the quinoa mixture.
- Top with breadcrumbs: Sprinkle panko and extra mozzarella on top.
- Final bake: Return stuffed squashes to the oven and bake for an additional 10-15 minutes.
- Serve and enjoy: Plate and optionally drizzle with extra lemon juice.
Notes
You can prepare the filling in advance and store it in the fridge. Adjust cooking times for different types of squash.
Nutrition
- Serving Size: 1 serving
- Calories: 300
- Sugar: 10g
- Sodium: 400mg
- Fat: 10g
- Saturated Fat: 3g
- Unsaturated Fat: 5g
- Trans Fat: 0g
- Carbohydrates: 40g
- Fiber: 8g
- Protein: 12g
- Cholesterol: 20mg
Keywords: quinoa, stuffed squash, vegetarian, healthy meal, pumpkin spice