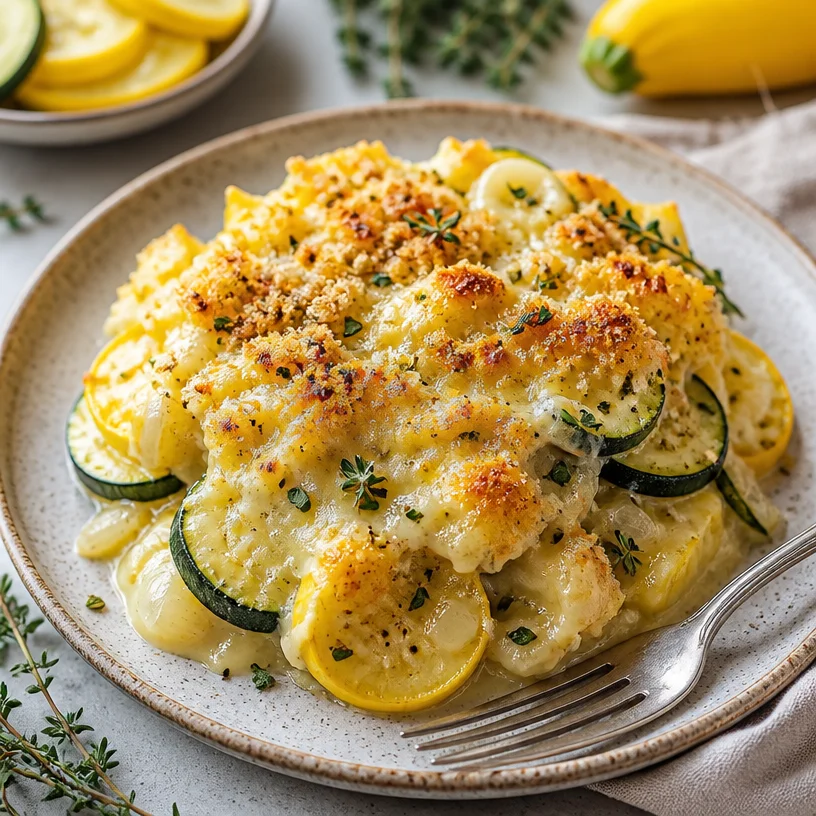
Weeknight Creamy One-Pan Summer Squash & Zucchini Casserole
Satisfy Your Cravings with Yellow Squash and Zucchini Casserole!
Hello, food lovers! Today, I’m excited to bring you a dish that is as comforting as it is delicious: Yellow Squash and Zucchini Casserole! This vibrant casserole is not only a fantastic way to celebrate summer’s bounty but also an excellent option for anyone looking to add some light yet satisfying flavors to their dinner table. With a delightful combination of fresh vegetables and gooey cheese, it’s a dish that will have everyone coming back for seconds!
Personal Story: A Flavorful Family Tradition
Growing up, summer evenings were filled with the enticing aroma of my mom’s cooking wafting through our home. One dish that always took center stage during the sunnier months was her yellow squash and zucchini casserole. I fondly remember watching her skillfully slice the vegetables while we chatted about our day. I loved how she made cooking feel like a form of art, transforming simple ingredients into something extraordinary.
After dinner, we’d often gather on the porch, savoring each bite while listening to the sounds of chirping crickets under a starlit sky. It was more than just a meal; it was about family, connection, and appreciating the simple things in life. Fast forward to today, and I find immense joy in recreating that same casserole for my friends and family, continuing the tradition while adding my own twists and flavors. So, let’s jump into this nostalgic recipe that we can all cherish!
Ingredients
Here’s what you’ll need for this mouthwatering Yellow Squash and Zucchini Casserole:
-
2 cups yellow squash, sliced: This summer squash provides a slight sweetness and a lovely texture. If you can’t find it, you can substitute with extra zucchini or even pattypan squash!
-
2 cups zucchini, sliced: Zucchini brings a subtle flavor and pairs perfectly with yellow squash. If zucchini’s not your jam, feel free to use eggplant or even bell peppers!
-
1 cup onion, chopped: Onion adds a savory depth to the dish. For a milder flavor, you can swap it out for shallots or green onions.
-
2 cups shredded cheese (e.g., cheddar or mozzarella): Cheese is the magical glue that holds this casserole together. Cheddar adds sharpness, while mozzarella gives creaminess. Experiment with pepper jack for a kick or a combo of your favorites!
-
1 cup bread crumbs: Breadcrumbs create a delightful crunch on top. You can use panko for extra crispiness or try crushed crackers for a unique twist.
-
1/2 cup milk: Milk adds moisture to the casserole. If you’re looking for a dairy-free option, almond milk or oat milk works well!
-
2 eggs: Eggs act as a binder, keeping everything together. For a vegan alternative, try flax eggs or a commercial egg replacer.
-
Salt and pepper to taste: These essentials elevate the flavors, so don’t skip them! Feel free to throw in your favorite spices or herbs to customize the taste.
-
Olive oil or butter for greasing: Choose whatever you love! Coconut oil or avocado oil is also a fabulous option.
Step-by-Step Instructions
Now, let’s dive into the heart of the matter—preparing this delicious casserole!
-
Preheat your oven to 350°F (175°C). This is the perfect time to get things warming up and ready for some cheesy goodness.
-
Prepare the veggies. Grab your cutting board and slice those yellow squash and zucchini into about 1/4-inch rounds. Feel free to make them a bit thicker if you prefer a heartier bite!
-
Chop the onion. Dice that onion into small pieces. If you’re sensitive to onion, positioning yourself in front of a fan can help keep the tears away.
-
Sauté the onion, if you wish! Heat a drizzle of olive oil in a skillet over medium heat. Add the chopped onion and sauté until it’s translucent and fragrant, about 5 minutes. This step is optional but adds a wonderful flavor base to the casserole.
-
Combine the veggies in a bowl. In a large mixing bowl, combine the sliced squash, zucchini, and sautéed onion (if you decided to go that route). Season them generously with salt and pepper—a pinch of this and a dash of that to your taste!
-
Mix the cheesy goodness. In a separate large bowl, whisk together the eggs and milk until fully combined. Slowly add the shredded cheese (reserve some for topping!) into the egg mixture, mixing it well. This cheesy bath brings everything together.
-
Add the breadcrumbs. Stir in the bread crumbs into the cheese mixture until evenly distributed. You can get creative here by adding herbs or spices to the breadcrumbs if desired.
-
Combine it all. Pour the cheese mixture into the bowl of veggies. Gently fold everything together until the squash and zucchini are well coated.
-
Grease the baking dish. Grab a 9×13 inch baking dish and grease it generously with olive oil or butter. This will prevent any sticking and help create a beautiful crust.
-
Transfer the mixture into the baking dish. Spread it evenly in the dish. You can also top it off with the reserved cheese for extra melty goodness.
-
Bake! Pop that casserole in the oven and bake for 30-35 minutes, or until the top is golden brown and the cheese is bubbly. You’ll know it’s ready when your kitchen smells like a cheesy heaven!
-
Cool and serve. Once it’s done baking, let it cool for a few minutes before serving. This gives it time to set a bit, making it easier to slice.
Serving Suggestions
When it comes to serving this Yellow Squash and Zucchini Casserole, the possibilities are endless! I love to serve it hot, right out of the oven, alongside a fresh green salad drizzled with a light vinaigrette. You can also pair it with grilled chicken or fish for a protein boost. This dish also makes a fabulous side for family gatherings or potlucks—just imagine presenting this colorful casserole alongside crispy roasted potatoes or a platter of seasonal veggies.
Recipe Variations
-
Herb-Infused: Add fresh or dried herbs such as thyme, oregano, or basil to the veggie mixture for an herbal twist.
-
Protein-Packed: Mix in some cooked ground turkey, chicken, or even black beans for added protein.
-
Spicy Kick: Add some diced jalapeños or crushed red pepper flakes for those who like a bit of heat!
-
Cheesy Overload: Try using a combination of your favorite cheeses, such as feta, mozzarella, and cheddar for a flavor explosion.
-
Gluten-Free Option: Substitute regular breadcrumbs with gluten-free bread crumbs or use crushed nuts for a grain-free alternative.
Chef’s Notes
As I’ve made this yellow squash and zucchini casserole over the years, I’ve learned that it’s one of those versatile dishes that can adapt to whatever you have on hand. It’s like a blank canvas for your creativity in the kitchen! I once experimented by tossing in some leftover roasted red peppers and wow—the dish took on a whole new dimension!
One of my funniest kitchen stories involving this casserole happened when I had friends over for dinner. I had forgotten to buy cheese, so I made a quick run to the store. While racing back home, I realized I had the wrong address in my mind and ended up on the other side of town. Let’s just say we all had a hearty laugh about it, but it was definitely worth it when everyone finally got their servings of cheesy goodness!
FAQs and Troubleshooting
-
Why is my casserole watery?
If your casserole turns out watery, it may be due to overcooked squash releasing too much moisture. You can remedy this by patting the sliced veggies dry before mixing them in. Also, make sure to not skip the baking time! -
Can I make this in advance?
Absolutely! You can prepare the casserole up to a day in advance and keep it in the fridge until you’re ready to bake. Just make sure to cover it well to avoid drying out. -
Can I freeze leftovers?
Yes! This casserole freezes quite well. Just ensure it’s cooled to room temperature before storing it in an airtight container. When ready to enjoy again, thaw in the fridge overnight and reheat in the oven. -
What if I don’t have breadcrumbs?
No worries! Use crushed crackers, oats, or even pulverized nuts for that crunchy topping.
Nutritional Info
Though I focus on clean eating with nourishing ingredients, it’s always good to be aware of nutritional values. A serving of this Yellow Squash and Zucchini Casserole includes a healthy portion of your daily veggies, protein from the cheese and eggs, and plenty of flavor without sacrificing your taste buds!
So there you have it—a scrumptious Yellow Squash and Zucchini Casserole that’s sure to become a staple in your kitchen! Whether you’re making it for a cozy family dinner or a festive gathering, everyone will appreciate this delightful dish. Let’s keep it fresh, simple, and seriously delicious! Happy cooking!
PrintYellow Squash and Zucchini Casserole

A comforting and delicious casserole featuring yellow squash and zucchini, perfect for summer.
- Prep Time: 15 minutes
- Cook Time: 35 minutes
- Total Time: 50 minutes
- Yield: 4 servings 1x
- Category: Main Course
- Method: Baking
- Cuisine: American
- Diet: Vegetarian
Ingredients
- 2 cups yellow squash, sliced
- 2 cups zucchini, sliced
- 1 cup onion, chopped
- 2 cups shredded cheese (e.g., cheddar or mozzarella)
- 1 cup bread crumbs
- 1/2 cup milk
- 2 eggs
- Salt and pepper to taste
- Olive oil or butter for greasing
Instructions
- Preheat your oven to 350°F (175°C).
- Prepare the veggies by slicing yellow squash and zucchini into about 1/4-inch rounds.
- Chop the onion into small pieces.
- Sauté the onion in a skillet with olive oil over medium heat until translucent, about 5 minutes (optional).
- Combine the sliced squash, zucchini, and sautéed onion in a large mixing bowl, seasoning with salt and pepper.
- Mix the eggs and milk in a separate bowl and then stir in the shredded cheese.
- Add the bread crumbs to the cheese mixture and stir until combined.
- Combine the cheese mixture with the vegetables until coated.
- Grease a 9×13 inch baking dish with olive oil or butter.
- Transfer the mixture into the baking dish, spreading it evenly and topping with reserved cheese.
- Bake for 30-35 minutes until golden brown and bubbly.
- Cool for a few minutes before serving.
Notes
Serve hot alongside a fresh salad or as a side for protein dishes. Can be made in advance and frozen.
Nutrition
- Serving Size: 1 serving
- Calories: 350
- Sugar: 5g
- Sodium: 400mg
- Fat: 12g
- Saturated Fat: 4g
- Unsaturated Fat: 6g
- Trans Fat: 0g
- Carbohydrates: 45g
- Fiber: 3g
- Protein: 15g
- Cholesterol: 30mg
Keywords: casserole, summer dish, vegetarian recipe, yellow squash, zucchini, comfort food
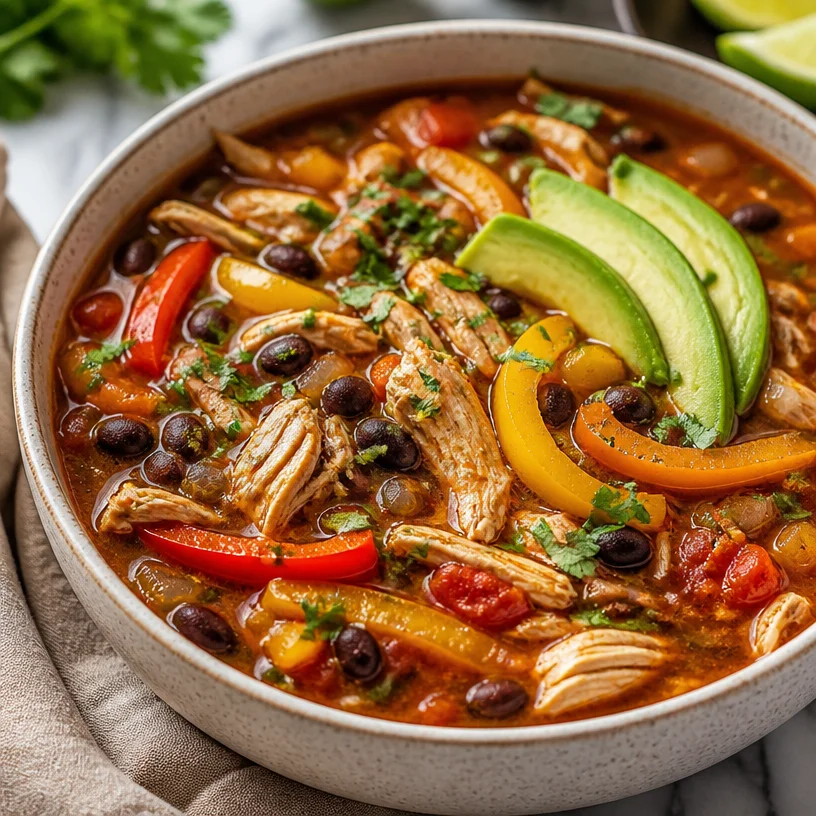
Weeknight One-Pan Chicken Fajita Soup in 30 Minutes
Chicken Fajita Soup: A Flavorful Bowl of Comfort
Welcome to the cozy corner of Clean Plate Cravings! Today, we’re diving into a recipe that will warm both your heart and your tummy—Chicken Fajita Soup! Think of this dish as a big hug in a bowl. It’s packed with vibrant flavors, colorful veggies, and a warm spice blend that will make your taste buds dance. Whether you’re enjoying a laid-back lunch at home, feeding the family, or hosting a casual gathering with friends, this soup is sure to impress.
If you’ve ever bitten into a sizzling chicken fajita, you know that magical combination of smokiness and spice. Now imagine that deliciousness in a soup! This dish brings all those fantastic fajita flavors together in a warming broth that’s easy to prepare and, most importantly, totally comforting. Plus, it’s a great way to sneak in some extra veggies without anyone noticing.
So grab your apron, put on your favorite playlist, and let’s get cooking!
Personal Story
Growing up, my family had this tradition of "Fajita Friday." I remember the smells wafting through the house as my mom marinated chicken in a savory medley of spices. As the grill sizzled and the peppers charred, we all gathered around the kitchen island, filling soft tortillas with beautifully seasoned chicken, onions, and peppers. We’d laugh, share stories about our week, and savor each bite.
One rainy day, however, we found ourselves craving those beloved fajitas—but who wants to grill under an umbrella? So, we decided to get creative and turned our favorite flavors into a soup. The result was a deliciously smoky broth filled with tender chicken and colorful veggies. It was love at first spoonful! Since then, this Chicken Fajita Soup has remained a staple, making it a warm reminder of those family nights filled with love, laughter, and flavorful food.
Ingredients
Here’s what you’ll need to create this mouthwatering Chicken Fajita Soup:
-
Chicken (breast or thighs): Use boneless skinless chicken breasts or thighs, depending on your preference. If you’re in a rush, rotisserie chicken can be a great shortcut.
-
Bell Peppers: A mix of red, yellow, and green bell peppers adds an explosion of color. Feeling adventurous? Any bell pepper will do, or toss in some poblano or jalapeño for extra spice!
-
Fajita Seasoning: You can use store-bought fajita seasoning or whip up your own with chili powder, cumin, garlic powder, and paprika. This is the magic that brings those Tex-Mex vibes to the soup!
-
Beans: Black beans or pinto beans work beautifully in this recipe. They add protein and creaminess. Canned beans are super convenient, but if you prefer dry beans, don’t forget to soak and cook them first!
-
Chicken Broth: This will be your flavorful base. Homemade is always preferred, but store-bought is perfectly fine. Swapping for vegetable broth can easily make this soup vegetarian.
-
Onion: Sweet onions, like Vidalia or yellow onions, lend a lovely sweetness to the dish. White onions are a good alternative if you want a sharper flavor.
-
Garlic: Fresh minced garlic will add a fragrant punch. If you’re short on time, garlic powder works in a pinch—just cut down the amount to about half a teaspoon.
-
Olive Oil: For sautéing, use high-quality extra virgin olive oil to elevate the dish’s flavor. Alternatively, avocado oil or any neutral oil will work.
-
Lime Juice: A splash of fresh lime juice at the end brightens everything up! This is non-negotiable, so make sure to have it!
-
Cilantro (optional): Fresh cilantro adds a refreshing finish. If you’re one of those who find cilantro soapy, leave it out! A sprinkle of green onion will work too!
Step-by-Step Instructions
Now, let’s get down to the cooking! Follow these steps, and you’ll have a steaming bowl of Chicken Fajita Soup ready to satisfy your cravings.
-
Prep Your Ingredients: Before you start cooking, it’s key to chop your onions, bell peppers, and garlic. Having everything ready to go makes the process so much smoother. This is called mise en place, and it’s a chef’s best friend!
-
Sauté the Aromatics: In a large pot, heat 2 tablespoons of olive oil over medium heat. Toss in the chopped onion and sauté for about 3-4 minutes until softened. Then, add the minced garlic and sauté for an additional minute, just until fragrant. If the garlic burns, it can taste bitter, so keep an eye on it!
-
Add the Peppers: Now, it’s time to introduce the beautiful bell peppers into the mix! Cook them for about 5-7 minutes until they soften up and start to play with the heat. They’ll be a lovely rainbow in your pot!
-
Season the Chicken: Cut your chicken into bite-sized pieces and sprinkle a generous amount of fajita seasoning over it. I recommend using about 2 tablespoons, but feel free to adjust based on how spicy you want the soup! If you’re using rotisserie chicken, skip this step and move on to the next one!
-
Brown the Chicken: Add the seasoned chicken pieces to the pot and cook for about 5 minutes until they get a nice golden brown on the edges. This step enhances flavor, so don’t skip it! If you’re using pre-cooked chicken, just stir it in with the broth and beans later.
-
Pour in Chicken Broth: Once the chicken is browned, pour in 4 cups of chicken broth. Bring the mixture to a gentle boil, stirring occasionally. The broth is where all the magic happens, so make sure it bubbles away happily!
-
Add the Beans: Rinse and drain your black beans, then toss them into the pot. They’ll contribute creaminess and heartiness to the soup. If you fancy a bit of kick, this is the moment to add a chopped jalapeño!
-
Simmer Away: Let the soup simmer for 20-25 minutes on low heat. This is a great time to kick back, relax, and let those flavors meld together beautifully. If you’re feeling fancy, you can also add a bay leaf for an extra depth of flavor.
-
Finish with Lime Juice: Before serving, squeeze in the juice of one lime to give it that fresh, zesty uplift—trust me, it’s a game changer!
-
Taste and Adjust: Give the soup a taste and see if it needs any salt or extra spices. Every palate is different, so adjust the seasonings until it’s perfect for you!
Serving Suggestions
This Chicken Fajita Soup is best served hot and fresh! Ladle it into bowls, and if you’re feeling indulgent, top each serving with a dollop of sour cream or Greek yogurt, a sprinkle of shredded cheese, and fresh cilantro. You can also serve it with crispy tortilla chips for added crunch or alongside some warm, crusty bread for soaking up every last drop.
Recipe Variations
Looking to switch things up? Here are a few fun variations to try:
-
Spicy Chicken Fajita Soup: Add chopped jalapeños during the sauté process or toss in a pinch of cayenne pepper to heat things up!
-
Vegetarian Option: Swap chicken for hearty vegetables like zucchini or mushrooms and use vegetable broth. You could also add tofu for extra protein!
-
Creamier Soup: Stir in 1 cup of coconut milk or heavy cream towards the end of cooking for a luxuriously creamy texture.
-
Fajita Tortilla Soup: Serve the soup over crispy tortilla strips and top with avocado slices for a delicious twist on traditional tortilla soup.
-
Southwest Fajita Soup: Toss in corn and diced tomatoes for a sweeter flavor and added texture.
Chef’s Notes
This Chicken Fajita Soup is a bit of a crowd-pleaser in my home! It’s easy to customize, and honestly, it never comes out exactly the same way twice—each batch is a new flavor adventure. I remember one time when I figured I could use up leftover steak instead of chicken. The result was fantastic! I love that this recipe evolves with the seasons and what’s in my pantry. Whether I’m using fresh produce from the farmer’s market or just the last bits of veggies hiding in my fridge, it always transforms into something delicious.
FAQs and Troubleshooting
Q: Can I make this soup ahead of time?
A: Absolutely! This soup stores great in the fridge for up to 3 days. Just reheat it before serving! The flavors actually get better as they sit.
Q: What if I don’t have fajita seasoning?
A: No problem! You can make your own by mixing together chili powder, cumin, garlic powder, paprika, and a pinch of salt.
Q: My soup is too salty! What can I do?
A: Try adding a few slices of potato to the pot and simmer for 10 minutes; the potato will absorb some salt. Just remember to remove them before serving!
Q: How can I thicken my soup?
A: If you want a thicker texture, you can blend a cup of the soup in a blender and return it to the pot. Alternatively, you can mix a tablespoon of cornstarch with cold water to create a slurry and stir it into the soup to thicken!
Nutritional Info
(Approximate per serving)
- Calories: 320
- Protein: 30g
- Carbohydrates: 30g
- Fat: 10g
- Fiber: 7g
So there you have it, my friends—your ultimate guide to Chicken Fajita Soup! I hope you enjoy making and savoring this delightful dish as much as I do. Remember, cooking is all about having fun and experimenting. Let your taste buds lead the way, and don’t hesitate to make this recipe your own. Happy cooking!
PrintChicken Fajita Soup

A flavorful and comforting Chicken Fajita Soup packed with vibrant flavors and colorful veggies.
- Prep Time: 15 minutes
- Cook Time: 30 minutes
- Total Time: 45 minutes
- Yield: 4 servings 1x
- Category: Soup
- Method: Stovetop
- Cuisine: Mexican
- Diet: Gluten-Free
Ingredients
- 2 boneless skinless chicken breasts or thighs
- 1 red bell pepper
- 1 yellow bell pepper
- 1 green bell pepper
- 2 tablespoons fajita seasoning
- 1 can (15 oz) black beans
- 4 cups chicken broth
- 1 sweet onion
- 2 cloves garlic, minced
- 2 tablespoons olive oil
- Juice of 1 lime
- Cilantro (optional)
Instructions
- Prep your ingredients: Chop onions, bell peppers, and garlic.
- Sauté the aromatics: Heat olive oil, add onion, and sauté for 3-4 minutes. Then add garlic and sauté for 1 more minute.
- Add the peppers and cook for 5-7 minutes until softened.
- Season the chicken with fajita seasoning.
- Brown the chicken for about 5 minutes until golden brown.
- Pour in the chicken broth and bring to a gentle boil.
- Add the black beans and optional jalapeños.
- Simmer for 20-25 minutes on low heat.
- Finish with lime juice and adjust seasoning to taste.
Notes
This soup is great served with a dollop of sour cream, shredded cheese, and crispy tortilla chips.
Nutrition
- Serving Size: 1 serving
- Calories: 320
- Sugar: 5g
- Sodium: 800mg
- Fat: 10g
- Saturated Fat: 2g
- Unsaturated Fat: 8g
- Trans Fat: 0g
- Carbohydrates: 30g
- Fiber: 7g
- Protein: 30g
- Cholesterol: 75mg
Keywords: chicken, fajita, soup, comfort food, Mexican
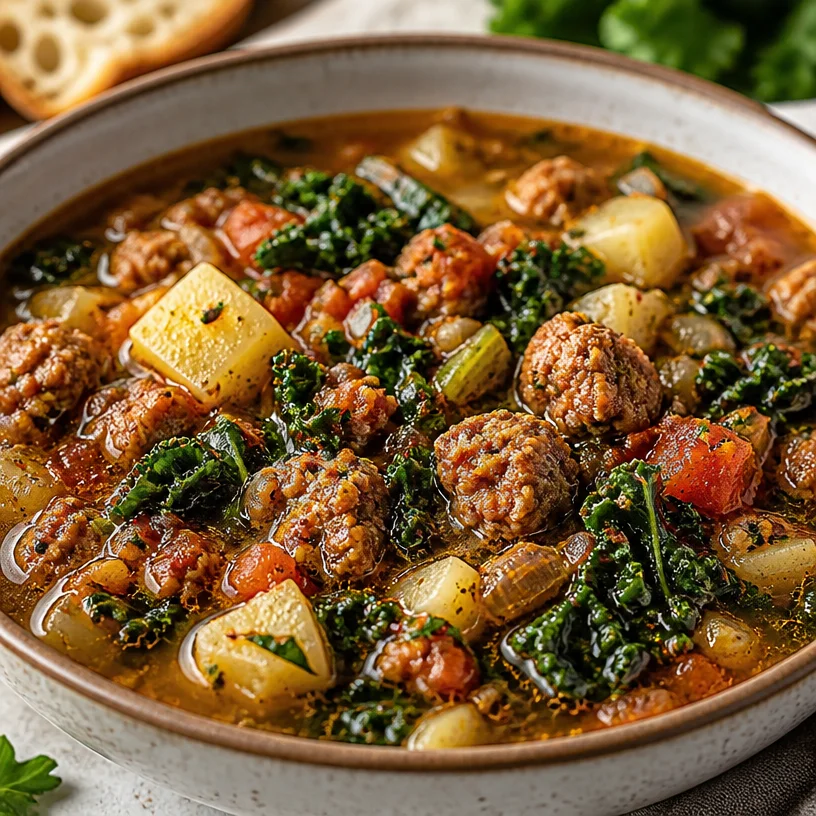
Budget-Friendly 30-Minute One-Pan Sausage Kale Soup
Warm Up with Hearty Sausage Kale Soup: A Cozy Delight
Hey there, fellow food lovers! If you’re looking for a warm hug in a bowl, you’ve landed in the right place. Today, we’re making a deliciously satisfying Sausage Kale Soup that is brimming with flavor and nutrition. With cozy days ahead, there’s nothing quite like a homemade soup to make you feel both nourished and happy.
Imagine a chilly evening where your home has an enticing aroma wafting from the kitchen. You scoop out your first bowl of this vibrant soup, topped with fresh herbs and crusty bread. Your taste buds revel in the savory blend of Italian sausage, tender kale, and hearty potatoes. Sounds delightful, right? Spoiler alert: It is, and I can’t wait to share this dish that has become a staple in my home, especially when the temperatures drop.
Cooking this Sausage Kale Soup is straightforward and fun—so let’s roll up our sleeves and dive into this culinary adventure together. Not only is it an absolute treat, but it’s also packed with nutrients that will keep you feeling great. I promise, you’ll want to make this one again and again!
A Taste of Nostalgia
Ah, soup! There’s something profoundly comforting about a bowl of homemade goodness simmering on the stove. I have fond memories of making soup with my grandma on cold winter days. She’d pull out her old, cherished pot, chop up fresh vegetables, and let me help mix everything together. Her secret ingredient was always a pinch of love, and a touch of humor—it made every bowl taste extra special.
One particular evening, as snow fell outside, we made a simple sausage soup together. I was probably around eight years old, and as much as I loved getting my hands dirty in the kitchen, I mostly loved the stories she told while we cooked. They were tales of her youth, her family’s traditions, and the places where food brought people together. I remember her laughter bouncing off the kitchen walls as she recounted the time my father tried to ‘help’ and accidentally added way too much salt!
That soup became part of my childhood, shaping my relationship with food. Inspired by those memories, I’ve created my own version of that comforting dish that’s filled with vibrant flavors and nourishing ingredients. So, grab a spoon—let’s make this together!
Ingredients
Here’s what you’ll need to gather for our Sausage Kale Soup:
-
Italian Sausage: This is the backbone of our soup, adding rich flavors and spices. You can choose between sweet or spicy varieties based on your preference. For a lighter option, turkey sausage is a fantastic substitute!
-
Kale: This nutrient-dense green is packed with vitamins and adds a lovely texture. If you don’t have kale on hand, Swiss chard or spinach works well, too!
-
Potatoes: Use any variety you have—Russett, Yukon Gold, or even sweet potatoes! They give the soup a hearty base and wonderful creaminess. Just peel and chop them into even pieces for even cooking.
-
Broth: A good-quality chicken or vegetable broth brings everything together. Make it homemade if you can, but store-bought is perfectly acceptable! For a twist, try using bone broth for extra nutrients.
-
Olive Oil: Used to sauté the sausage and vegetables. You can swap in coconut oil or ghee for different flavor profiles.
-
Onion: Adds sweetness and depth; yellow onions are the go-to choice, but red or shallots can offer a nice change, too!
-
Garlic: A must for flavor! Fresh minced garlic is always best, but garlic powder can work in a pinch.
-
Seasonings: Salt, pepper, and red pepper flakes enhance the flavors, but feel free to add in dried herbs like thyme or oregano for a more aromatic experience.
Step-by-Step Instructions
Alright, friends! Let’s dive into the process of making this scrumptious soup. Follow along with these easy-to-follow steps!
Step 1: Sauté the Sausage
In a large pot, heat a drizzle of olive oil over medium heat. Once the oil shimmers, add in your Italian sausage. Use a spatula to break it apart as it cooks—this should take about 5-7 minutes until it’s browned and cooked through. This is where the magic begins, as your kitchen fills with savory aromas. If you’re using a lower-fat sausage, watch it closely to avoid dryness!
Step 2: Add the Aromatics
With the sausage cooked, toss in your diced onion and minced garlic. Sauté for about 2-3 minutes until the onion becomes translucent. This step is crucial as the onions absorb the sausage flavors and become sweet. Just a tip: keep the heat moderate to prevent garlic from burning—it can turn bitter!
Step 3: Toss in the Veggies
Now, add the chopped potatoes and pour in your broth. Stir everything together, ensuring the potatoes are well-coated. This is where the broth magic happens! Feel free to pour in 4 cups of broth for a heartier soup or add more for a lighter version. Let it simmer for about 10-15 minutes or until the potatoes are fork-tender.
Step 4: Mix in the Kale
Once the potatoes are soft, it’s time to add the kale. Stir in a few big handfuls and cook for another 5-7 minutes until the kale is tender and vibrant. If you’re using thicker stems, give them a little extra time in the pot to soften up.
Step 5: Season and Serve
That’s it! Now, taste your soup and adjust seasonings with salt, pepper, and red pepper flakes. Once it’s seasoned to your liking, it’s ready to serve! I like to let it cool for a minute before ladling it into bowls.
Serving Suggestions
To serve your Sausage Kale Soup, ladle it into warm bowls and garnish with freshly chopped parsley or grated Parmesan cheese. A side of crusty whole-grain bread or a simple garden salad pairs perfectly alongside. You can also drizzle a little olive oil or squeeze of lemon on top for a touch of brightness—trust me, it takes the flavors up a notch!
Recipe Variations
Feeling adventurous? Here are a few creative twists you can try:
-
Add Beans: Stir in a can of white beans for added protein and creaminess.
-
Spicy Option: Kick up the heat by adding diced jalapeños or using spicy Italian sausage.
-
Vegan Version: Substitute sausage with plant-based sausage or skip it altogether. Enhance the broth with additional spices for a flavor boost.
-
Add Grains: Quinoa, farro, or barley can be great additions for a heartier soup! Just cook the grains separately and toss them in before serving.
-
Herbs & Spices: Experiment with fresh herbs like dill or thyme for a fresh herbal note.
Chef’s Notes
Every recipe I create is a little snapshot of my culinary journey. This Sausage Kale Soup has evolved over the years, and it continues to be a family favorite. It’s one of those dishes where the leftovers are even better the next day—every bite just gets more flavorful as it sits.
And believe me, I’ve had my fair share of soup mishaps. There was this one time when I mistook cayenne for paprika, and instead of a cozy bowl, my family got a spice bomb in a pot! But that’s the fun of cooking, right? Learning and laughter are what make the kitchen a joyful place.
FAQs and Troubleshooting
Q: Can I freeze this soup?
Absolutely! This soup freezes incredibly well. Just let it cool completely, then transfer to airtight containers or freezer bags—make sure to leave space for expansion. It can last up to 3 months in the freezer.
Q: It tastes bland! What do I do?
A common issue! Try adding a splash of vinegar or a squeeze of lemon juice for acidity, which can brighten flavors. A touch more salt or some fresh herbs can also do wonders!
Q: Can I use different greens?
Yes! While kale is a star player here, feel free to swap in collard greens, mustard greens, or even spinach. Just keep in mind that cooking times might vary based on the greens’ sturdiness.
Q: How do I make this soup creamy?
For a creamier texture, blend a cup or two of the soup in a blender and return it to the pot. You could also stir in a splash of heavy cream or coconut milk just before serving for an extra luxurious feel.
Nutritional Info
While I don’t usually include nutritional specifics, I can tell you that this Sausage Kale Soup is filled with healthy fats, protein, and plenty of vitamins from the kale and potatoes—making it a balanced meal that feels indulgent without the guilt!
I hope you enjoy this Sausage Kale Soup as much as I do and that it brings as much warmth and joy to your table as it has to mine. Remember, cooking is all about having fun and experimenting. So gather your ingredients, invite some friends over, and let’s create delicious memories together. Happy cooking!
PrintHearty Sausage Kale Soup

A warm and nourishing Sausage Kale Soup packed with flavor and nutrients, perfect for cozy days.
- Prep Time: 15 minutes
- Cook Time: 30 minutes
- Total Time: 45 minutes
- Yield: 4 servings 1x
- Category: Soup
- Method: Stovetop
- Cuisine: Italian
- Diet: Gluten-Free
Ingredients
- 1 lb Italian Sausage
- 4 cups Kale, chopped
- 2 cups Potatoes, diced
- 4 cups Chicken or Vegetable Broth
- 2 tbsp Olive Oil
- 1 Onion, diced
- 3 cloves Garlic, minced
- Salt, to taste
- Pepper, to taste
- Red Pepper Flakes, to taste
Instructions
- Sauté the sausage in olive oil over medium heat until browned, about 5-7 minutes.
- Add the onion and garlic, cooking for 2-3 minutes until translucent.
- Toss in the potatoes and pour in the broth. Let it simmer for 10-15 minutes.
- Mix in the kale and cook for another 5-7 minutes until tender.
- Season to taste and serve hot.
Notes
Garnish with fresh herbs or Parmesan cheese, and serve with crusty bread.
Nutrition
- Serving Size: 1 serving
- Calories: 450
- Sugar: 3g
- Sodium: 800mg
- Fat: 20g
- Saturated Fat: 7g
- Unsaturated Fat: 10g
- Trans Fat: 0g
- Carbohydrates: 40g
- Fiber: 5g
- Protein: 25g
- Cholesterol: 70mg
Keywords: soup, sausage, kale, comfort food, easy recipe
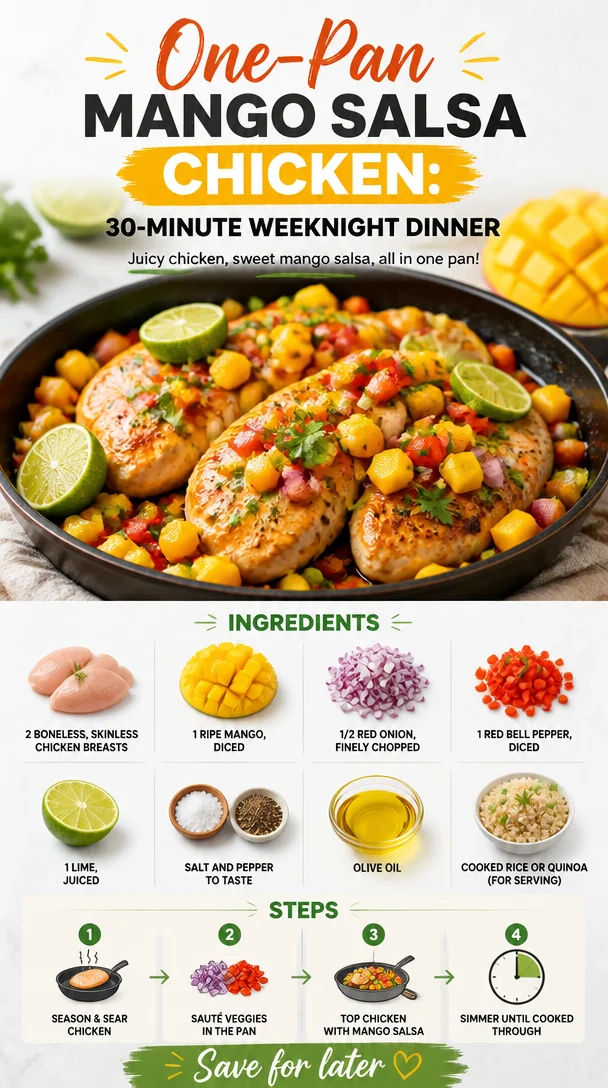
One-Pan Mango Salsa Chicken: 30-Minute Weeknight Dinner
Delightful Chicken with Mango Salsa: A Flavorful and Vibrant Meal
Welcome to Clean Plate Cravings! I’m absolutely thrilled to share a recipe that’s not just a crowd-pleaser but also perfect for those busy weeknights when you want something fresh, wholesome, and utterly delicious. Today, we’ll dive into the colorful world of Chicken with Mango Salsa—a dish that’s as vibrant as summer itself!
Eating well shouldn’t feel like a chore; it should feel exhilarating and nourishing. That’s exactly what this dish embodies. The tender chicken breast pairs beautifully with the juicy, sweet mango salsa that bursts with flavor in every bite. Whether you’re preparing a casual family dinner or impressing friends at a gathering, this recipe meets all of your culinary needs while keeping it light and fun.
Picture this: you’re cooking away in your kitchen, the tantalizing aroma of grilled chicken filling the air. You finish off the dish with a zesty mango salsa that adds that extra zing—how can anyone resist? This is what we’re crafting today! It’s fresh, simple, and seriously delicious—just how I like it. Let’s get started!
A Taste of Nostalgia
One of my fondest memories in the kitchen revolves around summer barbecues at my grandparents’ house. The anticipation of gathering around the grill with family rang in the air, and the vibrant aromas were a feast for the senses. My grandmother would whip up her famous grilled chicken, and the highlight was always her fresh mango salsa. I can still hear her laughter and the sound of sizzling chicken on the grill.
The combination of the tender chicken coated in spices and the sweet, tangy mango salsa would elevate any meal. It wasn’t just the flavor that made it special; it was the moments we shared together around the table, swapping stories and enjoying delicious food. I remember sneaking back to the grill, hoping for another bite.
This recipe channels that warmth and joy, infusing your kitchen with comforting memories of laughter and love. So, grab your knife, put on your apron, and let’s create some delicious magic together!
Ingredients
Here’s what you’ll need to whip up this delightful dish:
-
2 boneless, skinless chicken breasts
- These provide the perfect canvas for our spices. You can substitute with thighs if you like dark meat, which tends to be juicier!
-
1 ripe mango, diced
- Sweet and juicy, mangoes are the star of the show here! If mango is out of season, feel free to swap with diced pineapple or peach for a similar sweetness.
-
1/2 red onion, finely chopped
- It adds a crunchy texture and a mild flavor. If red onion feels too sharp for your palate, yellow or green onions work just as nicely.
-
1 red bell pepper, diced
- Sweet and refreshing, this bell pepper brings a pop of color and extra crunch. Try swapping it with yellow or orange bell peppers for a different flavor profile.
-
1 lime, juiced
- Lime juice brightens everything up; it balances the sweetness of the mango. If lime isn’t available, lemon juice makes a fine substitution.
-
Salt and pepper to taste
- Simple but essential! Seasoning is vital to elevate all the flavors in the dish.
-
Olive oil
- Perfect for sautéing or grilling the chicken. Feel free to use canola or avocado oil if that’s what you have on hand.
-
Cooked rice or quinoa (for serving)
- These grains soak up the delicious juices and make for a hearty side! You could use cauliflower rice for a low-carb option.
Step-by-Step Instructions
Now that we have our ingredients ready, let’s jump into the kitchen and get cooking!
Step 1: Preparing the Chicken
First up, let’s gear the chicken. Pat those chicken breasts dry with a paper towel and season them generously with salt and pepper. If you’re feeling adventurous, sprinkle on a bit of garlic powder or smoked paprika for an extra kick!
Step 2: Cooking the Chicken
Heat a skillet or grill pan over medium-high heat and drizzle it with olive oil. Once hot, place the chicken in the pan. You should hear that satisfying sizzle! Cook for about 6-7 minutes per side, or until the chicken is golden brown and cooked through (the internal temperature should reach 165°F).
Chef’s Tip: Let the chicken rest for a few minutes after cooking. This helps retain all those juicy flavors inside!
Step 3: Whipping Up the Mango Salsa
While the chicken is resting, let’s get to that marvelous salsa. In a mixing bowl, combine the diced mango, finely chopped red onion, and diced red bell pepper. Squeeze the fresh lime juice over the top, adding a pinch of salt and pepper. Toss gently to combine.
Chef’s Tip: For an added kick, throw in some diced jalapeño or a dash of chili powder—spicy salsa anyone?
Step 4: Plating It Up!
Now, to serve! Fluff up some cooked rice or quinoa on the plate as your base. Slice the rested chicken and place it on top. Finish with a generous scoop of that vibrant mango salsa right over the chicken. Voilà! You’re ready to dig in!
Serving Suggestions
For a restaurant-style presentation, consider garnishing with some freshly chopped cilantro or edible flowers. The bright green herbs pop beautifully against the chicken and salsa, making your dish visually stunning!
This Chicken with Mango Salsa is perfect for packing into lunch boxes or serving at a summer picnic—trust me, everyone will be asking for the recipe!
Recipe Variations
- Tropical Twist: Add diced avocado to the salsa for a creamier texture.
- Grilled Version: Grill the chicken outside for a smoky flavor and an enhanced char.
- Herbaceous Delight: Swap out lime juice for orange juice in the salsa for a sweeter flavor profile.
- Spicy Option: Incorporate some chopped cilantro and a touch of jalapeño in your salsa if you love a bit of heat.
- Meal Prep: Double the recipe and meal prep for the week—this dish tastes great cold on salads too!
Chef’s Notes
I’ve been whipping up variations of this dish for years, and I always love how it brings friends and family together. One time, I even made a version with grilled shrimp instead of chicken—talk about a crowd-pleaser! The salsa is super versatile, and I’ve even tossed it onto fish tacos; the freshness simply cannot be beat.
Cooking is about experimentation, and I encourage you to try out different fruits in the salsa or different methods of cooking the chicken. Who knows what delightful combination you might discover!
FAQs and Troubleshooting
Q: How can I make sure my chicken stays juicy?
A: Be sure not to overcook the chicken. Using a meat thermometer is a great way to check for doneness without guessing!
Q: Can I make the mango salsa ahead of time?
A: Yes! Just keep in mind that the mango may soften a bit over time. If you’re making it a few hours in advance, consider leaving out the red onion until you’re ready to serve for that crisp bite!
Q: What if my mango isn’t ripe?
A: A slightly underripe mango can still work; just add a pinch of sugar to balance out the tartness.
Q: Can I freeze leftovers?
A: I’d recommend freezing the chicken separately from the salsa, as the salsa doesn’t freeze well. The chicken will keep well in an airtight container for up to 3 months.
Nutritional Info
While this recipe is packed with wholesome ingredients, here’s a quick breakdown:
- Calories: Approximately 390 per serving
- Protein: 30g
- Carbohydrates: 30g
- Fat: 15g
- Fiber: 4g
This dish is not only a feast for your taste buds but also a nourishing option that fits perfectly into a balanced diet.
I hope you all love making this Chicken with Mango Salsa as much as I do! It’s a reminder of the joyous moments in the kitchen and the shared love for delicious food. So gather your loved ones, share a meal, and let laughter fill the air! Happy cooking, friends!
PrintChicken with Mango Salsa

A vibrant and flavorful dish featuring tender chicken breast paired with a refreshing mango salsa that bursts with sweetness.
- Prep Time: 15 minutes
- Cook Time: 20 minutes
- Total Time: 35 minutes
- Yield: 4 servings 1x
- Category: Main Course
- Method: Grilling
- Cuisine: American
- Diet: Gluten-Free
Ingredients
- 2 boneless, skinless chicken breasts
- 1 ripe mango, diced
- 1/2 red onion, finely chopped
- 1 red bell pepper, diced
- 1 lime, juiced
- Salt and pepper to taste
- Olive oil
- Cooked rice or quinoa (for serving)
Instructions
- Pat the chicken breasts dry with a paper towel and season generously with salt and pepper.
- Heat a skillet or grill pan over medium-high heat and drizzle with olive oil. Once hot, place the chicken in the pan and cook for about 6-7 minutes per side, until golden brown and cooked through.
- Combine the diced mango, finely chopped red onion, and diced red bell pepper in a mixing bowl. Squeeze lime juice over the top, adding a pinch of salt and pepper.
- Fluff up some cooked rice or quinoa on the plate, slice the rested chicken, and top with the vibrant mango salsa.
Notes
Add diced avocado to the salsa for creaminess or grill the chicken for a smoky flavor. Don’t overcook the chicken to maintain juiciness.
Nutrition
- Serving Size: 1 serving
- Calories: 390
- Sugar: 15g
- Sodium: 300mg
- Fat: 15g
- Saturated Fat: 2g
- Unsaturated Fat: 10g
- Trans Fat: 0g
- Carbohydrates: 30g
- Fiber: 4g
- Protein: 30g
- Cholesterol: 70mg
Keywords: chicken, mango salsa, summer recipe, healthy meal, grilling
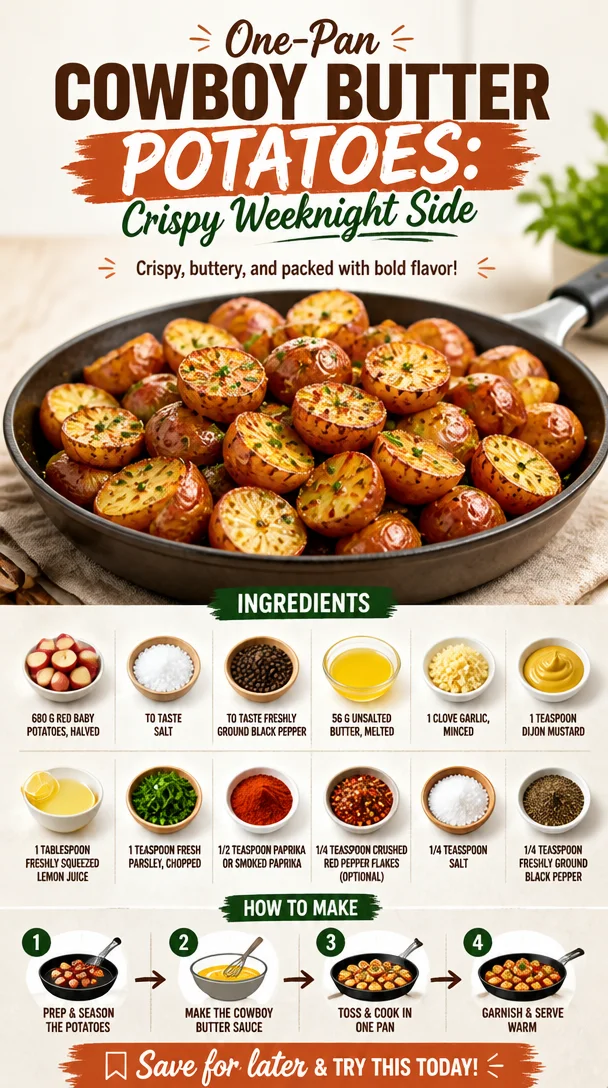
One-Pan Cowboy Butter Potatoes: Crispy Weeknight Side
Cowboy Butter Potatoes: A Deliciously Simple Dish
Hello, fellow food lovers! Today, I’m thrilled to share a recipe that reminds me of laid-back evenings, cowboy tales, and that warm feeling you get when you dig into a bowl of buttery goodness. Introducing Cowboy Butter Potatoes—a delightful dish that’s as vibrant as a sunset over the prairie and as comforting as a warm hug from an old friend.
When I first discovered these little red gems, I was astounded by how such simple ingredients could create something truly spectacular. I mean, who doesn’t love baby potatoes slathered in a garlicky, buttery sauce? The combination of flavors takes your tastebuds for a ride, creating a meal that’s not just filling but downright exhilarating.
Whether you’re hosting a backyard barbeque, enjoying a cozy family dinner, or simply looking to elevate your weeknight meal, Cowboy Butter Potatoes will steal the show every time. Let’s roll up our sleeves and get cooking!
A Taste of Nostalgia
Let me take you back for a moment. I remember vividly the first time I tried Cowboy Butter Potatoes at a rustic lodge during a family getaway when I was a kid. We were surrounded by the majestic mountains, with an open fire crackling nearby, and the tantalizing aroma of home-cooked meals wafting through the air.
After a day of hiking and exploring, we all gathered around a long wooden table, and that’s when I spotted the Cowboy Butter Potatoes. They were glistening, each bite-sized piece promising a burst of flavor. I couldn’t resist! One bite led to another, and soon I found myself going back for seconds, completely captivated by the combination of rich butter mingled with hints of garlic and spice.
That moment was more than just about the food; it was about connection, warmth, and the spirit of gathering around a table. Now, every time I make these potatoes, I’m transported back to that cozy lodge, surrounded by family, laughter, and love. This dish carries that spirit with it, and it’s now one of my go-to sides for any occasion. Let’s make your tastebuds dance with joy!
Ingredients
Gather up the following ingredients to create your own Cowboy Butter Potatoes:
-
680 g red baby potatoes, perfectly halved
These beautifully colored potatoes are not only cute but packed with flavor. Their thin skins mean you don’t have to peel them. If you can’t find red baby potatoes, you can use yellow or even Yukon Gold potatoes for a similar result. -
Salt, to taste
This is a flavor enhancer! Don’t be shy; great dishes always have the right amount of seasoning. Try sea salt or kosher salt for a different texture and taste. -
Freshly ground black pepper, to taste
You’ll want to use freshly ground for the best flavor kick! If you’re in a pinch, pre-ground pepper works but may lack the same intensity. -
56 g unsalted butter, melted
Oh, the richness! Unsalted butter allows you to control the saltiness of the dish. You can also substitute with ghee or olive oil for a twist. -
1 clove garlic, minced
Fresh garlic truly elevates this dish. If you don’t have fresh, 1/4 teaspoon of garlic powder will do the trick. -
1 teaspoon Dijon mustard
This adds a subtle tang that brightens every bite. If you prefer a milder taste, you can swap it for yellow mustard. -
1 tablespoon freshly squeezed lemon juice
The acidity from lemon juice balances the richness of the butter beautifully. Lime juice is a nice alternative if you want to mix it up! -
1 teaspoon fresh parsley, chopped
Fresh herbs bring a pop of color and flavor. If you’re short on time or fresh ingredients, use 1 teaspoon of dried parsley. -
1/2 teaspoon paprika or smoked paprika
This introduces warmth and depth of flavor. If you prefer a smokier taste, definitely opt for the smoked variety. -
1/4 teaspoon crushed red pepper flakes (optional)
Add this for a spicy kick! If you want to keep it mild, feel free to omit it. -
1/4 teaspoon salt
Just a touch more to bring it all together. -
1/4 teaspoon freshly ground black pepper
Just like the salt, this helps round out the flavor profile.
Step-by-Step Instructions
Now that you’ve gathered your ingredients, let’s dive right into the cooking process. Follow these easy steps:
-
Prep the Potatoes:
Start by washing those adorable red baby potatoes. You want them clean and ready to shine. Once they’re washed, carefully halve each potato so we can ensure they soak up that delicious Cowboy butter goodness. -
Boil the Potatoes:
Place the halved potatoes in a large pot, fill it with cold water (enough to cover them by about an inch), and add a generous pinch of salt. Bring the pot to a boil over medium-high heat. Once boiling, reduce to a simmer and cook for about 15-20 minutes, or until fork-tender. You want them soft but not falling apart.Chef’s tip: To check if they’re done, simply poke one with a fork—the fork should easily slide in without resistance!
-
Drain and Dry:
Once the potatoes are perfectly tender, drain them in a colander. Let them sit for a few minutes to dry out a bit—this will help caramelize the cut sides when you pan-sear them later. -
Make the Cowboy Butter Sauce:
In a medium bowl, mix together the melted butter, minced garlic, Dijon mustard, lemon juice, chopped parsley, paprika, crushed red pepper flakes, salt, and black pepper. Stir well to ensure the flavors meld together beautifully.Quick note: Don’t be afraid to taste and adjust! The best part of cooking is personalizing it to your liking.
-
Sear the Potatoes:
Heat a large skillet over medium heat, and add a splash of oil (olive or avocado work great). Once hot, carefully place the drained potatoes cut-side down onto the skillet. Give them a good sear for about 3-4 minutes until browned.Little Chef Hack: If you want extra crispiness, don’t overcrowd the skillet. Leave some space between the potatoes so they can brown nicely!
-
Coat the Potatoes:
Once they’re golden and delicious, turn the potatoes over and pour the Cowboy butter sauce over the top. Cook for another 2-3 minutes, allowing the potatoes to soak up all that flavor. -
Final Flavors:
Give everything a gentle toss to coat each potato in the buttery sauce, making sure that garlicky goodness gets everywhere. Cook for just another minute to make sure everything is heated through. -
Plate Up:
Transfer the Cowboy Butter Potatoes to a serving dish and drizzle any remaining sauce over top.
And there you have it! Cowboy Butter Potatoes, ready for everyone to dive in.
Serving Suggestions
These Cowboy Butter Potatoes are a stunning addition to any meal. Serve them warm, garnished with a sprinkle of extra parsley for a pop of color. They pair beautifully with grilled meats, roasted vegetables, or even just a fresh salad on the side. And trust me, everyone will be coming back for seconds!
Recipe Variations
Looking to shake things up a bit? Here are a few fun twists you might consider:
-
Herb-Infused Option:
Swap the parsley for fresh rosemary or thyme for a fragrant variation. -
Cheesy Delight:
Add a sprinkle of grated parmesan or crumbled feta on top just before serving for a creamy finish. -
Maple Glaze:
Replace half of the butter with maple syrup for a sweet-and-savory twist. It’s surprisingly delightful! -
Spicy Chipotle:
Use chipotle in adobo sauce instead of garlic for a smoky, spicy kick. -
Vegan Version:
Substitute the butter with vegan margarine or coconut oil and use a spoonful of nutritional yeast for that cheesy flavor.
Chef’s Notes
As much as I adore this recipe in its classic form, I’ve had my fair share of kitchen experiments with it over the years! There was that one epic barbecue where I thought I’d throw in some bacon bits for extra indulgence; let’s just say, that was a hit and a half.
I’ve even swapped out the Dijon mustard for whole grain mustard on a whim, and it added this delightful texture and flavor that I can’t stop thinking about. Cooking is all about exploration, so feel free to make it your own!
FAQs and Troubleshooting
Q1: My potatoes turned mushy; what did I do wrong?
A: Over-boiling can lead to mushy potatoes. Aim for fork-tender, and remember, you want them soft, not falling apart!
Q2: Can I use other types of potatoes?
A: Absolutely! Yukon golds, fingerlings, or even small russets will work. Just keep an eye on the cooking time as sizes may vary.
Q3: The sauce seemed too oily; how can I fix it?
A: If the butter sauce feels a bit heavy, consider using less butter next time, or be sure to balance it with more lemon juice and spices for brightness.
Q4: Can I prepare this ahead of time?
A: Totally! You can boil the potatoes a day in advance and toss them in the refrigerator. When you’re ready, just give them a quick sear and coat with the sauce.
Nutritional Info
Here’s a quick nutritional breakdown per serving (based on 6 servings):
- Calories: 180
- Fat: 8g
- Carbohydrates: 26g
- Protein: 3g
- Fiber: 2g
Now you’re armed with everything you need to whip up these Cowboy Butter Potatoes. Trust me, they’ll be a hit at your table just like they were at that cozy lodge all those years ago. Happy cooking, friends!
PrintCowboy Butter Potatoes

A deliciously simple dish of red baby potatoes slathered in a garlicky, buttery sauce, perfect for any gathering.
- Prep Time: 15 minutes
- Cook Time: 30 minutes
- Total Time: 45 minutes
- Yield: 6 servings 1x
- Category: Side Dish
- Method: Boiling and Searing
- Cuisine: American
- Diet: Vegetarian
Ingredients
- 680 g red baby potatoes, halved
- Salt, to taste
- Freshly ground black pepper, to taste
- 56 g unsalted butter, melted
- 1 clove garlic, minced
- 1 teaspoon Dijon mustard
- 1 tablespoon freshly squeezed lemon juice
- 1 teaspoon fresh parsley, chopped
- 1/2 teaspoon paprika or smoked paprika
- 1/4 teaspoon crushed red pepper flakes (optional)
- 1/4 teaspoon salt
- 1/4 teaspoon freshly ground black pepper
Instructions
- Prep the potatoes: Start by washing the red baby potatoes and halving each one.
- Boil the potatoes: Place the halved potatoes in a pot, cover with cold water, add salt, and bring to a boil. Simmer until fork-tender.
- Drain and dry: Drain the potatoes in a colander and let them sit for a few minutes.
- Make the Cowboy Butter sauce: In a bowl, mix melted butter, garlic, mustard, lemon juice, parsley, paprika, red pepper flakes, salt, and pepper.
- Sear the potatoes: Heat a skillet, add oil, and sear the cut-side of the potatoes until browned.
- Coat the potatoes: Turn the potatoes and pour the Cowboy butter sauce over them. Cook for another few minutes.
- Final flavors: Toss the potatoes to coat in the sauce and heat through.
- Plate up: Transfer the potatoes to a serving dish and drizzle with remaining sauce.
Notes
These potatoes can be served warm with a sprinkle of parsley and pair beautifully with grilled meats or salad.
Nutrition
- Serving Size: 1 serving
- Calories: 180
- Sugar: 1g
- Sodium: 500mg
- Fat: 8g
- Saturated Fat: 5g
- Unsaturated Fat: 3g
- Trans Fat: 0g
- Carbohydrates: 26g
- Fiber: 2g
- Protein: 3g
- Cholesterol: 15mg
Keywords: Cowboy Butter Potatoes, side dish, potatoes, buttery sauce, easy recipe
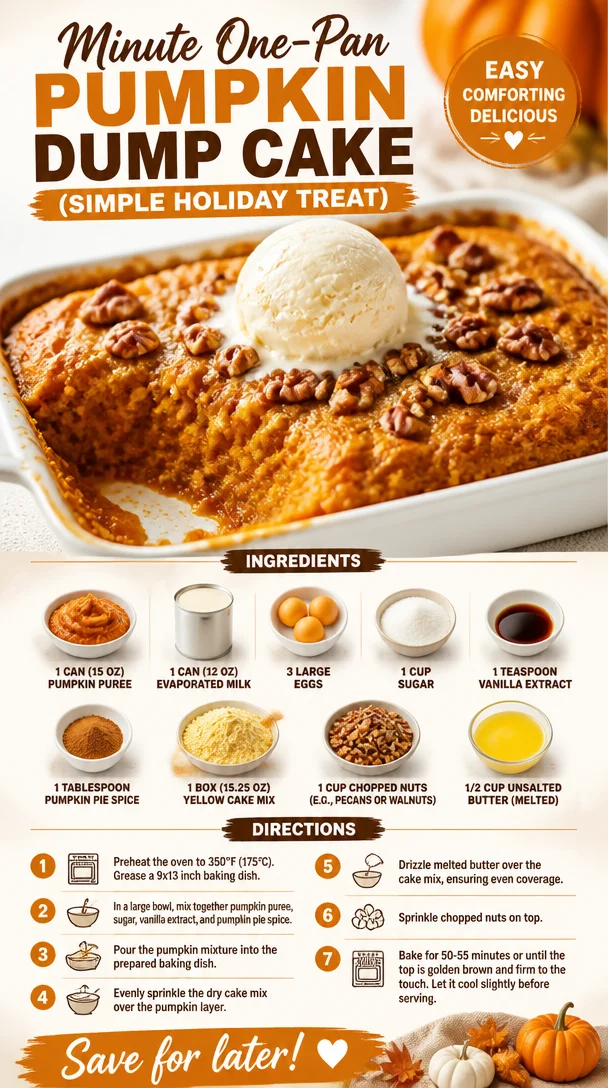
Minute One-Pan Pumpkin Dump Cake (Simple Holiday Treat)
The Joy of Baking: Pumpkin Dump Cake
Welcome to the cozy embrace of autumn, where leaves crunch underfoot, pumpkin spice reigns supreme, and our kitchens emanate warmth and sweetness. Today, I’m excited to share a recipe that’s not only easy to whip up but also a beloved classic that will have your family flocking to the table every time you make it. Enter the glorious Pumpkin Dump Cake, a dessert that captures the very essence of fall with its rich, spiced flavor and delightful texture.
Now, if you are wondering what exactly a "dump cake" is, let me tell you: it’s a glorious baking hack that involves “dumping” your ingredients into a pan without the fuss of layers or the worry of precision. This effortless method means you can spend more time savoring the season and less time sweating in the kitchen.
But pumpkin dump cake isn’t just any dessert; it holds a special place in my heart. As those cool breezes turn our thoughts to holiday gatherings and warm family moments, I can’t help but dive into the fond memories tied to this sweet treat.
A Slice of Nostalgia
I’ll never forget the first time I made pumpkin dump cake; it was a night that felt oddly magical. My best friend Sarah and I, fresh out of college and eager to impress our families, decided to hold a cozy fall dinner before heading off to our respective jobs. Armed with a few trusty recipes, pumpkin dump cake was our secret weapon.
We whipped it up in Sarah’s tiny apartment kitchen, laughter mingling with the scent of cinnamon and nutmeg wafting through the air. As we gently mixed the pumpkin puree with evaporated milk, sugar, and spice, we reminisced about our childhood—Halloween costumes, visits to pumpkin patches, and those endless nights of baking in her mom’s kitchen.
When our families came over, an enchanting aroma guided them straight to our dessert table. With every rich, creamy bite, we heard sighs of happiness and a chorus of “what is this deliciousness?”. They devoured every crumb, and Sarah and I shared knowing smiles. That night, we solidified our bond not just as friends, but as fellow food lovers. It was a slice of nostalgia I’ll carry with me forever, reminding me how food has the power to bring people together.
Ingredients
Let’s gather our ingredients for this delightful creation:
-
1 can (15 oz) pumpkin puree: The star of the show! Rich in flavor and nutrients, pumpkin puree provides that comforting taste we crave in autumn. For a twist, you could use butternut squash puree, which brings a slightly different sweetness.
-
1 can (12 oz) evaporated milk: This creamy ingredient adds richness to the cake. If you’re looking for a lighter option, feel free to swap in coconut milk or any non-dairy alternative.
-
3 large eggs: Eggs bind everything together and add a lovely fluffiness. If you’re doing a vegan version, substitute with flax eggs (1 tablespoon ground flaxseed mixed with 2.5 tablespoons water = 1 egg).
-
1 cup sugar: Sweetness is essential, but if you’re trying to reduce sugar, feel free to use coconut sugar or a sugar substitute that’s suitable for baking.
-
1 teaspoon vanilla extract: A dash of vanilla elevates the flavor. Consider using pure vanilla extract for more depth, or try almond extract for a unique twist!
-
1 tablespoon pumpkin pie spice: This fantastic mix should scream "fall." If you don’t have it on hand, mix your own with cinnamon, nutmeg, ginger, and cloves in equal parts.
-
1 box (15.25 oz) yellow cake mix: The foundation for our dump cake. You can swap this for a gluten-free cake mix or a spice cake mix for an extra flavor kick.
-
1 cup chopped nuts (e.g., pecans or walnuts): These add texture and nuttiness. This is optional; if you are nut-free, feel free to leave them out!
-
1/2 cup unsalted butter (melted): This step is key, as it creates a crispy, golden topping. For a vegan alternative, opt for melted coconut oil or dairy-free butter.
Step-by-Step Instructions
Let’s get down to the fun part! Here’s how to create your pumpkin dump cake:
-
Preheat Your Oven: Preheat your oven to 350°F (175°C). This allows for even baking from the get-go, ensuring your cake is moist and delicious.
-
Prepare the Baking Dish: Grab a 9×13 inch baking dish and lightly grease it with cooking spray or butter. This will make it easy to serve and clean up later.
-
Mix the Pumpkin Filling: In a large mixing bowl, combine the pumpkin puree, evaporated milk, sugar, eggs, vanilla extract, and pumpkin pie spice. Using a whisk, blend everything until smooth and homogenous. You want the mixture to be creamy and lovely.
-
Pour the Mixture: Pour this creamy pumpkin filling into the prepared baking dish and spread it evenly with a spatula.
-
Sprinkle the Cake Mix: Now for the “dump” part! Sprinkle the entire box of yellow cake mix over the pumpkin mixture. Don’t mix it! Just let the powder sit on top; this is what helps create that amazing crumbly topping.
-
Add the Nuts: If you’re using nuts, sprinkle them generously over the top. This adds a wonderful crunch that contrasts beautifully with the creamy pumpkin.
-
Drizzle with Butter: Melt your unsalted butter and drizzle it evenly over the cake mix and nuts. This is what makes it golden and delicious without needing to mix in!
-
Bake: Place the dish in the preheated oven and bake for about 50–60 minutes, or until the top is golden brown and a toothpick inserted comes out clean. The smell will fill your home, and you’ll be counting down the minutes!
-
Cool: Once baked, allow the cake to cool slightly in the dish. This makes it easier to slice and also helps the flavors meld.
Serving Suggestions
Slice into squares and serve warm, perhaps with a dollop of freshly whipped cream or a scoop of vanilla ice cream on top. For a more festive presentation, sprinkle some extra pumpkin spice or crushed nuts on top for that finishing touch. Trust me, your guests will be asking for seconds!
Recipe Variations
Feeling adventurous? Here are some creative twists to make this dish your own:
-
Add Chocolate: Sprinkle in some chocolate chips before baking for a delightful chocolate-pumpkin combo!
-
Coconut Flavor: Mix in shredded coconut for extra texture and a tropical hint.
-
Maple Glaze: Drizzle a warm maple syrup glaze over the top before serving for a rich finish.
-
Fruit Layer: Add a layer of fresh cranberries or sliced apples on top of the pumpkin filling for a pop of tartness.
-
Nut-Free Version: Swap in quick oats on the top layer rather than nuts for a hearty texture.
Chef’s Notes
Every time I bake this pumpkin dump cake, I’m reminded of all the simple joys of cooking—how it invites laughter and memories into the kitchen. Over the years, I’ve played around with flavors, tried various toppings, and even made it vegan on a few occasions. Each version has its own charm, but the classic remains close to my heart.
The best part? With virtually no cleanup, this recipe is ideal for a last-minute gathering or Thanksgiving dinner when time is of the essence!
FAQs and Troubleshooting
1. Why is my pumpkin dump cake too runny?
This might happen if the pumpkin puree is too watery. Always opt for high-quality pumpkin puree and drain any excess liquid if necessary before mixing.
2. Can I make this in advance?
Absolutely! You can prepare it the night before and bake it just before serving. Letting it sit overnight in the fridge allows those lovely flavors to meld together.
3. How do I store leftovers?
Cover the pan tightly with plastic wrap or transfer leftovers to an airtight container. It’ll last in the fridge for up to 5 days—but trust me, it’s unlikely to last that long!
4. Can I freeze the pumpkin dump cake?
Sure! Once cooled, you can freeze it for up to 3 months. Thaw in the refrigerator overnight before serving.
Nutritional Info
(If applicable; adjust based on actual ingredients used.)
Per serving: Approximately 250 calories, 10g fat, 35g carbohydrates, 3g protein. Keep in mind that this can vary based on ingredients and portion size!
So, whether you’re baking for a gathering, a cozy night in, or just because it’s a Tuesday, this pumpkin dump cake is sure to bring joy, comfort, and a heck of a lot of flavor to your table. Enjoy the process, share it with loved ones, and always keep it fresh, simple, and seriously delicious! Happy baking!
PrintPumpkin Dump Cake
An easy and delicious pumpkin dump cake that captures the essence of fall with its rich, spiced flavor and delightful texture.
- Prep Time: 15 minutes
- Cook Time: 60 minutes
- Total Time: 75 minutes
- Yield: 12 servings 1x
- Category: Dessert
- Method: Baking
- Cuisine: American
- Diet: Vegetarian
Ingredients
- 1 can (15 oz) pumpkin puree
- 1 can (12 oz) evaporated milk
- 3 large eggs
- 1 cup sugar
- 1 teaspoon vanilla extract
- 1 tablespoon pumpkin pie spice
- 1 box (15.25 oz) yellow cake mix
- 1 cup chopped nuts (e.g., pecans or walnuts)
- 1/2 cup unsalted butter (melted)
Instructions
- Preheat your oven to 350°F (175°C).
- Prepare a 9×13 inch baking dish by lightly greasing it with cooking spray or butter.
- Mix the pumpkin puree, evaporated milk, sugar, eggs, vanilla extract, and pumpkin pie spice in a large mixing bowl until smooth.
- Pour the pumpkin filling into the prepared baking dish and spread it evenly.
- Sprinkle the yellow cake mix over the pumpkin mixture without mixing.
- Add the chopped nuts on top, if using.
- Drizzle the melted butter evenly over the cake mix and nuts.
- Bake for 50–60 minutes or until golden brown and a toothpick inserted comes out clean.
- Cool slightly in the dish before slicing.
Notes
Serve warm with whipped cream or vanilla ice cream. Can be made in advance and frozen for up to 3 months.
Nutrition
- Serving Size: 1 serving
- Calories: 250
- Sugar: 10g
- Sodium: 300mg
- Fat: 10g
- Saturated Fat: 5g
- Unsaturated Fat: 3g
- Trans Fat: 0g
- Carbohydrates: 35g
- Fiber: 2g
- Protein: 3g
- Cholesterol: 50mg
Keywords: pumpkin cake, fall dessert, easy baking, Thanksgiving dessert, pumpkin recipes

Minute Weeknight One-Pan Cheesy Root Vegetable Gratin
Cheesy Root Vegetable Gratin: A Cozy Delight
Welcome to the comforting world of Cheesy Root Vegetable Gratin! If you’re searching for a dish that wraps you in warmth like a cozy blanket on a chilly evening, you’ve just struck gold. This gratin is not just about layers of glorious root vegetables; it’s about a delightful experience of flavors that dance on your palate. Imagine the creaminess of heavy cream, the richness of melted cheese, and the earthy undertones of various root veggies—doesn’t that sound like a hug from your favorite home-cooked meal?
As a chef who celebrates fresh, nourishing food, I’m super excited to share this recipe with you because it absolutely embodies my mission with Clean Plate Cravings. Eating well doesn’t mean compromising on taste. So, let your kitchen fill with the enticing aroma as we dive into this wonderful gratin that’s perfect for any occasion, from a casual weeknight dinner to a festive gathering with friends.
Join me as we chop, slice, and layer our way to creating a dish that will have your taste buds singing and your heart full. Grab your favorite apron, and let’s get started!
A Trip Down Memory Lane
Let me take you back to when I was a kid, eagerly waiting for family gatherings at my grandma’s house. Her kitchen was always alive with laughter, stories, and, of course, mouthwatering aromas. One dish that stood out among the spread was her root vegetable gratin, which was an ingenious way to make nutritious veggies taste exceptional.
I still remember standing on a stool, peeking over the countertop, watching her expertly slice the vegetables. With every layer she added, she’d sprinkle cheese and pour cream, all while telling me stories of her childhood—how she would gather fresh produce from the local farmers’ market. Those memories shaped my love for cooking and the joy it brings to those we share it with.
I’ve taken my grandma’s traditional gratin recipe and given it a little twist. It’s no longer just a nostalgic dish; it’s a celebration of flavors, textures, and the simple joy of cooking. So, let’s embrace the spirit of those family gatherings as we create our own version of this heartwarming dish.
Ingredients
Here’s a rundown of the ingredients you’ll need to whip up this delicious Cheesy Root Vegetable Gratin:
-
2 cups root vegetables (carrots, parsnips, and potatoes), sliced
These versatile vegetables bring a wonderful sweetness and texture to the dish. Feel free to swap them out with other root veggies like sweet potatoes or turnips! -
1 cup heavy cream
This is the secret ingredient that creates a rich, creamy base for our gratin. If you’re watching your dairy intake, you can substitute it with coconut milk or cashew cream for a non-dairy version. -
1 cup grated cheese (Gruyère or cheddar)
Cheese is always a crowd-pleaser. Gruyère lends a nutty flavor, while cheddar adds sharpness. Mix and match based on your taste preferences— mozzarella works too for a gooey texture! -
2 tablespoons butter
Just a little bit of butter adds a luxurious richness. If you’re looking for a dairy-free option, olive oil or vegan butter will do the trick. -
1 clove garlic, minced
Garlic adds depth to our gratin. You can play around with roasted garlic for a sweeter, milder flavor or use garlic powder for a simple substitution. -
Salt and pepper to taste
Seasoning is key to bringing out the flavors. I love using sea salt and freshly cracked black pepper for a pop of flavor. -
Fresh herbs (such as thyme or parsley) for garnish
Herbs add a lovely fresh note at the end and can transform the look of your dish. Feel free to mix in rosemary or chives according to your taste!
Step-by-Step Instructions
Now that we have all our ingredients, it’s time to roll up our sleeves and get cooking! Just follow these simple steps, and you’ll be enjoying a gorgeous gratin in no time.
-
Preheat your oven
Start by preheating your oven to 375°F (190°C). This ensures your gratin bakes evenly and gets that amazing golden top. -
Prepare the root vegetables
Thinly slice your root vegetables about 1/8 inch thick for even cooking. A mandoline slicer can make this step super quick and easy. Plus, they look so pretty in layers! -
Sauté the garlic
In a medium-sized pan, melt the butter over medium heat. Add the minced garlic and sauté for about 1 minute until it becomes fragrant. Be careful not to let it burn; you want it just golden. -
Combine cream and garlic
Pour in the heavy cream, stirring to combine it with the garlic. Sprinkle in some salt and pepper to taste. This mixture becomes the heavenly sauce that will envelop our veggies! -
Assemble the gratin
In a greased baking dish, start layering your root vegetables. Begin with a layer of potatoes or carrots, followed by a sprinkle of cheese. Pour a little of the cream sauce over it, and continue layering until you’ve used up all the ingredients. End with a generous layer of cheese on top—trust me, that melty goodness is key! -
Bake
Cover the dish with foil and bake in the preheated oven for 30 minutes. This allows the vegetables to soften. After that, remove the foil and bake for another 15–20 minutes until the top is beautifully golden and bubbly. -
Rest and garnish
Once out of the oven, let your gratin rest for about 5-10 minutes before serving. This helps it to set, making it easier to cut into portions. Garnish with fresh herbs for that final touch!
Serving Suggestions
This Cheesy Root Vegetable Gratin is incredibly versatile! Serve it hot from the oven as a comforting side dish to accompany your favorite roast or grilled meats. You can also include a fresh green salad on the side for a lovely balanced meal. If you’re feeling fancy, plate individual servings in ramekins for an elegant touch at dinner parties.
Recipe Variations
Looking to jazz things up? Here are a few playful variations you can try:
-
Herb-Infused Cream
Infuse your heavy cream with fresh herbs like rosemary or basil by gently warming the cream and letting the herbs steep for 10 minutes. This will add a delightful depth of flavor. -
Spicy Twist
Add a pinch of crushed red pepper flakes to your cream sauce, bringing a kick of heat that pairs wonderfully with the sweetness of the root vegetables. -
Savory Mushrooms
Incorporate sautéed mushrooms into the layers for an earthy flavor that complements the richness of the gratin perfectly. -
Nutty Crunch
Sprinkle toasted breadcrumbs or crushed nuts over the top before the final bake. This adds an irresistible crunchy texture that contrasts beautifully with the creamy interior. -
Dairy-Free Delight
For those avoiding dairy, swap the heavy cream for coconut milk, and use a blend of nutritional yeast and nuts to create a cheesy flavor that’s completely plant-based.
Chef’s Notes
Oh, where do I start? This recipe has become a staple in my home and continues to evolve. The great thing about this gratin is its adaptability. I often experiment with different types of cheese based on what’s in my refrigerator. One time, I even mixed leftover cheese from a fondue night with some sharp cheddar, and it turned out splendidly!
I also love sharing this dish with friends, and I get such a kick out of hearing their stories about their own family recipes. Food brings us together, igniting joy and connection, just like how my grandma’s cooking did for us all those years ago.
FAQs and Troubleshooting
Here are some common questions and potential hiccups you might encounter while making your Cheesy Root Vegetable Gratin:
-
Why did my gratin turn out watery?
This can happen if you use watery vegetables or don’t let it rest long enough after baking. Make sure to slice your vegetables evenly and be mindful of the moisture they contain. -
Can I prepare this gratin in advance?
Absolutely! You can slice your veggies and prepare your sauce a day ahead. Just assemble everything in the baking dish and refrigerate. When you’re ready, bake it straight from the fridge—just add a few extra minutes to the baking time. -
What if I don’t have Gruyère?
No worries! You can use any melty cheese you have on hand, such as mozzarella, Monterey Jack, or even vegan cheese alternatives for a delicious result. -
How do I store leftovers?
Allow your gratin to cool, then store it in an airtight container in the refrigerator. It will keep well for 3–4 days. Warm it up in the oven or microwave, but be sure to add a splash of cream or milk to keep it moist.
Nutritional Info
While I don’t typically dwell on numbers, it’s always good to know the general nutritional benefits! This gratin is rich in vitamins due to the vegetables, and when enjoyed in moderation, offers a delicious way to incorporate heart-healthy fats and proteins into your meals. Just remember that balance, as with life, is key!
So there you have it—your guide to making a crowd-pleasing Cheesy Root Vegetable Gratin! I hope you feel inspired to give it a try and perhaps even add your own personal touch. Remember, cooking is not just about following recipes; it’s about expressing your creativity and, most importantly, sharing love through food. Enjoy!
PrintCheesy Root Vegetable Gratin

A comforting dish featuring layers of root vegetables, rich cream, and melted cheese, perfect for cozy evenings.
- Prep Time: 15 minutes
- Cook Time: 45 minutes
- Total Time: 60 minutes
- Yield: 4 servings 1x
- Category: Side Dish
- Method: Baking
- Cuisine: French
- Diet: Vegetarian
Ingredients
- 2 cups root vegetables (carrots, parsnips, and potatoes), sliced
- 1 cup heavy cream
- 1 cup grated cheese (Gruyère or cheddar)
- 2 tablespoons butter
- 1 clove garlic, minced
- Salt and pepper to taste
- Fresh herbs (such as thyme or parsley) for garnish
Instructions
- Preheat your oven to 375°F (190°C).
- Prepare your root vegetables by slicing them about 1/8 inch thick.
- Sauté the garlic in a medium-sized pan with melted butter over medium heat for about 1 minute.
- Combine the heavy cream and sautéed garlic, then season with salt and pepper.
- Assemble the gratin by layering the root vegetables, cheese, and cream sauce in a greased baking dish.
- Bake covered with foil for 30 minutes, then uncover and bake for another 15–20 minutes until golden.
- Rest for 5-10 minutes before serving and garnish with fresh herbs.
Notes
You can prepare this gratin in advance and refrigerate before baking. Also, substitute heavy cream with coconut milk for a dairy-free option.
Nutrition
- Serving Size: 1 serving
- Calories: 400
- Sugar: 6g
- Sodium: 450mg
- Fat: 20g
- Saturated Fat: 10g
- Unsaturated Fat: 8g
- Trans Fat: 0g
- Carbohydrates: 35g
- Fiber: 4g
- Protein: 12g
- Cholesterol: 60mg
Keywords: gratin, root vegetables, cheesy, comfort food, vegetarian
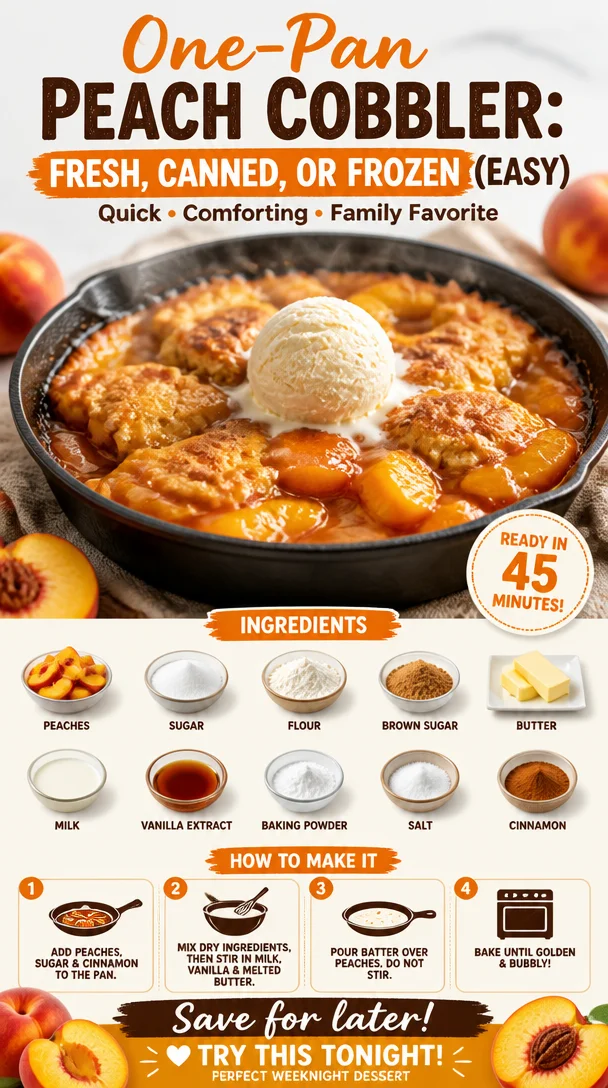
One-Pan Peach Cobbler: Fresh, Canned, or Frozen (Easy)
The Ultimate Homemade Peach Cobbler Recipe: A Sweet Slice of Nostalgia
Ah, peach cobbler. The very mention of it can transport you back to those sunny afternoons of your childhood, where the air was thick with laughter, sweet summer breezes, and the tantalizing aroma of baked peaches wafting through the kitchen. If your mouth is already watering, you’re in good company! Whether you’re using fresh, canned, or frozen peaches, this homemade peach cobbler recipe is a delightful way to embrace that nostalgia while creating a dish that will have everyone swooning.
Now, I can’t emphasize enough how this recipe is not just about throwing some peaches in a dish and slapping a crust on top. Oh no, my friends, this is about crafting a love letter to summer. My journey with peach cobbler started in my grandmother’s kitchen, where she would pull out her old, worn cookbook and remind me that the secret to a perfect cobbler is all about balance—sweetness, warmth, and that irresistible flaky crust that crumbles just right.
Some of my fondest memories are tied to helping her prepare this dish, learning the art of patience as we let those peaches marinate with a sprinkle of sugar, and watching them transform into a bubbling, golden masterpiece in the oven. So, while you’re mixing, baking, and savoring, know that you’re not just whipping up dessert; you’re creating memories, just like I did with my beloved grandma.
And here’s the best part: You can enjoy this peach cobbler no matter the season! Using fresh peaches in summer or those frozen gems straight out of your freezer makes it a year-round staple. Ready to dig into this deliciousness? Let me share the simple steps you need to create your own peach cobbler masterpiece!
Ingredients
-
Peaches (fresh, canned, or frozen): Use about 4 cups for this recipe. Fresh peaches are amazing in summer, but if you have canned or frozen on hand, they work just as well. If using frozen, let them thaw but don’t drain the juices—who doesn’t love a little extra peachy goodness?
-
Granulated sugar: About ¾ cup for sweetening the peaches and enhancing their natural flavors. You can adjust this based on the sweetness of your peaches or swap for coconut sugar for a healthier twist.
-
All-purpose flour: You’ll need 1 cup for the cobbler topping. Gluten-free flour blends can substitute here. Just be sure to check that they have xanthan gum for proper binding!
-
Baking powder: 2 teaspoons is what we’ll need to give our crust a nice rise. Make sure it’s fresh for the best results!
-
Salt: A pinch (about ¼ teaspoon) will enhance the flavors in both the peaches and the topping. It’s magic, I tell you!
-
Milk: ½ cup of milk (dairy or plant-based) will bring everything together in our cobbler batter. Almond or oat milk works beautifully if you’re dairy-free.
-
Butter: ½ cup (1 stick), melted. Butter makes everything better! If you prefer oil, coconut oil is a great alternative, just be sure it’s melted too.
-
Vanilla extract: 1 teaspoon adds that extra layer of flavor. Feel free to get creative with other extracts like almond or even a hint of cinnamon.
Step-by-Step Instructions
-
Preheat your oven: Start by preheating your oven to 375°F (190°C). This allows the peach cobbler to bake evenly and ensures you get that golden-brown crust.
-
Prepare the peaches: In a mixing bowl, toss your prepared peaches with ½ cup of sugar. If you’re using fresh peaches, peel, slice, and dice them. For frozen peaches, just let them thaw until they can be cut into manageable slices. Let this mixture sit while the sugar works its magic to draw out the juices—about 15 minutes is perfect.
-
Make the batter: In another bowl, whisk together the flour, remaining sugar, baking powder, and salt. This dry mix is the base of your topping. Then, gradually whisk in the milk and melted butter (and vanilla extract if you’re using it) until everything is smooth and combined. Don’t overmix; it’s okay if there are a few lumps!
-
Combine fruit and batter: Pour the peach mixture into a greased baking dish (about 9×13 inches works great) and then gently spoon your batter over the top. You want those bubbling juices to peek through the batter without completely mixing.
-
Bake it up: Slide your cobbler into the oven, and bake for about 30-40 minutes, or until the topping is golden brown and a toothpick inserted comes out clean. Keep an eye on it—if the edges start to darken too quickly, you can tent it with foil.
-
Cool and serve: Once it’s out of the oven, let it cool for about 15 minutes before serving. This helps the juices set a bit, but let’s be real—it’s hard to resist digging in right away!
Serving Suggestions
Serve this peach cobbler warm with a generous scoop of vanilla ice cream or a dollop of whipped cream for the ultimate indulgence. If you’re feeling fancy, sprinkle some toasted almonds or pecans on top for a lovely crunch. It’s also delightful with a drizzle of caramel sauce or a sprinkle of cinnamon for extra warmth!
Recipe Variations
-
Berry Peach Cobbler: Mix in some fresh or frozen blueberries or raspberries for a delightful burst of flavor.
-
Spicy Peach Cobbler: Add a teaspoon of cinnamon and a pinch of nutmeg to the peach mixture for a seasonal twist that warms up those cozy evenings.
-
Coconut Peach Cobbler: Substitute half the milk for coconut milk, and sprinkle shredded coconut on top for a tropical vibe.
-
Oat Topping: Swap half of the flour for rolled oats to create a chewy, hearty topping that adds texture and nutrition.
Chef’s Notes
This peach cobbler recipe has seen its fair share of evolution in my kitchen over the years. What started as a classic dish has transformed into a vehicle for creativity. I can’t tell you how many times I’ve mixed fruits or added unexpected spices just to see what would happen! Some experiments turned into instant favorites.
My funniest kitchen story with peach cobbler involves using lavender instead of vanilla once—I thought I was being inventive but ended up with a very floral dessert! It was a polite "no, thank you" from my friends that day. Now I stick with beloved flavors but still keep that spirit of experimentation alive.
FAQs and Troubleshooting
1. My cobbler topping is too dense. What went wrong?
- This could be due to overmixing the batter. Aim for a lumpy but uniform batter—mix just until you combine. Too much mixing can lead to gluten development, making your topping dense.
2. How do I know when it’s done?
- The cobbler is finished when the top is golden brown, and the juices are bubbling around the edges. A toothpick inserted into the center of the topping should come out clean or with a few moist crumbs (not wet batter).
3. Can I make this ahead?
- Yes! You can prepare it a few hours in advance and keep it covered in the fridge before baking. Just add about 5-10 minutes to the baking time if baking straight from the fridge.
4. What if I don’t have any peaches?
- No problem! You can substitute with almost any fruit you like, such as apples, cherries, or even mixed frozen berries. Just adjust the sugar according to the sweetness of the fruit.
Nutritional Info
While peach cobbler is definitely a treat, it can be made a bit healthier without losing any of its deliciousness! Each serving (assuming 9 servings from the above recipe) contains approximately:
- Calories: 250
- Protein: 3g
- Carbohydrates: 38g
- Fat: 10g
- Fiber: 2g
And there you have it—a sweet slice of nostalgia that’s easy to recreate no matter the time of year. So gather up those peaches, call your friends and family, and make some memories with this fabulous peach cobbler! Happy cooking! 🍑✨
PrintUltimate Homemade Peach Cobbler

A delightful and nostalgic peach cobbler recipe, perfect for any season using fresh, canned, or frozen peaches.
- Prep Time: 15 minutes
- Cook Time: 40 minutes
- Total Time: 55 minutes
- Yield: 9 servings 1x
- Category: Dessert
- Method: Baking
- Cuisine: American
- Diet: Vegetarian
Ingredients
- 4 cups peaches (fresh, canned, or frozen)
- ¾ cup granulated sugar
- 1 cup all-purpose flour
- 2 teaspoons baking powder
- ¼ teaspoon salt
- ½ cup milk (dairy or plant-based)
- ½ cup butter, melted
- 1 teaspoon vanilla extract
Instructions
- Preheat your oven to 375°F (190°C).
- Prepare the peaches by tossing them with ½ cup of sugar in a mixing bowl.
- Make the batter by whisking together flour, remaining sugar, baking powder, and salt, then gradually whisk in milk and melted butter.
- Combine the peach mixture with the batter by pouring the peaches into a greased baking dish and spooning the batter over the top.
- Bake for about 30-40 minutes or until the topping is golden brown.
- Cool for about 15 minutes before serving.
Notes
Serve warm with vanilla ice cream or whipped cream for the ultimate treat. Feel free to mix in other fruits or spices for variations.
Nutrition
- Serving Size: 1 serving
- Calories: 250
- Sugar: 10g
- Sodium: 150mg
- Fat: 10g
- Saturated Fat: 6g
- Unsaturated Fat: 3g
- Trans Fat: 0g
- Carbohydrates: 38g
- Fiber: 2g
- Protein: 3g
- Cholesterol: 30mg
Keywords: peach cobbler, dessert, summer recipe, baked dessert, nostalgic dessert
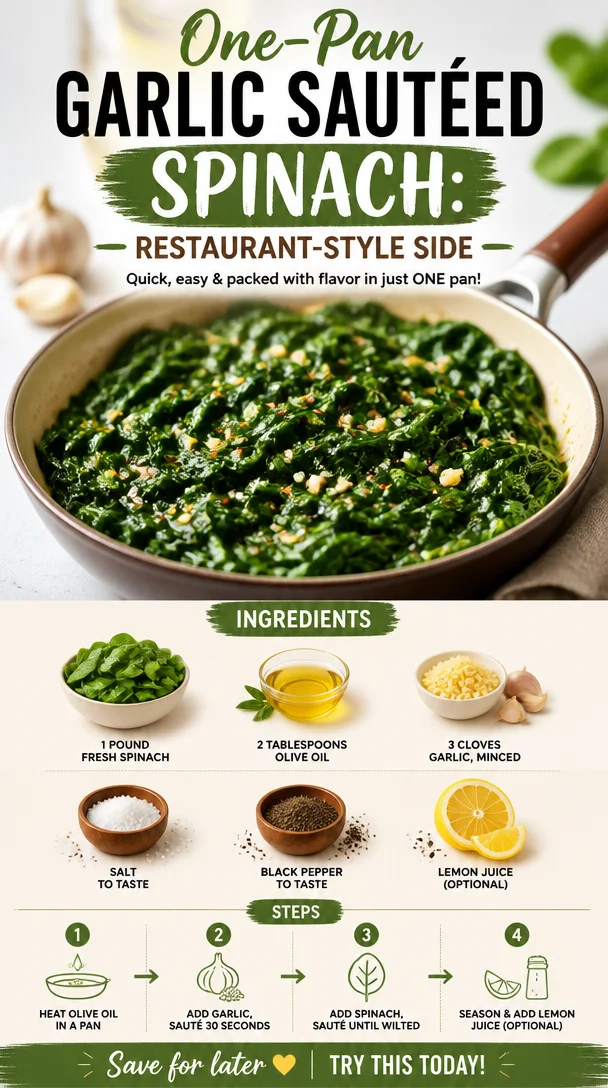
One-Pan Garlic Sautéed Spinach: Restaurant-Style Side
Easy Restaurant-Style Sautéed Spinach: Fresh, Fast, and Flavorful!
Welcome to the vibrant world of sautéed spinach! If you’re looking for a dish that’s super simple yet packed with flavor, you’re in the right place. Sautéed spinach is one of those side dishes that can turn a boring meal into something special in a flash. Plus, it’s a fantastic way to add nutrients and taste to your plate! Whether you’re whipping it up for a casual weeknight dinner or fancying it up for company, this quick and easy recipe is a true crowd-pleaser.
The beauty of sautéed spinach lies in its simplicity. With just a handful of fresh ingredients and a few minutes on the stove, you can create a delightful dish that shines both in flavor and nutrition. Plus, it’s SO versatile—you can serve it alongside practically anything! So roll up your sleeves, and let’s dive into this delicious recipe that’s sure to impress your taste buds and guests alike.
A Personal Story: The Spinach Serendipity
Growing up, my family’s dinner table was always a whirlwind of flavors. My mom was a culinary wizard, and she ensured we had a balanced meal every night. I remember one evening in particular when she made sautéed spinach as a side for our grilled salmon. She walked into the kitchen with a big, unimpressed bunch of spinach and my initial reaction was, "Ugh, spinach again?" But boy, did that change quickly!
She tossed the vibrant greens into a hot pan with olive oil and minced garlic as her signature background music played—Van Morrison’s soothing tunes wafting in the air. Within minutes, the kitchen transformed, filling with that intoxicating garlicky aroma. The once dull spinach turned into a glossy, emerald dish, and not only was it beautiful, but it also tasted divine!
From that day on, sautéed spinach quickly became a staple in our house. I saw firsthand how such a simple dish could elevate a meal. It was a delicious lesson in the fact that even the humblest ingredients can become extraordinary with just a little love and creativity.
Ingredients
Let’s gather our ingredients and get started! Here’s what you’ll need:
-
1 pound fresh spinach: Opt for vibrant, green leaves. If you can’t find fresh, you can use frozen spinach—just be sure to squeeze out excess water!
-
2 tablespoons olive oil: Not only does it add a lovely flavor, but it’s also packed with healthy fats. If you’re looking for a different taste, try avocado oil or butter for a richer finish.
-
3 cloves garlic, minced: Fresh garlic makes all the difference! If you’re in a pinch, garlic powder works too—just remember to use less since it’s concentrated.
-
Salt to taste: A little sprinkle enhances all the flavors. Feel free to experiment with various salts, such as sea salt or Himalayan pink salt.
-
Black pepper to taste: Freshly cracked black pepper elevates the dish nicely. White pepper can also work if you’re looking for a subtler flavor.
-
Lemon juice (optional): A squeeze of lemon at the end brightens everything up! If you don’t have fresh lemons, vinegar can also add that zesty kick.
Step-by-Step Instructions
Now that we have our ingredients ready, let’s sauté our way to deliciousness!
-
Prep the spinach: Start by rinsing the spinach thoroughly under cold water to remove any grit. Shake off excess water, but it’s okay to leave a little—it helps with steaming!
-
Heat the oil: In a large sauté pan or skillet, heat the olive oil over medium heat. You want the oil to shimmer but not smoke. This is when the magic begins!
-
Sauté the garlic: Toss in the minced garlic and sauté for about 30 seconds, or until fragrant. Keep an eye on it; garlic can go from golden to burned in a blink. Stir it gently, letting the aroma fill your kitchen.
-
Add the spinach: Gradually add in your fresh spinach. This allows you to stir it easily without overcrowding the pan. You’ll see it start to wilt almost instantly!
-
Toss and season: As the spinach wilts, use your tongs or spatula to toss it gently. Sprinkle in salt and black pepper to taste. You want to season as you go, letting all those flavors soak into the greens.
-
Finish with lemon: Once the spinach is wilted—this takes about 3-4 minutes—remove it from the heat. If you’re feeling fancy, squeeze some lemon juice over the top for a fresh finish.
-
Taste and adjust: Give it a final taste! Add more salt, pepper, or lemon juice as desired. Your sautéed spinach should be flavorful and vibrant.
Serving Suggestions
Now, how to plate this masterpiece? For a beautiful presentation, transfer your sautéed spinach to a serving bowl or plate and drizzle a little extra olive oil on top. If you’re feeling extra fancy, a sprinkle of grated Parmesan cheese or a few toasted pine nuts will elevate it even more! Serve it alongside grilled meats, pasta, or even as a bed for an egg dish for an irresistible brunch option.
Recipe Variations
Feel like switching it up? Here are a few creative twists for your sautéed spinach:
-
Add nuts: Toss in some toasted almonds or walnuts for a satisfying crunch.
-
Spicy kick: A pinch of red pepper flakes during cooking will add a delightful heat.
-
Cheesy delight: Stir in some feta or goat cheese right before serving for a creamy touch.
-
Herbs: Fresh herbs like basil, parsley, or dill make a lovely addition for summer flavors.
-
Balsamic reduction: Drizzle a balsamic glaze over the finished spinach for a sweet, tangy twist.
Chef’s Notes
Over the years, I’ve learned that this sautéed spinach recipe is forgiving and allows for lots of personal touches. There have been times I’ve thrown in leftover veggies or herbs to use them up, and they’ve only enhanced the flavor. It’s become one of my staple go-to sides, whether for an elegant dinner party or a quick weeknight meal at home. The comfort of nostalgia is always there—with each bite reminding me of those joyful family dinners with my mom.
FAQs and Troubleshooting
Q: Why did my spinach turn soggy?
A: Overcooking or using too much water can cause sogginess. Make sure to remove the spinach from the heat as soon as it wilts. If you rinse it, shake off excess water but don’t dry it completely.
Q: Can I use frozen spinach?
A: Absolutely! Just be sure to thaw it and squeeze out any excess water. You might need to sauté it a bit longer to ensure it’s heated through.
Q: How do I avoid burning garlic?
A: Keep your heat to medium and stir constantly. As soon as the garlic becomes fragrant and starts to turn golden, it’s time to add the spinach.
Q: Can I make this ahead of time?
A: While sautéed spinach is best fresh, you can sauté it ahead and warm it up shortly before serving. Just be mindful not to overcook it again!
Nutritional Info
While the nutritional info can vary based on how you serve this dish, sautéed spinach is generally low in calories but high in vitamins A and K, along with iron and calcium. It makes for a nutrient-packed addition to any meal!
Sautéed spinach may seem simple, but it’s all about bringing those flavors to life—with a touch of love and creativity. I hope this recipe inspires you to incorporate more greens into your meals without compromising on taste. Let’s embrace those fresh, feel-good flavors and make every meal a joy! Happy cooking!
PrintEasy Restaurant-Style Sautéed Spinach

A quick and flavorful side dish that elevates any meal using fresh spinach, garlic, and olive oil.
- Prep Time: 5 minutes
- Cook Time: 10 minutes
- Total Time: 15 minutes
- Yield: 4 servings 1x
- Category: Side Dish
- Method: Sautéing
- Cuisine: American
- Diet: Vegetarian
Ingredients
- 1 pound fresh spinach
- 2 tablespoons olive oil
- 3 cloves garlic, minced
- Salt to taste
- Black pepper to taste
- Lemon juice (optional)
Instructions
- Prep the spinach: Rinse thoroughly under cold water, shaking off excess water.
- Heat the oil: In a large sauté pan, heat olive oil over medium heat until shimmering.
- Sauté the garlic: Add minced garlic and sauté for about 30 seconds until fragrant.
- Add the spinach gradually, allowing it to wilt without overcrowding the pan.
- Toss and season: Gently toss the spinach, adding salt and black pepper to taste.
- Finish with lemon juice if desired, then remove from heat once wilted (about 3-4 minutes).
- Taste and adjust seasoning as needed.
Notes
Serve with a drizzle of olive oil, grated Parmesan, or toasted pine nuts for an extra touch.
Nutrition
- Serving Size: 1 serving
- Calories: 70
- Sugar: 1g
- Sodium: 180mg
- Fat: 5g
- Saturated Fat: 1g
- Unsaturated Fat: 4g
- Trans Fat: 0g
- Carbohydrates: 6g
- Fiber: 4g
- Protein: 3g
- Cholesterol: 0mg
Keywords: sautéed spinach, quick side dish, healthy vegetables
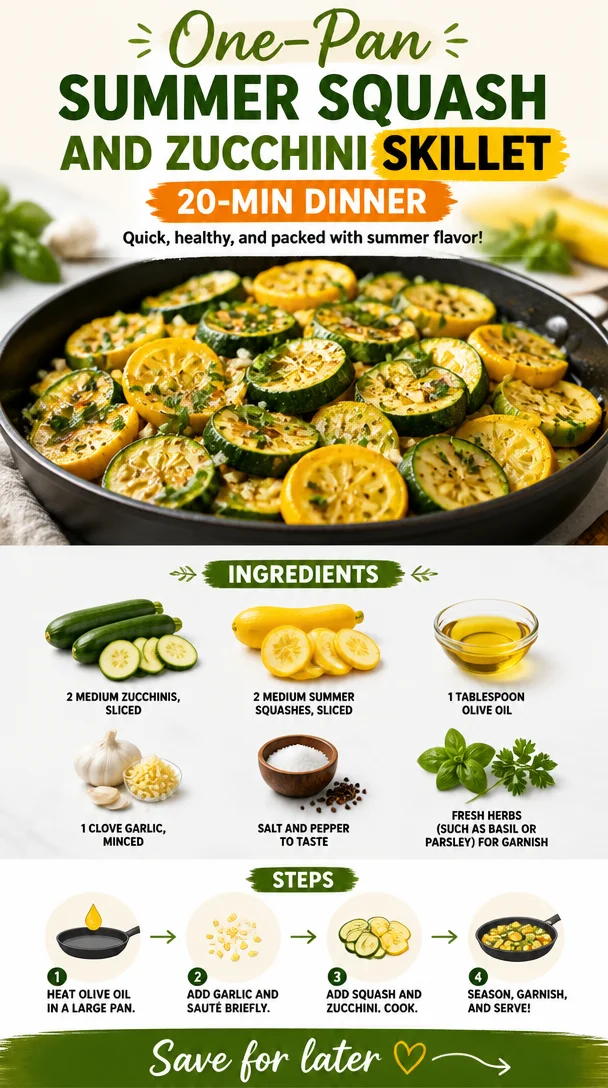
One-Pan Summer Squash and Zucchini Skillet – 20-Min Dinner
Quick Summer Squash and Zucchini Skillet: A Flavorful Essential
Summer is here, and with it comes the bounty of summer squash and zucchini! There’s something magical about stepping into a kitchen filled with the fragrance of fresh vegetables, the vibrant greens glistening on my cutting board. These simple yet scrumptious ingredients deserve the spotlight, and today, we’re whipping up a Quick Summer Squash and Zucchini Skillet that’s sure to tickle your taste buds!
This dish is not just a great way to use up the freshest summer produce; it captures the essence of easy cooking, allowing you to savor the flavors of summer without spending hours in the kitchen. Picture this: a sizzling skillet, a little olive oil creating a warm embrace, and the bright colors of fresh vegetables mingling together. Doesn’t that sound delightful? Plus, it’s incredibly versatile, making it perfect for any meal of the day.
Growing up, my grandmother always had a special place for zucchini in her garden. I fondly remember her summer dinners, where she would serve sautéed zucchini alongside family favorites. The simple act of cooking together with her inspired a lifelong love for food, where each meal felt special, vibrant, and filled with love. Today, I carry those cherished memories into my cooking, ensuring that every recipe I share is more than just a meal—it’s a slice of nostalgia. So let’s dive into this vibrant recipe that’s not just about cooking; it’s about sharing joy and flavor with the ones you love.
Ingredients
For this Quick Summer Squash and Zucchini Skillet, you’ll need the following:
-
2 medium zucchinis, sliced
Zucchini is versatile, packed with moisture, and has a mild flavor that pairs wonderfully with spices. Look for firm zucchinis with a shiny, unblemished skin for the best taste.
Substitution Tip: If you can’t find zucchini, yellow squash works beautifully as well! -
2 medium summer squashes, sliced
Summer squash is slightly sweeter than zucchini and adds a delightful color contrast in the dish.
Chef Insight: You can use any variety of summer squash, such as pattypan or yellow squash, for a unique twist! -
1 tablespoon olive oil
Olive oil provides a fragrant richness and helps to sauté the vegetables perfectly, bringing out their natural flavors.
Tip: You can substitute it with avocado oil for a higher smoke point if you’re cooking at higher temperatures. -
1 clove garlic, minced
Garlic brings an aromatic punch that elevates the dish and gives it a lovely flavor boost.
Quick Tip: Fresh garlic is best, but pre-minced in a jar can work in a pinch—just be mindful of its stronger taste. -
Salt and pepper to taste
Essentials for enhancing flavor; they’re what transforms the dish from bland to grand!
Insider Tip: Try adding a sprinkle of smoked salt for a unique depth. -
Fresh herbs (such as basil or parsley) for garnish
Fresh herbs brighten the dish and add a pop of color and additional flavor.
Creativity Tip: Experiment with oregano or thyme for different flavor profiles!
Step-by-Step Instructions
Now that we’ve gathered all our delicious ingredients, let’s get cooking! Follow these simple steps to whip up your Quick Summer Squash and Zucchini Skillet:
-
Prep Your Veggies
Start by washing the zucchinis and summer squashes thoroughly. Slice them into half-inch rounds or half-moons, depending on your preference. The goal is to ensure they cook evenly.
Chef Hack: If you’re short on time, grab pre-sliced veggies from the grocery store! -
Heat the Skillet
In a large skillet, heat one tablespoon of olive oil over medium heat. Let it warm until it has a gentle shimmer—this indicates it’s ready for sautéing.
Tip: A nonstick skillet works wonders if you want to avoid any sticking! -
Sauté the Garlic
Add the minced garlic first, and sauté for about 30 seconds until it’s fragrant but not browned—browned garlic can turn bitter. This step is key for infusing the oil with flavor!
Personal Touch: Sometimes, I even add a pinch of red pepper flakes at this stage for a hint of heat! -
Add the Sliced Veggies
Toss in the sliced zucchini and summer squash. Stir them gently to coat with the olive oil and garlic, ensuring they’re well mixed.
Pro Tip: Avoid overcrowding the skillet; if necessary, sauté in batches to achieve that perfect sear. -
Season
After the veggies have cooked for about 5-7 minutes, sprinkle with salt and pepper to taste. You want them tender but still slightly crisp to retain that delightful mouthfeel.
Chef’s Choice: For an added flavor dimension, consider a splash of lemon juice for brightness! -
Garnish and Serve
As soon as the zucchini and summer squash are tender, remove the skillet from the heat. Finely chop your chosen fresh herbs and sprinkle them generously over the top before serving.
Final Touch: A light drizzle of balsamic glaze over the veggies can give a lovely sweetness that complements the dish beautifully.
Serving Suggestions
Serve your Quick Summer Squash and Zucchini Skillet warm as a delightful side dish next to grilled chicken, fish, or even atop a bed of quinoa or rice for a light vegetarian main. To plate, use a large serving bowl or a colorful dish to show off the vibrant hues of the sautéed veggies. If you’re feeling fancy, add a sprinkle of feta or a dollop of Greek yogurt to make it even more delectable!
Recipe Variations
Feeling adventurous? Here are a few tasty twists to try with your skillet dish:
-
Add Protein: Toss in some cooked shrimp, chicken, or chickpeas for an easy protein boost to make it a standalone meal.
-
Cheesy Goodness: Grate some Parmesan or sprinkle feta cheese on top, letting it melt slightly over the warm veggies for a creamy addition.
-
Herb Fusion: Switch it up with herbs like dill or thyme for a different aromatic experience; each herb will change the entire flavor profile of the dish!
-
Nutty Finish: Consider topping the dish with a handful of toasted pine nuts or almonds for extra crunch and a nutritional kick.
-
Spicy Kick: For those who like it hot, add a pinch of cayenne pepper or diced jalapeños while sautéing for some heat.
Chef’s Notes
This Quick Summer Squash and Zucchini Skillet is like a canvas—it’s a base for creativity! I love reminiscing about those summer evenings spent in my grandmother’s cozy kitchen, where every sprinkle of herb or dash of seasoning sparked a conversation. Over time, I’ve learned that these simple ingredients can tell a story, while tiny adjustments can yield new masterpieces. Don’t be afraid to experiment and make this recipe your own; each tweak brings a new flavor journey!
FAQs and Troubleshooting
1. My zucchini turned mushy. What went wrong?
Zucchini has a high water content. To avoid mushiness, cook them just until tender and avoid overcrowding the skillet. Make sure your heat is set to medium to achieve that perfect balance!
2. Can I store leftovers?
Absolutely! Store any leftovers in an airtight container in the fridge for up to 2-3 days. However, note that reheating might make the veggies softer, so I recommend to enjoy them fresh if possible!
3. What can I do with the squash if I don’t use it all?
Leftover squash is perfect for adding to salads, soups, or frittatas the next day. It can also be blended into a smoothie if you’re feeling adventurous!
4. Can I use frozen zucchini or squash?
While you can technically use frozen veggies, they often come pre-cooked and can be mushy. Fresh vegetables yield the best texture and flavor for this skillet dish.
Nutritional Info
While I always encourage enjoying food without the stress of numbers, here’s a rough idea of what’s in your dish to guide you:
- Calories: Approximately 100 per serving
- Protein: 2g
- Carbohydrates: 10g
- Fat: 6g
- Fiber: 2g
Quick, simple, and packed with flavor, this Quick Summer Squash and Zucchini Skillet is more than just a meal—it’s a celebration of summer’s bounty. So, gather those fresh ingredients, put on your favorite playlist, and let’s create something delicious together! Here’s to fresh plates, happy hearts, and the kind of cooking that feels as good as it tastes. Enjoy!
PrintQuick Summer Squash and Zucchini Skillet
A vibrant and delicious skillet dish featuring fresh summer squash and zucchini, perfect for any meal of the day.
- Prep Time: 10 minutes
- Cook Time: 10 minutes
- Total Time: 20 minutes
- Yield: 4 servings 1x
- Category: Side Dish
- Method: Sautéing
- Cuisine: American
- Diet: Vegetarian
Ingredients
- 2 medium zucchinis, sliced
- 2 medium summer squashes, sliced
- 1 tablespoon olive oil
- 1 clove garlic, minced
- Salt and pepper to taste
- Fresh herbs (such as basil or parsley) for garnish
Instructions
- Prep your veggies. Start by washing the zucchinis and summer squashes thoroughly. Slice them into half-inch rounds or half-moons, depending on your preference.
- Heat the skillet. In a large skillet, heat one tablespoon of olive oil over medium heat.
- Sauté the garlic. Add the minced garlic first, and sauté for about 30 seconds until it’s fragrant.
- Add the sliced veggies. Toss in the sliced zucchini and summer squash.
- Season the veggies. After they have cooked for about 5-7 minutes, sprinkle with salt and pepper to taste.
- Garnish and serve. As soon as the zucchini and summer squash are tender, remove the skillet from the heat and sprinkle with fresh herbs before serving.
Notes
For additional flavor, consider a splash of lemon juice or a drizzle of balsamic glaze. Experiment with adding proteins or different herbs for variation.
Nutrition
- Serving Size: 1 serving
- Calories: 100
- Sugar: 3g
- Sodium: 200mg
- Fat: 6g
- Saturated Fat: 1g
- Unsaturated Fat: 5g
- Trans Fat: 0g
- Carbohydrates: 10g
- Fiber: 2g
- Protein: 2g
- Cholesterol: 0mg
Keywords: zucchini, summer squash, vegetable skillet, quick side dish, healthy cooking