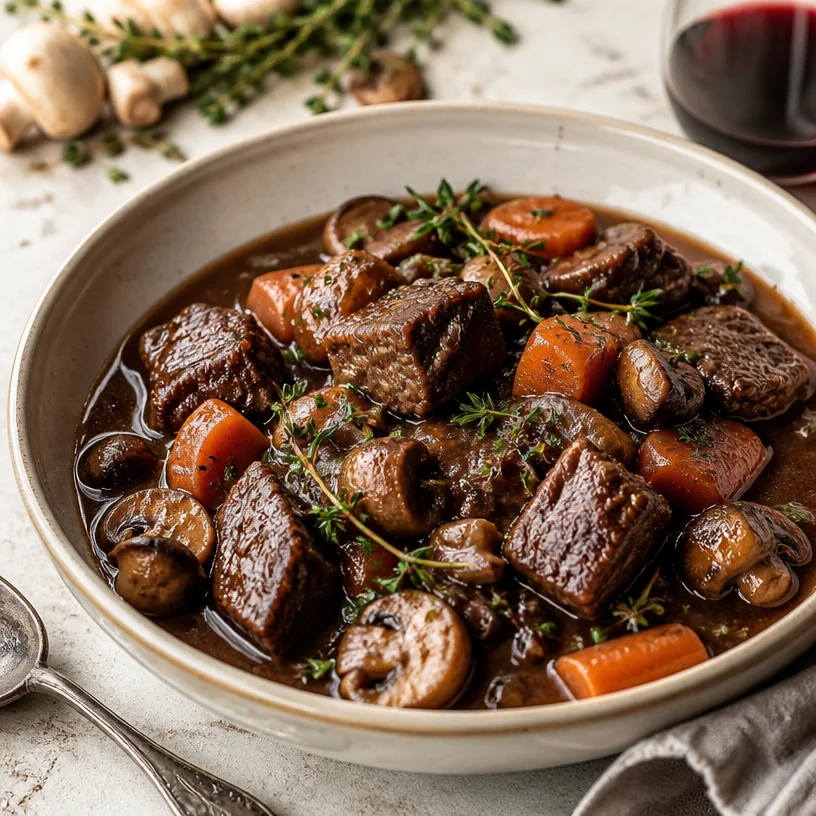
One-Pot Beef Bourguignon: Rich, Cozy Weeknight Stew
The Heartwarming Delight of Beef Bourguignon
Welcome, foodie friends! Today, we’re diving into one of the most iconic comfort dishes imaginable: Beef Bourguignon. Oh, be still my heart! This dish isn’t just a meal; it’s a journey to the rustic vineyards of Burgundy, France, where tender beef simmers lovingly in a rich red wine sauce, cozy enough to warm even the coldest of nights. This isn’t any ordinary stew. Each bite is a flavorful hug that invites slow savoring, making every forkful feel like a celebration.
Now, if you’ve ever craved something hearty yet elegant, this is your golden ticket! The best part? This recipe is approachable, meaning you don’t have to be a master chef or spend hours slaving away in the kitchen. With just a handful of wholesome ingredients and a simple cooking method, you’ll impress anyone fortunate enough to share your table. So grab your apron, and let’s gather around the kitchen to whip up something truly special.
Growing up, my family’s Sunday dinners were legendary. Long tables filled with laughter, love, and a spread of comforting meals that always felt like a warm hug. But there’s one dish that stood out to me—the Beef Bourguignon my grandmother made. As a child, I’d sit on a stool, an eager sous-chef, while she taught me the art of developing flavors. The smell of that rich, meaty sauce simmering on the stove would somehow manage to swirl its way into our living room, beckoning us to draw closer.
The clinking of pots and pans and the shared stories created a rich tapestry of connection, and I learned that cooking was as much about the memories we create as it is about the food itself. That special Beef Bourguignon always brought our family together around the table—a celebration that showed that meals are not just about nourishment, but about love and shared experiences. So let’s dive into this beautiful dish that holds so many flavors and memories!
Ingredients
Here’s what you’ll need to create your masterpiece:
-
Beef Chuck: The star of the show! Beef chuck is ideal because it’s flavorful and becomes melt-in-your-mouth tender with slow cooking. If you can’t find chuck, look for brisket or a similar cut with good marbling.
-
Mushrooms: These earthy beauties add depth and texture. Button or cremini mushrooms work great, and if you’re feeling adventurous, try shiitake for an extra flavor punch.
-
Carrots: Sweet and colorful, carrots not only brighten up the dish, but they also balance the richness of the beef. You can substitute with parsnips for a unique twist.
-
Red Wine: A good quality dry red wine is essential here. It enriches the sauce and deepens the flavor. Any bold wine you enjoy drinking will work well—Merlot, Cabernet Sauvignon, or Pinot Noir are great picks.
-
Onion and Garlic: These aromatics are the backbone of the flavor profile. Use yellow onions and fresh garlic for the best taste; shallots can be a lovely substitute for something a bit sweeter.
-
Beef Broth: This provides a base for the sauce. If you’d like a lighter option, low-sodium beef broth is perfect, or you can make your own broth from leftover bones for an extra boost of flavor.
-
Herbs: Fresh thyme is traditional in Beef Bourguignon, but feel free to add bay leaves and parsley. Think about getting creative—oregano or rosemary could be fun alternatives!
Ready to roll up your sleeves and get cooking? Let’s jump right into the magic of making Beef Bourguignon!
Step-by-Step Instructions
-
Prep Your Ingredients: Start by chopping your vegetables: slice the beef into 2-inch cubes, chop the carrots, and slice the mushrooms. Mince the garlic and dice the onion. Having everything prepped and organized makes the cooking process smooth sailing!
-
Sear the Beef: In a heavy-bottomed Dutch oven (or another nice pot), heat a splash of olive oil over medium-high heat. Once it’s shimmering, add the beef in batches; don’t crowd the pot! You want a beautiful golden crust on each piece. This is where a lot of flavor develops! After searing for about 5-7 minutes on each side, remove the beef and set it aside.
-
Sauté Vegetables: In the same pot, toss in your onions and a pinch of salt. Cook them until they soften and start to turn golden (about 4-5 minutes). Then, add the garlic and cook for another minute until fragrant.
-
Add Mushrooms and Carrots: Toss in the sliced mushrooms and carrots, sautéing them until the mushrooms are browned. This should take about 5 minutes. The goal here is to develop layers of flavor.
-
Deglaze with Wine: Time to bring in the star of the show! Pour in about 1.5 cups of your red wine, scraping up any browned bits from the bottom of the pot. This is where the magic happens!
-
Combine and Stew: Return the beef to the pot, add the broth, and toss in your herbs. Stir it all together, and bring the pot to a gentle simmer. Lower the heat and cover the pot, allowing it to simmer for about 1.5 to 2 hours, or until that beef becomes fork-tender. Oh, the aroma!
-
Final Touches: When the beef is nice and tender, taste and adjust the seasoning with salt and pepper. If you’d like to thicken the sauce, you can mix a bit of cornstarch and water to create a slurry and stir it in.
-
Let it Rest: Removing the pot from the heat and letting the dish rest for a few minutes allows the flavors to marry, resulting in a dish that’s even better the next day (if you can wait).
Serving Suggestions
Serve your Beef Bourguignon over creamy mashed potatoes, egg noodles, or a hefty slice of crusty French bread. Garnish with fresh parsley for a pop of color and freshness! Remember, presentation is key—arrange the beef, vegetables, and sauce artfully for a dish that’s as beautiful as it is delicious.
Recipe Variations
Feel free to have fun with this recipe! Here are a few variations to consider:
-
Herb-Infused: Swap out thyme for fresh rosemary or add a hint of dill for a unique flavor twist.
-
Vegetarian/Vegan Option: Use sturdy plant-based protein, like mushrooms or lentils, and opt for vegetable broth instead of beef broth.
-
Spicy Kick: Add a splash of red pepper flakes or a dash of your favorite hot sauce for a bit of heat.
-
Bacon Lover’s Delight: Sauté some diced bacon before cooking the beef. It adds a delicious smoky flavor that’s hard to resist.
-
Wine-Free Version: If you want to skip the alcohol, use additional beef broth with a splash of balsamic vinegar for depth.
Chef’s Notes
Our journey with Beef Bourguignon has evolved over the years. I remember the first time I attempted it; I was a little intimidated, but with every batch, I became more comfortable and even experimented along the way. It’s truly a forgiving dish that can handle a few tweaks here and there. Funny story: the first time I added too much wine, I thought I’d ruined everything. But instead, I ended up with a deeper, richer flavor that had everyone coming back for seconds!
This dish has a way of telling stories through food—embracing the warmth and memories that come with it. That’s the beauty of cooking!
FAQs and Troubleshooting
-
Can I make Beef Bourguignon ahead of time?
Absolutely! In fact, it tastes even better the next day. Store in an airtight container in the fridge for up to three days, or freeze it for later. -
What if my sauce is too thin?
If it’s too thin, just mix cornstarch with water to create a slurry and stir it into the stew while it’s simmering. Let it cook for a few minutes to thicken. -
What wine should I use?
Choose a robust red wine that you enjoy drinking. Avoid sweet wines, as they can alter the overall flavor profile. -
The beef turned out tough; what went wrong?
It’s crucial to simmer the dish low and slow; if you cook it at too high a temperature, the beef won’t become tender. Use a good quality cut and allow enough cooking time!
Nutritional Info
While I love sharing flavorful meals that make our bodies feel great, the focus here is on enjoyment. Remember, the nutritional value can vary based on the ingredients you choose and portion sizes. Generally, a hearty bowl of Beef Bourguignon can provide protein and a variety of vitamins and minerals from the vegetables. Balance it with your favorite sides for an ideal meal!
So there you have it—a classic Beef Bourguignon that’s not just about filling your belly, but filling your heart. As you cook this dish, let each step remind you of the connections formed around the table, the laughter shared, and the warmth created in your very own kitchen. When it comes to food, my friends, it’s all about keeping it fresh, simple, and seriously delicious. Happy cooking!
PrintBeef Bourguignon
A classic French stew of beef braised in red wine, enriched with mushrooms, carrots, and aromatic herbs, perfect for cozy gatherings.
- Prep Time: 15 minutes
- Cook Time: 120 minutes
- Total Time: 135 minutes
- Yield: 4 servings 1x
- Category: Main Course
- Method: Braising
- Cuisine: French
- Diet: None
Ingredients
- 2 lbs Beef Chuck, cut into 2-inch cubes
- 8 oz Mushrooms, sliced
- 2 large Carrots, chopped
- 1.5 cups Red Wine (dry)
- 1 large Onion, diced
- 4 cloves Garlic, minced
- 2 cups Beef Broth
- Fresh Thyme, to taste
- Olive Oil, for cooking
- Salt and Pepper, to taste
- Optional: Bay Leaves, Parsley, Oregano or Rosemary
Instructions
- Prep your ingredients: chop vegetables and prepare beef cubes.
- Sear the beef in a hot Dutch oven with olive oil until golden brown.
- Sauté onions until softened, then add garlic and stir.
- Add mushrooms and carrots and cook until browned.
- Deglaze the pot with red wine, scraping up the browned bits.
- Combine beef, broth, and herbs, bring to a simmer.
- Cover and let stew for 1.5 to 2 hours until beef is fork-tender.
- Let rest briefly, then adjust seasoning if necessary.
Notes
Serve over mashed potatoes or noodles and garnish with parsley. This dish tastes even better the next day!
Nutrition
- Serving Size: 1 serving
- Calories: 500
- Sugar: 7g
- Sodium: 600mg
- Fat: 20g
- Saturated Fat: 7g
- Unsaturated Fat: 10g
- Trans Fat: 0g
- Carbohydrates: 30g
- Fiber: 4g
- Protein: 35g
- Cholesterol: 90mg
Keywords: beef bourguignon, French stew, comfort food, beef recipes
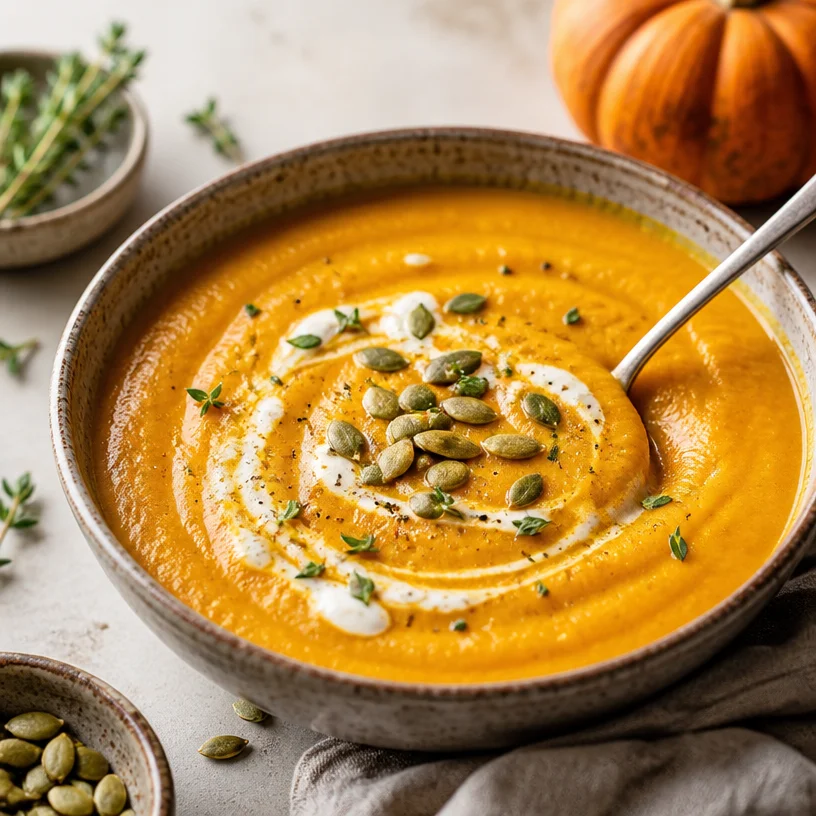
One-Pot Creamy Pumpkin Soup for Busy Weeknight Dinners
Creamy Pumpkin Soup: A Cozy Bowl of Fall Flavors
When the leaves start to turn and the air gets that crisp bite, it’s time to warm the soul with one of my all-time favorite comfort dishes: creamy pumpkin soup. This dish is like a hug in a bowl, radiating warmth and heartiness with every spoonful. Unlike those overly complex recipes you might find out there, this one is refreshing, simple, and bursting with flavor — the perfect representation of what Clean Plate Cravings is all about.
Imagine cozying up on the couch, a soft blanket wrapped around you, and the aroma of savory spices wafting through your home. It’s a depiction that feels just like fall, and it makes my heart happy. We’ve all been there — life gets busy, and sometimes we just need a wholesome meal that doesn’t require a culinary degree. Let’s dive into this creamy pumpkin soup recipe, which is not just nourishing but also a fantastic way to transition into those colder months ahead. Are you ready? Let’s bring the kitchen magic to life!
A Nostalgic Bowl
Growing up, every autumn my mom would whip up her signature pumpkin soup, packed with warmth and flavor. I remember coming home from school, the scent of garlic and pumpkin enveloping the house as I turned the corner into our kitchen. It was a bit of alchemy—watching her turn simple ingredients into something extraordinary. That soup was more than just a dish; it was a family tradition, a moment of togetherness, and a celebration of seasonal bounty.
I would eagerly await the sound of the blender whirring, signaling that the soup was almost ready, and I’d sneak spoonfuls straight from the pot. It was a ritual we shared, comfort food sealing our bond. Today, I strive to create a soup that captures that nostalgia in every bowl—a creamy pumpkin soup that radiates warmth, quality ingredients, and comfort. And trust me, your kitchen will smell fantastic!
Ingredients
Here’s what you’ll need to whip up this incredibly creamy pumpkin soup:
-
Pumpkin Puree: The star of the show! You can use canned pumpkin puree for convenience, or roast and puree fresh pumpkin if you’re feeling adventurous. Both work wonders. Just keep in mind that fresh pumpkin might be a tad lighter in color and flavor.
-
Broth (Vegetable or Chicken): This builds the base of our soup. A good quality broth enhances the flavor and gives a depth of taste. Want to cut down on sodium? Go for low-sodium varieties!
-
Heavy Cream: For that luscious creaminess that brings it all together! If you’re looking for a lighter version, coconut milk is a wonderful substitute, adding a hint of sweetness.
-
Onion: A finely chopped onion adds sweetness and depth. You can swap it with leeks for a milder flavor or shallots if you fancy something a bit more gourmet.
-
Garlic (optional): I always find that garlic elevates any dish. A couple of cloves, minced, can marry nicely with the pumpkin if you love that robust flavor. Skip it if you’re not a fan or have a sensitivity!
-
Spices (Cinnamon and Nutmeg): A dash of warm spices truly enhances the flavor profile of the soup. Feel free to use pumpkin pie spice if you have it on hand.
Understanding your ingredients is half the fun! We want this soup to be as approachable as it is delicious, so feel free to play around with substitutions based on your personal preferences and what you have on hand.
Step-by-Step Instructions
Ready to get cooking? Let’s bring our creamy pumpkin soup to life!
-
Sauté the Aromatics:
- In a large pot over medium heat, add a drizzle of olive oil (or butter for richer flavor) to coat the bottom. Add your chopped onion and a pinch of salt, allowing it to soften for about 5 minutes. Here’s a little kitchen hack: stirring in a bit of cracked black pepper helps to boost the flavor right away!
-
Add Garlic (if using):
- Toss in the minced garlic and sauté for about 1 minute; you’ll know it’s ready when the kitchen smells divine! Keep the heat at medium to avoid burning the garlic, which can become bitter.
-
Stir in the Pumpkin:
- Now, scoop in your pumpkin puree and mix it with the sautéed onions and garlic. This step is crucial—let it cook for a couple of minutes to enhance the flavor before adding the liquid. It allows the pumpkin to caramelize slightly and bring out its natural sweetness.
-
Incorporate Broth:
- Pour your broth of choice into the pot and stir to combine. Bring it to a gentle simmer. You want this to bubble gently, not boil fiercely. Let it cook for about 10 minutes! This allows the flavors to meld and develop.
-
Blend it Up:
- Here comes the fun part! If you have an immersion blender, use it directly in the pot to puree the soup until smooth. If using a regular blender, carefully transfer the soup in batches and blend until creamy. Always start slow to prevent any splashing.
-
Creamy Finish:
- Once blended to your liking, return the soup to the pot (if using a blender) and stir in your cream. You want this to get warm but not boil again. It’s that comforting creamy touch that brings it all together!
-
Season and Taste:
- Season your soup with salt and freshly cracked pepper. Here’s my secret: a pinch of cinnamon can elevate the sweetness of the pumpkin. Don’t forget to adjust the seasoning; everyone’s taste buds are different!
And voilà! You’ve crafted a delightful creamy pumpkin soup that’s a feast for the eyes and the taste buds!
Serving Suggestions
To serve this gorgeous soup, ladle into warm bowls, then finish with a drizzle of heavy cream for a touch of elegance. A sprinkle of roasted pumpkin seeds on top adds delightful crunch and nutty flavor. You can also finish with a dash of freshly chopped parsley or thyme for a pop of color and freshness. Paired with some crusty bread or grilled cheese, it’s a cozy meal to savor.
Recipe Variations
Feel like getting creative? Here are some variations to put a twist on this comforting classic:
-
Spicy Kick: Add a teaspoon of cayenne pepper or a splash of hot sauce to the pot for a spicy version that’ll warm you from the inside out.
-
Herb Infusion: Swap out some of the spices for fresh herbs such as thyme or sage, which complement pumpkin beautifully.
-
Smoky Flavor: Stir in some smoked paprika for an unexpected twist that adds depth and personality.
-
Roasted Veggie Medley: Before puréeing, fold in some roasted carrots or sweet potatoes for added sweetness and nutrition.
-
Vegan Version: Utilize coconut or almond milk instead of cream and vegetable broth to make this soup completely plant-based without losing any creaminess.
Chef’s Notes
What I love about this creamy pumpkin soup is how adaptable it is. Over the years, I’ve changed up the spices and toppings based on what I have available, but the core of the recipe always remains comforting. I’ve even been known to serve this soup cold during a particularly warm fall day! (Yes, yes, I know — sounds bizarre, but I promise it works!)
Cooking is about discovering what resonates with you and finding joy in the kitchen. Don’t be afraid to make this soup your own—after all, it should feel as good as it tastes!
FAQs and Troubleshooting
Q: My soup is too thick! What should I do?
A: Easy fix! Just stir in a bit more broth or water until you reach your desired consistency.
Q: How can I add more flavor?
A: Always taste as you go! A splash of apple cider vinegar or lemon juice at the end can brighten the flavors nicely.
Q: Can I freeze leftover soup?
A: Absolutely! Just let it cool completely, then freeze in airtight containers. To reheat, thaw overnight in the fridge and warm it up gently on the stove.
Q: My soup turned out grainy. What happened?
A: This can happen if the soup was blended too long or at too high a speed. Make sure to blend on a low setting, and just until smooth!
Nutritional Info
While I’m not a nutritionist, this creamy pumpkin soup is packed with vitamins and nutrients. Pumpkin is high in fiber and Vitamin A, making it a healthful option. Pair it with bread, and you’ve got a well-rounded meal!
And there you have it! A delightful, cozy, and creamy pumpkin soup that warms the heart and fills the belly, just like how my mom used to make it. I hope you enjoy every bite and create your own beautiful memories around the table. Remember, cooking is about connection and joy—it should never feel like a chore. Keep it fresh, simple, and utterly delicious, my friends! Happy cooking!
PrintCreamy Pumpkin Soup

A cozy bowl of creamy pumpkin soup, bursting with fall flavors and warmth.
- Prep Time: 15 minutes
- Cook Time: 30 minutes
- Total Time: 45 minutes
- Yield: 4 servings 1x
- Category: Main Course
- Method: Stovetop
- Cuisine: American
- Diet: Vegetarian
Ingredients
- 2 cups Pumpkin Puree
- 4 cups Broth (Vegetable or Chicken)
- 1 cup Heavy Cream
- 1 Onion, finely chopped
- 2 cloves Garlic, minced (optional)
- 1 teaspoon Cinnamon
- 1/2 teaspoon Nutmeg
- Olive oil or butter for sautéing
- Salt and pepper, to taste
Instructions
- Sauté the aromatics: In a large pot over medium heat, add a drizzle of olive oil (or butter) and sauté the onion with a pinch of salt for about 5 minutes.
- Add garlic (if using) and sauté for 1 minute.
- Stir in the pumpkin puree and let it cook for a couple of minutes.
- Incorporate broth and stir to combine. Bring to a gentle simmer and cook for about 10 minutes.
- Blend the soup until smooth using an immersion blender or a regular blender in batches.
- Add cream to the blended soup and warm it up without boiling.
- Season with salt, pepper, and a pinch of cinnamon to taste.
Notes
For a lighter version, use coconut milk instead of heavy cream. This soup can be served warm or cold.
Nutrition
- Serving Size: 1 serving
- Calories: 350
- Sugar: 5g
- Sodium: 400mg
- Fat: 12g
- Saturated Fat: 4g
- Unsaturated Fat: 6g
- Trans Fat: 0g
- Carbohydrates: 45g
- Fiber: 3g
- Protein: 15g
- Cholesterol: 30mg
Keywords: pumpkin soup, fall recipes, creamy soup, vegetarian soup, comfort food
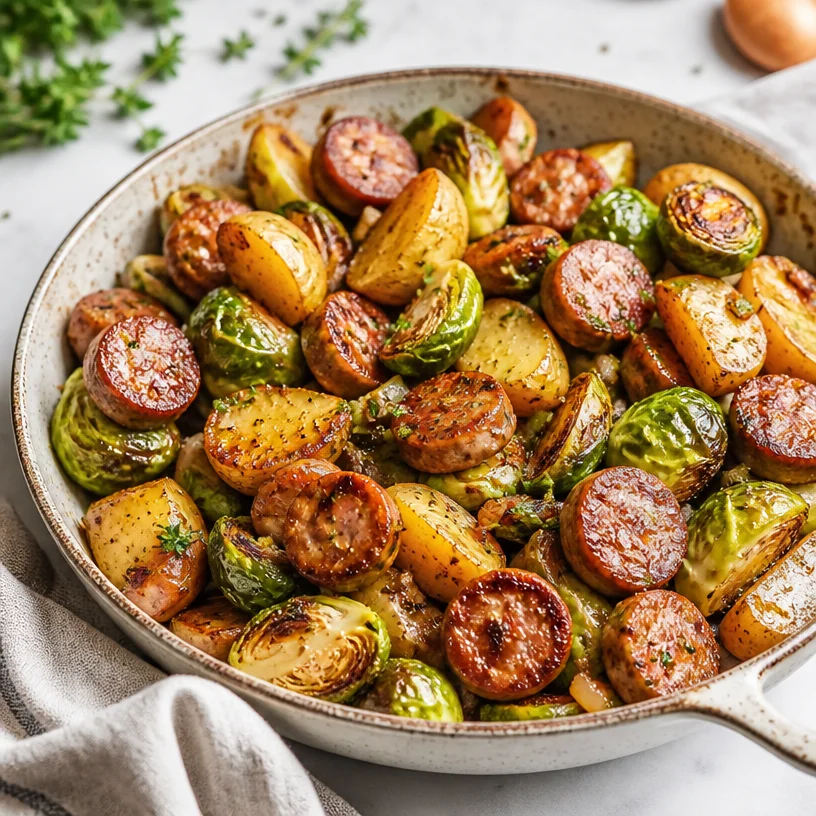
One-Pan Sausage Veggies: 25-Minute Weeknight Skillet
One-Pan Sausage Veggies: A Delicious and Easy Dinner Adventure
Welcome, food enthusiasts! Today, we’re diving into a dish that’s not only bursting with flavor but also a total game-changer for busy weeknights: One-Pan Sausage Veggies. Picture this: it’s been a long day, the last thing you want is a sink full of dishes or a complicated recipe to tackle. You want something that feels like a warm hug on a plate, right? Well, this recipe is just that—simple, delicious, and so satisfying!
Now, let’s talk about why one-pan meals have captured my heart. There’s something incredibly grounding and leisurely about those evenings spent in the kitchen. When I was a kid, my family often gathered around the table for homemade dinners. My mom had this magical ability to create mouthwatering meals with whatever we had left in the fridge. One night, she whipped up a dish that’s forever etched in my memory—sausage and whatever vegetables were on hand. It may have been a simple humble meal, but those delightful flavors dancing together on my plate ignited my love for cooking.
As I grew up and embarked on my culinary journey, I aimed to recreate that magic. This One-Pan Sausage Veggies recipe beautifully mirrors my childhood nostalgia while adding a modern twist. Made with hearty sausages, crisp Brussels sprouts, and creamy potatoes, you’ll find that every forkful is a satisfying bite of comfort. Plus, it’s all cooked in one pan, making clean-up a breeze. Are you ready to make this magic happen in your kitchen? Let’s get cooking!
A Taste of Home: A Personal Story
One of my fondest memories around food revolves around weekends with my family—a cherished time when we’d gather together after a busy week. I remember my mom preparing different meals every Saturday. It was like a fun cooking adventure. The aroma of sausages sizzling and potatoes roasting would waft throughout the house, filling every corner with warmth and excitement. One particular Saturday, she made a delightful one-pan dish with some leftover sausages, seasonings, and whatever vegetables we had lying around. As we sat at the table, sharing stories and laughing over each bite, I realized how food truly brings us together.
Fast forward to today, I’ve taken that very idea and built upon it. My One-Pan Sausage Veggies recipe channels that same cozy spirit, combining what once were fridge leftovers into a wholesome and vibrant dinner. Each time I cook this meal, I’m taken back to those sunlit days, bringing my kids into the kitchen to share that sense of togetherness. It’s a reminder that the best meals are often those made with love and a bit of creativity, all wrapped up in a single pan.
Ingredients
Here’s what you’ll need to get started on this beautiful dish:
-
Sausages (about 4-6, any variety you prefer)
- I recommend using your favorite sausage—whether it’s spicy Italian, chicken, or even plant-based options like soy or lentil. Feel free to customize to your taste!
-
Brussels Sprouts (1 pound, trimmed and halved)
- These little gems add such a beautiful, earthy flavor. If Brussels sprouts aren’t your thing, try substituting with broccoli, green beans, or even asparagus!
-
Potatoes (about 1 pound, diced)
- I like using baby Yukon Golds for their creamy texture, but any type of potato (sweet potatoes add a nice sweetness!) works here. Just make sure to cut them into even pieces for uniform cooking.
-
Olive Oil (3 tablespoons)
- Olive oil not only brings richness but also helps achieve that lovely golden brown crust. If you’re looking for a change, avocado oil is a fantastic alternative.
-
Garlic Powder (1 teaspoon)
- A flavor powerhouse! You can use fresh minced garlic if you prefer, just adjust the quantity according to your taste.
-
Dried Italian herbs (1 teaspoon – a blend of oregano, basil, and thyme works well)
- These herbs bring that Mediterranean vibe to your dish. Use fresh herbs to enhance the flavor even more if they’re available!
-
Salt and Pepper (to taste)
- Essential for bringing out the natural flavors in your veggies and sausage. Don’t be shy with this!
Step-by-Step Instructions
Now that we’ve gathered all our vibrant ingredients, let’s turn up the heat and whip up this delightful dish! Follow along with these simple steps:
-
Preheat your oven: Set your oven to 400°F (200°C) and let it come to that perfect cooking temperature. This step is crucial for achieving beautifully roasted vegetables.
-
Prepare the pan: Grab a large rimmed baking sheet—that surface area helps everything get nice and crispy! Drizzle about two tablespoons of olive oil over the top, making sure to spread it evenly.
-
Cut your sausages: If you prefer even cooking, slice your sausages into pieces—about 2 inches thick works well. If you’re using links, you can keep them whole for a rustic feel.
-
Toss the veggies: In a large bowl, combine the Brussels sprouts and diced potatoes. Drizzle with the remaining olive oil, then sprinkle the garlic powder, dried herbs, salt, and pepper over the top. Give everything a good toss so that each piece gets evenly coated. This is where the magic begins!
-
Add the sausages: Now, it’s time to introduce our stars of the show! Add the sliced sausages to the bowl and mix everything one last time. I’m telling you, this combination is mouthwatering already!
-
Spread it out: Pour the entire mixture onto your prepared baking sheet, spreading it out in a single layer. This allows for optimal roasting, so don’t overcrowd the pan—feel free to use two if needed!
-
Roast away: Pop the baking sheet into the preheated oven and let everything roast for about 25-35 minutes. Halfway through, make sure to stir the ingredients around to ensure even cooking. Keep an eye on those Brussels sprouts; you want them tender and golden-brown, not mushy.
-
Check for doneness: When your sausages are cooked through and the veggies are beautifully caramelized, take your pan out of the oven. Use a meat thermometer for the sausage to make sure they’ve reached an internal temperature of 165°F (74°C).
-
Serve it up: This dish is all about enjoying those simple moments. Grab your favorite plate or serving dish, and dive into the flavorful feast you just created.
Serving Suggestions
Plating this One-Pan Sausage Veggies is simple yet beautiful! Serve it hot, straight from the oven, and enjoy the vibrant colors on your plate. I love sprinkling a little extra chopped fresh parsley over the top for a pop of freshness and color. A side of crusty bread or a light green salad can complement this dish nicely if you’re feeling fancy. But let’s be real—this dish can stand strong on its own, and you’ll find it’s already a complete meal!
Recipe Variations
Feeling adventurous? Here are a few creative twists to keep things exciting:
- Spicy Kick: Add some red pepper flakes before roasting for a touch of heat!
- Herby Delight: Substitute the dried Italian herbs with fresh rosemary or thyme for a fragrant twist.
- Zesty Lemon: Squeeze some fresh lemon juice over the dish just before serving for brightness.
- Creamy Additions: Add dollops of crème fraîche or Greek yogurt on top for a creamy finish.
- Vegetarian Delight: Swap out the sausage for roasted chickpeas or marinated tempeh to make it plant-based.
Chef’s Notes
This One-Pan Sausage Veggies has a special place in my heart, quite like the cherished family meals from my childhood. It’s evolved over the years; I’ve learned that cooking doesn’t have to be tedious or stressful—it’s all about simplicity and flavor. Whenever I whip up this dish, I can’t help but smile as the aromas fill the kitchen, transforming the space into a cozy haven. Plus, my kids love it, which makes me a happy chef!
The flexibility of this recipe is fantastic, allowing for a little improvisation based on what you have at hand. It’s a reminder that every meal can be a little adventure. You just need the right ingredients and a generous sprinkle of creativity!
FAQs and Troubleshooting
1. What can I do if my veggies are cooking too quickly?
If you notice your veggies browning too fast, simply pull the baking sheet out and cover it loosely with aluminum foil to manage the cooking while still allowing them to roast.
2. Can I prep this dish ahead of time?
Absolutely! You can chop your veggies and sausage the night before. Store them in an airtight container in the fridge and toss them together right before roasting.
3. How can I tell when the sausages are fully cooked?
Using a meat thermometer is the best way to check! Sausages should reach an internal temperature of 165°F (74°C) to ensure they’re safe to eat.
4. Is it okay to use frozen veggies?
It’s best to use fresh vegetables for this recipe to achieve that lovely caramelized texture. However, if frozen veggies are all you have on hand, just be sure to adjust the cooking time, as they may require less time in the oven.
Nutritional Info
While I always encourage enjoying food without the pressure of counting calories, if you’re curious, a typical serving of One-Pan Sausage Veggies contains approximately:
- Calories: 450
- Protein: 20g
- Carbohydrates: 35g
- Fat: 25g
Your mileage may vary based on the specific ingredients and portion sizes, but this dish is sure to fill you with wholesome goodness!
That wraps up our culinary adventure into the delightful realm of One-Pan Sausage Veggies! I hope you find as much joy in cooking and sharing this dish as I do. Remember, every meal is an opportunity to create lasting memories—so let’s keep it fresh, simple, and seriously delicious! Happy cooking!
PrintOne-Pan Sausage Veggies

A simple and delicious one-pan meal featuring hearty sausages, Brussels sprouts, and creamy potatoes, perfect for busy weeknights.
- Prep Time: 15 minutes
- Cook Time: 35 minutes
- Total Time: 50 minutes
- Yield: 4 servings
- Category: Main Course
- Method: Baking
- Cuisine: American
- Diet: Omnivore
Ingredients
- Sausages (about 4-6, any variety)
- Brussels Sprouts (1 pound, trimmed and halved)
- Potatoes (about 1 pound, diced)
- Olive Oil (3 tablespoons)
- Garlic Powder (1 teaspoon)
- Dried Italian herbs (1 teaspoon)
- Salt and Pepper (to taste)
Instructions
- Preheat your oven to 400°F (200°C).
- Prepare a large rimmed baking sheet and drizzle two tablespoons of olive oil over it.
- Cut the sausages into pieces or leave them whole if using links.
- Toss the Brussels sprouts and diced potatoes in a bowl with the remaining olive oil, garlic powder, dried herbs, salt, and pepper.
- Add the sliced sausages and mix everything together.
- Spread the mixture on the prepared baking sheet in a single layer.
- Roast for about 25-35 minutes, stirring halfway through.
- Check for doneness with a meat thermometer to ensure sausages reach 165°F (74°C).
- Serve hot and enjoy!
Notes
For added flavor, sprinkle fresh parsley before serving. This dish pairs nicely with crusty bread or a light salad.
Nutrition
- Serving Size: 1 serving
- Calories: 450
- Sugar: 5g
- Sodium: 600mg
- Fat: 25g
- Saturated Fat: 9g
- Unsaturated Fat: 10g
- Trans Fat: 0g
- Carbohydrates: 35g
- Fiber: 5g
- Protein: 20g
- Cholesterol: 80mg
Keywords: one-pan meal, sausage, veggies, easy dinner, healthy recipe

One-Pan Creamy Cheesy Broccoli Rice Casserole for Weeknights
The Ultimate Cheesy Broccoli Rice Casserole: A Cozy Classic
Welcome, foodie friends! Today, we’re diving into the wonderfully creamy, cheesy world of Broccoli Rice Casserole. This dish is like a warm hug on a plate and an absolute family favorite. It’s comfort food at its best, packed with wholesome ingredients and delightful flavors, making it perfect for any occasion—from weeknight dinners to potlucks and holiday feasts.
A Nostalgic Bite: My Love for Casseroles
Growing up, my family had a tradition of “Casserole Sundays.” No matter where we were during the week, Sunday evenings were reserved for gathering around the dinner table, indulging in whatever delicious creation my mom whipped up. One dish that was always a star of the show was her Cheesy Broccoli Rice Casserole.
I can still picture the scene: the warmth of the kitchen, the tantalizing aroma wafting through the air, and the excitement as we impatiently waited for dinner. My brothers and I would race to the table, eager to dig into that gooey, cheesy goodness. Each bite felt like a celebration, not just of food but of family.
Now, as I make this casserole in my own kitchen, I find myself reminiscing about those moments and the joy that this dish brings. Cooking it is more than just preparing a meal; it’s an ode to my childhood, a connection to those precious family gatherings, and a beautiful reminder that food truly brings us together.
Ingredients for Cheesy Broccoli Rice Casserole
Let’s get started with what you need for this delightful dish! Here’s your shopping list:
-
Rice: Use long-grain white or brown rice for a nutty flavor or opt for instant rice for a quick cook. Brown rice adds a bit more fiber and nutrition as well.
-
Broccoli: Fresh broccoli is ideal, but if you’re short on time, frozen broccoli florets work just as well! Just make sure to thaw and squeeze out excess water to keep your casserole from getting soggy.
-
Cheddar Cheese: Sharp cheddar gives an extra kick of flavor, but feel free to mix it up with mild cheddar or even pepper jack if you’re feeling adventurous!
-
Milk: Whole milk enhances that creamy texture, but you can substitute with low-fat milk or plant-based milk for a dairy-free version.
-
Butter: Unsalted butter helps control the salt level in your dish. You can use olive oil or coconut oil for a dairy-free option.
-
Salt & Pepper: These simple seasonings elevate all the flavors. Adjust to taste, and consider adding garlic powder or onion powder for extra zing!
Step-by-Step Instructions
Now that we have our ingredients ready, let’s get cooking! Here’s how to make your very own Cheesy Broccoli Rice Casserole:
-
Preheat Your Oven: Set your oven to 350°F (175°C) and let it warm up while you prepare the casserole. This way, it’ll be perfectly heated when it’s time to bake!
-
Cook the Rice: In a medium saucepan, follow the package instructions to cook your rice. If you’re using brown rice, remember it takes a bit longer to cook, usually about 45 minutes. Once it’s soft and fluffy, set aside.
-
Blanch the Broccoli: While your rice is cooking, bring a small pot of salted water to a boil. Add the broccoli florets and cook for 2-3 minutes until bright green and tender. Immediately drain them and rinse under cold water to stop the cooking process. This keeps that vibrant color and crispy texture!
-
Prepare the Cheese Sauce: In a large mixing bowl, melt 3 tablespoons of butter in the microwave or a small saucepan. Whisk in the milk until smooth. Then add in 2 cups of shredded cheddar cheese, salt, and pepper. Keep whisking until the cheese is melted and the sauce is velvety!
-
Combine Rice, Broccoli, and Cheese: Add the cooked rice and blanched broccoli to the cheese sauce, stirring gently to combine. Make sure every piece of broccoli and grain of rice is coated in that delicious cheesy goodness.
-
Transfer to a Baking Dish: Lightly grease a 9×13 inch baking dish. Pour the mixture in, spreading it evenly. If you want to make it extra cheesy, sprinkle some additional cheese on top!
-
Bake: Pop your casserole in the oven and bake for about 25-30 minutes, or until the cheese is bubbly and golden brown on top. Your kitchen will smell amazing during this time!
-
Serve and Enjoy: Once baked, let it sit for a few minutes before diving in. This allows the casserole to firm up a bit, making it easier to scoop.
Serving Suggestions
When it’s time to serve, I love to plate this casserole in generous portions. Drizzle a bit of hot sauce on top for those who crave a little kick! Pair it with a simple side salad or some roasted veggies to balance out the richness. Your family will be raving about this dish long after the plates are empty!
Recipe Variations
Feel free to play with this recipe and make it your own! Here are a few fun variations:
-
Add Protein: For a heartier meal, stir in some cooked chicken, turkey, or even tofu for a veggie-packed option!
-
Get Spicy: Mix in some diced jalapeños or crushed red pepper flakes for a spicy twist.
-
Switch Up the Cheese: Try using a blend of mozzarella and gouda for a different flavor profile.
-
Vegan Version: Substitute dairy cheese with cashew cheese or a vegan cheese blend, and use almond milk instead of regular milk.
-
Extra Veggies: Toss in some cooked carrots or bell peppers for added color and nutrients!
Chef’s Notes
This casserole has evolved beautifully over time. I remember trying to make it healthier by adding quinoa instead of rice once—let’s just say it didn’t have the same comforting vibe! But it was a great experiment that taught me to keep this recipe classic. Every time I make it, I put my own little twist, whether it’s using up leftover veggies or changing the cheese; it’s always a surprise to see what combo will make a reappearance at our table.
And who could forget the time I accidentally spilled an entire cup of cheese in the mixing bowl? Let’s just say, the “extra cheesy” nickname stuck, and that night we had a castle of cheesy goodness!
FAQs and Troubleshooting
-
Why is my casserole watery?
Make sure to avoid overcooking your broccoli and draining it well if you’re using frozen. Also, if you add too much milk, it might become watery. Just tweak the liquid amounts next time! -
Can I prep this casserole ahead of time?
Absolutely! You can prepare everything up to the baking step, cover it, and store it in the fridge for 24 hours. When you’re ready to bake, let it sit at room temperature for about 30 minutes before popping it in the oven. -
What can I do with leftovers?
This casserole is fabulous for meal prep! Store in an airtight container in the fridge for up to 3–4 days. It also freezes well—just portion out your leftovers and freeze for those busy days when you need a quick meal! -
Can I make this without cheese?
You can! For a dairy-free option, skip the cheese and try a cashew cream or a creamy vegan sauce made with blended nuts and nutritional yeast for that cheesy flavor.
Nutritional Info
While the specific breakdown may vary based on ingredient choices, this Cheesy Broccoli Rice Casserole is generally a satisfying meal rich in fiber, vitamins, and minerals, making it a wholesome option for your table!
And there you have it, friends! This Cheesy Broccoli Rice Casserole is not just a recipe; it’s a chance to create memories that will last a lifetime. Gather around the table with your loved ones, dig in, and enjoy the cheesy goodness one delicious bite at a time. Happy cooking!
PrintThe Ultimate Cheesy Broccoli Rice Casserole

A wonderfully creamy and cheesy casserole, perfect for family dinners and gatherings.
- Prep Time: 15 minutes
- Cook Time: 30 minutes
- Total Time: 45 minutes
- Yield: 4 servings 1x
- Category: Main Course
- Method: Baking
- Cuisine: American
- Diet: Vegetarian
Ingredients
- 2 cups long-grain white or brown rice
- 2 cups fresh or frozen broccoli florets
- 2 cups shredded sharp cheddar cheese
- 1 cup whole milk
- 3 tablespoons unsalted butter
- Salt to taste
- Pepper to taste
Instructions
- Preheat your oven to 350°F (175°C).
- Cook the rice according to package instructions.
- Blanch the broccoli in salted boiling water for 2-3 minutes, then drain and rinse with cold water.
- Prepare the cheese sauce by melting butter and whisking in milk, then adding cheese, salt, and pepper.
- Combine cooked rice and broccoli with the cheese sauce.
- Transfer the mixture to a greased 9×13 inch baking dish.
- Bake for 25-30 minutes until cheese is bubbly and golden brown.
- Serve and enjoy after letting it sit for a few minutes.
Notes
You can prep this casserole ahead of time and bake it the next day. Drizzle with hot sauce for an added kick!
Nutrition
- Serving Size: 1 serving
- Calories: 350
- Sugar: 5g
- Sodium: 400mg
- Fat: 12g
- Saturated Fat: 4g
- Unsaturated Fat: 6g
- Trans Fat: 0g
- Carbohydrates: 45g
- Fiber: 3g
- Protein: 15g
- Cholesterol: 30mg
Keywords: broccoli casserole, cheesy rice, comfort food, vegetarian dish, family recipe

Weeknight One-Pan Chicken & Stuffing Bake (Crispy Crust)
Chicken & Stuffing Bake: A Cozy Comfort Dish for Any Day
Welcome to Clean Plate Cravings, where we’re all about fresh, feel-good food that fits seamlessly into our everyday lives! Today, we’re diving into a classic that warms the heart and fills the belly: the Chicken & Stuffing Bake. This dish is more than just a meal; it’s a nostalgic hug in a casserole dish, perfect for gatherings, weeknight dinners, or whenever you need a little extra comfort. Ready to create something truly delightful? Let’s get started!
A Delicious Memory
One of my fondest memories associated with this Chicken & Stuffing Bake takes me back to my childhood kitchen. Every Sunday, my family would gather around the table after a boisterous day of playing outside, and the scent of something delicious bubbling in the oven would beckon us in like a siren song. My mom would prepare her version of this dish, filling our home with the warm aromas of poultry, spices, and savory stuffing.
I distinctly remember the anticipation while waiting for dinner. I’d catch glimpses of the chicken turning golden brown and the stuffing puffing up ever so slightly, promising a mouthwatering finish. When we finally sat down, the clinks of forks and happy chatter danced around the table, blending with the satisfaction of a meal that felt like home. Each bite was a balance of juicy chicken, flavorful stuffing, and that little bit of creaminess I craved. This Chicken & Stuffing Bake became more than just another dish; it was an experience, a moment, and a tradition.
As I grew older and ventured into my own kitchen, I wanted to create that same sense of warmth and nostalgia. Now, I’m excited to share this cherished recipe with you. Let’s get cooking, shall we?
Ingredients
Here’s what you’ll need for the ultimate Chicken & Stuffing Bake:
-
Chicken Breasts (boneless, skinless)
Juicy and easy to cook, chicken breasts provide a lean protein base. You can swap with thighs for a richer flavor, just adjust the cooking time accordingly. -
Stuffing Mix
This is the star of our show! Purchase a pre-made stuffing mix for convenience. If you’re feeling adventurous, you can make your own from day-old bread seasoned with herbs. -
Cream of Chicken Soup
This adds that delectable creaminess to the dish! You can substitute it with cream of mushroom or even a homemade white sauce for a healthier twist. -
Chicken Broth (or stock)
A splash of broth keeps everything moist and flavorful. Low-sodium versions are great if you’re watching your salt intake. -
Butter
A couple of tablespoons of melted butter will enrich the stuffing and add another layer of flavor. Feel free to substitute with olive oil for a lighter option! -
Seasonings (Salt, Pepper, Herbs)
Simple salt and pepper work wonders, but consider adding sage, thyme, or rosemary to elevate the flavors. These herbs give a classic touch to the chicken and stuffing marriage.
Step-by-Step Instructions
Now, let’s put on our aprons and get into the kitchen! Here’s how to whip up this Chicken & Stuffing Bake:
-
Preheat Your Oven
Set that oven to 350°F (175°C). This preheating step is crucial for ensuring even cooking. Let the anticipation build as your kitchen fills with warmth! -
Prepare the Chicken
Season your chicken breasts with salt, pepper, and any herbs you desire. This simple step infuses flavor into the meat itself. Place them in a greased 9×13-inch baking dish. Get those puppies ready to soak up the goodness! -
Mix the Stuffing
In a separate bowl, combine your stuffing mix, melted butter, and chicken broth. This mixture should be moist but not soggy. If you prefer a little crunch, keep some broth aside to adjust the consistency as needed. I love to mix in some diced onions or celery if I’m feeling fancy! -
Layer the Goodness
Once the stuffing is mixed well, spread it evenly over the chicken in the baking dish. Don’t be shy; pack it down a bit! This layer of stuffing will absorb all the chicken juices as it cooks, creating that rich, fantastic flavor. -
Add the Cream
Pour the cream of chicken soup over the stuffing. Use the back of your spoon to spread it out evenly. This will ensure every bit of stuffing gets that luscious sauce! -
Bake to Perfection
Cover the dish with aluminum foil and pop it in the oven for about 45 minutes. This foil helps keep the chicken moist and the stuffing tender. Remove the foil and bake for an additional 10-15 minutes, or until the chicken is cooked through (internal temperature should hit 165°F or 74°C) and the stuffing is golden on top. -
Cool and Serve
Once it’s out of the oven, let it rest for about 10 minutes. This allows the juices to redistribute, ensuring juicy chicken and flavorful stuffing. Trust me, the wait will be worth it!
Serving Suggestions
To serve your Chicken & Stuffing Bake, simply scoop generous portions onto plates. Garnish it with fresh herbs like parsley or sage for a pop of color and flavor. Pair this dish with steamed green beans or a crisp salad to brighten up the meal. Oh, and don’t forget some crusty bread for those creamy leftovers—because let’s be honest, the sauce is the best part!
Recipe Variations
Feeling creative? Here are some tasty variations to switch things up:
-
Cheesy Chicken & Stuffing Bake: Add a layer of your favorite cheese (think cheddar or mozzarella) on top of the stuffing before the final bake for a gooey, cheesy delight.
-
Herb & Lemon Chicken: Infuse the dish with brightness by adding lemon zest to the stuffing and placing lemon slices on top of the chicken before baking.
-
Vegetable Medley: Stir in some diced vegetables like carrots, peas, or bell peppers into the stuffing mix for a nutritious upgrade.
-
Spicy Kick: Add some chopped jalapeños or a sprinkle of cayenne pepper to the stuffing for a little heat!
-
Gluten-Free Option: Use gluten-free stuffing mix and cream soup to make this dish suitable for gluten-sensitive friends or family.
Chef’s Notes
This Chicken & Stuffing Bake has been a staple in my kitchen for years, and I love how versatile it is. I remember experimenting with leftover holiday stuffing one Thanksgiving, adding chunks of turkey instead of chicken, and everybody adored it! This dish has evolved over time, allowing me to adapt it based on what I have on hand—proof that cooking should be a joyful and flexible experience.
So whether you make it classic, cheesy, or packed with veggies, you can’t go wrong with this comforting bake. Also, the leftovers (if there are any) taste even better the next day—seriously!
FAQs and Troubleshooting
Q: What if my chicken isn’t fully cooked after 60 minutes?
A: Ovens can vary in temperature, so if this happens, simply cover the dish and let it bake for another 10-15 minutes, checking periodically until the chicken reaches 165°F.
Q: Can I prepare this dish ahead of time?
A: Absolutely! You can assemble the Chicken & Stuffing Bake the night before. Just cover it tightly and refrigerate it. Bring it to room temperature before popping it in the oven, and adjust your cooking time as necessary.
Q: How do I prevent the stuffing from being dry?
A: Make sure your stuffing is adequately moistened with broth before adding it to the dish. You can also cover it with foil during the first part of baking to trap moisture.
Q: Can I use leftover cooked chicken?
A: Yes, you can skip the initial cooking of the chicken and layer in pre-cooked chicken. Just adjust your baking time down to 30-35 minutes, as you’re just warming everything through.
Nutritional Info
Here’s a quick glance at the nutrition of this comforting dish based on standard ingredients (per serving):
- Calories: Approximately 390
- Protein: 32g
- Carbohydrates: 38g
- Fat: 12g
Keep in mind that these values can vary based on portion sizes and specific ingredients used.
There you have it! A chicken dish that’s not only straightforward to make but layered with memories, flavor, and the spirit of comfort. I hope you enjoy this recipe as much as I do. It’s more than food; it’s a warm embrace, any day of the week. Happy cooking, and let’s keep it fresh, simple, and seriously delicious!
PrintChicken & Stuffing Bake

A cozy comfort dish that warms the heart and fills the belly, perfect for gatherings or weeknight dinners.
- Prep Time: 15 minutes
- Cook Time: 60 minutes
- Total Time: 75 minutes
- Yield: 4 servings 1x
- Category: Main Course
- Method: Baking
- Cuisine: American
- Diet: None
Ingredients
- 4 Chicken Breasts (boneless, skinless)
- 1 box Stuffing Mix
- 1 can Cream of Chicken Soup
- 1 cup Chicken Broth (or stock)
- 2 tablespoons Butter
- Salt, Pepper, and Herbs (to taste)
Instructions
- Preheat your oven to 350°F (175°C).
- Prepare the chicken by seasoning with salt, pepper, and herbs before placing in a greased baking dish.
- Mix the stuffing mix, melted butter, and chicken broth in a separate bowl until moist.
- Layer the stuffing evenly over the chicken in the baking dish.
- Add the cream of chicken soup over the stuffing, spreading it evenly.
- Bake covered with foil for 45 minutes, then uncovered for an additional 10-15 minutes until the chicken reaches 165°F (74°C).
- Cool for 10 minutes before serving.
Notes
Try adding cheese or vegetables for extra flavor and nutrition. This dish can also be prepared ahead of time.
Nutrition
- Serving Size: 1 serving
- Calories: 390
- Sugar: 2g
- Sodium: 700mg
- Fat: 12g
- Saturated Fat: 5g
- Unsaturated Fat: 6g
- Trans Fat: 0g
- Carbohydrates: 38g
- Fiber: 2g
- Protein: 32g
- Cholesterol: 75mg
Keywords: chicken bake, comfort food, casserole, stuffing, easy recipe
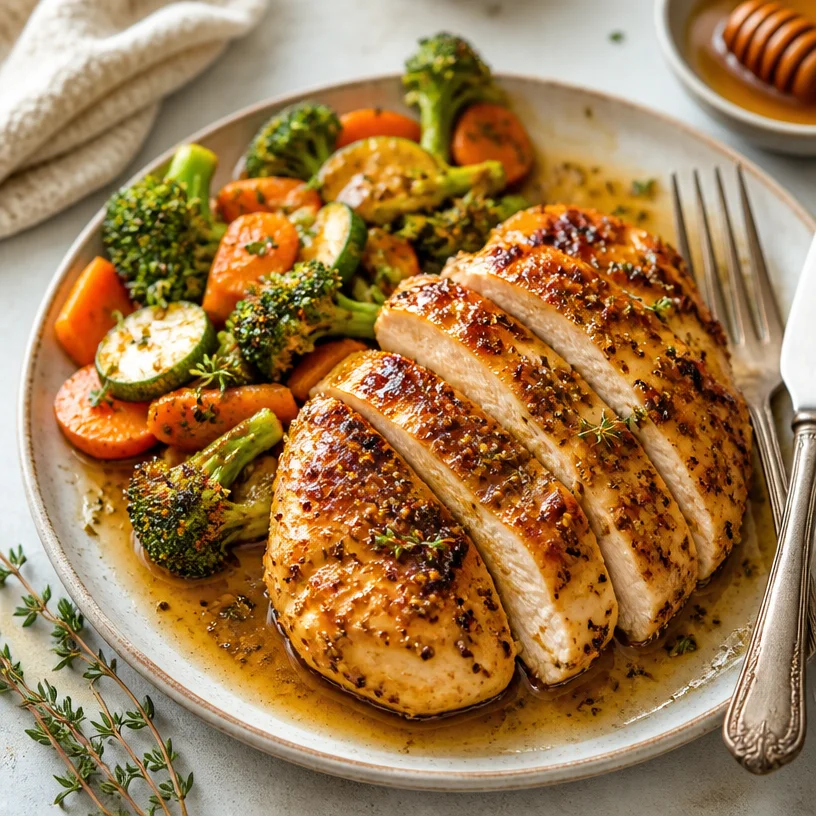
One-Pan Maple Mustard Chicken Dinner in 30 Minutes
Maple Mustard Chicken: A Simple Yet Satisfying Delight
Hey there, fellow food lovers! Today, we’re diving into the tasty world of Maple Mustard Chicken—trust me, this dish is going to blow your mind! It’s sweet, tangy, and everything you didn’t know you needed on your dinner table. If you’re looking for a recipe that’s not just simple but also satisfies those cravings for flavor and warmth, you’re in for a treat.
Let’s set the stage. Picture this: a cozy evening, the unmistakable aroma wafting from the kitchen, and your favorite playlist filling the air. You take that first bite of Maple Mustard Chicken, and it’s pure magic—the sweetness of maple syrup balancing beautifully with the zesty mustard. Oh yeah, you know what I’m talking about!
A Personal Taste of Nostalgia
This recipe brings back so many memories for me, and I can’t help but smile when I think of the first time I made it. It was one of those spontaneous weeknight dinners after a long day of work. I had just moved into my first apartment, and my kitchen was mostly bare with a few essential spices and sauces. On a whim, I decided to experiment. I grabbed some chicken breasts, a bottle of maple syrup sitting at the back of my fridge, and my trusty mustard.
With a little creativity and a dash of bravery, I whipped up this dish, not expecting much. But to my surprise, the blend of flavors was fantastic! My roommate, who is a notoriously picky eater, took one taste and declared it a hit! From that moment on, Maple Mustard Chicken became a staple in our household, a crowd-pleaser that brought smiles to busy weeknights. And let me tell you, it soon became the go-to recipe whenever friends came over for dinner.
So, if you’re ready to create delicious memories of your own, let’s jump right into it!
Ingredients
Here’s what you’ll need for this scrumptious Maple Mustard Chicken, along with some tips and tricks to make your dish shine:
-
Chicken Breasts: The star of the dish! I recommend using boneless skinless chicken breasts for tenderness and quicker cooking. Feel free to substitute with chicken thighs for a richer flavor, or even tofu for a vegetarian twist.
-
Maple Syrup: This liquid gold adds natural sweetness and depth to the dish. If you’re in a pinch, honey works great, though it does give a slightly different flavor profile. For a fun twist, try using agave syrup!
-
Mustard: I prefer Dijon for its tangy kick, but you can experiment with whole grain mustard for a more rustic texture or yellow mustard for a milder taste. Just remember, the mustard is what brings that zing!
-
Olive Oil: A little fat helps to carry flavor and adds a lovely golden color to the chicken. You can substitute it with avocado oil or even melted butter, depending on your preferences.
-
Garlic: Fresh garlic cloves add a lovely aromatic quality that elevates the dish. If you’re in a hurry, you can use garlic powder instead, but freshly minced brings the best flavor.
-
Salt and Pepper: These pantry staples enhance all the flavors in your dish. Always adjust to your taste!
Step-by-Step Instructions
Ready to cook? Here’s how to make your Maple Mustard Chicken:
-
Preheat Your Oven: First things first, preheat your oven to 375°F (190°C). This will ensure your chicken cooks evenly and gets that lovely roast.
-
Prepare the Chicken: Rinse the chicken breasts under cold water and pat them dry with paper towels. This step helps the marinade stick better. Season both sides with salt and pepper before moving on.
-
Make the Maple Mustard Marinade: In a medium bowl, combine ½ cup of maple syrup, ¼ cup of Dijon mustard, 2 minced garlic cloves, and 2 tablespoons of olive oil. Whisk until it’s well blended. Take a moment to enjoy the enticing aroma!
-
Marinate the Chicken: Place the chicken breasts in a shallow dish and pour the marinade over the top. Make sure each piece is coated evenly. This is key to getting that delicious flavor throughout! Cover it and let it marinate for at least 30 minutes—quick tip: the longer, the better! If you can, marinate overnight in the fridge.
-
Transfer to Baking Dish: Once marinated, transfer the chicken to a baking dish, reserving the marinade. Arrange the breasts evenly spaced so they cook nicely.
-
Bake: Pop the dish in the preheated oven. Bake for 25-30 minutes, or until the chicken is cooked through and reaches an internal temperature of 165°F (75°C). As it bakes, the sweet glaze will caramelize, creating a glorious crust.
-
Baste with Marinade: Halfway through baking, drizzle some reserved marinade over the chicken for extra glaziness. Just make sure to avoid cross-contamination.
-
Broil to Finish: For an extra touch, turn on the broiler for the last 2-3 minutes of cooking. Watch it carefully—the chicken will bubble and caramelize beautifully!
-
Rest and Serve: Once done, remove the chicken from the oven, tent it with foil, and let it rest for about 5 minutes. This allows the juices to redistribute, making your chicken ultra moist!
Serving Suggestions
When it’s time to serve, there are so many delightful options! Plate your Maple Mustard Chicken alongside a vibrant garden salad for a refreshing contrast. You can also serve it with roasted vegetables or over a fluffy bed of quinoa or rice to soak up that delicious sauce. Don’t forget to drizzle a bit of the leftover glaze on top for added flair!
Recipe Variations
Want to get a little creative? Here are some fun variations you can try:
-
Herb Infusion: Add fresh chopped herbs like rosemary or thyme to the marinade for an earthy touch.
-
Spicy Kick: Mix in a teaspoon of red pepper flakes or a splash of hot sauce to the marinade for a spicy version.
-
Fruitiness: Toss in some sliced apples or pears into the baking dish for a sweet touch that caramelizes beautifully alongside the chicken.
-
Gluten-Free Option: If you’re avoiding gluten, double-check your mustard and enjoy this dish with gluten-free sides like quinoa or a fresh veggie medley.
-
Stovetop Method: For a quick version, you can pan-sear the chicken in a skillet until golden brown, then pour in the marinade and let it simmer until cooked through.
Chef’s Notes
I can barely keep track of how many times I’ve made this dish over the years. From weeknight dinners to fancy gatherings, Maple Mustard Chicken never disappoints. One of my favorite memories was cooking this on a chilly fall night for my family as we gathered around the table, sharing laughter and stories. That’s the beauty of food—it brings us together!
In fact, it doesn’t just satisfy the taste buds; it nurtures relationships and creates lasting memories. So don’t be afraid to share your own kitchen stories when making this delicious recipe!
FAQs and Troubleshooting
-
How do I know when my chicken is done? Use a meat thermometer to check the internal temperature; it should read 165°F (75°C). No thermometer? Cut into the thickest part of the chicken, and it should be opaque with no pink juices.
-
Can I make this ahead of time? Absolutely! You can marinate the chicken the night before and store it in the fridge. For leftovers, just store the chicken in an airtight container in the refrigerator for up to 3 days.
-
Why is my glaze not sticking? Make sure you’re marinating long enough and basting during cooking. It helps create that sticky goodness you crave!
-
Can I use frozen chicken? Yes, but thaw it completely before marinating and cooking. This ensures even cooking and proper flavor absorption.
Nutritional Info
Although I like to stress the joy of food over strict nutrition, here’s a quick snapshot of the nutrition for a standard serving of Maple Mustard Chicken:
- Calories: Approximately 350 kcal
- Protein: 30g
- Carbohydrates: 30g
- Fat: 10g
Now that you have everything you need, it’s time to get cooking! Bring the aroma of Maple Mustard Chicken into your kitchen and savor every bite. Here’s to happy cooking and delicious memories, friends! Enjoy!
PrintMaple Mustard Chicken

A sweet and tangy chicken dish marinated in a delicious maple mustard glaze, perfect for any weeknight dinner.
- Prep Time: 10 minutes
- Cook Time: 30 minutes
- Total Time: 40 minutes
- Yield: 2 servings 1x
- Category: Main Course
- Method: Baking
- Cuisine: American
- Diet: Gluten-Free
Ingredients
- 2 boneless skinless chicken breasts
- ½ cup maple syrup
- ¼ cup Dijon mustard
- 2 minced garlic cloves
- 2 tablespoons olive oil
- Salt and pepper to taste
Instructions
- Preheat your oven to 375°F (190°C).
- Prepare the chicken by rinsing under cold water and patting dry.
- Make the maple mustard marinade by combining maple syrup, Dijon mustard, minced garlic, and olive oil in a medium bowl.
- Marinate the chicken in a shallow dish with the marinade for at least 30 minutes.
- Transfer the chicken to a baking dish and arrange evenly.
- Bake for 25-30 minutes, until the chicken reaches an internal temperature of 165°F (75°C).
- Baste the chicken with reserved marinade halfway through baking.
- Broil for the last 2-3 minutes for a crispy finish.
- Rest the chicken for 5 minutes before serving.
Notes
For more flavor, marinate overnight. Serve with a fresh salad or over quinoa.
Nutrition
- Serving Size: 1 serving
- Calories: 350
- Sugar: 25g
- Sodium: 400mg
- Fat: 10g
- Saturated Fat: 1g
- Unsaturated Fat: 8g
- Trans Fat: 0g
- Carbohydrates: 30g
- Fiber: 0g
- Protein: 30g
- Cholesterol: 70mg
Keywords: maple mustard chicken, easy chicken recipe, weeknight dinner, savory chicken

One-Pan Beef Taco Casserole in 30 Minutes for Weeknights
Beef Taco Casserole: A Flavorful Way to Spice Up Your Dinner
Welcome back to Clean Plate Cravings, my lovely food enthusiasts! Today, we’re diving into the flavors of a classic comforting dish that harmoniously blends the heartiness of beef with the vibrant kick of tacos—just in a casserole form. My Beef Taco Casserole is the ultimate weeknight warrior, and let me tell you, you’re going to crave this hearty, cheesy, and utterly satisfying meal over and over again!
Now, picture this: it’s a chilly Tuesday evening, and the last thing you want to think about is slaving away at the stove for hours. But you also don’t want takeout, because let’s be real; your body deserves a bit of nourishment! Enter this Taco Casserole that’s not just simple to whip up but also makes your home smell incredible. Plus, it’s a beautifully balanced meal that checks all the boxes: protein, warmth, and that oh-so-satisfying cheesy goodness.
This recipe has been a staple in my kitchen since I was a kid, warm family memories wrapped around every bite! Who doesn’t love the excuse to gather around the table and dive into a warm casserole? So, grab your skillet, let’s get cookin’, and create some delicious memories.
A Taste of Nostalgia
Let me take you back to my childhood kitchen. Picture it: my mom, wearing her favorite apron, bustling around as the aroma of seasoned beef mingled with fresh tortillas and melted cheese wafted through the air. Taco night was sacred in our house, and I remember the excitement bubbling within me each time we prepared it. I’d jump up and down, waiting for that golden-brown cheesy topping that meant we were almost ready to eat!
One evening in particular, my older brother decided to take matters into his own hands. Instead of following Mom’s recipe, he took some creative liberties—adding way too much salsa and extra cheese. What came out of the oven was definitely a casserole, but we were met with a bubbling mess instead of the beautiful layers we anticipated. To this day, we laugh about how that ‘hot cheese explosion’ became a family legend. But here’s the thing: from that chaotic kitchen moment, I learned that cooking is all about exploring flavors, laughing at mistakes, and enjoying the camaraderie that food brings into our lives.
And that’s what I want you to feel with this Beef Taco Casserole—joy, comfort, and maybe even a few giggles along the way!
Ingredients
For this scrumptious Beef Taco Casserole, gather the following ingredients:
-
Ground Beef: This is your protein star! It brings rich flavor and texture to the casserole. You can swap it out for ground turkey or chicken for a leaner option, or use plant-based crumbles for a veggie-friendly twist.
-
Tortillas: Flour or corn, they both work! I recommend using soft tortillas for a nice mouthfeel. If you prefer something gluten-free, look for corn tortillas or other gluten-free options.
-
Cheese: A blend of shredded cheddar and Monterey Jack gives you that gooey texture and hearty flavor. Want a kick? Spice it up with pepper jack cheese, or for a lighter option, try a reduced-fat cheese.
-
Salsa: Use your favorite jarred salsa for convenience. If you’re feeling adventurous, try homemade salsa, or swap it for diced tomatoes with green chilies for a different flavor profile.
Step-by-Step Instructions
Alright, folks, let’s bring this sweet dish to life! Follow along with my simple steps, and let’s do some kitchen magic together.
-
Preheat the Oven: First things first, let’s preheat our oven to 350°F (175°C) so it’s nice and hot when we’re ready to bake.
-
Cook the Beef: In a skillet over medium-high heat, add about a pound of ground beef. Break it apart with a wooden spoon while it cooks. Season it with a pinch of salt, pepper, and your favorite taco seasoning (I’ll give you the liberty to keep it mild or spicy, depending on your palette). Cook until it’s browned and cooked through, about 7-10 minutes. Pro tip: Drain any excess fat for a lighter casserole.
-
Layer It Up: While that beef is doing its thing, grab a baking dish (9×13 inches is perfect). Start by laying down some tortillas to cover the bottom of the dish. You can cut them into quarters for better coverage if you’d like.
-
Add the Beef and Salsa: Next, spoon half of the cooked beef over the tortillas, then drizzle a layer of salsa. Use as much as your heart desires! Layering is key for flavor depth here.
-
Cheese Please: Now, sprinkle a generous amount of your cheese mix over that beautiful beef and salsa layer. You’ll want a nice blanket of cheesiness because, let’s be honest, who doesn’t love melted cheese?
-
Repeat the Layers: Keep going—add another layer of tortillas, the remaining beef, more salsa, and cheese. Finish with one last layer of tortillas and top it off with the last of the cheese so it can achieve that gorgeous golden crust while baking.
-
Bake, Baby, Bake!: Tuck your casserole into the preheated oven and let it bake for 25-30 minutes. You want the cheese to be bubbly and slightly browned. Keep an eye on it—oven times can vary, and we want it perfectly golden, not burnt!
-
Cool & Serve: Once it’s out of the oven, let it cool for 5-10 minutes. This helps the layers set and makes serving easier. Then, cut yours into squares and enjoy every cheesy bite!
Serving Suggestions
How to serve this masterpiece? It’s all about tempting toppings that elevate the experience! I love to top my Beef Taco Casserole with a dollop of sour cream, a sprinkle of fresh cilantro, and a squeeze of lime. You could also consider a side of guacamole or a fresh garden salad for a crunchy contrast. Pair it with some tortilla chips if you’re feeling extra adventurous—taco night doesn’t get any better than this!
Recipe Variations
-
Mexican Fiesta: Swap out the beef for shredded chicken, and add some black beans and corn to the beef mixture for additional flavor and texture!
-
Spicy Twist: Use hot salsa and pepper jack cheese for that extra kick. Fire roasted salsa can also create a unique depth of flavor.
-
Veggie Delight: Keep things plant-based by omitting the beef in favor of sautéed mushrooms, zucchini, and bell peppers.
-
Breakfast for Dinner: Feel free to mix in some scrambled eggs instead of beef for a breakfast-style casserole. Add avocado and pico de gallo on the side for a full brunch experience!
Chef’s Notes
Over the years, this recipe has evolved right alongside my culinary journey! I’ve discovered the joy of adding different vegetables, experimenting with spice levels, and incorporating various types of cheese. What I love most about this dish is how forgiving it is—don’t have tortillas? Use nachos for a fun twist!
Remember that chaotic kitchen night with my brother? Well, he’s a culinary whiz now, and we sometimes recreate the ‘salsa explosion’ as a throwback, opting to serve it as a laughing reminder that cooking is about fun, experimentation, and a bit of mess!
FAQs and Troubleshooting
Q: Why did my casserole turn out watery?
A: Sometimes excess moisture from salsa or ingredients can lead to a watery casserole. Make sure to drain any excess juice from canned tomatoes or beans you choose to add and don’t skimp on the cheese layer—it helps absorb moisture!
Q: Can I make this casserole ahead of time?
A: Absolutely! Prepare it the day before, cover tightly with foil, and store it in the refrigerator. Just pop it in the oven when you’re ready to bake, adding an extra 10-15 minutes to the baking time if it’s cold.
Q: What if I prefer turkey over beef?
A: Ground turkey works just as wonderfully here! Just remember to season a bit more since turkey is milder than beef.
Q: How do I avoid burnt cheese?
A: If the cheese starts to brown too quickly, loosely cover the dish with aluminum foil midway through the baking process. This will let it continue cooking without burning.
Nutritional Info
(If applicable) This casserole packs a punch of protein, healthy fats from cheese, and a delightful blend of vibrant flavors. If made with lean ground beef, this dish can be a balanced weeknight meal. Pair it with a salad for added nutrients and fiber!
So there you have it, my friends—a fulfilling Beef Taco Casserole that will bring smiles to your dinner table, transport you down memory lane, and allow you to create new cherished moments in the kitchen. Don’t forget to have a little fun along the way and make it your own. Happy cooking, and enjoy every savory bite!
PrintBeef Taco Casserole

A hearty and cheesy casserole that combines the flavors of tacos in a comforting dish, perfect for weeknight dinners.
- Prep Time: 15 minutes
- Cook Time: 30 minutes
- Total Time: 45 minutes
- Yield: 4 servings 1x
- Category: Main Course
- Method: Baking
- Cuisine: Mexican
- Diet: None
Ingredients
- 1 lb Ground Beef
- 8 Soft Tortillas (flour or corn)
- 2 cups Shredded Cheddar and Monterey Jack Cheese
- 1 cup Salsa
Instructions
- Preheat the oven to 350°F (175°C).
- Cook the beef in a skillet over medium-high heat, seasoning with salt, pepper, and taco seasoning. Cook until browned, about 7-10 minutes.
- Layer tortillas in a baking dish to cover the base.
- Add half of the cooked beef over the tortillas, followed by a drizzle of salsa.
- Sprinkle a generous amount of cheese over the beef and salsa.
- Repeat layers with remaining ingredients, finishing with tortillas and cheese on top.
- Bake in the oven for 25-30 minutes until the cheese is bubbly and golden.
- Cool for 5-10 minutes before cutting and serving.
Notes
Top with sour cream, fresh cilantro, and lime for serving. Additional toppings like guacamole and tortilla chips enhance the experience!
Nutrition
- Serving Size: 1 serving
- Calories: 400
- Sugar: 6g
- Sodium: 450mg
- Fat: 20g
- Saturated Fat: 10g
- Unsaturated Fat: 8g
- Trans Fat: 1g
- Carbohydrates: 30g
- Fiber: 3g
- Protein: 25g
- Cholesterol: 75mg
Keywords: taco casserole, beef casserole, easy dinner, comfort food, Mexican recipes
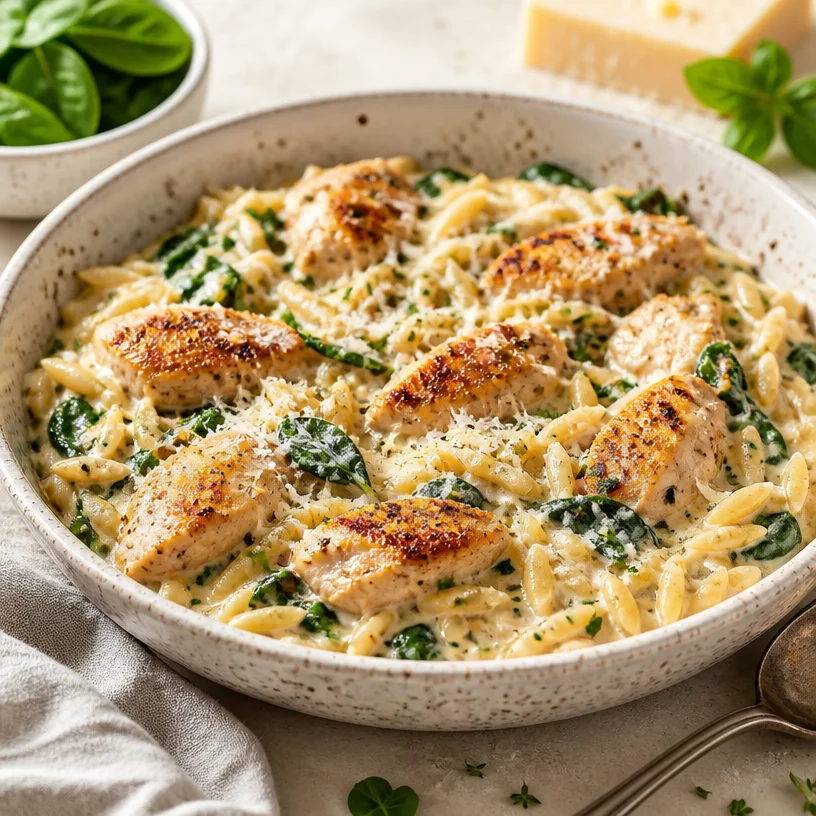
One-Pan Creamy Chicken Orzo (20-Minute Weeknight Dinner)
Creamy Chicken Orzo: A Comforting Delight
Welcome to our cozy corner of the culinary world! Today, we’re diving into a dish that’s as comforting as a warm hug and as satisfying as a Sunday brunch with friends. Say hello to Creamy Chicken Orzo! This delightful dish is a symphony of flavors—perfectly cooked chicken, tender orzo pasta, fresh spinach, and a luxurious creamy sauce that brings it all together. Whether you’re cooking for yourself, whipping up dinner for the family, or impressing a date, this recipe ticks all the boxes for deliciousness and ease.
A Warm Kitchen Memory
Every dish has a story, and this one is no exception. I can’t help but reminisce about the first time I made Creamy Chicken Orzo. It was a chilly autumn evening, and I had just come back from a long day at culinary school. My roommates had decided to host a little “end of the week” dinner gathering. With all the fresh ingredients piled up in the fridge and a craving for something comforting, I decided to whip up this dish on a whim.
The aroma filled our tiny kitchen, and soon after, peals of laughter and chatter filled the air. As we gathered around the table, I served up steaming bowls of this creamy delight, and the smiles on their faces made the effort all worth it. Our night turned into a beautiful blend of hearty food, laughter, and sharing dreams under the soft glow of candlelight. That’s the magic of cooking—it brings people together, creating memories that last far beyond the meal itself.
Ingredients You’ll Need
Let’s get down to business! Here’s what you’ll need to create this creamy masterpiece:
-
Chicken Breasts (2 pieces)
Juicy and tender, chicken breasts are the star protein of this dish. You can substitute chicken thighs if you prefer dark meat for added flavor and moisture. -
Orzo (1 cup)
This tiny rice-shaped pasta cooks quickly and adds a lovely texture to the dish. You can swap it for any small pasta, like ditalini or even quinoa for a gluten-free option. -
Fresh Spinach (2 cups)
Spinach adds a pop of color and packs a nutritional punch! Feel free to use kale or Swiss chard if that’s what you have on hand. -
Parmesan Cheese (½ cup, grated)
Essential for that creamy, cheesy goodness! Substitute with Pecorino Romano for a stronger flavor or nutritional yeast for a vegan option. -
Chicken Broth (3 cups)
It not only cooks the orzo but also infuses the dish with fantastic flavor. You can use vegetable broth for a lighter version or just water in a pinch. -
Heavy Cream (½ cup)
For creaminess you’ll want to dive into! You can use coconut cream for a dairy-free version, although the flavor might be a bit different. -
Garlic (2 cloves, minced)
Adds aromatic goodness. You can substitute with garlic powder; use about ½ teaspoon. -
Onion (1 small, diced)
A base flavor that elevates every dish; shallots work well as a substitute for a gentler flavor. -
Salt and Pepper (to taste)
Essential for seasoning! Always taste-tested to ensure your flavors are spot-on.
Step-by-Step Instructions
Now, let’s get cooking! Follow these steps to create your Creamy Chicken Orzo.
-
Prep your ingredients.
Gather all your ingredients and dice your chicken into bite-sized pieces. Ensure everything is prepped and ready to go so you move seamlessly through the cooking process. Pro tip: having everything prepped in advance makes the cooking experience smooth and enjoyable. -
Sauté the Chicken.
In a large skillet over medium heat, add a drizzle of olive oil. Once hot, toss in your diced chicken. Season with salt and pepper. Sauté until the chicken is golden brown and cooked through, about 6-7 minutes. Remember not to overcrowd the pan to let the chicken develop a beautiful sear! -
Add the Aromatics.
Once the chicken is cooked, push it to the side of the skillet and add your diced onion and minced garlic. Sauté until the onion becomes translucent, about 3-4 minutes. Ah, the smell of garlic wafting through the air—it’s magic! -
Stir in the Orzo.
Now, sprinkle in your orzo, stirring it around to coat it in all those glorious flavors. This step is key to ensuring that every bite is as delightful as the last. -
Pour in the Broth.
Carefully add your chicken broth, stirring to combine. Raise the heat to bring it to a gentle boil, then reduce to a simmer. Cover the skillet and let the orzo cook until al dente, which usually takes about 10 minutes. Give it a stir halfway through so nothing sticks! -
Cream it Up.
Once the orzo is nearly done, it’s time to add the heavy cream and grated Parmesan cheese. Stir them in, allowing the creamy mixture to envelop the orzo and chicken. It should create a luscious, velvety sauce! If it’s too thick, don’t hesitate to add more broth. -
Toss in the Spinach.
Finally, fold in the fresh spinach. Watch how it wilts and brightens the dish! Cook for an additional 2-3 minutes until the spinach is tender and vibrant green. -
Taste and Adjust.
Give your dish a taste test! Feel free to add more salt, pepper, or cheese according to your preference.
Serving Suggestions
Now that you’ve created your plate of Creamy Chicken Orzo, it’s time to serve! Ladle generous portions into shallow bowls for a rustic feel. A sprinkle of freshly cracked black pepper and a bit more grated Parmesan on top will add the perfect finishing touch. Pair it with a side salad or some crusty bread to soak up that creamy goodness, and you’re all set for a cozy meal!
Recipe Variations
Feeling adventurous? Here are a few fun twists you can try:
- Herbed Chicken: Add a teaspoon of dried Italian herbs to the chicken for an extra flavor boost.
- Mushroom Medley: Sauté some sliced mushrooms with the onions and garlic for an earthy addition.
- Spicy Kick: Throw in some crushed red pepper flakes for a bit of heat!
- Lemon Zest: A sprinkle of fresh lemon juice at the end adds freshness and brightness.
- Vegetarian Delight: Omit the chicken and double the spinach for a satisfying vegetarian version—swap the broth for vegetable broth!
Chef’s Notes
This dish has a special place in my heart, reminding me of moments shared with friends in that tiny kitchen. Over the years, I’ve adapted this recipe countless times based on what I have on hand and seasonal ingredients. Sometimes I play around with different vegetables—zucchini or peas are fantastic options. Cooking should always be about experimenting and evolving—don’t be afraid to make a dish your own!
FAQs and Troubleshooting
-
What if my orzo is too mushy?
Overcooking is often the culprit! Always check the package instructions for cooking time, and keep an eye on it as it nears the end. -
Can I make this dish ahead of time?
Absolutely! Just cook the orzo until al dente, then finish it when you’re ready to serve. Be aware that the orzo will continue to absorb the liquid, so add a little more broth when reheating. -
How can I make this dish dairy-free?
Substitute the heavy cream with coconut cream and use nutritional yeast instead of Parmesan. It’ll have a different flavor profile, but still enjoyable! -
Can I freeze leftovers?
Yes! Store it in an airtight container, and it should last for up to three months in the freezer. Just remember that the texture might change slightly upon reheating.
Nutritional Info
While I don’t focus solely on nutrition, a serving of Creamy Chicken Orzo packed with protein and veggies is a wonderful balance to fuel your day!
I hope you enjoyed this journey to creating a delightful Creamy Chicken Orzo! Remember, cooking is about joy, sharing, and creating memories. So roll up your sleeves, turn on some good tunes, and let’s dig into all that deliciousness together! Happy cooking!
PrintCreamy Chicken Orzo

A comforting dish of tender chicken, creamy orzo pasta, and fresh spinach, perfect for any occasion.
- Prep Time: 15 minutes
- Cook Time: 30 minutes
- Total Time: 45 minutes
- Yield: 4 servings 1x
- Category: Main Course
- Method: Sautéing
- Cuisine: Italian
- Diet: Non-Vegetarian
Ingredients
- 2 pieces Chicken Breasts
- 1 cup Orzo
- 2 cups Fresh Spinach
- ½ cup Parmesan Cheese, grated
- 3 cups Chicken Broth
- ½ cup Heavy Cream
- 2 cloves Garlic, minced
- 1 small Onion, diced
- Salt and Pepper, to taste
Instructions
- Prep your ingredients.
- Sauté the chicken in a skillet with olive oil until golden brown.
- Add the diced onion and minced garlic, sauté until translucent.
- Stir in the orzo and coat with flavors.
- Pour in the chicken broth and bring to a gentle boil, then simmer.
- Cream it up with heavy cream and Parmesan, stirring to combine.
- Toss in the fresh spinach and cook until wilted.
- Taste and adjust seasoning as needed.
Notes
Serve with freshly cracked pepper and additional Parmesan on top. Pairs well with a side salad or crusty bread.
Nutrition
- Serving Size: 1 serving
- Calories: 450
- Sugar: 2g
- Sodium: 600mg
- Fat: 20g
- Saturated Fat: 10g
- Unsaturated Fat: 8g
- Trans Fat: 0g
- Carbohydrates: 45g
- Fiber: 3g
- Protein: 30g
- Cholesterol: 70mg
Keywords: Creamy Chicken Orzo, Comfort Food, Pasta Recipe
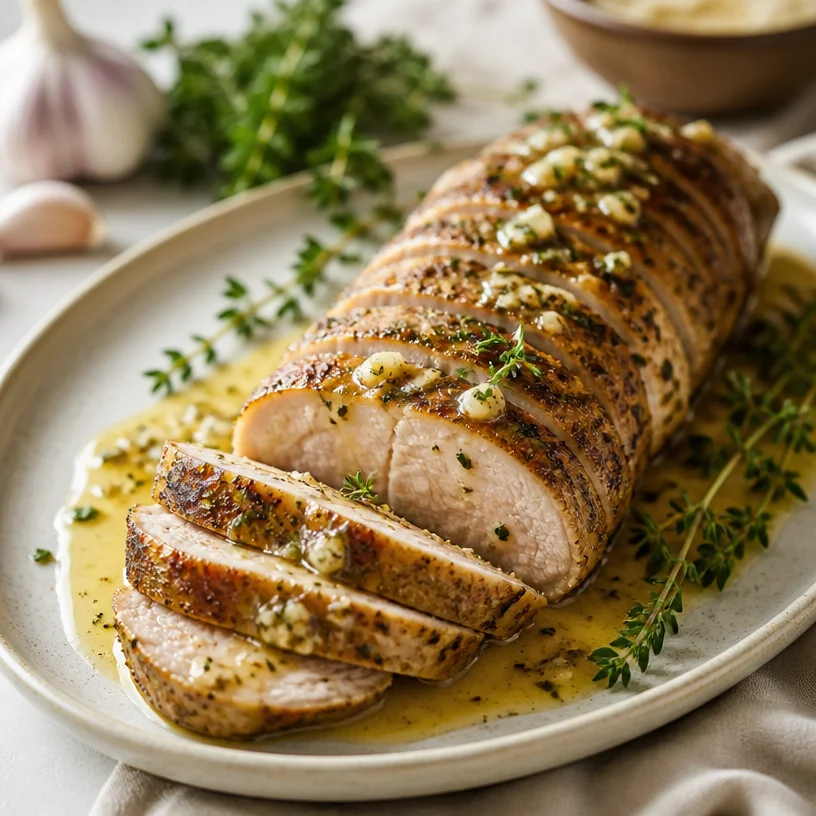
Garlic Butter Pork Tenderloin
Garlic Butter Pork Tenderloin: A Flavor-Packed Feast for All Occasions
Welcome to another culinary adventure at Clean Plate Cravings! Today, we’re diving into a delightful dish that embodies comfort, flavor, and just the right amount of indulgence: Garlic Butter Pork Tenderloin. This dish has a unique way of uniting people around the dinner table, and I’m excited to share it with you!
Imagine walking into a warm, inviting kitchen, with the tantalizing aroma of garlic and herbs wafting through the air. Your mouth begins to water in anticipation, and you can’t help but smile. That’s the kind of magic we’re talking about when we whip up this Garlic Butter Pork Tenderloin! It’s simple yet impressive, and perfect for a weeknight dinner or a special occasion. Plus, it comes together in a flash, leaving you with plenty of time to relax and enjoy your meal.
Cooking should feel like a joyful experience, one that invites creativity and love into each dish. With just a few fresh, everyday ingredients, you can create a culinary masterpiece that will delight your taste buds and leave your loved ones craving more. This dish is not just about filling your stomach; it’s about nourishing your spirit, too.
As I take you through this recipe, I hope to share not only the ingredients and cooking steps but also the joy of gathering around the table with those you care about. So grab your apron, and let’s get cooking! Trust me, you will want seconds of this Garlic Butter Pork Tenderloin!
A Culinary Memory: The First Time I Cooked Pork Tenderloin
Reflecting on my culinary journey, one of my most cherished memories revolves around this very dish. I remember the first time I cooked pork tenderloin. It was during a cozy Sunday dinner with my family. I had spent the morning browsing through cookbooks, my excitement bubbling over as I stumbled upon a recipe that promised juicy pork enveloped in a rich, garlicky butter sauce.
Feeling ambitious, I decided to take the plunge. With a little bit of nervousness in my stomach, I gathered my ingredients and began. There I was, chopping garlic and sprinkling herbs while my family shared stories around the kitchen table. Eventually, the aromatic smells filled the house, causing everyone to gravitate toward the kitchen. It was one of those magical moments when the food draws you in, sparking laughter and connection.
As we sat down to eat, I couldn’t help but beam at my family’s delighted faces as they took their first bites. Each slice of perfectly cooked, tender pork slathered in buttery goodness brought us together. It was a moment filled with love, laughter, and a sense of accomplishment that ignited my passion for cooking. Since that day, Garlic Butter Pork Tenderloin has become a staple in my kitchen, a dish I can always count on to bring smiles and nourished bellies.
Ingredients You’ll Need
-
Pork Tenderloin: The star of the show! This lean cut of meat is super tender and cooks relatively quickly. You can substitute it with chicken breast or even a beef tenderloin if you’re feeling adventurous, but they may require different cooking times.
-
Garlic: The backbone of this recipe, bringing a lovely aroma and flavor. Fresh garlic is best here, but in a pinch, you can use garlic powder (use about 1/4 teaspoon for every clove).
-
Butter: This rich ingredient helps create the luxurious sauce we’ll baste the pork with—keep it unsalted to control the seasoning. If you’re looking for a lower-fat option, you can use olive oil or ghee.
-
Fresh Herbs: I love a mix of thyme, rosemary, and parsley for brightness. Dried herbs can work in a bind (just use 1/3 the amount), but fresh ties everything together beautifully.
Step-by-Step Instructions
1. Preheat and Prepare
Start by preheating your oven to 425°F (220°C). This temperature allows us to achieve a beautifully caramelized exterior while keeping the pork juicy on the inside. While the oven is heating, prepare your pork tenderloin.
Chef’s Tip: Remove the silver skin (the tough, silvery membrane) from the pork tenderloin for better texture. A sharp knife makes this easy; simply slide it under and slice it away.
2. Season the Pork
Pat the pork dry with paper towels—it’s a simple step that helps improve the sear. Season generously with salt and pepper. You want that flavor to penetrate the meat!
Chef Hack: For added flavor, you can mix some crushed garlic and chopped herbs into your seasoning before rubbing it onto the pork. Double the garlic—why not?
3. Sear the Pork
In a large oven-safe skillet over medium-high heat, melt 2 tablespoons of butter. Once it’s sizzling, carefully place the pork tenderloin in the skillet. Sear it on all sides until golden brown (about 2-3 minutes per side).
Tip: Don’t rush this step! A good sear is key to developing flavor, creating that beautiful crust.
4. Add Garlic and Herbs
Once the pork is seared, reduce the heat to medium. Add minced garlic and a mix of fresh herbs to the skillet. Allow them to infuse the butter, stirring occasionally, for about 1 minute without burning the garlic.
Chef Insight: The smell will be heavenly and oh-so-inviting! Just be sure to keep an eye on the garlic so it doesn’t burn; burnt garlic can turn bitter.
5. Finish in the Oven
Transfer the skillet to your preheated oven. Roast for about 15 – 20 minutes or until the internal temperature reaches 145°F (63°C).
Tip: Use a meat thermometer for accuracy! Taking the guesswork out of cooking meat will ensure perfect results every time.
6. Rest and Slice
Once it’s done, remove the skillet from the oven and tent it with foil. Let it rest for about 5-10 minutes before slicing. This step allows the juices to redistribute for maximum tenderness!
Chef’s Note: While the pork rests, you can create a quick pan sauce with the leftover garlic-butter goodness. Simply place the skillet over medium heat, add a splash of white wine or chicken broth, scraping up the brown bits to create a sauce.
Serving Suggestions
When it comes to plating this dish, keep it simple yet elegant. Slice the pork tenderloin into medallions and fan them out on a plate. Drizzle the luscious garlic butter sauce over the top and sprinkle with extra herbs for a pop of color. Serve alongside roasted vegetables or creamy mashed potatoes for a complete, satisfying meal.
Recipe Variations
- Honey Mustard Glaze: Mix honey and Dijon mustard with the butter for a sweet and tangy twist.
- Spicy Kick: Add crushed red pepper flakes or a dash of cayenne to the garlic butter for those who like some heat.
- Citrus Zest: Incorporate lemon or orange zest into the butter for a refreshing, aromatic layer of flavor.
- Mushroom Medley: Sauté some mushrooms with the garlic for a heartier version that complements the pork perfectly.
- Stuffed Tenderloin: Cut a pocket into the pork and stuff it with spinach and feta before searing for a delicious twist.
Chef’s Notes
Ah, the journey of cooking! It never fails to surprise me with unique experiences and anecdotes. This recipe has evolved over the years, moving from a simple dinner to a go-to for holiday gatherings, dinner parties, and cozy nights in. Each time I make it, I find new ways to add my personal touch, whether it’s experimenting with different herbs or trying out fun sides.
One fond memory I have is when my best friend and I decided to hold a “Pork Party,” where we invited friends to savor various pork dishes made from scratch. This Garlic Butter Pork Tenderloin became the star of the night and wowed all our guests! It’s moments like these that remind me how food can bring people together.
FAQs and Troubleshooting
1. Why is my pork tenderloin tough?
- Overcooking is often the culprit! Make sure to monitor the internal temperature closely—145°F is the magic number for juicy goodness.
2. Can I make it ahead of time?
- Absolutely! You can roast the pork a day ahead and reheat it in the oven or skillet with a splash of broth to keep it moist.
3. How do I know when the garlic is done?
- You’ll know it’s ready when it becomes fragrant, turns golden, and is soft. Don’t let it burn, as it will become bitter.
4. Can I use a different cut of pork?
- Yes! You can substitute pork loin or even pork chops, but adjust the cooking time as needed since they vary in thickness.
Nutritional Info
While I won’t delve too deeply into numbers, this Garlic Butter Pork Tenderloin fits beautifully into a balanced meal! It is high in protein and packed with flavor from the herbs and garlic, making it great for a wholesome dinner without compromising on taste.
So there you have it: the juicy, flavorful Garlic Butter Pork Tenderloin made with love. I hope this recipe brings you as much joy as it has brought me. Remember to have fun and let your creativity shine in the kitchen. Happy cooking, friends! Enjoy every tender bite and the delightful moments they bring your way!
PrintGarlic Butter Pork Tenderloin

A simple yet impressive dish featuring tender pork enveloped in a rich, garlicky butter sauce, perfect for any occasion.
- Prep Time: 10 minutes
- Cook Time: 20 minutes
- Total Time: 30 minutes
- Yield: 4 servings 1x
- Category: Main Course
- Method: Baking
- Cuisine: American
- Diet: Gluten-Free
Ingredients
- 1 pound Pork Tenderloin
- 4 cloves Garlic, minced
- 1/4 cup Butter, unsalted
- 1 tablespoon Fresh Thyme, chopped
- 1 tablespoon Fresh Rosemary, chopped
- 1 tablespoon Fresh Parsley, chopped
- Salt, to taste
- Black Pepper, to taste
Instructions
- Preheat your oven to 425°F (220°C).
- Pat the pork dry with paper towels and season generously with salt and pepper.
- Sear the pork in a large oven-safe skillet with melted butter until golden brown.
- Add minced garlic and herbs to the skillet; infuse the butter for about 1 minute.
- Transfer the skillet to the oven and roast for 15-20 minutes until internal temperature reaches 145°F (63°C).
- Remove from oven, let rest for 5-10 minutes, and slice to serve.
Notes
For a richer flavor, create a pan sauce with the leftover garlic-butter by adding a splash of white wine or broth.
Nutrition
- Serving Size: 1 serving
- Calories: 350
- Sugar: 1g
- Sodium: 400mg
- Fat: 20g
- Saturated Fat: 8g
- Unsaturated Fat: 10g
- Trans Fat: 0g
- Carbohydrates: 2g
- Fiber: 0g
- Protein: 27g
- Cholesterol: 85mg
Keywords: pork tenderloin, garlic butter, easy recipe, weeknight dinner, comfort food
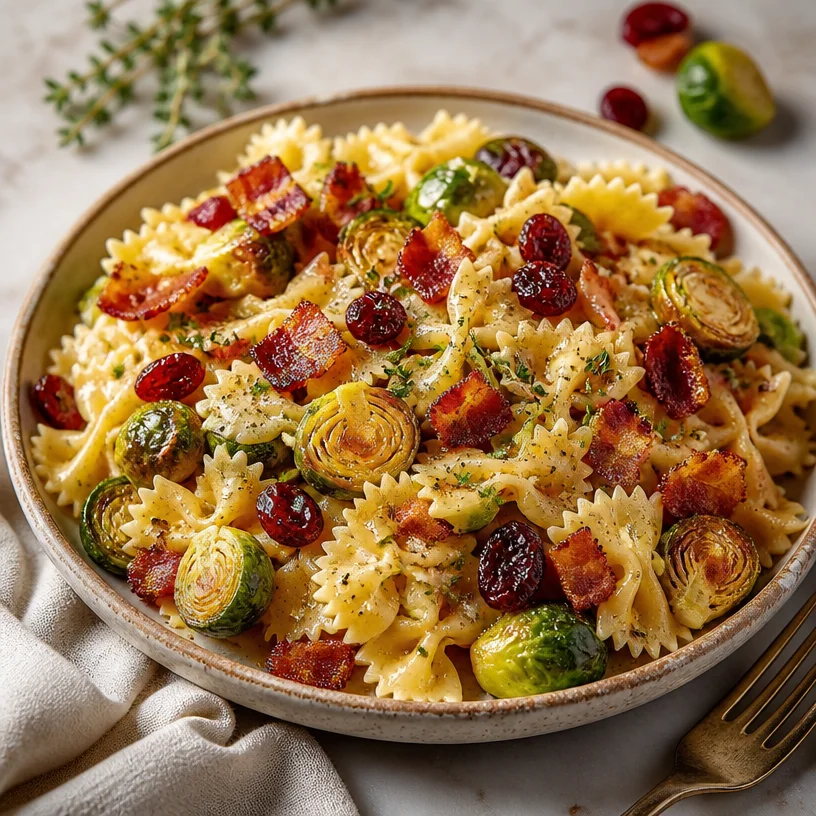
Minute Autumn Harvest Pasta with Roasted Veggies
Autumn Harvest Pasta: A Cozy Feast for the Soul
As the leaves turn golden and a crisp breeze fills the air, it’s the perfect time to dive into comforting foods that celebrate the flavors of the season. Today, I’m excited to share my delightful Autumn Harvest Pasta—one dish that brings together the best of fall in every bite! It’s a warm, hearty recipe featuring nutty Brussels sprouts, crispy bacon, and tangy cranberries, all wrapped up in your favorite pasta. This meal is a true celebration of autumn and comes together with minimal fuss, so you can enjoy more time sipping cider and soaking in the fall vibes!
Picture this: you’re walking through a local farmer’s market surrounded by the rich colors of autumn produce, the scent of spices wafting through the air, and the chatter of happy shoppers filling the space. You can’t help but be inspired to create something comforting yet vibrant that echoes the beauty around you. That’s how this dish came to life.
But this pasta isn’t just about seasonal ingredients; it’s about memories and love woven through simple cooking. I remember the first time I made a similar dish while visiting my grandmother. She had an incredible ability to transform everyday ingredients into something extraordinary. We spent the entire afternoon in her cozy kitchen, laughter echoing around us as we chopped and stirred. The smell wafting from the stove was intoxicating, and it felt like autumn wrapped itself around us like a warm hug. That memory stuck with me, and it’s what I want to recreate every time I whip up this Autumn Harvest Pasta.
Now, enough with the nostalgia—let’s get you into the kitchen and make something magical!
Ingredients
-
Pasta: Choose your favorite type—fettuccine, penne, or even whole wheat for a bit of added nutrition. You could also swap it for gluten-free pasta if needed. Cooking Tip: Make sure to salt your pasta water generously—it’s the first step to flavorful pasta!
-
Brussels Sprouts: The star of our dish! These little cabbages are packed with flavor and nutrients. Trim and halve them for perfect roasting. Not a fan? Try green beans or kale as a substitute!
-
Bacon: Crispy bacon adds a delicious, smoky flavor that pairs wonderfully with the sweet cranberries. For a lighter option, turkey bacon or a plant-based bacon alternative works nicely here.
-
Cranberries: Dried cranberries bring a pop of sweetness and a vibrant color. Plus, they complement the savory bacon perfectly. For those who prefer a tart kick, you can use fresh cranberries and adjust the sweetness with a touch of maple syrup.
-
Parmesan Cheese: A sprinkle of freshly grated Parmesan brings creaminess to the dish. If you’re looking for a dairy-free version, try nutritional yeast for a cheesy flavor.
-
Olive Oil: You’ll need a good extra virgin olive oil for sautéing and drizzling at the end. A hint of truffle oil as a luxurious finishing touch doesn’t hurt either!
-
Garlic: Fresh minced garlic adds warmth and depth. If you’re in a pinch, garlic powder can work too, but fresh is always my preference!
-
Salt & Pepper: Essential for enhancing flavors. Don’t shy away from seasoning to taste—these simple spices can elevate your dish wonderfully.
Step-by-Step Instructions
-
Prepare the Pasta:
- In a large pot, bring salted water to a boil and cook your pasta according to the package instructions until al dente. Remember to reserve about 1 cup of pasta water before draining—it’ll be a hero for your sauce!
-
Cook the Bacon:
- While the pasta cooks, heat a large skillet over medium heat. Add the diced bacon and cook until crispy, allowing the fat to render—about 5-7 minutes. This process brings out its rich flavor and creates a delicious base for the dish! Don’t rush it—this is where the magic happens.
-
Roast the Brussels Sprouts:
- In the same pan with the bacon fat, toss in halved Brussels sprouts cut side down and let them roast until golden—about 4-5 minutes. The bacon flavor is soaking in! Flip them and cook for another 3-4 minutes until they’re tender and crispy at the edges. If there’s too much grease, feel free to drain a little—but keep enough to add flavor!
-
Sauté the Garlic:
- Add minced garlic to the skillet with the Brussels sprouts. Stir often for about 30 seconds, just until fragrant. Be careful not to let it burn; we want golden and aromatic here, not bitter!
-
Combine Pasta and Ingredients:
- Add the drained pasta to the skillet along with the crispy bacon and sprouts. Toss everything together, letting the flavors marry for a minute or two. Use that reserved pasta water to loosen things up if needed! This technique will create a lovely sauce coating the pasta.
-
Finish with Cranberries and Cheese:
- Stir in the dried cranberries and a generous sprinkle of Parmesan cheese. The warmth from the pasta will plump the cranberries, releasing their sweetness into the dish.
-
Serve and Enjoy:
- Drizzle with a little olive oil, and season with salt and pepper to taste. Serve warm, garnished with extra cheese and fresh herbs if desired.
Serving Suggestions
This Autumn Harvest Pasta pairs beautifully with a simple side salad featuring mixed greens tossed in a light vinaigrette. For a cozy touch, add a slice of crusty bread on the side to mop up every last bit! You could also nicely plate individual servings topped with additional cranberries and a sprinkle of freshly cracked pepper.
Recipe Variations
-
Nutty Crunch: Add toasted walnuts or pecans for an extra crunch and some healthy fats.
-
Creamy Option: Stir in a dollop of ricotta or crème fraîche just before serving for a creamy twist.
-
Herbaceous Boost: Fresh herbs like sage or thyme brighten the dish wonderfully! Add them near the end of cooking for a fresh pop of flavor.
-
Spicy Kick: Toss in some red pepper flakes for a zesty bite that contrasts with the sweetness of the cranberries.
Chef’s Notes
I’ve made this pasta countless times, and each time I tweak something—sometimes based on what’s in my fridge, sometimes just for fun. I once added some roasted butternut squash, and it was a hit! The sweetness pairs beautifully with the savory bacon and tart cranberries. This dish has become a staple at my fall gatherings, where it’s met with smiles and happy bellies every single time.
FAQs and Troubleshooting
-
What if my pasta is overcooked?
- If you accidentally overcook your pasta, try mixing it with a little reserved pasta water to add moisture and flavor back in. You can also sauté it a little longer in the skillet with the other ingredients to give it a crispy texture.
-
Can I make this dish vegetarian?
- Absolutely! Just omit the bacon and use olive oil and a bit of smoked paprika to infuse flavor into the dish. You can also add mushrooms for an umami boost.
-
What’s the best way to store leftovers?
- Store any leftovers in an airtight container in the fridge for up to 3 days. When reheating, add a splash of water to bring back moisture.
-
Can I freeze this pasta dish?
- Freezing is possible, but I recommend leaving out the cheese and adding it when you reheat, as it can seize up during freezing.
Nutritional Info
(Include nutritional info if applicable based on specific ingredients or dietary needs – e.g., calories, fat, protein, etc. This could vary greatly based on brands and specific ingredient choices.)
So there you have it! My favorite Autumn Harvest Pasta, bursting with flavors that celebrate the season. It’s not just a dish; it’s a story, a warm embrace, and a slice of autumn goodness on a plate. I hope you enjoy making it and sharing it with your loved ones as much as I do. Happy cooking!
PrintAutumn Harvest Pasta

A warm, hearty pasta dish featuring nutty Brussels sprouts, crispy bacon, and tangy cranberries, perfect for autumn.
- Prep Time: 15 minutes
- Cook Time: 30 minutes
- Total Time: 45 minutes
- Yield: 4 servings
- Category: Main Course
- Method: Baking
- Cuisine: Italian
- Diet: Vegetarian
Ingredients
- Pasta (fettuccine, penne, or whole wheat)
- Brussels Sprouts (trimmed and halved)
- Bacon (or turkey/plant-based bacon)
- Dried Cranberries (or fresh cranberries with maple syrup)
- Parmesan Cheese (or nutritional yeast for a dairy-free option)
- Olive Oil (extra virgin, plus optional truffle oil)
- Garlic (minced)
- Salt & Pepper
Instructions
- Prepare the Pasta: In a large pot, bring salted water to a boil and cook your pasta according to the package instructions until al dente. Remember to reserve about 1 cup of pasta water before draining!
- Cook the Bacon: While the pasta cooks, heat a large skillet over medium heat. Add the diced bacon and cook until crispy, about 5-7 minutes.
- Roast the Brussels Sprouts: In the same pan with the bacon fat, toss in halved Brussels sprouts cut side down and let them roast until golden, about 4-5 minutes. Flip and cook for another 3-4 minutes until tender.
- Sauté the Garlic: Add minced garlic to the skillet with the Brussels sprouts and stir often for about 30 seconds, until fragrant.
- Combine Pasta and Ingredients: Add the drained pasta to the skillet along with the crispy bacon and sprouts, tossing everything together. Use reserved pasta water to loosen if needed.
- Finish with Cranberries and Cheese: Stir in the dried cranberries and a generous sprinkle of Parmesan cheese.
- Serve and Enjoy: Drizzle with olive oil, season with salt and pepper to taste, and serve warm garnished with extra cheese and fresh herbs.
Notes
This pasta dish can be made vegetarian by omitting the bacon and adding mushrooms for an umami boost.
Nutrition
- Serving Size: 1 serving
- Calories: 400
- Sugar: 6g
- Sodium: 600mg
- Fat: 15g
- Saturated Fat: 4g
- Unsaturated Fat: 8g
- Trans Fat: 0g
- Carbohydrates: 50g
- Fiber: 4g
- Protein: 18g
- Cholesterol: 35mg
Keywords: pasta, autumn, harvest, Brussels sprouts, bacon, cranberries