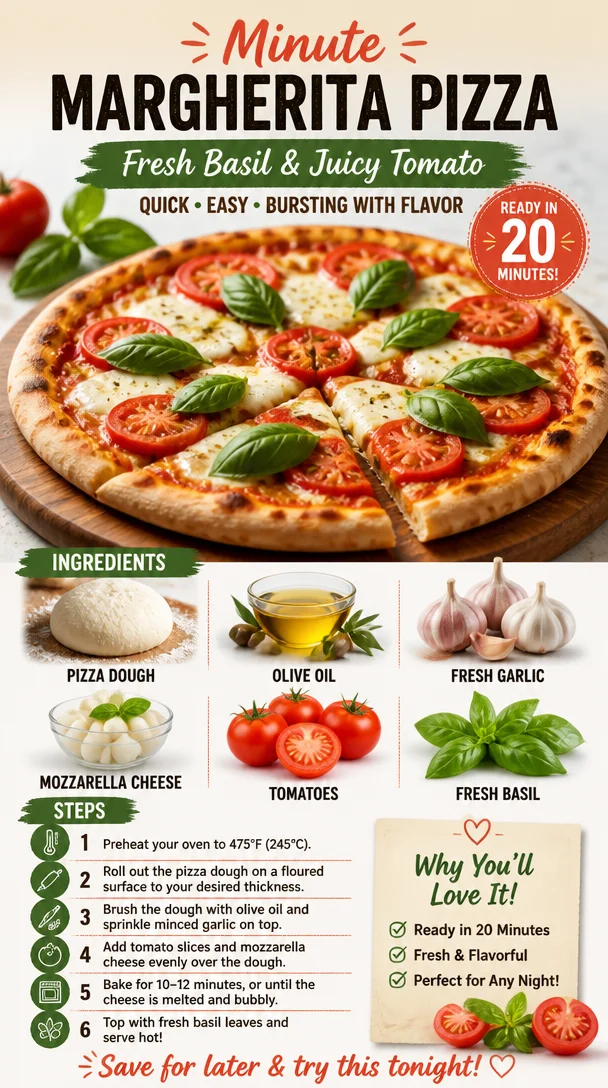
Minute Margherita Pizza: Fresh Basil & Juicy Tomato
The Joy of Margherita Pizza: A Culinary Love Letter
Welcome back to Clean Plate Cravings! Today, we’re diving into one of the most iconic and beloved dishes in the world of Italian cuisine: Margherita Pizza. There’s something just so magical about a well-made pizza, isn’t there? The aroma of fresh dough baking, the bubbling of melted cheese, and the vibrant, summery taste of tomatoes are all part of an experience that brings people together. Whether you’re celebrating, relaxing on a weekend, or simply craving something delicious, Margherita pizza always hits the spot.
I still remember the first time I had my heart set on making a Margherita pizza. I was a young, aspiring chef in a small kitchen, not too unlike yours at home. The sun peeked through the window, and the smell of fresh basil and tomatoes started to fill the air. I’d watched countless cooking shows, but that day felt different; I was ready to embark on my culinary adventure! As I kneaded the dough, a wave of nostalgia washed over me—the memory of my grandmother, who always had a homemade pizza waiting for us whenever we visited. That combination of emotions—joy, anticipation, and a dash of nervousness—still lingers every time I step into the kitchen to recreate that masterpiece.
And now, I want to share that experience with you. Making Margherita pizza from scratch might sound intimidating, but trust me, once you get the hang of it, you’ll want to whip it up regularly. With only a handful of fresh, wholesome ingredients like pizza dough, olive oil, fresh garlic, mozzarella cheese, tomatoes, and fresh basil, it’s all about keeping things simple yet delightful. So, grab your apron, put on some music, and let’s make Margherita pizza that you (and your taste buds) will adore!
Personal Story: A Slice of My Heart
As mentioned before, my love for pizza roots back to my childhood. My grandmother had this incredible way of bringing her family together through food, and pizza was her secret weapon. Every Saturday, after a long week, we’d gather at her cozy kitchen, where the walls were decorated with bright, colorful paintings that seemed to dance in the sun.
With flour dusting the table, I’d get excited as she flourished her hands in the dough, teaching me the art of kneading. The laughter and warmth echoed as we rolled out the crust, topped it with vibrant tomato sauce, rich mozzarella, and sprinkled fresh basil right before popping it into the oven. Watching that magical transformation happen through the oven window left me mesmerized. The cheese bubbling to perfection and the crust turning golden brown felt like witnessing a small miracle. It’s incredible how food can connect us to our memories and the people we love, isn’t it?
Ingredients: The Star Players
Now that you’re warmed up, let’s talk ingredients—these fresh, everyday items are the backbone of a delicious Margherita pizza!
-
Pizza Dough: The foundation of any pizza, store-bought or homemade, is perfect for creating that crispy crust. If you’re feeling adventurous, I highly recommend trying your hand at making it from scratch. Substitute with a gluten-free dough for a healthier option!
-
Olive Oil: This isn’t just for drizzling—an excellent quality extra virgin olive oil adds depth and a hint of fruity flavor to your pizza. For a twist, try infused herbal oils or avocado oil for cooking.
-
Fresh Garlic: A subtle touch of garlic elevates the flavor profile. You can use it minced or thinly sliced. For a milder flavor, roast whole garlic cloves before adding them to the pizza!
-
Mozzarella Cheese: Fresh mozzarella is the star of this dish, delivering that creamy texture and melt-in-your-mouth goodness. Don’t hesitate to substitute with burrata for another layer of indulgence!
-
Tomatoes: Ripe, juicy tomatoes are essential. Use fresh ones for the best taste but feel free to swap in a good-quality canned San Marzano tomato for a no-fuss option.
-
Fresh Basil: This aromatic herb ties all the flavors together. Always use fresh basil, but if you’re in a pinch, dried basil will work as a substitute—just use significantly less as it’s more potent.
With these vibrant ingredients, you’re well on your way to an unforgettable homemade Margherita pizza!
Step-by-Step Instructions: Crafting Your Pizza
Now let’s get into the nitty-gritty of crafting your Margherita pizza! Follow these steps closely, and you’ll be a pizza pro in no time!
-
Prepare Your Workspace: Start by clearing out your kitchen counter. Dust it lightly with flour to keep the dough from sticking. Trust me, a clean, organized space will make your pizza-making experience much more enjoyable!
-
Roll Out the Dough: If you’re using store-bought pizza dough, let it sit at room temperature for about 30 minutes. This helps it relax for easier stretching. If you’re feeling adventurous and have made your own dough, lightly flour your work surface and roll it out. Aim for about 12 inches in diameter and a thickness of about 1/4 inch. Don’t stress! The beauty of pizza is its rustic charm.
-
Preheat Your Oven: Turn on your oven to the highest setting (usually around 475°F to 500°F) about 30 minutes before you’re ready to bake. If you have a pizza stone, place that in the oven as it preheats. This helps achieve that perfect crispy crust!
-
Add Olive Oil: Once your dough is shaped, place it on a pizza peel or a baking sheet lightly dusted with flour. Drizzle a generous amount of olive oil over the surface of the dough, gently spreading it with your fingers to cover it evenly. That’s where your flavor starts!
-
Layer on the Garlic: Sprinkle the minced or thinly sliced fresh garlic over the olive oil. This is where you can unleash your inner chef! If you’re a garlic fan, don’t hold back. For a milder taste, feel free to use just a hint.
-
Spread the Tomatoes: Slice your tomatoes thinly and layer them over the dough. If you’re using canned tomatoes, crush them lightly and spread them evenly across the surface. Don’t skimp on this part; the luscious juices will help infuse the crust!
-
Melt the Mozzarella: Tear your fresh mozzarella into chunks and spread them generously over the tomatoes. If you’re brave and want to try something different, tossing in some ricotta or burrata can take your pizza to the next level!
-
Season It Up: Sprinkle a bit of sea salt and freshly cracked pepper over your pizza to elevate the flavors. A pinch of red pepper flakes can add a nice kick if you’re looking for something spicy.
-
Bake It: If you’re using a pizza stone, carefully transfer your pizza onto it. Bake for about 10-12 minutes, or until the cheese is bubbly and golden and the crust is beautifully crisp. Keep an eye on it, as every oven varies!
-
Add Fresh Basil: Once your pizza is out of the oven, immediately tear fresh basil leaves and scatter them over the top. This will slightly wilt in the heat, releasing all its aromatic goodness!
-
Slice and Serve: Allow the pizza to cool for a minute or so, then grab a pizza cutter and slice it into wedges. Serve immediately with an extra drizzle of olive oil or a sprinkle of Parmesan cheese if you like.
Voilà! You have created a stunning Margherita pizza that not only looks great but tastes even better.
Serving Suggestions: Presentation is Key
Plating the pizza is as fun as making it! Place your pizza on a wooden board or a large serving platter. It adds a rustic touch that complements the homemade feel. You can leave it whole for guests to cut at the table or slice it up for easy sharing. Just imagine the vibrant colors of the tomatoes and basil against the golden crust—it’s a feast for the eyes as well as the palate! If you really want to impress, pair it with a light salad or a glass of sparkling lemonade for a delightful meal!
Recipe Variations: Take Your Pizza to New Heights
While the classic Margherita is delicious on its own, here are a few creative twists you can try:
-
Veggie Loaded: Add some sautéed vegetables like bell peppers, zucchini, or mushrooms to the mix for a colorful and nutritious boost.
-
Pesto Drizzle: Instead of using tomato sauce, spread a layer of fresh pesto as your base for a zesty kick.
-
Meat Lover’s: Add cooked Italian sausage or prosciutto on top for a yummy meat blend.
-
White Pizza: Skip the tomatoes and use a blend of ricotta, mozzarella, and garlic for a creamy, decadent delight.
-
Spicy Kick: Add jalapeños or pickled peppers to give your pizza a zesty twist!
Chef’s Notes: Memories from My Kitchen
Over the years, my Margherita pizza recipe has evolved as I’ve played around with different toppings and techniques. There was that one time I was experimenting with a wood-fired oven—an absolute game changer! The taste of a smokey crust is something you just can’t replicate in a regular oven. I remember I had my friends over for a pizza night, and we had a blast shaping our own pies, sharing toppings, and tasting each other’s creations. I had this hilarious moment when someone accidentally picked up the wrong pizza! But the laughter that erupted made it one of my favorite nights in recent memory.
Cooking is all about experimenting, having fun, and creating wonderful memories! Remember that even if your pizza doesn’t turn out perfect, it’ll still be delicious because you made it with love.
FAQs and Troubleshooting: Pizza Questions Answered
-
Why is my pizza dough too sticky?
- If your dough feels too sticky, sprinkle in a bit of extra flour while you’re kneading. It should come together to form a smoother ball. But be careful not to overdo it; adding too much flour can make your crust tough!
-
What do I do if my pizza crust is soggy?
- A soggy crust often occurs when there’s too much moisture from the tomatoes. Try patting the sliced tomatoes dry with a paper towel or pre-cooking them in a pan before adding them to your pizza. Balancing toppings helps achieve that perfect crisp!
-
How do I prevent my cheese from burning?
- If the cheese is browning too quickly, you can cover the pizza loosely with aluminum foil for a couple of minutes while it finishes baking. This will prevent the cheese from burning while the crust gets that crunchy perfection.
-
Can I make the dough ahead of time?
- Absolutely! You can prepare the dough, let it rise, and then refrigerate it for up to 24 hours. Just make sure to bring it back to room temperature before rolling it out for your pizza.
Nutritional Info
While I often advocate for treating yourself without guilt, here’s a quick glance at the nutrition in a classic slice of Margherita pizza:
- Calories: Approximately 250-300 per slice
- Protein: About 10 g
- Fat: 12 g
- Carbohydrates: 30 g
But remember, these numbers can change based on the toppings and dough you use. The key is to enjoy every bite mindfully!
So there you have it—a comprehensive journey to creating a mouth-watering Margherita pizza that will make your kitchen come alive with flavors and nostalgic memories. Get in the kitchen, put on some fun music, and let your culinary creativity shine. Trust me—you’re going to love the process just as much as the final product! Happy cooking, my fellow foodies. 🍕
PrintMargherita Pizza
Dive into the classic flavors of Italy with this homemade Margherita pizza, featuring fresh ingredients and simple techniques.
- Prep Time: 30 minutes
- Cook Time: 12 minutes
- Total Time: 42 minutes
- Yield: 4 servings
- Category: Main Course
- Method: Baking
- Cuisine: Italian
- Diet: Vegetarian
Ingredients
- Pizza Dough
- Olive Oil
- Fresh Garlic
- Mozzarella Cheese
- Tomatoes
- Fresh Basil
Instructions
- Prepare your workspace: Clear your kitchen counter and lightly dust it with flour.
- Roll out the dough: Let it sit at room temperature for 30 minutes. Aim for about 12 inches in diameter and 1/4 inch thickness.
- Preheat your oven: Turn it on to the highest setting (475°F to 500°F) about 30 minutes before baking.
- Add olive oil: Place the shaped dough on a pizza peel or baking sheet and drizzle olive oil over it.
- Layer on the garlic: Sprinkle minced or sliced fresh garlic over the olive oil.
- Spread the tomatoes: Slice fresh tomatoes thinly and layer them over the dough or crush canned tomatoes and spread them evenly.
- Melt the mozzarella: Tear fresh mozzarella into chunks and distribute them over the tomatoes.
- Season it up: Sprinkle sea salt and freshly cracked pepper over the pizza.
- Bake it: Transfer your pizza to the oven and bake for 10-12 minutes until bubbly and golden.
- Add fresh basil: Tear basil leaves and scatter them over the pizza right after it comes out of the oven.
- Slice and serve: Allow it to cool slightly before slicing and serving immediately.
Notes
Feel free to explore variations like adding veggies, using pesto, or making a white pizza.
Nutrition
- Serving Size: 1 serving
- Calories: 300
- Sugar: 5g
- Sodium: 450mg
- Fat: 12g
- Saturated Fat: 4g
- Unsaturated Fat: 6g
- Trans Fat: 0g
- Carbohydrates: 30g
- Fiber: 2g
- Protein: 10g
- Cholesterol: 30mg
Keywords: pizza, Margherita, Italian pizza, homemade pizza, vegetarian recipe
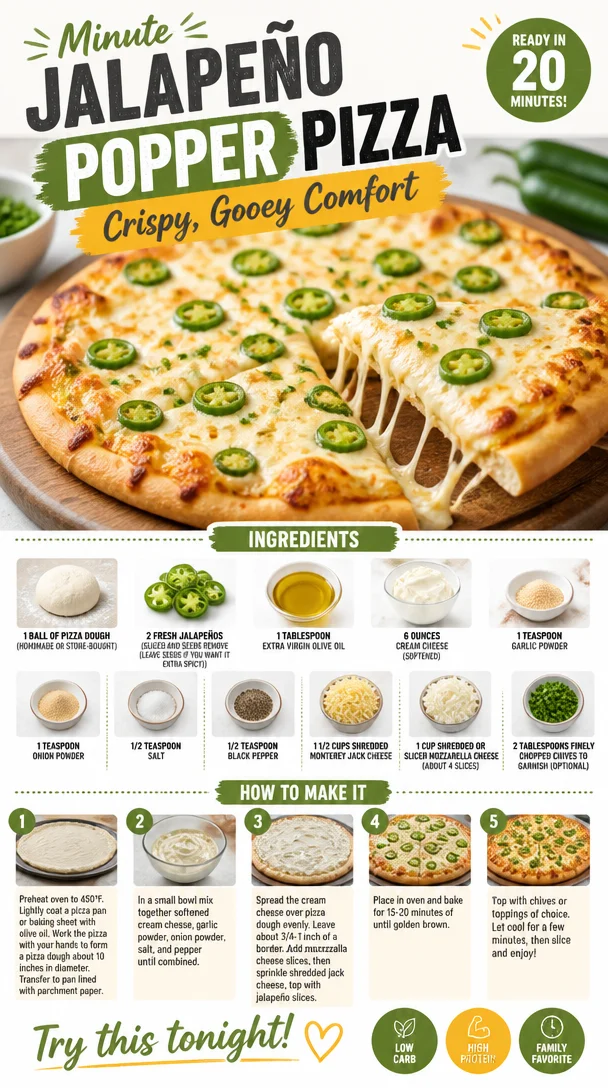
Minute Jalapeño Popper Pizza: Crispy, Gooey Comfort
Jalapeño Popper Pizza: A Flavorful Twist on a Classic Favorite
Welcome back to Clean Plate Cravings, my kitchen-loving friends! If you’re looking for a dish that combines the cheesy dreams of pizza with the spicy, creamy delight of jalapeño poppers, you’ve hit the jackpot! Today, we’re diving into the world of Jalapeño Popper Pizza, where every bite is an explosion of flavor. Whether you’re hosting friends for game night or just craving a comforting evening meal, this recipe is sure to impress without being overly complicated.
Imagine sinking your teeth into a crispy crust topped with a luscious layer of cream cheese, fresh jalapeños, and mountains of gooey cheese. Friends, it’s the perfect fusion of both worlds—a pizza you’ll want to make again and again. I find that cooking should be an adventure filled with joy and excitement, so let’s gear up and get cooking!
A Walk Down Memory Lane
Growing up, my family had a tradition of Friday night pizza parties. As a kid, I looked forward to it each week. We’d gather in the kitchen, and my dad would roll out the dough while the aroma of bubbling cheese filled the air. It was the kind of cozy chaos that caused laughter and a few flour-covered kitchen disasters. He had this knack for experimenting with flavors and toppings, and one night, he introduced us to the blissful experience of jalapeño poppers.
Flash-forward a few years, and I can still remember the crunch of that first bite. You know the one where the spicy, creamy goodness sends your taste buds on a joyride? That memory stayed with me, and it inspired me to create this Jalapeño Popper Pizza. It’s a celebration of flavors, nostalgia, and family traditions rolled into one fantastic pie that you can enjoy in the comfort of your own home.
Ingredients
Here’s what you’ll need to whip up this delicious Jalapeño Popper Pizza.
-
1 ball of pizza dough
You can use store-bought or make your own! If you’re using store-bought, look for a quality brand, or if you’re feeling adventurous, try my homemade dough recipe from earlier posts. -
2 fresh jalapeños (sliced and seeds removed)
If you like the heat, feel free to leave some seeds in! They bring a lovely depth of flavor. You can also substitute with roasted red peppers for a milder option. -
1 tablespoon extra virgin olive oil
This will help create a crispy crust and infuse flavor into the dough. You could also use melted butter for a richer taste. -
6 ounces cream cheese (softened)
The star of our popper-inspired topping! Be sure it’s softened—nothing’s worse than firm cream cheese trying to spread out. You can swap it with vegan cream cheese for a dairy-free version. -
1 teaspoon garlic powder
For that extra punch of flavor without biting into garlic chunks. Fresh minced garlic can also be used—just a little less than a teaspoon for the same effect! -
1 teaspoon onion powder
This brings a lovely sweetness to balance the heat from the jalapeños. Fresh onions can be used here; just make sure to sauté them first until they’re translucent. -
1/2 teaspoon salt
Essential for elevating all those delicious flavors! -
1/2 teaspoon black pepper
A must to add a bit of warmth. -
1 1/2 cups shredded Monterey Jack Cheese
This cheese melts beautifully and has a wonderful mild flavor. Pepper Jack could also add a little kick! -
1 cup shredded or sliced mozzarella cheese (about 4 slices)
Classic pizza cheese! You can experiment with provolone or gouda for something a bit different. -
2 tablespoons finely chopped chives (to garnish, optional)
Chives add a fresh burst of flavor on top! You could use green onions or even cilantro for a twist.
Step-by-Step Instructions
Now that we’ve snagged our ingredients, let’s jump into making our amazing Jalapeño Popper Pizza—step by step!
-
Preheat your oven: Start by preheating your oven to 475°F (245°C). This ensures your pizza crust gets that perfect golden-brown finish.
-
Prepare your pizza dough: If you’re using homemade dough, this is the time to roll it out! Lightly flour your work surface and roll your dough into your desired shape—be it round or rectangular. If you’re working with store-bought dough, follow the instructions on the packaging for the best results. Trust me, a good dough is the backbone of any pizza!
-
Brush with olive oil: After shaping your dough, transfer it to a baking sheet lined with parchment paper (or a pizza stone if you have one). Drizzle a tablespoon of extra virgin olive oil onto the surface of the dough, using a pastry brush or your fingers to spread it evenly across the top. This will give it a beautiful crust!
-
Soften the cream cheese: In a small bowl, combine your softened cream cheese, garlic powder, onion powder, salt, and black pepper. Mix well with a spatula or fork until smooth. This luscious mixture is the “popper” part of our pizza!
-
Spread the cream cheese mixture: Using a spatula, evenly spread the cream cheese mixture over the rolled-out dough, leaving a small border around the edges for the crust.
-
Add jalapeños: Scatter the freshly sliced jalapeños over the cream cheese layer. Use as few or as many as your heat tolerance allows. If you’re feeling bold, I’d say go for it—load it up!
-
Top with cheese: Now it’s time for cheese heaven! Sprinkle the shredded Monterey Jack cheese evenly over the jalapeños, then layer the mozzarella on top. Seriously, what’s pizza without a generous amount of ooey-gooey cheese?
-
Bake it up: Slide the pizza into the preheated oven and bake for about 12-15 minutes, or until the crust is golden brown and the cheese is bubbly and slightly caramelized. Keep an eye on it! Ovens can vary so make adjustments accordingly.
-
Garnish: In the last minute of baking, chop up your chives, so they’re ready to top your finished pizza.
-
Cool and serve: Once the pizza is out of the oven, let it cool for just a moment. This way, you’ll avoid burning your tongue on that molten cheese! Then, sprinkle the chopped chives on top for a pop of color and freshness.
Serving Suggestions
When it comes to serving up this Jalapeño Popper Pizza, keeping it casual is key! Slice it into wedges and serve with a side of ranch or blue cheese dressing for dipping. If you’re feeling generous, you can even whip up a quick and refreshing side salad to balance out that cheesy goodness. A simple arugula salad with lemon olive oil dressing or a classic Caesar salad would complement this dish perfectly!
Recipe Variations
Now that you’ve mastered the classic version, here are some fun ways to change it up:
-
BBQ Chicken Jalapeño Pizza: Add shredded cooked chicken and some BBQ sauce to the cream cheese mixture for an exciting twist!
-
Vegetarian Delight: Replace the jalapeños with bell peppers, mushrooms, or spinach for a veggie-packed version.
-
Spicy Sausage: Top with some crumbled spicy Italian sausage for a flavorful kick!
-
Double Cheese: Layer more creamy cheese like ricotta under the toppings for an extra indulgent pizza.
-
Gluten-Free Option: Use a gluten-free pizza crust to make this recipe friendly for everyone!
Chef’s Notes
This recipe brings back so many memories of my Friday night pizza nights, and it has evolved quite a bit over the years! Initially, I used very standard toppings until I discovered combining jalapeño poppers with pizza was an absolute game changer. Now, I love experimenting with different cheeses and toppings to see what new flavors I can create. One time I added a drizzle of honey after baking, and let me tell you, it took things to a whole new sweet-savory level!
FAQs and Troubleshooting
-
What if my dough doesn’t rise?
Make sure your yeast is fresh! If you’re using store-bought dough, follow the package’s instructions closely. If it’s homemade, double-check that your environment is warm enough for the dough to rise. -
My crust is soggy! What did I do wrong?
This could happen if you overload the toppings or don’t bake it long enough. Make sure to bake thoroughly and remove excess moisture from toppings, like patting the jalapeños dry. -
Can I make this ahead of time?
Absolutely! You can prepare the cream cheese mixture and slice your jalapeños ahead of time. Assemble the pizza just before baking for optimal freshness. -
How do I store leftovers?
Store leftover slices in an airtight container in the fridge for up to three days. Reheat in the oven for that freshly baked taste!
Nutritional Info
While I won’t dive deep into the nitty-gritty—because, hey, it’s pizza!—you can expect this Jalapeño Popper Pizza to be a delightful treat. Each slice combined with fresh ingredients provides a balance of fats, carbs, and proteins that can make your taste buds sing!
So there you have it! A culinary journey fueled by love, nostalgia, and a few spicy peppers. I hope you feel inspired to roll up your sleeves and create your own version of this Jalapeño Popper Pizza. It’s time to gather your friends, put on some fun music, and dig into some delicious homemade pies! Until next time, keep it fresh, simple, and seriously delicious!
PrintJalapeño Popper Pizza

A delicious fusion of pizza and jalapeño poppers with a crispy crust, creamy cheese, and a spicy kick.
- Prep Time: 15 minutes
- Cook Time: 15 minutes
- Total Time: 30 minutes
- Yield: 4 servings 1x
- Category: Main Course
- Method: Baking
- Cuisine: American
- Diet: Vegetarian
Ingredients
- 1 ball of pizza dough
- 2 fresh jalapeños (sliced and seeds removed)
- 1 tablespoon extra virgin olive oil
- 6 ounces cream cheese (softened)
- 1 teaspoon garlic powder
- 1 teaspoon onion powder
- 1/2 teaspoon salt
- 1/2 teaspoon black pepper
- 1 1/2 cups shredded Monterey Jack Cheese
- 1 cup shredded or sliced mozzarella cheese
- 2 tablespoons finely chopped chives (to garnish, optional)
Instructions
- Preheat your oven to 475°F (245°C).
- Prepare your pizza dough by rolling it out into your desired shape.
- Brush the shaped dough with olive oil.
- Soften the cream cheese and mix it with garlic powder, onion powder, salt, and black pepper.
- Spread the cream cheese mixture over the dough.
- Add sliced jalapeños over the cream cheese layer.
- Top with shredded Monterey Jack cheese and mozzarella cheese.
- Bake for about 12-15 minutes until the crust is golden brown and cheese is bubbly.
- Garnish with chopped chives before serving.
- Cool for a moment and then slice to serve.
Notes
Feel free to experiment with different toppings like BBQ chicken or bell peppers. Serve with ranch or blue cheese dressing for dipping.
Nutrition
- Serving Size: 1 slice
- Calories: 400
- Sugar: 2g
- Sodium: 450mg
- Fat: 22g
- Saturated Fat: 10g
- Unsaturated Fat: 8g
- Trans Fat: 0g
- Carbohydrates: 35g
- Fiber: 2g
- Protein: 15g
- Cholesterol: 40mg
Keywords: pizza, jalapeño poppers, creamy cheese, spicy pizza, comfort food
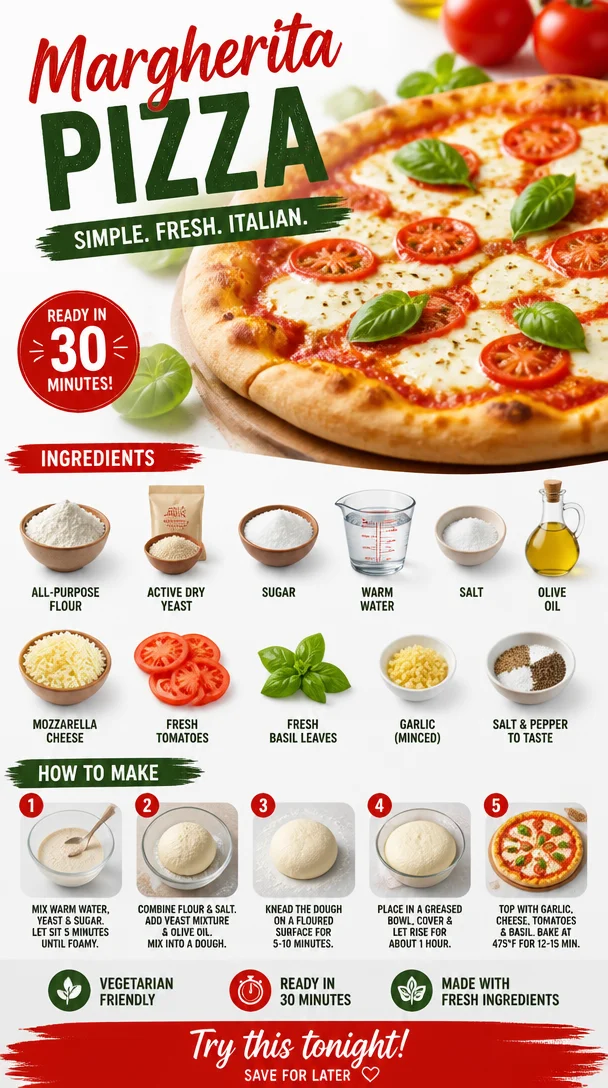
Margherita Pizza
Margherita Pizza: A Slice of Italy Right at Home!
Ah, pizza! The quintessential comfort food that sparks joy in millions around the globe. Today, we’re diving into one of the most celebrated varieties—the classic Margherita pizza. Picture this: a crispy golden crust topped with sweet, succulent tomatoes, creamy mozzarella, and fragrant basil. It’s simple yet sublime, and somehow, it feels just right whether you’re having a cozy night in or hosting friends for a weekend feast.
Why Margherita pizza, you ask? Well, there’s a rich history behind it, tied to the vibrant Italian culture. Legend has it that this pizza was created in honor of Queen Margherita of Savoy during her visit to Naples in the late 1800s. The colors of the ingredients—red tomatoes, white mozzarella, and green basil—symbolize the Italian flag. Eating it is like savoring a bite of Italian heritage!
But you don’t need to hop on a flight to Italy to enjoy a slice. You can create this masterpiece in your very own kitchen, filled with radiant flavors that celebrate fresh, quality ingredients. So grab your apron, roll up your sleeves, and let’s embark on a culinary adventure that turns your home into a pizzeria!
Ready? Let’s make some magic with the simple yet delightful Margherita pizza that’s bound to become a favorite in your home!
A Slice of Nostalgia: My First Margherita Pizza
I can still picture the first time I made a Margherita pizza. I was a wide-eyed culinary student, and my chef instructor handed out a sheet of dough, ingredients laid out like a painter’s palette. With my heart racing, I rolled out my dough, kneading and stretching it until it felt just right.
Then came the toppings—the fresh tomatoes, still warm from the summer sun, the mozzarella that glistened like tiny cheese diamonds, and the fragrant basil that filled the room with its herbal aroma. As I slid that pizza into the oven and waited anxiously, I couldn’t help but feel a mix of excitement and nervousness.
When it emerged, bubbling and golden, I tasted it as if I were experiencing magic for the first time. Each bite transported me to the cobblestone streets of Naples. From that day on, Margherita pizza has held a special place in my heart and my kitchen. It’s not just about the recipe; it’s a reminder of the joy and connection that cooking brings.
Essential Ingredients for Margherita Pizza
Let’s break down the ingredients you’ll need to create your own Margherita pizza masterpiece!
-
2 cups all-purpose flour: The backbone of your pizza crust! You can use bread flour for a chewier texture, or whole wheat flour for a nuttier flavor. Just remember, adjusting the water might be necessary depending on the flour type you choose.
-
1 packet active dry yeast: This tiny powerhouse is responsible for making your dough rise and giving it that delightful airy texture. Make sure your water is warm (not hot!) to help activate the yeast in the best way.
-
1 teaspoon sugar: Just a pinch to feed the yeast and promote fermentation. If you’re avoiding refined sugar, you can substitute honey or agave syrup.
-
3/4 cup warm water: The liquid love that brings all the dry ingredients together. Ensure it’s at about 110°F (43°C) for optimal yeast activation.
-
1 teaspoon salt: Essential for flavor enhancing! Feel free to experiment with sea salt or Himalayan pink salt for a unique twist.
-
2 tablespoons olive oil: Adds richness to your dough and helps achieve that lovely golden crust. Extra virgin olive oil is great for its fruity, vibrant flavor.
-
1 cup mozzarella cheese, shredded: The star of the show! Fresh mozzarella is preferred for its creaminess, but pre-shredded varieties work too. If you’re feeling adventurous, try burrata for a luscious touch.
-
1 cup fresh tomatoes, sliced: Go for ripe, seasonal tomatoes or even cherry tomatoes for a sweeter flavor. You can also use a delicious tomato sauce if you’re short on fresh produce.
-
1/4 cup fresh basil leaves: The aromatic touch that brightens up the dish! If basil isn’t available, consider using arugula or spinach for a different flavor profile.
-
1 clove garlic, minced: A hint of garlic adds depth to the flavor. If you’re not a fan, you can skip it or substitute with garlic powder.
-
Salt and pepper to taste: Essential for bringing all the flavors together. A sprinkle of freshly cracked black pepper elevates the dish beautifully!
Step-by-Step Instructions to Craft Your Margherita Pizza
Step 1: Mix It Up
In a large mixing bowl, combine the warm water, sugar, and yeast. Stir gently and let it sit for about 5-10 minutes until frothy. This means your yeast is alive and ready to work its magic! 🥳
Step 2: Create the Dough
Once the yeast mixture is frothy, it’s time to add in your flour, salt, and olive oil. Mix with a wooden spoon or your hands until a shaggy dough forms. Don’t stress about having a perfectly smooth dough at this stage—we just want it to come together!
Step 3: Knead and Flour Power
Flour a clean surface and transfer the dough onto it. Knead the dough for about 6-8 minutes until it’s smooth and elastic. You can even channel your inner chef and use a dough scraper to help! If the dough sticks too much, sprinkle a bit more flour on the surface—listening to your dough is key.
Step 4: Rise and Shine
Place the kneaded dough into a lightly oiled bowl, cover it with a damp cloth, and set it in a warm spot to rise for about 1 hour. Look for it to double in size—that’s the sign you’ve got a happy yeast.
Step 5: Shape Your Pizza
Once your dough has risen, preheat your oven to the highest setting (around 475°F or 245°C). Punch down the dough to release any air bubbles and turn it out onto your floured surface. Using your hands or a rolling pin, shape it into your desired pizza size. Thin crust? Go for it! A thicker crust? Absolutely!
Step 6: Assemble the Masterpiece
Transfer your shaped dough onto a baking sheet or a pizza stone. Now, spread a thin layer of tomato sauce (or your fresh tomato slices!) over the base. Scatter the shredded mozzarella generously atop the sauce, followed by sliced tomatoes, minced garlic, and a sprinkle of salt and pepper.
Step 7: Bake and Enjoy
Slide that beauty into the oven and bake for about 10-15 minutes, or until the crust is golden and the cheese is bubbly. There’s nothing quite like the aroma wafting through your kitchen at this point—pure bliss.
Step 8: The Fresh Finish
As soon as your pizza comes out, sprinkle it with fresh basil leaves. This brightens up the dish immensely and adds a pop of vibrant color. Let it set for a minute before slicing it up to share. Sigh There’s always something gratifying about slicing into a freshly made pizza!
Serving Suggestions: Let’s Plate It Up!
To serve, I love using a wooden pizza board for that rustic pizzeria feel. Arrange your sliced pizza on the board, and consider adding a small dish of balsamic glaze or olive oil for dipping. Pair with a simple arugula salad on the side drizzled in a light lemon vinaigrette for an extra fresh touch.
Recipe Variations: Make It Yours!
-
Add Your Favorite Toppings: Feel free to get creative! Go ahead and throw on some sautéed mushrooms, olives, or even prosciutto!
-
Veggie Delight: Use roasted vegetables like bell peppers, zucchini, or artichokes for a colorful twist.
-
Spicy Kick: Add red pepper flakes to your sauce for a spicy version that’ll warm you up.
-
Cheeseboard Style: Try mixing different cheeses—fontina or gouda could bring a delightful twist!
-
Gluten-Free: Substitute all-purpose flour with a gluten-free blend to enjoy a gluten-free take on this classic recipe.
Chef’s Notes: From My Kitchen to Yours
Over the years, my Margherita pizza has seen plenty of evolution! Initially, I stuck to the classic ingredients, but as I grew in my culinary journey, I started adding personal touches like a hint of honey in the dough for a touch of sweetness. One of my funniest moments in the kitchen was when I accidentally grabbed a bag of powdered sugar thinking it was flour. Let’s just say the sweetness was not the vibe for the pizza I was going for! But hey, every mistake taught me something valuable—and today, I embrace those little mishaps as part of the journey.
FAQs and Troubleshooting
1. Why didn’t my pizza crust rise?
If your crust didn’t rise, your yeast may have been inactive or the water was too hot. Always check the temperature and freshness of your yeast!
2. My pizza got soggy—what did I do wrong?
Sogginess can happen due to too many toppings or undercooked dough. Try pre-baking the crust for a few minutes before adding your toppings to ensure a crisp base.
3. Can I make the dough ahead of time?
Absolutely! You can make the dough a day in advance. Just let it rise, then refrigerate it after punching it down. Bring it back to room temperature before shaping it.
4. What if I want a thicker crust?
To achieve a thicker crust, after shaping the dough, allow it to rise again for about 30 minutes before topping it. You can also roll it out to be slightly thicker than usual.
Nutritional Info (if applicable)
- Serving Size: 1 slice (1/8 of pizza)
- Calories: Approx. 250
- Fat: 10g
- Carbohydrates: 30g
- Protein: 10g
Pizza is all about balance; enjoying a slice every now and then can certainly add joy to your meal!
So there you have it—your very own guide to crafting a delightful Margherita pizza from scratch. This isn’t just cooking; it’s a celebration, a story, a connection. I can’t wait for you to gather around the table with family and friends, digging into your freshly baked pizza, savoring each bite together. Let’s keep the kitchen adventures alive—happy cooking! 🍕✨
PrintMargherita Pizza
A classic Margherita pizza featuring a crispy crust topped with fresh tomatoes, mozzarella cheese, and fragrant basil.
- Prep Time: 15 minutes
- Cook Time: 15 minutes
- Total Time: 30 minutes
- Yield: 4 servings 1x
- Category: Main Course
- Method: Baking
- Cuisine: Italian
- Diet: Vegetarian
Ingredients
- 2 cups all-purpose flour
- 1 packet active dry yeast
- 1 teaspoon sugar
- 3/4 cup warm water
- 1 teaspoon salt
- 2 tablespoons olive oil
- 1 cup mozzarella cheese, shredded
- 1 cup fresh tomatoes, sliced
- 1/4 cup fresh basil leaves
- 1 clove garlic, minced
- Salt and pepper to taste
Instructions
- Mix the warm water, sugar, and yeast in a large mixing bowl, then let it sit for 5-10 minutes until frothy.
- Create the dough by adding flour, salt, and olive oil. Mix until a shaggy dough forms.
- Knead the dough for 6-8 minutes on a floured surface until smooth and elastic.
- Place the dough in a lightly oiled bowl, cover it, and let it rise in a warm spot for about 1 hour.
- Preheat your oven to 475°F (245°C).
- Shape the dough by punching it down and rolling it out on a floured surface.
- Assemble by spreading tomato sauce or fresh tomato slices, adding mozzarella, sliced tomatoes, minced garlic, and seasoning.
- Bake for 10-15 minutes until the crust is golden and the cheese is bubbly.
- Sprinkle fresh basil on top and let it set before slicing.
Notes
Creative variations include adding your favorite toppings, using roasted vegetables, or a gluten-free blend.
Nutrition
- Serving Size: 1 slice
- Calories: 250
- Sugar: 1g
- Sodium: 400mg
- Fat: 10g
- Saturated Fat: 3g
- Unsaturated Fat: 5g
- Trans Fat: 0g
- Carbohydrates: 30g
- Fiber: 2g
- Protein: 10g
- Cholesterol: 15mg
Keywords: pizza, Margherita pizza, Italian recipe
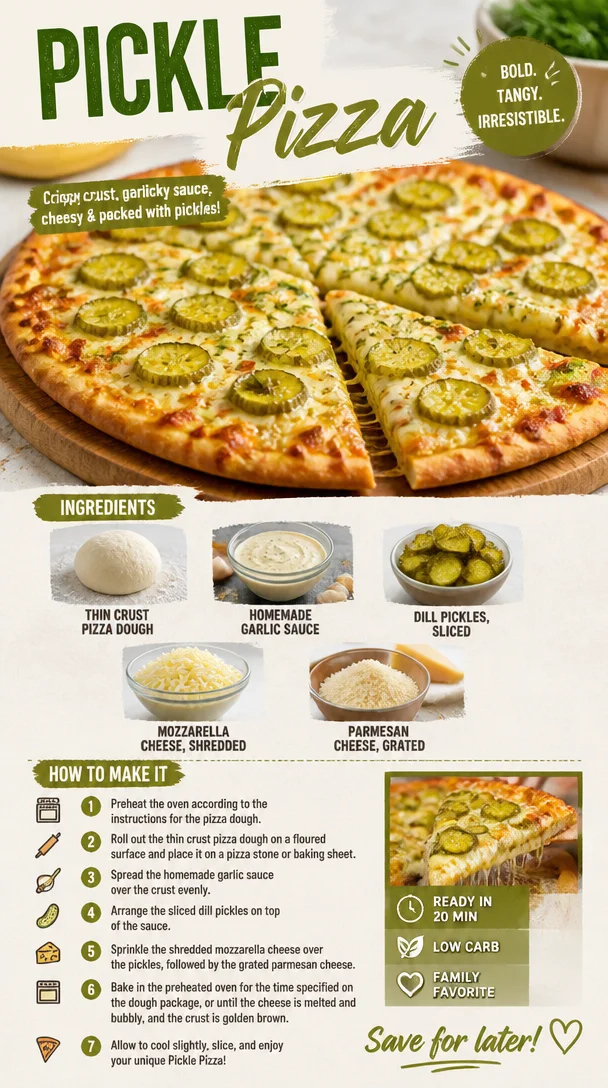
Pickle Pizza
Welcome to the Zesty World of Pickle Pizza!
Hey there, fellow food lovers! If you’ve stumbled upon this blog, you’re in for a treat—a slice of something truly unique and utterly delicious: Pickle Pizza! This quirky combination might just be the surprise hit at your next pizza night. With the perfect balance of tangy, creamy, and savory flavors, it’s a celebration of bold tastes that will keep your taste buds dancing.
I can almost hear your questions: “Really, pickles on pizza?” Yes, my friends! This culinary adventure is not only inspired by the growing trend of unexpected toppings but also by childhood memories wrapped in the comforting aroma of homemade pizza. There’s something about pizza that unites us all; it’s like a canvas where you can paint your own flavor masterpiece. And believe me, this Pickle Pizza will become a cherished addition to your rotation, whether you share it with family, friends, or simply keep it to yourself (I won’t tell!).
As we dive into the recipe, I want to make sure we embrace the fresh, feel-good vibe of cooking. Let me guide you through this easy, approachable recipe that celebrates both the playful aspect of food and the joy of creating something that nourishes and excites.
A Slice of Nostalgia
Ah, pickles! They may not be everyone’s favorite, but for me, they represent carefree summer days spent at picnics and backyard barbecues. I remember running around, catching fireflies with friends while our parents flipped burgers and set out potato salad piled high with lovingly sliced pickles. At those gatherings, I could always count on someone bringing a jar of pickles, and when they were offered as a topping on our pizza, it was like discovering a secret ingredient that made everything better.
That first bite of Pickle Pizza was mesmerizing. It was savory, crispy, and just the right amount of tangy. I couldn’t believe how well the flavor of the pickles complemented the warm, gooey cheese and the fragrant garlic sauce. It felt like I was unlocking a whole new world of pizza possibilities. With ingredients that burst with flavor and nostalgia, I knew then that this recipe had to be shared. So let’s roll up our sleeves and get cooking!
Ingredients You’ll Need
Here’s what you’ll need to whip up your own Pickle Pizza masterpiece:
-
Thin crust pizza dough: This provides a crispy base that allows the toppings to shine. You can go for homemade or store-bought. If you’re short on time, pre-made dough is a great shortcut.
-
Homemade garlic sauce: Made from scratch, this sauce is creamy and packed with flavor. You can easily switch it up with store-bought garlic sauce if time is tight.
-
Dill pickles, sliced: These are the star of the show! Use your favorite brand or even homemade pickles if you have them. If you’re not into dill, try bread-and-butter pickles for a sweeter twist.
-
Mozzarella cheese, shredded: The classic pizza cheese! Opt for fresh mozzarella for creaminess or good ol’ shredded mozzarella for convenience. You could also switch this for dairy-free cheese for a lactose-free option.
-
Parmesan cheese, grated: This adds a punch of salty flavor and enhances the overall taste of the pizza. You can substitute it with nutritional yeast for a dairy-free alternative.
Each ingredient is key to creating that burst of flavor with every bite. Feel free to make substitutions based on what you have on hand or your dietary preferences!
Step-by-Step Instructions
Let’s get cooking! Here’s how to assemble this delightful Pickle Pizza in a few easy steps:
-
Preheat Your Oven: Preheat your oven to 475°F (245°C). A hot oven is crucial for achieving that perfect crispy crust.
-
Prepare the Dough: If you’re using store-bought dough, follow the package instructions for resting. If you’re making your dough from scratch, roll it out on a lightly floured surface to your desired thickness—thin crust is the goal!
-
Make the Garlic Sauce: In a small bowl, mix together a couple of tablespoons of mayonnaise, minced garlic (fresh or powdered), a squeeze of lemon juice, and a pinch of salt. Adjust to taste. This creamy sauce will elevate your pizza game!
-
Assemble the Pizza: Transfer your rolled-out dough onto a pizza stone or baking sheet. Spread a generous layer of the garlic sauce evenly over the crust, leaving a little room at the edges for that golden crust. Remember, this sauce is packed with flavor, so don’t skimp on it!
-
Layer on the Cheese: Sprinkle a generous amount of shredded mozzarella cheese over the garlic sauce. The more cheese, the merrier!
-
Add Those Pickles: Now for the fun part—top your pizza with the deliciously sliced dill pickles. Arrange them evenly over the cheese; feel free to go wild with the placement!
-
Sprinkle Parmesan: Finish off with a sprinkle of grated Parmesan cheese. This layer adds a touch of depth and exquisite flavor to every bite.
-
Bake to Perfection: Place the pizza in the preheated oven and bake for 12-15 minutes or until the crust is golden and the cheese is bubbly and delicious. Keep an eye on it, because every oven is different!
-
Slice and Serve: Once baked to perfection, remove from the oven and let cool for a couple of minutes. Slice it up with a pizza cutter and get ready to dig in!
Serving Suggestions
To give your Pickle Pizza a visually appealing lift, consider garnishing it with fresh dill or parsley. It adds a pop of color and freshness. Serve the slices on a rustic wooden cutting board or a bright pizza plate for an appetizing display. Pair it with a light side salad or some garlic knots for a complete meal that’ll impress everyone!
Recipe Variations
Here are a few creative twists you might love to try:
-
Spicy Kick: Add jalapeños or crushed red pepper flakes for a spicy twist that complements the tanginess of the pickles.
-
Sweet & Savory: Swap out dill pickles for bread-and-butter pickles to create a sweet and savory flavor profile.
-
Caprese Style: Add fresh tomatoes and basil along with the pickles for a Caprese-inspired twist.
-
Vegan Version: Use vegan cheese and a plant-based mayonnaise for a scrumptious vegan friendly solution.
-
BBQ Lovin’: Drizzle a bit of barbecue sauce on top of the pizza before baking for an unexpected smoky flavor that pairs wonderfully with pickles.
Chef’s Notes
Oh, how this recipe has evolved! I remember when I first brought Pickle Pizza to a potluck, and the looks I got from my friends! Most were skeptical, but curiosity (and my enthusiastic encouragement) got the best of them. To my surprise, everyone left with seconds. Insert chef fist-pump here! This dish has transformed into a beloved staple in my kitchen because it blends nostalgia with creativity—and who doesn’t love that?
Cooking is about experimentation, so don’t hesitate to make this your own. Some of the best kitchen stories come from a bit of bravery!
FAQs and Troubleshooting
1. What if my dough is too sticky?
If your pizza dough is sticking to your hands or the counter, don’t fret! Sprinkle a little more flour both on your hands and the surface to make it easier to handle.
2. Can I make the garlic sauce in advance?
Absolutely! You can prepare the garlic sauce a day ahead. Just store it in the refrigerator in an airtight container. The flavors will meld beautifully while storing!
3. My pizza crust isn’t crispy; what did I do wrong?
Ensure your oven is fully preheated before baking. If you’re still facing issues, try baking on a preheated pizza stone or a metal baking sheet, which can help maintain heat.
4. What if I don’t have any parmesan cheese?
If you’re missing Parmesan, you can skip it or substitute with your favorite hard cheese. Nutritional yeast is also a fantastic dairy-free alternative that adds a cheesy flavor.
Nutritional Info
While the specifics can vary, here’s a rough estimate for one slice of Pickle Pizza (assuming 8 slices total):
- Calories: 280
- Protein: 12g
- Carbs: 30g
- Fat: 12g
As always, be sure to adjust based on the exact ingredients you use!
There you have it, my delightful foodie friends! Pickle Pizza is ready to become a fun new favorite with its nostalgic ties and bold flavors. Whether you make it for yourself or gather friends around the table, this recipe promises laughter, good vibes, and—of course—deliciousness. So grab your ingredients, let your creativity shine, and let’s make some magic in the kitchen together! Happy cooking! 🍕✨
PrintPickle Pizza
A unique and delicious pizza topped with tangy dill pickles, creamy garlic sauce, and gooey cheese.
- Prep Time: 15 minutes
- Cook Time: 15 minutes
- Total Time: 30 minutes
- Yield: 8 servings
- Category: Main Course
- Method: Baking
- Cuisine: American
- Diet: Vegetarian
Ingredients
- Thin crust pizza dough
- Homemade garlic sauce
- Dill pickles, sliced
- Mozzarella cheese, shredded
- Parmesan cheese, grated
Instructions
- Preheat your oven to 475°F (245°C).
- Prepare the dough by following package instructions or rolling it out to desired thickness.
- Make the garlic sauce by mixing mayonnaise, minced garlic, lemon juice, and salt.
- Assemble the pizza by spreading garlic sauce over the rolled-out dough.
- Layer on shredded mozzarella cheese.
- Add sliced dill pickles evenly on top.
- Sprinkle with grated Parmesan cheese.
- Bake for 12-15 minutes or until the crust is golden and cheese is bubbly.
- Slice and serve warm.
Notes
Garnish with fresh dill or parsley for extra flavor and color. Pair with a side salad or garlic knots.
Nutrition
- Serving Size: 1 slice
- Calories: 280
- Sugar: 2g
- Sodium: 500mg
- Fat: 12g
- Saturated Fat: 4g
- Unsaturated Fat: 6g
- Trans Fat: 0g
- Carbohydrates: 30g
- Fiber: 1g
- Protein: 12g
- Cholesterol: 20mg
Keywords: pickle pizza, unique pizza, garlic sauce, vegetarian recipes, comfort food
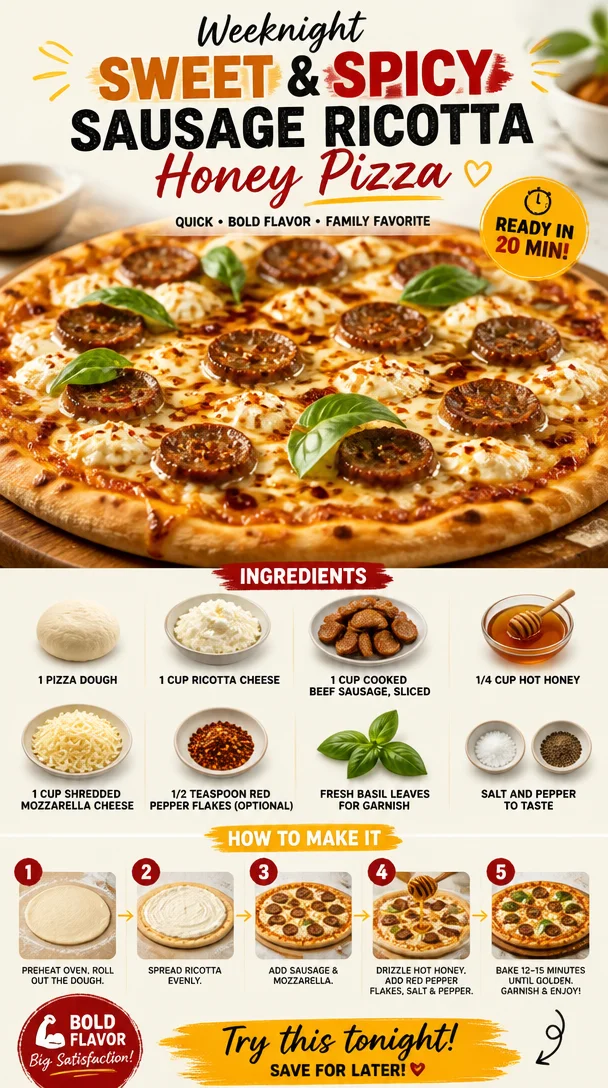
Weeknight Sweet & Spicy Sausage Ricotta Honey Pizza
Sweet & Spicy Sausage Ricotta Honey Pizza: A Flavorful Adventure
Ah, pizza—the universal comfort food we all adore! Whether it’s a midweek dinner, a fun gathering with friends, or just a cozy night in front of your favorite show, pizza has a way of bringing people together. Today, I’m excited to share a unique twist on the classic that you’ll absolutely love: Sweet & Spicy Sausage Ricotta Honey Pizza. This delightful dish goes beyond basic toppings, creating a perfect harmony of flavors that dances on your taste buds.
Imagine sinking your teeth into a crispy crust, bursting with hearty beef sausage, velvety ricotta, and a drizzle of hot honey, followed by hints of spiciness from the red pepper flakes. It’s a delightful balance of savory and sweet that will keep you coming back for more. And guess what? Making it at home is easier than you think!
Cooking is not just about the food; it’s about sharing stories and memories. For me, this pizza brings back a flood of nostalgia from my college days, where my friends and I would whip up late-night snacks in our cramped little kitchen. Let me take you on a culinary journey filled with laughter, cravings, and a little sweetness.
Personal Story: A Slice of Nostalgia
There’s something special about home-cooked meals that transports you back to cherished memories. For me, one of those memories revolves around late-night pizza-making marathons with my college pals. Picture this: the kitchen bustling with laughter, vibrant conversations, and the enticing aroma of melting cheese filling the air. With nothing but a few simple ingredients, we created personalized pizzas that matched our cravings.
One fateful night, we had some ricotta cheese left over from a previous dinner, and instead of letting it go to waste, we decided to experiment. We grabbed some sausages from the fridge and, in a moment of spontaneous creativity, added a drizzle of honey. At first, it seemed bizarre, but once we took a bite, we were hooked! That sweet and spicy flavor explosion has stayed with me ever since. It became a go-to recipe, and now I want to share it with you—because those kinds of memories are meant to be made in every kitchen, large or small!
Ingredients
Let’s gather our ingredients for this mouthwatering Sweet & Spicy Sausage Ricotta Honey Pizza. Here’s what you’ll need:
-
1 pizza dough: Store-bought or homemade! If you’re in a hurry, store-bought works like a charm. For a fun experiment, try using whole wheat or cauliflower crust for a healthier twist.
-
1 cup ricotta cheese: This creamy cheese adds a luscious texture and a mildly sweet flavor to your pizza. You can substitute it with mascarpone for a richer taste or even cottage cheese for a lighter option.
-
1 cup cooked beef sausage, sliced: Beef sausage adds a savory punch. Feel free to swap it out with turkey sausage or even spicy Italian sausage for an extra kick.
-
1/4 cup hot honey: The star of the show! It complements the richness of the cheese and sausage perfectly. If you can’t find hot honey, mix regular honey with a few drops of hot sauce or red pepper flakes.
-
1 cup shredded mozzarella cheese: A classic ingredient that binds everything together with its gooey, melty goodness. For a fun twist, try using smoked mozzarella for an elevated flavor.
-
1/2 teaspoon red pepper flakes (optional): Spice up your pizza if you like a bit of heat! You can adjust the quantity based on your heat tolerance.
-
Fresh basil leaves for garnish: These fragrant leaves add a burst of color and freshness. You can also use arugula for a peppery touch.
-
Salt and pepper to taste: Essential for enhancing the overall flavor of the dish.
Step-by-Step Instructions
Let’s get into the nitty-gritty! Follow these steps to create your Sweet & Spicy Sausage Ricotta Honey Pizza:
-
Preheat the oven: Start by preheating your oven to 475°F (245°C). A hot oven is essential for a crispy crust. If you have a pizza stone, place it inside the oven to heat up as well!
-
Prepare the pizza dough: If you’re using store-bought dough, let it sit at room temperature for about 30 minutes before stretching. This will make it easier to roll out. Lightly flour your countertop and use a rolling pin or your hands to stretch the dough into your desired shape. Go for a round or rectangular shape based on your preference.
-
Spread the ricotta: Once shaped, transfer the dough onto a parchment-lined baking sheet (or your preheated pizza stone if using). Using a spoon, dollop the ricotta cheese evenly over the dough, leaving a little space at the edges for the crust. Give it a light sprinkle of salt and pepper to fend off any blandness!
-
Add the sausage: Now, layer the sliced cooked beef sausage on top of the ricotta. This layer is where the heartiness comes in, and you can arrange it however you like—overlapping slices or artfully scattered.
-
Sprinkle the mozzarella: Generously sprinkle the shredded mozzarella cheese over the pizza. This cheesy layer is where the magic happens! Be generous, and feel free to add more if you’re a cheese lover.
-
Drizzle with hot honey: Here’s where the excitement begins. Drizzle the hot honey over the pizza, ensuring it touches the ricotta, sausage, and mozzarella. This step will create that delightful contrast of flavors.
-
Sprinkle red pepper flakes: If you’re feeling adventurous, add the red pepper flakes on top for an extra hint of spice. Adjust according to your taste—more if you’re in the mood for heat!
-
Bake the pizza: Carefully slide the pizza into the oven (or place it on the preheated pizza stone). Bake for about 12-15 minutes or until the crust is golden brown and the cheese is bubbly and slightly toasted. The aroma should be heavenly!
-
Garnish with basil: Once out of the oven, let it cool for a minute. Top your pizza with fresh basil leaves for that pop of color and fresh flavor.
-
Slice and serve: Use a sharp pizza cutter to slice your masterpiece and get ready for some serious deliciousness.
Serving Suggestions
To make your Sweet & Spicy Sausage Ricotta Honey Pizza even more inviting, consider serving it with a side salad filled with mixed greens and a light vinaigrette. The fresh crunch will balance out the richness of the pizza beautifully. And don’t forget to pour yourself a glass of your favorite drink—maybe something bubbly or a crisp white wine to enhance those flavors.
Recipe Variations
The beauty of pizza lies in its versatility! Here are a few creative twists you can try:
-
Vegetarian Option: Skip the sausage and load up on grilled veggies like bell peppers, onions, and mushrooms. Add a sprinkle of feta cheese for a tangy touch.
-
Sweet and Savory Twist: Mix in some caramelized onions or sliced fresh figs for a sweet contrast that plays beautifully with the ricotta and honey.
-
Spicy Italian Style: Swap the beef sausage for spicy Italian sausage, and add sliced jalapeños for an extra heat boost.
-
Herbed Delight: Mix fresh herbs like thyme or oregano into the ricotta for an aromatic twist, adding even more depth to the flavor profile.
-
BBQ-inspired: Replace the hot honey with your favorite barbecue sauce for a different flavor profile. Add pieces of grilled chicken for a BBQ chicken pizza experience!
Chef’s Notes
This pizza has been a go-to recipe in my kitchen for years, evolving as I discover new flavor combinations and techniques. I once hosted a pizza party where each guest brought their favorite toppings. Let me tell you, we ended up with the craziest and most delicious creations! From those gatherings, I learned how to embrace creativity and encourage folks to experiment with their own flavor profiles. So, don’t be afraid to put your spin on this recipe—after all, cooking is art, and your kitchen is the canvas!
FAQs and Troubleshooting
1. My pizza crust ended up soggy! What’s the secret to a crispy crust?
To achieve a perfect, crispy crust, preheat your oven thoroughly and use a pizza stone if you have one. It absorbs moisture and helps the bottom of the crust cook evenly. Always ensure your toppings, like the ricotta, aren’t too watery, as excess moisture can lead to sogginess.
2. Can I freeze the pizza dough?
Absolutely! If you have leftover dough, wrap it tightly in plastic wrap and store it in the freezer. When you’re ready to use it, let it thaw in the refrigerator overnight.
3. How can I make a gluten-free version of this pizza?
You can use a store-bought gluten-free pizza crust or make your own using almond flour or chickpea flour. Just ensure all your toppings are gluten-free as well.
4. What do I do if I don’t have ricotta?
No ricotta? No problem! You can blend cottage cheese until smooth or substitute with cream cheese mixed with a splash of milk for the creamy texture.
Nutritional Info (if applicable)
While the exact nutritional values will depend on your specific ingredients, here’s an approximate breakdown per serving (based on 8 slices):
- Calories: 280
- Protein: 15g
- Carbohydrates: 30g
- Fat: 12g
- Fiber: 2g
Now that you’re armed with this delightful recipe, get cooking and create your own Sweet & Spicy Sausage Ricotta Honey Pizza! Remember, the kitchen is the heart of the home—and the more experiences you weave into your meals, the stronger those delicious connections will become. Happy cooking, foodies! 🍕✨
PrintSweet & Spicy Sausage Ricotta Honey Pizza

A unique twist on classic pizza featuring a crispy crust topped with beef sausage, creamy ricotta, and a drizzle of hot honey for a delightful balance of savory and sweet.
- Prep Time: 15 minutes
- Cook Time: 15 minutes
- Total Time: 30 minutes
- Yield: 4 servings 1x
- Category: Main Course
- Method: Baking
- Cuisine: Italian
- Diet: Non-Vegetarian
Ingredients
- 1 pizza dough
- 1 cup ricotta cheese
- 1 cup cooked beef sausage, sliced
- 1/4 cup hot honey
- 1 cup shredded mozzarella cheese
- 1/2 teaspoon red pepper flakes (optional)
- Fresh basil leaves for garnish
- Salt and pepper to taste
Instructions
- Preheat the oven to 475°F (245°C).
- Prepare the pizza dough and let it sit at room temperature for 30 minutes.
- Spread the ricotta evenly over the shaped dough.
- Add the sliced cooked beef sausage on top of the ricotta.
- Sprinkle the shredded mozzarella cheese over the pizza.
- Drizzle the hot honey over the pizza.
- Sprinkle red pepper flakes on top if desired.
- Bake for 12-15 minutes until the crust is golden brown.
- Garnish with fresh basil leaves before serving.
- Slice and enjoy your delicious pizza!
Notes
Consider serving with a side salad for a refreshing balance.
Nutrition
- Serving Size: 2 slices
- Calories: 350
- Sugar: 10g
- Sodium: 600mg
- Fat: 15g
- Saturated Fat: 6g
- Unsaturated Fat: 8g
- Trans Fat: 0g
- Carbohydrates: 36g
- Fiber: 3g
- Protein: 18g
- Cholesterol: 40mg
Keywords: pizza, sausage, ricotta, honey, spicy, comfort food
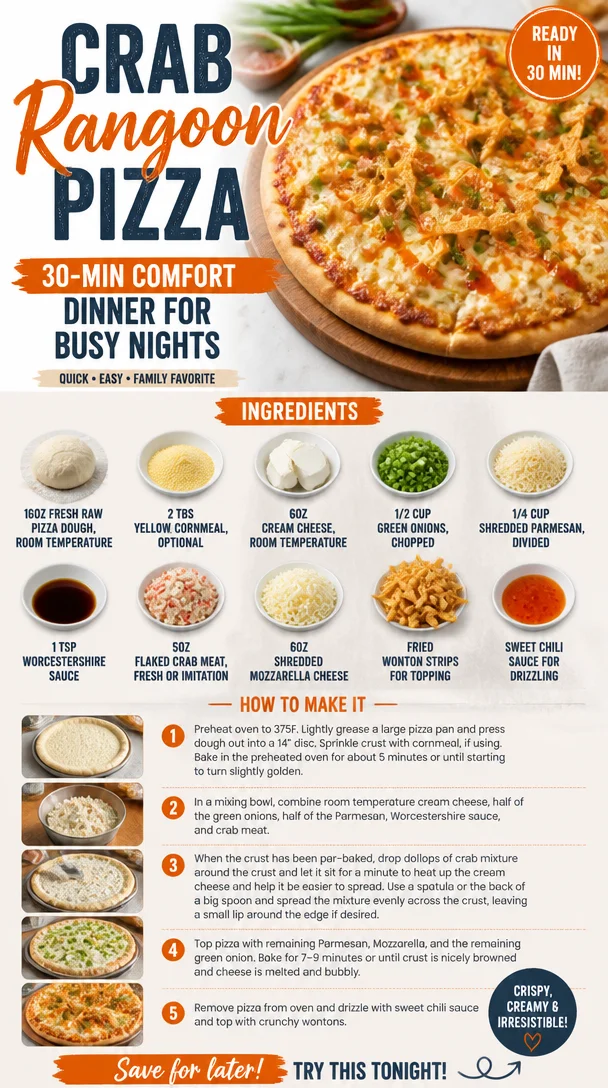
Crab Rangoon Pizza: 30-Min Comfort Dinner for Busy Nights
Crab Rangoon Pizza: A Delicious Fusion of Flavors and Fun
Oh, pizza! The ultimate comfort food that brings a smile to our faces on days that need a little extra love. But what if I told you there’s a way to take your pizza game to an entirely new level? Enter Crab Rangoon Pizza, where the crispy, creamy delight of crab rangoon meets the cheesy, doughy goodness of pizza. It’s a fun twist that combines two beloved dishes, and if you’re like me, you’re positively itching to pull it off your baking stone and take a big, cheesy bite.
Imagine the joy this dish will bring not just to your taste buds but also to your friends and family. Perfect for a cozy pizza night, festive gatherings, or just whenever the craving strikes—you’re going to want to keep this recipe in your back pocket. We’re talking about a creamy, cheesy masterpiece topped with crumbled crab, fresh scallions, and that delightful crunch that makes crab rangoon so addictive. With a drizzle of sweet chili sauce to finish it off, every bite is an experience! So, grab your apron, turn up the music, and let’s get cooking!
A Personal Story About Crab Rangoon
Growing up, I had a love affair with takeout food, and crab rangoon was always high on my list of favorites. The crispy little packages filled with creamy goodness and flaked crab meat would disappear before I even had a chance to savor them. My best friend and I would plan our Saturday movie marathons around our takeout spree, and the highlight was always wolfing down crab rangoon with our favorite dipping sauces.
Years later, as I started experimenting with my own recipes, I thought, why not marry that nostalgic flavor with one of my ultimate comfort foods, pizza? After some trial and error (a few failed crusts and an eruption of cheese in the oven later), Crab Rangoon Pizza was born! This recipe not only captures all that creamy, crabby magic but also lets you share it with others, making it a part of your own cherished memories. There’s something so special about creating a dish that combines nostalgia with a new twist, and when I serve this pizza, it’s like I’m inviting everyone into a warm kitchen filled with laughter and flavors that are oh-so-comforting.
Ingredients
Here’s everything you need to whip up this flavorful pizza masterpiece:
-
16oz fresh raw pizza dough, room temperature
This is the foundation of your pizza paradise. You can use store-bought or homemade dough. If you’re short on time, feel free to grab some from your favorite pizzeria! -
2 TBS yellow cornmeal (optional)
This gives your pizza base a delightful crunch and slightly nutty flavor. If you don’t have cornmeal, semolina or even a dusting of flour will work just fine. -
6oz cream cheese, room temperature
Cream cheese provides that classic creaminess we associate with crab rangoon. You can substitute this with ricotta or a plant-based cream cheese for a dairy-free option. -
1/2 cup green onions, chopped
These aromatic beauties not only enhance the pizza with their fresh flavor but also add a pop of color. If you’re not a fan, chives make a great alternative. -
1/4 cup shredded Parmesan, divided
Parmesan adds a savory depth to your pizza. If you’re avoiding dairy, nutritional yeast can provide a cheesy flavor without the actual cheese. -
1 tsp Worcestershire sauce
This powerful ingredient enhances the umami flavor of the crab. It’s also quite flexible; if you’re vegan, you might look into a plant-based Worcestershire sauce. -
5oz flaked crab meat (fresh or imitation)
No crab rangoon (or pizza) is complete without it! I recommend fresh crab meat for the best flavor, but imitation crab is a budget-friendly option that works surprisingly well. -
6oz shredded mozzarella cheese
Standard pizza fare! Mozzarella is the classic choice here, but feel free to mix it up with provolone or even a vegan cheese for a dairy-free option. -
Fried wonton strips (for topping)
These will add that delightful crunch we love in crab rangoon. If you’re short on time, store-bought wonton strips work perfectly, and you can even make your own if you’re feeling adventurous! -
Sweet chili sauce (for drizzling)
Drizzling this sweet-savory sauce ties the whole pizza together, shifting your taste buds into that perfect balance of flavor. It’s a staple in Asian cuisine, and you can easily find it in most grocery stores.
Step-by-Step Instructions
Now, let’s dive into the fun part—putting everything together! Follow these steps closely, and remember to enjoy the process. Cooking is as much about the journey as it is about the destination.
-
Preheat Your Oven
Preheat your oven to 475°F (245°C). A hot oven is key for a crispy crust! -
Prepare Your Workspace
Dust your counter or a baking sheet with the two tablespoons of cornmeal (if you’re using it). This will help the pizza slide easily when it’s done. -
Roll Out the Dough
Take your pizza dough and stretch it out into a flat circle (or rectangle, if that’s your jam) about 12 inches in diameter. Don’t worry about making it perfect—rustic is perfectly beautiful! Use your hands, or a rolling pin if you prefer. -
Layer the Cream Cheese Mixture
In a medium bowl, mix your softened cream cheese, chopped green onions, half of the shredded Parmesan, and Worcestershire sauce. Give it a good stir until everything is well combined. Spread this mixture evenly over the pizza dough, leaving a small border around the edges for the crust. This is where the cheesy magic begins! -
Add the Crab
Sprinkle the flaked crab meat across the cream cheese layer evenly. Remember, you want that crab flavor to burst through each slice, so don’t skimp! -
Top It with Cheese
Now it’s time for the mozzarella! Sprinkle it generously over the crab layer, making sure to cover evenly. Finish it off by adding the remaining Parmesan for an extra cheesy crust. -
Bake the Pizza
Carefully transfer your pizza onto the preheated oven (use a pizza stone or a baking sheet if you like). Bake for about 12-15 minutes, or until the crust is golden brown and the cheese is bubbling and slightly browned. Keep an eye on it—oven temperatures can vary! -
Add the Wontons
In the last minute of baking, toss those fried wonton strips on top to give them a little warmth and crisp them up just slightly. -
Drizzle with Sweet Chili Sauce
Once your pizza is done, remove it from the oven and let it rest for a few minutes. Then, drizzle sweet chili sauce over the entire pizza. This adds the perfect, glistening finish! -
Slice and Serve
Use a pizza cutter to slice it up and serve it hot. If you want, feel free to sprinkle a few extra green onions on top for that fresh crunch!
Serving Suggestions
Plating is key when it comes to a dish that’s as visually enticing as this! Serve your Crab Rangoon Pizza hot from the oven on a wooden cutting board or in a fun pizza pan. Pair it with a refreshing cucumber salad on the side or some steamed edamame for a full Asian-inspired feast. For a fun twist, set out some extra sweet chili sauce and soy sauce for dipping. Trust me; you’ll want to keep the flavor party going!
Recipe Variations
Now that you have the classic Crab Rangoon Pizza down, let’s talk variations. Here are a few creative twists to keep things fun:
- Spicy Crab Rangoon Pizza: Add red pepper flakes or sriracha to the cream cheese mixture for a kick!
- Vegetable Delight: Add bell peppers, mushrooms, or spinach for a veggie-rich option that’s still decadent.
- Buffalo Crab Rangoon Pizza: Toss the crab in some buffalo sauce before layering it on the pizza for a zesty flavor explosion.
- Gluten-Free Option: Use a gluten-free pizza crust or cauliflower crust for those avoiding gluten.
- Cheesy Bacon Version: Mix in crispy crumbled bacon for an irresistible salty crunch atop this cheesy delight.
Chef’s Notes
I’ve made this pizza for parties, cozy nights in, and even brunches—you wouldn’t believe how quickly it disappears! One time, I invited friends over for a “pizza challenge,” where we all brought a unique pizza recipe to share. I thought mine’d be the star, but to my surprise, everyone was equally charmed by their creations! It just goes to show that when you get creative in the kitchen, you can surprise even yourself! Remember, this dish has evolved over time for me. Don’t be afraid to tinker with the recipe, omit what you don’t love, and inject your personality into the dish.
FAQs and Troubleshooting
-
My pizza dough doesn’t stretch easily! What do I do?
If your dough is too cold or too tough, let it sit at room temperature for a bit longer. A little bit of patience can do wonders! -
What if I don’t have crab meat?
You can easily swap the crab for cooked chicken, shrimp, or even chickpeas for a vegetarian version! -
My crust isn’t crispy! What happened?
Ensure your oven is fully preheated and consider baking directly on a pizza stone for optimal heat transfer. If using a baking sheet, try preheating it in the oven before placing the pizza. -
Can I prepare the pizza in advance?
Yes! You can assemble the pizza up to 24 hours in advance and store it in the refrigerator before baking. Just don’t add the fried wontons until you’re ready to bake.
Nutritional Info
While I’m all about balance and enjoying food, here’s a rough estimate per slice (based on 8 slices):
- Calories: 320
- Protein: 14g
- Carbohydrates: 30g
- Fat: 15g
- Fiber: 1g
Now that you’re armed with this delicious and engaging Crab Rangoon Pizza recipe, it’s time to gather your ingredients and get your bake on! Trust me, you’re going to love every cheesy, satisfying bite. Enjoy!
PrintCrab Rangoon Pizza
A delicious fusion of crab rangoon and pizza, featuring creamy crab, fresh scallions, and topped with crispy wonton strips and sweet chili sauce.
- Prep Time: 15 minutes
- Cook Time: 15 minutes
- Total Time: 30 minutes
- Yield: 8 servings 1x
- Category: Main Course
- Method: Baking
- Cuisine: Asian Fusion
- Diet: Pescatarian
Ingredients
- 16oz fresh raw pizza dough, room temperature
- 2 TBS yellow cornmeal (optional)
- 6oz cream cheese, room temperature
- 1/2 cup green onions, chopped
- 1/4 cup shredded Parmesan, divided
- 1 tsp Worcestershire sauce
- 5oz flaked crab meat (fresh or imitation)
- 6oz shredded mozzarella cheese
- Fried wonton strips (for topping)
- Sweet chili sauce (for drizzling)
Instructions
- Preheat your oven to 475°F (245°C).
- Dust your counter or a baking sheet with the cornmeal.
- Roll out the pizza dough into a flat circle about 12 inches in diameter.
- Mix cream cheese, green onions, half the Parmesan, and Worcestershire sauce in a bowl.
- Spread the cream cheese mixture over the pizza dough.
- Sprinkle the flaked crab meat evenly across the cream cheese layer.
- Cover with shredded mozzarella and the remaining Parmesan.
- Bake the pizza for about 12-15 minutes until golden brown.
- Add fried wonton strips on top in the last minute of baking.
- Drizzle with sweet chili sauce and let it rest before slicing and serving.
Notes
Serve hot with extra sweet chili sauce and enjoy the fusion of flavors!
Nutrition
- Serving Size: 1 slice
- Calories: 320
- Sugar: 4g
- Sodium: 500mg
- Fat: 15g
- Saturated Fat: 7g
- Unsaturated Fat: 6g
- Trans Fat: 0g
- Carbohydrates: 30g
- Fiber: 1g
- Protein: 14g
- Cholesterol: 30mg
Keywords: Crab Rangoon, Pizza, Fusion Recipe
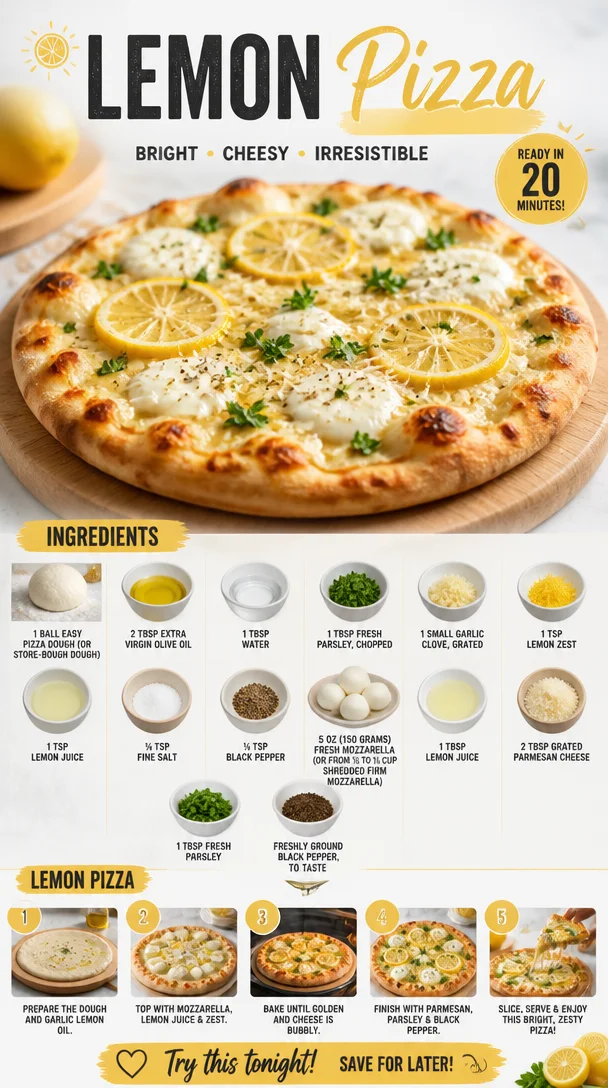
Lemon Pizza
A Zesty Twist: Crafting the Perfect Lemon Pizza
Welcome to Clean Plate Cravings! Today, we’re about to embark on a delightful culinary journey that takes an unconventional spin on a beloved classic: Lemon Pizza. Yes, you heard that right! This creation packs all the comfort of pizza with an invigorating citrus zing that’ll keep your taste buds dancing.
Picture this: the sun is shining, the air is filled with the scent of fresh herbs wafting through the kitchen, and you’re about to whip up something that’s probably unlike anything you’ve ever tasted before. That’s the magic of Lemon Pizza. Not only is it a fun dish to make, but it also draws together beautiful, simple ingredients that reflect a sunny, carefree attitude. You can serve it at a fun gathering or simply enjoy it during a cozy night in. Let’s dive in!
Personal Story
Back in the day, every summer, my family would take a trip to the coast, and one of my favorite traditions was visiting a little beachside pizzeria that specialized in unique flavors. Among their offerings was a lemon pizza that, at first, seemed totally crazy! But after that first bite, with its crispy crust and tangy zing, I was hooked. It was one of those dishes that brought the family together, sparking fun debates about what makes pizza “perfect." The freshness of lemon paired with creamy mozzarella has stuck with me ever since, and now, I’m excited to share my version with all of you!
Ingredients
For this delightful Lemon Pizza, you’ll need the following ingredients:
-
1 ball Easy pizza dough (or store-bought dough)
Choose a classic or whole wheat dough based on your preference. Homemade dough is always a winner, but store-bought can save you time! -
2 tablespoons extra virgin olive oil
This will add richness and help crisp the crust. You can use infused olive oil for extra flavor. -
1 tablespoon water
A small amount of water helps to keep the crust moist while cooking. Adjust as needed to achieve the right consistency. -
1 tablespoon fresh parsley, chopped
Adds a pop of color and freshness. Feel free to substitute with basil or arugula for different herb vibes! -
1 small garlic clove, grated
The garlic will infuse your pizza with a lovely aroma. If you’re not a garlic person, you can skip this or reduce the amount. -
1 teaspoon lemon zest
The zest packs in intense lemon flavor without the acidity. A microplane works wonders here! -
1 teaspoon lemon juice
For brightness, use fresh lemon juice. Bottled won’t have the same zing—trust me! -
¼ teaspoon fine salt
Enhances all the flavors. Make sure not to overdo it, as cheese also brings saltiness. -
¼ teaspoon black pepper
Freshly ground is best. Adds depth of flavor! -
5 oz (150 grams) fresh mozzarella (or ½ to ⅓ cup shredded firm mozzarella)
Fresh mozzarella melts beautifully, but feel free to experiment with other cheeses like goat cheese or ricotta! -
1 tablespoon lemon juice (for drizzling)
This extra drizzle on top after baking will intensify the lemon flavor—so good! -
2 tablespoons grated parmesan cheese
Parmesan adds a nutty, savory kick. Optional, but a great enhancer! -
1 tablespoon fresh parsley (for garnish)
A little extra for color and freshness! Optional, but this adds a lovely touch. -
Freshly ground black pepper, to taste
Add to your liking for that little extra kick!
Step-by-Step Instructions
Now that we have our ingredients lined up, let’s get cooking!
-
Preheat the oven:
Preheat your oven to a scorching 475°F (245°C). If you have a pizza stone, pop that in to heat as well! A hot oven means a crispy crust, which is essential. -
Prepare your dough:
Roll out your pizza dough on a lightly floured surface. Aim for a thickness of about 1/4 inch. Tip: Use a rolling pin or your hands to shape it—whatever feels most comfortable! -
Work on the olive oil base:
In a small bowl, mix 2 tablespoons of olive oil with 1 tablespoon of water, 1 teaspoon of lemon zest, grated garlic, salt, and pepper. This mixture will form a wonderful base on your dough, adding flavor right from the start! -
Brush the dough:
Brush your dough generously with the olive oil mixture, covering every nook and cranny. This step is key to a flavorful crust. -
Add the mozzarella:
Tear fresh mozzarella into bite-sized pieces (or sprinkle shredded mozzarella) and distribute it evenly over the dough. You want cheesy goodness in every bite! -
Bake it up:
Carefully transfer your pizza to the hot oven (or on your pizza stone) and bake for about 10-12 minutes, or until the crust is golden-brown and the cheese is bubbling. Tip: Keep an eye on it because it can go from golden to burnt pretty quickly! -
Finish with parmasan and citrus:
Once the pizza is out of the oven, drizzle it with an extra tablespoon of lemon juice and sprinkle 2 tablespoons of grated parmesan on top while it’s still hot. Letting the cheese melt from the heat of the pizza creates the perfect blend of flavors! -
Garnish:
Top with fresh chopped parsley and an extra sprinkle of black pepper. Voila—your Lemon Pizza is ready to be devoured!
Serving Suggestions
Slice your Lemon Pizza into wedges and serve it on a vibrant cutting board with fresh herbs sprinkled around for a lovely presentation. Pair it with a light salad or some roasted vegetables for a complete meal that’s sure to impress your friends and family. And don’t forget: a chilled glass of white wine or sparkling water will perfectly complement the brightness of this dish!
Recipe Variations
Feeling adventurous? Here are a few fun twists and substitutions to elevate your Lemon Pizza game:
- Add protein: Top with grilled chicken or shrimp for an added punch of protein.
- Veggie overload: Toss on some arugula, sun-dried tomatoes, or even artichokes before baking.
- Spice it up: Drizzle with chili oil or sprinkle red pepper flakes for a kick of heat.
- Cheese choice: Switch out mozzarella for goat cheese or feta for a tangy twist.
- Crust creativity: Try using a cauliflower pizza crust for a gluten-free alternative!
Chef’s Notes
This Lemon Pizza recipe has been a work in progress for years. Originally inspired by my favorite beachside spot, I’ve tweaked it to incorporate more herbs and flavors, creating a version that suits my zest-loving heart. I remember the first attempt: I was way too liberal with the lemon juice—let’s just say, my friends got a zesty surprise! Over the years, I’ve fine-tuned it, and I promise, the balance of fresh flavors makes all the difference.
Moreover, as seasons change, so do the ingredients I love to play with. Depending on the herbs or veggies available at the local farmer’s market, this pizza can take on a personality of its own!
FAQs and Troubleshooting
-
Why is my pizza crust soggy?
Make sure to preheat your oven thoroughly! A hot oven helps to crispen the crust, and you might also want to bake it a bit longer if needed. -
Can I use frozen pizza dough?
Absolutely! Just allow it to thaw and rise as per the package instructions before using. -
What if I don’t have fresh mozzarella?
No problem! Shredded mozzarella or even other cheeses like burrata or goat cheese will work just fine. -
How do I make it vegan?
Swap out cheese for a dairy-free alternative or make a "cheese" spread using blended cashews or nutritional yeast.
Nutritional Info
While I won’t bore you with numbers, remember that this Lemon Pizza is balanced with fresh ingredients, providing a lovely mix of carbs, fats, and proteins, all while keeping it light and satisfying. Perfect for a stress-free meal!
There you have it—your guide to creating a delightful Lemon Pizza that’s bursting with flavor! Whether for a casual dinner or a celebratory gathering, this dish has the power to surprise and delight. Now, grab those ingredients, turn on your favorite tunes, and get ready to enjoy a fresh slice of culinary creativity. Happy cooking, my foodie friends! 🍋🍕
PrintLemon Pizza
A delightful twist on traditional pizza, this Lemon Pizza features a crispy crust drizzled with zesty lemon juice and topped with fresh mozzarella and herbs.
- Prep Time: 15 minutes
- Cook Time: 12 minutes
- Total Time: 27 minutes
- Yield: 4 servings 1x
- Category: Main Course
- Method: Baking
- Cuisine: Italian
- Diet: Vegetarian
Ingredients
- 1 ball Easy pizza dough (or store-bought dough)
- 2 tablespoons extra virgin olive oil
- 1 tablespoon water
- 1 tablespoon fresh parsley, chopped
- 1 small garlic clove, grated
- 1 teaspoon lemon zest
- 1 teaspoon lemon juice
- ¼ teaspoon fine salt
- ¼ teaspoon black pepper
- 5 oz (150 grams) fresh mozzarella (or ½ to ⅓ cup shredded firm mozzarella)
- 1 tablespoon lemon juice (for drizzling)
- 2 tablespoons grated parmesan cheese
- 1 tablespoon fresh parsley (for garnish)
- Freshly ground black pepper, to taste
Instructions
- Preheat your oven to a scorching 475°F (245°C). If you have a pizza stone, pop that in to heat as well!
- Roll out your pizza dough on a lightly floured surface, aiming for a thickness of about 1/4 inch.
- Mix 2 tablespoons of olive oil with 1 tablespoon of water, 1 teaspoon of lemon zest, grated garlic, salt, and pepper in a small bowl.
- Brush your dough generously with the olive oil mixture.
- Tear fresh mozzarella into bite-sized pieces and distribute it evenly over the dough.
- Transfer your pizza to the hot oven and bake for about 10-12 minutes.
- Drizzle with an extra tablespoon of lemon juice and sprinkle 2 tablespoons of grated parmesan on top.
- Top with fresh chopped parsley and an extra sprinkle of black pepper.
Notes
Serve sliced into wedges with fresh herbs. Pairs well with a light salad or roasted vegetables.
Nutrition
- Serving Size: 1 slice
- Calories: 350
- Sugar: 2g
- Sodium: 500mg
- Fat: 15g
- Saturated Fat: 5g
- Unsaturated Fat: 8g
- Trans Fat: 0g
- Carbohydrates: 40g
- Fiber: 2g
- Protein: 10g
- Cholesterol: 20mg
Keywords: lemon pizza, unique pizza recipes, vegetarian pizza, homemade pizza, summer recipes
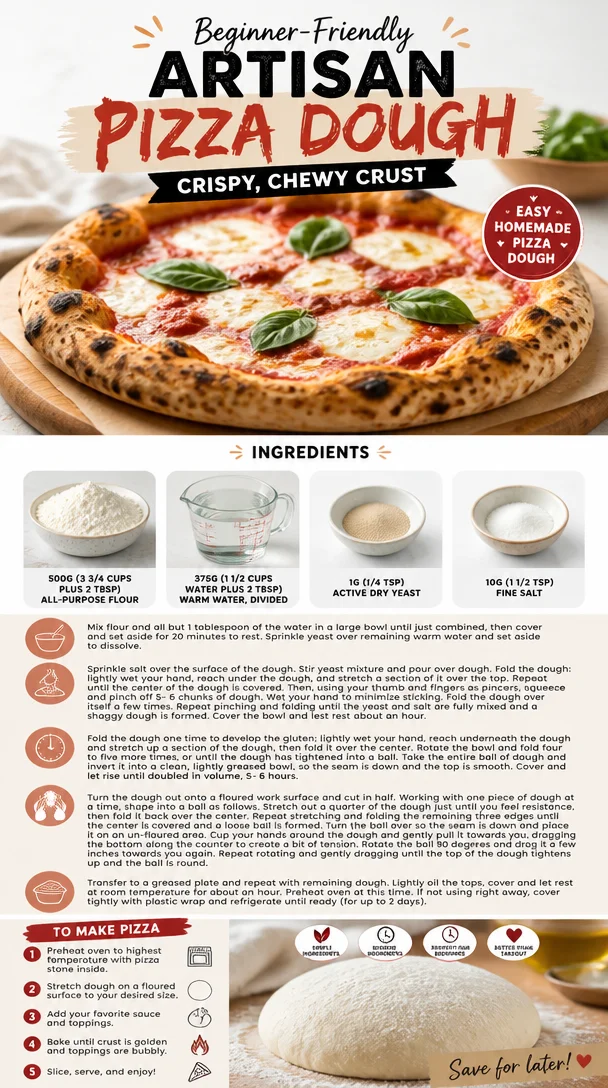
Beginner-Friendly Artisan Pizza Dough: Crispy, Chewy Crust
The Quest for the Perfect Artisan Pizza Dough: Crispy, Chewy, Bubbly Crust Awaits!
Hello, fellow food lovers! If there’s one thing we can all agree on, it’s that nothing brings people together quite like a pizza party. And while everyone has their favorite toppings (anchovies, anyone?), the star of the show is undoubtedly the crust. Today, I’m thrilled to take you on a journey to create the perfect artisan pizza dough right in your own kitchen. With a crispy exterior and a chewy, bubbly interior, this crust will have you saying goodbye to takeout and hello to homemade goodness!
Now, I know what you might be thinking: "Making pizza dough sounds complicated." But let me assure you, it’s easier than it seems! I created this recipe to showcase the joy of creating something delicious at home with just a handful of simple ingredients. So roll up your sleeves, and let’s dive into the delightful world of pizza!
A Slice of Nostalgia
Before we start kneading, let me share a little story that might just resonate with you. Reflecting on my childhood, I remember weekends spent at my grandma’s house, where the air would be filled with the cozy aroma of rising dough and garlic-infused tomato sauce. She had this old wooden pizza peel and a cozy red-checkered tablecloth, and we’d gather ‘round as she expertly spun the dough into the air. Each pizza topped with whatever fresh ingredients we could scrounge up from her garden—fresh basil, juicy tomatoes, and ooey-gooey mozzarella.
That sense of connection, creativity, and love stands as the foundation for my passion for cooking. That magic moment of pulling a bubbling, golden pie from the oven is something everyone deserves to experience. So let’s bring a little of that magic into your kitchen with this artisan pizza dough recipe!
Ingredients
Let’s talk about the star players in our pizza dough. Here’s what you’ll need:
-
500g (3 3/4 cups plus 2 tbsp) all-purpose flour: This is the backbone of your crust. All-purpose flour gives a great balance of chewiness and crispiness. If you’re looking for a healthier twist, you can substitute half of the flour with whole wheat flour for a nuttier flavor and added fiber!
-
375g (1 1/2 cups water plus 2 tbsp), divided: Water brings the dough together. Using warm water (about 105°F) helps activate the yeast to rise. Remember, too hot, and you’ll kill the yeast; too cold, and it won’t activate properly.
-
1g (1/4 tsp) active dry yeast: This tiny powerhouse works wonders! It’s what gives your dough that lovely rise. If you have instant yeast, you can use it in the same quantity; it’s super convenient and requires no proofing!
-
10g (1 1/2 tsp) fine salt: Salt enhances flavor and strengthens the dough’s structure. If you prefer a lower-sodium option, feel free to cut back a little—but keep in mind, salt is essential for flavor!
Now that you have your ingredients ready, let’s get onto the fun part!
Step-by-Step Instructions
-
Activate the yeast: In a small bowl, combine 80g (1/3 cup) of warm water and the active dry yeast. Let this mixture sit for about 5-10 minutes until it’s frothy and bubbly. This means your yeast is alive and ready to work its magic!
-
Mix the dry ingredients: In a large mixing bowl, add the flour and fine salt. Whisk them together to ensure that the salt is evenly distributed throughout the flour.
-
Combine wet and dry: Create a well in the center of the flour mixture and pour in the activated yeast and the remaining warm water. Start mixing with a wooden spoon or your hands until everything comes together into a shaggy dough. Don’t worry if it looks a bit messy—that’s normal!
-
Knead the dough: Transfer the dough to a lightly floured work surface. Knead the dough for about 10-12 minutes until it becomes smooth and elastic. A great way to know it’s ready is when the dough springs back after pressing it with your finger. Pro tip: If it sticks, add a dusting of flour—but avoid adding too much, as it can make the dough tough.
-
First rise: Form the kneaded dough into a ball and place it in a lightly greased bowl, turning it to coat. Cover the bowl with a damp kitchen towel or plastic wrap and let it rise in a warm spot for about 1-2 hours, or until the dough has doubled in size. You can also let it rise slower in the refrigerator overnight for even better flavor development!
-
Shape the dough: Punch down the risen dough to release the air. Turn it out onto a floured surface and divide it into 2 equal pieces (for large pizzas) or keep it whole for one giant pizza night! Shape into balls and let them rest for about 30 minutes under a damp towel.
-
Stretch and shape: Now comes the fun part—shaping the dough! Using your fingers, gently stretch the dough ball from the center outwards, working your way around. Avoid using a rolling pin, as you want to preserve those lovely air bubbles that will create a light, airy crust. If you’re feeling adventurous, give it a little toss in the air—just be sure the dough isn’t flying across the kitchen!
-
Pre-bake the crust: Preheat your oven to the highest setting (usually around 475°F to 500°F). To achieve that perfect crispy crust, it’s best to use a pizza stone or steel. Place your shaped dough on a parchment-lined baking sheet or directly onto the hot stone for about 5-7 minutes to form a light, pre-baked crust.
-
Top and bake: Remove the crust, add your favorite sauce, cheese, and toppings, and pop it back in the oven until the cheese is bubbly and the crust is golden, around 8-12 minutes.
-
Slice and serve: Once out of the oven, let your pizza cool for a couple of minutes, then slice it up and enjoy!
Serving Suggestions
Pizza is best enjoyed fresh out of the oven! For an added touch, drizzle a little extra virgin olive oil over the top, sprinkle on some fresh basil leaves, and serve with a side salad. Pizza night is all about sharing, so bring everyone together and indulge in this homemade goodness!
Recipe Variations
Feeling creative? Here are a few fun twists for your artisan pizza dough:
-
Herb-Infused Dough: Add a tablespoon of your favorite dried herbs (like oregano or basil) to the flour for an aromatic kick.
-
Garlic Lover’s Delight: Mix in some minced garlic or garlic powder to the dough for a savory burst of flavor.
-
Cheesy Dough: Incorporate grated Parmesan cheese into your dough for a hint of cheesy flavor in every bite.
-
Gluten-Free Option: Use a gluten-free flour blend and add a tablespoon of xanthan gum to help mimic the elasticity found in gluten-based dough.
-
Whole Wheat Wonderland: Swap half the flour for whole wheat flour for a heartier, nutty crust.
Chef’s Notes
Creating this dough has become a cherished ritual for me. It’s a great way to blow off steam after a long day and dive into something creative. I’ve played with various flours, herbs, and toppings over the years, and every iteration has its own charm. My favorite story? Once, when I was testing this recipe, I accidentally spilled a whole bottle of oregano into the dough. Thinking it was a disaster, I ended up with a standout pizza that had everyone begging for the “secret” ingredient. Turns out, culinary accidents can be delicious!
FAQs and Troubleshooting
1. My pizza dough didn’t rise! What went wrong?
- If your dough hasn’t risen, it could be that your yeast was dead or the water was too hot or too cold. Always check the expiration date on your yeast before using it, and make sure the water temperature is just right—warm but not scalding.
2. Why is my crust too tough?
- Overworking the dough can make it tough. Be gentle during kneading and stretching. Remember, a little stickiness is okay!
3. What if my dough is too sticky?
- If the dough is sticky, try dusting it with a small amount of flour during kneading. But don’t overdo it—too much flour can lead to a dry dough.
4. Can I make the dough ahead of time?
- Absolutely! You can let the dough rise in the fridge overnight or make it a few days in advance. Just pull it out, let it come to room temperature, and shape as directed.
Nutritional Info (Optional)
(Note: Nutritional information can vary based on specific brands and quantities used. Always consult a nutritionist for accurate dietary advice.)
- Servings: 2
- Calories per serving: Approximately 250 calories (without toppings)
- Protein: 8g
- Carbohydrates: 50g
- Fat: 1g
There you have it! Your ultimate guide to crafting the perfect artisan pizza dough with a crispy, chewy, bubbly crust. Whether you’re hosting a casual pizza night or indulging in a solo pizza binge, this dough will elevate every bite! So gather those ingredients, get your hands doughy, and let the pizza-making adventure begin. Remember, it’s all about the love you put into it, and I can’t wait for you to share your delicious creations! Happy cooking, friends!
PrintPerfect Artisan Pizza Dough
Create the perfect artisan pizza dough with a crispy, chewy, and bubbly crust that’s easy to make at home.
- Prep Time: 20 minutes
- Cook Time: 20 minutes
- Total Time: 40 minutes
- Yield: 2 servings 1x
- Category: Main Course
- Method: Baking
- Cuisine: Italian
- Diet: Vegetarian
Ingredients
- 500g (3 3/4 cups plus 2 tbsp) all-purpose flour
- 375g (1 1/2 cups plus 2 tbsp) warm water, divided
- 1g (1/4 tsp) active dry yeast
- 10g (1 1/2 tsp) fine salt
Instructions
- Activate the yeast: In a small bowl, combine 80g (1/3 cup) of warm water and the active dry yeast. Let this mixture sit for about 5-10 minutes until it’s frothy and bubbly.
- Mix the dry ingredients: In a large mixing bowl, add the flour and fine salt. Whisk them together.
- Combine wet and dry: Create a well in the center of the flour mixture and pour in the activated yeast and remaining warm water. Mix until it forms a shaggy dough.
- Knead the dough: Transfer the dough to a floured surface and knead for about 10-12 minutes until smooth and elastic.
- First rise: Place the dough in a greased bowl, cover it, and let it rise for about 1-2 hours until doubled in size.
- Shape the dough: Punch down the risen dough, divide it into pieces, shape into balls, and let rest for 30 minutes.
- Stretch and shape: Gently stretch the dough from the center outwards into your desired shape.
- Pre-bake the crust: Preheat oven to 475°F-500°F. Pre-bake the shaped dough for 5-7 minutes.
- Top and bake: Add toppings and bake until cheese is bubbly and crust is golden, about 8-12 minutes.
- Slice and serve: Let cool for a couple of minutes, then slice and enjoy!
Notes
Drizzle extra virgin olive oil and sprinkle fresh basil before serving.
Nutrition
- Serving Size: 1 serving
- Calories: 250
- Sugar: 1g
- Sodium: 400mg
- Fat: 1g
- Saturated Fat: 0g
- Unsaturated Fat: 0g
- Trans Fat: 0g
- Carbohydrates: 50g
- Fiber: 2g
- Protein: 8g
- Cholesterol: 0mg
Keywords: pizza dough, artisan pizza, homemade pizza
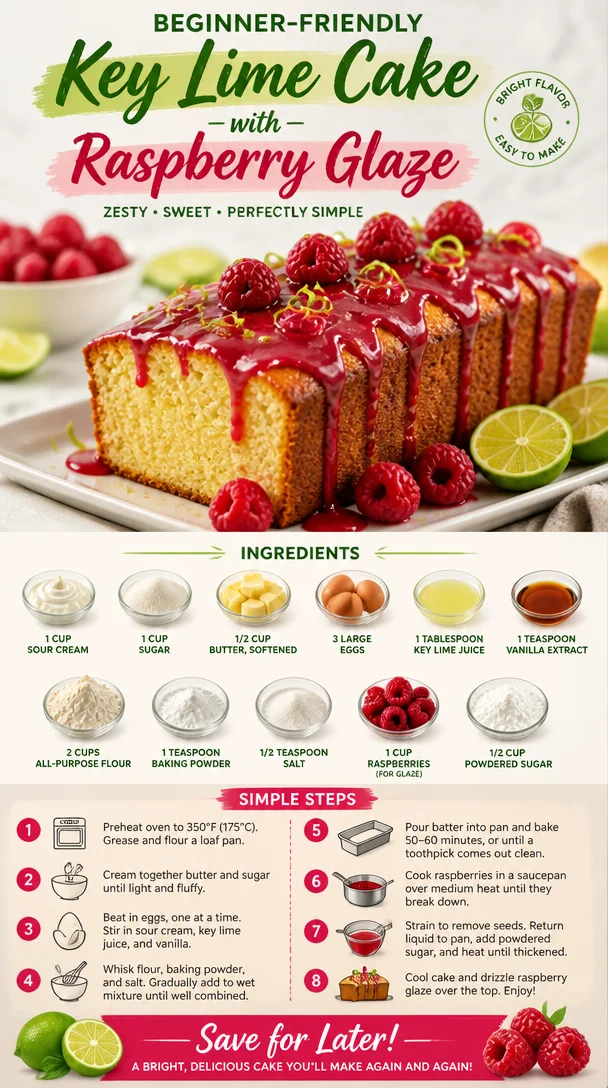
Beginner-Friendly Key Lime Cake with Raspberry Glaze
Key Lime Cake with Raspberry Glaze: A Slice of Sunshine
Welcome, fellow food lovers! Today, I’m excited to share a dessert that brings a burst of tropical sunshine to your plate: Key Lime Cake with Raspberry Glaze. Picture this: a moist and tangy cake topped with a vibrant raspberry glaze that not only delights the taste buds but also brightens up any gathering. Whether you’re prepping for a sunny afternoon picnic or a cozy dinner with friends, this cake is sure to impress.
When I think about key lime cake, I’m taken on a flavor journey filled with bright citrus notes and a deliciously sweet-tart raspberry finish. This recipe isn’t just about satisfying your sweet tooth; it’s about creating memories around the table. As we embark on this culinary adventure together, let’s dive into the heart and soul of this delightful treat!
A Slice of Nostalgia
Let me take you back to a childhood memory that sparked my passion for baking. Growing up in Florida, my summers were filled with the scent of citrus groves wafting through the warm air. Every summer, my family would venture to the local market, where we’d pick up fresh key limes and juicy raspberries. I still remember the first time I helped my grandmother make a key lime pie. We spent hours squeezing limes, laughing, and tasting our way through the process, creating a kitchen filled with joy and laughter.
Years later, I wanted to put a modern twist on that classic dessert. Thus, the Key Lime Cake was born—retaining the beloved tang while adding my own flair with a raspberry glaze. The first time I took a slice to share at a family gathering, the smiles around the table reminded me of those simple, joyful days. And now, I can’t wait for you to experience the magic of this cake and perhaps create some cherished memories of your own!
Ingredients
Here’s what you need to whip up this delicious Key Lime Cake with Raspberry Glaze:
-
1 cup sour cream: Adds moisture and tang to the cake, creating a soft crumb. If you prefer, you can swap it out for Greek yogurt for a healthier twist.
-
1 cup sugar: For sweetness! You can use coconut sugar or a sugar substitute if you’re looking for a lower-calorie option.
-
1/2 cup butter, softened: This is key for fluffing up the batter, creating that light texture. Make sure it’s at room temperature for easy mixing.
-
3 large eggs: Essential for binding and richness. If you’re looking for an egg-free option, you can substitute each egg with 1/4 cup of unsweetened applesauce.
-
1 tablespoon key lime juice: This delightful citrus juice is the star of the show, giving the cake its signature flavor. Freshly squeezed is always best, but bottled is a convenient shortcut.
-
1 teaspoon vanilla extract: Enhances the overall flavor and complements the tanginess of the lime.
-
2 cups all-purpose flour: The base of the cake! For a gluten-free version, you can use a 1:1 gluten-free flour blend.
-
1 teaspoon baking powder: Acts as a leavening agent, helping the cake rise to perfection.
-
1/2 teaspoon salt: Balances the sweetness and enhances all the flavors.
-
1 cup raspberries (for glaze): Adds a beautiful fruity touch! You can replace them with strawberries or blackberries if they’re more to your liking.
-
1/2 cup powdered sugar: Thickens the glaze and sweetens it just right. Feel free to adjust the amount based on your preferred sweetness.
Step-by-Step Instructions
Now that we have our fresh ingredients ready, let’s dive into the cheerful baking process!
-
Preheat Your Oven: Preheat the oven to 350°F (175°C) and grease a 9-inch round cake pan. Ensure to line the bottom with parchment paper for easy removal—nobody likes a stuck cake!
-
Mixing the Cake Batter: In a large mixing bowl, cream together the softened butter and sugar until light and fluffy. I usually take about 3–4 minutes on medium speed for this; it’s key to getting that airy texture.
-
Adding Eggs and Flavor: Add the eggs one at a time, mixing well after each addition. Then, add your key lime juice and vanilla extract. The batter will start to smell heavenly!
-
Incorporating the Dry Ingredients: In another bowl, whisk together the flour, baking powder, and salt. Gradually add this dry mixture to the wet mixture, alternating with the sour cream. Begin and end with the flour mixture (three additions of flour, two of sour cream). This helps to keep the batter from getting tough—trust me, this tip is a game-changer!
-
Pour It In: Once your batter is creamy and smooth, pour it into the prepared cake pan, smoothing the top with a spatula.
-
Bake It Up: Bake in the preheated oven for 25–30 minutes or until a toothpick inserted in the center comes out clean. If you notice the cake browning too quickly, just cover it lightly with foil.
-
Cool Down: Once done, remove the cake from the oven and allow it to cool in the pan for about 10 minutes—then turn it out onto a wire rack to cool completely. The cooling step is crucial for the next—glazing—process!
-
Prepare the Raspberry Glaze: While the cake cools, mash the raspberries in a small bowl and mix in the powdered sugar until smooth. Add more powdered sugar if you like a thicker glaze.
-
Glaze the Cake: Once the cake is completely cooled, drizzle the raspberry glaze over the top. Let some of it drip down the sides for that show-stopping effect!
-
Slice and Serve: Finally, slice the cake into pieces and enjoy. Pair it with a dollop of whipped cream or some fresh raspberries on the side for an extra flourish!
Serving Suggestions
When it comes to serving this Key Lime Cake, presentation is key! I recommend using a beautiful cake stand to elevate its charm. You can slice the cake into wedges and top each piece with a sprinkle of additional raspberries, a light dusting of powdered sugar, or a swirl of whipped cream. For a summer gathering, serve it alongside iced tea or lemonade for a refreshing combo that pairs perfectly!
Recipe Variations
Feeling adventurous? Here are some fun variations to mix things up:
-
Tropical Twist: Add shredded coconut to the cake batter for an added layer of tropical flavor. Just make sure to adjust the baking time slightly.
-
Chocolate Delight: Fold in mini chocolate chips for a cheeky chocolate-and-citrus surprise. Chocolate and lime? Yes, please!
-
Berry Blast: Use a mix of berries in the glaze, like strawberries and blueberries, for a colorful spin.
-
Zesty Lime: If you’re a lime lover, zest an extra tablespoon of key limes into the batter for an even more vibrant flavor.
-
Vegan Version: Substitute the eggs with flaxseed meal (1 tablespoon of flaxseed mixed with 2.5 tablespoons of water for each egg), swap out the butter with coconut oil, and use almond milk instead of sour cream.
Chef’s Notes
This Key Lime Cake has quite the story! Initially, it started as a simple option for summer potlucks, but over the years, it has become the centerpiece of birthdays, family reunions, and even my own bake sales! I like to think of it as a cake that brings people together. And as a little fun tip, if you ever have leftover cake (which is rare!), it freezes beautifully. Just wrap it well in plastic wrap and store it in an airtight container. When you’re ready for a treat, just thaw it out and enjoy!
FAQs and Troubleshooting
Here are some common questions and troubleshooting tips to keep your baking adventure smooth:
-
Why did my cake sink in the middle?
- This can happen if the batter has been overmixed or the oven temperature was too low. Always ensure you’re measuring your ingredients accurately and check that your oven is preheated properly.
-
Can I make this cake a day ahead?
- Absolutely! This cake actually tastes even better the next day as the flavors settle in. Just make sure to cover it properly so it doesn’t dry out.
-
My raspberry glaze is too runny. What should I do?
- No worries! If your glaze is too thin, simply add more powdered sugar until you reach the desired consistency. You can also try pureeing fewer raspberries next time.
-
Can I use regular limes instead of key limes?
- Yes, you can! Regular limes will give you a slightly different flavor, but it’ll still be delicious. Just adjust the quantity to taste.
Nutritional Info
Although I typically encourage enjoying dessert in moderation, knowing the nutritional facts can help you make informed choices. A slice of Key Lime Cake (without glaze) roughly contains:
- Calories: 300 kcal
- Protein: 4g
- Carbohydrates: 45g
- Fat: 12g
- Sugar: 22g
Of course, these figures can vary based on ingredient substitutions and portion sizes.
And there you have it—a delightful journey into the world of Key Lime Cake with Raspberry Glaze. It’s not just a recipe; it’s a way to bring sunshine into your kitchen and joy into your heart. I can’t wait for you to try it! Remember, cooking should be fun and adventurous, so go ahead, gather your ingredients, and make some delicious memories today! Happy baking!
PrintKey Lime Cake with Raspberry Glaze

A moist and tangy cake topped with vibrant raspberry glaze, perfect for any gathering.
- Prep Time: 15 minutes
- Cook Time: 30 minutes
- Total Time: 45 minutes
- Yield: 8 servings 1x
- Category: Dessert
- Method: Baking
- Cuisine: American
- Diet: Vegetarian
Ingredients
- 1 cup sour cream
- 1 cup sugar
- 1/2 cup butter, softened
- 3 large eggs
- 1 tablespoon key lime juice
- 1 teaspoon vanilla extract
- 2 cups all-purpose flour
- 1 teaspoon baking powder
- 1/2 teaspoon salt
- 1 cup raspberries (for glaze)
- 1/2 cup powdered sugar
Instructions
- Preheat the oven to 350°F (175°C) and grease a 9-inch round cake pan.
- Mix the softened butter and sugar until light and fluffy.
- Add the eggs one at a time, mixing well after each addition, followed by key lime juice and vanilla extract.
- Incorporate the flour, baking powder, and salt, alternately with the sour cream, beginning and ending with flour.
- Pour the batter into the prepared cake pan.
- Bake for 25–30 minutes or until a toothpick inserted comes out clean.
- Cool the cake in the pan for 10 minutes before turning it out onto a wire rack to cool completely.
- Prepare the raspberry glaze by mashing raspberries and mixing in the powdered sugar until smooth.
- Glaze the cooled cake with the raspberry mixture.
- Slice and serve with whipped cream or fresh raspberries.
Notes
If you have leftover cake, it freezes well. Wrap it in plastic wrap and store in an airtight container.
Nutrition
- Serving Size: 1 slice
- Calories: 300
- Sugar: 22g
- Sodium: 150mg
- Fat: 12g
- Saturated Fat: 7g
- Unsaturated Fat: 5g
- Trans Fat: 0g
- Carbohydrates: 45g
- Fiber: 2g
- Protein: 4g
- Cholesterol: 30mg
Keywords: Key Lime Cake, Raspberry Glaze, Dessert, Baking, Tropical Dessert
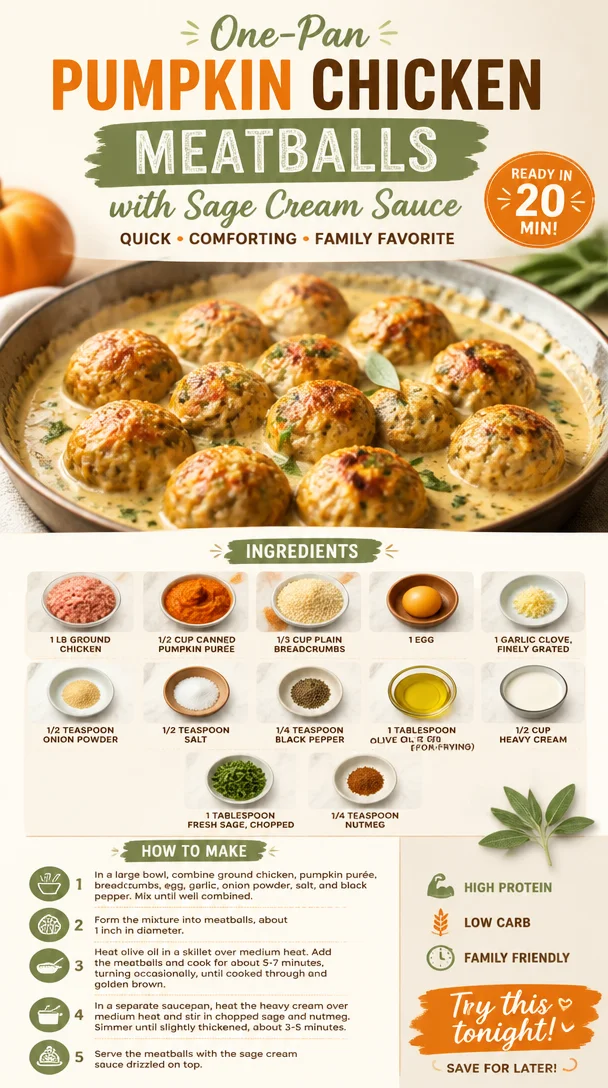
One-Pan Pumpkin Chicken Meatballs with Sage Cream Sauce
Pumpkin Chicken Meatballs with Sage Cream Sauce: A Comforting Dish to Celebrate Fall
Welcome back to Clean Plate Cravings, food lovers! Today, we’re diving into a delightful dish that perfectly embodies the fall season: Pumpkin Chicken Meatballs with Sage Cream Sauce. These tender meatballs blend the cozy flavors of pumpkin and sage in a way that’ll have your taste buds dancing! I believe that cooking should bring joy and a sense of comfort, and what better way to do that than with a dish that enchants both your palate and your soul?
I will always remember hunting for pumpkins as a kid in late September. My family would make the trek to a local pumpkin patch, where we’d pick the biggest, roundest pumpkins we could find. The crisp air was filled with laughter as we navigated through rows of orange believers, and my mom always had the best pumpkin recipes to try at home. There’s something magical about pumpkins, don’t you think? They turn into more than just a seasonal decoration; they can become meals that warm your heart and home!
So grab your apron and let’s cook together. Let’s make those meatballs and top them off with a creamy sage sauce that truly captures the essence of fall!
A Cozy Kitchen Memory
As a child, my fondest memories came from experimenting in the kitchen with my grandma. She was the queen of comfort food, and her pumpkin recipes always had a special place at the table. One chilly afternoon, she introduced me to her famous pumpkin meatballs. We spent hours measuring, mixing, and occasionally sneaking bites of the delicious mixture. I can still hear the sound of laughter as we created something from scratch, and it ignited a passion within me that I carry into my cooking today. She taught me that cooking is not just about following a recipe but about infusing love and joy into every bite, and that is exactly what we’re going to do today!
Ingredients
Here’s everything you need for those delicious Pumpkin Chicken Meatballs with Sage Cream Sauce. Each ingredient is handpicked to keep our dish vibrant and full of flavor!
-
1 lb ground chicken
A lean, protein-rich option that provides a perfect base for our meatballs. Feel free to substitute with ground turkey for a slightly different flavor! -
1/2 cup canned pumpkin purée
Adds moisture and a hint of sweetness. Don’t confuse it with pumpkin pie filling; we want pure pumpkin for this dish! You can swap it with butternut squash purée if you’re looking for an alternative. -
1/3 cup plain breadcrumbs
Helps bind the meatballs together while providing texture. If you’re gluten-free, try using almond flour or gluten-free breadcrumbs! -
1 egg
Acts as a binding agent and adds richness. If you’re vegan, a flax egg (1 tablespoon of ground flaxseed mixed with 3 tablespoons of water) works beautifully too. -
1 garlic clove, finely grated
Offers aromatic depth. You can easily swap fresh garlic for garlic powder—just use about 1/4 teaspoon. -
1/2 teaspoon onion powder
Adds subtle sweetness and a hint of flavor without overpowering the dish. -
1/2 teaspoon salt
Essential for enhancing all the other flavors. Feel free to reduce the quantity if you’re watching your sodium intake. -
1/4 teaspoon black pepper
A pinch for warmth and spice. Adjust according to your taste preferences! -
1 tablespoon olive oil (for pan-frying)
A healthy option for cooking that adds flavor. You can replace it with avocado oil for a different yet delicious twist. -
1/2 cup heavy cream
Creates a luscious sauce. If you want a lighter version, you could use half-and-half or even coconut cream for dairy-free! -
1 tablespoon fresh sage, chopped
This herb adds vibrant flavor and aroma. If fresh isn’t available, dried sage also works; just use about 1 teaspoon. -
1/4 teaspoon nutmeg
Adds warmth and depth to the sauce. It’s a must for that cozy, autumn flavor!
Step-by-Step Instructions
Ready to cook? Here’s how to transform these fresh ingredients into mouthwatering meatballs with a luscious cream sauce.
Step 1: Prepare the Meatball Mixture
In a large mixing bowl, combine the ground chicken, canned pumpkin purée, breadcrumbs, egg, grated garlic, onion powder, salt, and black pepper. Use your hands (don’t be shy!) to mix everything together until evenly combined. Tip: If you’re concerned about raw chicken, you can always cook a small patty of the mixture to taste for seasoning—adjust as needed!
Step 2: Form the Meatballs
Once everything is well-mixed, grab a tablespoon and scoop out portions of the mixture to form meatballs. Try to keep them about 1 inch in diameter for even cooking. Lightly roll them between your palms for that perfect ball shape! Place them on a plate or a baking sheet as you prepare to cook them.
Step 3: Pan-Fry the Meatballs
In a skillet, heat the olive oil over medium-high heat. When it’s hot (but not smoking), add the meatballs in batches to avoid overcrowding the pan. Cook for about 6-7 minutes, turning occasionally until they are browned and cooked through. Tip from Chef Ava: Use a spatula to gently flip them over—they can be delicate! Internal temperature should reach 165°F for safety.
Step 4: Make the Sage Cream Sauce
While the meatballs are cooking, you can start the sauce. In a separate saucepan, add the heavy cream and bring it to a gentle simmer over medium-low heat. Stir in the chopped sage and nutmeg. Let it bubble away for about 3-5 minutes until slightly thickened. Keep an eye on it to prevent burning—stir occasionally! If the sauce gets too thick for your liking, don’t hesitate to add a splash of chicken broth or water to bring it back to the right consistency.
Step 5: Combine Meatballs and Sauce
Once the meatballs are cooked and your sauce is ready, carefully transfer the meatballs into the saucepan with the sage cream sauce. Gently toss to coat each meatball with that luscious sauce and let it simmer together for another 2-3 minutes. This is where the magic happens; the flavors meld beautifully!
Serving Suggestions
There’s something deliciously satisfying about seeing your creation come together on a plate. Serve your Pumpkin Chicken Meatballs with Sage Cream Sauce over a bed of creamy polenta, or sautéed spinach for a vibrant pop of color! You can also pile them onto whole-grain pasta or nestled in a warm bowl of quinoa. Finish off with fresh sage leaves and a sprinkle of cracked black pepper for that wow factor!
Recipe Variations
-
Spicy Kick: Add a pinch of red pepper flakes into the meatball mixture for those who love a little heat.
-
Herb Infusion: Switch out the fresh sage for chopped fresh thyme or rosemary for a different aromatic experience!
-
Cheesy Delight: Fold in some grated parmesan cheese into the meatball mixture for bonus flavor!
-
Sweet & Savory: Mix in a few tablespoons of dried cranberries or raisins into the meatball mixture for a delightful sweet twist.
-
Zesty Touch: Add a squeeze of fresh lemon juice to the cream sauce for a zesty brightness.
Chef’s Notes
I love how this recipe has evolved over the years. Originally inspired by my grandma’s classic meatballs, I’ve made countless adjustments to make it my own—incorporating pumpkin was a game-changer! It not only adds a wonderful flavor but gives a comforting fall twist that I absolutely adore. This dish also sparks joy in my kitchen; it reminds me to celebrate the simple moments while enjoying a hearty meal.
FAQs and Troubleshooting
1. What if my meatballs fall apart while cooking?
You may not have added enough breadcrumbs or the mixture might be too wet. You can always adjust by adding a little more breadcrumbs to hold them together!
2. Can I bake the meatballs instead of pan-frying?
Absolutely! Preheat your oven to 400°F (200°C) and place the meatballs on a lined baking sheet. Bake for about 20-25 minutes or until cooked through.
3. Can I freeze these meatballs?
Yes! These meatballs freeze wonderfully. Just make sure they are completely cooled before placing them in an airtight container or freezer bag. Thaw in the fridge overnight before reheating.
4. How do I know when the meatballs are done?
Use a meat thermometer to check; they should reach an internal temperature of 165°F (75°C). Alternatively, you can cut one in half and check that there’s no pink inside.
Nutritional Info
While I won’t dive too deep into numbers, I can tell you that these little morsels are packed with protein from the chicken, healthy fats from the olive oil and cream, and, of course, the added benefits of pumpkin—like fiber and vitamins A and C!
I hope you find joy in making and serving these Pumpkin Chicken Meatballs with Sage Cream Sauce. Let it fill your kitchen with warmth and comfort, while bringing a taste of fall to your family table. Remember, healthy eating should be about enjoyable experiences, and these meatballs perfectly encapsulate that philosophy. Happy cooking!
PrintPumpkin Chicken Meatballs with Sage Cream Sauce

A comforting dish featuring tender pumpkin chicken meatballs topped with a creamy sage sauce, perfect for fall.
- Prep Time: 15 minutes
- Cook Time: 30 minutes
- Total Time: 45 minutes
- Yield: 4 servings 1x
- Category: Main Course
- Method: Pan-frying
- Cuisine: American
- Diet: Paleo
Ingredients
- 1 lb ground chicken
- 1/2 cup canned pumpkin purée
- 1/3 cup plain breadcrumbs
- 1 egg
- 1 garlic clove, finely grated
- 1/2 teaspoon onion powder
- 1/2 teaspoon salt
- 1/4 teaspoon black pepper
- 1 tablespoon olive oil (for pan-frying)
- 1/2 cup heavy cream
- 1 tablespoon fresh sage, chopped
- 1/4 teaspoon nutmeg
Instructions
- Prepare the Meatball Mixture: In a large mixing bowl, combine the ground chicken, canned pumpkin purée, breadcrumbs, egg, grated garlic, onion powder, salt, and black pepper. Use your hands to mix everything together until evenly combined.
- Form the Meatballs: Grab a tablespoon and scoop out portions of the mixture to form meatballs about 1 inch in diameter. Place them on a plate or a baking sheet.
- Pan-Fry the Meatballs: In a skillet, heat the olive oil over medium-high heat. Cook the meatballs in batches for about 6-7 minutes, turning occasionally until browned and cooked through.
- Make the Sage Cream Sauce: In a separate saucepan, add the heavy cream and bring it to a gentle simmer over medium-low heat. Stir in the chopped sage and nutmeg, simmer for 3-5 minutes until slightly thickened.
- Combine Meatballs and Sauce: Transfer the meatballs into the saucepan with the sage cream sauce. Gently toss to coat and let it simmer together for another 2-3 minutes.
Notes
For a lighter version, consider substituting heavy cream with half-and-half or coconut cream. For variation, you can add red pepper flakes for heat or fold in parmesan cheese for extra flavor.
Nutrition
- Serving Size: 1 serving
- Calories: 350
- Sugar: 5g
- Sodium: 400mg
- Fat: 12g
- Saturated Fat: 4g
- Unsaturated Fat: 6g
- Trans Fat: 0g
- Carbohydrates: 45g
- Fiber: 3g
- Protein: 15g
- Cholesterol: 30mg
Keywords: pumpkin, chicken meatballs, sage sauce, fall recipes, comfort food