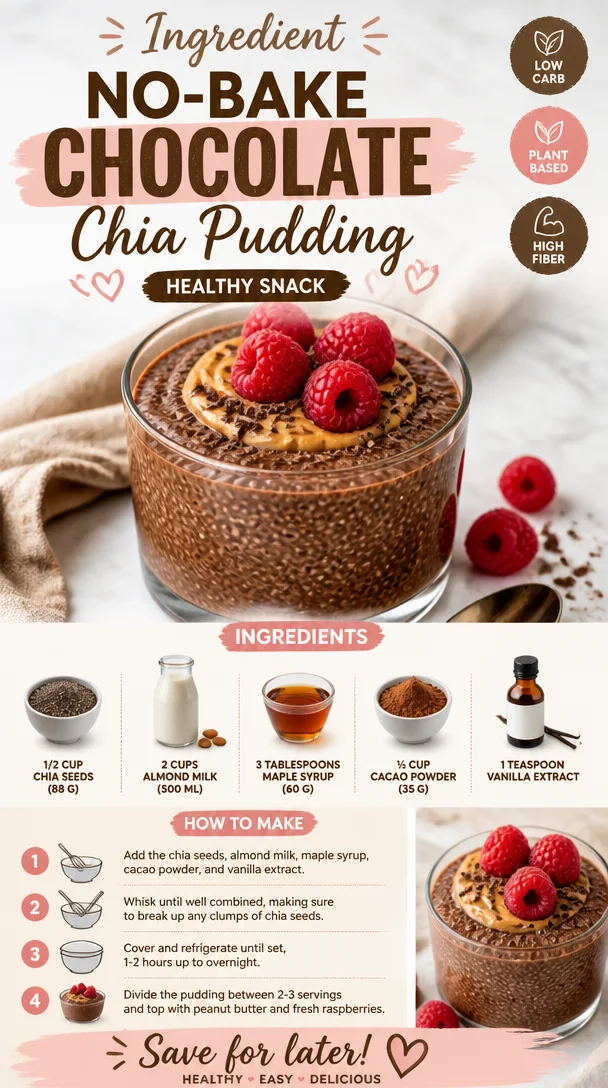
Ingredient No-Bake Chocolate Chia Pudding (Healthy Snack)
Indulge in Decadence: The Ultimate Chocolate Chia Pudding
Hey there, fellow food lover! I’m so excited to share this deliciously indulgent yet guilt-free dessert with you. If you’ve ever craved something rich and chocolaty, but also wanted to stay on the healthier side, then you’re in for a treat! Chocolate Chia Pudding is like a creamy dream that nourishes your body while tantalizing your taste buds. It’s packed with nutrients, easy to whip up, and you can customize it in countless ways to suit your cravings.
Imagine the velvety texture of chocolate pudding, yet it’s made with wholesome ingredients that do your body good. Are you drooling yet? Whether you need a quick dessert for a dinner party, a hearty breakfast on a busy morning, or a simple snack, this recipe checks all the boxes. Let’s dive into this scrumptious world of chocolate chia pudding, where health meets indulgence, because why not have both?
A Food Memory to Savor
Let me take you back to my childhood for a moment. I remember being a little kid, standing on a stool in my grandmother’s kitchen, her apron tied around my waist like a little chef. She would whip up her famous chocolate pudding, and I’d stand there, eyes wide with excitement, waiting for the magic to happen. As soon as the warm pudding hit the bowl, we’d indulge in a family ritual of sharing stories and laughter around the table.
One day, I noticed her blending chia seeds into her dessert. At first, I thought it was a little odd—who heard of chia seeds in pudding? But then she explained how these little seeds were not only nutritious but also added a delightful texture. Fast-forward to adulthood, and here I am, using that same idea, putting my own spin on the classic chocolate pudding. The nostalgia of those kitchen moments drives the passion I have for creating recipes that are not just filled with flavor, but memories too.
Ingredients That Make Magic Happen
To create this Chocolate Chia Pudding, you’ll need the following ingredients:
-
1/2 cup chia seeds (88 g)
These tiny nutritional powerhouses are packed with fiber, protein, and omega-3 fatty acids. They expand and create a beautiful, pudding-like texture. If you don’t have chia seeds on hand, you can also use flaxseeds, but remember to grind them first! -
2 cups almond milk (500 mL)
This creamy base gives the pudding a lovely texture. Unsweetened almond milk allows you more control over sweetness. Alternatives like coconut milk or oat milk work equally well for those who prefer different flavors or have nut allergies. -
3 tablespoons maple syrup (60 g)
This natural sweetener adds a hint of caramel flavor while keeping it plant-based. If you’re looking for a lower-calorie option, you can substitute with agave syrup or even just use ripe mashed bananas for sweetness. -
⅓ cup cacao powder (35 g)
Cacao powder is the star of the show, bringing that rich chocolatey flavor without the added sugar found in regular cocoa powder. If you’re in a pinch, unsweetened cocoa powder can replace it, but know that cacao is less processed and retains more nutrients. -
1 teaspoon vanilla extract
A splash of vanilla brightens the flavor and enhances the chocolate taste. Pure vanilla extract is preferred over imitation for a more authentic taste. However, feel free to play around with flavors—almond or hazelnut extracts can add a fun twist!
Step-By-Step Instructions: Make This Magic Happen
Ready to create your very own Chocolate Chia Pudding? Here’s how to do it!
-
Combine Ingredients
In a large mixing bowl, pour in the almond milk. Next, add the chia seeds, cacao powder, maple syrup, and vanilla extract.Chef’s Hack: Use a whisk to ensure everything mixes together smoothly without clumps. If you don’t have a whisk, a fork works just fine!
-
Mix Thoroughly
Give everything a good stir until all the chia seeds are well incorporated. The cacao powder should dissolve nicely, blending in seamlessly with the almond milk.Tip: Don’t be afraid to get your hands in there. Switch to a spoon if you prefer, but mixing thoroughly is key to avoiding clumps later.
-
Let It Rest
Cover the bowl with a lid or plastic wrap and let it sit at room temperature for about 5–10 minutes. This allows the chia seeds to absorb the liquid.Chef Insight: Alternatively, you can put this in the fridge and let it set overnight. The longer it sits, the thicker and creamier it becomes!
-
Stir Again
After the initial resting period, give it another stir. You want to break up any clumps that may have formed.Quick Tip: If it’s too thick for your liking, add a little more almond milk. You’re in charge of the texture here!
-
Chill It Out
Transfer the pudding to individual serving cups or bowls, covering them again, and let them chill in the fridge for at least two hours. If you’re in a hurry, 30 minutes will do too, but I promise the longer chill makes it taste better.Inside Pro: You can make these ahead of time (like meal prep) and have your dessert ready for the week!
Serving Suggestions: Time to Savor!
Once your pudding is set, you can’t just dive in—let’s make it fancy! Layer the chocolate chia pudding in your favorite glass, topping it off with fresh berries, a dollop of coconut whipped cream, or even a sprinkle of nuts for added crunch. Scattering shaved dark chocolate on top adds an indulgent touch that feels extra special, even on a weeknight!
If you’re feeling extra adventurous, you could serve it in a parfait style with granola or slices of banana for a delightful breakfast treat.
Recipe Variations: Get Creative!
The beauty of Chocolate Chia Pudding lies in its versatility. Here are a few creative twists you can try to mix things up:
-
Peanut Butter Chocolate Chia Pudding: Stir in a spoonful of natural peanut butter for a rich, nutty flavor that pairs beautifully with chocolate.
-
Mint Chocolate Chia Pudding: Add a few drops of peppermint extract for a refreshing spin, making it reminiscent of a mint chocolate dessert.
-
Tropical Treat: Replace cacao powder with carob powder and swap almond milk for coconut milk, creating a tropical flavor sensation.
-
Spicy Kick: Toss in a pinch of cayenne pepper or cinnamon for a surprising heat that enhances the chocolate flavor.
-
Fruit Fusion: Add pureed fruit like bananas or strawberries into the mix before chilling for a fruity twist.
Chef’s Notes: A Touch of Wisdom
As I sit here writing this, I can’t help but smile at the countless bowls of chocolate chia pudding I’ve made over the years. It started as an experiment to create something healthy without losing that comforting, indulgent chocolate fix we all crave. Over time, I’ve adapted the recipe based on seasonal ingredients and what my fridge had to offer, and it always surprises me how delicious it can be!
One time, I accidentally added too much cacao—what was meant to be “rich” turned into “bitter.” In my kitchen, that quickly evolved into a lesson learned, and I just added extra sweetener and whipped cream to balance it out. Perfect example of turning mistakes into culinary delights, right?
FAQs and Troubleshooting: Your Questions Answered
-
Can I make this without dairy?
Absolutely! The recipe already uses almond milk as a non-dairy option. Feel free to use any plant-based milk you love, such as oat, soy, or coconut milk. -
How long will this pudding last in the fridge?
It typically lasts around 3–5 days in the fridge when stored in an airtight container. Just give it a good stir before serving, as it may thicken up a bit after a couple of days. -
What if my pudding doesn’t thicken?
If your pudding doesn’t thicken, it could be due to not enough chia seeds or insufficient resting time. No worries—just let it sit longer, adding a few extra seeds if needed until you get the desired texture. -
Can I use other sweeteners?
You can absolutely use different sweeteners! Honey, agave, or stevia can replace maple syrup if you’d like. Just keep in mind the sweetness levels will vary based on which you choose.
Nutritional Info (Optional)
While I won’t get too bogged down in numbers, I can share that this recipe is high in fiber and healthy fats, making it a solid option for satiating those chocolate cravings without the guilt. Plus, it contains antioxidants and a good amount of protein. Honestly, it’s a winning treat!
So there you have it—a 2000+ word journey into the world of Chocolate Chia Pudding! It’s simple, nourishing, and oh-so-delicious. I can’t wait for you to dive into this recipe, share it with friends, and create your own food memories. Let’s make every meal a celebration of good food and joy! Happy cooking!
PrintUltimate Chocolate Chia Pudding
Indulge in this deliciously rich yet guilt-free Chocolate Chia Pudding, made with wholesome ingredients and perfect for any occasion.
- Prep Time: 10 minutes
- Cook Time: 0 minutes
- Total Time: 120 minutes
- Yield: 4 servings 1x
- Category: Dessert
- Method: Chilling
- Cuisine: Healthy
- Diet: Vegan
Ingredients
- 1/2 cup chia seeds (88 g)
- 2 cups almond milk (500 mL)
- 3 tablespoons maple syrup (60 g)
- ⅓ cup cacao powder (35 g)
- 1 teaspoon vanilla extract
Instructions
- Combine Ingredients: In a large mixing bowl, pour in the almond milk. Next, add the chia seeds, cacao powder, maple syrup, and vanilla extract. Chef’s Hack: Use a whisk to ensure everything mixes together smoothly without clumps.
- Mix Thoroughly: Give everything a good stir until all the chia seeds are well incorporated.
- Let It Rest: Cover the bowl and let it sit at room temperature for about 5–10 minutes.
- Stir Again: After the initial resting period, give it another stir to break any clumps.
- Chill It Out: Transfer the pudding to individual serving cups or bowls, cover, and let chill in the fridge for at least two hours.
Notes
Feel free to get creative with toppings like fresh berries, coconut whipped cream, or nuts.
Nutrition
- Serving Size: 1 serving
- Calories: 250
- Sugar: 8g
- Sodium: 150mg
- Fat: 15g
- Saturated Fat: 2g
- Unsaturated Fat: 10g
- Trans Fat: 0g
- Carbohydrates: 30g
- Fiber: 10g
- Protein: 6g
- Cholesterol: 0mg
Keywords: chocolate, chia pudding, healthy dessert, vegan dessert, nutritious snack
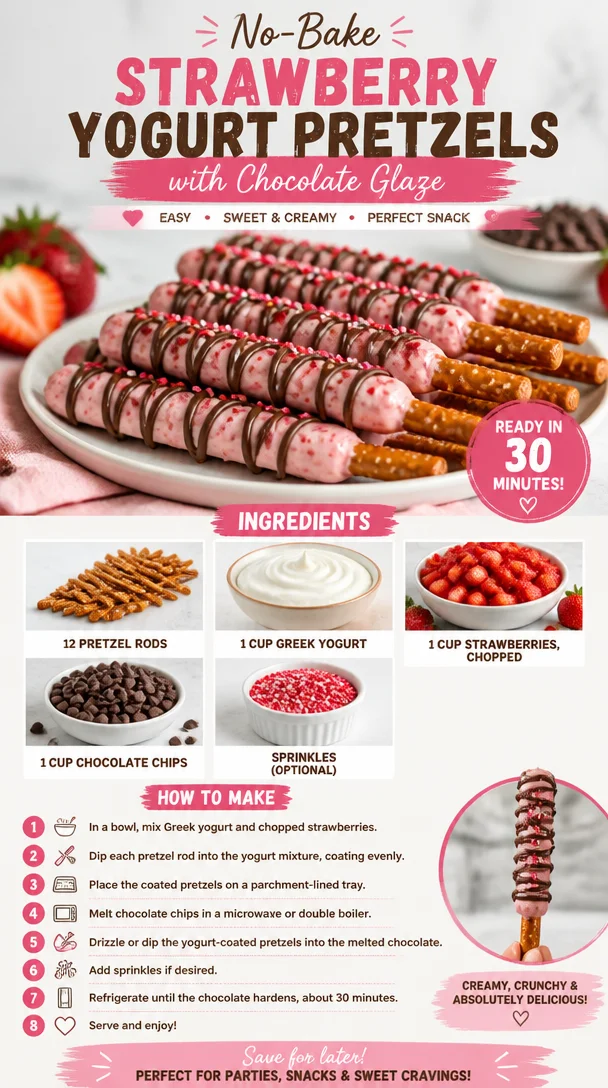
No-Bake Strawberry Yogurt Pretzels with Chocolate Glaze
Chocolate Covered Strawberry Yogurt Pretzel Rods: A Sweet Treat for Any Occasion
Hello, fellow food enthusiasts! Ava Carter here, and I’m excited to take you on a delightful culinary adventure today. If you’re searching for a fun, flavorful, and surprisingly easy treat to whip up for any occasion, you’ve landed on the perfect recipe: Chocolate Covered Strawberry Yogurt Pretzel Rods. These little beauties are the ultimate combination of sweet and salty, crunchy and creamy—truly a match made in foodie heaven!
Imagine this: a warm, sunny day, the aroma of melting chocolate wafting through your kitchen while you’re joyfully coating crunchy pretzel rods in yogurt and chocolate. It’s like a symphony of flavors that harmonizes perfectly with the vibrant sweetness of fresh strawberries. Not only are these pretzel rods easy to make, but they also look gorgeous on a platter, making them a show-stopping addition to any gathering. Whether you’re planning a picnic, hosting movie night, or simply craving a sweet snack, these will be the star of the snack table.
The best part is that you can customize these pretzel rods to suit your taste. Consider adding a sprinkle of sea salt for an extra flavor punch or drizzling some additional melted chocolate on top for that “wow” factor. The sky really is the limit with this recipe! So roll up your sleeves, grab your favorite apron, and let’s get cooking.
Remembering the Sweetness of Strawberries
Before we dive into the recipe, let me share a little personal story that makes this treat even more special to me. When I was growing up, summer was marked by juicy, ripe strawberries. My family would head to the local strawberry patch, where my siblings and I would compete to see who could pick the ripest, juiciest berries. Those strawberries would make their way into everything from smoothies to desserts, but my favorite was always my mom’s strawberry shortcake.
One hot afternoon, my mom decided it was time to experiment, and she covered some of our freshly picked strawberries in chocolate and served them up with a side of Greek yogurt for dipping. It was such a hit that from that day forward, we all begged her to make these chocolate-covered wonders! That sweet nostalgia and the joy of creating delicious things in the kitchen are what inspired me to craft these Chocolate Covered Strawberry Yogurt Pretzel Rods. They carry that same spirit of fun and deliciousness—perfect for the foodie in all of us!
Ingredients for Your Sweet Creation
Here’s what you’ll need for this simple yet satisfying recipe:
-
12 Pretzel Rods
Perfect for dipping and providing that satisfying crunch. You can also use gluten-free pretzel rods if you prefer. -
1 Cup Greek Yogurt
This will act as the creamy layer that beautifully complements the strawberries and chocolate. Opt for plain Greek yogurt for a tangy flavor, or try flavored varieties like vanilla for added sweetness. -
1 Cup Strawberries, Chopped
Fresh strawberries bring a burst of sweetness and freshness. Feel free to swap them with other berries or fruits, like raspberries or bananas, if strawberries aren’t in season. -
1 Cup Chocolate Chips
Choose your favorite type of chocolate—dark, semisweet, or even white chocolate for a fun twist. You can substitute with vegan chocolate chips for a non-dairy option. -
Sprinkles (Optional)
Because who doesn’t love a little extra color and fun? Use your favorite sprinkling toppings, or go seasonal with themed sprinkles for holidays.
Step-By-Step Instructions
Let’s get those pretzel rods ready! Here’s how to make your Chocolate Covered Strawberry Yogurt Pretzel Rods, step by step:
-
Prepare the Ingredients: Gather all your ingredients and any fun sprinkle toppings you want to use. This prep work makes everything flow smoothly while you cook. A little tip—use a large baking sheet lined with parchment paper for easy cleanup!
-
Melt the Chocolate: In a microwave-safe bowl, add the chocolate chips. Microwave in 30-second intervals, stirring after each interval, until the chocolate is completely melted and smooth. Be careful not to overheat it—chocolate can be temperamental! If you have a double boiler, that works great too.
-
Dip the Pretzel Rods: Grab a pretzel rod, holding it by the end. Dip it into the melted chocolate, coating it about halfway. Use a spoon to help spread the chocolate around if needed, allowing any excess chocolate to drip back into the bowl. This is where you can get creative and change up the depth of the chocolate coverage!
-
Coat with Yogurt: Next, take your chocolate-coated pretzel rod and dip it into the Greek yogurt, gently swirling it around to ensure a nice layer of creaminess. You can even layer them—chocolate first, then yogurt, or vice versa!
-
Add Strawberries: While the yogurt is fresh and creamy, sprinkle the chopped strawberries over the yogurt-coated pretzel rod. This step adds flavor and a beautiful pop of color. If you love texture, press the strawberries lightly to ensure they stick.
-
Sprinkle with Fun: Before the yogurt sets, add those colorful sprinkles if you’re using them. It’s all about making it visually fun!
-
Chill Out: Place your pretzel rods in the refrigerator for about 30 minutes to let the chocolate and yogurt set up.
-
Serve and Enjoy!: Once they’re set, take them out, plate them beautifully, and dive in. You’ve just made a delicious and beautiful treat!
Serving Suggestions
To plate your Chocolate Covered Strawberry Yogurt Pretzel Rods, try arranging them in a fun, upright position in a mason jar or a stylish serving platter. You can create a charming display using fresh strawberries or mint leaves around the base for that extra touch. If you’d like to make your presentation more festive, consider using colored plates that contrast beautifully with the vibrant yogurt and strawberries.
Recipe Variations
Now that you’ve mastered the basics, here are a few fun twists you can add to your Chocolate Covered Strawberry Yogurt Pretzel Rods:
-
Nut Butter Drizzle: After coating your pretzels, drizzle a little nut butter (like almond or peanut butter) over the top for a delicious nutty flavor.
-
Coconut Flakes: For a tropical twist, sprinkle some unsweetened coconut flakes over the yogurt-coated pretzels.
-
Dried Fruit: Swap out fresh strawberries for chopped dried fruit like apricots, cranberries, or even raisins for a different flavor experience.
-
Seasonal Flavors: Try infusing the yogurt with cinnamon or pumpkin spice during the fall for a seasonal treat.
-
Different Crunchy Bases: Instead of pretzel rods, you can use pretzel crisps for a bite-sized version or even graham crackers for a sweet crunch.
Chef’s Notes
Creating these Chocolate Covered Strawberry Yogurt Pretzel Rods has been such a delightful journey. My recipe has evolved over time, from my initial attempt with just chocolate to embracing the bright, tangy flavor of Greek yogurt. I love how customizable they are; each time I make them, my friends suggest new ideas for toppings or flavors. Just recently, a friend sprinkled some chili powder on her chocolate (yes, it was a bold choice!), and it added an unexpected kick—definitely something I’ll be incorporating into future experiments!
FAQs and Troubleshooting
1. What can I do if the chocolate is clumping?
If you notice your chocolate has clumped or seized up, you can add a tiny bit of coconut oil or vegetable oil to help smooth it out as you reheat gently.
2. Can I use frozen strawberries in this recipe?
While fresh strawberries give the best flavor, you can use frozen strawberries if you thaw them beforehand and drain any excess moisture to prevent sogginess.
3. How do I store leftovers?
Store any leftover pretzel rods in an airtight container in the fridge for up to three days. However, they’re best enjoyed fresh!
4. Can I use yogurt alternative?
Absolutely! If you’re aiming for a dairy-free version, opt for a dairy-free yogurt alternative, like almond or coconut yogurt.
Nutritional Info (if applicable)
While I believe in enjoying treats in moderation, here’s a quick look at the potential nutritional benefits of this recipe. Each pretzel rod featuring yogurt and strawberries can provide a solid source of protein and valuable vitamins. That said, the nutritional content can vary hugely based on the ingredients used and how many toppings you add.
So there you have it—a delightful adventure into the world of Chocolate Covered Strawberry Yogurt Pretzel Rods! I hope this recipe brings joy and deliciousness to your table, just as it has to mine. Happy munching, and remember to always savor the sweet moments in the kitchen! Let me know how yours turn out!
PrintChocolate Covered Strawberry Yogurt Pretzel Rods
A fun and flavorful treat that combines crunchy pretzel rods with creamy yogurt, chocolate, and fresh strawberries.
- Prep Time: 15 minutes
- Cook Time: 10 minutes
- Total Time: 45 minutes
- Yield: 12 servings 1x
- Category: Dessert
- Method: Chilling
- Cuisine: American
- Diet: Vegetarian
Ingredients
- 12 Pretzel Rods
- 1 Cup Greek Yogurt
- 1 Cup Strawberries, Chopped
- 1 Cup Chocolate Chips
- Sprinkles (Optional)
Instructions
- Prepare the Ingredients: Gather all your ingredients and any fun sprinkle toppings you want to use. Use a large baking sheet lined with parchment paper for easy cleanup!
- Melt the Chocolate: In a microwave-safe bowl, add the chocolate chips. Microwave in 30-second intervals, stirring after each, until melted and smooth.
- Dip the Pretzel Rods: Hold a pretzel rod by the end and dip it into the melted chocolate, coating it about halfway. Let excess chocolate drip back into the bowl.
- Coat with Yogurt: Dip the chocolate-coated pretzel rod into the Greek yogurt, swirling it to ensure a nice layer of creaminess.
- Add Strawberries: While the yogurt is fresh, sprinkle chopped strawberries over the yogurt-coated pretzel rod.
- Sprinkle with Fun: Before the yogurt sets, add colorful sprinkles if desired.
- Chill Out: Place your pretzel rods in the refrigerator for about 30 minutes to let the chocolate and yogurt set.
- Serve and Enjoy!: Once set, plate them beautifully and enjoy your delicious treat!
Notes
For added flavor, consider a sprinkle of sea salt or drizzling more melted chocolate on top. You can customize with different toppings as well.
Nutrition
- Serving Size: 1 pretzel rod
- Calories: 180
- Sugar: 15g
- Sodium: 200mg
- Fat: 8g
- Saturated Fat: 4g
- Unsaturated Fat: 3g
- Trans Fat: 0g
- Carbohydrates: 22g
- Fiber: 1g
- Protein: 3g
- Cholesterol: 5mg
Keywords: chocolate, strawberries, pretzel rods, dessert, sweet snack, yogurt
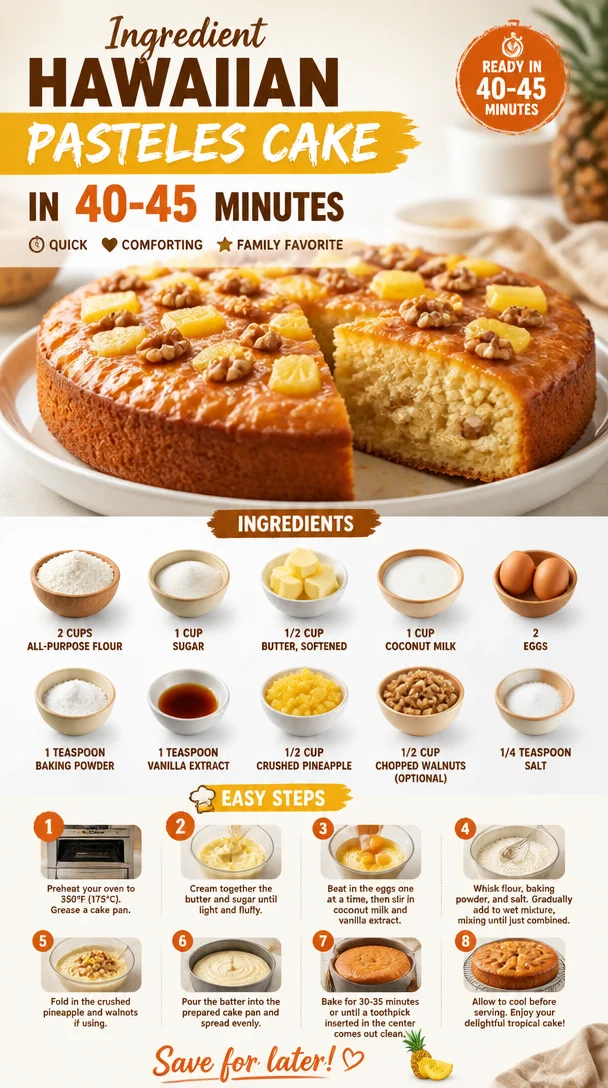
Ingredient Hawaiian Pasteles Cake in 40-45 Minutes
A Slice of Paradise: How to Make Hawaiian Pasteles Cake
Welcome, food lovers! Today, we’re diving into a delightful dish that promises to transport you straight to the lush landscapes of Hawaii—Hawaiian Pasteles Cake! This cake is not just a treat for your taste buds; it’s a warm hug for your soul. Imagine a soft, moist cake infused with the tropical flavors of coconut and pineapple, topped with crunchy walnuts for that perfect texture. It’s a dish that embodies the spirit of relaxation, sunshine, and good food shared with loved ones.
Growing up, my family spent every summer vacationing in Hawaii. The air was thick with the smell of plumeria and the salty ocean breeze, and every day was marked by vibrant sunsets and the sound of laughter. But, the real centerpiece of these vacations was always the food! From poke bowls to sweet, fluffy cakes, each meal played a pivotal role in creating memories. One dessert that particularly stands out is Pasteles Cake, a native dish beloved for its simplicity and flavor. I can still recall the moment my grandmother took me into the kitchen and introduced me to this heavenly cake. With every whisk and fold, I felt enveloped by her love and the essence of Hawaii. Let’s recreate that nostalgia together!
Ingredients
Here are the fresh, real ingredients you’ll need for this tropical delight:
-
2 cups all-purpose flour
- The foundation of your cake; it binds everything together while allowing it to rise. For a gluten-free option, try a 1:1 gluten-free flour blend!
-
1 cup sugar
- Sweetens the cake and balances the acidity from the pineapple. Coconut sugar can be a great substitute for a deeper flavor.
-
1/2 cup butter, softened
- Adds richness and moisture. If you want to lighten it up, you can use unsweetened applesauce!
-
1 cup coconut milk
- Brings in that creamy, tropical flavor. For dairy-free options, use almond milk or oat milk for a slightly different taste.
-
2 eggs
- Helps bind all the ingredients together. You can replace them with flax eggs for a vegan twist—just mix 1 tablespoon of ground flaxseed with 2.5 tablespoons of water, let it sit for 5 minutes to thicken, and voilà!
-
1 teaspoon baking powder
- The secret to your cake’s fluffiness! Make sure your baking powder is fresh for the best results.
-
1 teaspoon vanilla extract
- Adds warmth and enhances the other flavors. Homemade vanilla extract is definitely worth trying if you have the time!
-
1/2 cup crushed pineapple
- A crucial player in this cake—it adds moisture and a natural sweetness. For a different twist, use mashed ripe bananas!
-
1/2 cup chopped walnuts (optional)
- Adds a wonderful crunchy texture and nutty flavor. Pecan pieces or macadamia nuts would also be fantastic alternatives.
-
1/4 teaspoon salt
- Balances the sweetness and enhances all the flavors. Don’t skip this little but mighty ingredient!
Step-by-Step Instructions
Let’s get cooking! Put on your favorite playlist, and let’s create something magical.
-
Preheat Your Oven:
Preheat your oven to 350°F (175°C). This step is essential—it sets the stage for a perfectly baked cake. -
Prepare Your Baking Pan:
Grease a 9-inch round cake pan (or a square one if you prefer). You can use butter or non-stick spray, and don’t forget to dust it lightly with flour to prevent sticking. A little wax paper at the bottom works wonders too! -
Mix the Dry Ingredients:
In a medium bowl, whisk together the flour, baking powder, and salt. This ensures even distribution of the leavening agent, which is key for those fluffy cake vibes. -
Cream the Butter and Sugar:
In a large bowl, cream the softened butter and sugar together until light and fluffy—about 3-4 minutes with an electric mixer. Pro tip: If your butter is too hard, microwave it for just a few seconds, but be careful not to melt it! -
Add the Eggs and Vanilla:
Beat in the eggs one at a time, mixing well after each addition. Stir in that luscious vanilla extract. Each ingredient is adding depth to the flavor, so take your time! -
Incorporate the Coconut Milk:
Mix in the coconut milk until just combined. You’re going for a smooth, creamy batter. -
Combine the Wet and Dry Ingredients:
Gradually fold the dry ingredients into the wet mixture. Be gentle here—overmixing can lead to a dense cake. Use a spatula to gently bring it all together. -
Add the Pineapple and Walnuts:
Carefully fold in the crushed pineapple and walnuts. They’ll add moistness and texture to your lovely cake. -
Pour the Batter into the Pan:
Pour the cake batter into your prepared pan. Use a spatula to spread it evenly, smoothing the top. -
Bake!
Place the cake in the preheated oven and let it bake for 30-35 minutes, or until a toothpick inserted into the center comes out clean. Don’t be tempted to rush this part; the aroma filling your kitchen is a sign that magic is happening! -
Cool Down:
Once baked, remove it from the oven and let it cool in the pan for about 10 minutes before transferring it to a wire rack to cool completely. This step helps prevent soggy bottoms!
Serving Suggestions
Slice up your beautiful Hawaiian Pasteles Cake and serve it at room temperature or slightly chilled. It’s perfect on its own, but if you’re feeling extra generous, consider adding a dollop of whipped cream or a scoop of vanilla ice cream. Top it with a sprinkle of toasted coconut or crushed walnuts for an added crunch. You could even add a light drizzle of coconut syrup for that extra island flair!
Recipe Variations
Now, let’s get creative. Here are a few playful twists on the classic Hawaiian Pasteles Cake:
- Mocha Delight: Mix in 1/4 cup of cocoa powder for a rich chocolate version.
- Spiced Tropical Cake: Add a teaspoon of cinnamon or nutmeg for a warm, spiced cake.
- Lemon Zest: Incorporate the zest of one lemon for a refreshing citrus twist.
- Fruits Galore: Replace the pineapple with other fruits like mango or passion fruit for a tropical twist.
- Vegan Version: Swap out eggs for flaxseed, use plant-based butter, and replace coconut milk with almond milk.
Chef’s Notes
This Hawaiian Pasteles Cake has a special place in my heart. Over the years, I’ve played with the recipe, incorporating local ingredients from my surroundings. The joy of sharing this cake with family and friends, celebrating milestones, and creating new memories fuels my passion for baking. My grandmother once joked that the only secret to a great cake is the love you mix into it, and I wholeheartedly believe in that!
FAQs and Troubleshooting
-
Why is my cake dense?
If the cake turns out dense, it may be due to overmixing your batter or too much water content from the pineapple. Next time, fold gently and drain some of the excess juice! -
Can I freeze this cake?
Absolutely! Once cooled, wrap it tightly in plastic wrap and then in aluminum foil. It will last in the freezer for up to 3 months. Just let it thaw at room temperature when you’re ready to enjoy it again. -
How do I know when it’s done?
Perform the toothpick test. If the toothpick comes out clean, your cake is ready! If there’s wet batter on it, give it a few more minutes in the oven. -
Can I make this in advance?
You can! This cake stays fresh for a few days in an airtight container. Baking it a day before serving can actually enhance the flavors.
Nutritional Info
While the nutrition part can get tedious, enjoying food is equally important—remember that balance is key! However, I encourage you to savor every bite of this cake, knowing it’s made from wholesome ingredients, perfect for your next potluck or family gathering!
So there you have it, fellow foodies! Your guide to creating a spectacular Hawaiian Pasteles Cake that’s sure to bring sunshine to your plate—no matter the weather outside. Grab your ingredients, follow along, and let’s bake some memories! Happy cooking!
PrintHawaiian Pasteles Cake
This Hawaiian Pasteles Cake is a delicious and moist cake infused with tropical flavors of coconut and pineapple, topped with crunchy walnuts.
- Prep Time: 15 minutes
- Cook Time: 35 minutes
- Total Time: 50 minutes
- Yield: 8 servings 1x
- Category: Dessert
- Method: Baking
- Cuisine: Hawaiian
- Diet: Vegetarian
Ingredients
- 2 cups all-purpose flour
- 1 cup sugar
- 1/2 cup butter, softened
- 1 cup coconut milk
- 2 eggs
- 1 teaspoon baking powder
- 1 teaspoon vanilla extract
- 1/2 cup crushed pineapple
- 1/2 cup chopped walnuts (optional)
- 1/4 teaspoon salt
Instructions
- Preheat your oven to 350°F (175°C).
- Prepare a 9-inch round cake pan by greasing it and dusting it with flour.
- Mix the flour, baking powder, and salt in a medium bowl.
- Cream the butter and sugar together in a large bowl until light and fluffy.
- Add the eggs one at a time, mixing well after each addition, then stir in the vanilla extract.
- Incorporate the coconut milk until just combined.
- Combine the dry ingredients gradually into the wet mixture.
- Add the crushed pineapple and walnuts, folding them in gently.
- Pour the batter into your prepared pan and smooth the top.
- Bake for 30-35 minutes, or until a toothpick comes out clean.
- Cool the cake in the pan for 10 minutes, then transfer it to a wire rack to cool completely.
Notes
Consider serving with whipped cream or vanilla ice cream, and drizzle with coconut syrup for extra flavor.
Nutrition
- Serving Size: 1 slice
- Calories: 320
- Sugar: 18g
- Sodium: 120mg
- Fat: 12g
- Saturated Fat: 6g
- Unsaturated Fat: 4g
- Trans Fat: 0g
- Carbohydrates: 45g
- Fiber: 2g
- Protein: 4g
- Cholesterol: 40mg
Keywords: Hawaiian cake, Pasteles Cake, tropical dessert, coconut, pineapple
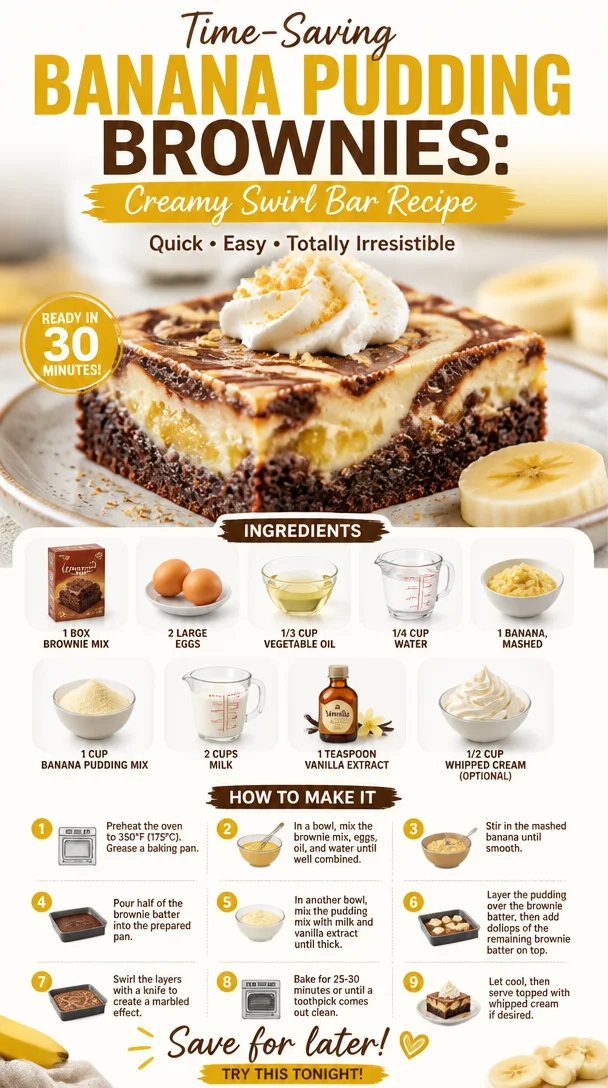
Time-Saving Banana Pudding Brownies: Creamy Swirl Bar Recipe
The Sweetest Mashup: Banana Pudding Brownies
Hey there, fellow food lovers! If you’re anything like me, dessert is where your heart truly lies, and it’s time to take it to a whole new level. Today, I’m thrilled to introduce you to a wonderful creation: Banana Pudding Brownies. Picture this: the rich, chocolaty goodness of brownies meets the creamy, nostalgic flavors of banana pudding—sounds divine, right? This recipe is not just a treat for the taste buds but also a beautiful ode to the delightful memories of my childhood, where dessert was always a centerpiece.
As we dive into this recipe, I want you to feel the excitement I feel when I pull these brownies out of the oven. They’re chewy, fudgy, and oh-so-delectable. Trust me, once you take your first bite, you’ll be transported back to those carefree days of summer picnics and family get-togethers, sharing laughter and treats under the sun. So, roll up your sleeves, grab your mixing bowl, and let’s create some magic in the kitchen!
A Nostalgic Twist
Let me take you back to my childhood for a moment. I was nine years old, sitting on my grandmother’s back porch with my cousins. It was a hot summer day, and the aroma of baked goods wafted through the air. My grandma was known for her legendary banana pudding, a recipe that had been passed down through generations. I remember her carefully layering the vanilla wafers, rich pudding, and slices of ripe bananas in a big glass bowl. We’d all sit around the table, forks in hand, eagerly waiting for dessert time, our excitement bubbling over just like the pudding!
This memory is what inspired me to merge two of my favorite desserts: brownies and banana pudding. The result? A dreamy treat that combines the best of both worlds. It’s the kind of dessert that brings back warm memories and creates new ones with every bite! Now, let’s get to the fun part—making these scrumptious Banana Pudding Brownies!
Ingredients
Here’s what you’ll need to whip up these delightful brownies. I’ve included some chef insights and substitution tips where relevant:
- 1 box brownie mix: This is the foundation of our dessert. Choose your favorite brand, and you can also opt for a gluten-free version if you need to.
- 2 large eggs: These act as a binder to hold everything together. If you’re vegan, you can substitute with unsweetened applesauce or a flax egg (1 tablespoon of ground flaxseed mixed with 2.5 tablespoons of water).
- 1/3 cup vegetable oil: Vegetable oil keeps the brownies moist and gives them a lovely texture. You can swap it out for melted coconut oil or unsweetened applesauce for a lighter version.
- 1/4 cup water: This adds to the moisture in the brownies. You can use any liquid, like milk or even a nut milk for added flavor.
- 1 banana, mashed: The star of our show! Bananas not only add flavor but also sweetness. Make sure your banana is ripe for maximum flavor. You can substitute applesauce for a different twist.
- 1 cup banana pudding mix: This is where the magic happens! It gives the brownies that nostalgic banana flavor and a creamy texture. Use instant pudding mix for best results.
- 2 cups milk: This is added to the pudding mix. If you prefer a dairy-free version, almond milk or coconut milk works beautifully.
- 1 teaspoon vanilla extract: Vanilla enhances the flavors, and you won’t want to skip this step! Feel free to use vanilla bean paste for a more intense flavor.
- 1/2 cup whipped cream (optional): While optional, a dollop of whipped cream on top can elevate your dessert to the next level. For a non-dairy option, consider coconut whipped cream!
Step-by-Step Instructions
Now that we’ve gathered our ingredients, it’s time to roll up our sleeves and get cooking! Follow these simple steps to make your Banana Pudding Brownies:
-
Preheat Your Oven: Start by preheating your oven to 350°F (175°C). This step is crucial to achieve that perfect brownie texture. While it’s heating up, you can prepare your baking dish!
-
Prepare Your Baking Dish: Grease a 9×13-inch baking dish lightly with cooking spray or line it with parchment paper for easy removal. I love using parchment paper because it makes cleanup a breeze!
-
Mix the Brownie Batter: In a large mixing bowl, combine the brownie mix, eggs, vegetable oil, water, and the mashed banana. Use a whisk or an electric mixer to ensure everything is well blended. This step is your opportunity for a bit of fun—don’t be afraid to get your hands in there if you want! The more you mix, the more rustic and fudgy your brownies will be.
-
Pour into the Baking Dish: Once your brownie batter is smooth and combined, pour it into your prepared baking dish. Use a spatula to spread it evenly so that every bite is decadent!
-
Bake the Brownie Base: Place the dish in the oven and bake for about 20-25 minutes. Keep an eye on them—every oven is different! You’ll want them to be set but still slightly gooey in the middle. A toothpick inserted into the center should come out with a few moist crumbs but not wet batter.
-
Prepare the Pudding Layer: While the brownies are baking, whip up that banana pudding. In a separate bowl, mix the banana pudding mix with the milk and vanilla extract according to the package instructions. This should take just a few minutes; whisk until it’s smooth and creamy.
-
Layer the Pudding: Once the brownies are out of the oven and have cooled slightly, it’s time to add the pudding layer. Pour the pudding over the warm brownies, spreading it evenly. The heat from the brownies will keep everything cozy and meld those flavors together beautifully.
-
Chill the Brownies: Cover your dish with plastic wrap or foil and let it chill in the refrigerator for at least 2 hours. This is when the magic happens! The pudding will set, making it easier to cut and serve later.
-
Add the Whipped Cream: If you’re feeling fancy, top with whipped cream before serving. You can add as much or as little as you like—because who doesn’t love whipped cream?
-
Slice and Serve: Now for the best part! Slice your brownies into squares and serve them chilled. You can garnish with additional banana slices or crumbled vanilla wafers for that banana pudding vibes.
Serving Suggestions
These Banana Pudding Brownies are best served chilled, making them the perfect make-ahead dessert for gatherings or potlucks. As you plate them, consider using a colorful dessert plate to contrast against the rich brownie and creamy pudding layers. Add a dollop of whipped cream on top, a few banana slices, and maybe even a sprinkle of crushed Nilla wafers for a delightful presentation. Your friends and family will be so impressed!
Recipe Variations
In the spirit of creativity, here are some fun twists you can try with this recipe:
- Peanut Butter Swirl: Add dollops of creamy peanut butter to the brownie batter before baking for a deliciously nutty flavor.
- Chocolate Chip Delight: Fold in a cup of chocolate chips into the brownie mixture for bonus chocolate goodness.
- Caramel Drizzle: Once you serve the brownies, drizzle them with caramel sauce for that extra decadence.
- Nutty Banana: Stir in some chopped walnuts or pecans into the brownie batter for added crunch.
- Choco-Banana Frosting: Top with a chocolate ganache frosting instead of whipped cream for a rich twist.
Chef’s Notes
As a chef who loves to experiment, this recipe has seen its fair share of adaptations over the years. I remember the first time I attempted to make it vegan—I was worried about losing that luscious texture, but the banana worked wonders! I’ve also enjoyed making mini versions in muffin tins for bite-sized delights. One funny story involves my dog sneaking a lick off the counter right before I was ready to chill them—let’s just say, it made for some laughter and a quick cleanup session!
FAQs and Troubleshooting
1. Can I use homemade brownie mix instead of a box mix?
Absolutely! If you prefer to whip up a homemade brownie recipe, feel free to use your favorite brownie ingredients. Just be cautious of the ratios, as box mixes can often vary in the amount of ingredients needed.
2. Why did my brownies turn out dry?
If your brownies feel dry, it could be that they were baked for too long. Ovens can vary, so I recommend checking on them a minute or two before the minimum baking time. Remember, a little gooeyness in the center is desirable!
3. Can I freeze these brownies?
You sure can! They freeze beautifully—just wrap them tightly in plastic wrap and then in foil before storing in the freezer. Thaw in the refrigerator before serving.
4. How do I make sure the pudding layer isn’t too runny?
Stir the pudding mix and milk diligently, ensuring it’s whisked well and allowed to chill enough in the fridge to set. Instant pudding is your best bet for the perfect consistency!
Nutritional Info
While I believe in indulging occasionally, it’s nice to be mindful about what our treats contain too. Here’s a rough estimate for one brownie with pudding topping:
- Calories: ~250
- Fat: 10g
- Carbohydrates: 38g
- Fiber: 1g
- Protein: 2g
Enjoy these Banana Pudding Brownies, channeling all the warmth of childhood memories into a delightful dessert that’s easy to make and impossible to resist. Now, go ahead and dig in—your taste buds are in for a treat! Happy baking! 🍌🍫
PrintBanana Pudding Brownies

A delightful fusion of rich brownies and creamy banana pudding that evokes warm childhood memories.
- Prep Time: 15 minutes
- Cook Time: 25 minutes
- Total Time: 150 minutes
- Yield: 12 servings 1x
- Category: Dessert
- Method: Baking
- Cuisine: American
- Diet: Vegetarian
Ingredients
- 1 box brownie mix
- 2 large eggs
- 1/3 cup vegetable oil
- 1/4 cup water
- 1 banana, mashed
- 1 cup banana pudding mix
- 2 cups milk
- 1 teaspoon vanilla extract
- 1/2 cup whipped cream (optional)
Instructions
- Preheat your oven to 350°F (175°C).
- Prepare a 9×13-inch baking dish by greasing it or lining it with parchment paper.
- Mix the brownie batter in a large bowl with the brownie mix, eggs, vegetable oil, water, and mashed banana.
- Pour the brownie batter into the prepared baking dish and spread it evenly.
- Bake for 20-25 minutes until set but slightly gooey in the center.
- Prepare the pudding layer by mixing the banana pudding mix with the milk and vanilla extract until smooth.
- Layer the pudding over the warm brownies once they are out of the oven.
- Chill in the refrigerator for at least 2 hours before serving.
- Add whipped cream on top if desired, then slice and serve chilled.
Notes
This dessert is best served chilled and can be garnished with banana slices or crumbled vanilla wafers.
Nutrition
- Serving Size: 1 brownie
- Calories: 250
- Sugar: 12g
- Sodium: 150mg
- Fat: 10g
- Saturated Fat: 2g
- Unsaturated Fat: 8g
- Trans Fat: 0g
- Carbohydrates: 38g
- Fiber: 1g
- Protein: 2g
- Cholesterol: 30mg
Keywords: banana pudding brownies, dessert recipe, nostalgic dessert
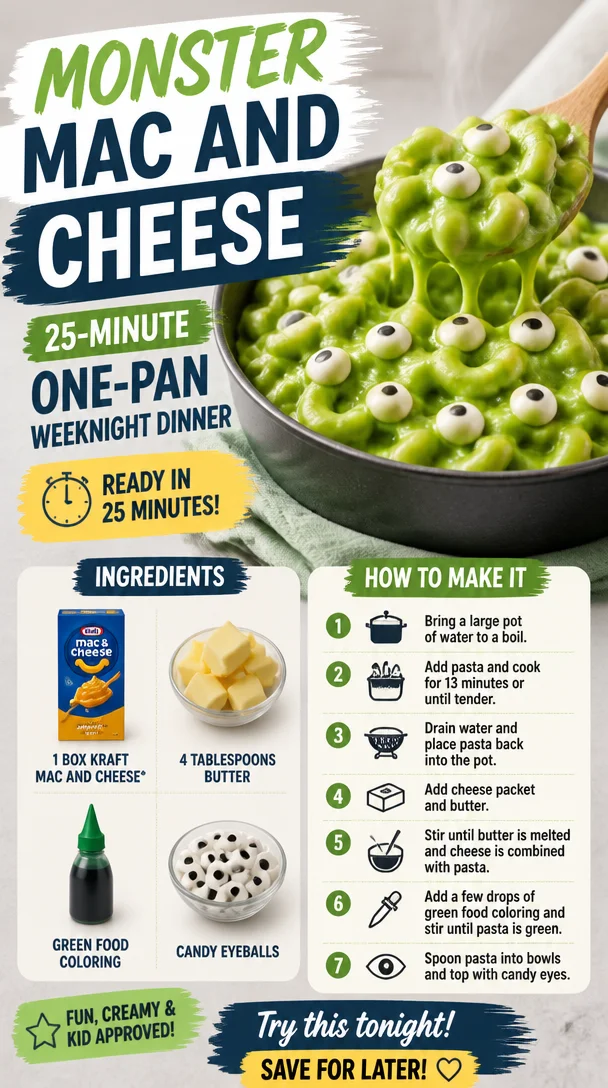
Monster Mac and Cheese: 25-Minute One-Pan Weeknight Dinner
Monster Mac and Cheese: A Ghoulishly Delicious Treat
Hey there, fellow food lovers! Ava here, and today, we’re diving into a whimsical world where comfort food meets creativity—today, I’m excited to share my recipe for Monster Mac and Cheese! This isn’t your average mac and cheese; oh no! We’re talking about a Halloween-inspired dish that’s sure to delight both kids and adults alike.
Imagine creamy, cheesy mac and cheese transformed into colorful, monster-filled fun. This dish is perfect for spooky getting-togethers, Halloween parties, or anytime you’re in the mood for a little culinary mischief. And the best part? It’s super simple and downright delicious!
Before we get started, let me take you on a little trip down memory lane.
Personal Story: A Spooky Tradition
Growing up, Halloween was always a highlight of my year. I’d spend the whole month picking out costumes, decorating the house, and, of course, cooking up fun dishes with my family. One of my favorite memories is from when I was about eight years old, standing in the kitchen with my mom and little sister, all of us wearing matching witch hats.
We decided to craft the ultimate Halloween dinner, filled with creepy treats. That year, we made “witch’s brew” soup and started a tradition of creating ghoulishly fun snacks. But the pièce de résistance was always the mac and cheese, which we dressed up into all sorts of creatures, using food coloring and a variety of toppings.
This Monster Mac and Cheese is a nod to those delightful moments—colorful, full of flavor, and a lively addition to any spooky feast. So grab your whisk, and let’s turn your kitchen into a monster cave!
Ingredients
Here’s what you’ll need for your Monster Mac and Cheese:
-
1 box Kraft mac and cheese*
A classic base with creamy cheese powder that makes preparations easy. If you want to skip processed cheese, feel free to use your homemade macaroni and cheese instead! -
4 tablespoons butter
Adds richness and creaminess. You could use olive oil or plant-based butter for a healthier or vegan alternative. -
Green food coloring
This gives our dish an eye-popping green hue that screams ‘monster!’ Feel free to use any color food dye if you want to get creative! -
Candy eyeballs
The finishing touch! These cute little eyes give our mac and cheese its monster personality! You can find edible candy eyes in most baking sections or try making your own out of fondant.
Chef Insight
Remember, the beauty of cooking is flexibility! Don’t feel tied down to the ingredients—switch them up to match your taste or what you have on hand. Cooking should be all about fun and experimenting.
Step-by-Step Instructions
Now that we’ve rounded up our ingredients, let’s dive into making this delightful Monster Mac and Cheese. Follow these steps to whip up a dish that will surely entertain:
-
Boil the Pasta
Start by bringing a large pot of salted water to a boil. Add the macaroni from your Kraft box and cook according to the package instructions (usually about 7-8 minutes).
Chef’s Tip: Stir occasionally to prevent sticking. The salt in the water enhances the flavor of the noodles! -
Prepare the Cheese Sauce
While the pasta is cooking, in a separate saucepan, melt 4 tablespoons of butter over medium heat. Once melted, whisk in the cheese powder from the Kraft box until smooth.
Hack: For extra creaminess, you can add a splash of milk to the mixture. Just be sure to keep whisking until fully blended! -
Color It Green
Now for the fun part! Add a few drops of green food coloring to the cheese sauce. Stir until you reach your desired monster hue. No limits here—go wild with the color!
Chef’s Note: If you’re feeling adventurous, adding a pinch of garlic powder can elevate the flavor, producing a more palate-pleasing monster. -
Combine
Once your macaroni is cooked, drain it and return it to the pot. Pour the green cheese mixture over the pasta and stir until every piece is coated in that delicious cheesy goodness.
Tip: A spatula can help you mix everything together without breaking the pasta. -
Monster Assembly
Serve the mac and cheese hot in bowls, and now’s the time to add the cutest part—candy eyeballs! Scatter them generously over the top to create your monstrous masterpiece.
Presentation Tip: Use a little extra green food coloring on the rim of your bowls for an added touch of spooky flair.
Serving Suggestions
To plate your Monster Mac and Cheese, you can serve it in colorful bowls, topped with a sprinkle of parsley or edible glitter for a festive touch. For extra fun, add some fall-themed decorations around the plate—think mini pumpkins or ghost-shaped candles for that perfect Halloween ambiance!
Recipe Variations
- Spicy Monster Mac: Add diced jalapeños or a sprinkle of cayenne for a delicious kick!
- Veggie Monsters: Stir in some steamed broccoli or peas for a nutritious twist. They can double as ‘monster arms’!
- Meaty Madness: Toss in cooked ground beef or sausage for a hearty version.
- Vegan Delight: Swap the butter for plant-based alternative and use a vegan cheese powder for a completely dairy-free treat.
Chef’s Notes
The Monster Mac and Cheese has evolved a lot since my childhood! I still remember the little surprised faces of my family when we unveiled our spooky dish. Over the years, I’ve played with flavors and colors, making it a staple at my Halloween gatherings. It always brings a smile, sometimes even giggles, especially when they connect a bite to those googly eyes floating around on top!
I encourage you to take this recipe and make it your own. Cooking is truly about sharing joy and creating memories, so have fun with it!
FAQs and Troubleshooting
1. How can I make my mac and cheese creamier?
You can add a splash of milk or even a dollop of cream cheese for extra richness when mixing the cheese sauce.
2. What if I’m not a fan of green food coloring?
Feel free to skip it or swap it out for any color you prefer! Blue mac and cheese could be just as fun!
3. Can I use gluten-free pasta?
Absolutely! Just follow the cooking instructions on the gluten-free pasta box, and you’ll have a delicious gluten-free Monster Mac!
4. My cheese sauce is lumpy! What happened?
This can happen if the butter is overheated or if you added the cheese powder too quickly. Take it off the heat, whisk vigorously, and add a little bit of warm milk to smooth it out.
Nutritional Info (if applicable)
While this Monster Mac and Cheese is all about fun, it’s important to balance it out as part of a healthy diet. If you’re looking for health-conscious adjustments, consider lighter versions of some ingredients, as mentioned before.
So there you have it, my food-loving friends! A ghoulishly delicious and fun-filled recipe that’s sure to make your Halloween gatherings memorable. Remember, cooking is a celebration—enjoy every moment spent in the kitchen! Keep it fresh, simple, and delicious. Happy cooking!
PrintMonster Mac and Cheese
A Halloween-inspired mac and cheese dish that’s colorful, fun, and perfect for spooky gatherings.
- Prep Time: 10 minutes
- Cook Time: 15 minutes
- Total Time: 25 minutes
- Yield: 4 servings 1x
- Category: Main Course
- Method: Boiling and Mixing
- Cuisine: American
- Diet: Vegetarian
Ingredients
- 1 box Kraft mac and cheese
- 4 tablespoons butter
- Green food coloring
- Candy eyeballs
Instructions
- Boil the pasta: Start by bringing a large pot of salted water to a boil. Add the macaroni from your Kraft box and cook according to the package instructions (usually about 7-8 minutes).
- Prepare the cheese sauce: While the pasta is cooking, in a separate saucepan, melt 4 tablespoons of butter over medium heat. Once melted, whisk in the cheese powder from the Kraft box until smooth.
- Color it green: Add a few drops of green food coloring to the cheese sauce. Stir until you reach your desired monster hue.
- Combine: Once your macaroni is cooked, drain it and return it to the pot. Pour the green cheese mixture over the pasta and stir until every piece is coated.
- Monster assembly: Serve the mac and cheese hot in bowls and scatter the candy eyeballs generously over the top.
Notes
Feel free to switch up ingredients according to taste. Cooking should be fun and flexible!
Nutrition
- Serving Size: 1 serving
- Calories: 400
- Sugar: 10g
- Sodium: 600mg
- Fat: 18g
- Saturated Fat: 9g
- Unsaturated Fat: 5g
- Trans Fat: 0g
- Carbohydrates: 50g
- Fiber: 2g
- Protein: 12g
- Cholesterol: 40mg
Keywords: Halloween, Monster Mac and Cheese, Kids Recipes, Comfort Food, Fun Recipes
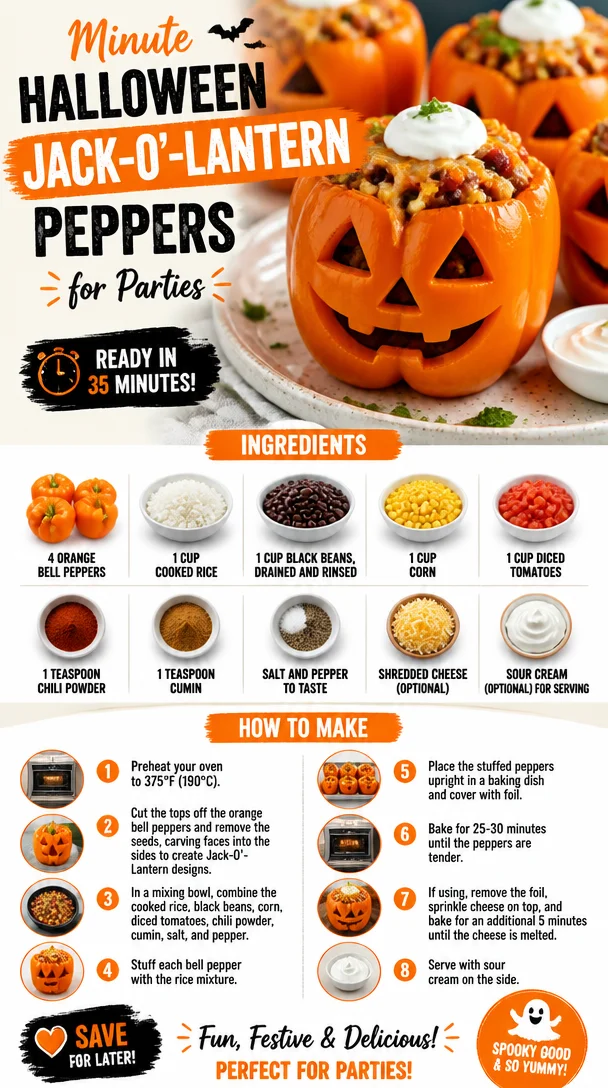
Minute Halloween Jack-O’-Lantern Peppers for Parties
Halloween Jack-O’-Lantern Peppers: A Spooky, Tasty Treat
Welcome, fellow foodies! As the leaves start to turn and the nights grow longer, there’s an undeniable magic in the air—Halloween season is upon us! There’s something truly enchanting about celebrating this time of year, especially when it comes to getting creative in the kitchen. Today, I want to share a festive dish that’s not only fun to make but also delicious and nutritious: Halloween Jack-O’-Lantern Peppers! 🎃
Imagine walking into your kitchen, the smell of spices wafting through the air, and out of the oven come adorable, glowing jack-o’-lanterns just bursting with flavor. These pepper creations are perfect for Halloween gatherings, cozy family dinners, or even just a cheerful weeknight meal. Plus, they are packed with wholesome ingredients that will keep you feeling energized and satisfied. So, grab your chef’s hat, and let’s dive into this spooky culinary adventure together!
A Personal Tale of Halloween and Food
Every Halloween, my family had a tradition that involved creativity and lots of laughter. I remember one year when I was in middle school; my mom decided we’d make Jack-O’-Lanterns, but instead of carving pumpkins, we turned to our vibrant orange bell peppers. As an ambitious foodie even back then, I was thrilled to add a culinary twist to our spooky decorations!
We spent the evening laughing, scooping out the insides, and designing silly faces to give each pepper its own unique personality. In between our creative bursts, we cooked up a delicious filling of rice, beans, and spices. I still remember the aroma of chili powder and cumin dancing around the kitchen, mixing with our giggles—it felt like pure magic. That night, we not only filled our bellies but also our hearts with joy and creativity.
Now, every October, I cherish those memories and carry that spirit into the kitchen. It’s a delightful reminder that cooking can be both nourishing and whimsical. So, let’s recreate that magic with these Jack-O’-Lantern Peppers!
Ingredients
Here’s what you’ll need to craft your own Halloween Jack-O’-Lantern Peppers:
-
4 orange bell peppers
Bright and cheerful, these peppers are perfect for carving spooky faces. Feel free to switch them out for yellow or red peppers if orange is out of season! -
1 cup cooked rice
Use any variety you prefer—white, brown, or even cauliflower rice for a lighter option. This serves as a hearty base for your filling while absorbing all those delicious flavors! -
1 cup black beans, drained and rinsed
High in protein and fiber, black beans add substance to your dish. If you don’t have them on hand, pinto beans or chickpeas will also work beautifully. -
1 cup corn
Sweet corn adds a pop of color and a bit of sweetness. Fresh, frozen, or even canned works here! Just make sure to drain and rinse if you’re using canned corn. -
1 cup diced tomatoes
These bring moisture and acidity to the filling. If fresh tomatoes aren’t available, canned diced tomatoes are a great alternative! -
1 teaspoon chili powder
Adds a warm, smoky flavor. If you like your food spicier, opt for a chipotle chili powder or add a shake of cayenne pepper! -
1 teaspoon cumin
Earthy and aromatic, cumin elevates the taste of your dish. Ground coriander is a nice substitute if you find yourself out of cumin. -
Salt and pepper to taste
Essential for rounding out the flavors of your dish. Don’t skip this step—it makes all the difference! -
Shredded cheese (optional)
For a cheesy layer on top, use cheddar, Monterey Jack, or a dairy-free alternative. -
Sour cream (optional)
A dollop on top adds creaminess and balances the flavors! Greek yogurt is a great swap for a healthier twist.
Step-by-Step Instructions
Step 1: Preheat your oven
Preheat your oven to 375°F (190°C). The perfect oven temperature for roasting the peppers to a tender finish and allowing the flavors to meld beautifully.
Step 2: Prepare the bell peppers
Cut the tops off the orange bell peppers and scoop out the seeds and membranes. Don’t toss those tops just yet! You can use them as “hats” for your pumpkins. Set the peppers upright in a baking dish. This is a great time to create your jack-o’-lantern faces—use a paring knife to carve silly or spooky expressions on the sides!
Step 3: Create the filling
In a large mixing bowl, combine cooked rice, black beans, corn, diced tomatoes, chili powder, cumin, salt, and pepper. This blend should be colorful and full of texture! Stir until everything is well combined. Chef Tip: Use the back of a fork to slightly mash the beans for a creamier filling!
Step 4: Fill those peppers!
Spoon the filling mixture into each bell pepper, packing it in gently but firmly. Don’t be shy—fill them to the brim! This is where the flavor all comes together. If you’re feeling adventurous, toss in some shredded cheese right in with the filling for an extra cheesy center!
Step 5: Bake the peppers
Place the stuffed peppers in the preheated oven and bake for about 30 minutes, or until the peppers are tender and slightly charred. Chef Hack: For a cheesy topping, sprinkle shredded cheese on top for the last 10 minutes of baking!
Step 6: Serve and enjoy
Once you pull them out of the oven, let them cool for a few minutes before serving.
Serving Suggestions
To plate these enchanting Jack-O’-Lantern Peppers, place each pepper on a colorful plate and drizzle with sour cream for a little extra flair. You could also serve them alongside a simple green salad or corn on the cob to keep the meal light and lively.
Recipe Variations
Feel free to get creative with these stuffed peppers! Here are a few tasty twists to consider:
- Mexican-Style Twist: Add taco spice mix or diced jalapeños to the filling for a spicy kick!
- Italian Flair: Use quinoa instead of rice, and mix in Italian herbs like oregano and basil.
- Veggie-Loaded: Add spinach or chopped zucchini to amp up the veggie content and add even more color.
- Meat Lover’s Delight: Mix in ground turkey or beef for a heartier filling amidst the beans and rice.
- Gluten-Free: Stick with rice or use gluten-free bread crumbs for a delightful twist!
Chef’s Notes
These Halloween Jack-O’-Lantern Peppers have gone through many iterations over the years! Initially, my filling consisted solely of rice and beans, but over time I discovered different ingredients that harmonized beautifully. The little nuances, like adding corn or tomatoes, have transformed them into a colorful fête of flavors. Plus, the happy grins on everyone’s faces while eating them make it all worthwhile!
FAQs and Troubleshooting
Q: Can I prepare the peppers in advance?
A: Absolutely! You can prepare the filling ahead of time, stuff the peppers, and refrigerate them until you’re ready to bake. Just add a few extra minutes to the baking time if cooking from cold.
Q: What if my filling is too dry?
A: If your filling is feeling a bit dry, add a splash of vegetable or chicken broth to moist it up. You want a nice, cohesive filling that holds together well.
Q: Can I use other colors of bell peppers?
A: For sure! Feel free to use green, yellow, or even mini peppers. Just keep in mind that green peppers tend to have a slightly more bitter flavor.
Q: How do I store leftovers?
A: These Peppers can be stored in an airtight container in the fridge for up to 3 days. Reheat in the oven or microwave until warm!
Nutritional Info
(Optional but helpful)
These Jack-O’-Lantern Peppers are packed with nutrients and flavor! Each pepper contains a wealth of vitamins, fiber, and protein. Nutritional values will vary based on variations and toppings—but you can expect a healthy dish that satisfies without guilt!
Embrace your Halloween spirit, gather your loved ones, and enjoy these delightful Jack-O’-Lantern Peppers! Cooking should always be filled with joy and creativity, just like the memories we make while doing it. Happy cooking, and enjoy the boo-tiful Halloween season! 🎃✨
PrintHalloween Jack-O’-Lantern Peppers
A festive and delicious treat for Halloween, these jack-o’-lantern stuffed peppers are filled with a tasty mixture of rice, beans, and spices.
- Prep Time: 15 minutes
- Cook Time: 30 minutes
- Total Time: 45 minutes
- Yield: 4 servings 1x
- Category: Main Course
- Method: Baking
- Cuisine: American
- Diet: Vegetarian
Ingredients
- 4 orange bell peppers
- 1 cup cooked rice
- 1 cup black beans, drained and rinsed
- 1 cup corn
- 1 cup diced tomatoes
- 1 teaspoon chili powder
- 1 teaspoon cumin
- Salt and pepper to taste
- Shredded cheese (optional)
- Sour cream (optional)
Instructions
- Preheat your oven to 375°F (190°C).
- Prepare the bell peppers by cutting the tops off and scooping out the seeds and membranes.
- Create the filling by combining cooked rice, black beans, corn, diced tomatoes, chili powder, cumin, salt, and pepper in a large mixing bowl.
- Fill each pepper with the mixture, packing it in gently.
- Bake the stuffed peppers for about 30 minutes, or until tender and slightly charred.
- Serve and enjoy after cooling for a few minutes.
Notes
Feel free to get creative with the filling by adding different spices or ingredients. Great for meal prep as the filling can be made ahead of time.
Nutrition
- Serving Size: 1 pepper
- Calories: 350
- Sugar: 5g
- Sodium: 400mg
- Fat: 12g
- Saturated Fat: 4g
- Unsaturated Fat: 6g
- Trans Fat: 0g
- Carbohydrates: 45g
- Fiber: 10g
- Protein: 15g
- Cholesterol: 30mg
Keywords: Halloween, stuffed peppers, vegetarian, spooky food, fall recipes
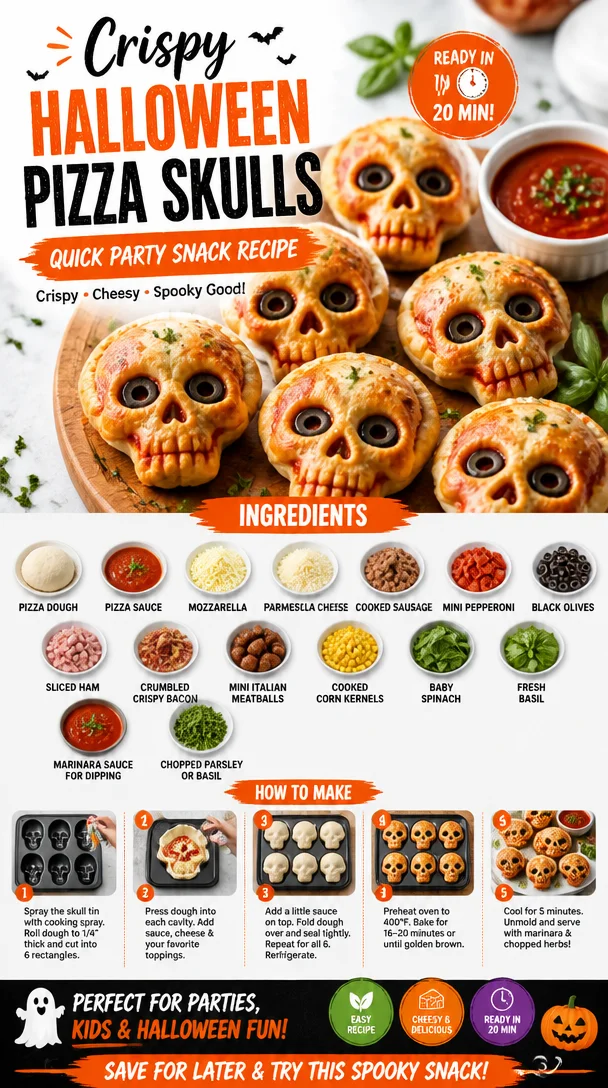
Crispy Halloween Pizza Skulls: Quick Party Snack Recipe
Cheesy Halloween Pizza Skulls: A Spooktacular Treat
As the leaves change and the air turns crisp, we enter my absolute favorite time of year: Halloween season! It’s the time when we can bring a little magic into our kitchens, create some deliciously spooky treats, and feast with friends and family. Today, I’m sharing a recipe that’s not only a showstopper but also super fun to make—Cheesy Halloween Pizza Skulls! Picture this: enchanting pepperoni and ooey-gooey cheese tucked inside edible skulls made from pizza dough—perfect for your Halloween bash or a cozy movie night at home. Add in some gutsy extras like chopped ham, crispy bacon, and vibrant spinach, and you’ve got a dish that’s delightfully creepy yet irresistibly delicious.
Now, not only are these pizza skulls eye-catching, but they’re also a nostalgic nod to the pizza-filled parties of my childhood. I remember gathering around the kitchen table with friends, laughing and crafting our own culinary creations. We’d pile on the toppings and challenge each other to create the most outrageous pizza. Those joyous times sparked my love for cooking, and now, every Halloween, I strive to recreate that magic—this time with a spooky twist!
So grab your favorite apron, heat that oven, and let’s dive into this spirited recipe that will make your Halloween celebrations just a bit more exciting.
Personal Story
One of my fondest memories of Halloween was when I was about ten years old. My best friend Maya and I decided we wanted to have a Halloween pizza party, and so we invited all of our friends over. We made a giant pizza that barely fit in the oven and covered it in every topping we could find—pepperoni, olives, you name it! We even added bizarre ingredients like jelly beans and gummy worms for fun. There was laughter (and a few disgusted faces) as we all took our first bites. The joy and chaos of that evening have stayed with me through the years, solidifying my love for creative cooking in the kitchen.
Fast forward to today, and while my taste has gotten a bit more refined, I still love the idea of bringing fun and creativity to my recipes. These Cheesy Halloween Pizza Skulls are the perfect blend of nostalgic fun and delicious flavors. I can already hear the giggles of children and the cheers from friends, just like those nights of my youth!
Ingredients
For creating these Cheesy Halloween Pizza Skulls, you’ll need the following ingredients:
-
13 to 16 ounces of pre-made pizza dough
- This is the backbone of our skull creations! You can find this at your local grocery store in the refrigerated section. If you’re feeling adventurous, feel free to make your own dough.
-
3/4 to 1 cup pizza sauce
- A generous helping of pizza sauce adds a burst of flavor inside the skulls. If you’re looking for something different, try using pesto or a spicy marinara sauce for a twist.
-
2 cups shredded mozzarella cheese
- The star of the show! Mozzarella gives that wonderful, stretchy gooeyness. You can substitute with a dairy-free cheese if you prefer.
-
1/4 cup grated Parmesan cheese
- Parmesan adds a nice salty, nutty flavor. If you’re avoiding dairy, nutritional yeast can be a great swap here!
-
8 ounces cooked sausage
- Sausage adds heartiness to your skulls. Feel free to use turkey sausage or a vegan sausage option.
-
6 ounces mini pepperoni
- These little bites are classic topping. You can substitute with turkey or plant-based pepperoni for a lighter option.
-
Black olives (sliced)
- These bring a nice briny flavor. If olives aren’t your thing, feel free to leave them out or swap with something else crunchy!
-
Sliced ham (chopped)
- A great addition for flavor! You could use turkey ham or completely swap this ingredient for shredded chicken if preferred.
-
Crumbled crispy bacon
- Because bacon makes everything better! Use turkey bacon for a healthier option or omit for a vegetarian version.
-
Mini Italian meatballs
- These add a fun touch and extra protein; plus, who can resist meatballs? You might also opt for plant-based meatballs instead.
-
Cooked corn kernels
- A sweet burst of flavor! If corn’s not your style, chopped bell peppers would add a similar sweetness.
-
Baby spinach
- A nutrient powerhouse that sneaks in greens! You can use kale or arugula for a different flavor profile.
-
Fresh basil
- This herb elevates the flavors—fresh is best, but dried basil will work in a pinch!
-
Marinara sauce for dipping
- A tangy dip that enhances the bite! You might also try ranch dressing for a fun twist.
-
Chopped parsley or basil
- Use for garnish to make your skulls even more festive—and it adds a fresh flavor boost!
Step-by-Step Instructions
Now that we have our ingredients ready, let’s get into the fun part: making those spooktacular pizza skulls!
Step 1: Preheat the Oven
Start by preheating your oven to 400°F (200°C). This is crucial for achieving that golden color and crispy crust. As the oven heats up, you’ll be getting your ingredients prepped.
Step 2: Roll Out Pizza Dough
On a floured surface, roll out your pizza dough to about 1/4 inch thick. It shouldn’t be too thin, or the skulls might tear. Use flour generously to avoid sticking! If you don’t have a rolling pin, a wine bottle works great in a pinch!
Step 3: Cut Shapes
Using a skull-shaped cookie cutter (or if you’re adventurous, a knife), cut out the skull shapes from the rolled-out dough. Place the cut-out dough on a baking sheet lined with parchment paper. The shapes don’t have to be perfect; they’re spooky, after all!
Step 4: Assemble the Filling
In a large bowl, combine your cooked sausage, mini pepperoni, black olives, ham, bacon, meatballs, corn, spinach, mozzarella cheese, and Parmesan. Give it a good mix—feel free to season with a pinch of salt, pepper, and crushed red pepper for an extra kick!
Step 5: Fill the Skulls
Spoon a generous amount of the filling onto half of the skull cutouts, leaving enough space around the edges to seal them. Make sure every skull has plenty of gooey goodness inside!
Step 6: Add the Sauce
Top the filling with a tablespoon of pizza sauce—this will keep your burger moist and flavorful. Don’t go overboard, or it may run out when cooking!
Step 7: Seal the Skulls
Take the remaining skull cutouts and place them over the filled ones. Press the edges together firmly, using a fork to crimp the edges decoratively. This step is crucial, as you want to keep all that goodness inside.
Step 8: Brush for Shine
For a gorgeous golden finish, brush the tops of the sealed skulls with a little olive oil or melted butter. This will help them brown beautifully while baking.
Step 9: Bake
Pop those adorable skulls into the preheated oven for 15–20 minutes, or until they are golden brown and crispy. I like to keep an eye on them for the last few minutes to prevent over-browning!
Step 10: Serve and Dip
Once they’re out of the oven, let them cool for a few minutes before serving. Present them on a platter with a side of warm marinara sauce for dipping. Trust me, the gooey cheese and marinara combo will have everyone diving in!
Serving Suggestions
Plate your Cheesy Halloween Pizza Skulls on a festive platter surrounded by some fun Halloween props like mini pumpkins or spooky decorations. You can serve them with an array of dipping sauces—marinara, ranch, or even a spicy aioli if you’re feeling adventurous. These would also be perfect along with a simple green salad for a well-rounded feast!
Recipe Variations
Here are a few creative twists to make these skulls even more exciting:
-
Ghostly Veggie Skulls: Swap out meat for your favorite veggies—think mushrooms, bell peppers, and zucchini. A great option for a plant-based treat!
-
Spicy Scary Skulls: Add jalapeños or red pepper flakes to the filling for a spicy kick. Halloween doesn’t have to be all tricks; let’s add some treats!
-
Stuffed Pumpkin Skulls: Mix canned pumpkin puree into the filling along with spices like cinnamon and nutmeg for an autumnal twist.
-
Cheesy Garlic Skulls: Add minced garlic and herbs to the filling for a delightful burst of flavor that complements the cheese beautifully.
-
Breakfast Skulls: Stuff your pizza skulls with scrambled eggs, cheese, and cooked sausage or veggies for a fun brunch idea.
Chef’s Notes
Cooking these Cheesy Halloween Pizza Skulls has become an annual tradition in my home. I love inviting friends over to join in on the festivities, and we often turn it into a competition to see who can create the most creative or spooky skull! Over the years, I’ve found that the real beauty of this recipe lies in its versatility—you can customize the filling based on what’s left in the fridge, and you’ll always end up with a winner.
I also have a funny story about the first time I made these. I—completely oblivious—set the oven too high, and they ended up looking more like crispy little skulls than golden brown delights. My kids still refer to them as “burned zombies,” and now, it’s become a running joke in our house!
FAQs and Troubleshooting
Q: Can I use homemade pizza dough instead of pre-made?
Absolutely! If you have a favorite pizza dough recipe or want to make it from scratch, go for it. Just ensure it has enough time to rise before you start shaping your skulls.
Q: How do I store leftovers?
These skulls are best enjoyed fresh, but you can store any leftovers in an airtight container in the fridge for a couple of days. Reheat in the oven to keep them crispy!
Q: What if the dough keeps sticking?
If you find your dough sticking while rolling out or cutting shapes, add a little more flour to your surface and the dough. A lightly floured rolling pin helps, too!
Q: How do I make them gluten-free?
Simply swap the pre-made pizza dough with a gluten-free pizza dough option available at many grocery stores. You’ll still achieve that delightful texture!
Nutritional Info
Note: Nutritional information will vary based on specific ingredient brands and types used, as well as portion sizes. Consider using a nutritional calculator for accuracy if specific dietary needs exist.
So there you have it—Cheesy Halloween Pizza Skulls that bring joy, laughter, and a hint of spookiness to your kitchen! Whether it’s a festive gathering or a fun night in with family, these delicious treats will surely delight everyone who shares them. I can’t wait for you to give them a try! Happy Halloween and happy cooking!
PrintCheesy Halloween Pizza Skulls

Fun and spooky pizza skulls filled with cheese and various tasty toppings, perfect for Halloween parties!
- Prep Time: 30 minutes
- Cook Time: 20 minutes
- Total Time: 50 minutes
- Yield: 4 servings 1x
- Category: Appetizer
- Method: Baking
- Cuisine: American
- Diet: Vegetarian
Ingredients
- 13 to 16 ounces of pre-made pizza dough
- 3/4 to 1 cup pizza sauce
- 2 cups shredded mozzarella cheese
- 1/4 cup grated Parmesan cheese
- 8 ounces cooked sausage
- 6 ounces mini pepperoni
- Black olives (sliced)
- Sliced ham (chopped)
- Crumbled crispy bacon
- Mini Italian meatballs
- Cooked corn kernels
- Baby spinach
- Fresh basil
- Marinara sauce for dipping
- Chopped parsley or basil
Instructions
- Preheat the oven to 400°F (200°C).
- Roll out your pizza dough to about 1/4 inch thick.
- Cut out skull shapes using a cookie cutter.
- Combine sausage, pepperoni, olives, ham, bacon, meatballs, corn, spinach, mozzarella, and Parmesan in a bowl.
- Spoon the filling onto half of the skull cutouts.
- Top filling with a tablespoon of pizza sauce.
- Place remaining skull cutouts over the filled ones and press edges to seal.
- Brush the tops with olive oil or melted butter.
- Bake for 15-20 minutes until golden brown.
- Serve with a side of marinara sauce for dipping.
Notes
These skulls can be customized with different fillings, such as veggies or spicy ingredients for a twist.
Nutrition
- Serving Size: 2 skulls
- Calories: 400
- Sugar: 3g
- Sodium: 600mg
- Fat: 20g
- Saturated Fat: 8g
- Unsaturated Fat: 6g
- Trans Fat: 0g
- Carbohydrates: 35g
- Fiber: 2g
- Protein: 18g
- Cholesterol: 40mg
Keywords: Halloween, pizza, skulls, spooky food, party snacks
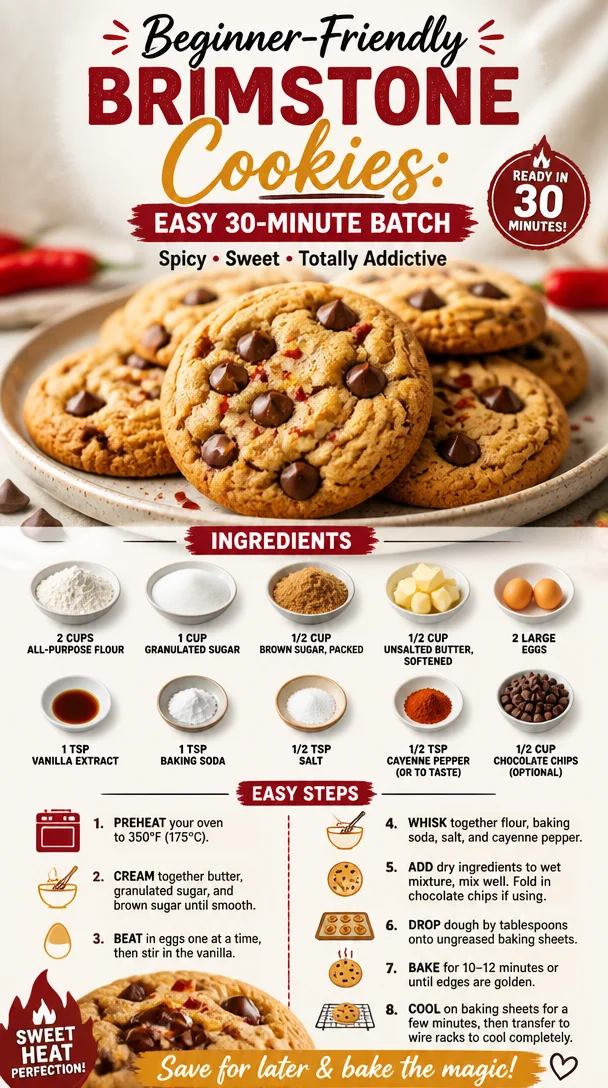
Beginner-Friendly Brimstone Cookies: Easy 30-Minute Batch
Brimstone Cookies: A Spicy Sweet Treat That Will Ignite Your Taste Buds
Welcome to Clean Plate Cravings, my foodie friends! Today, we’re diving into a cookie recipe that’s nothing short of magical—Brimstone Cookies! Now, you might be thinking, “What in the world makes a cookie brimstone?” Well, buckle up because I’m about to take your taste buds on a wild adventure that combines the warmth of sweet treats with a fiery twist that’ll leave you craving more!
Baking cookies is all about finding joy and a bit of nostalgia in the kitchen. Growing up, cookies were my ultimate comfort food. The aroma of warm cookies filling the house felt like a hug at the end of a long day. But, as I grew older and experimented with flavors, I realized that cookies could be so much more than just sugar and flour. So, what happens when you mix traditional cookie elements with a hint of heat? You get Brimstone Cookies—a unique blend that brings sweet and spicy together.
What inspired this fiery flavor? It was a cozy evening spent experimenting in my little kitchen while rewatching my favorite movie, "Chocolat." The idea sparked when the protagonist introduced spicy chocolate as a way to evoke passion and excitement. On a whim, I tossed a sprinkle of cayenne pepper into my usual cookie dough recipe, and oh boy, the results were explosive in the best possible way! The sweetness of the sugar and chocolate chips playfully dances with the warm kick of cayenne, creating a balance that’s utterly irresistible.
Imagine biting into a warm cookie that’s crispy on the outside, soft and chewy on the inside, with a delightful hint of heat that activates your taste buds. These Brimstone Cookies aren’t just a treat; they’re an experience. Plus, they make for a perfect dessert for a dinner party where you want to impress guests or simply enjoy a fun baking day at home. So, let’s get down to business and see what you need to whip up this extraordinary batch!
Ingredients
Gathering the right ingredients is crucial for creating delicious cookies. Here’s what you’ll need:
-
2 cups all-purpose flour
A staple in any baking recipe! If you’re gluten-free, you can substitute with a 1:1 gluten-free flour blend, but note that it might affect the texture slightly. -
1 cup granulated sugar
This adds sweetness and helps in achieving that delightful texture. Want a coconut twist? Try coconut sugar for a subtle caramel flavor! -
1/2 cup brown sugar, packed
Brown sugar not only sweetens but also offers moisture and rich flavor. If you’re out, white sugar mixed with a bit of molasses can work as a good substitute. -
1/2 cup unsalted butter, softened
Make sure it’s at room temperature for easier mixing. You can swap for coconut oil or vegan butter to make these cookies dairy-free! -
2 large eggs
Eggs provide structure and moisture. If you’re vegan or allergic, try using flaxseed meal mixed with water as a substitute—1 tablespoon flaxseed meal + 2.5 tablespoons water equals 1 egg! -
1 tsp vanilla extract
A splash of vanilla amplifies the flavors. Pure vanilla extract is worth it—try to avoid imitation! -
1 tsp baking soda
Key for helping the cookies rise and achieving that perfect texture. Always check the expiration date! -
1/2 tsp salt
A pinch of salt elevates flavors. Sea salt or kosher salt works wonders as it brings out the sweet notes! -
1/2 tsp cayenne pepper (or to taste)
Here’s where the magic happens! Adjust the amount based on your spice tolerance. If you prefer, you can even try chili powder for a milder kick. -
1/2 cup chocolate chips (optional)
These little gems add a touch of sweetness along with the chocolatey goodness. Use dark, milk, or even white chocolate chips based on your preference!
Step-by-Step Instructions
Now that we’ve got all our ingredients lined up, let’s get baking!
-
Preheat Your Oven
Preheat your oven to 350°F (175°C). This is key to achieving that perfect golden-brown color. If you forget, don’t worry! Just give your oven an extra few minutes—exact timing can vary by appliance. -
Mix the Dry Ingredients
In a large bowl, whisk together the all-purpose flour, baking soda, salt, and cayenne pepper. This ensures the baking soda is well-distributed throughout the flour, giving your cookies an even rise. -
Cream the Butter and Sugars
In another bowl, use an electric mixer to cream together the softened unsalted butter, granulated sugar, and brown sugar until the mixture is light and fluffy—about 2-3 minutes. This step is crucial for achieving a light texture, so don’t rush it! -
Add Eggs and Vanilla
Beat in the eggs one at a time, making sure each is combined before adding the next. Then mix in the vanilla extract. This adds a depth of flavor to the batter. -
Combine Dry and Wet Ingredients
Gradually mix the dry ingredients into the wet, being careful not to overmix—mix just until everything is combined! A few floury bits are okay because they’ll blend in during baking. -
Fold in the Chocolate Chips
If you’re using chocolate chips, gently fold them in at this point to incorporate them evenly into the dough. This is where the real fun happens! -
Scoop and Bake
Use a cookie scoop or two spoons to drop dollops of dough onto a parchment-lined baking sheet, leaving enough space between them to allow for spreading. Bake for 10-12 minutes, or until the edges are golden brown. Pro tip: for a chewy texture, take them out when they look slightly undercooked—they’ll continue to firm up as they cool! -
Cool Down
Remove the cookies from the oven and let them rest on the baking sheet for about 5 minutes before transferring them to a cooling rack. This cooling time helps develop that perfect texture!
Serving Suggestions
These Brimstone Cookies can be enjoyed on their own, but for an extra special treat, pair them with a scoop of vanilla ice cream or a dollop of whipped cream drizzled with chocolate syrup. They also make for a fabulous gift, so consider packaging them up in a cute box tied with a ribbon for your friends or family!
Recipe Variations
Feeling adventurous? Here are a few fun twists you can try with your Brimstone Cookies:
-
Nuts About it!
Add 1/2 cup of chopped pecans or walnuts for crunch and extra flavor. -
Spicy Chocolate Chips
Swap your standard chocolate chips for spicy chocolate chips to turn up the heat even more! -
Citrus Zing
Grate a teaspoon of orange or lemon zest into the dough for a refreshing burst that complements the spice beautifully. -
Dried Fruit
Introduce dried cherries or cranberries for a hint of tartness that pairs beautifully with the sweet heat. -
Double Trouble
Do a half-and-half mix of white and dark chocolate chips for a decadent flavor explosion.
Chef’s Notes
Brimstone Cookies started as a simple experiment, but they quickly became a family favorite. I remember serving them at a holiday gathering, and the guests were both surprised and delighted by the unexpected kick in every bite. Many have even asked me to host a "cookie tasting" where everyone brings their own spicy cookie interpretation. These cookies have turned into a conversation starter, a memory-maker!
FAQs and Troubleshooting
Q: Why are my cookies spreading too much?
A: If your cookies are spreading too much, try chilling the dough for at least 30 minutes before baking. This helps solidify the butter and gives you thicker cookies.
Q: Can I make these cookies ahead of time?
A: Absolutely! You can prepare the dough in advance and refrigerate it for up to 3 days. Just make sure to bring it back to room temperature before baking.
Q: My cookies turned out too spicy. What can I do?
A: If the spice is overwhelming, serve them with whipped cream or a scoop of vanilla ice cream to balance it out. You can also reduce the cayenne pepper in future batches.
Q: How should I store these cookies?
A: Store cooled cookies in an airtight container at room temperature for up to a week. If you want to keep them fresh longer, freeze them in a single layer and transfer to a freezer bag for up to 3 months.
Now that you have all the details, it’s time to roll up your sleeves and embark on your cookie-baking adventure. The Brimstone Cookies are sure to become a unique staple in your baking repertoire—combining sweetness and spice that keeps things fun! So grab your apron, preheat that oven, and let’s get baking! Each bite is like a tiny celebration, and I can’t wait to hear how yours turn out. Enjoy every spicy, sweet moment!
PrintBrimstone Cookies

A unique cookie recipe that combines sweet and spicy flavors, featuring a hint of cayenne pepper for an irresistible kick.
- Prep Time: 15 minutes
- Cook Time: 12 minutes
- Total Time: 27 minutes
- Yield: 24 cookies 1x
- Category: Dessert
- Method: Baking
- Cuisine: American
- Diet: Vegetarian
Ingredients
- 2 cups all-purpose flour
- 1 cup granulated sugar
- 1/2 cup brown sugar, packed
- 1/2 cup unsalted butter, softened
- 2 large eggs
- 1 tsp vanilla extract
- 1 tsp baking soda
- 1/2 tsp salt
- 1/2 tsp cayenne pepper (or to taste)
- 1/2 cup chocolate chips (optional)
Instructions
- Preheat your oven to 350°F (175°C).
- Mix the dry ingredients in a bowl.
- Cream the butter and sugars until light and fluffy.
- Add the eggs and vanilla, mixing well.
- Combine dry and wet ingredients without overmixing.
- Fold in chocolate chips if using.
- Scoop dollops of dough onto a baking sheet.
- Bake for 10-12 minutes until golden brown.
- Cool on a rack for 5 minutes before serving.
Notes
Pair with vanilla ice cream for an extra treat. Adjust cayenne to suit your spice tolerance.
Nutrition
- Serving Size: 1 cookie
- Calories: 150
- Sugar: 10g
- Sodium: 150mg
- Fat: 6g
- Saturated Fat: 4g
- Unsaturated Fat: 2g
- Trans Fat: 0g
- Carbohydrates: 22g
- Fiber: 1g
- Protein: 2g
- Cholesterol: 25mg
Keywords: cookies, spicy cookies, dessert recipe, baking, sweet and spicy
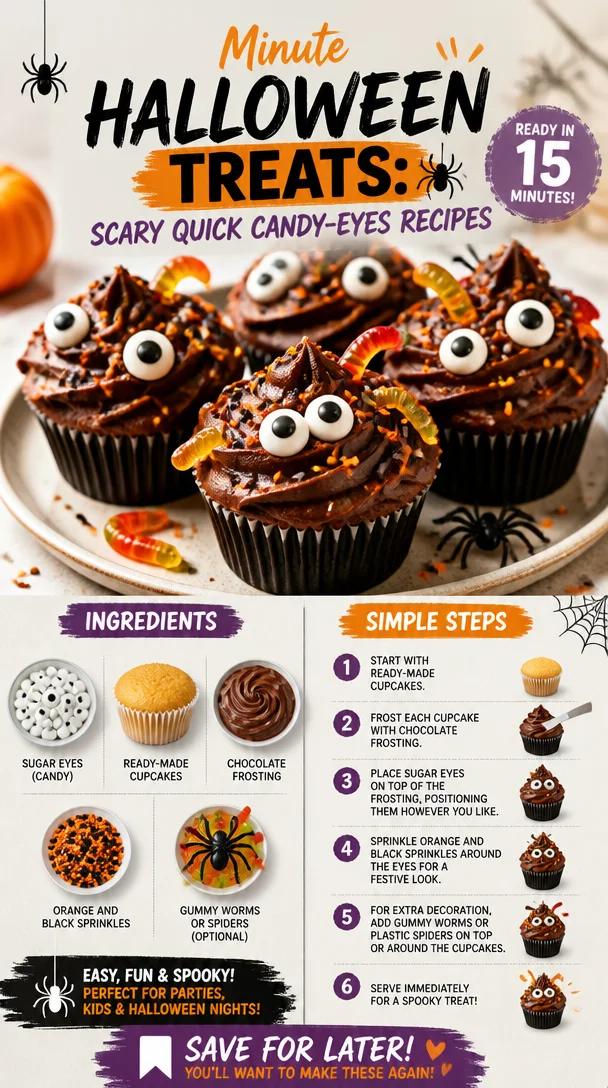
Minute Halloween Treats: Scary Quick Candy-Eyes Recipes
Scary Quick Halloween Recipes with Candy Eyes
Welcome, spooky snack enthusiasts! Halloween is just around the corner, and it’s the perfect time to whip up some frightfully fun treats that will delight your family, friends, and maybe even a few ghouls! With a bit of creativity and a pinch of Halloween spirit, you can create “Scary Quick Halloween Recipes” that are not only easy but also incredibly fun to make.
If you’re anything like me, the holiday season means your kitchen transforms into a fun zone. But let’s be real—sometimes life gets busy, and you need treats that are quick yet impressively spooky. That’s where our adorable creature cupcakes come in! Picture this: ready-made cupcakes adorned with chocolate frosting, candy eyes that stare back at you, and sprinkles that add a pop of festive color. You’ll have everyone screaming… with delight!
In this post, I’ll walk you through a super simple recipe that requires just a few ingredients and even less time. Whether you’re planning a Halloween party, looking for a fun activity with the kids, or just want to entice your co-workers with some whimsically decorated treats, I’ve got you covered. Let’s dive into the fun!
A Trip Down Memory Lane
I can’t help but reminisce about the Halloweens of my childhood. Clad in my favorite witch costume, my friends and I roamed the neighborhood, our candy bags overflowing with sweet treasures. When we returned, the real fun began: transforming everyday snacks into spooky delights. My mom would whip up cupcakes that we’d decorate with whatever we could find in the pantry. I remember the excitement of using those little candy eyes, making cupcakes look like they had faces! It was like a mini art project.
I’ll never forget one year when I added too many eyes to my cupcakes, giving them a delightfully creepy vibe. The kids loved them, and I didn’t want to stop at just cupcakes. That memory taught me that making treats is not just about food; it’s about creating joyful moments with loved ones. It’s this spirit that inspires me today, and I can’t wait to share this quick and easy Halloween recipe with you!
Ingredients
Here’s what you’ll need for these spooky cupcakes:
- Ready-made cupcakes: These are your canvas! Use vanilla, chocolate, or whatever flavor you love. Store-bought saves time, and you can focus on the fun decorations.
- Chocolate frosting: Rich, smooth, and a lovely base for our decorations. You can use store-bought or homemade. If you prefer lighter frosting, consider cream cheese frosting.
- Sugar eyes (candy): The spooky stars of the show! These come in different sizes and colors. If you can’t find candy eyes, use chocolate chips or even mini marshmallows with chocolate frosting for pupils!
- Orange and black sprinkles: These add the perfect pop of festive color. Feel free to mix this up with other colors based on your theme; buzzing bees could warrant yellow sprinkles!
- Gummy worms or spiders (optional): For an extra creepy factor, these are a fun addition. They can be added peeking out of the frosting or atop the cupcake for a chilling effect.
Step-by-Step Instructions
Now that you have your ingredients, let’s get baking (or rather, decorating)! Here’s a step-by-step guide that’ll make your cupcakes the talk of the town.
-
Prepare Your Workstation: Start by creating a clean and organized workspace. Lay out all your ingredients to ensure everything is within reach. Trust me, this will make the decorating process much smoother—no one likes a frantic search for sprinkles!
-
Frost Those Cupcakes: Grab your chocolate frosting and a knife or spatula. Scoop out a generous dollop of frosting and start spreading it over the top of your ready-made cupcakes. Don’t worry about perfection; a somewhat messy look adds to the charm! If you want fun shapes, you can use a piping bag with a large star tip—it’s like giving your cupcakes a delicious hairdo.
-
Add the Candy Eyes: Now comes the fun part! Gently press two candy eyes into the frosting on each cupcake. Position them in a way that brings your creations to life. You can put them close together for a googly-eyed monster effect or further apart for a wide-eyed look.
-
Sprinkle on Some Spookiness: Take your orange and black sprinkles and generously sprinkle them over the frosted cupcakes. Use a spoon or your fingers to scatter them—don’t hold back! The more, the merrier (and spookier!).
-
Add Gummy Worms or Spiders: If you’re feeling adventurous, grab your gummy worms or spiders and place them on top of your cupcakes. A worm hanging off the side gives a gross but adorable look—or you can have a spider crawling for that extra “scare” factor.
-
Voila!: Step back and admire your creepy creations! These adorable monsters not only look good—sharing them will make you the hit of the Halloween season.
Serving Suggestions
When it comes to presenting these fabulous cupcakes, keep it simple yet spooky! You can set them on a platter with a Halloween-themed cloth or even on a cake stand. For a more dramatic effect, display them on a webbed tablecloth with faux spiders scattered around. The excitement is in the details, so don’t skimp on the presentation!
Recipe Variations
Want to mix things up? Here are a few creative ideas for your Halloween cupcakes:
- Monster Madness: Instead of just frosting, add some colored buttercream to create colorful monster hair.
- Witch’s Brew: Use green-tinted icing for a witchy vibe and garnish with gummy frogs or witch hats.
- Pumpkin Patch: Switch to pumpkin-flavored cupcakes and use cream cheese frosting for a fall twist.
- Boozy Treats: Adults only! Consider adding a splash of flavored liqueur to your frosting for a delightful adult treat.
- Allergy-Friendly: Use gluten-free cupcakes and vegan frosting, ensuring those with dietary restrictions can enjoy your spooky creations!
Chef’s Notes
I’ll be honest; one of my favorite parts of cooking is the stories and memories that come along with it. These cupcakes have been a staple at my Halloween parties for years, and every year, I tweak them just a bit. One year, I experimented with ghostly white frosting and mini marshmallows, turning them into adorable ghosts—super cute!
Every time I make these cupcakes, I think of those childhood Halloweens, running door-to-door and laughing with friends, sharing every spooky treat. Cooking brings me joy and nostalgia, and I can only hope these treats will do the same for you.
FAQs and Troubleshooting
What if I can’t find candy eyes?
No problem! You can use chocolate chips, mini marshmallows, or even make your own using white icing and chocolate drops as pupils.
Can I make the cupcakes from scratch?
Absolutely! If you want to make your cupcakes from scratch, use your favorite recipe, just make sure to cool them fully before frosting.
How can I keep the cupcakes fresh?
Store them in an airtight container at room temperature for up to three days. If you need to keep them for longer, refrigerate, but be aware this might spoil the frosting’s texture.
What if the frosting is too soft?
If the frosting is too soft to hold its shape, try refrigerating it briefly to firm it up, or add a bit of powdered sugar to thicken it.
Nutritional Info
While the focus here is on fun and festivity, it’s worth noting that each cupcake provides a treat of indulgence, so perhaps consider moderation! Each frosted cupcake typically averages around 200-250 calories, depending on your ingredients.
And there you have it, folks! A guide to making Scary Quick Halloween Recipes with Candy Eyes that are sure to be a hit. Share them at your next gathering or enjoy them for a cozy night in. Happy Halloween and happy decorating! Remember, food should be fun, so enjoy every spooky bite!
PrintScary Quick Halloween Cupcakes
Whip up these frightfully fun cupcakes adorned with chocolate frosting and candy eyes for a spooky Halloween treat!
- Prep Time: 10 minutes
- Cook Time: 0 minutes
- Total Time: 10 minutes
- Yield: 12 servings
- Category: Dessert
- Method: No-Bake
- Cuisine: American
- Diet: Vegetarian
Ingredients
- Ready-made cupcakes (vanilla, chocolate, or your favorite flavor)
- Chocolate frosting
- Sugar eyes (candy)
- Orange and black sprinkles
- Gummy worms or spiders (optional)
Instructions
- Prepare your workstation: Start by creating a clean and organized workspace.
- Frost those cupcakes: Grab your chocolate frosting and spread it over the top of your cupcakes.
- Add the candy eyes: Gently press two candy eyes into the frosting on each cupcake.
- Sprinkle on some spookiness: Generously sprinkle orange and black sprinkles over the frosted cupcakes.
- Add gummy worms or spiders: Place them on top of your cupcakes for extra creepiness.
- Voila!: Step back and admire your creepy creations!
Notes
For festive presentation, place cupcakes on a Halloween-themed cloth or a cake stand.
Nutrition
- Serving Size: 1 cupcake
- Calories: 225
- Sugar: 20g
- Sodium: 150mg
- Fat: 10g
- Saturated Fat: 4g
- Unsaturated Fat: 5g
- Trans Fat: 0g
- Carbohydrates: 30g
- Fiber: 1g
- Protein: 2g
- Cholesterol: 20mg
Keywords: Halloween cupcakes, spooky treats, easy Halloween recipes, festive desserts, kid-friendly recipes
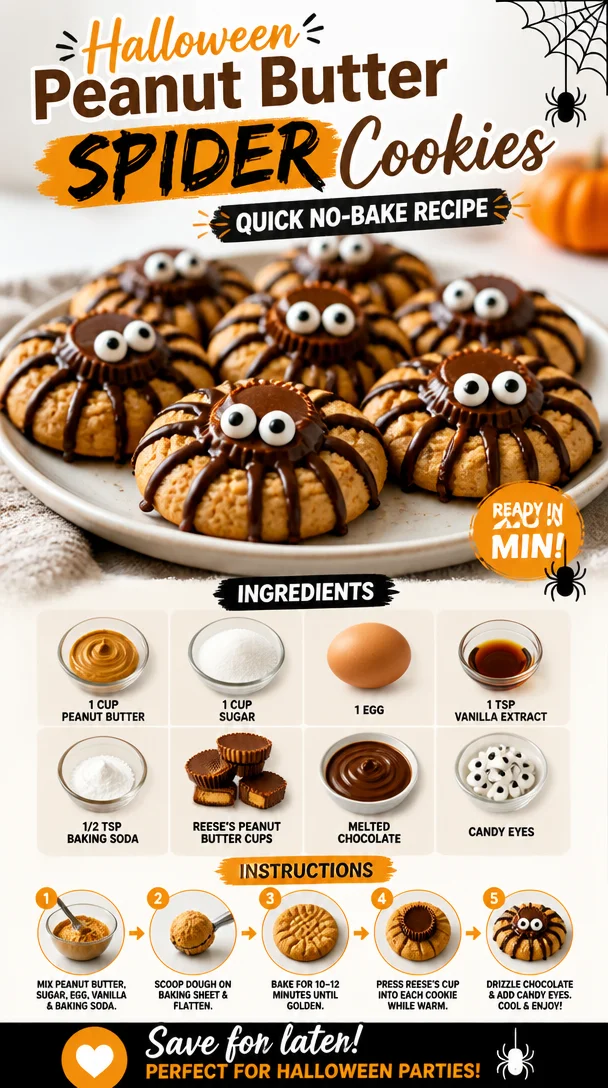
Halloween Peanut Butter Spider Cookies: Quick No-Bake Recipe
Peanut Butter Spider Cookies: A Fun Treat for All Ages
Welcome to the world of Peanut Butter Spider Cookies, where the joy of baking meets the playful side of culinary creativity! If you’re looking for a delightful treat that combines comfort and a dash of whimsy, you’ve landed in the right place. These cookies not only satisfy your sweet tooth but also bring that nostalgic childhood excitement back, making them perfect for parties, Halloween, or simply a fun baking session at home.
Now, as much as I adore gourmet meals, there’s something particularly magical about playful desserts that capture the imagination. Peanut Butter Spider Cookies are quick, easy, and come alive with character—literally! They’re the ultimate sweet treat for kids and adults alike, perfect for those moments when you need a little extra cheer. And trust me, the blend of rich peanut butter and sugary goodness is a flavor combination worth reaching for.
A Sweet Slice of Nostalgia
As a child, I remember my grandmother’s kitchen being an enchantingly warm place filled with the aroma of baked goods. Every Halloween, she would host a “spooky treats” party for the neighborhood kids, where we would don our costumes and help decorate cookies, cupcakes, and all manner of delectable goodies. One year, my job was to make spider cookies. I can still picture the fun of sticking candy eyes onto the cookies and drizzling them with warm chocolate, creating our own unique little monsters.
Those moments in the kitchen instilled a love for cooking that continues to this day. Each bite of these delectable Peanut Butter Spider Cookies reminds me of family bonding, laughter, and a carefree spirit. They brought a smile to kids’ faces, and now it’s your turn to create those joyful memories in your kitchen!
Ingredients
Here’s what you need to get started on making your own batch of Peanut Butter Spider Cookies:
-
1 cup peanut butter
This is the star of the show! Go for creamy peanut butter for a smooth texture, or chunky if you want a little nutty crunch. If you want a healthy alternative, almond or cashew butter makes a great swap. -
1 cup sugar
Regular granulated sugar gives these cookies their characteristic sweetness. If you want to experiment, you can substitute half of it with brown sugar for added richness. -
1 egg
This binds everything together, making your cookies soft and chewy. If you’re looking for an egg-free version, mashed banana or unsweetened applesauce can do the trick! -
1 tsp vanilla extract
A splash of vanilla elevates the flavor. If you’re out of vanilla, a dash of almond extract could add an interesting twist. -
1/2 tsp baking soda
This is the leavening agent that helps the cookies puff up a bit. If you’re out of baking soda, baking powder can be used but use twice the amount (1 tsp). -
Reese’s peanut butter cups (for topping)
These not only add a burst of flavor but also serve as the spider’s body! If you prefer, mini chocolate bars or other chocolate candies work just as well. -
Melted chocolate (for drizzling)
Dark or milk chocolate makes a rich drizzle for added decadence. White chocolate can be used too for a fun contrast. -
Candy eyes (for decoration)
The finishing touch for your spider cookies! Edible googly eyes can be found at most baking supply stores, or you can make your own with white chocolate and mini chocolate chips.
Step-by-Step Instructions
Now that we’ve gathered our ingredients, let’s get cooking! Here’s how to whip up your very own Peanut Butter Spider Cookies:
-
Prep Your Oven and Baking Sheets
Preheat your oven to 350°F (175°C). Line a baking sheet with parchment paper to ensure easy cleanup and prevent sticking. This step is key—working with non-stick surfaces makes everything more enjoyable! -
Mix Your Peanut Butter and Sugar
In a large mixing bowl, combine the peanut butter and sugar. Using an electric mixer or a sturdy whisk, beat them together until it’s creamy and well blended. You want it to have a smooth, spreadable consistency. If it feels too thick, a splash of almond milk can help loosen it up. -
Add the Egg and Vanilla
Crack the egg into your peanut butter-sugar mixture, followed by the vanilla extract. Beat it again until everything is combined. You’ll see it become lighter and fluffier—this is what you want for a beautifully textured cookie! -
Incorporate Baking Soda
Sprinkle in the baking soda. Give the dough a good stir until evenly mixed. If you see any lumps, don’t worry; it’ll all come together once you form the cookies. -
Scoop the Dough
Using a tablespoon or a cookie scoop, drop balls of dough onto your lined baking sheet, spacing them about 2 inches apart. If you want perfectly round cookies, roll the dough between your palms first—this is where the magic begins! -
Bake to Perfection
Pop them in the oven for about 10-12 minutes, or until they’re slightly golden around the edges. Keep a close eye on them because every oven is a bit different. -
Topping with Candy
Once baked, take the cookies out and immediately press a Reese’s peanut butter cup into the center of each cookie. Let them cool on the baking sheet for another 5 minutes—this will help the peanut butter cups stick beautifully! -
Drizzle with Chocolate
While your cookies are cooling, melt some chocolate in the microwave (or over a double boiler for you purists!). Once melted, using a fork or a piping bag, drizzle the melted chocolate over the cookies in a zig-zag pattern. -
Add Candy Eyes
While the chocolate is still warm, gently press the candy eyes into the chocolate drizzle—voila! Your spiders are coming to life! -
Cool Completely
Transfer the cookies to a wire rack to cool completely. This will set the chocolate and make them easy to handle when it’s time to indulge.
Serving Suggestions
When you’re ready to serve your Peanut Butter Spider Cookies, arrange them on a platter with a bit of flair! You can add spider webs made from melted white chocolate or scatter some mini chocolate chips around for added cuteness. Perfect for Halloween parties or any playful gathering!
Recipe Variations
Get creative with your Peanut Butter Spider Cookies! Here are a few fun twists you can try:
-
Nut-Free Option: Use sunflower seed butter in place of peanut butter for a nut-free version that’s just as delicious.
-
Gluten-Free Version: Swap in a gluten-free flour blend alongside the peanut butter for a cookie that’s friendly for gluten-sensitive folks.
-
White Chocolate Drizzle: Use white chocolate for drizzling instead of dark or milk chocolate to create a striking contrast with the peanut butter.
-
Chunky Add-Ins: Fold in mini chocolate chips or butterscotch chips into the dough for an extra treat in every bite!
-
Seasonal Spooks: Decorate with seasonal candies, like candy corn or pumpkin shapes for fall festivities.
Chef’s Notes
Every time I make these Peanut Butter Spider Cookies, I’m reminded of my grandmother’s warmth and how cooking can turn a simple gathering into something truly special. Over the years, I’ve modified this recipe to include some fun twists—like incorporating crushed pretzels for that salty-sweet balance! These cookies are also a fantastic way to get kids involved in the kitchen. Getting their hands sticky and creating their own cookie masterpieces is part of the fun!
FAQs and Troubleshooting
1. Why are my cookies too crumbly?
If your cookies are crumbling apart, there may not have been enough binding agent—check if you added the egg. Or you can always add a bit more peanut butter to the mix!
2. My cookies spread too much. What went wrong?
Cookies can spread a lot if the dough is too warm. If you’re in a warm climate, try chilling the dough in the fridge for 30 minutes before scooping.
3. Can I make the dough ahead of time?
Absolutely! You can make the dough, roll it into balls, and freeze them. Just bake from frozen, adding a couple of extra minutes to the baking time.
4. How do I store leftover cookies?
Store your Peanut Butter Spider Cookies in an airtight container at room temperature for up to a week, or refrigerate for longer freshness. They may lose a bit of their ‘spidey charm in the fridge but will still taste incredible!
Nutritional Info (Optional)
While the nutritional breakdown can vary, approximately one cookie (without alteration to the toppings) comes in around 150 calories, 7g fat, 21g carbs, and 4g protein. The richness of the peanut butter provides a satisfying energy boost, perfect for active days.
And there you have it—Peanut Butter Spider Cookies that are sure to enchant and delight anyone who takes a bite! Whether you’re baking with kids or treating yourself to a sweet moment, these cookies are a wonderful way to sprinkle a little magic into your life. So tie on that apron, gather your ingredients, and let’s make some fluttering, fun, and utterly delicious memories together!
PrintPeanut Butter Spider Cookies
A fun treat perfect for parties, Halloween, or simply a whimsical baking session at home.
- Prep Time: 15 minutes
- Cook Time: 12 minutes
- Total Time: 27 minutes
- Yield: 24 cookies 1x
- Category: Dessert
- Method: Baking
- Cuisine: American
- Diet: Vegetarian
Ingredients
- 1 cup creamy peanut butter
- 1 cup granulated sugar
- 1 egg
- 1 tsp vanilla extract
- 1/2 tsp baking soda
- Reese’s peanut butter cups (for topping)
- Melted chocolate (for drizzling)
- Candy eyes (for decoration)
Instructions
- Preheat your oven to 350°F (175°C) and line a baking sheet with parchment paper.
- Mix the peanut butter and sugar in a large mixing bowl until creamy and well blended.
- Add the egg and vanilla extract, mixing until combined.
- Incorporate the baking soda, stirring until evenly mixed.
- Scoop tablespoon-sized balls of dough onto the prepared baking sheet, spacing them about 2 inches apart.
- Bake for 10-12 minutes, until slightly golden around the edges.
- Topping them with Reese’s peanut butter cups immediately after baking.
- Drizzle melted chocolate over the cookies.
- Add candy eyes while the chocolate is still warm.
- Cool cookies completely on a wire rack.
Notes
For crispy edges, bake a bit longer; for softer cookies, reduce baking time. Customize with seasonal candies for holidays.
Nutrition
- Serving Size: 1 cookie
- Calories: 150
- Sugar: 21g
- Sodium: 50mg
- Fat: 7g
- Saturated Fat: 2g
- Unsaturated Fat: 5g
- Trans Fat: 0g
- Carbohydrates: 21g
- Fiber: 1g
- Protein: 4g
- Cholesterol: 30mg
Keywords: cookies, peanut butter, dessert, Halloween, treats