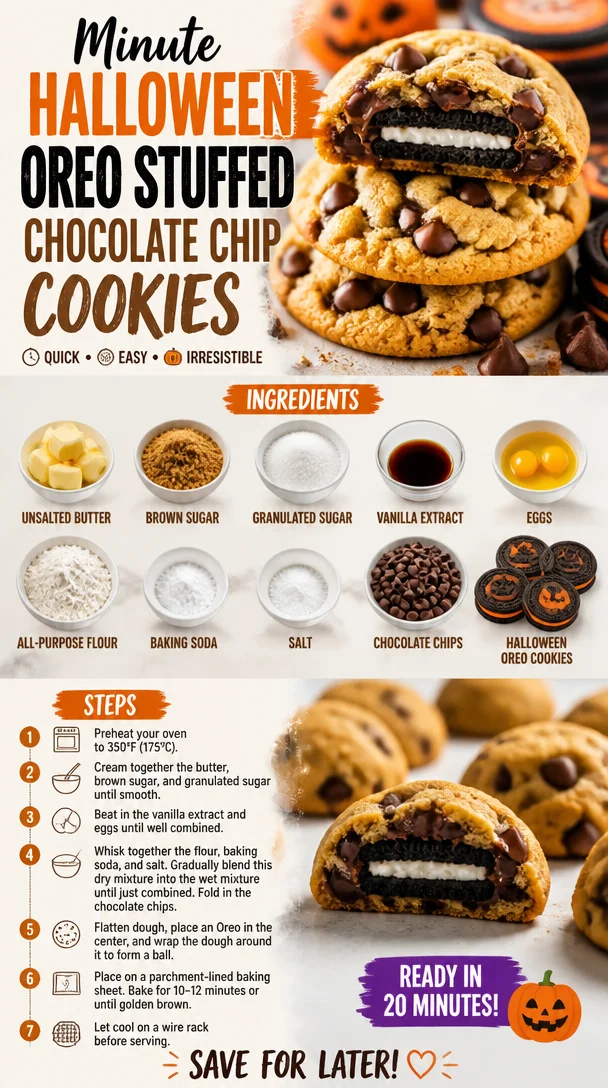
Minute Halloween Oreo Stuffed Chocolate Chip Cookies
Halloween Oreo Stuffed Chocolate Chip Cookies
Welcome to the spookiest time of the year—Halloween! It’s that magical season when the leaves crunch underfoot, pumpkin spice fills the air, and anything can be both adorable and eerie. As a food lover and self-proclaimed cookie aficionado, I think there’s no better way to celebrate than by baking something that combines the delightful flavors of chocolate and cookies. Enter Halloween Oreo Stuffed Chocolate Chip Cookies!
These cookies are a whimsical twist on the classic chocolate chip cookie, infused with the spirit of Halloween. Imagine biting into a soft, chewy chocolate chip cookie only to discover a surprise center of rich, creamy Oreo filling. It’s like an edible trick-or-treat! This fun recipe is perfect for kids, families, or anyone who wants to add a festive touch to their gatherings. Whether you’re throwing a Halloween party, looking to impress the little ghouls and goblins in your life, or simply craving something sweet, these cookies are guaranteed to bring a smile to your face and a dance in your step.
So grab your apron, a mixing bowl, and let’s conjure up a batch of these delicious treats together! Baking should be an enjoyable experience filled with laughter, spills, and a sprinkle of magic. So, let’s take a dive into the delicious world of Halloween Oreo Stuffed Chocolate Chip Cookies!
Personal Story
I still vividly remember the first time I made stuffed cookies. I was little Ava in a tiny kitchen, knee-high to the counter, standing on a stool, with flour dusting my cheeks like a magician’s cloak. My mom and I decided to experiment one rainy afternoon, and after a few tweaks and giggles, we created a version stuffed with peanut butter cups. The moment those warm cookies emerged from the oven, my heart raced as I pulled one apart to see the gooey surprise inside.
Fast forward to today, and I still channel that same excitement when I create sweet treats. Halloween has always been a favorite time of year for me, with all the imaginative costumes and spooky decorations. Transforming those nostalgic stuffed cookies into a Halloween special with Oreos felt like the perfect tribute to my childhood. Each bite brings back the warmth of those rainy afternoons, reminding me that cooking is not just about food; it’s about creating cherished memories. So, let’s bake these cookies and make some new ones!
Ingredients
Here’s what you’ll need to gather for our delightful Halloween Oreo Stuffed Chocolate Chip Cookies:
-
1 cup unsalted butter, softened
Tip: Make sure your butter is at room temperature. It should feel like a soft pillow! You can substitute with coconut oil for a dairy-free option, but your cookies might have a slight coconut flavor. -
3/4 cup brown sugar
Chef Insight: Brown sugar adds moisture and a deep, rich flavor to your cookies. You can use light or dark brown sugar—it’s up to your flavor preference! -
3/4 cup granulated sugar
Substitution: Feel free to swap in coconut sugar if you’re looking for a less refined sweet option. -
1 teaspoon vanilla extract
Insider Tip: Always opt for pure vanilla extract over imitation for a more nuanced flavor boost! -
2 large eggs
Helpful Hint: Ensure your eggs are at room temperature for better emulsification in your batter. You can substitute flaxseed eggs (1 tablespoon flaxseed meal mixed with 2.5 tablespoons water) for a vegan version. -
2 1/4 cups all-purpose flour
Tip: Spoon your flour into the measuring cup instead of scooping it directly; this prevents unnecessary packing. -
1 teaspoon baking soda
Insight: Baking soda acts as a leavening agent, making your cookies soft and chewy. -
1/2 teaspoon salt
Why It’s Important: Salt amplifies flavors, balancing the sweetness of your cookies beautifully. -
2 cups chocolate chips
Chef Note: Mix different types—dark, milk, and even white chocolate—for a fun flavor explosion. -
1 package Oreo cookies (Halloween-themed if available)
Fun Idea: Look for themed Oreos, like pumpkin or spooky designs, to make these cookies even more festive!
Step-by-Step Instructions
Now for the fun part! Here’s how to whip up these spooky cookies in your kitchen:
-
Preheat the Oven
Preheat your oven to 350°F (175°C). This step is key! A hot oven means your cookies bake evenly and rise beautifully. -
Cream the Butter and Sugars
In a large mixing bowl, combine the softened butter, brown sugar, and granulated sugar. Using an electric mixer, beat on medium speed until light and fluffy—about 2-3 minutes. This is when all that sugar goodness gets aerated, leading to the perfect texture! -
Add Vanilla and Eggs
Pour in the vanilla extract and add the eggs, one at a time, mixing well after each addition. You want those eggs thoroughly incorporated for a uniform batter. -
Mix Dry Ingredients
In another bowl, whisk together the all-purpose flour, baking soda, and salt. Gradually add these dry ingredients to the wet mixture, mixing just until combined. Avoid overmixing to keep your cookies soft and chewy! -
Fold in Chocolate Chips
With a spatula, gently fold in the chocolate chips. This is where you can get creative—feel free to add a splash of gluten-free chocolate chips for a gluten-free twist! -
Prepare Oreo Stuffing
Grab your Oreo cookies. For each cookie, take a tablespoon of cookie dough, flatten it in your palm, place an Oreo in the center, and cover it with another tablespoon of dough. Make sure to seal the edges well, so no Oreo is peeking out. -
Bake Your Cookies
Line your baking sheets with parchment paper and space your stuffed cookies about 2 inches apart. Bake in your preheated oven for 10-12 minutes, or until golden brown. They’ll look puffy but will sink slightly as they cool. -
Cool Down (If You Can Wait!)
Let your cookies cool on the baking sheet for 5 minutes, then transfer them to a wire rack to cool completely (if you can resist the warm gooeyness for that long!).
Serving Suggestions
Once your cookies are perfectly baked, it’s time to serve! These Halloween Oreo Stuffed Chocolate Chip Cookies are delightful on their own, but pair them with a glass of cold milk or warm pumpkin spice latte for an extra cozy treat. Arrange them on a fun Halloween-themed platter and sprinkle some spooky confetti or edible glitter around them to really set the mood!
Recipe Variations
Looking to switch things up? Here are a few fun twists you can try with this recipe:
- Pumpkin Spice Twist: Add 1 teaspoon of pumpkin spice to the dry ingredients for a fall flavor boost.
- Nutty Delight: Chop up some nuts like walnuts or pecans to fold in with the chocolate chips for added crunch.
- M&M’s Surprise: Swap half the chocolate chips for Halloween-themed M&M’s for extra color and fun.
- Peanut Butter Cup Stuffing: Switch out the Oreos and stuff the cookies with mini peanut butter cups for a rich, nutty flavor.
Chef’s Notes
Ah, cookies—the ultimate comfort food! This Halloween Oreo Stuffed Chocolate Chip Cookie recipe has transformed over the years. I originally created it with plain Oreos, but it’s always been in my heart to evolve and have some themed fun. Rather than making them just for kids, I’ve served them at adult Halloween parties, where they’ve been a huge hit! I often have a bit of a cookie competition amongst friends to see who can make the craziest stuffed cookie, and this recipe has certainly earned its place as a favorite.
FAQs and Troubleshooting
-
My cookies spread too much; what happened?
This can happen if your butter was too warm or you didn’t chill the dough. For next time, try chilling the dough for 30 minutes before baking. -
How should I store the cookies?
Keep them in an airtight container at room temperature for up to a week. They can also be frozen for longer storage; just make sure to layer them with parchment paper. -
Can I make the dough ahead of time?
Absolutely! You can make the dough a day in advance; just store it in the fridge until you’re ready to bake. -
What if I don’t have chocolate chips?
You could substitute with chunks of your favorite chocolate bar, white chocolate chips, or even dried fruit for a different flavor profile!
Nutritional Info
While indulging in these delights, you might want to keep an eye on the nutritional aspect. Each cookie is rich and satisfying, so enjoy them in moderation!
Calories: Approx. 200 per cookie (may vary)
Total Fat: 10g
Saturated Fat: 6g
Cholesterol: 30mg
Carbohydrates: 26g
Sugars: 15g
Protein: 2g
So, there you have it! A delightful journey into the world of Halloween Oreo Stuffed Chocolate Chip Cookies. With these delightful treats, you’re not just baking; you’re creating joy and magic right from your kitchen. Share them with your friends and family, and, most importantly, enjoy every gooey bite. Happy Halloween, and may your cookie adventures be as sweet as the treats you create!
PrintHalloween Oreo Stuffed Chocolate Chip Cookies

A whimsical twist on the classic chocolate chip cookie, featuring a surprise center of rich, creamy Oreo filling—perfect for Halloween celebrations!
- Prep Time: 15 minutes
- Cook Time: 12 minutes
- Total Time: 27 minutes
- Yield: 24 cookies 1x
- Category: Dessert
- Method: Baking
- Cuisine: American
- Diet: Vegetarian
Ingredients
- 1 cup unsalted butter, softened
- 3/4 cup brown sugar
- 3/4 cup granulated sugar
- 1 teaspoon vanilla extract
- 2 large eggs
- 2 1/4 cups all-purpose flour
- 1 teaspoon baking soda
- 1/2 teaspoon salt
- 2 cups chocolate chips
- 1 package Oreo cookies (Halloween-themed if available)
Instructions
- Preheat your oven to 350°F (175°C).
- Cream the softened butter, brown sugar, and granulated sugar in a large mixing bowl until light and fluffy—about 2-3 minutes.
- Add the vanilla extract and eggs, one at a time, mixing well after each addition.
- Mix together the all-purpose flour, baking soda, and salt in another bowl. Gradually add these dry ingredients to the wet mixture, mixing just until combined.
- Fold in the chocolate chips gently.
- Prepare each Oreo by taking a tablespoon of cookie dough, flattening it, placing an Oreo in the center, and covering it with another tablespoon of dough. Seal the edges well.
- Bake the stuffed cookies on parchment-lined baking sheets for 10-12 minutes, until golden brown.
- Cool on the baking sheet for 5 minutes before transferring to a wire rack.
Notes
These cookies pair perfectly with a glass of milk or warm pumpkin spice latte. For variations, try adding pumpkin spice, nuts, or even peanut butter cups as stuffing!
Nutrition
- Serving Size: 1 cookie
- Calories: 200
- Sugar: 15g
- Sodium: 200mg
- Fat: 10g
- Saturated Fat: 6g
- Unsaturated Fat: 2g
- Trans Fat: 0g
- Carbohydrates: 26g
- Fiber: 1g
- Protein: 2g
- Cholesterol: 30mg
Keywords: Halloween cookies, stuffed cookies, chocolate chip cookies, Oreo cookies
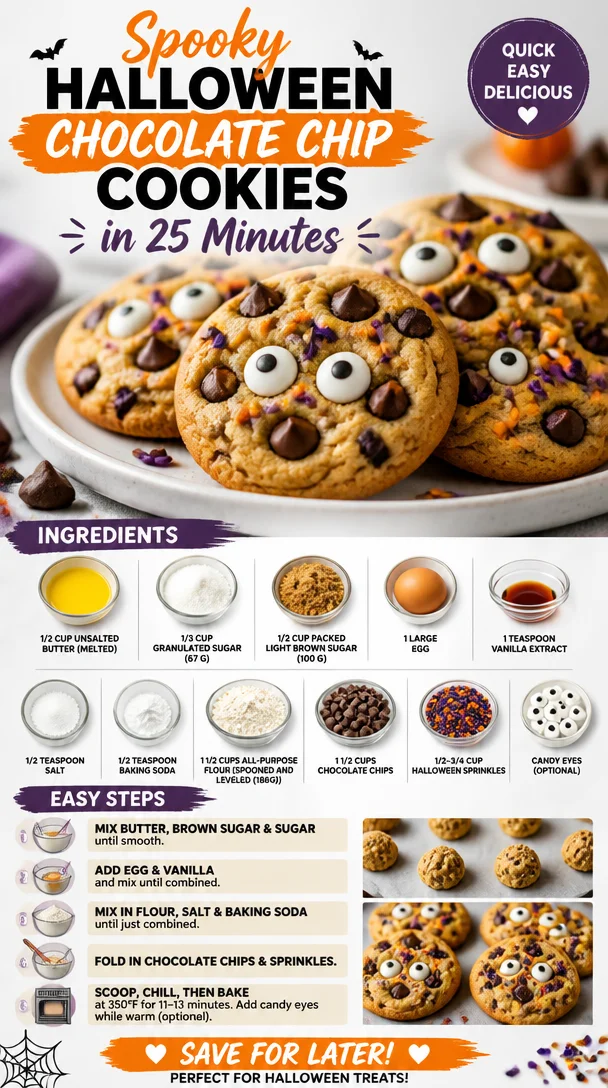
Spooky Halloween Chocolate Chip Cookies in 25 Minutes
Halloween Chocolate Chip Cookies: A Spooktacular Treat!
Hey there, fellow food lovers! As Halloween approaches, it’s time to summon that playful spirit and whip up something wickedly delicious in the kitchen. What could be more fun than baking a batch of Halloween Chocolate Chip Cookies? These cookies are not just any ordinary sweets; they’re bursting with chocolatey goodness, festooned with festive sprinkles, and ready to delight your ghoulish gathering or cozy movie night.
Imagine the sweet, warm aroma wafting through your kitchen as you mix up a simple dough that transforms into little bites of joy. Halloween should be all about having fun and indulging in treats that make your taste buds dance with delight. So, roll up your sleeves, grab your favorite mixing bowl, and let’s get started on this hauntingly good recipe!
A Sweet Memory from My Childhood
One of my fondest childhood memories revolves around Halloween baking nights with my mom. Each year, we’d dive into the kitchen, flour dusting our faces, and mix up our favorite cookie dough. I remember the excitement of breaking out the festive cookie cutters—ghosts, pumpkins, and bats. We’d fill our home with giggles and laughter, and the best part? Sneaking dough when my mom wasn’t looking!
One year, she introduced chocolate chip cookies loaded with Halloween sprinkles, and it was love at first bite! The crunchy outside, gooey chocolate inside, and a pop of color from the sprinkles took our Halloween to the next level! Now, every time I bake these cookies, I’m reminded of those delightful evenings, the warmth of the kitchen, and that unmistakable smell of freshly baked cookies. It fills my heart and makes me so grateful to share this tradition with you all.
Ingredients
Before we jump into the mixing and baking dance, let’s gather our ingredients!
-
1/2 cup unsalted butter (melted): Adds richness and depth. If you don’t have unsalted, you can use salted butter but cut back on the added salt.
-
1/3 cup granulated sugar (67 g): Provides sweetness and helps with a lovely chewy texture. Feel free to swap with coconut sugar for a healthier alternative!
-
1/2 cup packed light brown sugar (100 g): Its molasses content deepens the flavor and keeps cookies soft. Dark brown sugar works too, adding a more robust flavor.
-
1 large egg: Brings everything together and aids in fluffiness. For a vegan option, you can substitute with a flax egg (1 tablespoon flaxseed meal + 2.5 tablespoons of water, let sit for a few minutes).
-
1 teaspoon vanilla extract: A touch adds warmth and enhances all the flavors. Try using almond extract for a twist!
-
1/2 teaspoon salt: To balance sweetness—don’t skip this! If you’re on a low-sodium diet, consider reducing the amount or using a salt substitute.
-
1/2 teaspoon baking soda: This is your leavening agent. Make sure it’s fresh for the best rise! If you only have baking powder, use it at a 1:1 ratio, but note the flavor might be a little different.
-
1 1/2 cups all-purpose flour (spooned and leveled for 186g): The base of our cookies. For a gluten-free option, use a 1:1 gluten-free flour blend.
-
1 1/2 cups chocolate chips: The star of the show! Use semi-sweet, dark, or even white chocolate for a different taste profile.
-
1/2-3/4 cup Halloween sprinkles: Adds a festive touch! Don’t have Halloween sprinkles? Mix regular sprinkles with a bit of orange or black food coloring for custom colors.
-
Candy eyes (optional): For a fun spooky effect! If you can’t find them, white chocolate chips work just as well for that ghostly touch!
Step-by-Step Instructions
Ready to get baking? Let’s dive into the steps of creating these delightful treats!
-
Preheat the Oven: The first step to cookie perfection is preheating your oven to 350°F (175°C). This ensures your cookies bake evenly and get that mouthwatering golden-brown color!
-
Mix the Wet Ingredients: In a large mixing bowl, combine the melted butter, granulated sugar, brown sugar, and vanilla extract. With a whisk or electric mixer, mix until smooth and creamy, about 2 minutes. This step is crucial; it helps dissolve the sugars fully for a silky dough.
-
Add the Egg: Crack in your egg. Mix well until it’s fully incorporated—this should take about 30 seconds. The egg acts as a binder and helps the cookies spread perfectly.
-
Combine the Dry Ingredients: In a separate bowl, whisk together the flour, baking soda, and salt. I recommend this method for better distribution of the baking soda and avoiding clumps.
-
Mix it All Together: Gradually add the dry ingredients to the wet mixture, stirring gently until just combined. Overmixing can lead to tough cookies, so be gentle—think of it as nurturing your dough!
-
Fold in the Chocolate Chips and Sprinkles: Next, fold in the chocolate chips and 1/2 to 3/4 cup of Halloween sprinkles. This is where the magic happens! You’ll see so much color and texture, instantly thrilling for Halloween.
-
Scoop the Dough: Using a cookie scoop or two tablespoons, drop rounded balls of dough onto a lined baking sheet, leaving space for them to spread.
-
Decorate with Extra Sprinkles: If you’re feeling festive (and why wouldn’t you?), sprinkle a few more Halloween sprinkles on top of each dough ball. You could even add candy eyes for a spooky touch!
-
Bake: Place the baking sheet in the preheated oven and bake for 10-12 minutes or until the edges are golden brown and the center looks slightly undercooked. Remember, cookies continue to bake on the baking sheet once removed from the oven.
-
Cool Down: Allow the cookies to cool on the rack for 5 minutes before transferring them to a wire rack to cool completely. This patience is key for mastering that chewy texture!
Serving Suggestions
Now that we’ve baked our delicious Halloween Chocolate Chip Cookies, let’s talk about serving. I like to arrange these cheerful cookies on a spooky-themed platter with some purple and orange napkins, maybe even decorate the edge with candy corn for that extra festive feel. If you’re feeling extra crafty, you can stack them and tie with a pretty ribbon. Serve them warm, accompanied by a glass of milk (or a fun Halloween-inspired beverage) for the ultimate treat experience!
Recipe Variations
Nothing spices up a classic recipe like a twist! Here are a few fun variations to inspire your Halloween cookies:
-
Pumpkin Spice Cookie: Mix in 1/2 teaspoon of pumpkin spice to the dry ingredients for that cozy fall flavor.
-
Nutty Surprise: Fold in chopped nuts like pecans or walnuts for that added crunch!
-
White Chocolate Delight: Swap the semi-sweet chocolate chips for white chocolate chips and add a dash of orange zest for a burst of brightness.
-
Oatmeal Halloween Cookies: Replace 1/2 cup of flour with 1/2 cup of rolled oats for a chewy texture.
-
Limitless Sprinkles: Mix and match your favorite seasonal sprinkles! Think ghosts, witches, and pumpkins—the more, the merrier!
Chef’s Notes
These cookies have evolved over time from a standard gooey chocolate chip to a fun Halloween favorite. I started adding festive sprinkles just to make them look cute, but soon it became a crucial part of the recipe. It’s incredible how just a few vibrant sprinkles can turn a classic into a celebration.
Also, every batch tells its own story—sometimes they’re perfectly puffy; other times, they flatten out a bit more, but they’re always delicious! If you ever face a batch that flattens, it can often be due to butter that’s too warm, so make sure it’s melted but cooled slightly before mixing with sugars.
FAQs and Troubleshooting
-
Why are my cookies flat?
- If your cookies spread too much, it could be that your butter was too warm or you didn’t measure your flour correctly. Use a spoon to lightly portion flour into your measuring cup, then level off—no scooping!
-
Can I freeze these cookies?
- Absolutely! You can freeze the dough before baking. Just scoop the dough and place the balls on a cookie sheet to freeze until firm, then transfer to a freezer bag. Bake directly from the freezer, adding a couple of extra minutes to the baking time.
-
What if I don’t have sprinkles?
- No worries! You could decorate with crushed candy, chocolate drizzles, or even add a dollop of frosting on top after the cookies cool down for a sweet finishing touch.
-
How can I keep cookies soft?
- To keep your cookies soft, store them in an airtight container with a slice of bread! The moisture from the bread keeps the cookies soft and fresh.
Nutritional Info
While I’m all about enjoying treats like these Halloween Chocolate Chip Cookies, it’s good to keep some balance in mind. Each cookie roughly contains approximately 150 calories, 7 grams of fat, 22 grams of carbohydrates, 1 gram of protein, and minimal dietary fiber. Remember that enjoyment is key!
There you have it—a hefty 2000+ word journey into the thrilling world of Halloween Chocolate Chip Cookies! With every bite, you’ll not only taste the joy of chocolate but also the thrill of creating a festive treat that fills your home with magic and delight. So what are you waiting for? Grab those ingredients and let’s bake some spooky deliciousness together! 🍪👻
PrintHalloween Chocolate Chip Cookies

A spooktacular treat for Halloween, these chocolate chip cookies are loaded with sweetness, festive sprinkles, and a deliciously gooey center.
- Prep Time: 15 minutes
- Cook Time: 12 minutes
- Total Time: 27 minutes
- Yield: 12 servings 1x
- Category: Dessert
- Method: Baking
- Cuisine: American
- Diet: Vegetarian
Ingredients
- 1/2 cup unsalted butter (melted)
- 1/3 cup granulated sugar (67 g)
- 1/2 cup packed light brown sugar (100 g)
- 1 large egg
- 1 teaspoon vanilla extract
- 1/2 teaspoon salt
- 1/2 teaspoon baking soda
- 1 1/2 cups all-purpose flour (spooned and leveled for 186g)
- 1 1/2 cups chocolate chips
- 1/2–3/4 cup Halloween sprinkles
- Candy eyes (optional)
Instructions
- Preheat the oven to 350°F (175°C).
- Mix the melted butter, granulated sugar, brown sugar, and vanilla extract until smooth and creamy.
- Add the egg and mix well until fully incorporated.
- Combine the flour, baking soda, and salt in a separate bowl.
- Mix the dry ingredients with the wet mixture until just combined.
- Fold in the chocolate chips and Halloween sprinkles.
- Scoop rounded balls of dough onto a lined baking sheet.
- Decorate with extra sprinkles and optional candy eyes.
- Bake for 10-12 minutes or until golden brown.
- Cool on a wire rack before serving.
Notes
These cookies can be frozen before baking. Store in an airtight container with a slice of bread to keep them soft.
Nutrition
- Serving Size: 1 cookie
- Calories: 150
- Sugar: 10g
- Sodium: 100mg
- Fat: 7g
- Saturated Fat: 4g
- Unsaturated Fat: 3g
- Trans Fat: 0g
- Carbohydrates: 22g
- Fiber: 1g
- Protein: 1g
- Cholesterol: 30mg
Keywords: Halloween, chocolate chip cookies, festive treats, dessert, baking
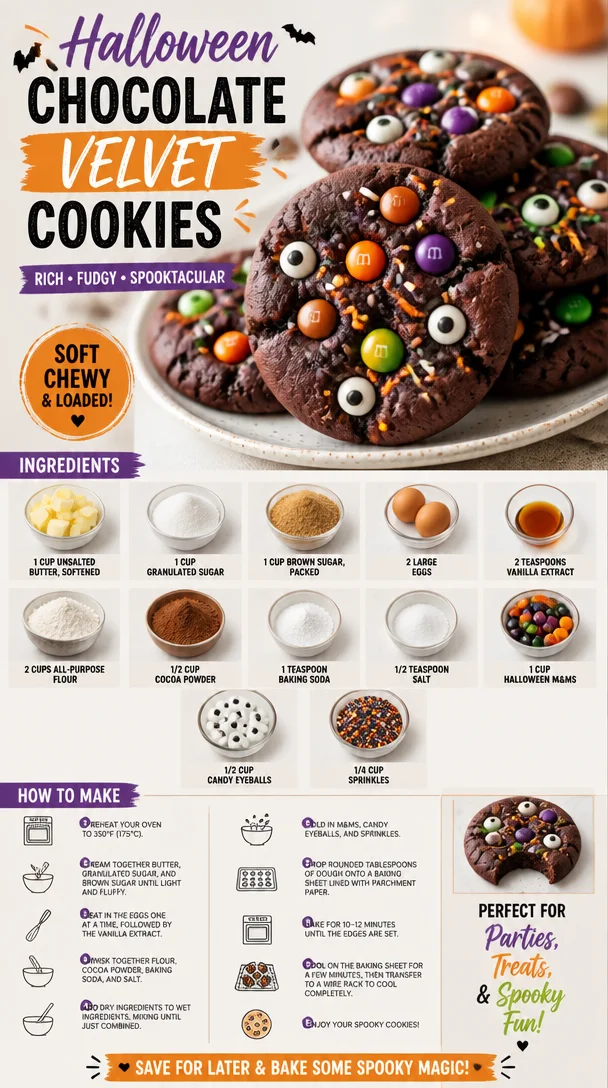
Halloween Chocolate Velvet Cookies
Halloween Chocolate Velvet Cookies: A Spooktacular Treat!
Welcome, my fellow foodies! It’s that time of year again when the leaves turn crisp, and the air is filled with the sweet scent of cocoa and cinnamon. As Halloween creeps around the corner, we’re all looking for ways to celebrate—a perfect time to whip up some delightful Halloween Chocolate Velvet Cookies! Trust me; these treats are not just delicious but also a fun way to get into the spooky spirit. Let’s dive in!
In my kitchen, Halloween isn’t just about costumes and candy; it’s about creating magical memories with food that dances on your taste buds. I remember a time when my best friend and I spent hours concocting Halloween treats, our faces covered in flour and our laughter filling the air. We would layer gooey molten chocolate in between ghost-shaped cookies while adorned with candy eyeballs to give our spooky snacks a little character. Fast forward a few years, and my love for those whimsical creations has only grown!
These Halloween Chocolate Velvet Cookies are a celebration of that spirit. They’re soft, chewy, and packed with rich chocolate flavor, perfect for making with friends or enjoying solo while cozied up on the couch with your favorite fall movie. Oh, and the best part? They’re loaded with colorful M&Ms and sprinkles that add that extra sprinkle of fun!
So grab your apron, and let’s create a batch of these enchanting cookies that will have everyone screaming for more!
Personal Story
I often recall the Halloween nights of my childhood, where our family kitchen transformed into a haunted bakery filled with festive scents. One year, I decided to team up with my little brother, who insisted on dressing as a vampire chef (which was quite the sight!). We spent the evening mixing batter and dodging powdered sugar clouds, all while bantering about the best way to decorate our cookies. It was during these innocent days that I realized a simple batch of cookies could evoke such joy, laughter, and connection.
From that moment on, every Halloween became a cherished tradition, filled with laughter and mouth-watering creations. Those memories kick-started my passion for baking, and now, we’re turning that nostalgia into pure magic with these delightful Halloween Chocolate Velvet Cookies.
Ingredients
Let’s get our spook on! Here’s what you’ll need for these delicious cookies:
-
1 cup unsalted butter, softened: You want your butter to be at room temperature for easy mixing. If you’re out of unsalted butter, salted butter is a suitable substitute—just reduce the salt in the recipe by half!
-
1 cup granulated sugar: This adds sweetness and helps achieve that perfect chewy texture. If you’re looking for a healthier alternative, coconut sugar can work, but it will give you a slightly different flavor.
-
1 cup brown sugar, packed: The moisture and slight caramel flavor from the brown sugar balances the rich cocoa. Feel free to use light brown sugar, but dark brown sugar adds even more depth.
-
2 large eggs: Eggs provide structure and moisture. If you’re vegan, a chia egg (1 tablespoon of chia seeds mixed with 2.5 tablespoons of water) is a great substitute!
-
2 teaspoons vanilla extract: This enhances the cookie’s flavor profile. Use pure vanilla extract for the best results.
-
2 cups all-purpose flour: Essential for structure, but whole wheat flour can also be used for a heartier texture—just consider reducing the amount slightly.
-
1/2 cup cocoa powder: The star ingredient! Use quality unsweetened cocoa for the richest flavor. You might swap this for Dutch-process cocoa for a deeper taste.
-
1 teaspoon baking soda: This is your leavening agent. If you’re out, you can substitute with baking powder using a 1:2 ratio (2 teaspoons of baking powder instead of 1 teaspoon of baking soda).
-
1/2 teaspoon salt: Salt balances sweetness and enhances flavors. If you’re using salted butter, you may want to skip this altogether!
-
1 cup Halloween M&Ms: These add color and fun! If you can’t find Halloween ones, go with regular M&Ms or even chocolate chips.
-
1/2 cup candy eyeballs: These are what make the cookies truly festive! You might use mini marshmallows if you want a softer option, but let’s be real—eyeballs are just way more fun!
-
1/4 cup sprinkles: Adds that extra festive touch to make your cookies pop. You could swap these out with themed sprinkles that match the season.
Step-by-Step Instructions
Let’s get down to the fun part—baking these beauties! Follow my trusty steps for cookie perfection, and don’t forget to channel your inner chef!
-
Preheat Your Oven: Preheat your oven to 350°F (175°C). This ensures that your cookies bake evenly. A tip from the kitchen: Don’t skip this step; a hot oven is crucial for achieving that perfect texture!
-
Mix the Sugars and Butter: In a large mixing bowl, cream together the softened butter, granulated sugar, and brown sugar until light and fluffy—around 3-4 minutes. This step incorporates air into the dough, creating a nice rise in your cookies. Pro tip: Make sure your butter is really soft; if it’s too hard, you won’t get that airy fluffiness.
-
Add the Eggs and Vanilla: Beat in the eggs one at a time, allowing each egg to fully incorporate before adding the next. Stir in the vanilla extract, and let the delicious aroma fill your kitchen. A little tip? Scrape down the sides of the bowl with a spatula; you don’t want any hidden chunks of butter!
-
Combine Dry Ingredients: In another bowl, whisk together the flour, cocoa powder, baking soda, and salt. This ensures that your dry ingredients are evenly distributed. And here’s a chef hack: Use a sifter for the cocoa powder to avoid clumps and achieve a silky-smooth texture!
-
Mix Wet and Dry: Gradually add the dry ingredient mixture to your butter mixture, mixing until just combined. Avoid over-mixing; we want tender cookies, not tough ones! Stop mixing as soon as you see no more flour streaks.
-
Fold in the Fun: Gently fold in the Halloween M&Ms, candy eyeballs, and sprinkles. This is where things get festive! Feel free to save a handful of M&Ms and sprinkles for topping when you place the cookies on the baking sheet.
-
Scoop and Drop: Using a tablespoon or cookie scoop, drop heaping tablespoons of dough onto a lined baking sheet. Leave about 2 inches of space between each ball as they will spread while baking. A fun tip: Use a spatula to shape them slightly for that perfect round look.
-
Bake: Pop them into your preheated oven and bake for 10-12 minutes until the edges are set but the center looks a bit soft. This is key for that chewy texture! Trust me; don’t overbake—your cookies will continue to cook a bit after you take them out.
-
Cool: Let them cool on the baking sheet for about 5 minutes before transferring to a wire rack to cool completely. This allows them to set while still warm so that they stay gooey on the inside.
-
Enjoy!: Once cooled, gather your friends, grab a cup of apple cider or a warm drink, and dig into these delightful Halloween Chocolate Velvet Cookies that everyone will rave about!
Serving Suggestions
To present your Halloween Chocolate Velvet Cookies, simply stack a few on a festive plate or tray, and don’t forget to sprinkle them with extra M&Ms and sprinkles for that spooky vibe! You can even set up a little cookie decorating station for guests to add their special touch—think extra sprinkles, melted chocolate drizzle, or even a dusting of powdered sugar for a ghostly effect!
Recipe Variations
Want to get even more creative? Here are some fun twists on the classic recipe:
-
Nutty Addition: Toss in 1/2 cup of chopped walnuts or pecans for a crunchy contrast to the soft cookie.
-
Mint-Chocolate: Swap out M&Ms for mint chocolate chips for a refreshing twist. Perfect for those who love chocolate mint combos!
-
Spooky Surprise: Add a mini marshmallow in the center of each dough ball before baking for a gooey surprise in every bite.
-
Chili Twist: For the adventurous, mix in a pinch of cayenne pepper or chili powder to the flour for a spicy, sweet kick!
-
Gluten-Free: Substitute the all-purpose flour with a 1:1 gluten-free baking flour to accommodate gluten-free diets. Watch the texture closely; you might need to adjust the baking time slightly!
Chef’s Notes
As with any good recipe, my Halloween Chocolate Velvet Cookies have seen some evolution over the years. Initially, everything I made was gigantic—you could say I went for the "monster cookie" idea, but they weren’t exactly enjoyable to eat in one sitting. With time, I found the joy of the perfect bite-sized cookie, and more importantly, I learned to enjoy sharing that experience with others.
Also, I can’t help but chuckle every time I bake these cookies; my cats always seem to think it’s hunting season when the oven buzzes, darting around my feet, hoping for a taste. Hiding some cookies on the counter always results in a game of fetch (with my cat not cooperating, of course) as they excitedly wait for those treats to cool.
Make these cookies your new Halloween tradition, and you won’t regret it!
FAQs and Troubleshooting
1. My cookies turned out flat. What did I do wrong?
This can happen for a couple of reasons! Make sure your butter wasn’t too melted (softened is key, not runny!). Also, check your baking soda—if it’s expired, it won’t provide the lift you need.
2. How do I store these cookies?
To keep them fresh, store in an airtight container at room temperature for up to a week. If you want them to last longer, freeze them! Just ensure they’re well-wrapped.
3. Can I make the dough ahead of time?
Absolutely! You can roll the dough into balls and freeze them for up to three months. Just bake them directly from the freezer, adding a minute or two to the bake time.
4. Can I skip the candy eyeballs?
Of course! While the eyeballs are super fun, you can either leave them out or replace them with any fun candy of your choice. The cookies will still be delicious!
Nutritional Info
We all know that indulging in a cookie deserves a little reflection on balance! A typical cookie (when made into about 24 cookies) contains approximately:
- Calories: 150
- Fat: 7g
- Carbohydrates: 21g
- Protein: 2g
- Fiber: 1g
Remember, treats are part of life, so enjoy these cookies in good company, guilt-free!
So there you have it, lovely foodies! Get ready to hit the kitchen and create some delightful Halloween Chocolate Velvet Cookies that will fill your home with the best aromas and fun memories. Happy Halloween baking!
PrintHalloween Chocolate Velvet Cookies

Deliciously soft and chewy Halloween Chocolate Velvet Cookies packed with rich chocolate flavor, colorful M&Ms, and fun candy eyeballs.
- Prep Time: 15 minutes
- Cook Time: 12 minutes
- Total Time: 27 minutes
- Yield: 24 servings 1x
- Category: Dessert
- Method: Baking
- Cuisine: American
- Diet: Vegetarian
Ingredients
- 1 cup unsalted butter, softened
- 1 cup granulated sugar
- 1 cup brown sugar, packed
- 2 large eggs
- 2 teaspoons vanilla extract
- 2 cups all-purpose flour
- 1/2 cup cocoa powder
- 1 teaspoon baking soda
- 1/2 teaspoon salt
- 1 cup Halloween M&Ms
- 1/2 cup candy eyeballs
- 1/4 cup sprinkles
Instructions
- Preheat your oven to 350°F (175°C).
- Mix together the softened butter, granulated sugar, and brown sugar until light and fluffy.
- Add the eggs one at a time, then stir in the vanilla extract.
- Combine the flour, cocoa powder, baking soda, and salt in another bowl.
- Mix the dry ingredients into the wet mixture until just combined.
- Fold in the M&Ms, candy eyeballs, and sprinkles gently.
- Scoop heaping tablespoons of dough onto a lined baking sheet.
- Bake for 10-12 minutes until the edges are set.
- Cool on the baking sheet for 5 minutes before transferring to a wire rack.
- Enjoy your festive cookies!
Notes
Store cookies in an airtight container at room temperature for up to a week. Freeze dough for up to three months for future baking.
Nutrition
- Serving Size: 1 cookie
- Calories: 150
- Sugar: 10g
- Sodium: 120mg
- Fat: 7g
- Saturated Fat: 4g
- Unsaturated Fat: 2g
- Trans Fat: 0g
- Carbohydrates: 21g
- Fiber: 1g
- Protein: 2g
- Cholesterol: 30mg
Keywords: Halloween cookies, chocolate cookies, dessert recipes
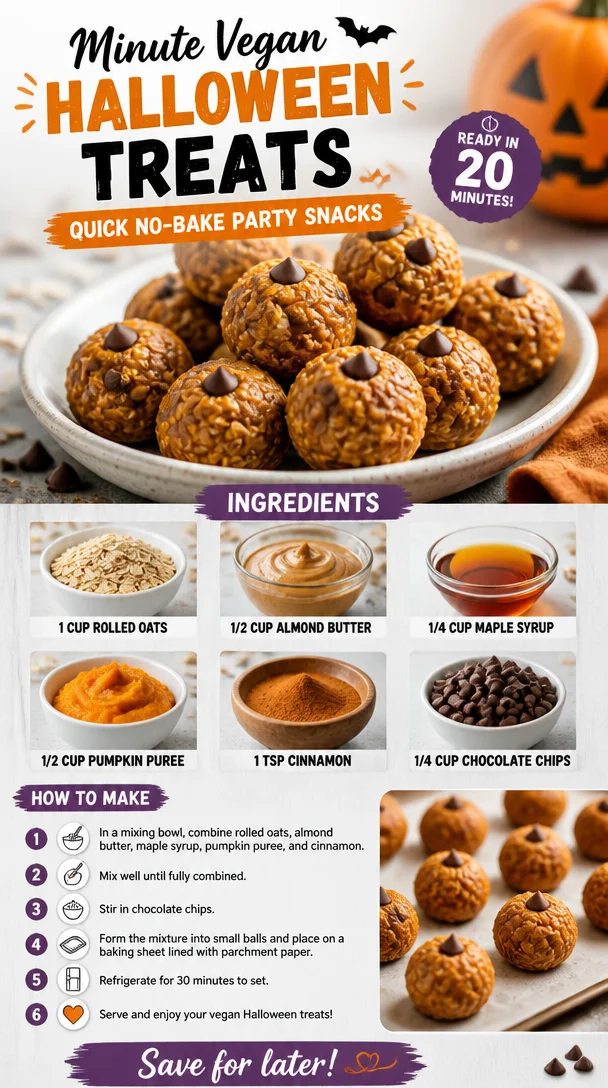
Minute Vegan Halloween Treats: Quick No-Bake Party Snacks
Spooktacular Vegan Halloween Treats: Your Go-To Recipe for Ghoulish Goodness
It’s that time of year again! The leaves are changing colors, the air is crisp, and a magical sense of mischief looms in the atmosphere. As Halloween approaches, our hearts—and stomachs—begin to yearn for delightful treats that bring us back to our childhood. I’m sure you can recall those carefree autumn days filled with pumpkin patches, spirited costume parties, and, of course, sweet indulgences. But what if I told you that delicious treats doesn’t have to mean sacrificing your health or your values? Whether you’re a die-hard vegan or just someone who loves tasty snacks, I’ve got a spooktacular recipe that’ll knock your socks off!
Welcome to Clean Plate Cravings, where fresh, feel-good food meets real life—even on Halloween! Today, we’re whipping up some delectable Vegan Pumpkin Oat Bites that are perfect for your Halloween festivities. These treats are not only easy to make but also pack a punch of flavor that everyone will adore. Plus, they’re made with wholesome ingredients like rolled oats, almond butter, and pumpkin puree, ensuring that your sweet tooth doesn’t get out of hand. So, grab your mixing bowl and let’s get started on this baking adventure that’s bound to impress friends and family alike.
A Sweet Memory from Halloween Past
I still remember my first Halloween party as a kid—it was nothing short of magical! We had all dressed up in our favorite costumes, ready to knock on doors and collect mountains of candy. Still, it was the food table that really stole the show. My mom, who had a knack for baking, prepared a smorgasbord of treats that were both delicious and a little creepy—think ghost-shaped sugar cookies and pumpkin spice cupcakes with ghoulish green frosting. I can still taste those delicate cupcakes.
Fast forward to today, and I strive to create that same joyous energy in my kitchen, but with a healthier twist. These Vegan Pumpkin Oat Bites are a nod to those delightful treats from my childhood, delivering all the nostalgic vibes without the guilt. They’re incredibly easy to whip up, and the best part? You won’t need to spend hours in the kitchen!
Ingredients
Here’s what you’ll need to make these delicious vegan pumpkin oatmeal bites:
-
1 cup rolled oats
Rolled oats are the star ingredient here. They provide a hearty texture and are packed with fiber, which keeps you feeling satisfied. If you don’t have rolled oats on hand, quick oats can work in a pinch, though they might alter the texture slightly. -
1/2 cup almond butter
Almond butter loves to add creaminess to our mixture and is a great source of healthy fats. Prefer peanut butter? Go for it! Just keep in mind that the flavor might change a little, but it’ll still be delicious. -
1/4 cup maple syrup
This liquid gold not only sweetens our bites but also gives them a lovely depth of flavor. If you’re looking for an alternative, agave syrup or date syrup could be great substitutes, providing similar sweetness. -
1/2 cup pumpkin puree
The pumpkin puree brings in that quintessential fall flavor. If you’re not a fan of pumpkin, mashed bananas can work for a sweeter twist, but they will change the taste profile. -
1 tsp cinnamon
Cinnamon adds a warm, aromatic touch that perfectly complements the pumpkin. Not a fan of cinnamon? You can swap it out for pumpkin spice for a delightful complexity of flavors. -
1/4 cup chocolate chips
A treat wouldn’t be complete without a touch of chocolate, right? You can use dark chocolate for a bittersweet flavor or go dairy-free with vegan chocolate chips. If you’re feeling adventurous, try dried fruit or nuts instead.
Let’s dive into making these bites of bliss!
Step-by-Step Instructions
-
Preheat your oven.
Set your oven to 350°F (175°C). Preheating ensures even cooking, so don’t skip this step! -
Mix your dry ingredients.
In a large mixing bowl, combine the rolled oats and cinnamon thoroughly. Stirring these together first helps ensure that the cinnamon is evenly distributed throughout the mixture, giving every bite a burst of flavor. -
Combine the wet ingredients.
In a separate bowl (or the same one if you’re feeling daring), mix together the almond butter, maple syrup, and pumpkin puree. You want these ingredients to blend together smoothly, creating a luscious, creamy mixture that will become the base of our bites. Use a hand mixer if you have one for a quick blend! -
Combine wet and dry.
Pour the wet mixture into the dry bowl of oats, giving it a good stir with a spatula or wooden spoon. You’ll want to mix until all the oats are coated, and you’ve created a dough-like consistency. If it feels a little dry, don’t be shy—add a splash of almond milk to loosen it up. -
Fold in the chocolate chips.
Now for the fun part! Gently fold in the chocolate chips (or your chosen mix-ins). This step adds delightful pockets of sweetness throughout, making every bite a surprise. -
Scoop onto a baking sheet.
Using a cookie scoop or just your hands, form small balls of dough and place them onto a lined baking sheet. Keep them about an inch apart; they won’t spread much, so you can fit a good number of them on one sheet! -
Bake until golden.
Pop your baking sheet into the preheated oven and let them bake for about 12-15 minutes. You’ll know they’re done when they start to turn golden brown and give off a mouthwatering aroma. -
Cool and devour.
Once out of the oven, allow the bites to cool on the baking sheet for about 5 minutes before transferring them to a wire rack. This step is crucial as it helps them firm up!
Serving Suggestions
When it comes to serving these Vegan Pumpkin Oat Bites, feel free to get a little creative! They make for a fabulous treat at Halloween parties, especially when arranged on a festive platter with some spooky decorations. Serve them with a side of dairy-free yogurt or a drizzle of more almond butter for added decadence. You can even garnish them with a sprinkle of pumpkin seeds or coconut flakes for a little extra flair!
Recipe Variations
Here are a few twists you can try with this recipe:
- Nut-Free Option: Replace almond butter with sunbutter for a school-safe snack that all kids can enjoy.
- Spooky Additions: Add in a few drops of orange food coloring to the mixture for a fun festive touch that makes them look even more like Halloween treats!
- Sweet and Spicy: Mix in 1 teaspoon of nutmeg or ginger for a spicier flavor profile. These spices elevate the seasonal vibe and can be a delightful surprise for your guests!
- Protein Boost: Stir in a scoop of your favorite plant-based protein powder for a pre- or post-workout snack that fuels your day.
Chef’s Notes
As I developed this recipe, I experimented with several different variations, and I can honestly say that these little bites have evolved over time. I started out with a more traditional cookie base, but discovered that these oat bites were not only healthier—they also had a unique texture that would make them a perfect snack to share with friends! The best part is the memories made while baking together as a family, laughing over the mess we create, and the aroma that fills the air as they bake. It’s these moments that make the kitchen feel like home.
FAQs and Troubleshooting
-
Q: My bites crumbled apart. What did I do wrong?
A: This could happen if you didn’t use enough binding ingredients like almond butter or pumpkin puree. Make sure to always measure accurately! Adding a little more almond butter could fix this issue. -
Q: Can I use quick oats instead of rolled oats?
A: Yes! Quick oats will work, but your bites may be a little softer due to the finer texture. However, they’ll still be delicious! -
Q: How long do these bites last?
A: They should keep well in an airtight container for about 5-7 days at room temperature or up to two weeks in the fridge. You can also freeze them for longer storage! -
Q: Can I add other ingredients?
A: Absolutely! Feel free to toss in dried fruit, chopped nuts, or seeds for added flavor and texture.
Nutritional Info
These Vegan Pumpkin Oat Bites are not only delicious but also nourishing! Each bite contains a robust mix of fiber and healthy fats, making them a satisfying snack. They contain about 120 calories, 4g protein, 8g fat, 10g carbohydrates, and a wholesome serving of vitamins from the pumpkin.
So there you have it, friends—your ultimate guide to creating these delightful Vegan Pumpkin Oat Bites for Halloween or any day of the week! Enjoy whipping these up in your kitchen, and may your Halloween be filled with laughter, joy, and, of course, fantastic food!
PrintVegan Pumpkin Oat Bites

Delicious and healthy Vegan Pumpkin Oat Bites, perfect for Halloween festivities, made with wholesome ingredients.
- Prep Time: 10 minutes
- Cook Time: 15 minutes
- Total Time: 25 minutes
- Yield: 24 bites 1x
- Category: Dessert
- Method: Baking
- Cuisine: Vegan
- Diet: Vegan
Ingredients
- 1 cup rolled oats
- 1/2 cup almond butter
- 1/4 cup maple syrup
- 1/2 cup pumpkin puree
- 1 tsp cinnamon
- 1/4 cup chocolate chips
Instructions
- Preheat your oven to 350°F (175°C).
- Mix your dry ingredients in a large bowl: rolled oats and cinnamon.
- Combine the wet ingredients in a separate bowl: almond butter, maple syrup, and pumpkin puree.
- Pour the wet mixture into the dry ingredients and mix until combined.
- Fold in the chocolate chips.
- Scoop small balls of dough onto a lined baking sheet.
- Bake for about 12-15 minutes until golden brown.
- Cool on the baking sheet for 5 minutes before transferring to a wire rack.
Notes
For added flair, serve with dairy-free yogurt or almond butter, and garnish with pumpkin seeds or coconut flakes.
Nutrition
- Serving Size: 2 bites
- Calories: 120
- Sugar: 5g
- Sodium: 50mg
- Fat: 8g
- Saturated Fat: 1g
- Unsaturated Fat: 7g
- Trans Fat: 0g
- Carbohydrates: 10g
- Fiber: 2g
- Protein: 4g
- Cholesterol: 0mg
Keywords: vegan treats, pumpkin recipes, Halloween snacks, healthy desserts
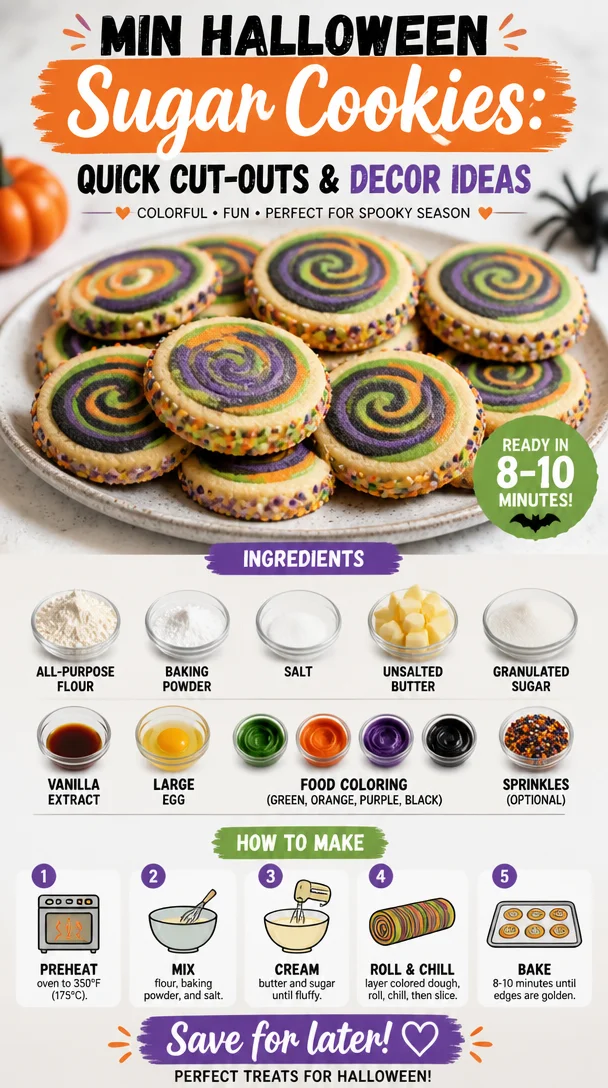
Min Halloween Sugar Cookies: Quick Cut-Outs & Decor Ideas
Easy Halloween Sugar Cookies: A Spook-tacular Treat
Ah, Halloween! The season of all things spooky and sweet, where the air turns crisp, costumes come alive, and, of course, the smell of freshly baked cookies wafts through the house. If there’s one treat that brings back childhood memories of trick-or-treating, it’s those delightful sugar cookies adorned with bright icing and sprinkles. Today, I’m excited to share my go-to recipe for Easy Halloween Sugar Cookies that will undoubtedly become a staple in your holiday festivities.
When I was growing up, my family had a tradition of gathering in the kitchen every Halloween to bake a mountain of sugar cookies. The kitchen would transform into a chaotic little workshop filled with laughter, flour explosions, and festive decorations. I vividly remember my little brother covering himself in flour as he tried to help roll out the dough (spoiler alert: it didn’t end well for him!). But in those moments of joyful creativity, we forged memories that tasted just as sweet as those cookies.
So, if you’re ready to bake a batch or two of sugar cookies that will be perfect for Halloween parties, school events, or just cozy nights at home, grab your apron, and let’s get started!
Ingredients
Here’s what you’ll need to whip up these spook-tacular cookies:
-
2 3/4 cups all-purpose flour: This is your cookie base. It provides the structure necessary to keep your cookies fluffy yet firm. For a gluten-free option, try using a 1:1 gluten-free flour blend.
-
1 teaspoon baking powder: This little booster helps your cookies rise perfectly without becoming cake-like. Make sure it’s fresh for the best results!
-
1/2 teaspoon salt: Salt enhances the sweetness of the cookies and balances the flavors. You can reduce it slightly if you prefer less saltiness.
-
1 cup unsalted butter, softened: Ah, butter! It gives the cookies their rich flavor and tender texture. If you’re sensitive to dairy, consider using a dairy-free butter substitute.
-
1 1/2 cups granulated sugar: Sweetness is key here! If you want to cut down on sugar, you can use a sugar substitute, but keep in mind it may alter the texture.
-
1 teaspoon vanilla extract: Vanilla adds a depth of flavor that makes cookies irresistible. For a twist, you could try almond extract instead for a nutty flavor!
-
1 large egg: Acts as a binding agent to hold everything together. If you’re looking for an egg substitute, a flaxseed egg or unsweetened applesauce can work in a pinch!
-
Food coloring (green, orange, purple, black): Get creative with your Halloween spirit! Gel food coloring gives the best vibrant results.
-
Sprinkles (optional): Who doesn’t love sprinkles? They add a festive touch and a little crunch. Choose your favorite Halloween-themed sprinkles to add a fun pop!
Now that we’ve gathered our cast of ingredients, let’s dive into the steps to create these magical cookies.
Step-by-Step Instructions
-
Preheat Your Oven: First things first, let’s get that oven fired up! Preheat it to 350°F (175°C). You want it nice and hot by the time you get your cookies ready to bake.
-
Mix Dry Ingredients: In a large bowl, whisk together the flour, baking powder, and salt. This helps ensure that your dry ingredients are evenly distributed and prevents any lumps in your dough. Plus, it gives you a chance to show off your whisking skills!
-
Cream the Butter and Sugar: In another bowl, beat the softened unsalted butter and granulated sugar together until the mixture is light and fluffy (about 3-5 minutes). This is where the magic happens! The air you incorporate here will help the cookies rise.
-
Add the Egg and Vanilla: Crack in the egg and pour in the vanilla extract. Beat until they are fully incorporated, creating a creamy mixture that smells heavenly.
-
Combine It All: Gradually add your flour mixture into the butter mixture, mixing until just combined. Don’t overmix! Your dough should come together nicely and not be sticky. If it feels too sticky, you can mix in a bit more flour, a tablespoon at a time.
-
Color the Dough: If you want to create colorful cookies, now’s the time! Divide the dough into separate bowls based on how many colors you plan to use, and then mix in your food coloring until you reach your desired shade. I love the vibrant hues that remind me of Halloween!
-
Chill the Dough: For best results, wrap your colored dough in plastic wrap and chill it in the refrigerator for at least 30 minutes. This helps improve the texture and makes it easier to roll out.
-
Roll Out & Cut: Once chilled, on a lightly floured surface, roll out the dough to about 1/4 inch thick. Use cookie cutters to cut out Halloween shapes like bats, ghosts, and pumpkins. Don’t forget to transfer them to a parchment-lined baking sheet!
-
Bake: Pop your cookie sheets in the preheated oven and bake for 8-10 minutes or until the edges are just slightly golden. Keep an eye on them because they can go from perfect to overbaked pretty quickly.
-
Cool: Remove the cookies from the oven and let them cool on the baking sheet for 5 minutes before transferring them to a wire rack to cool completely. This part can be tough because the smell is intoxicating, but patience is key!
-
Decorate: Once cooled, let your creativity run wild! Use icing, sprinkles, or edible glitter to decorate your cookies. Create spooky faces, vibrant designs, or anything that fits your Halloween theme!
Serving Suggestions
These Halloween Sugar Cookies can be served on a festive platter, or if you’re feeling extra spooky, arrange them in a haunted house shape! For a fun twist, place them in clear treat bags tied with colorful ribbons for party favors. Add your favorite spooky decorations around the platter to set the mood, and watch as everyone gathers around to grab a cookie (or five!).
Recipe Variations
Feeling adventurous? Here are some variations to spice up your cookie experience:
- Chocolate Sugar Cookies: Swap out a cup of flour for 1/2 cup of cocoa powder for a delicious chocolate twist.
- Spiced Sugar Cookies: Add a teaspoon of cinnamon and a pinch of nutmeg for a warm, autumn flavor.
- Lemon Zest Cookies: Stir in some lemon zest to the dough for a zesty surprise in your sweet treats.
- Pumpkin Spice Delight: Incorporate a tablespoon of pumpkin puree and pumpkin spice for an autumn-inspired cookie.
- Gluten-Free Delight: Use a gluten-free flour blend and ensure all other ingredients are gluten-free for a safe option for your friends with gluten intolerance.
Chef’s Notes
Every time I make these cookies, I’m reminded of those joyful kitchen moments with my family. I’ve experimented over the years—adding different flavors and colors, and each batch brings a new memory. One funny incident comes to mind where I accidentally grabbed a bag of salt instead of sugar (yikes!). Let’s just say that batch was not a crowd-pleaser. So, always double-check your ingredients!
This recipe has also evolved; I love trying new designs based on trends or fun shapes I find online. The versatility of sugar cookies means you can adapt them to fit any holiday or event!
FAQs and Troubleshooting
-
Why are my cookies spreading too much?
- Make sure your butter is properly softened (not melted) and that you chilled your dough adequately. If your kitchen is warm, consider chilling your cookies on the baking sheet before baking.
-
Can I freeze these cookies?
- Absolutely! You can freeze the dough before baking. Just wrap it tightly in plastic wrap and store it in an airtight container. When you’re ready to bake, let it thaw overnight in the refrigerator.
-
What if my icing isn’t setting?
- If your icing isn’t setting, it might be too thin. Add a little more powdered sugar to thicken it up. Make sure your cookies are cool before icing; warm cookies can cause icing to run.
-
How do I store these cookies?
- Store baked cookies in an airtight container at room temperature for up to a week. If you’ve decorated them with icing, let the icing set first before stacking them to avoid smudging.
Nutritional Info
While exact nutritional values can vary based on specific brands and ingredients used, here’s a rough estimate per cookie (assuming 24 cookies):
- Calories: 150
- Total Fat: 7g
- Saturated Fat: 4g
- Cholesterol: 20mg
- Sodium: 50mg
- Total Carbohydrates: 20g
- Dietary Fiber: 0g
- Sugars: 8g
- Protein: 2g
Remember, it’s all about balance and enjoying our favorite treats in moderation!
There you have it, friends! These Easy Halloween Sugar Cookies are bound to become a holiday tradition and will have everyone asking for seconds. I can’t wait to see the delightful creations you come up with—happy baking!
PrintEasy Halloween Sugar Cookies
Delicious and fun sugar cookies perfect for Halloween celebrations, decorated with vibrant icing and sprinkles.
- Prep Time: 30 minutes
- Cook Time: 10 minutes
- Total Time: 40 minutes
- Yield: 24 cookies 1x
- Category: Dessert
- Method: Baking
- Cuisine: American
- Diet: Vegetarian
Ingredients
- 2 3/4 cups all-purpose flour
- 1 teaspoon baking powder
- 1/2 teaspoon salt
- 1 cup unsalted butter, softened
- 1 1/2 cups granulated sugar
- 1 teaspoon vanilla extract
- 1 large egg
- Food coloring (green, orange, purple, black)
- Sprinkles (optional)
Instructions
- Preheat your oven to 350°F (175°C).
- Mix dry ingredients: In a large bowl, whisk together the flour, baking powder, and salt.
- Cream the butter and sugar in another bowl until light and fluffy.
- Add the egg and vanilla extract, and beat until incorporated.
- Combine the flour mixture into the butter mixture, mixing until just combined.
- Color the dough by dividing it and mixing in food coloring.
- Chill the dough in the refrigerator for at least 30 minutes.
- Roll out the dough to 1/4 inch thick and cut into Halloween shapes.
- Bake for 8-10 minutes or until edges are slightly golden.
- Cool on a wire rack and decorate with icing and sprinkles.
Notes
For best results, chill your dough adequately. Feel free to experiment with different flavors and decorations.
Nutrition
- Serving Size: 1 cookie
- Calories: 150
- Sugar: 8g
- Sodium: 50mg
- Fat: 7g
- Saturated Fat: 4g
- Unsaturated Fat: 3g
- Trans Fat: 0g
- Carbohydrates: 20g
- Fiber: 0g
- Protein: 2g
- Cholesterol: 20mg
Keywords: Halloween, sugar cookies, dessert, party treats, baking
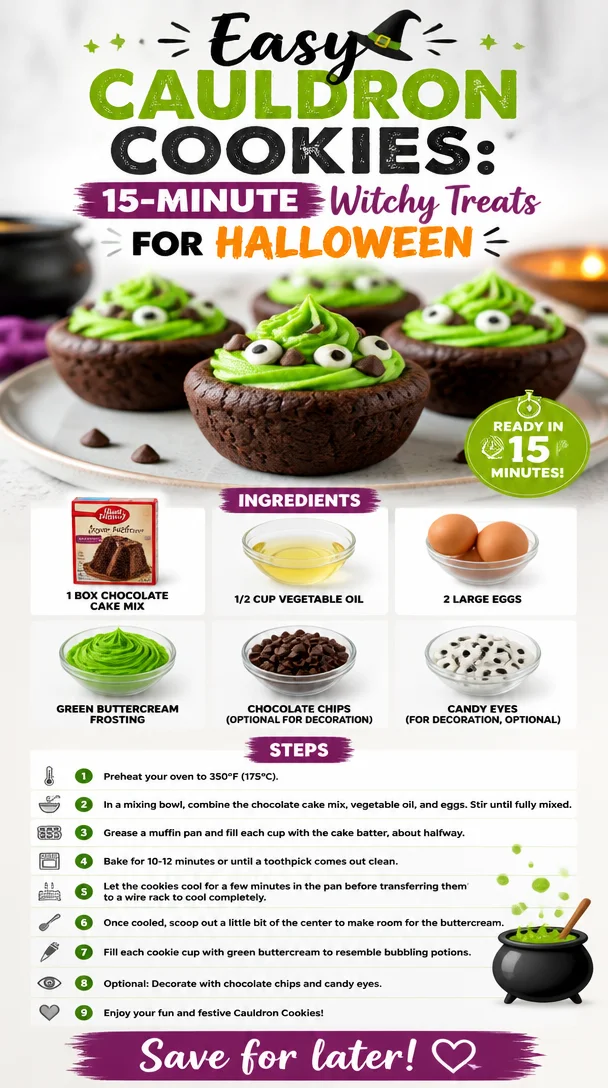
Easy Cauldron Cookies: 15-Minute Witchy Treats for Halloween
Cauldron Cookies: A Spellbinding Treat for All Occasions
Welcome, fellow food lovers! Today we’re diving into the whimsical world of Cauldron Cookies—delightfully spooky treats that are perfect for Halloween parties, festive gatherings, or any day you simply want to add a sprinkle of magic to your dessert table. Trust me, these cookies will enchant even the most discerning sweet tooth, turning the ordinary into the extraordinary.
When you think of cookies, there’s a certain nostalgic warmth that envelops you. They remind us of cozy afternoons spent baking with loved ones while the aroma of something delicious wafts through the air. These Cauldron Cookies not only deliver that nostalgic sensation but also bring a playful twist to your dessert game. Picture this: your kitchen filled with laughter, flour dust in the air, and a cauldron of gooey, chocolatey delights bubbling away (okay, maybe not a real cauldron, but you get what I mean!).
These cookies are so easy to whip up that they’ll become a staple in your kitchen repertoire, no matter the season. All you need is a box of chocolate cake mix, a couple of eggs, some vegetable oil, and your decorating wizardry with green buttercream frosting, chocolate chips, and cute little candy eyes. Seriously, can you get any more festive and fun? I don’t think so! So, let’s roll up our sleeves and conjure up a batch of these delectable Cauldron Cookies!
A Magical Memory: How Cauldron Cookies Came to Life
As a kid, Halloween was always one of my favorite times of the year. The costumes, the candy, and—most importantly—the creepy cuisine! I remember one Halloween when I decided to host my first little "haunted" get-together with my neighborhood friends. We spent the day crafting spooky decorations, bobbing for apples, and plotting the best tricks to play on unsuspecting adults.
But the real magic happened in the kitchen. My mom and I decided to bake something special, and that’s when the idea of Cauldron Cookies was born. We had no recipes; just a box of chocolate cake mix in the pantry and a wild imagination. I’ll never forget how we slathered those cookies with green frosting, topped them with chocolate chips, and added candy eyes that made them look alive. Laughter erupted as we placed them on a tray and called them "witch’s brew."
That Halloween turned into a cherished memory, and now, I’m excited to share this same joy with you. So, whether you intend to frighten friends with your baking skills or simply want a tasty treat, these cookies have got you covered.
Ingredients
Here’s what you’ll need to craft these magical delights:
-
1 Box Chocolate Cake Mix
The star of the show! This pre-made mix gives you a moist and rich flavor with minimal effort. If you want to unleash your inner baker, feel free to substitute it with your favorite homemade chocolate cookie recipe. -
1/2 Cup Vegetable Oil
This keeps the cookies moist and chewy. You can swap it for coconut oil or melted butter for a richer flavor, though the texture may vary slightly. -
2 Large Eggs
Eggs act as a binding agent, holding everything together! If you’re looking for an egg-free option, try using flaxseed meal or applesauce as a substitute. -
Green Buttercream Frosting
A whimsical topping that brings the cauldron to life! You can use store-bought frosting for convenience or whip up your own using powdered sugar, butter, and green food coloring. -
Chocolate Chips (optional)
For an extra dose of chocolatey goodness, sprinkle on some chocolate chips before baking. If you’re a white chocolate fan, feel free to swap them! -
Candy Eyes (optional)
These add a fun, quirky touch to your cookies. You can find these at craft stores or make your own candy eyeballs with melted chocolate!
Step-by-Step Instructions
Now that we’ve gathered our ingredients, let’s create some cookie magic together!
-
Preheat the Oven
Preheat your oven to 350°F (175°C). A properly preheated oven ensures even baking, helping our cookies rise to perfection. -
Mix the Ingredients
In a large mixing bowl, combine your box of chocolate cake mix, vegetable oil, and eggs. Mix until everything is well blended and forms a deliciously thick batter. It’s okay if a few lumps remain—perfection is not the goal here, just gooey chocolate goodness!Chef Tip: A spatula will do wonders for folding in the ingredients, ensuring your mix is smooth without overbeating it.
-
Spoon the Batter
Using a cookie scoop or spoon, drop rounded tablespoons of the batter onto a parchment-lined baking sheet. Keep them about 2 inches apart because they will spread a bit while baking.Chef Hack: Wet your hands slightly to prevent the batter from sticking—trust me, you’ll thank me later!
-
Bake
Pop your baking sheet into the oven and let your cookies bake for 10-12 minutes. They should look set around the edges and slightly soft in the middle. Remember, they’ll continue to cook a bit after you take them out.Chef Insight: If you love a little crunch, leave them in for a minute or two longer, but watch them closely to prevent overbaking!
-
Cool Down
After baking, take the cookies out and let them cool on the baking sheet for about 5 minutes before transferring them to a wire rack. This resting period allows them to firm up a bit more. -
Frost ‘Em Up
Once the cookies are completely cool, it’s time to decorate! Use a piping bag or a knife to generous dollops of green buttercream frosting right in the center—creating a “cauldron” effect. -
Decorate
Get creative! Top with chocolate chips for extra magic and place the candy eyes on the frosting to bring your cookies to life.
Serving Suggestions
Presentation is key, especially when it comes to a theme as fun as this! Arrange your Cauldron Cookies on a spooky platter, maybe surrounded by some Halloween-themed decorations like mini pumpkins or fake spiders. For added flair, you could place them in little cauldron bowls as if they’re concoctions bubbling over with goodies!
Recipe Variations
Feeling a little adventurous? Here are some creative twists to try:
- Mummy Cookies: Use white frosting to pipe “bandages” over the cookies and add candy eyes for a mummy effect.
- Peppermint Twist: Add peppermint extract to the batter for a seasonal flavor. Top with crushed candy canes for festive flair!
- Nutty Cauldrons: Mix in chopped nuts for added crunch, or even swap out some of the chocolate chips for butterscotch for a different flavor profile.
- Gluten-Free Option: Use gluten-free chocolate cake mix to make these delicious treats accessible for everyone.
Chef’s Notes
As I craft these cookies, I can’t help but reminisce about that magical Halloween many years ago. Since that time, I’ve experimented with various frosted designs and flavors to satisfy the evolving tastes of my friends and family. The great thing about Cauldron Cookies is that they are endlessly customizable, allowing you to channel your creativity every time you whip them up.
I’ve also had the joy of sharing this recipe with friends who are now baking enthusiasts themselves. It’s a delightful feeling to cultivate that passion for baking and the smile it brings to people’s faces—one cookie at a time!
FAQs and Troubleshooting
-
Why are my cookies flat?
If your cookies spread too much, it could be due to over-mixing the batter or your oven being too hot. Consider adjusting the oven temperature down slightly or chilling the dough for 30 minutes before baking. -
How can I store leftover cookies?
Store your Cauldron Cookies in an airtight container at room temperature for up to five days. Alternatively, you can freeze them! Just make sure they’re properly wrapped before going into the freezer. -
Can I make the dough in advance?
Absolutely! You can prepare the dough a day ahead and keep it covered in the fridge until you’re ready to bake. Just be sure to let it sit at room temperature for about 15 minutes before baking. -
What if I don’t have candy eyes?
No worries! You could create eyes with chocolate chips, mini marshmallows, or even sliced almonds for a humorous monster effect.
Nutritional Info
(Optional but helpful)
If you’re tracking your nutritional intake, each Cauldron Cookie approximately contains:
- Calories: 150
- Total Fat: 7g
- Saturated Fat: 1g
- Cholesterol: 25mg
- Sodium: 150mg
- Total Carbohydrates: 19g
- Dietary Fiber: 1g
- Sugars: 10g
- Protein: 2g
Remember, moderation is key when enjoying these delightful treats!
And there you have it! A super fun, easy-to-make recipe that’s sure to impress your friends and family. I hope you feel inspired to get in the kitchen and whip up a batch of these Cauldron Cookies! Don your witch’s hat or wizard’s robe, and let’s make some kitchen magic together. Enjoy every bite, and happy baking!
PrintCauldron Cookies

Delightfully spooky treats perfect for Halloween parties or any festive gathering.
- Prep Time: 15 minutes
- Cook Time: 12 minutes
- Total Time: 27 minutes
- Yield: 24 cookies 1x
- Category: Dessert
- Method: Baking
- Cuisine: American
- Diet: Vegetarian
Ingredients
- 1 Box Chocolate Cake Mix
- 1/2 Cup Vegetable Oil
- 2 Large Eggs
- Green Buttercream Frosting
- Chocolate Chips (optional)
- Candy Eyes (optional)
Instructions
- Preheat the oven to 350°F (175°C).
- Mix together the chocolate cake mix, vegetable oil, and eggs until well blended.
- Spoon rounded tablespoons of the batter onto a parchment-lined baking sheet, keeping them 2 inches apart.
- Bake for 10-12 minutes, until set around the edges but still soft in the middle.
- Cool on the baking sheet for about 5 minutes before transferring to a wire rack.
- Frost the cookies with green buttercream frosting.
- Decorate with chocolate chips and candy eyes before serving.
Notes
Store leftovers in an airtight container at room temperature for up to five days or freeze for longer storage.
Nutrition
- Serving Size: 1 cookie
- Calories: 150
- Sugar: 10g
- Sodium: 150mg
- Fat: 7g
- Saturated Fat: 1g
- Unsaturated Fat: 5g
- Trans Fat: 0g
- Carbohydrates: 19g
- Fiber: 1g
- Protein: 2g
- Cholesterol: 25mg
Keywords: cookies, Halloween, dessert, chocolate, festive treats

Macaroni and Cheese Stuffed Peppers
Macaroni and Cheese Stuffed Peppers: A Comfort Food Twist
Welcome to Clean Plate Cravings, foodie friends! Today, we’re diving into a dish that not only warms the soul but also puts a fun twist on a classic childhood favorite: Macaroni and Cheese Stuffed Peppers. Ah, macaroni and cheese—a comforting hug in bowl form that brings back cherry-red childhood memories of family dinners, movie nights, and lazy rainy days. Now, imagine elevating this comfort food by stuffing it into vibrant orange bell peppers. Intrigued? Let’s get cooking!
Personal Story
Growing up, my grandmother was the queen of macaroni and cheese. I still remember the sound of her old, creaky kitchen chair as she settled in for an afternoon of cooking. The walls would fill with the delicious aroma of bubbling cheese and buttery breadcrumbs. She’d whip up a giant casserole dish for my siblings and me, and we could hardly wait for it to cool before diving in. It was a dish that brought our family together, sparking laughter, stories, and the kind of bond that only comes from sharing delicious food.
One stormy weekend, she decided to get creative. We had a fridge full of bell peppers, and she suggested we stuff macaroni and cheese inside them—what a revelation! The combination of creamy pasta and soft roasted peppers made for a surprising yet delightful meal. Ever since that day, stuffed peppers have held a special place in my heart. Emulating Grandma’s creativity, I added my flair to the dish by mixing in Greek yogurt for creaminess and using a sharp cheddar that makes every bite a taste sensation. So, grab your apron—we’re about to dive into a recipe that marries nostalgia with vibrant flavor!
Ingredients
To create these delicious Macaroni and Cheese Stuffed Peppers, here’s what you’ll need:
-
6 Orange Bell Peppers: These vibrant beauties not only add a pop of color to your plate but also provide a sweet crunch. Feel free to swap them for green, red, or yellow if you prefer!
-
8 Ounces Elbow Macaroni (or pasta of your choice): Cook according to package directions. If you’re gluten-free, substitute with your favorite gluten-free pasta.
-
7 Ounces Truly Grass Fed Naturally Sharp Cheddar Cheese, shredded: This cheese is the star of the show. Its sharp flavor elevates the dish. If you need a dairy-free option, try a vegan cheese blend.
-
3 Tablespoons Truly Grass Fed Naturally Creamy Butter, divided: We’ll use this to create a rich, decadent roux. You can replace butter with olive oil for a dairy-free version.
-
2 Tablespoons All-Purpose Flour: This helps thicken our cheese sauce. If you want a gluten-free option, cornstarch or a gluten-free flour blend can work wonderfully!
-
½ Teaspoon Salt: A touch of salt enhances all the flavors. Add more to taste, but be careful, as the cheese will contribute some saltiness.
-
1 Clove Garlic, smashed and minced (or ½ tsp garlic powder): Fresh garlic brings an aromatic quality. Use garlic powder if you have it on hand.
-
1 Cup Whole or 2% Milk: This adds creaminess to your cheese sauce. Non-dairy milk (like almond or oat milk) can be used for a lighter option.
-
¼ Cup Plain Greek Yogurt: A secret ingredient for tang and health benefits! Swap it with sour cream for a similar taste.
-
½ Cup Panko Bread Crumbs: These add a fantastic crunch on top. For a unique twist, try Italian-seasoned bread crumbs for an extra boost of flavor.
Step-by-Step Instructions
Now that we have our ingredients lined up, let’s get cooking!
-
Preheat the Oven: Start by preheating your oven to 375°F (190°C). This ensures the peppers are tender and the cheese is bubbly!
-
Prep the Peppers: Cut the tops off your orange bell peppers, removing the seeds and membranes. Feel free to save those vibrant tops for a veggie stir-fry later! Place your peppers upright in a baking dish. (Tip: If they won’t stand, trim a small slice off the bottom to create a flat base.)
-
Cook the Pasta: Boil water in a large pot and cook the elbow macaroni according to the package directions until al dente. Drain and set aside—but hold onto a cup of pasta water, just in case!
-
Make the Roux: In a medium saucepan over medium heat, melt 2 tablespoons of butter. When it’s bubbling, add the flour and whisk constantly for 1-2 minutes until it’s golden and smells toasty—this is the base of your creamy cheese sauce!
-
Add Milk and Cheese: Gradually pour in the milk while whisking—no lumps allowed! Cook until the mixture thickens, which should take about 2-3 minutes. Lower the heat, then stir in the shredded Truly Grass Fed Naturally Sharp Cheddar Cheese until melted and smooth. (Chef’s hack: if the sauce is too thick, add a splash of that reserved pasta water!)
-
Flavor Boost: Stir in the minced garlic, Greek yogurt, and ½ teaspoon of salt. Taste and adjust seasoning as necessary. This creamy goodness should sing with flavor!
-
Combine Pasta and Sauce: Gently mix the cooked macaroni noodles with the cheese sauce, ensuring every noodle is coated with that cheesy goodness. It’s about to get even better!
-
Stuff the Peppers: Using a spoon, carefully fill each pepper with your macaroni and cheese mixture. Pile it high—trust me, it’ll be worth it!
-
Crunchy Topping: In a small bowl, mix together the panko breadcrumbs and the remaining tablespoon of melted butter. Sprinkle this crunchy mixture generously on top of the stuffed peppers for that golden finish.
-
Bake: Cover the dish with aluminum foil and pop it in the oven for 25 minutes. Remove the foil and bake for an additional 10-15 minutes until the tops are golden brown. Stand back and enjoy the aroma wafting through your kitchen!
Serving Suggestions
Once those beautiful peppers emerge from the oven, serve them hot for a delightful dinner. Garnish with fresh herbs, like parsley or chives, to elevate the presentation and freshness. Pair these stuffed peppers with a crisp green salad for a complete meal. You can also drizzle some hot sauce or ranch dressing on top for an extra kick—whatever tickles your taste buds!
Recipe Variations
Feeling adventurous? Here are some creative variations you can try out:
-
Meaty Option: Add cooked ground turkey, beef, or even shredded chicken into the macaroni and cheese mixture for added protein.
-
Veggie-Packed: Incorporate finely chopped spinach or kale into the cheese mixture for an extra nutrient boost.
-
Spicy Twist: Stir in diced jalapeños for a spicy kick, or top with a sprinkle of crushed red pepper flakes before serving.
-
Italian Flair: Mix in Italian seasoning or sun-dried tomatoes into the cheese sauce for a Mediterranean twist.
-
BBQ Chicken Stuffed Peppers: Swap the macaroni filling for leftover BBQ chicken and cheese for a smoky flavor punch.
Chef’s Notes
This recipe has come a long way since my grandmother’s initial creation. I love experimenting with different ingredients and flavors, which is why I’m always switching things up based on what’s in my fridge. You know what they say, a great recipe is only as good as the love and creativity you put into it!
One of my fondest kitchen memories involves a slight disaster: I forgot to cover the peppers during the first bake! The panko topping turned a dark brown, but once I tasted it, the toasty flavor was a hit! In the end, it became a favorite among my friends during dinner parties. So, embrace the kitchen chaos—it often leads to delicious surprises!
FAQs and Troubleshooting
Q: My cheese sauce turned out lumpy. What did I do wrong?
A: This can happen if the milk is added too quickly to the roux. Always add it slowly while whisking continuously to create a smooth sauce.
Q: How do I know when the peppers are done?
A: They should be tender and the tops golden brown. A fork should easily pierce through the pepper skin.
Q: Can I make this dish ahead of time?
A: Absolutely! You can prepare the stuffed peppers, cover them, and refrigerate. When ready to eat, just bake straight from the fridge, adding additional time to heat through.
Q: Do I need to pre-cook the peppers?
A: No need! The cooking time in the oven will tenderize the peppers while fluffing up the macaroni.
Nutritional Info (Optional)
While these stuffed peppers are a delightful indulgence, they can also be a source of nourishment! Here’s a rough estimate per stuffed pepper, making it a balanced meal option when paired with a side salad:
- Calories: 350
- Protein: 15g
- Carbohydrates: 40g
- Fat: 15g
Incorporating vibrant ingredients doesn’t just boost flavor; it keeps you feeling full and satisfied!
And there you have it—a cozy and delicious way to enjoy macaroni and cheese like never before! Remember, cooking is all about enjoying the process, so have fun experimenting with flavors and share it with loved ones. Happy cooking, and as always, keep those plates clean and cravings satisfied!
PrintMacaroni and Cheese Stuffed Peppers

A comforting twist on a classic favorite, these Macaroni and Cheese Stuffed Peppers marry nostalgia with vibrant flavor.
- Prep Time: 15 minutes
- Cook Time: 30 minutes
- Total Time: 45 minutes
- Yield: 4 servings 1x
- Category: Main Course
- Method: Baking
- Cuisine: American
- Diet: Vegetarian
Ingredients
- 6 Orange Bell Peppers
- 8 Ounces Elbow Macaroni
- 7 Ounces Truly Grass Fed Naturally Sharp Cheddar Cheese, shredded
- 3 Tablespoons Truly Grass Fed Naturally Creamy Butter, divided
- 2 Tablespoons All-Purpose Flour
- ½ Teaspoon Salt
- 1 Clove Garlic, smashed and minced
- 1 Cup Whole or 2% Milk
- ¼ Cup Plain Greek Yogurt
- ½ Cup Panko Bread Crumbs
Instructions
- Preheat the Oven: Start by preheating your oven to 375°F (190°C).
- Prep the Peppers: Cut the tops off your orange bell peppers, removing the seeds and membranes.
- Cook the Pasta: Boil water and cook the elbow macaroni until al dente. Drain and set aside.
- Make the Roux: In a medium saucepan, melt 2 tablespoons of butter and whisk in the flour.
- Add Milk and Cheese: Gradually pour in the milk while whisking until thickened, then stir in the cheese until melted.
- Flavor Boost: Stir in the garlic, Greek yogurt, and salt. Adjust seasoning as necessary.
- Combine Pasta and Sauce: Mix the cooked macaroni with the cheese sauce until coated.
- Stuff the Peppers: Fill each pepper with the macaroni and cheese mixture.
- Crunchy Topping: Mix panko breadcrumbs with the remaining butter and sprinkle on top.
- Bake: Cover with foil and bake for 25 minutes, then uncover and bake until tops are golden brown.
Notes
Serve garnished with fresh herbs and pair with a crisp green salad for a complete meal.
Nutrition
- Serving Size: 1 stuffed pepper
- Calories: 350
- Sugar: 2g
- Sodium: 400mg
- Fat: 15g
- Saturated Fat: 7g
- Unsaturated Fat: 6g
- Trans Fat: 0g
- Carbohydrates: 40g
- Fiber: 3g
- Protein: 15g
- Cholesterol: 30mg
Keywords: macaroni and cheese, stuffed peppers, comfort food, vegetarian recipe, family dinner
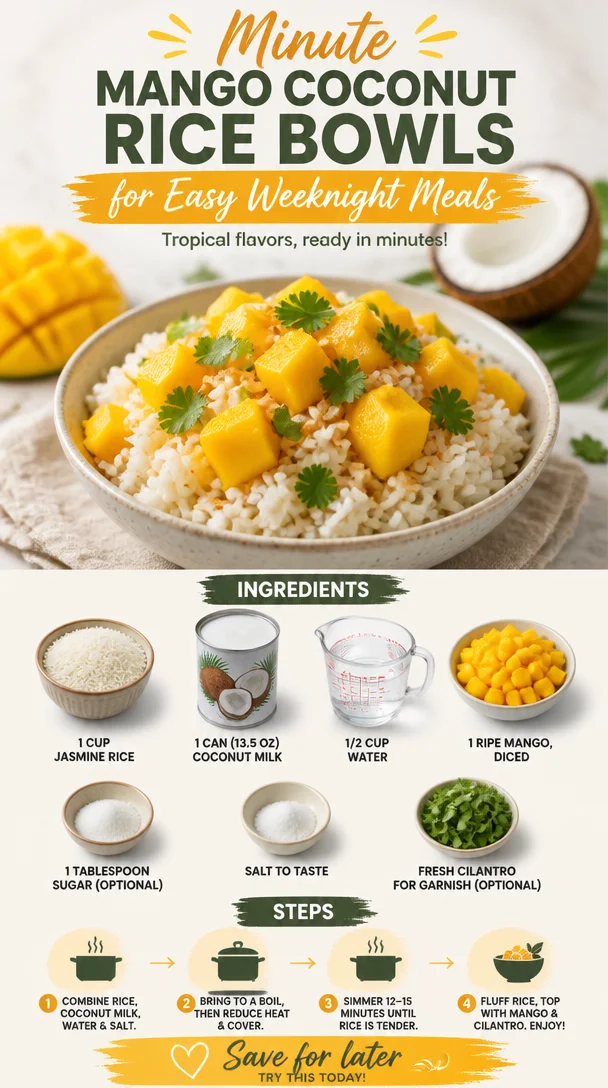
Minute Mango Coconut Rice Bowls for Easy Weeknight Meals
Mango Coconut Rice: A Tropical Treat That’ll Take You to Paradise
Hey there, food lover! If you’re anything like me, a good meal is more than just fuel; it’s an experience, a memory, and a celebration of flavors. Today, I’m super excited to share a dish that not only takes your taste buds on a tropical vacation but is also incredibly easy to whip up—Mango Coconut Rice! Picture this: velvety coconut-infused jasmine rice paired with sweet, luscious mango. It’s a dish that transports you straight to a sun-soaked beach, even if you’re just enjoying it on your kitchen table.
Eating well shouldn’t feel like a chore or a complicated assignment. The best meals are the ones that awaken your senses, spark joy, and leave you feeling great inside and out. That’s exactly what this dish does. Plus, it’s a fantastic way to enjoy the deliciousness of ripe mangoes while basking in the creamy goodness of coconut milk. The vibrant colors and flavors are perfect for any occasion—whether you’re hosting a dinner party or simply treating yourself on a quiet weekday evening.
So grab your apron, and let’s dive into this culinary adventure together! You’ll be impressing friends and family with a dish that’s simple yet bursting with flavor in no time.
A Spoonful of Nostalgia
When I think about mango coconut rice, I’m taken back to my childhood. I remember summers spent at my grandparents’ cozy beach cottage, where the salty sea breeze mingled with the sweet scent of blooming hibiscus. My grandmother would often prepare a similar dish, serving coconut rice alongside fresh mangoes we would pick from the trees in their backyard. Each bite was like summer itself—sweet, warm, and bursting with joy.
One particular afternoon, beneath the shade of a palm tree, we feasted on bowls of rice topped with juicy mango. I still remember my grandmother’s infectious laughter as she encouraged me to eat as much as I wanted. “The secret,” she’d wink, “is to keep it simple and use the freshest ingredients.” That’s a lesson I’ve carried with me into my kitchen. The combination of creamy coconut milk and sweet mango is not just a nostalgic memory for me; it’s also a reminder of the uncomplicated pleasures in life. This Mango Coconut Rice is an homage to those sunny days and shared moments, and I can’t wait for you to make your own memories with it!
Ingredients
Here’s what you’ll need to create this delightful tropical dish:
-
1 cup jasmine rice
A fragrant and fluffy rice variety, jasmine is perfect for absorbing the coconut milk’s rich flavor. For a different touch, you can substitute it with basmati or even brown rice for a nuttier taste, but remember that cooking times may vary! -
1 can (13.5 oz) coconut milk
This is the star of the show! Rich and creamy, coconut milk lends an irresistible flavor to the rice. If you’re watching your calories, you can choose light coconut milk or even unsweetened almond milk as a substitute, though it will alter the texture a bit. -
1/2 cup water
This helps in cooking the rice to the perfect consistency. Adjust according to your preference for softer or firmer rice. -
1 ripe mango (diced)
Look for mangoes that give slightly when pressed. You can replace them with any seasonal fruit, such as peaches or pineapples, to breathe new life into the dish. -
1 tablespoon sugar (optional)
While not mandatory, a touch of sweetness can enhance the flavors. Feel free to skip this if you prefer natural sweetness from the mango! -
Salt to taste
A pinch of salt helps balance the sweetness and enhances the dish’s overall flavor. -
Fresh cilantro for garnish (optional)
A sprinkle of cilantro adds a lovely freshness. If you’re not a fan, swap it for mint or simply leave it out!
Step-by-Step Instructions
Now that we have our ingredients ready, let’s get cooking! Follow these easy steps to whip up your delicious Mango Coconut Rice:
-
Rinse the Jasmine Rice
Start by rinsing the jasmine rice under cold water in a fine-mesh sieve or bowl. This helps to remove excess starch, resulting in fluffier rice. You want to rinse until the water runs clear. It should only take a few minutes, so don’t skip this step! -
Combine with Coconut Milk and Water
In a medium saucepan, combine the rinsed rice, coconut milk, and water. Add a pinch of salt to the mix. Give it a gentle stir to combine. This rich liquid is what makes the rice taste so heavenly! -
Bring to a Boil
Place the saucepan over medium-high heat. Keep an eye on it and let it come to a gentle boil. Once you see it bubbling, it’s time to reduce the heat. -
Simmer
Reduce the heat to low, cover the saucepan with a lid, and let the rice simmer for about 15 minutes. Here’s a little chef hack: resist the temptation to lift the lid too often; letting steam escape can result in undercooked rice. -
Fluff and Sweeten
After 15 minutes, remove the saucepan from the heat but leave the lid on for another 5 minutes. This will continue cooking the rice perfectly! Once time’s up, remove the lid and fluff the rice gently with a fork. If desired, sprinkle in the tablespoon of sugar at this point, mixing well. -
Add the Mango
Gently fold in the diced mango, being careful not to mash the fruit. You want those beautiful chunks to maintain their shape and sweetness! -
Serve
Time to enjoy! Scoop the Mango Coconut Rice into bowls and finish off with a sprinkle of fresh cilantro if using. This dish is best warm, but it can also be enjoyed chilled, so feel free to make it ahead of time!
Serving Suggestions
To serve, I love using beautiful, shallow bowls to showcase the vibrant colors of the mango against the creamy coconut rice. A sprinkle of fresh cilantro adds an aromatic touch and a pop of color. Pair it with grilled chicken or shrimp for a complete meal, or enjoy it as a refreshing side dish at picnics or barbecues. The versatility is part of what makes this dish so fantastic!
Recipe Variations
Want to mix things up? Here are a few creative twists you can try:
- Tropical Twist: Add diced pineapple or shredded coconut for extra texture and flavor.
- Spicy Kick: For a spicy kick, toss in finely chopped jalapeños or a dash of hot sauce while cooking the rice.
- Nutty Addition: Incorporate toasted cashews or almonds for some crunch. Just sprinkle them on top before serving!
- Vegan Delight: This recipe is already vegan-friendly, but add a splash of lime or lemon juice for a zesty twist.
- Herb-Infused: Infuse the rice with fresh basil or mint for an exciting herbal flavor.
Chef’s Notes
Over the years, this recipe has evolved into a go-to comfort food for me. Initially, I would keep it simple with just rice and mango, but my taste buds have led me to experiment with various additions and substitutions. One of my favorite variations is adding a sprinkle of lime zest! Trust me; it’s a game changer. And don’t even get me started on how delightful it is to serve this dish at gatherings. Watching friends and family dive into a tropical experience brings me so much joy.
Cooking is all about exploration, so don’t be afraid to make this recipe your own!
FAQs and Troubleshooting
1. Why did my rice come out mushy?
If the rice is mushy, it may have been overcooked or too much liquid was added. Make sure to measure the rice and liquids accurately, and be cautious with cooking times.
2. Can I make this recipe without coconut milk?
Absolutely! You can use almond milk or even regular milk, but be aware that the taste and creaminess will differ significantly.
3. How do I store leftovers?
Store any leftovers in an airtight container in the refrigerator for up to 3 days. Reheat gently in the microwave, adding a splash of water or coconut milk for moisture.
4. Where can I find ripe mangoes?
Most grocery stores carry ripe mangoes in season. Look for those that are slightly soft to the touch and have a pleasant aroma. If they aren’t ripe yet, you can let them sit at room temperature for a few days until they reach the desired ripeness.
Nutritional Info (Optional)
While I encourage you to focus on the joy of cooking and eating, here’s a quick nutritional overview (per serving):
- Calories: Approximately 290
- Protein: 4g
- Fat: 12g
- Carbohydrates: 44g
- Fiber: 2g
- Sugar: 6g
Conclusion
Mango Coconut Rice is more than just a recipe; it’s an invitation to relish the simple joys in life, just like my grandmother taught me all those years ago. So, whether you whip this dish up for a special occasion or as a weekday treat, I hope it brings you as much happiness as it does for me. The combination of creamy coconut, sweet mango, and warm jasmine rice creates an unforgettable culinary experience. Happy cooking, my friend—let’s keep those plates clean and cravings satisfied!
PrintMango Coconut Rice

A delightful tropical dish featuring velvety coconut-infused jasmine rice paired with sweet mango.
- Prep Time: 10 minutes
- Cook Time: 20 minutes
- Total Time: 30 minutes
- Yield: 4 servings 1x
- Category: Side Dish
- Method: Cooking
- Cuisine: Tropical
- Diet: Vegan
Ingredients
- 1 cup jasmine rice
- 1 can (13.5 oz) coconut milk
- 1/2 cup water
- 1 ripe mango (diced)
- 1 tablespoon sugar (optional)
- Salt to taste
- Fresh cilantro for garnish (optional)
Instructions
- Rinse the jasmine rice under cold water until the water runs clear.
- Combine the rinsed rice, coconut milk, and water in a medium saucepan. Add a pinch of salt and stir gently.
- Bring the saucepan to a gentle boil over medium-high heat.
- Simmer by reducing heat to low, cover, and let cook for about 15 minutes.
- Fluff the rice gently with a fork and let it sit covered for another 5 minutes.
- Add the diced mango and fold gently into the rice.
- Serve warm in bowls, garnished with fresh cilantro if desired.
Notes
For added flavor, a sprinkle of lime zest can be included. Adjust water according to preference for softer or firmer rice.
Nutrition
- Serving Size: 1 serving
- Calories: 290
- Sugar: 6g
- Sodium: 80mg
- Fat: 12g
- Saturated Fat: 10g
- Unsaturated Fat: 2g
- Trans Fat: 0g
- Carbohydrates: 44g
- Fiber: 2g
- Protein: 4g
- Cholesterol: 0mg
Keywords: Mango, Coconut, Rice, Tropical, Vegan, Easy Recipes
Minute Mango Sticky Rice: Beginner-Friendly Thai Dessert
Easy Yet Delicious Mango Sticky Rice
Welcome to another mouthwatering adventure in the kitchen! If you’re anything like me, you’re always on the lookout for recipes that are both easy to prepare and irresistibly delicious. Today, I’m thrilled to share a dish that’s a personal favorite—Mango Sticky Rice. This Thai dessert captures the essence of sweet, creamy coconut milk and perfectly ripe mangoes, all nestled atop a bed of tender sticky rice. It’s a simple yet glamorous treat that feels like sunshine in a bowl!
Now, I get it. Sometimes, dessert can seem a bit daunting, especially if you haven’t ventured into the world of sticky rice before. But trust me, the combination of flavors in this dish will have you swooning, and the best part? It’s so simple that you’ll wonder why you haven’t made it sooner! Plus, the vibrant colors and mouthwatering aroma will make your kitchen feel like a tropical island retreat. Ready to dive in? Let’s go!
A Sweet Memory to Inspire Us
Some of my fondest memories are linked to food, and Mango Sticky Rice is no exception. I remember the first time I tasted it during a family vacation in Thailand. We were exploring the bustling streets of Chiang Mai, soaking in the vibrant sights and sounds. After a long day of sightseeing, we stumbled upon a little street vendor selling Mango Sticky Rice. The vendor cheerfully served it in a banana leaf, and as I took my first bite, I was blown away by the explosion of flavors.
The sticky rice was perfectly chewy, the coconut milk rich and creamy, and the mangoes were so sweet and juicy. It was like a gift from the culinary gods! My family and I couldn’t help but devour every last bite, giggling about how we could eat this sweet treat every day of the week. That experience ignited my passion for exploring diverse cuisines and sharing those flavors with others. So here we are, working our magic in the kitchen together, where I hope to bring a little slice of that experience to your home!
Ingredients
To whip up this delightful dish, gather the following ingredients:
-
1 cup of sticky rice
Sticky rice (also known as glutinous rice) is key for achieving that chewy texture. You can find it in most Asian grocery stores. If you’re in a pinch, you can use short-grain rice, but the texture won’t be quite the same. -
1 1/2 cups of lukewarm water (divided)
The water is essential for soaking the rice and cooking it. The trick? Make sure your water isn’t too hot; lukewarm is ideal for better absorption! -
1 can of coconut milk (divided)
This will give the dish its rich, creamy flavor. You can opt for light coconut milk for a lower-fat version, though it may be slightly less luscious. -
1/4 teaspoon of salt
Just a pinch! Salt helps to enhance the sweetness of the coconut milk and balances the flavors in the dish. -
4 tablespoons of brown sugar (divided)
Brown sugar adds a lovely caramel note to the dish. If you’re aiming for a lighter option, you can substitute with honey or maple syrup. -
2 ripe mangoes
Look for mangoes that yield slightly to pressure for perfect sweetness. If mangoes are out of season, you could use sliced bananas for a twist, though they won’t replicate the original flavor.
Step-by-Step Instructions
-
Soak the Sticky Rice
Start by rinsing the sticky rice under cold water until the water runs clear. This removes excess starch and helps achieve that wonderful chewy texture. Next, place the rice in a bowl, cover it with lukewarm water, and let it soak for at least 4 hours or overnight if you have the time. Trust me, this soak makes all the difference! -
Prepare the Coconut Mixture
In a small saucepan, combine half of the coconut milk, 2 tablespoons of brown sugar, and salt. Heat over medium-low heat, stirring until the sugar dissolves. Be careful not to let it boil; just warm it enough until everything’s mixed together beautifully. -
Steam the Rice
Drain the soaked rice and place it in a steamer basket lined with cheesecloth (or a clean kitchen towel). You can also use a bamboo steamer for an authentic touch. Steam the rice over boiling water for about 25-30 minutes until tender and sticky. Give it a gentle stir halfway through to ensure even cooking. The aroma will be heavenly! -
Combine It All
Once the rice is done, transfer it to a large bowl or a plate and gradually stir in the warm coconut mixture. Mix until the rice absorbs the coconut goodness. Let it sit for about 15 minutes, allowing the flavors to meld together. -
Slice the Mangoes
While the rice is resting, peel and slice the ripe mangoes into thin strips. Aim for finesse here—beautiful presentation goes a long way in impressing friends and family! -
Serve it Up
To serve, place a generous scoop of the sticky rice on a plate or in a bowl, drizzle with the remaining coconut milk, and artfully arrange the mango slices on the side. There you have it—a masterpiece!
Serving Suggestions
For an eye-catching presentation, serve your Mango Sticky Rice in individual bowls topped with a lovely drizzle of coconut milk. Garnish with sesame seeds, a sprinkle of toasted coconut flakes, or fresh mint leaves for that extra touch of elegance. Pair this dessert with a slightly salty snack, like crispy fried spring rolls, creating a delightful contrast that will wow your guests!
Recipe Variations
- Coconut Pandan Version: Add a few drops of pandan extract to the coconut milk mixture for a fragrant twist!
- Tropical Bliss: Include sliced strawberries or cubes of pineapple for a fruity explosion!
- Vegan Delight: Swap brown sugar for coconut sugar to keep it 100% plant-based.
- Nutty Crunch: Add crushed peanuts or cashews on top for a delightful crunch.
Chef’s Notes
Mango Sticky Rice has been a staple in my dessert menu for as long as I can remember, but I’ve played around with it over the years. My sister once tried adding a bit of lime zest, and let me tell you, it was an unexpected hit! Sometimes, I also like to prep a batch on lazy Sunday afternoons, letting the aroma transport me back to those sun-kissed days in Thailand. Cooking is all about evolution, experimentation, and turning simple ingredients into beautiful memories!
FAQs and Troubleshooting
1. My rice didn’t turn out sticky. What happened?
If your rice isn’t sticky enough, it may be due to not soaking it long enough. Make sure to soak for at least 4 hours, preferably overnight, for the best results.
2. Can I use regular rice instead?
While you can use regular rice, the texture won’t quite match the chewiness of sticky rice. If you want an even closer result, try using short-grain rice instead.
3. How do I store leftovers?
Store any leftovers in an airtight container in the fridge for up to 2 days. The rice may harden, but you can warm it in the microwave with a splash of coconut milk to bring it back to life.
4. What’s the secret to perfect mangoes?
The key is to pick mangoes that are slightly soft yet firm to the touch. If mangoes aren’t in season, consider using a different fruit like bananas or even peaches!
Nutritional Info
While I don’t provide specific nutritional info for every recipe, enjoy knowing that this Mango Sticky Rice is packed with wholesome ingredients! The coconut milk offers healthy fats, while mangoes are rich in vitamins and minerals—definitely a treat you can feel good about!
So there you have it—Easy Yet Delicious Mango Sticky Rice that’s bound to impress! Whether you’re treating yourself, hosting a gathering, or simply looking to indulge in some tropical flavors, this dish ticks all the boxes. Happy cooking, and remember: keep it fresh, simple, and oh-so-delicious!
PrintEasy Yet Delicious Mango Sticky Rice
A delightful Thai dessert featuring sticky rice topped with sweet, ripe mangoes and creamy coconut milk.
- Prep Time: 15 minutes
- Cook Time: 30 minutes
- Total Time: 45 minutes
- Yield: 4 servings 1x
- Category: Dessert
- Method: Steaming
- Cuisine: Thai
- Diet: Vegetarian
Ingredients
- 1 cup of sticky rice
- 1 1/2 cups of lukewarm water (divided)
- 1 can of coconut milk (divided)
- 1/4 teaspoon of salt
- 4 tablespoons of brown sugar (divided)
- 2 ripe mangoes
Instructions
- Soak the sticky rice under cold water until the water runs clear, then soak in lukewarm water for at least 4 hours or overnight.
- Prepare the coconut mixture by combining half of the coconut milk, 2 tablespoons of brown sugar, and salt in a saucepan and warming it.
- Steam the soaked rice for 25-30 minutes until tender and sticky.
- Combine the warm coconut mixture with the steamed rice, stirring until absorbed and letting it sit for 15 minutes.
- Slice the mangoes into thin strips.
- Serve the sticky rice with a drizzle of coconut milk and arranged mango slices.
Notes
For added flavor, consider variations like coconut pandan or adding nuts on top. Serve with crispy snacks for a delightful contrast.
Nutrition
- Serving Size: 1 serving
- Calories: 350
- Sugar: 18g
- Sodium: 200mg
- Fat: 15g
- Saturated Fat: 13g
- Unsaturated Fat: 2g
- Trans Fat: 0g
- Carbohydrates: 50g
- Fiber: 2g
- Protein: 4g
- Cholesterol: 0mg
Keywords: Mango Sticky Rice, Thai Dessert, Easy Dessert, Coconut Milk, Mango Recipes

One-Pan Mango Salsa Chicken: 30-Minute Weeknight Dinner
Delightful Chicken with Mango Salsa: A Flavorful and Vibrant Meal
Welcome to Clean Plate Cravings! I’m absolutely thrilled to share a recipe that’s not just a crowd-pleaser but also perfect for those busy weeknights when you want something fresh, wholesome, and utterly delicious. Today, we’ll dive into the colorful world of Chicken with Mango Salsa—a dish that’s as vibrant as summer itself!
Eating well shouldn’t feel like a chore; it should feel exhilarating and nourishing. That’s exactly what this dish embodies. The tender chicken breast pairs beautifully with the juicy, sweet mango salsa that bursts with flavor in every bite. Whether you’re preparing a casual family dinner or impressing friends at a gathering, this recipe meets all of your culinary needs while keeping it light and fun.
Picture this: you’re cooking away in your kitchen, the tantalizing aroma of grilled chicken filling the air. You finish off the dish with a zesty mango salsa that adds that extra zing—how can anyone resist? This is what we’re crafting today! It’s fresh, simple, and seriously delicious—just how I like it. Let’s get started!
A Taste of Nostalgia
One of my fondest memories in the kitchen revolves around summer barbecues at my grandparents’ house. The anticipation of gathering around the grill with family rang in the air, and the vibrant aromas were a feast for the senses. My grandmother would whip up her famous grilled chicken, and the highlight was always her fresh mango salsa. I can still hear her laughter and the sound of sizzling chicken on the grill.
The combination of the tender chicken coated in spices and the sweet, tangy mango salsa would elevate any meal. It wasn’t just the flavor that made it special; it was the moments we shared together around the table, swapping stories and enjoying delicious food. I remember sneaking back to the grill, hoping for another bite.
This recipe channels that warmth and joy, infusing your kitchen with comforting memories of laughter and love. So, grab your knife, put on your apron, and let’s create some delicious magic together!
Ingredients
Here’s what you’ll need to whip up this delightful dish:
-
2 boneless, skinless chicken breasts
- These provide the perfect canvas for our spices. You can substitute with thighs if you like dark meat, which tends to be juicier!
-
1 ripe mango, diced
- Sweet and juicy, mangoes are the star of the show here! If mango is out of season, feel free to swap with diced pineapple or peach for a similar sweetness.
-
1/2 red onion, finely chopped
- It adds a crunchy texture and a mild flavor. If red onion feels too sharp for your palate, yellow or green onions work just as nicely.
-
1 red bell pepper, diced
- Sweet and refreshing, this bell pepper brings a pop of color and extra crunch. Try swapping it with yellow or orange bell peppers for a different flavor profile.
-
1 lime, juiced
- Lime juice brightens everything up; it balances the sweetness of the mango. If lime isn’t available, lemon juice makes a fine substitution.
-
Salt and pepper to taste
- Simple but essential! Seasoning is vital to elevate all the flavors in the dish.
-
Olive oil
- Perfect for sautéing or grilling the chicken. Feel free to use canola or avocado oil if that’s what you have on hand.
-
Cooked rice or quinoa (for serving)
- These grains soak up the delicious juices and make for a hearty side! You could use cauliflower rice for a low-carb option.
Step-by-Step Instructions
Now that we have our ingredients ready, let’s jump into the kitchen and get cooking!
Step 1: Preparing the Chicken
First up, let’s gear the chicken. Pat those chicken breasts dry with a paper towel and season them generously with salt and pepper. If you’re feeling adventurous, sprinkle on a bit of garlic powder or smoked paprika for an extra kick!
Step 2: Cooking the Chicken
Heat a skillet or grill pan over medium-high heat and drizzle it with olive oil. Once hot, place the chicken in the pan. You should hear that satisfying sizzle! Cook for about 6-7 minutes per side, or until the chicken is golden brown and cooked through (the internal temperature should reach 165°F).
Chef’s Tip: Let the chicken rest for a few minutes after cooking. This helps retain all those juicy flavors inside!
Step 3: Whipping Up the Mango Salsa
While the chicken is resting, let’s get to that marvelous salsa. In a mixing bowl, combine the diced mango, finely chopped red onion, and diced red bell pepper. Squeeze the fresh lime juice over the top, adding a pinch of salt and pepper. Toss gently to combine.
Chef’s Tip: For an added kick, throw in some diced jalapeño or a dash of chili powder—spicy salsa anyone?
Step 4: Plating It Up!
Now, to serve! Fluff up some cooked rice or quinoa on the plate as your base. Slice the rested chicken and place it on top. Finish with a generous scoop of that vibrant mango salsa right over the chicken. Voilà! You’re ready to dig in!
Serving Suggestions
For a restaurant-style presentation, consider garnishing with some freshly chopped cilantro or edible flowers. The bright green herbs pop beautifully against the chicken and salsa, making your dish visually stunning!
This Chicken with Mango Salsa is perfect for packing into lunch boxes or serving at a summer picnic—trust me, everyone will be asking for the recipe!
Recipe Variations
- Tropical Twist: Add diced avocado to the salsa for a creamier texture.
- Grilled Version: Grill the chicken outside for a smoky flavor and an enhanced char.
- Herbaceous Delight: Swap out lime juice for orange juice in the salsa for a sweeter flavor profile.
- Spicy Option: Incorporate some chopped cilantro and a touch of jalapeño in your salsa if you love a bit of heat.
- Meal Prep: Double the recipe and meal prep for the week—this dish tastes great cold on salads too!
Chef’s Notes
I’ve been whipping up variations of this dish for years, and I always love how it brings friends and family together. One time, I even made a version with grilled shrimp instead of chicken—talk about a crowd-pleaser! The salsa is super versatile, and I’ve even tossed it onto fish tacos; the freshness simply cannot be beat.
Cooking is about experimentation, and I encourage you to try out different fruits in the salsa or different methods of cooking the chicken. Who knows what delightful combination you might discover!
FAQs and Troubleshooting
Q: How can I make sure my chicken stays juicy?
A: Be sure not to overcook the chicken. Using a meat thermometer is a great way to check for doneness without guessing!
Q: Can I make the mango salsa ahead of time?
A: Yes! Just keep in mind that the mango may soften a bit over time. If you’re making it a few hours in advance, consider leaving out the red onion until you’re ready to serve for that crisp bite!
Q: What if my mango isn’t ripe?
A: A slightly underripe mango can still work; just add a pinch of sugar to balance out the tartness.
Q: Can I freeze leftovers?
A: I’d recommend freezing the chicken separately from the salsa, as the salsa doesn’t freeze well. The chicken will keep well in an airtight container for up to 3 months.
Nutritional Info
While this recipe is packed with wholesome ingredients, here’s a quick breakdown:
- Calories: Approximately 390 per serving
- Protein: 30g
- Carbohydrates: 30g
- Fat: 15g
- Fiber: 4g
This dish is not only a feast for your taste buds but also a nourishing option that fits perfectly into a balanced diet.
I hope you all love making this Chicken with Mango Salsa as much as I do! It’s a reminder of the joyous moments in the kitchen and the shared love for delicious food. So gather your loved ones, share a meal, and let laughter fill the air! Happy cooking, friends!
PrintChicken with Mango Salsa

A vibrant and flavorful dish featuring tender chicken breast paired with a refreshing mango salsa that bursts with sweetness.
- Prep Time: 15 minutes
- Cook Time: 20 minutes
- Total Time: 35 minutes
- Yield: 4 servings 1x
- Category: Main Course
- Method: Grilling
- Cuisine: American
- Diet: Gluten-Free
Ingredients
- 2 boneless, skinless chicken breasts
- 1 ripe mango, diced
- 1/2 red onion, finely chopped
- 1 red bell pepper, diced
- 1 lime, juiced
- Salt and pepper to taste
- Olive oil
- Cooked rice or quinoa (for serving)
Instructions
- Pat the chicken breasts dry with a paper towel and season generously with salt and pepper.
- Heat a skillet or grill pan over medium-high heat and drizzle with olive oil. Once hot, place the chicken in the pan and cook for about 6-7 minutes per side, until golden brown and cooked through.
- Combine the diced mango, finely chopped red onion, and diced red bell pepper in a mixing bowl. Squeeze lime juice over the top, adding a pinch of salt and pepper.
- Fluff up some cooked rice or quinoa on the plate, slice the rested chicken, and top with the vibrant mango salsa.
Notes
Add diced avocado to the salsa for creaminess or grill the chicken for a smoky flavor. Don’t overcook the chicken to maintain juiciness.
Nutrition
- Serving Size: 1 serving
- Calories: 390
- Sugar: 15g
- Sodium: 300mg
- Fat: 15g
- Saturated Fat: 2g
- Unsaturated Fat: 10g
- Trans Fat: 0g
- Carbohydrates: 30g
- Fiber: 4g
- Protein: 30g
- Cholesterol: 70mg
Keywords: chicken, mango salsa, summer recipe, healthy meal, grilling