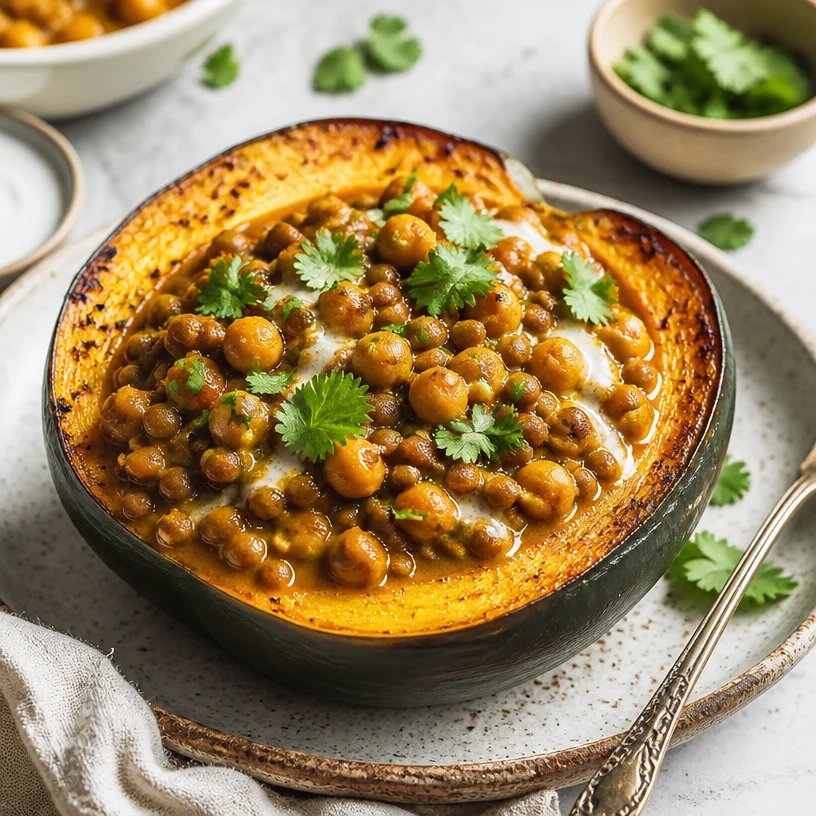
Acorn Squash Curry with Lentils & Roasted Chickpeas
Discover the Comfort of Acorn Squash Curry with Lentils & Roasted Chickpeas
Welcome to Clean Plate Cravings! Today, we’re diving into a bowl of pure warmth and comfort: Acorn Squash Curry with Lentils and Roasted Chickpeas. Now, before you start imagining complex flavors or endurance tests in the kitchen, let me assure you this dish is as simple as it is delectable. It’s that delightful balance of sweet, savory, and spicy that transforms a humble acorn squash into a cozy meal that feels like a hug.
I adore this recipe not just for its flavor but for its versatility; it’s perfect for a weeknight dinner or as a shared meal with friends on the weekend. Plus, it’s packed with nutrients, making it a stellar option for those days when you crave something hearty without the guilt.
So, grab that apron and let’s get cooking! You’re going to love the journey this recipe takes you on, from the vibrant colors of fresh ingredients to the satisfying aroma that fills your kitchen. Because, let’s be honest: cooking should be fun, and that’s exactly what we’re about here at Clean Plate Cravings.
A Memory to Savor
Cooking has always been more than just a necessity for me; it’s woven through my life’s fabric, filled with memories and magic. I still remember the first time I had anything resembling curry. My grandmother had a knack for making comforting dishes that spoke volumes about her heritage. One chilly afternoon, she invited my cousins and me into the kitchen to help prepare her famous curry. She set out all the ingredients, including a beautiful acorn squash glowing like sunshine on the countertop.
We all took turns peeling, chopping, and stirring, our laughter mixing with the aromatic spices simmering on the stove. As the flavors melded, the scent enveloped us like a warm blanket. Finally, when we gathered around the table, I remember feeling not just full but nourished in spirit. This Acorn Squash Curry with Lentils and Roasted Chickpeas brings back those nostalgic vibes but with my own spin. Every time I make this dish, I’m transported back to that vibrant kitchen, a place where love and food intertwined beautifully.
Ingredients You’ll Need
Now that you’re ready to embark on this culinary adventure, let’s gather our ingredients. Here’s what you’ll need:
-
1 acorn squash: The star of the show! Choose one that’s firm with a deep green color. Don’t worry about the shape and size; a little character adds charm! If acorn squash isn’t available, you can easily substitute with butternut or even pumpkin.
-
1 cup lentils (rinsed): Lentils are a fantastic source of protein and fiber, adding heartiness to the dish. Any lentils will work, but I prefer green or brown for their texture. If you’re short on time, canned lentils can be a great time-saver!
-
1 can chickpeas (drained and rinsed): Roasted for that crunchy texture! If you’re looking for an alternative, try using any beans you have on hand, like black beans or kidney beans.
-
1 onion (chopped): Adds a lovely sweetness when sautéed. If you’re in a pinch, shallots or even green onions can work too!
-
2 cloves garlic (minced): There’s nothing like the aroma of fresh garlic sautéing away. If you’re feeling adventurous, try using roasted garlic for a milder flavor.
-
1 tablespoon ginger (grated): This spice brings a warmth and zing to the dish. Don’t have fresh ginger? Ground ginger can work in a pinch, but fresh is always best!
-
1 can coconut milk: This is what makes the curry creamy and rich! If you’re looking for a lighter option, unsweetened almond milk can also be used, but you’ll lose some creaminess.
-
2 tablespoons curry powder: A blend of spices that creates that irresistible flavor! Feel free to use store-bought curry powder or mix up your own blend. A bit of turmeric or garam masala can elevate it further.
-
1 tablespoon olive oil: For sautéing the onions and spices. Any neutral oil will do, so if you’re out of olive oil, grapeseed or vegetable oils are fine substitutes.
-
Salt and pepper to taste: Don’t forget to season to your preference!
-
Fresh cilantro for garnish: Adds a burst of color and flavors at the end. If you’re not a cilantro fan, try parsley or basil for a different twist!
Step-by-Step Instructions
Here’s how we’ll unfold the magic!
-
Prep the Ingredients: Start by preheating your oven to 400°F (200°C). Cut the acorn squash in half, scoop out the seeds, and place the halves cut side up on a baking sheet lined with parchment paper. Drizzle gently with olive oil, a sprinkle of salt, and pepper. Allow it to roast for about 30-35 minutes or until tender, making your kitchen smell divine.
-
Cook the Lentils: While the squash is roasting, rinse your lentils in cold water. In a medium saucepan, bring 3 cups of water to a boil, then toss in the lentils and a pinch of salt. Reduce to a simmer and cook for about 20 minutes, or until tender but not mushy. Drain if any excess water remains and set aside.
Chef Tip: If you want to infuse your lentils with flavor, use vegetable broth instead of water.
-
Roast the Chickpeas: Grab another baking sheet for those chickpeas! Drain and rinse them, then pat them dry with a paper towel. Toss with a tablespoon of olive oil and spices of choice (I love paprika and cumin). Roast at 400°F (200°C) for about 25–30 minutes, stirring halfway through. They should become golden and crispy.
-
Sauté the Aromatics: In a large pot, heat a tablespoon of olive oil over medium heat. Add the chopped onion and sauté until translucent, about 3-4 minutes. Next, add the minced garlic and grated ginger. Your kitchen will be filled with fragrant goodness! Cook for another minute until everything is aromatic.
-
Incorporate the Spices: Stir in the curry powder, allowing it to bloom for about a minute. This will enhance the flavors and bring out the spice aroma, making your mouth water in anticipation!
-
Time for Coconut Milk!: Pour in the canned coconut milk and mix well. Bring to a gentle simmer, then add the cooked lentils. Stir until well combined and let it simmer on low for about 10 minutes. This is where the magic happens, and the flavors meld beautifully.
Chef Hack: If you find the curry too thick, you can add a splash of vegetable broth or water to reach your desired consistency.
-
Final Touches: Check for seasoning, and adjust salt and pepper as necessary. Once your squash is done roasting, carefully scoop the flesh out into the curry, or you can leave it in its shell for a beautiful presentation.
Serving Suggestions
To serve your Acorn Squash Curry with Lentils and Roasted Chickpeas, ladle generous portions into bowls. I like to nestle the roasted chickpeas right on top for that crunchy contrast, creating a visually appealing dish that beckons to be devoured. Finish with a sprinkle of fresh cilantro to elevate it even further!
Recipe Variations
Feeling adventurous? Here are a few ideas to change things up:
-
Spicy Kick: Add a minced chili or a dash of cayenne pepper to crank up the heat!
-
Add Greens: Stir in a couple of handfuls of spinach or kale at the end for a nutrition boost.
-
Nutty Delight: Toss in a few tablespoons of toasted coconut flakes or chopped peanuts on top for added texture.
-
Sweet Touch: Include a spoonful of maple syrup or honey for a hint of sweetness that complements the curry beautifully.
-
Curry Base Variety: Experiment with different curry pastes—like red or green curry—to switch up the flavor profile entirely!
Chef’s Notes
Cooking is truly an evolving art! Every time I make this dish, I think back to that delightful day in Grandma’s kitchen. I started simple, perhaps a lot simpler than this recipe today, and over the years, it expanded into what we have now, each iteration adding new layers of flavor and creativity. It’s okay to adjust ingredients based on what you have on hand or what suits your taste. After all, healthy eating should be joyful and personal!
FAQs and Troubleshooting
1. My lentils turned mushy; what went wrong?
Lentils can overcook quickly, especially if left too long. Check them a few minutes before the suggested cooking time for that perfect tender bite!
2. Why is my curry too thick?
No worries! Just add a splash more coconut milk or vegetable broth until you reach your desired consistency.
3. Can I make this dish in advance?
Absolutely! Curries actually taste better the next day as the flavors meld. Just store in an airtight container in the fridge for up to five days, and reheat gently when you’re ready.
4. Can this be frozen?
Definitely! Cool completely before transferring to freezer-safe containers. It can be frozen for up to three months; just thaw and reheat when you’re ready to enjoy.
Nutritional Info
While specific values can vary, here’s a general idea of what you can expect per serving (without chickpeas):
- Calories: 350-400
- Protein: 12g
- Carbohydrates: 45g
- Dietary Fiber: 14g
- Fat: 15g
This tasty dish is packed with healthy ingredients that leave you feeling full and energized!
And there you have it! Your very own Acorn Squash Curry with Lentils and Roasted Chickpeas, infused with stories, flavor, and happy memories. Cooking should be a reflection of your taste and experiences, so don’t hesitate to make it your own. Enjoy every delicious bite, and let me know how it turns out! Happy cooking!
PrintAcorn Squash Curry with Lentils & Roasted Chickpeas

A cozy and nutritious dish featuring roasted acorn squash, hearty lentils, and crispy chickpeas, perfect for a comforting meal any night of the week.
- Prep Time: 10 minutes
- Cook Time: 55 minutes
- Total Time: 65 minutes
- Yield: 4 servings 1x
- Category: Main Course
- Method: Baking
- Cuisine: Indian
- Diet: Vegetarian
Ingredients
- 1 acorn squash
- 1 cup lentils (rinsed)
- 1 can chickpeas (drained and rinsed)
- 1 onion (chopped)
- 2 cloves garlic (minced)
- 1 tablespoon ginger (grated)
- 1 can coconut milk
- 2 tablespoons curry powder
- 1 tablespoon olive oil
- Salt and pepper to taste
- Fresh cilantro for garnish
Instructions
- Prep the ingredients: Preheat your oven to 400°F (200°C). Cut the acorn squash in half, scoop out the seeds, and place the halves cut side up on a baking sheet lined with parchment paper. Drizzle with olive oil, salt, and pepper, and roast for 30-35 minutes until tender.
- Cook the lentils: Rinse lentils in cold water. In a medium saucepan, bring 3 cups of water to a boil. Add lentils and a pinch of salt, simmer for about 20 minutes until tender, then drain if necessary.
- Roast the chickpeas: Toss drained chickpeas with olive oil and spices on a baking sheet and roast at 400°F (200°C) for 25-30 minutes until golden and crispy.
- Sauté the aromatics: In a large pot, heat olive oil over medium heat. Sauté chopped onion until translucent, then add minced garlic and grated ginger, cooking for another minute.
- Incorporate the spices: Stir in the curry powder and allow it to bloom for a minute.
- Pour in the canned coconut milk and mix well. Bring to a gentle simmer, then add cooked lentils and combine. Let simmer on low for about 10 minutes.
- Check for seasoning and adjust salt and pepper. Carefully scoop roasted squash flesh into the curry or leave it in the shell for presentation.
Notes
For extra flavor, consider using vegetable broth instead of water for the lentils. You can also adjust the curry’s thickness by adding vegetable broth or water as needed.
Nutrition
- Serving Size: 1 serving
- Calories: 375
- Sugar: 5g
- Sodium: 500mg
- Fat: 15g
- Saturated Fat: 6g
- Unsaturated Fat: 8g
- Trans Fat: 0g
- Carbohydrates: 50g
- Fiber: 12g
- Protein: 15g
- Cholesterol: 0mg
Keywords: acorn squash, curry, vegetarian, lentils, chickpeas, comfort food, healthy recipe

Minute Crispy Zucchini Puffs for Busy Weeknights
The Ultimate Easy Zucchini Puffs: A Delightful Bites Experience
Welcome to Clean Plate Cravings! If you’re anything like me, you love hearty food that doesn’t just fill your belly but also warms your heart. Today, I’m super excited to share a gem of a recipe that’s perfect for any time of year: Easy Zucchini Puffs! These delightful savory bites are bursting with flavor, incredibly versatile, and oh-so-simple to whip up. Connecting our playful culinary adventures with nutrition and taste is what we’re all about, and these puffs hit that sweet spot like a home run!
Imagine the summer days of my childhood, running around the backyard, giggling with friends while the sweet smell of baked goodies wafted through the air. My grandma would be in the kitchen, making the most out of every vegetable she could find from the garden. Among her many creations were these little savory nuggets we lovingly called “zucchini puffs.” They were always the first to disappear at family gatherings, and I remember sneaking into the kitchen for just one more… and then another.
These puffs are a celebration of those crisp summer zucchinis, hugging together in a cheesy, savory embrace that brings smiles with every bite. They’re not just a snack – they bring back memories, connection, and joy. Ready to dive into this culinary adventure with me? Let’s do it!
Personal Story
Growing up, my summers were spent exploring my neighborhood and, of course, spending time with my grandma in her colorful garden. I can still visualize the delightful chaos of the vegetable patch – my tiny hands searching for plump zucchinis hidden beneath sprawling leaves. Whenever a batch came home, Grandma had a knack for turning them into the most mouthwatering dishes. One of my favorites was her famous zucchini puffs.
I can remember eagerly waiting by the kitchen counter, the aroma of cheesy goodness filling the air. It always amazed me how just a few simple ingredients could create such a zesty explosion of flavors! Watching her whisk, mix, and bake gave me a front-row seat to the magic of cooking, leaving me hooked for life. Today, I carry on that tradition, adding my own spin while cherishing the nostalgia. And lucky for you, I’m sharing the recipe that always reminds me of those golden afternoons spent with her.
Ingredients
Here’s what you’ll need to create these tasty Easy Zucchini Puffs:
-
¾ cup all-purpose flour
Essential for binding the puffs together. You can swap for whole wheat flour or a gluten-free mix if needed! -
¾ teaspoon baking powder
This is the magic ingredient that helps our puffs rise and become fluffy. Make sure it’s fresh for the best results! -
2 teaspoons Italian seasoning
A blend of herbs that adds a lovely aromatic touch. Feel free to customize this to your liking; oregano or thyme can be great substitutes! -
¾ cup milk
Milk helps keep our mixture moist. You can use almond milk or oat milk for a dairy-free version. -
1 large egg
This binds everything together. If you want a vegan option, replace it with a flax egg (1 tablespoon of ground flaxseeds mixed with 2.5 tablespoons of water, let it sit until it thickens). -
½ cup shredded cheddar cheese
Cheese provides that gooeyness and flavor. Try swapping with feta or mozzarella for a different twist! -
1 cup zucchini (grated)
The star of our recipe! You can also sneak in other veggies like carrots or squash for added nutrition and color.
Step-by-Step Instructions
-
Preheat Your Oven:
Preheat your oven to 375°F (190°C). This allows the puffs to rise beautifully while ensuring they turn golden brown. I always say, “A preheated oven is key to crispy puffs!” -
Prepare Your Zucchini:
Grate your zucchini and squeeze out excess moisture using a clean kitchen towel or cheesecloth. This step is crucial to prevent soggy puffs. Less water, more flavor! -
Mix the Dry Ingredients:
In a large bowl, combine flour, baking powder, and Italian seasoning. Whisk them together until evenly blended. Sifting can be a great way to add air, but honestly, a good whisk will do the trick! -
Combine Wet Ingredients:
In another bowl, whisk together the milk and egg until mixed. If you’re using a flax egg, this is the time to add that! Incorporating the wet ingredients into our dry mix is where the magic starts to happen! -
Fold in the Zucchini and Cheese:
Gently fold the grated zucchini and shredded cheese into the batter, making sure everything is uniformly coated. This is the fun part—watch the mixture become vibrant with green and yellow hues! -
Fill Your Muffin Tin:
Grease a muffin tin or line it with silicone cups. Spoon the mixture evenly into each cup; they should be about two-thirds full. Pro-tip: Using an ice cream scoop makes this step a breeze and keeps the portion sizes perfect! -
Bake to Perfection:
Slide your muffin tin into the preheated oven, and let those beauties bake for about 25-30 minutes or until they turn a lovely golden color. You’ll know they’re ready when a toothpick comes out clean. Don’t forget to check out that puffiness! -
Cool and Enjoy:
Once done, let them cool for a few minutes in the tin before transferring them to a wire rack. The aroma in your kitchen will have everyone begging for a taste!
Serving Suggestions
These Easy Zucchini Puffs are wonderfully versatile! You can treat them as appetizers, a fun snack, or even serve them as a side alongside a fresh salad or soup. Drizzle some homemade ranch or garlic aioli over the top for an extra flavor kick. Whether you’re chatting with friends at a gathering or enjoying a quiet evening in, these puffs are the perfect companion!
Recipe Variations
-
Spicy Zucchini Puffs: Add sliced jalapeños or a teaspoon of red pepper flakes for some heat!
-
Mediterranean Twist: Blend in sun-dried tomatoes and olives along with feta cheese for a Mediterranean twist.
-
Herbed Zucchini Puffs: Incorporate fresh herbs like basil or parsley for a burst of freshness.
-
Cheesy Bacon Zucchini Puffs: Add crumbled bacon and a mix of cheeses for a richer flavor profile.
-
Vegan Version: Simply replace the egg and milk with the flax egg and a plant-based milk to make them vegan!
Chef’s Notes
Every recipe carries a piece of our story, and these Easy Zucchini Puffs hold a special place in my kitchen. They have evolved over the years as I experimented with different ingredients. They weren’t always perfect; I recall a batch that was more like zucchini pancakes than puffs! But with every mishap comes learning. Cooking is personal, and I love how it allows us to express creativity while evoking memories and emotions.
Fun anecdote: Last summer, I made these puffs for a potluck, but they mysteriously vanished before I even made it into the party. Turns out, my friends thought they were irresistible and couldn’t resist sneaking bites while they were still cooling on the counter!
FAQs and Troubleshooting
Q: Why are my zucchini puffs soggy?
A: This often occurs when zucchini retains too much moisture. Make sure to squeeze out as much excess liquid as possible before mixing it into the batter!
Q: Can I make these puffs ahead of time?
A: Absolutely! You can make them a day in advance and store them in an airtight container in the fridge. Simply reheat in the oven for a few minutes before serving.
Q: How do I store leftovers?
A: Store any leftovers in an airtight container in the fridge for up to three days. They also freeze well! Just make sure to wrap them tightly.
Q: What can I serve with these puffs?
A: They pair beautifully with a tangy dipping sauce like tzatziki or marinara, or you can enjoy them alongside a fresh salad!
Nutritional Info
These Zucchini Puffs pack a balance of carbohydrates, protein, and healthy fats, making them a satisfying option! They are rich in vitamins thanks to the zucchini and provide a delightful cheesy flavor that’s hard to resist. Each puff is about 70 calories, making them a guilt-free treat that can be enjoyed without hesitation!
And there you have it, friends—the delightful journey of crafting your Easy Zucchini Puffs is complete! I hope you find as much joy making these in your kitchen as I did sharing this recipe with you. Remember, cooking is all about love, laughter, and plenty of flavor. Let’s keep these good vibes going, and enjoy every bite together! Happy cooking!
PrintEasy Zucchini Puffs

Delightful savory bites bursting with cheesy flavor, perfect for any occasion.
- Prep Time: 15 minutes
- Cook Time: 30 minutes
- Total Time: 45 minutes
- Yield: 4 servings 1x
- Category: Appetizer
- Method: Baking
- Cuisine: American
- Diet: Vegetarian
Ingredients
- ¾ cup all-purpose flour
- ¾ teaspoon baking powder
- 2 teaspoons Italian seasoning
- ¾ cup milk
- 1 large egg
- ½ cup shredded cheddar cheese
- 1 cup zucchini (grated)
Instructions
- Preheat your oven to 375°F (190°C).
- Grate your zucchini and squeeze out excess moisture.
- Combine flour, baking powder, and Italian seasoning in a large bowl.
- Whisk together the milk and egg in another bowl.
- Fold in the grated zucchini and shredded cheese into the batter.
- Grease a muffin tin and fill each cup about two-thirds full.
- Bake for 25-30 minutes until golden.
- Cool for a few minutes before transferring to a wire rack.
Notes
Serve as appetizers, snacks, or sides. Great with ranch or garlic aioli.
Nutrition
- Serving Size: 1 puff
- Calories: 70
- Sugar: 1g
- Sodium: 150mg
- Fat: 3g
- Saturated Fat: 1g
- Unsaturated Fat: 2g
- Trans Fat: 0g
- Carbohydrates: 10g
- Fiber: 1g
- Protein: 3g
- Cholesterol: 25mg
Keywords: zucchini, puffs, snack, appetizer, vegetarian
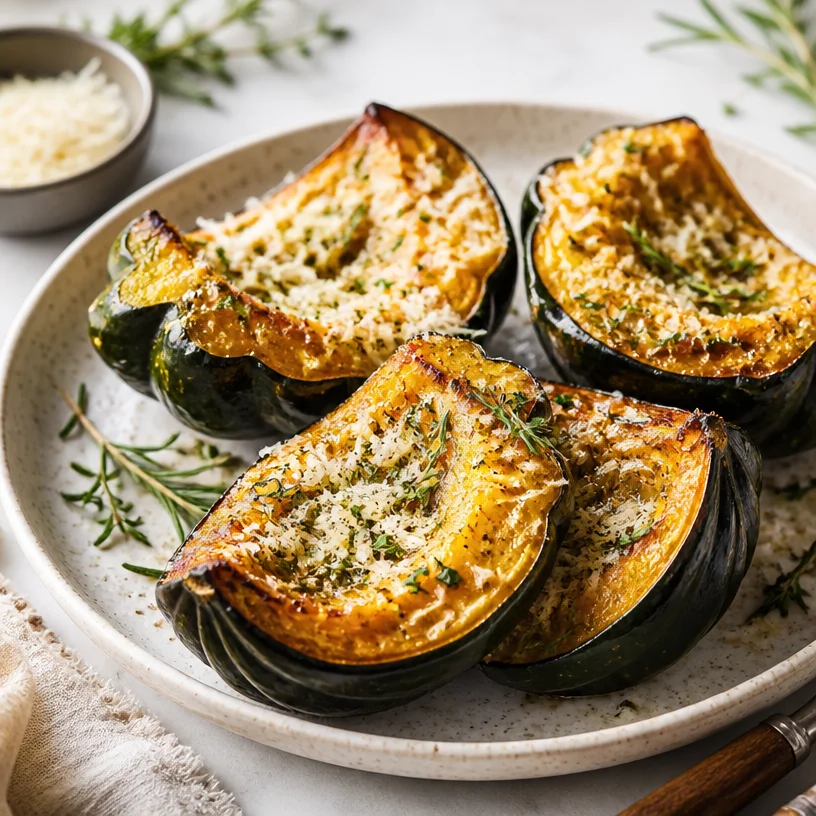
Roasted Acorn Squash with Parmesan Herb Seasoning
Roasted Acorn Squash with Parmesan Herb Seasoning: A Feel-Good Fall Delight
There’s something about autumn that just makes my heart sing. The air turns crisp, the leaves explode in a palette of golden hues, and the harvest fills our kitchens with warm, inviting scents. When I think of comfort food, roasted acorn squash instantly comes to mind. It’s not just delicious; it’s downright heartwarming. A vibrantly colored acorn squash roasted to perfection, drizzled with olive oil, sprinkled with fragrant herbs, and kissed with the earthy goodness of Parmesan cheese—that’s what I call a cozy meal.
Imagine walking into your kitchen, the aroma of roasting squash swirling around you like a warm hug. The best part? This dish is straightforward, requiring only a handful of ingredients, yet it never fails to impress. Whether you’re cooking for family, hosting friends, or simply whipping up a weeknight dinner for one, this roasted acorn squash is versatile and satisfying. It’s a dish that can stand alone or accompany almost anything. Let’s dive into the delicious details!
A Memorable Journey to the Kitchen
I remember the first time I had roasted acorn squash. It was a chilly fall evening, and I was invited to a friend’s house for dinner. She served it alongside a hearty soup and salad—a perfect trio for a cool night. I was smitten by the dish’s vibrant colors and the way the sweetness of the squash was harmonized beautifully with savory herbs and cheese.
As a child, my grandmother often said that the kitchen is the heart of the home. Watching her create magic from simple ingredients ignited my passion for cooking. So, when I took my first bite of the acorn squash that evening, I was transported back to those moments in my grandmother’s kitchen filled with warmth, laughter, and the sweet smells of home-cooked meals. I knew then that I had to recreate this dish myself! Now, every time I roast acorn squash, it feels like I’m inviting a piece of that nostalgia and love back into my life.
Ingredients You’ll Need
-
2 medium acorn squash: The star of the dish! Choose firm, unblemished squash. You can also substitute butternut squash for a sweeter flavor.
-
3 tablespoons olive oil: This adds richness and helps the squash caramelize beautifully. Feel free to swap in melted coconut oil for a different flavor profile.
-
1/2 cup grated Parmesan cheese: A touch of savory goodness! For a dairy-free option, try nutritional yeast for a similar umami kick.
-
1 tablespoon fresh rosemary, chopped: Earthy and aromatic. If you don’t have rosemary, thyme or sage can be delightful substitutes.
-
1 tablespoon fresh thyme, chopped: Enhances the overall flavor with a subtle woodsy note. Dried thyme works too in a pinch—just use about a teaspoon.
-
Salt and pepper to taste: Essential for bringing all the flavors together. Experiment with flavored salts for an exciting twist!
Step-by-Step Cooking Instructions
-
Preheat the Oven: Begin by preheating your oven to 400°F (200°C). This high temperature is key for caramelizing our squash and creating those lovely crispy edges.
-
Prepare the Squash:
- Cut the acorn squash in half lengthwise. Be careful here; the flesh can be a bit tough! A sharp knife and a gentle sawing motion work best.
- Scoop out the seeds and stringy bits with a spoon—don’t worry; we’re not wasting them! You can roast the seeds separately for a crunchy snack.
- Slice off a small piece at the base of each half to create flat surfaces, ensuring they sit upright in the oven.
-
Drizzle with Olive Oil:
- Place the squash halves cut side up on a baking sheet lined with parchment paper.
- Drizzle the olive oil over each half and use a brush or your hands to coat every inch. This ensures even roasting and prevents them from drying out.
-
Season Like a Pro:
- Sprinkle the grated Parmesan cheese inside each half generously.
- Next, toss the chopped rosemary and thyme into the mix, followed by a good pinch of salt and pepper.
- Feel free to get creative here! Add red pepper flakes for a kick or some garlic powder for additional depth.
-
Roast to Perfection:
- Pop the baking sheet in the preheated oven and roast for about 30-35 minutes.
- You’ll know they’re done when the flesh is tender and the edges have caramelized and turned golden brown.
- The aromas wafting through your kitchen will be pure magic.
-
Finish Strong:
- For an extra touch, broil the squash for the last 2-3 minutes of cooking. Just keep a close eye on it to prevent any burning; we want crispy, not charred!
Serving Suggestions
When it comes to serving roasted acorn squash, keep it simple and beautiful! Place each squash half on a colorful plate, cut side up, for an eye-catching presentation. Drizzle a little extra virgin olive oil on top for shine and flavor, and a sprinkle of fresh herbs for a pop of color. Pair it with a simple green salad or serve as a side dish alongside grilled chicken or fish. It’s versatile enough that it can easily be the star of the show or a delightful supporting role.
Recipe Variations
-
Sweet and Spicy: For a more adventurous flavor, drizzle a little maple syrup over the squash before roasting and sprinkle with cayenne pepper for an exciting balance of sweet and savory.
-
Mediterranean Inspired: Swap out parsley for the herbs and add some crumbled feta cheese for a tangy touch.
-
Nutty Addition: Top with toasted pecans or walnuts before serving for a satisfying crunch.
-
Vegan Delight: Omit the Parmesan or use a vegan version, and sprinkle with hemp seeds to keep it tasty and nutritious!
-
Stuffed Acorn Squash: After roasting, fill the squash with a mixture of quinoa, cranberries, and nuts for a filling main dish.
Chef’s Notes
Every time I make this dish, I’m reminded of how adaptable it is! I’ve experimented with different cheeses, herbs, and toppings. Sometimes, I’ve even turned it into a breakfast dish by adding a runny egg on top! It’s one of those recipes that continues to evolve with you—perfect for getting creative in the kitchen. Don’t hesitate to make it your own. The most memorable dishes come from a little experimentation and a lot of love!
FAQs and Troubleshooting
-
My squash didn’t caramelize: Make sure you have enough oil on the squash, and ensure your oven is set to the correct temperature. Love that high heat!
-
How do I know when it’s done?: The flesh should be fork-tender, and the edges should be golden brown. Don’t shy away from roasting them a bit longer for that beautiful caramelization.
-
Can I prepare the squash in advance?: Absolutely! You can cut and prep the squash a day ahead, store it in the fridge, and simply season and roast it when you’re ready to eat.
-
What else can I serve with it?: This pairs wonderfully with proteins like chicken, fish, or even a hearty lentil stew. It’s incredibly versatile and fits right in with a variety of cuisines.
Nutritional Info
While I don’t always focus on the numbers, it’s worth noting that acorn squash is rich in vitamins A and C, fiber, and contains antioxidants. The Parmesan adds a nice hit of protein and calcium, making this dish not only delicious but also nourishing!
Now, my friend, it’s time for you to put on your apron and enjoy the delicious process of bringing this roasted acorn squash to life in your kitchen! Remember, cooking should be fun and an opportunity to connect with those beautiful ingredients. Happy cooking!
PrintRoasted Acorn Squash with Parmesan Herb Seasoning
A cozy, heartwarming dish featuring roasted acorn squash drizzled with olive oil, topped with Parmesan cheese and fragrant herbs.
- Prep Time: 15 minutes
- Cook Time: 35 minutes
- Total Time: 50 minutes
- Yield: 4 servings 1x
- Category: Side Dish
- Method: Baking
- Cuisine: American
- Diet: Vegetarian
Ingredients
- 2 medium acorn squash
- 3 tablespoons olive oil
- 1/2 cup grated Parmesan cheese
- 1 tablespoon fresh rosemary, chopped
- 1 tablespoon fresh thyme, chopped
- Salt and pepper to taste
Instructions
- Preheat the oven to 400°F (200°C).
- Prepare the squash by cutting them in half lengthwise and scooping out the seeds.
- Drizzle olive oil over each half and coat evenly.
- Season with Parmesan cheese, rosemary, thyme, salt, and pepper.
- Roast in the oven for 30-35 minutes until tender and caramelized.
- Finish by broiling for 2-3 minutes for extra crispiness.
Notes
Feel free to experiment with different herbs and toppings for variety.
Nutrition
- Serving Size: 1 half squash
- Calories: 350
- Sugar: 5g
- Sodium: 400mg
- Fat: 12g
- Saturated Fat: 4g
- Unsaturated Fat: 6g
- Trans Fat: 0g
- Carbohydrates: 45g
- Fiber: 3g
- Protein: 15g
- Cholesterol: 30mg
Keywords: acorn squash, roasted vegetables, fall recipe, vegetarian side dish, comfort food
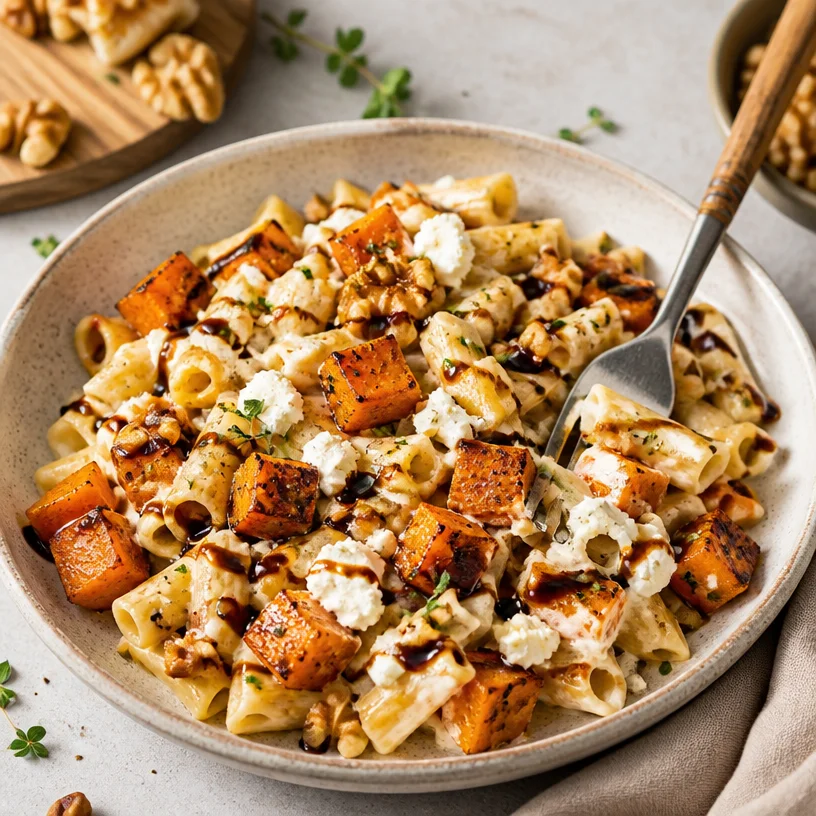
One-Pan Roasted Winter Squash Pasta for Cozy Weeknights
Roasted Winter Squash Pasta: A Cozy Dish for Chilly Days
Hello, food lovers! I’m Ava Carter, and today, we are diving into a dish that perfectly encapsulates the essence of comfort food—Roasted Winter Squash Pasta. With the winter chill creeping in, there’s nothing quite like a warm bowl of pasta that not only satisfies your cravings but also nourishes your body and spirit. This recipe is one I’ve savored over the years; it’s simple yet packed with flavor, and best of all, it’s guilt-free!
Picture this: You come home after a long day, your shoes soaked from the rain, and the only thing on your mind is coziness. What if I told you that you can whip up a delicious, wholesome meal in less than an hour, using just a handful of ingredients? That’s the magic of Roasted Winter Squash Pasta! Whether you’re preparing a solo meal or hosting friends for dinner, this dish is versatile enough for any occasion and gets everyone involved in the kitchen.
As we dive into this recipe, you’ll appreciate how the natural sweetness of the roasted squash pairs beautifully with tangy goat cheese, creating a rich, comforting flavor profile that wraps you in a warm embrace. Plus, it’s an excellent way to incorporate seasonal produce into your diet while keeping it exciting and creative!
So grab those aprons and let’s get cooking—because who says healthy eating can’t be delicious and fun?
Personal Story
I’ll never forget the first time I made roasted squash pasta. It was one of those crisp autumn afternoons, and I had just come back from the farmers’ market, my bags laden with fresh produce and the rich aroma of autumn. I had picked up a beautiful butternut squash, its bright orange flesh promising a sweetness that melted my heart.
Back in my cozy kitchen, I set to work, chopping up the squash and tossing it with olive oil and a sprinkle of salt. As it roasted, the sweet scent filled my home, creating a cozy nook that invited me to come to the table. I had invited a few close friends over for dinner that night, and as we sat around the table, sharing stories and laughter—giggling about our culinary mishaps and debating over the best pasta shapes—we savored every bite. The combination of nutty walnuts, creamy goat cheese, and the warm squash felt like a hug in every forkful.
That night turned into a cherished memory, and ever since, Roasted Winter Squash Pasta has become a staple in my kitchen, a meal that brings together friends and family to enjoy the simple pleasures of life.
Ingredients
Let’s gather our ingredients! Here’s what you’ll need to create this delightful dish:
-
1 butternut squash (or kabocha, or delicata)
This star of our dish brings natural sweetness and a creamy texture when roasted. If you can find kabocha or delicata squash, feel free to use those as they offer slightly different flavor profiles but work beautifully in this recipe. -
1 onion, chopped
The onion adds a touch of sweetness and depth to the dish. I love using yellow onions, but red onions work just as well if you want a bit more color! -
2 tablespoons olive oil
A heart-healthy fat that not only aids in roasting but also enhances flavor. You can swap the olive oil for melted coconut oil or even avocado oil if you’re looking for different nuances. -
Salt and pepper to taste
Essential elements for bringing out the flavors of our ingredients. No dish should ever be without a pinch of salt and a dash of pepper! -
8 oz pasta of choice
Use your favorite! I often go for whole wheat spaghetti or gluten-free pasta, but feel free to get creative—rigatoni or penne would work great too. -
4 oz goat cheese
This adds creaminess and offers a tangy twist to the dish. If you’re not a fan of goat cheese, parmesan or ricotta would be excellent substitutes. -
Pasta water (reserved from cooking pasta)
This starchy water is a secret weapon to make your sauce silky. Don’t forget to save a bit before draining! -
1/2 cup toasted walnuts
Crunchy, nutty goodness that complements the sweetness of the squash. If you’re nut-free, sunflower seeds or pumpkin seeds could be delicious substitutes. -
Balsamic glaze (for drizzling)
A sweet and tangy finishing touch that brings a lovely balance to the dish. You can make your own by reducing balsamic vinegar, or you can buy it pre-made!
Step-by-Step Instructions
Now that we’ve gathered our ingredients, let’s get down to the business of cooking! Follow these steps to create your delicious Roasted Winter Squash Pasta.
-
Preheat the Oven
Preheat your oven to 400°F (200°C). A hot oven is key to roasting vegetables, as it caramelizes sugars and adds depth to our dish. -
Prepare the Squash
Carefully cut the butternut squash in half lengthwise and scoop out the seeds. (Pro tip: A sturdy, sharp knife makes it much easier.) Cut the squash into cubes and place them in a large bowl. Next, toss the cubed squash with 1 tablespoon of olive oil, salt, and pepper, ensuring the pieces are evenly coated. -
Roast the Squash
Spread the seasoned squash in a single layer on a baking sheet lined with parchment paper. Roast it in the preheated oven for about 25-30 minutes, or until it’s fork-tender and slightly caramelized. Don’t forget to give it a flip halfway through for even roasting! -
Cook the Pasta
While the squash is roasting, set a large pot of water to boil and salt it generously. Add your pasta of choice and cook according to the package instructions until al dente. (Tip: Reserve 1 cup of the pasta cooking water before draining!) -
Sauté the Onions
In a large skillet, heat the remaining tablespoon of olive oil over medium heat. Add the chopped onion and sauté until soft and translucent, about 5-7 minutes. Season with a pinch of salt to bring out their natural sweetness. If you want to add a little depth, incorporate minced garlic during the last minute—trust me, it elevates everything! -
Combine it All
Once the squash is done roasting, add it to the skillet with the sautéed onions. Stir to combine. Then, add the drained pasta to the skillet, tossing everything together. -
Make it Creamy
Here comes the fun part! Crumble in the goat cheese and add a splash of reserved pasta water. Toss everything together until the cheese melts and coats the pasta—voilà! You should have a creamy, luscious sauce that’s silky and delicious. -
Finish with Nuts and Glaze
Finally, toss in the toasted walnuts—they add the perfect crunch! Plate this beauty up, and don’t forget a drizzle of balsamic glaze on top for that irresistible tangy-sweet finish.
Serving Suggestions
To serve your Roasted Winter Squash Pasta, I recommend plating it in wide, shallow bowls. This allows all the colors and textures to shine! Add a sprinkle of freshly cracked black pepper and an extra drizzle of balsamic glaze to elevate the presentation. Want to wow your guests? Garnish with a few parsley leaves or microgreens for that gourmet touch!
Recipe Variations
Now that you’ve mastered the classic Roasted Winter Squash Pasta, feel free to get creative! Here are some fun variations to inspire you:
-
Add Greens: Toss in some fresh spinach or kale while mixing in the pasta for an extra dose of nutrients.
-
Spice it Up: Add a pinch of red pepper flakes when sautéing the onions for a little heat!
-
Herby Twist: Mix in fresh herbs like sage or thyme with the roasted squash to amplify the autumnal flavors.
-
Cheese Swap: Use feta or blue cheese instead of goat cheese for a different flavor profile.
-
Vegan Version: Make it completely plant-based by omitting the cheese and using nutritional yeast for a cheesy flavor.
Chef’s Notes
This Roasted Winter Squash Pasta has evolved over the years, just like my cooking style. I’ve experimented with different cheeses, spices, and even added a dollop of cream for extra decadence. What started as a simple comfort food has transformed into a versatile dish that adapts to whatever I have on hand. One time, I even added a splash of white wine to deglaze the pan while sautéing the onions, and it took the dish to new realms of flavor—definitely worth a try!
FAQs and Troubleshooting
1. Why is my squash not roasting properly?
If your squash isn’t caramelizing, make sure you’ve cut it into evenly sized pieces and don’t overcrowd the baking sheet. Give it space to breathe!
2. Can I use other pasta shapes?
Absolutely! While I love long pasta for this dish, feel free to use shapes like farfalle or orecchiette. Just keep an eye on the cooking time!
3. How can I store leftovers?
Store any leftovers in an airtight container in the fridge for up to 3 days. Reheat gently in a skillet with a splash of water to prevent it from drying out.
4. What can I substitute for goat cheese?
If you’re not a fan of goat cheese, creamy ricotta or tangy feta could work wonders—or even a vegan cheese if you prefer a plant-based option!
Nutritional Info
While the exact nutritional info may vary depending on the specific brands and quantities you use, here’s a rough breakdown:
- Servings: 4
- Calories per serving: ~400
- Protein: 15g
- Carbs: 50g
- Fats: 18g
At the end of the day, let this recipe be a canvas for your flavors and preferences! I can’t wait to hear how yours turns out. So go on, get in the kitchen, and enjoy the simple pleasure of creating something fantastic. Happy cooking!
PrintRoasted Winter Squash Pasta

A cozy dish that combines roasted winter squash with creamy goat cheese for a warm, comforting pasta meal perfect for chilly days.
- Prep Time: 15 minutes
- Cook Time: 30 minutes
- Total Time: 45 minutes
- Yield: 4 servings 1x
- Category: Main Course
- Method: Baking
- Cuisine: Italian
- Diet: Vegetarian
Ingredients
- 1 butternut squash (or kabocha, or delicata)
- 1 onion, chopped
- 2 tablespoons olive oil
- Salt and pepper to taste
- 8 oz pasta of choice
- 4 oz goat cheese
- Pasta water (reserved from cooking pasta)
- 1/2 cup toasted walnuts
- Balsamic glaze (for drizzling)
Instructions
- Preheat the oven to 400°F (200°C).
- Prepare the butternut squash by cutting it in half, scooping out the seeds, and chopping it into cubes. Toss with 1 tablespoon olive oil, salt, and pepper.
- Roast the seasoned squash on a baking sheet for 25-30 minutes until fork-tender.
- Cook the pasta in a large pot of salted boiling water according to package instructions until al dente. Reserve 1 cup of pasta water before draining.
- Sauté the chopped onion in a skillet with the remaining tablespoon of olive oil over medium heat for 5-7 minutes.
- Combine the roasted squash with the sautéed onions, then add the drained pasta, tossing to mix.
- Make it creamy by crumbling in the goat cheese and adding a splash of reserved pasta water, mixing until combined.
- Finish with toasted walnuts and drizzle with balsamic glaze before serving.
Notes
Garnish with freshly cracked black pepper and microgreens for an elevated presentation. Leftovers can be stored in an airtight container for up to 3 days.
Nutrition
- Serving Size: 1 serving
- Calories: 400
- Sugar: 6g
- Sodium: 500mg
- Fat: 18g
- Saturated Fat: 4g
- Unsaturated Fat: 12g
- Trans Fat: 0g
- Carbohydrates: 50g
- Fiber: 5g
- Protein: 15g
- Cholesterol: 20mg
Keywords: pasta, winter squash, vegetarian recipe, comfort food, goat cheese
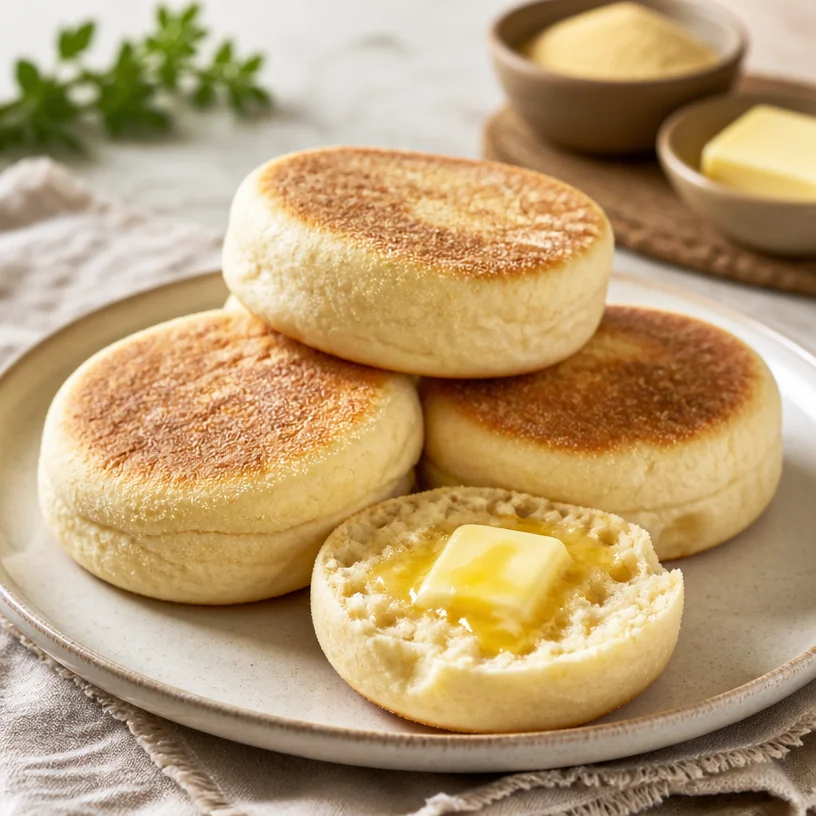
English Muffins
Welcome to Homemade English Muffins: A Culinary Adventure
Nothing quite matches the satisfaction of biting into a warm, toasty English muffin. The satisfying crunch on the outside gives way to a soft, pillowy interior with those signature nooks and crannies just waiting to be filled with butter, jam, or your favorite spread. Welcome back to Clean Plate Cravings, everyone! Today, we’re diving into a recipe that’s close to my heart—homemade English muffins. You may have seen them in the bakery aisle, but believe me when I say that making them from scratch is a rewarding experience that’s both fun and delicious.
Now, before you shrug off making English muffins as something only a fancy baker can do, let me assure you: this recipe is as approachable as it gets! With a handful of simple ingredients and a little love, you can whip up fluffy, mouthwatering muffins that will make your breakfast game soar! As we embark on this culinary journey together, I can’t wait to share a personal story, detailed instructions, and helpful tips to ensure your muffin adventure is a resounding success. Grab your apron and let’s get started!
A Slice of Nostalgia
Growing up, Saturday mornings in my house always came with a delicious aroma wafting through the air. My mother didn’t just reserve the weekend for pancakes or waffles; she took pride in crafting her own English muffins. I remember waking up to the sound of sizzling butter in a pan, the joy of watching her flip those golden rounds, and the magic that happened as she split them open, revealing the fluffy insides that were just perfect for slathering with creamy butter and homemade strawberry jam.
It wasn’t just about the muffins; those mornings were a ritual we shared—the kind where laughter, scents, and good food intertwined, creating a family bond stronger than any recipe. Now, as I stand in my kitchen, proudly carrying on this tradition, I wish to pass on that love and those memories to you. Making these English muffins isn’t just about the food; it’s about creating moments that you can savor and share with your loved ones!
Ingredients
Here’s what you’ll need for these delightful English muffins:
-
4 cups all-purpose flour
The backbone of our muffins, all-purpose flour provides the right texture and structure. You can substitute it with whole wheat flour, but keep in mind the texture may be denser and nuttier. -
2 tsp active dry yeast
This little powerhouse ferments and makes your muffins rise! If you have instant yeast, you can use that, but there’s no need to activate it in warm water; just mix it into the flour. -
1 cup whole milk (warm, 105-115 degrees)
Warm milk contributes moisture and flavor to our muffins. If you’re dairy-free, feel free to use almond or oat milk, just ensure it’s warm! -
1/2 cup water (warm, 105-115 degrees)
This will help keep the dough well-hydrated. Alternatively, you can replace some of the water with more milk to amp up the creaminess! -
2 tbsp shortening (melted)
This helps keep the muffins soft. If you prefer a more natural fat source, use oil or melted coconut oil instead. -
2 tbsp butter (melted)
Who doesn’t love butter? It adds flavor and richness to the muffins. For a dairy-free version, stick with the coconut oil swap. -
1 tsp salt
Elevating all the flavors! Kosher salt works fine if that’s what you have. -
1 tbsp sugar
Just a touch of sweetness to help balance the flavors and feed the yeast. You can also use honey or maple syrup for a different twist. -
2 tbsp cornmeal
This is for sprinkling on the baking sheet to prevent sticking, but it also adds a delightful texture. If you don’t have cornmeal, semolina flour works wonderfully, too.
Step-by-Step Instructions
Let’s roll up those sleeves and get cooking! Here’s how to make perfectly fluffy English muffins:
-
Activate the yeast: In a small bowl, dissolve the active dry yeast and sugar in warm water. Let it sit for about 5 to 10 minutes until it becomes frothy. This step ensures your yeast is alive and ready to work its magic.
-
Mix the wet ingredients: In a large mixing bowl, combine the warm milk, melted shortening, and melted butter. Add the frothy yeast mixture. Give it a gentle stir to mingle all those delicious flavors.
-
Combine the dry ingredients: In another bowl, whisk together the flour and salt. This will ensure the salt doesn’t directly touch the yeast before they interact positively.
-
Create the dough: Gradually add the dry ingredients to the wet mixture. Use a wooden spoon or spatula to bring it together until a shaggy dough forms. It’s perfectly okay if it looks a little rough at this point; it will come together beautifully!
-
Knead the dough: Transfer the dough to a floured surface and knead for about 8 to 10 minutes until it’s smooth and elastic. Don’t be afraid to put some muscle into it! (Chef hack: If the dough sticks to your hands, a little sprinkle of flour can help!)
-
First rise: Place your kneaded dough in a greased bowl, cover it with a clean kitchen towel, and let it rise in a warm place for about an hour, or until it has doubled in size. This is where the magic happens, so let that yeast work!
-
Shape the muffins: Once your dough has risen, punch it down gently and turn it out onto a floured surface. Roll it out to about 1-inch thickness and use a 3-inch round cutter to cut out your muffins. If you don’t have a cutter, a glass works perfectly!
-
Second rise: Place the rounds on a cornmeal-dusted baking sheet. Cover them lightly with the kitchen towel and let them rise again for about 30 minutes until puffed up.
-
Cook the muffins: Preheat a griddle or heavy skillet over medium heat. Place the muffins on the griddle and cook for about 7 minutes on each side until they’re a beautiful golden brown. Pro tip: Keep the heat low enough so the muffins cook through without burning the outside.
-
Cool and enjoy: Once they’re done cooking, transfer the muffins to a wire rack to cool. You can slice them in half, toast them, and enjoy the nooks and crannies filled with your favorite toppings!
Serving Suggestions
These homemade English muffins aren’t just breakfast; they can be the star of any meal! Serve them warm beside scrambled eggs and crispy bacon for a delicious breakfast plate, or toast them up and top with your favorite jam or avocado for a quick snack. And don’t forget about the classic eggs Benedict—these muffins are practically begging to be used for rich hollandaise sauce and poached eggs!
Recipe Variations
Now that you’re a pro at making classic English muffins, let’s shake things up a bit with some fun variations:
-
Herb & Cheese Muffins: Mix in about ½ cup of shredded cheese and your favorite herbs (like rosemary or oregano) into the dough for a savory spin.
-
Cinnamon Raisin Muffins: Add 2 teaspoons of cinnamon and about 1 cup of raisins to the dough for a sweet breakfast treat. And let’s not forget a touch of maple syrup for extra sweetness!
-
Gluten-Free Muffins: If you’re going gluten-free, substitute the all-purpose flour with a 1:1 gluten-free flour blend. Just be sure to adjust the liquid if necessary, as some blends absorb more moisture.
-
Pumpkin Spice Muffins: Mix in ½ cup of pure pumpkin puree and a teaspoon of pumpkin pie spice for a seasonal twist that screams autumn!
-
Chocolate Chip Muffins: Because who doesn’t love a little chocolate? Fold in a cup of chocolate chips for a decadently sweet treat that’s perfect for breakfast or dessert.
Chef’s Notes
I’ll be honest—these homemade English muffins marked a turning point in my journey as a home cook. My first attempt was a hot mess (literally; the dough stuck to everything!). It wasn’t until I learned to keep a light hand with the flour and not rush the rising process that they finally turned out beautifully. Don’t be discouraged by any hiccups along the way, as every time I make these muffins, I learn a little more about my craft. Enjoy the process, and most importantly, have fun in the kitchen!
FAQs and Troubleshooting
1. My muffins didn’t rise. What went wrong?
Sometimes, the yeast may not be active, possibly due to expired yeast or water that’s either too hot or too cold. Always check the expiration date, and remember to keep your water within the 105-115 degree range—too hot can kill the yeast!
2. Why do my muffins have a hard surface?
This usually occurs if the heat is too high while cooking. A low, steady heat allows the muffins to cook evenly and maintain their soft texture.
3. Can I freeze the muffins?
Absolutely! Cool the muffins completely, then place them in a freezer-safe bag and freeze for up to three months. To enjoy, simply toast them right from the freezer or let them thaw overnight.
4. How do I know when my muffins are done?
They should be golden brown on the outside, and when you tap the bottom, it should sound hollow. If you have a thermometer, aim for around 200 degrees Fahrenheit.
Nutritional Info
(For 1 muffin, not including toppings)
- Calories: 180
- Total Fat: 6g
- Saturated Fat: 3.5g
- Cholesterol: 15mg
- Sodium: 180mg
- Total Carbohydrates: 29g
- Dietary Fiber: 1g
- Sugars: 1g
- Protein: 5g
There you have it, my friends! Now you’re ready to storm the kitchen and make these delightful homemade English muffins. Whether it’s a leisurely weekend breakfast or a treat to share, the warmth, love, and flavor baked into each muffin will surely make them a top choice for any meal of the day. Enjoy, and let your cooking journey continue!
PrintHomemade English Muffins

Experience the joy of making warm, fluffy English muffins from scratch that are perfect for breakfast or any meal.
- Prep Time: 15 minutes
- Cook Time: 30 minutes
- Total Time: 45 minutes
- Yield: 12 servings 1x
- Category: Breakfast
- Method: Griddling
- Cuisine: British
- Diet: Vegetarian
Ingredients
- 4 cups all-purpose flour
- 2 tsp active dry yeast
- 1 cup whole milk (warm, 105–115 degrees)
- 1/2 cup water (warm, 105–115 degrees)
- 2 tbsp shortening (melted)
- 2 tbsp butter (melted)
- 1 tsp salt
- 1 tbsp sugar
- 2 tbsp cornmeal
Instructions
- Activate the yeast: In a small bowl, dissolve the active dry yeast and sugar in warm water. Let it sit for about 5 to 10 minutes until it becomes frothy.
- Mix the wet ingredients: In a large mixing bowl, combine the warm milk, melted shortening, and melted butter. Add the frothy yeast mixture and stir gently.
- Combine the dry ingredients: In another bowl, whisk together the flour and salt.
- Create the dough: Gradually add the dry ingredients to the wet mixture, stirring until a shaggy dough forms.
- Knead the dough: Transfer the dough to a floured surface and knead for about 8 to 10 minutes until smooth and elastic.
- First rise: Place the kneaded dough in a greased bowl, cover with a towel, and let it rise for about an hour until doubled in size.
- Shape the muffins: Roll out the dough to about 1-inch thickness and use a cutter to cut out muffins.
- Second rise: Place the rounds on a cornmeal-dusted baking sheet, cover lightly, and let them rise again for about 30 minutes.
- Cook the muffins: Preheat a griddle over medium heat and cook the muffins for about 7 minutes on each side until golden brown.
- Cool and enjoy: Transfer the muffins to a wire rack to cool before slicing and serving.
Notes
These muffins can be frozen and toasted later. Keep the heat low when cooking to ensure they cook through properly without burning.
Nutrition
- Serving Size: 1 muffin
- Calories: 180
- Sugar: 1g
- Sodium: 180mg
- Fat: 6g
- Saturated Fat: 3.5g
- Unsaturated Fat: 2.5g
- Trans Fat: 0g
- Carbohydrates: 29g
- Fiber: 1g
- Protein: 5g
- Cholesterol: 15mg
Keywords: English muffins, homemade muffins, breakfast recipe
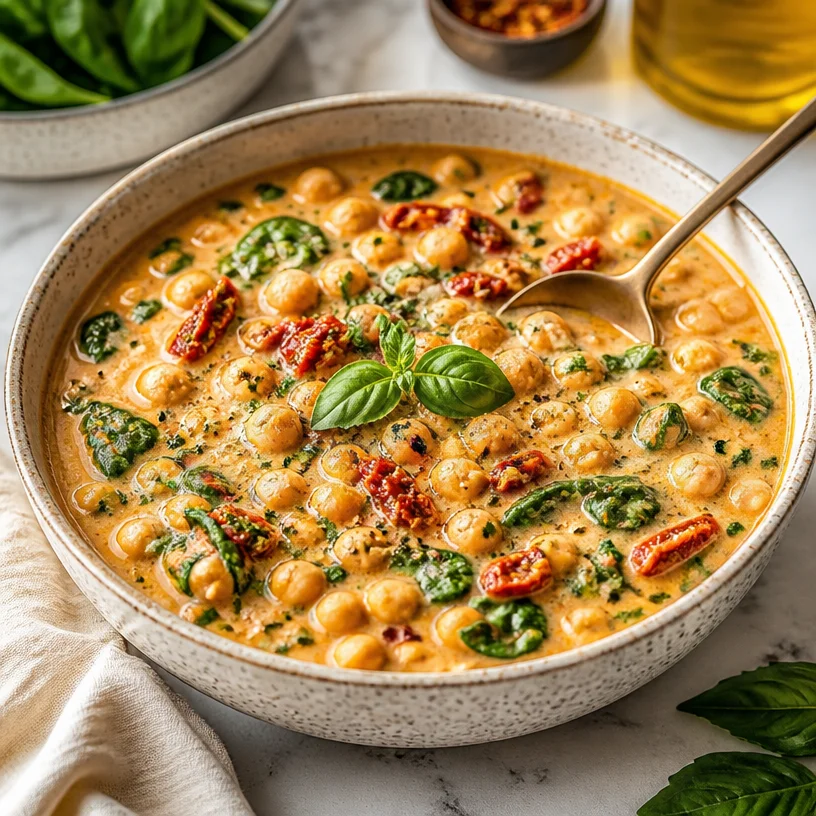
One-Pot Tuscan Garbanzo Bean Soup: Weeknight Comfort
Welcome to the World of Tuscan Garbanzo Bean Soup!
Hey there, food lovers! If you’re looking for a cozy, delicious dish that fills your kitchen with warmth and your heart with joy, you’re in the right place. Today, we’re diving into a comforting bowl of Tuscan Garbanzo Bean Soup, a recipe that’s not only packed with flavor but also overflows with love and memories. Cooking should never feel like a chore—it’s about creating moments, nourishing yourself and those you love, and of course, enjoying every single bite.
Now, let’s take a moment to appreciate the beauty of this soup. It’s rich, creamy, and oh-so-satisfying. Picture this: it’s a chilly evening, and you walk into your kitchen, greeted by the fragrant aroma of garlic and herbs mingling in the air. The vibrant greens of fresh spinach and the delightful pop of chickpeas bring a smile to your face. It’s a dish that invites you to gather around the table, share stories, and savor the flavors of life. Ready to create this culinary masterpiece? Let’s roll up our sleeves and get cooking!
A Memory in a Bowl
As I sit here reminiscing, I can’t help but think of my grandmother, who introduced me to the heartwarming world of soups. Growing up, her kitchen was the place to be, filled with laughter, stories, and, of course, the aromatic scents of her famous recipes. One of my favorites was her chickpea stew, which she cooked on rainy days—those moments became my fondest memories.
I remember one particular afternoon when my cousins and I gathered for our usual Sunday dinner at her cozy farmhouse. She had prepared a big pot of her chickpea soup, and as we sat at the table, she shared stories of her childhood in Tuscany, where fresh ingredients were always at our fingertips. The way she described the rustic markets, vibrant with colors, made the food taste even better. That soup brought us together, and though I didn’t realize it at the time, it sparked my passion for cooking.
These days, I carry on her legacy with this Tuscan Garbanzo Bean Soup recipe. Each spoonful is a nod to her love, and it brings me right back to those happy gatherings. So, let’s get the flavors dancing in our kitchens and create something that’s not just a meal, but a memory.
Ingredients
Here’s what you’ll need to whip up this soul-soothing soup:
-
1 tablespoon olive oil
A staple in Italian cooking! This adds a rich, fruity flavor. Try using extra-virgin olive oil for the best taste. Feel free to substitute with avocado oil if you want something with a higher smoke point. -
1/2 cup diced onion
Onions are the backbone of flavor in many dishes. If you’re in a pinch, shallots or leeks work great too! -
2 cloves garlic (minced)
Garlic adds that irresistible punch and aroma. Always use fresh for maximum flavor! You can swap in garlic powder in a pinch, but it won’t pack the same punch. -
1 teaspoon dried oregano
This herb brings a classic Italian taste to the soup. If you don’t have oregano, basil or thyme can be lovely alternatives. -
1/2 teaspoon red pepper flakes (adjust to taste)
For a hint of heat! Add more if you like things spicy, or leave it out altogether for a milder flavor. -
2 tablespoons tomato paste
Tomato paste thickens the soup and enhances the flavor. You can use crushed tomatoes if you’re out—just add them earlier in the cooking process. -
2 (15 oz) cans chickpeas (drained and rinsed)
Chickpeas provide protein and texture. If canned beans aren’t an option, dried ones can be cooked until tender instead. -
3-4 cups low sodium vegetable broth
A great base for your soup. You can use chicken broth if you’re not vegetarian or vegan, or water for a lighter option. -
1/3 cup sundried tomatoes in oil (chopped)
These add a sweet and tart flavor! If you prefer a fresher taste, try diced fresh tomatoes. -
Juice of 1/2 lemon
This brightens the entire dish! You can use lime juice if you’re looking for a different twist. -
1 cup full-fat coconut milk from a can (OR 1/2 cup heavy cream)
For that creamy texture! Full-fat coconut milk is vegan, while heavy cream provides a rich flavor. You could also try nut milk for a lighter version. -
2-3 cups fresh spinach
Spinach adds a burst of color and nutrients. Kale or Swiss chard can work if you’d like a change. -
Salt and black pepper to taste
Essential for bringing out all the flavors! -
Fresh basil leaves (for garnish)
Nothing says "fresh" like a sprinkle of basil on top!
Step-by-Step Instructions
Alright, let’s get cooking! Follow these detailed steps, and let’s turn those ingredients into a bowl of pure happiness.
-
Heat the Olive Oil
Start by drizzling a tablespoon of olive oil into a large pot over medium heat. Let it warm up for about a minute—it should shimmer but not smoke. This is that lovely moment where the aroma starts to fill your kitchen, setting the stage for an epic meal. -
Sauté the Aromatics
Toss in the diced onion and sauté for about 5 minutes, or until it’s translucent. This is the base of your soup, so take a moment to relish that fragrant onion-y goodness. Stir frequently to prevent sticking. Once it’s soft, add the minced garlic and red pepper flakes. Sauté for another minute until fragrant—it’ll feel like you’re walking through an Italian market! -
Add the Tomato Paste
Stir in the tomato paste and let it cook for about 2 minutes. This step is crucial because it caramelizes the sugars in the paste, bringing out a deeper umami flavor. You should see the ingredients clumping together nicely and smelling divine! -
Incorporate the Chickpeas
Now it’s time to add those drained and rinsed chickpeas. Stir them in well, mixing with the tomatoes and onions. Cook for about 2 more minutes, allowing the chickpeas to soak up some of that tomatoey goodness. Your kitchen should smell amazing by now! -
Pour in the Broth
It’s broth time! Gradually add in 3-4 cups of low-sodium vegetable broth, stirring continuously. If you want a thicker consistency, go with 3 cups. Let it come to a gentle boil, then reduce the heat to simmer. This is where the magic begins! -
Stir in Sundried Tomatoes
Toss in your chopped sundried tomatoes and keep simmering for about 10-15 minutes. This allows all the flavors to meld together beautifully. I love stirring occasionally and watching those vibrant colors turn into a harmony of rich flavors. -
Creamy Delight
After simmering, it’s time to add the full-fat coconut milk (or heavy cream). This makes your soup luxuriously creamy! Stir it in and let it simmer for another 5-10 minutes on low heat. You’re going to want to dip some crusty bread into this! -
Toss in Fresh Spinach
Just a few minutes before serving, throw in the fresh spinach. It wilts down quickly, keeping that gorgeous green color. Stir until it’s just wilted—no more than a couple of minutes. -
Finish with Lemon Juice
Squeeze in the juice of half a lemon—this is the finishing touch! Taste and adjust with salt and black pepper as needed. This small step brightens everything up and adds that pop of freshness! -
Serve It Up!
Ladle your Tuscan Garbanzo Bean Soup into bowls and garnish with fresh basil leaves. I like to add a drizzle of olive oil on top for that extra flair. Ready to serve!
Serving Suggestions
When it comes to serving this soup, I like to keep it simple yet stunning. Use deep bowls to hold all that goodness. A sprinkle of freshly chopped basil or a drizzle of balsamic glaze on top makes everything look gourmet. Pair it with a slice of crusty bread, perfect for dipping, or a light salad for a fuller meal. Trust me, you’ll impress your guests or simply treat yourself to a feast fit for a Tuscan kitchen!
Recipe Variations
Let’s spice things up! Here are some creative twists you can try with your Tuscan Garbanzo Bean Soup:
- Add Protein: Toss in some cooked chicken, sausage, or crispy bacon for a meaty version.
- Herb Adventure: Experiment with different herbs like thyme, rosemary, or even a bay leaf for a unique flavor profile.
- Creamy Alternative: Swap coconut milk with almond or cashew cream for a nutty flavor if you’re looking for non-dairy options.
- Vegetable Boost: Add in carrots, zucchini, or bell peppers for some added crunch and nutrients.
- Spice it Up: For more heat, experiment with different peppers or even a splash of hot sauce.
Chef’s Notes
This recipe is close to my heart, and every time I make it, I think of my grandmother stirring her big pot, teaching me how to make her beloved chickpea stew. Over the years, I’ve adapted it to suit my style and to include pantry staples I always have on hand. The beauty of this soup is that it’s flexible—feel free to make it your own! One of my favorite things about it is how it tastes even better the next day; it gives the flavors more time to mingle and becomes even more comforting.
Kitchens can be a wild adventure, though! I remember one time I accidentally mistook cayenne for paprika and ended up with a very spicy, albeit delicious, version of this soup. Sometimes, mistakes in the kitchen create the most memorable meals! Here’s a tip: embrace the mess and learn to laugh at your culinary trials.
FAQs and Troubleshooting
1. Can I make this soup ahead of time?
Absolutely! This soup is ideal for meal prep. Store it in the fridge for up to 5 days, and feel free to freeze it in portions for later enjoyment.
2. What if I don’t have vegetable broth?
No worries! You can use chicken broth, or simply add water and season with a bit more salt and spice until it suits your taste.
3. My soup is too thick; what can I do?
If your soup is thicker than you’d like, simply add more broth or water, stirring until you reach your desired consistency.
4. Can I blend the soup?
Definitely! For a creamier texture, you can blend part or all of the soup using an immersion blender or by transferring batches to a stand blender. Just be cautious with hot liquids.
Nutritional Info
While I won’t bore you with all the details, I can tell you that this Tuscan Garbanzo Bean Soup is packed with plant-based protein, healthy fats, and lots of vitamins! It’s vegetarian-friendly and can easily be made vegan or gluten-free with just a few clever swaps.
So, there you have it! A hearty, warm bowl of Tuscan Garbanzo Bean Soup that’s easy to make and full of love. I hope you find joy in every simmer and savor every spoonful. Happy cooking, my friends! Let the flavors of Tuscany come to life in your kitchen, and remember—what matters is that you share it with love!
PrintTuscan Garbanzo Bean Soup

A comforting and creamy Tuscan Garbanzo Bean Soup packed with flavors of garlic, herbs, and fresh spinach.
- Prep Time: 15 minutes
- Cook Time: 30 minutes
- Total Time: 45 minutes
- Yield: 4 servings 1x
- Category: Main Course
- Method: Stovetop
- Cuisine: Italian
- Diet: Vegetarian
Ingredients
- 1 tablespoon olive oil
- 1/2 cup diced onion
- 2 cloves garlic (minced)
- 1 teaspoon dried oregano
- 1/2 teaspoon red pepper flakes (adjust to taste)
- 2 tablespoons tomato paste
- 2 (15 oz) cans chickpeas (drained and rinsed)
- 3–4 cups low sodium vegetable broth
- 1/3 cup sundried tomatoes in oil (chopped)
- Juice of 1/2 lemon
- 1 cup full-fat coconut milk from a can (OR 1/2 cup heavy cream)
- 2–3 cups fresh spinach
- Salt and black pepper to taste
- Fresh basil leaves (for garnish)
Instructions
- Heat the olive oil in a large pot over medium heat for about a minute.
- Toss in the diced onion and sauté for about 5 minutes until translucent.
- Add the minced garlic and red pepper flakes, sautéing for another minute.
- Stir in the tomato paste and cook for about 2 minutes.
- Incorporate the drained chickpeas and cook for 2 more minutes.
- Pour in 3-4 cups of vegetable broth and let it come to a gentle boil.
- Toss in the chopped sundried tomatoes and simmer for about 10-15 minutes.
- Add the coconut milk (or heavy cream) and simmer for another 5-10 minutes.
- Stir in the fresh spinach and cook until just wilted.
- Squeeze in the lemon juice, adjusting seasonings as needed.
- Serve in bowls, garnished with fresh basil leaves.
Notes
The soup tastes even better the next day as flavors meld together. Perfect for meal prep!
Nutrition
- Serving Size: 1 serving
- Calories: 350
- Sugar: 6g
- Sodium: 600mg
- Fat: 15g
- Saturated Fat: 11g
- Unsaturated Fat: 4g
- Trans Fat: 0g
- Carbohydrates: 45g
- Fiber: 10g
- Protein: 12g
- Cholesterol: 0mg
Keywords: garbanzo bean soup, Tuscan soup, vegetarian recipe, comfort food
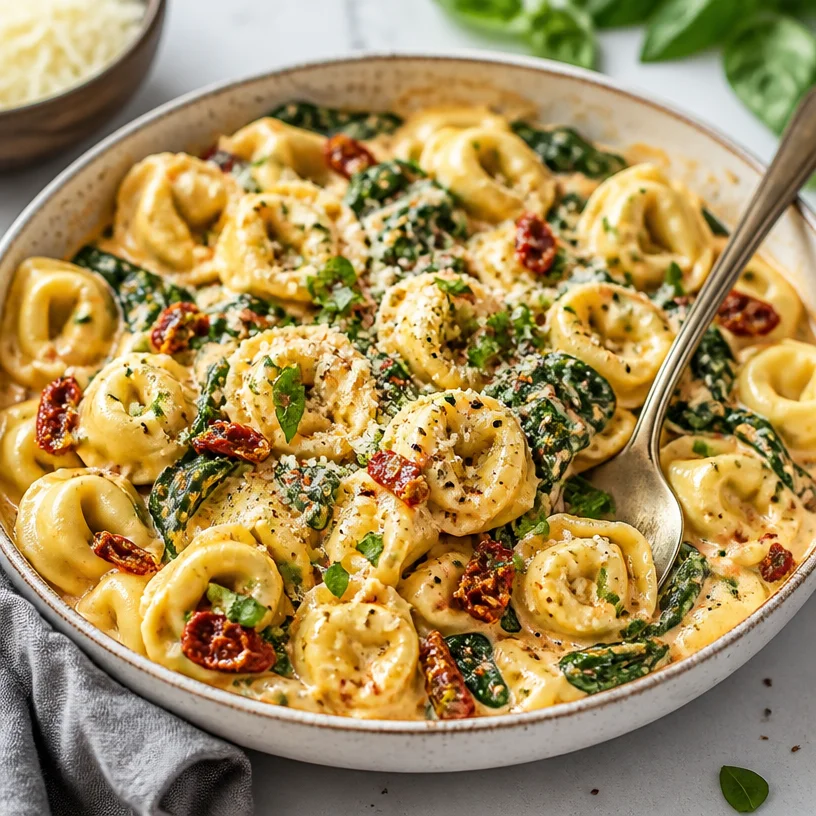
Weeknight Tortellini Dinner: One-Pan, 20-Minute Miracle
Marry Me Tortellini: The Ultimate Comfort Dish That Will Steal Your Heart
Welcome, food lovers! If you’re searching for a dish that’s as delightful to eat as it is to share with loved ones, you’ve landed in the right place. Today, we’re diving into the creamy and dreamy world of Marry Me Tortellini. This delightful pasta dish is not just about the flavors—it’s about memories, laughter, and a whole lot of love.
Picture this: it’s a cozy evening in your kitchen, the aroma of garlic and sun-dried tomatoes wafting through the air. You’re about to whip up a meal that’s sure to impress. Not only is this dish packed with flavor, but it’s also quick and easy enough for a weeknight dinner. So, whether you’re cooking for a date, hosting a small gathering, or simply treating yourself to a night of indulgence, Marry Me Tortellini is here to wow.
The beauty of this recipe lies in its simplicity. It features fresh cheese tortellini, rich creamy sauce, and vibrant spinach. Plus, there are just enough red pepper flakes to give it a little kick! And here’s a personal secret: I’ve yet to meet anyone who hasn’t fallen head over heels for it. Seriously!
Get ready to make a meal that could quite literally make someone pop the question. So, let’s roll up our sleeves, tie on our aprons, and create something truly special together!
A Personal Touch: My Love Story with Tortellini
I can still recall the first time I had tortellini. It was at my Aunt Clara’s house during a family reunion, and she was known for her culinary delights. Her secret? Always cook with heart! It was a cloudy afternoon, and the kitchen was filled with laughter and chitchat, forming the sweet backdrop to an unforgettable meal.
Aunt Clara had prepared a tortellini dish, and as the family gathered around the table, I was immediately drawn to the creamy, rich sauce glimmering with sun-dried tomatoes and vibrant greens. One bite and it felt like coming home. The tortellini was tender, and the sauce hugged each piece, adding a layer of comfort that made my heart sing.
Ever since then, I’ve been on a mission to recreate that moment. This Marry Me Tortellini is my homage to Aunt Clara and all the memories woven through that first taste. So, let’s carry on this sentimental journey together and create a plate of magic that can spark love—just like it did for me!
Ingredients You’ll Need
-
1 tbsp olive oil: This will be your cooking base. If you don’t have olive oil on hand, feel free to substitute it with avocado oil or a blend of canola and extra virgin olive oil.
-
2 cloves garlic (minced): Garlic is the heart of this dish, bringing warmth and depth. If you’re not a fan of garlic, you can use shallots instead.
-
1/2 tsp red pepper flakes: This will add a lovely kick! Adjust according to your heat preference. If you prefer milder flavors, omit or replace with sweet paprika.
-
1/3 cup sun-dried tomatoes (drained and chopped, oil-packed preferred): The sun-dried tomatoes bring a sweet and tangy flavor. If you can’t find them, diced fresh tomatoes are a great substitute, or even roasted red peppers!
-
3/4 cup heavy cream: This is your creamy base. For a lighter option, you can substitute coconut cream or use half-and-half.
-
1/2 cup chicken broth (or vegetable broth): This adds essential moisture and flavor. Homemade broth is always the best, but store-bought works perfectly if you’re in a pinch.
-
3/4 cup Parmesan cheese (finely grated, divided): Parmesan brings a savory, cheesy element. If you’re looking for a dairy-free option, nutritional yeast can work in a bind!
-
1 tsp Italian seasoning: This is a timeless mix. Feel free to get creative and use your favorite herbs!
-
18 oz fresh cheese tortellini (about 1 ½ pounds): Fresh tortellini elevates this dish to another level. If you can’t find fresh, dried works fine—just adjust the cooking time.
-
3 cups baby spinach: Spinach adds a pop of color and nutrients. Kale or arugula can make for interesting alternatives!
-
Salt and black pepper: A must for seasoning to taste! Don’t forget to taste as you go.
-
Fresh basil or parsley (chopped, for topping): This is an optional touch that adds freshness. You can also use chives or even a sprinkle of microgreens for a fun twist.
-
Extra Parmesan cheese (for serving): Because who doesn’t love extra cheese, right?
Step-by-Step Instructions: Let’s Cook!
Step 1: Sauté the Garlic
Start by heating 1 tablespoon of olive oil in a large saucepan over medium heat. Add the minced garlic and sauté it for about 1 minute, just until it becomes fragrant. This is where your kitchen will start smelling heavenly, so don’t walk away!
Step 2: Introduce the Red Pepper Flakes
Once the garlic is golden and aromatic, add in the red pepper flakes. Give it a quick stir for about 30 seconds to infuse that spice into the oil. Keep an eye on it—the last thing you want is burnt garlic!
Step 3: Mix in the Sun-Dried Tomatoes
Next, toss in the chopped sun-dried tomatoes. Stir them well to combine and let them cook together for about 2-3 minutes. The sun-dried tomatoes will start to soften and soak up all that delicious garlicky goodness.
Step 4: Pour in the Cream and Broth
Now, it’s time to bring in the creamy elements! Pour in the heavy cream and chicken broth, stirring continuously to merge everything into a luscious sauce. Let it simmer for about 5 minutes on low heat until it slightly thickens.
Step 5: Add the Cheese and Seasoning
Gradually sprinkle in ½ cup of grated Parmesan cheese and the Italian seasoning. Keep stirring until the cheese melts and you have a silky sauce. Taste and season it with salt and black pepper. This is your chance to tweak the flavors!
Step 6: Cook the Tortellini
In a separate pot, bring salted water to a boil. Add the fresh tortellini and cook according to the package instructions, typically around 3-4 minutes. You want them to be tender but still al dente!
Step 7: Combine Tortellini with the Sauce
Once the tortellini is ready, use a slotted spoon to transfer them directly into the creamy sauce. Gently fold everything together to coat the pasta thoroughly with that dreamy sauce.
Step 8: Add the Spinach
Finally, toss in the baby spinach and give it one last gentle fold. The heat from the pasta will wilt the spinach beautifully and add a vibrant green color to your dish.
Step 9: Serve!
Once everything is combined and hot, remove from the heat. Plate your Marry Me Tortellini in large bowls or plates, garnishing with freshly chopped basil or parsley and a sprinkle of extra Parmesan cheese. Voila! Dinner is served!
Creative Serving Suggestions
For an extra touch, serve your Marry Me Tortellini with a side of crusty garlic bread or a fresh green salad! This will perfectly complement the creamy richness of the dish. Pair it with a glass of crisp white wine, and you’ll have a meal that feels like a romantic getaway right at home.
Recipe Variations: Make It Your Own!
- Add Protein: Throw in grilled chicken, shrimp, or even crispy bacon for an extra protein boost.
- Vegetable Medley: Add bell peppers, mushrooms, or zucchini for a colorful veggie mix.
- Creamy Vegan Option: Swap the heavy cream for cashew cream and choose dairy-free tortellini for a vegan-friendly rendition.
- Herb Infused: Try infusing your olive oil with fresh herbs like rosemary or thyme before pouring it in for even more flavor.
- Zesty Twist: Add a splash of lemon juice or zest right before serving for a refreshing kick!
Chef’s Notes: A Culinary Journey
This Marry Me Tortellini recipe has evolved quite a bit over time. Initially, it started as a basic tortellini dish, but after countless taste tests and tweaking, it became this rich, creamy creation that people can’t resist!
I once whisked this dish together for a dinner party where a special someone was present, and let’s just say: it worked wonders. Between the flavors and the ambiance, my friend decided to pop the question a few months later! So yes, it’s not just a meal; it’s a story waiting to be written with every bite.
FAQs and Troubleshooting
Q: Can I use frozen tortellini?
A: Absolutely! Just follow the cooking instructions on the package. They might need a bit longer to cook, so keep an eye on the texture.
Q: What should I do if my sauce is too thick?
A: No worries! Just add a splash more chicken broth or cream to loosen it up. Stir well to combine.
Q: Can I make this dish ahead of time?
A: This dish is best enjoyed fresh, but you can prep the sauce and store it in the fridge. Just reheat gently and add the fresh tortellini when you’re ready to serve.
Q: How can I store leftovers?
A: Store any leftovers in an airtight container in the fridge for up to 3 days. Reheat gently on the stovetop with a little extra broth or cream to bring it back to life.
Nutritional Info (Optional)
This section can include estimates based on ingredients and portions, such as calories, protein, fats, carbs, etc. If you’d like this information added, let me know!
So there you have it—your guide to creating Marry Me Tortellini that’s sure to bring your friends, family, or that special someone to the table with cheerful hearts and happy bellies. Enjoy cooking and remember that each meal is an opportunity to create memories. Let’s get cooking!
PrintMarry Me Tortellini

A creamy and dreamy pasta dish featuring fresh cheese tortellini, garlic, sun-dried tomatoes, and spinach, perfect for impressing loved ones.
- Prep Time: 10 minutes
- Cook Time: 20 minutes
- Total Time: 30 minutes
- Yield: 4 servings 1x
- Category: Main Course
- Method: Cooking
- Cuisine: Italian
- Diet: Vegetarian
Ingredients
- 1 tbsp olive oil
- 2 cloves garlic (minced)
- 1/2 tsp red pepper flakes
- 1/3 cup sun-dried tomatoes (drained and chopped)
- 3/4 cup heavy cream
- 1/2 cup chicken broth (or vegetable broth)
- 3/4 cup Parmesan cheese (finely grated, divided)
- 1 tsp Italian seasoning
- 18 oz fresh cheese tortellini
- 3 cups baby spinach
- Salt and black pepper to taste
- Fresh basil or parsley (chopped, for topping)
- Extra Parmesan cheese (for serving)
Instructions
- Sauté the minced garlic in olive oil over medium heat for about 1 minute until fragrant.
- Introduce the red pepper flakes and stir for 30 seconds.
- Mix in the sun-dried tomatoes and cook for 2-3 minutes until softened.
- Pour in the heavy cream and chicken broth, stirring continuously to combine. Let it simmer for 5 minutes.
- Add the grated Parmesan cheese and Italian seasoning, stirring until the cheese melts into a silky sauce.
- Cook the tortellini in salted boiling water according to package instructions for 3-4 minutes.
- Combine the cooked tortellini with the creamy sauce.
- Add the baby spinach and gently fold until wilted.
- Serve garnished with chopped basil or parsley and extra Parmesan cheese.
Notes
For an extra touch, serve with crusty garlic bread or a fresh green salad.
Nutrition
- Serving Size: 1 serving
- Calories: 450
- Sugar: 5g
- Sodium: 500mg
- Fat: 22g
- Saturated Fat: 12g
- Unsaturated Fat: 8g
- Trans Fat: 0g
- Carbohydrates: 50g
- Fiber: 3g
- Protein: 15g
- Cholesterol: 60mg
Keywords: tortellini, pasta, comfort food, romantic dinner, cheesy dish, easy dinner
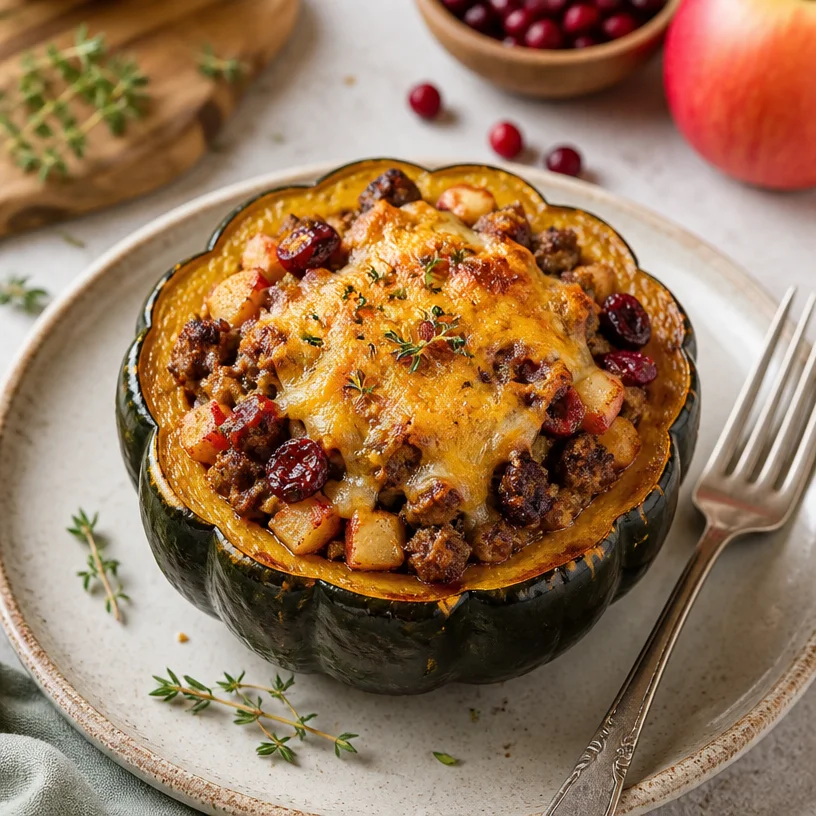
Sweet & Savory Stuffed Acorn Squash Dinner
Sweet & Savory Stuffed Acorn Squash Dinner
Welcome to another delicious adventure in the kitchen! Today, we’re diving into a dish that captures the cozy spirit of autumn with its vibrant colors and enticing aromas—Sweet & Savory Stuffed Acorn Squash. If you’re looking for a meal that’s not only delicious but also packed with nutrients, you’re in for a treat!
Introduction
There’s something magical about autumn, isn’t there? With the leaves turning golden and the air getting a crisp bite, it feels like an invitation to gather around the table with comforting meals that warm the soul. This Sweet & Savory Stuffed Acorn Squash is exactly that—a beautiful, wholesome dish that offers layers of flavors like a soft embrace.
Imagine slicing through perfectly roasted acorn squash, only to reveal a warm filling bursting with ground beef, tart apples, and a hint of spices! It’s a dish that makes you feel nourished while cozying up on those chilly evenings. Plus, it’s visually appealing, making it perfect for any cozy dinner party or family meal.
When my grandparents would visit during the colder months, they would often bring with them the first acorn squashes of the season from their garden. I vividly remember my grandmother teaching me how to prepare them—mapping out all the flavors and textures that made her version unforgettable. She’d say, “Cooking is like a story, dear. Each ingredient has its own chapter.” And oh, how true that is! I’ve since added my own twist to her classic recipe, bringing in a little bit of sweetness with apples and cranberries, creating a delightful balance between savory and sweet.
So gather your loved ones, roll up your sleeves, and let’s create some kitchen magic together!
Personal Story
I still remember that first time I made stuffed squash on my own. I was probably around 12 years old, eagerly trying to impress a few friends at a cozy gathering. With my grandmother’s voice echoing in my head, I roasted the acorn squash just right, careful not to overdo it. I remember the kitchen filled with an enticing aroma as the savory beef and sweet apples cooked together; I could hardly wait to serve it. When I brought those beauties to the table, everyone was stunned by the color and aroma. I eagerly scooped my first bite, and the rich flavors danced in my mouth! The combination of savory and sweet was an instant hit, sending my friends back for seconds and thirds. That moment sparked my love for cooking—turning simple ingredients into something truly special. Now, every time I make this dish, I’m transported back to that warm kitchen filled with laughter and the smell of home.
Ingredients
Here’s what you’ll need to create this warm, vibrant dish:
- 2 medium acorn squash: These are the stars of the show! Their sweet, nutty flavor pairs beautifully with the savory filling. Look for squash that feels heavy for its size and has a smooth, deep green skin.
- Sea salt, to taste: A little sprinkle here and there enhances the flavors. You can always adjust it at the end, so go easy at first.
- Black pepper, to taste: Freshly cracked black pepper adds a subtle heat that rounds out the dish beautifully.
- 1 lb ground beef: This is your protein base. If you’re looking for a healthier option, you can easily swap it for ground turkey or even a plant-based protein!
- 1/4 medium yellow onion, minced: Onions bring an aromatic backbone to the dish, adding depth and sweetness. Feel free to substitute with shallots or even green onions.
- 2 cloves garlic, minced: Garlic adds a beautiful aroma and flavor punch. If you’re a garlic lover, check out roasted garlic for a sweeter flavor!
- 1-2 small apples, peeled and chopped (about 1 cup chopped; I used 1 1/2 small Gala): Apples offer a slight sweetness and acidity that balance the savory tones. Gala, Fuji, or Honeycrisp work best; just avoid apples that are too tart!
- 1/2 tsp cinnamon: Cinnamon rounds out the dish with a warm, sweet spice that elevates the flavor.
- 1/2 tsp nutmeg: A pinch adds an earthy note, creating that comforting autumn vibe.
- 1/2 tsp cumin: This spice brings a smoky richness to the filling. For a twist, try smoked paprika!
- Dash of cayenne: A hint of heat to contrast with the sweet apples—totally optional if you’re sensitive to spice!
- 2 Tbsp dried cranberries, chopped: These little gems add pops of sweetness and chewiness. You can substitute with raisins or even chopped apricots.
- 1/4 cup shredded sharp cheddar: For that gooey, melty finish! Swap with a dairy-free cheese alternative for a vegan spin.
Step-by-Step Instructions
Now that we have our ingredients lined up, let’s get to cooking! Follow these steps for a dish that’s bound to wow you and your guests.
-
Preheat Your Oven: Preheat your oven to 400°F (200°C). This step is crucial for that perfectly roasted squash brimmed with flavor.
-
Prepare the Squash: Cut the acorn squashes in half lengthwise. Scoop out the seeds with a spoon and give them a gentle rinse to remove any strings. Pro tip: If you find the squash wobbling, slice a small piece off the bottom to create a flat base!
-
Roast the Squash: Place the acorn squash halves cut side up on a baking sheet. Drizzle with olive oil and sprinkle with sea salt and pepper. Roast in the oven for about 25-30 minutes or until tender and golden. You want them fork-tender but not mushy. Keep an eye on them!
-
Cook the Meat Mixture: While the squash roasts, heat a skillet over medium heat. Add a drizzle of olive oil, then toss in the minced onion. Sauté for about 2-3 minutes until translucent, then add the minced garlic. Cook until fragrant—about another minute.
-
Brown the Beef: Add the ground beef to the skillet. Brown it, breaking it up with a spatula until no longer pink, about 5-7 minutes. Drain excess fat if necessary.
-
Add the Sweetness: Once the beef is cooked through, stir in the chopped apples, cranberries, cinnamon, nutmeg, cumin, and a dash of cayenne. Let this cook for about 5 minutes, allowing the flavors to meld and the apples to soften slightly.
-
Season It Up: Taste your mixture and adjust seasoning with salt and pepper as needed. This step is key to personalizing the dish to your taste!
-
Stuff the Squash: Remove the roasted squash from the oven (careful, they’ll be HOT!). Spoon the beef mixture generously into each half, packing it in to maximize flavors.
-
Top with Cheese: Sprinkle the shredded sharp cheddar on top of each stuffed squash. Pop them back in the oven for an additional 5-10 minutes, until the cheese is melted and bubbly.
-
Serve: Remove from oven, let them cool for a minute, then drizzle a bit of olive oil or honey over the top if you’re feeling fancy. Garnish with fresh herbs if you have them on hand—like parsley or thyme!
Serving Suggestions
To serve, place each stuffed acorn squash half on a warm plate. I love garnishing with a sprinkle of fresh herbs for a pop of color and a dash of flavor. Pair it with a simple side salad or some roasted veggies to complete your meal. This dish is not only visually stunning but makes for beautiful leftovers, too!
Recipe Variations
- Vegetarian Delight: Swap the ground beef for a mix of lentils and mushrooms for a hearty, vegetarian version.
- Spicy Kick: Replace the sweet apples with spicy jalapeños or add in some diced red pepper to add heat and complexity.
- Nutty Twist: Stir in some chopped walnuts or pecans for an added crunch. They bring a deliciously nutty flavor that complements the squash perfectly.
- Quinoa Boost: Replace the beef with cooked quinoa for a plant-based protein boost that’s gluten-free!
- Greek Style: Use feta cheese instead of cheddar and toss in some chopped olives for a Mediterranean twist.
Chef’s Notes
This recipe has become a staple in my household, often made during family dinners or when I need a comforting meal at the end of a long day. I love how flexible it is—the possibilities are endless! Once, in the spirit of experimentation, I decided to toss in some cooked quinoa left over from a previous meal, and it was such a delightful surprise. My partner couldn’t even tell the difference, and it added such a lovely texture! Give it a try and watch how it evolves for you!
FAQs and Troubleshooting
-
How do I know when the squash is done cooking?
You want the squash to be fork-tender but not overly mushy. Check them around the 30-minute mark! -
Can I make this ahead of time?
Absolutely! You can prepare the filling a day in advance and stuff the squash just before baking for an easy meal. -
What’s the best way to store leftovers?
Store any leftovers in an airtight container in the refrigerator for up to 3-4 days. Reheat gently in the oven or microwave. -
Can I freeze the stuffed squash?
Yes! Once baked and cooled, you can freeze them. To serve, thaw in the fridge overnight and reheat in the oven until warmed through.
Nutritional Info
- Calories: Approximately 350-400 per serving (1 stuffed squash half).
- Protein: About 20-25 grams (depending on the meat used).
- Fiber: Roughly 5-6 grams (thanks to the acorn squash and cranberries).
And there you have it—a Sweet & Savory Stuffed Acorn Squash Dinner that brings warmth to your kitchen and deliciousness to your plate. Enjoy cooking, enjoy sharing, and as always, let your kitchen be filled with love and laughter! Happy cooking, foodie friends!
PrintSweet & Savory Stuffed Acorn Squash Dinner

A comforting autumn dish featuring roasted acorn squash stuffed with a savory mixture of ground beef, apples, and spices, perfect for family meals or cozy dinner parties.
- Prep Time: 15 minutes
- Cook Time: 30 minutes
- Total Time: 45 minutes
- Yield: 4 servings 1x
- Category: Main Course
- Method: Baking
- Cuisine: American
- Diet: Gluten-Free
Ingredients
- 2 medium acorn squash
- Sea salt, to taste
- Black pepper, to taste
- 1 lb ground beef
- 1/4 medium yellow onion, minced
- 2 cloves garlic, minced
- 1–2 small apples, peeled and chopped (about 1 cup)
- 1/2 tsp cinnamon
- 1/2 tsp nutmeg
- 1/2 tsp cumin
- Dash of cayenne
- 2 Tbsp dried cranberries, chopped
- 1/4 cup shredded sharp cheddar
Instructions
- Preheat your oven to 400°F (200°C).
- Prepare the acorn squashes by cutting them in half lengthwise and scooping out the seeds.
- Roast the acorn squash halves on a baking sheet, drizzled with olive oil and seasoned with salt and pepper, for about 25-30 minutes.
- Cook the minced onion in a skillet over medium heat for 2-3 minutes until translucent, then add the minced garlic.
- Brown the ground beef in the skillet for about 5-7 minutes, breaking it up until no longer pink.
- Add the chopped apples, cranberries, cinnamon, nutmeg, cumin, and cayenne to the beef mixture and cook for another 5 minutes.
- Season to taste with salt and pepper.
- Stuff the roasted squash halves with the beef mixture.
- Top with shredded cheddar and return to the oven for an additional 5-10 minutes until cheese is melted.
- Serve warm, garnished with olive oil or honey and fresh herbs, if desired.
Notes
This dish is flexible; feel free to substitute ground beef with turkey or a plant-based protein. Experiment with different cheeses and seasonal ingredients!
Nutrition
- Serving Size: 1 serving
- Calories: 375
- Sugar: 12g
- Sodium: 350mg
- Fat: 20g
- Saturated Fat: 9g
- Unsaturated Fat: 8g
- Trans Fat: 0g
- Carbohydrates: 36g
- Fiber: 5g
- Protein: 25g
- Cholesterol: 70mg
Keywords: acorn squash, stuffed squash, autumn recipes, cozy dinner, healthy meals

Ingredient Apple Fritter Muffins for Busy Weekday Mornings
Easy Apple Fritter Muffins to Make Your Mornings Delightful
Welcome, food lovers! If you’re stumbling upon this post while dreaming of tempting treats that brighten up your mornings, you’re in for a sweet surprise. Today, we’re diving into the world of Easy Apple Fritter Muffins. You know, those fluffy bites of heaven that perfectly balance the sweetness of apples and the warm spice of cinnamon? Yes, those! Whether you’re looking for a special breakfast to share with loved ones or just something to add a little joy to your weekday routine, I guarantee these muffins will become an instant favorite.
Now, let’s set the scene. Picture this: it’s a crisp autumn morning, the golden sunlight is filtering through the leaves, and the scent of fresh apples fills the air as I preheat the oven. My fingers are dusted with flour, and soon my kitchen will be transformed into a cozy haven of warmth and delicious aromas. With the first batch of Apple Fritter Muffins baking in the oven, I can’t help but share my excitement with you, as I’m pretty sure you’ll want to experience the magic of these delightful muffins. So, grab your apron, and let’s get baking!
A Memorable Kitchen Story
Let me take you back to one of my fondest childhood memories: the day my grandpa introduced me to apple fritters. It was a Saturday morning, and there was no school—just sweet freedom and the delightful smell of cinnamon wafting from the kitchen. Grandpa turned flour and sugar into magic. I still remember how he would peel the apples carefully, letting me do the fun part of dicing them into tiny cubes. We laughed and shared stories as the batter came together.
His secret was a touch of nutmeg, which gave the fritters a flavor like nothing I’d tasted before. Watching those fritters puff up in the hot oil was mesmerizing; they seemed to shimmer with sweetness, begging to be devoured. Later, he’d glaze them while they were still warm. Those moments were more than just about the food—they were bonding time filled with laughter, love, and the sweetest memories. Now, as I recreate this nostalgic recipe into muffin form, I honor those cherished moments every time.
Ingredients
Here’s what you’ll need to make those scrumptious Apple Fritter Muffins:
-
2 cups All-Purpose Flour
(Best to sift for light, fluffy muffins. If you prefer whole wheat, it adds a nutty flavor to the mix.) -
1 cup Granulated Sugar
(Feel free to adjust based on your preference. You can even use coconut sugar for a healthier twist.) -
2 teaspoons Baking Powder
(Ensure it’s fresh for that perfect rise. If you’re using something old, you might want a trip to the store!) -
0.5 teaspoon Salt
(Just a pinch goes a long way! Don’t skip it; it enhances all the flavors.) -
1 teaspoon Ground Cinnamon
(Use fresh for the best flavor impact. I love buying it from the local spice shop!) -
0.25 teaspoon Ground Nutmeg
(A little goes a long way; it adds that cozy warmth. Some even use freshly grated nutmeg if they’re feeling fancy!) -
1 Large Egg
(Substitute with a flax egg for a vegan option: mix 1 tablespoon ground flaxseed with 2.5 tablespoons water and let it sit until it thickens.) -
0.5 cup Milk (or Dairy-Free Alternative)
(Almond or oat milk works well. Experiment with different types until you find your favorite!) -
0.25 cup Vegetable Oil (or Melted Coconut Oil)
(They can be switched interchangeably. Coconut oil will add a subtle coconut flavor!) -
1 teaspoon Vanilla Extract
(Opt for pure extract for the best taste. Trust me, it’s worth it!) -
2 cups Peeled, Diced Apples
(Choose Granny Smith or Honeycrisp for optimal sweetness and texture. Feel free to mix varieties!) -
1 cup Powdered Sugar
(Sift for a smoother texture—nobody likes chunky glaze!) -
2-4 tablespoons Milk (for Glaze)
(Adjust quantity for desired glaze consistency. Start with less, adding more until it’s just right!)
Step-by-Step Instructions
Alright, let’s bring this recipe to life! Here’s how to make these delectable muffins:
-
Preheat the Oven:
Set your oven to 350°F (175°C) and line a muffin tin with paper liners. This saves you from the dreaded muffin cleanup later! -
Mix the Dry Ingredients:
In a large bowl, whisk together the flour, sugar, baking powder, salt, cinnamon, and nutmeg. This step ensures that all the dry ingredients are well incorporated and gives every muffin a consistent flavor. -
Combine Wet Ingredients:
In another bowl, beat the egg (or flax egg), then add the milk, vegetable oil, and vanilla extract. Stir until well combined. This part is super fun; feel free to sneak a little taste of the batter—just remember to save enough for the muffins! -
Combine Dry and Wet Mixtures:
Pour the wet ingredients into the dry ones and mix gently until just combined. Be careful—overmixing can lead to dense muffins. It’s all about those tender crumbs. -
Fold in the Apples:
Add those diced apples and fold them into the batter. This is where you get to enjoy the crunch of fresh, juicy apples. If you’re using multiple apple varieties, feel free to mix them; it adds visual flair and flavor depth! -
Fill the Muffin Tin:
Using a spoon or ice cream scoop, fill each muffin slot about 2/3 full. This allows room for them to rise beautifully without overflowing. -
Bake:
Pop the muffin tin into the preheated oven and bake for 18 to 22 minutes or until a toothpick inserted into the center of a muffin comes out clean. Keep an eye on them during the last few minutes; nobody wants a dry muffin! -
Cool and Prepare the Glaze:
Once baked, allow the muffins to cool in the tin for about 5 minutes before transferring them to a wire rack. To prepare your glaze, whisk together powdered sugar and milk until smooth—make it as thick or thin as you prefer! -
Drizzle the Glaze:
Drizzle that sweet glaze over the muffins, letting it cascade down the sides for an irresistible finish. You might want to make extra glaze because… yum!
Serving Suggestions
To serve these delightful Apple Fritter Muffins, arrange them on a pretty platter or wooden board for a rustic vibe. You can even garnish them with some extra diced apples on the side or a sprinkle of cinnamon. For an extra touch, pair them with a dollop of whipped cream or a scoop of vanilla yogurt. Trust me, your guests will be oooh-ing and aaah-ing over this spectacular morning treat!
Recipe Variations
Feel adventurous? Here are a few ways to twist the classic Apple Fritter Muffins:
- Cranberry Apple Delight: Toss in a cup of fresh or dried cranberries for that sweet-tart combination.
- Nutty Goodness: Add a handful of chopped walnuts or pecans for some crunch.
- Spiced Up Muffins: Experiment with ginger or cardamom for an unexpected flavor boost.
- Caramel Drizzle: Drizzle warm caramel sauce over the muffins instead of glaze for an indulgent treat.
- Vegan Swap: Create a fully plant-based version by substituting the egg, milk, and oil with their vegan counterparts.
Chef’s Notes
As I mentioned earlier, making these Apple Fritter Muffins takes me back to my childhood. Each time I bake them, I’m transported to that cozy kitchen, laughing and creating with my grandpa. Over the years, I’ve adapted this recipe to suit my palate and lifestyle—swapping out refined sugar for coconut sugar occasionally, or even bulking it up with some oats for added fiber. As always, feel free to adjust to your liking!
One of my favorite kitchen stories involves a minor mishap with too much nutmeg. Let’s just say, you can definitely overdo it! So, be gentle with those spices, or you might end up with muffins that taste like holiday potpourri!
FAQs and Troubleshooting
-
Why are my muffins dense?
If your muffins turned out dense, it might be because you overmixed the batter or used too much flour. Make sure to scoop the flour gently rather than packing it into the cup. -
Can I use other fruits?
Absolutely! You can swap apples for peaches, blueberries, or even bananas. Just adjust the quantity based on moisture content—bananas tend to be wetter than apples. -
How can I store them?
These muffins can stay fresh in an airtight container at room temperature for a couple of days. For longer storage, pop them in the fridge or freeze them for those busy mornings when you need a treat pronto! -
What can I do if they stick to the pan?
Make sure to grease your muffin tray well or use paper liners. If they still stick, run a butter knife around the edges to help loosen them while still warm.
Nutritional Info
Each muffin is approximately:
- Calories: 180
- Protein: 2g
- Carbohydrates: 28g
- Sugar: 10g
- Fat: 8g
Feel free to adjust based on your ingredient swaps!
And there you have it—deliciously Easy Apple Fritter Muffins that will make your mornings delightful! I hope you enjoy baking them and savoring every bite as much as I do. Remember, kitchen magic happens with love and a dash of creativity, so let that passion flow! Happy baking, friends!
PrintEasy Apple Fritter Muffins

Delightful apple fritter muffins that perfectly balance the sweetness of apples and warm cinnamon spice, ideal for a cozy morning treat.
- Prep Time: 15 minutes
- Cook Time: 20 minutes
- Total Time: 35 minutes
- Yield: 12 muffins 1x
- Category: Breakfast
- Method: Baking
- Cuisine: American
- Diet: Vegetarian
Ingredients
- 2 cups All-Purpose Flour
- 1 cup Granulated Sugar
- 2 teaspoons Baking Powder
- 0.5 teaspoon Salt
- 1 teaspoon Ground Cinnamon
- 0.25 teaspoon Ground Nutmeg
- 1 Large Egg
- 0.5 cup Milk (or Dairy-Free Alternative)
- 0.25 cup Vegetable Oil (or Melted Coconut Oil)
- 1 teaspoon Vanilla Extract
- 2 cups Peeled, Diced Apples
- 1 cup Powdered Sugar
- 2–4 tablespoons Milk (for Glaze)
Instructions
- Preheat the oven to 350°F (175°C) and line a muffin tin with paper liners.
- Mix the dry ingredients in a large bowl: flour, sugar, baking powder, salt, cinnamon, and nutmeg.
- Combine the wet ingredients in another bowl: beat the egg, then add the milk, vegetable oil, and vanilla extract.
- Pour the wet ingredients into the dry ingredients and mix gently until just combined.
- Fold in the diced apples into the batter.
- Fill each muffin slot about 2/3 full with the batter.
- Bake for 18 to 22 minutes or until a toothpick inserted comes out clean.
- Cool the muffins in the tin for about 5 minutes before transferring them to a wire rack.
- Whisk together powdered sugar and milk for the glaze.
- Drizzle the glaze over the muffins once cooled.
Notes
For a vegan option, substitute the egg with a flax egg and use a dairy-free milk alternative. Feel free to adjust the sugar according to taste.
Nutrition
- Serving Size: 1 muffin
- Calories: 180
- Sugar: 10g
- Sodium: 200mg
- Fat: 8g
- Saturated Fat: 2g
- Unsaturated Fat: 6g
- Trans Fat: 0g
- Carbohydrates: 28g
- Fiber: 1g
- Protein: 2g
- Cholesterol: 30mg
Keywords: apple muffins, breakfast muffins, easy muffins, baked goods
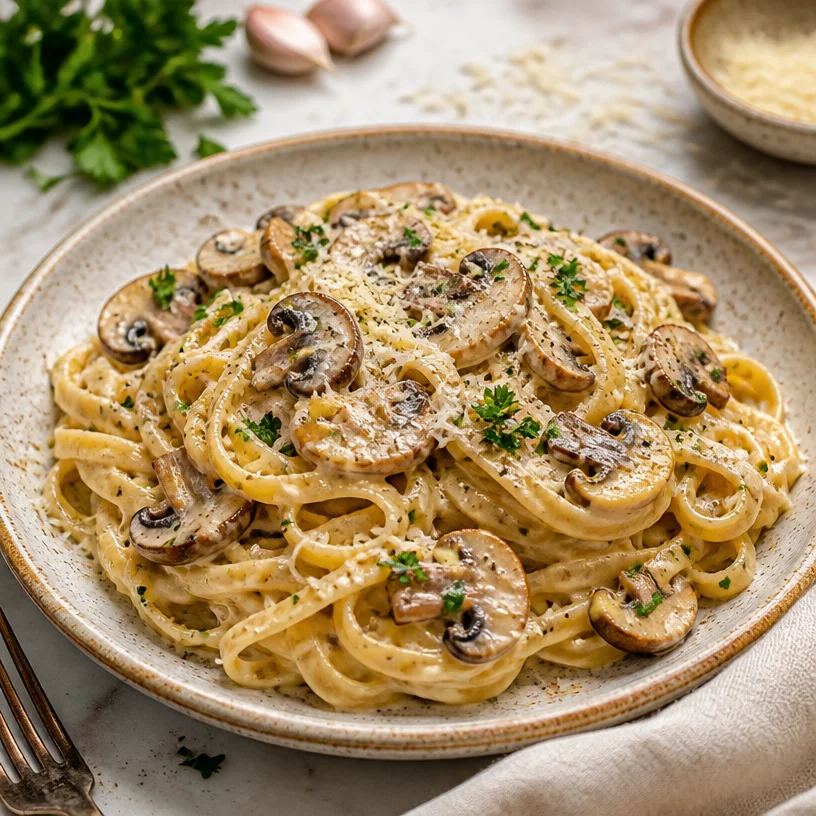
Minute Creamy Mushroom Pasta for Cozy Weeknights
Irresistibly Creamy Mushroom Pasta for Cozy Nights
There’s something magical about cozy nights in, especially when they’re infused with the warmth of good food and great company. Imagine the scene: it’s a chilly evening, and the glow from the kitchen fills the air with mouthwatering aromas. What’s cooking? Oh, just a pot of Irresistibly Creamy Mushroom Pasta that’s so delightful, it’ll have you saying goodbye to any takeout dreams for the night.
This dish is all about celebrating the simple ingredients that come together to create a comforting, creamy hug in a bowl. I’m Ava Carter, your friendly kitchen guide, and today I’m here to share my all-time favorite pasta recipe, infused with earthy mushrooms and luxurious cream that’ll leave you feeling nourished, satisfied, and utterly cozy.
Personal Story
I have a heartfelt memory tied to this creamy mushroom pasta recipe, one that I treasure deeply. It all started in my college days, when budget cuts meant relying on pantry staples. On one particular rainy evening, my friends and I huddled in our small kitchen, trying to figure out what to whip up for dinner. We rummaged through our meager supplies and what did we find? A package of pasta, a few mushrooms lurking in the fridge, and some heavy cream.
With a gentle drizzle of olive oil and the aromatic symphony of sautéing onions and garlic, we transformed those simple ingredients into a dish that felt like a gourmet meal. Laughter filled the kitchen as we twirled our pasta, savoring each bite as if we were dining in a high-end restaurant. The memories of those laughter-filled dinners still warm my heart, just like this pasta warms my belly.
Ingredients
Here’s what you’ll need to create your own cozy bowl of Irresistibly Creamy Mushroom Pasta:
-
200 grams Pasta (Any type you love, like fettuccine or penne.)
Pasta is the foundation of this dish. Feel free to opt for whole grain or gluten-free options if you prefer! -
2 tablespoons Olive Oil
This beautiful oil enhances the flavor wonderfully, but feel free to use any neutral oil, like canola or sunflower. -
1 medium Onion (Finely chopped.)
Onions bring a subtle sweetness and depth of flavor. If you’re not keen on onions, leeks or shallots make great substitutes! -
2 cloves Garlic (Minced.)
Garlic adds that unmistakable zing! Fresh is best, but you can use garlic powder if you’re in a pinch – just around half a teaspoon should do! -
250 grams Mushrooms (Cremini or Button.)
Mushrooms are the stars of our dish, lending an earthy and umami-rich flavor. Don’t shy away from shiitake or portobello for a twist! -
1 cup Heavy Cream
This is what makes the sauce luxuriously creamy. If you want a lighter version, try substituting part of it with Greek yogurt or coconut cream for a dairy-free option! -
100 grams Parmesan Cheese
Not only does this add flavor, but it creates a nice creamy texture. Reserve some for garnishing! If you’re avoiding dairy, nutritional yeast is a great alternative. -
Salt, to taste
Always taste as you go! A little pinch makes a huge difference in enhancing flavors. -
Pepper, to taste
A dash of freshly cracked pepper adds a warmth that complements the creaminess beautifully! -
1 teaspoon Thyme (Dried or Fresh)
Thyme brings a subtle earthy note. If you don’t have thyme, Italian seasoning works like a charm too! -
1 tablespoon Fresh Parsley (Chopped.)
The final touch! It adds a vibrant pop of color and freshness to the dish. You could also use basil if you prefer!
Step-by-Step Instructions
Ready to get cooking? Let’s dive into the magic of making this creamy pasta!
-
Boil the Pasta:
Start by bringing a large pot of salted water to a rolling boil. Toss in your pasta and cook it according to package instructions until al dente. Remember, you want it just right—slightly firm to the bite! Once done, reserve about a cup of pasta water and drain the rest. Set the pasta aside while we whip up that creamy sauce. -
Sauté Onions and Garlic:
In a large skillet, heat the olive oil over medium heat. Add the finely chopped onion and sauté until it becomes translucent—about 3-4 minutes. This is where the kitchen starts to smell heavenly! Stir in the minced garlic, cooking just until fragrant, about 30 seconds. Don’t let it burn; we want it aromatic, not bitter! -
Cook the Mushrooms:
Time for our delicious mushrooms! Add them to the skillet, stirring occasionally until they’re golden brown and have released their moisture (around 5-7 minutes). This process concentrates their flavor and adds that irresistible umami punch. Pro tip: Don’t overcrowd the pan; if necessary, cook them in batches for the best results. -
Whip up the Cream Sauce:
Now, lower the heat slightly and pour in that luscious heavy cream. Stir well, allowing it to gently bubble. Add the thyme, salt, and pepper. If you love a hint of nutty flavor, grating in some fresh nutmeg will elevate your sauce beautifully. Turn the heat to low and let it simmer to thicken a bit—about 5 minutes. If you feel your sauce is too thick, you can always add a splash of reserved pasta water! -
Combine and Serve:
Toss your cooked pasta right into the skillet, making sure every strand is enveloped in that creamy goodness! Stir in the grated Parmesan cheese gradually until it melts and merges with the sauce. If you’re feeling indulgent, add more cheese! Season again to taste—every chef knows that tasting is vital in the kitchen. -
Plate It Up!
Ah, the grand finishing touch! Plate your creamy mushroom pasta, and don’t forget to sprinkle the reserved Parmesan and fresh parsley on top for that restaurant-style feel. Trust me, your friends (or family) will be swooning over the presentation!
Serving Suggestions
Serve this creamy pasta with a simple side of garlic bread or a crisp green salad drizzled with lemon vinaigrette. The bright acidity from the lemon pairs wonderfully with the richness of the pasta, cutting through the creaminess just right. Share it with friends, light a few candles, and create a cozy atmosphere—dinner is truly served!
Recipe Variations
Feeling adventurous? Here are some fun variations to try out:
-
Add Protein: Pan-seared chicken or shrimp can easily be tossed in for a heartier meal.
-
Veggie Power: Toss in some spinach, kale, or roasted cherry tomatoes for added nutrition and color.
-
Herby Twist: Switch out thyme for fresh basil or oregano for a different flavor profile.
-
Spicy Kick: Add a pinch of red pepper flakes or a dash of hot sauce to the sauce for a spicy kick!
-
Citrus Zing: A splash of lemon juice at the end can give a refreshing twist to the dish.
Chef’s Notes
This creamy mushroom pasta recipe has evolved over time, starting from those haphazard college days. I’ve experimented with different mushrooms and cream ratios, and each version has been saved in my little recipe box as a cherished memory. One time, I even added a splash of white wine to the sauce, and let me tell you, it transformed the dish! The beauty of cooking is that it’s all about experimenting. So go ahead, make it your own!
FAQs and Troubleshooting
1. My sauce is too thick; what should I do?
If your sauce becomes overly thick, simply add a bit of the reserved pasta water until you reach your desired consistency. This not only thins it out but also adds a touch of starchy flavor that helps bind the sauce to the pasta.
2. How can I store leftovers?
Store any leftover pasta in an airtight container in the fridge for up to 3 days. Just remember, the pasta may absorb some of the sauce, so you might want to add a splash more cream or water when reheating to bring it back to life!
3. I don’t like mushrooms; what else can I use?
No problem at all! You can replace mushrooms with cooked spinach, zucchini, or even sautéed bell peppers for a delightful twist!
4. Can I use whole wheat or gluten-free pasta?
Absolutely! Whole wheat and gluten-free pastas work beautifully in this dish. Just make sure to adjust the cooking times as needed since these alternatives can vary in texture and cooking length.
Nutritional Info
(Per serving, approximate):
Calories: 590
Protein: 18g
Fat: 30g
Carbohydrates: 60g
Fiber: 3g
There you have it! Your ultimate guide to creating an unforgettable bowl of Irresistibly Creamy Mushroom Pasta. It’s more than just a meal—it’s a celebration of flavor, nostalgia, and cozy moments shared around the table. So roll up those sleeves, grab a fork, and let’s get cooking, my culinary friend! Happy cooking!
PrintIrresistibly Creamy Mushroom Pasta

Creamy mushroom pasta that brings comfort and warmth, perfect for cozy nights in.
- Prep Time: 15 minutes
- Cook Time: 30 minutes
- Total Time: 45 minutes
- Yield: 4 servings 1x
- Category: Main Course
- Method: Baking
- Cuisine: Italian
- Diet: Vegetarian
Ingredients
- 200 grams Pasta (Any type you love, like fettuccine or penne.)
- 2 tablespoons Olive Oil
- 1 medium Onion (Finely chopped.)
- 2 cloves Garlic (Minced.)
- 250 grams Mushrooms (Cremini or Button.)
- 1 cup Heavy Cream
- 100 grams Parmesan Cheese
- Salt, to taste
- Pepper, to taste
- 1 teaspoon Thyme (Dried or Fresh)
- 1 tablespoon Fresh Parsley (Chopped.)
Instructions
- Boil the Pasta: Start by bringing a large pot of salted water to a rolling boil. Toss in your pasta and cook it according to package instructions until al dente. Reserve about a cup of pasta water and drain the rest.
- Sauté Onions and Garlic: In a large skillet, heat the olive oil over medium heat. Add the finely chopped onion and sauté until it becomes translucent—about 3-4 minutes. Stir in the minced garlic, cooking just until fragrant, about 30 seconds.
- Cook the Mushrooms: Add the mushrooms to the skillet, stirring until they’re golden brown and have released their moisture (around 5-7 minutes).
- Whip up the Cream Sauce: Lower the heat slightly and pour in the heavy cream. Stir well and allow it to gently bubble. Add the thyme, salt, and pepper.
- Combine and Serve: Toss your cooked pasta right into the skillet, stirring in the grated Parmesan cheese gradually until it melts and merges with the sauce.
- Plate It Up: Plate your creamy mushroom pasta and sprinkle the reserved Parmesan and fresh parsley on top.
Notes
Serve with garlic bread or a crisp green salad for a complete meal.
Nutrition
- Serving Size: 1 serving
- Calories: 590
- Sugar: 4g
- Sodium: 500mg
- Fat: 30g
- Saturated Fat: 15g
- Unsaturated Fat: 12g
- Trans Fat: 0g
- Carbohydrates: 60g
- Fiber: 3g
- Protein: 18g
- Cholesterol: 80mg
Keywords: creamy pasta, mushroom pasta, cozy dinner, vegetarian pasta, Italian cuisine