
Creamy Broccoli Potato Soup in 25 Minutes (One-Pot)
Creamy Broccoli Potato Soup: A Feel-Good Recipe to Warm Your Soul
Welcome to my cozy kitchen, where the aroma of fresh ingredients dances in the air and delicious memories are made! Today, we’re diving into a dish that warms the heart and satisfies the soul: Creamy Broccoli Potato Soup. Whether you’re curling up on a chilly evening or just in need of a comforting bowl of goodness, this soup is your perfect companion.
Why do I love this dish so much? Well, it’s not just the creamy texture or the cozy comfort that draws me in—it’s the nostalgia it brings. Growing up, my mom would whip up this broccoli potato soup whenever we had a rainy day or were feeling a bit under the weather. The vibrant green of the broccoli and the heartiness of the potatoes turned any gloomy afternoon into a bright, delicious feast!
Not only is this soup packed with flavor, but it’s also incredibly nourishing. The blend of fresh vegetables creates a satisfying bowl that you can feel good about serving your family. Plus, it’s surprisingly easy to make, even on the busiest of days. If you’re a fan of simple, flavorful meals that don’t compromise on health, then grab your apron, and let’s get started!
A Fond Memory: The Soup That Healed
I remember the first time my mom made this soup; it was one of those dreary days where the rain just wouldn’t stop. As a kid, nothing felt better than coming home from school to the smell of something warm and comforting bubbling away on the stove. The moment I stepped through the door, I could smell the savory blend of garlic and onion sautéing in the pan—it was pure magic.
My mom would always encourage us to help in the kitchen. I remember standing on a stool, eagerly tossing broccoli florets into a big pot, while she taught me the art of seasoning. She explained how just a pinch of salt could elevate the flavors and how we could make the soup creamy without being overly heavy.
That day, we topped the soup with extra cheddar cheese and sat around the table together, enjoying each spoonful. It was more than just a meal; it was a time for laughter and connection. This soup became a staple in our home, a recipe I carry with me and have modified over the years. Now, whenever I whip up a batch, I feel that love and warmth all over again.
Ingredients: What You’ll Need
Here’s a simple rundown of what you’ll need to create this delicious soup:
-
Broccoli: Fresh or frozen, this green powerhouse is rich in vitamins and adds a wonderful earthiness to the soup.
-
Potatoes: Use Russet, Yukon Gold, or red potatoes for that creamy texture. They help thicken the soup naturally.
-
Cheddar Cheese: Nothing beats sharp cheddar for a rich, colorful finish. Feel free to swap with a dairy-free cheese for a vegan option.
-
Onion: A classic base for any good soup. Sweet onions will give a milder flavor, while yellow onions add a bolder taste.
-
Garlic: Fresh garlic contributes aromatic warmth. If you’re short on time, garlic powder works as a substitute, though fresh is best!
-
Vegetable Broth: Use homemade if you have it! It adds depth to the flavor. Chicken broth is okay too, but it will change the soup’s essence.
-
Salt: Essential for elevating the flavors. Start with a pinch and adjust to taste.
-
Pepper: Freshly ground gives the best flavor. Add more for a little kick!
-
Cream: A splash of heavy cream brings everything together into a silky texture. You can substitute coconut cream for a non-dairy version.
Step-by-Step Instructions
Step 1: Prep Your Ingredients
Start off by washing and chopping your broccoli into bite-sized florets. If you’re feeling ambitious, use the stems, too—it’s all good! Next, peel and dice your potatoes, chop the onion, and mince the garlic. Having everything prepped makes the cooking process so much smoother.
Step 2: Sauté the Aromatics
In a large pot, heat a tablespoon of olive oil over medium heat. Once hot, toss in the diced onion and sauté for about 5 minutes, or until it’s translucent. Add the garlic next (oh, that smell!) and sauté for an additional minute until fragrant. Don’t let it burn; burnt garlic isn’t our friend!
Step 3: Add the Vegetables
Now, it’s time to incorporate the potatoes and broccoli! Stir them into the pot, letting them mingle with the garlic and onion for about 2 minutes. This step helps to enhance their flavors through that sautéing process.
Step 4: Pour in the Broth
Pour in about 4 cups of vegetable broth, submerging your veggies completely. Bring everything to a gentle boil, then reduce the heat to a simmer for about 15-20 minutes. You want the potatoes to be fork-tender and the broccoli bright green but still vibrant.
Step 5: Blend it Up!
Once cooked, it’s time to blend the soup until smooth. You can use an immersion blender (my favorite!) right in the pot or carefully transfer to a countertop blender if you prefer. If using a standard blender, be cautious and allow the steam to escape; hot soup can make a mess!
Step 6: Stir in the Cream and Cheese
After blending, return the soup to the pot (if you used a blender) and add a splash of cream and shredded cheddar cheese. Stir continuously over low heat until the cheese melts and everything is creamy and luxurious. Don’t forget to taste and adjust the seasoning with salt and pepper.
Step 7: Serve It Up
Ladle your beautifully blended soup into bowls. The vibrant green is so appetizing! I love to garnish with a little extra shredded cheese, a drizzle of cream, or some freshly cracked black pepper. A side of crusty bread or a light salad makes for a wonderful pairing!
Serving Suggestions
To elevate your dining experience, serve this creamy broccoli potato soup in rustic bowls with thick slices of toasted sourdough on the side. A sprinkle of fresh herbs like chives or parsley on top adds a pop of color and a fresh flavor. If you’re feeling adventurous, some croutons or crispy bacon bits can add a delightful crunch!
Recipe Variations
-
Vegan Version: Substitute dairy cheese for a vegan cheese and use coconut cream instead of heavy cream for a rich texture.
-
Spicy Kick: Add in diced jalapeños during the sautéing process for a spicy twist.
-
Herb Infusion: Toss in some fresh thyme or rosemary while simmering for an aromatic depth of flavor.
-
Extra Greens: Spinach, kale, or peas can be added along with broccoli for even more nutrients.
-
Cheese Lover’s Delight: Experiment with different cheese varieties like Gruyère or goat cheese for a unique flavor profile.
Chef’s Notes
I’ve made this soup countless times, and it has evolved along the way. Some days, I add a zip of lemon juice for brightness, and other days, I might throw in a few more veggies depending on what I have. It’s one of those lovely recipes that adapts to your pantry and your preferences. The best thing? It freezes beautifully! Just make sure to let it cool completely before portioning it into airtight containers for those busy days when you need a quick meal.
FAQs and Troubleshooting
Q: My soup is too thick. How can I thin it out?
A: No problem! Just add a little more broth or water—stirring until it reaches your desired consistency.
Q: Can I use frozen broccoli?
A: Absolutely! Frozen broccoli will work just fine; just add it during the last 5-10 minutes of cooking.
Q: What if I don’t have enough broth?
A: You can use water in a pinch, but try to add some extra seasoning to keep the flavor rich.
Q: Why is my soup not creamy?
A: If your soup isn’t blending to the right consistency, it might need a little more blending time. Give it a thorough mix until velvety smooth! If you’re still feeling it’s lacking, adding more cream or cheese can help create that rich texture.
Nutritional Info
While I won’t provide exact numbers, this soup is generally packed with vitamins from the broccoli, filling carbohydrates from the potatoes, and a good serving of protein from the cheese. It’s an incredibly balanced dish perfect for any meal!
There you have it—a friendly, approachable guide to making a creamy broccoli potato soup that won’t just nourish your body but also add a sprinkle of love to your table. So, gather your ingredients, get comfy, and let the kitchen magic unfold! Happy cooking, friends!
PrintCreamy Broccoli Potato Soup

A comforting soup that combines fresh broccoli and hearty potatoes, perfect for warming your soul on chilly days.
- Prep Time: 15 minutes
- Cook Time: 30 minutes
- Total Time: 45 minutes
- Yield: 4 servings 1x
- Category: Soup
- Method: Stovetop
- Cuisine: American
- Diet: Vegetarian
Ingredients
- 4 cups Broccoli florets (fresh or frozen)
- 2 large Potatoes (Russet, Yukon Gold, or red)
- 1 cup Cheddar Cheese (shredded)
- 1 Onion (chopped)
- 3 cloves Garlic (minced)
- 4 cups Vegetable Broth
- Salt (to taste)
- Pepper (to taste)
- 1/2 cup Cream (heavy or coconut for dairy-free)
Instructions
- Prep Your Ingredients: Wash and chop the broccoli, peel and dice the potatoes, chop the onion, and mince the garlic.
- Sauté the Aromatics: In a large pot, heat olive oil over medium heat. Sauté the onion for 5 minutes, then add the garlic and sauté for an additional minute.
- Add the Vegetables: Stir in the potatoes and broccoli, cooking for about 2 minutes.
- Pour in the Broth: Add vegetable broth and bring to a gentle boil. Reduce heat and simmer for 15-20 minutes until the potatoes are fork-tender.
- Blend it Up: Blend the soup until smooth using an immersion blender or a countertop blender.
- Stir in the Cream and Cheese: Return the soup to the pot, add cream and cheese, stirring over low heat until melted.
- Serve It Up: Ladle into bowls, garnish with extra cheese or cracked pepper, and enjoy!
Notes
For a vegan version, substitute dairy cheese with vegan cheese and use coconut cream. This soup can be frozen for future meals.
Nutrition
- Serving Size: 1 serving
- Calories: 350
- Sugar: 5g
- Sodium: 400mg
- Fat: 12g
- Saturated Fat: 4g
- Unsaturated Fat: 6g
- Trans Fat: 0g
- Carbohydrates: 45g
- Fiber: 3g
- Protein: 15g
- Cholesterol: 30mg
Keywords: broccoli soup, potato soup, creamy soup, healthy soup, vegetarian soup
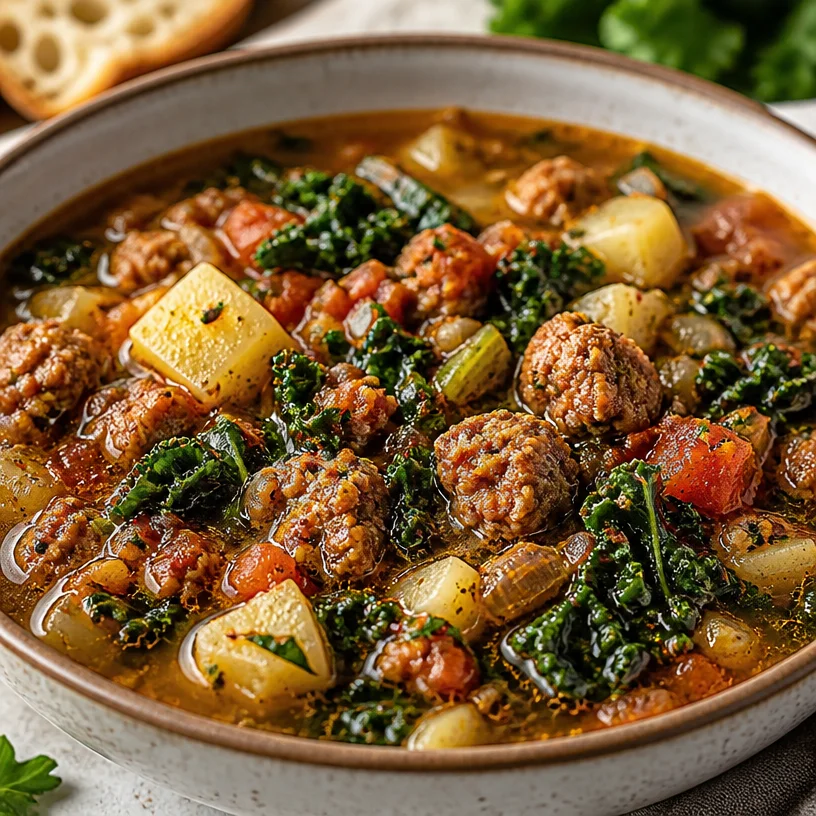
Budget-Friendly 30-Minute One-Pan Sausage Kale Soup
Warm Up with Hearty Sausage Kale Soup: A Cozy Delight
Hey there, fellow food lovers! If you’re looking for a warm hug in a bowl, you’ve landed in the right place. Today, we’re making a deliciously satisfying Sausage Kale Soup that is brimming with flavor and nutrition. With cozy days ahead, there’s nothing quite like a homemade soup to make you feel both nourished and happy.
Imagine a chilly evening where your home has an enticing aroma wafting from the kitchen. You scoop out your first bowl of this vibrant soup, topped with fresh herbs and crusty bread. Your taste buds revel in the savory blend of Italian sausage, tender kale, and hearty potatoes. Sounds delightful, right? Spoiler alert: It is, and I can’t wait to share this dish that has become a staple in my home, especially when the temperatures drop.
Cooking this Sausage Kale Soup is straightforward and fun—so let’s roll up our sleeves and dive into this culinary adventure together. Not only is it an absolute treat, but it’s also packed with nutrients that will keep you feeling great. I promise, you’ll want to make this one again and again!
A Taste of Nostalgia
Ah, soup! There’s something profoundly comforting about a bowl of homemade goodness simmering on the stove. I have fond memories of making soup with my grandma on cold winter days. She’d pull out her old, cherished pot, chop up fresh vegetables, and let me help mix everything together. Her secret ingredient was always a pinch of love, and a touch of humor—it made every bowl taste extra special.
One particular evening, as snow fell outside, we made a simple sausage soup together. I was probably around eight years old, and as much as I loved getting my hands dirty in the kitchen, I mostly loved the stories she told while we cooked. They were tales of her youth, her family’s traditions, and the places where food brought people together. I remember her laughter bouncing off the kitchen walls as she recounted the time my father tried to ‘help’ and accidentally added way too much salt!
That soup became part of my childhood, shaping my relationship with food. Inspired by those memories, I’ve created my own version of that comforting dish that’s filled with vibrant flavors and nourishing ingredients. So, grab a spoon—let’s make this together!
Ingredients
Here’s what you’ll need to gather for our Sausage Kale Soup:
-
Italian Sausage: This is the backbone of our soup, adding rich flavors and spices. You can choose between sweet or spicy varieties based on your preference. For a lighter option, turkey sausage is a fantastic substitute!
-
Kale: This nutrient-dense green is packed with vitamins and adds a lovely texture. If you don’t have kale on hand, Swiss chard or spinach works well, too!
-
Potatoes: Use any variety you have—Russett, Yukon Gold, or even sweet potatoes! They give the soup a hearty base and wonderful creaminess. Just peel and chop them into even pieces for even cooking.
-
Broth: A good-quality chicken or vegetable broth brings everything together. Make it homemade if you can, but store-bought is perfectly acceptable! For a twist, try using bone broth for extra nutrients.
-
Olive Oil: Used to sauté the sausage and vegetables. You can swap in coconut oil or ghee for different flavor profiles.
-
Onion: Adds sweetness and depth; yellow onions are the go-to choice, but red or shallots can offer a nice change, too!
-
Garlic: A must for flavor! Fresh minced garlic is always best, but garlic powder can work in a pinch.
-
Seasonings: Salt, pepper, and red pepper flakes enhance the flavors, but feel free to add in dried herbs like thyme or oregano for a more aromatic experience.
Step-by-Step Instructions
Alright, friends! Let’s dive into the process of making this scrumptious soup. Follow along with these easy-to-follow steps!
Step 1: Sauté the Sausage
In a large pot, heat a drizzle of olive oil over medium heat. Once the oil shimmers, add in your Italian sausage. Use a spatula to break it apart as it cooks—this should take about 5-7 minutes until it’s browned and cooked through. This is where the magic begins, as your kitchen fills with savory aromas. If you’re using a lower-fat sausage, watch it closely to avoid dryness!
Step 2: Add the Aromatics
With the sausage cooked, toss in your diced onion and minced garlic. Sauté for about 2-3 minutes until the onion becomes translucent. This step is crucial as the onions absorb the sausage flavors and become sweet. Just a tip: keep the heat moderate to prevent garlic from burning—it can turn bitter!
Step 3: Toss in the Veggies
Now, add the chopped potatoes and pour in your broth. Stir everything together, ensuring the potatoes are well-coated. This is where the broth magic happens! Feel free to pour in 4 cups of broth for a heartier soup or add more for a lighter version. Let it simmer for about 10-15 minutes or until the potatoes are fork-tender.
Step 4: Mix in the Kale
Once the potatoes are soft, it’s time to add the kale. Stir in a few big handfuls and cook for another 5-7 minutes until the kale is tender and vibrant. If you’re using thicker stems, give them a little extra time in the pot to soften up.
Step 5: Season and Serve
That’s it! Now, taste your soup and adjust seasonings with salt, pepper, and red pepper flakes. Once it’s seasoned to your liking, it’s ready to serve! I like to let it cool for a minute before ladling it into bowls.
Serving Suggestions
To serve your Sausage Kale Soup, ladle it into warm bowls and garnish with freshly chopped parsley or grated Parmesan cheese. A side of crusty whole-grain bread or a simple garden salad pairs perfectly alongside. You can also drizzle a little olive oil or squeeze of lemon on top for a touch of brightness—trust me, it takes the flavors up a notch!
Recipe Variations
Feeling adventurous? Here are a few creative twists you can try:
-
Add Beans: Stir in a can of white beans for added protein and creaminess.
-
Spicy Option: Kick up the heat by adding diced jalapeños or using spicy Italian sausage.
-
Vegan Version: Substitute sausage with plant-based sausage or skip it altogether. Enhance the broth with additional spices for a flavor boost.
-
Add Grains: Quinoa, farro, or barley can be great additions for a heartier soup! Just cook the grains separately and toss them in before serving.
-
Herbs & Spices: Experiment with fresh herbs like dill or thyme for a fresh herbal note.
Chef’s Notes
Every recipe I create is a little snapshot of my culinary journey. This Sausage Kale Soup has evolved over the years, and it continues to be a family favorite. It’s one of those dishes where the leftovers are even better the next day—every bite just gets more flavorful as it sits.
And believe me, I’ve had my fair share of soup mishaps. There was this one time when I mistook cayenne for paprika, and instead of a cozy bowl, my family got a spice bomb in a pot! But that’s the fun of cooking, right? Learning and laughter are what make the kitchen a joyful place.
FAQs and Troubleshooting
Q: Can I freeze this soup?
Absolutely! This soup freezes incredibly well. Just let it cool completely, then transfer to airtight containers or freezer bags—make sure to leave space for expansion. It can last up to 3 months in the freezer.
Q: It tastes bland! What do I do?
A common issue! Try adding a splash of vinegar or a squeeze of lemon juice for acidity, which can brighten flavors. A touch more salt or some fresh herbs can also do wonders!
Q: Can I use different greens?
Yes! While kale is a star player here, feel free to swap in collard greens, mustard greens, or even spinach. Just keep in mind that cooking times might vary based on the greens’ sturdiness.
Q: How do I make this soup creamy?
For a creamier texture, blend a cup or two of the soup in a blender and return it to the pot. You could also stir in a splash of heavy cream or coconut milk just before serving for an extra luxurious feel.
Nutritional Info
While I don’t usually include nutritional specifics, I can tell you that this Sausage Kale Soup is filled with healthy fats, protein, and plenty of vitamins from the kale and potatoes—making it a balanced meal that feels indulgent without the guilt!
I hope you enjoy this Sausage Kale Soup as much as I do and that it brings as much warmth and joy to your table as it has to mine. Remember, cooking is all about having fun and experimenting. So gather your ingredients, invite some friends over, and let’s create delicious memories together. Happy cooking!
PrintHearty Sausage Kale Soup

A warm and nourishing Sausage Kale Soup packed with flavor and nutrients, perfect for cozy days.
- Prep Time: 15 minutes
- Cook Time: 30 minutes
- Total Time: 45 minutes
- Yield: 4 servings 1x
- Category: Soup
- Method: Stovetop
- Cuisine: Italian
- Diet: Gluten-Free
Ingredients
- 1 lb Italian Sausage
- 4 cups Kale, chopped
- 2 cups Potatoes, diced
- 4 cups Chicken or Vegetable Broth
- 2 tbsp Olive Oil
- 1 Onion, diced
- 3 cloves Garlic, minced
- Salt, to taste
- Pepper, to taste
- Red Pepper Flakes, to taste
Instructions
- Sauté the sausage in olive oil over medium heat until browned, about 5-7 minutes.
- Add the onion and garlic, cooking for 2-3 minutes until translucent.
- Toss in the potatoes and pour in the broth. Let it simmer for 10-15 minutes.
- Mix in the kale and cook for another 5-7 minutes until tender.
- Season to taste and serve hot.
Notes
Garnish with fresh herbs or Parmesan cheese, and serve with crusty bread.
Nutrition
- Serving Size: 1 serving
- Calories: 450
- Sugar: 3g
- Sodium: 800mg
- Fat: 20g
- Saturated Fat: 7g
- Unsaturated Fat: 10g
- Trans Fat: 0g
- Carbohydrates: 40g
- Fiber: 5g
- Protein: 25g
- Cholesterol: 70mg
Keywords: soup, sausage, kale, comfort food, easy recipe
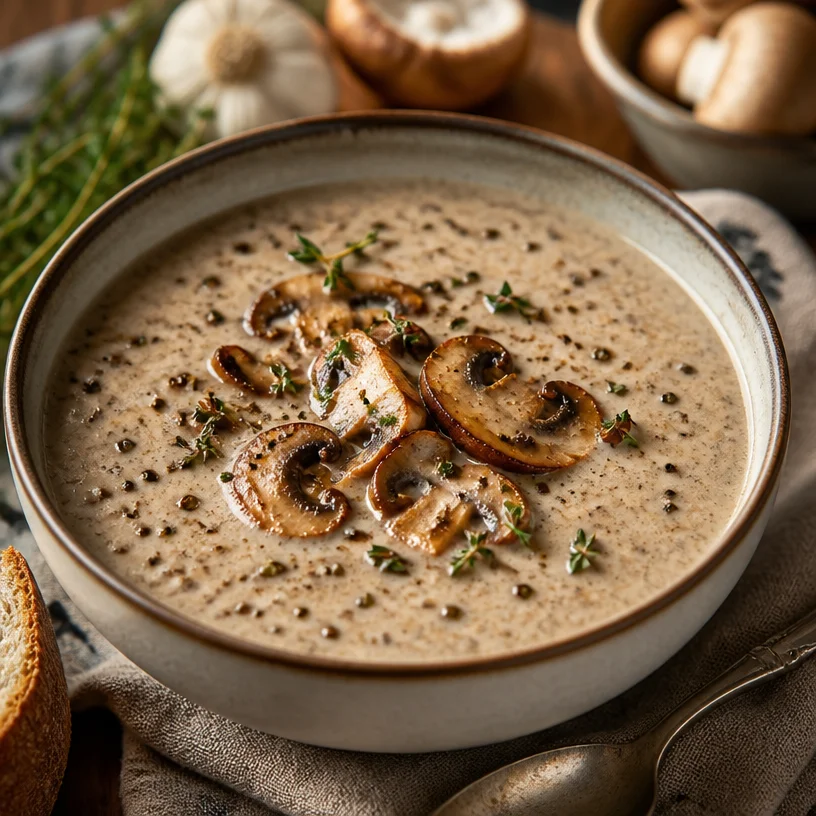
Creamy Mushroom Soup: 30-Minute One-Pot Weeknight Comfort
Creamy Mushroom Soup: A Bowl Full of Comfort
Welcome to Clean Plate Cravings! Today, we’re diving into the comforting world of creamy mushroom soup—a dish that’s not just delicious, but also warms the soul on chilly days. There’s something incredibly satisfying about a bowl of creamy mushroom soup, don’t you think? With its rich, earthy flavors and velvety texture, it’s the kind of dish that feels like a warm hug in a bowl.
A Taste of Nostalgia
Let me take you back to my childhood kitchen, where the aroma of sautéing mushrooms would fill the air on rainy days. My grandmother, a passionate cook, would often whip up her signature creamy mushroom soup. The kitchen would buzz with love, laughter, and that unmistakable scent of garlic and thyme.
I remember standing on my tiptoes, peering into the pot as she stirred, desperate to steal a taste. She’d smile at me, reminding me to be patient; the best things come to those who wait! Once it was ready, we’d gather around the table, bowls in hand, and savor every spoonful together.
That soup wasn’t just a meal; it was a moment, a memory—a celebration of life’s simple pleasures. And now, I want to share that feeling with you through this delightful creamy mushroom soup recipe. So, roll up your sleeves, and let’s reconnect with that nostalgia!
Ingredients
Before we begin, let’s gather our ingredients. Here’s what you’ll need for our creamy mushroom soup:
-
Mushrooms (500g): Fresh mushrooms are the star of this soup. I recommend cremini or shiitake for a richer flavor. If you’re in a pinch, you can use canned mushrooms, but fresh is always best!
-
Onion (1 medium): A finely chopped onion adds sweetness and depth. Yellow onions work best here, but white or even shallots can be excellent substitutes if you want a milder flavor.
-
Garlic (2 cloves): Minced garlic brings a lovely aroma and enhances the overall taste. Feel free to use garlic powder in a pinch, but fresh garlic provides that vibrant kick!
-
Thyme (1 tsp dried or 2 tsp fresh): Thyme adds an herby nuance that complements the mushrooms beautifully. If you’re out of thyme, rosemary or parsley can provide a nice alternative.
-
Vegetable or Chicken Broth (4 cups): This is the base of our soup. Use homemade broth if you have it; otherwise, a good-quality store-bought version works wonders. Feel free to use a plant-based broth to keep it vegetarian or vegan.
-
Heavy Cream (1 cup): For a luscious and creamy finish, heavy cream is key. If you want a lighter option, half-and-half can be a great substitute, or for a dairy-free version, coconut cream will do the trick!
-
Salt and Pepper: To taste, of course! Consider using sea salt for a touch of flavor enhancement, and freshly cracked black pepper for a bit of heat.
Step-by-Step Instructions
Now that we have our ingredients ready, let’s get cooking! Follow these steps, and I promise you’ll be enjoying a comforting bowl of creamy mushroom soup in no time.
-
Sauté the Aromatics: In a large pot, heat a tablespoon of olive oil over medium heat. Add the chopped onion and cook for about 5 minutes until it’s soft and translucent. Then, toss in the minced garlic and dried thyme, and cook for another minute. This step is crucial; it’s where the flavor foundation is built!
-
Cook the Mushrooms: Add the sliced mushrooms to the pot. Stir them well to coat with the oil and mix with the aromatics. Continue to cook for about 8-10 minutes, allowing them to release their moisture and develop a nice golden color. Be patient! This caramelization is what adds depth to your soup.
-
Pour in the Broth: Once the mushrooms are looking fabulous, it’s time to pour in the broth. Scrape up any lovely brown bits at the bottom of the pot as you do so—that’s flavor gold! Bring the mixture to a boil, then reduce the heat and let it simmer for about 15 minutes. The aroma will be inviting!
-
Blend for Creaminess: After simmering, you have a choice here. If you prefer a smooth soup, use an immersion blender right in the pot to blend until creamy. Alternatively, transfer the soup to a blender in batches. Just be cautious—it’s hot! If you like your soup a bit chunky, skip the blending entirely and proceed to the next step.
-
Stir in the Cream: Return the blended soup to the pot (if you blended it), and stir in the heavy cream. Season with salt and pepper to taste. Let the soup simmer for another 5 minutes so everything can mingle together wonderfully.
-
Serve and Enjoy: Spoon your creamy mushroom soup into bowls, and garnish with a sprinkle of fresh thyme or a drizzle of olive oil if you’re feeling fancy. Get ready for the cozy vibes!
Serving Suggestions
Plating is everything, am I right? For the best presentation, ladle the soup into warmed bowls. Add a touch of fresh herbs like thyme or parsley on top for color, and consider serving it with crunchy toasted baguette slices or a light salad on the side. This adds not just style, but a delightful contrast in textures!
Recipe Variations
Here are some exciting twists to make this creamy mushroom soup your own:
-
Add Spinach or Kale: Stir in a handful of fresh spinach or kale during the last few minutes of cooking for a nutritional boost and vibrant color.
-
Truffle Oil Drizzle: If you’re feeling extra indulgent, a drizzle of truffle oil just before serving will elevate the flavors to a whole new level of gourmet goodness.
-
Mushroom Medley: Explore various mushroom types like portobello or chanterelles for a more complex flavor profile.
-
Nutty Crunch: Toast some pine nuts or slivered almonds and sprinkle them on top. It adds a lovely crunch and makes the dish even more delightful.
-
Spicy Kick: Add a pinch of red pepper flakes while sautéing the onions for a hint of heat that balances beautifully with the creamy richness.
Chef’s Notes
When I first started making this creamy mushroom soup, it was just a simple recipe I pieced together from memory. Over the years, I’ve played around with different herbs and spices, and I’ve even experimented with adding a splash of wine. Every tweak made it a little more special!
A funny story: one time, I accidentally grabbed cayenne pepper instead of black pepper. Let’s just say the soup turned out to be a “spicy surprise” for my dinner guests! So, double-check those spice jars, friends!
FAQs and Troubleshooting
Q: Why is my soup too thin?
A: If your soup is too runny, return it to the heat and simmer for a few more minutes to reduce it. Alternatively, make a slurry with cornstarch and water, then whisk it in to thicken.
Q: Can I make this soup ahead of time?
A: Absolutely! Creamy mushroom soup keeps well in the fridge for 3-4 days. Just remember to add the cream right before serving for the best consistency.
Q: How can I make this soup vegan?
A: For a vegan version, use coconut cream instead of heavy cream, and opt for vegetable broth. You can also add a splash of nutritional yeast for that cheesy flavor!
Q: The flavor seems flat. What can I do?
A: Sometimes all it needs is a touch more salt, acid (like a squeeze of lemon), or fresh herbs to brighten it up. Taste as you go!
Nutritional Info
While I prefer to enjoy my meals without focusing too much on numbers, here’s a quick look to keep you in the loop. A serving of creamy mushroom soup (1 cup) typically contains:
- Calories: ~250
- Protein: ~5g
- Carbohydrates: ~20g
- Fat: ~18g
Remember, these numbers can vary based on the specific ingredients and proportions you use!
So there you have it! My family’s comforting creamy mushroom soup recipe that I hope will bring warmth and joy to your kitchen just like it did in mine. Give it a try, and feel free to share your own memories, variations, or any kitchen adventures along the way. Let’s indulge in some hearty deliciousness together! Happy cooking!
PrintCreamy Mushroom Soup

A comforting bowl of creamy mushroom soup, rich and velvety with earthy flavors.
- Prep Time: 10 minutes
- Cook Time: 30 minutes
- Total Time: 40 minutes
- Yield: 4 servings 1x
- Category: Soup
- Method: Cooking
- Cuisine: American
- Diet: Vegetarian
Ingredients
- 500g fresh mushrooms (cremini or shiitake)
- 1 medium onion, finely chopped
- 2 cloves garlic, minced
- 1 tsp dried thyme (or 2 tsp fresh)
- 4 cups vegetable or chicken broth
- 1 cup heavy cream
- Salt and pepper to taste
Instructions
- Sauté the aromatics: In a large pot, heat a tablespoon of olive oil over medium heat. Add the chopped onion and cook for about 5 minutes until soft and translucent. Then, toss in the minced garlic and dried thyme, and cook for another minute.
- Cook the mushrooms: Add the sliced mushrooms to the pot. Stir well to coat with the oil and mix with the aromatics. Continue to cook for about 8-10 minutes.
- Pour in the broth: Once the mushrooms are looking fabulous, pour in the broth. Scrape up any brown bits and bring to a boil, then reduce the heat and let it simmer for about 15 minutes.
- Blend for creaminess: Use an immersion blender to blend the soup until smooth or transfer to a blender in batches for a smoother consistency.
- Stir in the cream: Return the blended soup to the pot (if applicable), and stir in the heavy cream. Season with salt and pepper to taste. Let it simmer for another 5 minutes.
- Serve and enjoy: Spoon your creamy mushroom soup into bowls, garnish with fresh thyme or olive oil, and enjoy the cozy vibes!
Notes
For a vegan option, substitute the heavy cream with coconut cream and use vegetable broth. Keep the soup in the fridge for 3-4 days and add cream just before serving for best consistency.
Nutrition
- Serving Size: 1 cup
- Calories: 250
- Sugar: 3g
- Sodium: 470mg
- Fat: 18g
- Saturated Fat: 10g
- Unsaturated Fat: 8g
- Trans Fat: 0g
- Carbohydrates: 20g
- Fiber: 2g
- Protein: 5g
- Cholesterol: 60mg
Keywords: creamy mushroom soup, comfort food, easy soup recipe, vegetarian soup, hearty soup
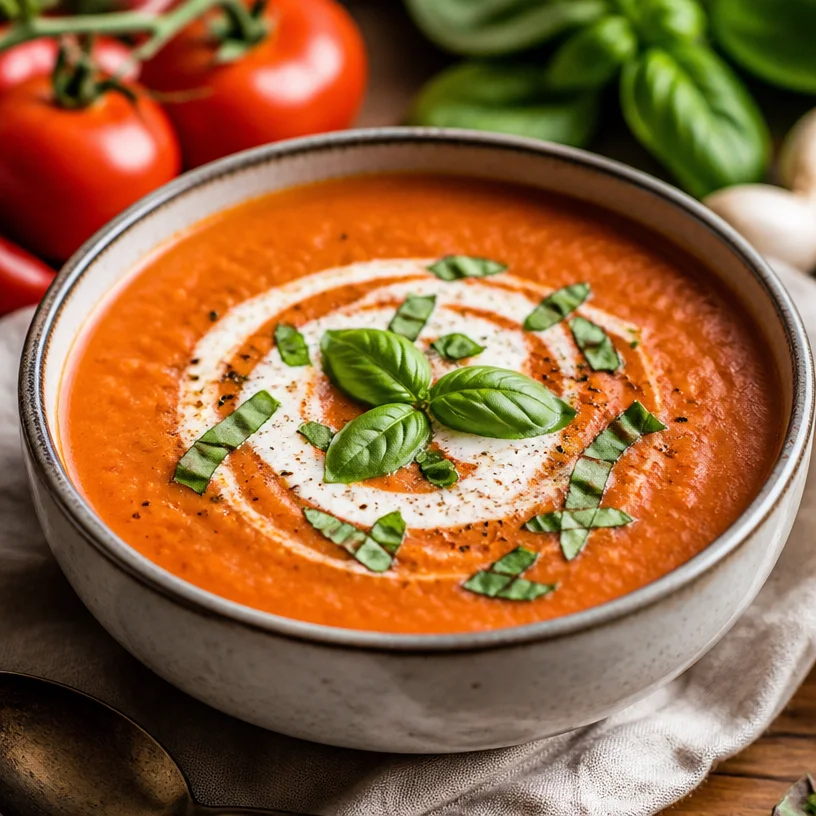
Creamy Tomato Basil Soup: 15-Minute One-Pot Weeknight Win
Tomato Basil Soup: A Bowl of Comfort and Flavor
Welcome to another delicious journey through the kitchen, my fellow foodies! Today, I’m thrilled to share a recipe that’s close to my heart: Tomato Basil Soup. Imagine curling up with a cozy bowl of this creamy, vibrant soup, each spoonful wrapping you in nostalgia and warmth. It’s fresh, it’s filling, and best of all, it’s downright delightful!
Why Tomato Basil Soup, You Ask?
This dish is more than just a meal; it’s an experience. As the summer days turn to crisp autumn evenings, there’s something special about indulging in a bowl of hot soup. Plus, it’s incredibly versatile—perfect for pairing with a crunchy grilled cheese sandwich, enjoying on its own, or even drizzling over some roasted veggies for a refreshing touch. This soup not only fills you up but also warms your soul, and there are countless ways to make it your own.
A Personal Touch
One of my favorite memories associated with Tomato Basil Soup takes me back to the summers I spent at my grandmother’s house. She had the most beautiful garden overflowing with ripe, juicy tomatoes and fragrant basil, the aroma wafting through the air as we spent lazy afternoons picking ingredients right off the vine. Grandma would cook up her famous soup for dinner, blending the garden’s bounty into a warm, comforting bowl that felt like a hug. We’d sit at the table, laughing and sharing stories, dipping homemade bread into the steaming soup. Those moments taught me that food is a way of connecting—both with our loved ones and the earth.
Ingredients
Let’s gather the stars of our show! Here’s what you’ll need to whip up a delicious Tomato Basil Soup:
-
Tomatoes (fresh or canned)
- Why? The base of the soup, tomatoes bring a bright, tangy flavor.
- Tip: If using fresh, look for ripe, juicy varieties like Roma or vine-ripened for the best flavor. Canned tomatoes are a godsend for winter months or if you’re craving this soup outside of tomato season.
-
Fresh Basil
- Why? Basil adds a fresh, aromatic punch that elevates the entire dish.
- Tip: Torn basil leaves release their essential oils faster, giving your soup a delectable taste. If you don’t have fresh basil, dried basil can work—just halve the amount since it’s more concentrated.
-
Garlic
- Why? It adds depth and complexity to the soup.
- Tip: Use fresh garlic cloves for the best flavor, but if you’re in a pinch, minced garlic from a jar will do. Don’t skip this ingredient!
-
Cream (optional but recommended)
- Why? A splash of cream gives the soup a rich, velvety texture.
- Tip: For a lighter version, you can substitute with coconut milk or cashew cream for a dairy-free option. Even a dollop of Greek yogurt on top can add creaminess!
Step-by-Step Instructions
Now let’s get cooking! Follow these steps to create your own bowl of Tomato Basil Soup.
-
Prep Your Ingredients
Start by washing and chopping your vegetables. If you’re using fresh tomatoes, roughly chop them into large chunks. For canned tomatoes, simply open the can and set them aside. Chop 4-5 garlic cloves—don’t be shy, garlic lovers!Chef Hack: If you want an aromatic kick, sauté the garlic in a little olive oil before adding the tomatoes. This extra step enhances the garlic’s sweetness and mellows its pungency.
-
Sauté the Garlic
In a pot, heat a tablespoon of olive oil over medium heat. Add your chopped garlic and cook for about 1-2 minutes until fragrant and slightly golden. Keep stirring—nobody wants burnt garlic ruining this beautiful soup! -
Add the Tomatoes
Once the garlic is ready, toss in your chopped tomatoes (or the canned goodness). If you’re using fresh tomatoes, let them cook down for about 10 minutes until they start to release their juices. Stir occasionally and watch the magic happen! -
Create the Broth
Here’s where the soup gets its depth. Pour in about 2 cups of vegetable or chicken broth (or even plain water if that’s what you have). Bring the mixture to a gentle simmer. Let it cook for about 20 minutes, allowing all those flavors to meld together. -
Blend It Up
If you’re after a smooth soup, grab your immersion blender and blend until velvety. If you don’t have one, carefully transfer the soup to your standing blender in batches, but be cautious not to burn yourself!Tip from the chef: If you love a bit of texture, leave a few chunky bits for that rustic, cozy feel!
-
Add the Basil and Cream
After blending, return the soup to low heat. Stir in a generous handful of torn fresh basil (reserving some for garnish) and add in that splash of cream. Let it heat through for a couple more minutes. Taste and season with salt and pepper as needed. -
Serve and Enjoy
Your Tomato Basil Soup is now ready to serve! Ladle it into bowls, garnish with extra basil leaves and a swirl of cream if desired. Enjoy the fruits of your labor with crusty bread or a pressed sandwich.
Serving Suggestions
When it comes to serving Tomato Basil Soup, the possibilities are endless! A big, rustic bowl shows off its vibrant orange-red hue beautifully. For a fun twist, serve it in bread bowls for a delightful edible experience. A sprinkle of croutons or parmesan cheese can add texture, while a drizzle of olive oil or a dollop of pesto can take it up a notch. Pair it with your favorite grilled cheese for a classic combo. Or keep it light with a simple salad on the side.
Recipe Variations
Here are some creative twists to inspire your soup adventure:
- Spicy Tomato Basil Soup: Add a pinch of red pepper flakes for a kick.
- Roasted Tomato Basil Soup: Roast your tomatoes and garlic ahead of time for a deeper flavor.
- Vegetable-Loaded Soup: Toss in chopped vegetables like carrots, zucchini, or bell peppers for added nutrition and texture.
- Herb-Infused: Mix in other fresh herbs like oregano or thyme to enhance flavor complexity.
- Cheesy Delight: Blend in some grated Parmesan cheese for an extra creamy and savory twist!
Chef’s Notes
This Tomato Basil Soup recipe has evolved over the years, growing from my grandmother’s garden fresh version to a more modern, cozy meal that can be whipped up effortlessly during busy weeks. One funny kitchen story involves a time I was blending the soup and got a little too excited. Let’s just say I ended up wearing more tomato soup than I actually served! But, every spill has taught me to embrace the process and continue experimenting with flavors.
FAQs and Troubleshooting
-
Can I freeze this soup?
Absolutely! Tomato Basil Soup freezes beautifully. Just let it cool completely, then pack it into airtight containers. It will stay fresh for about 3 months. Just reheat on the stovetop or microwave when you’re ready to enjoy! -
My soup is too acidic. How can I balance it?
If your soup ends up a bit tangy, try stirring in a pinch of sugar or a splash of honey to balance the acidity. -
Why is my soup watery?
If your soup is too thin, let it simmer longer to evaporate excess liquid. Additionally, you can blend in a little more cooked tomato to thicken it up. -
Can I use dried basil instead?
Yes, you can use dried basil, but remember that it’s more concentrated, so you need less. Start by using about a tablespoon and adjust to your taste.
Nutritional Info
(For a 1-cup serving)
- Calories: 150
- Protein: 3g
- Total Fat: 8g
- Saturated Fat: 4g
- Carbohydrates: 18g
- Fiber: 3g
- Sugars: 5g
Hope this delightful adventure into the world of Tomato Basil Soup has inspired you to grab your apron and get cooking! Remember, cooking is all about joy and experimenting with flavors, so make this recipe your own and keep the love coming from your kitchen. Happy cooking!
PrintTomato Basil Soup

A comforting and flavorful Tomato Basil Soup that wraps you in nostalgia and warmth, perfect for cozy evenings.
- Prep Time: 15 minutes
- Cook Time: 30 minutes
- Total Time: 45 minutes
- Yield: 4 servings 1x
- Category: Soup
- Method: Blending
- Cuisine: Italian
- Diet: Vegetarian
Ingredients
- 2 cups Tomatoes (fresh or canned)
- 1 cup Fresh Basil
- 4–5 cloves Garlic
- 1 tbsp Olive Oil
- 2 cups Vegetable or Chicken Broth
- 1/2 cup Cream (optional)
Instructions
- Prep your ingredients by washing and chopping vegetables. Chop fresh tomatoes into chunks and garlic cloves.
- Sauté the garlic in olive oil over medium heat until fragrant and golden.
- Add the tomatoes and cook for about 10 minutes until they release their juices.
- Create the broth by pouring in vegetable or chicken broth and simmer for 20 minutes.
- Blend the soup until smooth using an immersion blender or a standing blender.
- Add in torn basil and cream, stirring to combine, and heat through.
- Serve and enjoy, garnishing with fresh basil and cream if desired.
Notes
Substitute cream with coconut milk or cashew cream for a dairy-free option. Freezes well for up to 3 months.
Nutrition
- Serving Size: 1 cup
- Calories: 150
- Sugar: 5g
- Sodium: 600mg
- Fat: 8g
- Saturated Fat: 4g
- Unsaturated Fat: 4g
- Trans Fat: 0g
- Carbohydrates: 18g
- Fiber: 3g
- Protein: 3g
- Cholesterol: 30mg
Keywords: soup, tomato basil, comforting soup, vegetarian soup, cozy meal
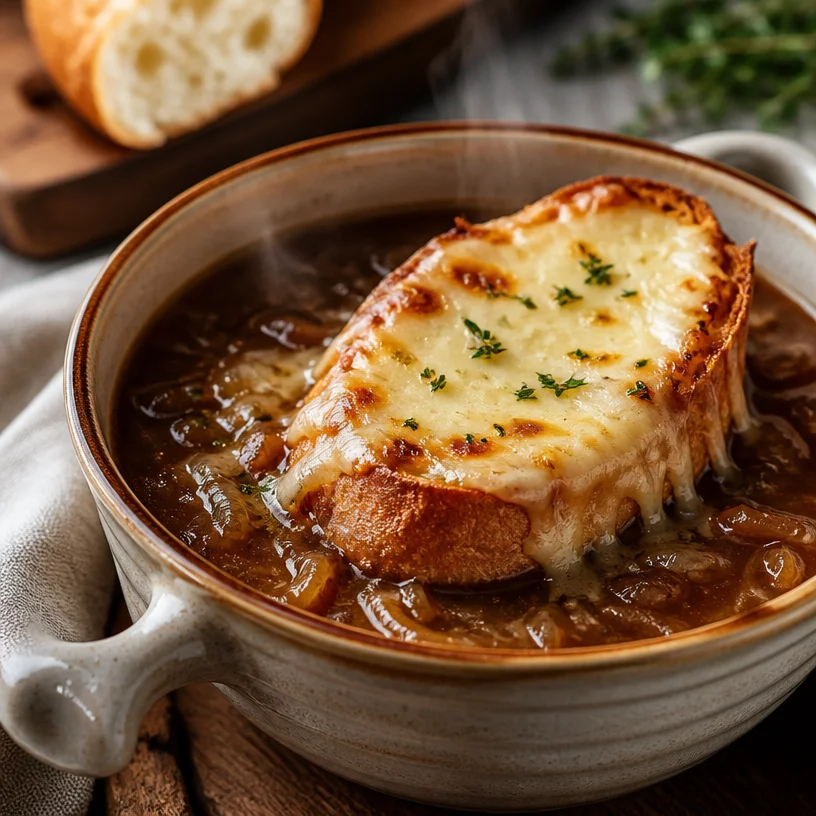
One-Pot French Onion Soup: 30-Minute Classic Comfort
French Onion Soup: A Warm Hug in a Bowl
When the cold winds begin to blow, there’s no comfort quite like a steaming bowl of French onion soup. This dish, a unique blend of sweet caramelized onions, rich beef broth, and bubbly melted Gruyère cheese, is more than just a meal; it’s a journey back to cozy, cherished moments.
I remember the first time I decided to tackle this classic dish on my own—it was one of those chilly evenings where you want nothing more than to wrap yourself in a blanket and sip something warm. I was probably around 12 years old, and my love for cooking was blossoming thanks to my grandmother, who always greeted me with a smile and a cutting board when I stepped into her kitchen. She’d whip up French onion soup as quickly as a magician pulls a rabbit from a hat, and I was in awe of how something so simple could taste so divine.
Fast forward a couple of decades, and I still find myself drawn to the comforting aromas of caramelized onions sizzling in a pan. The beauty of this soup is not just in its taste but also in the experience of creating it. It invites you to slow down, savor the process, and enjoy the fruits of your labor. So put on your favorite apron, and let’s dive into making a bowl of French onion soup that’ll warm your soul!
Ingredients
Here’s what you’ll need to whip up this delightful soup, along with a few tips to enhance your dish:
-
Onions: The star of the show! You’ll want yellow or sweet onions—these varieties caramelize beautifully and give that sweet, rich flavor that’s crucial for a tasty French onion soup. If you don’t have onions on hand, shallots can be a delicious alternative.
-
Beef Broth: This is where the deep, savory flavor comes from. If you’re looking for a lighter option, you can substitute with vegetable broth. Just ensure it’s a good quality broth for the best flavor.
-
Baguette: This crusty bread is essential for that delightful topping. It absorbs just the right amount of broth and provides a lovely texture contrast when toasted. If baguette isn’t available, any hearty bread will do—I’ve even used sourdough in a pinch!
-
Gruyère Cheese: This melty, gooey cheese is the crowning glory of your soup. It has that perfect nuttiness that complements the sweetness of the onions. If Gruyère is hard to find, you can substitute it with Emmental, or even Swiss cheese will work, though the flavor profile will shift slightly.
Step-by-Step Instructions
Now that we’ve gathered our ingredients, let’s get cooking! Follow these steps for a tasty bowl of French onion soup that will impress your friends and family:
-
Slice the Onions: Start by peeling and slicing your onions thinly. I like to cut them into about ¼-inch thick rounds. Don’t worry if the tears start to flow; it’s all part of the fun! A sharp knife will help here; it minimizes the juices that make you cry.
-
Caramelize the Onions: In a large, heavy-bottomed pot (a Dutch oven works great), heat 2 tablespoons of butter and a drizzle of olive oil over medium heat. Add your sliced onions, stirring to coat them in the fat. Cook them slowly for about 30-40 minutes. You want them to turn a lovely golden brown and caramelize, stirring occasionally. This patience is key—rushing this step means missing out on that sweet flavor!
-
Add the Broth: Once the onions are beautifully caramelized, pour in 4 cups of beef broth. This is where the magic begins! Turn the heat up to bring it to a gentle simmer. Allow it to cook for another 15-20 minutes, letting all those flavors marry beautifully. Season with a pinch of salt and pepper, tasting as you go.
-
Prepare the Baguette: While the soup simmers, preheat your broiler. Slice the baguette into 1-inch thick pieces and toast them lightly on both sides if you prefer a crunchier texture. You can place them directly under the broiler for a quick toasted crust!
-
Cheesy Goodness: Ladle your soup into oven-safe bowls, and place a slice or two of the toasted baguette on top. Generously sprinkle Gruyère cheese over each piece of bread. The more, the better in my book!
-
Broil: Place the bowls on a baking sheet and slide them under the broiler for about 2-4 minutes or until the cheese is bubbly and golden. Keep an eye on it—things can go from beautifully melted to burnt in a flash!
-
Serve and Enjoy: Carefully remove the bowls from the oven (they’ll be hot!), and let them cool for a minute before indulging. Garnish with a sprinkle of fresh thyme or chives if desired.
Serving Suggestions
For that restaurant-style experience, serve your French onion soup piping hot in individual oven-safe bowls. A sprinkle of fresh herbs not only adds color but enhances those wonderful flavors. Pair it with a simple green salad dressed in a light vinaigrette to balance the richness of the soup. Don’t forget a crisp white wine or a warm chai to keep things cozy and inviting!
Recipe Variations
Feeling adventurous? Here are a few fun twists to elevate your French onion soup:
-
Herb Infusion: Add a few sprigs of fresh thyme or a bay leaf while the broth simmers for an aromatic enhancement.
-
Wine Pairing: Pour a splash of white wine or sherry into the pot after the onions are caramelized. This adds a depth of flavor that brings everything together beautifully.
-
Vegetarian Option: Use vegetable broth instead of beef broth and omit any meat-based seasonings for a delicious vegetarian version.
-
Spicy Kick: Add a pinch of red pepper flakes to the broth for an unexpected heat that complements the sweetness of the onions.
-
Mushroom Medley: Incorporate sautéed mushrooms with the onions for an earthy twist.
Chef’s Notes
One time, I got a bit too excited with the caramelization process and let the onions go a tad too far. Instead of a sweet golden color, I had deep, dark brown onions—almost a bit charred! But you know what? It turned into a delightful smoky flavor that everyone loved! That dish is now known in my circle as "Ava’s Smoky Soup," and it just goes to show that kitchen accidents can lead to delicious surprises.
Over the years, I’ve played around with this recipe quite a bit. I started with a very traditional take, but I now love experimenting with different broths, cheeses, and even adding personal touches like a dollop of sour cream on top. Truly, the best part of cooking is discovering what works for you.
FAQs and Troubleshooting
-
Why are my onions not caramelizing?
If your onions are getting mushy rather than caramelized, your heat may be too high. Dial it down and give them time—patience is key! -
How can I store leftovers?
Store any leftover soup in an airtight container in the fridge for up to 3 days. Reheat on the stovetop, but I recommend adding fresh cheese before broiling again for that melty goodness. -
Can I freeze French onion soup?
Absolutely! Just make sure to freeze the soup without the bread and cheese. When you’re ready to eat, thaw, reheat, and add freshly toasted bread and cheese before serving. -
What can I do if it’s too salty?
A splash of water or low-sodium broth can help mellow out salty flavors. A few extra slices of potato can also balance it out—just be sure to remove them before serving.
Nutritional Info
While comfort food is usually higher in calories, French onion soup can be made a bit lighter by controlling the amount of cheese and butter you use. A serving typically contains around 300-400 calories before adding the cheese and bread, depending on your exact measurements and cooking methods.
And there you have it! A delicious, heartwarming bowl of French onion soup that’s easy to make and even easier to enjoy. Gather your loved ones, pour the wine, and dig in! Happy cooking!
PrintFrench Onion Soup

A comforting bowl of French onion soup made with sweet caramelized onions, rich beef broth, and bubbly melted Gruyère cheese.
- Prep Time: 15 minutes
- Cook Time: 60 minutes
- Total Time: 75 minutes
- Yield: 4 servings 1x
- Category: Soup
- Method: Cooking
- Cuisine: French
- Diet: Vegetarian (with broth substitution)
Ingredients
- 4 large yellow or sweet onions
- 4 cups beef broth (or vegetable broth for a lighter option)
- 1 baguette (or hearty bread)
- 1 1/2 cups Gruyère cheese (or Emmental/Swiss cheese)
- 2 tablespoons butter
- Olive oil
- Salt and pepper to taste
- Fresh thyme or chives (for garnish)
Instructions
- Slice the onions thinly.
- Caramelize the onions in a pot with butter and olive oil for 30-40 minutes.
- Add the beef broth and season with salt and pepper; simmer for 15-20 minutes.
- Prepare the baguette by slicing it and toasting if desired.
- Ladle the soup into bowls and top with baguette slices and Gruyère cheese.
- Broil the bowls until the cheese is bubbly and golden.
- Serve with a garnish of thyme or chives.
Notes
For a vegetarian option, substitute vegetable broth and omit meat-based seasonings. You can also enhance the flavor with herbs or wine.
Nutrition
- Serving Size: 1 serving
- Calories: 350
- Sugar: 7g
- Sodium: 800mg
- Fat: 15g
- Saturated Fat: 7g
- Unsaturated Fat: 6g
- Trans Fat: 0g
- Carbohydrates: 30g
- Fiber: 3g
- Protein: 10g
- Cholesterol: 30mg
Keywords: French onion soup, comfort food, cozy recipes
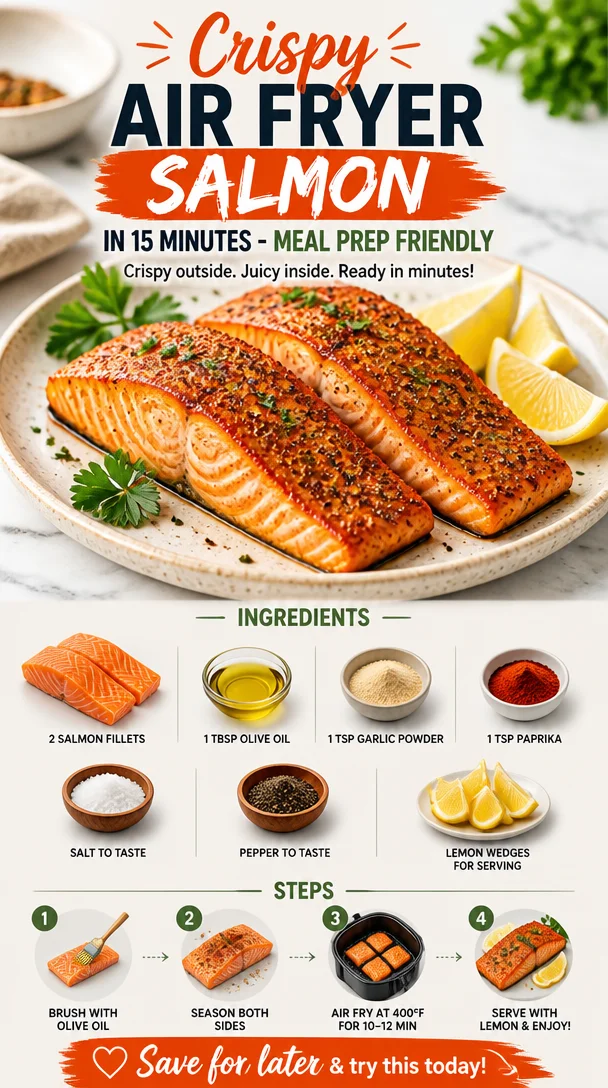
Crispy Air Fryer Salmon in 15 Minutes – Meal Prep Friendly
Air Fryer Fresh Salmon: A Delightful Journey to Flavorful Dining
Let’s chat about fresh salmon, shall we? Imagine a dish so delicious that it transports you straight to a cozy seaside café, with the sound of waves gently lapping at the shore. I’m here to tell you that air-fried salmon can give you just that experience—all from the comfort of your kitchen. Cooking with an air fryer is not only fun; it’s a game changer for busy food lovers who crave flavor but might feel intimidated by meal prep. Plus, baking, grilling, or pan-searing can take time and effort, but with an air fryer, you get that perfect flaky texture in a fraction of the time.
Now, you might wonder: how does this work? The magic happens with a powerful fan that circulates hot air around the food, giving you that crispy, golden finish without drowning your salmon in oil. It’s clean, healthy, and just plain genius!
Now, as we embark on this culinary adventure together, I invite you to dive into the incredible world of air-fried salmon. Whether you’re a novice in the kitchen or a seasoned chef, this recipe will add sparkle to your weeknight dinners. So grab your apron, roll up your sleeves, and let’s make a delicious meal that you—and everyone around you—will adore!
A Taste of Nostalgia
Growing up, fish wasn’t exactly my best friend. I remember summer family vacations at the lake, where my parents would catch fish and fry them up in our rustic cabin. As a little girl, I’d shy away from the smoky, fried scent wafting up from the kitchen. But when I tasted grilled salmon for the first time—flaky, buttery, and with a hint of citrus—I was hooked (pun intended!). The thrill of discovering a love for salmon was as transformative as it was delightful.
Fast forward to my culinary journey today, where I’ve embraced every cooking method imaginable. Discovering the air fryer was a revelation! I can now make that magical salmon I adored so much as a child in a healthier and quicker way. Every time I prepare this dish, it brings back sunny memories and fills my kitchen with the scent of nostalgia. Trust me; once you try this recipe, it may just evoke a few cherished memories of your own!
Ingredients
Here’s what you’ll need to bring some air-fryer magic into your home:
-
2 Salmon Fillets: Look for wild-caught salmon for the best flavor and sustainability. If you can’t find it, Atlantic salmon is a good substitute. Keep the skin on for extra moisture!
-
1 Tablespoon Olive Oil: This adds a touch of healthy fat and enhances flavor. In a pinch, avocado oil works wonders too!
-
1 Teaspoon Garlic Powder: Who can resist garlic? It gives the salmon a rich, warm taste. If you prefer fresh garlic, minced cloves will work—just adjust the amount as fresh garlic is stronger.
-
1 Teaspoon Paprika: This adds a mild smoky flavor and vibrant color. Sweet or smoked paprika can both shine here—choose based on your preference!
-
Salt and Pepper to Taste: Simple yet powerful! Freshly cracked pepper can elevate your dish. If you’re on a low-sodium diet, consider using a salt substitute.
-
Lemon Wedges for Serving: Fresh lemon juice is a game changer! It brightens the entire dish and adds a needed zing. You can also zest the lemon for an extra pop of flavor—talk about fresh!
Step-by-Step Instructions
Now that we’ve rounded up our ingredients, let’s get started on this glorious air-fried salmon!
-
Preheat Your Air Fryer: Set your air fryer to 400°F (200°C). It’s like warming up your car on a chilly morning—getting it hot first ensures that your salmon cooks evenly and quickly.
-
Prepare the Salmon: Pat the salmon fillets dry with a paper towel. This step is vital because moisture can hinder that beautiful caramelization we crave. Place the fillets on a cutting board, skin side down. Drizzle the olive oil over each fillet, making sure to coat them generously.
-
Spice Things Up: Mix the garlic powder, paprika, salt, and pepper in a small bowl. Rub this seasoning mixture all over the salmon. Get your hands in there! Massage those flavors into the fish. The more love you give it, the tastier it will be.
-
Air Fry: Place the seasoned salmon fillets in the air fryer basket, making sure they’re not cramped. We want good airflow for that crispy finish! Close the lid and let them do their thing for 10-12 minutes, depending on thickness. If you like your salmon medium-rare, keep it on the lower end. Pro tip: you can check for doneness with a fork—if it flakes easily, it’s ready!
-
Squeeze a Lemon: As the salmon cooks, get those lemon wedges ready. Once the salmon is finished, take it out and let it rest for a minute. Drizzle that freshly squeezed lemon juice over the top, letting it do its magic.
-
Plate it Up: Transfer the beautiful fillets onto a plate, and garnish with extra lemon slices and maybe a sprig of fresh parsley if you’re feeling fancy.
And voilà! You’ve just created a gloriously juicy air-fried salmon dish that’s ready to be devoured.
Serving Suggestions
To serve this delight, plate the salmon with a side of steamed asparagus and quinoa salad. A sprinkle of sesame or a drizzle of your favorite dressing can take it to the next level. If you’re feeling adventurous, consider turning this dish into an elegant platter for guests, arranging colorful sides around the salmon. Scatter herbs or edible flowers for that extra touch of magic!
Recipe Variations
-
Herb-Encrusted Salmon: Add fresh herbs like dill or parsley to the seasoning mix for an aromatic twist.
-
Spicy Cajun: Switch the spices to create a Cajun seasoning blend for heat—perfect for those who love a kick!
-
Lemon-Basil Infusion: Use crushed fresh basil in place of the garlic powder for a Mediterranean vibe that pops.
-
Sesame-Ginger Glaze: Add a teaspoon of sesame oil and ginger paste to the olive oil for an Asian-inspired flavor.
-
Mango Salsa Topper: Serve the salmon with a refreshing mango salsa—just combine diced mango, red onion, cilantro, lime juice, and a pinch of salt for a fruity punch!
Chef’s Notes
Ah, the evolution of this recipe! You wouldn’t believe the countless “experiments” I’ve had trying to perfect air fryer salmon. There was one particularly memorable disaster where I got a bit too ambitious (and a touch too distracted by a TV show). Let’s just say salmon was involved—and a smoke alarm! But out of that culinary chaos emerged this fantastic, fool-proof recipe.
I’ve learned that simplicity often leads to incredible flavor. Each time I make this air-fried salmon dish, I find joy not just in cooking but in connecting with the food and the techniques that make it shine. I genuinely hope it brings some joy to your table, too!
FAQs and Troubleshooting
Q: Can I use frozen salmon fillets?
Absolutely! Just make sure to thaw the salmon completely before seasoning and cooking. You can quickly do this by placing it in the refrigerator overnight or using the cold water method, where you submerge it in water until it’s thawed.
Q: Why is my salmon still raw in the center after cooking?
Cooking times can vary based on the thickness of your fillets. If it looks raw in the center, simply pop it back in the air fryer for an additional few minutes. Always check doneness with a fork—good salmon should flake easily.
Q: How do I clean my air fryer?
Many air fryers have removable parts that are dishwasher-safe, which makes cleanup a breeze! If not, let the basket soak in warm soapy water, then scrub it off. Just make sure to wipe down the main unit with a damp cloth—keeping everything fresh will prolong the life of your air fryer.
Q: Can I over-season my salmon?
Yes! A little goes a long way, especially with strong spices. Adjust the amount of seasoning based on your taste rather than drowning the fillets. Remember, you can always add seasoning in layers; it’s easier to add than to take away!
Hopefully, these tips help you avoid any culinary mishaps, but remember: the kitchen is a place for exploration (and occasional mistakes!). Enjoy the process!
Nutritional Info
While this recipe primarily focuses on flavor, here’s a rough breakdown (per serving of salmon without additional sides):
- Calories: ~280
- Protein: 40g
- Fats: 14g (mostly healthy fats)
- Carbohydrates: 0g
With nutritious and wholesome ingredients, this dish not only excites your taste buds but also fuels your body well.
So there you have it—your ultimate guide to effortlessly air-frying salmon! Keep it fresh, simple, and seriously delicious, and remember: every time you step into the kitchen, it’s an opportunity to create something unique and wonderful. Happy cooking!
PrintAir Fryer Fresh Salmon

Delicious and healthy air-fried salmon that captures the essence of flavor and simplicity, perfect for any weeknight dinner.
- Prep Time: 10 minutes
- Cook Time: 12 minutes
- Total Time: 22 minutes
- Yield: 2 servings 1x
- Category: Main Course
- Method: Air Frying
- Cuisine: American
- Diet: Paleo
Ingredients
- 2 Salmon Fillets (wild-caught preferred)
- 1 Tablespoon Olive Oil
- 1 Teaspoon Garlic Powder
- 1 Teaspoon Paprika
- Salt and Pepper to Taste
- Lemon Wedges for Serving
Instructions
- Preheat your air fryer to 400°F (200°C).
- Prepare the salmon by patting it dry with a paper towel and drizzling olive oil over it.
- Spice things up by mixing garlic powder, paprika, salt, and pepper, then rub the mixture onto the salmon fillets.
- Air fry the salmon for 10-12 minutes, checking for doneness.
- Squeeze lemon juice over the cooked salmon.
- Plate and serve with additional lemon slices.
Notes
Consider serving with a side of steamed asparagus and quinoa salad for a complete meal.
Nutrition
- Serving Size: 1 serving
- Calories: 280
- Sugar: 0g
- Sodium: 200mg
- Fat: 14g
- Saturated Fat: 2g
- Unsaturated Fat: 10g
- Trans Fat: 0g
- Carbohydrates: 0g
- Fiber: 0g
- Protein: 40g
- Cholesterol: 80mg
Keywords: salmon, air fryer, healthy dinner, seafood, easy recipe
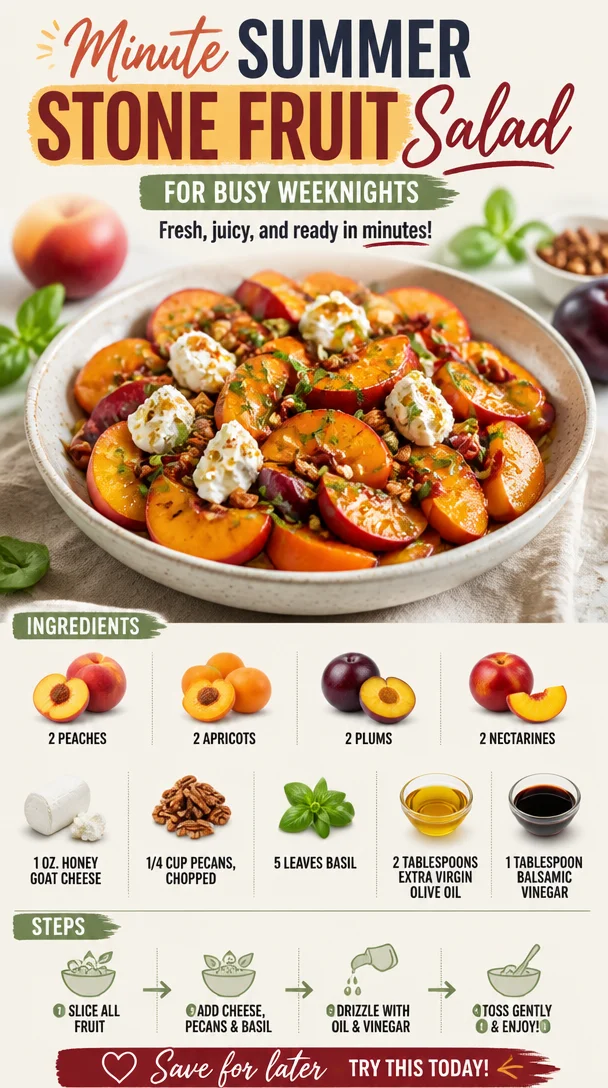
Minute Summer Stone Fruit Salad for Busy Weeknights
Summer Stone Fruit Salad: A Celebration of Flavor and Freshness
Welcome, fellow food lovers! Today, I’m thrilled to share one of my all-time favorite summer recipes—Summer Stone Fruit Salad. As the sun shines brightly and the days stretch longer, there’s nothing quite like gathering fresh, ripe stone fruits and putting together a dish that not only looks stunning but also bursts with flavor and joy.
Stone fruits—peaches, plums, apricots, and nectarines—are synonymous with summer indulgence. They remind me of warm afternoons spent lounging in my grandparents’ backyard, where the air was sweet with the scent of blossoms and the promise of juicy treats. It was during one of those idyllic days that I first discovered the magic of combining these fruits, and let me tell you, it was a game-changer!
This Summer Stone Fruit Salad isn’t just a dish; it’s a vibrant homage to lazy summer days, picnics in the park, and the art of uncomplicated, delicious cooking. Picture yourself on a sunny patio, a gentle breeze blowing, and a refreshing bowl of this colorful salad in front of you. It’s the kind of dish that draws everyone in—it’s fresh, energizing, and oh-so-satisfying.
Let’s dive deeper into what makes this salad a must-try recipe, as we blend textures, flavors, and aromas in a way that celebrates the bounty of summer. Ready to get cookin’? Let’s go!
A Nostalgic Kitchen Memory
One of my fondest culinary memories revolves around those lazy summer afternoons at my grandparents’ house. Each year, right in the middle of summer, my grandma would gather all of us in the kitchen, enlisting my help to create what she called her "Fruit Fiesta."
The kitchen would be alive with laughter, chatter, and the delightful scents of fresh fruits. As she sliced up peaches, plums, and nectarines, I would eagerly pluck a piece of fruit here and there, their sweet juice running down my chin. Grandma would always tell stories about why she loved stone fruits so much. They reminded her of her childhood summers—playing outside until dusk, with not a worry in the world.
Sometimes she’d whip up a simple fruit salad drizzled with honey and olive oil, tossing in whatever she could find ripe on the counter. It taught me that cooking need not be complicated; it’s all about using what you have and letting those flavors shine. This summer stone fruit salad I’m sharing with you today is my homage to those moments—simple, delicious, and filled with all the joy of summer.
Ingredients
Here’s what you’ll need to whip up this fabulous Summer Stone Fruit Salad:
-
2 peaches: Sweet and juicy, they add a delightful burst of flavor. Look for slightly fuzzy skin and a fragrant aroma. If peaches aren’t in season, feel free to use nectarines—they’re just as delicious!
-
2 apricots: These little gems bring a beautiful tangy sweetness that balances the salad perfectly. If they aren’t available, you can substitute with more plums or even some mango for a tropical twist.
-
2 plums: Plums introduce a lovely tartness that contrasts perfectly with the sweetness of the peaches and apricots. If plums are out of season, cherries make an excellent substitute!
-
2 nectarines: Nectarines are fabulous subs for peaches if you prefer a smooth skin. They bring a slightly firmer texture, which adds variety to the salad.
-
1 oz. honey goat cheese: This creamy cheese elevates the salad with its unique flavor profile—sweet and tangy all at once! Can’t find honey goat cheese? Regular goat cheese with a drizzle of honey works wonders too!
-
1/4 cup pecans, chopped: These add a satisfying crunch and earthy flavor. If nuts aren’t your thing, toasted sunflower seeds or pumpkin seeds are excellent gluten-free alternatives.
-
5 leaves basil: Fresh basil brightens the dish with herbal notes. If you’re feeling adventurous, try mint or cilantro for a different twist!
-
2 tablespoons extra virgin olive oil: A drizzle of good olive oil enhances the fruit’s natural sweetness and adds richness. Opt for a fruity version to complement the salad’s flavors.
-
1 tablespoon balsamic vinegar: This adds depth and a little acidity to balance out the sweetness. A splash of lemon juice or apple cider vinegar can be used in a pinch!
Step-by-Step Instructions
Now that we have all our ingredients ready, it’s time to bring our Summer Stone Fruit Salad to life! Grab your favorite cutting board and let’s get chopping!
-
Prep your stone fruits: Begin by washing all your stone fruits under cool running water to remove any dirt or pesticides. Once they’re clean, slice the peaches, apricots, plums, and nectarines into bite-sized pieces. I love leaving the skin on for added texture and nutrients, plus the colors are just gorgeous. Pro tip: Use a serrated knife for juicy fruits—it minimizes squishing!
-
Assemble the base: In a large mixing bowl, gently toss together the sliced fruits. Let them mingle and appreciate each other’s company—this salad is all about the vibrant flavors coming together!
-
Make the dressing: In a small bowl, whisk together the extra virgin olive oil and balsamic vinegar. You want a well-emulsified mixture that will coat all the fruits beautifully. If you’re feeling fancy, add a pinch of salt and a sprinkle of freshly cracked black pepper to the dressing for added depth.
-
Combine the salad: Drizzle your dressing over the fruit mixture and gently fold everything together. You want to ensure each piece is evenly coated without breaking the delicate fruits.
-
Add the cheese and pecans: Crumble the honey goat cheese over the top and sprinkle with chopped pecans. It’s amazing how the creaminess of the cheese complements the fruity goodness. For a bit of added flair, toss in some torn basil leaves at this stage too!
-
Taste and adjust: Give your salad a taste! This is the moment to check if it needs a little extra honey if you prefer it sweeter, or perhaps a splash more vinegar if you like a bit more tang. Trust your palate; it knows best!
-
Chill (optional): If you have time, let the salad sit in the fridge for about 30 minutes. This allows the flavors to meld beautifully and creates a refreshing dish that’s a joy to eat cold.
Serving Suggestions
When it comes to serving this delightful Summer Stone Fruit Salad, keep it simple! Use a large, shallow bowl to beautifully showcase those vibrant colors. For a more formal occasion, consider plating individual portions in small bowls or mason jars, layering the fruits with the cheese and nuts for a charming presentation. Drizzle a bit of extra dressing on top for visual appeal, and garnish with whole basil leaves for that fresh touch.
It’s equally tasty as a main dish, a side salad, or even a light dessert—versatility at its finest!
Recipe Variations
Get creative with your Summer Stone Fruit Salad! Here are some fun variations to keep things interesting:
-
Grilled Stone Fruits: Try grilling your stone fruits for a smoky twist. The caramelized edges add an entirely new flavor profile!
-
Berry Boost: Add a handful of fresh berries like strawberries, blueberries, or raspberries for a burst of color and flavor.
-
Citrus Infusion: Toss in some orange or grapefruit segments to give the salad a refreshing zing.
-
Sweet & Spicy: Add a sprinkle of chili powder or cayenne pepper to the dressing for a hint of heat that beautifully contrasts with the fruits’ sweetness.
-
Vegan Version: Substitute the honey goat cheese with a vegan cream cheese or avocado for a luscious creaminess without dairy.
Chef’s Notes
This Summer Stone Fruit Salad has evolved over the years—initially, it would include whatever stone fruits were available at the market or our local farmer’s stand. Sometimes, I’d swap in different nuts or add in a splash of flavored vinaigrette to change it up. The beauty of this recipe is in its flexibility—it allows you the freedom to experiment based on seasonal availability and your taste preferences.
And speaking of flexibility, I once had a friend who decided to throw in some hot sauce for fun while we were enjoying a BBQ together—it was a wild card, but to our surprise, it added an exciting twist! We ended up laughing and munching on our little flavor experiment that day. Cooking is all about joy and exploration—don’t be afraid to live a little!
FAQs and Troubleshooting
Q: Can I make this salad in advance?
A: Absolutely! Just keep in mind that some fruits can brown if they sit too long. If you’re preparing it in advance, consider adding the cheese and nuts just before serving for the best texture.
Q: What if I can’t find honey goat cheese?
A: No worries! Regular goat cheese with a drizzle of honey is a fantastic alternative. You can also use feta cheese if you prefer something tangier.
Q: Can I make this salad without nuts?
A: Certainly! Feel free to omit the nuts entirely for a nut-free version, or substitute with seeds or crispy chickpeas for that crunch.
Q: What’s the best way to store leftovers?
A: If you have any leftovers, store them in an airtight container in the fridge for up to 2 days. Just be aware that the fruits may release some juices over time.
Nutritional Info
While the exact nutritional information may vary based on specific ingredients used, here’s an approximate breakdown (per serving, serves 2):
- Calories: 250
- Protein: 7g
- Carbohydrates: 30g
- Dietary Fiber: 4g
- Sugars: 18g
- Fat: 13g
- Saturated Fat: 3g
So there you have it, dear friends! A delightful, vibrant Summer Stone Fruit Salad that’s not only delicious but also brings back wonderful memories of sun-soaked summer days. Let’s lift our forks and celebrate the season with a bowlful of freshness, flavor, and fun!
Bon appétit, and happy cooking! 🍑🌞
PrintSummer Stone Fruit Salad

A vibrant and refreshing salad featuring fresh stone fruits like peaches, plums, apricots, and nectarines, drizzled with olive oil and balsamic vinegar.
- Prep Time: 15 minutes
- Cook Time: 0 minutes
- Total Time: 15 minutes
- Yield: 4 servings 1x
- Category: Salad
- Method: No-Cook
- Cuisine: American
- Diet: Vegetarian
Ingredients
- 2 peaches, sliced
- 2 apricots, sliced
- 2 plums, sliced
- 2 nectarines, sliced
- 1 oz. honey goat cheese, crumbled
- 1/4 cup pecans, chopped
- 5 leaves basil, torn
- 2 tablespoons extra virgin olive oil
- 1 tablespoon balsamic vinegar
Instructions
- Wash all stone fruits under cool running water.
- Slice the peaches, apricots, plums, and nectarines into bite-sized pieces.
- Toss together the sliced fruits in a large mixing bowl.
- Whisk together the olive oil and balsamic vinegar in a small bowl.
- Drizzle the dressing over the fruit mixture and fold gently.
- Crumble honey goat cheese over the salad and sprinkle with chopped pecans.
- Taste and adjust seasoning with honey or vinegar if necessary.
- Chill in the fridge for about 30 minutes before serving.
Notes
Let the salad sit in the fridge to meld flavors. Best enjoyed fresh.
Nutrition
- Serving Size: 1 serving
- Calories: 250
- Sugar: 18g
- Sodium: 100mg
- Fat: 13g
- Saturated Fat: 3g
- Unsaturated Fat: 8g
- Trans Fat: 0g
- Carbohydrates: 30g
- Fiber: 4g
- Protein: 7g
- Cholesterol: 10mg
Keywords: summer salad, stone fruit, fresh fruit salad, healthy salad
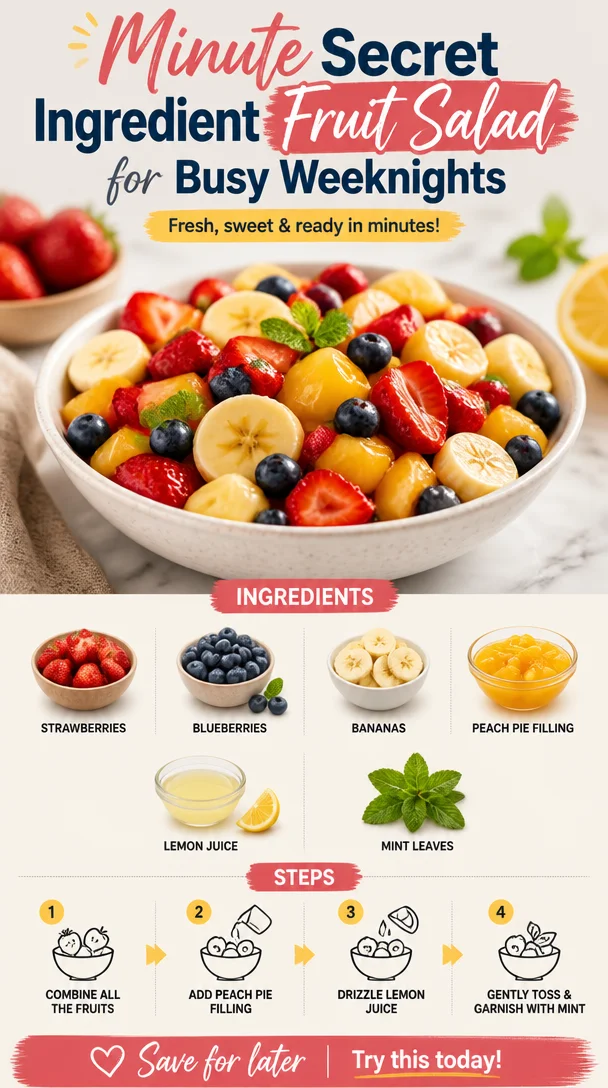
Minute Secret Ingredient Fruit Salad for Busy Weeknights
Secret Ingredient Fruit Salad: A Sweet Twist on a Classic
Welcome to Clean Plate Cravings! If you’re anything like me, a bright and colorful fruit salad can instantly lift your spirits, especially on a warm, sunny day. But what if I told you there’s a way to take that classic dish and elevate it with just one secret ingredient? Well, friends, that’s what we’re diving into today!
Imagine sitting outside on a lazy afternoon, surrounded by friends and family, and served with a bowl of the sweetest fruit salad imaginable. You take a bite and suddenly realize that there’s something special about it—something that makes it ridiculously delicious. This isn’t just fruit; it’s a harmonious blend of flavors that dances on your tongue!
Today, we’re going to explore the magical world of fruit salad with a twist. The secret? Peach pie filling. Yes, you heard that right! It adds a touch of sweetness and a creamy texture that transforms ordinary fruits into a symphony of flavors. Let’s jump into this fun kitchen adventure and create the perfect Secret Ingredient Fruit Salad that’s bound to impress your guests and keep you coming back for more!
A Little Kitchen Nostalgia
I remember the first time I ever experimented with adding something unexpected to a classic dish. I was about 12 years old, and my grandma was in the kitchen making her famous peach cobbler. One summer day, I decided to sneak a taste of the peach pie filling and accidentally spilled some into my fruit bowl of freshly washed strawberries and bananas. At first, I panicked! But then, as I took a taste, I was met with an explosion of flavor. The creaminess of the filling perfectly complemented the tartness of the strawberries and the sweetness of the bananas. That moment ignited a passion in me for playing with ingredients, experimenting, and turning simple dishes into something extraordinary.
Ever since then, I’ve been on a quest to find ways to reinvent simple recipes, celebrating the joy of cooking with fun, unexpected ingredients. So, today, we’re going to channel that same spirit of creativity and joy, transforming a typical fruit salad into something you’ll remember. Grab your favorite fruits and let’s get cooking!
Ingredients
To whip up this Secret Ingredient Fruit Salad, you’ll need the following components:
-
Fruit of Your Choice (e.g., strawberries, blueberries, bananas): Fresh fruits are the star of our show! Select your favorites or whatever is in season. For an extra flavor punch, feel free to mix tart and sweet fruits—like strawberries combined with sweet bananas.
-
Peach Pie Filling: This is the secret ingredient that adds a delightful sweetness and creamy texture. If you’re feeling adventurous, you could also use other pie fillings like cherry or apple for a different twist.
-
1 Tablespoon Lemon Juice: This adds a touch of brightness and balances out the sweetness. Lemon juice also helps prevent fruits like bananas from browning too quickly. If you prefer a different citrus flavor, feel free to swap it with lime juice!
-
Mint Leaves for Garnish: These fresh leaves not only add a pop of color but also a refreshing flavor touch. If mint isn’t your jam, consider using fresh basil or even edible flowers for a whimsical flair.
Step-by-Step Instructions
Ready to make this stunning fruit salad? Let’s break it down step by step!
-
Prepare Your Fruit: Begin by selecting the fruits you want to include. I love a vibrant mix of strawberries, blueberries, and bananas for a sweet and colorful combination. Wash your strawberries and blueberries thoroughly, and if you’re using bananas, slice them into bite-sized pieces. Pro tip: to keep your bananas from browning, only slice them just before assembling.
-
Gently Combine: In a large bowl, add your prepared fruits. Be gentle while mixing; we want to avoid mushing all that goodness together. A light toss will keep the fruits intact and looking fresh!
-
Add the Secret Ingredient: Here comes the magic! Spoon in the peach pie filling. Start with a couple of generous spoonfuls—it’s always easier to add more than to take it out. The filling should coat the fruit without overpowering it.
-
Squeeze in Lemon Juice: Drizzle in that tablespoon of lemon juice and give everything a gentle toss. The citrus will brighten up the flavors and meld everything together. It also adds a beautiful sheen to the fruit!
-
Taste Test: Now’s the fun part—taste your fruit salad! Does it need a little more pie filling? A bit of sugar or honey if you prefer it sweeter? Adjust to your liking!
-
Chill it Down: If you have time, cover the bowl and let your salad chill in the fridge for about 30 minutes before serving. This allows the flavors to marry and creates a refreshing treat.
-
Garnish: Just before serving, you can give your salad a final touch. Toss in some fresh mint leaves, or if you’re feeling fancy, arrange them artfully on top of the salad for a pop of color.
And voilà! Your Secret Ingredient Fruit Salad is ready to shine.
Serving Suggestions
Presentation is everything! When you’re ready to serve, consider using a clear glass bowl to showcase the vibrant colors of your fruit salad. You can serve it as a light dessert, a refreshing side at a summer barbecue, or even as a breakfast twist alongside pancakes or yogurt. If you want to elevate it even more, consider pairing it with a drizzle of honey or a scoop of vanilla ice cream for an indulgent treat!
Recipe Variations
Looking for ways to switch things up? Here are a few fun variations to consider:
- Tropical Twist: Swap your berries for tropical fruits like mangoes, kiwis, and pineapples for a sunny flavor explosion!
- Berry Medley: Use an all-berry mix—blueberries, raspberries, and blackberries—paired with the peach pie filling for a berry lover’s dream.
- Citrus Salad: Add segments of orange and grapefruit for a citrusy kick, pairing wonderfully with the peach flavor.
- Nutty Crunch: Toss in some chopped nuts, like pecans or almonds, for added texture, flavor, and a protein boost.
- Yogurt Parfait: Layer your salad with yogurt and granola for a delicious and satisfying parfait option!
Chef’s Notes
As a chef in this wonderful world of flavors, I’ve learned that recipes are never merely sharable instructions—they carry stories and memories. This fruit salad has been a staple in my gatherings, sparking laughter and joyful exchanges at every bite. While I always come back to the tried-and-true peach pie filling, I love to play around with other unexpected ingredients too; who knows—perhaps one day I’ll stumble upon the next delightful surprise! Every time I make this salad, I’m reminded of those summer afternoons spent with family, creativity flowing in the air, and joy found in every bowl.
FAQs and Troubleshooting
Here are some common questions you might have when making your Secret Ingredient Fruit Salad, along with helpful tips:
Q: What fruits work best in this salad?
A: Almost any fruit works well! Just make sure they’re ripe and fresh. I find that the best combinations happen with a mix of sweet and tart flavors. Don’t shy away from trying seasonal fruits!
Q: Can I prepare this salad in advance?
A: Absolutely! You can make it a few hours ahead of time, but I recommend adding delicate fruits like bananas only right before serving to avoid browning. Keep it refrigerated until you’re ready to enjoy!
Q: Can I use frozen fruit?
A: Yes, though fresh will give you a crisper texture. If you choose frozen fruit, make sure to thaw and drain it well, as excess liquid could make your salad more soupy than you’d like.
Q: Is this salad good for meal prep?
A: While this salad is best fresh to maintain texture, you can prepare the fruit the night before and mix everything the next day for a quick grab-and-go meal.
Nutritional Info
While the specific nutritional information can vary based on the fruits and pie filling used, generally, this salad is a nutritious choice packed with vitamins and antioxidants from the fresh fruits, along with some added sweetness from the pie filling. Enjoy this as a guilt-free treat!
So, whether you’re entertaining guests or simply looking to brighten your day, this Secret Ingredient Fruit Salad is an absolute must-try. With just a simple twist, you’ll create a dish that’s vibrant, delicious, and oh-so-memorable. Let’s get cooking and enjoy every delicious bite!
PrintSecret Ingredient Fruit Salad

A refreshing fruit salad elevated with the secret addition of peach pie filling for a creamy, sweet twist.
- Prep Time: 15 minutes
- Cook Time: 0 minutes
- Total Time: 15 minutes
- Yield: 4 servings 1x
- Category: Side Dish
- Method: No cooking required
- Cuisine: American
- Diet: Vegetarian
Ingredients
- Fruit of Your Choice (e.g., strawberries, blueberries, bananas)
- 1 cup Peach Pie Filling
- 1 Tablespoon Lemon Juice
- Mint Leaves for Garnish
Instructions
- Prepare your fruit: Select and wash the fruits you want to include, slicing bananas into bite-sized pieces just before assembling.
- Gently combine: In a large bowl, add your prepared fruits and toss gently to avoid mushing.
- Add the secret ingredient: Spoon in the peach pie filling and mix until the fruit is coated.
- Squeeze in lemon juice: Drizzle lemon juice over the fruit and give it a gentle toss.
- Taste test: Adjust sweetness if necessary by adding more pie filling, sugar, or honey.
- Chill it down: Cover and let the salad chill in the fridge for about 30 minutes.
- Garnish: Just before serving, toss in fresh mint leaves or arrange them on top.
Notes
Serve in a clear glass bowl to showcase the vibrant colors. Pairs well with honey or vanilla ice cream.
Nutrition
- Serving Size: 1 serving
- Calories: 180
- Sugar: 25g
- Sodium: 10mg
- Fat: 1g
- Saturated Fat: 0g
- Unsaturated Fat: 1g
- Trans Fat: 0g
- Carbohydrates: 43g
- Fiber: 3g
- Protein: 1g
- Cholesterol: 0mg
Keywords: fruit salad, summer recipe, peach pie filling, refreshing dessert
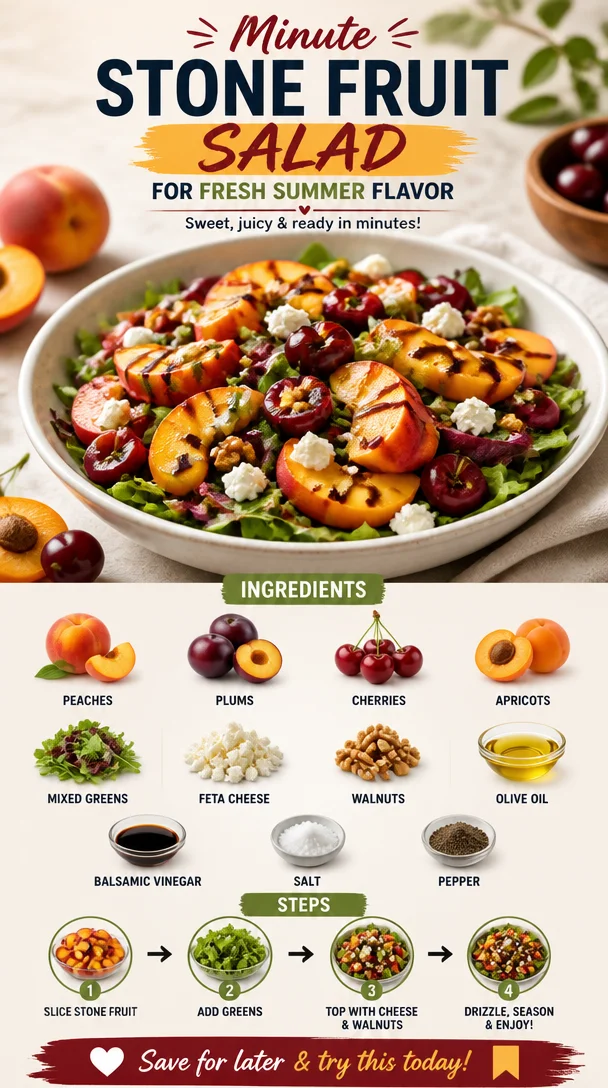
Minute Stone Fruit Salad for Fresh Summer Flavor
Elegant Stone Fruit Salad: A Burst of Summer on Your Plate
Welcome, fellow food lovers! Today, I’m excited to share with you a vibrant and refreshing dish that captures the essence of summer—an Elegant Stone Fruit Salad. Perfect for picnics, barbecues, or even a quiet dinner at home, this salad celebrates the bold, juicy flavors of seasonal stone fruits. Think peaches, plums, cherries, and apricots artfully tossed together with mixed greens, crumbled feta, and toasted walnuts—all brought together with a drizzle of olive oil and balsamic vinegar. Let’s get this delicious journey started!
Imagine walking through a sunlit orchard, warm breezes rustling the leaves overhead, and the sweet scent of ripe stone fruits filling the air. That’s exactly how I feel every time I make this salad. It brings back memories of long summer afternoons spent at my grandparents’ farmhouse, where we would pluck sun-warmed fruit straight from the tree and enjoy it at the picnic table under a sprawling oak. Each bite of this salad evokes that nostalgic bliss, making me feel a bit like a kid again.
Stone fruits, like peaches and plums, are not only delightful to eat but also full of nutrients. Each season, I can’t resist the vibrant colors and shapes they bring to my plate. This salad is a celebration—of flavor, of memories, and of fresh, wholesome food that doesn’t take itself too seriously. Because life is too short for boring meals, right? Let’s dive into this delightful dish and see how it all comes together!
Personal Story
Ah, stone fruits! The very name conjures up memories of sweet summer days. I remember visiting my grandparents during the harvest season, when the air was thick with sunshine and the promise of juicy bites. I’d trudge out to the orchard, eager to fill my basket with the best peaches and plums my small hands could grab. My grandfather would teach me the art of picking—how to choose the ripest ones without damaging the rest. After our harvest, we’d gather to prepare a feast that always included a stone fruit salad. It was a time for laughter, storytelling, and tons of taste-testing.
To this day, I carry those traditions into my kitchen. This Elegant Stone Fruit Salad is more than just a dish—it’s a way to connect with the past and celebrate the present. Every time I make it, I can hear my grandfather’s voice offering cooking tips, and that brings a big smile to my face. So, let’s honor those memories and make something that will create new ones, shall we?
Ingredients
Here’s what you’ll need to whip up this gorgeous salad:
- Peaches: Sweet and juicy, peaches are the stars of this salad. Choose firm but ripe to give your salad the right texture.
- Plums: A delightful complement to peaches, they add tartness and brilliant color. Any variety will work, so feel free to experiment!
- Cherries: Fresh, juicy cherries with a pop of sweetness! Look for bright red, plump ones—these will take your salad to the next level.
- Apricots: These little gems bring a unique sweetness and a lovely orange hue to the mix—plus, they’re rich in vitamins A and C.
- Mixed Greens: Any combination of greens works here—arugula, spinach, or even baby kale. The greens provide a refreshing base and balance out the sweetness of the fruits.
- Feta Cheese: Creamy, tangy, and briny, feta adds an incredible depth of flavor that brightens up the salad.
- Walnuts: Crunchy, toasty walnuts bring texture and healthy fats. You can roast them lightly for added flavor.
- Olive Oil: A good quality extra virgin olive oil will elevate your dish, adding richness without overwhelming the fresh flavors.
- Balsamic Vinegar: This adds a sweet-tart kick. Look for a high-quality balsamic for the best flavor.
- Salt & Pepper: Simple seasoning helps bring out the natural sweetness of the fruits.
Chef Insight
Keep in mind that fresh ingredients are key to making this salad pop! Always choose ripe, in-season fruits for the best flavor. If a certain stone fruit isn’t available, don’t hesitate to swap it out for whatever juicy fruits you can find.
Step-by-Step Instructions
Let’s bring this beautiful salad to life together! Here’s how to do it:
-
Gather Your Ingredients: First things first, make sure you have everything ready. This is important, especially with a salad, where you want to maintain the freshness of each component.
-
Prep the Fruits: Start by washing all your fruits under cool water. Pat them dry before slicing. Next, slice the peaches, plums, and apricots into thin wedges—about 1/4-inch thick—so they can mingle nicely with your greens. Prune cherries can be halved or left whole depending on your preference.
-
Chop the Greens: Toss the mixed greens into a large salad bowl. Feel free to tear them by hand; it makes for a lovely, rustic look.
-
Add the Fruits: Gently add the sliced fruits to the bowl. Aim for a visually pleasing arrangement! The more colorful the salad, the more inviting it will be.
-
Feta & Walnuts Time: Crumble the feta cheese over the top, creating little pockets of creamy goodness. Then, sprinkle in the walnuts for that crispy crunch.
-
Whisk the Dressing: In a small bowl, whisk together your olive oil and balsamic vinegar. Aim for a ratio of about 3 parts oil to 1 part vinegar, but feel free to adjust based on your taste. Whisk until well combined. Season with salt and pepper to taste.
-
Dress the Salad: Pour the dressing over the salad, but don’t drown it! You can always add more later, so toss gently to coat everything without bruising the greens or the fruits.
-
Taste and Adjust: This is where the magic happens! Taste your salad and see if it needs a little more salt, a drizzle of honey, or extra balsamic. Trust your taste buds!
-
Serve: Once everything is nicely mixed, it’s time to plate. Transfer your Elegant Stone Fruit Salad to a clean serving dish, allowing all the vibrant colors to shine.
Chef Tips
- Use a variety of stone fruits to provide a range of textures and flavors. Mix in anything else you love—like nectarines or colored cherries.
- Feel free to add some herbs like mint or basil for an extra flavor kick!
- Make it ahead of time for meal prep by storing the dressing separately to keep your greens fresh.
Serving Suggestions
How you present this salad can elevate the entire dining experience! I love serving it on a large, beautiful platter; scattering the fruits and greens so that every guest can see each vibrant component. Garnishing with extra feta and walnuts right before serving makes it look like a work of art. You could also serve it alongside grilled chicken or fish for a delightful complete meal.
Recipe Variations
Here are a few fun twists to mix things up:
-
Herbed Variation: Add fresh herbs like basil or mint for a refreshing twist on your salad.
-
Grilled Fruits: Fire up the grill! Grilling the fruits intensifies their sweetness and adds a smoky flavor, which is absolutely divine.
-
Nutty Swap: Switch walnuts for pecans or almonds to discover new textures and flavors.
-
Vegan Option: Leave the feta cheese out or use a vegan feta substitute to tailor this salad for strict plant-based diets.
-
Spicy Touch: Add a sprinkle of chili flakes or a drizzle of spicy honey for a sweet and heat combo that’ll awaken your palate!
Chef’s Notes
As I’ve gathered secrets and tips along my cooking journey, this salad has evolved a lot! Originally, I played with boring iceberg lettuce as the base. But along the way, I discovered mixed greens and just how versatile stone fruits can be. Honestly, every season brings in something new—swapping out fruits or adding components based on what’s fresh has made this dish close to my heart. The best part? It’s a recipe that begs for creativity, and that’s what cooking is all about!
FAQs and Troubleshooting
1. Can I make this salad ahead of time?
Absolutely! To keep the greens fresh, prepare the fruits and dressing ahead but wait to combine everything until right before serving. Just store everything separately in the fridge.
2. What if some of the fruits are overripe?
Use slightly softer stone fruits for a sauce or puree instead of raw. They can taste divine in a smoothie or as a topping for yogurt!
3. How do I adjust for a larger crowd?
Scaling this salad up is easy! Just increase the quantities while maintaining the same ratios. A little more fruit, greens, and nuts will go a long way!
4. What if I don’t have balsamic vinegar?
Not a problem! Substitute with apple cider vinegar or a splash of lemon juice mixed with honey for a lovely tangy dressing!
Nutritional Info
While the precise nutrition will vary based on your specific ingredients and portions, this salad is generally low in calories and high in vitamins, antioxidants, and healthy fats, making it a nourishing choice.
With the season’s best fruits at your fingertips, this Elegant Stone Fruit Salad is your ticket to vibrant meals that everyone will love. I invite you to dive into the joy of cooking and create beautiful memories with every delicious bite. Happy cooking, friends!
PrintElegant Stone Fruit Salad
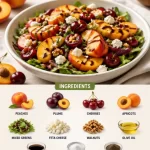
A vibrant and refreshing stone fruit salad that captures the essence of summer with peaches, plums, cherries, and apricots, tossed with mixed greens, feta, and walnuts.
- Prep Time: 15 minutes
- Cook Time: 0 minutes
- Total Time: 15 minutes
- Yield: 4 servings 1x
- Category: Salad
- Method: No-Cook
- Cuisine: American
- Diet: Vegetarian
Ingredients
- 2 ripe peaches, sliced
- 2 plums, sliced
- 1 cup cherries, halved
- 4 apricots, sliced
- 4 cups mixed greens (arugula, spinach, or baby kale)
- 1/2 cup feta cheese, crumbled
- 1/4 cup walnuts, toasted
- 3 tbsp olive oil
- 1 tbsp balsamic vinegar
- Salt and pepper to taste
Instructions
- Gather your ingredients.
- Prep the fruits by washing them and slicing peaches, plums, and apricots into wedges.
- Chop the mixed greens into a large salad bowl.
- Add the sliced fruits to the bowl, arrange them attractively.
- Crumble the feta cheese over the top, then sprinkle in the walnuts.
- Whisk the olive oil and balsamic vinegar together in a small bowl.
- Dress the salad gently with the dressing, then adjust the seasoning.
- Serve the salad on a beautiful platter and enjoy!
Notes
Use ripe, in-season fruits for the best flavor. Feel free to experiment with different stone fruits or add fresh herbs.
Nutrition
- Serving Size: 1 serving
- Calories: 250
- Sugar: 15g
- Sodium: 250mg
- Fat: 18g
- Saturated Fat: 4g
- Unsaturated Fat: 12g
- Trans Fat: 0g
- Carbohydrates: 20g
- Fiber: 3g
- Protein: 5g
- Cholesterol: 10mg
Keywords: salad, stone fruits, summer salad, healthy recipe, picnic recipe
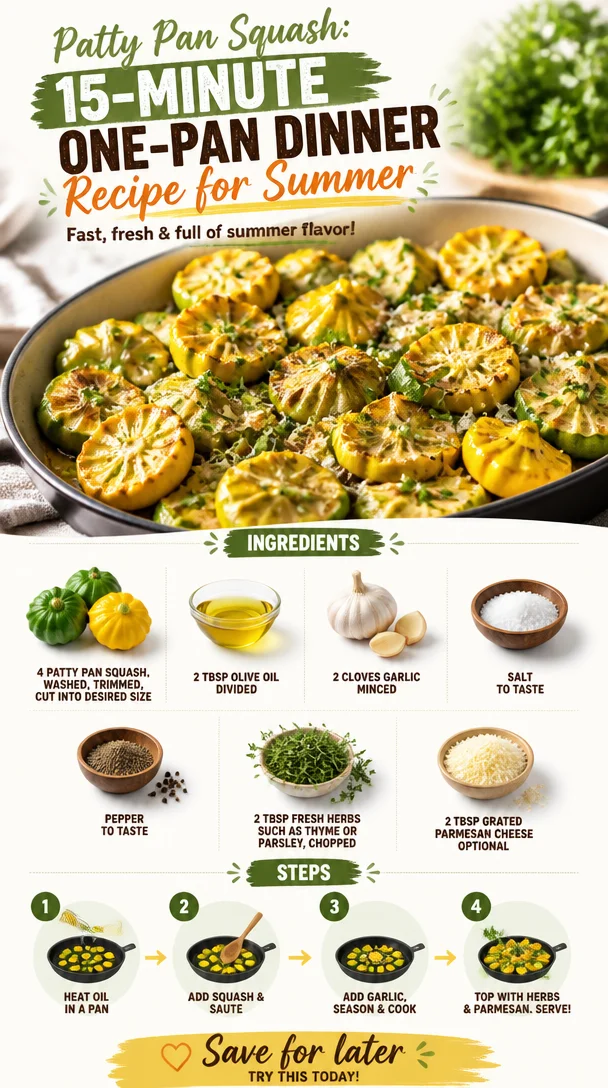
Patty Pan Squash: 15-Minute One-Pan Dinner Recipe for Summer
The Sprightly Squash: A Celebration of Patty Pan Delights
Welcome, fellow food aficionados! Today, we’re diving into the wonderfully whimsical world of patty pan squash. If you’re new to this delightful little veggie, you’re in for a treat. These cheerful, scalloped squashes are not only a feast for the eyes but also a canvas for delicious flavors. Let’s discover together how easy—and fun—it is to whip up a meal that will have you dazzling your dinner guests (or treating yourself!).
A Personal Journey with Patty Pan Squash
My love affair with patty pan squash goes way back to summer afternoons in my grandmother’s garden. Her garden was like a treasure trove of fresh produce, and I can still remember the delight on her face as she picked those quirky, sun-kissed squashes. She would hand me a freshly picked patty pan squash, all gleaming and green, and invite me into the kitchen to transform it into something spectacular.
One of my favorite memories is when we turned them into a vibrant roasted dish that filled the house with an irresistible aroma. The way the squash caramelized in the oven was pure magic! Watching her artfully chop fresh herbs and sprinkle them over the shimmering patty pans was both a lesson in cooking and a cherished bonding experience. Those afternoons shaped my journey as a chef and instilled in me the belief that cooking is about joy, sharing, and celebration.
So, gear up as we recreate these beautiful memories and enjoy patty pan squash in the most flavorful way possible!
Ingredients
Here’s what you’ll need for this vibrant dish:
- 4 patty pan squash: These unique, scalloped squash can vary in color from yellow to green. They have a mild taste that can take on various flavors wonderfully. If unavailable, zucchini can be a good substitute, though the shape won’t be the same.
- 2 tbsp olive oil, divided: A staple in many kitchens, olive oil not only enhances flavor but also helps achieve that lovely roasted finish. Feel free to swap it out for avocado oil if you prefer something with a higher smoke point.
- 2 cloves garlic, minced: Fresh garlic is a game changer! It adds depth and flavor to your dish. If you’re in a pinch, garlic powder can serve as a substitute, but nothing beats freshly minced garlic for that aromatic punch.
- Salt and Pepper to taste: These basics are vital in elevating the overall flavor of your dish. Use sea salt for a pop of flavor, and don’t be shy with the pepper!
- 2 tbsp fresh herbs: I love using thyme or parsley for brightness. You can also mix it up with basil for a sweeter note or oregano for a more earthy flavor.
- 2 tbsp grated Parmesan cheese (optional): This optional ingredient adds a nutty, salty touch that can really elevate your dish. For a dairy-free alternative, nutritional yeast works beautifully here.
Step-by-Step Instructions
Now that we’ve gathered our ingredients, let’s jump into making our delicious roasted patty pan squash!
-
Preheat Your Oven: Set your oven to 400°F (200°C). This heat will help the squash roast perfectly, developing that lovely caramelized exterior while staying tender inside.
-
Prep the Squash: Start by washing your patty pan squash under cool water to remove any dirt. Trim the tops and bottoms, then cut them into bite-sized pieces. The whimsical shape of these squashes makes for a beautiful presentation, so don’t stress too much about uniformity—let their natural shapes shine.
-
Toss with Olive Oil and Garlic: In a large bowl, combine the cut squash with 1 tablespoon of olive oil and the minced garlic. Now, here’s a chef hack: Instead of just adding the garlic raw, you can sauté it for a minute in the olive oil before tossing it with the squash. This step brings out that sweet, rich garlic flavor!
-
Season Generously: Sprinkle in salt and pepper to taste, and mix well. This is your moment to infuse flavor into the squash, so don’t be shy! Remember, salt helps draw out moisture and flavors, while pepper adds the perfect zing.
-
Add Fresh Herbs: Fold in the fresh herbs, ensuring every piece of squash gets a touch of that herby goodness. The aroma alone will make you feel like you’re walking through a sunlit herb garden.
-
Roast to Perfection: Spread the squash mixture evenly on a baking sheet lined with parchment paper. This ensures easy cleanup and avoids any sticking. Roast in the preheated oven for about 20-25 minutes. You’ll know they are ready when they’re tender and golden brown, stirring halfway through to ensure even cooking.
-
Finish with Parmesan: Once they’re beautifully roasted, take them out of the oven and sprinkle with Parmesan cheese, if using. Pop them back in for an additional 2-3 minutes until the cheese is melted and bubbly.
-
Serve and Enjoy: Once you pull that tray out of the oven, watch out! You’ll instantly be drawn in by the melty cheese and fragrant herbs. Taste a piece, and you might just be transported to those summer afternoons in the garden!
Serving Suggestions
These roasted patty pan squash are best served warm. I love plating them alongside a light salad or some grilled chicken for a complete meal. You can garnish with a few extra fresh herbs for a pop of color and freshness. For a lovely presentation, consider stacking them on a vibrant plate or serving them in a rustic bowl, drizzled with a touch of balsamic reduction. Enjoy every colorful bite!
Recipe Variations
- Spicy Kick: Add a pinch of red pepper flakes along with your other seasonings for a touch of heat!
- Mediterranean Vibes: Toss in some chopped olives and sun-dried tomatoes before roasting for a burst of Mediterranean flavor.
- Sweet Glaze: Drizzle with honey or maple syrup in the last few minutes of roasting for a delightful sweet contrast.
- Vegan Version: Skip the cheese or substitute with a nut-based cheese for a deliciously creamy result without dairy.
- Stuffed Patty Pan: For a more filling option, you can scoop out the squash and fill them with quinoa and veggies before roasting!
Chef’s Notes
Oh, the stories I have about patty pan squash! Once during a cook-out, I mischievously offered a friend some “exotic” vegetable that they had never tried before. Little did they know it was just good ol’ patty pan squash! Their surprised expression when they found out made my day! These quirky squashes are often overlooked, but they deserve the spotlight—embrace their unique shapes and flavors, and let your creativity flow in the kitchen.
Over the years, my recipe has evolved as I’ve experimented with different herbs and spices. Don’t be afraid to make it your own—add that touch of “you” into every dish!
FAQs and Troubleshooting
-
Why are my squash mushy?
- If your squash turned out mushy, it may have been overcooked. Each oven is different, so keep an eye on them, especially in the last few minutes of roasting!
-
Can I prep these squash in advance?
- Absolutely! You can chop and season the squash a few hours ahead of time and store it in the refrigerator until you’re ready to roast them.
-
What can I serve with patty pan squash?
- These roasted delights pair beautifully with grilled fish, steak, or a simple green salad. They can also be served as a vibrant side dish to any meal.
-
How do I store leftover patty pan squash?
- Store unused roasted squash in an airtight container in the fridge for up to 3 days. Reheat gently in the oven or microwave!
Nutritional Info
While specific nutritional data varies based on portion sizes, patty pan squash is low in calories, making it a fantastic option for those looking for lighter meal options. It’s high in vitamins A and C and rich in antioxidant properties, which are great for your skin and immune health!
So there you have it! A fun, flavorful journey into the delightful world of patty pan squash, complete with nostalgia and culinary creativity. I hope this recipe inspires you to bring these charming veggies into your kitchen and creates new food memories of your own! Let’s keep it fresh, simple, and delicious! Happy cooking, food friends!
PrintRoasted Patty Pan Squash

A vibrant and flavorful dish featuring roasted patty pan squash, enhanced with garlic and fresh herbs.
- Prep Time: 15 minutes
- Cook Time: 25 minutes
- Total Time: 40 minutes
- Yield: 4 servings 1x
- Category: Side Dish
- Method: Roasting
- Cuisine: Vegetarian
- Diet: Vegetarian
Ingredients
- 4 patty pan squash, cut into bite-sized pieces
- 2 tbsp olive oil, divided
- 2 cloves garlic, minced
- Salt and Pepper to taste
- 2 tbsp fresh herbs (thyme, parsley, or basil)
- 2 tbsp grated Parmesan cheese (optional)
Instructions
- Preheat your oven to 400°F (200°C).
- Wash the patty pan squash under cool water, trim the tops and bottoms, and cut into bite-sized pieces.
- Toss the cut squash with 1 tablespoon of olive oil and minced garlic.
- Season with salt and pepper to taste.
- Fold in the fresh herbs.
- Spread the mixture evenly on a baking sheet lined with parchment paper and roast for about 20-25 minutes, stirring halfway through.
- Sprinkle with Parmesan, if using, and return to the oven for an additional 2-3 minutes.
- Serve warm and enjoy!
Notes
For a vegan version, skip the cheese or substitute with a nut-based cheese.
Nutrition
- Serving Size: 1 serving
- Calories: 150
- Sugar: 2g
- Sodium: 300mg
- Fat: 10g
- Saturated Fat: 2g
- Unsaturated Fat: 8g
- Trans Fat: 0g
- Carbohydrates: 12g
- Fiber: 3g
- Protein: 3g
- Cholesterol: 5mg
Keywords: patty pan squash, roasted vegetables, vegetarian recipes