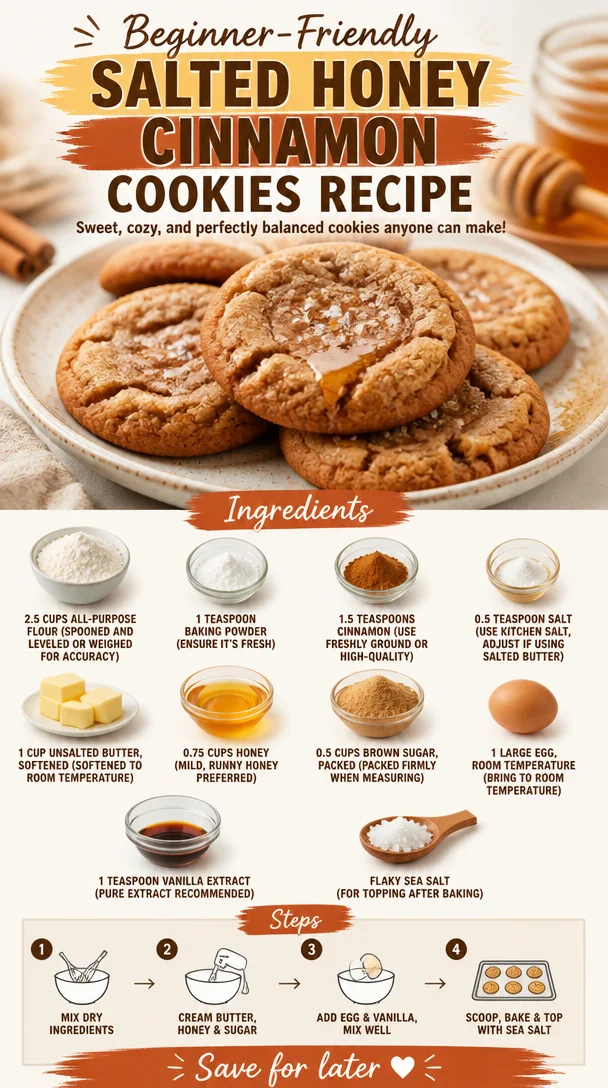
Beginner-Friendly Salted Honey Cinnamon Cookies Recipe
Salted Honey Cinnamon Cookies: A Delicious Journey
Welcome, fellow food lovers! Today, I’m thrilled to share a special recipe that’s not only delectable but also wrapped in sweet memories. We’re diving into the world of Salted Honey Cinnamon Cookies—an irresistible treat that marries the warm, cozy flavors of honey and cinnamon with a hint of sea salt. Trust me; these cookies are about to become your new favorite!
I know what you’re thinking: “Ava, what makes these cookies so special?” Well, let me take you on a little journey back to my childhood, where the magic of baking first took hold of my heart. Picture this: a bustling kitchen, the comforting sound of laughter, and the aroma of freshly baked cookies wafting through the air, making even the grumpiest neighbor smile.
A Nostalgic Memory
One of my favorite childhood memories is baking cookies with my grandmother every Sunday afternoon. We would gather in her quaint kitchen, her apron dusted with flour as she expertly mixed ingredients while sharing stories from her own youth. I fondly recall the day we decided to experiment, combining the sweetness of honey with the warmth of cinnamon. The kitchen filled with laughter, a sprinkle of flour in the air, and soon enough, we had golden cookies ready to be devoured.
As we sat by the window, sharing bites of that somehow still-warm magic, I remember the joy that swept over me—not just from the taste, but from the love and time spent in the kitchen. These Salted Honey Cinnamon Cookies are a tribute to those beautiful afternoons. Follow along as I guide you to create this warm, comforting treat that encapsulates love, flavor, and nostalgia!
Ingredients
Here’s what you’ll need to make these delightful cookies:
-
2.5 cups all-purpose flour
This is your base! Make sure to spoon it into your measuring cup and level it off for accuracy. You can switch it up with whole wheat flour for a nuttier flavor and a bit more fiber. -
1 teaspoon baking powder
Ensure it’s fresh! Older baking powder can affect the rise of your cookies. If you’re out, you can use baking soda with a bit of cream of tartar in a pinch. -
1.5 teaspoons cinnamon
The warmer, the better! Freshly ground cinnamon is ideal for a more robust flavor. If you’re feeling adventurous, try subbing a bit of nutmeg for a cozy twist! -
0.5 teaspoon salt
I recommend using kitchen salt, but if you’re using salted butter in your recipe, you can reduce this or even omit it. -
1 cup unsalted butter, softened
This should be at room temperature—just like your dough! For a dairy-free version, coconut oil works well too. -
0.75 cups honey
Choose a mild, runny honey for the best results. If you can’t find honey, agave syrup would make a good alternative. -
0.5 cups brown sugar, packed
The molasses in brown sugar adds a lovely depth to your cookies. If you’re out, granulated sugar will work, but pack it in to maintain moisture. -
1 large egg, room temperature
Bringing the egg to room temperature helps it blend more smoothly. If you need an egg substitute, try a flax egg! -
1 teaspoon vanilla extract
Opt for pure extract for the best flavor. I won’t judge if you double this because vanilla makes everything better! -
Flaky sea salt (for topping after baking)
This is the finishing touch! It adds that delicious contrast to the sweet cookies. A pinch of sea salt is all you need.
Step-by-Step Instructions
-
Preheat Your Oven:
Start by preheating your oven to 350°F (175°C). This step is often overlooked but trust me, a properly heated oven can make all the difference in your cookie’s texture. -
Mix the Dry Ingredients:
In a medium bowl, combine your flour, baking powder, cinnamon, and salt. Whisk these together lightly to ensure they’re well mixed. This will help the baking powder distribute evenly in your dough, making for perfectly risen cookies! -
Cream Together the Butter and Sugars:
In a large mixing bowl, beat together the softened butter, honey, and brown sugar until it’s creamy and light in color. Use an electric mixer if possible—the combination of these ingredients is key to a chewy cookie! -
Add the Egg and Vanilla:
Crack in that room temperature egg and pour in your vanilla extract. Mix until everything is beautifully incorporated. This is where the magic happens—just imagine that heavenly aroma! -
Combine the Mixtures:
Gradually add your dry ingredients to the wet mixture, mixing just until combined. Be careful here—not to overmix! This is a common cookie blunder. If you overmix, your cookies can turn out tough. We want soft, tender bites of deliciousness. -
Scoop and Chill:
Scoop tablespoonfuls of dough onto a parchment-lined baking sheet. Space them out about two inches apart—these cookies like to spread a bit! For a thicker cookie, chill the dough in the refrigerator for about 30 minutes before baking. -
Sprinkle with Sea Salt:
Just before baking, add a light sprinkle of flaky sea salt on top of each cookie. This is the game-changer, trust me! It enhances the flavors and gives that delightful contrast between sweet and salty. -
Bake:
Pop those beauties in the preheated oven for about 10-12 minutes, or until the edges are lightly golden. Get ready for your kitchen to smell absolutely divine! -
Cool and Enjoy:
Once baked, allow the cookies to cool on the sheet for a few minutes before transferring them to a wire rack. This will help them set up nicely without falling apart.
Serving Suggestions
These cookies are perfect enjoyed warm from the oven with a glass of milk, or you can serve them alongside a cup of tea for a cozy afternoon treat. For a little extra flair, plate them with a sprinkling of cinnamon and a drizzle of honey—your guests won’t be able to resist!
Recipe Variations
Feeling adventurous? Here are some fun twists on the classic salted honey cinnamon cookie:
-
Nuts: Fold in some chopped walnuts or pecans for added crunch and flavor.
-
Chocolate Chips: Add in some dark chocolate chips (or chunks) for a rich, decadent touch.
-
Coconut: Mix in some shredded coconut for a tropical twist—trust me, it’s delightful!
-
Dried Fruits: Consider adding dried cranberries or raisins for a fruity contrast that complements the spices.
-
Gluten-Free: Swap the all-purpose flour for a gluten-free blend to make these cookies suitable for gluten-sensitive friends.
Chef’s Notes
As with any beloved recipe, I’m constantly tweaking and experimenting. The original version of these cookies was a bit too sweet for my taste, so I played around with the ratios until I struck that perfect balance. Every batch has its own story, and I love discovering new elements to bring out the flavors. And of course, there are always little kitchen mishaps—like the time I accidentally used expired baking powder! Let’s just say the cookies were a lesson learned!
FAQs and Troubleshooting
Q: My cookies spread too much! What did I do wrong?
A: This could be due to overly warm dough or not chilling it enough. Make sure your butter is just softened, not melted, and try chilling the dough for at least 30 minutes before baking.
Q: Why are my cookies dry?
A: Overbaking is often the culprit. Keep a close eye on them once you hit the 10-minute mark. Every oven is different, so checks after this point are key to keeping your cookies tender.
Q: Can I make these cookies ahead of time?
A: Absolutely! You can prepare the dough and store it in the fridge for up to three days or freeze it for longer storage. Then, bake them fresh whenever you like!
Q: What if I don’t have honey?
A: No worries! You can substitute it with maple syrup or agave syrup—though you may need to tweak the flour a bit if you find the dough too wet.
Nutritional Info
While I usually encourage enjoying food for its flavor and joy, if you’re curious about nutritional information, these cookies contain roughly:
- Calories: 180 per cookie
- Total Fat: 8g
- Saturated Fat: 5g
- Carbohydrates: 25g
- Sugar: 12g
- Protein: 1g
And there you have it—the delightful journey of making Salted Honey Cinnamon Cookies! I hope this recipe brings you as much joy as it has brought me over the years. Remember, cooking is all about exploring and enjoying the process! Happy baking, everyone!
PrintSalted Honey Cinnamon Cookies

Delightful cookies combining honey and cinnamon with a touch of sea salt.
- Prep Time: 15 minutes
- Cook Time: 12 minutes
- Total Time: 27 minutes
- Yield: 24 cookies 1x
- Category: Dessert
- Method: Baking
- Cuisine: American
- Diet: Vegetarian
Ingredients
- 2.5 cups all-purpose flour
- 1 teaspoon baking powder
- 1.5 teaspoons cinnamon
- 0.5 teaspoon salt
- 1 cup unsalted butter, softened
- 0.75 cups honey
- 0.5 cups brown sugar, packed
- 1 large egg, room temperature
- 1 teaspoon vanilla extract
- Flaky sea salt (for topping after baking)
Instructions
- Preheat your oven to 350°F (175°C).
- Mix the dry ingredients: flour, baking powder, cinnamon, and salt.
- Cream together the butter, honey, and brown sugar until creamy.
- Add the egg and vanilla and mix until incorporated.
- Combine the mixtures by gradually adding dry to wet ingredients.
- Scoop tablespoonfuls of dough onto a baking sheet, spacing them two inches apart.
- Sprinkle flaky sea salt on top of each cookie.
- Bake for 10-12 minutes or until edges are golden.
- Cool on a wire rack before enjoying.
Notes
These cookies pair beautifully with a glass of milk or a cup of tea. Feel free to experiment with add-ins like nuts or chocolate chips!
Nutrition
- Serving Size: 1 cookie
- Calories: 180
- Sugar: 12g
- Sodium: 100mg
- Fat: 8g
- Saturated Fat: 5g
- Unsaturated Fat: 2g
- Trans Fat: 0g
- Carbohydrates: 25g
- Fiber: 0g
- Protein: 1g
- Cholesterol: 30mg
Keywords: cookies, honey, cinnamon, baking, dessert
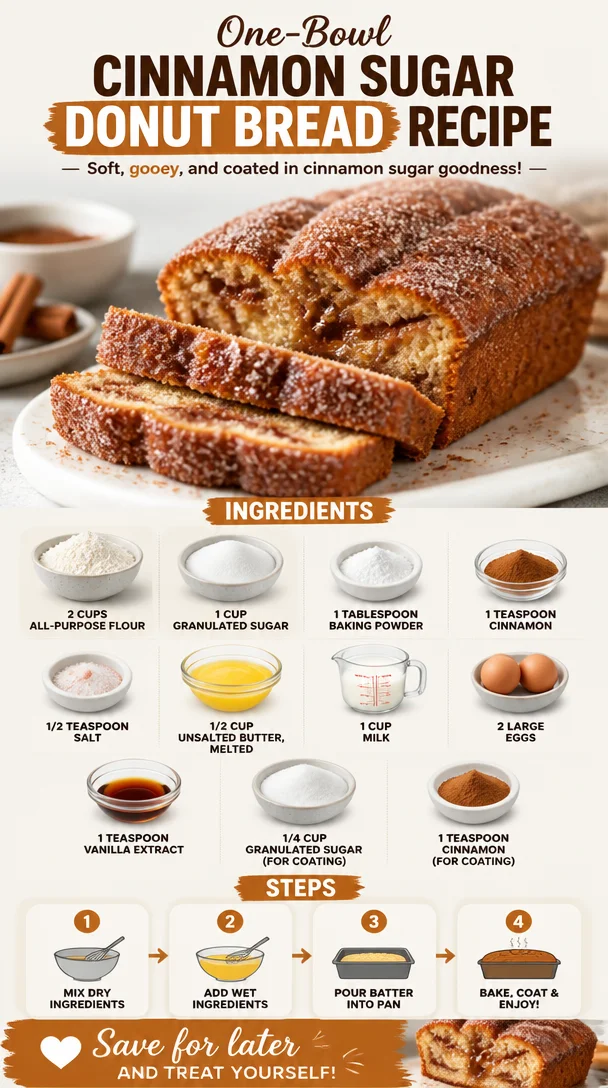
One-Bowl Cinnamon Sugar Donut Bread Recipe (Soft & Gooey)
The Sweet Beginnings of Cinnamon Sugar Donut Bread: A Slice of Nostalgia
If there’s one thing that can effortlessly transport you back to sun-soaked childhood mornings, it’s the warm aroma of cinnamon and sugar wafting through the air. Welcome, dear foodie friends, to the delightful world of Cinnamon Sugar Donut Bread! This scrumptious treat is a beautiful combination of sweet, soft bread that reminds us of our favorite donuts but in loaf form. Yes, you heard that right—donut in loaf form. Let’s dive into how this delightful dish can make your kitchen a little sweeter and your mornings a lot brighter!
I can still picture the cozy kitchen of my childhood home. The sun peeked through the window, casting a golden hue over the countertops, while my mom haphazardly tossed flour, sugar, and cinnamon into a mixing bowl. It was an annual tradition—a Sunday ritual where we baked sweet treats to share with neighbors and friends. The highlight was undoubtedly this Cinnamon Sugar Donut Bread, which always disappeared faster than you could say “delicious.” With each slice, we’d slather on some butter, watch the sugar glisten, and savor every bite.
Creating this dish at home is like wrapping up a hug for your taste buds—a cozy, familiar embrace that invites you to slow down and enjoy the simple pleasures in life. Whether you’re whipping it up for brunch or just because it’s Tuesday, this bread is bound to become a favorite in your home. So, grab your apron, and let’s embark on this sweet culinary journey together!
A Slice of Family Tradition
Reflecting on those blissful mornings, one particular memory stands out—sitting cross-legged on the floor, peering over the kitchen island as my mom mixed the ingredients together. I vividly recall the way she’d carefully measure out the flour, while I hopped up every few moments hoping to catch that golden mixing bowl before it was whisked away to the oven.
As the bread baked, the kitchen would fill with a mouthwatering aroma that made time stand still. Each of my siblings would crowd around, arms outstretched with anticipation, eager for the first slice. What I realized was that the bread was more than just food—it was a symbol of love, connection, and joyful mornings spent together as a family. This Cinnamon Sugar Donut Bread embodies those sweet moments, and I can’t wait for you all to experience a bit of that joy in your own kitchens.
Ingredients
Here’s what you’ll need to create this heavenly Cinnamon Sugar Donut Bread:
-
2 cups all-purpose flour
- Provides the structure for your bread. You can substitute with whole wheat flour for a heartier version or a gluten-free mix if needed.
-
1 cup granulated sugar
- The sweetness that brings everything together! Feel free to reduce the sugar a bit if you prefer a less sweet bread.
-
1 tablespoon baking powder
- The secret behind that fluffy texture. Make sure it’s fresh for the best rise.
-
1 teaspoon cinnamon
- It’s not just a flavor; it’s an experience! Consider using freshly ground cinnamon for a more intense flavor.
-
1/2 teaspoon salt
- A pinch brings balance to the sweetness. Don’t skip it!
-
1/2 cup unsalted butter, melted
- Adds richness and moisture. Coconut oil or vegetable oil work as great substitutes.
-
1 cup milk
- The liquid gold that binds everything. You can swap it for any milk alternative like almond milk or oat milk.
-
2 large eggs
- They help with binding and add moisture too. If you’re vegan, consider using flax eggs (1 tablespoon ground flaxseed mixed with 2.5 tablespoons water per egg).
-
1 teaspoon vanilla extract
- For that extra hint of warmth! You can also use almond extract for a different twist.
-
1/4 cup granulated sugar (for coating)
- This sweet touch is non-negotiable! You could mix it up with brown sugar for a richer flavor.
-
1 teaspoon cinnamon (for coating)
- Because we can never have too much cinnamon!
Step-by-Step Instructions
Now that we have our ingredients lined up, it’s time to get cooking! Here’s how to create your own masterpiece:
Step 1: Preheat and Prepare
Preheat your oven to 350°F (175°C). Grease a 9×5-inch loaf pan with butter or non-stick spray. This is crucial to ensure that your beautiful bread doesn’t stick, making it easier to pop out once it’s done baking. You want that gorgeous loaf to have a grand entrance!
Step 2: Mix the Dry Ingredients
In a medium bowl, whisk together your flour, sugar, baking powder, cinnamon, and salt. If you can, sift the flour before measuring—it can make for a fluffier loaf. Set this lovely mixture aside while we tackle the wet ingredients.
Step 3: Blend Wet Ingredients
In a large mixing bowl, combine the melted butter, milk, eggs, and vanilla extract. Whisk them until everything is beautifully blended. Here’s a little chef hack: letting your eggs come to room temperature before adding them to the mixture helps with a better rise and texture in your final loaf.
Step 4: Combine Wet and Dry
Slowly add the dry ingredients to the wet mixture, stirring gently to avoid overmixing. Overmixed batter can lead to a tough bread—no one wants that! Aim for just mixed until you see a few lumps. Remember, some imperfections make it homey.
Step 5: Pour into the Pan
Pour the batter into your prepared loaf pan, smoothing the top with a spatula. Don’t worry too much about perfection at this stage; you’re going to cover it up with that sugary goodness soon!
Step 6: Bake It Up
Pop that loaf into your preheated oven and let it bake for about 50-60 minutes. Check it around the 50-minute mark with a toothpick; it’s done when it comes out clean (with maybe a crumb or two). The warm, heavenly scent will envelop your kitchen before you even realize it.
Step 7: The Sweet Coating
While the bread bakes, prepare your cinnamon sugar coating by whisking together the sugar and cinnamon in a shallow dish. This is where the magic happens! Once you’ve taken the bread out of the oven, let it cool in the pan for about 10 minutes before transforming it into a sugary delight.
Step 8: Final Touch
Remove the loaf from the pan and while it’s still warm, roll it in the cinnamon-sugar mix until it’s fully coated. This is the stage where your bread gets its iconic donut-esque finish. Trust me, this is where you’ll want to sneak an edge before it cools completely!
Serving Suggestions
To serve this delightful Cinnamon Sugar Donut Bread, slice it into thick, generous pieces. You could enjoy it warm with a smear of butter, or if you really want to elevate it, try adding a dollop of cream cheese frosting or a drizzle of icing. It also pairs perfectly with a steaming cup of coffee or a refreshing glass of milk. Best enjoyed with friends or family—after all, sharing is caring!
Recipe Variations
-
Pumpkin Spice Twist: Add 1/2 cup of pureed pumpkin for a fall-inspired version; swap out some cinnamon for pumpkin spice for an extra kick.
-
Nutty Addition: Fold in some chopped walnuts or pecans into the batter for a crunchy texture and a rich flavor contrast.
-
Fruit Infusion: Toss in a cup of fresh or frozen blueberries for a fruity twist. Just be sure not to overmix—gentle folds are key!
-
Gluten-Free Option: Use a 1:1 gluten-free flour blend for the all-purpose flour, and you’re good to go!
-
Chocolate Drizzle: Melt some chocolate and drizzle it over the top once it’s cooled for a decadent twist. Because let’s be real, who doesn’t love chocolate?
Chef’s Notes
I love that this recipe can evolve alongside me—after all, food is like life. It grows and changes with every scoop of batter and sprinkle of cinnamon! The memories associated with this bread only get sweeter as the years go by. It’s about experimentation, too. One day I may add more spice, and the next day I might take a classic approach—the beauty is in the creativity.
Another favorite kitchen memory? One Christmas, I decided to gift this bread as holiday treats to neighbors. It was a delightful experiment that brought sweet smiles to faces. Package a loaf in pretty paper, and trust me—it’ll be a cherished gift!
FAQs and Troubleshooting
Q: My bread didn’t rise! What happened?
A: This could be due to old baking powder or overmixing the batter. Always check the freshness of your baking ingredients!
Q: Can I make this ahead of time?
A: Absolutely! The bread can be stored in an airtight container at room temperature for up to 3 days or in the fridge for about a week. For longer storage, freeze it, and simply thaw when you crave it!
Q: Why is my bread so dense?
A: Overmixing or not using enough leavening agent (baking powder) could be culprits. Light touches when mixing and double-checking your ingredients will help!
Q: Can I use something other than milk?
A: Yes! You can substitute it with any non-dairy milk like almond, oat, or soy. Just make sure it’s unsweetened to keep the flavors balanced.
Nutritional Info (per slice)
Calories: 210
Fat: 9g
Carbohydrates: 31g
Fiber: 1g
Protein: 3g
Sugar: 10g
So there you have it, friends! You now have all the keys to unlock the magic of Cinnamon Sugar Donut Bread in your kitchen. Make it your own, sprinkle in some love, and enjoy the deliciousness that follows. Happy baking!
PrintCinnamon Sugar Donut Bread
A delightful loaf that combines the sweetness of cinnamon and sugar in a bread format reminiscent of your favorite donuts.
- Prep Time: 15 minutes
- Cook Time: 60 minutes
- Total Time: 75 minutes
- Yield: 8 servings 1x
- Category: Dessert
- Method: Baking
- Cuisine: American
- Diet: Vegetarian
Ingredients
- 2 cups all-purpose flour
- 1 cup granulated sugar
- 1 tablespoon baking powder
- 1 teaspoon cinnamon
- 1/2 teaspoon salt
- 1/2 cup unsalted butter, melted
- 1 cup milk
- 2 large eggs
- 1 teaspoon vanilla extract
- 1/4 cup granulated sugar (for coating)
- 1 teaspoon cinnamon (for coating)
Instructions
- Preheat your oven to 350°F (175°C). Grease a 9×5-inch loaf pan.
- Mix together your flour, sugar, baking powder, cinnamon, and salt in a medium bowl.
- Blend the melted butter, milk, eggs, and vanilla extract in a large mixing bowl.
- Combine the dry ingredients with the wet mixture, stirring gently to avoid overmixing.
- Pour the batter into your prepared loaf pan, smoothing the top.
- Bake for 50-60 minutes, checking with a toothpick around the 50-minute mark.
- Prepare the cinnamon sugar coating by whisking together the sugar and cinnamon.
- Remove the loaf from the pan and roll it in the cinnamon-sugar mix while still warm.
Notes
Enjoy it warm with butter or cream cheese frosting. Pairs perfectly with coffee or milk.
Nutrition
- Serving Size: 1 slice
- Calories: 210
- Sugar: 10g
- Sodium: 300mg
- Fat: 9g
- Saturated Fat: 5g
- Unsaturated Fat: 3g
- Trans Fat: 0g
- Carbohydrates: 31g
- Fiber: 1g
- Protein: 3g
- Cholesterol: 60mg
Keywords: cinnamon, sugar, bread, dessert, baking
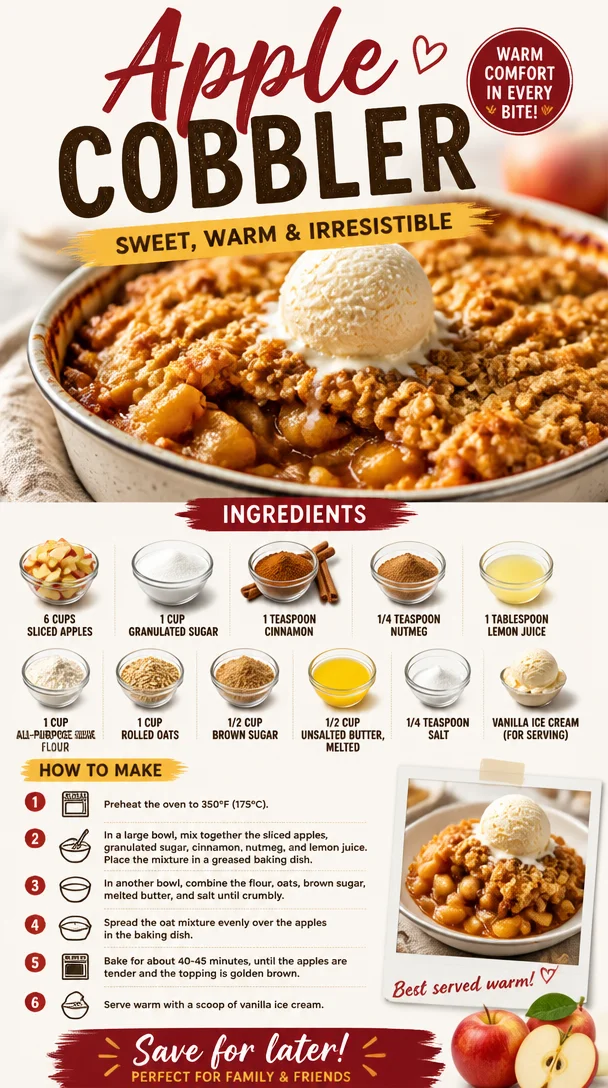
Apple Cobbler
Apple Cobbler: A Comforting Classic with a Flavorful Twist
Welcome, food lovers! Today, we’re diving into one of the ultimate comfort desserts—apple cobbler. There’s just something magical about the aroma of baked apples mixed with spices wafting through the kitchen that instantly makes you feel at home. Whether you’re hosting a cozy dinner party or simply want to treat yourself after a long day, this apple cobbler is sure to delight your taste buds and warm your soul.
A Taste of Nostalgia
Let me take you back to my childhood—hot summer afternoons spent at my grandmother’s house, where the kitchen was always bustling. I remember the sound of her antique wooden spoon clinking against the mixing bowl as she prepared her famous apple cobbler. She had a knack for turning simple ingredients into something extraordinary, and that recipe was her crown jewel. Whenever she pulled the cobbler out of the oven, the sweet, cinnamon-scented air would wrap around us like a warm hug.
On those lazy afternoons, we’d gather around the table, plates piled high with that toasty, bubbling dessert. The first scoop would always be the best—smooth, soft apples paired with a crispy topping, often dished out with a scoop of vanilla ice cream melting into it. There’s something about those memories that fills me with joy, and it inspires me to share this classic dish with all of you today. It reminds us that the kitchen can be a gathering place, a source of comfort, and a canvas for creativity.
Ingredients
Here’s what you’ll need to whip up this delightful apple cobbler. Each ingredient plays a key role in creating the perfect balance of flavor and texture.
-
6 cups sliced apples
- Apple varieties like Granny Smith, Honeycrisp, or Fuji add the perfect balance of sweetness and tartness. Don’t hesitate to mix and match!
-
1 cup granulated sugar
- This is essential for sweetening your apples. If you’re looking to cut back on sugar, you can substitute half with honey or maple syrup for a more natural option!
-
1 teaspoon cinnamon
- Cinnamon is the star spice in this recipe, bringing warmth and comfort. For an extra kick, try adding some cardamom or allspice!
-
1/4 teaspoon nutmeg
- Just a hint of nutmeg enhances the flavors beautifully. If you’re not a fan of nutmeg, feel free to leave it out.
-
1 tablespoon lemon juice
- This balances the sweetness of the apples and keeps them from browning. You can use lime juice in a pinch for a zesty twist!
-
1 cup all-purpose flour
- This forms the base of your topping. If you’re looking for a gluten-free option, almond flour or a gluten-free baking blend works wonders!
-
1 cup rolled oats
- Oats bring a chewy texture—perfect for that comforting topping. For a nutty flavor, try substituting half with chopped nuts like pecans or walnuts.
-
1/2 cup brown sugar
- This adds depth and a slight hint of caramel flavor. You can easily swap it with coconut sugar for a healthier option!
-
1/2 cup unsalted butter, melted
- Butter adds richness to the cobbler. If you’d like to lighten it up, you can use coconut oil instead for a dairy-free version.
-
1/4 teaspoon salt
- A pinch of salt enhances all the flavors in the dish, making it taste richer. Always a must!
-
Vanilla ice cream (for serving)
- A scoop of creamy vanilla ice cream is a classic complement. Try caramel or cinnamon ice cream for an extra treat!
Step-by-Step Instructions
Now that we have our ingredients ready, it’s time to get to the fun part—cooking! Follow these steps to create a mouthwatering apple cobbler that’ll have everyone begging for seconds.
-
Preheat Your Oven:
- Preheat your oven to 350°F (175°C). This is crucial because you want your cobbler to bake evenly and achieve that golden, crispy topping.
-
Prepare the Apples:
- In a large mixing bowl, toss together the sliced apples, granulated sugar, cinnamon, nutmeg, and lemon juice until the apples are well-coated.
- Tip: If you’re using different apple varieties, combine them for a more layered flavor profile. The key here is to let them mingle with the sugar and spices for at least 10 minutes!
-
Make the Topping:
- In another bowl, mix together the flour, oats, brown sugar, salt, and melted butter.
- Chef’s Hack: Use your hands to crumble the mixture. It might feel messy, but that’s where the magic happens! You want a crumbly texture that will bake up crispy.
-
Combine Layers:
- Pour the apple mixture into a greased 9×13-inch baking dish, making sure to spread it evenly. Sprinkle the topping mixture generously over the apples.
- Tip: Don’t worry about covering every inch. Leaving some gaps allows the heat to penetrate and creates those delightful crispy bits!
-
Bake to Perfection:
- Place your baking dish in the oven and bake for about 40-45 minutes or until the apples are bubbling and the topping is golden brown.
- Pro Tip: Keep an eye on it towards the end of the baking time—you want it bubbly and golden, but not burnt!
-
Cool and Serve:
- Allow the cobbler to cool for 10-15 minutes before serving. This sets everything and makes it easier to scoop out.
- Nothing feels better than serving warm cobbler topped with that creamy ice cream as it slowly melts into the sweet filling!
Serving Suggestions
For the ultimate presentation, serve your warm apple cobbler in individual ramekins or a big scoop in cozy bowls. Top each serving with a generous scoop of vanilla ice cream, and perhaps a sprig of mint for a pop of color. Drizzle with caramel sauce if you’re feeling a little extra! It’s all about creating that inviting, shareable moment around the table.
Recipe Variations
-
Berry-Apple Delight:
- Add mixed berries (like blueberries or raspberries) to your apple mixture for a sweet and tangy burst of flavor!
-
Caramel Swirl:
- Drizzle some caramel sauce over the apple layer before adding the topping for an indulgent twist.
-
Nutty Crumble:
- Include chopped pecans or walnuts in the crumble topping for added crunch and nuttiness.
-
Spiced Pear Cobbler:
- Swap out some apples for ripe pears for a different but equally delicious flavor combination.
-
Oatless Option:
- For a lighter topping, substitute the oats with crushed graham crackers mixed with a bit of butter for that classic dessert vibe!
Chef’s Notes
This apple cobbler recipe has been a staple in my kitchen for years, and it’s evolved over time—just like us! I started with my grandmother’s version, which was perfectly lovely but lacked a bit of texture. By incorporating oats and tweaking the spices, I created my own spin. One thing remains the same though: it’s still about those cozy memories and the joy of sharing this dessert with family and friends.
Now, imagine pulling this lively cobbler out of the oven and the hearts it brings together—each slice tells a story and adds a note of warmth to any gathering. It’s truly a simple yet profound expression of love!
FAQs and Troubleshooting
1. What if my apples are too tart?
- If your apples are too tart, consider adding a bit more sugar to balance the flavors. A drizzle of honey or maple syrup can also help enhance the sweetness!
2. My cobbler topping is too dry. What should I do?
- If your topping feels too dry before baking, try adding a tablespoon or two more melted butter until it reaches a crumbly but moist consistency.
3. Can I make this ahead of time?
- Absolutely! You can prepare both the apple filling and the topping a day ahead. Just assemble and bake when you’re ready to serve for that freshly-baked goodness!
4. How do I store leftovers?
- Store any leftovers in an airtight container in the refrigerator for 3-4 days. To reheat, pop it in the oven at 350°F (175°C) until warmed through—or enjoy it cold (though I highly recommend it warm!).
Nutritional Info (Optional)
For those who might be keeping track, a typical serving of apple cobbler (about 1/8 of the pan) contains:
- Calories: Approximately 250-300
- Protein: 3g
- Fat: 12g
- Carbohydrates: 40g
- Fiber: 2g
- Sugar: 20g
Now you know all the ins and outs of making a delightful apple cobbler! The best part? It’s as easy as it is delicious. I can’t wait for you to create your own memories with this dish. So grab your aprons, gather your ingredients, and let the magic begin! Happy baking! 🍏🥧
PrintApple Cobbler
A comforting and classic apple cobbler with a delicious twist.
- Prep Time: 15 minutes
- Cook Time: 45 minutes
- Total Time: 60 minutes
- Yield: 8 servings 1x
- Category: Dessert
- Method: Baking
- Cuisine: American
- Diet: Vegetarian
Ingredients
- 6 cups sliced apples
- 1 cup granulated sugar
- 1 teaspoon cinnamon
- 1/4 teaspoon nutmeg
- 1 tablespoon lemon juice
- 1 cup all-purpose flour
- 1 cup rolled oats
- 1/2 cup brown sugar
- 1/2 cup unsalted butter, melted
- 1/4 teaspoon salt
- Vanilla ice cream (for serving)
Instructions
- Preheat your oven to 350°F (175°C).
- In a large mixing bowl, toss together the sliced apples, granulated sugar, cinnamon, nutmeg, and lemon juice until the apples are well-coated.
- Mix together the flour, oats, brown sugar, salt, and melted butter in another bowl.
- Pour the apple mixture into a greased 9×13-inch baking dish.
- Sprinkle the topping mixture generously over the apples.
- Bake for about 40-45 minutes or until the apples are bubbling and the topping is golden brown.
- Allow the cobbler to cool for 10-15 minutes before serving.
Notes
Serve warm topped with vanilla ice cream for the ultimate treat. You can also drizzle with caramel sauce for extra sweetness!
Nutrition
- Serving Size: 1 serving
- Calories: 275
- Sugar: 20g
- Sodium: 100mg
- Fat: 12g
- Saturated Fat: 7g
- Unsaturated Fat: 4g
- Trans Fat: 0g
- Carbohydrates: 40g
- Fiber: 3g
- Protein: 3g
- Cholesterol: 30mg
Keywords: apple cobbler, dessert, comfort food, baking, thanksgiving dessert
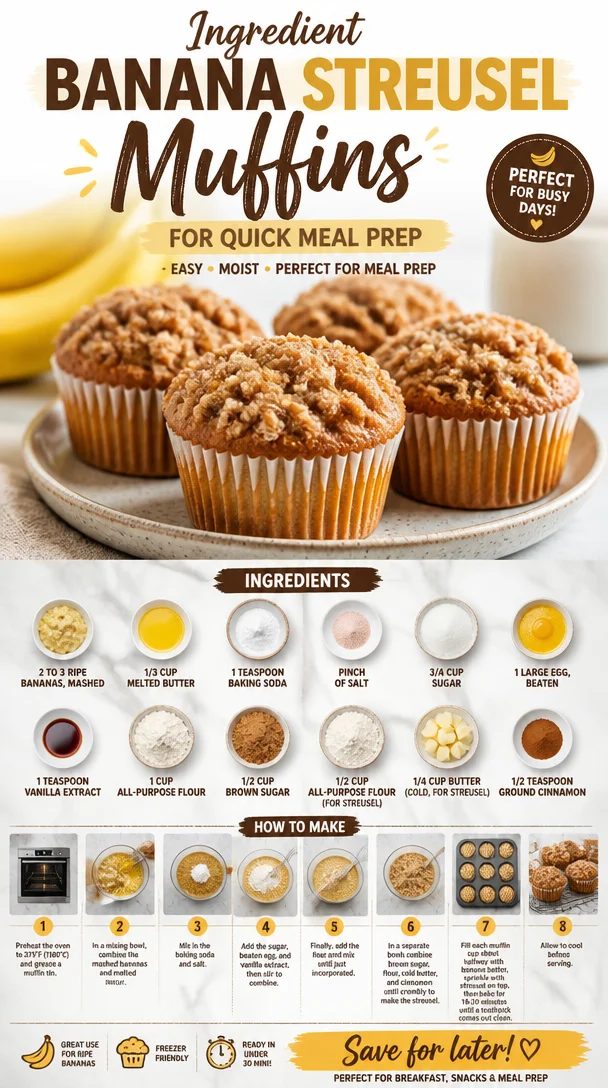
Ingredient Banana Streusel Muffins for Quick Meal Prep
Banana Streusel Muffins: A Deliciously Comforting Treat
Welcome back to Clean Plate Cravings! Today, I’ve got a recipe that will surely become a star in your kitchen: Banana Streusel Muffins. Picture this: it’s a Saturday morning, the sun is shining, and you’ve got your favorite coffee brewing. What could make that moment even better? Freshly baked muffins that smell divine wafting through your home! Trust me, these muffins are super moist, bursting with banana goodness, and topped with a crunchy streusel that whispers sweet nothings of cinnamon and sugar.
You know, muffins have a special place in my heart. They remind me of cozy mornings spent with my family, where we gathered around the breakfast table, a mix of laughter and sweet aromas in the air. Would you believe that just a whiff of banana can transport me back to my childhood kitchen? It’s true! Every time I bake these Banana Streusel Muffins, I can almost hear my grandma’s laughter as she guided me through the art of baking. She taught me that baking isn’t just about precise measurements; it’s about love, sharing, and building memories. Those moments made me realize that food has an incredible power to unite us.
So, let’s dive into this delightful recipe! Break out your apron, and let’s make some magic happen!
Ingredients
Here’s what you’ll need to whip up these scrumptious Banana Streusel Muffins:
-
2 to 3 ripe bananas, mashed
Ripe bananas bring sweetness and moisture to the muffins. They’ll also add that wonderful banana flavor. If you’re in a pinch, you can substitute with unsweetened applesauce—just remember to adjust the sugar slightly! -
1/3 cup melted butter
Butter adds richness and moisture, making your muffins soft and tender. You can swap it with coconut oil for a dairy-free option, but the flavor will change slightly. -
1 teaspoon baking soda
This is the leavening agent that gives your muffins that fluffy texture. Baking powder can be used as a substitute, but adjust the quantity. -
Pinch of salt
Just a pinch! It enhances the sweetness and balances the flavors. -
3/4 cup sugar
For sweetness! Coconut sugar or brown sugar can be great alternatives, each imparting a slightly different flavor. -
1 large egg, beaten
Eggs contribute to the structure and moisture. For a vegan option, try using a flaxseed egg (1 tablespoon ground flaxseed mixed with 2.5 tablespoons water). -
1 teaspoon vanilla extract
Vanilla adds depth to the flavor. It’s one of those ingredients that elevates any baked good—from muffins to cookies! -
1 cup all-purpose flour
This forms the base of your muffins. You can experiment with whole wheat flour for added nutrition; just note that the texture will be a bit denser. -
1/2 cup brown sugar
This is for your streusel topping! It brings a caramel flavor and a hint of moisture. You can use coconut sugar here as well if you want a less refined option. -
1/2 cup all-purpose flour (for streusel)
This helps make the streusel crumbly and delicious. Same as the previous point on flour, feel free to use whole wheat or gluten-free flour if needed. -
1/4 cup butter (cold, for streusel)
Cold butter is essential for that perfect crumbly topping. You can use vegan butter for a dairy-free version. -
1/2 teaspoon ground cinnamon
Cinnamon adds warmth and an inviting aroma. You can also experiment with nutmeg or cardamom for a little twist!
Step-by-Step Instructions
Let’s make some incredibly scrumptious Banana Streusel Muffins!
-
Preheat your oven to 350°F (175°C)
Preheating is crucial! It ensures that your muffins bake evenly. It’s like giving your kitchen a warm-up before the main event. -
Prepare your muffin pan
Grease a 12-cup muffin pan or line it with baking cups. Using liners makes for easy clean-up and a lovely presentation. If you’re feeling fancy, try dusting the liners with a little flour to prevent sticking! -
Mash the bananas
In a large bowl, mash the ripe bananas using a fork or potato masher. If you like chunkier muffins, leave some banana lumps for texture. I love seeing those banana bits when biting into a warm muffin! -
Mix in the wet ingredients
Add melted butter, sugar, beaten egg, and vanilla extract to the mashed bananas. Stir until combined. The mixture should look glossy and inviting. A good stir here incorporates flavors beautifully! -
Combine the dry ingredients
In another bowl, mix the flour, baking soda, and salt. Whisking these together ensures the baking soda is evenly distributed throughout the flour, preventing any bitter bites from concentrated baking soda. -
Combine wet and dry ingredients
Gradually add the dry mixture to the wet banana mixture, stirring gently. Don’t overmix! A few floury little streaks are perfectly okay. Overmixing results in tough muffins—you want them to be light and fluffy! -
Prepare the streusel topping
In a small bowl, combine 1/2 cup all-purpose flour, brown sugar, ground cinnamon, and cold butter. Use your fingers or a pastry cutter to mix until it resembles coarse crumbs. This is where the magic happens; the smell coming from this mixture will have you swooning! -
Fill the muffin cups
Spoon the muffin batter into your prepared muffin cups, filling each about 2/3 full. You’ll want room for that lovely streusel topping. -
Add the streusel on top
Sprinkle a generous amount of the streusel mixture on top of each muffin. This is what makes them so special! The streusel will create a beautifully crunchy crust. -
Bake
Place your muffin pan in the preheated oven and bake for 18–20 minutes, or until a toothpick inserted into the center of a muffin comes out clean. The tops should be golden brown, and your kitchen will smell absolutely heavenly! -
Let it cool
Allow your muffins to cool in the pan for about 5 minutes, then transfer them to a wire rack. This little cooling time lets the flavors settle and makes them easier to handle.
Serving Suggestions
These Banana Streusel Muffins are perfect for breakfast, brunch, or as a delightful snack any time of the day. Serve them warm with a pat of butter or a drizzle of honey for an added touch. You can also pair them with Greek yogurt for a protein boost or a fresh fruit salad to make a well-rounded meal. They’re great to pack for on-the-go breakfasts or to share with friends!
Recipe Variations
-
Nutty Banana Muffins: Add half a cup of walnuts or pecans to the batter for a delightful crunch.
-
Chocolate Chip Twist: Throw in some dark chocolate chips for an indulgent treat. You can never go wrong with chocolate!
-
Coconut Delight: Mix in sweetened shredded coconut to the batter for a tropical vibe.
-
Spiced Up: Add a dash of nutmeg or even cardamom for an aromatic twist that complements the bananas beautifully.
-
Dairy-Free/Dietary Swap: Use almond milk and flaxseed egg if you’re looking for a dairy-free or vegan option!
Chef’s Notes
I learned to bake with my grandma, and she always had a way of making even the simplest recipes feel special. These Banana Streusel Muffins have evolved over the years, influenced by seasonal ingredients and my personal health journey. I love playing around with spices or mixing in different types of flours. One time, I substituted half of the all-purpose flour with almond flour, and they turned out beautifully nutty. There’s magic in experimenting, and I hope you feel encouraged to make this recipe your own!
FAQs and Troubleshooting
1. My muffins sank in the middle—what went wrong?
This can happen if the oven temperature is too low, or if there was too much moisture in the batter. Make sure your ingredients are measured correctly and your oven is properly preheated.
2. Can I freeze these muffins?
Absolutely! After baking, let them cool completely. Then, wrap them in plastic wrap and place them in a freezer-safe bag. They’ll last about 2-3 months. Just pop them in the microwave or oven to warm them up!
3. How do I tell if my muffins are done?
Insert a toothpick into the center of a muffin. If it comes out clean or with a few crumbs (not wet batter!), they’re done. Every oven is different, so keep an eye on them!
4. Can I use frozen bananas?
Yes! Just thaw them out first and drain any excess liquid. It’s a great way to use up overripe bananas you’ve been saving!
Nutritional Info (Optional)
While the exact nutritional content can vary depending on specific brands and measurements, here’s a rough estimate per muffin:
- Calories: 180
- Carbohydrates: 26g
- Protein: 2g
- Fat: 7g
- Fiber: 1g
- Sugar: 10g
And there you have it—my favorite Banana Streusel Muffins! I hope you enjoy making and savoring them just as much as I do. Happy baking, and remember, share those muffins with someone you love! Let’s keep it fresh, simple, and seriously delicious. Happy cooking, my friends!
PrintBanana Streusel Muffins
Deliciously moist Banana Streusel Muffins topped with a crunchy cinnamon streusel.
- Prep Time: 15 minutes
- Cook Time: 20 minutes
- Total Time: 35 minutes
- Yield: 12 muffins 1x
- Category: Breakfast
- Method: Baking
- Cuisine: American
- Diet: Vegetarian
Ingredients
- 2 to 3 ripe bananas, mashed
- 1/3 cup melted butter
- 1 teaspoon baking soda
- Pinch of salt
- 3/4 cup sugar
- 1 large egg, beaten
- 1 teaspoon vanilla extract
- 1 cup all-purpose flour
- 1/2 cup brown sugar (for streusel)
- 1/2 cup all-purpose flour (for streusel)
- 1/4 cup butter (cold, for streusel)
- 1/2 teaspoon ground cinnamon
Instructions
- Preheat your oven to 350°F (175°C).
- Prepare your muffin pan by greasing or lining it with baking cups.
- Mash the bananas in a large bowl.
- Mix in the melted butter, sugar, beaten egg, and vanilla extract.
- Combine the flour, baking soda, and salt in another bowl.
- Combine the wet and dry ingredients gently.
- Prepare the streusel topping by mixing flour, brown sugar, ground cinnamon, and cold butter.
- Fill the muffin cups about 2/3 full with the batter.
- Add the streusel topping on each muffin.
- Bake for 18–20 minutes or until golden brown.
- Let the muffins cool in the pan for about 5 minutes, then transfer to a wire rack.
Notes
Serve warm with butter or honey. Perfect for breakfast or snacks.
Nutrition
- Serving Size: 1 muffin
- Calories: 180
- Sugar: 10g
- Sodium: 150mg
- Fat: 7g
- Saturated Fat: 4g
- Unsaturated Fat: 2g
- Trans Fat: 0g
- Carbohydrates: 26g
- Fiber: 1g
- Protein: 2g
- Cholesterol: 30mg
Keywords: banana muffins, streusel muffins, breakfast muffins
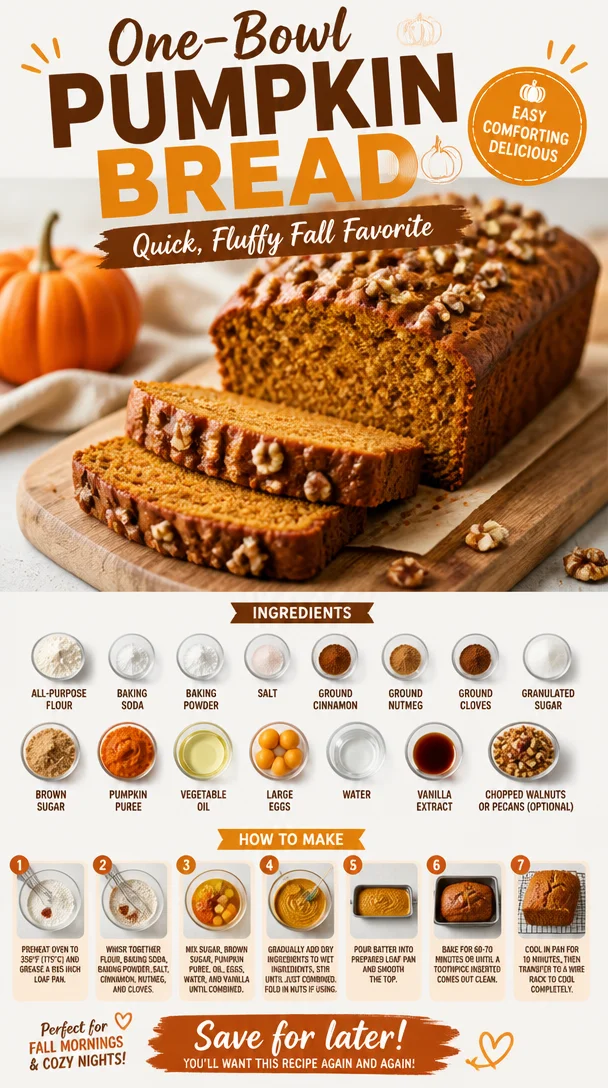
One-Bowl Pumpkin Bread: Quick, Fluffy Fall Favorite
The World’s Best Pumpkin Bread: A Cozy Slice of Fall
Welcome to Clean Plate Cravings! Today, I’m super excited to share with you my take on what I confidently call the World’s Best Pumpkin Bread. Picture this: a warm loaf bursting with the flavors of fall—think spicy cinnamon, rich pumpkin, and a hint of sweetness that dances on your palate. Whether enjoyed for breakfast, as an afternoon snack with your favorite tea, or as a delightful dessert, this pumpkin bread is here to satisfy all your autumn cravings. Let’s dive into this cozy recipe, shall we?
A Slice of Nostalgia
Every time I make this pumpkin bread, I am transported back to my childhood kitchen where the aroma of warm spices wafted in the air. My mom would crank up the oven, and there I was, eagerly waiting for the first slice to come out. The kitchen was our sanctuary, and pumpkin bread was our seasonal treat. We’d pull out an old, dog-eared recipe book filled with notes and stains, each an indication of the love poured into those pages over the years.
As the bread baked, my siblings and I would take turns whisking the batter and sneaking in generous pinches of brown sugar while Mom wasn’t looking. The laughter, the teasing, the anticipation of that first buttery slice—it’s what made every fall so special. Now, as I whip up this recipe in my own kitchen, I can’t help but smile, knowing that I’m continuing that legacy of warmth and flavor. Let’s recreate those memories together with this irresistible pumpkin bread recipe!
Ingredients
To whip up the World’s Best Pumpkin Bread, here’s what you’ll need:
-
2 cups all-purpose flour
The foundation of our bread! All-purpose flour gives just the right texture. If you want a whole-grain version, feel free to swap in half whole wheat flour. -
1 tsp baking soda
This is our leavening agent, helping the bread rise and achieve that fluffy texture. Double-check your baking soda’s freshness for the best results! -
1/2 tsp baking powder
A little backup for our leavening process. It ensures that the bread is light and airy. -
1/2 tsp salt
Enhances the flavors in all our ingredients. Don’t skip this; it makes a significant difference! -
1 tsp ground cinnamon
This spice is the heart of the bread’s flavor profile, invoking that classic pumpkin spice essence we all adore. Freshly ground is even better if you can manage it! -
1/2 tsp ground nutmeg
Adds a warm, earthy flavor that beautifully complements the cinnamon. It’s perfect for creating that cozy atmosphere. -
1/4 tsp ground cloves
A dash of clove gives a subtle kick to the bread. If you don’t have this on hand, you can opt out—but it brings extra warmth! -
1 cup granulated sugar
Sweetness at its core! You can reduce this a bit if you prefer a less sweet bread, but I love it as is. -
1/2 cup brown sugar
Adds moisture and that lovely caramel flavor. If you’re out of brown sugar, you can make your own using white sugar and molasses! -
1 cup pumpkin puree
The star of the show! Canned or freshly made, pumpkin puree is what gives this bread its signature flavor and moistness. -
1/2 cup vegetable oil
This keeps our bread moist and delicious. You could also substitute it with melted coconut oil for a bit of a tropical twist. -
4 large eggs
Another key player for fluffiness and binding everything together. -
1/4 cup water
Helps to create the perfect batter consistency. If you prefer, you can replace it with applesauce for an extra touch of sweetness and moisture. -
1 tsp vanilla extract
Because why not? A splash of vanilla takes everything up a notch! -
1/2 cup chopped walnuts or pecans (optional)
For those who enjoy a little crunch in their bread, these nuts add texture and a nutty richness. Go for toasted nuts for an extra flavor boost. If you want to keep it nut-free, simply leave them out!
Step-by-Step Instructions
Now, let’s get cooking! Follow these steps to create the most delightful pumpkin bread you’ll ever taste:
-
Preheat your oven to 350°F (175°C).
This ensures your bread starts baking at the perfect temperature right from the get-go. The delightful aroma will soon fill your home! -
Prepare your loaf pan.
Grease a 9×5-inch loaf pan with oil or cooking spray. This step prevents our delicious creation from sticking! -
Mix your dry ingredients.
In a large bowl, whisk together all-purpose flour, baking soda, baking powder, salt, cinnamon, nutmeg, and cloves. Make sure it’s well blended. This step is crucial to have an even distribution of flavors. I usually do this in a separate bowl to avoid lumps later. -
Combine the sugars and wet ingredients.
In another bowl, combine granulated sugar, brown sugar, pumpkin puree, vegetable oil, eggs, water, and vanilla extract. Whisk until smooth. This is where the magic begins! The mixture should be velvety and luscious. -
Mix it all together.
Gradually fold in the dry ingredients into the wet mixture. Be gentle! We want all of that airy goodness to stay intact. Mix until just combined; some lumps are okay, as overmixing can lead to dense bread. -
Add in the nuts (if using).
Gently fold in the chopped walnuts or pecans for that extra texture. If you are nut-sensitive, I promise it’ll still be amazing without them! -
Pour into the prepared pan.
Transfer the batter into the greased loaf pan. Use a spatula to smooth out the top as evenly as possible. -
Bake to perfection.
Place it in your preheated oven and let it bake for 55-65 minutes. You’ll know it’s done when a toothpick inserted into the center comes out clean (or with just a few moist crumbs). Trust me, your kitchen will smell heavenly! -
Cool down.
Once baked, remove from the oven and let it cool in the pan for about 10 minutes. Then, carefully transfer to a wire rack to cool completely. I know, it’s tough to wait, but this cooling process is essential for the perfect slice!
Serving Suggestions
When you’re finally ready to slice into this pumpkin bread, I recommend serving it warm with a pat of butter or a drizzle of honey for an extra indulgent treat. For a fun twist, try topping it off with cream cheese frosting for a dessert-like feel, or serve alongside your favorite herbal tea for a cozy afternoon snack. Slice it up, plate it, and enjoy each bite!
Recipe Variations
- Chocolate Chip Pumpkin Bread: Fold in 1/2 cup of semi-sweet or dark chocolate chips for a decadent twist!
- Pumpkin Spice Swirl: Layer your batter with a simple cinnamon-sugar mixture for a beautiful marbled effect.
- Gluten-Free Version: Substitute the all-purpose flour with a gluten-free baking blend for an equally delicious loaf.
- Vegan Pumpkin Bread: Replace the eggs with 1/2 cup of applesauce or flaxseed meal (1 Tbsp per egg) and use a plant-based oil.
- Spiced Pumpkin Bread: Add a pinch of ground cardamom or ginger for an extra layer of flavor that will warm your heart.
Chef’s Notes
I’ve been making this pumpkin bread for years, and it’s slightly evolved along the way. I’ve experimented with different spices, and let me tell you, the blend I use now truly is my favorite! One baking mishap that always makes me chuckle: I once swapped salt for sugar in a hurried attempt to multitask. The outcome was…interesting, to say the least! But that’s the beauty of cooking—each misstep brings a new story and experience to cherish.
FAQs and Troubleshooting
Q: Why is my pumpkin bread dense?
A: Most likely, it’s overmixed. Gently combine your ingredients to maintain the fluffiness. Also, ensure your leavening agents are fresh!
Q: Can I use fresh pumpkin puree instead of canned?
A: Absolutely! Just roast and puree your pumpkin, making sure to drain any excess moisture for the right consistency.
Q: How do I store leftover pumpkin bread?
A: Store it in an airtight container at room temperature for about 3-4 days, or refrigerate for a week. It also freezes beautifully for up to 3 months—just wrap slices tightly!
Q: Can I add other spices?
A: Yes! Feel free to play around with spices. Ground ginger and allspice are excellent options for that warm, festive vibe.
Nutritional Info
This pumpkin bread is packed with nutritious pumpkin and can be enjoyed in moderation as part of a balanced diet. If you want to calculate precise nutritional information, consider using an online recipe calculator based on portion size and the specific ingredients you use.
With this recipe in hand, you’re all set to create the World’s Best Pumpkin Bread in your kitchen, bringing warmth and joy to your home. So, preheat that oven and let the magic unfold! Happy baking! 🍞✨
PrintWorld’s Best Pumpkin Bread
This warm loaf is bursting with fall flavors like cinnamon, rich pumpkin, and a hint of sweetness, perfect for any occasion.
- Prep Time: 15 minutes
- Cook Time: 60 minutes
- Total Time: 75 minutes
- Yield: 1 loaf (approximately 10 slices) 1x
- Category: Bakery
- Method: Baking
- Cuisine: American
- Diet: Vegetarian
Ingredients
- 2 cups all-purpose flour
- 1 tsp baking soda
- 1/2 tsp baking powder
- 1/2 tsp salt
- 1 tsp ground cinnamon
- 1/2 tsp ground nutmeg
- 1/4 tsp ground cloves
- 1 cup granulated sugar
- 1/2 cup brown sugar
- 1 cup pumpkin puree
- 1/2 cup vegetable oil
- 4 large eggs
- 1/4 cup water
- 1 tsp vanilla extract
- 1/2 cup chopped walnuts or pecans (optional)
Instructions
- Preheat your oven to 350°F (175°C).
- Prepare your loaf pan by greasing it with oil or cooking spray.
- Mix your dry ingredients in a large bowl, whisking flour, baking soda, baking powder, salt, cinnamon, nutmeg, and cloves until well blended.
- Combine the sugars and wet ingredients in another bowl, whisking granulated sugar, brown sugar, pumpkin puree, vegetable oil, eggs, water, and vanilla extract until smooth.
- Mix it all together by gradually folding the dry ingredients into the wet mixture until just combined.
- Add in the nuts (if using) and gently fold them into the batter.
- Pour the batter into the prepared pan and smooth out the top.
- Bake for 55-65 minutes until a toothpick inserted comes out clean.
- Cool the bread for about 10 minutes in the pan, then transfer to a wire rack to cool completely.
Notes
Serve warm with butter, honey, or even cream cheese frosting for a delicious twist. Store leftovers in an airtight container for up to a week.
Nutrition
- Serving Size: 1 slice
- Calories: 300
- Sugar: 20g
- Sodium: 300mg
- Fat: 10g
- Saturated Fat: 1g
- Unsaturated Fat: 8g
- Trans Fat: 0g
- Carbohydrates: 45g
- Fiber: 2g
- Protein: 6g
- Cholesterol: 40mg
Keywords: pumpkin bread, fall recipes, baking, dessert
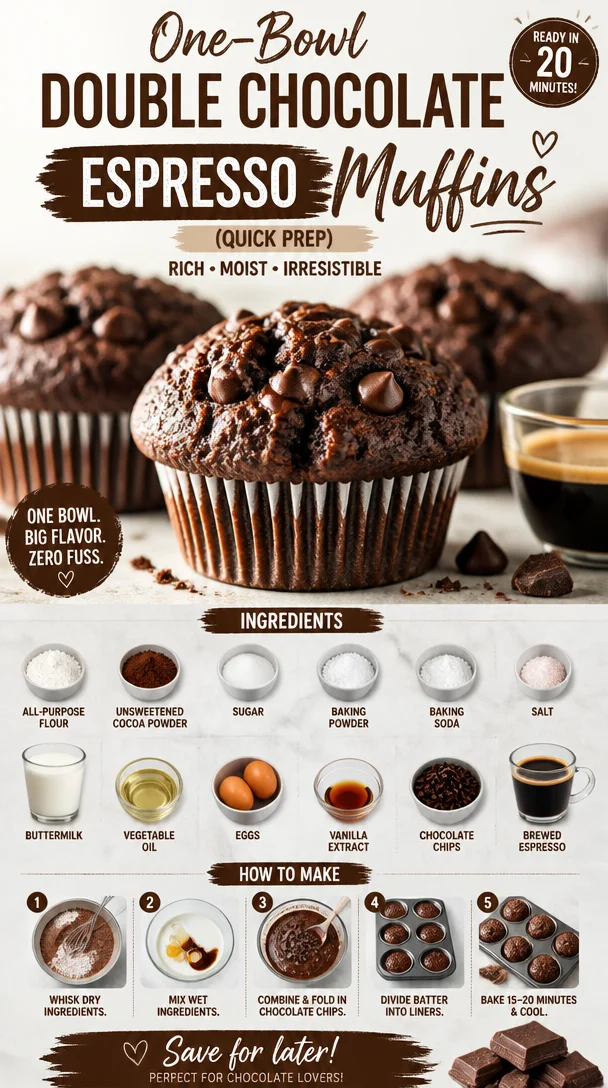
One-Bowl Double Chocolate Espresso Muffins (Quick Prep)
Double Chocolate Espresso Muffins: A Delicious Indulgence
Welcome, fellow food lovers! If you’re anything like me, there are few things that can brighten up a dreary morning than the intoxicating aroma of baked goods wafting through your kitchen. Picture this: the smell of rich chocolate mingling with the deep, robust scent of freshly brewed espresso. That’s right—today, we’re diving headfirst into the world of Double Chocolate Espresso Muffins! Not only do these muffins promise a delectable bite of chocolate goodness, but they also pack a caffeine punch that’ll kickstart your day. Perfect for breakfast, a midday snack, or even dessert, these muffins are a delightful treat that you’ll be reaching for time and again.
Now, I believe that every recipe comes with its own story, and this one is a sweet chapter from my own kitchen adventures. This muffin recipe didn’t just pop into existence; it evolved over the years in my quest to find the ultimate chocolate muffin. A few years back, I decided to have a little baking competition with myself. The goal? To create the most decadent chocolate muffin that was still easy enough to whip up on a lazy Sunday morning. After a few trial-and-error sessions (not every batch made it out of the oven), I added espresso to the mix, elevating the chocolate flavor to a whole new level. And let me tell you, when I took that first bite of a warm muffin fresh from the oven, I knew I had struck gold!
So let’s roll up our sleeves and make some muffins that are sure to bring smiles and happy tummies to your table. Grab your aprons, and let’s get started!
Ingredients
Here’s what you’ll need for these delicious Double Chocolate Espresso Muffins:
-
1 cup all-purpose flour
The foundation of our muffins! You can substitute gluten-free flour for a gluten-free option or try whole wheat flour if you’re looking for a bit more fiber. -
1/2 cup unsweetened cocoa powder
This adds the rich chocolate flavor. Dutch-processed cocoa can be used for a smoother taste, but make sure to adjust your leavening agents if you do! -
1 cup sugar
Sweetness is essential here! Use brown sugar for a more caramel-like flavor, or coconut sugar for a healthier option. -
1 teaspoon baking powder
The magic ingredient that helps our muffins rise. Don’t skip this! Baking soda is sometimes popular, but in this case, we’re sticking with baking powder for best results. -
1/2 teaspoon baking soda
A little boost to ensure our muffins reach fluffy perfection. Remember, don’t confuse it with baking powder—each has its role! -
1/4 teaspoon salt
Essential for balancing flavors. Aim for sea salt or kosher salt for a cleaner taste. -
1 cup buttermilk
Buttermilk brings moisture and tang. If you don’t have any, just mix regular milk with a teaspoon of vinegar to make a quick substitute! -
1/4 cup vegetable oil
This keeps our muffins moist and tender. If you prefer a healthier option, use coconut oil or applesauce for a lower-calorie alternative. -
2 large eggs
Eggs provide structure and stability. You can substitute flax eggs for a vegan version (1 tablespoon of ground flaxseed mixed with 3 tablespoons of water equals 1 egg). -
1 teaspoon vanilla extract
Trust me, this is the secret weapon for adding depth of flavor. It’s like a warm hug for your muffins! -
1 cup chocolate chips
The more, the merrier! Use dark, semi-sweet, or even mint chocolate chips for a fun twist. -
1/2 cup brewed espresso or strong coffee
This ingredient is the star of the show! If you’re not a coffee drinker, you can opt for a strong brewed herbal tea that lends depth without the caffeine.
Step-by-Step Instructions
Now that we have our ingredients lined up, let’s get baking! Ready? Let’s go!
-
Preheat Your Oven: Start by preheating your oven to 350°F (175°C). You want it nice and warm so that your muffins bake evenly and rise beautifully.
-
Prepare Your Muffin Pan: Grab a muffin pan and line it with paper liners or grease it lightly with butter or non-stick spray. This will help remove the muffins easily after baking. Your future self will thank you!
-
Mix the Dry Ingredients: In a large bowl, whisk together the flour, cocoa powder, sugar, baking powder, baking soda, and salt. Make sure no lumps remain—you’re aiming for a smooth and silky mix! This step helps evenly distribute the leavening agents.
-
Combine the Wet Ingredients: In a separate bowl, whisk together the buttermilk, vegetable oil, eggs, vanilla extract, and brewed espresso. This wet mixture should be smooth and cohesive, with all the ingredients well combined.
-
Bring It All Together: Pour the wet ingredients into the dry mixture. Using a spatula or wooden spoon, mix until just combined—don’t overdo it! A few lumps are perfectly fine. Overmixing will lead to tough muffins, and we want light and fluffy!
-
Add in the Chocolate Chips: Gently fold in the chocolate chips. Feel free to throw in a few extra chips for good measure! This is the fun part; you can never have too much chocolate, right?
-
Scoop into Muffin Pan: Using an ice cream scoop or a tablespoon, scoop the batter into the prepared muffin pan, filling each cup about three-quarters full. This provides enough room for the muffins to rise without overflowing.
-
Bake: Pop the muffin pan into the preheated oven and bake for about 18-20 minutes. You’ll know they’re done when a toothpick inserted into the center comes out clean (or with just a few crumbs attached).
-
Cool: Once baked, remove the muffins from the oven and let them cool in the pan for about 5 minutes before transferring them to a wire rack. The cooling process helps set them up nicely, and you want to enjoy them warm but not steaming hot.
-
Enjoy: These muffins are best enjoyed fresh out of the oven, but they’re also amazing the next day! Pair with a cold glass of milk, a cup of coffee, or even a dollop of whipped cream for extra indulgence.
Serving Suggestions
When it’s time to serve these delightful muffins, presentation matters! Arrange them on a beautiful plate or stand, dust them lightly with powdered sugar for an elegant touch, and offer a small bowl of fresh berries or whipped cream on the side. The color contrast is stunning, and they’ll look as good as they taste!
Recipe Variations
Here are a few creative twists to elevate your Double Chocolate Espresso Muffins even further:
-
Peanut Butter Swirl: Swirl in a tablespoon of peanut butter in the batter before baking for a delicious chocolate-peanut butter combo.
-
Minty Fresh: Add a few drops of peppermint extract or chopped fresh mint for a refreshing flavor burst—hello, chocolate mint lovers!
-
Nutty Crunch: Fold in chopped nuts like walnuts or hazelnuts for an added crunch. They pair beautifully with the chocolate.
-
Spicy Kick: Want to spice things up? Add a pinch of cayenne pepper or cinnamon for a unique flavor that complements the chocolate.
-
Gluten-Free Version: Swap the all-purpose flour for a gluten-free all-purpose blend and ensure all other ingredients are gluten-free to suit your dietary needs.
Chef’s Notes
As a passionate home chef, I’ve had my share of kitchen blunders—and let me tell you, that’s where the magic truly happens! I once forgot to add sugar to my muffins while texting a friend, and what came out of the oven were little puffs of chocolate despair. On the flip side, I learned the hard way that experimenting in the kitchen is half the fun! This recipe has grown with me, adapting to different diets and flavor trends, but one thing has remained the same: the joy it brings to every bite.
FAQs and Troubleshooting
1. Why are my muffins flat?
This could be due to expired baking powder or baking soda. Make sure to check the freshness of your leavening agents. Also, avoid overmixing the batter, as that can lead to dense muffins.
2. Can I use milk instead of buttermilk?
Yes, just mix regular milk with a teaspoon of vinegar or lemon juice and let it sit for about 5-10 minutes. This will mimic the acidity in buttermilk, giving your muffins the right texture!
3. How do I store muffins?
Store your muffins in an airtight container at room temperature for up to 3 days. For longer storage, freeze them in a sealed bag, and thaw as needed. They taste just as good, even after some time!
4. Can I double the recipe?
Absolutely! Just remember to adjust your baking time as needed and keep an eye on them in the oven. Sharing is caring, after all!
Nutritional Info
While I like to focus on flavor, I understand that nutrition matters too. Each muffin contains around 200 calories, 3g of protein, and offers a delightful energy boost from the chocolate and espresso. They’re perfect for a balanced treat in your day!
Well, there you have it, my friends! Your very own batch of Double Chocolate Espresso Muffins ready to be baked to perfection. I hope this recipe delights your senses and fills your kitchen with the warm aroma of chocolatey goodness. Remember, cooking is all about joy and creativity—so feel free to make this recipe your own. Happy baking!
PrintDouble Chocolate Espresso Muffins
Indulge in these rich and fluffy Double Chocolate Espresso Muffins, infused with coffee for an extra kick. Perfect for breakfast or a sweet snack!
- Prep Time: 10 minutes
- Cook Time: 20 minutes
- Total Time: 30 minutes
- Yield: 12 servings 1x
- Category: Dessert
- Method: Baking
- Cuisine: American
- Diet: Vegetarian
Ingredients
- 1 cup all-purpose flour
- 1/2 cup unsweetened cocoa powder
- 1 cup sugar
- 1 teaspoon baking powder
- 1/2 teaspoon baking soda
- 1/4 teaspoon salt
- 1 cup buttermilk
- 1/4 cup vegetable oil
- 2 large eggs
- 1 teaspoon vanilla extract
- 1 cup chocolate chips
- 1/2 cup brewed espresso or strong coffee
Instructions
- Preheat your oven to 350°F (175°C).
- Prepare a muffin pan with paper liners or grease it.
- Mix the dry ingredients: flour, cocoa powder, sugar, baking powder, baking soda, and salt in a bowl.
- Combine the wet ingredients: buttermilk, vegetable oil, eggs, vanilla extract, and brewed espresso in another bowl.
- Bring it all together by pouring the wet ingredients into the dry mixture and mixing until just combined.
- Add in the chocolate chips and fold gently.
- Scoop the batter into the prepared muffin pan, filling each cup about three-quarters full.
- Bake for about 18-20 minutes, or until a toothpick comes out clean.
- Cool for 5 minutes in the pan before transferring to a wire rack.
- Enjoy fresh or the next day, paired with milk or whipped cream!
Notes
For gluten-free muffins, substitute all-purpose flour with a gluten-free blend. Add peanut butter or mint for flavor variations.
Nutrition
- Serving Size: 1 muffin
- Calories: 200
- Sugar: 20g
- Sodium: 200mg
- Fat: 8g
- Saturated Fat: 2g
- Unsaturated Fat: 5g
- Trans Fat: 0g
- Carbohydrates: 30g
- Fiber: 2g
- Protein: 3g
- Cholesterol: 40mg
Keywords: muffins, chocolate, espresso, baking, dessert
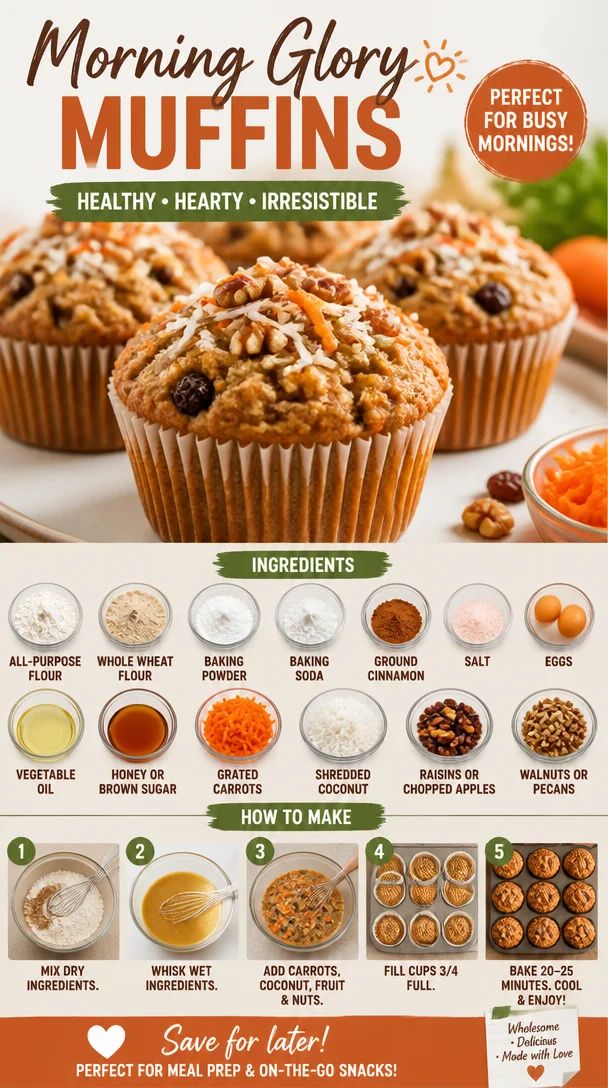
Morning Glory Muffins
Morning Glory Muffins: A Delicious Start to Your Day
Welcome to another delightful journey in the kitchen! Today, we’re baking something that might just become your new breakfast favorite: Morning Glory Muffins. These little gems are not only bursting with flavor, but they also pack a nutritional punch, making them perfect for busy mornings or cozy weekend brunches. So, grab your apron, and let’s dive into a recipe that’s as comforting as it is energizing!
A Breakfast Memory to Treasure
I can still remember the first time I tasted morning glory muffins. It was a chilly autumn morning, and my grandmother had a tradition of baking these muffins every Sunday. The warm aroma of cinnamon and carrots wafted through the house, drawing everyone to the kitchen like bees to honey. My siblings and I would gather around the table, eagerly waiting for that first warm muffin to land on our plates. As we dug in, our smiles were as bright as the golden autumn leaves outside.
That first bite was a blend of sweet and spicy, with just the right crunch from the nuts and the delightful chewiness of raisins. It was an experience that went beyond just eating; it was about family, warmth, and the joy of sharing food. Those muffins were a staple of my childhood, and now I love sharing this recipe, keeping that cherished memory alive and welcoming you into the fold of deliciousness!
Ingredients
Let’s talk about what you’ll need to make these super scrumptious morning glory muffins. Here’s the lineup:
-
1 cup all-purpose flour: This is your base for the muffins, giving them structure. You can substitute with a 1:1 gluten-free flour blend if you want a gluten-free version.
-
1 cup whole wheat flour: This adds nutrition and a delightful nutty flavor. If you don’t have whole wheat, feel free to use more all-purpose flour.
-
1 teaspoon baking powder: This is your leavening agent, helping the muffins rise and become fluffy.
-
1/2 teaspoon baking soda: A little extra lift here—plus, it balances the acidity of the honey or brown sugar.
-
1 teaspoon ground cinnamon: This warm spice is what gives our muffins that cozy flavor. You can swap it out for nutmeg if you’re feeling adventurous!
-
1/2 teaspoon salt: A must for enhancing all the other flavors; it’s the secret ingredient!
-
2 large eggs: These provide moisture and act as a binder. For a vegan option, consider using flaxseed mixed with water as a substitute.
-
1/2 cup vegetable oil: This keeps the muffins moist. You can also use melted coconut oil for a tropical twist.
-
1/2 cup honey or brown sugar: Sweetness is key! Honey brings a lovely floral note, while brown sugar adds a caramel-like depth.
-
2 cups grated carrots: This is where the "morning glory" shines, adding natural sweetness and moisture.
-
1/2 cup shredded coconut: A tropical flair! Unsweetened coconut works great if you’re looking for a healthier option.
-
1/2 cup raisins or chopped apples: Both options add sweetness and texture. If you’re not a fan, you can leave them out altogether or use dried cranberries instead.
-
1/2 cup walnuts or pecans, chopped: They give these muffins a satisfying crunch. Feel free to swap for sunflower seeds if you have nut allergies.
Step-by-Step Instructions
Now that you have your ingredients laid out, let’s get started on making these incredible muffins!
-
Preheat Your Oven: First things first, preheat your oven to 350°F (175°C). This step ensures that the muffins start to bake immediately when you put them in, giving you those perfect domes!
-
Prepare Your Muffin Tin: Grease a standard muffin tin or line it with paper liners for easy removal. I always prefer using liners as it makes cleanup a breeze, plus it adds a pop of color!
-
Mix Dry Ingredients: In a large mixing bowl, combine the all-purpose flour, whole wheat flour, baking powder, baking soda, ground cinnamon, and salt. This is where the magic starts! Whisk them together until well blended—this helps ensure that your leavening agents are evenly distributed.
-
Whisk Wet Ingredients: In another bowl, beat the eggs, then add in the vegetable oil and honey (or brown sugar). Whisk these together until everything is nicely combined. You’ll want it to be smooth and creamy. It’s my little ritual to smile at this point, knowing deliciousness awaits!
-
Combine Wet and Dry Ingredients: Pour the wet ingredients into the dry ingredients. Using a spatula (or a wooden spoon), gently fold the mixture. Be careful not to overmix; a few lumps are totally okay! This keeps your muffins nice and fluffy.
-
Add the Goodness: Now it’s time to add in your grated carrots, coconut, raisins (or apples), and nuts. This is where the colors and textures really come to life—in a rainbow of health!
-
Scoop Into Muffin Tin: Using an ice cream scoop or two spoons, fill each muffin cup about 2/3 full. This allows room for the muffins to rise beautifully!
-
Bake Amazonian Muffins: Slide your muffin tin into the preheated oven and bake for about 20-25 minutes. The muffins should be golden brown, and a toothpick inserted into the center should come out clean. But keep an eye on them; ovens can be sneaky!
-
Cool Down: Once baked, let the muffins cool in the tin for a few minutes, then transfer them to a wire rack to cool completely. This prevents them from getting soggy and lets them set perfectly!
Serving Suggestions
There’s nothing better than warming up a muffin, slathering it with a bit of butter (or coconut oil for dairy-free), and enjoying it with your morning coffee or tea. Serve these muffins slightly warm, perhaps with a side of fresh fruit or yogurt for a wholesome breakfast that feels like a treat. Want a fancy touch? Top them with a dollop of whipped cream cheese for an indulgent twist!
Recipe Variations
Feeling like getting creative? Here are some delicious variations you can try:
-
Tropical Twist: Substitute the raisins with pineapple and add macadamia nuts for a lush island flavor.
-
Chocolate Chip Delight: Fold in dark chocolate chips instead of nuts for a sweet, gooey surprise.
-
Apple Cinnamon: Swap out the grated carrots for grated apples and increase the cinnamon for an irresistible apple-cinnamon combo.
-
Savory Spin: Add some sautéed spinach or zucchini for a savory muffin that’s packed with veggies—perfect for brunch!
-
Vegan Version: Use flax eggs and unsweetened applesauce in place of eggs and half the oil, and you’re all set for a vegan treat!
Chef’s Notes
As I’ve been making these muffins over the years, each batch carries a little story. One time, I decided to make a double batch for a brunch gathering. I was feeling pretty proud until I realized I had accidentally grabbed baking soda instead of baking powder! The result was an incredibly dense muffin that had everyone laughing—at least they were delicious!
They’ve evolved as I’ve experimented with adding various spices and flavors, but the classic version remains my favorite. Baking is all about love and learning, after all, and I can’t wait for you to create your own memories with these delightful muffins.
FAQs and Troubleshooting
1. My muffins came out flat. What happened?
- This can happen if the leavening agents (baking powder and soda) are old or if the batter is overmixed. Make sure these ingredients are fresh, and fold gently!
2. Can I freeze the muffins?
- Absolutely! These muffins freeze well. Let them cool completely, wrap them tightly in plastic wrap, and store them in an airtight container. They’ll last up to three months. Just pop them in the microwave or toaster oven when you’re ready to enjoy!
3. How do I keep my muffins moist?
- Ensure you’re using enough moisture in the recipe. Don’t skip the oil, and consider adding in a bit of applesauce for added moisture. Also, be careful not to overbake!
4. Can I use other sweeteners?
- Yes! Maple syrup or agave nectar can be great substitutes for honey or brown sugar. Just make sure to adjust the liquid content slightly as needed.
Nutritional Info
Here’s a quick look at the nutritional benefits of our Morning Glory Muffins (per muffin, approx.):
- Calories: 180
- Protein: 3g
- Fat: 7g
- Carbohydrates: 27g
- Fiber: 2g
- Sugar: 7g
So, there you have it! Morning Glory Muffins that are as joyful to make as they are to eat. I hope you’ll bring this recipe into your home, creating memories and delicious moments just like my grandmother did with me. Happy baking, friends! Let’s make every bite full of love and flavor!
PrintMorning Glory Muffins
These delightful muffins are bursting with flavor and packed with nutrition, perfect for busy mornings or cozy weekend brunches.
- Prep Time: 15 minutes
- Cook Time: 25 minutes
- Total Time: 40 minutes
- Yield: 12 servings 1x
- Category: Breakfast
- Method: Baking
- Cuisine: American
- Diet: Vegetarian
Ingredients
- 1 cup all-purpose flour
- 1 cup whole wheat flour
- 1 teaspoon baking powder
- 1/2 teaspoon baking soda
- 1 teaspoon ground cinnamon
- 1/2 teaspoon salt
- 2 large eggs
- 1/2 cup vegetable oil
- 1/2 cup honey or brown sugar
- 2 cups grated carrots
- 1/2 cup shredded coconut
- 1/2 cup raisins or chopped apples
- 1/2 cup walnuts or pecans, chopped
Instructions
- Preheat your oven to 350°F (175°C).
- Prepare a standard muffin tin by greasing it or lining it with paper liners.
- Mix together the all-purpose flour, whole wheat flour, baking powder, baking soda, ground cinnamon, and salt in a large mixing bowl.
- Whisk the eggs, then add the vegetable oil and honey (or brown sugar) in another bowl and mix until well combined.
- Combine the wet ingredients with the dry ingredients and gently fold until just combined.
- Add in the grated carrots, coconut, raisins (or apples), and nuts.
- Scoop the batter into the muffin tin, filling each cup about 2/3 full.
- Bake for about 20-25 minutes until golden brown and a toothpick comes out clean.
- Cool the muffins in the tin for a few minutes, then transfer to a wire rack to cool completely.
Notes
These muffins are best enjoyed warm with a bit of butter or coconut oil and pair nicely with coffee or tea. Variations include using chocolate chips or apples instead of carrots.
Nutrition
- Serving Size: 1 muffin
- Calories: 180
- Sugar: 7g
- Sodium: 200mg
- Fat: 7g
- Saturated Fat: 1g
- Unsaturated Fat: 5g
- Trans Fat: 0g
- Carbohydrates: 27g
- Fiber: 2g
- Protein: 3g
- Cholesterol: 30mg
Keywords: morning glory muffins, breakfast muffins, healthy muffins
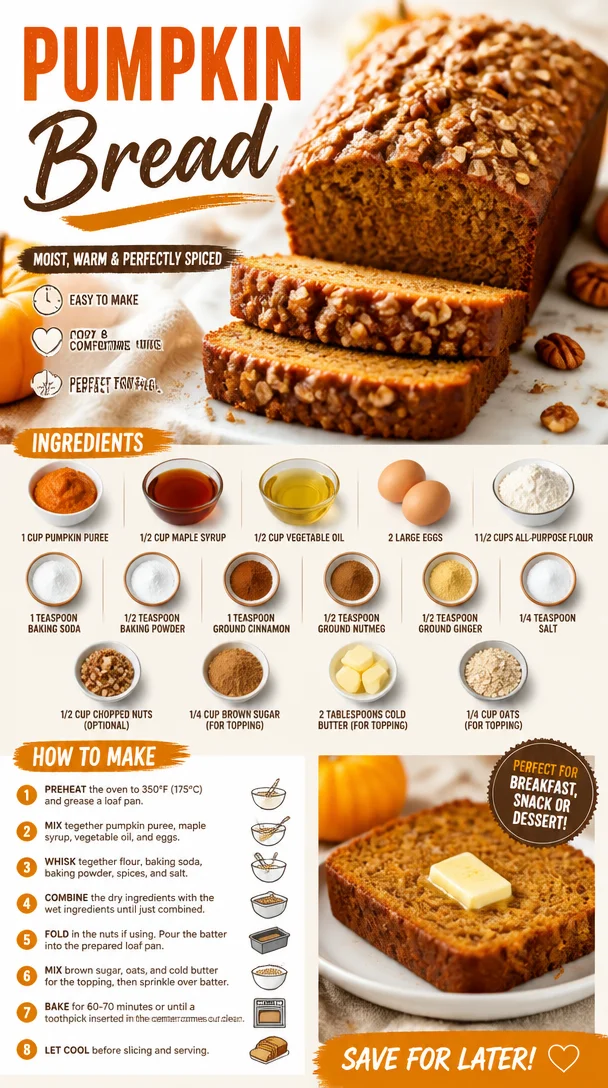
Pumpkin Bread
The Ultimate Pumpkin Bread: A Slice of Fall Awesomeness
When the leaves begin to crunch beneath our feet and the air turns crisp with that unmistakable scent of autumn, we all know it’s time for cozy sweaters, pumpkin spice everything, and, of course, the beloved pumpkin bread! This delightful treat captures the essence of the season in every single slice. It’s hearty, moist, and bursting with warm spices that not only fill your home with mouthwatering aromas but also warm your heart. Here at Clean Plate Cravings, we believe that enjoying the flavors of fall doesn’t need to be complicated. So grab your apron, and let’s bake up some magic!
A Journey Back to Grandma’s Kitchen
Growing up, my fondest memories are laced with the smell of spices and pumpkin wafting through my grandmother’s kitchen. Every year, as autumn rolled in, she would set aside time to whip up her famous pumpkin bread. It wasn’t just a recipe; it was a celebration! I remember watching her mix the ingredients together with such care, the way her hands danced through the motions of baking was utterly mesmerizing.
With her signature apron tied snugly around her waist, she would always let me “help” — which really meant standing on a stool next to her, stirring the batter while trying to sneak a taste of the sweet, spiced concoction. The best part? The topping! Sometimes, she’d sprinkle an extra dash of nutmeg, or sneak in some chocolate chips when she thought no one was looking. That was a little secret tradition of ours: the ‘bread with a surprise.’
Now, whenever I make this pumpkin bread, I think of her cheerful spirit, her tender smile, and how she taught me that cooking is all about love and sharing. So let’s carry on that legacy! Here’s how to create your very own pumpkin bread that not only brings comfort but also fills your kitchen with warmth.
Ingredients
Here’s what you’ll need to make this delightful pumpkin bread:
-
1 cup pumpkin puree
You can use canned pumpkin puree for convenience, or make your own by roasting a fresh pumpkin. The latter enhances flavor and adds a personal touch! -
1/2 cup maple syrup
This natural sweetener adds a unique depth to the flavor. Honey or agave syrup could be a great substitute. -
1/2 cup vegetable oil
For moistness! You can opt for melted coconut oil if you’re aiming for a tropical twist, though it may alter the flavor slightly. -
2 large eggs
Helps bind the ingredients and adds richness. Flax eggs (1 tablespoon ground flaxseed with 3 tablespoons water per egg) are a good vegan substitute. -
1 1/2 cups all-purpose flour
This is the backbone of your bread. Whole wheat flour works too, but it will yield a denser texture. -
1 teaspoon baking soda
This is your leavening agent. Always make sure it’s fresh for the best rise. -
1/2 teaspoon baking powder
A bit more leavening power! -
1 teaspoon ground cinnamon
The quintessential fall spice that gives your bread that warm hug feeling. -
1/2 teaspoon ground nutmeg
A pinch of this spice enhances the pumpkin flavor beautifully. -
1/2 teaspoon ground ginger
Adds a subtle kick that balances the sweetness. -
1/4 teaspoon salt
Essential for flavor enhancement! Salt can uplift the sweetness, allowing all the flavors to shine. -
1/2 cup chopped nuts (optional)
Walnuts or pecans are perfect here! They add a nice crunch and nutty flavor, but feel free to skip if you prefer. -
1/4 cup brown sugar (for topping)
A little sprinkle on top will give your loaf a deliciously sweet crust. -
2 tablespoons cold butter (for topping)
This helps create a lovely crumble when mixed with the brown sugar. -
1/4 cup oats (for topping)
For added texture, these oats will crisp up beautifully in the oven.
Step-by-Step Instructions
Ready to create some pumpkin perfection? Let’s dive into the kitchen!
-
Preheat Your Oven
Preheat your oven to 350°F (175°C). This step is crucial to ensure your pumpkin bread bakes evenly. -
Mix the Wet Ingredients
In a large mixing bowl, combine 1 cup of pumpkin puree, 1/2 cup of maple syrup, and 1/2 cup of vegetable oil. Carefully crack the two large eggs into the bowl, and whisk everything together until you have a gorgeous, smooth mixture. Tip: Use a rubber spatula to scrape the sides to ensure nothing is left behind! -
Combine the Dry Ingredients
In another bowl, whisk together 1 1/2 cups of all-purpose flour, 1 teaspoon of baking soda, 1/2 teaspoon of baking powder, 1 teaspoon of ground cinnamon, 1/2 teaspoon of ground nutmeg, 1/2 teaspoon of ground ginger, and 1/4 teaspoon of salt. Mixing the dry ingredients separately first helps distribute the leavening agents evenly. -
Combine Wet and Dry Mixtures
Gently fold the dry ingredients into the wet mixture. Be careful not to overmix—this can lead to dense bread. Just mix until everything is combined, and a few lumps are okay! Chef Hack: Turn your spoon on its side while mixing; this keeps air in the batter and helps your bread rise! -
Toss in the Nuts
If you’re adding chopped nuts, add them now and give a gentle fold to incorporate. Chef Insight: Toasting the nuts beforehand will intensify their flavor, just be sure to let them cool before adding. -
Prepare the Topping
In a small bowl, combine 1/4 cup of brown sugar, 2 tablespoons of cold butter (cut into small cubes), and 1/4 cup of oats. Use your fingertips to mix until it resembles coarse crumbs. -
Pour the Batter into the Pan
Grease a loaf pan (9×5 inches) or line it with parchment paper for easy removal. Pour the batter in, smoothing the top with a spatula. -
Sprinkle the Topping
Spread the topping mixture evenly over the batter. This will create a delightful crunchy finish! -
Bake
Place the loaf pan into the preheated oven and bake for 50-60 minutes, or until a toothpick inserted in the center comes out clean. Chef Trick: If the top browns too quickly, you can tent it with aluminum foil during the last 15 minutes. -
Cool and Enjoy
Once baked to perfection, remove from the oven and let it cool in the pan for about 10 minutes. Then transfer to a wire rack to cool completely. Slice it up, and you’re ready to enjoy!
Serving Suggestions
Slice your pumpkin bread and serve it warm or at room temperature. It’s fantastic on its own but also works beautifully with a dollop of whipped cream, a smear of butter, or even a drizzle of cream cheese frosting for an extra festive touch. Pair it with a hot cup of coffee or tea for the ultimate cozy experience!
Recipe Variations
- Chocolate Chip Pumpkin Bread: Add 1/2 cup of semi-sweet chocolate chips to the batter for a delicious twist.
- Pumpkin Spice Latte Bread: Mix in 1 tablespoon of instant coffee granules for a caffeinated kick.
- Nut-Free Version: Simply omit the nuts for a smooth, kid-friendly treat.
- Gluten-Free Option: Substitute the all-purpose flour with a 1:1 gluten-free baking blend.
- Add Sweet Dried Fruits: Consider folding in a handful of raisins or dried cranberries for added sweetness and texture.
Chef’s Notes
Baking this pumpkin bread always brings a smile to my face. It’s funny how the simplest recipes work out to be the most soothing and comforting. Over the years, I’ve experimented with different spices and toppings, tailoring it to fit delicious surprises. Now, every time I pull a loaf from the oven, it reminds me of being a kid in my grandma’s kitchen, eagerly waiting for that first taste. Each slice is indeed a memory wrapped in flavor, always encouraging me to make new ones along the way.
FAQs and Troubleshooting
-
My pumpkin bread is dense; what did I do wrong?
This can happen if the batter is overmixed, leading to a tough loaf. Mix until combined, but don’t be afraid of a few lumps! -
Why did my bread sink in the middle?
This can occur if the eggs weren’t properly beaten or the oven temperature was too low. Make sure both are up to par! -
How should I store leftover pumpkin bread?
Wrap it tightly in plastic wrap or store it in an airtight container at room temperature for up to 5 days. It also freezes beautifully for up to 3 months! -
Can I use fresh pumpkin?
Absolutely! Just make sure to roast it and puree it until smooth before adding it to the batter.
Nutritional Info
Although pumpkin bread is a treat, it packs some nutritional punch! Each slice provides fiber, vitamins, and that sweet comfort we all crave during the chilly months. Enjoy it mindfully, savoring every bite!
Pumpkin bread is more than food; it’s a seasonal tradition that invites us to embrace autumn’s warmth and generosity. So whip out that mixing bowl, channel your inner baker, and bake up a loaf that will create your own seasonal memories—one delicious slice at a time!
PrintThe Ultimate Pumpkin Bread
A delightful pumpkin bread that captures the essence of fall with warm spices and a cozy aroma.
- Prep Time: 15 minutes
- Cook Time: 60 minutes
- Total Time: 75 minutes
- Yield: 12 servings 1x
- Category: Dessert
- Method: Baking
- Cuisine: American
- Diet: Vegetarian
Ingredients
- 1 cup pumpkin puree
- 1/2 cup maple syrup
- 1/2 cup vegetable oil
- 2 large eggs
- 1 1/2 cups all-purpose flour
- 1 teaspoon baking soda
- 1/2 teaspoon baking powder
- 1 teaspoon ground cinnamon
- 1/2 teaspoon ground nutmeg
- 1/2 teaspoon ground ginger
- 1/4 teaspoon salt
- 1/2 cup chopped nuts (optional)
- 1/4 cup brown sugar (for topping)
- 2 tablespoons cold butter (for topping)
- 1/4 cup oats (for topping)
Instructions
- Preheat your oven to 350°F (175°C).
- Mix the wet ingredients: combine pumpkin puree, maple syrup, vegetable oil, and eggs in a bowl.
- Combine the dry ingredients in another bowl: flour, baking soda, baking powder, cinnamon, nutmeg, ginger, and salt.
- Combine the wet and dry mixtures, mixing gently until just combined.
- Toss in the chopped nuts if using and fold gently.
- Prepare the topping by mixing brown sugar, cold butter, and oats until crumbly.
- Pour the batter into a greased loaf pan.
- Sprinkle the topping evenly over the batter.
- Bake for 50-60 minutes or until a toothpick comes out clean.
- Cool for 10 minutes in the pan, then transfer to a wire rack.
- Enjoy with butter or whipped cream if desired.
Notes
For variations, consider adding chocolate chips, instant coffee, or dried fruits. For gluten-free, replace flour with a gluten-free blend.
Nutrition
- Serving Size: 1 slice
- Calories: 200
- Sugar: 12g
- Sodium: 150mg
- Fat: 8g
- Saturated Fat: 1g
- Unsaturated Fat: 6g
- Trans Fat: 0g
- Carbohydrates: 30g
- Fiber: 2g
- Protein: 3g
- Cholesterol: 40mg
Keywords: pumpkin bread, fall recipes, baking, cozy dessert
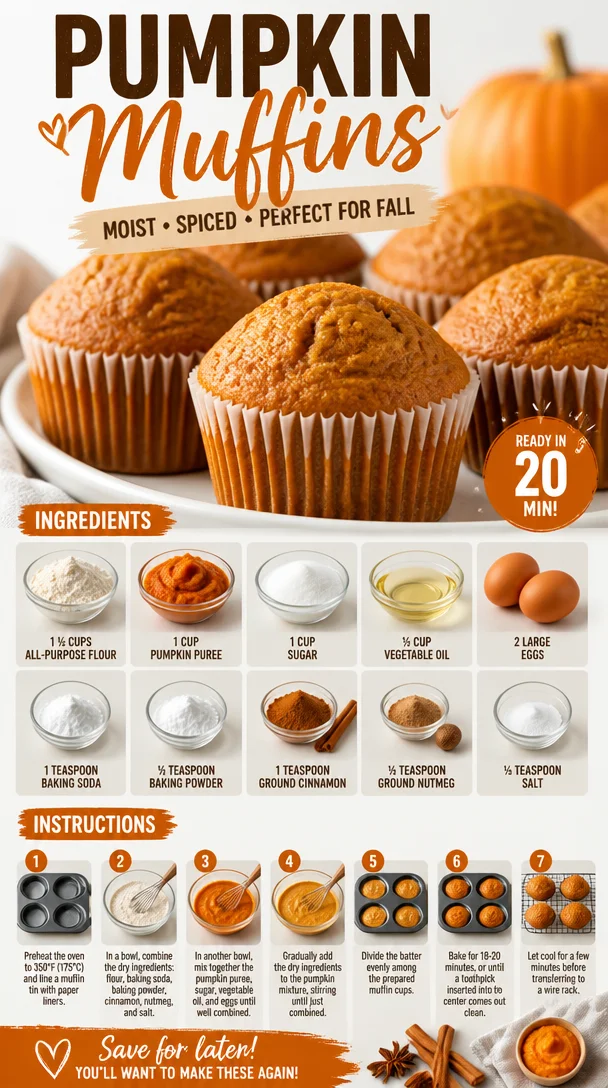
Pumpkin Muffins
The Ultimate Pumpkin Muffins: Warm, Cozy, and Oh-So Delicious!
As the leaves begin to turn and a crisp chill fills the air, my mind inevitably drifts to one of my all-time favorite fall treats: pumpkin muffins. There is just something comforting about the smell of warm spices wafting through the kitchen. It’s like a cozy hug on a cool morning! At Clean Plate Cravings, we love to celebrate seasonal flavors, and pumpkin is at the top of my list.
In my kitchen, pumpkin muffins are more than just a delicious snack; they are a symbol of nostalgia and connection. I remember the first time I baked them with my grandmother in her sunlit kitchen, filled with the rich, comforting aroma of cinnamon and nutmeg. We would sing our favorite tunes while mixing ingredients, and she insisted on using only the freshest pumpkin puree—which, at the time, felt like a top-secret tip I had yet to discover. Whenever I munch on these muffins, I can almost hear her laughter and feel her warmth wrapping around me like a cozy blanket.
Not only are pumpkin muffins a treat for the taste buds, but they also come packed with nutrients. Full of fiber and flavor, they make a perfect breakfast option or afternoon snack, keeping you satisfied and energized throughout the day. So whether it’s a busy morning or a quiet afternoon, I’m excited to share my recipe for these delightful pumpkin muffins, along with a sprinkle of kitchen wisdom gained through the years. Ready? Let’s get baking!
Ingredients You’ll Need
Here’s a simple and straightforward list of ingredients to whip up these pumpkin muffins, along with helpful notes to guide you:
-
1 ½ cups all-purpose flour: This is the backbone of the muffins. For gluten-free options, try using a cup-for-cup gluten-free flour blend.
-
1 cup pumpkin puree: Make sure it’s pure pumpkin, not pumpkin pie filling! You can also substitute with homemade pumpkin puree if you’re feeling adventurous.
-
1 cup sugar: Regular granulated sugar works well; if you’re aiming for less sweetness, you can reduce the quantity or use coconut sugar for a deeper flavor.
-
½ cup vegetable oil: This gives your muffins a moist texture. You can swap it for melted coconut oil or applesauce for a healthier twist.
-
2 large eggs: These bind the ingredients together and add moisture. If you’re looking for a vegan option, you can use flax eggs (1 tablespoon flaxseed meal mixed with 2.5 tablespoons water, let sit for 5 minutes).
-
1 teaspoon baking soda: This will help your muffins rise beautifully. Always check for freshness—baking soda should be active for best results.
-
½ teaspoon baking powder: A little extra leavening to ensure those muffins are light and fluffy.
-
1 teaspoon ground cinnamon: This warm spice brings out the best in pumpkin and is a classic flavor pairing.
-
½ teaspoon ground nutmeg: A touch of nutmeg adds a warm, spicy depth that’s quintessentially fall.
-
¼ teaspoon salt: Salt enhances all the flavors. Don’t skip it!
Step-by-Step Instructions
Ready to transform those ingredients into a batch of delightful pumpkin muffins? Here’s how to do it:
-
Preheat the Oven: Start by preheating your oven to 350°F (175°C). This ensures your muffins will rise properly and bake evenly.
-
Mix Dry Ingredients: In a medium bowl, whisk together the flour, baking soda, baking powder, cinnamon, nutmeg, and salt. This will help ensure the spices and leaveners are evenly distributed throughout the flour.
-
Prepare the Wet Ingredients: In another large mixing bowl, combine the pumpkin puree, sugar, and vegetable oil. Use a whisk to blend everything together until it’s creamy and homogenous. The beauty of this step? You can feel free to sneak a spoonful of that pumpkin goodness—it’s just too tempting!
-
Add in the Eggs: Crack the eggs into the pumpkin mixture and whisk until fully incorporated. You want everything perfectly mixed as it helps create that tender muffin texture.
-
Combine Wet and Dry: Gradually add the dry ingredients into the wet mixture, stirring gently with a spatula or wooden spoon. Be careful not to overmix! You want just to combine until there are no visible dry spots. A few lumps are perfectly fine. This is a key tip to keep those muffins tender!
-
Prepare Your Muffin Tin: Line a muffin tin with paper liners or generously grease it with cooking spray (trust me, you don’t want the muffins to stick!). Scoop the batter evenly into each muffin cup, filling it about ¾ full to allow room for rising.
-
Bake: Pop that muffin tin into your preheated oven and bake for 20–25 minutes, or until a toothpick inserted into the center comes out clean. Your kitchen will smell heavenly! If you have an extra batch, you might even want to rotate the muffin tin halfway through for even baking—but that’s just my little chef hack!
-
Cooling: Once baked, remove the muffins from the oven and let them cool in the pan for about 5 minutes. This allows them to firm up a bit. Then, transfer them to a wire rack to cool completely. (Pro tip: if you can wait long enough, they taste even better once they’ve cooled!)
Serving Suggestions
These pumpkin muffins are fantastic on their own but also pair wonderfully with a dollop of cream cheese spread or a drizzle of maple syrup. You can serve them warm or at room temperature with a cup of coffee or tea. For a beautiful presentation, dust the tops with a sprinkle of powdered sugar or extra cinnamon before serving.
Recipe Variations
Just like the changing seasons, these muffins can be easily adapted to fit your cravings:
-
Chocolate Chip Pumpkin Muffins: Stir in a handful of semi-sweet or dark chocolate chips for a delightful twist.
-
Nutty Cinnamon Crunch: Add a handful of chopped walnuts or pecans to the batter for crunch and flavor.
-
Spiced Up Pumpkin Muffins: Mix in some ginger or allspice for a bolder, spicier muffin.
-
Cranberry-Pumpkin Muffins: Toss in fresh or dried cranberries for a tart contrast to the sweet pumpkin.
Chef’s Notes
Over the years, I’ve played with this recipe—experimenting with different spices, sweetness levels, and add-ins. This recipe has evolved into one of my go-to treats because it’s so versatile and forgiving! One time, I ran out of vegetable oil and used melted butter instead, and I was shocked by how good it turned out—rich and flavorful! Remember, the kitchen is your playground; it’s all about having fun and making these muffins your own.
FAQs and Troubleshooting
1. Why are my muffins dense?
This usually happens from overmixing the batter. Be gentle and mix only until combined!
2. Can I freeze pumpkin muffins?
Absolutely! Allow them to cool completely, then wrap them in foil or freezer bags. They’re perfect for quick snacks or breakfasts later on.
3. How can I tell when my muffins are done?
A toothpick inserted in the center should come out clean or with a few moist crumbs—not wet batter!
4. What can I do if my muffins are too dry?
Next time, check your baking time. Also, adding some applesauce can help retain moisture in future batches.
Nutritional Info (optional)
While the exact nutritional content can vary depending on specific ingredients used, a single pumpkin muffin made from this recipe generally contains:
- Approximate Calories: 210
- Protein: 3g
- Carbohydrates: 30g
- Fat: 9g
- Fiber: 1.5g
Closing Thoughts
Creating these pumpkin muffins is not just about the final product; it’s about enjoying the process, making memories, and savoring the flavors of the season. So whether you’re gathering with friends or enjoying a quiet moment to yourself, these muffins will bring a warm smile to any occasion. I can’t wait to hear how yours turn out! Happy baking, fellow foodies!
PrintUltimate Pumpkin Muffins
Delicious and cozy pumpkin muffins, perfect for fall, packed with warm spices and nutrients.
- Prep Time: 10 minutes
- Cook Time: 25 minutes
- Total Time: 35 minutes
- Yield: 12 servings 1x
- Category: Breakfast
- Method: Baking
- Cuisine: American
- Diet: Vegetarian
Ingredients
- 1 ½ cups all-purpose flour
- 1 cup pumpkin puree
- 1 cup sugar
- ½ cup vegetable oil
- 2 large eggs
- 1 teaspoon baking soda
- ½ teaspoon baking powder
- 1 teaspoon ground cinnamon
- ½ teaspoon ground nutmeg
- ¼ teaspoon salt
Instructions
- Preheat the oven to 350°F (175°C).
- Mix dry ingredients: Whisk together the flour, baking soda, baking powder, cinnamon, nutmeg, and salt.
- Prepare the wet ingredients: In another bowl, combine pumpkin puree, sugar, and vegetable oil.
- Add in the eggs and whisk until fully combined.
- Combine the wet and dry ingredients gently until mixed.
- Prepare your muffin tin by lining it or greasing it.
- Bake the muffins for 20–25 minutes or until a toothpick comes out clean.
- Cooling: Let the muffins cool in the pan for 5 minutes before transferring to a wire rack.
Notes
Serve muffins warm or at room temperature. Great with cream cheese or maple syrup.
Nutrition
- Serving Size: 1 muffin
- Calories: 210
- Sugar: 10g
- Sodium: 200mg
- Fat: 9g
- Saturated Fat: 1g
- Unsaturated Fat: 8g
- Trans Fat: 0g
- Carbohydrates: 30g
- Fiber: 1.5g
- Protein: 3g
- Cholesterol: 30mg
Keywords: pumpkin muffins, fall recipes, cozy baking, seasonal flavors, snacks
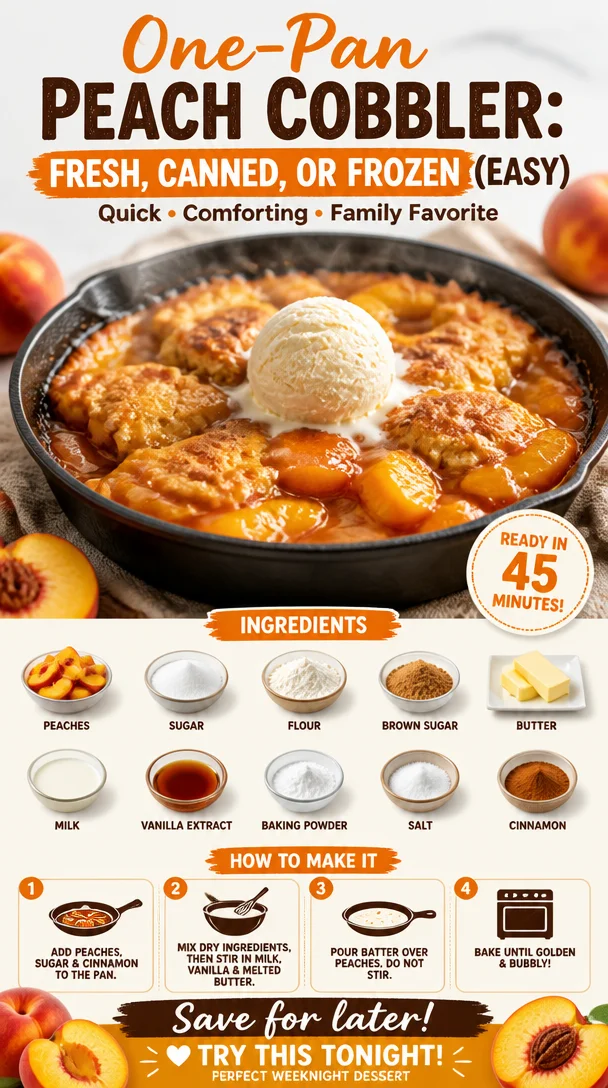
One-Pan Peach Cobbler: Fresh, Canned, or Frozen (Easy)
The Ultimate Homemade Peach Cobbler Recipe: A Sweet Slice of Nostalgia
Ah, peach cobbler. The very mention of it can transport you back to those sunny afternoons of your childhood, where the air was thick with laughter, sweet summer breezes, and the tantalizing aroma of baked peaches wafting through the kitchen. If your mouth is already watering, you’re in good company! Whether you’re using fresh, canned, or frozen peaches, this homemade peach cobbler recipe is a delightful way to embrace that nostalgia while creating a dish that will have everyone swooning.
Now, I can’t emphasize enough how this recipe is not just about throwing some peaches in a dish and slapping a crust on top. Oh no, my friends, this is about crafting a love letter to summer. My journey with peach cobbler started in my grandmother’s kitchen, where she would pull out her old, worn cookbook and remind me that the secret to a perfect cobbler is all about balance—sweetness, warmth, and that irresistible flaky crust that crumbles just right.
Some of my fondest memories are tied to helping her prepare this dish, learning the art of patience as we let those peaches marinate with a sprinkle of sugar, and watching them transform into a bubbling, golden masterpiece in the oven. So, while you’re mixing, baking, and savoring, know that you’re not just whipping up dessert; you’re creating memories, just like I did with my beloved grandma.
And here’s the best part: You can enjoy this peach cobbler no matter the season! Using fresh peaches in summer or those frozen gems straight out of your freezer makes it a year-round staple. Ready to dig into this deliciousness? Let me share the simple steps you need to create your own peach cobbler masterpiece!
Ingredients
-
Peaches (fresh, canned, or frozen): Use about 4 cups for this recipe. Fresh peaches are amazing in summer, but if you have canned or frozen on hand, they work just as well. If using frozen, let them thaw but don’t drain the juices—who doesn’t love a little extra peachy goodness?
-
Granulated sugar: About ¾ cup for sweetening the peaches and enhancing their natural flavors. You can adjust this based on the sweetness of your peaches or swap for coconut sugar for a healthier twist.
-
All-purpose flour: You’ll need 1 cup for the cobbler topping. Gluten-free flour blends can substitute here. Just be sure to check that they have xanthan gum for proper binding!
-
Baking powder: 2 teaspoons is what we’ll need to give our crust a nice rise. Make sure it’s fresh for the best results!
-
Salt: A pinch (about ¼ teaspoon) will enhance the flavors in both the peaches and the topping. It’s magic, I tell you!
-
Milk: ½ cup of milk (dairy or plant-based) will bring everything together in our cobbler batter. Almond or oat milk works beautifully if you’re dairy-free.
-
Butter: ½ cup (1 stick), melted. Butter makes everything better! If you prefer oil, coconut oil is a great alternative, just be sure it’s melted too.
-
Vanilla extract: 1 teaspoon adds that extra layer of flavor. Feel free to get creative with other extracts like almond or even a hint of cinnamon.
Step-by-Step Instructions
-
Preheat your oven: Start by preheating your oven to 375°F (190°C). This allows the peach cobbler to bake evenly and ensures you get that golden-brown crust.
-
Prepare the peaches: In a mixing bowl, toss your prepared peaches with ½ cup of sugar. If you’re using fresh peaches, peel, slice, and dice them. For frozen peaches, just let them thaw until they can be cut into manageable slices. Let this mixture sit while the sugar works its magic to draw out the juices—about 15 minutes is perfect.
-
Make the batter: In another bowl, whisk together the flour, remaining sugar, baking powder, and salt. This dry mix is the base of your topping. Then, gradually whisk in the milk and melted butter (and vanilla extract if you’re using it) until everything is smooth and combined. Don’t overmix; it’s okay if there are a few lumps!
-
Combine fruit and batter: Pour the peach mixture into a greased baking dish (about 9×13 inches works great) and then gently spoon your batter over the top. You want those bubbling juices to peek through the batter without completely mixing.
-
Bake it up: Slide your cobbler into the oven, and bake for about 30-40 minutes, or until the topping is golden brown and a toothpick inserted comes out clean. Keep an eye on it—if the edges start to darken too quickly, you can tent it with foil.
-
Cool and serve: Once it’s out of the oven, let it cool for about 15 minutes before serving. This helps the juices set a bit, but let’s be real—it’s hard to resist digging in right away!
Serving Suggestions
Serve this peach cobbler warm with a generous scoop of vanilla ice cream or a dollop of whipped cream for the ultimate indulgence. If you’re feeling fancy, sprinkle some toasted almonds or pecans on top for a lovely crunch. It’s also delightful with a drizzle of caramel sauce or a sprinkle of cinnamon for extra warmth!
Recipe Variations
-
Berry Peach Cobbler: Mix in some fresh or frozen blueberries or raspberries for a delightful burst of flavor.
-
Spicy Peach Cobbler: Add a teaspoon of cinnamon and a pinch of nutmeg to the peach mixture for a seasonal twist that warms up those cozy evenings.
-
Coconut Peach Cobbler: Substitute half the milk for coconut milk, and sprinkle shredded coconut on top for a tropical vibe.
-
Oat Topping: Swap half of the flour for rolled oats to create a chewy, hearty topping that adds texture and nutrition.
Chef’s Notes
This peach cobbler recipe has seen its fair share of evolution in my kitchen over the years. What started as a classic dish has transformed into a vehicle for creativity. I can’t tell you how many times I’ve mixed fruits or added unexpected spices just to see what would happen! Some experiments turned into instant favorites.
My funniest kitchen story with peach cobbler involves using lavender instead of vanilla once—I thought I was being inventive but ended up with a very floral dessert! It was a polite "no, thank you" from my friends that day. Now I stick with beloved flavors but still keep that spirit of experimentation alive.
FAQs and Troubleshooting
1. My cobbler topping is too dense. What went wrong?
- This could be due to overmixing the batter. Aim for a lumpy but uniform batter—mix just until you combine. Too much mixing can lead to gluten development, making your topping dense.
2. How do I know when it’s done?
- The cobbler is finished when the top is golden brown, and the juices are bubbling around the edges. A toothpick inserted into the center of the topping should come out clean or with a few moist crumbs (not wet batter).
3. Can I make this ahead?
- Yes! You can prepare it a few hours in advance and keep it covered in the fridge before baking. Just add about 5-10 minutes to the baking time if baking straight from the fridge.
4. What if I don’t have any peaches?
- No problem! You can substitute with almost any fruit you like, such as apples, cherries, or even mixed frozen berries. Just adjust the sugar according to the sweetness of the fruit.
Nutritional Info
While peach cobbler is definitely a treat, it can be made a bit healthier without losing any of its deliciousness! Each serving (assuming 9 servings from the above recipe) contains approximately:
- Calories: 250
- Protein: 3g
- Carbohydrates: 38g
- Fat: 10g
- Fiber: 2g
And there you have it—a sweet slice of nostalgia that’s easy to recreate no matter the time of year. So gather up those peaches, call your friends and family, and make some memories with this fabulous peach cobbler! Happy cooking! 🍑✨
PrintUltimate Homemade Peach Cobbler

A delightful and nostalgic peach cobbler recipe, perfect for any season using fresh, canned, or frozen peaches.
- Prep Time: 15 minutes
- Cook Time: 40 minutes
- Total Time: 55 minutes
- Yield: 9 servings 1x
- Category: Dessert
- Method: Baking
- Cuisine: American
- Diet: Vegetarian
Ingredients
- 4 cups peaches (fresh, canned, or frozen)
- ¾ cup granulated sugar
- 1 cup all-purpose flour
- 2 teaspoons baking powder
- ¼ teaspoon salt
- ½ cup milk (dairy or plant-based)
- ½ cup butter, melted
- 1 teaspoon vanilla extract
Instructions
- Preheat your oven to 375°F (190°C).
- Prepare the peaches by tossing them with ½ cup of sugar in a mixing bowl.
- Make the batter by whisking together flour, remaining sugar, baking powder, and salt, then gradually whisk in milk and melted butter.
- Combine the peach mixture with the batter by pouring the peaches into a greased baking dish and spooning the batter over the top.
- Bake for about 30-40 minutes or until the topping is golden brown.
- Cool for about 15 minutes before serving.
Notes
Serve warm with vanilla ice cream or whipped cream for the ultimate treat. Feel free to mix in other fruits or spices for variations.
Nutrition
- Serving Size: 1 serving
- Calories: 250
- Sugar: 10g
- Sodium: 150mg
- Fat: 10g
- Saturated Fat: 6g
- Unsaturated Fat: 3g
- Trans Fat: 0g
- Carbohydrates: 38g
- Fiber: 2g
- Protein: 3g
- Cholesterol: 30mg
Keywords: peach cobbler, dessert, summer recipe, baked dessert, nostalgic dessert