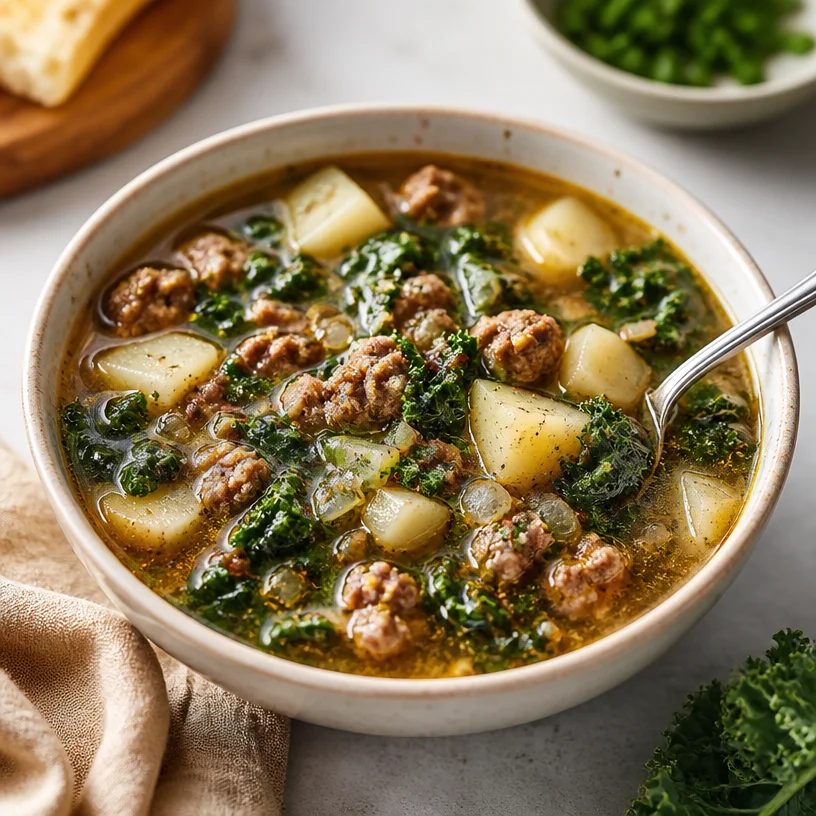
One-Pot Sausage Kale Soup: 30-Minute Weeknight Comfort
Warm Up with Sausage Kale Soup: A Cozy Classic
As the crisp autumn air settles in and the leaves begin to crispily crunch beneath our feet, there’s something undeniably comforting about snuggling up with a steaming bowl of soup. Now, if you’re like me—a passionate foodie who believes in the goodness of fresh ingredients packed into a bowl—then you’ve probably dived headfirst into the world of soups. This Sausage Kale Soup is one of those recipes that warms not just your body but your soul too.
Picture this: it’s a chilly Sunday afternoon, and my kitchen has transformed into a cozy haven. I can hear the soft sizzle of Italian sausage browning in the pan, the aromatic scent wafting through the air, just inviting me to take that first taste. This dish isn’t just food; it’s a heartfelt embrace on a plate. It’s a simple and hearty soup that brings friends and family together, and today I can’t wait to pass it along to you!
Sausage Kale Soup is vibrant, nourishing, and surprisingly easy to make—a perfect combination for busy weeknights or lazy Sundays. Whether you’re looking to whip up something quick after a long day or you want to impress guests at a dinner party, this soup has got your back. You won’t be standing over the stove for hours; instead, you’ll find yourself reveling in the aroma of home-cooked goodness. Plus, with its wholesome ingredients, it’s a dish that nourishes your body and satisfies those cravings for something a little more indulgent without sacrificing health.
So grab your apron and let’s dive into this delicious journey!
A Soup that Celebrates Memories
Now, let me take you back to a cozy kitchen in my grandmother’s house—the heart of our family gatherings. Whenever the leaves began to turn and the weather dipped, her Sausage Kale Soup simmered on the stove. I remember bursting through the door after a day of climbing trees and playing outside, greeted by that unmistakable aroma. It was a combination of earthy kale and savory sausage mingling together, and it always seemed to hug me tighter than any sweater.
Friends and family would gather around the dining table, bowls steaming in hand, laughter drifting amidst the bites of warm, hearty soup. Grandma had this unique way of making everyone feel welcomed, filling each bowl not just with soup but with love. It was a dish that brought us together, creating lasting memories over simple ingredients. Today, I find joy in recreating that soup and sharing it with you all, hoping it brings as much warmth and comfort to your home as it did to mine.
Ingredients
Here’s what you’ll need to whip up a delicious pot of Sausage Kale Soup, along with some handy tips:
-
Italian Sausage
The star of this soup! You can use either sweet or spicy, depending on your preference. If you’re looking for a lighter option, feel free to swap it out for chicken or turkey sausage. -
Kale
This leafy green is a stellar source of vitamins. Lacinato kale is my go-to for this recipe due to its tender texture, but you can also use curly kale or even spinach for a milder flavor. -
Potatoes
They’re essential to create a hearty base. I usually choose Yukon gold or red potatoes since they hold their shape well. If you’re watching carbs, try cauliflower for a lighter alternative. -
Broth
Chicken or vegetable broth works perfectly here. Homemade broth is always best for flavor, but if you’re short on time, store-bought does the trick. Go for low-sodium options to control the saltiness. -
Onion
A classic flavor base—don’t skip this one! Adding diced onion helps build layers of taste in the soup. Shallots are a great substitute if you want a milder flavor. -
Garlic
A few cloves of minced garlic elevate this soup with irresistible flavor. Feel free to add more if you’re a garlic lover! -
Olive Oil
To sauté the onions. If you’re looking for a different flavor, try using avocado oil or even butter for a richer taste. -
Spices
A pinch of red pepper flakes brings warmth and depth. You can adjust the amount depending on how spicy you like it! -
Salt and Pepper
Essential seasonings to tie everything together. Freshly cracked pepper adds a lovely zing.
Cooking Tips
Don’t hesitate to get creative with these ingredients! For example, you can mix in other vegetables like carrots or celery, or even add some beans for extra protein.
Step-by-Step Instructions
Ready for a cozy cooking session? Gather your ingredients, and let’s get started!
-
Preparation Time
Begin by prepping your vegetables. Dice the onion, mince the garlic, and chop the potatoes into bite-sized pieces. Wash the kale thoroughly and tear it into smaller pieces. This will make for a smoother texture in your soup. -
Sauté the Base
In a large pot, heat 2 tablespoons of olive oil over medium heat. When it’s hot, toss the diced onion in, seasoning it with a pinch of salt. Cook until they become translucent and fragrant, around 3-4 minutes. Pro tip: Adding a pinch of salt at this stage helps the onion release its moisture, making it sweeter and more flavorful. -
Add Garlic and Sausage
Add in the minced garlic and stir for about 30 seconds; you want to infuse that savory base with the garlicky goodness. Then, throw in the Italian sausage, breaking it apart with a wooden spoon. Cook until it’s brown and fully cooked; this should take about 5-7 minutes. The golden-brown bits sticking to the bottom of the pot? That’s flavor gold! Just scrape them up while stirring. -
Put in the Potatoes
Next, add your chopped potatoes to the pot, stirring well. Let them sit for a couple of minutes to absorb all the flavors, then pour in your broth. Make sure the liquid covers all the ingredients. At this point, your kitchen should start smelling incredible! -
Simmer Away
Bring the soup to a gentle boil, and then reduce the heat and let it simmer for about 10-15 minutes, or until the potatoes are tender. You can cover it with a lid to speed up the cooking process and maintain the warmth. Keep an eye on it, ensuring it doesn’t boil over! -
The Kale Finishing Touch
As soon as the potatoes are fork-tender, stir in the kale and let it wilt for about 3-4 minutes. This is where the soup gets that vibrant green hue. If you love your greens, you can definitely add more kale than what the recipe suggests! -
Season to Perfection
Finally, add your salt, pepper, and red pepper flakes to taste. Give it a good stir, and if you’re like me and can’t get enough garlic flavor, toss in an extra minced clove right at the end. It’s your soup, after all!
And voila! Your Sausage Kale Soup is ready to serve.
Serving Suggestions
Ladle the soup into warm bowls, and for an extra touch of love, add a sprinkle of freshly chopped parsley or grated Parmesan. Serve with a side of crusty bread for dipping and mopping up all that delicious broth.
Recipe Variations
Feeling adventurous? Try these fun twists on the classic Sausage Kale Soup:
-
Add Beans
For extra protein and creaminess, mix in a can of white beans like cannellini or northern beans. -
Spicy Kick
Swap out the Italian sausage for spicy Italian sausage or add diced jalapeños for an extra kick! -
Creamy Version
At the end of cooking, add a splash of heavy cream or coconut milk for a richer consistency. -
Herb Infusion
Try adding fresh herbs like thyme or dill during cooking for a lovely aromatic touch. -
Veggie Delight
Load the soup with more vegetables—zucchini, carrots, or bell peppers make great additions!
Chef’s Notes
Looking back, this recipe has taken on a life of its own. There were times when I experimented with the proportions, discovering that a little too much garlic turns out to be just… right. And oh, the stories I could tell of kitchen mishaps! Like the time I accidentally dumped in an entire jar of red pepper flakes instead of just a pinch! (But hey, we embraced the heat!)
As I share this soup with friends and family, I love to ask everyone to give it their own flair—suddenly everyone’s becoming a chef. That’s the magic of food; it brings us all together and makes each moment a little more special.
FAQs and Troubleshooting
Q: Can I make this in a slow cooker?
Absolutely! Brown the sausage and sauté the garlic and onions first, then transfer to the slow cooker with the rest of the ingredients. Cook on low for 6 hours or on high for 3-4 hours.
Q: What if I don’t have any kale?
No worries! Spinach is a fantastic substitute. Just keep in mind that spinach wilts much quicker, so add it in during the final few minutes of cooking.
Q: How long does this soup last in the fridge?
Stored in an airtight container, this soup should last about 3-4 days in the fridge. Just remember to reheat it slowly to avoid overcooking the kale.
Q: Can I freeze this soup?
Yes! Let it cool completely, then freeze it in individual portions. It should be good for about 3 months. Just thaw and reheat gently when you’re ready to enjoy.
Nutritional Info
Each serving of Sausage Kale Soup is packed with nutrients. It contains protein from the sausage, fiber from the kale and potatoes, and ample vitamins that will keep you glowing from within.
So there you have it, my friends! This Sausage Kale Soup is not just a meal; it’s a whole experience. I hope you find joy in each spoonful, just as I have over the years. Enjoy cooking, and most importantly, enjoy sharing this dish with those you love! Dive in, and let’s keep it fresh, simple, and seriously delicious!
PrintSausage Kale Soup

A cozy and hearty soup that combines Italian sausage and nutritious kale, perfect for chilly days.
- Prep Time: 15 minutes
- Cook Time: 30 minutes
- Total Time: 45 minutes
- Yield: 4 servings 1x
- Category: Soup
- Method: Cooking
- Cuisine: Italian
- Diet: Paleo
Ingredients
- 1 pound Italian sausage
- 4 cups Lacinato kale, chopped
- 2–3 Yukon gold or red potatoes, chopped
- 6 cups chicken or vegetable broth
- 1 onion, diced
- 3 cloves garlic, minced
- 2 tablespoons olive oil
- 1 teaspoon red pepper flakes
- Salt and pepper to taste
Instructions
- Begin by prepping your vegetables: dice the onion, mince the garlic, and chop the potatoes.
- In a large pot, heat the olive oil over medium heat. Add the diced onion and season with salt; cook until translucent.
- Add the minced garlic and sauté for 30 seconds before adding the Italian sausage, breaking it apart and cooking until browned.
- Next, add the chopped potatoes and stir to combine, then pour in the broth.
- Bring the soup to a gentle boil, then reduce heat and let it simmer until the potatoes are tender.
- Stir in the kale and let it wilt for 3-4 minutes.
- Finally, season to taste with salt, pepper, and red pepper flakes.
Notes
Serve with a sprinkle of freshly chopped parsley or grated Parmesan, along with crusty bread for dipping.
Nutrition
- Serving Size: 1 bowl
- Calories: 400
- Sugar: 3g
- Sodium: 800mg
- Fat: 20g
- Saturated Fat: 7g
- Unsaturated Fat: 10g
- Trans Fat: 0g
- Carbohydrates: 35g
- Fiber: 5g
- Protein: 20g
- Cholesterol: 50mg
Keywords: soup, kale, sausage, cozy, healthy

French Onion Grilled Cheese
French Onion Grilled Cheese: A Deliciously Comforting Twist on a Classic
Welcome back, food lovers! Today, we’re diving into one of my absolute favorite comfort foods: the French Onion Grilled Cheese. Now, I know what you might be thinking. How can grilled cheese get any better than it already is? But trust me on this one—this dish combines the gooey, cheesy goodness we all know and love with the rich, savory flavors of French onion soup. It’s a nostalgic flavor explosion that will warm your heart and delight your taste buds!
Picture it: a chilly evening, the first leaves of fall starting to turn, and the scent of buttery onions caramelizing in the pan filling your kitchen. This grilled cheese isn’t just a sandwich; it’s an experience, a memory in the making—one you’ll want to share with friends and family. Whether you’re cozying up at home or impressing guests, this recipe is here to take your grilled cheese game to the next level. So grab your apron, and let’s get cooking!
A Nostalgic Kitchen Memory
Growing up, my family had a tradition of weekly “grilled cheese night.” We would gather around the kitchen table, chatting and laughing as my mom created endless variations of our cheesy favorite. Each week, she’d add a surprise ingredient—a slice of tomato here, a sprinkle of chili flakes there—but nothing ever quite compared to the classic combination of crispy bread and melted cheese.
One evening, I remember her experimenting with caramelized onions. The moment my mom lifted the lid off the pot, a wave of sweet, savory aroma filled the air. She layered those golden, caramelized onions generously between buttery slices of toasted bread, and I was instantly hooked. That first bite was pure bliss—the crunch of the toast giving way to the gooey cheese and sweet onions was a moment I’ll never forget. It brought our family together in the best way, and that’s the essence I want to share with you today.
Ingredients
To whip up this delightful French Onion Grilled Cheese, you’ll need the following ingredients:
- Bread: Use a crusty sourdough, a robust whole grain, or even a classic white bread. Sourdough has a lovely tang that complements the savory onions beautifully. If you’re gluten-free, feel free to substitute with your favorite gluten-free bread!
- Onions: Sweet onions work best here—the natural sugars in onions will caramelize beautifully when cooked. You can also use yellow onions if that’s what you have on hand. Experimenting with red onions offers a slightly different flavor profile.
- Gruyère cheese: The melting capacity and nutty flavor of Gruyère is unparalleled. If you can’t find it or want to mix it up, try Emmental cheese for a similar taste, or even a sharp cheddar for an extra kick.
- Butter: You can’t make a great grilled cheese without good butter! It adds richness and helps to create that perfect, crispy crust. If you want to make it dairy-free, opt for vegan butter or even avocado oil for grilling.
Step-by-Step Instructions
Now that we have our ingredients ready, let’s get cooking! Follow these detailed steps to make your French Onion Grilled Cheese:
-
Caramelize the Onions:
- Heat a tablespoon of butter in a medium skillet over medium-low heat. Add 2-3 sliced onions and a pinch of salt.
- Keep it low and slow, allowing those onions to soften and caramelize for about 20-30 minutes, stirring occasionally.
- Chef tip: If your onions start to stick, add a splash of water or broth to help them along—don’t rush this step; it’s crucial for developing that rich flavor!
-
Prepare Your Bread and Cheese:
- While your onions are caramelizing, prepare the bread by spreading a thin layer of butter on one side of each slice.
- On the unbuttered side, layer on a generous mound of Gruyère cheese—don’t hold back here; you want gooeyness!
-
Layer the Good Stuff:
- Once your onions are beautifully caramelized and translucent, evenly distribute them on top of the cheese on one slice of bread, then top with a bit more cheese for extra gooeyness before placing the second slice of bread on top, buttered side out.
-
Heat the Skillet:
- Wipe the skillet clean, then heat it over medium heat. Place the sandwich in the skillet and cook for about 4-5 minutes until golden brown and crispy on one side.
- Chef hack: Use a spatula to press down on the sandwich slightly while it cooks to ensure even browning.
-
Flip and Finish:
- Carefully flip the sandwich and repeat. Once both sides are golden and the cheese is melty, remove it from the skillet and let it sit for a minute before slicing. Trust me; the wait will be worth it!
Serving Suggestions
To plate your French Onion Grilled Cheese, slice it diagonally for that classic presentation and serve on a rustic wooden board or a colorful plate. Pair it with a bowl of warm, brothy French onion soup for the ultimate flavor marriage and a sprinkle of fresh herbs like thyme or parsley for a pop of color!
Recipe Variations
- Herbed Capital: Add dried herbs like thyme or rosemary to the butter before spreading it on the bread for an aromatic twist.
- Bacon Bliss: Layer crispy bacon in between the cheese and onions for an added smokiness that takes this sandwich to the next level of indulgence.
- Vegetarian Delight: Swap out the bread for a veggie-based option like portobello mushrooms for a gluten-free, low-carb variation.
- Spicy Kick: Incorporate some sautéed jalapeños or a smear of spicy mustard to elevate your grilled cheese with some heat!
Chef’s Notes
Ah, the glorious evolution of the grilled cheese! This recipe came about as a way to merge my two favorite comfort foods: grilled cheese and French onion soup. Over the years, I’ve experimented with different cheeses, bread types, and even roasted garlic, and I can confidently say it’s a symphony of flavors that reminds me that cooking is a journey of exploration. Always remember that cooking is flexible—tweak this recipe until it’s your own masterpiece!
FAQs and Troubleshooting
-
What if my cheese doesn’t melt properly?
- Make sure your heat isn’t too high! Lower heat allows the bread to toast perfectly while giving the cheese time to melt. Also, if your cheese is too cold, let it sit out for a few minutes before using.
-
Can I make this in advance?
- I recommend enjoying it fresh, but you can prepare the caramelized onions ahead of time. Store them in the fridge for up to a week, and you’ll have a quick assembly ready to go!
-
What if my sandwich is too greasy?
- If your sandwich is too oily after cooking, try using less butter next time or wiping the pan excess grease before adding the sandwich.
-
How can I make this dairy-free?
- Opt for a dairy-free cheese and vegan butter for this recipe, ensuring you still get that meltiness without any dairy products!
Nutritional Info
This information can vary based on the exact ingredients used, but here’s a rough estimate for one sandwich:
- Calories: 350-400
- Protein: 15g
- Carbs: 30g
- Fat: 22g
Conclusion
There you have it—your ultimate guide to crafting a mouthwatering French Onion Grilled Cheese! Remember, cooking is all about joy, deliciousness, and the memories you build around the table. Drop me a comment below and let me know your thoughts, or share your own variations! I’d love to hear how this recipe becomes part of your culinary story. Happy cooking, foodies!
PrintFrench Onion Grilled Cheese

A deliciously comforting twist on a classic grilled cheese with rich, savory French onion flavors.
- Prep Time: 10 minutes
- Cook Time: 30 minutes
- Total Time: 40 minutes
- Yield: 1 serving 1x
- Category: Main Course
- Method: Grilling
- Cuisine: French
- Diet: Vegetarian
Ingredients
- Crusty sourdough or whole grain bread
- 2–3 sweet onions
- Gruyère cheese
- Butter
Instructions
- Heat a tablespoon of butter in a medium skillet over medium-low heat. Add the sliced onions and a pinch of salt.
- Cook for about 20-30 minutes, stirring occasionally, until onions are caramelized.
- Spread butter on one side of each slice of bread.
- Layer Gruyère cheese on the unbuttered side of one slice.
- Distribute caramelized onions on top of the cheese, then add more cheese before topping with the second slice of bread, buttered side out.
- Heat the skillet over medium heat and cook the sandwich for about 4-5 minutes until golden brown on one side.
- Flip the sandwich and repeat until both sides are golden and the cheese is melted.
- Let sit for a minute before slicing and serve.
Notes
Pair your grilled cheese with a bowl of warm French onion soup for a complete experience.
Nutrition
- Serving Size: 1 sandwich
- Calories: 375
- Sugar: 6g
- Sodium: 500mg
- Fat: 24g
- Saturated Fat: 12g
- Unsaturated Fat: 8g
- Trans Fat: 0g
- Carbohydrates: 40g
- Fiber: 2g
- Protein: 15g
- Cholesterol: 50mg
Keywords: grilled cheese, French onion, comfort food, sandwich
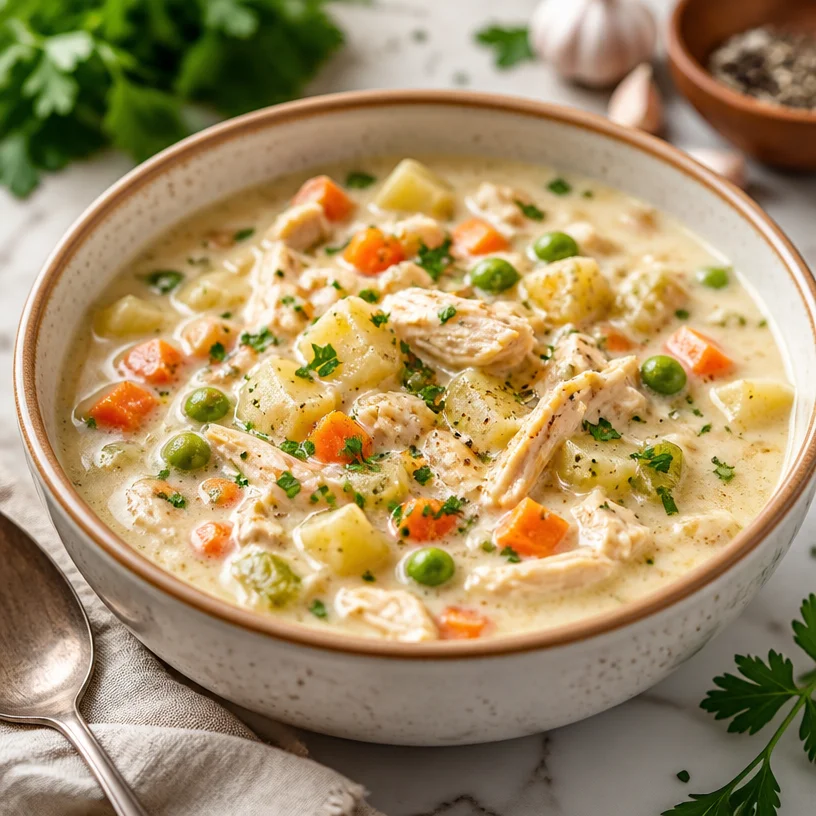
One-Pot Chicken Pot Pie Soup: Creamy Weeknight Comfort
Cozy Up with Chicken Pot Pie Soup: A Heartwarming Dish
Welcome back, foodies! Today, we’re diving into a bowlful of nostalgia and comfort with a delightful Chicken Pot Pie Soup that will warm your heart and satisfy your cravings. It’s creamy, hearty, and bursting with flavors that take you straight to your happy place. This soup is like a hug in a bowl and is perfect for those chilly evenings when you want something nourishing yet incredibly satisfying.
So grab your apron, and let’s cook up something that not only fills your belly but also brings a smile to your face. As always, I assure you it won’t be complicated. We’re keeping it real, fresh, and absolutely delicious!
A Bite of Nostalgia
One of my fondest culinary memories dates back to my childhood kitchen, where every Sunday was a cooking adventure. My mom would whip up her famous chicken pot pie, its flaky crust golden and inviting. The aroma of her savory filling—chicken mingling with vegetables, spices, and that rich, creamy base—would fill our home, making it impossible to resist sneaking spoonfuls before dinner.
Fast forward to today, and while I adore the original pie, I wanted to give it a modern twist with this soup version. It retains that same comforting essence but with the ease of a bowlful of goodness that’s perfect for today’s busy lives. Plus, there’s no fussing with pie crust; just hearty goodness that fills you from the inside out.
Ingredients You’ll Need
Here’s what you’ll need to make your Chicken Pot Pie Soup:
-
2 cups cooked chicken, shredded
Use rotisserie chicken for a quick start, or poach some chicken breasts in chicken broth until cooked—super juicy and flavorful! -
4 cups chicken broth
Homemade is always ideal, but store-bought works just as well. Look for low-sodium varieties to control the saltiness of your soup. -
2 cups potatoes, diced
Yukon Gold or red potatoes hold their shape well and add creaminess. For a lighter option, try using cauliflower instead! -
1 cup carrots, diced
Sweet and colorful, they add texture. Substitute with parsnips for an earthier taste. -
1 cup celery, diced
Adds a crunch and depth of flavor. You can swap it out for leeks if you want a milder, onion-like flavor. -
1 cup green peas
Frozen peas are perfect and easy! Fresh peas can also be used when in season. -
1 onion, chopped
A staple that adds sweetness and depth. Try shallots for a more delicate flavor. -
3 cloves garlic, minced
Fresh minced garlic enhances the savory profile. Garlic powder can be used, but fresh is always best! -
1 cup heavy cream
This gives the soup its rich, creamy texture. For a lighter version, use half-and-half or coconut milk for a dairy-free option. -
2 tablespoons olive oil
To sauté your veggies! Feel free to use butter for an even richer flavor. -
1 teaspoon dried thyme
A classic herb that complements the dish beautifully. Fresh thyme is always a great substitution! -
Salt and pepper to taste
Essential for bringing out all the flavors. Always season as you go for the best results. -
Fresh parsley for garnish
Brightens up the dish and adds a pop of color. Chives or dill also work nicely here.
Step-by-Step Instructions
Let’s bring everything together for this soul-warming soup!
-
Sauté the Veggies
In a large pot, heat the olive oil over medium heat. Add the chopped onions and sauté until they’re translucent, about 3-4 minutes. There’s something magical about the smell of onions hitting the pan—it’s the fragrance of home! Just like my mom’s kitchen filled with comforting scents. -
Add Your Garlic
Stir in your minced garlic and cook for an additional minute. This step is crucial! You want to release all that garlicky goodness without letting it burn. -
Stir in the Veggies
Toss in your diced carrots, celery, and potatoes. Give everything a good stir and let it cook for about 5-7 minutes. This allows the veggies to soften and enhances their flavors. The colors alone will brighten your day! -
Pour in the Broth
Now, pour in the chicken broth and bring everything to a simmer. This is where the magic starts! As it bubbles away, the broth will absorb all those lovely flavors. -
Add Chicken and Peas
After about 15 minutes, when the potatoes are fork-tender, stir in your shredded chicken and green peas. Allow it to simmer for an additional few minutes until everything is well combined and heated through. -
Pour in the Cream
Finally, add the heavy cream and dried thyme. Stir gently to combine, and let it simmer for an additional 5 minutes. This will thicken up the soup and make it ultra-creamy. Taste it—add salt and pepper as needed. -
Garnish and Serve
Ladle the soup into bowls and garnish with freshly chopped parsley. Enjoy the well-deserved culinary moment!
Serving Suggestions
Serving up this Chicken Pot Pie Soup is simple yet satisfying. I like to dig out my favorite rustic bowls, ladle in a generous portion, and finish with a sprinkle of fresh parsley. Serve it alongside some crusty bread or a side salad to balance things out. Pair it with a glass of white wine or your favorite sparkling water for a cozy dinner experience!
Recipe Variations
Get creative with your Chicken Pot Pie Soup! Here are some delicious variations to consider:
- Herb Infusion: Add fresh herbs like rosemary or dill for an exciting flavor twist.
- Spice it Up: Add a pinch of red pepper flakes for a hint of heat.
- Vegetarian Option: Replace chicken with hearty mushrooms or chickpeas for a fulfilling meatless version.
- Dumplings Delight: Top the soup with biscuit or dumpling dough and bake for a delightful twist on traditional pot pie.
- Slow Cooker Magic: Prepare the soup in a slow cooker for an even easier option—just toss everything in, and let it cook on low for 6-8 hours.
Chef’s Notes
This Chicken Pot Pie Soup has come a long way since that inspiring moment in my childhood kitchen! I’ve played with textures and flavors over the years, always striving to keep it comforting and nourishing. The best part? It’s fridge-friendly! I often make a big pot and enjoy it for days. Just be mindful that it thickens as it sits; a splash of broth or cream during reheating works wonders.
And if you ever find yourself with a little leftover, guess what? A spoonful of homemade biscuit dough placed on top can turn your soup into a pot pie-style dish that is just as cozy and comforting!
FAQs and Troubleshooting
1. Can I make this soup gluten-free?
Definitely! Just ensure you use gluten-free chicken broth, and you’re good to go. The recipe is naturally gluten-free as it stands.
2. What can I do if my soup is too thick?
Simply stir in some additional broth or water, a splash at a time until it reaches your desired consistency.
3. How can I make this dish more filling?
For a heartier meal, add some cooked rice or noodles to the soup. Quinoa is also a fantastic, protein-packed option.
4. Can I freeze Chicken Pot Pie Soup?
Yes! This soup freezes beautifully. Just cool it completely before transferring it to airtight containers, and it should last up to three months in the freezer. Remember to leave a little space at the top of the container, as it will expand when frozen.
Nutritional Info
For those interested in the nutritious side of things, each serving provides a wholesome balance of protein, healthy fats, and a variety of vitamins from the veggies. It’s the perfect meal to refuel after a busy day!
So there you have it, friends! A classic Chicken Pot Pie Soup that’s cozy, creamy, and bursting with flavor, just like my mom’s. I hope you whip up a batch soon and enjoy not only the deliciousness but the memories it brings. Happy cooking!
PrintChicken Pot Pie Soup

A creamy and hearty chicken pot pie soup that warms your heart and satisfies your cravings, perfect for chilly evenings.
- Prep Time: 10 minutes
- Cook Time: 30 minutes
- Total Time: 40 minutes
- Yield: 4 servings 1x
- Category: Main Course
- Method: Stovetop
- Cuisine: American
- Diet: None
Ingredients
- 2 cups cooked chicken, shredded
- 4 cups chicken broth
- 2 cups potatoes, diced
- 1 cup carrots, diced
- 1 cup celery, diced
- 1 cup green peas
- 1 onion, chopped
- 3 cloves garlic, minced
- 1 cup heavy cream
- 2 tablespoons olive oil
- 1 teaspoon dried thyme
- Salt and pepper to taste
- Fresh parsley for garnish
Instructions
- Sauté the Veggies: In a large pot, heat the olive oil over medium heat. Add the chopped onions and sauté until they’re translucent, about 3-4 minutes.
- Add Your Garlic: Stir in your minced garlic and cook for an additional minute.
- Stir in the Veggies: Toss in your diced carrots, celery, and potatoes. Give everything a good stir and let it cook for about 5-7 minutes.
- Pour in the Broth: Pour in the chicken broth and bring everything to a simmer.
- Add Chicken and Peas: After about 15 minutes, stir in your shredded chicken and green peas.
- Pour in the Cream: Finally, add the heavy cream and dried thyme. Stir gently to combine.
- Garnish and Serve: Ladle the soup into bowls and garnish with freshly chopped parsley.
Notes
This soup thickens as it sits; add a splash of broth or cream during reheating. Freezes well for up to three months.
Nutrition
- Serving Size: 1 serving
- Calories: 400
- Sugar: 6g
- Sodium: 600mg
- Fat: 20g
- Saturated Fat: 10g
- Unsaturated Fat: 8g
- Trans Fat: 0g
- Carbohydrates: 30g
- Fiber: 4g
- Protein: 20g
- Cholesterol: 60mg
Keywords: chicken pot pie, soup, comfort food, creamy soup, cozy recipe

English Muffins
Welcome to Homemade English Muffins: A Culinary Adventure
Nothing quite matches the satisfaction of biting into a warm, toasty English muffin. The satisfying crunch on the outside gives way to a soft, pillowy interior with those signature nooks and crannies just waiting to be filled with butter, jam, or your favorite spread. Welcome back to Clean Plate Cravings, everyone! Today, we’re diving into a recipe that’s close to my heart—homemade English muffins. You may have seen them in the bakery aisle, but believe me when I say that making them from scratch is a rewarding experience that’s both fun and delicious.
Now, before you shrug off making English muffins as something only a fancy baker can do, let me assure you: this recipe is as approachable as it gets! With a handful of simple ingredients and a little love, you can whip up fluffy, mouthwatering muffins that will make your breakfast game soar! As we embark on this culinary journey together, I can’t wait to share a personal story, detailed instructions, and helpful tips to ensure your muffin adventure is a resounding success. Grab your apron and let’s get started!
A Slice of Nostalgia
Growing up, Saturday mornings in my house always came with a delicious aroma wafting through the air. My mother didn’t just reserve the weekend for pancakes or waffles; she took pride in crafting her own English muffins. I remember waking up to the sound of sizzling butter in a pan, the joy of watching her flip those golden rounds, and the magic that happened as she split them open, revealing the fluffy insides that were just perfect for slathering with creamy butter and homemade strawberry jam.
It wasn’t just about the muffins; those mornings were a ritual we shared—the kind where laughter, scents, and good food intertwined, creating a family bond stronger than any recipe. Now, as I stand in my kitchen, proudly carrying on this tradition, I wish to pass on that love and those memories to you. Making these English muffins isn’t just about the food; it’s about creating moments that you can savor and share with your loved ones!
Ingredients
Here’s what you’ll need for these delightful English muffins:
-
4 cups all-purpose flour
The backbone of our muffins, all-purpose flour provides the right texture and structure. You can substitute it with whole wheat flour, but keep in mind the texture may be denser and nuttier. -
2 tsp active dry yeast
This little powerhouse ferments and makes your muffins rise! If you have instant yeast, you can use that, but there’s no need to activate it in warm water; just mix it into the flour. -
1 cup whole milk (warm, 105-115 degrees)
Warm milk contributes moisture and flavor to our muffins. If you’re dairy-free, feel free to use almond or oat milk, just ensure it’s warm! -
1/2 cup water (warm, 105-115 degrees)
This will help keep the dough well-hydrated. Alternatively, you can replace some of the water with more milk to amp up the creaminess! -
2 tbsp shortening (melted)
This helps keep the muffins soft. If you prefer a more natural fat source, use oil or melted coconut oil instead. -
2 tbsp butter (melted)
Who doesn’t love butter? It adds flavor and richness to the muffins. For a dairy-free version, stick with the coconut oil swap. -
1 tsp salt
Elevating all the flavors! Kosher salt works fine if that’s what you have. -
1 tbsp sugar
Just a touch of sweetness to help balance the flavors and feed the yeast. You can also use honey or maple syrup for a different twist. -
2 tbsp cornmeal
This is for sprinkling on the baking sheet to prevent sticking, but it also adds a delightful texture. If you don’t have cornmeal, semolina flour works wonderfully, too.
Step-by-Step Instructions
Let’s roll up those sleeves and get cooking! Here’s how to make perfectly fluffy English muffins:
-
Activate the yeast: In a small bowl, dissolve the active dry yeast and sugar in warm water. Let it sit for about 5 to 10 minutes until it becomes frothy. This step ensures your yeast is alive and ready to work its magic.
-
Mix the wet ingredients: In a large mixing bowl, combine the warm milk, melted shortening, and melted butter. Add the frothy yeast mixture. Give it a gentle stir to mingle all those delicious flavors.
-
Combine the dry ingredients: In another bowl, whisk together the flour and salt. This will ensure the salt doesn’t directly touch the yeast before they interact positively.
-
Create the dough: Gradually add the dry ingredients to the wet mixture. Use a wooden spoon or spatula to bring it together until a shaggy dough forms. It’s perfectly okay if it looks a little rough at this point; it will come together beautifully!
-
Knead the dough: Transfer the dough to a floured surface and knead for about 8 to 10 minutes until it’s smooth and elastic. Don’t be afraid to put some muscle into it! (Chef hack: If the dough sticks to your hands, a little sprinkle of flour can help!)
-
First rise: Place your kneaded dough in a greased bowl, cover it with a clean kitchen towel, and let it rise in a warm place for about an hour, or until it has doubled in size. This is where the magic happens, so let that yeast work!
-
Shape the muffins: Once your dough has risen, punch it down gently and turn it out onto a floured surface. Roll it out to about 1-inch thickness and use a 3-inch round cutter to cut out your muffins. If you don’t have a cutter, a glass works perfectly!
-
Second rise: Place the rounds on a cornmeal-dusted baking sheet. Cover them lightly with the kitchen towel and let them rise again for about 30 minutes until puffed up.
-
Cook the muffins: Preheat a griddle or heavy skillet over medium heat. Place the muffins on the griddle and cook for about 7 minutes on each side until they’re a beautiful golden brown. Pro tip: Keep the heat low enough so the muffins cook through without burning the outside.
-
Cool and enjoy: Once they’re done cooking, transfer the muffins to a wire rack to cool. You can slice them in half, toast them, and enjoy the nooks and crannies filled with your favorite toppings!
Serving Suggestions
These homemade English muffins aren’t just breakfast; they can be the star of any meal! Serve them warm beside scrambled eggs and crispy bacon for a delicious breakfast plate, or toast them up and top with your favorite jam or avocado for a quick snack. And don’t forget about the classic eggs Benedict—these muffins are practically begging to be used for rich hollandaise sauce and poached eggs!
Recipe Variations
Now that you’re a pro at making classic English muffins, let’s shake things up a bit with some fun variations:
-
Herb & Cheese Muffins: Mix in about ½ cup of shredded cheese and your favorite herbs (like rosemary or oregano) into the dough for a savory spin.
-
Cinnamon Raisin Muffins: Add 2 teaspoons of cinnamon and about 1 cup of raisins to the dough for a sweet breakfast treat. And let’s not forget a touch of maple syrup for extra sweetness!
-
Gluten-Free Muffins: If you’re going gluten-free, substitute the all-purpose flour with a 1:1 gluten-free flour blend. Just be sure to adjust the liquid if necessary, as some blends absorb more moisture.
-
Pumpkin Spice Muffins: Mix in ½ cup of pure pumpkin puree and a teaspoon of pumpkin pie spice for a seasonal twist that screams autumn!
-
Chocolate Chip Muffins: Because who doesn’t love a little chocolate? Fold in a cup of chocolate chips for a decadently sweet treat that’s perfect for breakfast or dessert.
Chef’s Notes
I’ll be honest—these homemade English muffins marked a turning point in my journey as a home cook. My first attempt was a hot mess (literally; the dough stuck to everything!). It wasn’t until I learned to keep a light hand with the flour and not rush the rising process that they finally turned out beautifully. Don’t be discouraged by any hiccups along the way, as every time I make these muffins, I learn a little more about my craft. Enjoy the process, and most importantly, have fun in the kitchen!
FAQs and Troubleshooting
1. My muffins didn’t rise. What went wrong?
Sometimes, the yeast may not be active, possibly due to expired yeast or water that’s either too hot or too cold. Always check the expiration date, and remember to keep your water within the 105-115 degree range—too hot can kill the yeast!
2. Why do my muffins have a hard surface?
This usually occurs if the heat is too high while cooking. A low, steady heat allows the muffins to cook evenly and maintain their soft texture.
3. Can I freeze the muffins?
Absolutely! Cool the muffins completely, then place them in a freezer-safe bag and freeze for up to three months. To enjoy, simply toast them right from the freezer or let them thaw overnight.
4. How do I know when my muffins are done?
They should be golden brown on the outside, and when you tap the bottom, it should sound hollow. If you have a thermometer, aim for around 200 degrees Fahrenheit.
Nutritional Info
(For 1 muffin, not including toppings)
- Calories: 180
- Total Fat: 6g
- Saturated Fat: 3.5g
- Cholesterol: 15mg
- Sodium: 180mg
- Total Carbohydrates: 29g
- Dietary Fiber: 1g
- Sugars: 1g
- Protein: 5g
There you have it, my friends! Now you’re ready to storm the kitchen and make these delightful homemade English muffins. Whether it’s a leisurely weekend breakfast or a treat to share, the warmth, love, and flavor baked into each muffin will surely make them a top choice for any meal of the day. Enjoy, and let your cooking journey continue!
PrintHomemade English Muffins

Experience the joy of making warm, fluffy English muffins from scratch that are perfect for breakfast or any meal.
- Prep Time: 15 minutes
- Cook Time: 30 minutes
- Total Time: 45 minutes
- Yield: 12 servings 1x
- Category: Breakfast
- Method: Griddling
- Cuisine: British
- Diet: Vegetarian
Ingredients
- 4 cups all-purpose flour
- 2 tsp active dry yeast
- 1 cup whole milk (warm, 105–115 degrees)
- 1/2 cup water (warm, 105–115 degrees)
- 2 tbsp shortening (melted)
- 2 tbsp butter (melted)
- 1 tsp salt
- 1 tbsp sugar
- 2 tbsp cornmeal
Instructions
- Activate the yeast: In a small bowl, dissolve the active dry yeast and sugar in warm water. Let it sit for about 5 to 10 minutes until it becomes frothy.
- Mix the wet ingredients: In a large mixing bowl, combine the warm milk, melted shortening, and melted butter. Add the frothy yeast mixture and stir gently.
- Combine the dry ingredients: In another bowl, whisk together the flour and salt.
- Create the dough: Gradually add the dry ingredients to the wet mixture, stirring until a shaggy dough forms.
- Knead the dough: Transfer the dough to a floured surface and knead for about 8 to 10 minutes until smooth and elastic.
- First rise: Place the kneaded dough in a greased bowl, cover with a towel, and let it rise for about an hour until doubled in size.
- Shape the muffins: Roll out the dough to about 1-inch thickness and use a cutter to cut out muffins.
- Second rise: Place the rounds on a cornmeal-dusted baking sheet, cover lightly, and let them rise again for about 30 minutes.
- Cook the muffins: Preheat a griddle over medium heat and cook the muffins for about 7 minutes on each side until golden brown.
- Cool and enjoy: Transfer the muffins to a wire rack to cool before slicing and serving.
Notes
These muffins can be frozen and toasted later. Keep the heat low when cooking to ensure they cook through properly without burning.
Nutrition
- Serving Size: 1 muffin
- Calories: 180
- Sugar: 1g
- Sodium: 180mg
- Fat: 6g
- Saturated Fat: 3.5g
- Unsaturated Fat: 2.5g
- Trans Fat: 0g
- Carbohydrates: 29g
- Fiber: 1g
- Protein: 5g
- Cholesterol: 15mg
Keywords: English muffins, homemade muffins, breakfast recipe
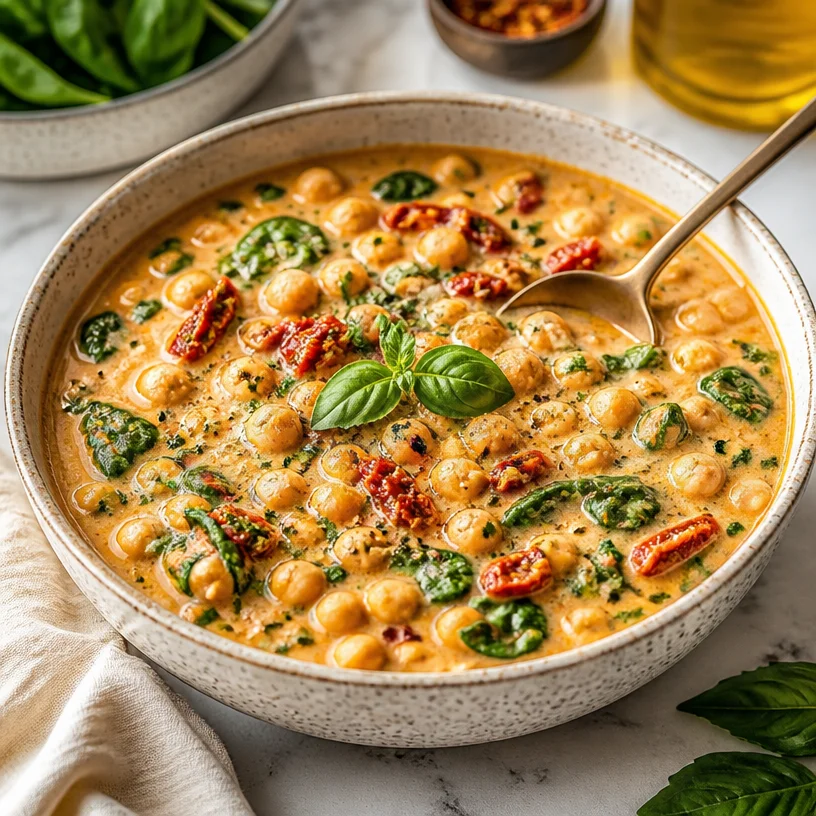
One-Pot Tuscan Garbanzo Bean Soup: Weeknight Comfort
Welcome to the World of Tuscan Garbanzo Bean Soup!
Hey there, food lovers! If you’re looking for a cozy, delicious dish that fills your kitchen with warmth and your heart with joy, you’re in the right place. Today, we’re diving into a comforting bowl of Tuscan Garbanzo Bean Soup, a recipe that’s not only packed with flavor but also overflows with love and memories. Cooking should never feel like a chore—it’s about creating moments, nourishing yourself and those you love, and of course, enjoying every single bite.
Now, let’s take a moment to appreciate the beauty of this soup. It’s rich, creamy, and oh-so-satisfying. Picture this: it’s a chilly evening, and you walk into your kitchen, greeted by the fragrant aroma of garlic and herbs mingling in the air. The vibrant greens of fresh spinach and the delightful pop of chickpeas bring a smile to your face. It’s a dish that invites you to gather around the table, share stories, and savor the flavors of life. Ready to create this culinary masterpiece? Let’s roll up our sleeves and get cooking!
A Memory in a Bowl
As I sit here reminiscing, I can’t help but think of my grandmother, who introduced me to the heartwarming world of soups. Growing up, her kitchen was the place to be, filled with laughter, stories, and, of course, the aromatic scents of her famous recipes. One of my favorites was her chickpea stew, which she cooked on rainy days—those moments became my fondest memories.
I remember one particular afternoon when my cousins and I gathered for our usual Sunday dinner at her cozy farmhouse. She had prepared a big pot of her chickpea soup, and as we sat at the table, she shared stories of her childhood in Tuscany, where fresh ingredients were always at our fingertips. The way she described the rustic markets, vibrant with colors, made the food taste even better. That soup brought us together, and though I didn’t realize it at the time, it sparked my passion for cooking.
These days, I carry on her legacy with this Tuscan Garbanzo Bean Soup recipe. Each spoonful is a nod to her love, and it brings me right back to those happy gatherings. So, let’s get the flavors dancing in our kitchens and create something that’s not just a meal, but a memory.
Ingredients
Here’s what you’ll need to whip up this soul-soothing soup:
-
1 tablespoon olive oil
A staple in Italian cooking! This adds a rich, fruity flavor. Try using extra-virgin olive oil for the best taste. Feel free to substitute with avocado oil if you want something with a higher smoke point. -
1/2 cup diced onion
Onions are the backbone of flavor in many dishes. If you’re in a pinch, shallots or leeks work great too! -
2 cloves garlic (minced)
Garlic adds that irresistible punch and aroma. Always use fresh for maximum flavor! You can swap in garlic powder in a pinch, but it won’t pack the same punch. -
1 teaspoon dried oregano
This herb brings a classic Italian taste to the soup. If you don’t have oregano, basil or thyme can be lovely alternatives. -
1/2 teaspoon red pepper flakes (adjust to taste)
For a hint of heat! Add more if you like things spicy, or leave it out altogether for a milder flavor. -
2 tablespoons tomato paste
Tomato paste thickens the soup and enhances the flavor. You can use crushed tomatoes if you’re out—just add them earlier in the cooking process. -
2 (15 oz) cans chickpeas (drained and rinsed)
Chickpeas provide protein and texture. If canned beans aren’t an option, dried ones can be cooked until tender instead. -
3-4 cups low sodium vegetable broth
A great base for your soup. You can use chicken broth if you’re not vegetarian or vegan, or water for a lighter option. -
1/3 cup sundried tomatoes in oil (chopped)
These add a sweet and tart flavor! If you prefer a fresher taste, try diced fresh tomatoes. -
Juice of 1/2 lemon
This brightens the entire dish! You can use lime juice if you’re looking for a different twist. -
1 cup full-fat coconut milk from a can (OR 1/2 cup heavy cream)
For that creamy texture! Full-fat coconut milk is vegan, while heavy cream provides a rich flavor. You could also try nut milk for a lighter version. -
2-3 cups fresh spinach
Spinach adds a burst of color and nutrients. Kale or Swiss chard can work if you’d like a change. -
Salt and black pepper to taste
Essential for bringing out all the flavors! -
Fresh basil leaves (for garnish)
Nothing says "fresh" like a sprinkle of basil on top!
Step-by-Step Instructions
Alright, let’s get cooking! Follow these detailed steps, and let’s turn those ingredients into a bowl of pure happiness.
-
Heat the Olive Oil
Start by drizzling a tablespoon of olive oil into a large pot over medium heat. Let it warm up for about a minute—it should shimmer but not smoke. This is that lovely moment where the aroma starts to fill your kitchen, setting the stage for an epic meal. -
Sauté the Aromatics
Toss in the diced onion and sauté for about 5 minutes, or until it’s translucent. This is the base of your soup, so take a moment to relish that fragrant onion-y goodness. Stir frequently to prevent sticking. Once it’s soft, add the minced garlic and red pepper flakes. Sauté for another minute until fragrant—it’ll feel like you’re walking through an Italian market! -
Add the Tomato Paste
Stir in the tomato paste and let it cook for about 2 minutes. This step is crucial because it caramelizes the sugars in the paste, bringing out a deeper umami flavor. You should see the ingredients clumping together nicely and smelling divine! -
Incorporate the Chickpeas
Now it’s time to add those drained and rinsed chickpeas. Stir them in well, mixing with the tomatoes and onions. Cook for about 2 more minutes, allowing the chickpeas to soak up some of that tomatoey goodness. Your kitchen should smell amazing by now! -
Pour in the Broth
It’s broth time! Gradually add in 3-4 cups of low-sodium vegetable broth, stirring continuously. If you want a thicker consistency, go with 3 cups. Let it come to a gentle boil, then reduce the heat to simmer. This is where the magic begins! -
Stir in Sundried Tomatoes
Toss in your chopped sundried tomatoes and keep simmering for about 10-15 minutes. This allows all the flavors to meld together beautifully. I love stirring occasionally and watching those vibrant colors turn into a harmony of rich flavors. -
Creamy Delight
After simmering, it’s time to add the full-fat coconut milk (or heavy cream). This makes your soup luxuriously creamy! Stir it in and let it simmer for another 5-10 minutes on low heat. You’re going to want to dip some crusty bread into this! -
Toss in Fresh Spinach
Just a few minutes before serving, throw in the fresh spinach. It wilts down quickly, keeping that gorgeous green color. Stir until it’s just wilted—no more than a couple of minutes. -
Finish with Lemon Juice
Squeeze in the juice of half a lemon—this is the finishing touch! Taste and adjust with salt and black pepper as needed. This small step brightens everything up and adds that pop of freshness! -
Serve It Up!
Ladle your Tuscan Garbanzo Bean Soup into bowls and garnish with fresh basil leaves. I like to add a drizzle of olive oil on top for that extra flair. Ready to serve!
Serving Suggestions
When it comes to serving this soup, I like to keep it simple yet stunning. Use deep bowls to hold all that goodness. A sprinkle of freshly chopped basil or a drizzle of balsamic glaze on top makes everything look gourmet. Pair it with a slice of crusty bread, perfect for dipping, or a light salad for a fuller meal. Trust me, you’ll impress your guests or simply treat yourself to a feast fit for a Tuscan kitchen!
Recipe Variations
Let’s spice things up! Here are some creative twists you can try with your Tuscan Garbanzo Bean Soup:
- Add Protein: Toss in some cooked chicken, sausage, or crispy bacon for a meaty version.
- Herb Adventure: Experiment with different herbs like thyme, rosemary, or even a bay leaf for a unique flavor profile.
- Creamy Alternative: Swap coconut milk with almond or cashew cream for a nutty flavor if you’re looking for non-dairy options.
- Vegetable Boost: Add in carrots, zucchini, or bell peppers for some added crunch and nutrients.
- Spice it Up: For more heat, experiment with different peppers or even a splash of hot sauce.
Chef’s Notes
This recipe is close to my heart, and every time I make it, I think of my grandmother stirring her big pot, teaching me how to make her beloved chickpea stew. Over the years, I’ve adapted it to suit my style and to include pantry staples I always have on hand. The beauty of this soup is that it’s flexible—feel free to make it your own! One of my favorite things about it is how it tastes even better the next day; it gives the flavors more time to mingle and becomes even more comforting.
Kitchens can be a wild adventure, though! I remember one time I accidentally mistook cayenne for paprika and ended up with a very spicy, albeit delicious, version of this soup. Sometimes, mistakes in the kitchen create the most memorable meals! Here’s a tip: embrace the mess and learn to laugh at your culinary trials.
FAQs and Troubleshooting
1. Can I make this soup ahead of time?
Absolutely! This soup is ideal for meal prep. Store it in the fridge for up to 5 days, and feel free to freeze it in portions for later enjoyment.
2. What if I don’t have vegetable broth?
No worries! You can use chicken broth, or simply add water and season with a bit more salt and spice until it suits your taste.
3. My soup is too thick; what can I do?
If your soup is thicker than you’d like, simply add more broth or water, stirring until you reach your desired consistency.
4. Can I blend the soup?
Definitely! For a creamier texture, you can blend part or all of the soup using an immersion blender or by transferring batches to a stand blender. Just be cautious with hot liquids.
Nutritional Info
While I won’t bore you with all the details, I can tell you that this Tuscan Garbanzo Bean Soup is packed with plant-based protein, healthy fats, and lots of vitamins! It’s vegetarian-friendly and can easily be made vegan or gluten-free with just a few clever swaps.
So, there you have it! A hearty, warm bowl of Tuscan Garbanzo Bean Soup that’s easy to make and full of love. I hope you find joy in every simmer and savor every spoonful. Happy cooking, my friends! Let the flavors of Tuscany come to life in your kitchen, and remember—what matters is that you share it with love!
PrintTuscan Garbanzo Bean Soup

A comforting and creamy Tuscan Garbanzo Bean Soup packed with flavors of garlic, herbs, and fresh spinach.
- Prep Time: 15 minutes
- Cook Time: 30 minutes
- Total Time: 45 minutes
- Yield: 4 servings 1x
- Category: Main Course
- Method: Stovetop
- Cuisine: Italian
- Diet: Vegetarian
Ingredients
- 1 tablespoon olive oil
- 1/2 cup diced onion
- 2 cloves garlic (minced)
- 1 teaspoon dried oregano
- 1/2 teaspoon red pepper flakes (adjust to taste)
- 2 tablespoons tomato paste
- 2 (15 oz) cans chickpeas (drained and rinsed)
- 3–4 cups low sodium vegetable broth
- 1/3 cup sundried tomatoes in oil (chopped)
- Juice of 1/2 lemon
- 1 cup full-fat coconut milk from a can (OR 1/2 cup heavy cream)
- 2–3 cups fresh spinach
- Salt and black pepper to taste
- Fresh basil leaves (for garnish)
Instructions
- Heat the olive oil in a large pot over medium heat for about a minute.
- Toss in the diced onion and sauté for about 5 minutes until translucent.
- Add the minced garlic and red pepper flakes, sautéing for another minute.
- Stir in the tomato paste and cook for about 2 minutes.
- Incorporate the drained chickpeas and cook for 2 more minutes.
- Pour in 3-4 cups of vegetable broth and let it come to a gentle boil.
- Toss in the chopped sundried tomatoes and simmer for about 10-15 minutes.
- Add the coconut milk (or heavy cream) and simmer for another 5-10 minutes.
- Stir in the fresh spinach and cook until just wilted.
- Squeeze in the lemon juice, adjusting seasonings as needed.
- Serve in bowls, garnished with fresh basil leaves.
Notes
The soup tastes even better the next day as flavors meld together. Perfect for meal prep!
Nutrition
- Serving Size: 1 serving
- Calories: 350
- Sugar: 6g
- Sodium: 600mg
- Fat: 15g
- Saturated Fat: 11g
- Unsaturated Fat: 4g
- Trans Fat: 0g
- Carbohydrates: 45g
- Fiber: 10g
- Protein: 12g
- Cholesterol: 0mg
Keywords: garbanzo bean soup, Tuscan soup, vegetarian recipe, comfort food
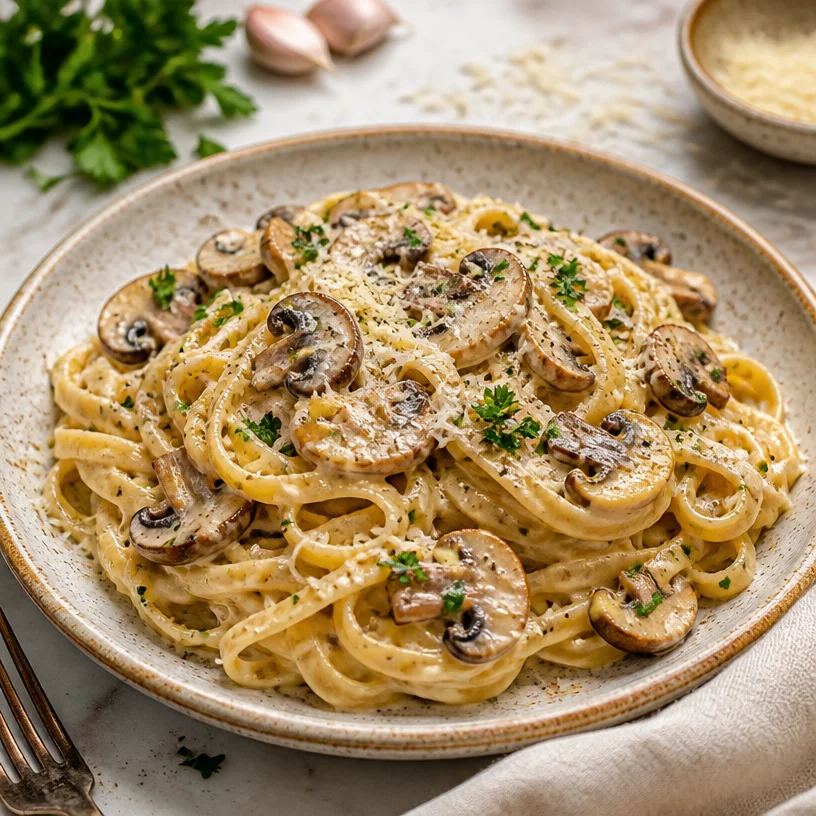
Minute Creamy Mushroom Pasta for Cozy Weeknights
Irresistibly Creamy Mushroom Pasta for Cozy Nights
There’s something magical about cozy nights in, especially when they’re infused with the warmth of good food and great company. Imagine the scene: it’s a chilly evening, and the glow from the kitchen fills the air with mouthwatering aromas. What’s cooking? Oh, just a pot of Irresistibly Creamy Mushroom Pasta that’s so delightful, it’ll have you saying goodbye to any takeout dreams for the night.
This dish is all about celebrating the simple ingredients that come together to create a comforting, creamy hug in a bowl. I’m Ava Carter, your friendly kitchen guide, and today I’m here to share my all-time favorite pasta recipe, infused with earthy mushrooms and luxurious cream that’ll leave you feeling nourished, satisfied, and utterly cozy.
Personal Story
I have a heartfelt memory tied to this creamy mushroom pasta recipe, one that I treasure deeply. It all started in my college days, when budget cuts meant relying on pantry staples. On one particular rainy evening, my friends and I huddled in our small kitchen, trying to figure out what to whip up for dinner. We rummaged through our meager supplies and what did we find? A package of pasta, a few mushrooms lurking in the fridge, and some heavy cream.
With a gentle drizzle of olive oil and the aromatic symphony of sautéing onions and garlic, we transformed those simple ingredients into a dish that felt like a gourmet meal. Laughter filled the kitchen as we twirled our pasta, savoring each bite as if we were dining in a high-end restaurant. The memories of those laughter-filled dinners still warm my heart, just like this pasta warms my belly.
Ingredients
Here’s what you’ll need to create your own cozy bowl of Irresistibly Creamy Mushroom Pasta:
-
200 grams Pasta (Any type you love, like fettuccine or penne.)
Pasta is the foundation of this dish. Feel free to opt for whole grain or gluten-free options if you prefer! -
2 tablespoons Olive Oil
This beautiful oil enhances the flavor wonderfully, but feel free to use any neutral oil, like canola or sunflower. -
1 medium Onion (Finely chopped.)
Onions bring a subtle sweetness and depth of flavor. If you’re not keen on onions, leeks or shallots make great substitutes! -
2 cloves Garlic (Minced.)
Garlic adds that unmistakable zing! Fresh is best, but you can use garlic powder if you’re in a pinch – just around half a teaspoon should do! -
250 grams Mushrooms (Cremini or Button.)
Mushrooms are the stars of our dish, lending an earthy and umami-rich flavor. Don’t shy away from shiitake or portobello for a twist! -
1 cup Heavy Cream
This is what makes the sauce luxuriously creamy. If you want a lighter version, try substituting part of it with Greek yogurt or coconut cream for a dairy-free option! -
100 grams Parmesan Cheese
Not only does this add flavor, but it creates a nice creamy texture. Reserve some for garnishing! If you’re avoiding dairy, nutritional yeast is a great alternative. -
Salt, to taste
Always taste as you go! A little pinch makes a huge difference in enhancing flavors. -
Pepper, to taste
A dash of freshly cracked pepper adds a warmth that complements the creaminess beautifully! -
1 teaspoon Thyme (Dried or Fresh)
Thyme brings a subtle earthy note. If you don’t have thyme, Italian seasoning works like a charm too! -
1 tablespoon Fresh Parsley (Chopped.)
The final touch! It adds a vibrant pop of color and freshness to the dish. You could also use basil if you prefer!
Step-by-Step Instructions
Ready to get cooking? Let’s dive into the magic of making this creamy pasta!
-
Boil the Pasta:
Start by bringing a large pot of salted water to a rolling boil. Toss in your pasta and cook it according to package instructions until al dente. Remember, you want it just right—slightly firm to the bite! Once done, reserve about a cup of pasta water and drain the rest. Set the pasta aside while we whip up that creamy sauce. -
Sauté Onions and Garlic:
In a large skillet, heat the olive oil over medium heat. Add the finely chopped onion and sauté until it becomes translucent—about 3-4 minutes. This is where the kitchen starts to smell heavenly! Stir in the minced garlic, cooking just until fragrant, about 30 seconds. Don’t let it burn; we want it aromatic, not bitter! -
Cook the Mushrooms:
Time for our delicious mushrooms! Add them to the skillet, stirring occasionally until they’re golden brown and have released their moisture (around 5-7 minutes). This process concentrates their flavor and adds that irresistible umami punch. Pro tip: Don’t overcrowd the pan; if necessary, cook them in batches for the best results. -
Whip up the Cream Sauce:
Now, lower the heat slightly and pour in that luscious heavy cream. Stir well, allowing it to gently bubble. Add the thyme, salt, and pepper. If you love a hint of nutty flavor, grating in some fresh nutmeg will elevate your sauce beautifully. Turn the heat to low and let it simmer to thicken a bit—about 5 minutes. If you feel your sauce is too thick, you can always add a splash of reserved pasta water! -
Combine and Serve:
Toss your cooked pasta right into the skillet, making sure every strand is enveloped in that creamy goodness! Stir in the grated Parmesan cheese gradually until it melts and merges with the sauce. If you’re feeling indulgent, add more cheese! Season again to taste—every chef knows that tasting is vital in the kitchen. -
Plate It Up!
Ah, the grand finishing touch! Plate your creamy mushroom pasta, and don’t forget to sprinkle the reserved Parmesan and fresh parsley on top for that restaurant-style feel. Trust me, your friends (or family) will be swooning over the presentation!
Serving Suggestions
Serve this creamy pasta with a simple side of garlic bread or a crisp green salad drizzled with lemon vinaigrette. The bright acidity from the lemon pairs wonderfully with the richness of the pasta, cutting through the creaminess just right. Share it with friends, light a few candles, and create a cozy atmosphere—dinner is truly served!
Recipe Variations
Feeling adventurous? Here are some fun variations to try out:
-
Add Protein: Pan-seared chicken or shrimp can easily be tossed in for a heartier meal.
-
Veggie Power: Toss in some spinach, kale, or roasted cherry tomatoes for added nutrition and color.
-
Herby Twist: Switch out thyme for fresh basil or oregano for a different flavor profile.
-
Spicy Kick: Add a pinch of red pepper flakes or a dash of hot sauce to the sauce for a spicy kick!
-
Citrus Zing: A splash of lemon juice at the end can give a refreshing twist to the dish.
Chef’s Notes
This creamy mushroom pasta recipe has evolved over time, starting from those haphazard college days. I’ve experimented with different mushrooms and cream ratios, and each version has been saved in my little recipe box as a cherished memory. One time, I even added a splash of white wine to the sauce, and let me tell you, it transformed the dish! The beauty of cooking is that it’s all about experimenting. So go ahead, make it your own!
FAQs and Troubleshooting
1. My sauce is too thick; what should I do?
If your sauce becomes overly thick, simply add a bit of the reserved pasta water until you reach your desired consistency. This not only thins it out but also adds a touch of starchy flavor that helps bind the sauce to the pasta.
2. How can I store leftovers?
Store any leftover pasta in an airtight container in the fridge for up to 3 days. Just remember, the pasta may absorb some of the sauce, so you might want to add a splash more cream or water when reheating to bring it back to life!
3. I don’t like mushrooms; what else can I use?
No problem at all! You can replace mushrooms with cooked spinach, zucchini, or even sautéed bell peppers for a delightful twist!
4. Can I use whole wheat or gluten-free pasta?
Absolutely! Whole wheat and gluten-free pastas work beautifully in this dish. Just make sure to adjust the cooking times as needed since these alternatives can vary in texture and cooking length.
Nutritional Info
(Per serving, approximate):
Calories: 590
Protein: 18g
Fat: 30g
Carbohydrates: 60g
Fiber: 3g
There you have it! Your ultimate guide to creating an unforgettable bowl of Irresistibly Creamy Mushroom Pasta. It’s more than just a meal—it’s a celebration of flavor, nostalgia, and cozy moments shared around the table. So roll up those sleeves, grab a fork, and let’s get cooking, my culinary friend! Happy cooking!
PrintIrresistibly Creamy Mushroom Pasta

Creamy mushroom pasta that brings comfort and warmth, perfect for cozy nights in.
- Prep Time: 15 minutes
- Cook Time: 30 minutes
- Total Time: 45 minutes
- Yield: 4 servings 1x
- Category: Main Course
- Method: Baking
- Cuisine: Italian
- Diet: Vegetarian
Ingredients
- 200 grams Pasta (Any type you love, like fettuccine or penne.)
- 2 tablespoons Olive Oil
- 1 medium Onion (Finely chopped.)
- 2 cloves Garlic (Minced.)
- 250 grams Mushrooms (Cremini or Button.)
- 1 cup Heavy Cream
- 100 grams Parmesan Cheese
- Salt, to taste
- Pepper, to taste
- 1 teaspoon Thyme (Dried or Fresh)
- 1 tablespoon Fresh Parsley (Chopped.)
Instructions
- Boil the Pasta: Start by bringing a large pot of salted water to a rolling boil. Toss in your pasta and cook it according to package instructions until al dente. Reserve about a cup of pasta water and drain the rest.
- Sauté Onions and Garlic: In a large skillet, heat the olive oil over medium heat. Add the finely chopped onion and sauté until it becomes translucent—about 3-4 minutes. Stir in the minced garlic, cooking just until fragrant, about 30 seconds.
- Cook the Mushrooms: Add the mushrooms to the skillet, stirring until they’re golden brown and have released their moisture (around 5-7 minutes).
- Whip up the Cream Sauce: Lower the heat slightly and pour in the heavy cream. Stir well and allow it to gently bubble. Add the thyme, salt, and pepper.
- Combine and Serve: Toss your cooked pasta right into the skillet, stirring in the grated Parmesan cheese gradually until it melts and merges with the sauce.
- Plate It Up: Plate your creamy mushroom pasta and sprinkle the reserved Parmesan and fresh parsley on top.
Notes
Serve with garlic bread or a crisp green salad for a complete meal.
Nutrition
- Serving Size: 1 serving
- Calories: 590
- Sugar: 4g
- Sodium: 500mg
- Fat: 30g
- Saturated Fat: 15g
- Unsaturated Fat: 12g
- Trans Fat: 0g
- Carbohydrates: 60g
- Fiber: 3g
- Protein: 18g
- Cholesterol: 80mg
Keywords: creamy pasta, mushroom pasta, cozy dinner, vegetarian pasta, Italian cuisine
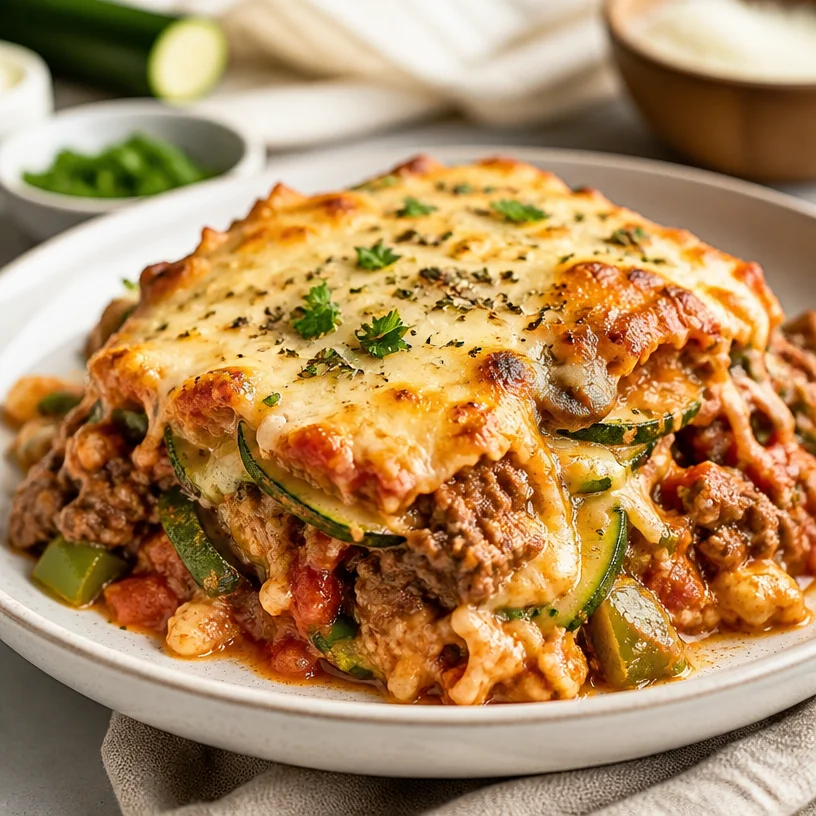
Ingredient Zucchini Pizza Casserole: Quick Low-Carb Comfort
Zucchini Pizza Casserole: Your New Favorite Low-Carb Comfort Food
Welcome to Clean Plate Cravings! Today, we’re diving into a dish that’s going to change your weeknight dinners forever—Zucchini Pizza Casserole! Trust me, if you’re a pizza lover but want to keep things low-carb, you’ve stumbled upon a winner. Not only does this casserole pack the same savory flavors you adore, but it also keeps you feeling light and energized. Imagine all that cheesy goodness layered with wholesome veggies in one pan; it’s the comfort food experience redefined!
Nostalgic Kitchen Story
Let me take you back to my childhood kitchen, filled with the aroma of spices and melted cheese. Every Friday night, my family had a special tradition. We’d whip up homemade pizza from scratch—yes, we were those people who had flour on every surface! I can still hear my mom’s laughter as we fought over the last piece of pepperoni or how my little brother would drench his slice in extra parmesan like it was a race. Those moments were filled with happiness and a sprinkle of chaos—just how I like it!
Fast forward to now, and while Friday family pizza nights still hold a dear place in my heart, I’ve adopted a slightly different approach to keep it healthier. Enter: Zucchini Pizza Casserole! It brings all those cherished flavors together but adds a whole nutrition boost without skimping on taste. Get ready to make some memories of your own in the kitchen with this creamy, cheesy goodness!
Ingredients
Here’s what you’ll need to gather for this lovely low-carb casserole:
-
4 cups Zucchini (Grated): This is the star of our show! Zucchini makes the perfect base, providing a subtle flavor while soaking up all the delicious seasonings. Use a box grater or food processor for quick grating. If you’re in a pinch, yellow squash works just as well!
-
1 teaspoon Salt: Sprinkle this on your grated zucchini to draw out moisture. It’s an essential step to avoid a soggy casserole! You could use sea salt or kosher salt here—both will do the trick.
-
2 large Eggs (Beaten): The binding agents of our casserole! They add richness and help hold everything together. You can swap them for two tablespoons of flaxseed mixed with water for a vegan option.
-
1/2 cup Parmesan Cheese (Grated): A touch of this adds a nutty flavor and a delightful crisp on top. Pecorino Romano can be a fantastic substitute if you’re up for a sharper edge.
-
1 cup Mozzarella Cheese (Shredded): This brings all the cheesy goodness we crave! Feel free to use low-fat mozzarella for a lighter version, or go for lactose-free if dairy is an issue.
-
1 cup Cheddar Cheese (Shredded): Cheddar adds a depth of flavor and creaminess to balance the dish. Try gouda for a smokier finish or pepper jack for a bit of spice.
-
1 pound Ground Beef: A classic choice for the protein in our casserole. You can easily swap it with ground turkey, chicken, or even plant-based crumbles if you’re not feeling meaty!
-
1 medium Onion (Chopped): Fresh onions add sweetness and depth. Red onions work great if you prefer a milder flavor.
-
1 cup Pizza Sauce: Go for your favorite store-bought brand or whip up a homemade version. The sauce infuses the casserole with that iconic pizza flavor!
-
1 cup Green Bell Pepper (Chopped): Added crunch and flavor! Colorful bell peppers like red or yellow will brighten up your dish even more.
-
1 cup Mushrooms (Sliced): These bring an earthy richness that’s wonderfully complementary. If you’re not a fan, try spinach or zucchini instead!
-
1 teaspoon Dried Oregano: A classic pizza herb that ties all the flavors together! Fresh oregano will give an even bolder flavor boost.
-
1 teaspoon Garlic Powder: Because everything’s better with garlic! You can absolutely use fresh minced garlic if you want to elevate the dish a notch.
-
To taste Black Pepper: A sprinkle of black pepper brings everything together. Give it a taste and adjust as needed!
Step-by-Step Instructions
Now, let’s roll up our sleeves and get cooking! Follow these steps to whip up your Zucchini Pizza Casserole:
-
Prep the Zucchini:
- Start by grating your zucchini. Grab a box grater or a food processor to make this step quick and easy. Place the grated zucchini in a clean kitchen towel and squeeze out excess moisture (this prevents a watery casserole!). Trust me, it’s worth the extra effort for the best texture!
-
Combine with Salt:
- In a large mixing bowl, toss the grated zucchini with salt and let it sit for about 10 minutes. This allows some of the water to escape, ensuring your casserole doesn’t turn into a soggy mess. It’s like giving your veggies a spa day!
-
Preheat the Oven:
- While your zucchini is resting, preheat your oven to 375°F (190°C). This way, it’ll be nice and toasty when your casserole is ready to go in.
-
Cook the Meat:
- In a medium skillet over medium heat, brown the ground beef (or your chosen substitute) with the chopped onion. Sauté until the meat is fully cooked and the onions become translucent—around 5-7 minutes. Drain the excess fat if needed. Browned meat enhances the flavor!
-
Mix Everything Together:
- In your mixing bowl, combine the cooked meat and onions with the squeezed zucchini, beaten eggs, Parmesan cheese, 1/2 cup of mozzarella cheese, oregano, garlic powder, black pepper, bell pepper, and mushrooms. Stir until everything is well combined. You want all those flavors to meld together!
-
Layer and Pour:
- Prepare a greased 9×13 inch baking dish. Spread the zucchini mixture evenly in the dish. Pour your pizza sauce over the top, spreading it out with a spatula. You can also swirl it in for a fun marbled effect!
-
Top with Cheese:
- Sprinkle the remaining mozzarella cheese and cheddar cheese on top. This is where you can get extra with the cheese if you want it super melty and gooey!
-
Bake:
- Pop the casserole into your preheated oven and bake for 30-35 minutes until the cheese is bubbly and golden. If you like a little extra crunch, throw it under the broiler for 2-3 minutes at the end—but keep an eye on it!
-
Cool and Serve:
- Once it’s out of the oven, let it cool for about 10 minutes before slicing. This resting time allows it to firm up a bit, making serving easier. Trust me, the wait is worth it!
Serving Suggestions
Ready to serve your masterpiece? Cut it into squares and serve warm. It pairs beautifully with a side salad dressed in a zesty vinaigrette to bring a refreshing contrast. For an extra pop of color, garnish with fresh basil or parsley! Look at you, adding that chef flair!
Recipe Variations
Feeling adventurous? Here are some ways to make this dish your own:
-
Cauliflower Crust: Substitute half the zucchini for cauliflower rice to give it a different texture.
-
Load on the Veggies: Add in more diced vegetables like spinach, olives, or even artichoke hearts for extra nutrients and flavor.
-
Spicy Kick: Toss in some diced jalapeños or crushed red pepper flakes if you like heat!
-
Herb Swap: Use fresh basil in place of dried oregano for a burst of freshness.
-
Meatless Delight: Try swapping the ground beef for black beans or lentils for a plant-based protein alternative!
Chef’s Notes
One of the joys of cooking is how recipes evolve! This Zucchini Pizza Casserole actually came to life one day when I had a ton of zucchini from my garden, and I was feeling a little lazy about making pizza. It originally started as a layered bake but has transformed into this fabulous one-pan dish! It’s become a favorite at potlucks, and I love how everyone can cater it to their personal preferences. Plus, the leftovers (if you have any!) are brilliant for meal prep!
FAQs and Troubleshooting
1. Why is my casserole watery?
- Make sure to squeeze out as much moisture from the zucchini as possible and let the mixture sit with salt for a bit before baking.
2. Can I make this ahead of time?
- Yes! You can prepare and layer it the night before, then simply pop it in the oven when you’re ready to serve.
3. What if I don’t like mushrooms?
- No problem! Just leave them out or substitute with veggies you prefer, like zucchini or spinach!
4. How do I store leftovers?
- Store any leftover casserole in an airtight container in the refrigerator for up to 4-5 days. Reheat in the microwave or oven until warmed through.
Nutritional Info
(You’ll want to calculate based on the specific brands and quantities used! As a general guideline, here’s an approximate breakdown for a standard serving of this casserole)
- Calories: 300
- Protein: 25g
- Carbs: 10g
- Fat: 20g
- Fiber: 3g
In closing, this Zucchini Pizza Casserole is all about enjoying delicious comfort food while keeping it healthy! So gather your loved ones, share your culinary stories, and let this dish bring a cozy vibe to your dining table. Happy cooking, friends!
PrintZucchini Pizza Casserole

A delicious low-carb casserole that combines all the flavors of pizza while keeping it light and nutritious.
- Prep Time: 15 minutes
- Cook Time: 35 minutes
- Total Time: 50 minutes
- Yield: 6 servings 1x
- Category: Main Course
- Method: Baking
- Cuisine: Italian
- Diet: Low-Carb
Ingredients
- 4 cups Zucchini (Grated)
- 1 teaspoon Salt
- 2 large Eggs (Beaten)
- 1/2 cup Parmesan Cheese (Grated)
- 1 cup Mozzarella Cheese (Shredded)
- 1 cup Cheddar Cheese (Shredded)
- 1 pound Ground Beef
- 1 medium Onion (Chopped)
- 1 cup Pizza Sauce
- 1 cup Green Bell Pepper (Chopped)
- 1 cup Mushrooms (Sliced)
- 1 teaspoon Dried Oregano
- 1 teaspoon Garlic Powder
- To taste Black Pepper
Instructions
- Prep the Zucchini: Grate your zucchini using a box grater or a food processor. Place it in a clean kitchen towel and squeeze out excess moisture.
- Combine with Salt: In a large mixing bowl, toss the grated zucchini with salt and let it sit for about 10 minutes.
- Preheat the Oven: Preheat your oven to 375°F (190°C).
- Cook the Meat: In a medium skillet, brown the ground beef and chopped onion over medium heat until fully cooked.
- Mix Everything Together: In your mixing bowl, combine the cooked meat, onions, squeezed zucchini, beaten eggs, Parmesan cheese, half of the mozzarella cheese, oregano, garlic powder, black pepper, bell pepper, and mushrooms.
- Layer and Pour: Prepare a greased 9×13 inch baking dish, spread the zucchini mixture evenly, and pour the pizza sauce over the top.
- Top with Cheese: Sprinkle the remaining mozzarella cheese and cheddar cheese on top.
- Bake: Bake for 30-35 minutes until the cheese is bubbly and golden.
- Cool and Serve: Let it cool for about 10 minutes before slicing.
Notes
You can prepare this casserole ahead of time and bake it when you’re ready to serve. Adjust the vegetables according to your preference!
Nutrition
- Serving Size: 1 serving
- Calories: 300
- Sugar: 4g
- Sodium: 500mg
- Fat: 20g
- Saturated Fat: 10g
- Unsaturated Fat: 5g
- Trans Fat: 0g
- Carbohydrates: 10g
- Fiber: 3g
- Protein: 25g
- Cholesterol: 120mg
Keywords: Zucchini, Pizza, Casserole, Low-Carb, Comfort Food
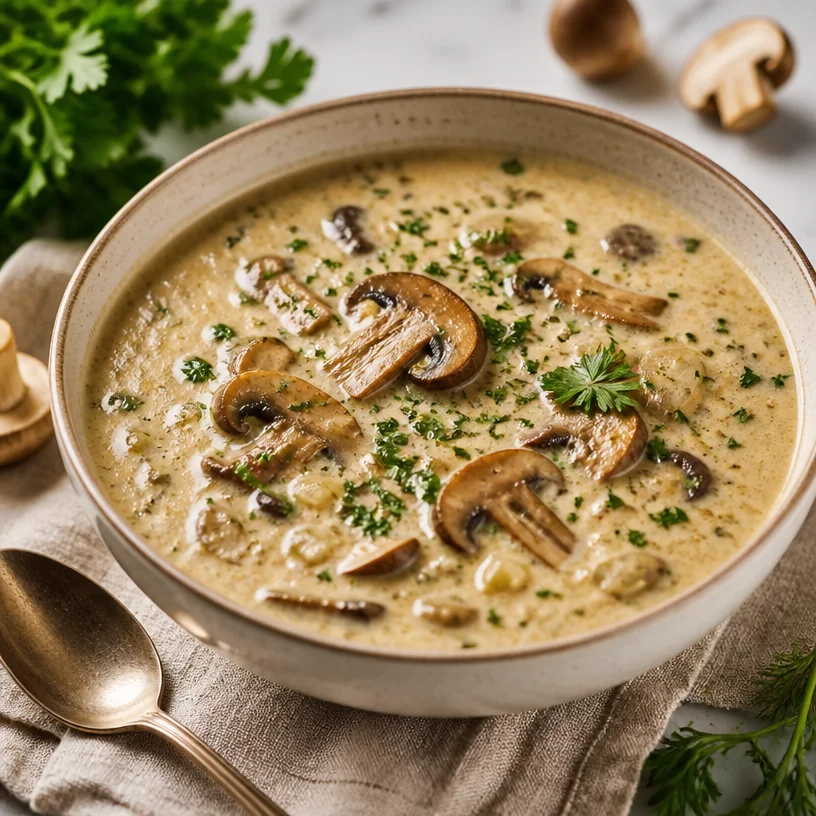
Creamy Hungarian Mushroom Soup: 30-Minute One-Pot Comfort
Creamy Hungarian Mushroom Soup: A Cozy Bowl of Nostalgia
Welcome to another delicious adventure in the kitchen! Today, we’re diving into a dish that wraps around you like a warm hug on a chilly day—Creamy Hungarian Mushroom Soup. This savory, earthy soup is not just packed with delicious flavor; it also contains a rich history and a splash of nostalgia for me. Whether you’re looking for a comforting meal after a long day or a dish that brings a little warmth to your table, this soup is exactly what you need.
Growing up, my family had a ritual of gathering around the dinner table every Sunday. The aroma of something hearty usually filled the air, and I remember the chatter and laughter echoing in the cozy kitchen. One of our favorite dishes was my grandma’s version of mushroom soup. Every spoonful was rich, comforting, and had just the right hint of tanginess from the sour cream. It was so delightful that it became a staple in our kitchen, especially during the colder months.
This creamy Hungarian Mushroom Soup has a unique twist of flavors that elevate it from the ordinary. It’s everything you’d desire in a cozy bowl: it’s rich, earthy, and oh-so-indulgent, all while being a little lighter than traditional recipes. You’ll absolutely love how easy this is to whip up, but more importantly, you’ll cherish every delicious bite. So, grab your apron, and let’s embark on this culinary journey together!
A Taste of Belonging: My Mushroom Soup Story
Let me share a little story with you. My culinary passion ignited in my grandmother’s kitchen, where I developed not only my love for cooking but also an appreciation for the way food brings us all together. I remember the first time she taught me how to make this creamy mushroom soup. She handed me a wooden spoon and told me that the secret ingredient was love, but I quickly learned that the real magic was in the fresh, earthy mushrooms and the delightful spices used to create depth in flavor.
We stood side by side, her piercing blue eyes sparkling with joy, as she explained the importance of each ingredient. The mushrooms—oh boy, how they captivated us! I could hardly believe that something so humble could transform into something extraordinary. As the aroma wafted through the house, drawing family members in one by one, I realized that food had the power to create not just meals but memories.
Now, every time I make this soup, it’s as if I’m right back there in her kitchen, stirring the pot with her by my side. Each creamy, mushroom-packed bowl tells a story—a story of togetherness, warmth, and pure comfort. So, whether you’re making this for yourself or for loved ones, remember that each spoonful carries a bit of that magic.
Ingredients You’ll Need
Here’s what you need to make this luscious Creamy Hungarian Mushroom Soup. Trust me, it’ll be worth the trip to the grocery store!
-
3 tablespoons olive oil
The heart of our base! Olive oil adds richness and depth. You can substitute with avocado oil or melted coconut oil for a different flavor profile. -
1 ½ pounds mixed mushrooms (trimmed and sliced ¼-inch thick)
Go wild here! Use any mushrooms you love—button, cremini, shiitake, or even portobello! They’re packed with umami, giving the soup an earthy flavor. If you want a gluten-free option, just make sure to check for gluten-free varieties if you’re using any pre-packaged items. -
2 cups diced yellow onions
Onions create a wonderful foundation of flavor. If you prefer a milder taste, try using sweet onions like Walla Walla or Vidalia. -
3 tablespoons unsalted butter
Butter adds creaminess and flavor. For those looking for a dairy-free option, vegan butter or coconut cream can do the trick. -
¼ cup all-purpose flour
This will help thicken the broth. If you’re gluten-free, use a gluten-free all-purpose flour mix. -
4 teaspoons sweet mild paprika
A quintessential Hungarian spice that adds warmth and color. If you like a little heat, try using smoked paprika for a smoky twist. -
1 tablespoon chopped fresh dill, or 2 teaspoons dried dill
Dill brings a refreshing taste. Fresh is always better, but dried works fine too. Feel free to swap with thyme or tarragon for a different herbaceous note. -
Kosher salt and cracked black pepper
Essential seasoning that enhances the overall flavor. Don’t skimp on this! -
½ cup dry white wine (such as Sauvignon Blanc)
This adds a lovely acidity. If you prefer not to use wine, substitute with additional broth and a splash of lemon juice. -
3 cups low-sodium chicken broth or vegetable broth
Use homemade or store-bought as your soup base. For a vegetarian version, vegetable broth works like a charm. -
2 tablespoons low-sodium soy sauce
Adds a nice umami hit. You can swap it for tamari if you want a gluten-free option. -
1 ½ cups whole milk
This creamy component makes the soup indulgent! Use plant-based milk for a lactose-free option. -
¾ cup sour cream
For that rich creaminess and a little tang! Greek yogurt works brilliantly as a substitute. -
2 tablespoons white wine vinegar or sherry vinegar
This little splash brightens the flavors. If you’re out of vinegar, a squeeze of lemon juice can do the trick. -
½ cup chopped fresh parsley
Finish off with a pop of color and brightness. You could also use chives or green onions for a different twist!
Step-by-Step Instructions
Now, let’s get to the fun part—cooking! Here’s how to whip up this creamy goodness.
-
Heat the Olive Oil
In a large pot, heat the olive oil over medium heat. Let it warm for about a minute or until it starts to shimmer. This is the base of our flavors, so don’t skip this step! -
Sauté the Onions and Mushrooms
Add the diced onions and a generous pinch of salt to the pot. Cook, stirring occasionally, until the onions are translucent (about 5-7 minutes). Next, toss in your sliced mushrooms. Let them sizzle away for about 10-15 minutes until they get beautifully browned and release their juices. This is where it gets aromatic and you’ll start feeling like a superstar chef! -
Incorporate the Butter and Flour
Now it’s time to add the butter. Stir until it melts, then sprinkle in the flour. Cook this mixture for about 2 minutes, stirring constantly until it turns golden brown. This roux will help thicken our soup later. -
Add the Paprika and Dill
Stir in the sweet paprika and dill, allowing it to coat the mushroom mixture for about 30 seconds. You’ll capture that gorgeous flavor that makes this dish stand out! -
Pour in the Wine
Pour in the dry white wine and scrape the bottom of the pot to deglaze it—those brown bits are flavor gold! Let the wine simmer for 2-3 minutes, allowing the alcohol to cook off. -
Stir in the Broth and Soy Sauce
Next, gradually stir in the chicken or vegetable broth and soy sauce, bringing everything to a boil, then reduce the heat and let it simmer for about 15 minutes. -
Add Milk and Sour Cream
After simmering, reduce the heat to low, slowly whisk in the whole milk and sour cream until everything is combined. Trust me, you’ll want to taste this once it’s mixed! -
Add Vinegar and Season
Finally, stir in the white wine vinegar or sherry vinegar, then season it generously with kosher salt and cracked black pepper to taste. Adjust to your preferred seasoning level! -
Garnish and Enjoy
Just before serving, stir in fresh parsley and prepare yourself for the feast about to unfold!
Serving Suggestions
Presentation is key! Ladle this creamy soup into beautiful bowls, and don’t forget to top it off with a sprinkle of fresh parsley—this adds a touch of color and elegance. Serve with a crusty slice of bread or a light salad for a complete meal, and watch your guests’ eyes light up with the first whiff of that savory aroma!
Recipe Variations
Feeling adventurous? Here are some fantastic twists you can try with this soup:
- Spicy Hungarian Mushroom Soup: Add a dash of cayenne pepper or a few red pepper flakes to give it a kick.
- Creamy Vegan Option: Use coconut milk instead of whole milk, and substitute sour cream with cashew cream
- Wild Mushroom Medley: Experiment with exotic mushrooms like oyster and enoki for a more complex flavor.
- Cheesy Addition: Add a handful of shredded cheese like Gruyère just before serving for a delightful cheesy twist.
- Add Protein: Shredded chicken or sautéed sausage can be incorporated for a heartier meal.
Chef’s Notes
Oh, how this recipe has evolved over time! I remember when I first tried making this with whatever mushrooms I had on hand. It was a bit of a disaster, but every misstep taught me something new about balancing flavors. Nowadays, I love venturing into farmers’ markets to source different mushrooms—you’d be amazed by the variety available! Oh, and pro tip: never rush the sautéing process; that’s where all the magic happens!
FAQs and Troubleshooting
1. My soup is too thick; how do I fix it?
If your soup turned out thicker than expected, just gradually add a bit more broth or water until you reach your desired consistency.
2. Can I make this soup ahead of time?
Absolutely! It stores beautifully in the fridge for up to 3 days. Just reheat gently on the stove, adding a splash of broth to loosen it up.
3. What if I can’t find fresh dill?
No worries! Dried dill or even thyme can be wonderful substitutes. Remember, dried herbs are more potent, so use about one-third of the amount.
4. Can I freeze this soup?
Yes, but the texture may slightly change after freezing. Store in an airtight container and enjoy within 3 months. Defrost it in the fridge overnight before reheating.
Nutritional Info
This Creamy Hungarian Mushroom Soup is not just delicious but also nourishing!
- Calories: Approximately 320 per serving
- Protein: 8g
- Carbohydrates: 25g
- Fat: 22g (mostly from the olive oil and butter)
So there you have it, my friends—a warm, comforting bowl of Creamy Hungarian Mushroom Soup that’s perfect for any occasion! Whether you’re snuggled up on the couch or sharing a meal with loved ones, this soup is a gentle reminder that food truly brings us together. Happy cooking, and may every spoonful bring you joy!
PrintCreamy Hungarian Mushroom Soup

A rich and comforting mushroom soup that brings warmth and nostalgia to your table.
- Prep Time: 15 minutes
- Cook Time: 30 minutes
- Total Time: 45 minutes
- Yield: 6 servings 1x
- Category: Soup
- Method: Stovetop
- Cuisine: Hungarian
- Diet: Vegetarian
Ingredients
- 3 tablespoons olive oil
- 1 ½ pounds mixed mushrooms (trimmed and sliced ¼-inch thick)
- 2 cups diced yellow onions
- 3 tablespoons unsalted butter
- ¼ cup all-purpose flour
- 4 teaspoons sweet mild paprika
- 1 tablespoon chopped fresh dill, or 2 teaspoons dried dill
- Kosher salt and cracked black pepper to taste
- ½ cup dry white wine (such as Sauvignon Blanc)
- 3 cups low-sodium chicken broth or vegetable broth
- 2 tablespoons low-sodium soy sauce
- 1 ½ cups whole milk
- ¾ cup sour cream
- 2 tablespoons white wine vinegar or sherry vinegar
- ½ cup chopped fresh parsley
Instructions
- Heat the olive oil in a large pot over medium heat until shimmering.
- Sauté the diced onions with a pinch of salt until translucent (about 5-7 minutes), then add the sliced mushrooms and cook until browned (10-15 minutes).
- Incorporate the butter until melted, then stir in the flour and cook for about 2 minutes.
- Add the paprika and dill, stirring for about 30 seconds.
- Pour in the dry white wine and deglaze the pot, simmering for 2-3 minutes.
- Stir in the broth and soy sauce, bringing it to a boil before reducing heat and simmering for about 15 minutes.
- Add the milk and sour cream, whisking until combined.
- Finish by stirring in the vinegar and seasoning to taste.
- Garnish with fresh parsley before serving.
Notes
For a vegan version, substitute whole milk with coconut milk and sour cream with cashew cream. Add a sprinkle of cayenne for a spicy twist!
Nutrition
- Serving Size: 1 serving
- Calories: 320
- Sugar: 5g
- Sodium: 600mg
- Fat: 22g
- Saturated Fat: 10g
- Unsaturated Fat: 10g
- Trans Fat: 0g
- Carbohydrates: 25g
- Fiber: 3g
- Protein: 8g
- Cholesterol: 30mg
Keywords: mushroom soup, creamy soup, comforting soup

One-Pot Creamy Beer Cheese Potato Soup with Sausage
Indulgent Beer Cheese Potato Soup with Sausage Bliss
Introduction
Hey there, soup lovers! If you’re like me, nothing says comfort food quite like a warm bowl of hearty soup. And let me tell you, there’s one dish that can turn any chilly evening into a cozy, delicious feast: Indulgent Beer Cheese Potato Soup with Sausage Bliss. Imagine creamy, cheesy goodness infused with the rich flavors of beer and savory sausage, all while being packed with wholesome veggies. Sounds heavenly, right?
When I first created this soup, I was reminiscing about my college days, where budget-friendly meals often turned into culinary experiments. I remember huddling with friends, sharing laughs, and crafting a meal that was delicious and filling. We would gather around with our beat-up cookbooks, a couple of random ingredients, and a very low budget, all trying to outdo each other with our latest concoction. This particular recipe started out as a simple potato soup, but as you’ll see, it developed into something out of this world.
The best part? You don’t need to be a culinary pro to whip this up! With straightforward ingredients and a few simple steps, you can create a dish that’s not only comforting but also bursting with flavor. So let’s roll up our sleeves, grab our aprons, and dive into this delightful adventure in the kitchen!
Personal Story
I still vividly remember the first time I made this beer cheese potato soup. It was a crisp autumn evening, and I was hosting a cozy gathering at my little apartment. My friends were bundled up in sweaters, the air was filled with the scent of fallen leaves, and we were ready for a feast. I decided to experiment with what I had on hand—a few leftover potatoes, some sausage, and yes, a bottle of that craft beer I’d been saving for the occasion.
As I diced the veggies and simmered everything together, the comforting aroma started to fill the room. We gathered around the kitchen island, chatting and taste-testing as the soup bubbled away. The moment we took our first spoonfuls, there were sounds of delighted “mmm’s” echoed all around. That night turned from a simple dinner into a full-on food extravaganza, with everyone asking for seconds. From then on, this soup became a staple in my recipe arsenal, a surefire hit at any gathering!
Ingredients
-
1 lb Bacon
You can substitute with turkey bacon for a lighter, leaner option. Adding bacon gives a smoky depth to the soup, creating that cozy, inviting flavor. -
1 lb Sausage
Choose from Italian, chorizo, or breakfast sausage for variety. Each type will bring its unique flair to the dish. Don’t be shy—mix and match for a flavor explosion! -
1 medium Onion (Diced)
A must-have for that aromatic base. If you’re not a fan of onion, try using leeks for a milder taste. -
2 medium Carrots (Diced)
Sweet, colorful, and packed with nutrients. For a different spin, substitute with parsnips for a more earthy flavor. -
2 stalks Celery (Diced)
Essential for the classic flavor foundation! If you’re in a pinch, you can skip it, but it really does enhance the overall taste. -
2 cloves Garlic (Minced)
Because garlic makes everything better! Fresh is ideal, but in a pinch, jarred minced garlic will do. -
1/4 cup Flour
You can swap this with cornstarch for a gluten-free option. This will help thicken your soup to that dreamy, velvety consistency. -
1 12 oz Beer
Opt for light ales or lagers to avoid bitterness. A good beer can elevate the flavor dramatically, so choose one you enjoy drinking! -
4 cups Chicken Broth
Use vegetable broth for a vegetarian version without losing that hearty essence. Homemade broth is fantastic if you have it! -
2 cups Potatoes (Diced)
Feel free to swap with cauliflower for a lower-carb alternative. Just remember to choose waxy potatoes like Yukon Gold for creaminess. -
1 tbsp Thyme
Fresh thyme is best as it adds a vibrant herby note that complements the cheese and sausage beautifully. -
1 tbsp Smoked Paprika
This ingredient adds a touch of smokiness that enhances the flavor profile. You could use regular paprika if that’s what you have on hand. -
1 cup Heavy Cream
For a lighter version, half-and-half or cashew cream works like a charm. This will make your soup luxuriously creamy! -
8 oz Cream Cheese (Softened)
Essential for that rich, creamy texture! Take it out of the fridge beforehand so it softens nicely. -
2 cups Cheddar Cheese (Shredded)
Avoid pre-shredded cheese for better melting—you want that gooey, cheesy goodness! Sharp cheddar works beautifully, but feel free to mix in a little Gruyère for extra flavor.
Step-by-Step Instructions
-
Cook the Bacon
Start by preheating your pot over medium heat. Add the bacon and sizzle until it’s crispy and golden. Use a slotted spoon to transfer it onto a paper towel-lined plate (this helps keep it crispy and soaked up the extra grease). If you like, reserve a tablespoon of that bacon grease to sauté the vegetables for added flavor! -
Sauté the Vegetables
In the same pot, toss in your diced onions, carrots, and celery (and that reserved bacon grease, if you went for it). Sauté for about 5-7 minutes until they’re softened and the onions turn translucent. Your kitchen will start smelling heavenly! -
Add the Garlic
Stir in the minced garlic and sauté for an additional minute. This is where the magic starts happening! Be careful not to burn the garlic—just a quick sauté is enough to release its fantastic flavor. -
Add the Flour
Sprinkle the flour over the vegetable mixture and stir it in. This will help thicken your soup later on. Cook for an additional 2-3 minutes, stirring constantly to create a nice roux. Your mixture should look a bit thick and pasty. -
Pour in the Beer
Gradually pour in the beer, whisking continuously to combine everything. This is a crucial step; it’ll help deglaze the bottom of your pot, lifting all those delicious caramelized bits! Let it simmer for about 2-3 minutes so the alcohol can cook off. -
Add the Broth and Potatoes
Stir in the chicken broth, diced potatoes, thyme, and smoked paprika. Bring everything to a gentle boil, then reduce the heat to a simmer. Cover and cook for about 15-20 minutes or until the potatoes are tender when pierced with a fork. -
Creamy Goodness Time
Once the potatoes are tender, stir in the heavy cream and softened cream cheese, stirring continuously until the cheese has melted and everything is smooth and creamy. Why is it so creamy? Because that was the goal all along! -
Add the Cheddar and Sausage
Stir in your cooked bacon (save a little for garnish if you’d like) and the shredded cheese until it’s all melted and mixed in. If you want a kick, you can add some diced cooked sausage at this point for that irresistible sausage bliss! -
Season and Serve
Taste your soup and adjust the seasoning with salt and pepper as needed. Let it simmer for another 5 minutes to allow the flavors to meld together beautifully. And voila, your indulgent, creamy beer cheese potato sausage bliss is ready to be served!
Serving Suggestions
Ladle the soup into warm bowls, and if you saved some bacon, sprinkle it on top for that extra crunch! A sprinkle of fresh thyme or chives brings a lovely pop of color and freshness. Serve it up with some crusty bread or warm rolls on the side for dipping. Trust me, your guests (and your taste buds) will thank you!
Recipe Variations
- Spicy Kick: Add a splash of hot sauce or a few diced jalapeños to spice things up.
- Veggie Delight: Toss in some frozen or fresh corn to add sweetness and texture.
- Herb Coverage: Use a mix of fresh herbs like parsley and rosemary instead of just thyme for an aromatic twist.
- Vegan Version: Swap out the sausage for lentils or chickpeas and use coconut cream instead of heavy cream for a dairy-free option.
- Smoky Twist: Incorporate smoked sausage instead of regular sausage for that robust smokiness.
Chef’s Notes
This soup has definitely evolved over the years; it started simple and has transformed into something delightfully indulgent. There was even a phase where I tried blending the soup for a super smooth texture! But after many taste tests, I decided the chunky texture is where the heart is. And let’s face it—what could be better than a hearty, comforting bowl of soup that embodies both nostalgia and indulgence? I still chuckle every time I think about my friends’ faces after their first bites. It’s moments like these that remind me why I love creating in the kitchen!
FAQs and Troubleshooting
1. My soup is too thick! What did I do wrong?
Don’t worry! You can easily add a little more chicken or vegetable broth to thin it out to your desired consistency. Just add a splash and stir!
2. Can I make this soup ahead of time?
Absolutely! The flavors deepen nicely after a day. Just store it in an airtight container in the fridge. Reheat on the stove, adding a splash of broth for the right consistency.
3. How do I store leftovers?
Let the soup cool completely before transferring it to an airtight container. It will last for 3-4 days in the refrigerator.
4. What’s the best way to reheat?
Gently reheat on the stove over medium heat, stirring frequently. If it’s too thick, add a touch of broth or cream to bring it back to life.
Nutritional Info (Optional)
While I don’t focus heavily on nutritional info, it’s worth noting that this soup is hearty and filling, perfect for a satisfying meal! Feel free to calculate based on your modifications if you’re keeping an eye on calories or specific ingredients.
And there you have it, my delightful, indulgent beer cheese potato soup with sausage bliss! I hope you enjoy every creamy, cheesy bite as much as I do. Happy cooking and even happier feasting! 🥣✨
PrintIndulgent Beer Cheese Potato Soup with Sausage Bliss

A creamy, cheesy potato soup infused with beer and savory sausage, perfect for chilly evenings.
- Prep Time: 15 minutes
- Cook Time: 30 minutes
- Total Time: 45 minutes
- Yield: 6 servings 1x
- Category: Soup
- Method: Stovetop
- Cuisine: American
- Diet: Meat
Ingredients
- 1 lb Bacon
- 1 lb Sausage
- 1 medium Onion (Diced)
- 2 medium Carrots (Diced)
- 2 stalks Celery (Diced)
- 2 cloves Garlic (Minced)
- 1/4 cup Flour
- 1 12 oz Beer
- 4 cups Chicken Broth
- 2 cups Potatoes (Diced)
- 1 tbsp Thyme
- 1 tbsp Smoked Paprika
- 1 cup Heavy Cream
- 8 oz Cream Cheese (Softened)
- 2 cups Cheddar Cheese (Shredded)
Instructions
- Cook the bacon until crispy, then transfer to a paper towel-lined plate.
- Sauté the diced onions, carrots, and celery in the same pot for 5-7 minutes.
- Add the minced garlic and sauté for an additional minute.
- Sprinkle the flour over the vegetable mixture and stir, cooking for 2-3 minutes.
- Pour in the beer, whisking continuously to combine and simmer for 2-3 minutes.
- Add the chicken broth, diced potatoes, thyme, and smoked paprika. Bring to a boil, then simmer for 15-20 minutes.
- Stir in the heavy cream and cream cheese until smooth and creamy.
- Add the cooked bacon and cheddar cheese, stirring until melted.
- Season with salt and pepper, and let it simmer for another 5 minutes before serving.
Notes
For a lighter version, use turkey bacon and half-and-half. Adjust seasoning based on preference.
Nutrition
- Serving Size: 1 bowl
- Calories: 450
- Sugar: 5g
- Sodium: 800mg
- Fat: 28g
- Saturated Fat: 15g
- Unsaturated Fat: 8g
- Trans Fat: 0g
- Carbohydrates: 32g
- Fiber: 4g
- Protein: 20g
- Cholesterol: 70mg
Keywords: soup, potato soup, beer cheese soup, comfort food, sausage recipes

Creamy One-Pot Loaded Taco Potato Soup (Weeknight Meal)
Loaded Taco Potato Soup: A Comforting Bowl of Happiness
Welcome back to Clean Plate Cravings! Today, I’m thrilled to share with you a recipe that marries two of my favorite cozy comforts: tacos and soup! Yes, you heard that right! We’re diving into a bowl of Loaded Taco Potato Soup that’s not just mouthwateringly delicious but also packed with wholesome goodness. It’s the ultimate fusion dish of nachos and a hearty chowder—perfect for chilly days, celebratory gatherings, or any time you simply need a comforting bowl of happiness.
As a chef who believes healthy eating should be an exciting adventure, let me assure you that this soup is a celebration of flavor. Picture fluffy potatoes mingling with seasoned ground beef, all bathed in a warm, savory broth. And let’s not forget the toppings—cheddar cheese, sour cream, and fresh cilantro taking center stage as they complete this flavor-packed dish!
What I love most about this Loaded Taco Potato Soup is its flexibility. You can adjust it to fit any dietary need or personal taste, making it a dish that everyone will want seconds of. So roll up your sleeves, grab your spoon, and let’s whip this together!
A Taste of Nostalgia
Whenever I smell a batch of taco seasoning simmering on the stove, I’m transported back to my childhood dinners around the kitchen table. My mom had this way of turning even the simplest meals into cherished family gatherings. I remember those nights vividly—our little kitchen alive with laughter, the sound of spoon clinking against bowls, and the aroma of taco-flavored food wafting through the air.
One of my favorite dishes was her zesty taco soup, and while I loved it, I can’t help but think it could use just a little extra comfort. Fast forward to the present, and I’ve taken that beloved recipe, sprinkled some potato magic, and created this Loaded Taco Potato Soup. It holds all of the nostalgia and warmth, but with an exciting twist that’s sure to have your family gathering around the table just like mine did.
What You’ll Need
Let’s gather our ingredients! Here’s what you’ll need to whip up this deliciousness:
-
Ground Beef: The star of our show! It adds protein and a rich flavor. Try swapping it for ground turkey, chicken, or even lentils for a vegetarian option.
-
Potatoes: I prefer russet potatoes for their fluffiness, but Yukon gold potatoes work too. You could even use sweet potatoes for a slightly sweeter and healthier twist!
-
Taco Seasoning: You can use a store-bought packet or make your own. Spice it up with cayenne or keep it mild—totally up to you!
-
Cheddar Cheese: A generous sprinkling on top elevates this soup! If you want a different flavor, try pepper jack or Monterey Jack cheese.
-
Vegetable Broth: This gives your soup depth. Use low-sodium for more control over salt or chicken broth for a different flavor.
-
Sour Cream or Greek Yogurt: This is perfect for finishing touches; it adds creaminess. You can also go for dairy-free options if that suits your diet!
-
Toppings: Let’s not forget about the fun! Add fresh cilantro, diced tomatoes, avocado, or crushed tortilla chips for a satisfying crunch.
Step-by-Step Instructions
Here comes the fun part—let’s cook!
-
Brown the Beef: In a large pot over medium-high heat, add the ground beef. Use a wooden spoon to break it up as it cooks—this should take about 5-7 minutes or until it’s no longer pink. This is where the magic begins! If you’re using lean beef, you might want to add a splash of olive oil to prevent it from drying out.
-
Add Potatoes: Dice your potatoes into small cubes while the beef is cooking. Once the beef is browned, drain any excess fat, then toss in your potatoes. Stir them around with the beef for 2-3 minutes to blend those flavors.
-
Season it Up: Sprinkle in your taco seasoning and give everything another good stir to coat those potatoes and beef evenly. Your kitchen should start smelling heavenly!
-
Pour in Broth: Add the vegetable broth to the pot, enough to cover the potatoes completely, typically about 4 cups. Bring it to a boil, then reduce heat and let it simmer for about 15-20 minutes. This allows the potatoes to soften and soak up those delicious taco flavors.
-
Cheesy Goodness: When the potatoes are tender, it’s time to stir in a handful of cheddar cheese—or more, if you’re feeling adventurous! Allow it to melt in, creating that creamy texture we’re after. Give it a taste; this is a perfect moment to adjust the seasoning.
-
Finishing Touches: Serve hot, and don’t forget the toppings! A dollop of sour cream and a handful of fresh cilantro will brighten it all up. You might even want to throw on some crushed tortilla chips for that satisfying crunch.
Serving Suggestions
For a picture-perfect presentation, ladle the soup into beautiful, rustic bowls. Sprinkle the remaining cheddar cheese on top, followed by a generous dollop of sour cream, and finish with a flourish of cilantro. A few slices of avocado or a side of warm, crusty bread would elevate the experience even more!
Recipe Variations
Don’t be afraid to get creative with this one! Here are some fun twists you can try:
-
Spicy Kick: Add chopped jalapeños or a dash of hot sauce to the mix for some heat.
-
Beefless Delight: Swap out the ground beef for black beans or chickpeas for a filling vegetarian option.
-
Taco Fiesta: Toss in a cup of corn or black olives for extra flavor, color, and texture.
-
Creamy Vegan Version: Use plant-based ground beef and coconut cream instead of sour cream for a full dairy-free experience.
Chef’s Notes
This recipe has come a long way since my mom’s taco soup days. Originally inspired by those family dinners, I experimented with different ingredients until I stumbled upon the delightful combination of potatoes and taco flavors. It’s become a staple in my home, especially during busy weekdays or when friends drop by unexpectedly.
And let me tell you, the success of this soup has spawned a “potato night” tradition, where we swap out fillings each week! So, don’t hesitate to make this your own!
FAQs and Troubleshooting
1. What if my soup is too thick?
No worries! If it’s thicker than you’d like, gradually add more broth (or water) until it reaches your desired consistency.
2. How can I make this a one-pot meal?
You’re in luck! This recipe is in itself a one-pot wonder, but you can simply use frozen mixed veggies of your choice to add more nutrients without compromising on flavor.
3. My potatoes turned mushy!
Potatoes can get quite soft if overcooked. Make sure to check them at the 15-minute mark. They should be tender but not disintegrating.
4. Can I freeze leftovers?
Absolutely! Allow the soup to cool completely, then store it in airtight containers. It should last up to 3 months in the freezer. Just thaw and reheat when you’re ready!
Nutritional Info
(For a basic serving of Loaded Taco Potato Soup)
- Calories: 350
- Protein: 20g
- Carbohydrates: 40g
- Fat: 15g
- Fiber: 5g
Ready to soup it up? I can’t wait for you to try it and to hear all about your loaded taco potato adventures! So, gather your ingredients, get comfy, and let’s make some magical flavors come to life. Until next time, keep it fresh, simple, and seriously delicious!
PrintLoaded Taco Potato Soup

A cozy fusion of taco flavors and hearty potato soup, perfect for cold days.
- Prep Time: 15 minutes
- Cook Time: 30 minutes
- Total Time: 45 minutes
- Yield: 6 servings 1x
- Category: Soup
- Method: Stovetop
- Cuisine: Mexican
- Diet: Gluten-Free, Nut-Free
Ingredients
- 1 lb Ground Beef
- 3 large Potatoes (russet or Yukon gold)
- 2 tbsp Taco Seasoning
- 4 cups Vegetable Broth
- 1 cup Cheddar Cheese
- ½ cup Sour Cream or Greek Yogurt
- Fresh Cilantro for garnish
- Diced Tomatoes, Avocado, and Crushed Tortilla Chips for toppings
Instructions
- Brown the Beef: In a large pot over medium-high heat, add the ground beef. Cook until no longer pink, about 5-7 minutes.
- Add Potatoes: Dice the potatoes and toss them in after draining excess fat from the beef, stirring for 2-3 minutes.
- Season it Up: Sprinkle in taco seasoning and stir to coat beef and potatoes.
- Pour in Broth: Add vegetable broth to cover potatoes and bring to a boil, then simmer for 15-20 minutes.
- Stir in Cheddar: When potatoes are tender, stir in cheddar cheese until melted.
- Serve: Ladle into bowls and top with sour cream, cilantro, and any additional toppings.
Notes
Feel free to customize with spicy toppings or substitute ingredients for dietary needs.
Nutrition
- Serving Size: 1 bowl
- Calories: 350
- Sugar: 5g
- Sodium: 400mg
- Fat: 15g
- Saturated Fat: 6g
- Unsaturated Fat: 8g
- Trans Fat: 0g
- Carbohydrates: 40g
- Fiber: 5g
- Protein: 20g
- Cholesterol: 70mg
Keywords: taco soup, potato soup, comfort food, Mexican cuisine, healthy soup