
One-Pan 30-Minute Creamy Pumpkin Mac and Cheese this Fall
The Creamy Comfort of Pumpkin Mac and Cheese
Ah, fall! The beautiful dance of leaves changing colors, the aroma of cinnamon wafting through the air, and, of course, the irresistible call of pumpkin-flavored everything. There’s something about this season that makes us all just a little more nostalgic and a lot more hungry for cozy comfort foods. And speaking of comfort food, let me introduce you to the star of today’s show—Pumpkin Mac and Cheese!
This dish takes the classic mac and cheese we all know and love to a whole new level, infusing creamy pumpkin puree with cheese to create a luscious, orange-hued pasta dish that’s perfect for both chilly evenings and festive gatherings. It’s festive yet approachable, nourishing yet indulgent. You see, as a self-proclaimed pumpkin enthusiast, I can’t help but celebrate the versatility of this seasonal superstar, and what better way to do that than by combining it with the ultimate go-to comfort food?
In this post, not only will you learn how to whip up the best Pumpkin Mac and Cheese of your life, but I’ll also sprinkle in some of my favorite kitchen stories, tips, and tricks along the way. So grab your apron and let’s dive into a world where pasta meets pumpkin in the most delicious way possible!
A Taste of Nostalgia
Ah, mac and cheese. A dish that transcends time and age! Like most children of the ’90s, I grew up on the blue box—those neon orange powder days are forever etched in my memory. But it wasn’t until college that I discovered the magic of making mac and cheese from scratch. Let me take you back to an unforgettable fall evening when a few friends and I decided it was time to throw a cozy movie night. We were armed with blankets, popcorn, and yes, lots of cheesy goodness!
Since it was October, I thought, “Why not add some pumpkin to our mac and cheese?” After all, what could be better than pairing the creamy, cheesy pasta we adored with the warming flavors of fall? The result was nothing short of magical! The blending of spices with the gooey cheese made for an unforgettable experience—a simple, nostalgic dish with a new vibrant twist. The laughter and flavors shared that night remain a treasured memory, and it sparked my lifelong passion for experimenting with flavors that worked together in a cozy harmony. And that’s why I’m so excited to share this Pumpkin Mac and Cheese recipe with you today!
Ingredients
Let’s gather everything you need to create this autumnal masterpiece. Here’s your grocery list, along with chef insights for each ingredient:
-
Pasta (Elbow Macaroni or Shells)
- Opt for elbow macaroni for the classic feel, or switch it up with shells for more surface area to hold that creamy sauce. Whole wheat pasta can be a great alternative for added fiber.
-
Pumpkin Puree
- This ingredient adds a delightful creaminess and a subtle earthy flavor to your dish. Make sure to pick up pure pumpkin puree, not pumpkin pie filling, which contains added sugars and spices.
-
Cheddar Cheese (Sharp or Mild)
- Cheddar provides that classic cheesy goodness! Sharp cheddar gives a bold flavor, while mild is less intense. You can use any cheese you love, even gouda or gruyere, for a unique twist.
-
Mozzarella Cheese
- This cheese adds a melty texture that pulls together the dish. For a fun touch, try using smoked mozzarella for a slightly different flavor profile.
-
Butter
- You’ll need this for the roux, which is the base for your cheese sauce. Vegan butter can be used for a dairy-free version.
-
Milk
- Whole milk will create a creamy sauce, but you can substitute with almond milk or oat milk if you’re looking for a lighter or non-dairy alternative.
-
Spices (Salt, Pepper, Nutmeg, and Paprika)
- These little guys elevate the flavor profile. Nutmeg pairs beautifully with pumpkin, while paprika adds a hint of warmth. Feel free to sprinkle in some garlic powder or thyme for more complexity!
Step-by-Step Instructions
1. Prepare Your Pasta
Bring a large pot of salted water to a boil. Add in your pasta and cook according to the package instructions until al dente. Don’t forget to stir occasionally! Once cooked, drain it and set aside, but remember to reserve about a cup of pasta water for later. This starchy water will help thicken your cheese sauce.
2. Make the Creamy Sauce
In the same pot, melt 4 tablespoons of butter over medium heat. Once melted, add in ¼ cup of flour, whisking constantly for about 1-2 minutes. This creates a roux that helps thicken the sauce. Chef Hack: Don’t rush this step! Cooking the roux for long enough helps eliminate any raw flour taste.
3. Whisk in the Milk
Slowly pour in 3 cups of milk while whisking continuously. This helps create a smooth and creamy texture without lumps. Bring the mixture to a gentle simmer, allowing it to thicken slightly—this should take about 5 minutes.
4. Add the Pumpkin Puree and Spices
Stir in 1 cup of pumpkin puree, 1 teaspoon of salt, ½ teaspoon pepper, ¼ teaspoon nutmeg, and ½ teaspoon paprika. Give it a good mix until everything is combined and the sauce is beautifully orange. Tip: Taste as you go! Adjust the seasoning if needed to get the flavor just right for your palate.
5. Cheese, Please!
Remove the pot from the heat and slowly fold in 2 cups of shredded cheddar and 1 cup of mozzarella. Stir continuously until the cheeses melt into that creamy goodness. If the sauce is too thick, whisk in some reserved pasta water until you achieve the desired consistency.
6. Combine Pasta and Sauce
Fold the pasta into the cheese sauce until fully coated. This is where the magic happens! The pasta should be lush and perfectly enveloped in that pumpkin-cheese dream.
7. Serve It Up!
Transfer your Pumpkin Mac and Cheese to a serving dish and dive in! You could also sprinkle some more cheese on top and pop it into the oven for a bubbly, cheesy crust if you’re feeling a little extra.
Serving Suggestions
For an elegant touch, serve your Pumpkin Mac and Cheese in individual ramekins for a fancy dinner party vibe, or place it in a large serving bowl for family-style dining. Pair it with a fresh green salad drizzled with a light vinaigrette to balance the richness, and don’t forget the crusty bread on the side!
Recipe Variations
Feeling adventurous? Here are some delicious twists you can try:
- Spicy Kick: Add a dash of cayenne pepper to the sauce for a little heat.
- Meaty Add-in: Incorporate cooked bacon or sautéed sausage for a savory punch.
- Veggie Delight: Stir in sautéed spinach or roasted Brussels sprouts for extra nutrition and flavor.
- Cheesy Overload: Mix in crumbled blue cheese for a gourmet indulgence.
- Herb Infusion: Add in fresh herbs like sage or thyme for a fragrant twist that complements the pumpkin.
Chef’s Notes
This recipe has evolved over time from my college experimentations to a beloved fall favorite. I remember that one evening when I decided to add a hint of nutmeg, and it changed everything! The warm spices made all the difference and transformed my simple mac and cheese into a dish that feels like a warm hug. It’s become a staple in my kitchen, perfect for gatherings or a cozy night in—my friends can never say no to it!
FAQs and Troubleshooting
1. My sauce is too thick! What did I do wrong?
Don’t fret! Simply whisk in a little reserved pasta water or milk until you reach the desired consistency.
2. What can I use as a cheese substitute?
You can use various non-dairy cheeses for a vegan version; just make sure they melt well!
3. How do I prevent my cheese sauce from being grainy?
Be sure to melt your cheeses on low heat and add them slowly to avoid separating. If it happens, try blending the sauce until smooth.
4. Can I bake this dish?
Absolutely! If you’d like a crispy topping, transfer it to a baking dish, top with breadcrumbs and extra cheese, and bake at 350°F (175°C) for about 20 minutes or until golden and bubbly.
Nutritional Info
Per serving:
- Calories: ~500 kcal
- Protein: ~20g
- Carbohydrates: ~60g
- Fat: ~25g
So there you have it, my deliciously creamy Pumpkin Mac and Cheese! With these tips, tricks, and stories, I hope you feel inspired to take on this cozy dish in your kitchen. Remember, cooking should be fun and enjoyable. Let’s keep it fresh, simple, and oh-so-delicious! Happy cooking, friends!
PrintPumpkin Mac and Cheese

A creamy and comforting twist on classic mac and cheese with the delightful flavors of pumpkin.
- Prep Time: 15 minutes
- Cook Time: 30 minutes
- Total Time: 45 minutes
- Yield: 4 servings 1x
- Category: Main Course
- Method: Baking
- Cuisine: American
- Diet: Vegetarian
Ingredients
- 2 cups Elbow Macaroni or Shells
- 1 cup Pumpkin Puree
- 2 cups Sharp or Mild Cheddar Cheese, shredded
- 1 cup Mozzarella Cheese, shredded
- 4 tablespoons Butter
- 3 cups Milk
- 1/4 cup Flour
- 1 teaspoon Salt
- 1/2 teaspoon Pepper
- 1/4 teaspoon Nutmeg
- 1/2 teaspoon Paprika
Instructions
- Prepare your pasta by boiling salted water and cooking until al dente. Drain and reserve pasta water.
- Make the creamy sauce by melting butter and whisking in flour to create a roux.
- Whisk in the milk and simmer until slightly thickened.
- Add the pumpkin puree and spices, mixing until combined.
- Remove from heat and fold in the cheeses until melted.
- Combine pasta with the cheese sauce until fully coated.
- Serve in a dish and enjoy, optionally baking for a cheesy crust.
Notes
Try adding a dash of cayenne for a spicy kick or sautéed vegetables for extra nutrition.
Nutrition
- Serving Size: 1 serving
- Calories: 500
- Sugar: 5g
- Sodium: 600mg
- Fat: 25g
- Saturated Fat: 12g
- Unsaturated Fat: 8g
- Trans Fat: 0g
- Carbohydrates: 60g
- Fiber: 3g
- Protein: 20g
- Cholesterol: 75mg
Keywords: pumpkin, mac and cheese, comfort food, fall recipes, vegetarian
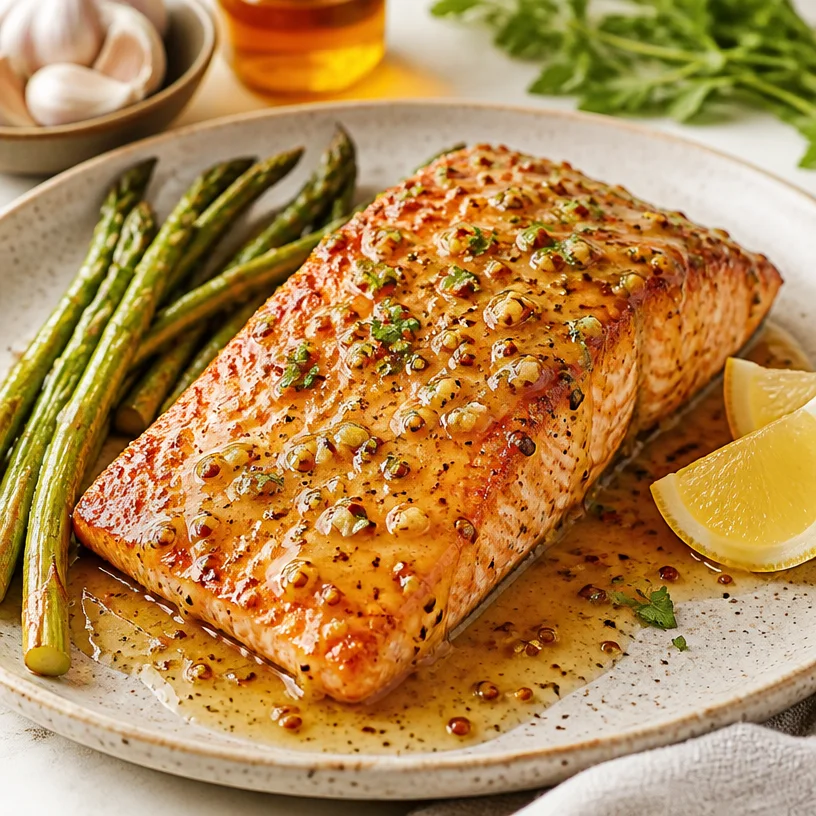
One-Pan Maple-Dijon Salmon: Weeknight Dinner in 20 Minutes
Maple Dijon Salmon: A Flavor-Packed Delight
Welcome to the vibrant world of Clean Plate Cravings, where I am excited to share with you one of my absolute favorites: Maple Dijon Salmon! If you’re anything like me, you crave meals that are not only delicious but make you feel good about what you’re eating. In this blog post, I’ll walk you through creating a sensational salmon dish that will elevate your weeknight dinners and impress your friends at gatherings.
Imagine succulent salmon fillets kissed by the sweetness of maple syrup and the zing of Dijon mustard, all finished with a hint of garlic. This dish is a perfect marriage of flavors that combines simplicity and sophistication. Whether you’re a seasoned home chef or just starting in the kitchen, trust me, this dish will have you feeling like a pro in no time.
What I love most about Maple Dijon Salmon is its versatility and ease. You can whip it up for a casual family dinner or serve it as a showstopper for your weekend guests. Pair it with a fresh side salad or steamed veggies, and you’ve got a meal that’s both hearty and healthful. Plus, it only takes about 30 minutes from start to finish—what’s not to love?
Let’s dive into this culinary adventure, where every step is infused with love and flavor. Prepare to wow your taste buds and make them shout for joy!
A Nostalgic Kitchen Adventure
One of my fondest memories in the kitchen revolves around my great-aunt Martha. She was a culinary wizard who made cooking seem like a magical art form. Growing up, I would often find myself perched on a stool, watching her concoct delightful dishes that danced with flavor. One of her favorites was a glaze she made for her salmon—a sweet and tangy number that always drew compliments from family and friends.
As I learned more about cooking, I tried to recreate her delicious meals. I wanted to capture that feeling of warmth and joy that came from sharing good food. After some experimentation in my kitchen, I stumbled upon the idea of combining maple syrup with Dijon mustard to create a glaze that not only honors Aunt Martha’s magic but adds my twist. The first time I made it for my family, they were blown away by how well the flavors blended. It reminded me of those joyful days with Aunt Martha, and for me, that’s the heart of cooking—bringing people together with deliciousness.
Ingredients
Let’s gather our ingredients! Here’s what you’ll need for this dazzling Maple Dijon Salmon:
-
Salmon Fillets: The star of this dish! Fresh, wild-caught salmon is ideal for flavor and health benefits. If you can’t find salmon, trout or any fatty fish can be excellent substitutes, offering similar taste and texture.
-
Maple Syrup: This natural sweetener not only adds a delightful sweetness but also complements the fish beautifully. If you don’t have maple syrup, honey or agave syrup could work in a pinch, though the flavor will vary slightly.
-
Dijon Mustard: This tangy condiment elevates the dish with its distinct kick. For a milder taste, you can swap in yellow mustard, or for something a bit spicier, whole grain mustard would add a fun texture.
-
Garlic: Fresh minced garlic gives this glaze its incredible aroma and depth. If you’re in a hurry, garlic powder can be a decent alternative, though fresh is always best!
These ingredients come together in a magical way, bringing health benefits and flavor in every bite. Now that we have our gear, let’s get to cooking!
Step-by-Step Instructions
-
Preheat the Oven: Start by preheating your oven to 400°F (200°C). A hot oven is essential for achieving that perfect caramelization on your salmon.
-
Prepare the Glaze: In a small mixing bowl, combine ¼ cup of maple syrup, 2 tablespoons of Dijon mustard, and 2 cloves of minced garlic. Whisk them together until smooth. Not only does this create a glossy glaze, but the whisking also infuses air into it, making it light and fluffy. A little chef tip: If you want a hint of spice, add a pinch of cayenne pepper!
-
Prepare the Salmon: Place your salmon fillets skin-side down on a lined baking sheet. Make sure to leave some space between each fillet for even cooking. Season the fillets lightly with salt and pepper to enhance the natural flavors of the fish.
-
Add the Glaze: Spoon the delicious maple Dijon mixture evenly over each salmon fillet. Don’t be shy—get that glaze on there! Use a pastry brush if you want a more polished finish.
-
Bake to Perfection: Slide the baking sheet into the oven and bake for about 15-20 minutes, or until the salmon flakes easily with a fork. You’ll know it’s ready when the edges turn golden and the glaze gets a bit bubbly. Chef’s hack: If you like a crispy top, broil the salmon for the last 2-3 minutes of cooking!
-
Let It Rest: Once the salmon is out of the oven, let it sit for a couple of minutes. This helps the juices redistribute, resulting in a moist and tender bite.
-
Ready to Serve: You can garnish with fresh herbs like parsley or chives for an extra pop of color and flavor. And voilà! You have a stunning Maple Dijon Salmon that’s ready to impress!
Serving Suggestions
To plate your Maple Dijon Salmon, serve it on a vibrant dinner plate with a fresh side salad or steamed vegetables. A sprinkle of sesame seeds or a squeeze of fresh lemon juice can brighten the dish even more. If you’re feeling adventurous, serve it alongside a creamy quinoa or warm brown rice to soak up all that fantastic glaze. Trust me; your guests will be clamoring for seconds!
Recipe Variations
Here are a few creative twists you can try with this recipe:
-
Spicy Maple Dijon: Add a teaspoon of sriracha or a dash of hot sauce to the glaze mix for a zesty kick.
-
Herby Delight: Fold in fresh herbs like dill or thyme into the glaze for an earthier flavor profile.
-
Citrus Twist: Squeeze some fresh lemon or orange juice into the glaze for a zesty flavor that pairs wonderfully with salmon.
-
Sweet Potato Side: Serve with roasted sweet potatoes drizzled with olive oil and a sprinkle of cinnamon for a comforting side.
-
Wrap it Up: Try this glaze on grilled chicken or tofu for an equally delicious meal that caters to different palates.
Chef’s Notes
One thing I love about this recipe is its evolution. Early on, I used way too much syrup, and it turned my dish into a sticky mess. I learned that balance is key! The beauty of cooking is that it allows you to experiment and discover what works best for you. As I’ve played around with the ratios, I’ve learned to appreciate the unique flavor profile created by each ingredient. It’s those small tweaks that lead to magic in the kitchen.
Every time I make this dish, I’m transported back to those cherished moments with Aunt Martha, reminding me that food is more than just sustenance—it’s an expression of love.
FAQs and Troubleshooting
1. How can I tell if the salmon is done?
You’ll know the salmon is cooked when it flakes easily with a fork and the flesh turns from translucent to opaque. Use a meat thermometer for precision—it should read 145°F (63°C).
2. What if I overcooked the salmon?
If your salmon is dry, try adding a squeeze of lemon or a drizzle of olive oil just before serving to help moisten the fish.
3. Can I use frozen salmon?
Absolutely! Just be sure to thaw it completely in the refrigerator before cooking to ensure even cooking.
4. How can I store leftovers?
Store leftover salmon in an airtight container in the refrigerator for up to 2 days. Reheat gently in the oven or microwave. To keep it moist, add a splash of water before reheating.
Nutritional Info
- Serving Size: 1 fillet
- Calories: Approximately 350
- Protein: 30g
- Carbohydrates: 15g
- Fat: 20g
- Fiber: 0g
- Sugars: 12g
Whether you’re whipping this up for a quick weeknight dinner or impressing friends at a weekend dinner party, this Maple Dijon Salmon is sure to be a hit. Remember, cooking is about enjoying the process and indulging your taste buds. So grab those ingredients, put on your favorite tunes, and get ready to create something magical in your kitchen! Happy cooking, my friends!
PrintMaple Dijon Salmon
A succulent salmon dish with a sweet maple glaze and a hint of Dijon mustard, perfect for any dinner occasion.
- Prep Time: 10 minutes
- Cook Time: 20 minutes
- Total Time: 30 minutes
- Yield: 4 servings 1x
- Category: Main Course
- Method: Baking
- Cuisine: American
- Diet: Pescatarian
Ingredients
- 4 Salmon fillets
- ¼ cup Maple syrup
- 2 tablespoons Dijon mustard
- 2 cloves Garlic, minced
- Salt and pepper, to taste
Instructions
- Preheat your oven to 400°F (200°C).
- Combine maple syrup, Dijon mustard, and minced garlic in a small bowl.
- Place salmon fillets skin-side down on a lined baking sheet.
- Season lightly with salt and pepper.
- Spoon the maple Dijon mixture over each salmon fillet.
- Bake for 15-20 minutes, until the salmon flakes easily with a fork.
- Let it rest for a couple of minutes before serving.
- Garnish with fresh herbs if desired and serve.
Notes
You can substitute salmon with trout or other fatty fish. Experiment with adding spices or fresh herbs for a twist on flavors.
Nutrition
- Serving Size: 1 fillet
- Calories: 350
- Sugar: 12g
- Sodium: 400mg
- Fat: 20g
- Saturated Fat: 3g
- Unsaturated Fat: 14g
- Trans Fat: 0g
- Carbohydrates: 15g
- Fiber: 0g
- Protein: 30g
- Cholesterol: 60mg
Keywords: salmon, maple glaze, Dijon mustard, quick dinner, healthy recipes
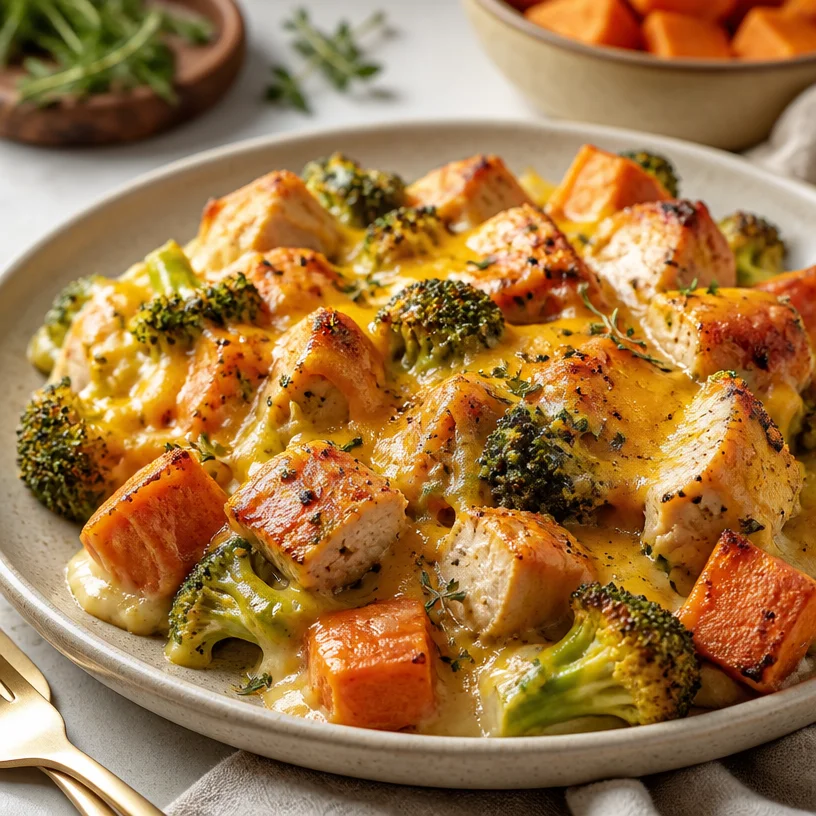
One-Pan Harvest Chicken Casserole for Weeknight Dinners
Harvest Chicken Casserole: A Cozy Feast for the Soul
Welcome, fellow food lovers! Today, we’re diving into the heart of what makes comfort food so darn comforting with my Harvest Chicken Casserole. Picture this: tender chicken, sweet potatoes, vibrant broccoli, and a melting layer of cheddar cheese all harmoniously coming together to create a dish that warms your heart while tantalizing your taste buds. Whether it’s a chilly evening or just a family gathering, this casserole is bound to shine on your dinner table.
Eating clean doesn’t mean sacrificing flavor, and I promise you won’t feel deprived with this delightful dish. It’s easy, satisfying, and incredibly versatile! So grab your apron and let’s get cooking!
A Personal Story: Inspired by My Grandmother
Before we dive into the recipe, let me share a little story from my kitchen. Growing up, Sunday dinners at my grandmother’s house were sacred. She was a master of casseroles, and her "Harvest Surprise" was the star of the show. As kids, we’d always peek into the oven, eyes wide with anticipation, hoping to catch a whiff of the savory goodness. She expertly layered ingredients, always ensuring the flavors burst forth like fireworks.
I remember how she’d have me help her peel the sweet potatoes while regaling me with tales of her childhood. It wasn’t just the dish that warmed my belly, but the love she poured into it that filled my heart. It’s those precious moments that inspired me to create my own version of her beloved casserole, with a modern twist of course!
Ingredients
Here’s what you’ll need for this delectable Harvest Chicken Casserole:
-
2 cups cooked chicken, shredded or diced
A great source of protein, you can use rotisserie chicken for speed or poach your own. For a vegetarian option, consider subbing with chickpeas or lentils! -
2 medium sweet potatoes, peeled and cubed
Naturally sweet and rich in nutrients, sweet potatoes add a delicious earthiness. If you’re craving a different flavor, butternut squash is a fantastic substitute! -
2 cups broccoli florets
Fresh or frozen, broccoli packs a nutritional punch and adds lovely color. Don’t have broccoli? Brussels sprouts or green beans work beautifully too. -
1 ½ cups shredded cheddar cheese
The gooey goodness that holds everything together! Feel free to switch it up with mozzarella or a dairy-free cheese blend for a comforting dairy-free option. -
1 cup chicken broth
This keeps everything moist and flavorful. Homemade broth is the best, but store-bought is a convenient choice if time is short. -
1 teaspoon garlic powder
Essential for a flavor boost—fresh garlic would work wonders too! -
Salt & pepper to taste
Essential for seasoning! Always taste as you go to get the perfect balance. -
Olive oil for drizzling
Just a splash helps enhance flavors and makes for a golden-brown finish.
These ingredients are easy to find and combine to create a symphony of flavors and textures that will keep you coming back for seconds.
Step-by-Step Instructions
-
Preheat Your Oven:
Start by preheating your oven to 375°F (190°C). A hot oven is crucial for that perfectly baked casserole, so don’t skip this step! -
Prepare Your Sweet Potatoes:
Toss those cubed sweet potatoes into a pot of boiling salted water. Let them cook for about 10-12 minutes until fork-tender. This little pre-cook ensures they’ll be soft and perfectly integrated in the casserole! Drain and set aside. -
Mix Chicken and Broccoli:
In a large mixing bowl, combine your shredded chicken, broccoli florets, garlic powder, salt, and pepper. Stir until everything is well coated. Here’s a tip: If your broccoli is frozen, just give it a quick steam first—trust me, it’ll still turn out beautifully! -
Combine Ingredients in a Casserole Dish:
In a greased 9×13 inch casserole dish, layer the cooked sweet potatoes in an even layer at the bottom. Top this with the chicken and broccoli mixture, spreading it evenly. -
Pour the Chicken Broth:
Gradually pour the chicken broth over the entire dish. This will ensure your casserole remains moist and flavorful as it bakes. -
Add the Cheese:
Go ahead and sprinkle that glorious shredded cheddar cheese all over the top. Cheese is happiness in food form, and it’ll create a delicious, bubbly top! -
Bake to Perfection:
Place it in the oven and let it bake for about 30-35 minutes, or until the cheese is melted and bubbly, and the edges are lightly browned. You might want to use a broiler for the last few minutes to get that golden finish—just keep an eye on it! -
Let It Rest:
Once it comes out of the oven, let it rest for about 10 minutes. This allows everything to set and makes for easier serving. Trust me; it’s worth the wait!
Serving Suggestions
When it comes to plating your Harvest Chicken Casserole, simplicity is key! Go for serving it directly from the casserole dish, garnished with a sprinkle of fresh herbs, such as parsley or chives, for a pop of color. You can also pair it with a fresh green salad to balance out the warm, hearty casserole. For those cozy nights, it’s perfect with a side of crusty bread to soak up all those luscious flavors!
Recipe Variations
-
Swap the Protein:
How about going vegetarian by using quinoa or tofu instead of chicken? For a spicy kick, add some cooked Italian sausage! -
Veggie Lovers Delight:
Mix in other veggies like spinach, bell peppers, or zucchini for added nutrients and fiber without sacrificing taste! -
Flavor Burst:
Add a teaspoon of smoked paprika or a tablespoon of Dijon mustard to the mix for an extra layer of flavor. -
Cheesy Goodness:
Try using different cheese combinations such as pepper jack for a little heat or feta for a tangy twist. -
Herbs and Spices:
Experiment with various herbs, such as thyme or rosemary. A sprinkle of Italian seasoning will elevate it to a whole new level!
Chef’s Notes
This recipe has been a cherished part of my cooking repertoire for years. It started as a simple homage to my grandma’s casserole and has evolved into a dish bursting with flavors that reflect my cooking journey. I remember one Thanksgiving when I accidentally dropped my casserole dish! I salvaged it as best I could, and you know what? Everyone went back for seconds. A perfect reminder that cooking is about love, experimentation, and sometimes, embracing the unexpected!
FAQs and Troubleshooting
Q1: Can I prep this casserole in advance?
Absolutely! You can assemble it a day ahead and store it in the refrigerator. Just remember to add a few extra minutes to the cooking time if you’re baking it straight from cold.
Q2: Why is my casserole watery?
If you find your casserole is too watery, it might be because the vegetables released moisture while cooking. Ensure to not overdo it on the broth, or you can let it simmer a bit longer on the stove to reduce excess liquid.
Q3: How long will leftovers last?
Covered, leftovers can last in the fridge for up to 3 days. This casserole also freezes well! Just make sure to separate it into portions and store in freezer-safe containers if you want to save some for later.
Q4: Can I make this gluten-free?
Yes, this recipe is naturally gluten-free! Just be sure to double-check your broth choice and any substitutes to ensure they fit your dietary needs.
Nutritional Info (Optional)
Each serving of the Harvest Chicken Casserole has approximately:
- Calories: 370
- Protein: 30g
- Carbohydrates: 45g
- Dietary Fiber: 6g
- Fat: 12g
Feel free to adjust portions as needed!
And there you have it—every bit of comfort packed into a single casserole dish, ready to nourish your body and soul. I hope you dive headfirst into making this Harvest Chicken Casserole because nothing feels quite as rewarding as serving a warm meal that resonates with heartwarming memories. Happy cooking, and let’s keep those plates clean and cravings satisfied!
PrintHarvest Chicken Casserole

A cozy feast for the soul featuring tender chicken, sweet potatoes, vibrant broccoli, and melted cheddar cheese that warms your heart.
- Prep Time: 15 minutes
- Cook Time: 35 minutes
- Total Time: 50 minutes
- Yield: 4 servings 1x
- Category: Main Course
- Method: Baking
- Cuisine: American
- Diet: Gluten-Free
Ingredients
- 2 cups cooked chicken, shredded or diced
- 2 medium sweet potatoes, peeled and cubed
- 2 cups broccoli florets
- 1 ½ cups shredded cheddar cheese
- 1 cup chicken broth
- 1 teaspoon garlic powder
- Salt & pepper to taste
- Olive oil for drizzling
Instructions
- Preheat your oven to 375°F (190°C).
- Toss cubed sweet potatoes into boiling salted water and cook for 10-12 minutes until fork-tender. Drain and set aside.
- In a large mixing bowl, combine shredded chicken, broccoli, garlic powder, salt, and pepper. Stir until well coated.
- In a greased 9×13 inch casserole dish, layer cooked sweet potatoes evenly at the bottom.
- Top with the chicken and broccoli mixture, spreading it evenly.
- Pour chicken broth over the dish.
- Sprinkle shredded cheddar cheese on top.
- Bake for about 30-35 minutes, until cheese is melted and bubbly.
- Let it rest for 10 minutes before serving.
Notes
This dish can be prepared a day in advance and stored in the refrigerator. Leftovers last up to 3 days in the fridge and freeze well.
Nutrition
- Serving Size: 1 serving
- Calories: 370
- Sugar: 6g
- Sodium: 750mg
- Fat: 12g
- Saturated Fat: 6g
- Unsaturated Fat: 4g
- Trans Fat: 0g
- Carbohydrates: 45g
- Fiber: 6g
- Protein: 30g
- Cholesterol: 90mg
Keywords: chicken casserole, comfort food, healthy recipe
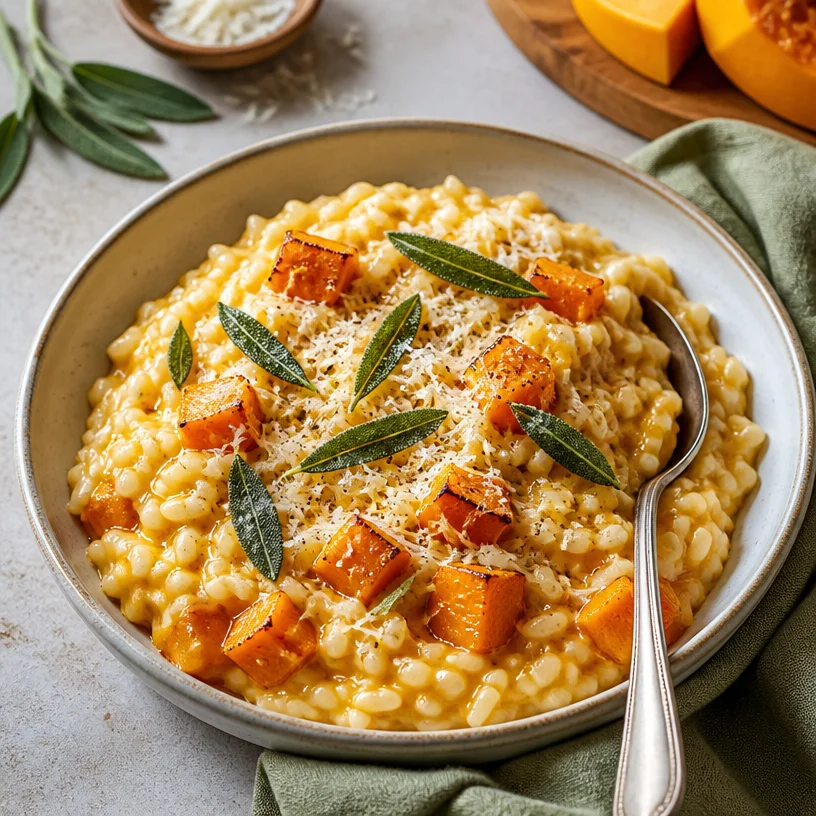
Weeknight One-Pan Creamy Butternut Squash Risotto with Sage
Butternut Squash Risotto: A Warm Hug in a Bowl
Welcome, fellow food enthusiasts! Today, I’m absolutely thrilled to share one of my all-time favorite dishes: Butternut Squash Risotto. Imagine creamy, indulgent rice that’s infused with the warm, nutty sweetness of roasted butternut squash—comfort food at its finest! This risotto is the kind of meal that wraps you in a cozy blanket after a long day, filling your kitchen with irresistible aromas. Let’s dive into this delightful dish that’s perfect for any occasion, from casual weeknight dinners to special gatherings with friends.
Now, I know risotto can sound a bit intimidating at first. The stirring! The timing! But trust me, this creamy masterpiece is way easier than you might think. With just a little patience and love, you’ll have a restaurant-quality dish right in your own home. Plus, this recipe is packed with wholesome ingredients that will leave you feeling satisfied and nourished without sacrificing flavor. So get ready to delight your taste buds and impress your loved ones with this dish that truly speaks both comfort and elegance!
My Risotto Journey
Let me take you back to the first time I ever attempted making risotto. I was in college, and my friends and I were hosting a "fancy" dinner party. The goal was to impress everyone with some homemade gourmet cuisine. After flipping through a well-loved cookbook and getting mildly lost in its beautiful pictures of creamy risottos, I settled on a butternut squash version.
Despite my nerves, I felt a thrill of excitement. The kitchen was alive with chatter, and laughter echoed off the walls as I stirred the pot. There were a few mishaps—a splash or two of broth here, a moment of panic when I added too much cheese, and definitely a bit of squash that decided to escape the roasting pan. But through it all, that creamy, golden goodness came together beautifully.
When I finally served it, the room fell silent as everyone savored every bite. In that moment, I realized that cooking doesn’t just fill our bellies; it feeds our souls and connects us with those we love. Ever since then, butternut squash risotto has held a special place in my heart. So let’s roll up our sleeves and create this comforting dish together!
Ingredients
Here’s what you’ll need to whip up this delightful Butternut Squash Risotto:
-
Arborio Rice: The star of our show! This short-grain rice is essential for achieving that creamy texture we all love. If you can’t find Arborio, Carnaroli or Vialone Nano are excellent substitutes.
-
Butternut Squash: Sweet, nutty, and packed with vitamins, butternut squash is perfect for risotto. You can swap it with pumpkin or acorn squash if necessary—just adjust cooking times slightly.
-
Vegetable or Chicken Broth: This is what elevates our dish to the next level of flavor! Homemade broth is fantastic, but low-sodium store-bought variety works well too. Want a richer flavor? Use bone broth instead.
-
Parmesan Cheese: Ah, the secret ingredient for that luscious creaminess! Freshly grated Parmesan is the best way to go; if you’re dairy-free, nutritional yeast adds a delicious cheesy flavor.
-
Fresh Sage: This herb contributes a warm, earthy aroma to our risotto. If you can’t find fresh sage, dried sage can be used—just use half the amount since dried herbs have a stronger flavor.
Step-by-Step Instructions
Alright, let’s get cooking! Follow these steps to create your butternut squash risotto masterpiece:
-
Prep the Butternut Squash: Start by peeling, seeding, and cutting your butternut squash into small, even cubes (about 1-inch pieces). This ensures even cooking. Preheat your oven to 400°F (200°C), spread the cubes on a baking sheet, drizzle with a little oil, and toss with a pinch of salt. Roast them for 25-30 minutes or until they’re tender and caramelized—this will amplify their sweetness!
Chef Tip – To speed up prep, look for pre-cut butternut squash in your grocery store.
-
Gather Your Broth: In a medium saucepan, heat about 4 cups of vegetable or chicken broth and keep it warm over low heat. This will help the rice cook evenly.
-
Sauté the Aromatics: In a large skillet over medium heat, add a drizzle of olive oil and a tablespoon of butter (you can use all olive oil if you prefer). Once it’s sizzling, toss in 1 finely chopped onion and sauté until it’s translucent—about 5 minutes. This is where the flavor base begins to build!
-
Toast the Rice: Add 1 cup of Arborio rice to the skillet with the onions and stir for about 2 minutes until the rice is lightly toasted. This step helps the rice absorb flavors and gives it a slight nuttiness.
Chef Hack – Resist the urge to stir too vigorously. Gentle stirring is key for releasing the starches that will make your risotto creamy.
-
Add the Broth Gradually: Begin adding your warm broth one ladle at a time, stirring frequently. Wait until most of the liquid has been absorbed before adding the next ladle. This gradual absorption is crucial for that creamy texture we crave.
Chef Insight – This process takes about 20-25 minutes. Enjoy the stirring—it’s therapeutic!
-
Add the Roasted Squash: Once your rice is creamy and al dente, fold in your roasted butternut squash along with a handful of chopped fresh sage, and let it cook for an additional 5 minutes to allow those flavors to meld together.
-
Finish with Parmesan: Off the heat, stir in about ½ cup of freshly grated Parmesan cheese and another pat of butter for richness. Taste and adjust the seasoning with salt and pepper.
Enjoy the aroma of pure joy wafting through your kitchen!
Serving Suggestions
Your Butternut Squash Risotto is ready to steal the show! To serve it, simply spoon generous portions into shallow bowls and garnish with more grated Parmesan, a sprinkle of fresh sage, and a drizzle of high-quality olive oil. It also pairs beautifully with a side salad or crusty bread for that perfect meal experience.
Recipe Variations
Feeling adventurous? Here are some delicious twists you can try with your risotto:
- Mushroom Risotto: Swap out half of the butternut squash for mushrooms for an earthy twist.
- Herbed Risotto: Add fresh herbs like thyme or rosemary instead of sage for a different flavor profile.
- Creamy Spinach: Stir in a couple of cups of fresh spinach at the end for a vibrant, nutrient-packed variation.
- Lemon Zest: Add a touch of brightness with freshly grated lemon zest before serving.
- Bacon Lardons: Crispy bacon bits sprinkled on top make for a decadent twist!
Chef’s Notes
As I’ve played with this recipe over the years, I’ve discovered that the beauty of risotto is its adaptability. You can sneak in seasonal veggies (think peas in the spring or wild mushrooms in the fall) or incorporate leftovers for a hearty meal. Whenever I make risotto, I challenge myself to use whatever I have in my pantry or fridge, and I’m always amazed at the delicious results. One time, I added some leftover roasted garlic, and it took the dish to a whole new level!
Always remember, cooking is about embracing creativity and having fun in the kitchen; don’t be afraid to experiment!
FAQs and Troubleshooting
Q: My risotto is too sticky. What did I do wrong?
A: Overcooking the rice can cause it to become mushy and sticky. Be sure to keep an eye on your cooking time and don’t use too much broth at once.
Q: Can I reheat leftover risotto?
A: Absolutely! Add a splash of broth or water while reheating on the stovetop to bring back that creamy texture. Microwaving is another option, but the stovetop works better for restoring the creaminess.
Q: How can I make this dish vegan?
A: Replace the butter and cheese with plant-based alternatives, and use vegetable broth. Nutritional yeast can add a delicious cheesy flavor!
Q: Can I make risotto ahead of time?
A: Risotto is best enjoyed fresh, but if you need to prepare it ahead, cook up to the point when you add the cheese. Once reheated, stir in the cheese just before serving.
Nutritional Info (Optional)
While risotto is comforting and satisfying, portion control is key! A typical serving of butternut squash risotto (about 1 cup) contains approximately:
- Calories: 350
- Protein: 10g
- Fat: 10g
- Carbohydrates: 55g
- Fiber: 4g
Remember, these values can vary depending on your ingredient choices and portions!
So there you have it—my heartfelt take on Butternut Squash Risotto! I hope this recipe becomes a staple in your kitchen, bringing warmth and joy to your dining table as it has in mine. Let’s keep sharing our love for good food, and as always, happy cooking!
PrintButternut Squash Risotto

A creamy and indulgent risotto infused with the warm, nutty sweetness of roasted butternut squash, perfect for any occasion.
- Prep Time: 15 minutes
- Cook Time: 30 minutes
- Total Time: 45 minutes
- Yield: 4 servings 1x
- Category: Main Course
- Method: Baking
- Cuisine: Italian
- Diet: Vegetarian
Ingredients
- 1 cup Arborio rice
- 2 cups butternut squash, peeled and cubed
- 4 cups vegetable or chicken broth
- ½ cup freshly grated Parmesan cheese
- 1 onion, finely chopped
- 2 tablespoons olive oil
- 1 tablespoon butter
- Fresh sage, chopped
- Salt and pepper, to taste
Instructions
- Prep the butternut squash: Preheat your oven to 400°F (200°C), spread the cubed squash on a baking sheet, drizzle with oil, and roast for 25-30 minutes.
- Gather your broth: In a saucepan, heat the broth and keep warm over low heat.
- Sauté the aromatics: In a large skillet, heat olive oil and butter, then add onion and sauté until translucent.
- Toast the rice: Add Arborio rice and stir for about 2 minutes until lightly toasted.
- Add the broth gradually, one ladle at a time, stirring frequently until most of the liquid is absorbed.
- Fold in the roasted squash and sage, cooking for an additional 5 minutes.
- Finish with Parmesan: Off the heat, stir in the cheese and adjust seasoning.
Notes
For best results, maintain gentle stirring to release starches for creaminess. Experiment with seasonal vegetables for variations!
Nutrition
- Serving Size: 1 serving
- Calories: 350
- Sugar: 6g
- Sodium: 400mg
- Fat: 10g
- Saturated Fat: 4g
- Unsaturated Fat: 5g
- Trans Fat: 0g
- Carbohydrates: 55g
- Fiber: 4g
- Protein: 10g
- Cholesterol: 20mg
Keywords: butternut squash, risotto, Italian, vegetarian comfort food, creamy risotto, warm dish
One-Pan Apple Cider Pork Chops: Quick Weeknight Dinner
Apple Cider Pork Chops: A Cozy Culinary Delight
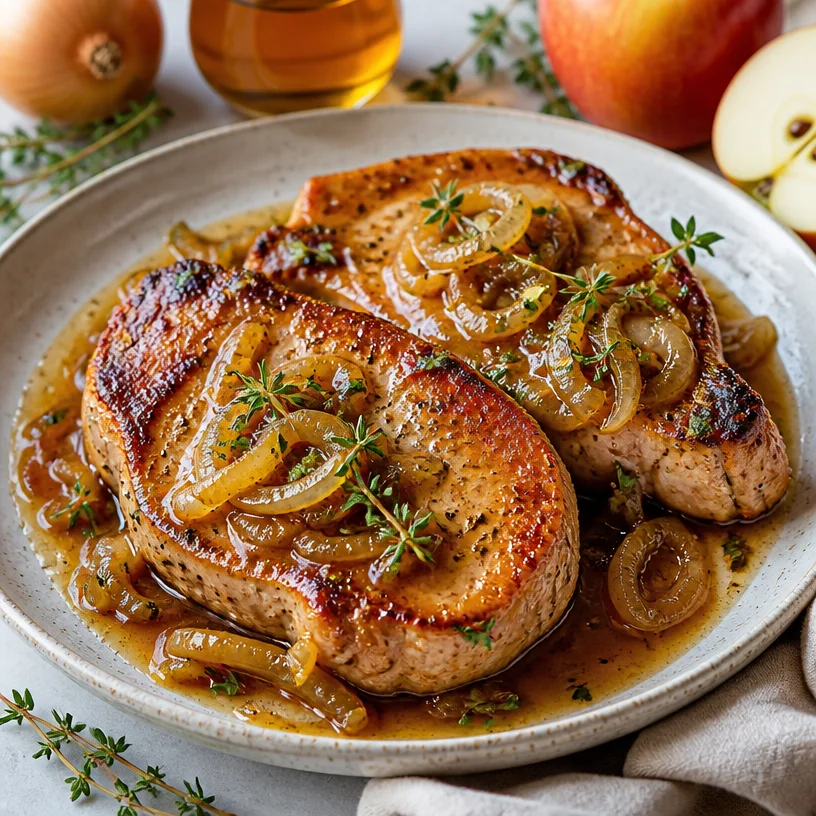
Welcome to the heart of the kitchen! Today, we’re diving into a dish that’s not just satisfying but also bursts with flavor and nostalgia: Apple Cider Pork Chops. If you’re looking for a meal that warms you from the inside out, you’ve come to the right place. Picture this: savory pork chops seeping in sweet and tangy apple cider, mingling with the aromatic hints of thyme and the sweet caramelization of onions. It’s comfort food at its finest!
Introduction: The Magic of Apple Cider Pork Chops
As the leaves turn golden and the crisp air sets in, there’s something so comforting about cooking meals that evoke homey vibes and cherished memories. Apple Cider Pork Chops embody that feeling perfectly. This dish is not just about the ingredients but the experiences and heartwarming moments that come with it. It’s ideal for everything from a weeknight dinner to a cozy gathering with friends and family.
But let’s talk about the magic of cooking with apple cider. There’s a reason it has been a staple in many recipes. Its sweetness cuts through the richness of the pork, accentuating its flavor while bringing a hint of fall to your plate. Pair it with tender onions and fragrant thyme, and you have a symphony of tastes that sing in harmony. As you cook, the aroma wafts through your kitchen, wrapping you in a comforting embrace.
Whether you’re tweaking your dinner routine or impressing guests, this recipe is your ticket to success. Grab those pork chops and a bottle of apple cider; together, we’re about to create something fantastically delicious!
Personal Story
Let me take you back to a chilly autumn evening a few years ago when my family gathered around our rustic dining table for a celebration. Mom decided to whip up her famous Apple Cider Pork Chops, a recipe passed down through generations. I vividly remember how the kitchen filled with a delightful mix of flavors as the chops sizzled in the pan. My siblings and I leaned against the counter, eager for tastes and smells that hinted at the delicious meal to come.
As we sat down, the ambiance was filled with laughter and stories, punctuated only by the sound of fork meeting plate. Each bite was a reminder of home, warmth, and togetherness. That night, not only did we enjoy a scrumptious meal, but we also shared memories that are still cherished today. This dish has since become a beloved tradition in my home, a go-to for potlucks and special gatherings alike. Now that you’ve shared in my nostalgia, let’s cook up some magic in your kitchen!
Ingredients
To create these delicious Apple Cider Pork Chops, here’s what you’ll need:
-
Pork Chops (4 pieces)
Go for bone-in chops for extra flavor and juiciness. If you prefer leaner options, boneless chops work beautifully too. -
Apple Cider (1 cup)
Choose a quality apple cider that isn’t overly sweet; it will balance well with the pork. For a non-alcoholic version, any apple juice can be used for a similar sweetness. -
Onions (1 large, sliced)
Sweet onions like Vidalia add a lovely flavor; however, yellow onions are also a great choice. Sautéing them brings out their natural sweetness, enhancing the dish. -
Thyme (2 teaspoons, fresh)
Fresh thyme elevates the dish with its earthy flavor, but if you only have dried thyme on hand, use about a teaspoon—just crush it between your fingers for better flavor release! -
Butter (2 tablespoons)
Butter adds richness and depth. You can substitute with olive oil for a healthier option. However, leave a little butter in for flavor, if possible.
Step-by-Step Instructions
Now that we’ve gathered our ingredients, let’s get cooking! Follow these steps for perfectly succulent Apple Cider Pork Chops.
-
Prepare the Pork Chops
Start by patting your pork chops dry with a paper towel. This is a small but essential step that ensures that gorgeous golden-brown crust forms when you cook them. Season both sides generously with salt and pepper—don’t be shy! The seasoning enhances the overall flavor. -
Sear the Chops
Heat a large skillet over medium-high heat and add the butter. Allow it to melt and start to bubble gently. When ready, place the pork chops in the skillet. You should hear that satisfying sizzle! Sear them for about 4-5 minutes on each side until they’re beautifully browned. If your chops are thick, you may need an extra minute or two.Chef’s Tip: Avoid overcrowding the pan; if it’s too crowded, you won’t achieve that lovely sear!
-
Remove and Set Aside
Once the pork chops are seared, remove them from the pan and set them aside on a plate. Lower the heat a bit; we’re now transitioning into that flavorful sauce. -
Caramelize the Onions
In the same skillet, add the sliced onions and a pinch of salt. Sauté them for about 5-7 minutes, stirring occasionally, until they become translucent and slightly caramelized. This is where the magic happens!
Chef Tip: If the onions start to brown too quickly, add a splash of apple cider to deglaze the pan—this helps lift all those scrumptious bits stuck to the bottom.
-
Add the Apple Cider and Thyme
Pour in the apple cider, scraping up those delightful browned bits as you do. Sprinkle in the fresh thyme. Bring the mixture to a simmer. This step lets the flavors meld together beautifully. -
Return the Pork Chops
Nestle the pork chops back into the skillet, spooning some of the sauce over the top. Cover the skillet and let everything simmer together for about 10-15 minutes, or until the pork is cooked through (an internal temperature of 145°F). Your kitchen is about to smell heavenly! -
Adjust the Seasoning
Once the pork chops finish cooking, taste the sauce. Adjust seasoning with more salt, pepper, or even a splash of vinegar if you crave a little tanginess. -
Serve and Enjoy
Plate the pork chops, drizzling the apple cider sauce over them. You can garnish with a sprig of fresh thyme for a touch of color and flavor.
Serving Suggestions
These Apple Cider Pork Chops shine when paired with sides that complement their rich flavors and comforting nature. I recommend serving them alongside creamy mashed potatoes or roasted Brussels sprouts. For a lighter option, a crisp fall salad featuring arugula, nuts, and sliced apples will balance out the dish perfectly. Don’t forget to pour a glass of that remaining apple cider—it’s a match made in culinary heaven!
Recipe Variations
Let’s get creative! Here are a few twists you can explore with your Apple Cider Pork Chops:
-
Spicy Kick: Add a pinch of red pepper flakes to the onions during cooking for a spicy kick that complements the sweetness beautifully.
-
Herb Swap: Don’t have thyme? Fresh rosemary or sage can elevate the dish with a unique flavor twist.
-
Fruit Fusion: Toss in slices of pears or even cranberries into the sauce for added sweetness and festive flair.
-
Sweet and Savory: Drizzle a bit of maple syrup into the sauce before simmering for an enhanced depth of flavor.
-
Grill It: If you’re feeling adventurous, marinate the pork chops in apple cider overnight and throw them on the grill for a smoky flavor profile!
Chef’s Notes
Over the years, this recipe has become a staple not just in my home but with friends who’ve requested it multiple times. The first time I made it for a group, I accidentally grabbed apple juice instead of apple cider. The pork still turned out delicious—armed with that experience; I learned that cooking often leads to great surprises. Each iteration of this dish has been a reminder that adapting recipes to your taste is part of the culinary adventure!
FAQs and Troubleshooting
-
What if my pork chops are tough?
Overcooking is often the culprit. Ensure you’re cooking them just until they reach an internal temperature of 145°F for the most tender results. -
Can I use a slow cooker?
Absolutely! Sear the chops first, then combine all ingredients in a slow cooker and cook on low for 6-8 hours. -
What if I don’t have apple cider?
No worries! You can use apple juice, but remember to adjust sweetness if it’s very sugary. A mix of apple juice and a splash of vinegar can mimic the tang of cider. -
How do I store leftovers?
Place any leftovers in an airtight container and store them in the refrigerator for up to 3 days. Reheat gently in the skillet to keep them juicy.
Nutritional Info
While I won’t bore you with numbers, this dish is a comforting choice packed with protein and flavors, balanced by the natural sweetness of the cider and offers a great source of iron from the pork. Plus, you can play around with sides to make it as healthy as you wish!
So there you have it! A fabulous Apple Cider Pork Chops recipe that you can whip up easily and enjoy with loved ones. Trust me, every bite will be filled with warmth and flavor, turning any meal into a memorable occasion. Happy cooking!
PrintApple Cider Pork Chops
Apple Cider Pork Chops are savory pork chops cooked in sweet and tangy apple cider, enhanced with caramelized onions and fresh thyme for a comforting meal.
- Prep Time: 15 minutes
- Cook Time: 30 minutes
- Total Time: 45 minutes
- Yield: 4 servings 1x
- Category: Main Course
- Method: Pan-frying
- Cuisine: American
- Diet: Paleo
Ingredients
- 4 Pork Chops (bone-in for extra flavor)
- 1 cup Apple Cider
- 1 large Onion, sliced
- 2 teaspoons fresh Thyme
- 2 tablespoons Butter
Instructions
- Prepare the pork chops by patting them dry and seasoning with salt and pepper.
- Sear the chops in a skillet with melted butter for 4-5 minutes on each side until browned.
- Remove the chops and set them aside on a plate.
- Caramelize the sliced onions in the same skillet for 5-7 minutes until translucent.
- Add the apple cider and thyme, bringing it to a simmer.
- Return the pork chops to the skillet, cover, and simmer for 10-15 minutes until cooked through.
- Adjust seasoning to taste with salt, pepper, or vinegar.
- Serve the pork chops with the sauce drizzled on top.
Notes
Serve with mashed potatoes or roasted Brussels sprouts for sides that complement the rich flavors. You can also garnish with a sprig of fresh thyme.
Nutrition
- Serving Size: 1 chop
- Calories: 350
- Sugar: 10g
- Sodium: 400mg
- Fat: 12g
- Saturated Fat: 5g
- Unsaturated Fat: 7g
- Trans Fat: 0g
- Carbohydrates: 40g
- Fiber: 2g
- Protein: 28g
- Cholesterol: 90mg
Keywords: pork chops, apple cider, comfort food, autumn recipes, family meal
One-Pan Creamy Tuscan Chicken in 30 Minutes: Weeknight Dinner
Creamy Tuscan Chicken: A Delicious Journey
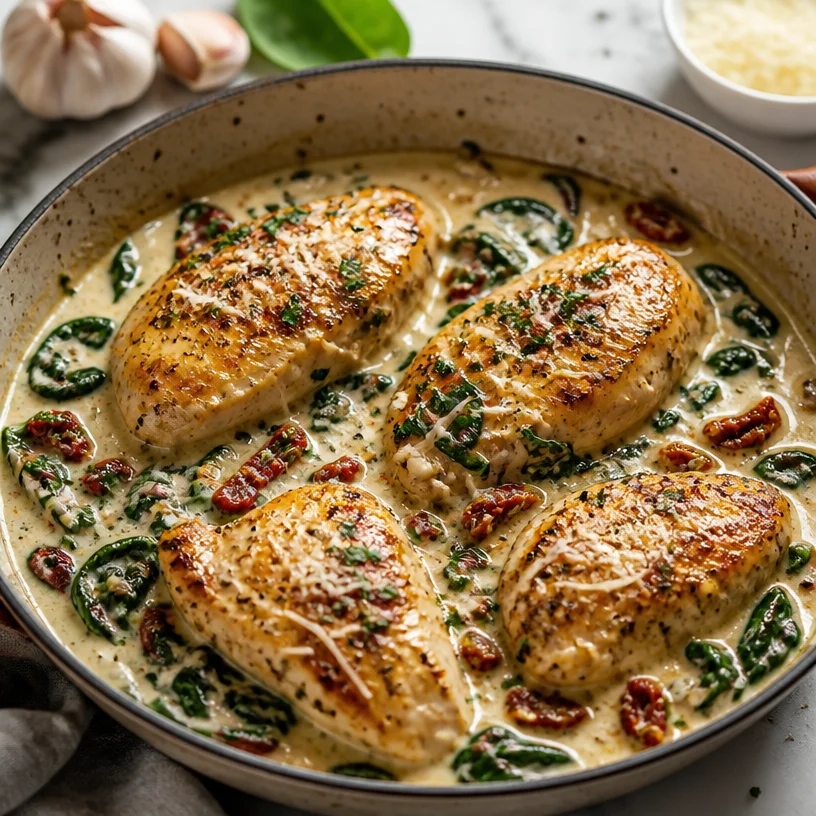
Welcome to Clean Plate Cravings, my foodie friends! Today, I’m thrilled to share with you a dish that has quickly become a favorite in our kitchen—Creamy Tuscan Chicken. This dish is not just a meal; it’s an experience that brings the warmth of Italian cooking right into your home. Imagine succulent chicken breasts draped in a velvety sauce bursting with flavors from sun-dried tomatoes and fresh spinach, finished off with a sprinkle of Parmesan cheese. It’s comfort food at its finest, and trust me, you’ll be going back for seconds!
A Slice of My Kitchen Memories
Let me take you back to a delightful summer evening a few years ago. I was visiting my best friend Sofia, who invited me for dinner at her family’s cozy home, which felt a bit like stepping right into Italy. Her mom prepared this incredible Creamy Tuscan Chicken, and I still remember the tantalizing aroma wafting through the kitchen. The golden crispy edges of the chicken, the vibrant greens of the spinach, and the deep, rich flavors of sun-dried tomatoes filled us with excitement.
As we gathered around the table, my heart was light, having spent the day laughing, reminiscing, and savouring amazing food. That first bite was pure magic—each element harmonizing perfectly with the others. I learned an important lesson that night: food tastes best when shared with those you love. It was a beautiful reminder that the kitchen is not just a place to cook; it’s where memories are created and hearts are nourished. Now, every time I make this dish, it takes me back to that summer night filled with laughter and love.
Ingredients
Here’s what you’ll need to create your own creamy masterpiece:
-
Chicken Breasts (2-4 pieces)
Juicy and tender, chicken breasts are the backbone of this dish. You can substitute with chicken thighs for a richer flavor, or for a lighter version, use turkey breast. -
Spinach (2 cups, fresh)
Fresh spinach not only adds a vibrant color but also packs a nutritious punch. If you’re out of spinach, kale or Swiss chard works too! -
Sun-Dried Tomatoes (1 cup)
Sweet and tangy, these add a burst of flavor to the dish. If you prefer a milder taste, replace them with roasted red peppers or chopped fresh tomatoes. -
Garlic (4 cloves, minced)
A fresh, aromatic garlic brings a beautiful depth to the sauce. If you’re short on fresh garlic, a teaspoon of garlic powder can suffice—though it won’t have quite the same impact. -
Parmesan Cheese (1 cup, grated)
Savory and cheesy, Parmesan elevates the creaminess of the dish. Pecorino Romano is a fantastic substitute, especially if you enjoy a stronger taste. -
Heavy Cream (1 cup)
This is the secret to that luscious, creamy texture! For a lighter option, you can experiment with half-and-half or coconut cream for a dairy-free version.
Step-by-Step Instructions
Now, let’s get cooking! Follow these simple steps to whip up your Creamy Tuscan Chicken:
-
Prep Your Ingredients
Start by gathering all your ingredients. Chop the garlic, slice the sun-dried tomatoes, and rinse your spinach. This makes the cooking process smooth and enjoyable. Trust me, a little prep goes a long way! -
Sear the Chicken
In a large skillet over medium heat, add a splash of olive oil. Season your chicken breasts with salt and pepper. When the oil is hot, place the chicken in the pan and let it sear for about 6-7 minutes on each side until golden brown. This step caramelizes the chicken and enhances the flavor. Chef hack: Avoid flipping the chicken too soon to achieve that lovely crust! -
Remove and Rest
Once cooked through, remove the chicken from the skillet and let it rest on a plate. This allows the juices to redistribute, keeping your chicken juicy. Cover it with foil to keep it warm while you work on the sauce. -
Sauté the Garlic and Spinach
In the same skillet (don’t clean it; we want those yummy flavors), add a bit more olive oil if needed, then toss in the minced garlic. Sauté for about 30 seconds or until fragrant—your kitchen will smell heavenly! Next, add the fresh spinach and cook until wilted. This adds both nutrients and color! -
Add Sun-Dried Tomatoes
Now, stir in the sun-dried tomatoes. Let them mingle with the garlic and spinach for a minute, letting their flavors blend together. This is where the magic begins—your taste buds will sing! -
Introduce Heavy Cream
Slowly pour in the heavy cream, stirring to combine. Bring the sauce to a gentle simmer, and watch it thicken beautifully. Chef tip: If you want an even thicker sauce, let it simmer a little longer. -
Add the Parmesan
Stir in the grated Parmesan cheese until it melts into the sauce. This gives your dish that iconic creaminess. Taste and adjust seasoning if necessary—maybe a pinch more salt or some cracked black pepper. -
Combine it All
Return the chicken to the skillet, spooning the sauce over it. Let everything simmer together for another 3-4 minutes. This step allows the chicken to soak up all the delicious flavors. -
Serve with Love
Your Creamy Tuscan Chicken is ready! Serve it hot and watch your family and friends be mesmerized by this beautiful meal.
Serving Suggestions
To plate your Creamy Tuscan Chicken, you can serve it over a bed of pasta, rice, or even zucchini noodles for a lighter option. A sprinkle of fresh parsley or basil on top adds a pop of color and freshness to the dish. Pair it with crusty bread for dipping into that delicious sauce, and don’t forget a side salad for balance!
Recipe Variations
Feeling adventurous? Here are some fun variations to shake things up:
- Mushroom Lovers: Add sautéed mushrooms for an earthy flavor boost.
- Spicy Kick: Toss in a pinch of red pepper flakes when sautéing the garlic for some heat.
- Herby Twist: Incorporate fresh herbs like thyme, oregano, or basil for extra aromatic bliss.
- Cauliflower Rice: Make it keto-friendly by serving over cauliflower rice instead of traditional grains.
- Vegan Delight: Swap chicken for chickpeas or a plant-based protein and use coconut cream instead of heavy cream.
Chef’s Notes
This recipe has evolved over the years, and I’ve experimented with different ingredients and flavors. The creaminess of the sauce was inspired by my love for Italian pasta dishes, but the addition of spinach and sun-dried tomatoes took it to the next level! I remember the first time I tried it with a sprinkle of crushed red pepper—it was a game-changer. Food is all about experimenting, so don’t hesitate to make it your own!
FAQs and Troubleshooting
1. My sauce is too thick; what should I do?
If your sauce is thicker than you’d like, simply add a splash of chicken broth or water to thin it out to your desired consistency.
2. Can I use frozen spinach?
Absolutely! Thaw the frozen spinach and squeeze out excess water before adding it to the skillet.
3. The chicken is still pink inside; how do I make sure it cooks fully?
If you find your chicken is undercooked, lower the heat and cover the skillet to allow it to cook through without drying out.
4. How do I store leftovers?
Store leftover Creamy Tuscan Chicken in an airtight container in the fridge for up to 3 days. Reheat gently on the stove or in the microwave.
Nutritional Info (Optional)
This Creamy Tuscan Chicken is packed with protein and vitamins from the spinach and tomatoes. Each serving provides approximately 400 calories, 30g of protein, 28g of fat, and 5g of carbohydrates, making it a balanced dish that satisfies without weighing you down.
And there you have it! Your scrumptious Creamy Tuscan Chicken is ready to impress. Remember, the heart of this recipe lies not just in the ingredients but in the joy of creating and sharing this meal. So gather your loved ones, dig in, and savor every bite together! Happy cooking!
PrintCreamy Tuscan Chicken

A comforting dish featuring succulent chicken breasts in a velvety sauce with sun-dried tomatoes, fresh spinach, and Parmesan cheese.
- Prep Time: 15 minutes
- Cook Time: 30 minutes
- Total Time: 45 minutes
- Yield: 4 servings 1x
- Category: Main Course
- Method: Sautéing
- Cuisine: Italian
- Diet: None
Ingredients
- 2–4 pieces Chicken Breasts
- 2 cups Fresh Spinach
- 1 cup Sun-Dried Tomatoes
- 4 cloves Garlic, minced
- 1 cup Grated Parmesan Cheese
- 1 cup Heavy Cream
Instructions
- Prep your ingredients by chopping the garlic, slicing the sun-dried tomatoes, and rinsing your spinach.
- Sear the chicken in a skillet over medium heat with olive oil, seasoning with salt and pepper, for 6-7 minutes on each side.
- Remove the chicken from the skillet and let it rest on a plate to keep it juicy.
- Sauté the minced garlic in the same skillet, followed by adding the fresh spinach and cooking until wilted.
- Add the sun-dried tomatoes to the skillet and let them mingle with the garlic and spinach.
- Introduce the heavy cream, stirring to combine and allowing it to simmer until thickened.
- Add the grated Parmesan cheese, stirring until melted into the sauce.
- Combine the chicken back into the skillet with the sauce, letting it simmer for another 3-4 minutes.
- Serve hot and enjoy your Creamy Tuscan Chicken!
Notes
For variations, try adding sautéed mushrooms, red pepper flakes for heat, or substitute the chicken with chickpeas for a vegan option.
Nutrition
- Serving Size: 1 serving
- Calories: 400
- Sugar: 5g
- Sodium: 400mg
- Fat: 28g
- Saturated Fat: 15g
- Unsaturated Fat: 10g
- Trans Fat: 0g
- Carbohydrates: 5g
- Fiber: 1g
- Protein: 30g
- Cholesterol: 100mg
Keywords: Creamy Tuscan Chicken, Italian recipe, chicken dinner, comfort food
One-Pan Creamy Spinach Mushroom Pasta in 15 Minutes
Spinach Mushroom Pasta: A Soul-Warming Classic
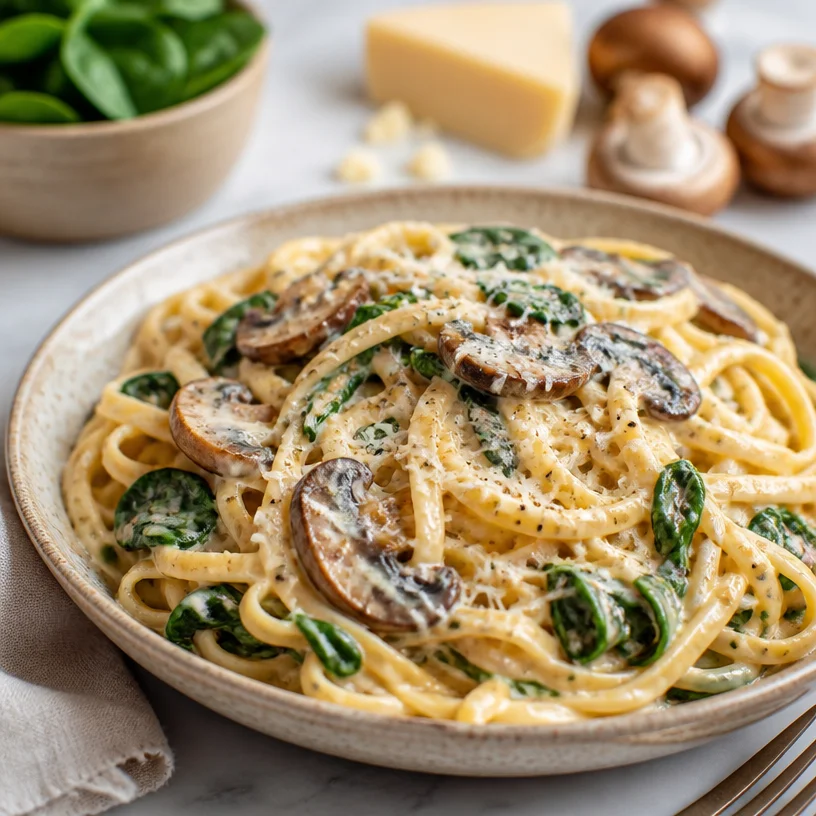
Welcome to my kitchen, where fresh ingredients and nourishing flavors come together to celebrate the joys of cooking! Today, we’re diving into a dish that has been a staple in my life for years: Spinach Mushroom Pasta. If you’re seeking comforting meals that pack a punch of flavor, you’re in the right place.
This delightfully simple pasta dish bridges the gap between the hustle of daily life and the quiet joy of savoring something homemade and wholesome. It’s made with just a handful of fresh ingredients, yet each one shines vibrantly. So, grab your apron, and let’s stir up some magic!
A Taste of Nostalgia
I can’t help but chuckle when I think back to my early days in the kitchen, armed with a tiny cookbook and an adventurous spirit. One of my first culinary experiments was making pasta from scratch. However, I didn’t quite have the finesse I boast today, and my dough ended up a bit more like a pancake batter than the silky sheets of pasta I envisioned.
Nevertheless, in those moments of flour-covered countertops and laughter sprinkled with a dash of chaos, I discovered my affinity for creating something delicious out of simple ingredients. Fast forward a few years, and my love for pasta had only deepened.
I remember the day I first tried spinach mushroom pasta. It was a rainy afternoon, and the smell of sautéed mushrooms wafted through the air, mingling perfectly with the rustic embrace of garlic and the earthiness of fresh spinach. It felt like a warm hug on a cold day, and I was sold. Let’s just say, it became a cherished go-to recipe not just for myself but for friends and family as well. This dish is not just food; it’s a celebration of connection, comfort, and the many gatherings that pasta has facilitated over the years.
Ingredients
Here’s what you’ll need to create this delightful dish. Each ingredient plays a key role in the final flavor and texture, so let’s give them some love!
-
Pasta (8 oz): Choose your favorite type—spaghetti, fettuccine, or even whole-grain. They all work beautifully. Can’t gluten? Opt for chickpea or zucchini noodles!
-
Mushrooms (8 oz): Button, cremini, or shiitake mushrooms add a rich, umami flavor. If you’re feeling adventurous, try wild mushrooms for an earthy twist.
-
Spinach (4 cups, fresh): Packed with nutrients, spinach adds color and a mild flavor. Frozen spinach also works fine; just make sure to thaw and drain excess moisture!
-
Parmesan Cheese (½ cup, grated): This adds a salty, nutty flavor. For a vegan option, nutritional yeast gives a similar taste without dairy.
-
Garlic (3 cloves, minced): A must-have for that aromatic presence! Shallots can be a nice substitute if you prefer a sweeter, more delicate flavor.
-
Olive Oil (2 tbsp): A splash of extra virgin olive oil enhances everything, but feel free to swap it with avocado oil for a buttery flavor.
-
Salt and Pepper: To taste; if you’re watching your sodium, a dash of lemon juice can balance flavors beautifully!
Step-by-Step Instructions
Now that we have our ingredients set, let’s whip up some delightful Spinach Mushroom Pasta!
-
Cook the Pasta: Start by bringing a large pot of salted water to a boil. Once boiling, add your pasta and cook according to package directions until al dente. I like to reserve a cup of pasta water before draining, as it works wonders to adjust sauce consistency later on!
-
Sauté the Mushrooms: In a large skillet, heat the olive oil over medium heat. Add the sliced mushrooms and sauté for about 5-7 minutes until they’re golden and tender. Here’s a chef hack: don’t crowd the pan! This allows your mushrooms to brown beautifully instead of steaming.
-
Add Garlic: Toss in the minced garlic and sauté for another 1-2 minutes, just until fragrant. Be careful not to burn it; burnt garlic can taste bitter and ruin the dish!
-
Incorporate Spinach: Add in the fresh spinach and stir until it wilts down, about 3-4 minutes. The vibrant green color is incredibly satisfying, don’t you think? If using frozen spinach, ensure it’s thawed and drained.
-
Combine Pasta and Sauce: Drain the pasta and add it directly into the skillet with the sautéed veggies, tossing everything together. If it looks a tad dry, gradually add reserved pasta water until you reach your desired consistency. The starch in the water will help create a luxurious sauce that clings to the pasta.
-
Finish with Parmesan: Sprinkling in the grated Parmesan, toss until it melts and coats everything. The heat will work its magic here! Taste and adjust your seasoning with salt and pepper.
-
Plate and Serve: Transfer the pasta to bowls, and don’t forget to sprinkle a little extra Parmesan on top if you’re feeling indulgent!
As you savor each bite, relish that beautiful medley of flavors—a buttery mouthfeel from the pasta, the umami richness of mushrooms, and the freshness of spinach. This dish is not only satisfying but oh-so-fulfilling too!
Serving Suggestions
To plate this lovely pasta, twirl the noodles elegantly onto a bowl or plate, letting those ribbons cascade in a delightful way. A sprinkle of fresh cracked pepper and extra Parmesan elevates the dish’s presentation. Pair it with a simple side salad tossed with a light vinaigrette for a complete meal. As the saying goes, “We eat with our eyes first!”
Recipe Variations
Let’s spice things up! Here are a few creative twists on your Spinach Mushroom Pasta:
-
Add Protein: Toss in grilled chicken, shrimp, or chickpeas for a heartier option.
-
Creamy Texture: Mix in a splash of cream or a dollop of ricotta for a decadent sauce.
-
Herb Infusion: Fresh basil or parsley can elevate the flavors! Sprinkle them on top right before serving for a fresh finish.
-
Spicy Kick: If you’re in the mood for heat, a pinch of red pepper flakes or a drizzle of sriracha can jazz things up!
-
Nutty Addition: Toasted pine nuts or walnuts can add a delightful crunch and richness to your pasta.
Chef’s Notes
Every time I make this Spinach Mushroom Pasta, I’m reminded of how versatile and satisfying it truly is. I’ve made it for last-minute dinner parties and cozy nights in. Once, I even whipped it up to impress a date, and to my delight, it turned out to be a meal that made him weak in the knees (spoiler alert: it worked!).
Over the years, I’ve evolved this recipe, giving it personal touches that speak to my unique flavor palette. It’s a reminder that cooking is not just about following rules but letting your creativity shine through. So please, don’t hesitate to adjust the ingredients to suit your taste.
FAQs and Troubleshooting
-
What if my pasta is overcooked?
Overcooked pasta can happen to the best of us! If it’s a bit mushy, try pairing it with a bolder sauce to mask the texture. -
Can I freeze leftovers?
Absolutely! Store any leftover pasta in an airtight container. When reheating, add a splash of water or olive oil to revive the saucy goodness! -
What can I use instead of Parmesan?
Grated Pecorino Romano provides a strong flavor. For a dairy-free option, reach for nutritional yeast sprinkled in generously. -
What do I do if my sauce is too thick?
If your pasta looks dry, don’t fret! Just add a little of that reserved pasta cooking water until you reach the desired creaminess.
Nutritional Info
(Adjust this section if you’d like to include specific nutritional values based on your preferences or take it out altogether!)
This Spinach Mushroom Pasta embodies everything we strive for in home-cooked meals: wholesome, flavorful, and filled with memories. So, what are you waiting for? Get into the kitchen and enjoy this comforting dish that’s ready to nourish your body and soul. Happy cooking!
PrintSpinach Mushroom Pasta
A comforting and flavorful pasta dish made with fresh spinach and mushrooms, perfect for any occasion.
- Prep Time: 15 minutes
- Cook Time: 15 minutes
- Total Time: 30 minutes
- Yield: 4 servings 1x
- Category: Main Course
- Method: Baking
- Cuisine: Italian
- Diet: Vegetarian
Ingredients
- 8 oz pasta (spaghetti, fettuccine, or whole-grain)
- 8 oz mushrooms (button, cremini, or shiitake)
- 4 cups fresh spinach
- ½ cup grated Parmesan cheese
- 3 cloves garlic, minced
- 2 tbsp olive oil
- Salt and pepper to taste
Instructions
- Cook the Pasta: Bring a large pot of salted water to a boil, add pasta, and cook according to package directions until al dente.
- Sauté the Mushrooms: In a skillet, heat olive oil over medium heat, add sliced mushrooms, and sauté for 5-7 minutes.
- Add Garlic: Toss in minced garlic and sauté for 1-2 minutes until fragrant.
- Incorporate Spinach: Add fresh spinach and stir until wilted, about 3-4 minutes.
- Combine Pasta and Sauce: Drain pasta, add to skillet, and toss with veggies, adding reserved pasta water as needed.
- Finish with Parmesan: Sprinkle in grated Parmesan and toss until melted and combined.
- Plate and Serve: Transfer to bowls and garnish with more Parmesan if desired.
Notes
Feel free to adjust ingredients based on your preferences. Add protein or creamy textures for variations.
Nutrition
- Serving Size: 1 serving
- Calories: 350
- Sugar: 5g
- Sodium: 400mg
- Fat: 12g
- Saturated Fat: 4g
- Unsaturated Fat: 6g
- Trans Fat: 0g
- Carbohydrates: 45g
- Fiber: 3g
- Protein: 15g
- Cholesterol: 30mg
Keywords: spinach, mushroom, pasta, vegetarian, easy recipes
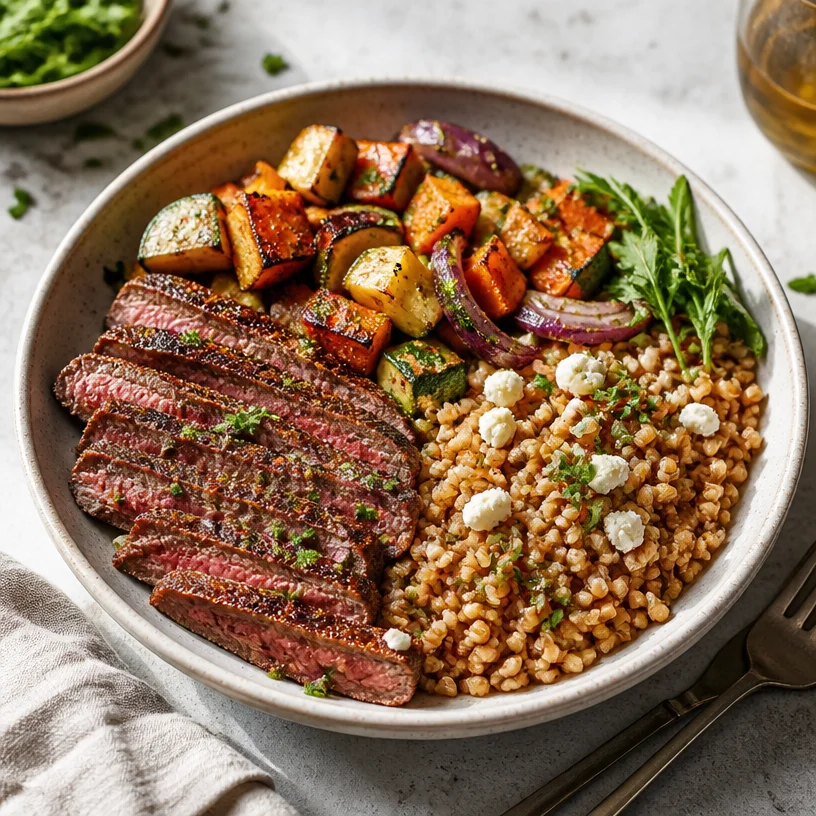
One-Pan Steak Grain Bowl: 25-Minute Weeknight Meal Prep
Steak Grain Bowl: A Wholesome Hug in a Bowl
Hey there, fellow food enthusiasts! If you’re looking to elevate your mealtime with a dish that’s not only delicious but also packed with nourishing goodness, you’re in for a treat. Today, I’m sharing my favorite Steak Grain Bowl—a hearty, healthy meal that’s bursting with flavors and colors.
Why do I call it a “wholesome hug in a bowl”? Because that’s exactly how it feels when you take a bite—the savory steak, nutty farro, and versatile roasted vegetables come together in perfect harmony. This dish isn’t just a meal; it’s a true experience, perfect for a cozy dinner or impressing your friends at a get-together.
Picture this: You sit down after a long day, and as soon as you serve yourself a bowl of this nourishing delight, your senses dance with the smokiness of the grilled steak, the warmth of the roasted vegetables, and the chewiness of the farro. Each spoonful is a reminder that eating healthy can be a joyous adventure, not a chore. It’s flavorful, satisfying, and best of all, it doesn’t take forever to prepare!
Let’s embark on this culinary journey together, where I’ll walk you through the simple steps to create this masterpiece in your very own kitchen. Ready? Let’s dive right into the heart of our recipe!
A Culinary Memory: The Night of the Epic Cookout
I remember vividly the first-ever cookout I hosted in my tiny apartment’s courtyard a few summers ago. With friends gathered around, the air was filled with laughter and delicious aromas wafting from the grill. That’s when I decided to experiment with steak, tossing in various spices and herbs while relying on my trusty grain—to celebrate not just good food but great company.
As I plated everything together for the first time, the vibrant colors of the roasted vegetables caught the afternoon sun just right. My friends dug in, and the looks on their faces were priceless! That night, we shared more than just a meal; we created memories, bonding over each amazing mouthful. It became an annual tradition, and I later transformed that initial cookout into the recipe you see here—a steak grain bowl that continues to bring joy and warmth to every table.
Ingredients
To whip up this scrumptious Steak Grain Bowl, you’ll need the following ingredients:
-
Steak (sirloin or flank steak): Rich in protein and flavor, steak brings a satisfying chew to your bowl. If you’re looking for a leaner option, try chicken breast or grilled tofu for a vegetarian twist.
-
Farro: A nutty, chewy grain that complements the steak perfectly. If you’re not a fan, quinoa or brown rice are excellent alternatives that will still keep your bowl hearty and wholesome.
-
Seasonal Roasted Vegetables: Think bell peppers, zucchini, carrots, and red onions. Not only do they add color and texture, but they also pack a nutritional punch! Feel free to use whatever vegetables you have on hand—just remember to cut them evenly for even roasting.
-
Olive Oil: A splash of extra virgin olive oil adds richness and helps the veggies caramelize beautifully. Avocado oil or coconut oil are great substitutes if you’re looking for a different flavor profile.
-
Herbs & Spices: Fresh herbs like rosemary and thyme elevate the flavors of the steak. If you’re in a pinch, dried herbs work too! Don’t be afraid to get creative with your spice blends—smoked paprika or chili powder can add an exciting kick.
-
Salt & Pepper: Essential for enhancing the flavors of each ingredient. Go for sea salt and freshly ground black pepper for the best taste.
Step-by-Step Instructions
Step 1: Prep the Steak
Start by making sure your steak is at room temperature—this helps it cook more evenly. Rub it with olive oil, and season generously with salt, black pepper, and your favorite herbs. Let it rest while you prepare the rest of your ingredients. (Chef hack: This resting time is key for juicy steak!)
Step 2: Cook the Farro
In a pot of boiling salted water, add the farro. Cook according to package instructions (usually about 25 minutes) until tender but still chewy. Drain and set aside—don’t forget to drizzle a bit of olive oil to prevent sticking.
Step 3: Roast the Vegetables
Preheat your oven to 425°F (220°C). Chop your seasonal veggies into bite-sized pieces and toss them in olive oil, salt, and pepper. Spread them out on a lined baking sheet in a single layer, ensuring they roast evenly. Roast for about 20-25 minutes, flipping halfway through. The goal is for them to be tender and slightly caramelized. (Tip: The more colors, the better—mix it up to keep things fun and nutritious!)
Step 4: Sear the Steak
While the veggies are roasting, grab a skillet or grill pan and heat it over medium-high heat. Add a drizzle of olive oil. Sear the steak for about 4–5 minutes per side for medium-rare.* (Pro tip: Instead of flipping too early, wait until a nice crust forms to avoid tearing the meat!). Adjust cooking time based on your preferred doneness. Remove and let it rest for at least 5 minutes before slicing.
Step 5: Assemble the Bowls
Grab your favorite bowl and start by adding a base of farro. Layer the roasted vegetables atop the grains. Then, thinly slice your steak against the grain and place it on top. Finish with a drizzle of olive oil, a sprinkle of fresh herbs, and maybe even some feta cheese or avocado if you’re feeling fancy!
Step 6: Dig In!
Now comes the best part—serving. Invite your family or friends to the table and share the beautiful and vibrant meal you’ve created! Enjoy the explosion of flavors that dance on your taste buds.
Serving Suggestions
For an extra pop of color and freshness, serve your Steak Grain Bowl with a squeeze of fresh lemon juice. You could also garnish it with microgreens or a handful of nuts for added texture. The presentation can be simple yet stylish—arranging the ingredients artfully in your bowl makes the experience all the more delightful!
Recipe Variations
- Spicy Steak Bowls: Use chipotle seasoning on your steak or add sliced jalapeños to the roasted veggie mix for a kick of heat.
- Mediterranean Twist: Substitute farro with couscous and top with olives, cherry tomatoes, and a dollop of tzatziki, creating a vibrant Mediterranean experience.
- Vegan Delight: Swap steak for marinated grilled portobello mushrooms and load up on lots of greens—think kale or spinach.
- Breakfast Bowl: Top your steak bowl with a sunny-side-up egg for a satisfying breakfast or brunch option!
Chef’s Notes
This recipe has evolved over time, and it’s one of those dishes that can adjust to whatever pantry staples you have on hand. I once used leftover grilled veggies from a barbecue, and it turned out to be one of my favorite variations! The best thing about the Steak Grain Bowl is its versatility—it’s the perfect canvas for whatever your taste buds desire.
I’ve had my fair share of kitchen mishaps, too. One time, I forgot to soak the farro overnight, ended up with crunchy grains, and had to improvise a ‘salad bowl’ instead! So remember, flexibility is key in cooking!
FAQs and Troubleshooting
-
How do I know when my steak is done?
Use a meat thermometer! Aim for 130°F (54°C) for medium-rare and 145°F (63°C) for medium. Trust me, the more you cook, the easier it becomes. -
What if my farro is too chewy?
Simply cook it longer! Make sure you’re tasting it every few minutes after the recommended time to gauge its doneness. -
Can I make this bowl ahead of time?
Absolutely! You can meal prep the ingredients in advance—just store everything in separate containers in the fridge. When you’re ready to eat, reheat and assemble! -
What’s the best way to cut my steak?
Always cut against the grain. This technique shortens the muscle fibers, making each bite tender and easier to chew.
Nutritional Info
While specific nutritional values can greatly vary based on ingredient amounts and types, a rough estimate per serving (excluding added toppings) is approximately:
- Calories: 550
- Protein: 35g
- Carbohydrates: 60g
- Fiber: 10g
- Fat: 20g
There you have it, my friend! The ultimate Steak Grain Bowl recipe that’s not just delicious, but also an experience to behold. So, roll up your sleeves, channel your inner chef, and let’s create some kitchen magic! Happy cooking!
PrintSteak Grain Bowl
A hearty and healthy Steak Grain Bowl packed with flavorful steak, nutty farro, and colorful roasted vegetables—a wholesome hug in a bowl.
- Prep Time: 15 minutes
- Cook Time: 30 minutes
- Total Time: 45 minutes
- Yield: 4 servings 1x
- Category: Main Course
- Method: Grilling, Roasting
- Cuisine: American
- Diet: Omnivore
Ingredients
- 1 lb sirloin or flank steak
- 1 cup farro
- 2 cups seasonal roasted vegetables (e.g., bell peppers, zucchini, carrots, red onions)
- 2 tablespoons olive oil
- Fresh herbs (e.g., rosemary, thyme)
- Salt to taste
- Pepper to taste
Instructions
- Prep the steak by rubbing it with olive oil and seasoning with salt, pepper, and herbs. Let it rest.
- Cook the farro in boiling salted water according to package instructions until tender, about 25 minutes. Drain and set aside.
- Roast the vegetables at 425°F (220°C) for 20-25 minutes, flipping halfway through, until tender and caramelized.
- Sear the steak in a heated skillet for 4-5 minutes per side for medium-rare. Let it rest for 5 minutes before slicing.
- Assemble the bowls with a base of farro, topped with roasted vegetables and sliced steak. Drizzle with olive oil and garnish with fresh herbs.
- Enjoy your meal with family or friends and savor the flavors!
Notes
Feel free to use any seasonal vegetables you have on hand. This dish is versatile and can be adjusted to your taste.
Nutrition
- Serving Size: 1 serving
- Calories: 550
- Sugar: 5g
- Sodium: 600mg
- Fat: 20g
- Saturated Fat: 6g
- Unsaturated Fat: 10g
- Trans Fat: 0g
- Carbohydrates: 60g
- Fiber: 10g
- Protein: 35g
- Cholesterol: 90mg
Keywords: steak, grain bowl, farro, healthy meal, roasted vegetables
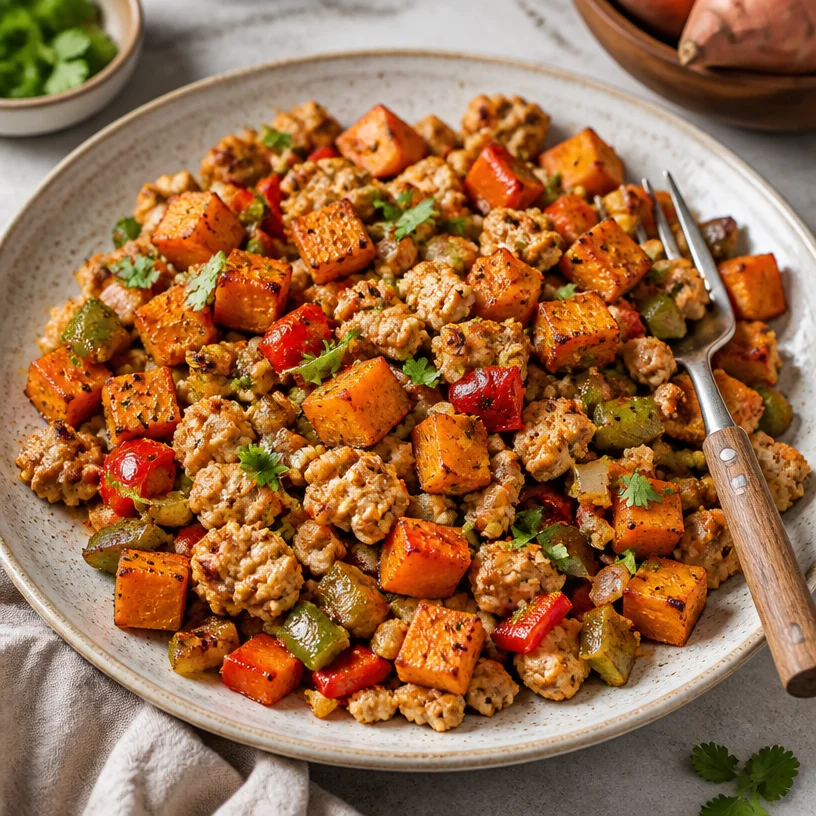
One-Pan Turkey Sweet Potato Hash: 30-Min Weeknight Dinner
Turkey Sweet Potato Hash: A Wholesome Comfort Food Delight
Welcome, fellow food lovers, to another delicious adventure in the kitchen! Today, we’re diving into one of my all-time favorite recipes: Turkey Sweet Potato Hash. This dish is a wonderful amalgamation of savory turkey, sweet potatoes, and vibrant peppers, all coming together to create a colorful, nutritious meal that feels like a warm hug. Whether you’re gasping for a quick breakfast, lunch, or dinner option, this hash is your friend. It’s hearty yet light, uncomplicated yet satisfying, and trust me—your taste buds will thank you!
Embracing Nostalgia in Every Bite
Let me take you back to my childhood. Growing up, weekend mornings were sacred ritual in our household—especially when the aromas wafted from the kitchen. Mom would whip up her famous hash with whatever leftovers we had on hand. The clattering of pots and the sizzle of ingredients dancing on the stovetop were music to my ears. I can still picture the vibrant orange of sweet potatoes mingling with the earthy tones of ground turkey while my brothers and I eagerly waited at the table, forks poised and ready.
In those moments, it was more than just a meal; it was about family, laughter, and love. The hash was versatile, allowing Mom to use whatever vegetables were fresh in her garden or leftover from the week’s meals. It ignited a sense of adventure within me, and to this day, I prioritize meals that feel familiar but leave room for creativity in the kitchen. And that, my friends, is the spirit behind this Turkey Sweet Potato Hash—a dish that marries nostalgia with a healthy twist, perfect for you and your family to enjoy.
Ingredients
Let’s dive into the star players of our Turkey Sweet Potato Hash. Here’s what you need:
-
Ground Turkey: A lean protein that offers a great source of amino acids. If you prefer, you can substitute with chicken or even a plant-based protein like tempeh or lentils for a vegetarian option.
-
Sweet Potatoes: These vibrant tubers are rich in fiber, vitamins, and antioxidants. You can swap them for regular potatoes or butternut squash if you’re feeling adventurous, but sweet potatoes add a lovely sweetness that’s just divine.
-
Bell Peppers: These colorful veggies bring a pop of freshness and crunch. Feel free to mix and match colors—red, yellow, and green all work beautifully. If you’re avoiding nightshades, zucchini or broccoli can provide a nice alternative.
-
Olive Oil: A heart-healthy fat that enhances flavor and helps in cooking. Avocado oil is a great substitute if you prefer a higher smoke point.
-
Salt and Pepper: Essential for flavor enhancement. Don’t be shy with these—seasoning is key to elevating your dish!
Step-by-Step Instructions
Ready to make this delicious hash? Let’s get cooking! Follow these simple steps for a fantastic meal:
-
Prep Your Ingredients: Start by peeling and dicing two medium-sized sweet potatoes into bite-sized cubes. Aim for uniformity to ensure even cooking. Next, chop up one bell pepper (any color you like) into small pieces. Set aside.
-
Cook the Sweet Potatoes: In a large skillet, heat about 2 tablespoons of olive oil over medium heat. Once hot, toss in the sweet potato cubes. Add a pinch of salt and a few cracks of pepper. Cook, stirring occasionally, for about 10-15 minutes or until they’re tender and lightly browned. Chef tip: If you’re in a hurry, you can microwave the sweet potatoes for about 5 minutes before dicing them!
-
Add the Peppers: As soon as the sweet potatoes are perfectly cooked, make a little space in the center of the pan and add the chopped bell peppers. This technique adds flavor without losing the veggies’ crunch. Sauté for another 3-4 minutes until they begin to soften.
-
Brown the Turkey: Next, push the sweet potatoes and peppers to the edges of the skillet. In the center, add in one pound of ground turkey. Using a wooden spoon, break up the turkey as it cooks. Season with salt and pepper to taste. Cook until the turkey is browned and fully cooked, which should take about 5-7 minutes.
-
Combine and Finish: Once the turkey is cooked through, stir everything together, combining the sweet potatoes, peppers, and turkey into a glorious medley. Taste and adjust the seasoning if necessary!
-
Serve and Enjoy!: This turkey sweet potato hash is best enjoyed hot! You can serve it straight from the skillet for a rustic presentation or plate it elegantly with some chopped fresh herbs on top—think parsley or cilantro for a delightful touch.
Serving Suggestions
Plating this hash is easy peasy! You can serve it in a simple bowl, and top it with a fried or poached egg for a delightful breakfast twist, or load it on a bed of greens for a light yet filling lunch or dinner. Pair it with sliced avocado or a dollop of Greek yogurt for extra creaminess. Your guests will be all smiles when they see such a colorful, hearty dish on the table.
Recipe Variations
Feeling adventurous? Here are some creative twists you can add for fun:
-
Spicy Kick: Toss in some chopped jalapeños or sprinkle red pepper flakes for an added kick.
-
Herbal Flair: Add fresh herbs like thyme or rosemary during the cooking process for an aromatic angle.
-
Cheesy Goodness: Top the hash with shredded cheese like cheddar or feta just before serving, letting it melt into the warm dish.
-
Citrusy Pop: Drizzle with a little lime juice or top with a fresh lime wedge to brighten up the flavors.
-
Sweet & Savory Combo: Add dried cranberries or raisins for a sweet touch that pairs wonderfully with the savory turkey and sweet potatoes.
Chef’s Notes
Every great dish has its story, and this is one of my favorites. Inspired by my mother’s creativity, I’ve added my own flair throughout the years. I remember one time when I ran out of bell peppers. So, I used shredded carrots instead, and not only did they add a sweet crispness, but they also gave the dish a lovely crunch. That’s what I love about this recipe—it can evolve with the seasons or whatever you have in your pantry!
FAQs and Troubleshooting
-
What if my sweet potatoes burn before getting tender?
- When cooking sweet potatoes, keep the heat at medium and monitor closely. Stir frequently to prevent them from sitting too long in one spot. If they seem to be browning too quickly, lower the heat a notch.
-
Can I make this dish ahead of time?
- Absolutely! This hash works wonderfully as leftovers. Just store in an airtight container in the fridge for up to 3 days. Reheat on the stove or microwave.
-
What can I use if I can’t find ground turkey?
- Ground chicken, lean ground beef, or even crumbled tofu or tempeh can be great swaps, depending on your dietary preferences.
-
How can I make this dish vegan?
- Replace the ground turkey with seasoned lentils and use olive oil to sauté the vegetables. You’ll have a hearty and flavorful dish with a plant-based twist!
Nutritional Info
This Turkey Sweet Potato Hash is not only tasty but also packed with nutrition! Here’s a quick breakdown:
- Calories: ~350
- Protein: 25g
- Carbohydrates: 30g
- Fat: 15g
- Fiber: 6g
Now that you have all the inside scoop, I can’t wait for you to try your hand at this Turkey Sweet Potato Hash! It’s a simple yet satisfying dish that can bring joy and flavor to any meal. So roll up those sleeves, crank up the heat, and let’s make some magic in the kitchen. Happy cooking!
PrintTurkey Sweet Potato Hash
A wholesome and colorful dish blending ground turkey, sweet potatoes, and vibrant peppers, perfect for breakfast, lunch, or dinner.
- Prep Time: 15 minutes
- Cook Time: 25 minutes
- Total Time: 40 minutes
- Yield: 4 servings 1x
- Category: Main Course
- Method: Stovetop
- Cuisine: American
- Diet: Paleo
Ingredients
- 1 pound Ground Turkey
- 2 Medium Sweet Potatoes, peeled and diced
- 1 Bell Pepper, chopped
- 2 tablespoons Olive Oil
- Salt, to taste
- Pepper, to taste
Instructions
- Prep your ingredients: Peel and dice sweet potatoes and chop the bell pepper.
- Cook the sweet potatoes: Heat olive oil in a skillet and add sweet potatoes, cooking for 10-15 minutes.
- Add the peppers: Make space in the skillet and sauté chopped peppers for 3-4 minutes.
- Brown the turkey: Push the veggies aside, add turkey, and cook until browned.
- Combine everything together: Stir sweet potatoes, peppers, and turkey until mixed well.
- Serve hot: Plate the hash with toppings like herbs or an egg.
Notes
Feel free to customize with other vegetables or proteins. Leftovers can be stored for up to 3 days.
Nutrition
- Serving Size: 1 serving
- Calories: 350
- Sugar: 5g
- Sodium: 400mg
- Fat: 15g
- Saturated Fat: 3g
- Unsaturated Fat: 9g
- Trans Fat: 0g
- Carbohydrates: 30g
- Fiber: 6g
- Protein: 25g
- Cholesterol: 90mg
Keywords: turkey hash, sweet potato, comfort food, meal prep, easy recipes
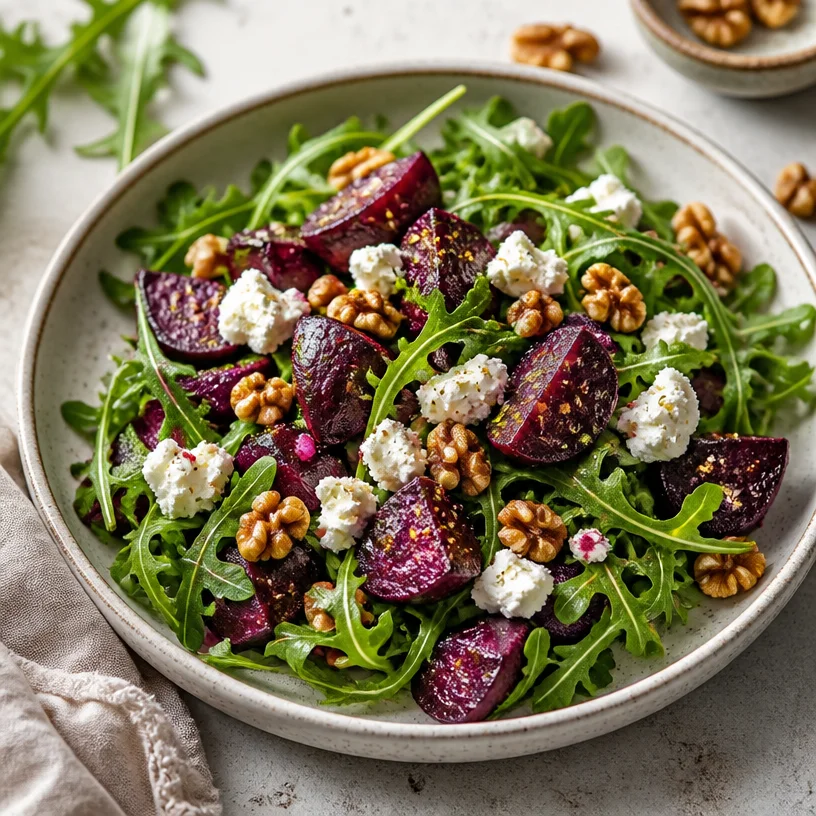
One-Pan Roasted Beet Goat Cheese Salad (Weeknight)
The Colorful Delight of Roasted Beet Goat Cheese Salad
Fresh, vibrant, and bursting with flavors—that’s how I like to describe my favorite Roasted Beet Goat Cheese Salad. There’s something so satisfying about the combination of earthy roasted beets, tangy goat cheese, crunchy walnuts, and peppery arugula. This meal not only looks like a masterpiece but also feels wholesome, leaving you energized and ready to take on the day.
Let’s take a moment to appreciate just how magical salads can be. They aren’t just a pile of greens; they’re a canvas for creativity, flavor, and nutrition. And when you toss in roasted beets and creamy goat cheese, you’re transforming that canvas into a work of art that not only pleases the eyes but also the taste buds.
Now, let’s be real: if you had asked me a few years ago what my idea of a salad was, it probably would have resembled something along the lines of sad iceberg lettuce and a few sprigs of wilted celery. But oh, how times have changed! After experimenting in the kitchen, I discovered how fresh, feel-good ingredients can elevate a simple dish into something truly special. And this Roasted Beet Goat Cheese Salad is a glowing example of that transformation.
So, roll up your sleeves, grab your apron, and let’s dive into this earthy, flavor-packed salad that’s just as delightful perched on your dining table as it is at a potluck or picnic.
A Nostalgic Kitchen Memory
I remember the very first time I had roasted beet and goat cheese salad. It was at a small bistro in the heart of a bustling city, where the ambiance was warm and inviting, and the air was filled with the aroma of freshly baked bread. I was having lunch with my best friend, and we both decided to go for something adventurous. As soon as I took that first bite of the salad, I was whisked away into a world of flavors I had never experienced before: the sweet and earthy beets combined with the tangy creaminess of goat cheese was nothing short of a revelation. We shared a moment of delight over those colorful plates, laughing at the way we had come to appreciate the power of fresh ingredients.
Fast forward a few years later, and I decided to recreate that magic in my own kitchen. With a little experimentation, I made it a signature dish for myself and a crowd favorite at numerous dinner parties. Now, I want to share that same joy with you, hoping this recipe ignites your culinary creativity just like it did for me!
Ingredients You’ll Need
-
Beets: The star of the show! These root vegetables are loaded with nutrients and offer an earthy sweetness. A tip: if you’re short on time, you can use pre-cooked beets from the grocery store—convenient without sacrificing flavor!
-
Goat Cheese: Creamy and tangy, goat cheese beautifully complements the beets. If you’re not a fan, feta cheese is a great substitute that can still deliver that creamy touch.
-
Arugula: This peppery green adds a delightful bite to the salad. If arugula is too strong for your palate, spinach or mixed greens can easily step in.
-
Walnuts: Toasted walnuts provide a lovely crunch and healthy fats. If you’re allergic or just not a fan, feel free to swap in pecans or sunflower seeds for a similar texture and taste.
-
Olive Oil: A drizzle of high-quality extra virgin olive oil enhances the flavors and adds richness. Always opt for fresh, unrefined olive oil if possible for the best taste.
-
Balsamic Vinegar: A sweet and tangy dressing that ties everything together. Need a change? Try apple cider vinegar or a citrus vinaigrette for a twist!
-
Salt and Pepper: Essential for seasoning and bringing out all the delicious flavors.
Step-by-Step Instructions
-
Roast the Beets:
- Preheat your oven to 400°F (200°C). Wrap the beets in aluminum foil, Drizzle with olive oil, and season with salt and pepper.
- Place them on a baking sheet and roast for about 45-60 minutes, or until tender (you can ease a knife through them). The kitchen will fill with such a delightful aroma!
-
Prep the Greens:
- While the beets are roasting, take a large bowl and toss in your arugula.
- You can add a drizzle of olive oil and a pinch of salt to slightly massage the greens—this will enhance their flavors, making them extra delicious!
-
Toast the Walnuts:
- Heat a small, dry skillet over medium heat. Add the walnuts and toast them for about 5 minutes, stirring frequently until they’re golden and fragrant.
- Be careful not to burn them; a little extra toasting can turn them from delectable to disastrous quickly!
-
Make the Dressing:
- In a small bowl, whisk together equal parts balsamic vinegar and olive oil. Season with salt and pepper to taste. This is where you can adjust the sweetness or tartness of your dressing—add a little honey if you like it sweeter!
-
Assemble the Salad:
- Once the beets are roasted and cooled, peel off the skins (they should come off easily with your fingers or a paper towel). Chop them into bite-sized pieces.
- Toss the roasted beets onto the arugula, crumble the goat cheese on top, and sprinkle the toasted walnuts over.
-
Dress and Serve:
- Drizzle your homemade dressing over the salad. Gently toss everything together and serve on individual plates for an elegant presentation or in one big bowl for a casual family-style meal.
-
Enjoy Every Bite!:
- This salad is best enjoyed fresh, but it holds up beautifully for leftovers too. Just keep the dressing separate until you’re ready to dig in so the greens stay crisp!
Serving Suggestions
When it comes to plating your Roasted Beet Goat Cheese Salad, think about contrast and color. A simple white plate makes the vibrant colors pop, showcasing those beautiful reds and greens. Alternatively, serving in a rustic wooden bowl brings a touch of homey charm. Pair it with crusty whole-grain bread for a delightful lunch, or add some grilled chicken or shrimp for a protein-packed dinner option.
Recipe Variations
-
Mediterranean Twist: Add sliced cucumbers, cherry tomatoes, and olives for a Mediterranean flair. Drizzle with a lemony herb dressing for extra freshness.
-
Nuts About Flavor: Swap out walnuts for candied pecans or almonds to introduce a sweet crunch that contrasts beautifully with the beets.
-
Dairy-Free Delight: Replace goat cheese with avocado slices or a vegan cheese alternative to keep it fresh without dairy.
-
Spicy Kick: Toss in some sliced jalapeños or drizzle with a sriracha-infused dressing for those who enjoy a spicy touch to their salads.
-
Grain Bowl: Serve the salad over a bed of quinoa or farro to make it more filling and add a wholesome grain component.
Chef’s Notes
One of my favorite parts of cooking is the stories that develop around each dish. The Roasted Beet Goat Cheese Salad has certainly encountered its fair share of culinary mishaps during my experimentation phase. I once forgot the walnuts and had a moment of panic—only for my friend to proclaim, “This is the best salad ever!” That mishap taught me that recipes can be flexible and that the heart is what really makes a meal memorable.
Over the years, I’ve embraced the seasonal variations of this salad, adding fresh herbs from my garden or even some fruits like peaches or pomegranates when they’re in season. The beauty of this dish lies in its versatility!
FAQs and Troubleshooting
-
How do I know when beets are done roasting?
- You’ll know they’re done when you can easily pierce them with a knife or fork. If they still feel firm, give them a little more time in the oven.
-
Can I make this salad ahead of time?
- You can prep all the components ahead—just keep the dressing separate and mix it all together when you’re ready to serve to avoid soggy greens.
-
What if I don’t like goat cheese?
- No worries! Try feta, mozzarella, or a vegan cheese alternative that suits your taste.
-
How do I peel beets easily?
- Once roasted, let them cool slightly and then use your hands or a paper towel to rub the skins right off—like magic!
Nutritional Info
This Roasted Beet Goat Cheese Salad is packed full of vitamins, antioxidants, and healthy fats. Here’s a rough nutritional breakdown per serving (without additional proteins):
- Calories: 250
- Protein: 7g
- Fat: 18g
- Carbohydrates: 22g
- Fiber: 5g
This salad is not only a feast for the eyes but also a nourishing companion to your health journey. So go ahead—put on your favorite playlist, embrace your inner chef, and whip up a bowl of this stunning Roasted Beet Goat Cheese Salad. Happy cooking!
PrintRoasted Beet Goat Cheese Salad
A vibrant salad featuring earthy roasted beets, tangy goat cheese, crunchy walnuts, and peppery arugula.
- Prep Time: 15 minutes
- Cook Time: 60 minutes
- Total Time: 75 minutes
- Yield: 4 servings 1x
- Category: Salad
- Method: Roasting
- Cuisine: Mediterranean
- Diet: Vegetarian
Ingredients
- 4 medium Beets
- 4 oz Goat Cheese
- 4 cups Arugula
- 1/2 cup Walnuts
- 2 tbsp Olive Oil
- 2 tbsp Balsamic Vinegar
- Salt
- Pepper
Instructions
- Preheat your oven to 400°F (200°C). Wrap the beets in aluminum foil, drizzle with olive oil, and season with salt and pepper.
- Place them on a baking sheet and roast for about 45-60 minutes, or until tender. The kitchen will fill with a delightful aroma!
- While the beets are roasting, take a large bowl and toss in your arugula.
- Add a drizzle of olive oil and a pinch of salt to slightly massage the greens.
- Heat a small, dry skillet over medium heat. Add the walnuts and toast for about 5 minutes, stirring frequently until golden and fragrant.
- In a small bowl, whisk together equal parts balsamic vinegar and olive oil, seasoning with salt and pepper to taste.
- Once the beets are roasted and cooled, peel off the skins and chop them into bite-sized pieces.
- Toss the roasted beets onto the arugula, crumble the goat cheese on top, and sprinkle the toasted walnuts over.
- Drizzle your homemade dressing over the salad, gently tossing everything together.
- Serve on individual plates for an elegant presentation or in one big bowl for a casual meal.
Notes
Best enjoyed fresh, but leftovers can be stored if dressing is kept separate until ready to serve.
Nutrition
- Serving Size: 1 serving
- Calories: 250
- Sugar: 5g
- Sodium: 400mg
- Fat: 18g
- Saturated Fat: 4g
- Unsaturated Fat: 10g
- Trans Fat: 0g
- Carbohydrates: 22g
- Fiber: 5g
- Protein: 7g
- Cholesterol: 25mg
Keywords: salad, roasted beets, goat cheese, healthy recipe, vegetarian salad