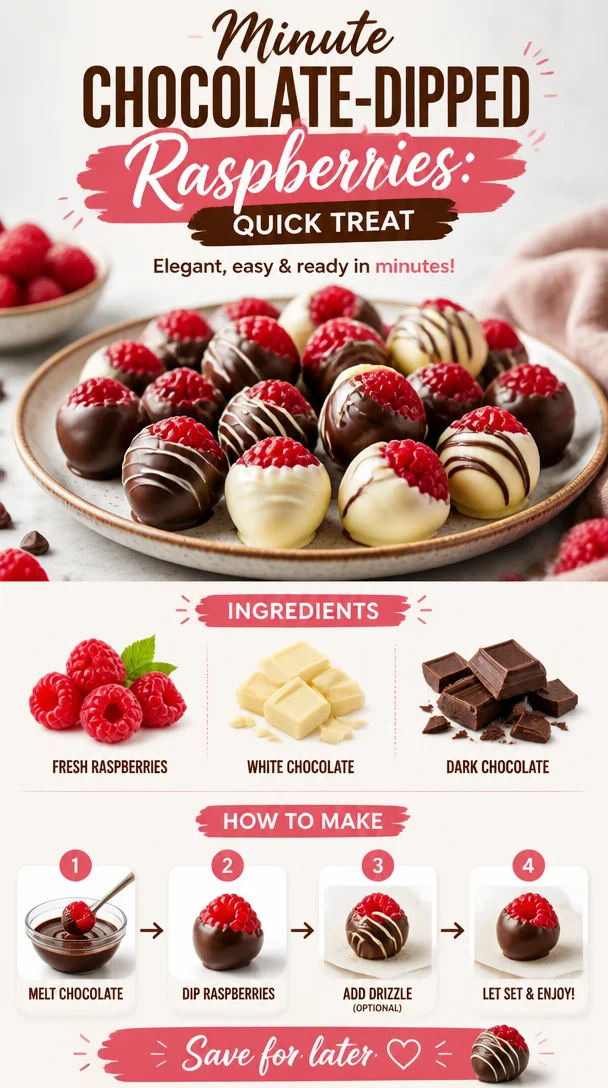
Minute Chocolate-Dipped Raspberries: Quick Treat
Indulge in Delight: Chocolate-Covered Raspberries
Hey there, fellow food lovers! Welcome back to Clean Plate Cravings, where the combination of fresh ingredients and chocolate is everything we need for a good mood. Today, I’m excited to share a delightful treat that will have you dancing in the kitchen—Chocolate Covered Raspberries! These little bites of joy are a perfect blend of tart and sweet, wrapped up in luscious chocolate—a treat that’s not just for special occasions but perfect for any day that deserves a sprinkle of happiness.
Let’s talk about raspberries for a second. These beauties are not only delicious but also bursting with antioxidants. And when you envelop them in rich dark or creamy white chocolate, you create a harmonious treat perfect for satisfying that sweet tooth while still keeping things light and fresh. So grab your aprons, because we’re about to turn your kitchen into a haven of flavor!
A Sweet Memory from My Kitchen
I still remember the first time I made chocolate-covered raspberries—it was an accident, really! I was a teenager back in my parents’ kitchen, juggling my attempts to bake a cake and accidentally left some melted chocolate from an earlier project. My little sister wandered in, eyes wide, and insisted I dip the fresh raspberries from our garden into the chocolate.
Those juicy, tart bites, lovingly dipped in a blanket of rich chocolate, were nothing short of mind-blowing. It was a messy but fun experience, with chocolate smudges on our faces and laughter echoing through the kitchen. Fast forward a few years, and that same desire to share simple yet delicious recipes still drives me today. Every time I dip a raspberry in chocolate, I’m reminded of that playful kitchen moment with my sister.
Ingredients
To whip up these Chocolate Covered Raspberries, you’ll need just three simple ingredients:
-
Fresh Raspberries
These are the star of the show! Look for plump, vibrant raspberries that are firm to the touch. If you can’t find fresh ones, you can also use frozen raspberries, just be aware that they may create a little extra moisture when thawed. A fun tip? Raspberries are super easy to rinse—just toss them gently under running water and drain! -
White Chocolate
This sweet, creamy chocolate balances the tartness of the raspberries beautifully. You can opt for candy melts or traditional white chocolate bars. If you’re looking for a healthier option, consider using sugar-free white chocolate. Just keep an eye on the melting instructions; they can be a bit different! -
Dark Chocolate
Nothing beats the bold flavor of rich dark chocolate! Aim for a high-quality chocolate with at least 60% cocoa for that perfect balance of sweetness and richness. If dark chocolate isn’t your jam, feel free to substitute it with milk chocolate for a sweeter treat, or even a dairy-free chocolate for a vegan option.
Step-by-Step Instructions
Now that we’ve got our ingredients, let’s get rolling with the cooking steps that will lead you to chocolate-covered delight!
-
Prep Your Ingredients
Start by gathering your fresh raspberries, and give them a gentle rinse under cool water. After rinsing, lay them out on a clean towel to dry completely. Excess moisture can ruin the chocolate coating, so this step is essential. Plus, who doesn’t love a little kitchen tidiness? -
Melt Your Chocolates
Divide your chocolate into two separate heatproof bowls—one for the white chocolate and one for the dark chocolate. Use the microwave or a double boiler to melt them. If you’re using the microwave, heat the chocolate in 30-second intervals, stirring in between until it’s smooth and melted. If you see any lumps, don’t panic! Stirring usually helps smooth it out, and be patient—burnt chocolate is a bummer. -
Dip Those Raspberries
Once your chocolate is melted, it’s time to dunk! Hold each raspberry by the stem, dip it into the chocolate, letting the excess drip off. This is where you can get creative; swirl the raspberry to fully coat it or give it a twirl for a cute look. Place the dipped raspberry on a parchment-lined baking sheet for a beautiful presentation. -
Chill Out
After all your raspberries are coated and beautifully placed, pop the tray in the fridge for about 20-30 minutes. This is when the chocolate will harden, creating that delightful shell around the juicy fruit. Bonus tip: if you want to speed up this process, consider placing them in the freezer briefly—but don’t forget them! -
Presentation Time!
Once the chocolate is set, it’s time to serve these beauties! Not only do they taste divine, but they also look stunning on a plate. Arrange them in a circular pattern on a serving platter, or get fancy and stack them on a tiered cake stand. Your guests will think you’re a gourmet chef (and you totally are!).
Serving Suggestions
Here’s where the fun really begins! Chocolate-covered raspberries are not only great on their own but can be elevated in so many ways. Consider dusting them with a pinch of sea salt, a sprinkle of crushed nuts, or a drizzle of extra melted chocolate for presentation. You can also serve them with a side of whipped cream or yogurt for an indulgent dip. Just imagine the flavors mingling together!
Recipe Variations
Feeling adventurous? Here are a few variations to get those creative juices flowing:
-
Nutty Coating: After dipping the raspberries in chocolate, roll them in crushed nuts—think almonds, pistachios, or hazelnuts for a crunchy surprise!
-
White Chocolate Drizzle: Instead of being fully coated in dark chocolate, you can drizzle melted white chocolate over dark chocolate-covered raspberries for a lovely contrast.
-
Spicy Kick: Add a touch of cayenne pepper or sea salt to your melted dark chocolate for a spicy twist on this classic treat.
-
Coconut Flakes: Roll the dipped raspberries in unsweetened coconut flakes for a tropical flair, or use a mix of dark and white chocolate for a marbled look.
-
Flavored Chocolate: Try adding citrus zest (like orange or lemon) to your melted chocolate for a burst of flavor that pairs beautifully with the raspberries.
Chef’s Notes
This recipe has become a staple in my kitchen not just because of how easy it is, but also how versatile it has proven to be. Over the years, I’ve experimented with different flavor profiles and toppings—just the other day, I experimented with a sprinkle of cardamom in my chocolate. Yes, it was as amazing as it sounds!
Whenever I make these, I can’t help but recall those messy moments from my childhood. It reminds me that cooking doesn’t have to be perfect; it should be fun and filled with laughter. So, embrace the mess and the chaos—it’s all part of the delicious journey!
FAQs and Troubleshooting
Q: My chocolate isn’t melting smoothly. What should I do?
It’s crucial to melt chocolate over low heat. If it’s getting lumpy, there may be too much moisture, or it might be overheating. Try stirring it continuously, and if you think it might burn, lower the heat!
Q: How long will the chocolate-covered raspberries last?
These delectable treats are best enjoyed within 2 days. Store them covered in the refrigerator, but be careful—they may lose their freshness and texture the longer they’re kept.
Q: Can I freeze chocolate-covered raspberries?
Yes! But make sure to place them in an airtight container between layers of parchment paper so they don’t stick together. Just keep in mind that freezing can affect the texture a bit, so they are best enjoyed fresh!
Q: What if I don’t have a double boiler?
No worries! A makeshift double boiler can be created by placing a heatproof bowl over a saucepan of simmering water. Just ensure the bowl doesn’t touch the water directly.
Nutritional Info
While I love to focus on the wholesome benefits of these treats, it’s important to remember that indulgence is key! Chocolate-covered raspberries offer a great source of vitamins and antioxidants but also pack some sugars. Here’s a rough breakdown per serving (about 4-5 pieces):
- Calories: 200-300 (depending on chocolate type)
- Carbs: 30g
- Protein: 2g
- Fats: 15g
Remember to enjoy these delights in moderation as part of a balanced diet!
So there you have it—Chocolate-Covered Raspberries that are simple, delicious, and filled with joy! I hope you recreate this fun dish in your kitchen and savor each bite. Happy cooking, friends! 🍫❤️
PrintChocolate-Covered Raspberries

Indulge in these delightful Chocolate-Covered Raspberries, a perfect blend of tart raspberries and rich chocolate, ideal for any occasion.
- Prep Time: 10 minutes
- Cook Time: 10 minutes
- Total Time: 30 minutes
- Yield: 4 servings
- Category: Dessert
- Method: No Bake
- Cuisine: American
- Diet: Vegetarian
Ingredients
- Fresh Raspberries
- White Chocolate
- Dark Chocolate
Instructions
- Prep your ingredients by rinsing the raspberries under cool water and laying them out to dry.
- Melt your chocolates in separate heatproof bowls using a microwave or double boiler until smooth.
- Dip each raspberry by holding it by the stem and coating it in the melted chocolate, then place them on a parchment-lined baking sheet.
- Chill the tray in the fridge for 20-30 minutes until the chocolate hardens.
- Present your beautiful chocolate-covered raspberries on a serving platter.
Notes
You can get creative with toppings, such as crushed nuts, sea salt, or drizzled chocolate for an extra special touch.
Nutrition
- Serving Size: 1 serving
- Calories: 250
- Sugar: 15g
- Sodium: 50mg
- Fat: 15g
- Saturated Fat: 9g
- Unsaturated Fat: 6g
- Trans Fat: 0g
- Carbohydrates: 30g
- Fiber: 2g
- Protein: 3g
- Cholesterol: 5mg
Keywords: chocolate dessert, chocolate-covered, raspberries, easy dessert
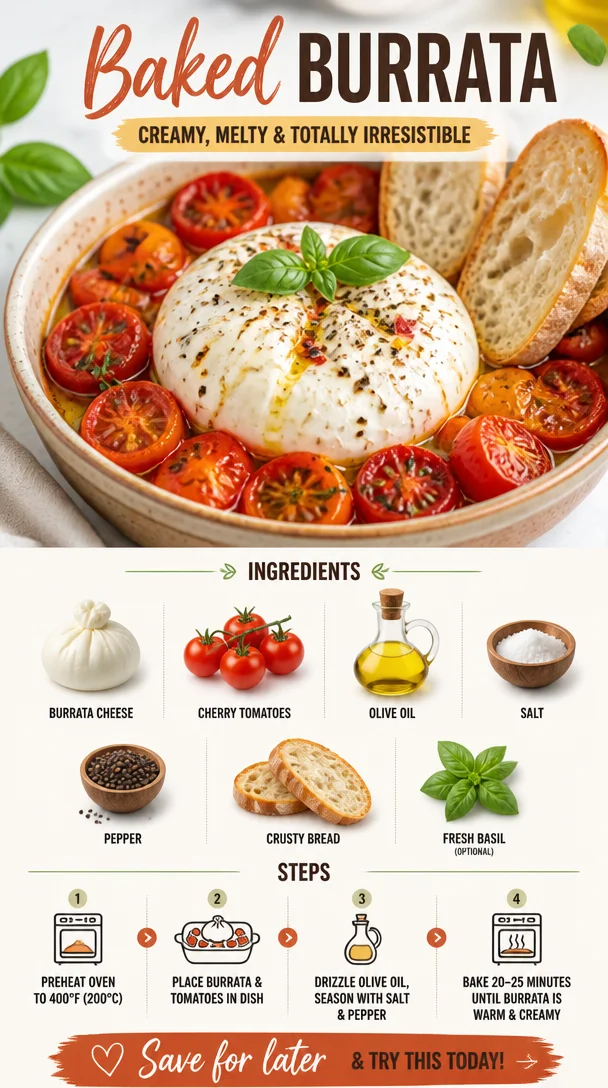
Baked Burrata
The Magic of Baked Burrata: A Delightful Culinary Journey
Welcome to my cozy corner of the kitchen, where we’re about to embark on a delicious adventure with a dish that sings comfort and flavor: Baked Burrata! If you’ve ever wanted to elevate your cheese game and impress your friends, then you’re in for a treat. This delightful dish is not just a meal; it’s an experience—a testament to the joy of simple ingredients coming together to create something breathtakingly delicious.
Picture this: a creamy ball of burrata cheese perfectly nestled among roasted cherry tomatoes, drizzled with a hint of olive oil, and finished with a sprinkle of salt and pepper. It’s a symphony of flavors, served warm and oozy—perfect for sharing or indulging all by your lonesome when the craving strikes. And trust me, once you try Baked Burrata, you’ll wonder how you ever lived without it!
One of the things I love most about Baked Burrata is how it resonates with real life. A dish this comforting and satisfying works beautifully for date nights, lazy Sundays, or even last-minute gatherings with friends. The ingredients are simple, but when combined, they create something extraordinary that can transform any occasion into a feast.
Our journey into the world of Baked Burrata is more than just cooking; it’s about celebrating the moments that happen around the table—the laughter, the connection, and the love that fills the air. So, grab your apron, preheat that oven, and let’s dive into the wonderful world of Baked Burrata!
A Fond Memory: The Burrata Moment
I remember the first time I tasted burrata. It was at a quaint little Italian café tucked away in the heart of the city. The owner, a warm and spirited chef with a twinkle in his eye, proudly presented us with a dish of freshly baked burrata, surrounded by bright cherry tomatoes that looked like jewels against white porcelain. That first gooey bite was nothing short of a revelation. The creaminess of the burrata mingling with the sweetness of the tomatoes was a love story I never wanted to end.
Fast forward a few years, and I’ve taken that memory and transformed it into a dish I can whip up whenever the mood strikes. The simplicity of baking burrata at home means I can enjoy my favorite café experience on a casual Wednesday or serve it at the next gathering with friends. It’s a nostalgic taste of Italy that I can now share with all of you!
Ingredients: What You Need
Here’s what you’ll need to bring this delightful dish to life:
-
Burrata Cheese: The star of the show! Burrata is a creamy Italian cheese that’s an ode to indulgence. If you can’t find burrata, fresh mozzarella, while not quite the same, provides a similar texture.
-
Cherry Tomatoes: These tiny flavor bombs burst with sweetness as they roast. If you’re feeling adventurous, you can swap them out for sun-dried tomatoes for a different flavor profile.
-
Olive Oil: A drizzle of good olive oil adds richness and depth. If you’re low on olive oil, any light oil like avocado or grapeseed can work.
-
Salt: Brings all the flavors together—use sea salt or kosher salt for texture, or go for flavorful finishing salts like flaky Maldon for a gourmet touch.
-
Pepper: A little bit of freshly cracked black pepper adds a lovely bite. You can substitute with red pepper flakes for a spicy kick!
-
Crusty Bread: Perfect for dipping into that luscious burrata! If you’re gluten-free, consider serving it with veggie sticks or gluten-free crackers.
-
Fresh Basil (Optional): Adds a fresh burst of flavor and a beautiful pop of color! If you can’t find fresh basil, a sprinkle of dried herbs like oregano can suffice.
Step-by-Step Instructions: Let’s Get Cooking!
Now that we have our ingredients ready, let’s dive into the cooking process. Trust me, it’s easier than you think!
-
Preheat Your Oven: Start by preheating your oven to 400°F (200°C). The goal is to create a warm environment for our burrata to melt into cheesy bliss!
-
Arrange the Tomatoes: Grab a baking dish and throw in your cherry tomatoes. They can be halved for quicker cooking, but I love throwing them in whole for that extra burst of juiciness. Drizzle them generously with olive oil, and sprinkle with salt and pepper to taste. Give them a gentle toss to ensure every tomato is coated in that luscious oil.
-
Make a Space for the Burrata: Create a little nest among the tomatoes for the burrata to rest comfortably. This allows it to absorb some of that tomato goodness as it bakes. Place the burrata directly in the center of your beautiful tomato bed.
-
Drizzle More Olive Oil: Don’t be shy—drizzle a little more olive oil over the burrata. This step is purely for indulgence! It enhances the flavor and helps achieve that beautiful golden-brown crust.
-
Bake It Up: Pop the baking dish into your preheated oven for about 15 minutes. You’ll know it’s done when the burrata is warm and slightly oozy and the tomatoes start to blister and burst. Your kitchen will smell incredible, by the way.
-
Garnish and Serve: Once it’s out of the oven, let it rest for a minute (if you can resist!). Finish it off with a sprinkle of fresh basil. This step is totally optional but does add that lovely, aromatic touch. Now get your crusty bread ready for dipping!
-
Dig In: Serve this beauty straight out of the oven—there’s something magical about that warm, gooey burrata just waiting to be scooped up with your bread. Don’t forget to drizzle any leftover tomato juice over the top. It’s pure heaven!
Serving Suggestions: An Elegant Plating
When it comes to serving Baked Burrata, keep it simple and delicious. Use a beautiful wooden board or a rustic platter for presentation. Place the baking dish in the center, and surround it with toasted slices of crusty bread for scooping. You might even throw in a small bowl of balsamic reduction or a sprinkle of pine nuts for an extra touch. Drizzle with a bit more olive oil and fresh basil for that final pop of color—your guests will be in awe!
Recipe Variations: Get Creative
Baked Burrata is as versatile as it is delicious! Here are a few creative twists to try:
-
Pesto Infusion: Add a spoonful of basil pesto to the tomatoes before baking for an extra layer of flavor.
-
Spicy Kick: Toss in some red pepper flakes with the tomatoes for a delightful heat that pairs well with the creamy cheese.
-
Roasted Garlic: Include a few cloves of whole, unpeeled garlic with the tomatoes for a sweet and mellow roasted garlic flavor.
-
Mediterranean Twist: Mix in some olives and artichokes for a Mediterranean flair that adds even more depth to the dish.
-
Herb-Infused: Experiment with fresh herbs like thyme or rosemary for a unique twist on flavor.
Chef’s Notes: Lessons from the Kitchen
Baked Burrata has become a staple in my kitchen, and I’ve learned a few things along the way. Once, I tried to bake it with flavored oils, and the result was a bit too overwhelming. Now, I stick to good-quality olive oil to let the burrata shine on its own. Also, don’t let leftover tomatoes go to waste—mix them into a salad or pasta dish the next day for a refreshing lunch!
Cooking can be an adventure, and every little mishap in the kitchen is a chance to learn something new. Whether it’s forgetting to preheat the oven or realizing you’re out of olive oil (oops!), those moments often lead to surprisingly delicious outcomes.
FAQs and Troubleshooting: Your Questions Answered
-
Can I use regular mozzarella instead of burrata?
Yes! While burrata has a creamier texture, fresh mozzarella will still deliver a satisfying result. Just make sure to use a good quality one. -
What should I do if my tomatoes aren’t bursting?
If your tomatoes aren’t bursting, try roasting them a little longer. They need that heat to release their natural juices, but keep an eye on the burrata to prevent overcooking. -
How do I store leftovers?
If there’s any left (which is rare!), store it in an airtight container in the fridge. Reheat gently in the oven or microwave—just be careful not to dry out the burrata! -
What can I serve with baked burrata?
It pairs beautifully with a light salad, savory roasted vegetables, or even as a stunning appetizer before pasta dishes!
Nutritional Info
While every dish can vary based on specific ingredients and portions, here’s a rough idea per serving of Baked Burrata:
- Calories: Approximately 300-400 (including bread)
- Carbohydrates: 20-30g (depending on bread choice)
- Protein: 15-20g
- Fats: 25-30g
Note that the nutritional information will change based on substitutions and portions used, but remember, enjoyment and balance in what you eat are what truly matters!
And there you have it! Baked Burrata is more than just a dish; it’s a celebration of flavor, nostalgia, and, best of all, the art of uncomplicated cooking. I hope you relish making this delightful recipe and create your own kitchen memories along the way. Happy cooking, my fellow foodies!
PrintBaked Burrata
A comforting and indulgent baked burrata cheese dish served with roasted cherry tomatoes and crusty bread, perfect for sharing or solo feasting.
- Prep Time: 10 minutes
- Cook Time: 15 minutes
- Total Time: 25 minutes
- Yield: 4 servings
- Category: Appetizer
- Method: Baking
- Cuisine: Italian
- Diet: Vegetarian
Ingredients
- Burrata Cheese
- Cherry Tomatoes
- Olive Oil
- Salt
- Pepper
- Crusty Bread
- Fresh Basil (Optional)
Instructions
- Preheat your oven to 400°F (200°C).
- Arrange the cherry tomatoes in a baking dish, drizzle with olive oil, and sprinkle with salt and pepper.
- Create a space among the tomatoes for the burrata to rest.
- Drizzle more olive oil over the burrata for added flavor.
- Bake for about 15 minutes until the burrata is warm and oozy, and the tomatoes start to blister.
- Garnish with fresh basil if desired, then serve with crusty bread for dipping.
- Dig in and enjoy the warm, gooey burrata with the roasted tomatoes.
Notes
Feel free to experiment with different add-ins like pesto, red pepper flakes, or garlic for additional flavor.
Nutrition
- Serving Size: 1 serving
- Calories: 350
- Sugar: 5g
- Sodium: 400mg
- Fat: 30g
- Saturated Fat: 10g
- Unsaturated Fat: 15g
- Trans Fat: 0g
- Carbohydrates: 22g
- Fiber: 3g
- Protein: 20g
- Cholesterol: 30mg
Keywords: baked burrata, burrata recipe, Italian cheese, comfort food, easy appetizer
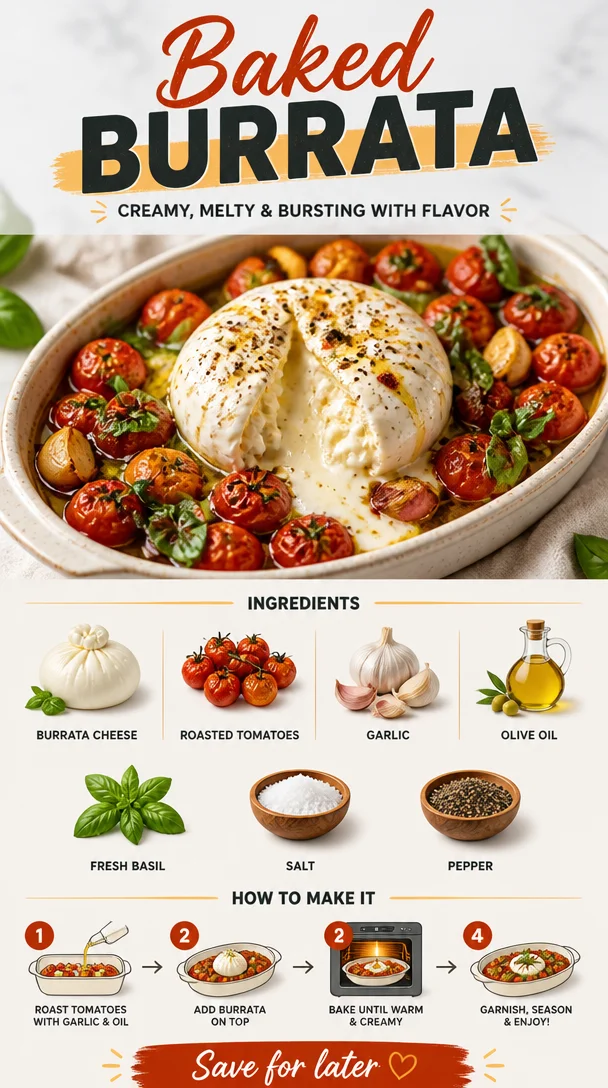
Baked Burrata
Baked Burrata: A Warm & Cheesy Hug in a Dish
Welcome to the cozy world of Clean Plate Cravings, where each recipe feels like a warm embrace! Today, we’re diving into a dish that epitomizes comfort food while keeping it fresh and vibrant—Baked Burrata. Picture it: creamy, dreamy burrata cheese wrapped in a crisp shell, complemented by luscious roasted tomatoes, aromatic garlic, and fragrant basil. It’s like a personal invitation to indulge without the side of guilt. So grab your apron and let’s get cooking!
A Story Behind The Dish
Baked burrata holds a special place in my heart, not just because it lights up any dinner table but also for the nostalgic memories it brings back. I recall a sun-soaked afternoon spent at a charming little café in Florence, Italy with friends. We had just spent the day wandering through narrow cobblestone streets, soaking in the sights, sounds, and of course, the mouthwatering smells wafting from every bakery and trattoria.
We settled down at this quaint café with cute, colorful plates and rustic wooden tables. We ordered a plate of baked burrata, blissfully unaware of how that dish would become a staple in my own kitchen. When it arrived, the cheese was bubbly and golden, surrounded by a medley of roasted tomatoes and fragrant herbs. The first bite—oh my! It was rich and creamy, a burst of flavor that seemed to sing with each mouthful. That day, I discovered the beauty of simple yet sumptuous creations.
Since then, I’ve made it my mission to recreate the magic of that meal. And here we are! Ready to bring a taste of Italy straight into your own kitchen. Let’s joyfully explore the flavors that make this dish a masterpiece.
Ingredients You’ll Need
Here’s what you need to whip up this creamy delight:
-
Burrata Cheese: This soft cheese is the star of the show! If you can’t find burrata, fresh mozzarella can be a decent substitute, although it won’t have that creamy center.
-
Roasted Tomatoes: Sweet, succulent, and bursting with flavor! Feel free to use cherry or grape tomatoes—they caramelize beautifully. You can roast them in advance and keep them in your fridge for quick meals!
-
Garlic: Freshly minced garlic adds depth and aromatic warmth. If you’re not a fan, roasted garlic is a sweeter alternative.
-
Olive Oil: Extra virgin olive oil not only enhances flavors but also adds richness when drizzled over the dish. Avocado oil can be a suitable substitute if you want a higher smoke point.
-
Fresh Basil: This fragrant herb elevates the dish with its distinct flavor. You can swap it for fresh parsley or even a sprinkle of dried basil in a pinch.
-
Salt & Pepper: These pantry staples are essential for seasoning. Use kosher salt for better control and fresh cracked black pepper for a more vibrant flavor.
Step-by-Step Instructions to Baked Burrata Bliss
Now, let’s dive into the cooking process. Follow these steps, and it will feel like a culinary hug with each bite.
-
Preheat the Oven: First off, turn your oven to 400°F (200°C). A hot oven is crucial for roasting those tomatoes to perfection and getting that burrata bubbly!
Chef Tip: Always preheat your oven. It ensures an even cooking temperature, which is key to wonderful roasted flavors.
-
Prepare the Tomatoes: Slice your cherry or grape tomatoes in half. Toss them on a baking sheet with a drizzle of olive oil, minced garlic, and season with salt and pepper.
Hacks: You could add a splash of balsamic vinegar or a sprinkle of sugar to enhance their sweetness.
-
Roast the Tomatoes: Place the baking sheet in the preheated oven and roast for about 20-25 minutes. You want them to become blistered and juicy—just watch for any that might start to burn!
Chef Insight: Roasting concentrates the tomatoes’ sweetness and deepens their flavors. Trust me; you don’t want to skip this step!
-
Add the Burrata: Once your tomatoes have caramelized beautifully, it’s time to introduce the burrata. Nestle the burrata in the center of the pan, gently pressing it into the tomatoes like making a little cheesy bed. Drizzle with more olive oil and a dash of salt and pepper.
-
Bake Again: Pop the tray back into the oven for another 10-15 minutes, just until the burrata begins to soften and ooze. The cheese should be melty and ever so slightly golden on the top.
Chef Hack: You can broil the top for the last couple of minutes for that golden color—just keep an eye on it!
-
Finish with Basil: Once you’ve pulled it out of the oven, tear fresh basil leaves on top. The heat from the dish will release the aromatic fragrance of the basil—pure heaven!
Happiness Tip: Don’t skimp on the basil; it’s what lifts this dish to new heights!
Serving Suggestions
Serving baked burrata is almost as fun as making it! I recommend plating it family-style, straight from the baking dish. Let your guests dig in—pair it with crusty bread for dipping, or serve it over a fresh arugula salad for a delightful contrast. You could also whip up a bruschetta topping using the baked burrata and tomatoes, spreading it generously over toasted crostini. It’s a versatile dish and sure to impress!
Recipe Variations
Let your creativity shine with these delicious twists on baked burrata:
-
Spicy Kick: Add red pepper flakes for a spicy touch! It beautifully balances the creaminess of burrata.
-
Mediterranean Vibes: Toss in olives and artichoke hearts before baking for extra depth of flavor.
-
Vegetable Medley: Mix in other roasted veggies like zucchini, bell peppers, or asparagus for a colorful addition.
-
Pest-o it Up: Incorporate dollops of pesto sauce before baking for a vibrant herbaceous note.
-
Add Nuts: Sprinkle some toasted pine nuts or walnuts on top for an added crunch and healthy fats!
Chef’s Notes
Cooking is always an adventure, right? When I first experimented with this recipe, I was a little hesitant about combining tomatoes directly with burrata. But from the moment I took that first bite of melting cheese fused with sweet, roasted tomatoes, I knew I hit the jackpot. I’ve since played around with flavors and ingredients, continuously evolving this simple dish. Sometimes it turns into a gorgeous summer salad; other times, it’s a comforting winter warmer.
FAQs and Troubleshooting
1. Why is my burrata not melting?
Burrata can be quite delicate. Ensure you’re using fresh burrata and fire up the heat in your oven! If it’s not melting after the suggested time, try checking for doneness—sometimes it just needs a bit more time.
2. Can I prepare this dish in advance?
Absolutely! You can roast the tomatoes ahead of time, store them in the fridge, and bake the burrata just before serving. It’s a great prep hack!
3. What should I do if my tomatoes burn?
If your tomatoes start to burn, reduce the heat. It’s better to roast for a longer time at lower heat than to char them in the oven.
4. Can I make this dish vegan?
Yes! While burrata is a dairy product, you could try vegan cheese alternatives, though flavors will vary. Try soft cashew cheese or a nut-based ricotta substitute for that creamy texture.
Nutritional Info (Optional)
While I always advocate for enjoying food without restriction, here’s a quick look at what’s in your delicious baked burrata per serving (calculated for 4 servings):
- Calories: 310
- Protein: 10g
- Carbohydrates: 6g
- Fats: 28g
Feel free to adjust servings based on your needs!
Thank you for joining this flavorful journey into the world of baked burrata! It’s a dish that’s perfect for gatherings or cozy nights in, and I can’t wait for you to experience the joy it brings. Happy cooking, friends! 🌿🍅🧀
PrintBaked Burrata

A warm and cheesy dish featuring creamy burrata cheese, roasted tomatoes, garlic, and fresh basil.
- Prep Time: 15 minutes
- Cook Time: 30 minutes
- Total Time: 45 minutes
- Yield: 4 servings
- Category: Main Course
- Method: Baking
- Cuisine: Italian
- Diet: Vegetarian
Ingredients
- Burrata Cheese
- Cherry or Grape Tomatoes
- Garlic
- Extra Virgin Olive Oil
- Fresh Basil
- Salt
- Pepper
Instructions
- Preheat the oven to 400°F (200°C).
- Prepare the tomatoes by slicing them in half and tossing them on a baking sheet with olive oil, minced garlic, salt, and pepper.
- Roast the tomatoes in the oven for about 20-25 minutes until blistered and juicy.
- Add the burrata to the center of the pan and drizzle with more olive oil, salt, and pepper.
- Bake again for 10-15 minutes until the burrata is softened and slightly golden.
- Finish by tearing fresh basil leaves on top before serving.
Notes
Pair with crusty bread or a fresh arugula salad for a delightful contrast.
Nutrition
- Serving Size: 1 serving
- Calories: 310
- Sugar: 4g
- Sodium: 300mg
- Fat: 28g
- Saturated Fat: 10g
- Unsaturated Fat: 16g
- Trans Fat: 0g
- Carbohydrates: 6g
- Fiber: 2g
- Protein: 10g
- Cholesterol: 30mg
Keywords: baked burrata, comfort food, Italian dish, creamy cheese, roasted tomatoes
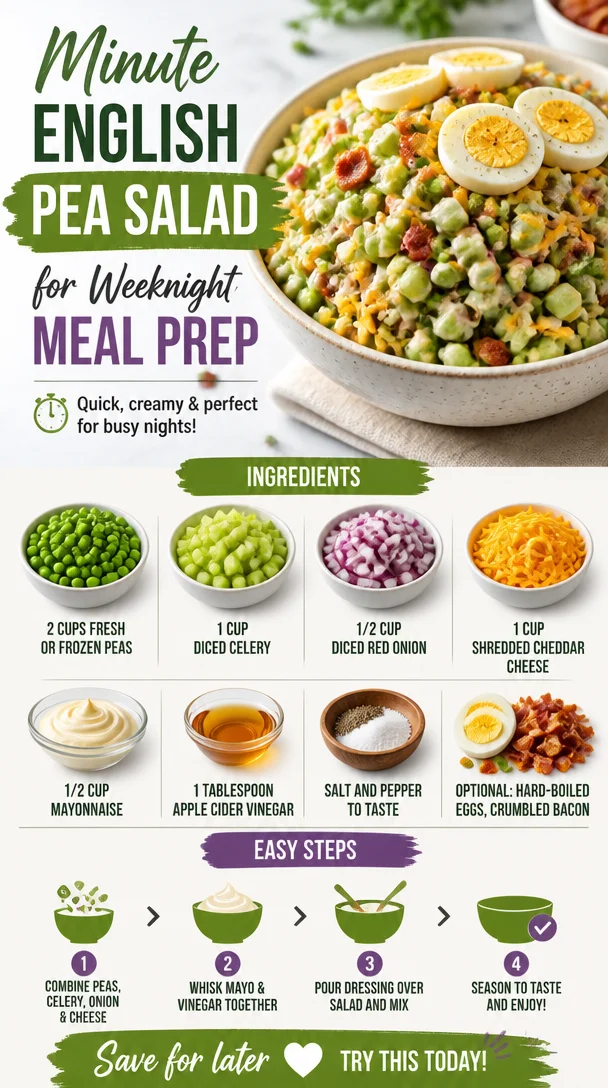
Minute English Pea Salad for Weeknight Meal Prep
The Bright and Fresh English Pea Salad: A Dish That Celebrates Spring
Welcome back, foodies! Today, I’m beyond excited to share with you one of my favorite springtime dishes: English Pea Salad. This light, vibrant salad is bursting with flavor and energy, making it the perfect addition to any meal or gathering. With every bite, you’ll relish the crunch of fresh produce, the creamy delight of cheese, and just a hint of something tangy that ties it all together. Trust me; your taste buds will be thanking you!
When finding delicious ways to enjoy healthier meals, simplicity is key. This salad features fresh or frozen peas, crunchy celery, and savory red onions, all harmoniously blended with cheddar cheese and a simple dressing made from mayo and apple cider vinegar. Easy to whip up and totally satisfying, this dish is not just a salad—it’s an experience that will transport you right back to those warm, sunlit days of childhood.
So, grab your apron, let’s roll up our sleeves, and dive into the magic of making English Pea Salad!
A Little Taste of Nostalgia
When I was a kid, springtime meant one thing: pea planting with my grandmother. Each year, we’d venture into her garden, where neat rows of pea plants awaited us, sunlit and vibrant. It was such a magical time, filled with shared laughter, dirt-stained hands, and high hopes for the garden’s bounty.
One of my fondest memories is the delightful sound of popping those sweet little peas from their pods. It felt like opening nature’s little presents! After our hard work, we’d whip up a simple English Pea Salad using the freshest peas right from the garden. The joy of sharing that meal with family, surrounded by blooming flowers and buzzing bees, planted in me a love for cooking that has only grown over the years. That’s why I absolutely adore recreating this dish—it’s a personal nod to my grandmother, her garden, and those beautiful, sun-soaked afternoons.
Ingredients
Let’s gather our ingredients and make this delicious salad together!
-
2 cups fresh or frozen peas
Fresh peas offer a sweet, vibrant flavor that shines through in this dish, but frozen peas work just as well if you’re in a pinch. For substitution, you can use diced green beans for a different crunch! -
1 cup diced celery
Celery adds that delightful crunch and refreshing bite. If you’re not a fan of celery, feel free to replace it with diced cucumber for a sweeter flavor. -
1/2 cup diced red onion
These bring a pop of color and a mild onion flavor. For a more subtle taste, try using green onions or scallions instead. -
1 cup shredded cheddar cheese
Cheddar adds a creamy, tangy richness to the salad. If you want a lighter version, try using reduced-fat cheese or even feta for a tangier twist! -
1/2 cup mayonnaise
This creamy base is what binds the salad together. If you prefer a lighter option, swap it out for Greek yogurt—it offers protein and a nice tang! -
1 tablespoon apple cider vinegar
The vinegar adds a delightful tang to balance the richness of the mayonnaise. Lemon juice can be an excellent substitute if you want something citrusy. -
Salt and pepper to taste
These simple seasonings enhance all the flavors and bring everything to life. -
Optional: hard-boiled eggs, crumbled bacon
For an extra layer of flavor and heartiness, throw in some sliced hard-boiled eggs or crispy bacon bits. You can always leave these out for a lighter, vegetarian option!
Step-by-Step Instructions
Now that we’ve gathered our ingredients, let’s dive into the cooking process! Trust me, making this English Pea Salad is a breeze.
-
Prep Your Ingredients
Begin by gathering all your ingredients on the counter. It helps to have a clean workspace! Dice your celery and red onion, and if you’re using fresh peas, shell them while humming your favorite cooking tune. -
Cook the Peas (if using fresh)
If you decided to go with fresh peas, bring a pot of water to a boil. Add the peas and blanch them for about 2-3 minutes until they’re bright green and tender. Don’t forget to drain them and plunge them into cold water to stop the cooking process. This keeps their beautiful color intact! -
Mix the Dressing
In a medium bowl, combine your mayonnaise and apple cider vinegar. Stir until smooth. Taste it—it should be creamy with just a hint of tang. Feel free to adjust the vinegar according to your preference! -
Combine Everything
In a large mixing bowl, combine the cooked (or thawed) peas, diced celery, diced red onion, and cheddar cheese. Pour the dressing over the mixture and gently fold everything together. Be careful not to mash the peas; we want them to stay intact for that satisfying crunch! -
Season
Season your salad with salt and pepper to taste. This is a great time to add optional ingredients like diced hard-boiled eggs or crispy bacon for extra flavor and heartiness. Mix it all once more to ensure an even distribution. -
Chill
For the best flavor, cover your salad with plastic wrap or a lid and let it chill in the fridge for at least 30 minutes. This allows the flavors to meld and marry beautifully—trust me, patience is key here! -
Serve and Enjoy
Once your salad has chilled, give it a gentle stir before serving. Plate it in a beautiful bowl, garnishing with a sprinkle of fresh herbs if you like, and get ready to dig in!
Serving Suggestions
This English Pea Salad is perfect for picnics, BBQs, or as a delightful side at any meal. Serve it cold or at room temperature alongside grilled chicken, fish, or a hearty veggie burger. You can also serve it in lettuce cups for a fun and fresh way to enjoy it!
Recipe Variations
The beauty of this salad is how versatile it is! Here are a few creative twists you can try:
- Herbed Up: Add in some fresh herbs like dill, parsley, or basil to elevate the flavor profile.
- Nutty Addition: Toss in some toasted walnuts or pecans for an extra crunch and healthy fats.
- Spicy Kick: For a bit of heat, try adding diced jalapeños or a splash of hot sauce into the dressing—your taste buds will thank you!
- Fruit Fiesta: Diced apples or berries can introduce a lovely sweetness that contrasts beautifully with the savory elements of the salad.
Chef’s Notes
As with any dish, this English Pea Salad has evolved over time in my kitchen! When I was initially developing the recipe, my grandmother’s influence always loomed large. I experimented with various ingredients until I found this delicious blend that pays homage to those sunny garden days. Funny enough, my brother was convinced that salad couldn’t taste great—until he had his first bite of this creamy, savory wonder. Now he requests it for every family gathering!
One of my favorite moments is when you observe friends and family enjoying it and going back for seconds (and thirds!). It’s those experiences wrapped up in wholesome food that make cooking so rewarding.
FAQs and Troubleshooting
Q: Can I use frozen peas?
Absolutely! Frozen peas work perfectly here and save you lots of prep time. Just thaw them before adding to the salad.
Q: How long will this salad last in the fridge?
This salad is best enjoyed within 2-3 days. The flavors will intensify, but the texture may slightly diminish over time.
Q: Can I make this salad ahead of time?
Yes! You can prepare it the night before, letting the flavors meld overnight. Just give it a good stir before serving the next day.
Q: What if my salad turns out too salty?
If you’ve accidentally added too much salt, try to balance it with a little more creamy dressing or add in extra peas to dilute the saltiness.
Nutritional Info
This salad is a wholesome mix of nutrients! With protein from the cheese and eggs (if included), fiber from the peas and celery, plus healthy fats from the mayonnaise or yogurt, this dish is perfect for a balanced meal.
So there you have it! This English Pea Salad might seem simple, but it’s packed with memories, flavors, and joy. I hope you enjoy making it as much as I do! Remember that cooking is all about experimenting—so don’t hesitate to make it your own! Happy cooking, my fellow food lovers!
PrintEnglish Pea Salad
A light and vibrant salad celebrating spring with fresh peas, crunchy celery, and creamy cheddar cheese, balanced with a tangy dressing.
- Prep Time: 15 minutes
- Cook Time: 5 minutes
- Total Time: 50 minutes
- Yield: 4 servings 1x
- Category: Salad
- Method: Mixing
- Cuisine: American
- Diet: Vegetarian
Ingredients
- 2 cups fresh or frozen peas
- 1 cup diced celery
- 1/2 cup diced red onion
- 1 cup shredded cheddar cheese
- 1/2 cup mayonnaise
- 1 tablespoon apple cider vinegar
- Salt and pepper to taste
- Optional: hard-boiled eggs, crumbled bacon
Instructions
- Prep your ingredients by gathering them on the counter and dicing celery and red onion.
- Cook the peas by boiling them for about 2-3 minutes if using fresh, and then drain and plunge into cold water.
- Mix the dressing by combining mayonnaise and apple cider vinegar until smooth.
- Combine everything in a large mixing bowl, adding the cooked peas, celery, onion, and cheddar cheese.
- Season the salad with salt and pepper, and add optional ingredients if desired.
- Chill the salad in the fridge for at least 30 minutes to allow flavors to meld.
- Serve and enjoy your refreshing English Pea Salad!
Notes
This salad is versatile; feel free to add herbs, nuts, or fruits for a creative twist.
Nutrition
- Serving Size: 1 serving
- Calories: 250
- Sugar: 5g
- Sodium: 300mg
- Fat: 15g
- Saturated Fat: 3g
- Unsaturated Fat: 10g
- Trans Fat: 0g
- Carbohydrates: 25g
- Fiber: 5g
- Protein: 8g
- Cholesterol: 20mg
Keywords: salad, spring, peas, vegetarian, easy recipe
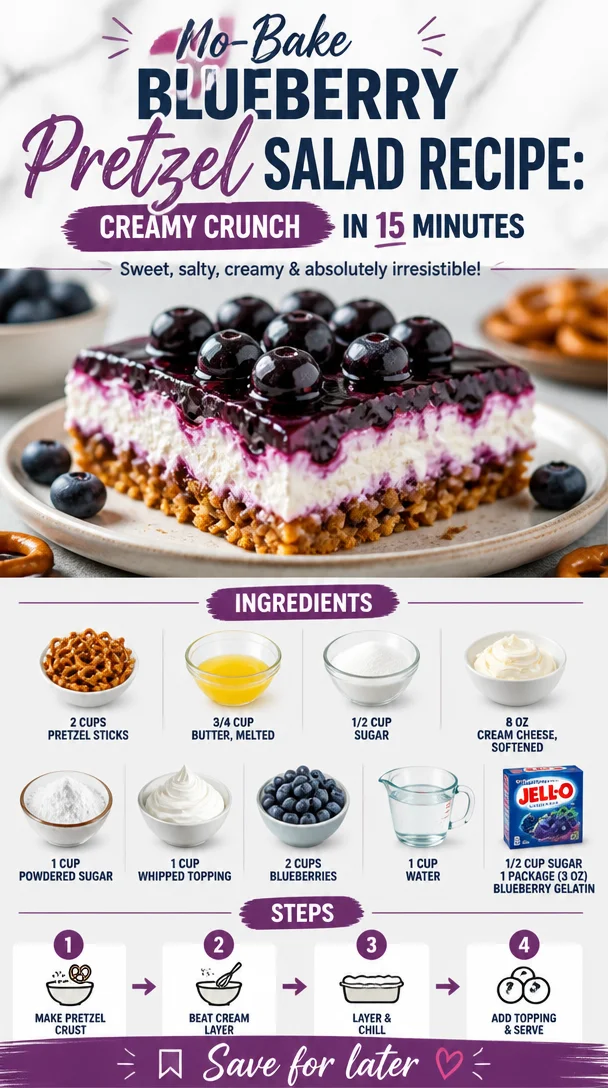
No-Bake Blueberry Pretzel Salad Recipe: Creamy Crunch in 15 Minutes
Blueberry Pretzel Salad: A Cool Summer Treat!
Welcome to my kitchen, where we’re diving into a classic dessert that plays a sweet symphony on your taste buds while bringing a wave of nostalgia: Blueberry Pretzel Salad! Now, this isn’t your ordinary salad filled with leafy greens—oh no! This is a delightful blend of sweet, salty, and creamy goodness that feels like a celebration in a bowl. Whether you serve it at a summer picnic, a holiday gathering, or simply as a refreshing treat at home, this dessert salad is bound to leave everyone smiling and craving more.
Picture this: It’s a warm summer day, and the sun is shining. The air is filled with the laughter of friends and family, and you’re seated at a long table adorned with a colorful spread of delicious food. In the center, there’s a bowl of that beautiful blueberry pretzel salad—the eye-catching layers of salty pretzels, creamy filling, and vibrant blueberries beckoning everyone to dig in. This dish isn’t just about flavor; it’s encapsulated with memories, love, and moments shared around the table.
This delightful dessert is so easy to make, you’ll wonder why you didn’t whip it up sooner! Not only does it tantalize your taste buds, but it also brings a sense of joy and nostalgia that keeps you coming back for more. Are you ready to create your own Blueberry Pretzel Salad that will be the star of your next gathering? Let’s roll up our sleeves and get into the kitchen—trust me, it’s going to be a delicious journey!
A Taste of Nostalgia
Growing up, summer gatherings with my family were always a treat, but the highlight was undoubtedly my grandma’s famous Blueberry Pretzel Salad. Every time she’d make it, the aroma of melted butter combined with the crunch of salty pretzels filled the room, setting the stage for something truly special. I remember standing on tiptoes, peeking into the fridge, eagerly waiting for our after-meal dessert.
With each bite of that sweet and creamy salad, I was transported to a world where everything felt light and joyful. The crunch of the pretzels perfectly balanced the velvety cream cheese mixture, and the blueberries provided a burst of flavor that was always refreshing. It wasn’t just a dessert; it was a family tradition that united us, sparking laughter and stories as we savored every last bite.
To this day, I love recreating that same dish, evoking those cherished memories while adding my own twist. It’s amazing how food has this magical ability to transport us back in time, don’t you think? So grab your apron and let’s make some new memories around this timeless dessert!
Ingredients
Here’s what you’ll need to whip up your very own Blueberry Pretzel Salad. Each component brings something special to this dish!
-
2 cups pretzel sticks
These provide that delicious salty crunch! You can substitute with gluten-free pretzels if you need a gluten-free option. -
3/4 cup butter, melted
This forms the base for our pretzel crust and adds richness. If you’re looking for a healthier option, you can try coconut oil for a tropical twist. -
1/2 cup sugar
Sugar balances the saltiness of the pretzels and enhances the flavors of our cream cheese filling. You can swap it with maple syrup or agave nectar for a more natural sweetener. -
8 oz cream cheese, softened
This creamy base is what makes our salad luscious and decadent. Neufchâtel cheese is a great lower-fat substitute! -
1 cup powdered sugar
For that smooth sweetness! If you want a grain-free alternative, powdered erythritol will work too. -
1 cup whipped topping
This adds a light and airy texture. If you prefer a homemade touch, use freshly whipped cream instead! -
2 cups blueberries
Fresh or frozen—both work wonderfully. Swap with raspberries or strawberries for a unique flavor twist. -
1 cup water
This will be used to dissolve our gelatin. -
1/2 cup sugar
Another layer of sweetness for the blueberry layer! Same sweetener options apply here. -
1 package (3 oz) blueberry gelatin
This packs a punch of blueberry flavor, giving our salad its beautiful color and sweetness. If you’d like to avoid artificial sweeteners, look for natural gelatin options.
Step-by-Step Instructions
Ready to create this beautiful Blueberry Pretzel Salad? Here’s how to bring it all together!
-
Preheat your oven to 350°F (175°C).
Preheating is essential for an even bake, so don’t skip this step! -
Crush the pretzel sticks.
Place the pretzel sticks in a large zip-top bag and crush them gently with a rolling pin or meat mallet. You want a mixture of large and small pieces for texture. Trust me, the crunch will be amazing! -
Combine pretzels and butter.
In a bowl, mix the crushed pretzels, melted butter, and 1/2 cup sugar until fully combined. This will create that irresistible salty crust. The melted butter helps hold everything together! -
Spread mixture in a baking dish.
Press the pretzel mixture evenly into the bottom of a 9×13-inch baking dish. It’s important to pack it down well, as this will serve as the crust for our salad. -
Bake the pretzel crust.
Pop the baking dish into your preheated oven and bake for about 10 minutes until golden brown. Keep an eye on it—over-baking can lead to a hard crust! -
Let it cool.
Remove the dish from the oven and let it cool completely while you prepare the filling. This is the perfect time to snag a sip of your favorite drink! -
Make the cream cheese filling.
In a large bowl, beat the softened cream cheese and powdered sugar together until smooth and creamy. You want a smooth texture—this is the heart of our salad! A handheld mixer works wonderfully here. -
Fold in the whipped topping.
Gently fold in the whipped topping until fully incorporated. This will add lightness to our mixture! Take care not to deflate the fluffiness of the whipped topping. -
Spread the cream cheese mixture.
Once your pretzel crust has cooled, spread the cream cheese mixture evenly over the crust. Use a spatula to get it nice and smooth. -
Prepare the blueberry layer.
In a separate bowl, dissolve the blueberry gelatin in hot water, stirring until completely dissolved. Then, add 1/2 cup of sugar and mix well. This step is essential, as it brings that vibrant blueberry flavor to life! -
Add the blueberries.
Stir in the blueberries gently, ensuring they’re evenly distributed throughout the mixture. -
Pour the blueberry mixture over the cream cheese layer.
Gently pour the gelatin mixture over the cream cheese layer in your baking dish, spreading it out evenly. You want it to set beautifully atop the creamy filling. -
Chill and set.
Cover with plastic wrap and place in the refrigerator for at least 4 hours, or overnight if possible. This allows all the flavors to meld beautifully! -
Serve and Enjoy!
Slice into squares or scoop into bowls, and serve chilled. This dessert is ready to impress with its layered beauty!
Serving Suggestions
Plating your Blueberry Pretzel Salad is easy and fun! You can serve it directly from the baking dish or scoop individual servings into glass dessert cups for an elegant touch. Add a sprig of mint or a sprinkle of fresh blueberries on top for a pop of color and freshness. Enjoy every delightful layer, and watch the smiles grow with each delicious bite!
Recipe Variations
Feeling adventurous? Here are a few creative twists you can try with your Blueberry Pretzel Salad:
- Mixed Berry Medley: Swap out blueberries for a mix of your favorite berries like strawberries, raspberries, or blackberries for a colorful twist.
- Nutty Crunch: Add some chopped nuts like pecans or walnuts into the pretzel crust for an additional crunch and flavor.
- Infused Cream Cheese: Try adding lemon zest or a splash of almond extract to the cream cheese mixture for an elevated flavor profile.
- Chocolate Drizzle: For a decadent treat, drizzle melted chocolate over the top before chilling.
- Vegan Version: Use dairy-free cream cheese and whipped topping for a fabulous vegan-friendly option!
Chef’s Notes
This Blueberry Pretzel Salad has been a staple in my family for as long as I can remember, and I love how every batch seems to come out a little differently. Sometimes I’ll add a bit of lemon zest to brighten the flavor, while other times, I keep it classic. One memorable occasion was when I accidentally used sea salt instead of regular sugar on the crust—they say trial and error is the best teacher! The sweet and salty combination turned out to be deliciously surprising, and I’m still sticking with it for a little extra flair! Every time I make it, I’m reminded of those lovely summer gatherings and the joy of sharing food with loved ones.
FAQs and Troubleshooting
-
Can I use fresh blueberries instead of frozen?
Absolutely! Fresh blueberries are perfect for this recipe—just make sure to rinse and dry them lightly before adding them to your gelatin mixture. -
How can I store leftovers?
Store any leftovers in an airtight container in the refrigerator. Enjoy them within 3-4 days for the best freshness. -
What should I do if my gelatin doesn’t set?
If your gelatin isn’t setting, make sure you’re using the correct amount of water. If the layers don’t firm up, you can place it back in the refrigerator for additional time. -
Can I make this ahead of time?
Yes! This salad is perfect for make-ahead; preparing it the day before lets all the flavors meld beautifully.
Nutritional Info (Optional)
(Nutritional information may vary based on specific ingredients and serving sizes but here’s a rough estimate per serving, based on 12 servings)
- Calories: 215
- Total Fat: 11g
- Saturated Fat: 6g
- Cholesterol: 30mg
- Sodium: 150mg
- Total Carbohydrates: 29g
- Dietary Fiber: 1g
- Sugars: 15g
With this Blueberry Pretzel Salad, you’re not just creating a dessert; you’re crafting an experience filled with laughter and warmth. So grab your ingredients, gather your loved ones, and let’s make some delicious memories together! Happy cooking!
PrintBlueberry Pretzel Salad

A delightful blend of sweet, salty, and creamy goodness, this Blueberry Pretzel Salad is the perfect cool summer treat that everyone will love.
- Prep Time: 20 minutes
- Cook Time: 10 minutes
- Total Time: 240 minutes
- Yield: 12 servings 1x
- Category: Dessert
- Method: Baking
- Cuisine: American
- Diet: Vegetarian
Ingredients
- 2 cups pretzel sticks
- 3/4 cup butter, melted
- 1/2 cup sugar
- 8 oz cream cheese, softened
- 1 cup powdered sugar
- 1 cup whipped topping
- 2 cups blueberries
- 1 cup water
- 1/2 cup sugar
- 1 package (3 oz) blueberry gelatin
Instructions
- Preheat your oven to 350°F (175°C).
- Crush the pretzel sticks.
- Combine pretzels and butter.
- Spread mixture in a baking dish.
- Bake the pretzel crust for about 10 minutes until golden brown.
- Let it cool.
- Make the cream cheese filling.
- Fold in the whipped topping.
- Spread the cream cheese mixture.
- Prepare the blueberry layer.
- Add the blueberries.
- Pour the blueberry mixture over the cream cheese layer.
- Chill and set for at least 4 hours.
- Serve and Enjoy!
Notes
This dessert can be made ahead of time and stored in the refrigerator. For an extra twist, try mixing in different berries or adding nuts.
Nutrition
- Serving Size: 1 serving
- Calories: 215
- Sugar: 15g
- Sodium: 150mg
- Fat: 11g
- Saturated Fat: 6g
- Unsaturated Fat: 5g
- Trans Fat: 0g
- Carbohydrates: 29g
- Fiber: 1g
- Protein: 3g
- Cholesterol: 30mg
Keywords: blueberry, pretzel, salad, dessert, summer treat
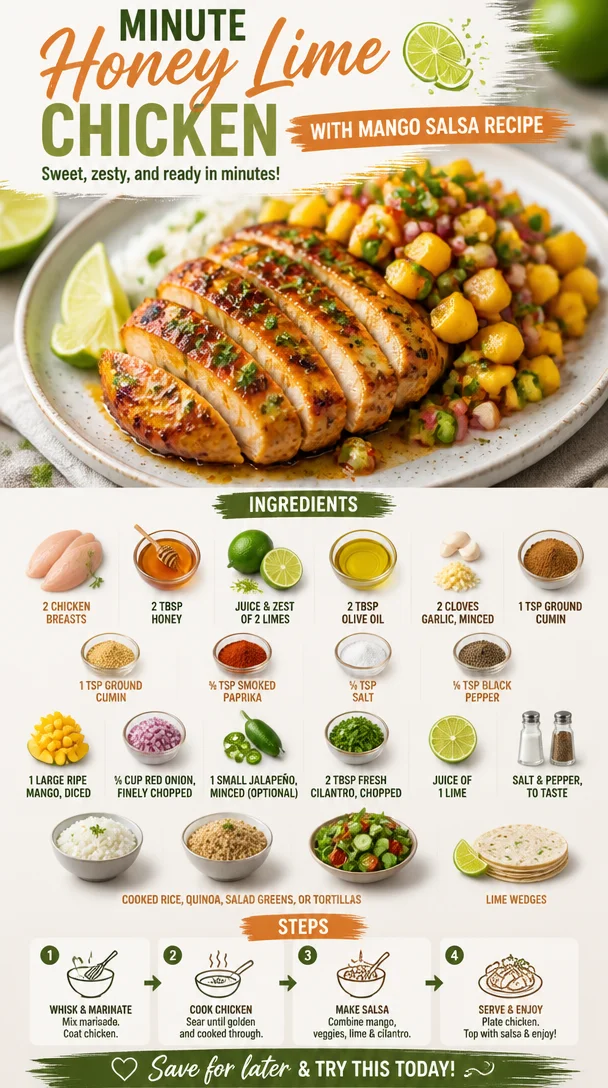
Minute Honey Lime Chicken with Mango Salsa Recipe
Honey Lime Chicken with Mango Salsa: A Flavorful Escape to the Tropics
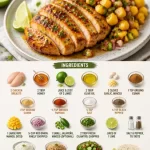
Welcome back, my foodie friends! Today, we’re diving into the vibrant and tangy world of Honey Lime Chicken with a refreshing Mango Salsa. Imagine the sun shining, the sound of waves crashing in the distance, and the sweet scent of tropical fruits woven together with the savory notes of perfectly grilled chicken. Whether you’re cooking for family, friends, or just treating yourself to a scrumptious meal, this dish is bound to be a hit.
Eating is not just about fueling our bodies—it’s also about creating memories, sharing experiences, and enjoying the moment. In this post, we’ll guide you through a journey of flavors, nostalgia, and a few chef secrets that will make you feel like a kitchen rockstar. So grab your apron, and let’s get cooking!
A Memory to Savor
Growing up, summer evenings meant gathering around the grill with family and friends. My parents would fire up the barbecue, and the aroma of marinated meats would fill the air. One dish that stood out was a simple honey lime chicken, marinated to perfection and served with a side of vibrant salsa. I remember sneaking bites of juicy mango while my mom prepared the salsa, giggling as my little brother tried to steal the last piece of grilled chicken from my plate.
It was more than just a meal; it was about laughter, warmth, and connection. As each bite filled my senses with flavor, I realized that food has a beautiful way of bringing people together. This Honey Lime Chicken with Mango Salsa echoes those cherished moments, inviting you to create your own delicious memories around the dinner table.
Ingredients
Here’s what you’ll need to create this culinary masterpiece:
-
2 large boneless, skinless chicken breasts (or 4 small): Choose free-range or organic chicken for the best flavor. If you’re vegan, try using tofu or portobello mushrooms as a hearty substitute.
-
2 tablespoons honey: This natural sweetener adds a wonderful caramelization when grilled. You can swap it for agave syrup if you’re looking for a vegan alternative.
-
Juice and zest of 2 limes: A must for that zesty punch! Zest adds vibrant flavor—don’t skip it!
-
2 tablespoons olive oil: This healthy fat helps with cooking and enhances overall flavor. If you’re sensitive to olive oil, feel free to use avocado oil instead.
-
2 cloves garlic, minced: Fresh garlic brings a touch of warmth to the dish. If you’re in a pinch, garlic powder works too. Use ½ teaspoon instead.
-
1 teaspoon ground cumin: Adds a lovely earthy flavor. For a different twist, try smoked cumin to enhance the smokiness.
-
½ teaspoon smoked paprika: This ingredient gives the chicken a subtle smokey flavor along with its beautiful color.
-
½ teaspoon salt: It elevates all the flavors but adjust according to personal preference.
-
¼ teaspoon black pepper: Freshly ground adds better flavor. It can be omitted for a milder taste.
-
1 large ripe mango, diced: This fruit offers a sweet, juicy counterpoint to the savory chicken. Substitute with pineapple for a different tropical flair.
-
¼ cup red onion, finely chopped: Adds a nice crunch and tang. If you prefer a milder taste, soak the onion in cold water for about 10 minutes before using.
-
1 small jalapeño, seeded and minced (optional for heat): Add just a little spice if you’re a heat lover! Skip it entirely if you prefer a milder salsa.
-
2 tablespoons fresh cilantro, chopped: For a refreshing touch. If cilantro isn’t your thing, try fresh parsley or mint.
-
Juice of 1 lime: Enhances flavor in the salsa—always fresh for the best result.
-
Salt and pepper, to taste: Don’t forget to adjust these for the final season.
-
Cooked rice, quinoa, salad greens, or tortillas: These serve as great accompaniments for serving.
-
Lime wedges: Perfect for a zesty squeeze right before enjoying!
Step-by-Step Instructions
-
Marinate the Chicken: In a mixing bowl, combine the honey, lime juice, lime zest, olive oil, minced garlic, cumin, smoked paprika, salt, and black pepper. Whisk until smooth. Add the chicken and make sure it’s well-coated in the marinade. Cover and let it marinate for at least 30 minutes (or up to 4 hours!) in the refrigerator. Chef Hack: The longer you marinate, the more flavor your chicken will have, but if you’re short on time, even 30 minutes will make a difference!
-
Prepare the Salsa: While the chicken marinates, let’s whip up that vibrant mango salsa! In a separate bowl, mix the diced mango, red onion, minced jalapeño (if using), chopped cilantro, lime juice, salt, and pepper. Gently fold to combine—be careful not to mash the mango! Tip: Letting the salsa sit for about 10-15 minutes allows the flavors to meld beautifully—don’t rush this step!
-
Preheat the Grill: Get your grill or grill pan ready by preheating it to medium-high heat. Lightly grease the grill grates to prevent the chicken from sticking.
-
Cook the Chicken: Remove the chicken from the marinade, letting the excess drip off. Place the chicken on the grill and cook for about 5-7 minutes on each side, or until the internal temperature reaches 165°F and the juices run clear. Fun Tip: Don’t flip the chicken too early! Give it some time to get those beautiful grill marks!
-
Rest the Chicken: Once cooked, transfer the chicken to a cutting board and let it rest for about 5 minutes before slicing. This resting period keeps the juices sealed inside, ensuring tender, juicy meat!
-
Plate the Dish: Slice the chicken against the grain into strips. Presentation matter—and who doesn’t love a beautifully plated dish?
Serving Suggestions
For the perfect meal, create a bed of fluffy rice, quinoa, or fresh salad greens. Lay the sliced Honey Lime Chicken on top and generously spoon some mango salsa over it. Garnish with lime wedges for that extra zesty finish! This dish pairs beautifully with some grilled veggies or warm tortillas on the side.
Recipe Variations
-
Tropical Twist: Swap the mango for diced pineapple or papaya for a new tropical flavor.
-
Spicy Sour: Add a bit of diced red chili for an extra kick in the salsa.
-
Vegan Delight: Substitute chicken with marinated tofu or chickpeas for a delightful plant-based version.
-
Herbaceous Infusion: Swap cilantro for fresh basil or mint in the salsa for a twist on freshness!
-
Citrus Burst: Mix other citrus juices like orange or grapefruit into the marinade for a unique flavor profile.
Chef’s Notes
I’ve experimented with this recipe for years, tweaking the ingredients and cooking techniques along the way. One time, I used too much cumin, and while my family was understanding, they joked that it tasted more like spice than food! Since then, I’ve learned that balance is key. Remember, cooking is a bit like life—you’ll have your ups and downs, but those little lessons make the journey worthwhile.
I love how this dish embodies the lively, sunny days of summer and brings a taste of the tropics right to your kitchen.
FAQs and Troubleshooting
What can I pair with this chicken?
You can pair it with rice, quinoa, greens, or even tortilla wraps for a fun twist.
My chicken is too dry. What went wrong?
Overcooking can lead to dry chicken. Make sure you keep an eye on it, and always let it rest before slicing!
Can I make the mango salsa ahead of time?
Absolutely! The salsa tastes even better 24 hours after making it—just give it a good stir before serving.
What if I don’t have a grill?
You can easily bake the chicken in the oven at 400°F for about 20-25 minutes or until cooked through. A skillet on the stove works just as well, giving you those lovely sear marks!
Nutritional Info
While this recipe is packed with flavor, it’s equally good for you! Each serving of Honey Lime Chicken with Mango Salsa contains roughly:
- Calories: 350
- Protein: 30g
- Carbohydrates: 25g
- Fats: 15g
This equates to a satisfying meal that won’t weigh you down!
Now that you’ve got the scoop on Honey Lime Chicken with Mango Salsa, why not plan a tropical dinner adventure? Whether it’s a casual weeknight meal or a fun gathering with friends, this dish is sure to impress. Remember, cooking is an art. Let your taste buds lead the way, and don’t be afraid to make it your own. Happy cooking, and may your kitchen be filled with laughter and flavor!
PrintHoney Lime Chicken with Mango Salsa
A vibrant and tangy chicken dish marinated in honey and lime, paired with a refreshing mango salsa.
- Prep Time: 30 minutes
- Cook Time: 15 minutes
- Total Time: 45 minutes
- Yield: 4 servings 1x
- Category: Main Course
- Method: Grilling
- Cuisine: Tropical
- Diet: Gluten Free, Dairy Free
Ingredients
- 2 large boneless, skinless chicken breasts
- 2 tablespoons honey
- Juice and zest of 2 limes
- 2 tablespoons olive oil
- 2 cloves garlic, minced
- 1 teaspoon ground cumin
- ½ teaspoon smoked paprika
- ½ teaspoon salt
- ¼ teaspoon black pepper
- 1 large ripe mango, diced
- ¼ cup red onion, finely chopped
- 1 small jalapeño, seeded and minced (optional)
- 2 tablespoons fresh cilantro, chopped
- Juice of 1 lime
- Salt and pepper, to taste
- Cooked rice, quinoa, salad greens, or tortillas (for serving)
- Lime wedges (for garnish)
Instructions
- Marinate the chicken: In a mixing bowl, combine the honey, lime juice, lime zest, olive oil, minced garlic, cumin, smoked paprika, salt, and black pepper. Whisk until smooth. Add the chicken and make sure it’s well-coated in the marinade. Cover and let it marinate for at least 30 minutes (or up to 4 hours!) in the refrigerator.
- Prepare the salsa: In a separate bowl, mix the diced mango, red onion, minced jalapeño (if using), chopped cilantro, lime juice, salt, and pepper. Gently fold to combine.
- Preheat the grill: Preheat your grill or grill pan to medium-high heat. Lightly grease the grill grates.
- Cook the chicken: Remove the chicken from the marinade and place it on the grill. Cook for about 5-7 minutes on each side or until the internal temperature reaches 165°F.
- Rest the chicken: Transfer the chicken to a cutting board and let it rest for about 5 minutes before slicing.
- Plate the dish: Slice the chicken against the grain into strips and serve with the mango salsa and garnished with lime wedges.
Notes
For a vegan option, substitute chicken with tofu or portobello mushrooms.
Nutrition
- Serving Size: 1 serving
- Calories: 350
- Sugar: 15g
- Sodium: 400mg
- Fat: 12g
- Saturated Fat: 2g
- Unsaturated Fat: 9g
- Trans Fat: 0g
- Carbohydrates: 25g
- Fiber: 3g
- Protein: 30g
- Cholesterol: 70mg
Keywords: chicken, mango salsa, grilled chicken, tropical recipes, summer recipes
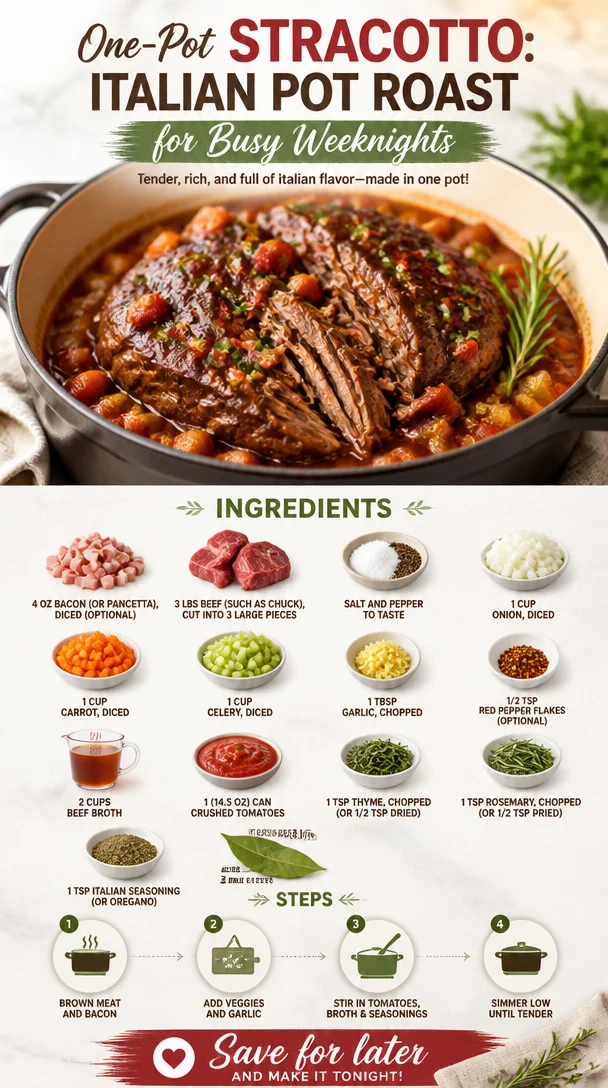
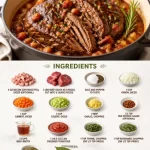
One-Pot Stracotto: Italian Pot Roast for Busy Weeknights
Embrace the Warmth of Italian Comfort: Stracotto Recipe
Welcome to the cozy corners of my kitchen, where love and good food mingle as freely as laughter and stories. Today, we’re diving into a dish that holds a special place in my heart and my recipe collection—Italian Pot Roast, or as it’s affectionately known, Stracotto. This dish isn’t just a meal; it’s a culinary hug, a celebration of hearty flavors and tender textures that transport you straight to Italy with every bite.
A Journey Through Flavors and Memories
Growing up, Sunday dinners at my grandmother’s house were always a marvel. The tantalizing aroma of her Stracotto would wrap around us like a warm blanket as soon as we stepped through the door. If you’ve ever walked into a home that smells of slow-cooked goodness and hearty spices, you know exactly what I mean. Grandma’s kitchen was where the family gathered, stories were shared, and laughter was the added ingredient that made every meal unforgettable.
I remember being little and perched on a stool, my chin resting on the countertop while Grandma stirred her beloved pot. “Cooking is all about love,” she’d say, her eyes twinkling as she adjusted a sprig of thyme. “And a little bit of patience.” Such wise words! We’d wait for hours, the anticipation stirring our appetites, chatting about everything from school to secret crushes. When a tender slice of beef hit the table, smothered in rich sauce, it felt like magic.
Stracotto is more than just a recipe; it’s a time capsule of wonderful memories, and I’m excited to share my take on this beautiful dish with you. Let’s roll up our sleeves and get ready to create some new memories together!
Ingredients You’ll Love
Here’s what you’ll need to whip up your very own pot of Stracotto:
-
4 ounces bacon or pancetta, diced (optional)
Adds a delightful layer of smokiness and depth of flavor. If you want a lighter option, feel free to skip this or substitute with turkey bacon! -
3 pounds beef (like chuck), cut into 3 large pieces
Chuck roast is my favorite for its tenderness and flavorful marbling. If you’re looking for a leaner cut, consider using round roast, but keep in mind it may not be as tender. -
Salt and pepper to taste
Essential for bringing out the natural flavors of your ingredients! -
1 cup onion, diced
The sweet base for our sauce. Yellow onions are a classic choice, but you can use sweet onions if you prefer a milder flavor. -
1 cup carrot, diced
Adds beautiful color and a hint of sweetness. For a fun twist, try using rainbow or purple carrots! -
1 cup celery, diced
This crunchy veggie contributes a lovely earthy flavor to the pot. If you’re not a fan, feel free to leave it out. -
1 tablespoon garlic, chopped
Because you can never have enough garlic! Fresh garlic is a must, but in a pinch, garlic powder works too. -
1/2 teaspoon red pepper flakes (optional)
Adds a little kick! If you’re sensitive to spice, keep this to a minimum or omit entirely. -
2 cups beef broth
Use low-sodium broth for more control over saltiness. You can always add more seasoning later! -
1 (14.5 ounce) can crushed tomatoes
The backbone of our sauce, providing richness and acidity. You can also use fresh tomatoes if they’re in season. -
1 teaspoon thyme, chopped (or 1/2 teaspoon dried)
Thyme’s earthy aroma elevates the flavors. Fresh is better, but dried works just fine! -
1 teaspoon rosemary, chopped (or 1/2 teaspoon dried)
A fragrant herb that adds depth; if you can find fresh, snip away! -
1 teaspoon Italian seasoning (or oregano)
A little blend of herbs conveys that Italian essence. Feel free to experiment with other herbs too! -
2 bay leaves
Always a must in slow-simmered dishes to add complexity. Just don’t forget to remove them before serving!
Step-by-Step Instructions: Cooking Your Stracotto
1. Sear the Meat
Start by heating a large Dutch oven over medium-high heat. Add your diced bacon or pancetta to the pan and let it cook until it’s crispy and golden brown. This step is crucial; it creates a flavorful base. If you’re skipping the bacon, just heat the pot, and add a splash of olive oil. Once the bacon is done, remove it from the pot and set it aside, leaving the rendered fat in the pot.
2. Brown the Beef
Now, season your beef chunks generously with salt and pepper. Add them to the hot pot, searing each piece for about 3-4 minutes on each side until golden brown. This step builds that rich flavor we all crave. Don’t rush it! If your pot is crowded, do it in batches to ensure a good sear.
3. Add the Aromatics
Once your beef is browned, toss in the diced onions, carrots, and celery, stirring everything well. Let this sauté for 5-7 minutes until the vegetables are softened, and the onions are translucent. This is where the scent starts to fill your kitchen, and trust me, it’s heavenly!
4. Stir in the Garlic and Spices
Add the chopped garlic and red pepper flakes, if you’re using them, stirring constantly for about 1 minute. You want to release those fragrant oils without burning the garlic—nothing ruins a dish faster than bitter burnt garlic!
5. Deglaze the Pot
Pour in the beef broth, using a wooden spoon to scrape up all those delicious bits stuck to the bottom of the pot. This is where all the magic happens! Then, add the crushed tomatoes, thyme, rosemary, Italian seasoning, and bay leaves. Stir everything together until well-combined.
6. Return the Beef and Bacon
Carefully place the seared beef back into the pot and pour any accumulated juices over the top. Bring the mixture to a gentle simmer. This is the moment of transformation!
7. Slow Cook
Cover the pot and transfer it to a preheated oven at 325°F (165°C). Let it cook for about 3-4 hours, until the meat is fork-tender and falls apart effortlessly. If you’d rather use a slow cooker, you can also transfer everything to that after the initial sautéing—you’ll just need to set it for about 6-8 hours on low.
8. Finishing Touches
Once it’s done cooking, remove it from the oven, and let it rest for 20 minutes before digging in. This resting phase allows those juices to redistribute, making every bite irresistible.
Serving Suggestions: How to Plate Your Stracotto
To serve, ladle the Stracotto onto a lovely platter or deep bowls, making sure to include a generous amount of the sauce. Garnish with fresh herbs for a pop of color and a hint of brightness. Pair it with creamy polenta, crusty bread, or even a hearty serving of mashed potatoes to soak up all the incredible sauce. And don’t forget—this is comfort food, so it’s always better shared with great company!
Recipe Variations:
- Herbed Variation: Add a handful of fresh parsley or basil when you serve for a fresh twist.
- Vegetarian Twist: Swap the beef for hearty mushrooms and use vegetable broth for a delicious plant-based version.
- Sweet and Spicy: Toss in some diced bell peppers and a tablespoon of honey for a hint of sweetness that balances the savory.
- Red Wine Reduction: Substitute a portion of the beef broth with red wine to deepen the flavors—just remember to let it simmer a bit longer uncovered to reduce the alcohol.
Chef’s Notes:
This Stracotto recipe has evolved over the years, inspired by those cherished Sunday dinners and countless attempts at perfecting flavors. The beauty of this dish is its flexibility. I remember a time I was out of beef broth and used mushroom broth instead; it was surprisingly delightful! Cooking is about experimenting, so don’t be afraid to make it your own. And let’s be honest, cooking is a bit like life—messy, beautiful, and always better when shared.
FAQs and Troubleshooting
Q: My meat is tough, what did I do wrong?
A: Tough meat usually means it needs more time! Let it simmer longer, and don’t be afraid to check for tenderness as it cooks.
Q: Can I make Stracotto ahead of time?
A: Yes, this dish actually tastes even better the next day! Just store it in the fridge and reheat on the stovetop when you’re ready to eat.
Q: What should I do if my sauce is too thick?
A: If you find the sauce too thick, simply stir in a bit more beef broth or water until it reaches your desired consistency.
Q: Can I use a different cut of meat?
A: Absolutely! While chuck is recommended, other cuts like brisket or even pork shoulder can work just as well. Just adjust cooking times according to the cut.
Nutritional Info (Optional)
This hearty dish serves about 6 and is packed with protein, vitamins, and minerals! Each serving typically contains around 350 calories, depending on ingredients and portion sizes. Serve it with veggies or a salad to create a well-balanced meal!
And there you have it! A slice of my heart, straight from my kitchen to yours. I hope you enjoy making this Stracotto as much as I do! Let’s keep it fresh, simple, and above all, delicious. Happy cooking, friends!
PrintStracotto (Italian Pot Roast)
A hearty Italian pot roast that celebrates flavors and memories, slowly cooked to perfection for a comforting meal.
- Prep Time: 20 minutes
- Cook Time: 240 minutes
- Total Time: 260 minutes
- Yield: 6 servings 1x
- Category: Main Course
- Method: Braising
- Cuisine: Italian
- Diet: Carnivore
Ingredients
- 4 ounces bacon or pancetta, diced (optional)
- 3 pounds beef (like chuck), cut into 3 large pieces
- Salt and pepper to taste
- 1 cup onion, diced
- 1 cup carrot, diced
- 1 cup celery, diced
- 1 tablespoon garlic, chopped
- 1/2 teaspoon red pepper flakes (optional)
- 2 cups beef broth
- 1 (14.5 ounce) can crushed tomatoes
- 1 teaspoon thyme, chopped (or 1/2 teaspoon dried)
- 1 teaspoon rosemary, chopped (or 1/2 teaspoon dried)
- 1 teaspoon Italian seasoning (or oregano)
- 2 bay leaves
Instructions
- Sear the meat: Heat a large Dutch oven over medium-high heat. Add the diced bacon or pancetta, cooking until crispy. If skipping the bacon, add a splash of olive oil.
- Brown the beef: Season the beef with salt and pepper and sear each piece in the pot for 3-4 minutes on each side until golden brown.
- Add the aromatics: Toss in the diced onions, carrots, and celery, sautéing for 5-7 minutes until softened.
- Stir in the garlic and spices: Add garlic and red pepper flakes, stirring for about 1 minute.
- Deglaze the pot: Pour in beef broth, scraping up any bits stuck to the pot. Add crushed tomatoes, thyme, rosemary, Italian seasoning, and bay leaves.
- Return the beef and bacon: Place seared beef back in the pot and pour juices over. Bring to a gentle simmer.
- Slow cook: Cover and transfer to a preheated oven at 325°F (165°C) for 3-4 hours until fork-tender.
- Finishing touches: Remove from oven and let rest for 20 minutes before serving.
Notes
This recipe can be made ahead of time and tastes even better the next day. Feel free to experiment with different herbs or cuts of meat.
Nutrition
- Serving Size: 1 serving
- Calories: 350
- Sugar: 6g
- Sodium: 600mg
- Fat: 18g
- Saturated Fat: 6g
- Unsaturated Fat: 8g
- Trans Fat: 0g
- Carbohydrates: 30g
- Fiber: 4g
- Protein: 25g
- Cholesterol: 75mg
Keywords: Stracotto, Italian Pot Roast, Comfort Food, Hearty Meal, Slow Cooked Beef
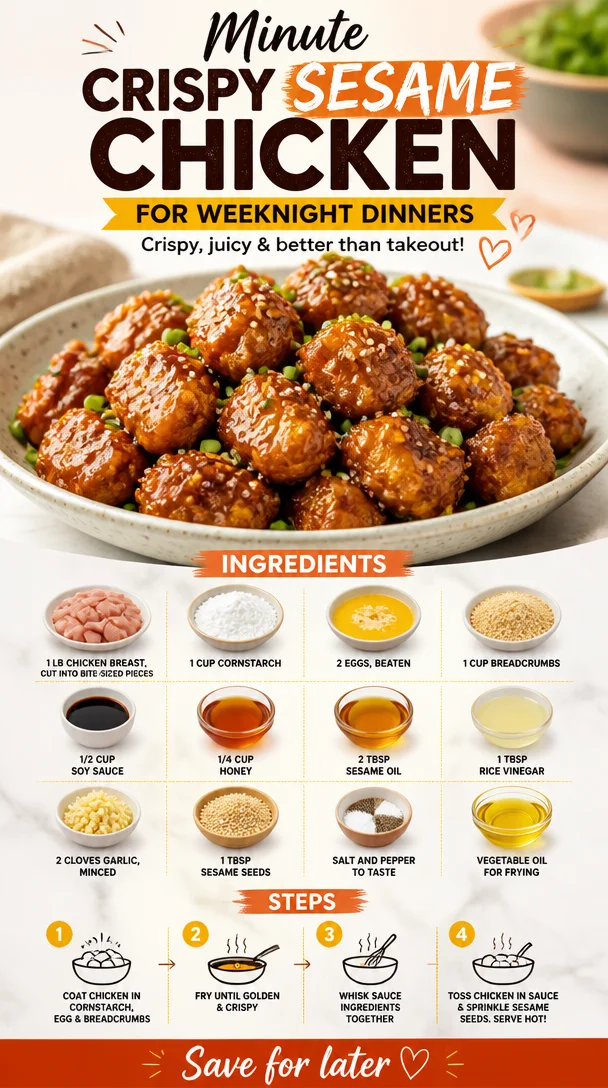
Minute Crispy Sesame Chicken for Weeknight Dinners
Crispy Sesame Chicken: A Flavorful Journey
Welcome to another delightful adventure in the kitchen, where I, Ava Carter, am thrilled to share one of my all-time favorite recipes with you—Crispy Sesame Chicken! 🥢✨ This dish is not only a crowd-pleaser but also a fantastic way to bring the warmth of Asian-inspired cooking right into your home. Whether you’re dining with family or whipping up a feast for friends, this crispy delight is sure to impress.
Introduction
Imagine this: the aroma of fragrant sesame oil and garlic wafts through the air, mingling with the sizzle of chicken in a hot pan. As you take your first bite, the crunchy exterior gives way to tender, juicy chicken, and you can’t help but smile. That’s the magic of Crispy Sesame Chicken!
In my culinary adventures, I believe that every great recipe starts with a story—it’s about flavor, love, and a sprinkle of nostalgia. For me, this dish is reminiscent of cozy evenings spent at local Asian restaurants, where the enticing scent of sesame filled the air, and the ambiance was vibrant with laughter and conversation. Each bite was a celebration, and I wanted to bring that experience into my own home kitchen.
But here’s the best part about this recipe: it’s simple enough for a weeknight dinner yet impressive enough for special occasions. Plus, it’s versatile! You can whip up a dish that’s crispy, savory, and slightly sweet. Are you ready to start cooking? Let’s dive into it!
Personal Story
Growing up, my family had a tradition of going out for Chinese food every Friday night. It was a mini celebration to kick off the weekend, and each restaurant had its own special spin on beloved dishes. One evening, I found myself captivated by a dish of crispy sesame chicken, its glistening sauce and crunchy bits capturing my attention immediately. Dipping my fork into the velvety sauce and indulging in the textures was pure heaven!
That moment always stuck with me. Many years later, during a culinary class, I decided to recreate that magical dish. The first time I perfected it, I couldn’t wait to share it with friends and family. Watching them savor each bite brought back fond memories while creating new ones. This recipe feels like a bridge between my past and present—a celebration of taste and nostalgia in every crispy, sesame-infused bite.
Ingredients
To make your Crispy Sesame Chicken, you’ll need the following ingredients:
-
1 lb chicken breast, cut into bite-sized pieces
A lean protein that cooks quickly and absorbs flavors beautifully. Chicken thighs can also be used for extra juiciness. -
1 cup cornstarch
This is the secret to that irresistible crunch! It creates a light, crispy coating. If you want to keep it gluten-free, use arrowroot powder as a substitute. -
2 eggs, beaten
This adds moisture and helps the cornstarch adhere to the chicken. Flaxseed meal mixed with water can be a great vegan replacement. -
1 cup breadcrumbs
I recommend panko breadcrumbs for an extra crispy texture! You can swap with crushed rice crackers for a gluten-free option or use whole-wheat breadcrumbs for a healthier version. -
1/2 cup soy sauce
A savory backdrop for the dish; it infuses the chicken with deep umami flavor. For a gluten-free version, use tamari. -
1/4 cup honey
This adds a delightful sweetness and balances the saltiness of soy sauce. Maple syrup can be a great plant-based substitute. -
2 tablespoons sesame oil
A key flavor component! It adds a nutty aroma. If you’re sensitive to sesame, consider using a neutral oil like canola instead. -
1 tablespoon rice vinegar
For that tangy kick! Apple cider vinegar can be used if rice vinegar isn’t available. -
2 cloves garlic, minced
Fresh garlic enhances the flavor of the sauce, making it aromatic and robust. You can use garlic powder in a pinch—just adjust the amount to your taste. -
1 tablespoon sesame seeds
These little gems provide a lovely crunch and nutty flavor! Feel free to toast them for an extra depth of flavor. -
Salt and pepper to taste
Simple seasoning that elevates the dish! -
Vegetable oil for frying
A neutral oil is best for frying; canola or peanut oil works wonders!
Step-by-Step Instructions
Let’s get cooking! Follow these steps for making your Crispy Sesame Chicken:
1. Preparing the Chicken
Start by cutting your chicken breasts into bite-sized pieces (approximately 1-inch cubes). This ensures even cooking and makes it easy to eat. Season the chicken lightly with salt and pepper—don’t oversalt, as the soy sauce will add plenty of flavor.
2. Creating the Coating
In one mixing bowl, whisk together the eggs until they’re frothy. In another bowl, put the cornstarch, and in a third bowl, add the breadcrumbs. This three-bowl method may seem like a bit of a hassle, but I promise it’s worth it! This setup prevents clumping and ensures an even coating.
3. Coating the Chicken
Take each piece of chicken and first dip it in the cornstarch, shaking off the excess. Then dip it into the egg mixture, allowing it to coat evenly. Finally, roll it in the breadcrumbs, pressing down slightly to ensure they stick. Repeat until all the chicken pieces are coated.
Pro Tip: If you want an extra layer of crunch, feel free to double-dip in the cornstarch and egg mixture before the breadcrumbs!
4. Heating the Oil
In a large skillet or wok, heat about 1/4 inch of vegetable oil over medium-high heat. You want the oil to be hot enough for frying, but not smoking. A good test is to drop a few breadcrumbs into the oil; they should sizzle immediately.
5. Frying the Chicken
Working in batches to avoid overcrowding the pan (which can lower the oil temperature), carefully add the coated chicken pieces to the hot oil. Fry them for about 4-5 minutes on each side until they are golden brown and crispy. Use tongs to turn them over for even cooking!
Chef Hack: To keep the fried chicken warm while you finish cooking the rest, place the cooked pieces on a wire rack set over a baking sheet. This allows any excess oil to drip off while keeping them crispy!
6. Making the Sauce
Once the chicken is all fried up and golden, it’s time for the best part! In a small bowl, mix together the soy sauce, honey, sesame oil, rice vinegar, and minced garlic. Pour this delightful mixture into a clean skillet over medium heat, bringing it to a simmer.
7. Tossing It All Together
When the sauce is warm, add the crispy chicken pieces into the skillet. Gently toss the chicken in the sauce until entirely coated. Sprinkle the sesame seeds over the top and mix once more to distribute evenly.
8. Final Touches
Remove from heat and let sit for a moment to allow the flavors to meld. It’s now time to serve!
Serving Suggestions
Plate your Crispy Sesame Chicken on a vibrant dish, garnished with additional sesame seeds and a sprinkle of sliced green onions for a pop of color. This dish pairs beautifully with fluffy white rice, steamed broccoli, or a light salad. You could even serve it in lettuce wraps for a fun twist! Don’t forget to drizzle some of that luscious sauce over the top for an extra touch of sweetness.
Recipe Variations
Want to get creative with your Crispy Sesame Chicken? Here are a few delicious twists:
- Spicy Sesame Chicken: Add a touch of sriracha or red pepper flakes to the sauce for a spicy kick!
- Honey Garlic Version: Swap honey for brown sugar in the sauce and add chopped green onions and sesame seeds right before serving for a fresh and zesty flavor.
- Orange Sesame Chicken: Incorporate fresh orange juice and zest into the sauce for a citrusy bright twist.
- Vegetarian Alternative: Use tofu instead of chicken—press it to remove moisture, coat, and fry for a delightful vegetarian dish!
- Crispy Cauliflower: For a vegan option, replace chicken with bite-sized cauliflower florets. Coat and fry in the same way for a beautiful crispy dish!
Chef’s Notes
Cooking this Crispy Sesame Chicken has been a joyous journey! I remember the first time I tried it with my kids; their eyes lit up just like mine once did at that restaurant all those years ago. We dressed up a little for the evening, set the table with chopsticks, and indulged in this crispy wonder. It turned a regular dinner into a celebration!
Over the years, I’ve played with this recipe; sometimes, I add different sauces, and other times, I go lighter on the sugar. Each time, it transforms into something new and exciting, but it always brings back that warm feeling of home and togetherness.
FAQs and Troubleshooting
Q: Why did my chicken turn out soggy?
A: This can happen if the oil isn’t hot enough, or if the chicken pieces are overcrowded in the pan. Make sure your oil is hot, and fry in batches to achieve that perfect crispy texture!
Q: Can I bake this chicken instead of frying?
A: Absolutely! Preheat your oven to 400°F (200°C). Place the breaded chicken on a baking sheet lined with parchment paper. Lightly spray with cooking spray or drizzle with a bit of oil and bake for about 20-25 minutes, turning halfway through.
Q: How can I store leftover chicken?
A: Store leftover Crispy Sesame Chicken in an airtight container in the fridge for up to 3 days. Reheat in the oven or an air fryer to regain its crispy texture!
Q: Can I use other proteins?
A: Yes! Feel free to try shrimp, beef, or even tempeh for a twist. Just adjust cooking times accordingly.
Nutritional Info
While I believe in enjoying good food, here’s a quick overview of the nutritional aspects (per serving, assuming you eat a moderate portion):
- Calories: Approximately 350
- Protein: 24g
- Carbohydrates: 30g
- Fat: 15g
- Fiber: 1g
Crispy Sesame Chicken is not only delicious but also fairly balanced!
Conclusion
I hope you enjoyed this colorful journey through the creation of Crispy Sesame Chicken! Cooking doesn’t have to be intimidating; it should be fun and filled with flavorful experiences. So gather your ingredients, invite some friends over, and enjoy the process of making this delicious recipe as much as savoring each delightful bite!
Here’s to keeping it fresh, simple, and seriously delicious—until next time, happy cooking! 🌟
PrintCrispy Sesame Chicken

A delightful Asian-inspired dish featuring crispy chicken coated in a savory sesame sauce that balances flavors beautifully.
- Prep Time: 15 minutes
- Cook Time: 25 minutes
- Total Time: 40 minutes
- Yield: 4 servings 1x
- Category: Main Course
- Method: Frying
- Cuisine: Asian
- Diet: Paleo
Ingredients
- 1 lb chicken breast, cut into bite-sized pieces
- 1 cup cornstarch
- 2 eggs, beaten
- 1 cup panko breadcrumbs
- 1/2 cup soy sauce
- 1/4 cup honey
- 2 tablespoons sesame oil
- 1 tablespoon rice vinegar
- 2 cloves garlic, minced
- 1 tablespoon sesame seeds
- Salt and pepper to taste
- Vegetable oil for frying
Instructions
- Start by cutting your chicken breasts into bite-sized pieces (approximately 1-inch cubes). Season the chicken lightly with salt and pepper.
- In one mixing bowl, whisk together the eggs until they’re frothy. In another bowl, put the cornstarch, and in a third bowl, add the breadcrumbs.
- Take each piece of chicken and dip it in the cornstarch, then into the egg mixture, and finally roll it in the breadcrumbs.
- Heat about 1/4 inch of vegetable oil over medium-high heat until hot.
- Working in batches, add the coated chicken pieces to the hot oil and fry for about 4-5 minutes each side until golden brown.
- In a small bowl, mix together the soy sauce, honey, sesame oil, rice vinegar, and minced garlic. Pour into a skillet and bring to a simmer.
- Add the crispy chicken pieces into the skillet and toss until coated. Sprinkle sesame seeds over the top.
- Remove from heat and let sit for a moment before serving.
Notes
This dish pairs beautifully with white rice, steamed broccoli, or lettuce wraps. For a twist, try adding sriracha for heat or substituting with tofu for a vegetarian option.
Nutrition
- Serving Size: 1 serving
- Calories: 350
- Sugar: 15g
- Sodium: 800mg
- Fat: 15g
- Saturated Fat: 2g
- Unsaturated Fat: 8g
- Trans Fat: 0g
- Carbohydrates: 30g
- Fiber: 1g
- Protein: 24g
- Cholesterol: 120mg
Keywords: Crispy Chicken, Sesame Chicken, Asian Cuisine, Easy Recipes, Dinner
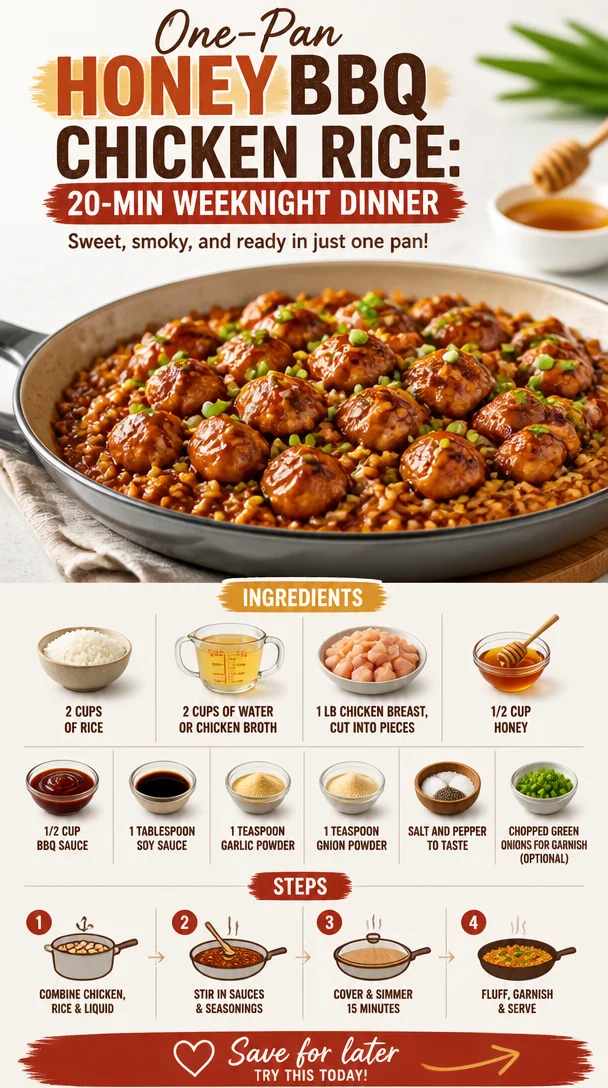
One-Pan Honey BBQ Chicken Rice: 20-Min Weeknight Dinner
One-Pan Honey BBQ Chicken Rice: A Deliciously Easy Comfort Meal
Welcome back to Clean Plate Cravings, friends! Today, we’re diving into a dish that truly embodies the joy of simple, satisfying cooking: One-Pan Honey BBQ Chicken Rice. This recipe is not only packed with flavor but also perfect for those busy nights when you want to whip up something delicious without spending hours in the kitchen. If you’re a fellow food lover who craves mouthwatering meals that don’t come with a laundry list of complicated steps, you’re in the right place!
Let’s be real—life can get hectic. Between juggling work, family commitments, and maybe even squeezing in a workout (if we’re lucky!), cooking can sometimes feel like an uphill battle. But who says healthy eating has to be all about takeout or bland microwave meals? My mission here is to show you that wholesome, enticing food can fit right into your daily routine.
So, grab that apron, and let me take you on a flavorful journey with this One-Pan Honey BBQ Chicken Rice. Trust me, this dish will leave your taste buds dancing and your kitchen smelling heavenly. Plus, it’s all made in one pan—how easy is that? Let’s get cooking!
A Nostalgic Twist on a Family Favorite
When I think of the one-pan meals my mom used to whip up on busy weeknights, my heart swells with nostalgia. I can still picture her in our cozy, bustling kitchen, effortlessly tossing together whatever was in the fridge. One of her go-to’s was a variation of BBQ chicken, often paired with rice. The aroma of tangy barbecue sauce mingling with a hint of sweetness from honey was enough to bring the whole family together around the dinner table.
One evening, I remember her calling us in with that irresistible smell wafting through the house, and I couldn’t wait to dig into that sticky, savory goodness. It wasn’t just food; it was love served on a plate. Now, as I recreate that dish in my own kitchen, I like to think I’m passing down the same warmth and joy to my family.
But let me tell you, this One-Pan Honey BBQ Chicken Rice takes those memories and elevates them to a whole new level! It’s all about simplicity, flavor, and bringing everyone together at the table—all while being an absolute breeze to prepare!
Ingredients You’ll Need
Before we jump into the cooking fun, let’s gather our ingredients. Here’s what you’ll need:
- 2 cups of rice: I recommend long-grain rice for a fluffy texture, but feel free to use basmati or jasmine rice if that’s your jam.
- 2 cups of water or chicken broth: Chicken broth adds extra flavor! If you want a vegetarian option, use vegetable broth instead.
- 1 lb chicken breast, cut into pieces: Boneless, skinless chicken breasts work wonderfully. You can also use thighs for a richer flavor or even tofu for a plant-based twist!
- 1/2 cup honey: This sweet element balances the tanginess of the BBQ sauce. If you’re vegan, agave syrup or maple syrup works perfectly.
- 1/2 cup BBQ sauce: Go for your favorite brand! If you’re feeling adventurous, try making your own—smoky, sweet, and oh-so-good.
- 1 tablespoon soy sauce: This adds a savory depth. For a gluten-free option, use tamari.
- 1 teaspoon garlic powder: A staple in my pantry; it gives an instant flavor boost.
- 1 teaspoon onion powder: This rounds out the flavors. If you prefer fresh, dice a small onion to stir in at the beginning.
- Salt and pepper to taste: Always important for that finishing touch!
- Chopped green onions for garnish (optional): These add a fresh crunch and a pop of color.
Chef’s Insights
Don’t hesitate to switch things up! If you’re not a fan of certain flavors, you can leave ingredients out or replace them. Cooking is all about experimentation, so feel free to adjust to your taste preferences!
Step-by-Step Cooking Instructions
Let’s get into the nitty-gritty of making our delicious One-Pan Honey BBQ Chicken Rice. Trust me, your kitchen is about to smell divine!
-
Prep the Ingredients:
Start by prepping all your ingredients. This will make the cooking process smoother. Cut your chicken breast into bite-sized pieces and chop the green onions if you’re using them for garnish. -
Sauté the Chicken:
In a large, deep skillet or a pan with a lid, heat a drizzle of olive oil over medium heat. Once hot, add the chicken pieces and season with a pinch of salt and pepper. Cook them for about 5-7 minutes, stirring occasionally, until they’re golden brown and no longer pink in the center.Chef’s Tip: Don’t crowd the pan; if needed, cook the chicken in batches. This helps achieve that beautiful caramelization!
-
Mix in the Flavors:
Once the chicken is cooked, reduce the heat to low and pour in the soy sauce, garlic powder, onion powder, honey, and BBQ sauce. Stir everything together evenly, ensuring the chicken is well-coated with that tasty sauce.Chef Hack: If you want a personal touch, feel free to add a splash of your favorite hot sauce for a kick!
-
Add the Rice:
Now, it’s time to incorporate the rice. Sprinkle the rice evenly over the chicken in the pan. Then, pour in the water or chicken broth. Don’t stir it yet! -
Bring to a Simmer:
Increase the heat to medium-high and bring the mixture to a gentle simmer. Let it come together, then reduce the heat to low. Cover the pan with a lid and let it cook for about 20 minutes. This allows the rice to absorb all those amazing flavors while becoming fluffy.Pro Tip: Do not lift the lid! Steam is key for cooking rice perfectly, and you don’t want to let it escape.
-
Final Touches:
After 20 minutes, remove the lid and give everything a gentle stir. You’ll see the rice has soaked up the sauce beautifully! Taste and adjust seasoning, adding a little more salt or pepper if needed. -
Serve it Up:
Scoop generous portions onto plates or into bowls. Garnish with the chopped green onions for that fresh crunch.Serving Suggestion: Consider serving this dish with a side of steamed veggies or a crisp green salad to round out your meal!
Recipe Variations
Looking to mix things up? Here are a few variations to try:
- Spicy BBQ Chicken: Add a tablespoon of sriracha or your favorite hot sauce to the BBQ sauce mixture for a spicy kick.
- Vegetable Boost: Toss in some diced bell peppers, broccoli, or snap peas while the chicken is cooking to add some color and nutrition.
- Pineapple Twist: For a tropical flair, add diced pineapple to the pan when mixing in the honey and BBQ sauce.
- Whole Grains: Substitute white rice with brown rice or quinoa for added fiber and a nuttier flavor.
- Herbed Rice: Add fresh herbs like chopped cilantro or parsley after cooking for a pop of freshness.
Chef’s Notes
As someone who has always loved creating in the kitchen, this One-Pan Honey BBQ Chicken Rice recipe is one I’ve tweaked over the years. What started as a simple family dinner has transformed into a weeknight go-to that my family requests time and again.
I love how it brings someone’s modern-day spin to the nostalgic meals of my childhood. It’s also my secret weapon when I want to impress friends without spending hours prepping—who doesn’t love a one-pan meal?
Remember, cooking is all about exploration and having fun. Do not be afraid to make this dish your own, just as I did!
FAQs and Troubleshooting
1. My rice is too sticky. What did I do wrong?
Usually, overly sticky rice indicates that it’s been overcooked or that it was too wet when cooking. Ensure you measure your liquid accurately and don’t lift the lid during cooking!
2. Can I use frozen chicken?
Absolutely! Just make sure to adjust the cooking time accordingly. Frozen chicken may need a few extra minutes to ensure it cooks through.
3. What if I’m out of honey?
You can substitute with maple syrup or agave syrup. Both will give you that sweet flavor without compromising the dish!
4. How can I reheat leftovers?
Leftovers are best reheated on the stove over medium heat with a splash of water or broth to keep the rice from drying out. Stir often until heated through.
Nutritional Information
While I’ve left the nutritional details out for simplicity, this One-Pan Honey BBQ Chicken Rice is a balanced meal that provides protein from the chicken, carbs from the rice, and a splash of flavor-packed goodness!
And there you have it! A simple, delicious, and nourishing One-Pan Honey BBQ Chicken Rice recipe that embodies everything Clean Plate Cravings stands for. Filling, flexible, and utterly satisfying, this dish is perfect for busy weeknights and relaxing weekends alike. So next time you’re in the mood for something homemade yet effortless, remember this recipe! Happy cooking!
PrintOne-Pan Honey BBQ Chicken Rice

A deliciously easy comfort meal perfect for busy nights, featuring tender chicken, sweet honey, and savory BBQ sauce all cooked in one pan with fluffy rice.
- Prep Time: 10 minutes
- Cook Time: 30 minutes
- Total Time: 40 minutes
- Yield: 4 servings 1x
- Category: Main Course
- Method: Baking
- Cuisine: American
- Diet: None
Ingredients
- 2 cups long-grain rice (or basmati/jasmine)
- 2 cups water or chicken broth
- 1 lb boneless, skinless chicken breast, cut into pieces
- 1/2 cup honey
- 1/2 cup BBQ sauce
- 1 tablespoon soy sauce
- 1 teaspoon garlic powder
- 1 teaspoon onion powder
- Salt and pepper to taste
- Chopped green onions for garnish (optional)
Instructions
- Prep the ingredients by cutting chicken into bite-sized pieces and chopping green onions.
- Sauté the chicken in a skillet with olive oil, seasoning with salt and pepper, until golden brown.
- Mix in soy sauce, garlic powder, onion powder, honey, and BBQ sauce, stirring to coat the chicken.
- Add the rice evenly over the chicken, then pour in water or broth without stirring.
- Bring to a simmer, then cover and reduce heat, cooking for about 20 minutes.
- Remove the lid, stir gently, and adjust seasoning if necessary.
- Serve portions onto plates or bowls, garnished with green onions.
Notes
Feel free to switch up ingredients and add vegetables or spices to suit your taste!
Nutrition
- Serving Size: 1 serving
- Calories: 450
- Sugar: 12g
- Sodium: 700mg
- Fat: 10g
- Saturated Fat: 2g
- Unsaturated Fat: 6g
- Trans Fat: 0g
- Carbohydrates: 54g
- Fiber: 2g
- Protein: 25g
- Cholesterol: 70mg
Keywords: chicken, rice, one-pan meal, BBQ, comfort food
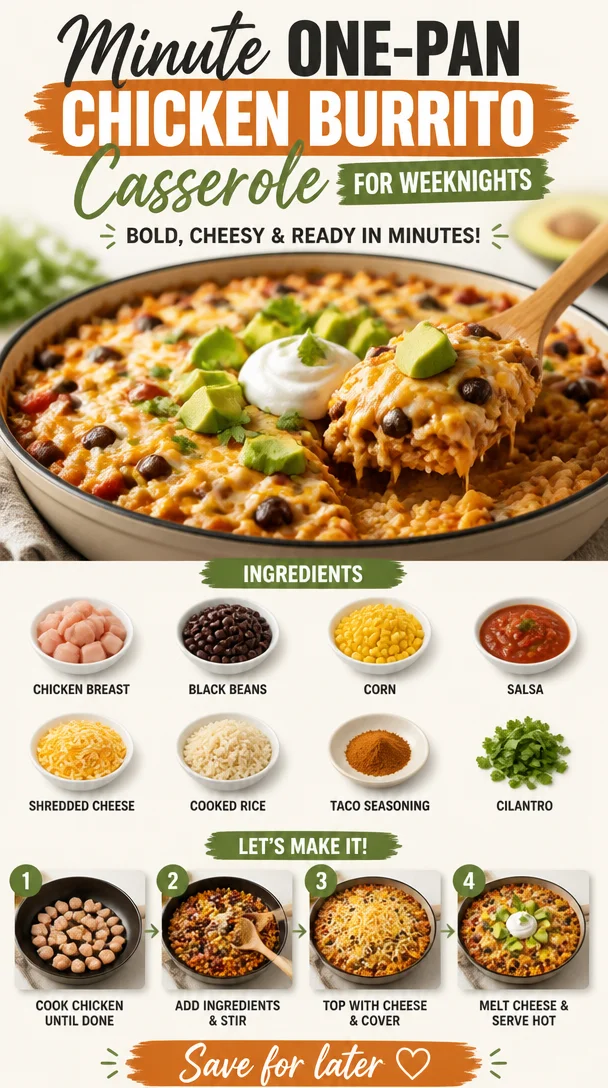
Minute One-Pan Chicken Burrito Casserole for Weeknights
Chicken Burrito Casserole: A Comforting Classic That Delivers Flavor and Warmth
Hello, fellow foodies! Today, we’re diving into one of my absolute favorite recipes that feels like a warm hug: Chicken Burrito Casserole. This dish effortlessly combines the hearty, comforting elements of a casserole with all the spicy, zesty flavors we love in burritos. If you’re looking for a meal that’s easy to prepare, family-friendly, and utterly delicious, you’ve found your winner!
Picture this: a busy weeknight when you want to whip up something that not only fills your belly but also ignites your taste buds with excitement. This Chicken Burrito Casserole checks all the boxes. Imagine layers of tender chicken, colorful veggies, zesty spices, and ooey-gooey cheese—all baked to perfection and served hot from the oven. Sounds dreamy, right?
This dish is perfect for meal prep, easy enough for beginners, and versatile enough for any palate. It embraces everything we love about burritos, minus the fuss of rolling them up. Plus, it’s a hit with friends and family—everyone will be asking for seconds!
So grab your apron, turn up the music, and let’s get ready to create a wholesome dish that brings people together. This Chicken Burrito Casserole isn’t just about the food; it’s about sharing delicious moments around the table.
A Nostalgic Kitchen Memory
Let me take you back to a particularly vivid memory from my childhood. I remember coming home from school, the rich aroma of spices wafting through the air as my mom prepped one of our family favorites—burritos. Those after-school moments were sacred. We would gather around the kitchen island, my siblings and I hunched over a plate, eagerly awaiting our turn to fill our soft tortillas with all the delicious fixings.
But there was one day that stands out vividly in my mind. My mom decided to mix things up and made a burrito casserole instead. We were skeptical at first—where was the fun of rolling our own burritos? But as soon as we took our first bite, oh boy! The gooey melted cheese, the perfectly seasoned chicken, and the burst of flavors conquered our taste buds in an instant. From that moment on, burrito casseroles became our family’s go-to for a fun, flavorful meal.
Fast forward to today, when I find myself sharing this timeless recipe with everyone who needs a little comfort in their life. It’s a beautiful reminder of how food can be a bridge connecting generations, cultures, and memories.
Ingredients
Here’s what you’ll need to create this mouthwatering Chicken Burrito Casserole:
-
Cooked Chicken Breast: (about 3 cups, shredded)
You can use rotisserie chicken for convenience or poach some chicken breast at home. If you’re vegetarian, feel free to substitute with black beans or chickpeas for a protein-packed alternative! -
Tortillas: (10-12 corn or flour tortillas)
I prefer corn for the traditional taste, but flour tortillas work well too! For gluten-free options, you can use corn tortillas or even a grain-free tortilla. -
Black Beans: (1 can, drained and rinsed, or 1.5 cups cooked black beans)
These add protein and fiber! If you’re not a fan of black beans, try pinto beans or kidney beans for a different flavor. -
Corn: (1 cup, frozen or canned)
Sweet, crisp corn enhances the texture! If you can get your hands on fresh corn, it elevates the dish even further. -
Diced Tomatoes: (1 can, with juice)
Tomatoes provide acidity and moisture. Substitute with fresh chopped tomatoes or salsa for an extra kick. -
Onion: (1 medium onion, diced)
Sautéed onions add depth. You can swap out with leeks or shallots if you want to switch things up. -
Red Bell Pepper: (1, diced)
Sweet and colorful, red bell peppers brighten up the dish. Any bell pepper variety can work here! -
Chili Powder: (1 tablespoon)
This is where the flavors really start to pop! Feel free to use other spices like cumin or paprika if you prefer a different spice profile. -
Garlic Powder: (1 teaspoon)
It’s a must for savory dishes! Fresh garlic is a great substitute if you prefer a bold flavor. -
Cumin: (1 teaspoon)
Cumin brings warmth and authenticity. You could replace it with a pinch of taco seasoning if you have it on hand. -
Shredded Cheese: (2 cups, such as cheddar or Monterey Jack)
Creamy and melty, cheese is the finishing touch! For a dairy-free version, try cashew cheese or nutritional yeast. -
Fresh Cilantro: (for garnish)
This adds a refreshing touch. If you’re not a cilantro fan, green onions or parsley can be used instead.
Step-by-Step Instructions
Ready to get cooking? Let’s dive into the steps to create your Chicken Burrito Casserole!
Step 1: Preheat Your Oven
Preheat your oven to 375°F (190°C). Prepping ahead of time will ensure your casserole is perfectly baked without any fuss later on!
Step 2: Dice the Veggies
While the oven heats up, let’s get chopping! Dice the onion and red bell pepper. This is where you can let your creativity shine. Want to throw in some zucchini or mushrooms? Go for it! The more veggies you add, the healthier your casserole becomes.
Step 3: Sauté on the Stovetop
In a large skillet over medium heat, drizzle a little olive oil. Add your diced onion and red bell pepper. Sauté for about 5-7 minutes until they are soft and fragrant. This step is crucial because it brings out the natural sweetness of the veggies and adds a ton of flavor.
Step 4: Add the Chicken and Spices
Now, stir in your shredded chicken, black beans, corn, diced tomatoes, chili powder, garlic powder, and cumin. Give everything a good stir to combine all the ingredients evenly. Let it cook for about 5 minutes, allowing the flavors to meld together. This is also your moment to taste test—don’t be shy!
Step 5: Layer the Dish
Grab a 9×13 inch baking dish and start layering. Begin by spreading a couple of spoonfuls of the chicken mixture evenly at the bottom of the dish. Then, line the tortillas over the mixture, covering the entire surface. Don’t worry too much about gaps; they’ll fill in as the casserole bakes.
Step 6: Add More Goodness
Spread another layer of the chicken mixture over the tortillas, and then sprinkle half of your shredded cheese on top. Repeat this layering process with more tortillas, the remaining chicken mixture, and top it off with the remaining cheese. It’s all about those delicious layers that create that moment of bliss when you dive in!
Step 7: Bake It Up
Cover the dish with aluminum foil (to avoid sticking) and bake in the preheated oven for 20 minutes. After that, remove the foil and bake for an additional 10-15 minutes, or until the edges are bubbly and the cheese is melted and golden. Your kitchen will smell like heaven right about now!
Step 8: Garnish and Serve
Once baked, take the casserole out of the oven and let it sit for about 10 minutes before serving. This will allow everything to settle and make for easier slicing. Garnish with fresh cilantro for that vibrant pop of color and flavor!
Serving Suggestions
Serve your Chicken Burrito Casserole with a side of tangy guacamole or fresh salsa. You could even serve it alongside a light leafy green salad dressed with lime vinaigrette to contrast the rich flavors of the casserole. The beauty of this dish is that it’s a complete meal on its own, but adding a refreshing side balances the richness beautifully.
Recipe Variations
Feel like switching things up? Here are a few creative variations you can try:
- Spicy Kick: Add diced jalapeños to the chicken mixture for an extra kick of heat!
- Vegetarian Delight: Replace the chicken with a mix of your favorite vegetables like zucchini, mushrooms, and more beans.
- Taco Fiesta: Swap out the cilantro for fresh corn salsa for a zesty surprise.
- Cheesy Goodness: Experiment with different cheese blends, like pepper jack for a spicier rendition.
- BBQ Twist: Incorporate BBQ sauce into the chicken mixture for a smoky flavor profile.
Chef’s Notes
This recipe has evolved over the years as I’ve experimented with different ingredients and flavor combinations. I’ve swapped in various beans, added seasonal veggies, and even used leftover barbecue chicken to make it feel fresh and new every time. There’s simply no wrong way to make a burrito casserole, and that’s part of the joy!
Sometimes, I’ll throw on some diced avocados right before serving for a creamy contrast that everyone loves. Also, keep in mind that this recipe freezes beautifully! Prepare a double batch, then freeze one for a rainy day—it’s like an instant meal waiting for you!
FAQs and Troubleshooting
Can I make this dish ahead of time?
Absolutely! You can prepare the casserole up to the baking step, cover it, and store it in the fridge for up to 24 hours. Just pop it in the oven when you’re ready!
Why did my casserole turn out soggy?
If the casserole has too much moisture, it can turn soggy. Make sure to drain the canned ingredients and not to overload with liquid.
Can I substitute the chicken for another protein?
Yes! Feel free to try turkey, beef, or even tofu for a plant-based option. Just make sure to adjust cooking times based on the protein used.
How do I store leftover casserole?
Keep any leftovers in an airtight container and store them in the fridge for up to four days. Reheat in the oven or microwave until warmed through!
Nutritional Info
If you’re tracking nutrition, here’s a quick overview (per serving, assuming 8 servings):
- Calories: 380
- Protein: 25g
- Carbohydrates: 40g
- Fats: 15g
- Fiber: 6g
(Note: Nutritional info may vary based on ingredient brands and portion sizes.)
And there you have it! Your Chicken Burrito Casserole is officially ready to be devoured. Thank you for joining me today, and I can’t wait to hear how your version turns out. Remember: good food is all about connection, exploration, and joy. So keep it fresh, keep it simple, and keep enjoying every delicious bite!
PrintChicken Burrito Casserole

A comforting Chicken Burrito Casserole that delivers flavorful layers of chicken, black beans, corn, and cheese, all baked to perfection.
- Prep Time: 15 minutes
- Cook Time: 30 minutes
- Total Time: 45 minutes
- Yield: 8 servings 1x
- Category: Main Course
- Method: Baking
- Cuisine: Mexican
- Diet: None
Ingredients
- 3 cups cooked chicken breast, shredded
- 10–12 corn or flour tortillas
- 1 can black beans, drained and rinsed
- 1 cup corn, frozen or canned
- 1 can diced tomatoes, with juice
- 1 medium onion, diced
- 1 red bell pepper, diced
- 1 tablespoon chili powder
- 1 teaspoon garlic powder
- 1 teaspoon cumin
- 2 cups shredded cheese (cheddar or Monterey Jack)
- Fresh cilantro, for garnish
Instructions
- Preheat your oven to 375°F (190°C).
- Dice the onion and red bell pepper.
- Sauté in a large skillet over medium heat with olive oil for about 5-7 minutes.
- Add the shredded chicken, black beans, corn, diced tomatoes, chili powder, garlic powder, and cumin.
- Layer the ingredients in a 9×13 inch baking dish starting with the chicken mixture, followed by the tortillas, then more chicken, and finally the cheese.
- Cover with aluminum foil and bake for 20 minutes, then remove the foil and bake for another 10-15 minutes.
- Garnish with fresh cilantro before serving.
Notes
This recipe freezes beautifully, so consider making a double batch!
Nutrition
- Serving Size: 1 serving
- Calories: 380
- Sugar: 4g
- Sodium: 600mg
- Fat: 15g
- Saturated Fat: 7g
- Unsaturated Fat: 5g
- Trans Fat: 0g
- Carbohydrates: 40g
- Fiber: 6g
- Protein: 25g
- Cholesterol: 70mg
Keywords: chicken casserole, burrito casserole, comfort food, Mexican dish, easy recipe