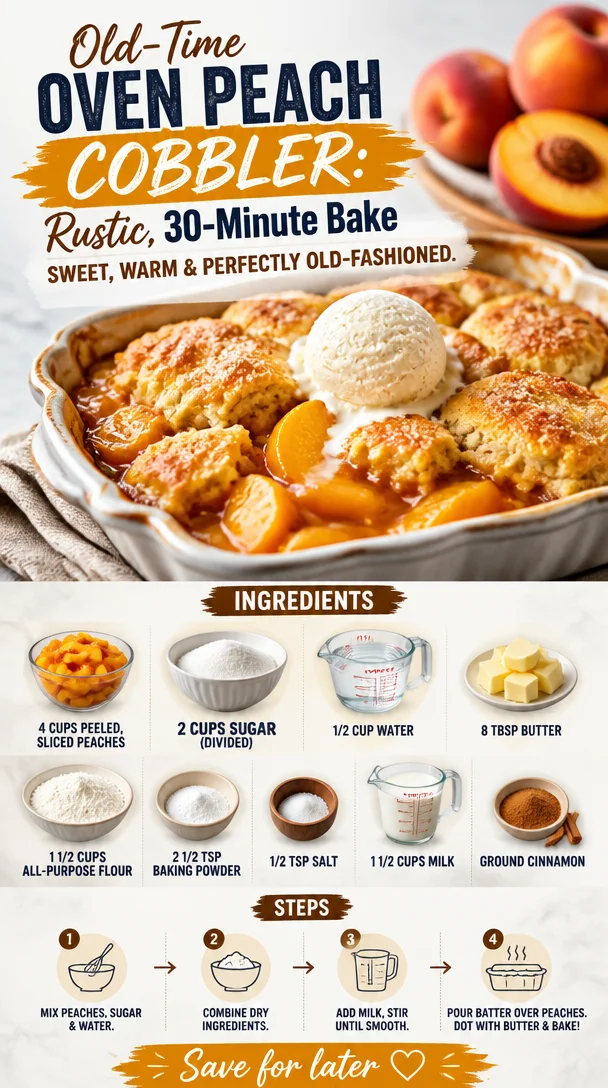
Old-Time Oven Peach Cobbler: Rustic, 30-Minute Bake
Old Time Oven Peach Cobbler: A Slice of Nostalgia
Welcome, fellow food lovers! Today, we’re diving into a timeless classic that will tantalize your taste buds and evoke sweet memories—Old Time Oven Peach Cobbler. There’s something irresistibly comforting about this dish; perhaps it’s the way it warms your kitchen as it bakes or the symphony of flavors that bursts forth with each bite. Whether you’re serving it warm with a scoop of vanilla ice cream or indulging in it simply on its own, this cobbler has a way of wrapping you in nostalgia, making you feel at home no matter where you are.
As a chef who adores sharing stories, I can’t help but think back to times spent in my grandmother’s kitchen, where the air was thick with the fragrance of ripe peaches and freshly baked goodness. Every summer, when peaches were at their peak, my grandma would whip up her famous peach cobbler, each layer crafted with love and care, just like her hugs. Standing on a rickety wooden stool, I would watch in awe as she peeled and sliced the peaches, her hands moving with an elegance that spoke of years of practice. The rhythm of her stirring and the sound of the bubbling fruit as it mingled with sugar were music to my ears. The cobbler was always a family favorite and was often served during hot summer evenings as we gathered on the porch to watch the sun dip below the horizon.
Now, I’m thrilled to share this cherished recipe with you! With warm, buttery crusts and succulent peach filling that just screams summer, this Old Time Oven Peach Cobbler will surely become a beloved favorite in your home too.
Ingredients
Here’s what you’ll need to create this delightful dish:
-
4 cups peeled, sliced peaches
Fresh peaches are ideal, but you can substitute with frozen or canned peaches in a pinch. If using canned, make sure to drain them well. -
2 cups sugar (divided)
This may seem like a lot, but sugar is essential for balancing the tartness of the peaches and achieving that lovely caramelization. For a healthier twist, use coconut sugar or a sugar substitute of your choice. -
1/2 cup water
This helps create a syrup with the sugar and peaches, intensifying their flavor. If you’re feeling adventurous, try replacing it with peach juice for an extra fruity kick! -
8 tbsp butter
Butter is the key to achieving a rich, flavorful crust. You can use unsalted butter, but if you’re short on time, margarine works too. -
1 1/2 cups all-purpose flour
All-purpose flour creates the perfect balance of lightness and structure in the cobbler’s topping. If you need a GF option, almond flour or a gluten-free all-purpose blend can work well. -
2 1/2 tsp baking powder
The baking powder helps the batter rise and creates a fluffy texture. Make sure it’s fresh for the best results. -
1/2 tsp salt
A pinch of salt enhances the flavors and balances the sweetness. You can skip it if you’re watching sodium intake, but I wouldn’t recommend it! -
1 1/2 cups milk
This adds moisture to the batter. For a dairy-free version, almond milk, oat milk, or coconut milk can work nicely. -
Ground cinnamon
A sprinkle of cinnamon elevates the flavor, giving your cobbler that warm, cozy essence. Feel free to swap it with nutmeg or ginger for a twist!
Step-by-Step Instructions
Let’s get baking! Follow these easy steps to prepare your Old Time Oven Peach Cobbler, and I promise you’ll be rewarded with delightful aromas wafting through your kitchen.
-
Preheat Your Oven
Set your oven to 350°F (175°C). Preheating your oven ensures even baking. Trust me; your cobbler will thank you for this extra step! -
Prepare the Peaches
Peel and slice your peaches. If you’re using fresh peaches, opt for ripe fruit for maximum sweetness and juiciness. If they’re a bit firm, a quick dip in boiling water for 30 seconds will help loosen the skins! -
Make the Peach Syrup
In a medium saucepan over medium heat, combine the peach slices, 1 cup of sugar, and 1/2 cup of water. Stir gently until the sugar dissolves and the peaches soften, about 5-7 minutes. This will create a luscious syrup that’s the heart of the cobbler. For an extra flavor boost, add a splash of vanilla extract! -
Prepare the Batter
In a mixing bowl, whisk together the flour, 1 cup of sugar, baking powder, and salt. Then, slowly add in the milk, stirring until smooth. The batter should be pourable but thick enough to hold its shape slightly. -
Assemble the Cobbler
Now it’s time to bring it all together! Pour the melted butter into a 9×13 inch baking dish. Then, pour the batter over the butter—don’t mix it! It’s crucial that the butter stays on the bottom for a beautifully crispy bottom crust. Next, gently spoon the peach syrup and juices over the batter. You want it to be evenly distributed but not mixed in. -
Dust with Cinnamon
Before sending it in the oven, generously sprinkle ground cinnamon over the top. This step is all about enhancing that delightful aroma as it bakes. -
Bake
Pop your cobbler into the preheated oven and let it bake for about 45-50 minutes or until golden brown on top. The crust should be firm to the touch but moist underneath. If your kitchen hasn’t already turned into a cozy paradise filled with scrumptious smells, you’re doing something wrong! -
Cool and Serve
Once baked, remove the cobbler and allow it to cool for about 15-20 minutes. It’s going to be piping hot, and allowing it to rest helps it set up just a bit. Serve it warm; your tastebuds will thank you!
Serving Suggestions
When it comes to serving, nothing pairs better with peach cobbler than a generous scoop of vanilla ice cream or a dollop of whipped cream. Try drizzling it with caramel sauce for an added treat! For an extra pop of flavor, garnish with fresh mint leaves or crushed nuts for crunch.
Recipe Variations
Feeling a bit adventurous? Here are some fun twists you can add to your Old Time Oven Peach Cobbler:
-
Mixed Berry Cobbler: Add a cup of blueberries or raspberries to the peach filling for a vibrant color and tartness.
-
Spiced Up: Add a touch of nutmeg or cardamom to the batter for a warm, spiced flavor.
-
Peach and Ginger: Toss in some diced crystalized ginger with the peaches for a zesty twist.
-
Gluten-Free Cobbler: Swap out the all-purpose flour for a gluten-free blend to enjoy a guilt-free treat.
-
Coconut Delight: Substituting half of the milk with coconut milk will give your cobbler a tropical flair!
Chef’s Notes
Cooking is a journey, and recipes like this peach cobbler evolve over time in our hearts and kitchens. I remember the first time I experimented with adding herbs to the mix—a sprinkle of fresh basil made for an unexpected yet delightful pairing with the peaches. It’s a testament to the fact that you can always infuse your personality into your cooking.
It’s always a joy to see friends’ faces light up as they take that first bite. I hope your Old Time Oven Peach Cobbler becomes a staple in your home, just like it did in mine. Cooking is about sharing and creating those life moments with others, and I can’t wait for you to experience that!
FAQs and Troubleshooting
1. My cobbler turned out too soggy. What happened?
Don’t fret! Sogginess often occurs when there’s too much liquid in the fruit. Ensure you’re draining any excess liquid if using canned peaches or be mindful of adding water if your fresh peaches are exceptionally juicy.
2. Can I use frozen peaches?
Absolutely! Just thaw and drain any excess water before using. Remember, frozen fruit may take a tad longer to bake, so keep that in mind when timing.
3. Why is my batter too thick?
If your batter is too thick, you can add a splash more milk to reach the desired consistency. Sometimes, different flours can absorb liquids differently, so trust your chef instincts!
4. How should I store leftovers?
Keep your cobbler covered in the fridge for up to 3 days—though I doubt it will last that long! Reheat in the oven or microwave for a quick dessert reminder of those warm summer nights.
Nutritional Info
While I believe dessert is meant for enjoyment rather than strict calculations, a basic estimate per serving (assuming 12 servings) includes approximately:
- Calories: 320
- Total Fat: 12g
- Carbohydrates: 48g
- Sugar: 24g
- Protein: 4g
Of course, it varies based on substitutions and portion sizes, but indulge mindfully and enjoy every bite!
So there you have it, folks! Your guide to crafting an Old Time Oven Peach Cobbler that’s sure to enchant your friends and family. From the first slice to the last crumb, every moment spent with this dish will be a memory in the making—not just a dessert, but an experience. Happy baking! 🍑✨
PrintOld Time Oven Peach Cobbler

A timeless classic that evokes sweet memories with its warm, buttery crust and succulent peach filling.
- Prep Time: 20 minutes
- Cook Time: 50 minutes
- Total Time: 70 minutes
- Yield: 12 servings 1x
- Category: Dessert
- Method: Baking
- Cuisine: American
- Diet: Vegetarian
Ingredients
- 4 cups peeled, sliced peaches
- 2 cups sugar (divided)
- 1/2 cup water
- 8 tbsp butter
- 1 1/2 cups all-purpose flour
- 2 1/2 tsp baking powder
- 1/2 tsp salt
- 1 1/2 cups milk
- Ground cinnamon (to taste)
Instructions
- Preheat your oven to 350°F (175°C).
- Prepare the peaches by peeling and slicing them.
- Make the peach syrup by combining peach slices, 1 cup of sugar, and 1/2 cup of water in a medium saucepan. Cook until the sugar dissolves.
- Prepare the batter by whisking together flour, 1 cup of sugar, baking powder, and salt, then gradually adding milk.
- Assemble the cobbler by pouring melted butter into a baking dish and then pouring the batter on top. Spoon the peach syrup over the batter.
- Dust with ground cinnamon.
- Bake for 45-50 minutes until golden brown.
- Cool for 15-20 minutes before serving.
Notes
Serve warm with vanilla ice cream or whipped cream. Can also be drizzled with caramel sauce for added flavor.
Nutrition
- Serving Size: 1 serving
- Calories: 320
- Sugar: 24g
- Sodium: 200mg
- Fat: 12g
- Saturated Fat: 7g
- Unsaturated Fat: 4g
- Trans Fat: 0g
- Carbohydrates: 48g
- Fiber: 2g
- Protein: 4g
- Cholesterol: 30mg
Keywords: peach cobbler, dessert, summer dessert, baked dessert, nostalgic recipes
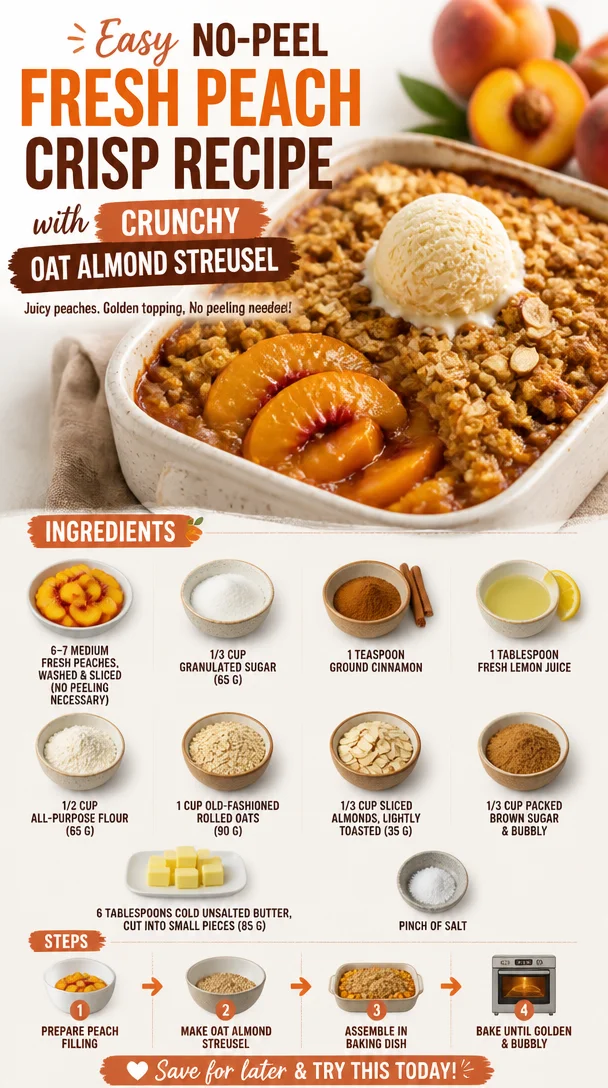
Easy No-Peel Fresh Peach Crisp Recipe with Crunchy Oat Almond Streusel
Easy No-Peel Fresh Peach Crisp Recipe with Crunchy Oat Almond Streusel
Introduction
Hey there, fellow foodies! If there’s one thing that absolutely screams summer, it’s the glorious, juicy peach. There’s something truly magical about biting into a perfectly ripe peach, with its sweet nectar dribbling down your chin—ah, bliss! It’s no wonder why peaches have a special place in my heart (and my kitchen). Today, I’m excited to share a recipe for Easy No-Peel Fresh Peach Crisp that’s as delightful as a sunny afternoon picnic.
This crisp is a true celebration of summer flavors. You might be wondering, why make a peach crisp? Well, let me tell you—nothing beats the sweet, tangy goodness of fresh peaches baked to bubbly perfection, topped with a hearty layer of crunchy oat-almond streusel. And the best part? No peeling required! That means one less step in the kitchen, and trust me, this dish is all about simplicity and enjoyment.
Picture this: a warm peach crisp, fresh out of the oven, filling your kitchen with the most heavenly aroma. You dish it up with a scoop of vanilla ice cream that slowly melts into warm, gooey goodness—the ultimate summer dessert. Whether you’re hosting a dinner with friends, enjoying a cozy family night, or just treating yourself after a long day, this Peach Crisp delivers comfort in every bite.
Ready to get started? Grab your apron, and let’s dive into the sweet adventure of making this scrumptious Easy No-Peel Peach Crisp together!
Personal Story
Let me take you down memory lane for a second. Growing up, my grandmother had the biggest peach tree in her backyard. I still remember the golden light filtering through the leaves, illuminating the plump peaches just waiting for us to pick them. My cousins and I would race to see who could get the ripest ones and come running back to Grandma, arms filled with fragrant fruit that was just begging to be eaten.
One summer, she decided to whip up her famous peach crisp, and I had the privilege of being her little sous chef. Armed with our large mixing bowls, we mashed the peaches with sugar and cinnamon, our laughter ringing through the kitchen. We might have snuck a few bites of fresh peaches along the way (who could resist?), and I couldn’t help but think how wonderful it was to create something so delicious out of ingredients right from the tree.
That crisp, with its crunchy topping and sweet, juicy filling, quickly became a family favorite. Today, every time I make this dish, I can practically hear Grandma’s cheerful spirit and see her warm smile. It’s a beautiful reminder that food not only nourishes us but also creates magical moments and cherished memories. Let’s make our own memories with this Easy No-Peel Fresh Peach Crisp!
Ingredients
Here’s what you’ll need for this amazing Peach Crisp:
-
6 to 7 medium fresh peaches, washed and sliced: The star of the show! Choose ripe, fragrant peaches for the best flavor. If you can’t find peaches, feel free to use nectarines—same delightful result, no peeling required!
-
1/3 cup granulated sugar (65 g): This helps sweeten the peaches and balance their tartness. Use a sugar substitute, like stevia, for a low-calorie option if preferred.
-
1 teaspoon ground cinnamon: This aromatic spice complements the sweetness of peaches beautifully. If you adore warm spices, consider adding a pinch of nutmeg or allspice.
-
1 tablespoon fresh lemon juice: A splash of lemon juice brightens up the flavors and prevents browning. Lime juice can also work in a pinch!
-
1/2 cup all-purpose flour (65 g): This adds structure to the crisp topping. For gluten-free options, substitute with almond flour or a gluten-free all-purpose blend.
-
1 cup old-fashioned rolled oats (90 g): Oats give that delightful crunch in the streusel topping. You can use quick oats, but the texture will be slightly different.
-
1/3 cup sliced almonds, lightly toasted (35 g): These add a lovely nutty flavor and crunch. If you’re nut-free, feel free to use pumpkin seeds or leave them out altogether.
-
1/3 cup packed brown sugar (70 g): Brown sugar gives that rich, caramel-like flavor to the topping. Coconut sugar or maple sugar can be used as alternatives.
-
6 tablespoons cold unsalted butter, cut into small pieces (85 g): Butter creates a rich, buttery flavor in the topping. For a dairy-free version, you can substitute with coconut oil or vegan butter.
-
Pinch of salt: Balances all the flavors beautifully.
Step-by-Step Instructions
Ready to whip up this delightful dessert? Let’s get cooking with these step-by-step instructions!
-
Preheat the Oven: Start by preheating your oven to 350°F (175°C). This ensures that your peach crisp bakes evenly and gets beautifully golden brown.
-
Prep the Peaches: Slice your fresh peaches into wedges. No need to peel! I love the extra texture and flavor the skins bring. If your peaches aren’t super ripe, give them a little gentle massage in your hands to help release some juices.
-
Combine Peach Filling: In a large mixing bowl, toss those sliced peaches with granulated sugar, cinnamon, and lemon juice. Give them a good stir until everything is well coated. Let the mixture sit for about 10 minutes to allow the juices to develop.
-
Prepare the Topping: In another bowl, combine the all-purpose flour, rolled oats, sliced almonds, brown sugar, and a pinch of salt. Add the cold butter pieces. Using a pastry cutter or your fingers, mix everything together until the mixture resembles coarse crumbs. This is where the magic happens—feel free to get your hands in there for the best texture!
-
Assemble the Crisp: In a greased 8×8-inch baking dish (or a similar size), pour the peach mixture evenly into the bottom. Then, sprinkle the oat-almond topping generously over the peaches. Don’t hold back! The goal is to have an even layer that will create a heavenly crunch.
-
Bake to Perfection: Place the baking dish in your preheated oven and bake for about 30-35 minutes, or until the top is golden and the peaches are bubbly. Depending on your oven, you might want to check at 25 minutes. If the topping is getting too dark, you can cover it lightly with aluminum foil.
-
Cool and Serve: Once your crisp is bubbling and golden, take it out of the oven and let it cool for 10-15 minutes. This wait is super important—it allows the juices to thicken up a bit before you dive in.
Serving Suggestions
Serve your Easy No-Peel Fresh Peach Crisp warm, straight out of the oven, and don’t forget that scoop of vanilla ice cream on top! The creamy contrast of the ice cream melting over the warm crisp is simply divine. You can also garnish with a sprinkle of extra toasted almonds or a drizzle of honey for an added touch of flair.
Recipe Variations
Feeling adventurous? Here are some creative twists to put your spin on this recipe:
-
Berry Blast: Add a cup of fresh blueberries or raspberries to the peach mixture for a delicious berry-peach combo.
-
Tropical Vibes: Swap out some peaches for diced pineapples or mangoes for a fun tropical twist!
-
Spiced Up: Incorporate some fresh ginger or a dash of cardamom into the peach filling for a warm, aromatic twist.
-
Nut-Free Version: Simply omit the sliced almonds or replace them with sunflower seeds if you prefer a nut-free option.
Chef’s Notes
You know, this recipe has evolved over the years. I’ve tried it with different fruit combinations and toppings, and every twist has brought smiles around my dinner table. The beauty of a peach crisp is its versatility—feel free to experiment! A little extra sugar, a pinch of cardamom, or even a splash of amaretto liqueur can really elevate the flavor profile.
One fun kitchen story I have is when I accidentally swapped out the brown sugar for powdered sugar. Let’s just say crunchy defeated gooey, and I learned my lesson—read those labels closely! So, always double-check your ingredients; it can lead to delightful surprises, but sometimes, not so much!
FAQs and Troubleshooting
-
What if I can’t find ripe peaches?
- Look for peaches with a little give when you press them gently. If they’re hard, leave them at room temperature for a couple of days, and they’ll ripen perfectly.
-
Can I make this ahead of time?
- Absolutely! Pre-assemble the peach and topping mixture and store them separately in the fridge. When you’re ready to bake, just combine and pop it in the oven.
-
Why is my crisp soggy?
- This usually happens when there’s too much juice from the fruit or if it wasn’t baked long enough. Make sure your oven temperature is accurate, and if it starts bubbling over, a little longer in the oven will help.
-
How should I store leftovers?
- Cover any leftover crisp tightly with plastic wrap or store it in an airtight container. It’s best enjoyed within 2-3 days!
Nutritional Info
This Peach Crisp recipe is not only delicious but also packed with vitamins and fiber thanks to those fresh peaches. And just think—when you make it at home, you can control the sweetness and ingredients to suit your dietary preferences!
Now that you’re armed with this fantastic Easy No-Peel Fresh Peach Crisp recipe, I can’t wait for you to share your creations with friends and family. Remember, cooking is all about having fun and making memories along the way. So, go ahead, embrace those summer vibes, and dig in! 🍑✨
PrintEasy No-Peel Fresh Peach Crisp

A delightful summer dessert featuring juicy peaches topped with a crunchy oat-almond streusel, requiring no peeling for simplicity.
- Prep Time: 15 minutes
- Cook Time: 35 minutes
- Total Time: 50 minutes
- Yield: 8 servings 1x
- Category: Dessert
- Method: Baking
- Cuisine: American
- Diet: Vegetarian
Ingredients
- 6 to 7 medium fresh peaches, washed and sliced
- 1/3 cup granulated sugar (65 g)
- 1 teaspoon ground cinnamon
- 1 tablespoon fresh lemon juice
- 1/2 cup all-purpose flour (65 g)
- 1 cup old-fashioned rolled oats (90 g)
- 1/3 cup sliced almonds, lightly toasted (35 g)
- 1/3 cup packed brown sugar (70 g)
- 6 tablespoons cold unsalted butter, cut into small pieces (85 g)
- Pinch of salt
Instructions
- Preheat the oven to 350°F (175°C).
- Slice the peaches into wedges, no need to peel.
- In a large bowl, toss sliced peaches with sugar, cinnamon, and lemon juice; let sit for 10 minutes.
- In another bowl, combine flour, oats, almonds, brown sugar, and salt.
- Add cold butter pieces and mix until it resembles coarse crumbs.
- Pour peach mixture into a baking dish and sprinkle topping evenly over the peaches.
- Bake for 30-35 minutes until top is golden and peaches are bubbly.
- Cool for 10-15 minutes before serving.
Notes
Serve warm with vanilla ice cream for the best experience. You can add berries or swap in other fruits for variations.
Nutrition
- Serving Size: 1 serving
- Calories: 300
- Sugar: 25g
- Sodium: 150mg
- Fat: 14g
- Saturated Fat: 8g
- Unsaturated Fat: 6g
- Trans Fat: 0g
- Carbohydrates: 45g
- Fiber: 3g
- Protein: 4g
- Cholesterol: 30mg
Keywords: peach crisp, summer dessert, easy dessert, peach recipe, fruit crisp, no-peel recipe
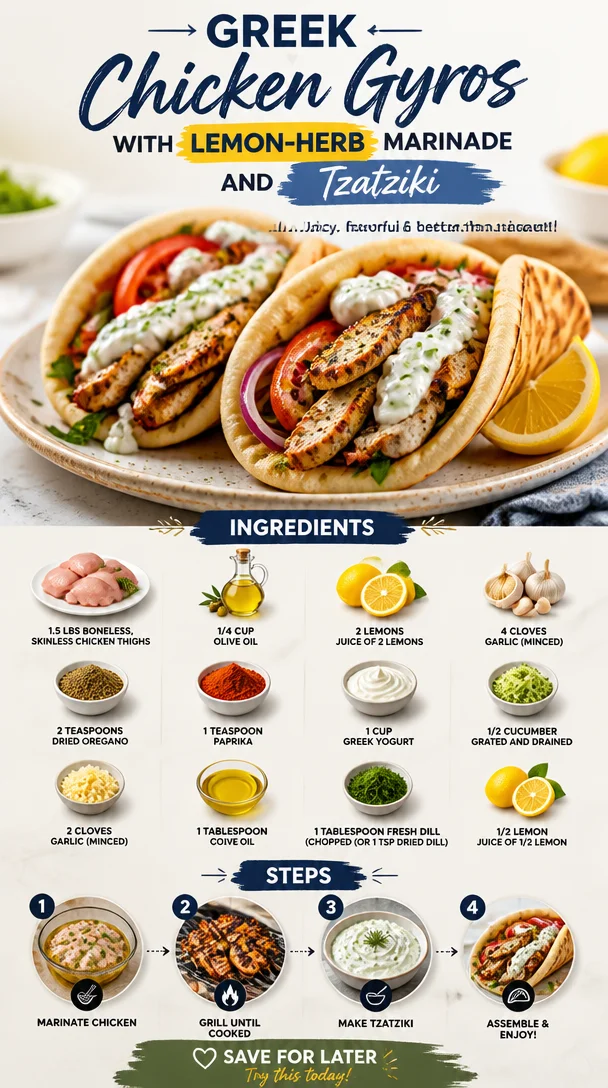
Greek Chicken Gyros with Lemon-Herb Marinade and Tzatziki
Greek Chicken Gyros with Lemon-Herb Marinade and Tzatziki
Welcome to my kitchen, food lovers! Today, we’re diving into the delicious world of Greek cuisine with my take on Greek Chicken Gyros. If you’ve ever wandered through the bustling streets of Athens or tasted the vibrancy of Mediterranean flavors, you’re in for a treat! These gyros are not just a meal; they’re a celebration of fresh ingredients, zesty flavors, and, of course, a good dash of love.
Eating should be an adventure, a way to connect with the world and with each other. My love affair with Greek food began in my early twenties. I was lucky enough to spend a summer in Greece, soaking up the sun, culture, and most importantly, the food. I vividly remember savoring gyros from a little roadside stand, the fragrant meat piled high in fluffy pita bread, smothered in creamy tzatziki, and adorned with fresh veggies. The taste was a whirlwind of flavors—perfectly spiced chicken, refreshing cucumbers, and a hint of tang from the yogurt. I knew then that I wanted to bring that experience home and recreate it for myself and everyone I know.
So, whether you’re planning a cozy dinner, a picnic in the park, or just want to bring a little Mediterranean sunshine to your plate, this recipe will be your go-to. Let’s get cooking!
Ingredients
Here’s what you’ll need to make these mouth-watering gyros:
-
1.5 lbs boneless, skinless chicken thighs
- A perfect choice for gyros due to their rich flavor and juicy texture. You can substitute with boneless chicken breasts if you prefer white meat, but keep in mind that they might be a bit drier.
-
¼ cup olive oil
- This is your heart-healthy fat! Olive oil adds richness to the marinade. If you’re looking for alternatives, avocado oil also works beautifully.
-
Juice of 2 lemons
- Fresh lemon juice brightens the flavors and helps tenderize the chicken. If you don’t have fresh lemons, bottled lemon juice can work in a pinch.
-
4 cloves garlic (minced)
- Garlic is my kitchen hero! It brings depth and aromatic goodness. If you’re short on garlic, a pinch of garlic powder can suffice, but fresh is always best.
-
2 teaspoons dried oregano
- Oregano is the signature herb in Greek cuisine. It’s earthy and slightly sweet. Feel free to experiment with mixed herbs or even fresh oregano if you can find it!
-
1 teaspoon paprika
- Paprika adds a gentle warmth and lovely color. You could swap in smoked paprika for a deeper flavor profile.
-
1 cup Greek yogurt
- The creamy base for your tzatziki. Full-fat Greek yogurt gives the best results, but low-fat or dairy-free alternatives are options for those with dietary restrictions.
-
½ cucumber (grated and drained)
- Cucumber brings crunch and hydration to the tzatziki. If you’re out of cucumber, shredded zucchini can also work but remember to drain it well!
-
2 cloves garlic (minced) for tzatziki
- Yep, more garlic for your sauce! It adds that delicious garlicky punch.
-
1 tablespoon olive oil for tzatziki
- Just a touch of oil helps to smooth out the texture. You can omit it if you’re watching calories.
-
1 tablespoon fresh dill (chopped or 1 teaspoon dried dill)
- Dill pairs beautifully with yogurt and cucumber. If you don’t like dill, mint is a fantastic alternative!
-
Juice of ½ lemon for tzatziki
- This adds brightness and tang to your sauce, enhancing the overall flavor.
Step-by-Step Instructions
Now that we have our ingredients prepped, let’s get into the fun part—cooking!
Step 1: Marinate the Chicken
-
Create the Marinade: In a bowl, combine the olive oil, juice of 2 lemons, minced garlic, oregano, and paprika. Give it a good whisk until everything is well blended.
- Chef’s Tip: You can make the marinade in advance, allowing the flavors to meld together overnight for an even more flavorful chicken!
-
Add the Chicken: Place the boneless, skinless chicken thighs into your marinade. Ensure each piece is well coated.
- Cooking Hack: If you have time, let the chicken marinate in the fridge for at least 30 minutes, or even up to 4 hours. The lemon juice will not only add flavor but also help tenderize the meat.
-
Preheat the Grill or Skillet: While the chicken marinates, heat up your grill or a skillet over medium-high heat. A cast-iron skillet works wonders for that perfect sear.
- Expert Advice: If you’re using a grill, ensure it’s well-oiled to prevent sticking!
Step 2: Cook the Chicken
-
Grill the Chicken: Once your grill is hot, add the marinated chicken. Cook for about 5–6 minutes on each side, or until the internal temperature reaches 165°F (75°C).
- Fun Fact: The caramelization from grilling adds a delicious depth to the chicken that makes every bite more flavorful!
-
Let it Rest: Remove the chicken from the heat and let it rest for about 5 minutes. This helps the juices redistribute and keeps your chicken juicy.
- Chef’s Note: While you wait, you can start prepping your toppings!
Step 3: Prepare the Tzatziki
-
Make the Tzatziki: In a mixing bowl, combine Greek yogurt, grated cucumber (make sure it’s drained), minced garlic, olive oil, chopped dill, and the juice of ½ lemon. Season with salt to taste.
- Pro Tip: For a thicker tzatziki, make sure you squeeze out as much water from the cucumber as possible!
-
Mix Until Smooth: Stir all the ingredients until you have a creamy and smooth tzatziki. Adjust seasoning if needed.
- Taste Test: Don’t forget to taste and tweak! A little hint of extra lemon or dill can take it over the top.
Step 4: Serve It Up
- Slice the Chicken: Once your chicken has rested, slice it into strips. Aim for bite-sized pieces!
- Serving Suggestion: This is the perfect time to warm up your pita bread on the grill or in a dry skillet. A few seconds on each side will do the trick!
Step 5: Assemble Your Gyros
- Build Your Gyro: Lay out the warm pita, fill it with sliced chicken, and top with tzatziki. Add fresh veggies like sliced tomatoes, red onion, or lettuce for crunch.
- Plating Tip: Don’t be shy—stuff it to the brim! The more, the merrier!
Step 6: Enjoy!
- Dig In! Wrap your gyro in foil or paper for easy eating on the go, or serve it straight on a plate with a side of Greek salad or crispy fries.
- Eat with Joy: There’s no wrong way to enjoy this dish, so dive in and relish every bite!
Serving Suggestions
Serve your Greek Chicken Gyros with a side of crispy roasted potatoes or a vibrant Greek salad topped with olives and feta. A glass of chilled lemonade or a light white wine pairs beautifully with this meal. Whether it’s a family feast or a casual weeknight dinner, the bright flavors will transport you straight to a sun-drenched terrace in Greece.
Recipe Variations
Feel free to get creative! Here are a few fun twists to keep your gyros exciting:
-
Spicy Peach Salsa: Add diced peaches and jalapeños to your gyro for a sweet and spicy kick that pairs beautifully with the tzatziki.
-
Mediterranean Bowls: Transform your gyro into a colorful bowl by serving everything over a bed of fluffy quinoa or wild rice, paired with hummus.
-
Veggie Option: Swap out chicken for marinated grilled vegetables like zucchini, bell peppers, and eggplant for a delicious vegetarian version.
-
Different Proteins: Try using lamb or beef for a different flavor profile—it’s traditional and oh-so-tasty!
-
Herb Variations: Experiment with other fresh herbs like mint or parsley to switch up the tzatziki flavor!
Chef’s Notes
This recipe has been a staple in my kitchen since that incredible summer in Greece. I often change it up by experimenting with different marinades or adding seasonal veggies. Cooking should be fun and flexible! I remember the first time I tried to recreate this dish, I accidentally added way too much oregano—it turned into a herb explosion! But, sometimes those little mishaps lead to new discoveries, so don’t be afraid to let the culinary journey guide you.
FAQs and Troubleshooting
Q: The chicken is dry. What went wrong?
- A: Chicken thighs are naturally juicier, but overcooking can still happen. Always use a meat thermometer to check for doneness, and let the chicken rest after cooking to maintain moisture.
Q: How can I make this dish gluten-free?
- A: Make sure to serve your gyro in gluten-free pita bread or lettuce wraps. You can also serve everything over a salad for a fresh, low-carb option!
Q: My tzatziki is too watery. How can I fix it?
- A: If your tzatziki has excess water, try squeezing the grated cucumber in a clean kitchen towel before mixing it into the yogurt. This will help eliminate moisture.
Q: Can I prep this in advance?
- A: Absolutely! Marinate the chicken a day ahead, and tzatziki can be made and stored in the fridge for 2-3 days. Just give it a good stir before serving!
Nutritional Info
The nutritional information for these gyros can vary based on portion sizes and specific ingredients used, but generally:
- Calories: Approximately 400 per serving
- Protein: 28g
- Carbs: 30g
- Fat: 18g
Remember to adjust the ingredients to fit your dietary needs!
Thank you for joining me on this culinary adventure! I hope these Greek Chicken Gyros bring a bit of Mediterranean magic into your kitchen. Cooking is about joy, sharing, and discovering new flavors together. I can’t wait for you to try your hand at these gyros—enjoy every single bite!
PrintGreek Chicken Gyros with Lemon-Herb Marinade and Tzatziki

A delicious and vibrant recipe for Greek Chicken Gyros, featuring marinated chicken thighs and creamy tzatziki.
- Prep Time: 30 minutes
- Cook Time: 15 minutes
- Total Time: 45 minutes
- Yield: 4 servings 1x
- Category: Main Course
- Method: Grilling
- Cuisine: Greek
- Diet: Gluten-Free
Ingredients
- 1.5 lbs boneless, skinless chicken thighs
- ¼ cup olive oil
- Juice of 2 lemons
- 4 cloves garlic (minced)
- 2 teaspoons dried oregano
- 1 teaspoon paprika
- 1 cup Greek yogurt
- ½ cucumber (grated and drained)
- 2 cloves garlic (minced) for tzatziki
- 1 tablespoon olive oil for tzatziki
- 1 tablespoon fresh dill (chopped) or 1 teaspoon dried dill
- Juice of ½ lemon for tzatziki
Instructions
- Create the Marinade: In a bowl, combine the olive oil, juice of 2 lemons, minced garlic, oregano, and paprika. Give it a good whisk until everything is well blended.
- Add the Chicken: Place the boneless, skinless chicken thighs into your marinade. Ensure each piece is well coated.
- Preheat the Grill or Skillet: While the chicken marinates, heat up your grill or a skillet over medium-high heat.
- Grill the Chicken: Once your grill is hot, add the marinated chicken. Cook for about 5–6 minutes on each side, or until the internal temperature reaches 165°F (75°C).
- Let it Rest: Remove the chicken from the heat and let it rest for about 5 minutes.
- Make the Tzatziki: In a mixing bowl, combine Greek yogurt, grated cucumber, minced garlic, olive oil, chopped dill, and the juice of ½ lemon. Season with salt to taste.
- Mix Until Smooth: Stir all the ingredients until you have a creamy and smooth tzatziki.
- Slice the Chicken: Once your chicken has rested, slice it into strips.
- Build Your Gyro: Lay out the warm pita, fill it with sliced chicken, and top with tzatziki.
- Dig In: Wrap your gyro in foil or paper for easy eating on the go.
Notes
You can marinate the chicken a day ahead, and tzatziki can be made and stored in the fridge for up to 2-3 days.
Nutrition
- Serving Size: 1 serving
- Calories: 400
- Sugar: 5g
- Sodium: 500mg
- Fat: 18g
- Saturated Fat: 4g
- Unsaturated Fat: 10g
- Trans Fat: 0g
- Carbohydrates: 30g
- Fiber: 2g
- Protein: 28g
- Cholesterol: 70mg
Keywords: gyros, Greek cuisine, chicken, tzatziki, Mediterranean food
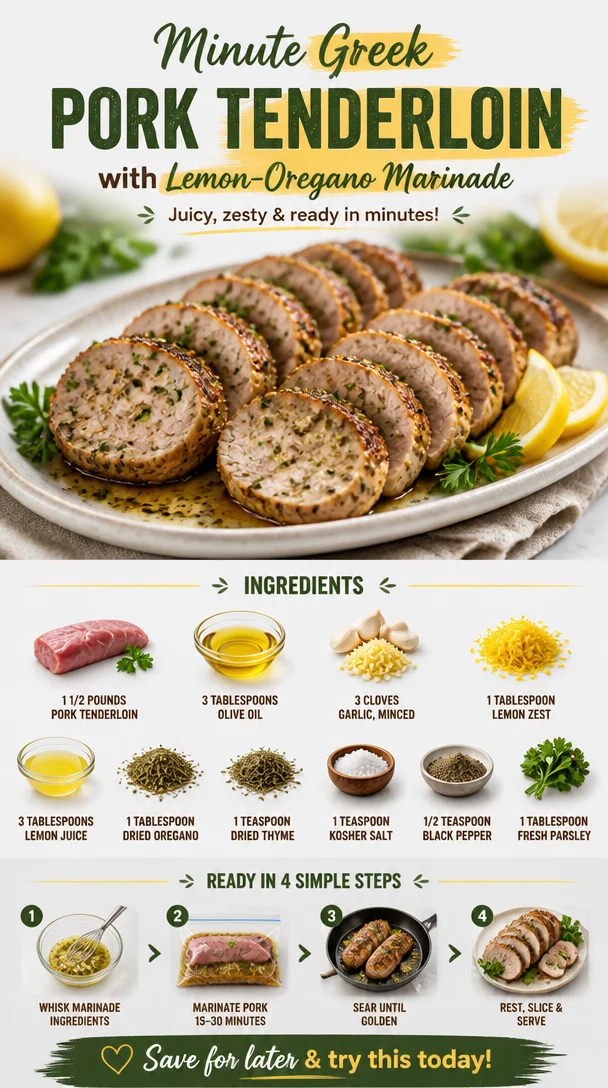
Minute Greek Pork Tenderloin with Lemon-Oregano Marinade
Greek Pork Tenderloin Recipe: A Flavorful Mediterranean Escape
Welcome back, my friends! Today, I’m thrilled to share a dish that’s not just mouthwateringly delicious but also transports you straight to the sunny shores of Greece. Picture this: the smell of olive oil, garlic, and fresh herbs wafting through your kitchen as you prepare a stunning Greek Pork Tenderloin. This dish is all about vibrant flavors and simple ingredients that come together to create a feast that feels as good as it tastes.
I’m Ava Carter, your friendly culinary guide, and I’m here to show you how to whip up this delightful meal with ease. Both novice chefs and seasoned foodies will find joy in this recipe, which marries the tender, juicy texture of pork with zesty Mediterranean spices. Let’s dive right into this flavor-packed adventure that will brighten up your dinner plans!
Personal Story
Growing up, my family had a tradition of hosting Sunday dinners. My Greek grandmother, a culinary wizard, would often bring us together with the irresistible aromas of her legendary dishes. I remember one evening vividly, the sun setting as the sky turned shades of pink and gold, and the laughter of my family filling the air. That night, she made her incredible marinated pork tenderloin. It was perfectly cooked, the olive oil glistening on the surface, with savory garlic and herbs weaving beautiful flavors together. It became a cherished recipe passed down from generation to generation.
Years later, I’ve put my own spin on that beloved dish, making it lighter and just as vibrant. Now, I’m excited to share my version of this classic with you! With the same heart and soul, let’s recreate that magical moment—and infuse it with our own kitchen stories.
Ingredients
Here’s what you’ll need to create this mouthwatering Greek Pork Tenderloin:
-
1 1/2 pounds pork tenderloin
The star of the show! Pork tenderloin is lean and cooks beautifully, resulting in a juicy and flavorful dish. If you’re looking for a different protein, feel free to substitute with chicken breast or even tofu for a plant-based option. -
3 tablespoons olive oil
Rich and fragrant, olive oil is a staple in Mediterranean cooking. It adds depth to the dish and prevents sticking. In a pinch, you can swap it for avocado oil or another neutral cooking oil. -
3 cloves garlic, minced
Garlic brings an incredible aroma and flavor that uplift any dish. If fresh garlic isn’t on hand, garlic powder can work in a pinch—just use about 1 teaspoon instead of whole cloves. -
1 tablespoon lemon zest
Zest adds a bright zing without adding acidity. You can use lime zest if you’d like to switch things up! Just be sure to zest before juicing your lemon. -
3 tablespoons lemon juice
Fresh lemon juice gives a refreshing tang. Bottled lemon juice is an option too, but fresh really packs a punch! -
1 tablespoon dried oregano
A classic herb in Greek cuisine! If you’re out of oregano, try using dried thyme or herbes de Provence for a lovely twist. -
1 teaspoon dried thyme
Thyme complements the pork beautifully, but if you want to mix it up, rosemary could offer a nice flavor in its place. -
1 teaspoon kosher salt
A key seasoning to enhance the overall flavors. If you’re using table salt, cut it down to about 3/4 teaspoon, as it’s finer and saltier. -
1/2 teaspoon black pepper
Freshly cracked black pepper adds a hint of warmth. If you want more heat, cayenne pepper or crushed red pepper flakes could spice things up! -
1 tablespoon fresh parsley, chopped
Not just for garnish! Fresh parsley adds a green, herbaceous finish to the dish. You can swap this for cilantro if you’re feeling adventurous!
Step-by-Step Instructions
Now, let’s get cooking! Follow these steps to create your Greek Pork Tenderloin masterpiece:
-
Preheat your oven to 400°F (200°C).
This ensures your pork will roast evenly. While it heats, you can prepare the marinade. -
Make the marinade.
In a small bowl, mix together the olive oil, minced garlic, lemon zest, lemon juice, oregano, thyme, salt, and black pepper. Stir until well combined. This is where the magic begins—those aromatic ingredients are just waiting to infuse the pork with flavor. -
Prepare the pork tenderloin.
Trim any silverskin from the pork tenderloin. This tough connective tissue can make the meat chewy, so it’s worth the few minutes to remove it. After trimming, place the tenderloin in a large zip-top bag or a shallow dish. -
Marinate the pork.
Pour the marinade over the pork, making sure it’s well coated. Seal the bag or cover the dish, and let it marinate in the fridge for at least 30 minutes. For an extra flavor boost, let it marinate for up to overnight—your patience will be rewarded! -
Sear the pork.
Heat a large oven-safe skillet over medium-high heat. Drizzle in a bit of olive oil, and once hot, take the pork out of the marinade (but don’t toss the marinade just yet!). Sear the tenderloin on all sides for about 2-3 minutes each, until it’s golden brown. This step locks in those juicy flavors—don’t rush it! -
Roast in the oven.
After searing, pour the leftover marinade over the pork. Transfer the skillet to your preheated oven and roast for 20-25 minutes, or until the internal temperature reaches 145°F (63°C). Use a meat thermometer for the best results! -
Rest the pork.
Once it’s done, remove the skillet from the oven and let the pork rest for about 10-15 minutes before slicing. This step is crucial—resting allows the juices to redistribute, making each bite tender and juicy. -
Slice and serve!
After resting, slice the pork tenderloin into medallions. You can arrange them beautifully on a platter or individual plates, drizzling any remaining juices from the skillet over the top.
Serving Suggestions
To elevate your Greek Pork Tenderloin experience, serve it alongside a colorful Greek salad, roasted vegetables, or fluffy quinoa. You could also introduce a side of tzatziki sauce for a refreshing complement! Just scoop some onto the plate and enjoy a flavor explosion.
Recipe Variations
Want to mix things up a little? Here are some creative twists you can try with this Greek Pork Tenderloin recipe:
-
Mediterranean Marinade: Add a splash of red wine vinegar to the marinade for a little zing or mix in some Dijon mustard for an extra depth of flavor.
-
Spicy Twist: For those who enjoy heat, toss in some crushed red pepper flakes or a diced jalapeño to provide a spicy kick.
-
Herb Blend: Experiment with fresh herbs like rosemary or dill instead of dried herbs for a vibrant pop of flavor.
-
Citrus Infusion: Use orange juice and zest for a sweet citrus profile that pairs seamlessly with the pork.
-
Stuffed Tenderloin: Cut a pocket into the tenderloin and stuff it with feta cheese, spinach, or sundried tomatoes before marinating. Bake for an elevated feast!
Chef’s Notes
This recipe has been a staple in my kitchen for years, but it has certainly evolved! I love experimenting with flavors and ingredients based on what I have on hand or what’s in season. There’s something incredibly rewarding about creating meals that draw from cherished memories without losing their modern flair. And honestly, I still can’t help but smile every time I pull this pork from the oven—the hallowed smell always reminds me of those family gatherings with my grandmother. Try it out, and you too might create some beautiful memories along the way!
FAQs and Troubleshooting
1. What can I do if my pork is dry?
If the pork is overcooked, unfortunately, there’s no saving it; however, serving it with a delicious sauce like tzatziki can help to moisten it up. Next time, check it with a meat thermometer!
2. Can I skip marinating?
While marinating enhances the flavor, if you’re short on time, you can still rub the marinade directly onto the pork before cooking. Just remember, the longer you let it marinate, the more flavorful it will be.
3. Can I make this ahead of time?
Absolutely! You can marinate the pork the night before and allow the flavors to develop while you sleep—who doesn’t love waking up to a delicious meal planned?
4. What’s the best way to store leftovers?
Store any leftover pork in an airtight container in the fridge for up to 4 days. Reheat gently to avoid drying it out—try using an oven or a skillet with some broth!
Nutritional Info
Calories per serving: Approximately 250-300 calories (excluding sides), depending on portion size and additional ingredients.
Conclusion
And there you have it—your very own Greek Pork Tenderloin that’s bursting with flavor and goodness! I hope this recipe brightens your kitchen and creates lasting memories, just like it has for me. If you give it a try, please share your kitchen stories and any variations you come up with. I’m always eager to hear how you’re keeping it fresh, simple, and seriously delicious! Happy cooking!
PrintGreek Pork Tenderloin
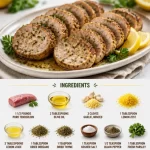
A flavorful Mediterranean dish featuring tender pork marinated in olive oil, garlic, and zesty herbs.
- Prep Time: 15 minutes
- Cook Time: 30 minutes
- Total Time: 45 minutes
- Yield: 4 servings 1x
- Category: Main Course
- Method: Baking
- Cuisine: Mediterranean
- Diet: Paleo
Ingredients
- 1 1/2 pounds pork tenderloin
- 3 tablespoons olive oil
- 3 cloves garlic, minced
- 1 tablespoon lemon zest
- 3 tablespoons lemon juice
- 1 tablespoon dried oregano
- 1 teaspoon dried thyme
- 1 teaspoon kosher salt
- 1/2 teaspoon black pepper
- 1 tablespoon fresh parsley, chopped
Instructions
- Preheat your oven to 400°F (200°C).
- Make the marinade by mixing together olive oil, minced garlic, lemon zest, lemon juice, oregano, thyme, salt, and black pepper.
- Prepare the pork tenderloin by trimming any silverskin.
- Marinate the pork by pouring the marinade over it and letting it sit in the fridge for at least 30 minutes.
- Sear the pork in a hot skillet with olive oil for about 2-3 minutes on each side until golden brown.
- Roast the pork in the oven for 20-25 minutes until the internal temperature reaches 145°F (63°C).
- Rest the pork for about 10-15 minutes before slicing.
- Slice and serve the pork tenderloin, drizzling remaining juices over the top.
Notes
For best results, allow the pork to marinate overnight. Serve with Greek salad or tzatziki sauce.
Nutrition
- Serving Size: 1 serving
- Calories: 275
- Sugar: 1g
- Sodium: 300mg
- Fat: 10g
- Saturated Fat: 1.5g
- Unsaturated Fat: 6g
- Trans Fat: 0g
- Carbohydrates: 5g
- Fiber: 0g
- Protein: 38g
- Cholesterol: 90mg
Keywords: pork tenderloin, Mediterranean recipe, Greek cuisine, easy dinner, marinated pork
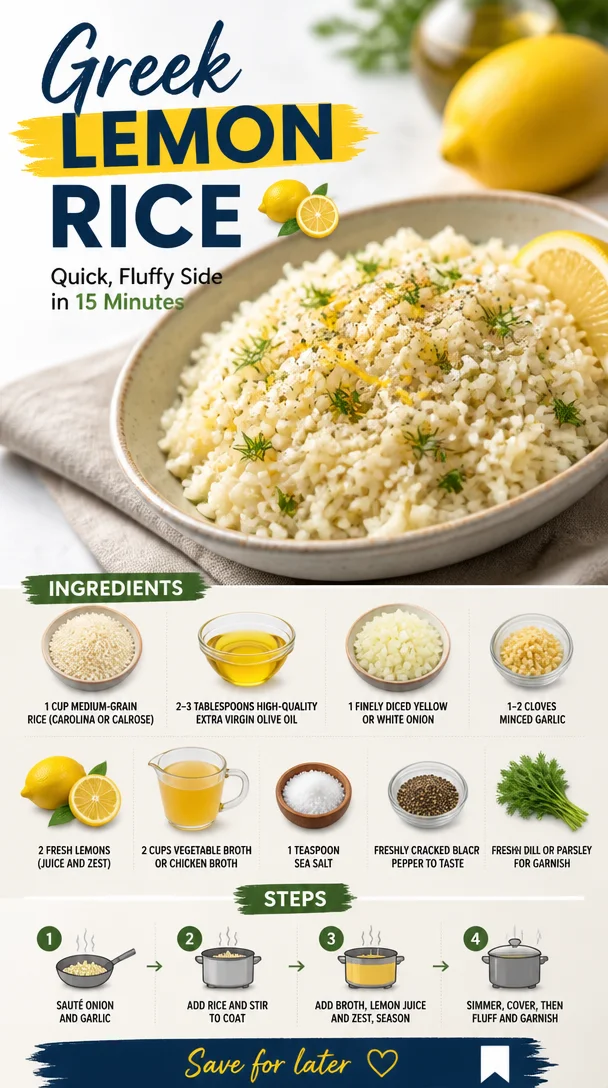
Greek Lemon Rice: Quick, Fluffy Side in 15 Minutes
Authentic Greek Lemon Rice Recipe – Simple & Delicious!
Introduction
Hello, fellow food lovers! If you’ve ever found yourself wandering the sun-drenched lanes of a picturesque Greek island—bright blue skies above, the scent of fresh herbs in the air, and the melodic sound of waves lapping at the shore—you get this flutter in your heart. That’s the magic of the Mediterranean right there, and it inspires everything I do in the kitchen.
Today, I’m thrilled to share a dish with you that brings that tantalizing Mediterranean flavor right into your home: Authentic Greek Lemon Rice. This dish is simple yet bursting with flavor, making it the perfect accompaniment to a variety of meals or a satisfying meal on its own. Trust me, when you make this lemony delight, you’ll be transported—no plane ticket required!
Rice is a staple in many cultures, but this version is lovingly infused with zesty lemon, fresh herbs, and the comforting depth of sautéed onions and garlic. It’s a versatile side that pairs beautifully with grilled chicken, roasted vegetables, or even as a light main dish when you just want something fresh and uplifting. And did I mention it’s pretty easy to whip up?
Cooking is like storytelling, and in this recipe, every ingredient adds its own little plot twist. With a handful of pantry staples and a few zesty notes, you’ll have a dish that dazzles your palate and brightens your table. So, let’s get cooking and create some kitchen magic together!
Personal Story
Ah, lemon rice—a dish that takes me way back to summer evenings spent in my grandmother’s garden. The sun would be setting, painting the sky in stunning oranges and pinks, while the aroma of her cooking wafted through the air. She would always say, “Food should tell a story,” and boy, did it ever with her Greek cuisine.
One particular evening, she was preparing lemon rice for a family gathering. I remember her rolling her sleeves up, squeezing fresh lemons with a fervor that was contagious. There was something enchanting about her rhythm as she danced around the kitchen, effortlessly mixing ingredients that seemed simple yet transforming them into something magical. The laughter, the chatter, and the clinking of glasses filled the garden, and that lemon rice—so bright and flavorful—was the star of the show.
That zestiness, blended with the love and laughter shared around the table, left a lasting impression. Now, every time I make this dish, it evokes those cherished memories while creating new ones in my own home. This recipe isn’t just about cooking; it’s about sharing and celebrating the moments that matter.
Ingredients
Let’s gather our ingredients for this delightful dish:
-
1 cup medium-grain rice (Carolina or Calrose): This type of rice is perfect for achieving a fluffy, tender texture. Substitutes can include long-grain rice like jasmine, but keep in mind it might alter the texture a bit.
-
2-3 tablespoons high-quality extra virgin olive oil: A must-have in Greek cooking! This oil adds richness and enhances the flavors. Feel free to swap it out for avocado oil if you prefer a milder taste.
-
1 finely diced yellow or white onion: This adds a sweet, aromatic base to the dish. Any onion variety will work, though red onions can lend a unique twist!
-
1-2 cloves minced garlic: Because every dish deserves a bit of garlic! You can also use garlic powder if you’re in a pinch, but fresh garlic really amps up the flavor.
-
2 fresh lemons (juice and zest): The star of the dish! The juice provides acidity while the zest brightens up the flavor. If you’re in a bind, bottled lemon juice can work in a pinch.
-
2 cups vegetable broth or chicken broth: Broth adds depth. Vegetable broth makes it vegan-friendly, while chicken broth will give a richer flavor.
-
1 teaspoon sea salt: Just enough to enhance those flavors! Adjust according to your taste.
-
Freshly cracked black pepper to taste: A dash brings warmth and balances the tanginess of the lemons.
-
Fresh dill or parsley for garnish: Not only does it add a pop of color, but fresh herbs elevate this dish to the next level!
Step-by-Step Instructions
Now that we have everything ready, it’s time to dive into the cooking process! Follow along step-by-step, and I’ll sprinkle in some tips and hacks along the way.
-
Rinse the Rice: Start by rinsing your medium-grain rice under cold water until the water runs clear. This step removes excess starch and helps ensure each grain stays fluffy and separate. It’s a little detail that makes a big difference!
-
Sauté the Aromatics: In a medium saucepan, heat 2-3 tablespoons of extra virgin olive oil over medium heat. Once shimmering, add the diced onion and sauté for about 3-5 minutes until they become translucent and fragrant. Go ahead and hip-hop your way around the kitchen; the aroma is worth every jig!
-
Add Garlic: Toss in the minced garlic and stir for about 1 minute, just until you can smell that beautiful garlicky scent! Don’t let it brown—burnt garlic is a no-go and can ruin the dish.
-
Incorporate the Rice: Add the rinsed rice to the pot, stirring it to coat with the oil and mix with the onions and garlic. Toasting the rice a bit helps enhance its nutty flavor. Just 2-3 minutes of stirring will do the trick; you want them to get slightly translucent without cooking all the way through.
-
Pour in the Broth: Next, add your choice of vegetable or chicken broth, the juice, and zest of the lemons, salt, and freshly cracked black pepper. Give everything a gentle stir to combine, then bring it to a gentle boil.
-
Simmer the Mixture: Once boiling, cover the pot with a tight-fitting lid, reduce the heat to low, and let it simmer for about 18-20 minutes. Timing is key here! If your rice is ready before the broth has fully absorbed, just remove it from the heat, keeping it covered for another 5 minutes to steam.
-
Fluff and Garnish: After the rice has cooked, remove the lid and fluff it with a fork. This is when you’ll see the grains fall gently apart, all thanks to those rinsing steps! Stir in fresh dill or parsley for an added burst of flavor. Just imagine that lovely green against the bright yellow rice!
-
Taste Test: Give your rice a quick taste—this is a fun chance to adjust the seasoning. Need a little more salt or a splash more lemon? Go for it!
Serving Suggestions
When it comes to plating, let’s keep it rustic and vibrant. Serve your authentic Greek lemon rice in a beautiful bowl garnished with extra fresh herbs on top. It pairs wonderfully with grilled chicken, lamb, or a medley of roasted vegetables. You can also serve it as a refreshing base for protein-packed chickpeas or lentils for a hearty vegan meal!
Recipe Variations
Let’s shake things up a bit! Here are some fun variations to personalize your lemon rice:
-
Add Vegetables: Throw in some finely chopped spinach, bell peppers, or peas while cooking for added nutrition and color.
-
Cheesy Delight: Stir in some crumbled feta cheese or grated parmesan right before serving for a creamy, cheesy twist.
-
Herbaceous Twist: Experiment with different herbs like mint or oregano for a distinct flavor.
-
Nutty Element: Add toasted pine nuts or almonds for a delightful crunch and a protein boost!
-
Spicy Kick: Toss in a pinch of crushed red pepper flakes to give your dish a little heat.
Chef’s Notes
This recipe has gone through a few iterations in my kitchen and has evolved based on seasonal ingredients and what’s hanging out in my pantry. Sometimes I throw in whatever fresh veggies I have—it’s amazing how adaptable it is! And believe me, there have been some “oops” moments—like forgetting to rinse the rice and ending up with a sticky mess! But it’s all part of the journey, right? Embrace those moments, laugh them off, and just keep cooking.
FAQs and Troubleshooting
1. What type of rice is best for this recipe?
- I recommend using medium-grain rice like Carolina or Calrose for the perfect fluffy texture. Long-grain varieties work too, but you might notice a difference in texture.
2. My rice always turns mushy. What am I doing wrong?
- Rinsing the rice is key! Make sure you’re also using the correct water-to-rice ratio. For this recipe, two cups of broth for one cup of rice is perfect.
3. Can I make this dish ahead of time?
- Absolutely! This lemon rice stores well in the fridge for 3-4 days. Just reheat it gently to avoid drying it out.
4. How can I add protein to this dish?
- Grilled chicken, chickpeas, or shrimp would be excellent additions! Just adjust your cooking times accordingly.
Nutritional Info
While I don’t usually focus a lot on numbers, this lemon rice recipe is a fantastic source of carbs and can be a vibrant vessel for adding various nutrients depending on your chosen additions. Not to mention, it’s vegan and easily customizable for anyone’s dietary needs!
Conclusion
And there you have it—my Authentic Greek Lemon Rice recipe that’s not just simple and delicious but also a gateway to countless culinary adventures! Cooking isn’t just about the food; it’s about the stories and memories we create along the way. So, whether you’re enjoying this as a side dish or making it the main event with your favorite toppings, know that you’re part of a beautiful tradition of shared meals and joy.
Thanks for joining me in the kitchen today! I can’t wait to hear how your lemon rice turns out and the memories you’ll create around the dinner table. Happy cooking, friends!
PrintAuthentic Greek Lemon Rice

A simple and delicious Greek lemon rice recipe bursting with zesty flavors, perfect as a side or light main dish.
- Prep Time: 10 minutes
- Cook Time: 20 minutes
- Total Time: 30 minutes
- Yield: 4 servings 1x
- Category: Side Dish
- Method: Stovetop Cooking
- Cuisine: Greek
- Diet: Vegan
Ingredients
- 1 cup medium-grain rice (Carolina or Calrose)
- 2–3 tablespoons high-quality extra virgin olive oil
- 1 finely diced yellow or white onion
- 1–2 cloves minced garlic
- 2 fresh lemons (juice and zest)
- 2 cups vegetable broth or chicken broth
- 1 teaspoon sea salt
- Freshly cracked black pepper to taste
- Fresh dill or parsley for garnish
Instructions
- Rinse the rice under cold water until the water runs clear.
- Sauté the onion in olive oil over medium heat for about 3-5 minutes.
- Add the minced garlic and stir for about 1 minute.
- Incorporate the rinsed rice, stirring to coat it with olive oil.
- Pour in the broth, lemon juice, zest, salt, and pepper, stirring to combine.
- Simmer covered on low heat for about 18-20 minutes.
- Fluff the rice with a fork and garnish with fresh herbs.
- Taste and adjust seasoning as needed.
Notes
This dish is easily adaptable; feel free to add vegetables or proteins as desired.
Nutrition
- Serving Size: 1 serving
- Calories: 300
- Sugar: 1g
- Sodium: 400mg
- Fat: 12g
- Saturated Fat: 2g
- Unsaturated Fat: 8g
- Trans Fat: 0g
- Carbohydrates: 45g
- Fiber: 3g
- Protein: 6g
- Cholesterol: 0mg
Keywords: Greek rice, lemon rice, Mediterranean recipe, vegan side dish, easy rice recipe
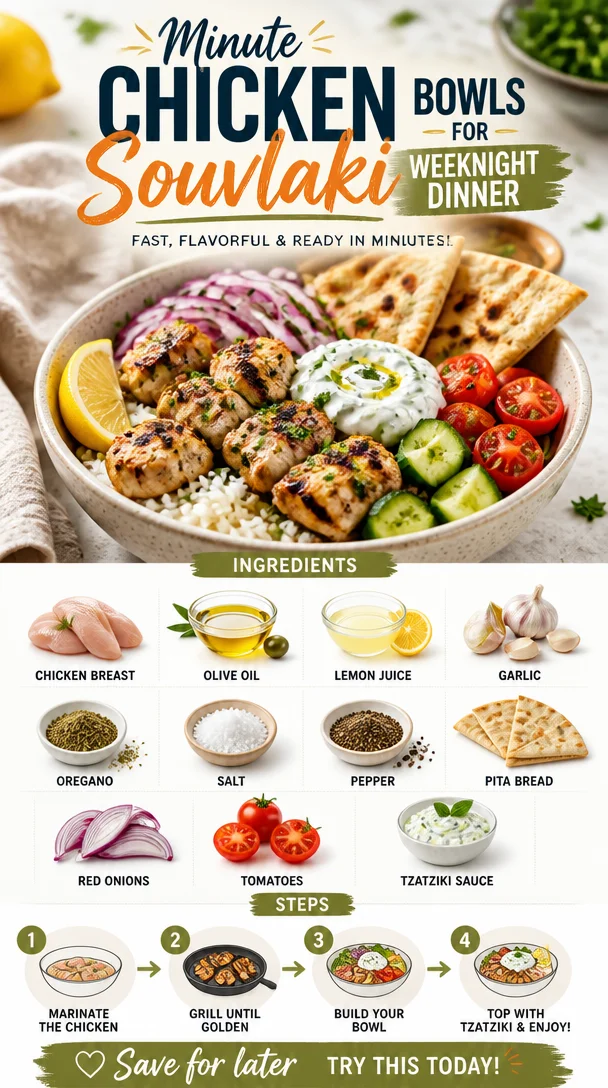
Minute Chicken Souvlaki Bowls for Weeknight Dinner
Chicken Souvlaki: A Flavorful Journey to the Mediterranean
Welcome, food lovers! Today, we’re venturing into the vibrant world of Mediterranean cuisine with a mouthwatering recipe for Chicken Souvlaki. Trust me; once you get a taste of this dish, it’ll become a staple in your kitchen. Imagine juicy chicken marinated in a zesty blend of lemon and herbs, grilled to perfection, and served with warm pita, crisp veggies, and luscious tzatziki. It’s fresh, it’s flavorful, and it’s downright delicious!
Why Chicken Souvlaki? Well, this dish is more than just food; it’s a culinary experience that takes you straight to the sun-kissed shores of Greece. Beyond that, it perfectly embodies my philosophy that eating clean doesn’t need to be complicated or bland. If you’ve been on the lookout for something that hits all the right notes—comforting yet invigorating, simple yet impressive—you’re in the right place.
There’s a unique joy in preparing souvlaki. Picture yourself hosting a gathering, the scent of grilled chicken filling the air, laughter echoing around the table—it’s an invitation to savor not just a meal but a moment. Plus, it’s a breeze to whip up even during your busiest days! Join me as I guide you through every step, including those chef tips and tricks that will leave your loved ones raving about your newfound skills. Ready to dive in? Let’s go!
A Nostalgic Memory with Souvlaki
Growing up, my family didn’t often dine out; instead, we created our own little world in the kitchen. One summer evening, I remember we decided to host a backyard barbecue that would transform our humble home into a Mediterranean haven. My dad, who’s known for his grilling prowess, chose chicken souvlaki as the star of the show. He marinated the chicken overnight, and as it grilled, the delightful aroma wafted through our neighborhood—I’m pretty sure our neighbors were secretly jealous!
My job was to prepare the sides. I chopped fresh veggies, mashed garlic for the tzatziki, and laughed with my siblings as we watched our dad flip the chicken skewers, charred to perfection. That evening, surrounded by family, friends, and delicious food, I learned the joyous power of shared meals. My love for cooking was born that night, sparked by the simple act of grilling chicken and blending flavors. Since then, Chicken Souvlaki has been a beloved family tradition, a dish that brings us together, no matter how far life takes us.
Ingredients for Chicken Souvlaki
Gathering quality ingredients is a crucial part of creating mouthwatering chicken souvlaki. Here’s what you need:
-
Chicken Breast: Skinless, boneless chicken breast is lean and cooks beautifully on the grill. If you prefer dark meat, boneless thighs work well too!
-
Olive Oil: Extra virgin olive oil adds richness and helps lock in flavor. It’s also heart-healthy! In a pinch, avocado oil is a great alternative.
-
Lemon Juice: Freshly squeezed lemon juice brightens up the dish and tenderizes the chicken. Bottled lemon juice could work, but fresh is best for flavor.
-
Garlic: Fresh garlic adds aromatic depth. If you’re in a hurry, pre-minced garlic can be used, though it lacks that punch!
-
Oregano: This herb is a Mediterranean superstar! Dried oregano is perfect for marinades, but if you can get your hands on fresh, definitely use that for a more vibrant flavor.
-
Salt and Pepper: Simple seasonings that enhance the natural flavors of the chicken. Feel free to experiment with flavored salts or freshly cracked black pepper for a twist.
-
Pita Bread: Soft, warm pita is the traditional wrap. You can substitute with flatbreads or even collard greens for a low-carb option.
-
Red Onions & Tomatoes: Fresh veggies add crunch and freshness. Customize with other favorites, like cucumbers or bell peppers!
-
Tzatziki Sauce: This creamy yogurt sauce is a must! You can buy it pre-made for convenience, or try making your own with Greek yogurt, cucumber, garlic, and dill for something truly special.
Step-by-Step Instructions
It’s time to cook, friends! Follow these simple steps to create your own Chicken Souvlaki masterpiece.
-
Marinate the Chicken: In a bowl, combine 2 pounds of cubed chicken breast with ½ cup olive oil, ¼ cup fresh lemon juice, 4 minced garlic cloves, 2 teaspoons dried oregano, 1 teaspoon salt, and ½ teaspoon pepper. Mix everything to coat the chicken well. Cover the bowl and let it marinate in the fridge for at least 30 minutes, or even overnight if you have the time. Chef’s Tip: The longer it marinates, the more flavorful it becomes!
-
Preheat the Grill: Get your grill ready! Preheat it to medium-high heat for at least 10-15 minutes. If you’re using skewers, soak them in water if they’re wooden to prevent burning. Chef Hack: If grilling indoors, a grill pan works beautifully!
-
Skewer the Chicken: Once marinated, thread the chicken onto skewers. Leave a little space between each piece to ensure even cooking. Note: If you’re using vegetables, feel free to incorporate some red onion or bell pepper between the chicken pieces for a colorful, flavor-packed skewer!
-
Grill the Chicken: Place the skewers on the hot grill. Cook for about 10-12 minutes, turning them halfway through, until the chicken is cooked through (internal temperature should reach 165°F). Tip: Avoid pressing down on the chicken while grilling; this releases juices that keep it moist!
-
Warm the Pitas: While the chicken grills, wrap your pita bread in aluminum foil and place it on the grill for the last 2-3 minutes to warm up. You can also use indirect heat on the grill or even a toaster oven!
-
Prepare Tzatziki: If you’re making homemade tzatziki, mix 1 cup of Greek yogurt, ½ grated cucumber (squeezed of excess water), 1 minced garlic clove, 1 tablespoon chopped fresh dill (or 1 teaspoon dried), a squeeze of lemon, and salt to taste in a bowl.
-
Assemble Your Dish: Remove the chicken skewers from the grill. Carefully take each piece off the skewer, then layer them on the warm pita and top with sliced red onions, diced tomatoes, and generous dollops of tzatziki. Optional: Create a little salad on the side with cucumbers and lettuce for extra crunch!
Serving Suggestions
Presentation is key! Serve your Chicken Souvlaki wrapped in warm pita on a colorful plate with fresh veggies and tzatziki served on the side for dipping. If you’re feeling fancy, garnish with a sprig of dill or parsley. Pair it with a light salad dressed with olive oil and lemon to complete the meal. This delightful platter will not only be a feast for the taste buds but also a treat for the eyes!
Recipe Variations
Chicken Souvlaki is incredibly versatile! Here are some delicious variations to keep things interesting:
-
Shrimp Souvlaki: Swap chicken for shrimp! Just adjust the cooking time since shrimp cooks faster.
-
Vegetarian Option: Use marinated tofu, seitan, or your favorite hearty vegetables, like zucchini and bell peppers, for a scrumptious vegetarian souvlaki.
-
Herb Variations: Explore different herbs! Try adding fresh mint or parsley to your marinade for a unique flavor twist.
-
Spicy Kick: Add a pinch of red pepper flakes or a splash of your favorite hot sauce to the marinade for an extra zing!
-
Mediterranean Bowl: Instead of pitas, serve the marinated chicken over rice or quinoa, topped with veggies and tzatziki for a satisfying grain bowl.
Chef’s Notes
Every chef has those kitchen adventures that become cherished stories, and mine involves a delightful disaster! One day, in my excitement to impress friends, I thought I could multitask and marinate the chicken while whipping up a batch of homemade tzatziki. The tzatziki turned out fine, but I forgot about the chicken sitting on the counter! Let’s just say, I learned the hard way to either set a timer or keep a close eye on the marinating process. But in retrospect, it turned into a funny memory, and everyone at the table enjoyed a good laugh, squished pita sandwiches and all!
Chicken Souvlaki holds a special place in my heart, evolving over time from a simple family recipe to something even more dynamic; adding herbs, tweaking spices, and even changing up the sides keep it exciting. I think that’s the beauty of cooking—creating your own twist on cherished dishes.
FAQs and Troubleshooting
-
Can I use chicken thighs instead of breast? Absolutely! Chicken thighs are juicy and delicious and can give your souvlaki an even richer flavor.
-
How do I know when the chicken is done? The best way to ensure your chicken is fully cooked is to use a meat thermometer. Aim for an internal temperature of 165°F.
-
What if my chicken is dry? A few reasons could lead to dry chicken. Overcooking can cause it to dry out, so take it off the grill once it reaches temp. Additionally, let your chicken rest for a few minutes after grilling; this helps retain juices!
-
Can I make the marinade ahead of time? Yes! You can prepare the marinade up to 24 hours in advance. Just make sure to store it in an airtight container in the fridge until you’re ready to add it to the chicken.
Nutritional Info
While I typically focus on flavor, let’s not forget about nutrition! A serving of Chicken Souvlaki typically includes lean protein from the chicken and healthy fats from the olive oil, making it a balanced choice for any meal. The veggies add fiber and vitamins, and the yogurt in tzatziki provides probiotics—just the right boost for your health!
Now, let’s bring this Chicken Souvlaki recipe into your kitchen! Get ready to enjoy Mediterranean flavors that will not only satisfy your cravings but nourish your body. Invite a friend over, put on some music, and savor each delicious bite together. Happy cooking!
PrintChicken Souvlaki

A delicious Mediterranean dish featuring juicy chicken marinated in lemon and herbs, grilled to perfection, served in warm pita with fresh veggies and tzatziki.
- Prep Time: 30 minutes
- Cook Time: 15 minutes
- Total Time: 45 minutes
- Yield: 4 servings 1x
- Category: Main Course
- Method: Grilling
- Cuisine: Mediterranean
- Diet: Paleo
Ingredients
- 2 pounds skinless boneless chicken breast, cubed
- ½ cup extra virgin olive oil
- ¼ cup freshly squeezed lemon juice
- 4 cloves fresh garlic, minced
- 2 teaspoons dried oregano
- 1 teaspoon salt
- ½ teaspoon pepper
- Pita bread or flatbreads
- Red onions and tomatoes, for serving
- Tzatziki sauce, for serving
Instructions
- Marinate the chicken by combining cubed chicken breast, olive oil, lemon juice, garlic, oregano, salt, and pepper in a bowl. Mix and let it marinate in the fridge for at least 30 minutes.
- Preheat the grill to medium-high heat for 10-15 minutes.
- Skewer the marinated chicken onto skewers with space between each piece.
- Grill the skewers for 10-12 minutes, turning halfway, until the chicken reaches an internal temperature of 165°F.
- Warm the pita bread on the grill for the last 2-3 minutes.
- Prepare the tzatziki if making homemade by mixing Greek yogurt, grated cucumber, minced garlic, dill, lemon juice, and salt.
- Assemble the dish by removing chicken from skewers, placing it on warm pita, and topping with onions, tomatoes, and tzatziki.
Notes
For extra flavor, add grilled vegetables to the skewers or serve with a light salad dressed with olive oil and lemon.
Nutrition
- Serving Size: 1 serving
- Calories: 380
- Sugar: 2g
- Sodium: 450mg
- Fat: 22g
- Saturated Fat: 3g
- Unsaturated Fat: 19g
- Trans Fat: 0g
- Carbohydrates: 20g
- Fiber: 3g
- Protein: 30g
- Cholesterol: 70mg
Keywords: Chicken, Souvlaki, Mediterranean, Grilled Chicken, Healthy Recipe
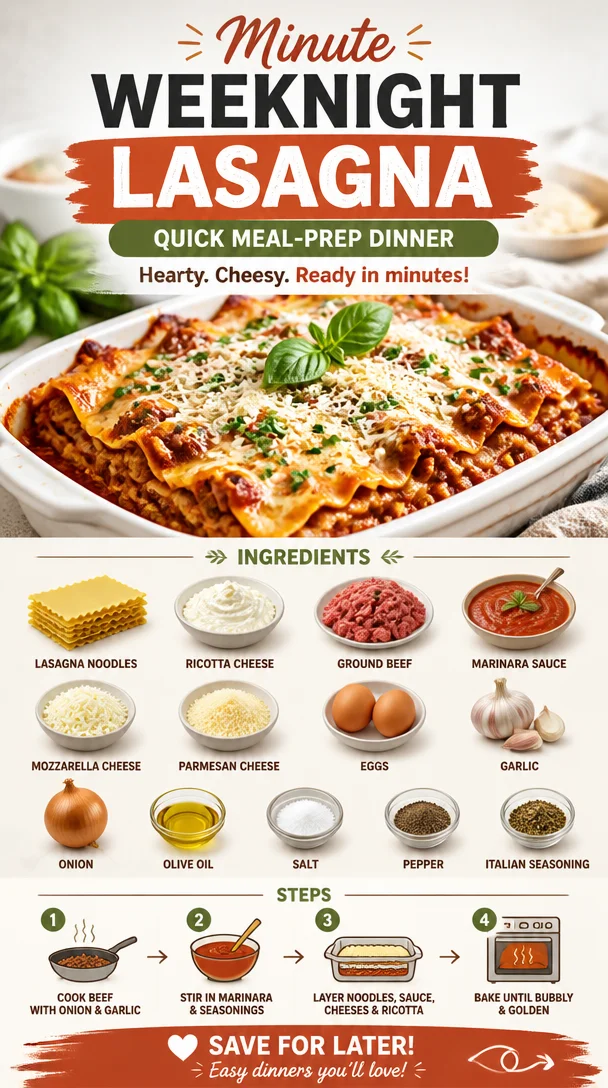
Minute Weeknight Lasagna: Quick Meal-Prep Dinner
The World’s Best Lasagna: A Comfort Food Adventure
Welcome to Clean Plate Cravings! Today, we’re diving into a dish that brings warmth, nostalgia, and flavor straight to your table – the world’s best lasagna! There’s something magical about a steaming, cheesy lasagna fresh out of the oven. This Italian classic can lift even the heaviest of hearts and turn any dinner into a cozy celebration.
In my kitchen, lasagna is more than just a delicious meal; it’s a ritual. I remember the first time I made this dish. It was a chilly Saturday afternoon when I whisked together the vibrant flavors of garlic, fresh herbs, and a rich marinara sauce. As I layered the ingredients, the kitchen filled with aromas that instantly transported me back to my grandmother’s house. She had a way of taking simple ingredients and transforming them into something extraordinary, and I wanted to capture that essence in my own cooking.
Lasagna is like a loving hug on a plate. Whether it’s for a family gathering or a cozy night in, this dish can evoke sweet memories, spark joyous conversations, and make everyone feel right at home. Plus, it’s so versatile! You can personalize your layers with all of your favorite flavors while sticking to wholesome ingredients that make it feel good. Don’t worry; I’ll guide you through every step, so we can create this culinary masterpiece together!
Ready to roll up your sleeves and head into lasagna-land with me? Let’s get started!
A Slice of Memory
Growing up, one of my favorite Saturday traditions was helping my grandma in the kitchen. The focal point was always her bubbling pot of marinara sauce, simmering away on the stove. The whole house would be filled with that comforting scent, making our bellies rumble by midday. As she taught me to layer the ingredients, we’d chat about everything from school to her childhood.
One special memory stands out in my mind. She had just finished layering the final tray of lasagna and proclaimed it would be the best she had ever made. Between the ricotta, plenty of ground beef, and oozing mozzarella, I could barely contain my excitement. When it finally came out of the oven, sheer perfection! Perfectly golden on the top, and as we cut into it, the steam danced up, filling the air with its rich aroma. That first bite was a revelation! It was rich, comforting, and everything I imagined it would be.
Afterward, we spent hours at the table, reminiscing as we savored each satisfying slice. Little did I know, those Saturday afternoons would inspire my journey into the world of cooking, where I’d eventually craft my own recipes while carrying on grandma’s legacy. Now, it’s my delight to share this joy with all of you!
Ingredients
For the ultimate lasagna, you’ll want to gather the following ingredients:
-
Lasagna noodles: The foundation of any great lasagna. You can use traditional wheat noodles, or for a gluten-free option, swap for zucchini slices or gluten-free noodles.
-
Ricotta cheese: Creamy, delicious, and provides a beautiful texture. For a lighter version, try cottage cheese or goat cheese as a flavorful alternative.
-
Ground beef: This adds protein and richness. You can easily substitute with ground turkey, chicken, or a plant-based meat for a vegetarian twist.
-
Marinara sauce: This is where a lot of flavor comes from! You can use homemade sauce or store-bought for convenience. Look for a low-sodium variety to keep it healthier, or make your own using canned tomatoes, garlic, and herbs.
-
Mozzarella cheese: Cheesy goodness that stretches and melts beautifully. If you’re feeling adventurous, try swapping with provolone or fontina cheese.
-
Parmesan cheese: For that punch of umami! If you want a sharper flavor, pecorino Romano works wonders too.
-
Eggs: Used to bind the ricotta and enhance its creaminess. For a vegan option, you can use flax eggs or silken tofu blended until smooth.
-
Garlic: A must for that aromatic base! Fresh garlic is always preferred, but you can use garlic powder if you’re in a pinch.
-
Onion: Adds sweetness and depth to the filling. I recommend yellow or sweet onions, but shallots work well too.
-
Olive oil: For sautéing the onions and garlic. Feel free to substitute with avocado oil for a different flavor profile.
-
Salt and Pepper: Always necessary to bring out the best flavors!
-
Italian seasoning: A medley of herbs like oregano, basil, and thyme that enhances the overall taste. If you don’t have this blend, you can easily mix your own using dried ingredients.
Step-by-Step Instructions
Now that we’ve gathered our necessities, let’s jump into the step-by-step process of crafting our incredible lasagna! Follow along for some handy chef tips:
-
Preheat Your Oven: Start by preheating your oven to 375°F (190°C). This ensures that your lasagna bakes evenly and gives you that perfect bubbly top.
-
Cook the Noodles: In a large pot, bring salted water to a boil. Add the lasagna noodles and cook them until al dente, as they will continue to cook in the oven. Remember to stir occasionally to prevent sticking. Drain and lay them flat on parchment paper or a baking sheet while you prepare the filling.
-
Prepare the Meat Mixture: In a large skillet over medium heat, add a splash of olive oil. Sauté the diced onions until they become translucent, about 3-4 minutes. Then, add in minced garlic and stir for an additional minute. Toss in the ground beef, breaking it apart as it cooks. Season it with salt, pepper, and Italian seasoning. Cook until the beef is browned, and drain the excess fat.
-
Mix the Ricotta Filling: In a medium bowl, mix the ricotta cheese, egg, half of the grated Parmesan, a good pinch of salt, pepper, and Italian seasoning. This mixture is creamy and provides that lovely layer of flavor in your lasagna.
-
Assemble the Lasagna: In a 9×13-inch baking dish, spread a thin layer of marinara sauce at the bottom. Layer your first sheet of noodles, then add half of the ricotta mix, half of the beef mixture, a layer of marinara sauce, and a sprinkle of mozzarella. Repeat this layering process, finishing with a top layer of noodles, marinara sauce, remaining mozzarella, and the rest of the Parmesan.
-
Cover and Bake: Cover the baking dish tightly with aluminum foil (to prevent the cheese from burning) and bake for 30 minutes. Then, remove the foil and bake for an additional 15 minutes, until the cheese is golden and bubbling.
-
Cool and Serve: Let your beautiful lasagna rest for about 15 minutes before slicing into it. This will help the layers set, making serving easier and more elegant!
Serving Suggestions
When it comes to serving your masterpiece, a little presentation goes a long way! Slice your lasagna into hearty squares and plate it alongside a simple green salad drizzled with olive oil and balsamic vinegar for a refreshing contrast. I love topping my lasagna with a sprinkle of fresh basil or parsley to add a pop of color. And don’t forget a sprinkle of extra Parmesan—it makes every slice just that much more special!
Recipe Variations
Let’s get creative! Here are a few fun twists you could explore with this lasagna recipe:
-
Vegetable Lasagna: Layer in sautéed spinach, zucchini, or mushrooms for a nutritious cozy meal. You can even replace the noodles with thinly sliced vegetables for a low-carb option.
-
Pesto Twist: Swap traditional marinara for pesto sauce, and add roasted red peppers or artichokes for an Italian flare with a twist.
-
Spicy Sausage Lasagna: For those who love a kick, use spicy Italian sausage instead of ground beef. It adds incredible flavor and heat.
-
Caprese Style: Layer in fresh tomatoes and basil. Top it off with burrata instead of mozzarella for a luxurious twist.
Chef’s Notes
Over the years, my lasagna has evolved from my grandma’s classic recipe to become a personal canvas reflecting my own culinary journey. Each twist I’ve made has been inspired by moments around the dinner table—friends and family prompting me to share flavors from my travels, from the sun-soaked streets of Italy to local farmer’s markets bursting with fresh produce. One of my favorite things to do is to experiment with veggies and sauces to create unique flavor combinations, while still honoring that comforting, gooey goodness we all crave.
FAQs and Troubleshooting
-
Why is my lasagna watery?
If your lasagna turns out watery, it’s likely due to excess moisture in the sauce or vegetables. To avoid this, make sure your veggies are well-drained, or simmer your sauce longer before assembly. -
Can I make this ahead of time?
Absolutely! You can assemble your lasagna ahead of time and refrigerate it for up to 24 hours before baking. Just add an extra 10–15 minutes to the baking time if it’s cold straight from the fridge. -
What if the cheese is browning too fast?
If the cheese on top is browning too quickly and the pasta isn’t cooked through, cover it back up with foil and continue baking. The foil helps reflect the heat and prevents over-browning while the inside continues to cook. -
How can I store leftovers?
Store any leftovers in an airtight container in the fridge for up to 3 days. Reheat in the oven at 350°F (175°C) for about 20 minutes, covered with foil to keep the moisture in.
Nutritional Info
(Approx. per serving)
- Calories: 450
- Protein: 28g
- Carbohydrates: 40g
- Fat: 19g
- Fiber: 3g
And there you have it—your guide to crafting the world’s best lasagna! It’s time to bring your loved ones around the table and share this delicious experience. I hope this recipe brings as much joy and comfort to your life as it has to mine. Remember, the kitchen is a place of creativity and love. Let’s keep it fresh, simple, and seriously delicious! Happy cooking!
PrintThe World’s Best Lasagna

A comforting and nostalgic Italian classic lasagna recipe that layers rich flavors and brings warmth to your table.
- Prep Time: 15 minutes
- Cook Time: 45 minutes
- Total Time: 60 minutes
- Yield: 6 servings
- Category: Main Course
- Method: Baking
- Cuisine: Italian
- Diet: Gluten-Free (with swaps), Vegetarian (with substitutions)
Ingredients
- Lasagna noodles
- Ricotta cheese
- Ground beef
- Marinara sauce
- Mozzarella cheese
- Parmesan cheese
- Eggs
- Garlic
- Onion
- Olive oil
- Salt
- Pepper
- Italian seasoning
Instructions
- Preheat your oven to 375°F (190°C).
- Cook the noodles until al dente, then drain them.
- Prepare the meat mixture by sautéing onions and garlic, then add ground beef and season.
- Mix the ricotta filling with eggs and seasonings.
- Assemble the lasagna using layers of noodles, ricotta mixture, meat mixture, and sauce.
- Cover and bake for 30 minutes, then uncover and bake for 15 more minutes.
- Cool for 15 minutes before serving.
Notes
For variation, try adding vegetables, using different sauces, or substituting meats to suit your taste.
Nutrition
- Serving Size: 1 serving
- Calories: 450
- Sugar: 7g
- Sodium: 800mg
- Fat: 19g
- Saturated Fat: 9g
- Unsaturated Fat: 7g
- Trans Fat: 0g
- Carbohydrates: 40g
- Fiber: 3g
- Protein: 28g
- Cholesterol: 80mg
Keywords: lasagna, comfort food, Italian recipe, cheesy lasagna, family dinner
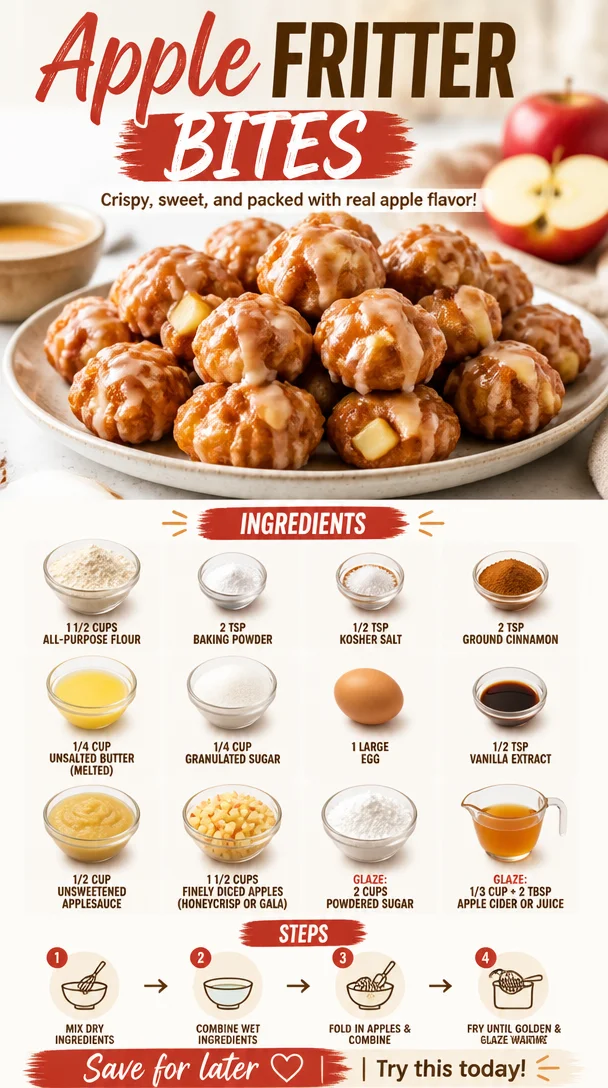
Apple Fritter Bites
The Joy of Apple Fritter Bites: A Delicious Journey
Welcome to the delightful world of Apple Fritter Bites! If you’ve ever found yourself munching on a warm, soft fritter while the sweet aroma of apples and cinnamon fills the air, you know exactly how magical these little treats can be. Here at Clean Plate Cravings, we believe that every bite should be pure joy, and apple fritters are the epitome of happiness wrapped in dough.
Imagine the sound of autumn leaves crunching beneath your feet, the crisp air tinged with the scent of roasted pumpkin, and the image of a cozy kitchen where the family gathers around to share stories. For me, apple fritters evoke those vivid memories of my grandmother’s kitchen, where each fall she would make a batch just for us after we spent the day picking apples at the orchard.
There’s something incredibly nostalgic about baking, especially when it involves fresh produce. My grandmother’s kitchen was my safe haven, and it was her love for food that inspired my passion. The way she would roll out dough, toss in the apples, and dust each fritter with sugar made it feel like magic. Now, I carry that magic into my kitchen, transforming those cherished moments into something we can all enjoy—apple fritter bites that are not only delicious but effortlessly simple to make at home!
Ready to create your own cherished food memories? Let’s jump into the recipe, sprinkle in some love, and dive headfirst into making these apple fritter bites that are bound to impress family and friends alike!
A Fond Memory: The Kitchen Chronicles
As a child, every autumn, my excitement would escalate seeing the leaves change colors outside our window. The first weekend after the first heavy frost, my grandmother would announce it was time for apple picking. Grabbing our baskets, we’d head to the local orchard, the crisp air invigorating us with each step.
Once we returned home with our bounty of Honeycrisp and Gala apples, the magic truly began! The kitchen became our playground, with flour dust swirling in the air and the unmistakable aroma of melting butter. I have a vivid memory of my grandmother guiding my small hands as we mixed ingredients together—a dancing mixture of flour, cinnamon, and apples. The best part was always the last step: the hot oil bubbling away in her old cast-iron skillet, perfectly heating the fritters until they were golden brown. After dipping them into a sweet glaze, our hot fritters would be piled high on a plate, ready for us to dive into.
Every bite was a sweet reminder of love, home, and the joy of sharing food. Those precious moments in her kitchen fueled my passion for baking, and today, I channel that same warmth and excitement into every recipe I create. Apple fritter bites remain a connection to those carefree days, and I can’t wait for you to make your own memories with this delicious treat!
Ingredients You’ll Need for Apple Fritter Bites
Let’s gather everything you need to create these delightful apple fritter bites! Here’s the ingredient list, along with some inspiration and substitution ideas to make it work for you:
-
1 1/2 cups all-purpose flour
The backbone of our fritters, providing structure and a delightful chew. If you prefer a gluten-free option, try substituting with a 1:1 gluten-free flour blend. -
2 tsp baking powder
This is our secret helper for light, fluffy fritters. Make sure it’s fresh to work its magic. -
1/2 tsp kosher salt
Essential for balancing sweetness and elevating flavors. If you’re using table salt, reduce to a quarter teaspoon, as it’s more potent. -
2 tsp ground cinnamon
The warm, comforting spice that brings everything together. Want a twist? Consider adding a pinch of nutmeg for extra depth. -
1/4 cup unsalted butter (melted)
Richness and flavor come from this melty goodness—just don’t forget to let it cool slightly so it doesn’t cook your egg when mixed! -
1/4 cup granulated sugar
For that perfect touch of sweetness. Want to substitute? Try coconut sugar for a lower glycemic index option; your fritters will have a slight caramel flavor! -
1 large egg
This binds everything together, giving richness. For a vegan option, use 1/4 cup of unsweetened applesauce or a flax egg (1 tbsp ground flaxseed + 2.5 tbsp water, let sit for 5 minutes). -
1/2 tsp vanilla extract
Adds warmth and a hint of fragrant sweetness—use pure vanilla for the best flavor. -
1/2 cup unsweetened applesauce
This not only adds moisture but also enhances the apple flavor. Can’t find applesauce? You can easily substitute it with more finely diced apples. -
1 1/2 cups finely diced apples (Honeycrisp or Gala)
Fresh apples give the fritters their signature flavor and texture. Feel free to mix different varieties for a complex taste!
For the Glaze:
-
2 cups powdered sugar
A sweet topping that makes everything even more irresistible. -
1/3 cup + 2 tbsp apple cider or juice
This will whisk the powdered sugar into a smooth, pourable glaze, bringing that fruity zing!
Step-by-Step Instructions to Make Apple Fritter Bites
Let’s get cooking! Follow these steps to bring your apple fritter bites to life, infused with delightful flavors and memories.
Step 1: Preheat Your Oven
Preheat your oven to 350°F (175°C) if you prefer baking these fritters instead of frying. Line a baking sheet with parchment paper for easy cleanup.
Step 2: Mix the Dry Ingredients
In a large mixing bowl, whisk together the all-purpose flour, baking powder, kosher salt, and ground cinnamon. This step is crucial—mix thoroughly so levitating agents like baking powder get evenly distributed. This ensures a fluffy texture throughout your fritters!
Step 3: Combine Wet Ingredients
In a separate bowl, whisk together the melted butter, granulated sugar, egg, vanilla extract, and applesauce until smooth. The warm melted butter should be slightly cooled to avoid potential chances of scrambling the egg.
Step 4: Blend It All Together
Pour the wet mixture into the dry ingredients, gently folding them together with a spatula. Remember: don’t overmix! A few lumps here and there are perfectly fine; it keeps the fritters tender.
Step 5: Add Those Apples
Gently fold in the finely diced apples until evenly incorporated. The apple pieces will add moisture and bursts of flavor in every bite—yum!
Step 6: Heat the Oil
In a deep heavy skillet or pot, heat about 2 inches of oil over medium heat (about 350°F or 175°C) until it shimmers. Be careful not to overheat it, or you’ll risk burning your fritters!
Step 7: Fry the Fritters
Using a cookie scoop or tablespoon, drop heaping spoonfuls of batter into the hot oil. Fry a few at a time, ensuring you don’t overcrowd the pan. Fry for about 2 – 3 minutes on each side until they’re golden brown. Keep an eye on them and adjust the heat if necessary for even cooking!
Step 8: Drain and Glaze
Once they’re golden brown, use a skimmer to transfer the fritters to a paper towel-lined plate to drain any excess oil. While they’re still warm, dip them into the apple cider glaze, ensuring a perfect coating.
Step 9: Serve Warm
These fritter bites are best served warm, fresh out of the fryer. Your kitchen will smell divine, and your tastebuds will be dancing!
Serving Suggestions
To serve up these delicious apple fritter bites, arrange them on a beautiful platter, dusting with a little extra powdered sugar for a touch of elegance. Pair them with a warm cup of apple cider or a scoop of vanilla ice cream for a dessert that feels truly special. You can even enjoy them as a delightful breakfast treat or share them at gatherings with friends and family. Trust me, they won’t last long!
Recipe Variations
Feeling adventurous? Here are some fun twists you can try with your apple fritter bites:
- Spicy Fritter Bites: Add 1/4 tsp of ground nutmeg or ginger to the dry mixture for an extra kick.
- Nutty Crunch: Mix in 1/2 cup of chopped nuts like pecans or walnuts for a delightful crunch!
- Berry Frenzy: Swap out some of the apples for blueberries or raspberries for a fruity twist.
- Maple Glaze: Replace the apple cider in your glaze with maple syrup for a delightful fall flavor.
Chef’s Notes
Creating this recipe has been such a joy! Over the years, I’ve played around with frying times, flavors, and even dipped my fritters in different types of glazes. My favorite moments are still when I get to share these bites with loved ones, sitting around a table, reminiscencing about family traditions. Every apple fritter bite feels like a hug! Keep it light-hearted in the kitchen; if a fritter doesn’t turn out perfect, it’s still delicious, and those little imperfections tell a story of their own.
FAQs and Troubleshooting
1. Can I bake these instead of frying?
Absolutely! Just drop spoonfuls on a lined baking sheet and bake them at 350°F (175°C) for about 15-20 minutes or until golden brown.
2. My fritters came out too oily; what went wrong?
This can happen if the oil isn’t hot enough before frying. Make sure to preheat the oil to the right temperature.
3. How can I store leftovers?
These fritters can be stored in an airtight container at room temperature for up to 2 days. For longer storage, consider freezing them—simply reheat them in the oven for a crispy exterior.
4. How do I know when my fritters are done?
Keep an eye on them; they should be golden brown on the outside. Use a skimmer to break one open if you’re unsure—the center should be cooked through but still moist.
Nutritional Info
(Provide nutritional information if applicable, otherwise omit.)
Thank you for joining me on this delicious journey through the warm, comforting world of apple fritter bites! I hope you’re inspired to recreate these cherished treats in your kitchen, creating your own beautiful memories to share for years to come. Keep it fresh, simple, and seriously delicious! 🍏✨
PrintApple Fritter Bites

Delicious and nostalgic apple fritter bites perfect for gatherings and fall festivities.
- Prep Time: 15 minutes
- Cook Time: 30 minutes
- Total Time: 45 minutes
- Yield: 4 servings 1x
- Category: Dessert
- Method: Frying
- Cuisine: American
- Diet: Vegetarian
Ingredients
- 1 1/2 cups all-purpose flour
- 2 tsp baking powder
- 1/2 tsp kosher salt
- 2 tsp ground cinnamon
- 1/4 cup unsalted butter (melted)
- 1/4 cup granulated sugar
- 1 large egg
- 1/2 tsp vanilla extract
- 1/2 cup unsweetened applesauce
- 1 1/2 cups finely diced apples (Honeycrisp or Gala)
- 2 cups powdered sugar (for glaze)
- 1/3 cup + 2 tbsp apple cider or juice (for glaze)
Instructions
- Preheat your oven to 350°F (175°C) and line a baking sheet with parchment paper.
- Mix together the flour, baking powder, salt, and cinnamon in a large mixing bowl.
- Combine the melted butter, sugar, egg, vanilla, and applesauce in a separate bowl till smooth.
- Pour the wet mixture into the dry ingredients and gently fold together.
- Add the finely diced apples and mix until incorporated.
- Heat about 2 inches of oil in a deep skillet over medium heat until shimmering.
- Fry spoonfuls of batter for about 2-3 minutes on each side until golden brown.
- Drain fritters on a paper towel and dip them into the apple cider glaze.
- Serve warm for the best experience!
Notes
For a vegan option, substitute the egg with unsweetened applesauce or a flax egg.
Nutrition
- Serving Size: 2-3 fritters
- Calories: 300
- Sugar: 15g
- Sodium: 200mg
- Fat: 15g
- Saturated Fat: 6g
- Unsaturated Fat: 8g
- Trans Fat: 0g
- Carbohydrates: 35g
- Fiber: 2g
- Protein: 3g
- Cholesterol: 40mg
Keywords: apple fritters, dessert, fall recipes
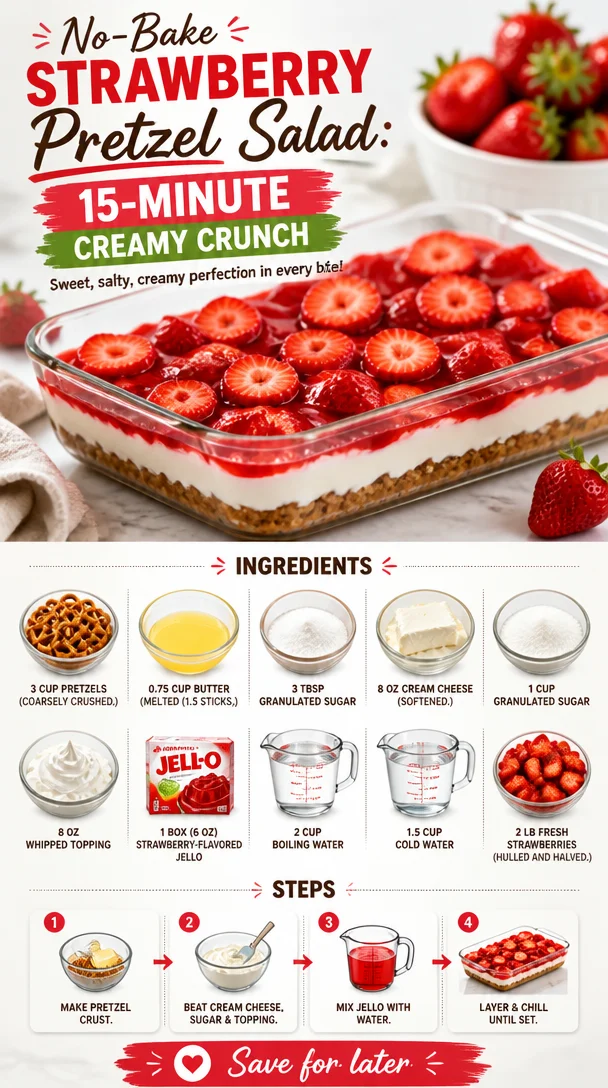
No-Bake Strawberry Pretzel Salad: 15-Minute Creamy Crunch
Strawberry Pretzel Salad: A Sweet and Salty Summer Delight!
Welcome to another delicious journey with me, Ava Carter, your friendly neighborhood foodie! Today, I’m thrilled to share one of those nostalgic treats that takes me back to delightful summer picnics and family gatherings—it’s the Strawberry Pretzel Salad! Now, you might be thinking, "Salad? With pretzels and strawberries?" And to that, I say: absolutely!
This whimsical dessert combines the best of salty and sweet, with crunchy pretzel crust, creamy filling, and a refreshing strawberry topping that’ll make your taste buds sing. It’s easy to make, no-fuss, and perfect for impressing your friends at a potluck or enjoying a sweet treat after dinner. So, roll up your sleeves and let’s make the kitchen smell amazing!
A Little Slice of My Past
Ah, the Strawberry Pretzel Salad! I can’t help but smile when I think about it. When I was a kid, summer meant family reunions at the park, and you could always count on the dessert table being packed with colorful, delectable treats. But the star of the show? This magical concoction of sweet, salty, and creamy goodness.
I remember watching my Aunt Betty whip it up in her kitchen, her laughter bubbling out like the Jello she was mixing. She always kept a close eye on the kids to make sure we were not snatching pretzels from the bowl before they got into the salad! The way it contrasted flavors was something I never understood as a child, but as I grew up, I realized it perfectly represents the essence of summer: fun, light, and a little unexpected. Every bite is like a little trip down memory lane, reminding me that the best dishes often come with stories.
Ingredients You’ll Need
Alright, let’s dive into making this delicious Strawberry Pretzel Salad! Here’s what you’ll need:
-
3 cups pretzels (coarsely crushed)
Perfect for that salty crunch! You can use regular pretzels or go for the stick version—whatever tickles your fancy. If gluten is a concern, gluten-free pretzels work wonders, too! -
0.75 cup butter (melted; about 1.5 sticks)
This binds the pretzels and adds rich flavor. Don’t forget to let it cool slightly before mixing in—you don’t want to melt your sugar and ruin the fun! -
3 tbsp granulated sugar
Just a touch to sweeten the crust. Too much sugar and it’ll get overly sweet, so keep it balanced. -
8 oz cream cheese (softened)
This creamy layer is the heart of your dessert! If you’re looking for a lighter option, consider using Neufchâtel cheese. -
1 cup granulated sugar
Sweetens the cream cheese mixture. This is where the magic happens! -
8 oz whipped topping
Light and airy, it gives the filling a delightful fluffiness. If you want a healthier version, you can swap it for whipped coconut cream. -
1 box (6 oz) strawberry-flavored Jello
This is what brings the whole salad together! You could switch it up with any other favorite flavor—raspberry or peach would be delicious, too! -
2 cups boiling water
To dissolve that Jello! It’s essential for achieving that perfect consistency. -
1.5 cups cold water
This helps to cool down the mixture faster—no one likes waiting! -
2 lbs fresh strawberries (hulled and halved)
Juicy and ripe! They’re the stars of the show, not only adding vibrant color but also fresh flavor.
Let’s gather our ingredients and have some fun!
Step-by-Step Instructions
Now that we have all our ingredients ready, let’s roll up our sleeves and get cooking! Here’s how to create your very own Strawberry Pretzel Salad:
-
Preheat the oven to 350°F (175°C)
This step helps to ensure your pretzel crust gets crispy and golden! -
Prepare the crust
In a mixing bowl, combine the coarsely crushed pretzels, melted butter, and 3 tablespoons of granulated sugar. Stir until everything is mixed well. Here’s a little chef tip: you’ll want it crumbly yet cohesive—think damp sand! Press this mixture into the bottom of a greased 9×13-inch baking dish. This is your base, so pack it down tightly! -
Bake the crust
Pop the dish in the preheated oven for about 10 minutes, until it’s golden brown. Mmm, the aroma will have everyone swinging by to see what’s cooking! -
Cool it down
Once baked, remove the crust from the oven and let it cool completely. Patience is crucial here! If you pour the filling over a warm crust, it’ll become soggy—no one wants that. -
Make the cream cheese filling
In a large mixing bowl, beat the softened cream cheese with 1 cup of sugar until it’s creamy and smooth. Next, fold in the whipped topping—this part is so satisfying! Use a rubber spatula to gently mix in a way that keeps the airiness, so your filling stays light and fluffy. -
Spread the filling
Once combined, spread the cream cheese mixture over the cooled pretzel crust, smoothing it out with your spatula. Here’s where the texture comes into play! Make sure to go right to the edges to ensure every bite contains that creamy goodness. -
Prepare the Jello
In another bowl, dissolve the strawberry-flavored Jello in 2 cups of boiling water. Stir until completely dissolved. Then mix in 1.5 cups of cold water—this will help it cool down and set properly. Let it sit for a few minutes while you prep the strawberries. -
Add the strawberries
Once the Jello has cooled but not set, add the hulled and halved strawberries into the mixture. This is where the colorful fun begins! Gently stir them in, making sure they’re evenly distributed throughout. -
Pour the Jello mixture over the cream cheese layer
Carefully pour the Jello and strawberry mix over the cream cheese layer. Make sure to cover all edges so the filling stays intact as it sets up. -
Chill
Cover the dish with plastic wrap and pop it into the fridge for at least 4 hours (preferably overnight). This is key! The Jello needs to firm up beautifully. -
Serving time!
When you’re ready to dive in, slice it into squares and serve! A dollop of extra whipped topping on top never hurts.
Serving Suggestions
Plating this Strawberry Pretzel Salad is all about presentation! Cut it into neat squares and arrange on a pretty serving platter. A sprinkle of fresh mint leaves on top adds a pop of color and a lovely freshness. You can even drizzle a little melted chocolate over it for that extra indulgence! Trust me; your guests will be snapping photos before they take a bite!
Recipe Variations
Now, let’s talk about making this dish even more exciting with a few creative twists:
-
Use Different Fruits: Swap strawberries for blueberries or raspberries! Or create a mixed berry version for a colorful dessert.
-
Add a Layer of Crunch: Mix in some chopped nuts like pecans or walnuts to your pretzel crust, giving it an exciting texture!
-
Sugar-Free Options: Use sugar-free Jello and lower-sugar options for the cream cheese filling for a lighter twist.
-
Chocolate Lovers: Add cocoa powder to your cream cheese layer for a chocolatey surprise!
-
Tropical Twist: Replace the strawberry Jello with pineapple flavor and mix in fresh pineapple chunks for a tropical delight.
Chef’s Notes
This Strawberry Pretzel Salad has been a cherished recipe in my collection for years. It’s evolved through the seasons with different fruits and flavors, but what always remains is the joy attached to enjoying it with friends and family. One time, I even turned it into a cake by layering it within actual cake layers—talk about a showstopper!
Remember, cooking is all about experimenting, so feel free to make it your own. This dish always leaves my kitchen filled with laughter, and I hope it brings you and yours just as much joy.
FAQs and Troubleshooting
1. Why is my Jello not setting?
If your Jello isn’t setting, it might be that the mixture was too warm when pouring over the cream cheese layer. Make sure to allow it to cool down properly before combining!
2. Can I make this ahead of time?
Absolutely! Previous guests have often made it a day ahead, allowing it to chill and set overnight in the fridge. It actually tastes even better the next day as the flavors meld.
3. How should I store leftovers?
Keep any leftovers covered in the fridge for about 3-5 days. It’s great for a quick snack or a sweet pick-me-up!
4. Can I use low-fat ingredients?
You sure can! You can use low-fat cream cheese and whipped topping to make it lighter. Just keep in mind the texture might be slightly different, but delicious nonetheless!
Nutritional Info
This delightful treat can pack a punch in flavor, but let’s keep it balanced in moderation. Each serving (1 square) has approximately:
- Calories: 250
- Total Fat: 12g
- Saturated Fat: 7g
- Carbohydrates: 32g
- Sugars: 16g
- Protein: 3g
Now that you have all the ingredients to whip up this delicious Strawberry Pretzel Salad, it’s time to gather your loved ones and get cooking! I can’t wait to hear how your memories come alive with every bite you take. Embrace the joy of cooking—keep it fresh, simple, and seriously delicious! Enjoy!
PrintStrawberry Pretzel Salad

A whimsical dessert combining salty pretzel crust, creamy filling, and refreshing strawberry topping—a perfect sweet treat for summer gatherings.
- Prep Time: 20 minutes
- Cook Time: 10 minutes
- Total Time: 240 minutes
- Yield: 12 servings 1x
- Category: Dessert
- Method: Baking
- Cuisine: American
- Diet: Vegetarian
Ingredients
- 3 cups pretzels (coarsely crushed)
- 0.75 cup butter (melted; about 1.5 sticks)
- 3 tbsp granulated sugar
- 8 oz cream cheese (softened)
- 1 cup granulated sugar
- 8 oz whipped topping
- 1 box (6 oz) strawberry-flavored Jello
- 2 cups boiling water
- 1.5 cups cold water
- 2 lbs fresh strawberries (hulled and halved)
Instructions
- Preheat the oven to 350°F (175°C).
- Prepare the crust by combining the pretzels, melted butter, and granulated sugar. Press into a greased 9×13-inch baking dish.
- Bake for about 10 minutes until golden brown.
- Cool the crust completely.
- Make the cream cheese filling by beating the softened cream cheese with 1 cup of sugar, then folding in the whipped topping.
- Spread the filling over the cooled pretzel crust.
- Prepare the Jello by dissolving it in boiling water, then mixing in cold water.
- Add the hulled and halved strawberries to the Jello mixture.
- Pour the Jello mixture over the cream cheese layer.
- Chill in the refrigerator for at least 4 hours (preferably overnight).
- Serve by cutting into squares and enjoying!
Notes
Great for potlucks and summer picnics. Leftovers can be stored in the fridge for about 3-5 days.
Nutrition
- Serving Size: 1 square
- Calories: 250
- Sugar: 16g
- Sodium: 300mg
- Fat: 12g
- Saturated Fat: 7g
- Unsaturated Fat: 3g
- Trans Fat: 0g
- Carbohydrates: 32g
- Fiber: 1g
- Protein: 3g
- Cholesterol: 30mg
Keywords: strawberry pretzel salad, summer dessert, easy dessert recipe, nostalgic dessert
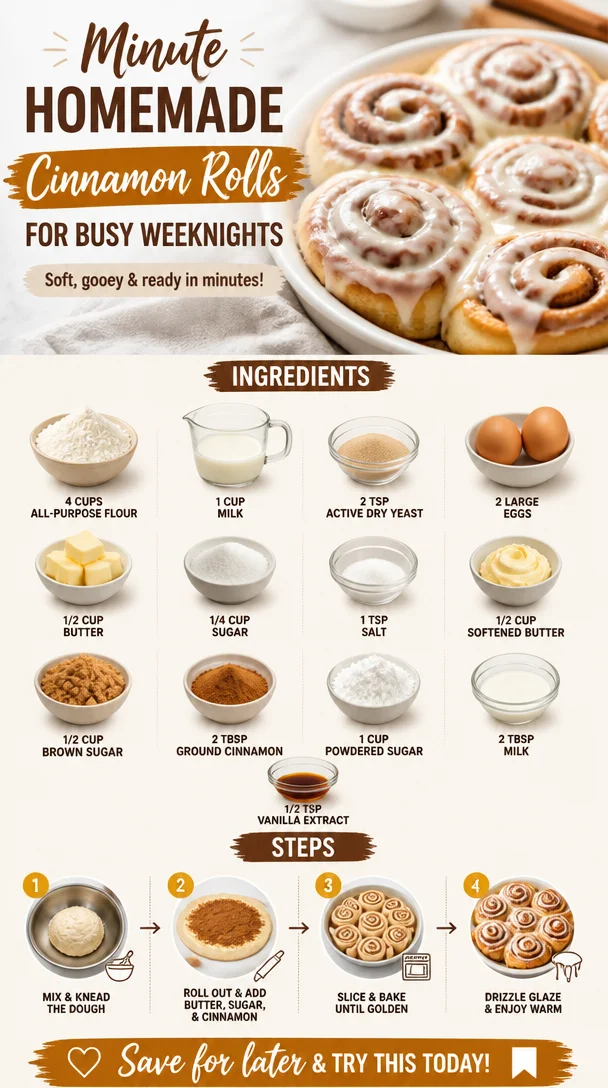
Minute Homemade Cinnamon Rolls for Busy Weeknights
Easy Homemade Cinnamon Rolls: A Delicious Journey in Baking
Oh, the smell of cinnamon rolls baking in the oven! It’s one of those scents that instantly transports you back to cozy mornings, where the aroma wraps around you like a warm hug. If you’re anything like me, you’ve probably scrolled through endless recipes, imagining how heavenly it would be to bite into a soft, gooey cinnamon roll. But let’s be real—you don’t want just any cinnamon roll; you want one that’s fluffy, filled with a delightful blend of cinnamon and sugar, and topped with a sweet glaze that makes your heart skip a beat.
Well, look no further! I’m Ava Carter, your friendly kitchen companion, and today we’re diving into the wonderful world of easy homemade cinnamon rolls. This recipe is not only simple and straightforward but also packed with flavor that will make you feel like a baking superstar—even if you’re just a beginner.
Cinnamon rolls have a special place in my heart. They remind me of Saturday mornings spent in the kitchen with my grandmother, who would whip up a batch while I watched in awe. I still remember the way she would knead the dough, her hands dusted with flour, the way she’d smile while sprinkling cinnamon and sugar, and how her laughter would fill the kitchen. Making cinnamon rolls is more than just a culinary project; it’s a way to create memories, share love, and savor the good times with cherished ones.
So, grab your apron, put on your favorite tunes, and let’s embark on this delicious journey together. Trust me, you’ll never want to buy store-bought cinnamon rolls again!
Personal Story
Let me take you back to a Saturday morning a few years ago, where my culinary journey took a delightful turn. I woke up to the sweet smell of cinnamon wafting through the house. My grandmother was awake before sunrise, preparing for her special Saturday baking ritual. With flour clouds floating in the air and my favorite apron hanging on a chair, I rushed to the kitchen, ready to lend a hand.
“Today, we’re making cinnamon rolls, darling!” she declared with a twinkle in her eye. I could hardly contain my excitement. I remember the way she carefully measured the flour, adding a pinch of love with each scoop. We rolled the dough together, her hands guiding mine, showing me the perfect technique for cutting those spirals of pure goodness.
Fast forward to today: I often make these cinnamon rolls for my friends and family, each bite reminiscent of those warm, laughter-filled mornings with my grandma. Food has a way of weaving memories into its very essence, and every time I pop those rolls into the oven, I’m reminded of the joy in sharing—and the magic that happens when you create something delicious with your own two hands.
Ingredients
Here’s what you’ll need to whip up your own batch of mouthwatering cinnamon rolls. Each ingredient has a purpose, so let’s explore:
-
4 cups All-purpose flour: This is the foundation of your dough. Aim for a dough that’s slightly tacky rather than sticky. If you need to substitute, you can use bread flour for a chewier texture, but all-purpose works beautifully.
-
1 cup Milk: Warm milk is crucial here. Use whole milk for the softest crumb, but you can also substitute almond or oat milk if you prefer dairy-free options.
-
2 teaspoons Active dry yeast or instant yeast: If using active dry yeast, bloomin’ is key! Bloom it in warm milk with a pinch of sugar before adding it to the dough mix. Instant yeast works directly into the dry ingredients without blooming.
-
2 large Eggs: Bring these fellas to room temperature before adding them to the dough. This helps create a smoother mixture, giving your rolls their fluffy texture.
-
1/2 cup Butter: Opt for softened butter, not melted! This will ensure your dough has the right consistency. You can substitute with vegan butter or coconut oil for dairy-free versions.
-
1/4 cup Sugar: Just a bit of sweetness in the dough helps feed the yeast and adds flavor. Feel free to replace it with coconut sugar or a sugar alternative, if you’d like.
-
1 teaspoon Salt: A crucial ingredient for balancing sweetness and amplifying flavors throughout your rolls.
-
1/2 cup Softened butter: This spreadable goodness is for slathering on the rolled-out dough.
-
1/2 cup Brown sugar: Sprinkle this on top of the butter for that glorious filling! You can use light or dark brown sugar depending on your preference.
-
2 tablespoons Ground cinnamon: The star of the show! Adds warmth and that signature cinnamon flavor.
-
1 cup Powdered sugar: Essential for your creamy vanilla glaze.
-
2 tablespoons Milk: Helps achieve that perfect glaze consistency—you want it pourable yet thick.
-
1/2 teaspoon Vanilla extract: An absolute must for enhancing the flavor of your glaze.
Step-by-Step Instructions
Ready to dive into the magic of baking? Follow these handy steps, and you’ll be enjoying fresh, homemade cinnamon rolls in no time!
Step 1: Prepare Your Dough
-
Warm your milk: In a small saucepan or microwave, heat the milk until it’s warm to the touch—around 110°F (no hotter!). Remember, hot milk can kill the yeast, and you don’t want that!
-
Bloom the yeast: If you’re using active dry yeast, sprinkle it over the warm milk along with a pinch of sugar. Let it sit for about 5-10 minutes until it’s frothy. If you’re using instant yeast, just skip this step and combine it with the dry ingredients later.
-
Mix the dry ingredients: In a large mixing bowl, combine the flour, sugar, and salt. Mix it just enough to see that everything is evenly distributed.
-
Combine eggs and yeast: In a separate bowl, whisk together the eggs with the bloomed yeast mixture (or combine directly if using instant yeast).
-
Form the dough: Gradually add the wet ingredients to the dry ingredients, mixing with a wooden spoon or spatula until a shaggy dough forms.
-
Knead the dough: Lightly flour a clean surface and transfer your dough onto it. Knead for about 8–10 minutes until it’s smooth and elastic. If it’s too sticky, sprinkle in a bit of flour; just be careful not to add too much!
Step 2: Let it Rise
-
First rise: Form the dough into a ball and place it in a greased bowl. Cover it with a clean kitchen towel or plastic wrap, and let it rise in a warm spot until it doubles in size, about 1 hour.
-
Punch it down: Once it has risen, gently punch it down to release the air. This is one of the most satisfying parts of the process!
Step 3: Roll it Out
-
Prep your workspace: Lightly flour your surface again and roll the dough out into a large rectangle—about 16×24 inches and about 1/4 inch thick.
-
Spread the butter: Use your softened butter to slather the entire surface of the rolled-out dough. Get it right to the edges!
-
Sprinkle with filling: Combine your brown sugar and ground cinnamon in a bowl, then sprinkle this mixture generously over the buttered dough—make it rain cinnamon goodness!
Step 4: Roll and Cut
-
Roll it up: Starting from one long side, roll the dough tightly into a log. Make sure it’s snug but not so tight that it squishes the filling out.
-
Slice into rolls: Using a sharp knife or dental floss (yes, really!), slice the roll into 12 equal pieces.
Chef Tip: If you use dental floss, slide it under the log, cross the ends over each other, and pull to cut cleanly without squishing the rolls.
Step 5: Second Rise
-
Arrange the rolls: Place the sliced rolls into a greased 9×13 inch baking dish. Leave a bit of space between each one for rising.
-
Rise again: Cover the rolls again and let them rise for another 30 minutes until they puff up nicely.
Step 6: Bake
-
Preheat the oven: While the rolls are rising, preheat your oven to 350°F (175°C).
-
Bake those beauties: Once they’ve risen, pop them into the oven and bake for 25–30 minutes or until golden brown on top.
Step 7: Glaze
-
Make the glaze: While your rolls are baking away, whip up your glaze! In a small bowl, combine powdered sugar, milk, and vanilla extract. Mix until you get a smooth, drizzle-able consistency.
-
Drizzle it on: As soon as the rolls come out of the oven, lavishly drizzle the glaze over the top. It will melt slightly and soak into the warm rolls—heavenly!
Serving Suggestions
Once your cinnamon rolls cool for a few minutes, they’re ready to be devoured! Serve them warm, straight from the oven, ideally paired with a hot cup of coffee or tea. You can also sprinkle some extra cinnamon or chopped nuts on top for that added crunch. Oh, and don’t forget—they’re perfect for brunch gatherings, family holidays, or simply as a sweet treat to brighten your day!
Recipe Variations
Feeling adventurous? Here are some fun twists you can try with your cinnamon rolls:
-
Nutty Delight: Add chopped walnuts or pecans between the dough and the filling for a lovely crunch.
-
Fruity Fun: Layer in some fresh berries like raspberries or blueberries into the filling for a fruity kick.
-
Spiced Up: Add a hint of nutmeg or cardamom to your cinnamon mix for an extra layer of flavor.
-
Vegan Version: Substitute with plant-based milk, vegan butter, and flax eggs for a wholly plant-based option.
-
Chocolate Lover’s Dream: Swap out half of the sugar for cocoa powder in the filling for delicious chocolate cinnamon rolls!
Chef’s Notes
These cinnamon rolls first came to life in my grandmother’s kitchen, but I’ve added my own touch over the years. The beauty of these rolls is their flexibility—each time I make them, I can try out a new variation or mix in an unexpected ingredient. Like my grandma always said, “Cooking is an art, and baking is a science; so have fun blending the two!” Don’t hesitate to make this recipe your own, and laugh at any cooking mishaps along the way!
FAQs and Troubleshooting
-
Why did my cinnamon rolls not rise?
If your dough doesn’t rise, it might be because your yeast is old or the milk was too hot. Always make sure to test the yeast and maintain the right temperature for the milk. -
Why are my rolls dense?
Dense rolls usually come down to too much flour. Try to measure your flour accurately, using the spoon-and-level method, and avoid adding excess while kneading. -
Can I make the dough ahead of time?
Yes! You can prepare the dough the night before and place it in the fridge after the first rise. In the morning, let it come to room temperature before rolling out. -
How do I store leftovers?
Store any leftover rolls in an airtight container at room temperature for up to 2 days. You can also freeze them by wrapping them tightly in plastic wrap and foil; just thaw and reheat when you’re ready to enjoy!
Nutritional Info
While I haven’t included specific nutritional info in this post, you can calculate approximate values based on the ingredients you use. Just keep in mind, these rolls are meant to be a delightful treat to enjoy occasionally, so savor each bite!
So there you have it! With this easy homemade cinnamon rolls recipe, you can recreate a little piece of joy in your kitchen. Happy baking, and may your kitchen be filled with the heartwarming aroma of cinnamon goodness!
PrintEasy Homemade Cinnamon Rolls

Enjoy the delightful aroma and taste of fluffy homemade cinnamon rolls filled with a sweet cinnamon mixture and topped with a creamy glaze.
- Prep Time: 15 minutes
- Cook Time: 30 minutes
- Total Time: 45 minutes
- Yield: 12 servings 1x
- Category: Breakfast
- Method: Baking
- Cuisine: American
- Diet: Vegetarian
Ingredients
- 4 cups All-purpose flour
- 1 cup Milk
- 2 teaspoons Active dry yeast or instant yeast
- 2 large Eggs
- 1/2 cup Butter
- 1/4 cup Sugar
- 1 teaspoon Salt
- 1/2 cup Softened butter
- 1/2 cup Brown sugar
- 2 tablespoons Ground cinnamon
- 1 cup Powdered sugar
- 2 tablespoons Milk
- 1/2 teaspoon Vanilla extract
Instructions
- Warm your milk in a small saucepan until it’s warm to the touch, around 110°F.
- Bloom the yeast by sprinkling it over the warm milk with a pinch of sugar and let it sit for about 5-10 minutes until frothy.
- Mix the flour, sugar, and salt in a large mixing bowl.
- Combine eggs with the bloomed yeast mixture or directly with the instant yeast.
- Form the dough by gradually adding wet ingredients to dry, mixing until shaggy.
- Knead the dough on a floured surface for 8–10 minutes until smooth and elastic.
- Cover the dough in a greased bowl with a towel and let it rise until doubled, about 1 hour.
- Punch it down after rising to release air.
- Prepare your workspace and roll the dough out into a large rectangle about 16×24 inches and 1/4 inch thick.
- Spread the softened butter on the dough surface.
- Combine brown sugar and ground cinnamon, then sprinkle over the buttered dough.
- Roll the dough tightly into a log from one long side.
- Slice the rolled dough into 12 equal pieces.
- Arrange the rolls in a greased baking dish, leaving space between them.
- Cover and let them rise for another 30 minutes.
- Preheat your oven to 350°F (175°C) while rolls rise.
- Bake for 25–30 minutes until golden brown.
- Make the glaze by mixing powdered sugar, milk, and vanilla extract until smooth.
- Drizzle the glaze over the rolls as soon as they come out of the oven.
Notes
These rolls can be customized with nuts, fruit, or other spices. Store leftovers in an airtight container for up to 2 days.
Nutrition
- Serving Size: 1 roll
- Calories: 250
- Sugar: 12g
- Sodium: 200mg
- Fat: 10g
- Saturated Fat: 6g
- Unsaturated Fat: 4g
- Trans Fat: 0g
- Carbohydrates: 34g
- Fiber: 1g
- Protein: 4g
- Cholesterol: 40mg
Keywords: cinnamon rolls, breakfast, baking, sweet rolls, homemade, easy recipe