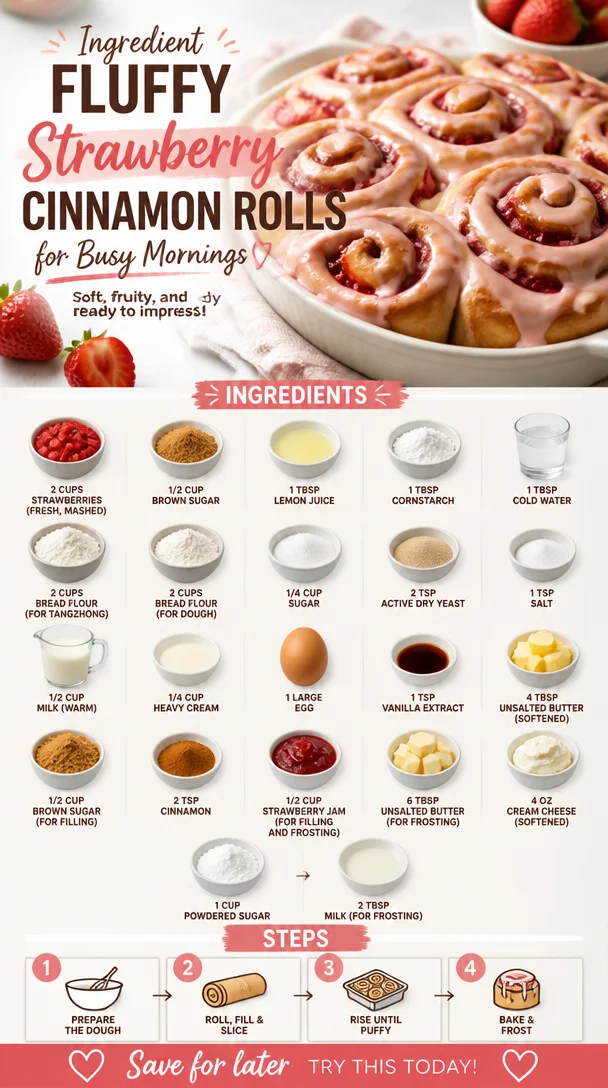
Ingredient Fluffy Strawberry Cinnamon Rolls for Busy Mornings
Irresistibly Fluffy Strawberry Cinnamon Rolls for Breakfast Bliss
There’s something undeniably magical about the scent of freshly baked cinnamon rolls wafting through the house. Picture this: it’s a cozy morning, sunlight is streaming in through the windows, and you can hear the birds chirping outside. You step into the kitchen, the smell of warm strawberries and cinnamon fills the air, and your mouth begins to water in anticipation. That’s the bliss I want to share with you today: irresistibly fluffy strawberry cinnamon rolls that’ll turn any breakfast into a special occasion!
These rolls are more than just a sweet treat; they evoke nostalgic memories of lazy Sunday mornings spent with family, laughter echoing around the kitchen as we waited impatiently for the timer to ding. It wasn’t uncommon for my grandmother to whip up a fresh batch of cinnamon rolls, and as kids, we were all too eager to help—pushing flour all over the counter and attempting to create the perfect roll. Now, I see those moments as a delicious blend of love and a little bit of chaos in the kitchen, something I strive to recreate every time I bake.
With these strawberry cinnamon rolls, I’m inviting you to bring that same joy into your home. They’re fluffy, flavorful, and feature luscious, fresh strawberries that not only elevate the taste but also make for an eye-catching presentation. You don’t need to reserve these golden delights only for special occasions—they are just as delightful on a regular Tuesday morning as they are on a holiday.
Let’s dive into the fun, fluffy, and fruity world of these strawberry cinnamon rolls. You’ll see just how easy it is to change up your breakfast routine and elevate those cozy kitchen moments. Grab your apron, and let’s make these scrumptious rolls!
Personal Story
You know, every recipe has a story, and this one is no different. I remember the first time I decided to mix strawberries into a classic cinnamon roll recipe. I was in college, sitting in my tiny kitchen with a couple of friends, and we had a basket of strawberries that were just on the brink of becoming too ripe. Instead of letting them go to waste, we got a wild idea—let’s make cinnamon rolls!
After some playful banter and laughter, we quickly mashed up those strawberries and folded them into the dough instead of the usual brown sugar filling. As the rolls baked, the sweet aroma filled every corner of the kitchen. And when we pulled those golden beauties out of the oven, we couldn’t wait to dig in. One bite and we were hooked! The burst of strawberry flavor combined perfectly with the warm, buttery cinnamon—it was pure bliss. We spent the rest of the afternoon reminiscing about family breakfasts and making plans for many more roll-baking sessions. That day was not just the birth of my strawberry cinnamon rolls; it sparked a love for combining classic recipes with delightful twists.
Craving nostalgia? Let’s recreate those memories together!
Ingredients
To whip up your own batch of these heavenly strawberry cinnamon rolls, here’s what you’ll need:
-
2 cups strawberries (fresh, mashed)
- Fresh strawberries will give you the best flavor. If you can’t find fresh, frozen strawberries also work—just make sure to thaw and drain excess liquid.
-
1/2 cup brown sugar
- This sugar adds a deeper flavor compared to white sugar. Light or dark brown sugar can both be used for a caramel-like sweetness.
-
1 tbsp lemon juice
- A little acidity balances the sweetness of the strawberries beautifully. You can substitute it with lime juice if that’s what you have on hand.
-
1 tbsp cornstarch
- This thickens the strawberry filling so it doesn’t run out of the rolls. Alternatively, you can use arrowroot starch for a similar effect.
-
1 tbsp cold water
- Helps in mixing the cornstarch to create the filling.
-
2 cups bread flour (for tangzhong)
- Using bread flour instead of all-purpose flour gives the rolls their fluffy, chewy texture, and makes for an extra soft crumb.
-
2 cups bread flour (for dough)
- Again, stick with bread flour for the fluffiest rolls.
-
1/4 cup sugar
- Just a bit to sweeten the dough.
-
2 tsp active dry yeast
- Proofing the yeast ensures it’s active and ready to help the rolls rise. If you have instant yeast, you can use that directly without proofing.
-
1 tsp salt
- Enhances overall flavor.
-
1/2 cup milk (warm)
- This helps activate the yeast. Make sure it’s warm to the touch but not scalding!
-
1/4 cup heavy cream
- Adds richness to the dough and helps keep it moist.
-
1 large egg
- Acts as a binder and contributes to the rolls’ tenderness.
-
1 tsp vanilla extract
- A little dash of vanilla adds a lovely depth of flavor.
-
4 tbsp unsalted butter (softened)
- Essential for a rich dough. Always use unsalted butter to maintain control over the saltiness.
-
1/2 cup brown sugar (for filling)
- Sweetens the cinnamon filling; you can use coconut sugar for a healthier option.
-
2 tsp cinnamon
- Ground cinnamon is classic in this recipe, but feel free to try other spices like cardamom for a unique twist.
-
1/2 cup strawberry jam (for filling and frosting)
- You can either make homemade strawberry jam or buy your favorite store brand.
-
6 tbsp unsalted butter (for frosting)
- Softened butter is best for blending.
-
4 oz cream cheese (softened)
- Adds a creamy, tangy flavor to the frosting.
-
1 cup powdered sugar
- Sweetens the frosting and gives it that smooth, spreadable consistency.
-
2 tbsp milk (for frosting)
- Adjust the amount of milk depending on how thick or thin you prefer your frosting.
Step-by-Step Instructions
Ready to bring this recipe to life? Let’s get rolling!
Step 1: Prepare the Strawberry Filling
-
Mash the Strawberries: In a bowl, mash the 2 cups of fresh strawberries. You want a chunky texture—this way, you’ll get those delightful bursts of fruit in every bite.
-
Cook the Filling: In a small saucepan, combine the mashed strawberries, ½ cup brown sugar, 1 tablespoon lemon juice, 1 tablespoon cornstarch, and 1 tablespoon cold water. Cook over medium heat, stirring occasionally, until the mixture thickens (about 5-7 minutes). Then, set it aside to cool as we move onto the dough.
Step 2: Make the Dough
-
Mix Your Yeast: In a small bowl, add the warm milk (make sure it’s warm, not hot) and sprinkle the 2 teaspoons of active dry yeast on top. Let it sit for about 5-10 minutes until it becomes frothy. This step is critical—if you don’t see bubbles, your yeast might be dead!
-
Combine Dry Ingredients: In a large bowl, whisk together the 2 cups of bread flour for the dough, ¼ cup sugar, and 1 teaspoon salt. This will help distribute the ingredients evenly.
-
Bring it All Together: Make a well in the center of the dry mix and add the frothy yeast mixture, the large egg, 1 teaspoon vanilla extract, 4 tablespoons softened butter, and the remaining 2 cups of bread flour for the tangzhong. Mix until a dough forms.
-
Knead Away: Transfer the dough to a lightly floured surface and knead for about 10 minutes until it’s smooth and elastic. This is such an important step—your dough will thank you later with that incredible fluffiness.
Step 3: First Rise
- Time to Rise: Place the dough in a greased bowl, cover it with a clean kitchen towel, and let it rise in a warm spot until it doubles in size (about 1-2 hours). This is where the magic happens!
Step 4: Roll Out the Dough
- Roll It Out: Once your dough has risen, punch it down to release the air. Transfer it to a floured surface and roll it out into a rectangle about 12×18 inches in size.
Step 5: Fill and Roll
-
Spread the Goodness: Spread the cooled strawberry filling evenly over the rolled-out dough. Leave a little border around the edges so it doesn’t spill out when you roll it.
-
Cinnamon Time: In a small bowl, mix the ½ cup brown sugar and 2 teaspoons cinnamon together. Sprinkle this mixture generously over the strawberry filling.
-
Roll It Up: Starting from one long edge, roll the dough tightly into a log. I recommend going slow and steady to keep it even!
Step 6: Slice and Second Rise
-
Cut the Rolls: Using a sharp knife or a kitchen string, slice the rolled dough into 12 equal portions. Place them cut side up in a greased 9×13 inch baking dish.
-
Second Rise: Cover the dish with a clean kitchen towel and let the rolls rise again until they puff up (approximately 30-45 minutes).
Step 7: Bake Those Rolls!
-
Preheat Your Oven: Preheat your oven to 350°F (175°C) while your rolls rise.
-
Bake: Bake the rolls for 25-30 minutes until golden brown and delicious. Your kitchen will smell heavenly—trust me!
Step 8: Prepare the Frosting
- Frosting Prep: While the rolls are baking, make the frosting! In a medium bowl, beat together the 6 tablespoons of softened unsalted butter, 4 oz softened cream cheese, 1 cup powdered sugar, and 2 tablespoons of milk until smooth and spreadable.
Step 9: Cool and Frost
- Cool Down: Once the rolls are out of the oven, let them cool for about 10-15 minutes before generously spreading the cream cheese frosting over the top.
Serving Suggestions
Serving these fluffy strawberry cinnamon rolls is all about presentation! Place them on a beautiful platter and dust with a little extra powdered sugar for that bakery-style finish. You can even drizzle with some more strawberry jam for that added fruity delight. Pair them with a steaming cup of coffee or a refreshing glass of fresh orange juice, and you have yourself a breakfast you won’t soon forget.
Recipe Variations
If you’re in the mood to be adventurous, here are a few variations to try:
- Berry Bliss: Swap the strawberries for raspberries or blueberries, or mix a couple of berries together for an explosion of color and flavor!
- Nutty Crunch: Add chopped walnuts or pecans into the filling for an extra crunch. They add a lovely texture that complements the softness of the rolls.
- Spicy Twist: Combine the cinnamon with a pinch of nutmeg or ginger to spice things up a notch!
- Vegan Option: Replace the egg with flaxseed meal mixed with water, use plant-based milk, and substitute the butter for vegan alternatives.
Chef’s Notes
Every time I bake these strawberry cinnamon rolls, they remind me of the love and laughter I experienced in my grandmother’s kitchen. This recipe has evolved—I’ve shared it with friends, tweaked it with new ideas, and, over time, perfected my frosting to achieve an undeniable, creamy finish. One of my funniest memories is when I tried to impress a date by baking these for breakfast; let’s just say I had more flour on my face than I did on the table! But that little kitchen disaster turned out to be the best icebreaker.
FAQs and Troubleshooting
1. Why are my rolls dense?
- A dense roll could mean your dough wasn’t kneaded enough to develop the gluten structure, or the yeast might not have been activated properly. Make sure to proof your yeast and knead the dough until it’s silky smooth.
2. What if my filling oozes out while baking?
- If you notice excess filling leaking out, don’t fret! Make sure you leave that small border when spreading your filling. Snugly rolling the dough helps reduce the overflow, too.
3. Can I make these ahead of time?
- Absolutely! You can prepare the rolls up to the second rise, cover them well, and pop them in the fridge overnight. In the morning, let them come to room temperature before baking.
4. What can I substitute for heavy cream?
- If you’re looking for a lighter option, you can use half-and-half or even whole milk in a pinch. It won’t be as rich, but still delicious!
Nutritional Info
While these delightful strawberry cinnamon rolls are a treat that shouldn’t be indulged in every day, balance is key! Generally, each roll contains around 280-330 calories. Just remember, they’re made with love and lots of wholesome ingredients that make breakfast feel extra special.
I hope this recipe inspires you to whip up a warm batch of strawberry cinnamon rolls, creating your own kitchen memories filled with laughter and joy. So gather your loved ones, add a splash of creativity, and let’s bake our way to deliciousness! Happy cooking—eat well and live well!
PrintIrresistibly Fluffy Strawberry Cinnamon Rolls

Delightful strawberry cinnamon rolls that are fluffy and filled with fresh strawberries, perfect for any breakfast occasion.
- Prep Time: 30 minutes
- Cook Time: 30 minutes
- Total Time: 60 minutes
- Yield: 12 servings 1x
- Category: Breakfast
- Method: Baking
- Cuisine: American
- Diet: Vegetarian
Ingredients
- 2 cups strawberries (fresh, mashed)
- 1/2 cup brown sugar
- 1 tbsp lemon juice
- 1 tbsp cornstarch
- 1 tbsp cold water
- 2 cups bread flour (for tangzhong)
- 2 cups bread flour (for dough)
- 1/4 cup sugar
- 2 tsp active dry yeast
- 1 tsp salt
- 1/2 cup milk (warm)
- 1/4 cup heavy cream
- 1 large egg
- 1 tsp vanilla extract
- 4 tbsp unsalted butter (softened)
- 1/2 cup brown sugar (for filling)
- 2 tsp cinnamon
- 1/2 cup strawberry jam (for filling and frosting)
- 6 tbsp unsalted butter (for frosting)
- 4 oz cream cheese (softened)
- 1 cup powdered sugar
- 2 tbsp milk (for frosting)
Instructions
- Mash the strawberries in a bowl until chunky.
- Cook the filling in a saucepan with brown sugar, lemon juice, cornstarch, and cold water over medium heat until thickened.
- Mix the yeast with warm milk and let it sit until frothy.
- Combine dry ingredients for the dough in a large bowl.
- Add the yeast mixture, egg, vanilla extract, butter, and flour into the dry mix and combine until a dough forms.
- Knead the dough on a floured surface until smooth and elastic.
- Place the dough in a greased bowl, cover it, and let it rise until doubled in size.
- Roll out the dough into a rectangle after the first rise.
- Spread the cooled strawberry filling on the dough.
- Sprinkle the cinnamon and brown sugar mixture over the filling.
- Roll the dough tightly from one edge to form a log.
- Cut the log into 12 equal portions and place them in a greased baking dish.
- Let the rolls rise again until puffy.
- Preheat the oven and bake the rolls until golden brown.
- Beat together the frosting ingredients until smooth while the rolls are baking.
- Cool the rolls before frosting them.
Notes
Add chopped nuts for extra crunch, or try different berries for variation.
Nutrition
- Serving Size: 1 roll
- Calories: 300
- Sugar: 15g
- Sodium: 300mg
- Fat: 14g
- Saturated Fat: 8g
- Unsaturated Fat: 4g
- Trans Fat: 0g
- Carbohydrates: 45g
- Fiber: 2g
- Protein: 5g
- Cholesterol: 30mg
Keywords: strawberry, cinnamon rolls, breakfast, baking, fluffy
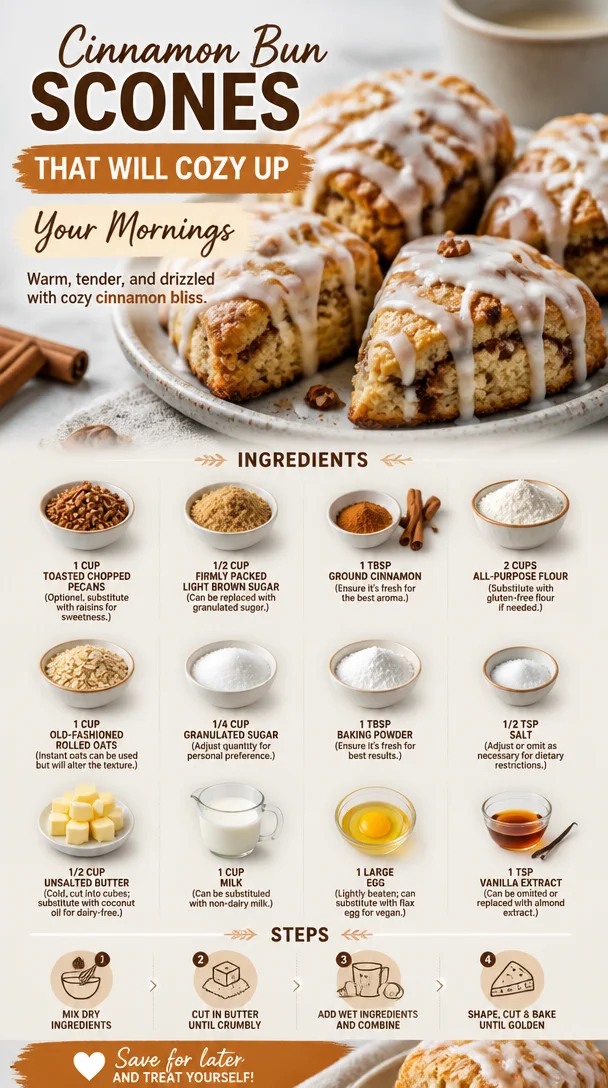
Cinnamon Bun Scones That Will Cozy Up Your Mornings
Cozy Up Your Mornings with Cinnamon Bun Scones
Hey there, fellow foodies! If you’re like me, there’s just something about the scent of cinnamon wafting through your kitchen that instantly turns any ordinary morning into a special occasion. You can practically hear the “oohs” and “aahs” as you bring these beauties out of the oven. Today, we’re diving into the delightful world of Cinnamon Bun Scones! These fluffy treats bring all the cozy vibes of classic cinnamon buns but in a much simpler form. Perfect for brunch, a cozy breakfast, or even as a sweet afternoon snack—they’re incredibly versatile!
Imagine this: it’s early Sunday morning, the sun is just peeking through the clouds, and you’ve got your favorite playlist softly lilting in the background. You pull a tray of scones from the oven, and the moment is just blissful. You take that first bite—flaky, warm, and oh-so-cinnamony—and everything feels right in the world. Are you ready to embark on this baking journey with me? Let’s go!
My Connection to Cinnamon Bun Scones
Growing up, Sundays were sacred in our household. They were always a blend of lazy mornings and a bit of culinary magic. My mom had this adorable vintage cookbook filled with recipes from the 1970s, most of which featured a ton of baking—and you guessed it, cinnamon buns were in there! I fondly remember waking up to the sweet aroma of cinnamon and sugar wafting up the stairs as my mom whipped up a batch. There was a certain joy in rolling that dough, sprinkling the cinnamon mixture all over, and then waiting with sheer anticipation for them to rise and bake.
But, let’s be honest—life can be busy, and sometimes those delightful cinnamon buns feel far too complicated for an everyday treat. That’s where these Cinnamon Bun Scones come into play! They capture that nostalgic flavor without requiring hours of kneading and rising. Each bite is a hug in pastry form that takes me back to those carefree Sunday mornings. Let’s create that experience for you, shall we?
Ingredients
Here’s what you’ll need to whip up these fabulous scones, along with some chef tips for each ingredient:
-
1 cup Toasted Chopped Pecans (Optional)
These nutty gems add a lovely crunch! If you’re not a nut fan, feel free to swap them out for sweet raisins instead. Just be careful with the substitutions to maintain that lovely texture! -
1/2 cup Firmly Packed Light Brown Sugar
This is where the sweetness comes from! You could swap it with granulated sugar for a simpler flavor, but I find that brown sugar gives a deeper, richer taste that pairs perfectly with cinnamon. -
1 tbsp Ground Cinnamon
Make sure to use fresh cinnamon for the best aroma! A little tip: store your cinnamon in a cool, dark place to keep it potent. -
2 cups All-Purpose Flour
If you’re gluten-free, no worries! You can use a gluten-free flour blend here. Just ensure it contains xanthan gum for that fluffy texture. -
1 cup Old-Fashioned Rolled Oats
These oats provide a chewier texture that complements the scones beautifully! If you’re in a pinch, you can use instant oats, but keep in mind the texture will be different. -
1/4 cup Granulated Sugar
Adjust the amount based on your sweetness preference. You can play with this if your sweet tooth is feeling particularly bold! -
1 tbsp Baking Powder
Make sure it’s fresh; nothing is worse than flat scones. Trust me; this ingredient is essential for achieving that delightful rise! -
1/2 tsp Salt
A little pinch of salt balances out the sweetness, making the flavors pop! Feel free to adjust or omit it depending on dietary restrictions. -
1/2 cup Unsalted Butter
Use cold butter here, cut into cubes for the perfect flaky textures! If you’re dairy-free, coconut oil works like a charm. -
1 cup Milk
Cow’s milk is great, but non-dairy options like almond or oat milk work beautifully too—keeping it rich and creamy! -
1 large Egg
This is lightly beaten to help bind the ingredients. You can use a flax egg as a vegan alternative (1 tbsp flaxseed meal + 2.5 tbsp water), and it works just as well! -
1 tsp Vanilla Extract
This adds a depth of flavor that makes your scones sing! If you’re after a more robust flavor, try almond extract instead.
Step-by-Step Instructions
Ready to bake? Let’s get started with our Cinnamon Bun Scones! Here’s how you can bring these delicate treats to life, step-by-step.
-
Preheat Your Oven
Start by preheating your oven to 400°F (200°C). This warm embrace will help your scones bake perfectly and turn golden brown! -
Prep the Baking Sheet
While that oven is warming up, line a baking sheet with parchment paper. This prevents the scones from sticking and makes for an easier clean-up! -
Mix Dry Ingredients
In a large mixing bowl, combine the flour, oats, baking powder, salt, brown sugar, granulated sugar, and ground cinnamon. Use a whisk to mix everything together evenly. It’s so satisfying to watch those ingredients come to life! -
Cut in the Butter
Now, take your cold butter cubes and add them to the dry ingredients. Using a pastry cutter (or your fingers), work the butter into the flour mixture until it resembles coarse crumbs. This step is crucial for those flaky layers! Don’t overmix; we want those tiny pockets of butter to stay intact. -
Combine Wet Ingredients
In a separate bowl, whisk together the egg, milk, and vanilla extract. This is where the magic begins! What’s a scone without that creamy richness? -
Bring Mixtures Together
Gradually pour the wet mixture into the dry mixture. Gently stir until just combined. The dough might seem a tad sticky—don’t worry; that’s exactly what we want! -
Add the Fun Stuff
Fold in those toasted pecans (or raisins if you’re swapping). This is also a great time to get creative—think about adding chocolate chips or dried fruit! -
Shape the Scones
On a floured surface, turn the dough out and shape it into a circle about 1-inch thick. Cut into wedges or use a biscuit cutter for round scones. I like to use a bench scraper to make clean cuts! -
Bake
Place scones onto your prepared baking sheet and bake for 15-18 minutes until they’re golden brown. The smell that envelops your home during this time is pure bliss—you’ll be counting down the minutes! -
Cool and Enjoy
Once they’re baked, let them cool for a few minutes on the baking sheet before transferring them to a wire rack. This ensures they won’t steam and stay perfect.
Serving Suggestions
These scones are perfect served warm, straight out of the oven! I love to plate them up with a drizzle of maple glaze, a sprinkle of chopped pecans, or even a dollop of whipped cream cheese. Pair them with your favorite morning beverage—coffee, tea, or even a refreshing fruit smoothie—and you’ve got yourself a cozy breakfast situation that’s sure to impress!
Recipe Variations
Feeling adventurous? Here are a few fun twists to make these scones your own:
- Pumpkin Spice Scones: Swap out some of the flour for pumpkin puree and add pumpkin spice!
- Chocolate Chip Scones: For a sweet twist, fold in mini chocolate chips.
- Maple Pecan Scones: Drizzle with maple syrup instead of traditional icing!
- Dried Fruit Scones: Consider adding chopped dried apricots or cranberries for a tart and sweet contrast.
- Lemon Zest Scones: A hint of lemon zest perks up the cinnamon flavors beautifully.
Chef’s Notes
Oh, and here’s a little tidbit from my kitchen: I once tried to make these scones in a “then-what-was-I-thinking” health kick, subbing out ingredients left and right. Let’s just say, while the effort was commendable, it turned my scones into something that resembled a shy pancake instead! So, my friends, while it’s wonderful to experiment, sometimes sticking to the basics is what keeps these scones truly magical. Trust the ingredients and techniques!
FAQs and Troubleshooting
-
Why are my scones dry?
This can happen if you overmix the dough or add too much flour. Gently fold your ingredients, and remember that cold ingredients help create the flakiness! -
Can I freeze these scones?
Absolutely! Freeze them before baking on a parchment-lined baking sheet and transfer them to a zip-seal bag. When ready to enjoy, bake from frozen, adding a couple of extra minutes to the bake time. -
How do I store left-over scones?
Store them in an airtight container at room temperature for 1-2 days. For longevity, consider refrigerating them in a sealed container. -
Can I make these scones vegan?
Yes! Use plant-based milk, coconut oil instead of butter, and a flax egg instead of the egg. They’ll be just as delicious!
Nutritional Info
While cooking, I focus on food that’s both delicious and nourishing. Depending on your chosen variations and ingredient swaps, the nutritional details will vary. It’s all about balance, and I encourage you to personalize your scones to suit your diet!
Alright, my dear food enthusiasts, it’s time to get into your kitchens and whip up a batch of these Cinnamon Bun Scones! Enjoy the process, savor the aromas, and most importantly, relish every bite. Here’s to cozy mornings and flavor-packed adventures! Happy baking!
PrintCinnamon Bun Scones
Fluffy scones that capture the cozy vibes of classic cinnamon buns, perfect for brunch or a sweet afternoon snack.
- Prep Time: 15 minutes
- Cook Time: 18 minutes
- Total Time: 33 minutes
- Yield: 8 servings 1x
- Category: Breakfast
- Method: Baking
- Cuisine: American
- Diet: Vegetarian
Ingredients
- 1 cup Toasted Chopped Pecans (Optional)
- 1/2 cup Firmly Packed Light Brown Sugar
- 1 tbsp Ground Cinnamon
- 2 cups All-Purpose Flour
- 1 cup Old-Fashioned Rolled Oats
- 1/4 cup Granulated Sugar
- 1 tbsp Baking Powder
- 1/2 tsp Salt
- 1/2 cup Unsalted Butter
- 1 cup Milk
- 1 large Egg
- 1 tsp Vanilla Extract
Instructions
- Preheat your oven to 400°F (200°C).
- Prep a baking sheet with parchment paper.
- Mix dry ingredients in a large bowl.
- Cut in the cold butter until it resembles coarse crumbs.
- Combine wet ingredients in a separate bowl and whisk together.
- Bring the wet mixture into the dry mixture and stir until just combined.
- Add the toasted pecans (or raisins) to the mixture.
- Shape the dough into a circle about 1-inch thick and cut into wedges.
- Bake for 15-18 minutes until golden brown.
- Cool for a few minutes before transferring to a wire rack.
Notes
Serve warm with a drizzle of maple glaze or a dollop of whipped cream cheese.
Nutrition
- Serving Size: 1 scone
- Calories: 250
- Sugar: 12g
- Sodium: 200mg
- Fat: 10g
- Saturated Fat: 5g
- Unsaturated Fat: 4g
- Trans Fat: 0g
- Carbohydrates: 32g
- Fiber: 2g
- Protein: 4g
- Cholesterol: 30mg
Keywords: scones, cinnamon, breakfast, easy recipe, baking
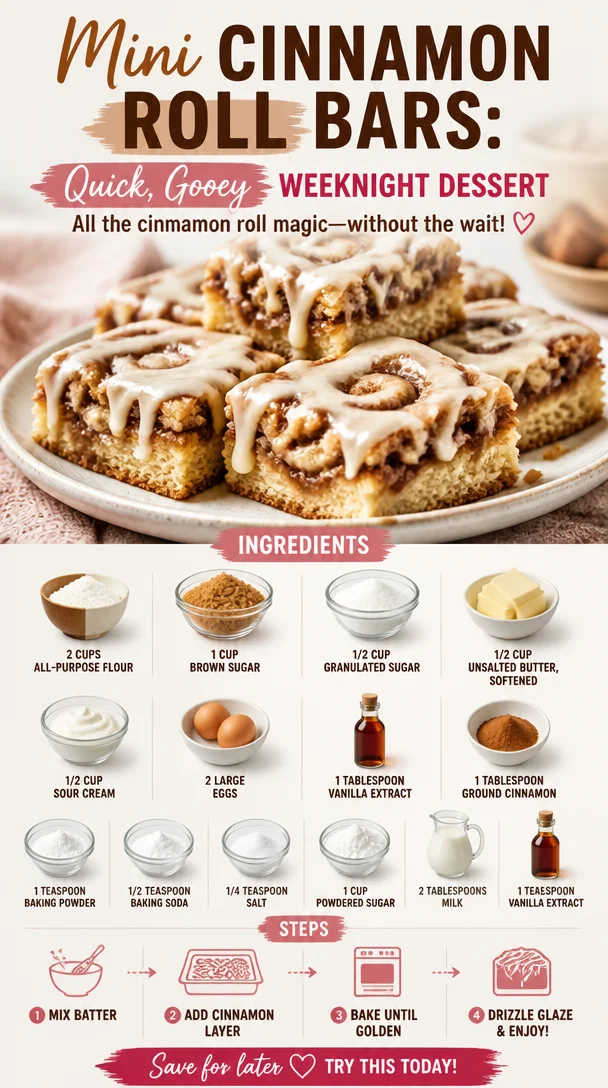
Min Cinnamon Roll Bars: Quick, Gooey Weeknight Dessert
Cinnamon Roll Bars: Quick and Easy Dessert Recipe
Welcome to another delightful adventure in the kitchen! If you adore the rich, buttery flavor of cinnamon rolls but find yourself short on time (who isn’t these days?), you’re in for a real treat! Today, I’ll be sharing my oh-so-easy Cinnamon Roll Bars. These little squares of joy combine everything you love about traditional cinnamon rolls with an effortless preparation that’s perfect for busy weeknights or when you’re itching for a sweet treat without all the fuss. So grab your apron, and let’s dive into this crave-worthy dessert!
A Whirlwind of Nostalgia
The first time I made cinnamon roll bars, I was just a kid standing on a stool next to my mom in our warm and inviting kitchen. The scent of cinnamon wafted through the air while we giggled and stirred together creamy butter and sugar. It was weekend baking bliss, and the anticipation of a freshly made dessert was the cherry on top!
Fast forward to adulthood, and I found myself craving those nostalgic moments. But let’s be honest—who wants to spend hours making traditional cinnamon rolls when you could whip up these bars in no time? They deliver the same delicious flavor but come together quickly, making them perfect for bringing back those fond memories without turning your kitchen into a bake-off challenge zone.
Ingredients
Here’s what you’ll need for these delicious Cinnamon Roll Bars:
-
2 cups all-purpose flour: The backbone of any baked good! You can substitute with whole wheat flour for a nuttier taste or gluten-free flour if you need to accommodate dietary restrictions.
-
1 cup brown sugar: This adds a rich, deep sweetness and moisture. Feel free to swap in coconut sugar for a healthier twist or use white sugar in a pinch.
-
1/2 cup granulated sugar: Balances the flavor of the brown sugar; you could use only brown sugar if that’s your preference for a richer flavor.
-
1/2 cup unsalted butter, softened: Because butter makes everything better! You can use coconut oil or a vegan butter alternative if you’re looking for dairy-free options.
-
1/2 cup sour cream: This ingredient ensures the bars are moist and adds a slight tang. Plain yogurt or cottage cheese can also work in its place.
-
2 large eggs: These help bind everything together. If you’re looking for an egg-free alternative, try mashed banana or a flax egg (1 tablespoon ground flaxseed + 2.5 tablespoons water).
-
1 tablespoon vanilla extract: A must for flavor! You could also use almond extract for a different flavor profile.
-
1 tablespoon ground cinnamon: The star of the show! For a twist, experiment with freshly grated nutmeg or a dash of cardamom.
-
1 teaspoon baking powder: Provides the lift that gives these bars their light texture. You could use baking soda in place of it, just remember to balance it with an acid, like yogurt.
-
1/2 teaspoon baking soda: Another leavening agent for extra fluffiness; don’t skip it!
-
1/4 teaspoon salt: Enhances all the flavors and balances the sweetness.
-
1 cup powdered sugar: For that sweet, delicious glaze on top! You can substitute with a sugar-free alternative or simply omit it if you prefer less sweetness.
-
2 tablespoons milk: To thin out the icing. Use any milk you love—dairy or plant-based works wonders!
-
1 teaspoon vanilla extract (for the glaze): Because every glaze needs a hint of vanilla! Feel free to experiment with flavored extracts here too.
Step-by-Step Instructions
Ready to dive into the baking process? Let’s do this!
-
Preheat your oven: Preheat your oven to 350°F (175°C). This ensures your bars bake evenly from the start. While you’re at it, grease a 9×13 inch baking pan or line it with parchment paper for easy removal later.
-
Mix the dry ingredients: In a medium bowl, whisk together the flour, baking powder, baking soda, salt, and cinnamon. This is a crucial step—mixing these together first ensures you won’t have bursts of baking soda or uneven flavors in your bars. Set the bowl aside for now.
-
Cream the butter and sugars: In a large mixing bowl, cream together the softened butter, brown sugar, and granulated sugar until light and fluffy (about 3-4 minutes). This step is what introduces air to your batter, so it’s essential for that melt-in-your-mouth texture.
-
Add the eggs and sour cream: One by one, add in the eggs, mixing well after each addition, followed by the sour cream and vanilla extract. Keep mixing until fully combined. You’ll notice that the batter starts to come together beautifully.
-
Combine wet and dry ingredients: Gradually add the dry mixture to the wet ingredients, mixing just until no flour streaks remain. Be careful not to overmix—that can lead to tougher bars. A few lumps are totally okay!
-
Spread and swirl: Pour the batter into your prepared baking pan, spreading it evenly. Now here comes the fun part! In a small bowl, mix together a tablespoon of cinnamon and a bit of sugar (like 2-3 tablespoons) to make your cinnamon swirl. Drizzle this mixture over the batter and use a knife or skewer to gently swirl it in. This step creates that lovely cinnamon roll style marbling.
-
Bake: Pop your pan into the oven and bake for about 25-30 minutes, or until a toothpick inserted in the center comes out clean. The smell will be irresistible, and you might have a hard time waiting!
-
Cool and glaze: Once they’re out of the oven, let the bars cool in the pan for about 10-15 minutes. Meanwhile, take another bowl and mix the powdered sugar, milk, and vanilla until you achieve a smooth glaze. Drizzle it over the warm bars with a spoon or whisk for a delightful finishing touch.
Serving Suggestions
To serve your Cinnamon Roll Bars, slice them into squares while they’re still warm and plate on a cheerful serving dish. The glaze will glisten, creating a mouthwatering presentation. You can garnish with additional cinnamon or even a sprinkle of nuts for some added texture. Pair these bars with a hot cup of coffee or tea, and you’re in for a treat!
Recipe Variations
If you want to get creative, here are a few fun variations to try:
-
Apple Cinnamon Roll Bars: Add diced apples to the batter for a delicious twist on a classic.
-
Chocolate Drizzle: Melt some chocolate chips and drizzle over the glaze for a decadent finish.
-
Nutty Crunch: Toss in chopped pecans or walnuts for a delightful crunch throughout the bars.
-
Fruity Flare: Add in some dried cranberries or raisins for an extra pop of flavor.
-
Maple Glaze: Substitute maple syrup for the vanilla in the glaze for a unique flavor twist.
Chef’s Notes
These Cinnamon Roll Bars have become a staple in my kitchen, evolving with the seasons and my family’s cravings. One time, I forgot to take them out of the oven on time, and they turned out a tad more caramelized. Surprisingly, that crispy edge ended up being a new family favorite! It’s funny how even a sweet mishap can lead to delightful discoveries.
I also love how adaptable this recipe is—it’s a great base for different flavors and mix-ins. Whenever friends come over and I want to impress them without spending hours in the kitchen, these bars are sure to make an appearance!
FAQs and Troubleshooting
1. Why are my bars dense?
If you find your bars are overly dense, you may have overmixed the batter. Remember to mix until just combined. Also, check that your leavening agents (baking powder and baking soda) are fresh.
2. Can I make these ahead of time?
Absolutely! These bars store well in an airtight container at room temperature for a few days or in the fridge for a week. You can also prep the batter ahead of time and bake them when you’re ready.
3. What if I don’t have sour cream?
No sour cream? No problem! You can substitute with plain Greek yogurt, or even buttermilk for a similar tanginess and moisture.
4. How can I tell when they’re done?
The best way to check for doneness is to insert a toothpick into the center. If it comes out clean or with a few crumbs, they’re ready to come out of the oven. If there’s wet batter, give them a couple more minutes.
Nutritional Info
Each bar is approximately 200 calories, with varying amounts of sugar and fat depending on your ingredient choices. Remember, indulgence is part of the fun, especially when it comes to desserts!
And there you have it—delicious, easy-to-make Cinnamon Roll Bars that’ll have you reminiscing about cozy kitchen moments while enjoying a scrumptious treat. Whether it’s a family gathering, a casual get-together, or just a quiet evening at home, these bars are sure to spread joy. Happy baking, fellow foodies! Let’s keep it fresh, simple, and seriously delicious!
PrintCinnamon Roll Bars

Delicious Cinnamon Roll Bars that deliver the rich, buttery flavor of traditional cinnamon rolls with a quick and easy preparation.
- Prep Time: 15 minutes
- Cook Time: 30 minutes
- Total Time: 45 minutes
- Yield: 12 servings 1x
- Category: Dessert
- Method: Baking
- Cuisine: American
- Diet: Vegetarian
Ingredients
- 2 cups all-purpose flour
- 1 cup brown sugar
- 1/2 cup granulated sugar
- 1/2 cup unsalted butter, softened
- 1/2 cup sour cream
- 2 large eggs
- 1 tablespoon vanilla extract
- 1 tablespoon ground cinnamon
- 1 teaspoon baking powder
- 1/2 teaspoon baking soda
- 1/4 teaspoon salt
- 1 cup powdered sugar
- 2 tablespoons milk
- 1 teaspoon vanilla extract (for the glaze)
Instructions
- Preheat your oven to 350°F (175°C) and grease a 9×13 inch baking pan or line it with parchment paper.
- Mix the dry ingredients: whisk together the flour, baking powder, baking soda, salt, and cinnamon.
- Cream together the softened butter, brown sugar, and granulated sugar until light and fluffy (about 3-4 minutes).
- Add in the eggs one by one, mixing well after each addition, followed by the sour cream and vanilla extract.
- Combine the dry mixture with the wet ingredients, mixing just until no flour streaks remain.
- Spread the batter into the prepared baking pan and make a cinnamon swirl with a mix of cinnamon and sugar over the batter.
- Bake for 25-30 minutes, or until a toothpick inserted in the center comes out clean.
- Cool for 10-15 minutes and prepare the glaze by mixing the powdered sugar, milk, and vanilla until smooth.
- Drizzle the glaze over the warm bars before slicing into squares and serving.
Notes
These bars are adaptable; you can add mix-ins like nuts, apples, or chocolate. Store in an airtight container at room temperature for a few days.
Nutrition
- Serving Size: 1 bar
- Calories: 200
- Sugar: 18g
- Sodium: 200mg
- Fat: 8g
- Saturated Fat: 4g
- Unsaturated Fat: 3g
- Trans Fat: 0g
- Carbohydrates: 31g
- Fiber: 1g
- Protein: 3g
- Cholesterol: 40mg
Keywords: cinnamon rolls, dessert, easy baking, quick dessert, bars
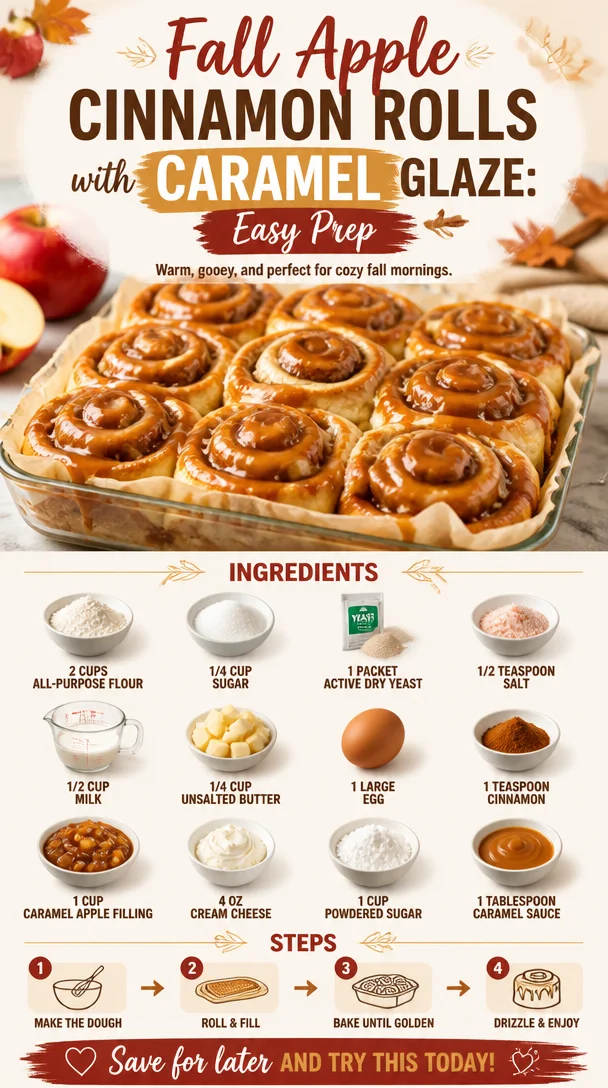
Fall Apple Cinnamon Rolls with Caramel Glaze: Easy Prep
Caramel Apple Cinnamon Rolls: A Sweet Slice of Nostalgia
When the chill of fall blows in and the leaves start to change, my heart starts to crave all those cozy flavors that remind me of home. There’s something truly enchanting about the combination of caramel, apple, and cinnamon—especially when it’s all rolled up in soft, fluffy dough. Ladies and gentlemen, welcome to my kitchen where we’re about to embark on a delightful journey to make Caramel Apple Cinnamon Rolls!
This dish isn’t just about satisfying your taste buds; it’s about evoking cherished memories that connect us with loved ones through food. I can vividly recall my grandmother’s kitchen filled with the tantalizing aroma of cinnamon swirling in the air as she baked batch after batch of cinnamon rolls every Sunday morning. We would all gather around the table, barefoot and still in our pajamas, ready to dig into those warm rolls topped with a generous drizzle of homemade caramel sauce. It’s those moments of laughter and love that inspired me to create my own take on this classic dish.
So grab your apron and let’s dive into a recipe that’s guaranteed to become a staple in your home, bringing warmth and comfort to your table, just like it did in mine!
Personal Story
Growing up, Sundays were sacred in my house. They were all about family, love, and—most importantly—food. My beloved grandmother was the queen of baked goods, and no one could resist the charm of her warm cinnamon rolls. I remember early mornings spent in her sunlit kitchen, patiently waiting while she rolled out dough and sprinkled heaps of cinnamon and sugar across the surface. My job? To be her assistant, hand her ingredients, and sample as much of the caramel as I could manage without her noticing!
Those Sunday mornings were filled with chatter, the clinking of coffee cups, and the laughter of family. As we all sat down together around that old oak table, it felt like time stood still. It’s amazing how a simple dish can hold so many memories and emotions—food truly brings people together.
Now, every time I whip up these Caramel Apple Cinnamon Rolls in my own kitchen, I can’t help but smile as I think about my grandmother. This recipe might be inspired by her, but I’ve added my twist with a luscious caramel apple filling that makes each roll even more decadent and delightful, just like those sweet Sundays of my youth.
Ingredients
Let’s take a look at what we need to create these mouthwatering Caramel Apple Cinnamon Rolls:
-
2 cups all-purpose flour
The foundation of our roll! You can substitute with whole wheat flour or a gluten-free blend, if preferred. The amount may vary slightly depending on the flour type, so keep an eye on your dough consistency as you mix! -
1/4 cup sugar
This not only sweetens the dough but also nourishes the yeast. If you want to cut down on sugar, honey or maple syrup can work, but be sure to adjust the liquid in your recipe accordingly. -
1 packet active dry yeast
Yeast makes the dough rise, creating that fluffy texture we all adore. Make sure it’s fresh for the best rise! If you only have instant yeast, you can use that without proofing it in water. -
1/2 teaspoon salt
Salt enhances all the flavors in the rolls; don’t skip it! If you use unsalted butter, this is especially important. -
1/2 cup milk
Warm milk helps activate the yeast and makes the dough pleasantly soft. You can substitute with nut milk or any dairy-free alternative, but warm it gently before adding. -
1/4 cup unsalted butter
Butter creates richness in flavor. If you’re looking for a healthier option, you can swap half of this with applesauce for less fat. -
1 large egg
Eggs add richness, moisture, and act as a binding agent. For an egg-free version, use a flax egg (1 tablespoon ground flaxseed mixed with 2.5 tablespoons water). -
1 teaspoon cinnamon
This is the star spice that brings warmth! Feel free to add a touch of nutmeg or allspice for an extra flavor kick. -
1 cup caramel apple filling
This is where the magic happens! You can use store-bought caramel apple filling or make your own using diced apples sautéed in butter and caramel sauce. -
4 oz cream cheese
This adds a creamy, decadent element to your frosting. You can use a vegan cream cheese alternative or Greek yogurt for a lighter version. -
1 cup powdered sugar
Sweetness for our frosting! If you prefer, you can use stevia or a powdered sugar substitute to cut down on sugar. -
1 tablespoon caramel sauce
A drizzle of caramel on top adds that finishing touch! Use store-bought or homemade—either way, it’s simply irresistible.
Step-by-Step Instructions
Ready to get your bake on? Let’s follow these step-by-step instructions to create your very own Caramel Apple Cinnamon Rolls!
Step 1: Proof the Yeast
In a small bowl, combine the warm milk (about 110°F or 43°C) and the packet of yeast along with a pinch of the sugar. Let it sit for about 5-10 minutes until it becomes foamy. This is proof that your yeast is ready to work its magic! If it doesn’t foam, you might want to start over with new yeast.
Step 2: Make the Dough
In a large mixing bowl, whisk together the flour, remaining sugar, and salt. Once your yeast is foamy and bubbly, pour it into the flour mixture along with the melted butter and egg. Mix until combined—here’s where a wooden spoon comes in handy! If you have a stand mixer with a dough hook, you can use that for an even easier experience.
Step 3: Knead the Dough
Turn the dough out onto a lightly floured surface and start kneading! This should take about 5-7 minutes. If the dough is sticky, add a little bit more flour, a tablespoon at a time, until it’s smooth and elastic. Kneading is a great workout; don’t skimp on it!
Step 4: Let it Rise
Form the dough into a ball and place it in a greased bowl. Cover it with a clean kitchen towel and let it rise in a warm spot for 1-2 hours, or until it’s doubled in size. This step is essential for fluffy rolls, so be patient!
Step 5: Roll it Out
Once risen, punch the dough down (no really, this is a fun part!) and turn it out onto a floured surface. Roll it out into a rectangle about 1/2 inch thick. The shape doesn’t have to be perfect—as long as it’s big enough to spread the filling, you’re golden!
Step 6: Spread the Caramel Apple Filling
Spread your caramel apple filling evenly over the dough, leaving a little border around the edges. This is where the lusciousness begins! Feel free to sprinkle a bit more cinnamon over the top for added flavor.
Step 7: Roll it Up
Starting from one edge, roll the dough tightly into a log. When you reach the end, pinch the seam to seal. Now slice the log into 1–2 inch pieces—this is where those gorgeous rolls begin to take shape!
Step 8: Second Rise
Place the sliced rolls in a greased baking dish, leaving a little space between each for them to expand. Cover again and let rise for another 30-45 minutes until puffy.
Step 9: Bake the Rolls
Preheat your oven to 350°F (175°C). Once the rolls have risen, pop them in the oven for about 20–25 minutes or until golden brown on top. The smell wafting through your kitchen will be absolutely mouthwatering!
Step 10: Make the Frosting
While the rolls are baking, whip up your cream cheese frosting. In a mixing bowl, beat the softened cream cheese and powdered sugar together until smooth. Add a splash of milk if needed to reach your desired consistency. Drizzle in a tablespoon of caramel sauce for an added touch of sweetness!
Step 11: Frost and Serve
As soon as the rolls come out of the oven (and while they’re still warm!), slather that cream cheese frosting on top. Allow it to melt slightly into the crevices. Finish off with a light drizzle of extra caramel sauce—and there you have it!
Serving Suggestions
These Caramel Apple Cinnamon Rolls are best enjoyed fresh out of the oven! Serve them warm, dusted with a sprinkle of cinnamon or topped with some chopped nuts for an added crunch. Pair them with a steaming cup of coffee or spiced apple cider—perfect for those chilly mornings with family or friends.
Recipe Variations
Feel free to let your creativity shine with these variations:
- Nutty Delight: Sprinkle in some chopped pecans or walnuts into the filling for a delightful crunch.
- Spiced Pumpkin Version: Substitute half of the apple filling for pumpkin puree and add pumpkin spice for a fall twist.
- Creamy Apple Pie Rolls: Add diced fresh apples along with the caramel apple filling for a more fruity texture.
- Chocolate Drizzle: Replace the caramel sauce with melted chocolate for a decadent variation.
- Vegan Twist: Use plant-based milk, dairy-free butter, and flax eggs to make this recipe vegan-friendly!
Chef’s Notes
Every time I make these Caramel Apple Cinnamon Rolls, I think back to those kitchen adventures with my grandmother. She would always tell me, "Cooking is about sharing love through food," and I carry that tradition with me today. This recipe has evolved over time, and while it’s inspired by my childhood, I’ve infused it with my own unique spin that makes it even more special.
Remember, the kitchen is a place for experimentation and fun—so don’t hesitate to make it your own!
FAQs and Troubleshooting
1. Why didn’t my rolls rise?
If your dough didn’t rise, it might be due to inactive yeast. Always check the expiration date and make sure the milk isn’t too hot or too cold when proofing.
2. How can I make these rolls ahead of time?
You can prepare the dough and filling the night before. Assemble everything, cover, and place in the fridge overnight. The next morning, let them rise for 1 hour at room temperature before baking.
3. Can I freeze these rolls?
Absolutely! Once fully baked and cooled, wrap them tightly in plastic wrap and foil before freezing. When you’re ready to indulge, pop them in the oven at 350°F (175°C) for about 10-15 minutes to warm through.
4. They turned out too dry—what happened?
Overbaking can cause dryness! Keep an eye on them during the last few minutes of baking. If you do end up with a dry batch, consider soaking them with a little milk before topping with frosting.
Nutritional Info
While these rolls are undeniably a treat and meant to be enjoyed in moderation, here’s a rough estimate of the nutritional info per roll (without frosting):
- Calories: 250
- Protein: 4g
- Fat: 8g
- Carbohydrates: 40g
- Sugar: 8g
Indulging in a warm Caramel Apple Cinnamon Roll is more than just treating yourself—it’s about savoring the memories and the flavors that connect us with each other. I hope you enjoy creating (and sharing!) these delicious rolls just as much as I do. Remember, cooking is all about happiness and connection, so keep it fun and full of craving! Happy baking!
PrintCaramel Apple Cinnamon Rolls

Soft and fluffy cinnamon rolls filled with decadent caramel apple filling and topped with creamy frosting, perfect for fall mornings.
- Prep Time: 20 minutes
- Cook Time: 30 minutes
- Total Time: 50 minutes
- Yield: 12 servings 1x
- Category: Dessert
- Method: Baking
- Cuisine: American
- Diet: Vegetarian
Ingredients
- 2 cups all-purpose flour
- 1/4 cup sugar
- 1 packet active dry yeast
- 1/2 teaspoon salt
- 1/2 cup milk
- 1/4 cup unsalted butter
- 1 large egg
- 1 teaspoon cinnamon
- 1 cup caramel apple filling
- 4 oz cream cheese
- 1 cup powdered sugar
- 1 tablespoon caramel sauce
Instructions
- Proof the yeast by combining warm milk with yeast and sugar; let it sit until foamy.
- Make the dough by mixing flour, remaining sugar, and salt; add yeast mixture, butter, and egg.
- Knead the dough on a floured surface for 5-7 minutes until smooth.
- Let it rise in a greased bowl, covered, for 1-2 hours or until doubled in size.
- Roll out the dough into a rectangle about 1/2 inch thick.
- Spread caramel apple filling over the dough, leaving a border.
- Roll the dough tightly into a log and cut into 1-2 inch pieces.
- Place in a greased baking dish and let rise for another 30-45 minutes.
- Bake at 350°F (175°C) for 20-25 minutes until golden brown.
- Make the frosting by beating cream cheese and powdered sugar together; add caramel sauce.
- Frost the warm rolls and drizzle with extra caramel.
Notes
These rolls are best enjoyed fresh out of the oven and can be paired with coffee or spiced apple cider.
Nutrition
- Serving Size: 1 roll
- Calories: 250
- Sugar: 8g
- Sodium: 300mg
- Fat: 8g
- Saturated Fat: 4g
- Unsaturated Fat: 2g
- Trans Fat: 0g
- Carbohydrates: 40g
- Fiber: 1g
- Protein: 4g
- Cholesterol: 30mg
Keywords: cinnamon rolls, caramel, apple, dessert, fall baking
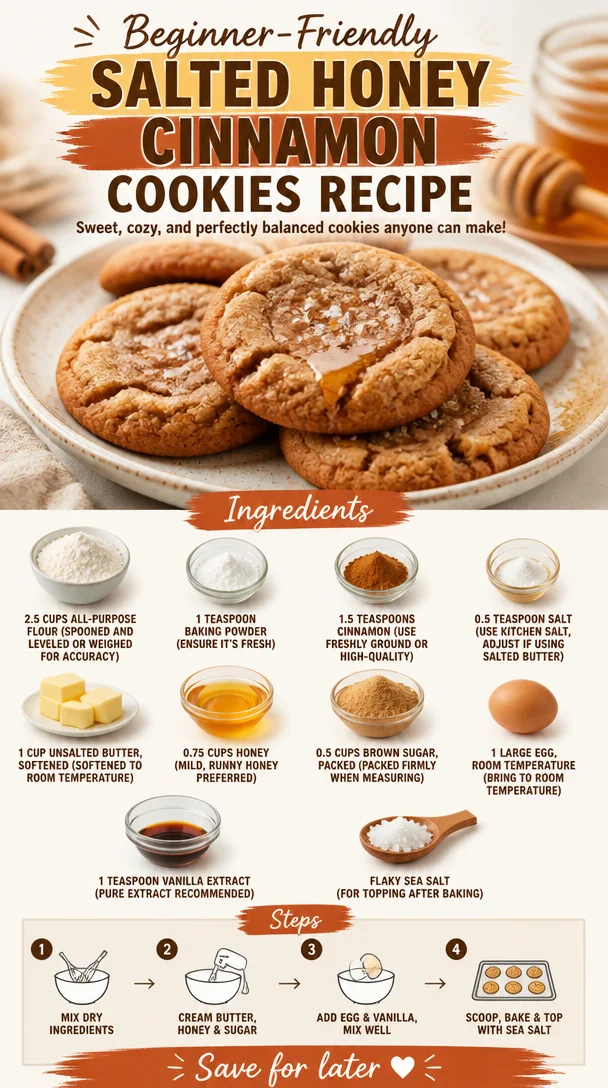
Beginner-Friendly Salted Honey Cinnamon Cookies Recipe
Salted Honey Cinnamon Cookies: A Delicious Journey
Welcome, fellow food lovers! Today, I’m thrilled to share a special recipe that’s not only delectable but also wrapped in sweet memories. We’re diving into the world of Salted Honey Cinnamon Cookies—an irresistible treat that marries the warm, cozy flavors of honey and cinnamon with a hint of sea salt. Trust me; these cookies are about to become your new favorite!
I know what you’re thinking: “Ava, what makes these cookies so special?” Well, let me take you on a little journey back to my childhood, where the magic of baking first took hold of my heart. Picture this: a bustling kitchen, the comforting sound of laughter, and the aroma of freshly baked cookies wafting through the air, making even the grumpiest neighbor smile.
A Nostalgic Memory
One of my favorite childhood memories is baking cookies with my grandmother every Sunday afternoon. We would gather in her quaint kitchen, her apron dusted with flour as she expertly mixed ingredients while sharing stories from her own youth. I fondly recall the day we decided to experiment, combining the sweetness of honey with the warmth of cinnamon. The kitchen filled with laughter, a sprinkle of flour in the air, and soon enough, we had golden cookies ready to be devoured.
As we sat by the window, sharing bites of that somehow still-warm magic, I remember the joy that swept over me—not just from the taste, but from the love and time spent in the kitchen. These Salted Honey Cinnamon Cookies are a tribute to those beautiful afternoons. Follow along as I guide you to create this warm, comforting treat that encapsulates love, flavor, and nostalgia!
Ingredients
Here’s what you’ll need to make these delightful cookies:
-
2.5 cups all-purpose flour
This is your base! Make sure to spoon it into your measuring cup and level it off for accuracy. You can switch it up with whole wheat flour for a nuttier flavor and a bit more fiber. -
1 teaspoon baking powder
Ensure it’s fresh! Older baking powder can affect the rise of your cookies. If you’re out, you can use baking soda with a bit of cream of tartar in a pinch. -
1.5 teaspoons cinnamon
The warmer, the better! Freshly ground cinnamon is ideal for a more robust flavor. If you’re feeling adventurous, try subbing a bit of nutmeg for a cozy twist! -
0.5 teaspoon salt
I recommend using kitchen salt, but if you’re using salted butter in your recipe, you can reduce this or even omit it. -
1 cup unsalted butter, softened
This should be at room temperature—just like your dough! For a dairy-free version, coconut oil works well too. -
0.75 cups honey
Choose a mild, runny honey for the best results. If you can’t find honey, agave syrup would make a good alternative. -
0.5 cups brown sugar, packed
The molasses in brown sugar adds a lovely depth to your cookies. If you’re out, granulated sugar will work, but pack it in to maintain moisture. -
1 large egg, room temperature
Bringing the egg to room temperature helps it blend more smoothly. If you need an egg substitute, try a flax egg! -
1 teaspoon vanilla extract
Opt for pure extract for the best flavor. I won’t judge if you double this because vanilla makes everything better! -
Flaky sea salt (for topping after baking)
This is the finishing touch! It adds that delicious contrast to the sweet cookies. A pinch of sea salt is all you need.
Step-by-Step Instructions
-
Preheat Your Oven:
Start by preheating your oven to 350°F (175°C). This step is often overlooked but trust me, a properly heated oven can make all the difference in your cookie’s texture. -
Mix the Dry Ingredients:
In a medium bowl, combine your flour, baking powder, cinnamon, and salt. Whisk these together lightly to ensure they’re well mixed. This will help the baking powder distribute evenly in your dough, making for perfectly risen cookies! -
Cream Together the Butter and Sugars:
In a large mixing bowl, beat together the softened butter, honey, and brown sugar until it’s creamy and light in color. Use an electric mixer if possible—the combination of these ingredients is key to a chewy cookie! -
Add the Egg and Vanilla:
Crack in that room temperature egg and pour in your vanilla extract. Mix until everything is beautifully incorporated. This is where the magic happens—just imagine that heavenly aroma! -
Combine the Mixtures:
Gradually add your dry ingredients to the wet mixture, mixing just until combined. Be careful here—not to overmix! This is a common cookie blunder. If you overmix, your cookies can turn out tough. We want soft, tender bites of deliciousness. -
Scoop and Chill:
Scoop tablespoonfuls of dough onto a parchment-lined baking sheet. Space them out about two inches apart—these cookies like to spread a bit! For a thicker cookie, chill the dough in the refrigerator for about 30 minutes before baking. -
Sprinkle with Sea Salt:
Just before baking, add a light sprinkle of flaky sea salt on top of each cookie. This is the game-changer, trust me! It enhances the flavors and gives that delightful contrast between sweet and salty. -
Bake:
Pop those beauties in the preheated oven for about 10-12 minutes, or until the edges are lightly golden. Get ready for your kitchen to smell absolutely divine! -
Cool and Enjoy:
Once baked, allow the cookies to cool on the sheet for a few minutes before transferring them to a wire rack. This will help them set up nicely without falling apart.
Serving Suggestions
These cookies are perfect enjoyed warm from the oven with a glass of milk, or you can serve them alongside a cup of tea for a cozy afternoon treat. For a little extra flair, plate them with a sprinkling of cinnamon and a drizzle of honey—your guests won’t be able to resist!
Recipe Variations
Feeling adventurous? Here are some fun twists on the classic salted honey cinnamon cookie:
-
Nuts: Fold in some chopped walnuts or pecans for added crunch and flavor.
-
Chocolate Chips: Add in some dark chocolate chips (or chunks) for a rich, decadent touch.
-
Coconut: Mix in some shredded coconut for a tropical twist—trust me, it’s delightful!
-
Dried Fruits: Consider adding dried cranberries or raisins for a fruity contrast that complements the spices.
-
Gluten-Free: Swap the all-purpose flour for a gluten-free blend to make these cookies suitable for gluten-sensitive friends.
Chef’s Notes
As with any beloved recipe, I’m constantly tweaking and experimenting. The original version of these cookies was a bit too sweet for my taste, so I played around with the ratios until I struck that perfect balance. Every batch has its own story, and I love discovering new elements to bring out the flavors. And of course, there are always little kitchen mishaps—like the time I accidentally used expired baking powder! Let’s just say the cookies were a lesson learned!
FAQs and Troubleshooting
Q: My cookies spread too much! What did I do wrong?
A: This could be due to overly warm dough or not chilling it enough. Make sure your butter is just softened, not melted, and try chilling the dough for at least 30 minutes before baking.
Q: Why are my cookies dry?
A: Overbaking is often the culprit. Keep a close eye on them once you hit the 10-minute mark. Every oven is different, so checks after this point are key to keeping your cookies tender.
Q: Can I make these cookies ahead of time?
A: Absolutely! You can prepare the dough and store it in the fridge for up to three days or freeze it for longer storage. Then, bake them fresh whenever you like!
Q: What if I don’t have honey?
A: No worries! You can substitute it with maple syrup or agave syrup—though you may need to tweak the flour a bit if you find the dough too wet.
Nutritional Info
While I usually encourage enjoying food for its flavor and joy, if you’re curious about nutritional information, these cookies contain roughly:
- Calories: 180 per cookie
- Total Fat: 8g
- Saturated Fat: 5g
- Carbohydrates: 25g
- Sugar: 12g
- Protein: 1g
And there you have it—the delightful journey of making Salted Honey Cinnamon Cookies! I hope this recipe brings you as much joy as it has brought me over the years. Remember, cooking is all about exploring and enjoying the process! Happy baking, everyone!
PrintSalted Honey Cinnamon Cookies

Delightful cookies combining honey and cinnamon with a touch of sea salt.
- Prep Time: 15 minutes
- Cook Time: 12 minutes
- Total Time: 27 minutes
- Yield: 24 cookies 1x
- Category: Dessert
- Method: Baking
- Cuisine: American
- Diet: Vegetarian
Ingredients
- 2.5 cups all-purpose flour
- 1 teaspoon baking powder
- 1.5 teaspoons cinnamon
- 0.5 teaspoon salt
- 1 cup unsalted butter, softened
- 0.75 cups honey
- 0.5 cups brown sugar, packed
- 1 large egg, room temperature
- 1 teaspoon vanilla extract
- Flaky sea salt (for topping after baking)
Instructions
- Preheat your oven to 350°F (175°C).
- Mix the dry ingredients: flour, baking powder, cinnamon, and salt.
- Cream together the butter, honey, and brown sugar until creamy.
- Add the egg and vanilla and mix until incorporated.
- Combine the mixtures by gradually adding dry to wet ingredients.
- Scoop tablespoonfuls of dough onto a baking sheet, spacing them two inches apart.
- Sprinkle flaky sea salt on top of each cookie.
- Bake for 10-12 minutes or until edges are golden.
- Cool on a wire rack before enjoying.
Notes
These cookies pair beautifully with a glass of milk or a cup of tea. Feel free to experiment with add-ins like nuts or chocolate chips!
Nutrition
- Serving Size: 1 cookie
- Calories: 180
- Sugar: 12g
- Sodium: 100mg
- Fat: 8g
- Saturated Fat: 5g
- Unsaturated Fat: 2g
- Trans Fat: 0g
- Carbohydrates: 25g
- Fiber: 0g
- Protein: 1g
- Cholesterol: 30mg
Keywords: cookies, honey, cinnamon, baking, dessert
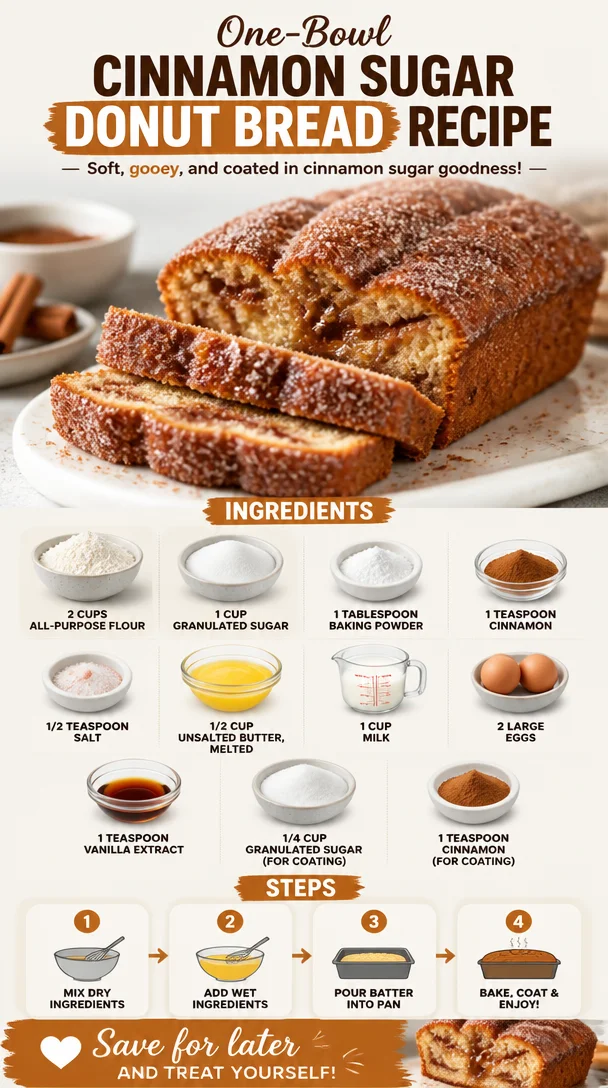
One-Bowl Cinnamon Sugar Donut Bread Recipe (Soft & Gooey)
The Sweet Beginnings of Cinnamon Sugar Donut Bread: A Slice of Nostalgia
If there’s one thing that can effortlessly transport you back to sun-soaked childhood mornings, it’s the warm aroma of cinnamon and sugar wafting through the air. Welcome, dear foodie friends, to the delightful world of Cinnamon Sugar Donut Bread! This scrumptious treat is a beautiful combination of sweet, soft bread that reminds us of our favorite donuts but in loaf form. Yes, you heard that right—donut in loaf form. Let’s dive into how this delightful dish can make your kitchen a little sweeter and your mornings a lot brighter!
I can still picture the cozy kitchen of my childhood home. The sun peeked through the window, casting a golden hue over the countertops, while my mom haphazardly tossed flour, sugar, and cinnamon into a mixing bowl. It was an annual tradition—a Sunday ritual where we baked sweet treats to share with neighbors and friends. The highlight was undoubtedly this Cinnamon Sugar Donut Bread, which always disappeared faster than you could say “delicious.” With each slice, we’d slather on some butter, watch the sugar glisten, and savor every bite.
Creating this dish at home is like wrapping up a hug for your taste buds—a cozy, familiar embrace that invites you to slow down and enjoy the simple pleasures in life. Whether you’re whipping it up for brunch or just because it’s Tuesday, this bread is bound to become a favorite in your home. So, grab your apron, and let’s embark on this sweet culinary journey together!
A Slice of Family Tradition
Reflecting on those blissful mornings, one particular memory stands out—sitting cross-legged on the floor, peering over the kitchen island as my mom mixed the ingredients together. I vividly recall the way she’d carefully measure out the flour, while I hopped up every few moments hoping to catch that golden mixing bowl before it was whisked away to the oven.
As the bread baked, the kitchen would fill with a mouthwatering aroma that made time stand still. Each of my siblings would crowd around, arms outstretched with anticipation, eager for the first slice. What I realized was that the bread was more than just food—it was a symbol of love, connection, and joyful mornings spent together as a family. This Cinnamon Sugar Donut Bread embodies those sweet moments, and I can’t wait for you all to experience a bit of that joy in your own kitchens.
Ingredients
Here’s what you’ll need to create this heavenly Cinnamon Sugar Donut Bread:
-
2 cups all-purpose flour
- Provides the structure for your bread. You can substitute with whole wheat flour for a heartier version or a gluten-free mix if needed.
-
1 cup granulated sugar
- The sweetness that brings everything together! Feel free to reduce the sugar a bit if you prefer a less sweet bread.
-
1 tablespoon baking powder
- The secret behind that fluffy texture. Make sure it’s fresh for the best rise.
-
1 teaspoon cinnamon
- It’s not just a flavor; it’s an experience! Consider using freshly ground cinnamon for a more intense flavor.
-
1/2 teaspoon salt
- A pinch brings balance to the sweetness. Don’t skip it!
-
1/2 cup unsalted butter, melted
- Adds richness and moisture. Coconut oil or vegetable oil work as great substitutes.
-
1 cup milk
- The liquid gold that binds everything. You can swap it for any milk alternative like almond milk or oat milk.
-
2 large eggs
- They help with binding and add moisture too. If you’re vegan, consider using flax eggs (1 tablespoon ground flaxseed mixed with 2.5 tablespoons water per egg).
-
1 teaspoon vanilla extract
- For that extra hint of warmth! You can also use almond extract for a different twist.
-
1/4 cup granulated sugar (for coating)
- This sweet touch is non-negotiable! You could mix it up with brown sugar for a richer flavor.
-
1 teaspoon cinnamon (for coating)
- Because we can never have too much cinnamon!
Step-by-Step Instructions
Now that we have our ingredients lined up, it’s time to get cooking! Here’s how to create your own masterpiece:
Step 1: Preheat and Prepare
Preheat your oven to 350°F (175°C). Grease a 9×5-inch loaf pan with butter or non-stick spray. This is crucial to ensure that your beautiful bread doesn’t stick, making it easier to pop out once it’s done baking. You want that gorgeous loaf to have a grand entrance!
Step 2: Mix the Dry Ingredients
In a medium bowl, whisk together your flour, sugar, baking powder, cinnamon, and salt. If you can, sift the flour before measuring—it can make for a fluffier loaf. Set this lovely mixture aside while we tackle the wet ingredients.
Step 3: Blend Wet Ingredients
In a large mixing bowl, combine the melted butter, milk, eggs, and vanilla extract. Whisk them until everything is beautifully blended. Here’s a little chef hack: letting your eggs come to room temperature before adding them to the mixture helps with a better rise and texture in your final loaf.
Step 4: Combine Wet and Dry
Slowly add the dry ingredients to the wet mixture, stirring gently to avoid overmixing. Overmixed batter can lead to a tough bread—no one wants that! Aim for just mixed until you see a few lumps. Remember, some imperfections make it homey.
Step 5: Pour into the Pan
Pour the batter into your prepared loaf pan, smoothing the top with a spatula. Don’t worry too much about perfection at this stage; you’re going to cover it up with that sugary goodness soon!
Step 6: Bake It Up
Pop that loaf into your preheated oven and let it bake for about 50-60 minutes. Check it around the 50-minute mark with a toothpick; it’s done when it comes out clean (with maybe a crumb or two). The warm, heavenly scent will envelop your kitchen before you even realize it.
Step 7: The Sweet Coating
While the bread bakes, prepare your cinnamon sugar coating by whisking together the sugar and cinnamon in a shallow dish. This is where the magic happens! Once you’ve taken the bread out of the oven, let it cool in the pan for about 10 minutes before transforming it into a sugary delight.
Step 8: Final Touch
Remove the loaf from the pan and while it’s still warm, roll it in the cinnamon-sugar mix until it’s fully coated. This is the stage where your bread gets its iconic donut-esque finish. Trust me, this is where you’ll want to sneak an edge before it cools completely!
Serving Suggestions
To serve this delightful Cinnamon Sugar Donut Bread, slice it into thick, generous pieces. You could enjoy it warm with a smear of butter, or if you really want to elevate it, try adding a dollop of cream cheese frosting or a drizzle of icing. It also pairs perfectly with a steaming cup of coffee or a refreshing glass of milk. Best enjoyed with friends or family—after all, sharing is caring!
Recipe Variations
-
Pumpkin Spice Twist: Add 1/2 cup of pureed pumpkin for a fall-inspired version; swap out some cinnamon for pumpkin spice for an extra kick.
-
Nutty Addition: Fold in some chopped walnuts or pecans into the batter for a crunchy texture and a rich flavor contrast.
-
Fruit Infusion: Toss in a cup of fresh or frozen blueberries for a fruity twist. Just be sure not to overmix—gentle folds are key!
-
Gluten-Free Option: Use a 1:1 gluten-free flour blend for the all-purpose flour, and you’re good to go!
-
Chocolate Drizzle: Melt some chocolate and drizzle it over the top once it’s cooled for a decadent twist. Because let’s be real, who doesn’t love chocolate?
Chef’s Notes
I love that this recipe can evolve alongside me—after all, food is like life. It grows and changes with every scoop of batter and sprinkle of cinnamon! The memories associated with this bread only get sweeter as the years go by. It’s about experimentation, too. One day I may add more spice, and the next day I might take a classic approach—the beauty is in the creativity.
Another favorite kitchen memory? One Christmas, I decided to gift this bread as holiday treats to neighbors. It was a delightful experiment that brought sweet smiles to faces. Package a loaf in pretty paper, and trust me—it’ll be a cherished gift!
FAQs and Troubleshooting
Q: My bread didn’t rise! What happened?
A: This could be due to old baking powder or overmixing the batter. Always check the freshness of your baking ingredients!
Q: Can I make this ahead of time?
A: Absolutely! The bread can be stored in an airtight container at room temperature for up to 3 days or in the fridge for about a week. For longer storage, freeze it, and simply thaw when you crave it!
Q: Why is my bread so dense?
A: Overmixing or not using enough leavening agent (baking powder) could be culprits. Light touches when mixing and double-checking your ingredients will help!
Q: Can I use something other than milk?
A: Yes! You can substitute it with any non-dairy milk like almond, oat, or soy. Just make sure it’s unsweetened to keep the flavors balanced.
Nutritional Info (per slice)
Calories: 210
Fat: 9g
Carbohydrates: 31g
Fiber: 1g
Protein: 3g
Sugar: 10g
So there you have it, friends! You now have all the keys to unlock the magic of Cinnamon Sugar Donut Bread in your kitchen. Make it your own, sprinkle in some love, and enjoy the deliciousness that follows. Happy baking!
PrintCinnamon Sugar Donut Bread
A delightful loaf that combines the sweetness of cinnamon and sugar in a bread format reminiscent of your favorite donuts.
- Prep Time: 15 minutes
- Cook Time: 60 minutes
- Total Time: 75 minutes
- Yield: 8 servings 1x
- Category: Dessert
- Method: Baking
- Cuisine: American
- Diet: Vegetarian
Ingredients
- 2 cups all-purpose flour
- 1 cup granulated sugar
- 1 tablespoon baking powder
- 1 teaspoon cinnamon
- 1/2 teaspoon salt
- 1/2 cup unsalted butter, melted
- 1 cup milk
- 2 large eggs
- 1 teaspoon vanilla extract
- 1/4 cup granulated sugar (for coating)
- 1 teaspoon cinnamon (for coating)
Instructions
- Preheat your oven to 350°F (175°C). Grease a 9×5-inch loaf pan.
- Mix together your flour, sugar, baking powder, cinnamon, and salt in a medium bowl.
- Blend the melted butter, milk, eggs, and vanilla extract in a large mixing bowl.
- Combine the dry ingredients with the wet mixture, stirring gently to avoid overmixing.
- Pour the batter into your prepared loaf pan, smoothing the top.
- Bake for 50-60 minutes, checking with a toothpick around the 50-minute mark.
- Prepare the cinnamon sugar coating by whisking together the sugar and cinnamon.
- Remove the loaf from the pan and roll it in the cinnamon-sugar mix while still warm.
Notes
Enjoy it warm with butter or cream cheese frosting. Pairs perfectly with coffee or milk.
Nutrition
- Serving Size: 1 slice
- Calories: 210
- Sugar: 10g
- Sodium: 300mg
- Fat: 9g
- Saturated Fat: 5g
- Unsaturated Fat: 3g
- Trans Fat: 0g
- Carbohydrates: 31g
- Fiber: 1g
- Protein: 3g
- Cholesterol: 60mg
Keywords: cinnamon, sugar, bread, dessert, baking
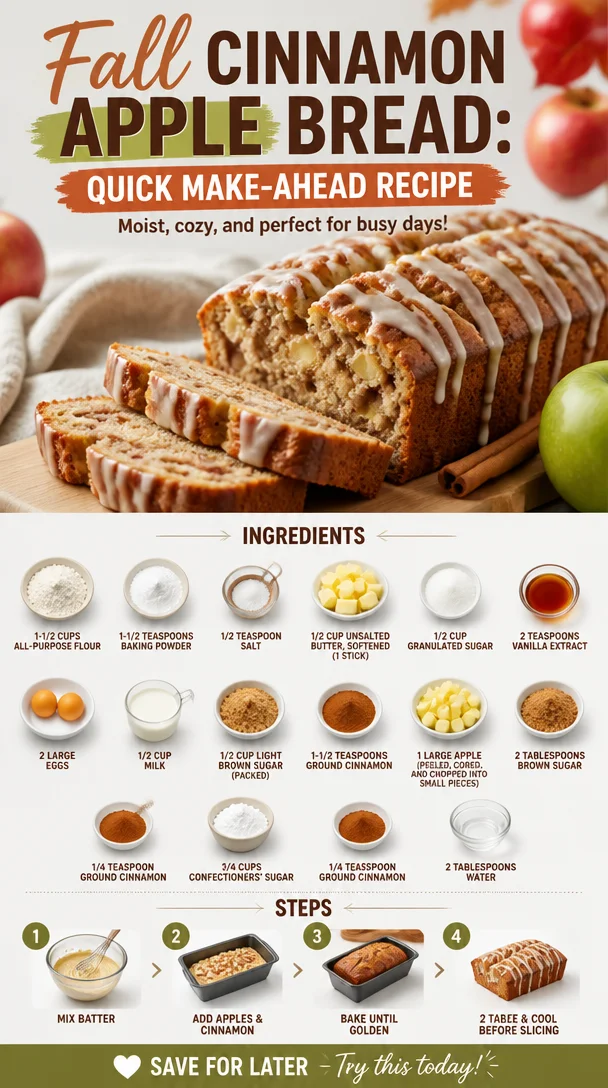
Fall Cinnamon Apple Bread: Quick Make-Ahead Recipe
Warm and Cozy Cinnamon Apple Bread: A Slice of Nostalgia
Welcome back to Clean Plate Cravings! Today, we’re diving into a recipe that wraps you in a warm, sugary hug and fills your home with irresistible aromas—the heartwarming Cinnamon Apple Bread. Whether you’re hosting a cozy breakfast with friends, packing a sweet treat for someone special, or simply indulging in a slice during quiet moments with a cup of tea, this bread feels like a hug from grandma.
But really, what’s better than the wonderful smell of cinnamon wafting through your kitchen? I remember the first time I baked apple bread. I was just a kid, standing on a stool beside my mom in our tiny kitchen. We had just picked fresh apples from a local orchard, and as we chopped them up, my excitement grew, knowing a delicious treat was on the horizon. My mom had a knack for turning everyday ingredients into something extra magical, and this cinnamon apple bread was one of her go-to recipes.
As we mixed the batter and sprinkled in the cinnamon—oh, that heavenly smell!—I realized that something special was happening. This wasn’t just a recipe; it was a special moment shared between us. This bread became our family’s comfort food, perfect for cozying up with a hot cup of cocoa on chilly evenings or gifting to neighbors during the holidays. It was a delicious blend of sweet and spice with a moist, tender crumb that had us all coming back for seconds.
Now, I’m excited to share my own version of this cherished recipe with you! With its balance of flavors and simple ingredients, you too can create a memorable experience with every slice. Let’s jump into the delectable world of Cinnamon Apple Bread!
Ingredients
Here’s what you’ll need to whip up this delightful cinnamon apple bread:
-
1-1/2 cups all-purpose flour
The base of your bread! If you’re looking for a gluten-free version, substitute with gluten-free all-purpose flour. Just make sure it includes xanthan gum for proper texture! -
1-1/2 teaspoons baking powder
This is your leavening agent, helping the bread rise. Be sure it’s fresh; expired baking powder can lead to dense bread. -
1/2 teaspoon salt
A pinch of salt enhances all those lovely flavors. Don’t overlook it! -
1/2 cup unsalted butter, softened (1 stick)
Brings richness and flavor to your bread. If dairy is a concern, coconut oil works as a great substitute! -
1/2 cup granulated sugar
Sweetness factor! You can also use coconut sugar for a lower glycemic index. -
2 teaspoons vanilla extract
Adds a lovely warmth. Use pure vanilla extract for a deeper flavor-profile, though imitation works too in a pinch! -
2 large eggs
These bind everything together and add moisture. For a vegan option, substitute with flax eggs (1 tablespoon of ground flaxseed mixed with 2.5 tablespoons of water per egg). -
1/2 cup milk
Dairy or plant-based milk works! Almond milk, oat milk, or even coconut milk can be excellent choices. -
1/2 cup light brown sugar (packed)
This brings a subtle caramel flavor to the bread. If you run out, you can use dark brown sugar instead—it’ll just give more depth. -
1-1/2 teaspoons ground cinnamon
The flavor star of this recipe! For a twist, consider using fresh ground cinnamon or even a dash of nutmeg or cardamom for added spice. -
1 large apple (peeled, cored, and chopped into small pieces)
The fresh fruit keeps your bread moist and adds a lovely tartness. Granny Smith or Honeycrisp apples work wonderfully here! -
2 tablespoons brown sugar
Great for sprinkling on top for a crunchy finish! -
1/4 teaspoon ground cinnamon
Used here for the topping—because you can never have too much cinnamon! -
3/4 cups confectioners’ sugar
This is for an optional glaze to make your bread extra special. -
1/4 teaspoon ground cinnamon
A final touch for the glaze! -
2 tablespoons water
To achieve the perfect glaze consistency.
Step-by-Step Instructions
Let’s make this cinnamon apple bread shine! Here’s how we do it—step by step:
-
Preheat the oven: Start by preheating your oven to 350°F (175°C). This is crucial for ensuring your bread bakes evenly. While it heats up, you can prepare your loaf pan.
-
Grease your loaf pan: Grab a 9×5-inch loaf pan and grease it with a little butter or line it with parchment paper. This will make it super easy to get your bread out after baking.
-
Mix the dry ingredients: In a medium bowl, whisk together the flour, baking powder, cinnamon, and salt. This is a cool chef hack! Whisking these dry ingredients helps to evenly distribute the leavening agents and ensures there are no flour lumps later.
-
Cream the butter and sugar: In a large bowl, using a hand mixer or a stand mixer, cream the softened butter and granulated sugar together until it’s light and fluffy—about 3 minutes. It’s important to really aerate the mixture here; that’s where the magic happens!
-
Add eggs and vanilla: Add in the eggs one by one, mixing well after each addition. Then, stir in the vanilla extract. This step adds moisture and flavor to your batter.
-
Incorporate the milk: Gradually mix in the milk until it’s well combined. Here’s a little tip: If your batter seems too thick, a splash more milk can help!
-
Combine wet and dry: Gradually add your dry ingredient mixture to the wet ingredients. Fold gently with a spatula until just combined. Avoid overmixing—this helps your bread stay light and fluffy!
-
Add the apples: Gently stir in your chopped apples. This is the fun part! Those little apple bits will caramelize beautifully in the oven, offering pockets of warm, juicy goodness.
-
Pour into the pan: Transfer your batter to the greased loaf pan, smoothing the top down with your spatula.
-
Prepare the topping: In a small bowl, mix together the brown sugar and cinnamon. Sprinkle this mixture evenly over the top of your batter. This little topping gives your bread a crunchy, sweet crust!
-
Bake: Pop your loaf in the preheated oven and bake for 50-60 minutes, or until a toothpick comes out clean from the center. The aroma that fills your kitchen will have you salivating!
-
Cool and glaze: Once it’s baked, let it cool in the pan for about 10 minutes before transferring it to a wire rack. If you’re feeling adventurous, make a quick glaze by whisking together the confectioners’ sugar, cinnamon, and water until smooth. Drizzle it over the cooled bread!
Serving Suggestions
Slice your cinnamon apple bread while it’s still warm for that fresh-out-of-the-oven experience! Serve it on a rustic wooden board with a side of creamy butter or spreadable cream cheese. Cuddle up on the sofa with a generous slice and your favorite hot drink—the perfect pairing for a relaxing afternoon!
Recipe Variations
Here are some fun twists on this classic recipe to keep things exciting:
- Nutty Additions: Fold in 1/2 cup of chopped walnuts or pecans into the batter for a crunchy element.
- Dried Fruits: Add 1/4 cup of raisins or cranberries for a delightful surprise textural contrast.
- Spiced Up: Want more warmth? Toss in a pinch of nutmeg or ginger along with the cinnamon.
- Maple Glaze: Swap the water in the glaze for pure maple syrup for a richer sweetness.
- Mini Loaves: Bake in mini loaf pans for adorable gifts or portion control!
Chef’s Notes
This cinnamon apple bread is a well-loved family recipe that I’ve cherished and adapted over the years. I remember one holiday baking marathon when my family decided to make it with a twist—adding cranberries for a festive flair! It turned out to be a huge hit!
Now, I often use this recipe as a base for other fruity breads too: swap apples for mashed bananas for a banana bread version or try zucchini for a savory twist.
Remember, baking should be fun and adaptable! Don’t stress too much about measurements—cooking is all about flavors and the love you put into it!
FAQs and Troubleshooting
1. My bread is too dense. What did I do wrong?
Overmixing can lead to a denser bread. Mix just until combined. Also, ensure your baking powder is fresh!
2. Can I use frozen apples?
Absolutely! Just make sure to thaw and drain them well to avoid extra moisture. Fresh apples are best, but frozen works in a pinch.
3. How should I store the bread?
Store it in an airtight container at room temperature for up to 3 days. For longer freshness, wrap it tightly and freeze. It tastes great even after thawing!
4. What’s the best way to serve leftovers?
Slicing it and toasting the leftover bread gives it a lovely crispy texture and warms up that cinnamon goodness!
This delightful Cinnamon Apple Bread is more than just a recipe; it’s an opportunity to create fond memories while enjoying scrumptious, homemade goodness. So gather your ingredients, roll up your sleeves, and let’s make some kitchen magic together. Enjoy every bite!
PrintWarm and Cozy Cinnamon Apple Bread
A heartwarming recipe for Cinnamon Apple Bread that fills your home with the irresistible aroma of cinnamon and fresh apples.
- Prep Time: 15 minutes
- Cook Time: 60 minutes
- Total Time: 75 minutes
- Yield: 10 servings 1x
- Category: Dessert
- Method: Baking
- Cuisine: American
- Diet: Vegetarian
Ingredients
- 1–1/2 cups all-purpose flour
- 1–1/2 teaspoons baking powder
- 1/2 teaspoon salt
- 1/2 cup unsalted butter, softened
- 1/2 cup granulated sugar
- 2 teaspoons vanilla extract
- 2 large eggs
- 1/2 cup milk
- 1/2 cup light brown sugar, packed
- 1–1/2 teaspoons ground cinnamon
- 1 large apple, peeled, cored, and chopped
- 2 tablespoons brown sugar
- 1/4 teaspoon ground cinnamon
- 3/4 cups confectioners’ sugar
- 1/4 teaspoon ground cinnamon
- 2 tablespoons water
Instructions
- Preheat the oven: Start by preheating your oven to 350°F (175°C).
- Grease your loaf pan: Use a 9×5-inch loaf pan and grease with butter or line with parchment paper.
- Mix the dry ingredients: In a medium bowl, whisk together flour, baking powder, cinnamon, and salt.
- Cream the butter and sugar: In a large bowl, cream the softened butter and granulated sugar together until light and fluffy, about 3 minutes.
- Add eggs and vanilla: Mix in the eggs one by one, then stir in the vanilla extract.
- Incorporate the milk: Gradually mix in the milk until well combined.
- Combine wet and dry: Gradually add the dry ingredient mixture to the wet ingredients and fold gently until just combined.
- Add the apples: Gently stir in the chopped apples.
- Pour into the pan: Transfer the batter to the greased loaf pan and smooth the top.
- Prepare the topping: Mix the brown sugar and cinnamon, then sprinkle over the top of the batter.
- Bake: Bake for 50-60 minutes, or until a toothpick comes out clean from the center.
- Cool and glaze: Let it cool in the pan for about 10 minutes before transferring to a wire rack.
- Make a glaze (optional): Whisk together confectioners’ sugar, cinnamon, and water until smooth, then drizzle over the cooled bread.
Notes
This bread is perfect for cozying up with a hot drink or gifting during the holidays. Enhance it with nuts or dried fruits for added texture.
Nutrition
- Serving Size: 1 slice
- Calories: 310
- Sugar: 25g
- Sodium: 250mg
- Fat: 12g
- Saturated Fat: 7g
- Unsaturated Fat: 5g
- Trans Fat: 0g
- Carbohydrates: 44g
- Fiber: 1g
- Protein: 4g
- Cholesterol: 50mg
Keywords: cinnamon apple bread, dessert, baking, comfort food, easy recipe
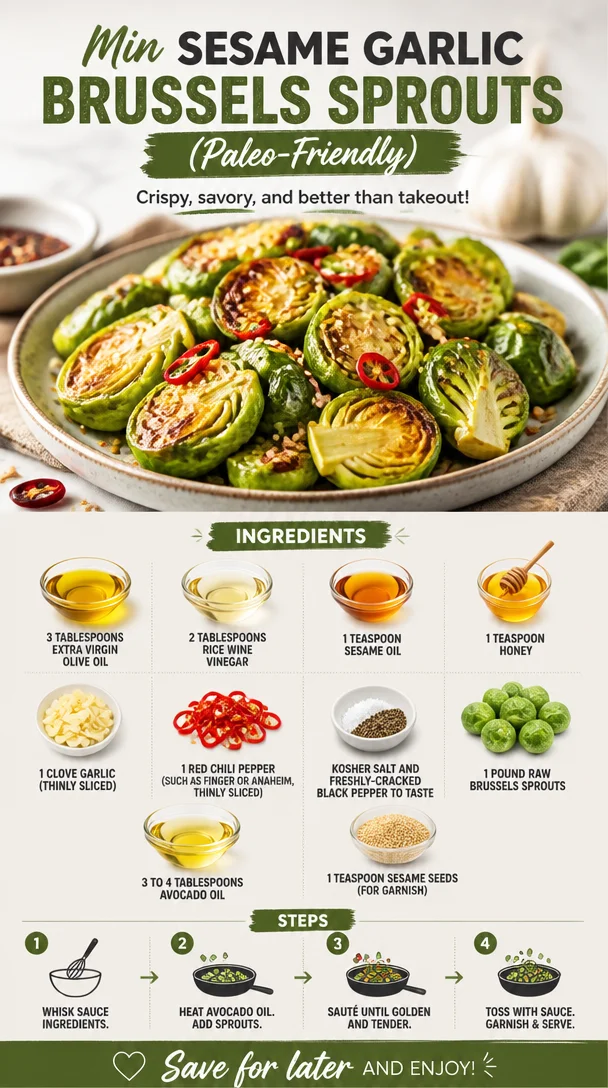
Min Sesame Garlic Brussels Sprouts (Paleo-Friendly)
Sesame Garlic Brussels Sprouts: A Deliciously Wholesome Dish to Savor
Welcome back to Clean Plate Cravings, where we believe that the path to healthy eating is full of flavors and creativity! Today, I’m excited to share one of my all-time favorites—Sesame Garlic Brussels Sprouts. Honestly, these little cabbages are not only soul-satisfying but also quick and simple to whip up. Whether you’re looking to impress at your next dinner party or simply elevate your weeknight meals, this dish checks all the boxes for flavor, healthiness, and ease.
Growing up, I was never a big fan of Brussels sprouts. In fact, I can remember my childhood self pulling that “yucky” face whenever they made their way onto the dinner table. But oh boy, how times have changed! Now, I can honestly say they hold a special place in my heart. It all began on a rainy Sunday afternoon when I decided to experiment in the kitchen. Armed with some garlic, a splash of sesame oil, and a bit of honey, I created a dish that transformed my relationship with Brussels sprouts forever. The warm, nutty aroma danced through my kitchen, sparking a passion that I’d love to share with you.
Ready to dive into these crispy, savory bites of goodness? Let’s make those Brussels sprouts shine!
Personal Story: My Brussels Sprouts Awakening
I’ll never forget the day that I turned the tables on Brussels sprouts. It was a cozy Sunday with rain gently tapping against the window, and the perfect mood for an experiment. My fridge was low on groceries, but I stumbled upon a bag of Brussels sprouts and decided it was time to give them another chance. Armed with my trusty pan and a few essentials, I chopped, sautéed, and tossed seasoning with reckless abandon. The result? A heavenly dish of Sesame Garlic Brussels Sprouts that made my tastebuds sing.
Those crispy, caramelized bites combined with the strong punch of garlic and the gentle sweet nutty finish of sesame oil created a magical symphony of flavors. As I sat down to savor my creation, I couldn’t help but reminisce about those childhood dinners filled with sighs of disdain. Little did I know that Brussels sprouts would become a staple in my kitchen, and I wouldn’t just tolerate them; I would love them! The method to my madness? A simple combo of ingredients and a sprinkle of culinary love. So join me, my fellow food enthusiasts, and let’s whip up these sprightly little orbs of joy!
Ingredients
Here’s the list of everything you’ll need to create this scrumptious Sesame Garlic Brussels Sprouts dish:
-
3 tablespoons Extra Virgin Olive Oil
A staple in every kitchen! Olive oil adds a beautiful, rich flavor to our Brussels sprouts while keeping things light and healthy. For a different flavor, you can substitute with avocado oil or melted coconut oil. -
2 tablespoons Rice Wine Vinegar
This vinegar adds a subtle sweetness and a slight tang that perfectly complements the richness of the olive oil. If you’re looking for a substitute, apple cider vinegar would work beautifully! -
1 teaspoon Sesame Oil
Just a dash of this aromatic oil can elevate the dish with its nutty flavor. If you can’t find sesame oil, try using a touch of toasted almond oil for a similar vibe. -
1 teaspoon Honey
The sweet harmony between the garlic and Brussels sprouts. It balances the flavors! If you’re looking for a vegan option, agave syrup or maple syrup can easily take its place. -
1 clove Garlic (thinly sliced)
Garlic brings a burst of flavor, making this dish irresistible! Feel free to add more if you’re feeling adventurous, or swap for shallots for a different yet delightful taste. -
1 red chili pepper (such as finger or Anaheim, thinly sliced)
This adds a spicy kick! If you’re looking for something milder, try a dash of red pepper flakes instead. -
Kosher Salt and Freshly-Cracked Black Pepper to taste
Essential for enhancing all the flavors! We want to season these babies just right. -
1 pound raw Brussels sprouts
These little beauties are the star of our dish! Choose sprouts that are small, bright green, and firm. If you’re out of Brussels sprouts, try using broccoli or cauliflower as a substitution! -
3 to 4 tablespoons Avocado Oil
A healthier alternative to traditional oils, it’s perfect for roasting the Brussels sprouts to crispy perfection. -
1 teaspoon Sesame Seeds (for garnish)
These little seeds not only add crunch but are also rich in flavor. Feel free to toast them slightly for a deeper flavor!
Let’s set our ingredients aside and prepare for some phenomenal cooking!
Step-by-Step Instructions
-
Preheat Your Oven to 400°F (200°C):
Preheating the oven is crucial when it comes to achieving the perfect roasted Brussels sprouts. This high temperature will help caramelize the outside while keeping the insides tender. Perfecto! -
Prep the Brussels Sprouts:
Start by trimming the stem ends of the Brussels sprouts. Discard any discolored leaves. Cut larger sprouts in half to ensure even cooking. The size is important—too small and they’ll burn; too large and they won’t cook through. Aim for a uniform size! -
Make the Sauce:
In a medium bowl, whisk together the extra virgin olive oil, rice wine vinegar, sesame oil, honey, sliced garlic, and chili pepper. This sauce is where the magic happens! It marries all those flavors together, resulting in a deliciously sticky coating for our sprouts. -
Toss It All Together:
Place the trimmed Brussels sprouts in a large mixing bowl. Drizzle the sauce over them and toss to ensure they’re evenly coated. Don’t be shy! Use your hands if you need to get in there and really mix things up. The more love you put into it, the better they’ll taste! -
Roast Away:
Spread the Brussels sprouts on a large baking sheet in a single layer. This will allow them to roast evenly. If they’re too crowded, they’ll steam instead of roast, and nobody wants that. Roast in the preheated oven for 20–25 minutes or until they’re golden brown and crispy, flipping them halfway through. This is where those lovely caramelized edges come to life! -
Season It Up:
Once they’re out of the oven, sprinkle with kosher salt and freshly-cracked black pepper to taste. Don’t be skimpy with those seasonings—they make a world of difference. -
Garnish and Serve:
Transfer the Brussels sprouts to a serving plate or bowl, and sprinkle with sesame seeds for that final touch. Just look at those beauties!
Serving Suggestions
These Sesame Garlic Brussels Sprouts can be served warm as a delightful side dish to accompany a main course, or they can stand alone as a superstar option in a salad or grain bowl. I love to pair them with grilled chicken or tofu, fresh greens, and a drizzle of extra sesame dressing for a wholesome meal. Don’t forget to sprinkle a few more sesame seeds on top for that perfect finishing touch!
Recipe Variations
Feeling adventurous? Here are some creative twists to make this dish uniquely yours:
-
Citrusy Boost:
Add a squeeze of fresh lime or orange juice just before serving for a refreshing zing! -
Maple Mustard Glaze:
Replace honey with maple syrup and add a tablespoon of Dijon mustard to the sauce for a whole new flavor profile. -
Nutty Crunch:
Toss in some chopped walnuts or pecans during the last 10 minutes of roasting for added texture and nutty goodness. -
Asian Flair:
Add a splash of soy sauce or tamari for a savory umami kick! -
Cheesy Finish:
Sprinkle nutritional yeast or grated parmesan cheese over the roasted sprouts for a cheesy flavor without all the dairy.
Chef’s Notes
Oh, how I love the evolution of recipes! This dish has transformed from a simple roast to one that can take center stage on any table. I remember the first time I brought it to a potluck—everyone adored it. People were asking for the recipe left and right. It made me realize how a little creativity and good ingredients can change the way we perceive certain foods. The joy of seeing others savoring my cooking fueled my passion even more. Every time I make it now, I love to experiment with whatever I have on hand. Cooking has no boundaries!
FAQs and Troubleshooting
Q: Why are my Brussels sprouts not crispy?
A: If your sprouts are soft or soggy, they were likely overcrowded on the baking sheet, or the oven wasn’t hot enough. Make sure to give them room to breathe!
Q: Can I use frozen Brussels sprouts?
A: While fresh Brussels sprouts yield the best results, you can use frozen sprouts. Just be sure to thaw and pat them dry before roasting to eliminate excess moisture.
Q: What’s the best way to store leftovers?
A: Place any leftovers in an airtight container and store in the refrigerator for up to 3 days. Reheat in the oven for that crispy texture again!
Q: Can I serve these cold?
A: Absolutely! These Brussels sprouts also taste great cold as part of a salad. Just toss them with some mixed greens, nuts, and your favorite dressing.
Nutritional Info
Per serving (based on 4 servings):
- Calories: 150
- Protein: 4g
- Fat: 12g (saturated fat: 1.5g)
- Carbohydrates: 10g
- Fiber: 4g
- Sugar: 2g
Brussels sprouts are high in vitamins (especially K and C) and fiber—perfect for nourishing your body!
And there you have it—my beloved Sesame Garlic Brussels Sprouts! I hope you feel inspired to bring this wholesome dish into your kitchen and share the love. Remember, cooking is all about having fun and exploring flavors, so don’t hesitate to make this recipe your own. Happy cooking, foodies! Let me know how yours turn out!
PrintSesame Garlic Brussels Sprouts
Deliciously wholesome Sesame Garlic Brussels Sprouts that are crispy, savory, and easy to prepare, perfect for a side dish or as a salad topper.
- Prep Time: 10 minutes
- Cook Time: 25 minutes
- Total Time: 35 minutes
- Yield: 4 servings 1x
- Category: Side Dish
- Method: Roasting
- Cuisine: American
- Diet: Vegetarian
Ingredients
- 3 tablespoons Extra Virgin Olive Oil
- 2 tablespoons Rice Wine Vinegar
- 1 teaspoon Sesame Oil
- 1 teaspoon Honey
- 1 clove Garlic (thinly sliced)
- 1 red chili pepper (thinly sliced)
- Kosher Salt and Freshly-Cracked Black Pepper to taste
- 1 pound raw Brussels sprouts
- 3 to 4 tablespoons Avocado Oil
- 1 teaspoon Sesame Seeds (for garnish)
Instructions
- Preheat your oven to 400°F (200°C).
- Prep the Brussels sprouts by trimming the stem ends and cutting larger sprouts in half.
- Make the sauce by whisking together olive oil, rice wine vinegar, sesame oil, honey, garlic, and chili pepper.
- Toss the sprouts with the sauce in a large mixing bowl.
- Roast the Brussels sprouts on a baking sheet for 20–25 minutes, flipping halfway, until golden brown and crispy.
- Season with kosher salt and pepper to taste.
- Garnish with sesame seeds before serving.
Notes
Excellent as a side dish or as a topping for salads or grain bowls. Try variations with citrus or nuts for added flavor!
Nutrition
- Serving Size: 1 serving
- Calories: 150
- Sugar: 2g
- Sodium: 200mg
- Fat: 12g
- Saturated Fat: 1.5g
- Unsaturated Fat: 10g
- Trans Fat: 0g
- Carbohydrates: 10g
- Fiber: 4g
- Protein: 4g
- Cholesterol: 0mg
Keywords: Brussels sprouts, vegetarian, side dish, sesame, garlic
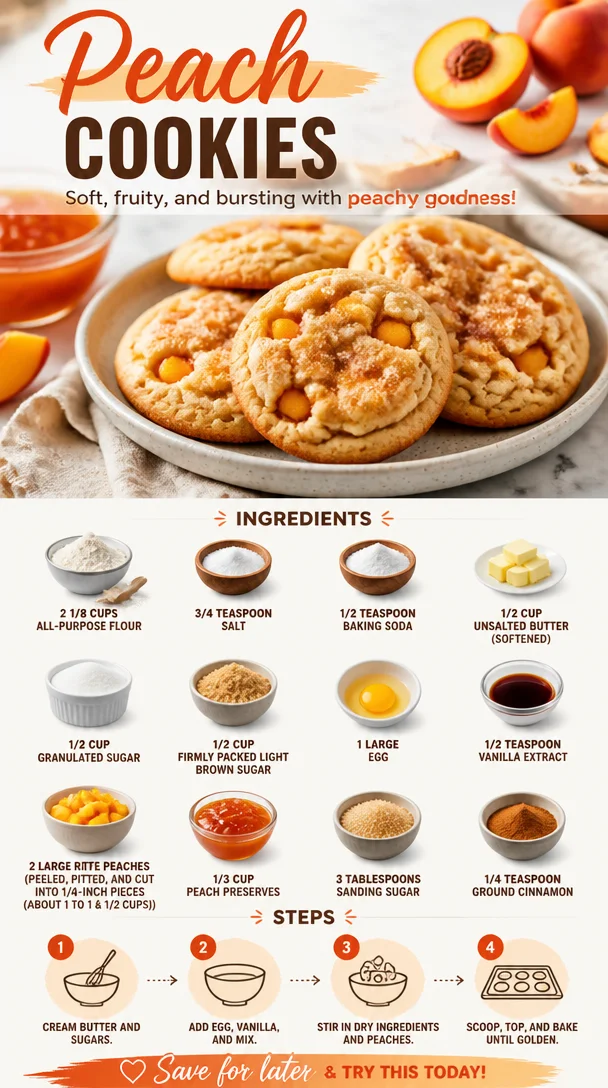
Peach Cookies
The Juicy Delight of Peach Cookies: A Summer Treat You’ll Crave All Year
Welcome back to Clean Plate Cravings! Today, we’re about to step into a sunny kitchen filled with the sweet aroma of peaches, butter, and just a hint of cinnamon. Yep, it’s peach cookie time! When summer rolls around, and ripe peaches start filling the farmers’ markets, I can hardly contain my excitement for baking. These soft, fruity cookies are not just a delightful dessert; they encapsulate the essence of summer in every bite. So, grab your apron, and let’s get started on crafting some peach cookies that will have you dreaming of sunshine, warm breezes, and lazy afternoons.
Peach cookies have a nostalgic charm that takes me back to my childhood. I remember visiting my grandmother during those hot summer months, where she always had a basket filled with fresh fruits harvested from her garden. The best days were when she’d surprise me after school with a fresh batch of cookies, warm from the oven, still gooey with juicy peaches. We would sit on the porch, eating cookies and sipping cold lemonade, feeling that life couldn’t get any better. That’s the kind of happiness I want to replicate when baking these peach cookies today. They’re not just baked goods; they’re little pieces of joy that remind you of simpler times.
Ingredients
Here’s what you’ll need to fill your kitchen with the heavenly aroma of peach cookies:
-
2 1/8 cups all-purpose flour
The backbone of your cookie! You can substitute with a gluten-free blend if needed, but the texture may vary a bit. -
3/4 teaspoon salt
A touch of salt enhances sweetness and balances flavors. Don’t skip it! It’s essential. -
1/2 teaspoon baking soda
This ingredient adds lift and helps your cookies spread perfectly. Make sure it’s fresh for the best results! -
1/2 cup unsalted butter (softened)
Good-quality butter is key here! If you’re dairy-free, coconut oil or vegan butter works too—but keep in mind it may alter the flavor slightly. -
1/2 cup granulated sugar
Sweetens the deal! You might consider reducing the sugar if your peaches are extra sweet or using coconut sugar for a more caramel-like flavor. -
1/2 cup firmly packed light brown sugar
Adds moisture and a lovely depth of flavor. If you can’t find light brown sugar, you can use dark brown, but it will impart a stronger molasses flavor. -
1 large egg
This acts as a binder. If you need an egg replacement, 1/4 cup of unsweetened applesauce can work beautifully! -
1/2 teaspoon vanilla extract
A classic flavor enhancer! You could swap in almond extract for a nutty twist if you fancy. -
2 large ripe peaches (peeled, pitted, and cut into 1/4-inch pieces; about 1 to 1 1/2 cups)
Fresh fruit makes all the difference! If peaches aren’t in season, you could use canned peaches (just make sure they’re well-drained) or even substituting with nectarines for a slightly different flavor. -
1/3 cup peach preserves
This adds an extra layer of peach goodness. If you need a lower-sugar option, you can look for natural fruit spreads. -
3 tablespoons sanding sugar
This gives your cookies a beautiful, sparkly finish! You can substitute with regular granulated sugar or skip it if you prefer a more understated look. -
1/4 teaspoon ground cinnamon
A pinch of cinnamon brings warmth; don’t be shy! If you love spices, feel free to add more or mix in nutmeg for an exciting twist.
Step-by-Step Instructions
Let’s dive into the magic of creating these peach cookies:
-
Preheat Your Oven: First things first, preheat your oven to 350°F (175°C). As the oven heats up, it sets the stage for those cookies to rise perfectly!
-
Mix Dry Ingredients: In a medium bowl, whisk together the flour, salt, and baking soda. This ensures that the leavening agent is evenly distributed. Pro tip: If you’re feeling adventurous, you can sift the mixture to make your cookies super light!
-
Cream Butter and Sugars: In your mixing bowl, cream together the softened butter, granulated sugar, and brown sugar using an electric mixer on medium speed. You’re looking for a fluffy, pale mixture. It should take about 2-3 minutes. A little secret? Scrape down the sides of the bowl halfway through to ensure everything gets well combined.
-
Add Egg and Vanilla: Crack in the egg and pour in the vanilla extract. Mix until just combined—you don’t want overmixing at this stage, as it can toughen your cookies.
-
Incorporate Dry Ingredients: Gradually add your flour mixture to the wet ingredients, mixing on low speed. Just blend until you see no more flour pockets—this is key for soft cookies!
-
Fold in Peaches and Preserves: Now, gently fold in those delightful chunks of peach and the peach preserves using a spatula. It’s okay if some peach juice runs down your spatula; it’s all part of the deliciousness!
-
Scoop and Sugar: Using a cookie scoop or tablespoon, drop your cookie dough onto a lined baking sheet, spacing them about 2 inches apart. Lightly sprinkle the tops with sanding sugar for that pretty finish.
-
Bake: Slide your tray into the oven and bake for 10-12 minutes or until the edges are set and golden brown, but be careful—don’t overbake! You want those cookies to be soft in the center.
-
Cool: Once they’re out of the oven, let them sit on the baking sheet for a few minutes before transferring them to a wire rack to cool completely. The hard part is waiting for them to cool enough to eat!
Serving Suggestions
As these peach cookies cool, I recommend serving them on a rustic platter, with a few slices of fresh peach for that gorgeous presentation. You can enjoy them as is, or add a scoop of vanilla ice cream on the side for an extra-special treat. Trust me, it’s like summer in every bite!
Recipe Variations
Want to shake things up a bit? Here are a few fun variations to consider:
-
Nutty Addition: Stir in some chopped pecans or walnuts for a delightful crunch, adding a beautiful flavor contrast to the juicy peaches!
-
Spiced Up: Amp up the flavor by adding a pinch of nutmeg along with the cinnamon. It will take your cookies to the next level!
-
Chocolate Lovers: Mix in some chocolate chips or chunks for a delicious chocolate-peach pairing.
-
Herbal Spice: Try adding fresh mint into the dough for a fresh, lively flavor that brightens up the cookies.
-
Oatmeal Peach Cookies: For a heartier version, consider substituting half of the all-purpose flour with oats. You might need to adjust the liquid slightly.
Chef’s Notes
These peach cookies have become a staple in my kitchen, and over the years, I’ve played around with varying levels of sweetness and different fruits. Each time I make them, they remind me of those wonderful days with my grandma. I can still picture her laughing while we licked cookie batter off our fingers! Remember, recipes are not about being perfect; they’re about adjusting to your taste preferences and making them your own.
Interestingly enough, I once had a little mishap while trying to blend peach yogurt into the dough! I miscalculated the measurements, and while the cookies turned out oddly tropical, they sparked a whole new idea for peach yogurt muffins. So hey, be creative in the kitchen; the only real rule is to have fun!
FAQs and Troubleshooting
-
Can I use frozen peaches?
Absolutely! Just make sure to thaw and drain them well before adding to your dough, as too much liquid can make your cookies soggy. -
Why are my cookies flat?
This could be due to warm butter or not enough flour. Ensure your butter is softened, not melted, and that you measure your flour properly (spoon it into the measuring cup without packing it). -
How can I store leftover cookies?
Keep them in an airtight container for up to a week. You can also freeze them for longer storage—simply layer parchment paper between them and pop them in a freezer bag! -
Can I make the dough ahead of time?
Definitely! You can chill the dough for up to 48 hours in the fridge. When ready to bake, let the dough sit out for about 30 minutes before scooping.
Nutritional Info
(An optional section. If you need specific nutritional info, let’s calculate based on the ingredients!)
There you have it, my foodie friends! A delightful recipe for peach cookies that embodies summer nostalgia and wholesome flavor. Whether you enjoy them with family, share them with friends, or savor them solo with your favorite book, these cookies are bound to bring you joy. Now, get those peaches at the market and let’s get baking! Happy cooking!
PrintPeach Cookies

Sweet and soft peach cookies that encapsulate the essence of summer in every bite.
- Prep Time: 15 minutes
- Cook Time: 12 minutes
- Total Time: 27 minutes
- Yield: 24 cookies 1x
- Category: Dessert
- Method: Baking
- Cuisine: American
- Diet: Vegetarian
Ingredients
- 2 1/8 cups all-purpose flour
- 3/4 teaspoon salt
- 1/2 teaspoon baking soda
- 1/2 cup unsalted butter (softened)
- 1/2 cup granulated sugar
- 1/2 cup firmly packed light brown sugar
- 1 large egg
- 1/2 teaspoon vanilla extract
- 2 large ripe peaches (peeled, pitted, and cut into 1/4-inch pieces; about 1 to 1 1/2 cups)
- 1/3 cup peach preserves
- 3 tablespoons sanding sugar
- 1/4 teaspoon ground cinnamon
Instructions
- Preheat your oven to 350°F (175°C).
- Mix dry ingredients: whisk together the flour, salt, and baking soda.
- Cream together the softened butter, granulated sugar, and brown sugar until fluffy.
- Add the egg and vanilla extract and mix until just combined.
- Incorporate the dry ingredients gradually to the wet mixture.
- Fold in the peaches and peach preserves gently.
- Scoop cookie dough onto a lined baking sheet and sprinkle with sanding sugar.
- Bake for 10-12 minutes or until edges are set and golden brown.
- Cool on the baking sheet for a few minutes before transferring to a wire rack.
Notes
Feel free to substitute gluten-free flour or coconut oil if needed. Experiment with adding nuts or chocolate chips for variations.
Nutrition
- Serving Size: 1 cookie
- Calories: 150
- Sugar: 10g
- Sodium: 100mg
- Fat: 7g
- Saturated Fat: 4g
- Unsaturated Fat: 3g
- Trans Fat: 0g
- Carbohydrates: 21g
- Fiber: 1g
- Protein: 2g
- Cholesterol: 20mg
Keywords: peach cookies, summer dessert, easy cookies, fruit cookies
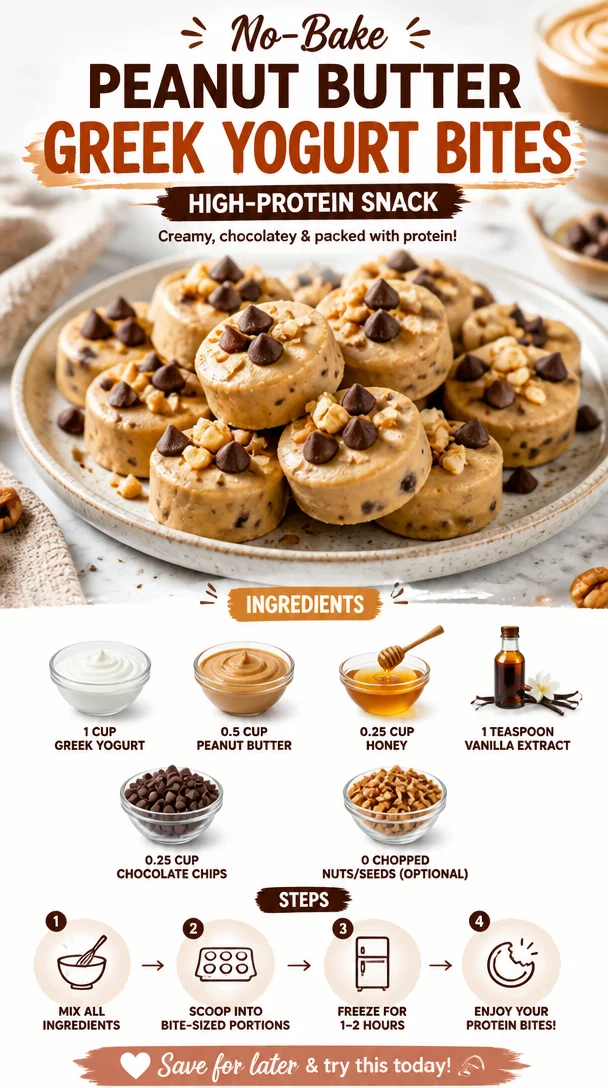
No-Bake Peanut Butter Greek Yogurt Bites: High-Protein Snack
Peanut Butter Greek Yogurt Bites: A Guilt-Free Delight
Hey there, food friends! If you’re anything like me, you know how important it is to have delicious yet guilt-free snacks at your fingertips. Let’s face it, life gets busy, and when those cravings hit, we want something that’s not only satisfying but also makes us feel good about what we’re eating. That’s why I’m so excited to share with you one of my all-time favorite treats: Peanut Butter Greek Yogurt Bites!
These delightful little morsels are a scrumptious combination of creamy Greek yogurt and rich peanut butter, perfect for a quick energy boost or a post-workout pick-me-up. I promise you, they’re easy to make and will quickly become a staple in your snack rotation. So grab your apron, and let’s dive in!
A Personal Taste of Nostalgia
As I reminisce about my childhood, I can’t help but smile when I think of my dad making peanut butter and jelly sandwiches on lazy weekends. That gooey, salty-sweet combination took my taste buds on a nostalgic ride every time I’d take a bite. Fast forward to my adult years, and while those sandwiches still hold a special place in my heart, I’ve had to find healthier alternatives that fit my lifestyle.
During one particularly hot summer, I was searching for something refreshing, satisfying, and healthy. That’s when I stumbled upon the idea of blending Greek yogurt and peanut butter to create a rich, creamy mixture that harkened back to those beloved sandwiches—but in a bite-sized snack form! It was an instant hit, and I’ve been experimenting with variations ever since. Trust me, you’re going to love these bites as much as I do!
Ingredients
Ready to whip up these delicious bites? Here’s what you’ll need:
-
1 cup Greek Yogurt
Greek yogurt is packed with protein and probiotics, making it a fantastic base for our bites. If you’re avoiding dairy, feel free to substitute it with non-dairy yogurt, like almond or coconut yogurt! -
0.5 cup Peanut Butter
The star of the show! Choose a natural peanut butter that’s free of added sugars and oils for the best flavor. Not a peanut fan? Almond or sunflower seed butter works great too—just use similar amounts. -
0.25 cup Honey
This adds just the right amount of sweetness and helps bind the ingredients together. If you prefer a vegan option, swap it out for maple syrup or agave nectar! -
1 teaspoon Vanilla Extract
This is a magical addition that elevates the flavor profile, making the bites irresistible. Opt for pure vanilla extract if you want the absolute best flavor. -
0.25 cup Chocolate Chips
Because let’s be real, chocolate makes everything better! You can use dark, milk, or dairy-free chocolate based on your preference. -
Chopped Nuts or Seeds (optional)
For an added crunch, sprinkle in some chopped pecans, walnuts, or even chia seeds. It adds texture and extra nutrients!
Step-by-Step Instructions
Let’s get cooking! Follow these simple steps to make your Peanut Butter Greek Yogurt Bites:
-
Gather Your Ingredients
Lay out all your ingredients on the counter. This not only makes the process smoother but also helps you double-check that you have everything you need. -
Mix the Base
In a mixing bowl, combine the Greek yogurt and peanut butter. Use a whisk or a spatula to blend until they are smooth and fully incorporated. This is where the magic begins! The creamy peanut butter should meld perfectly into the yogurt. -
Sweeten It Up
Add in the honey (or your chosen sweetener) and vanilla extract. Again, mix well until everything is combined. You want a smooth and creamy consistency, and the sweetness should balance perfectly with the tang of the yogurt. -
Add the Chocolate Chips
Gently fold in the chocolate chips. Make sure to reserve a few to sprinkle on top if you like that aesthetic touch! This is also the perfect moment to add any chopped nuts or seeds if you’re going for that extra crunch. -
Scoop and Shape
Using a cookie scoop or spoon, portion out the mixture onto a parchment-lined baking sheet. I love using a teaspoon for bite-sized goodness, but feel free to make them larger if you’re feeling indulgent! -
Chill Out!
Pop the baking sheet in the freezer for about 30 minutes until the bites are solid. This step is crucial for that perfect bite! -
Store Them Right
Once frozen, you can transfer the bites into an airtight container. They’ll keep well in the freezer for up to three months—if they last that long!
Serving Suggestions
When it comes to serving these delicious bites, the options are limitless! Enjoy them as a quick pick-me-up during the day, post-workout fuel, or as a sweet treat after dinner. You can also garnish your serving plate with some fresh fruit slices and drizzles of chocolate or nut butter for an extra splash of indulgence. Perfectly presentable for yourself or your guests—these bites are sure to impress!
Recipe Variations
Feeling adventurous? Here are some creative ways to mix it up:
-
Berry Blast
Add a tablespoon of chia seeds and mix in some chopped strawberries or blueberries to the base for a fruity kick! -
Mint Chocolate Chip
Add a drop of peppermint extract to the mix and try adding mini chocolate chips. It’s refreshing and perfect for summertime! -
Coconut Craze
Toss in some unsweetened shredded coconut to the mix to give a tropical twist to these bites! -
Spicy Kick
Feeling bold? Mix in a dash of cinnamon or even cayenne for a surprising flavor kick! -
Nut-Free Delight
Swap peanut butter for sunflower seed butter to create nut-free bites that are just as tasty.
Chef’s Notes
I wanted to create these bites to be super flexible, and they have evolved quite a bit! There was a time I added protein powder to amplify the nutritional value (great for those post-workout cravings!). And I absolutely love how you can adjust the sweetness to suit personal tastes. Every time I make them, I find myself excited to see what new twist I can come up with. Plus, they’re always an excellent conversation starter at parties!
Oh, and a little tidbit: the first time I made these, I forgot to add the sweetener! While the bites were definitely good, they were just missing that little sweet spark—and my friends promptly informed me of that!
FAQs and Troubleshooting
Here are some common questions you might have while making these bites:
-
Can I make these without honey?
Absolutely! You can use maple syrup, agave nectar, or even date syrup for sweetness. -
What if I don’t have Greek yogurt?
You can use regular yogurt, but the texture might be a bit runnier. Draining it for a little while can help! -
Are these snack bites too sweet?
You control the sweetness! Feel free to adjust the amount of honey or sweetener according to your taste preferences. -
How do I store these?
There’s nothing easier! Just pop them in an airtight container in the freezer, and they’ll last for up to three months.
Nutritional Info (Optional)
While exact nutritional information can vary, here’s a rough estimate per bite (assuming you yield about 12 bites):
- Calories: 110
- Protein: 4g
- Carbohydrates: 9g
- Fat: 7g
- Sugar: 4g
So there you have it, my friends—Peanut Butter Greek Yogurt Bites are not just a tasty and wholesome snack; they’re adjustable, fun, and super crowd-pleasing! I hope you enjoy making them as much as I do. Let me know how yours turn out, and feel free to share your unique twists! Keep it fresh, simple, and seriously delicious! 🍽️
PrintPeanut Butter Greek Yogurt Bites
A guilt-free snack made with creamy Greek yogurt and rich peanut butter, perfect for a quick energy boost or a post-workout treat.
- Prep Time: 15 minutes
- Cook Time: 30 minutes
- Total Time: 45 minutes
- Yield: 12 bites 1x
- Category: Snack
- Method: Freezing
- Cuisine: American
- Diet: Vegetarian
Ingredients
- 1 cup Greek Yogurt
- 0.5 cup Peanut Butter
- 0.25 cup Honey
- 1 teaspoon Vanilla Extract
- 0.25 cup Chocolate Chips
- Chopped Nuts or Seeds (optional)
Instructions
- Gather your ingredients.
- Mix the Greek yogurt and peanut butter until smooth.
- Sweeten it up by adding honey and vanilla extract, then mix well.
- Add the chocolate chips and optional nuts or seeds.
- Scoop the mixture onto a parchment-lined baking sheet.
- Chill in the freezer for about 30 minutes until solid.
- Store in an airtight container in the freezer for up to three months.
Notes
Feel free to customize with different nut butters, sweeteners, or mix-ins like berries or coconut!
Nutrition
- Serving Size: 1 bite
- Calories: 110
- Sugar: 4g
- Sodium: 50mg
- Fat: 7g
- Saturated Fat: 1g
- Unsaturated Fat: 6g
- Trans Fat: 0g
- Carbohydrates: 9g
- Fiber: 1g
- Protein: 4g
- Cholesterol: 0mg
Keywords: snack, healthy bites, peanut butter, yogurt, guilt-free